


Old Collingwood
-
Posts
11,645 -
Joined
-
Last visited
Content Type
Profiles
Forums
Gallery
Events
Posts posted by Old Collingwood
-
-
1 minute ago, mtaylor said:
I think it would, OC. Very fitting.
Thanks mark.
OC.
- popeye the sailor, Canute and mtaylor
-
 3
3
-
As part of my tribute to my late farther I will soon add a Hurricane to my build logs as he also worked on them, I remember him telling me the Hurricanes were the work horses and the Spits were the fast boys toys,
I think the Three would make him proud.
OC.
-
-
2 minutes ago, popeye the sailor said:
you welcome OC........and thanks for the good word. when I read the number of British planes they had, I thought of you. perhaps you can show us a Spitfire with German markings
")
May have to think about that one, bet there are a few German ones that the MOD got there hand s on also.
OC.
- mtaylor, Canute, thibaultron and 1 other
-
4
-
Great work denis - its becoming a lovely tribute to the Fortress, thank you for the link as well.
OC.
- thibaultron, mtaylor and Canute
-
3
-
Evening all,
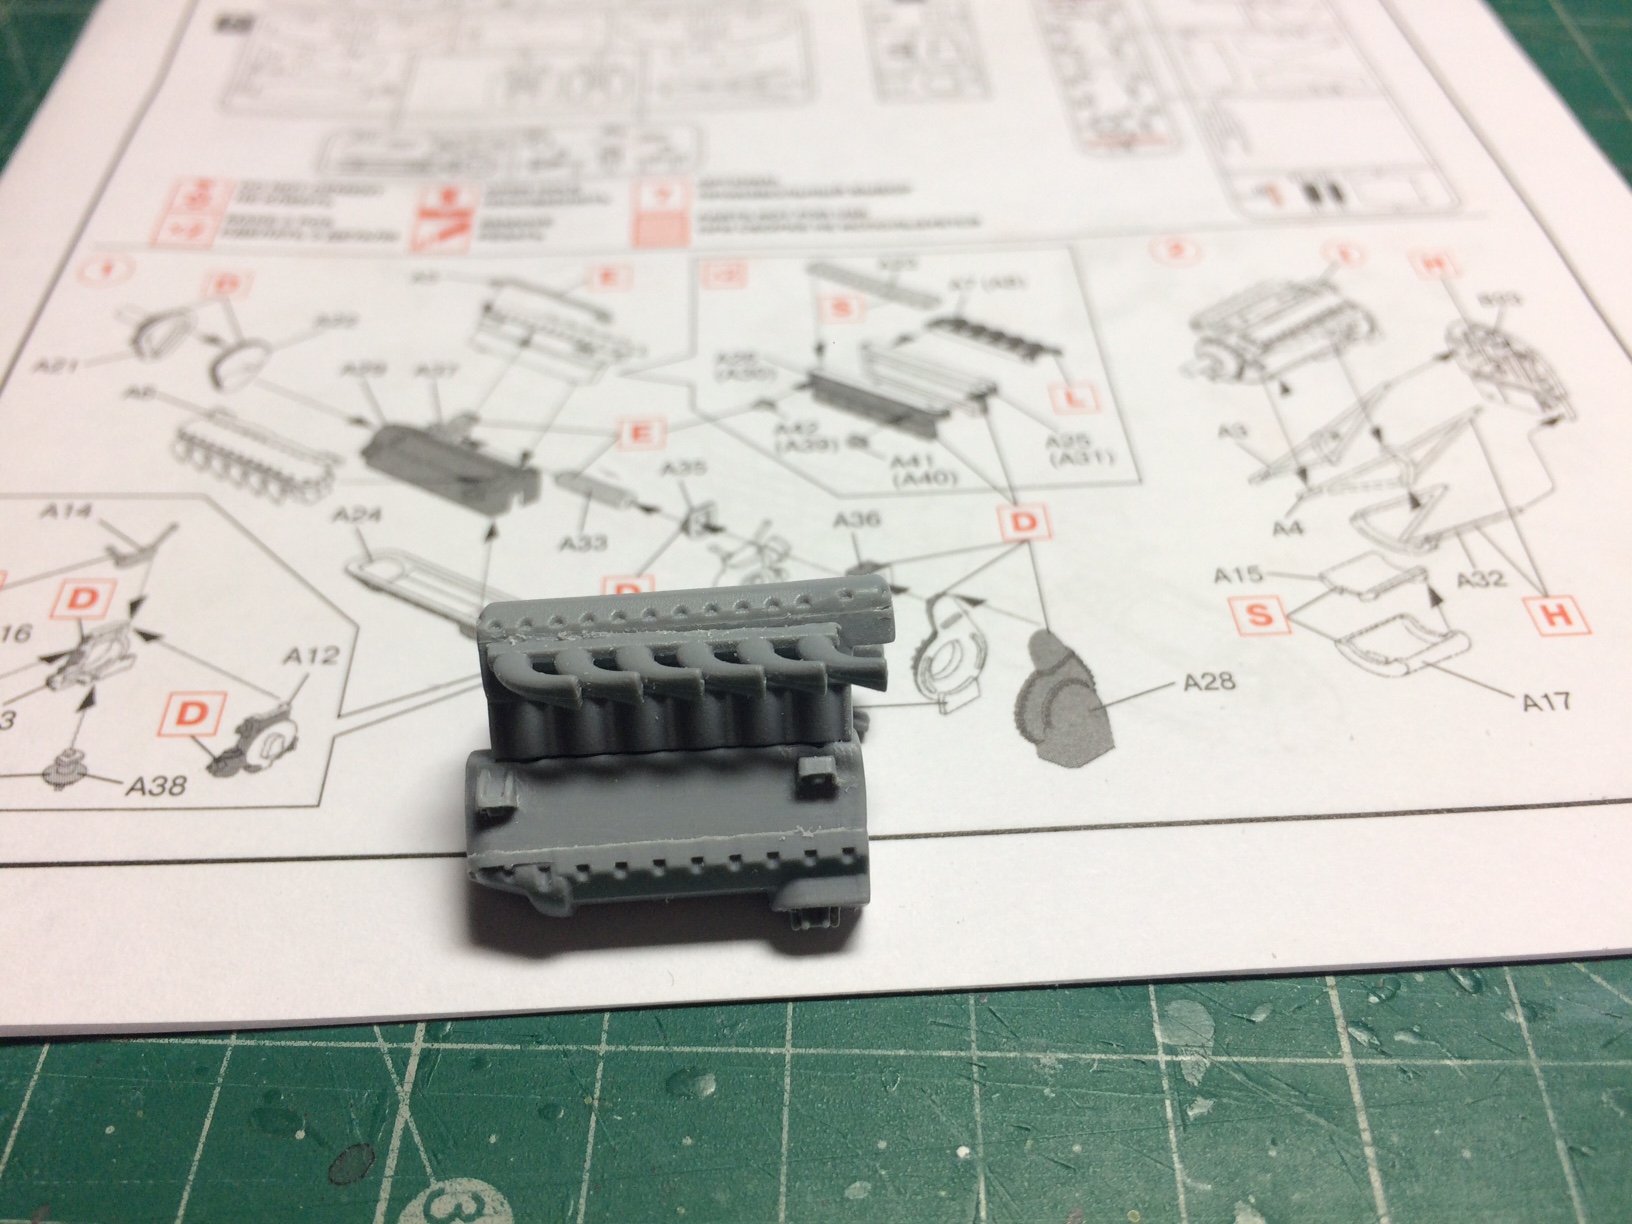
So I decided to start this today - the kit calls for the power plant to be assembled first, its a lovely rendition of the superb Merlin, it starts with the lower end and sump, to this are attached the two lower cylinder heads and to each of these the exhaust manifolds and oil feeds, I still have more to add before I start painting and weathering.
OC.
.thumb.JPG.7adf3b30fe5b6dd886e1384073be18c7.JPG)

- Canute, popeye the sailor, CDW and 7 others
-
10
-
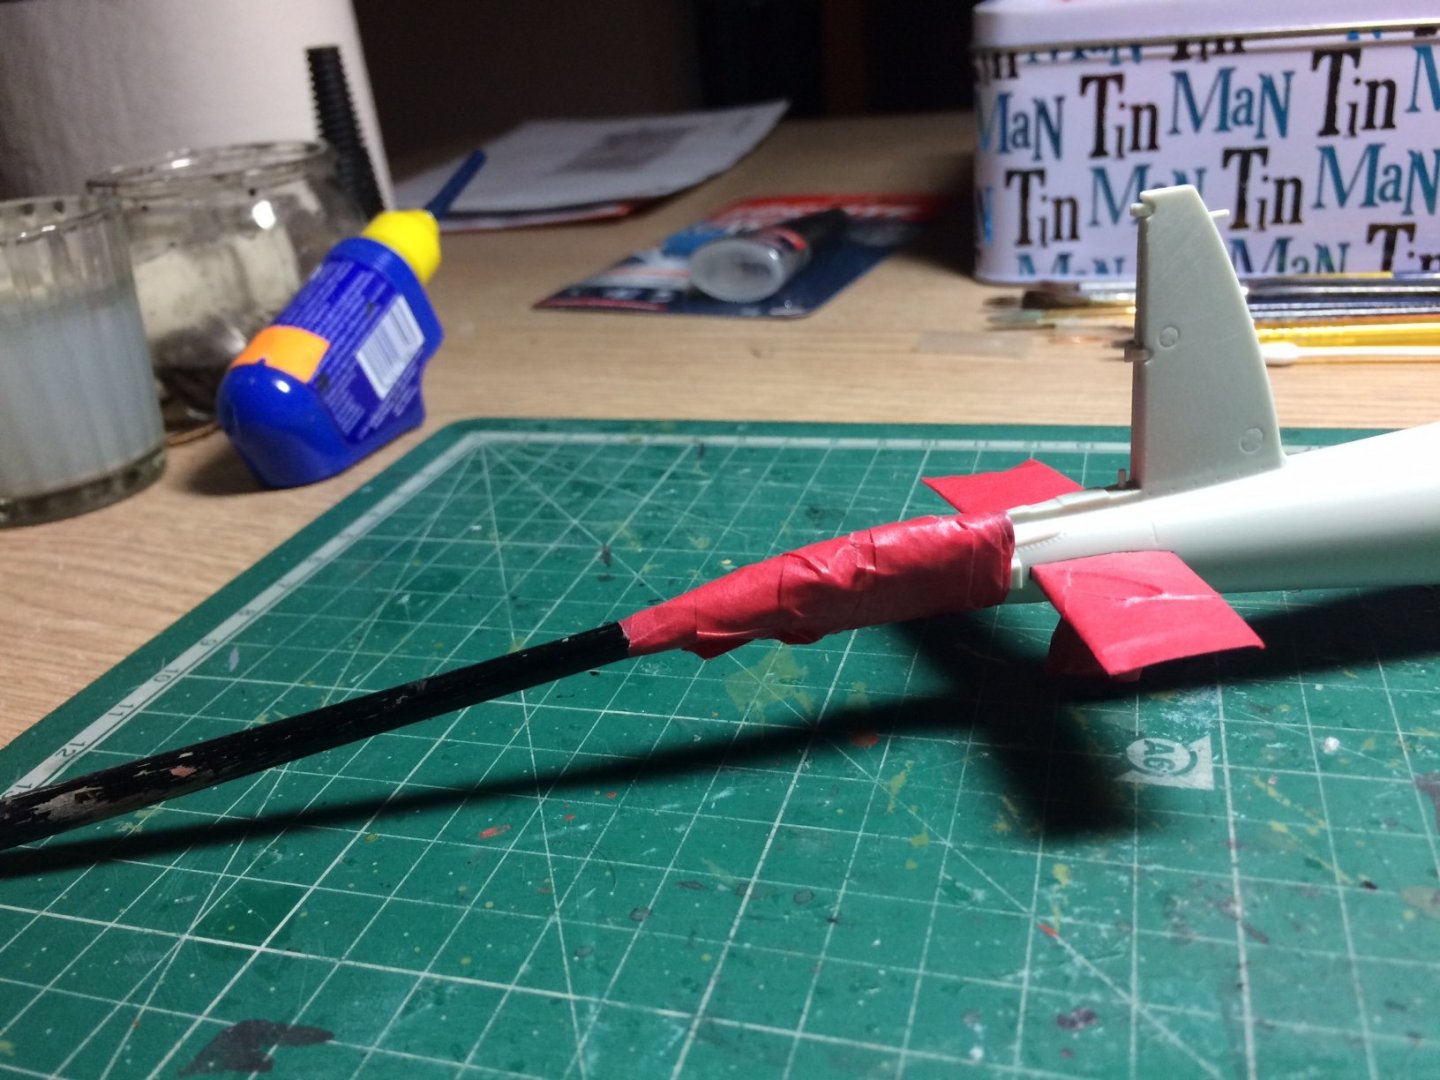
A tiny bit of progress today - I have decided to build her on a little modification - during the Bomber Mosquito's missions it had a secondary role where by it operated as as towing escort for damaged planes from spits to mosquito's, during the war there was a surplus of giant paint brushes that came in perfectly for use as towing handles.................
OC.
-
1 minute ago, mtaylor said:
Looking good and I'll keep my fingers crossed for the painting.
Thanks Mark.
OC.
- Canute, popeye the sailor and mtaylor
-
3
-
As craig said she is looking super.
OC.
- mtaylor, Canute, popeye the sailor and 2 others
-
5
-
42 minutes ago, Moab said:
Looking great...Moab
Thank you kindly for looking in.
OC.
- Canute and popeye the sailor
-
2
-
I have decided to start this along with my Mossie kit, as there will be times when I can not get the spraying done outside due to the weather, so it gives me things to get on with.
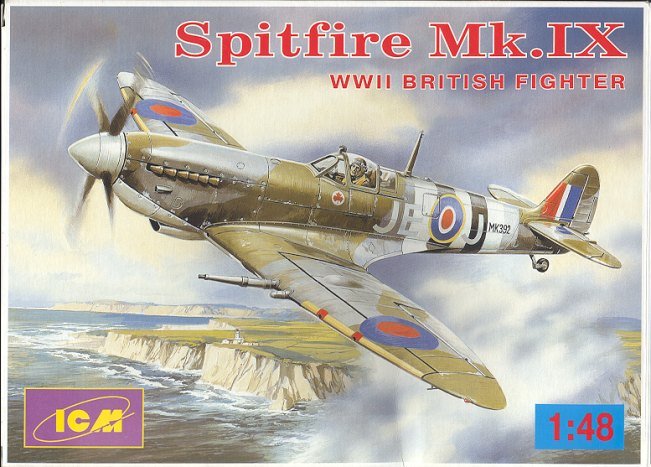
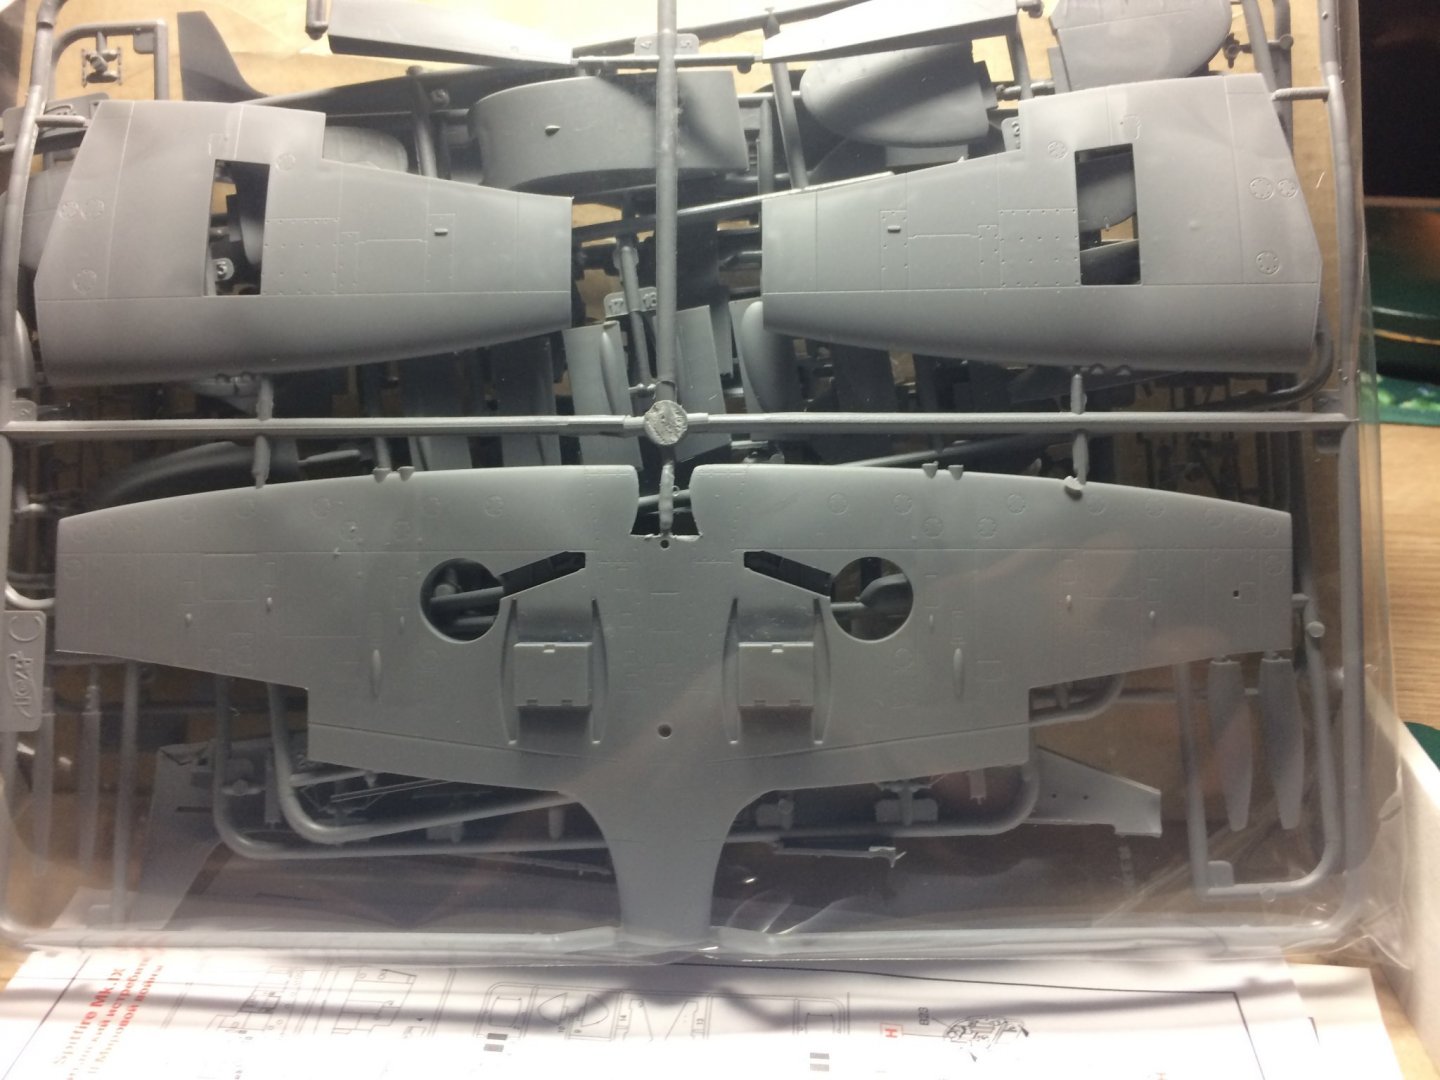
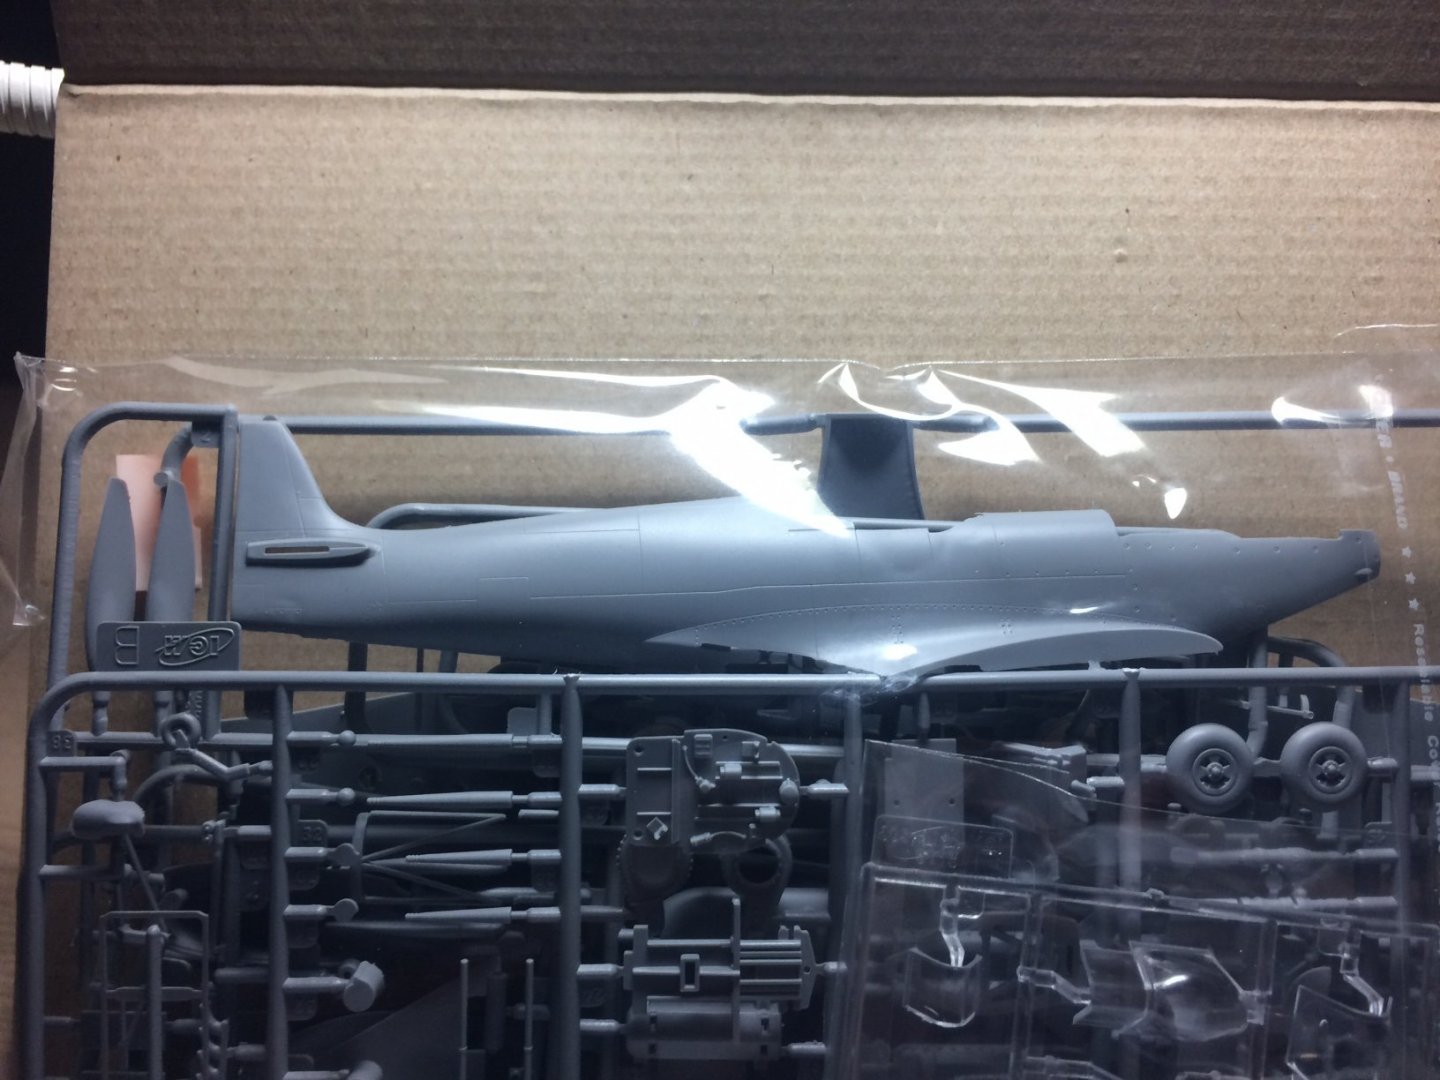
I won this in ebay for a knock down price - it is an open box but all bags are sealed, the ICM version of the Spit IX is renowned for being the most accurate model of a Spit in this scale, I will build her more or less straight out the box as I understand the cockpit and parts are very very good.
So to start with - here's the top box art and quick look at the bag contents.
I do apologize I put the complete wrong box pic up - how I dont know - This is the Right One.
OC.
- GrandpaPhil, Edwardkenway, mtaylor and 9 others
-
12
-
25 minutes ago, popeye the sailor said:
which part???

All of it, just liked what you put mate.
OC.
- jct, mtaylor, popeye the sailor and 1 other
-
4
-
8 minutes ago, popeye the sailor said:
yea....it would be hard to cover those bubbles .......I'm sure the yellow masking doesn't have anything for it. when ever I mask.....I always go over it before I spray. I've been goofed too many time
 Damn you Murphy!
Yep I will re check before I pray/spray or both, I might put some more tape over it - knowing me it will have so many layers on it it will end up several inches thick.😲
OC.
- Canute, mtaylor and popeye the sailor
-
3
-
So just to explain myself a bit better - the canopy is done its just covered in extra tape to stop any spray from going on it, it will stay covered like that until all the spraying (including the top coat) has been done.
OC.
- popeye the sailor, mtaylor and Canute
-
3
-
55 minutes ago, Javlin said:
The idea OC is to tape off all glass leaving the framing exposed and then glue all glass into play and spray.The temptation is high to remove the tape but leave it till all decals and clears have been applied this gives the paint a uniform coat.You will be okay as it sits but did you remove the tape from the canopy and why it is taped as such now?
 Kevin
Kevin
Some of the masks were in separate sections and too fiddly to put on the remaining glazed windows in the canopy - so I left them off and painted the frame by hand with a fine brush, the frame of the canopy has been painted and had a couple of top coats (Just on the frame not the glass).
So the canopy is a completed assembly I glued it on as its easier than covering the cockpit area with tissue paper in case the delicate parts in the cockpit got damaged.
I then added additional tape to cover the canopy (any small bits of frame where it meats the fuselage are ok as the spray colour is the same as what I hand painted.
Well thats the idea anyway.
OC.
- popeye the sailor, mtaylor and Canute
-
3
-
2 hours ago, popeye the sailor said:
any time is a good time Thomas. the book on KG 200 was very helpful with this subject. at any given time, the KG 200 had around twenty B 17's that were flyable...they also had an assortment of other planes, as well as British Spitfires and who knows what else
B 24's and B 25's were also captured and studied. this is a subject that really hasn't attracted too many modelers........an obscure subject to be sure. but I stumbled onto it and it was so unique, that I had to try it. I think it worked out very well ") the idea was so interesting to do, that I made up my mind to do another project that is somewhat obscure......I read about it......I've even seen it, but I have the perfect model for it, and I decided to give it a go. sadly....it's not a plane. I may not go into this subject again.......but I have a habit of checking out ever link that's sent to me { I wouldn't be a modeler if I didn't}.
the idea was so interesting to do, that I made up my mind to do another project that is somewhat obscure......I read about it......I've even seen it, but I have the perfect model for it, and I decided to give it a go. sadly....it's not a plane. I may not go into this subject again.......but I have a habit of checking out ever link that's sent to me { I wouldn't be a modeler if I didn't}.
thanks for the head's up
hope to see you in one of my other projects....promise......... I'll give you a good laugh
I was hoping you'd look in J...........yea....this plastic stuff grabbed me by the golden globes and won't let go. kind of refreshing to work with wood again....and with you {not gett'in mushy or anything like that} "brothers don't shake hands.........Brother's hug! leave it to me to pick the strangest projects.....aye! glad you like the model.....just a tad more I want to do, and then I'll have the finished photos. thank you my friend!
hey......and thank you all for the likes!
I appreciate the interest during my insane episode........I hope I can come up with another ............soon
Well said denis.👍
OC.
- thibaultron, mtaylor and Canute
-
3
-
1 hour ago, popeye the sailor said:
nose cones and glass like that I try to cut around the edge, lightly scraping afterwards. sanding always leave the white ring where ya did it. what you did is good, but isn't that going to give a slight rise when painted? you want to be careful around the cockpit......the tape looks like it's lifting {happens to me too....I have to be vigilant}. I also have been known to use scotch tape...clear or the clouded stuff to hide mating lines.......it's a bit thinner than paper...fingers crossed it doesn't swell on you 🎨
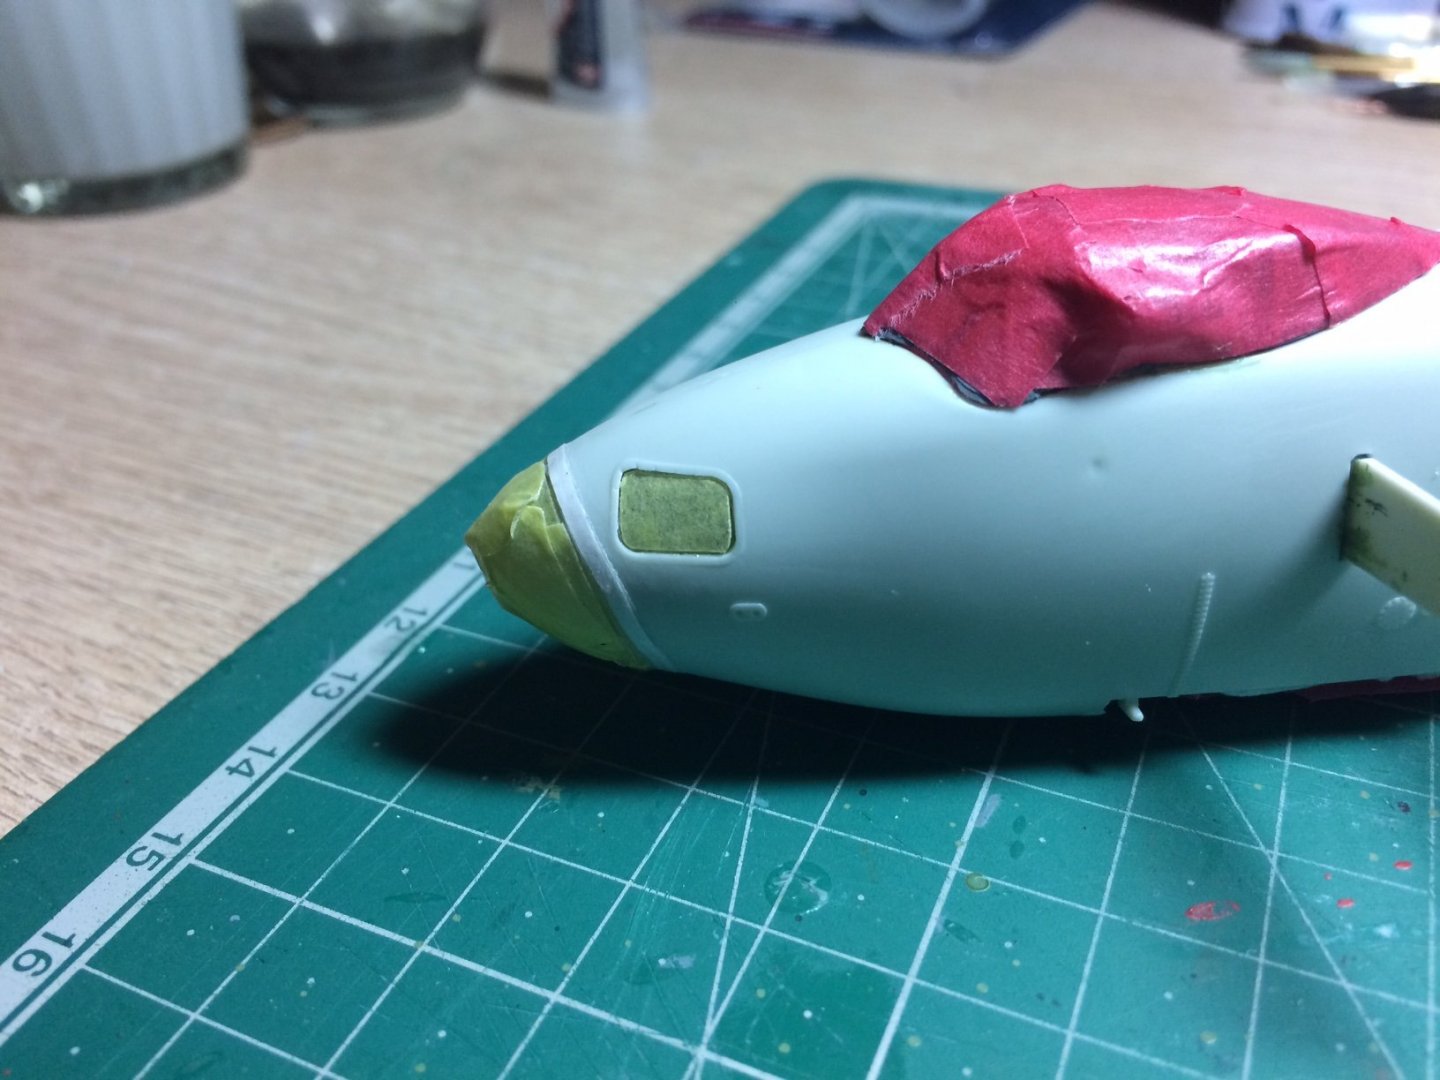
There is a few layers of tape on there denis so fingers crossed (I will press it down again though before spraying) hopefully the paper ring around the nose will not be too noticable when its painted as it is quite thin I think it just stands out with the lighting kind of causing a shadow (oh and its white). Any one asks though - its battle damage repair to strengthen the nose.
OC.
- popeye the sailor, mtaylor and Canute
-
3
-
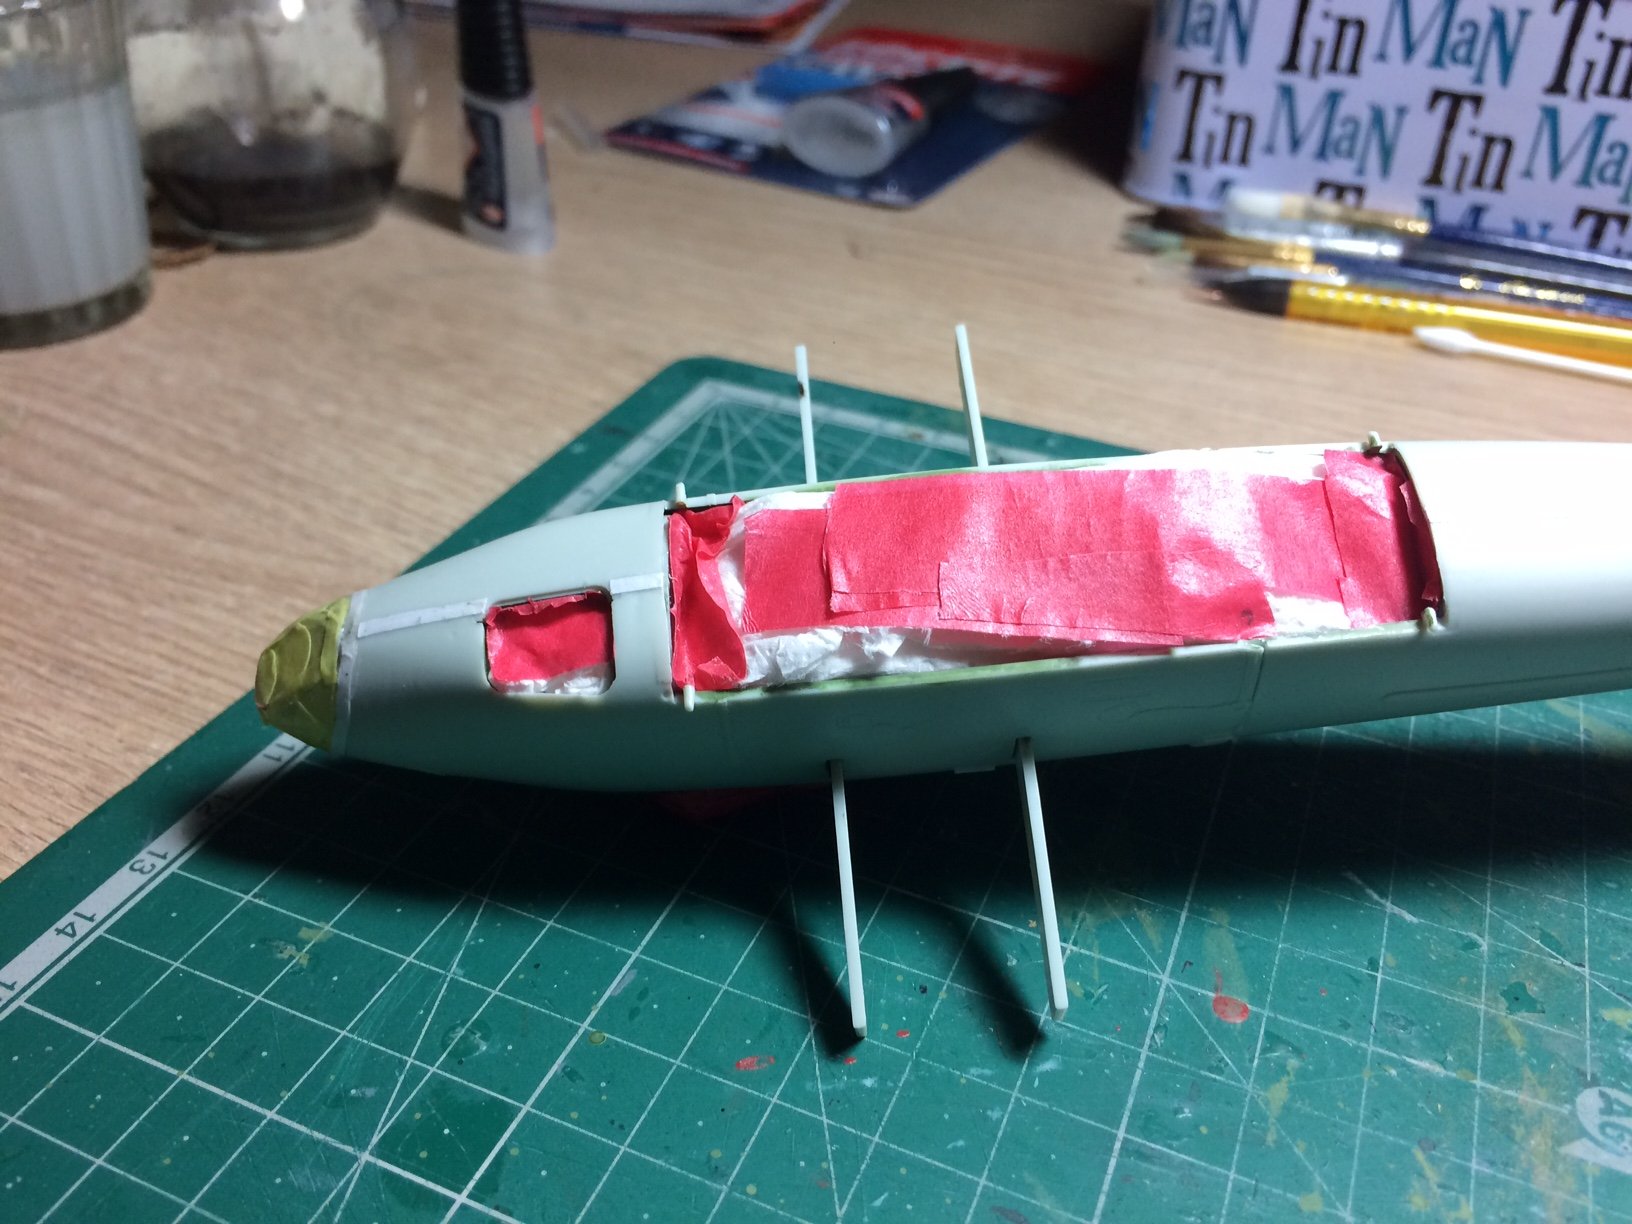
Good day all,
Firstly a Big thank you for all the likes and comments,
Right, another good day - I had a go at hiding the difference between the nose glazing unit and the fuselage, I cut a narrow strip of paper about 2mm wide then using watery pva I stuck it down following the nose glazing, then I joined it underneath and trimmed it. I sealed it using a bit of top coat, next I painted the cockpit canopy frame with a couple of coats of top coat, then put it aside to dry.
I then packed inside the bomb bay and entrance hatch with tissue paper - and covered the rear wheel with tape.
When the main canopy was dry I glued it in place.
So the fuselage is now ready for its first spray of Tamiya surface primer - just need to wait for a dry day as all spraying has to be done out doors.
OC.


-
6 hours ago, SigEp Ziggy said:
Coming along nicely.
Thank you kindly.
OC.
- mtaylor, Canute and popeye the sailor
-
3
-
1 minute ago, mtaylor said:
I'm not at this point as I have checked the fit as yet. Besides it's "Bashing" for everyone else, for me it's "Butchering".

That brings visions to my mind like in Toy Story with the mutilated toys.😧
OC.
- mtaylor, popeye the sailor, lmagna and 2 others
-
5
-
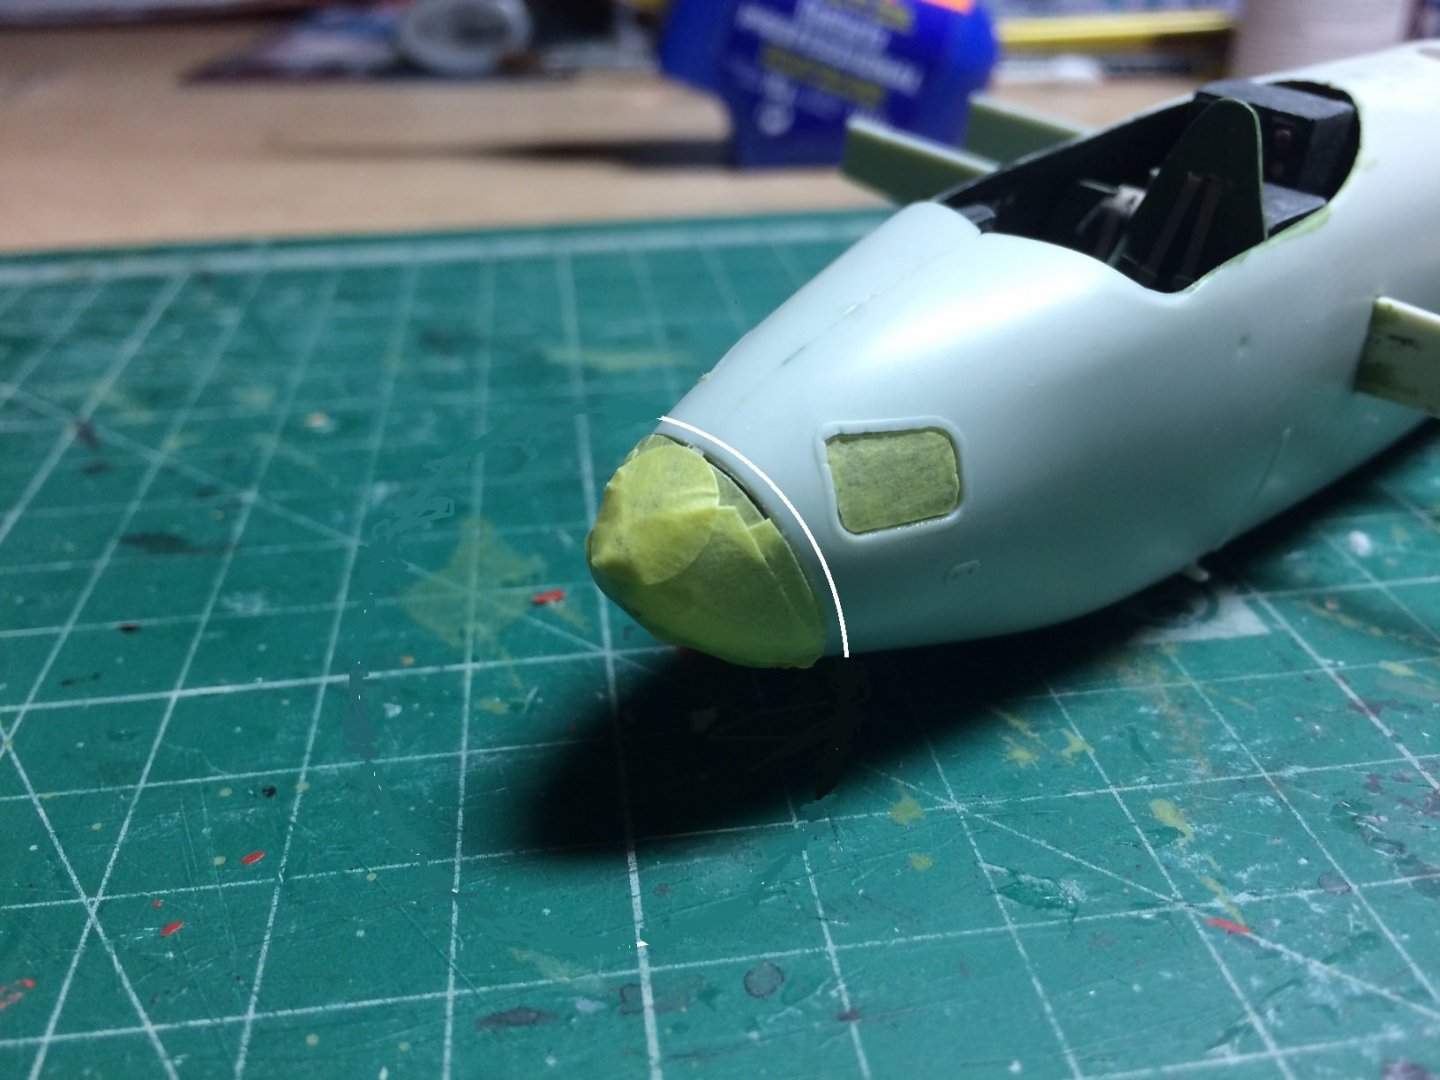
I was wondering (as you do) with the circumference difference between the glazed nose cone and the front part of the fuselage, I wonder if a thin/narrow piece of paper wrapped around the fuselage would work as a "stepper" it could simulate a riveting band.
Like this inside the white line -
OC.
- SigEp Ziggy, Jack12477, mtaylor and 6 others
-
9
-
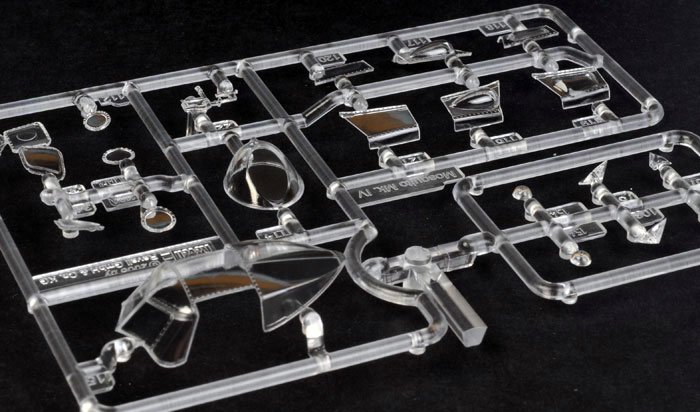
These are the clear parts showing the main canopy and the four side units.
Pic of the net not mine.
OC.
- Canute, lmagna, popeye the sailor and 2 others
-
5
-
4 minutes ago, popeye the sailor said:
really nice progress OC........did you use window maker to assemble the canopy? I've done canopys before by hand and really stunk at it......most of the time I don't do them. we'll see what happens with my next project. did you have to add the bubbles on the sides? those will be tough to mask.
I just held it between my fingers (very carefully) as it was very fragile - then I added a line of ca to the main part where the smaller bubble section was to go then as best as I could I attempted to glue it in place, I must have tried it about five times each side before it would stay in place, then I ran a fine line of ca using a fuse wire tip to catch the other sides of the small part, then I did the same on the other side.
My heart was jumping out my chest as I was doing it - so so so fiddly.
OC.
- popeye the sailor, lmagna, Canute and 1 other
-
4
-
2 minutes ago, CDW said:
Are the "bubble" portions on each side of the canopy the separate pieces you write about? Your canopy came out nice I think. I can see why those features were molded separately, as the only other way would have maybe been a slide mold. From what I've read, a slide mold is a very expensive item to tool. They were probably concentrating on keeping the cost of the kit down to a level that would make it available to many modeler's budget. If my Tamiya 1:32 Mossie wasn't buried in such a deep pile of models, I would drag it out to see how the canopy is molded in that kit.
Yeah in the kit on the clear parts there are two options flat or bubble, these are four separate parts, I went for the bubble as I think it was more highly used on the B IV model.
Just would have been better if the assemblies were complete wit two canopy options for bubble of flat.
OC.
.JPG.7f7146d509fd7e939b493b6a8514f1cf.JPG)


ICM 1/48 Spitfire MkIX Scrapped.
in Non-ship/categorised builds
Posted
Hi all, another rainy day so the mossie remains un painted, so back on with this, I managed to finish assembling the Merlin then paint and weathering - so the power plant is complete but Im currently working on the engine bay cradle for the merlin.
OC.