


Old Collingwood
-
Posts
12,000 -
Joined
-
Last visited
Content Type
Profiles
Forums
Gallery
Events
Posts posted by Old Collingwood
-
-
56 minutes ago, Egilman said:
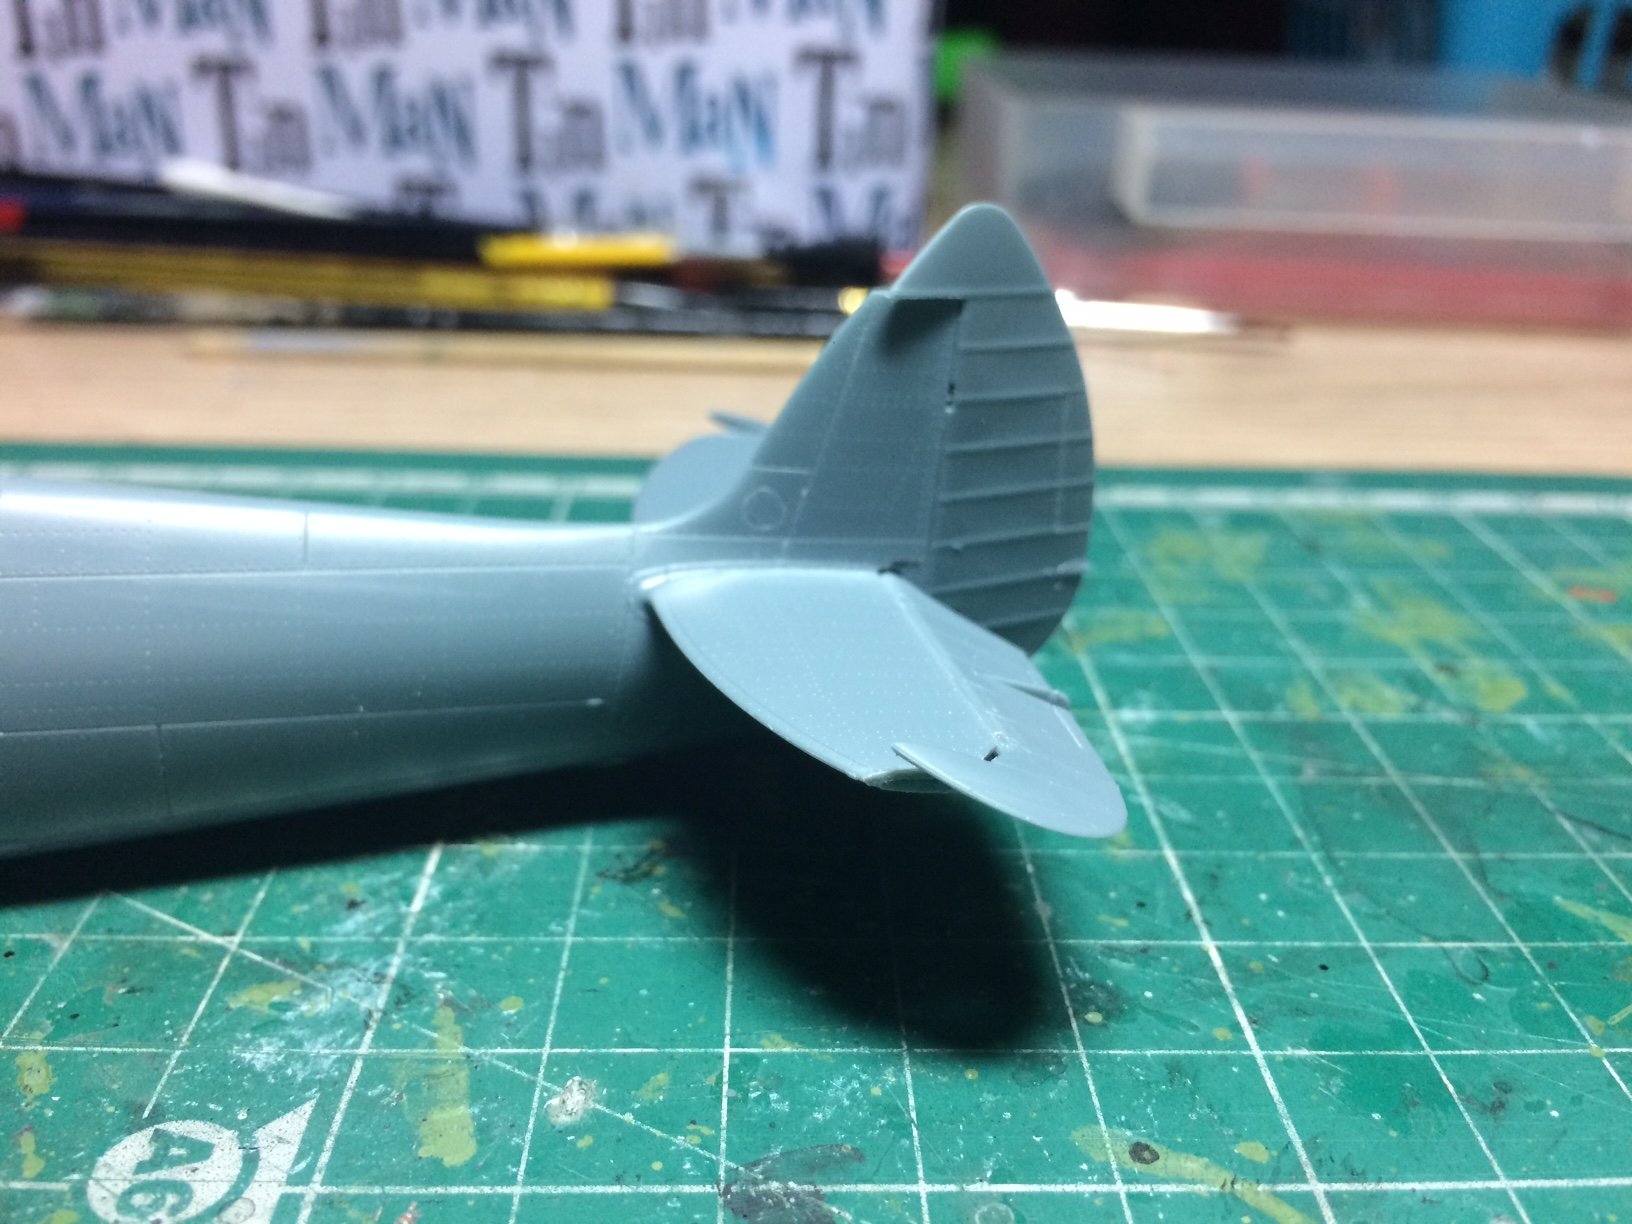
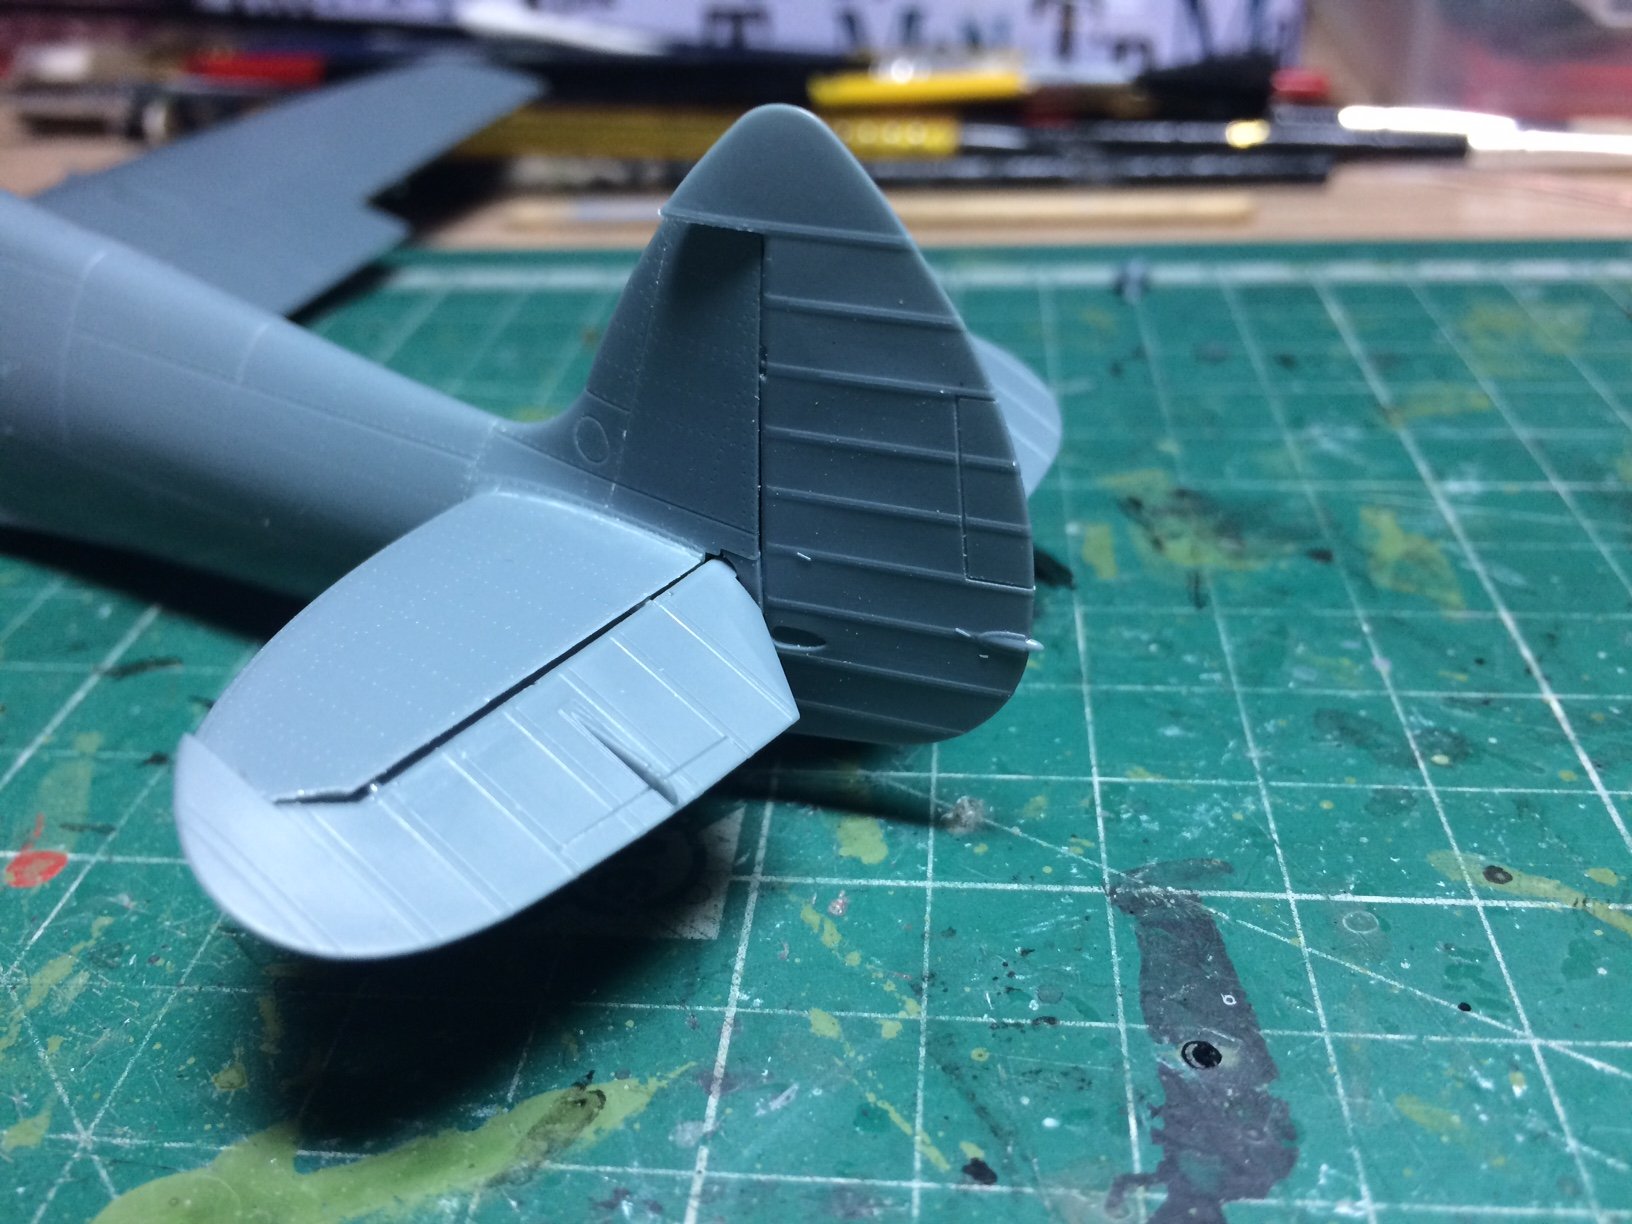
They were cable operated with a spring on the control stick to keep the stick basically centered, with serious usage the spring would relax a bit and allow the elevator, (horizontal stabilizer control surfaces) to droop a bit... The rudder would lie whichever way the rudder pedals were last touched as they were a push pull configuration and the ailerons on the wings would twist on the same basis depending on the side the stick leaned towards.... I'm not remembering exactly when they went to hydraulics on the Spit, but that was the case with the early built birds. But when they did go to hydraulics, the elevator droop would become much more pronounced as the hydraulic pressure bled off.....
Separate control surfaces in the kit allows this mechanical habit to be modeled accurately
I am doing mine drooped stabs slight rudder turn and level ailerons with the flaps in there locked up position (these are molded in with the lower wings)
OC.
-
15 minutes ago, popeye the sailor said:
nice progress so far OC........not understanding the significance of tilting the stabilizer ailerons downward for the rudder, as they are shaped to allow for it.
Just a bit of builder artistic license denis - think it looks better that way.
OC.
- Canute, popeye the sailor and mtaylor
-
 3
3
-
-
Thats looking super - you have brought the detail out really well.
OC.
- Egilman, cog, popeye the sailor and 2 others
-
5
-
Got my seat ready - this will be good so great to have a fellow spit build on the forum (your F18 looks Superb)
OC.
- lmagna, mtaylor, popeye the sailor and 3 others
-
6
-
-
6 minutes ago, popeye the sailor said:
WOW! superb job on the Dauntless Ed! very well done
")
I don't recall ever doing a Japanese plane before........might be interesting. I think the Russians have it beat though.......TU 95MS

not sure if there's a kit for it........but then again, I've not done a Russian plane either
 I've got Tora Tora Tora in my library........my favorite is the Blue Max.......went through hell finding a copy
 ")
They do a kit of that not sure what scale though - memory escapes me.
OC.
-
As denis said - very nice work - I love the shading in the fuselage.
OC.
- Edwardkenway, mtaylor, Tom E and 3 others
-
6
-
38 minutes ago, Jack12477 said:
The boxes came shrink wrapped, haven't looked inside yet. My Dad's youngest brother was a Captain in a tank retrieval unit somewhere in France, can't remember where tho.
Small world Jack/Ken.
OC.
- lmagna, popeye the sailor, mtaylor and 1 other
-
4
-
Later today (yep I know where does the time go) I will check the join where the Stabs meet the fuselage and fill if needed, then I think it will be wing tip and Aileron fitting time, I will probably keep the Ailerons level as I dont think they are gravity enduced so wont droop on power down.
OC.
- lmagna, Canute, popeye the sailor and 4 others
-
7
-
3 minutes ago, Edwardkenway said:
Text blindness, I meant definite in my liking of the Sherman 😖
Battle of the Bulge, another favourite film of a desperate time, touch and go for the allies. Coincidentally just finished re-watching Band of Brothers episode set in the Ardennes/Bastogne
One of mine was "A bridge too far" after watching the film as a teenager I went out and brought the Airfix Dio kit of the same thing - soldiers and Tanks and the bridge all in 1/72.
OC.
- Edwardkenway, mtaylor, Canute and 3 others
-
6
-
-
13 minutes ago, Canute said:
Your work looks good, OC. And working on the prettiest fighter of WW II doesn't hurt either. 😁
Thank you Ken.
OC.
- Canute, popeye the sailor, mtaylor and 2 others
-
5
-
Evening all hope all are well and not going too nuts yet,
I spent another hour or so on the Spit, I decided to make the stab frames / stabs and rudder, quite straight forward with minumum fuss, I decided to droop the stabs and give the ruidder a bit of angle.
OC.


- Egilman, lmagna, Edwardkenway and 5 others
-
8
-
6 hours ago, Tigerdvr said:
Outstanding work on what appears to be an outstanding kit. They even have an arrow embossed inside the fuselage so we know which way to fly🛩️
Seriously, very well done, enjoying your progress.
Cheers
No thats where the Bow goes with the Arrows 😉 But thank you for the compliment.
OC.
-
8 hours ago, cog said:
You are positive, you do not get commision on UK sales???
Yep - but deffo a brll kit.
OC.
- Canute, mtaylor, popeye the sailor and 2 others
-
5
-
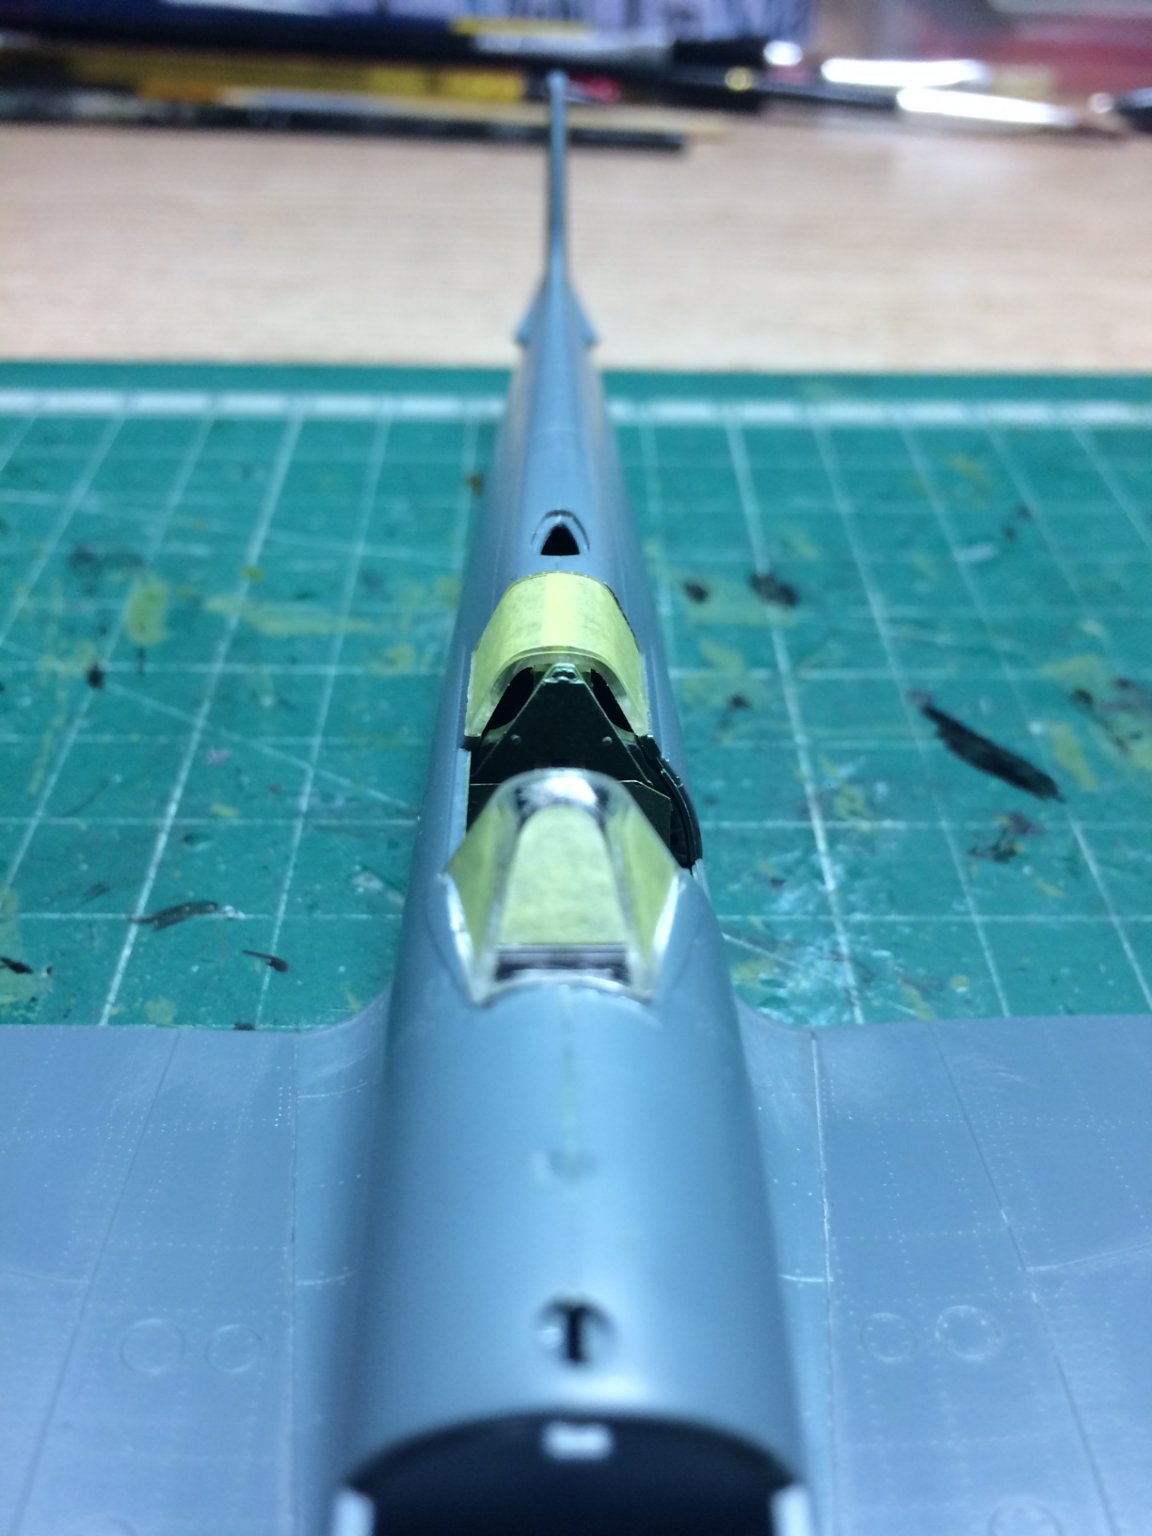
Plan for today (later) there is still a hairline gap where the wings meet the fuselage so I will work some plastic putty into it, then I will either attach the rudder stabs and Rudder or the wing tips (depends what I fancy doing first).
I know I keep saying it - but I really recommend thses Eduard kits they are simply first rate in every way.
OC.
- Canute, BLACK VIKING, Egilman and 2 others
-
5
-
Very nice work mate - very nice indeed, that red colour really makes her stand out.
OC.
- FriedClams, mtaylor, Jack12477 and 2 others
-
5
-
-
Yellow ocre is the colour we all know for the bulwarks and carriages, but if you find the shade a we bit too bright you could always dull it a bit by adding a bit of white, its completely how you want to display it my friend and how pleasing it wil be to your eyes.
I am loving those canon/carriages though they will look super when finished.
OC.
-
24 minutes ago, Egilman said:
Nice work.... Usually I just close mine up cause I'm not that good at cockpits. Impressive work....
Thank you EG, credit to the kit as its Superb best I have ever built.
OC.
- mtaylor, lmagna, Edwardkenway and 3 others
-
6
-
Lovely job Edfward a real credit to you mate - it really has come out first class, I will miss the banter and viewing oyur work in The Special section (Here) hurry up mate and find another thing to build - we will be waiting.
OC.
- mtaylor, Edwardkenway, Canute and 2 others
-
5
-
Now, this will be cracking also - good choice of kit.
OC.
- mtaylor, Edwardkenway, Javlin and 4 others
-
7
-
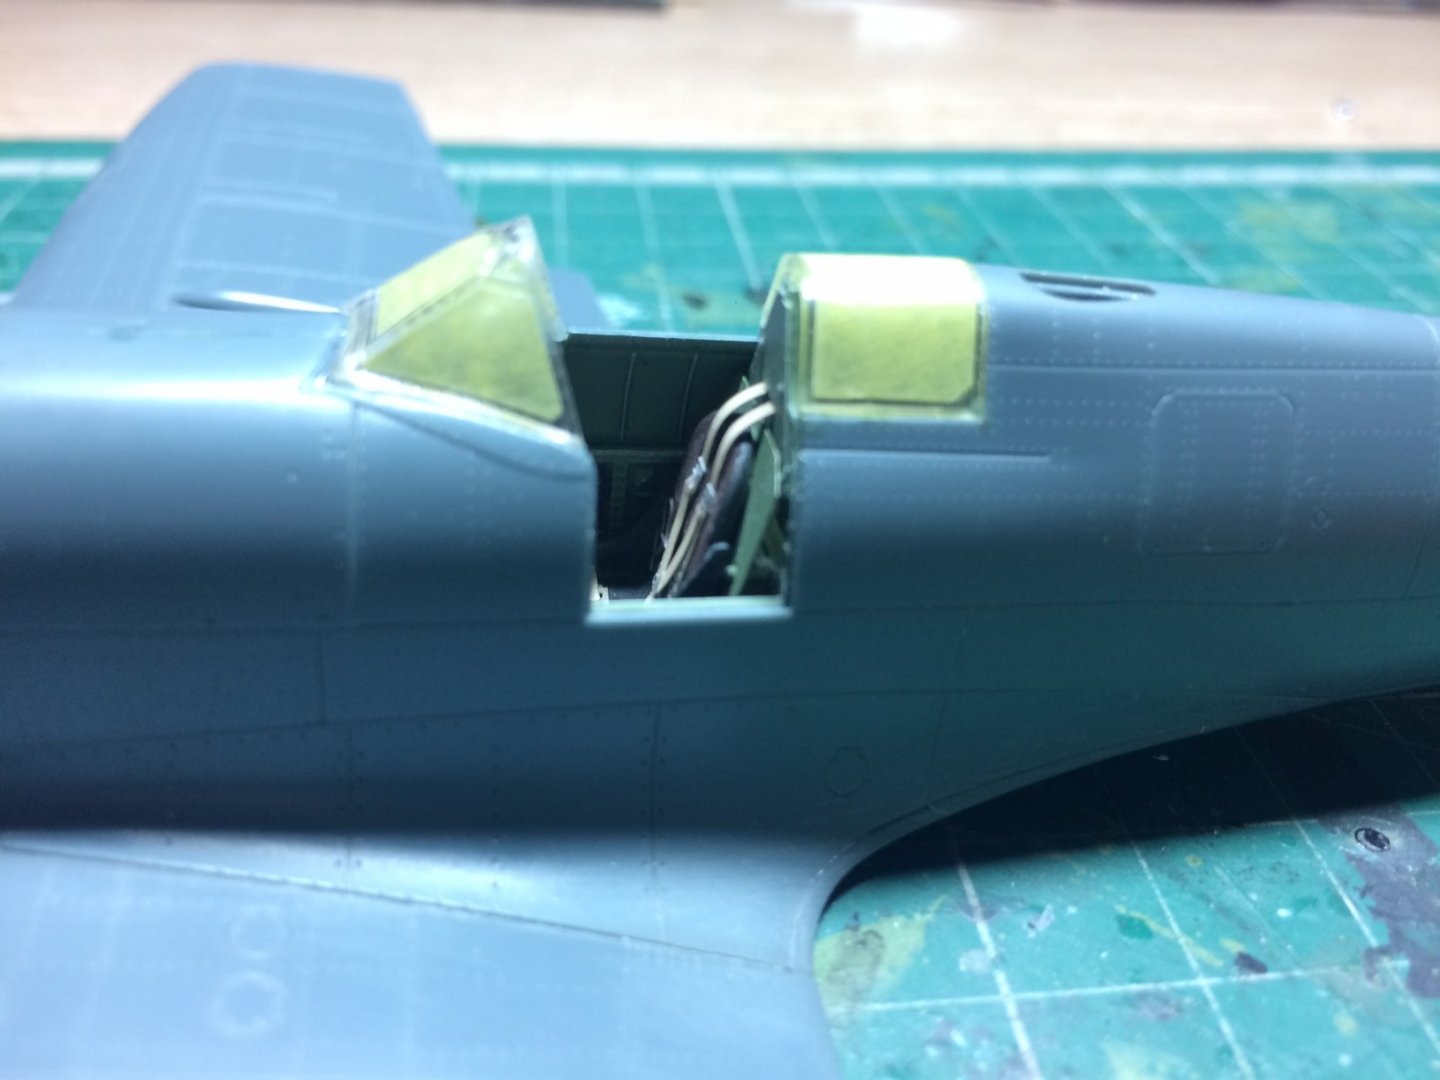
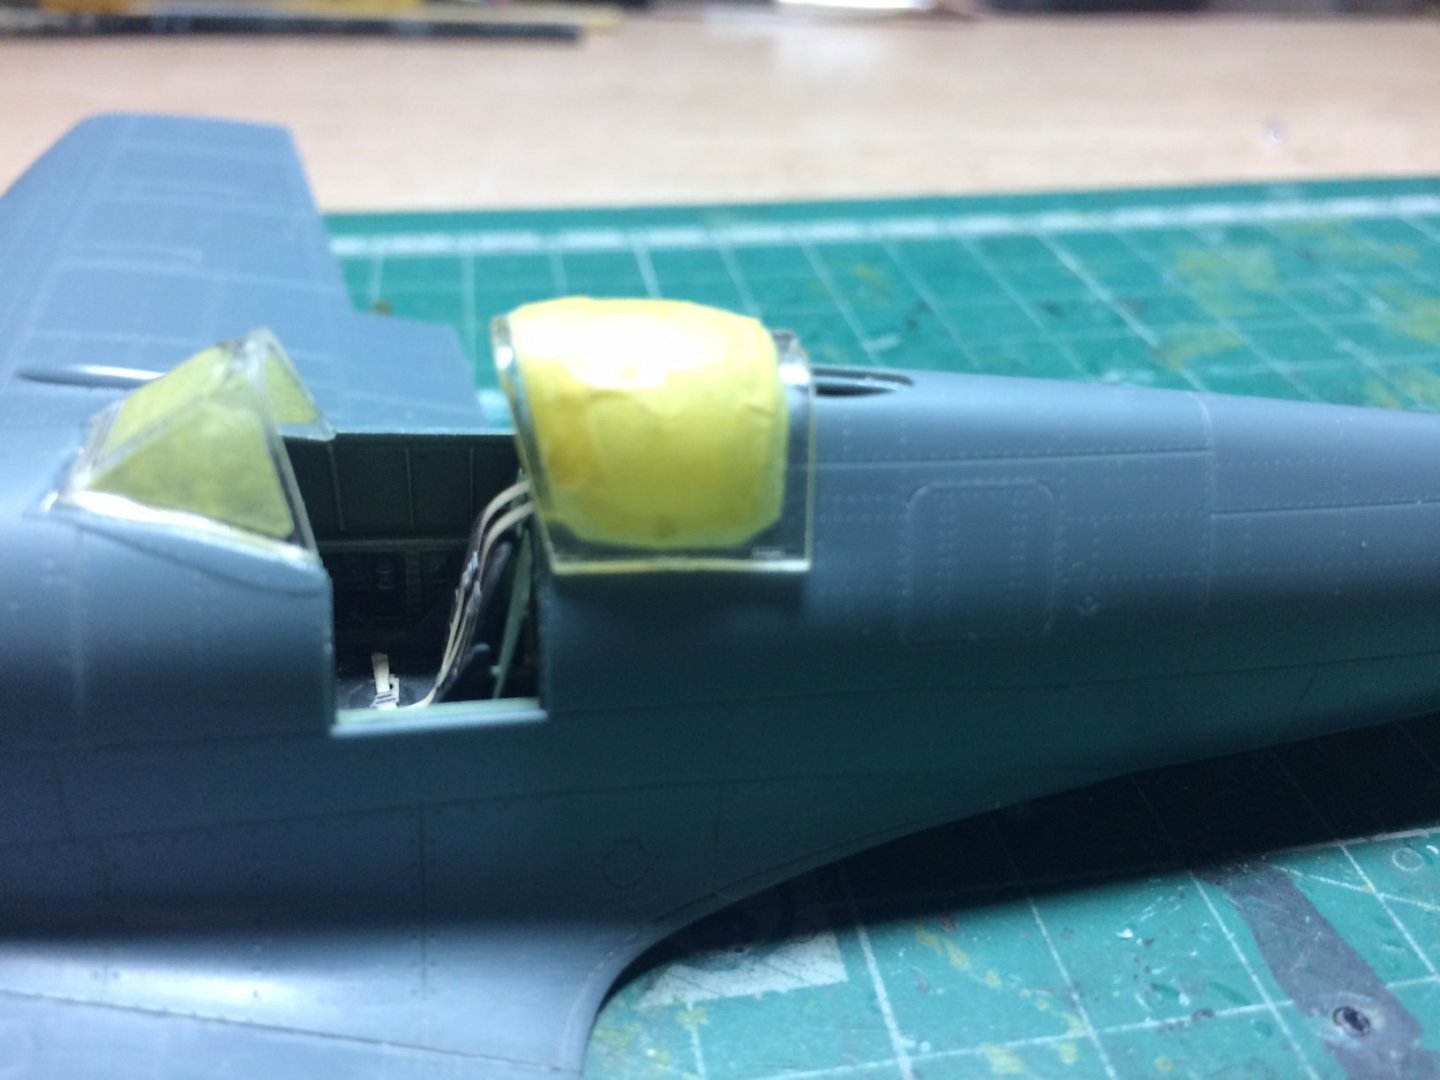
A bit more progress - no work done in the day time as we were sat out enjoying that weird bright ornage thing in the sky, so I decided to work on the cockpit glazing, this is in three sections due to me having the cockpit open, first I cut away the front section and after tyding up the edge I fitted some masks that came in the kit, this was a three part mask - I then glued it in place and set it down using the dryer, next was the rear section - again tydy up and masked using two masks, this was then glued down/heated, last was the sliding section - this had the same prodecure, but it stays off till the last stages of the build.
Thank you all for the interest people are showing in my build.
OC.


Spitfire IX (Late Mark) by Old Collingwood - FINISHED - Eduard - 1/48
in Non-ship/categorised builds
Posted · Edited by Old Collingwood
I thought about building it with everything flush but thought it would be more interesting with things drooped.
This pic off the net shows a powerd down spit with stabs drooped and some movement of the rudder.
OC.