MORE HANDBOOKS ARE ON THEIR WAY! We will let you know when they get here.
×


Old Collingwood
-
Posts
12,077 -
Joined
-
Last visited
Content Type
Profiles
Forums
Gallery
Events
Everything posted by Old Collingwood
-
 Good evening all, I thought I would give a bit of an update (no pictures with it so you will have to make do with my writting content (sorry) anyway I have continued working on the foremast - I gave the rest of it a coat of paint or two, then I put it aside to dry. I then turned my attention to the main superstructure - this needed some ladders and a bit of touch up here and there, I then found a fab photo on the IWM site showing the cable routing and flag ropes and to my supprise where I had covered a cut out in the floor of the signaling deck - there is one surrounded by a curved shield. So I meesed around with one of my spare ork tubs and sanded it down in height, but also gave it a square end taht will sit aginst the flag lockers, I also cut it back underneath to give it a semi circuler cut out, the idea is - I will attache some railing around the top rim of it and attach some fine copper wire to this, that will be attached to the lower yard arm on the mast when I attach it (well thats the idea) OC.
 -
Another genious with xray vision - some days I have trouble finding my boat sitting on the sideboard, then I put my glasses on and it comes into focus but still a slight blur. OC.
-
Sorry to hear about your uncle carl, building our little projects does help take our mind off stuff abit. OC.
-
Superb stuff greg, it occured to me that the ole girl and seydlitz have met in conflict at Jutland. OC.
-
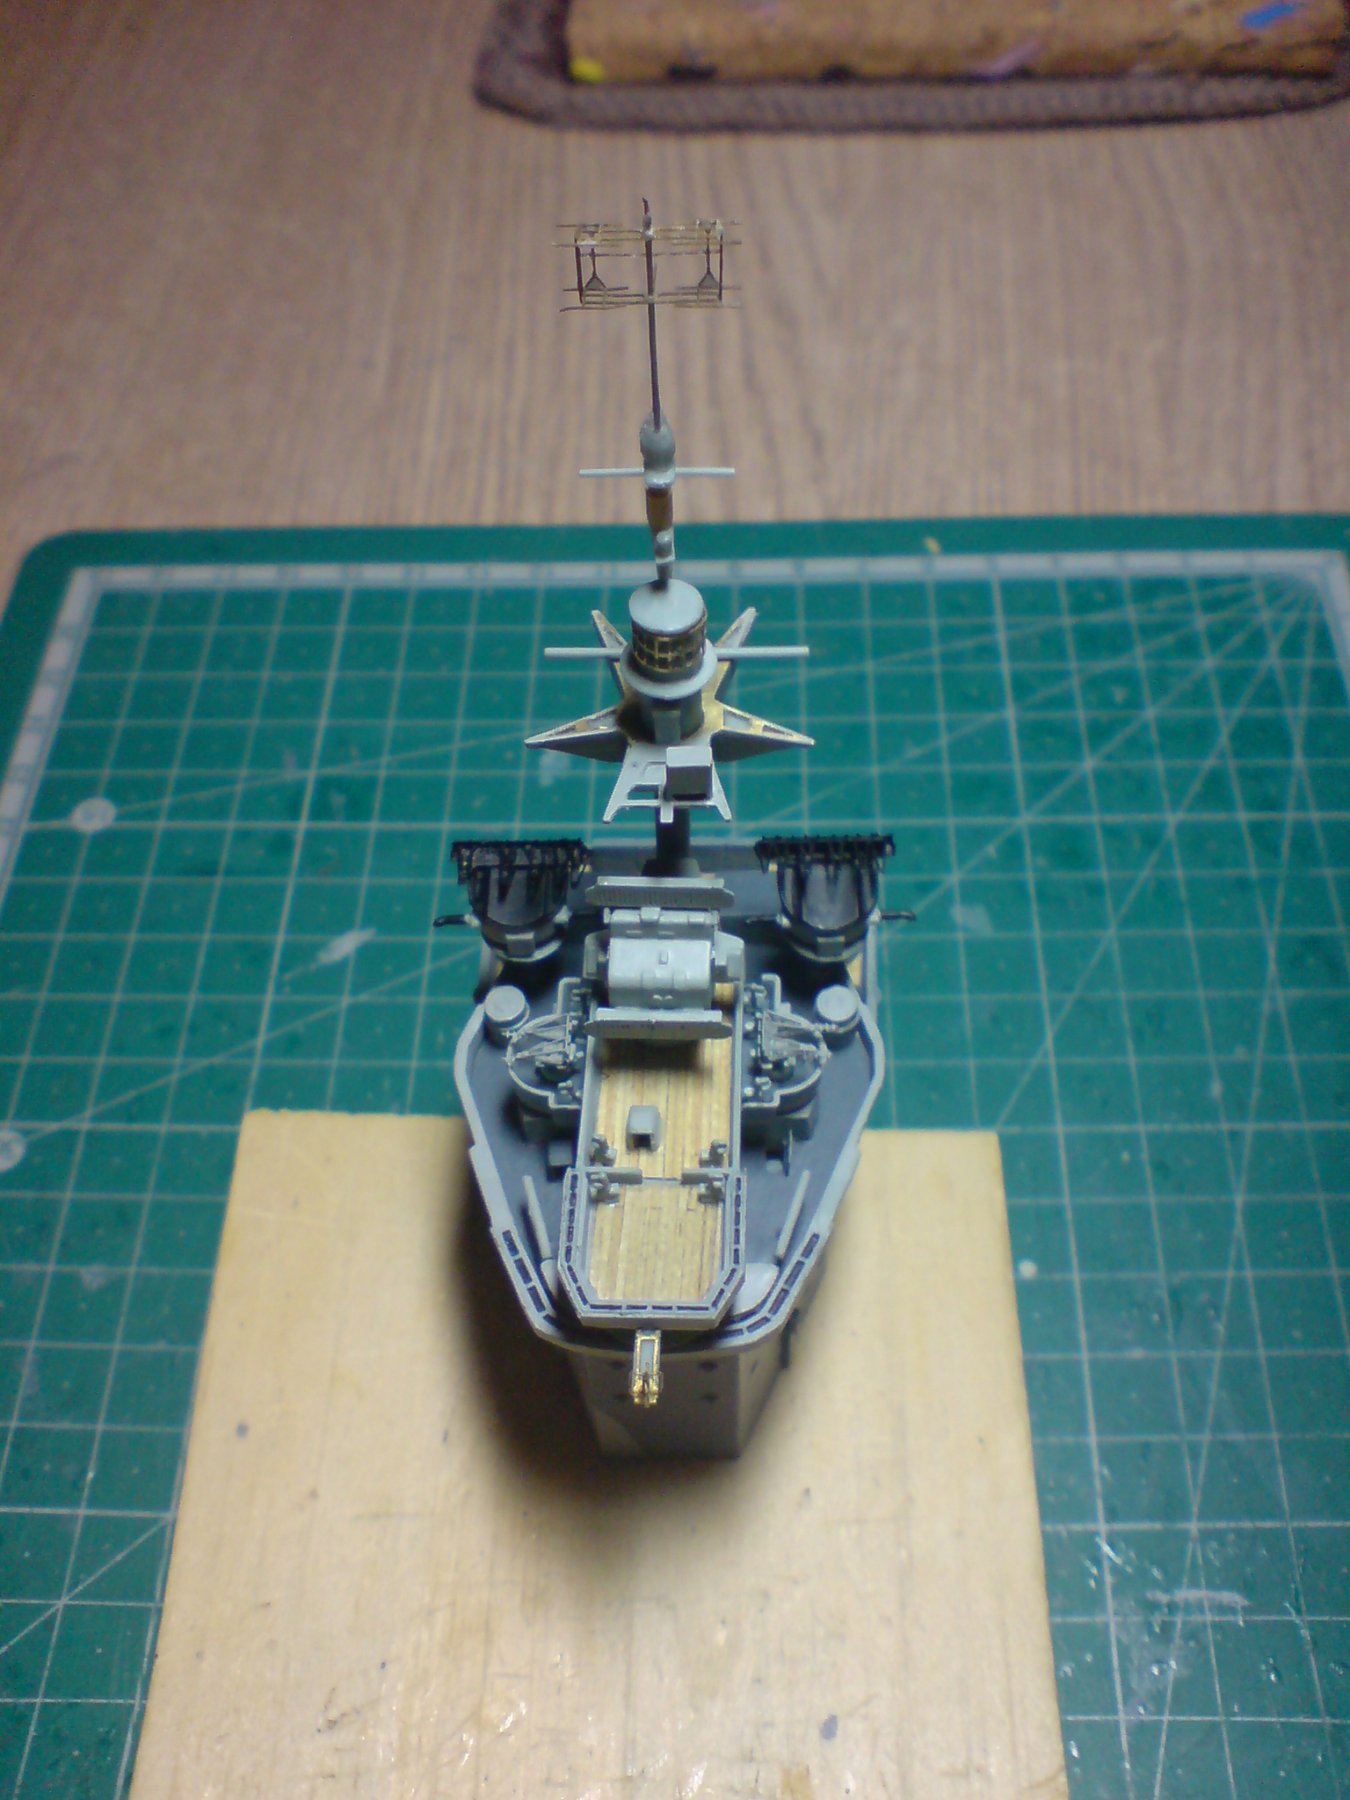
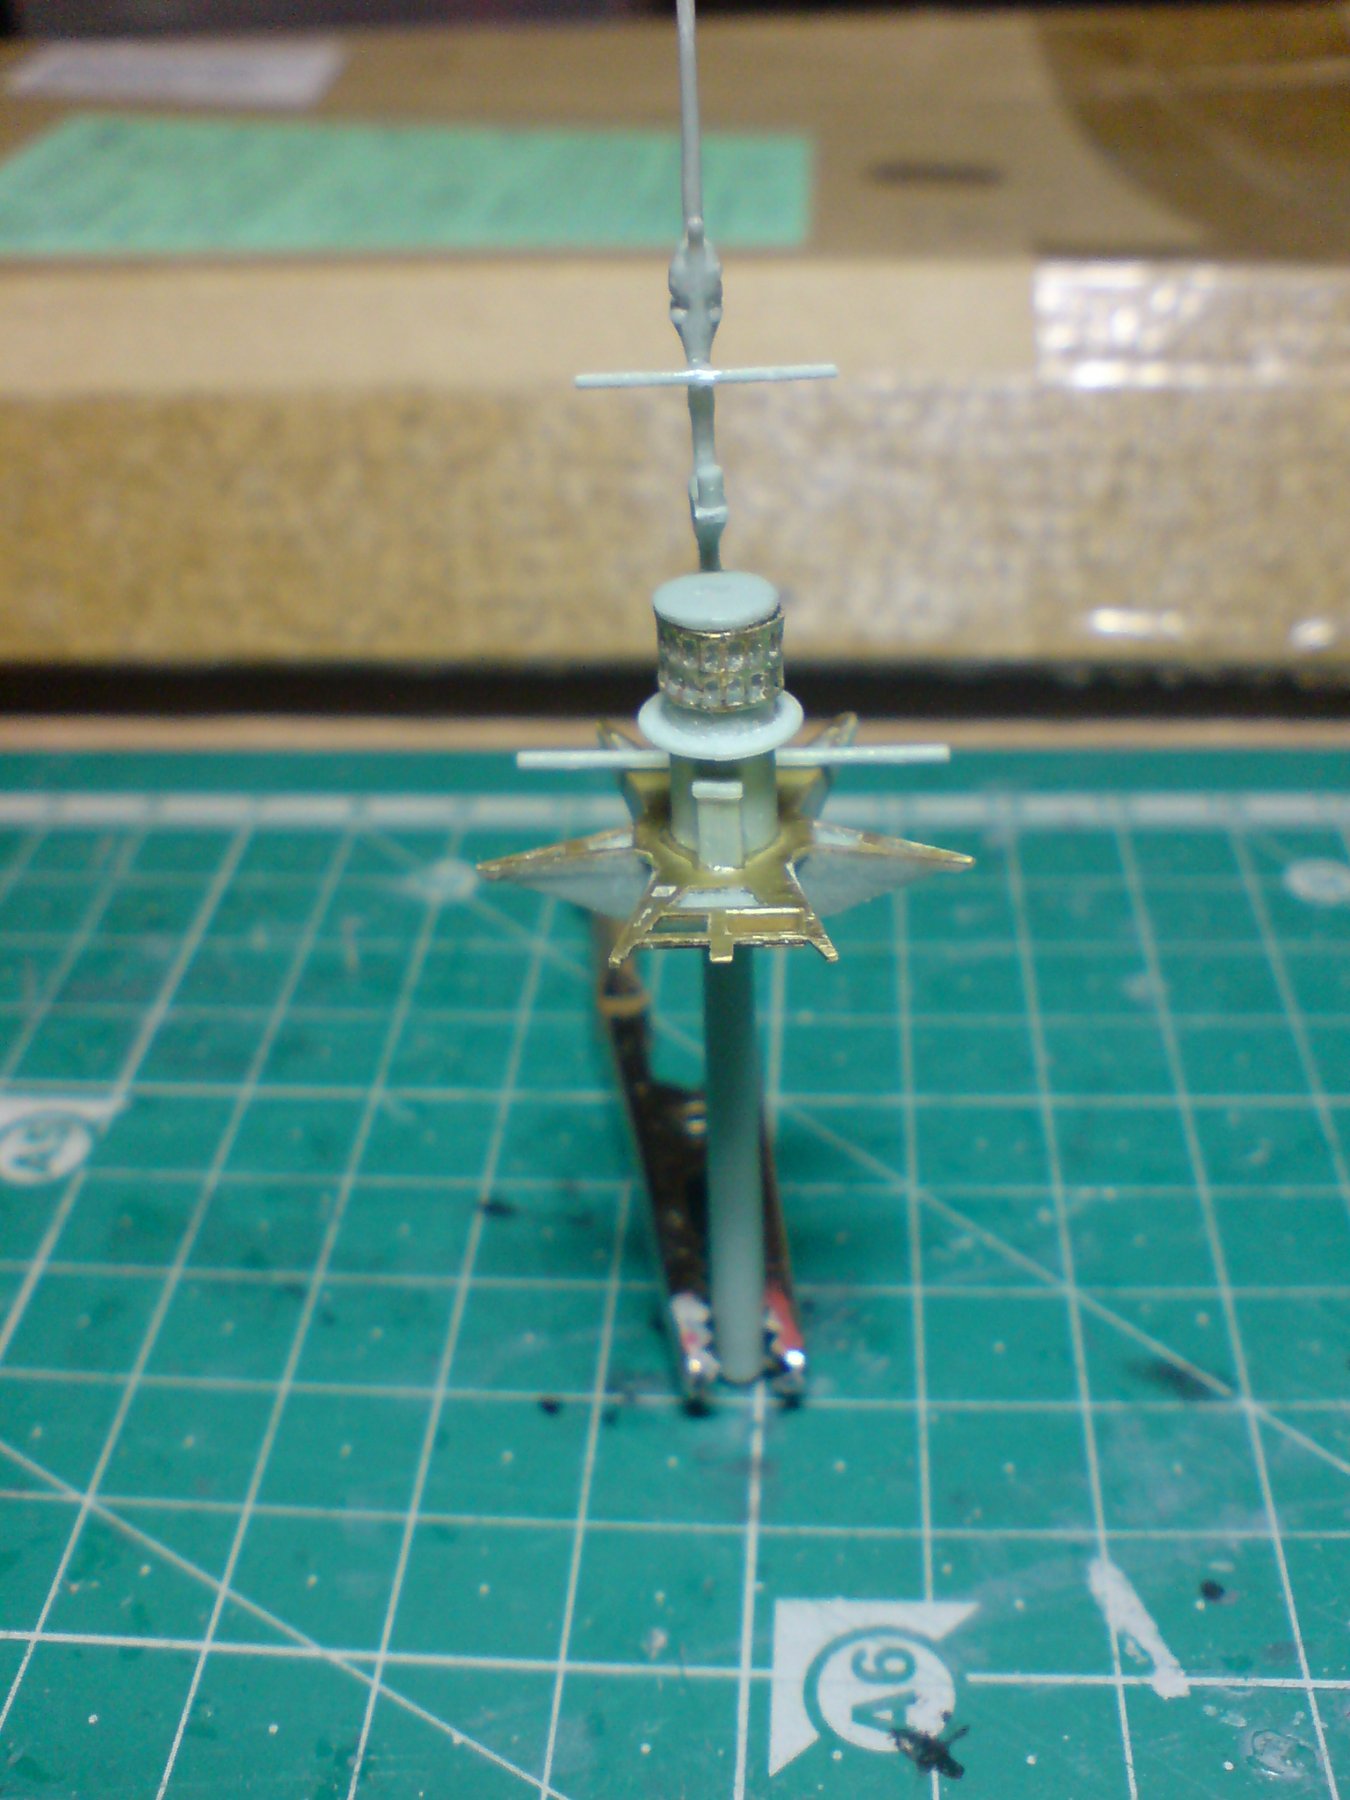
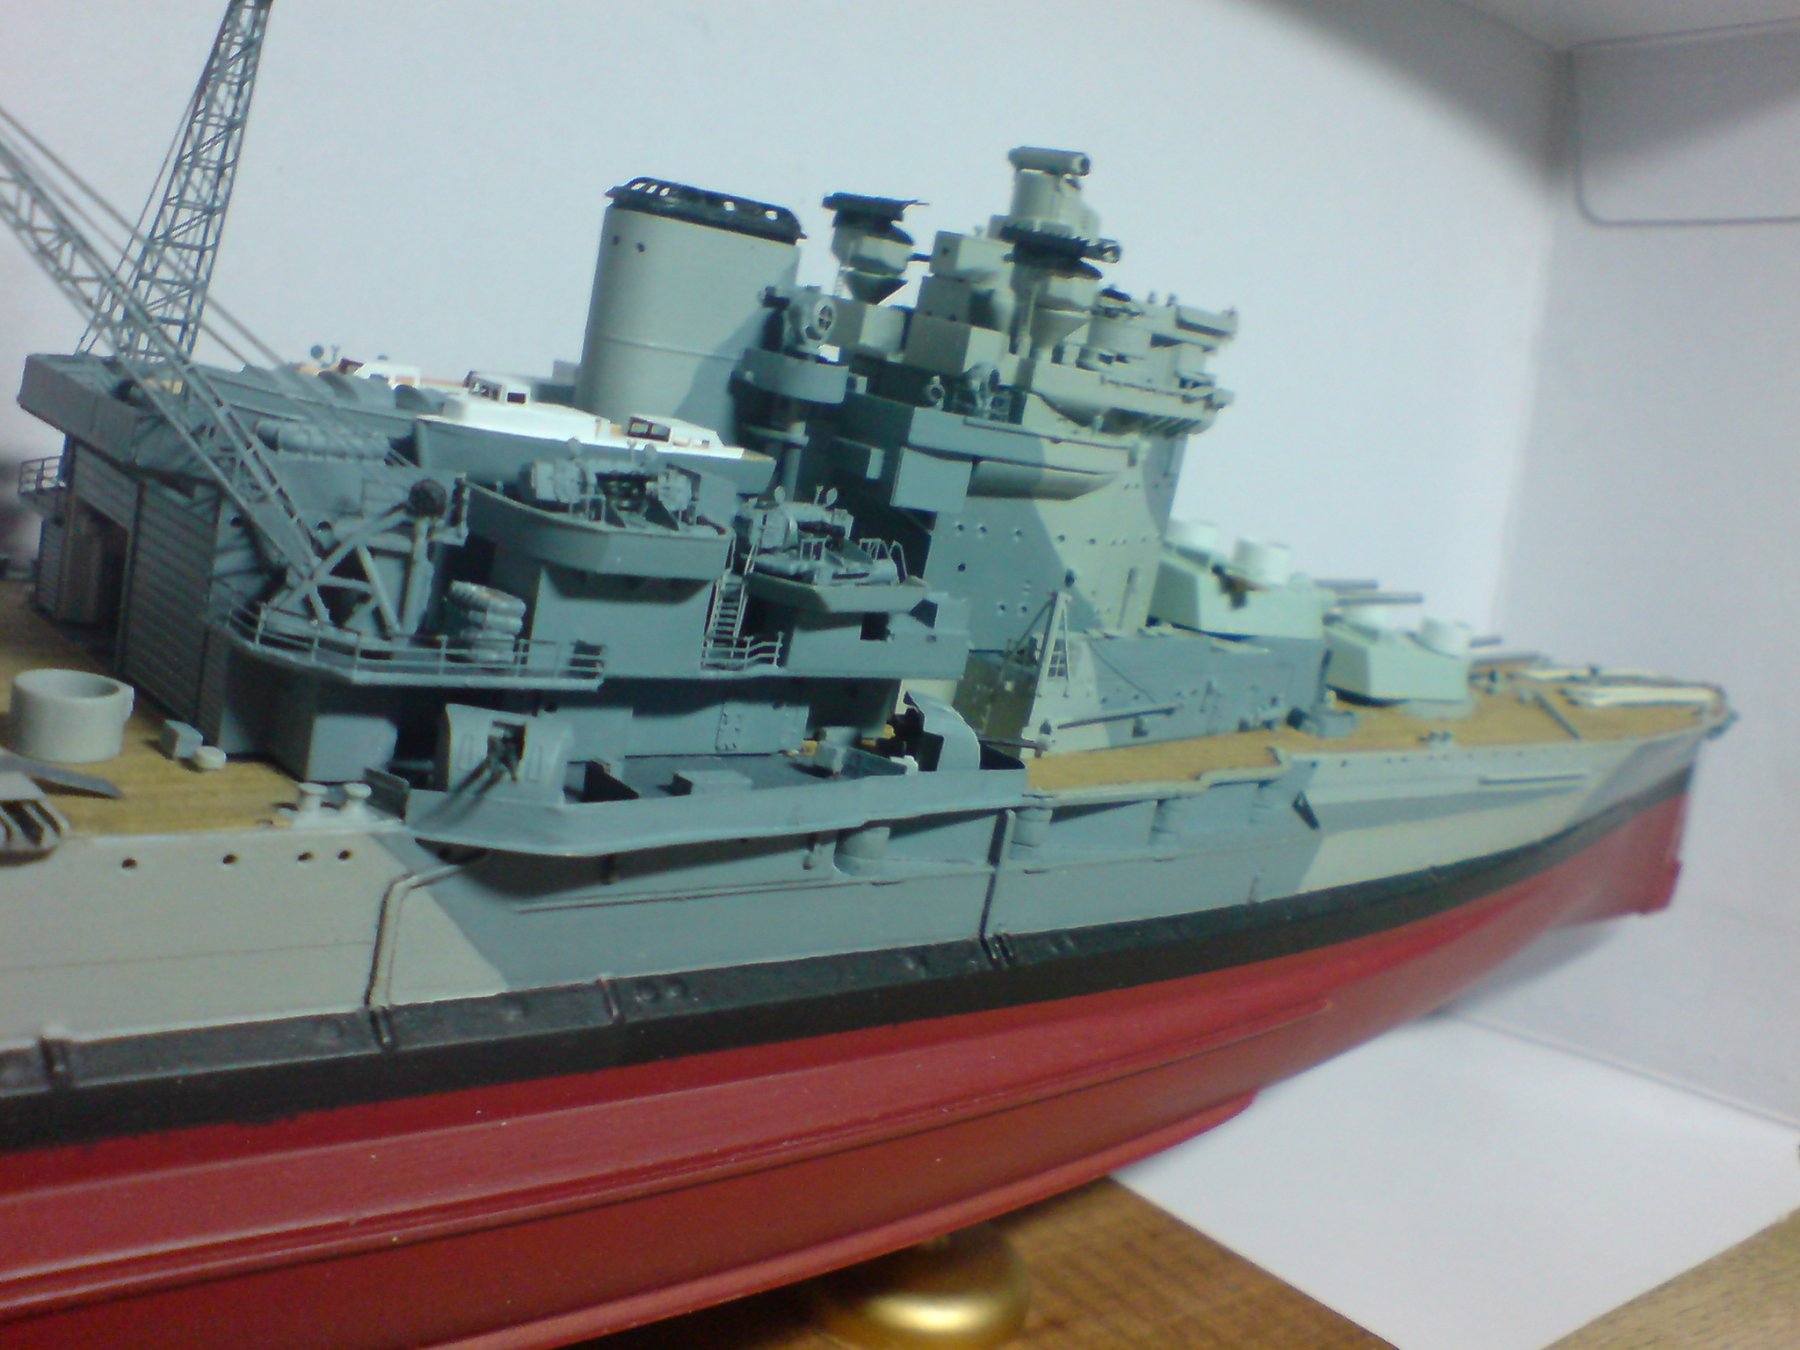
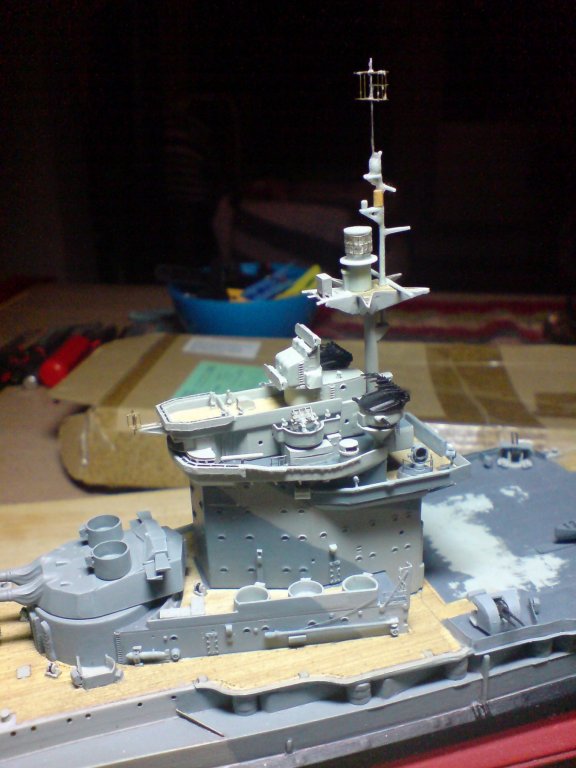
Evening all, more work today - still on the forward mast, I constructed and fitted one of the starfish boxes, then attached the post ladder, then I painted the lower half, while it was set aside to dry I constructed the type 281 radar aerial, this is fiddly box like construction and needs bending in on four sides, then the awkward part started - the radar (box) has two tiny holes that are supposed to drop over the end of the mast, these are real tinty, so no amount of thining the plastic mast would do - it was becoming too fragile, so plan number two - use another of my tiny drill bits like I did before, this was simple with the aerial, just pop it through the holes and add ca glue (job done) but the fiddly part was to drill a pilot hole in the top section of the mast after cutting off the kit part, this of course snapped away and I had to make up a stronger joining section for the part I had drilled a pilot hole in, a piece of dowel came to my rescue and the radar and top mast was glued to that with ca. So here are a few pics showing how the forward mast looks just dry fitted for now. OC.


-
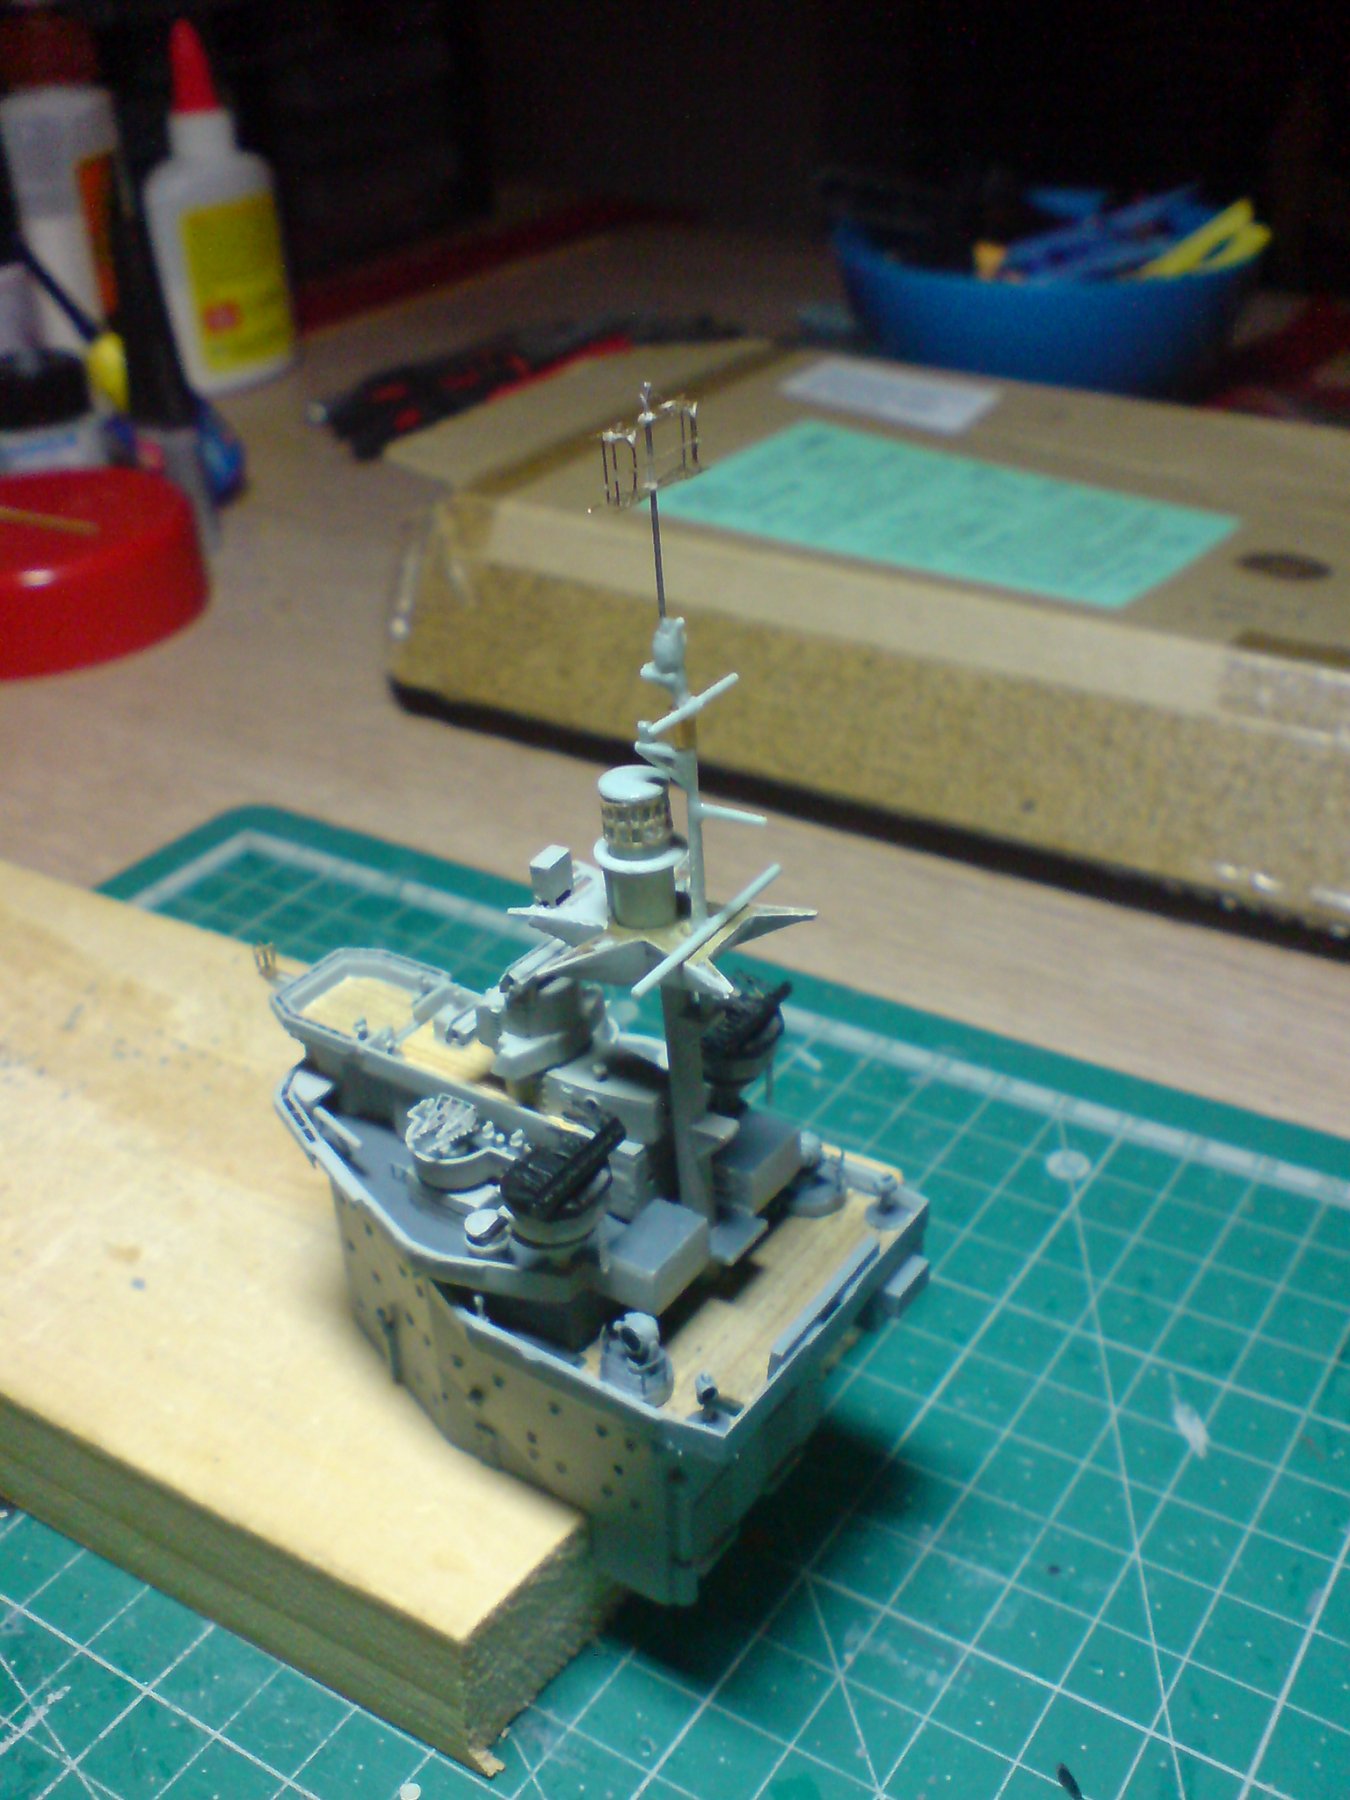
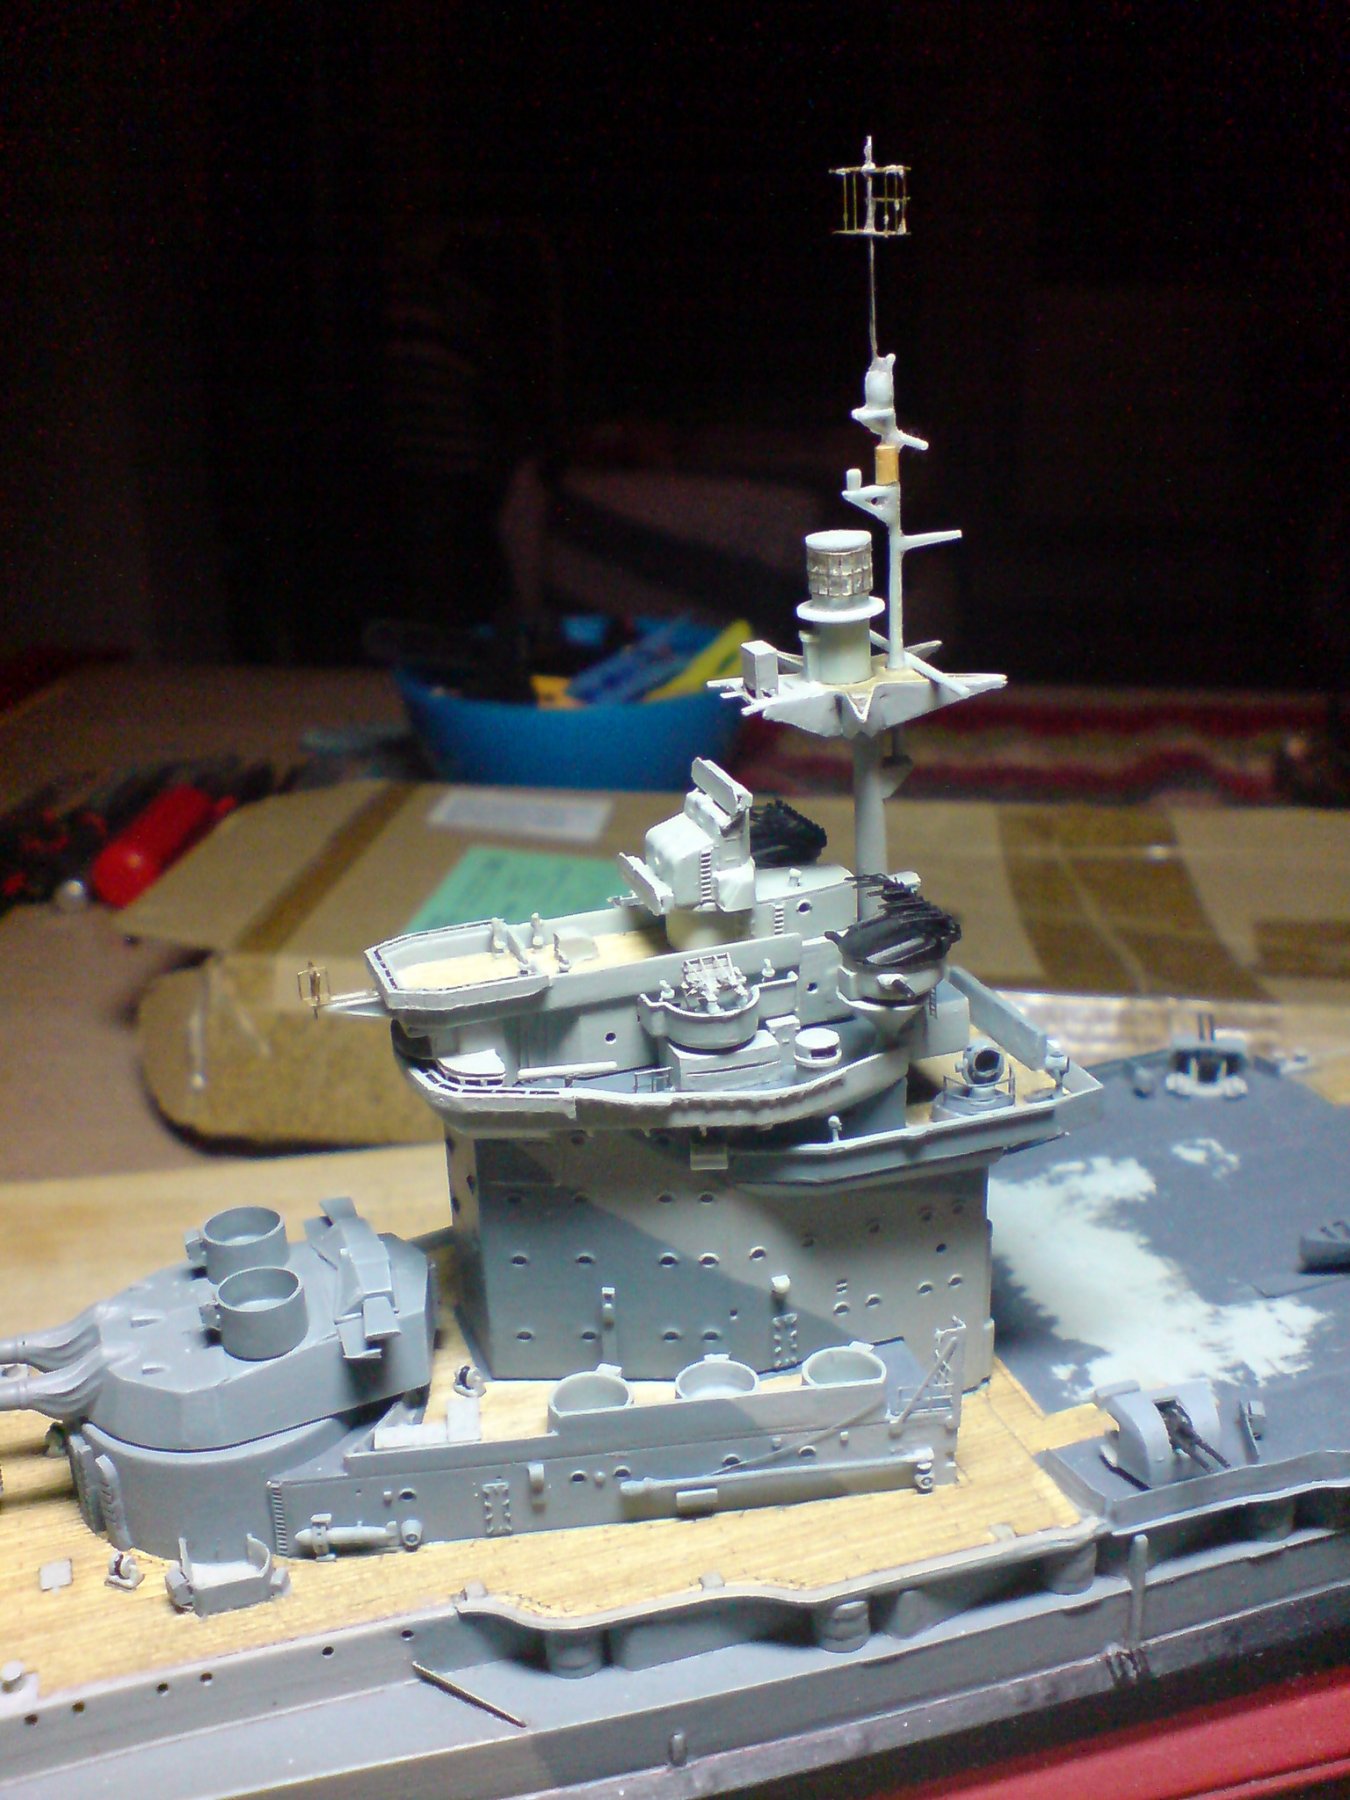
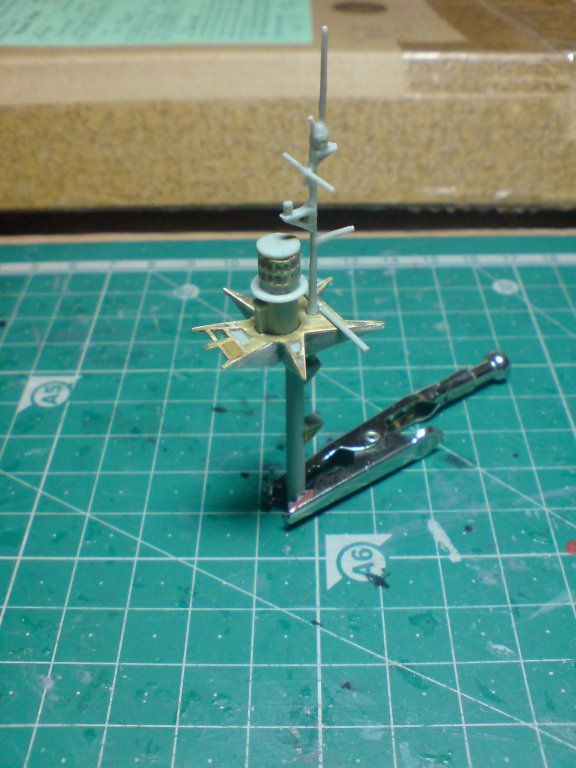
After a couple of days off - I returned to the bench, she is on the finishing strait now - todays work was with the forward mast, I decised to combine the kit parts and the top starfish platform pe parts, I decided to do it like this to add strength by combining both parts. Its completed minus the 281 RDF aerial and the mast ladder. Just a couple of pics. OC.

-
"Hey"! that could have been me in my early days...... OC.
-
Great to see you back on vic mate, what a lovely build. OC.
- 1,319 replies
-
- 3
-

-
- caldercraft
- Victory
- (and 1 more)
-
I just keep all my pic files in my windows picture viewer, and when I want to display them on here I just drag them into the box with my post. OC.
-
Thank you kindly, I have the front mast, wiring, a couple of small bits including the flag staffs, then the railings before I put it away awaiting the oerks. OC.
-
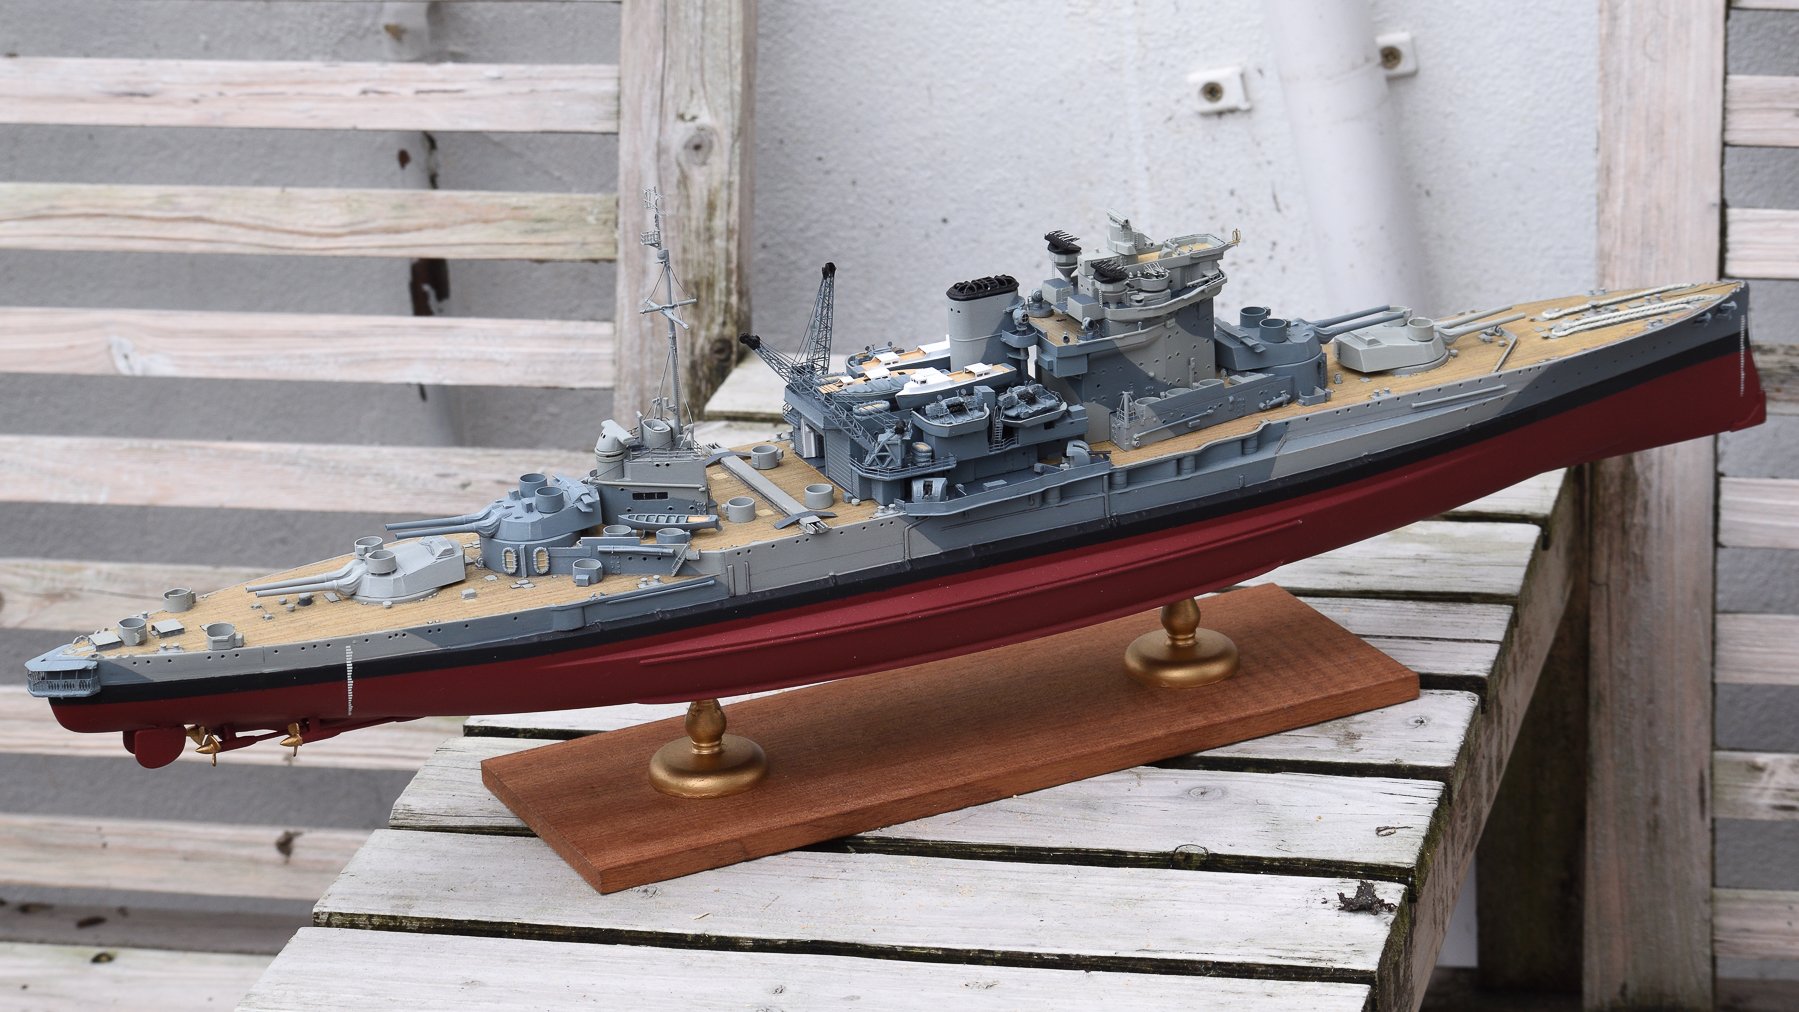
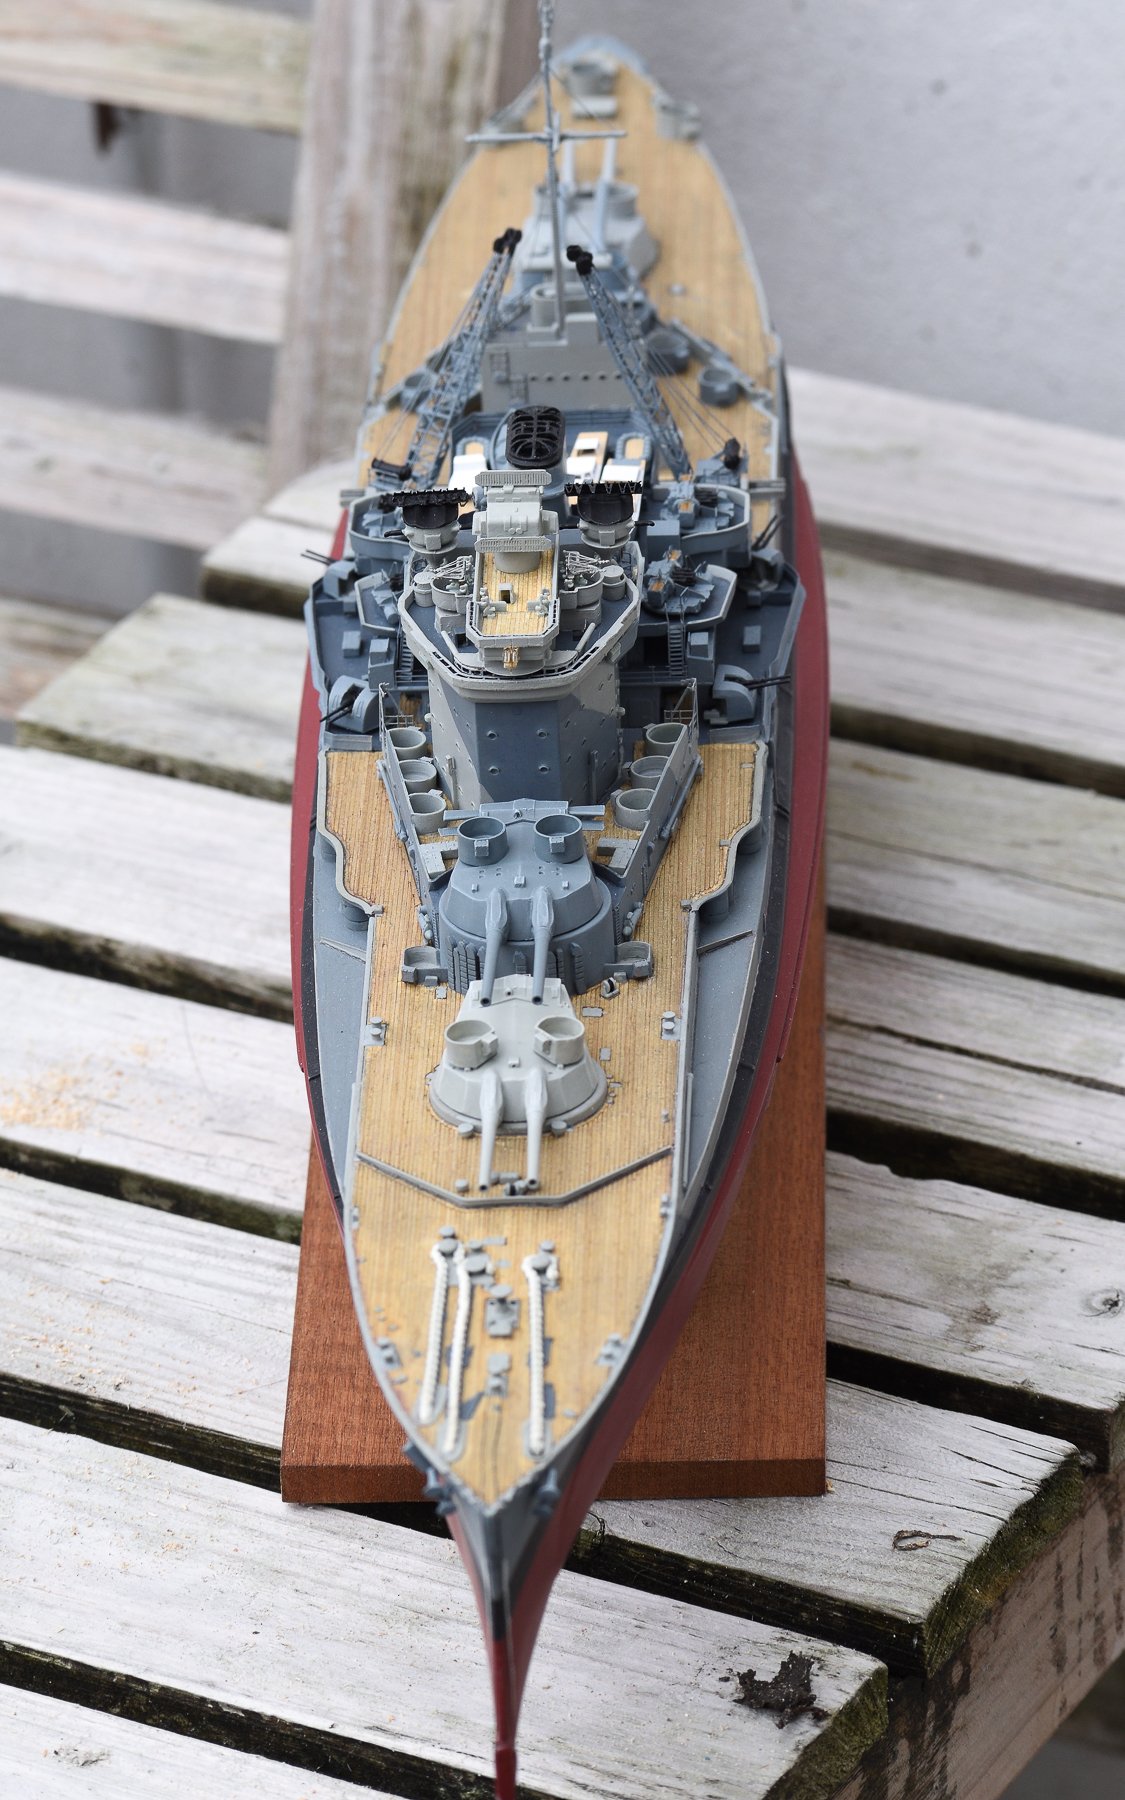
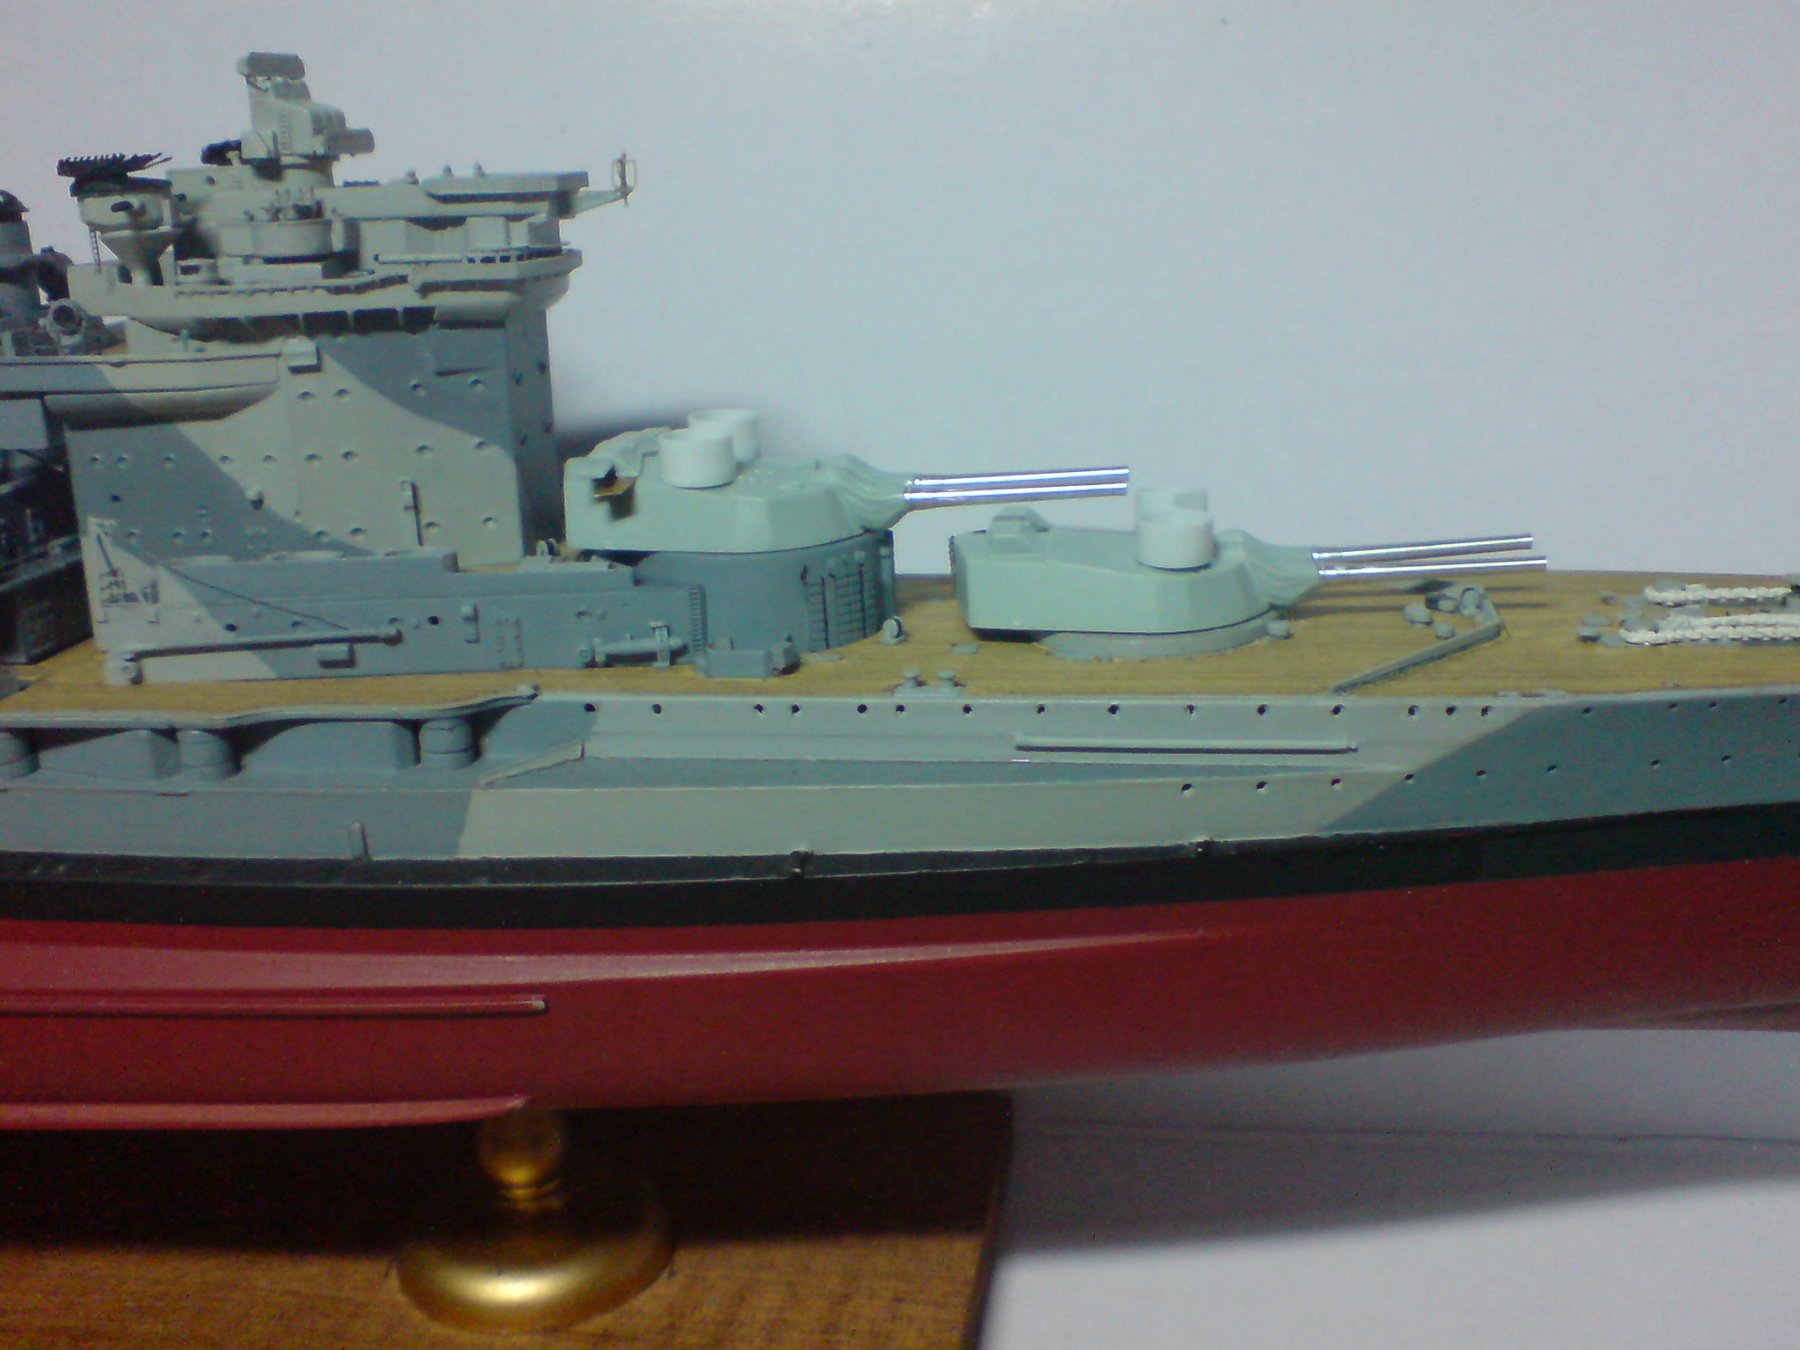
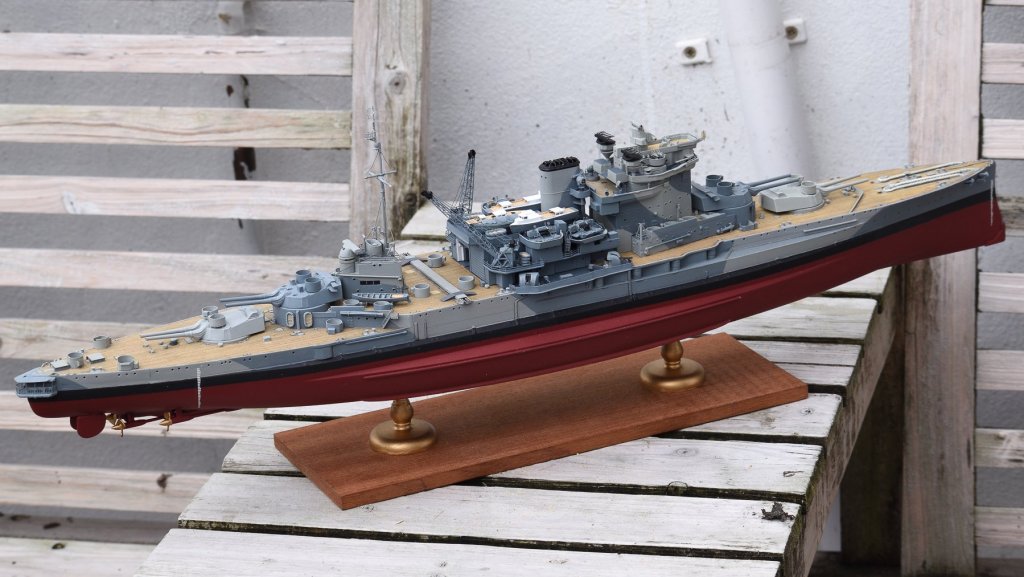
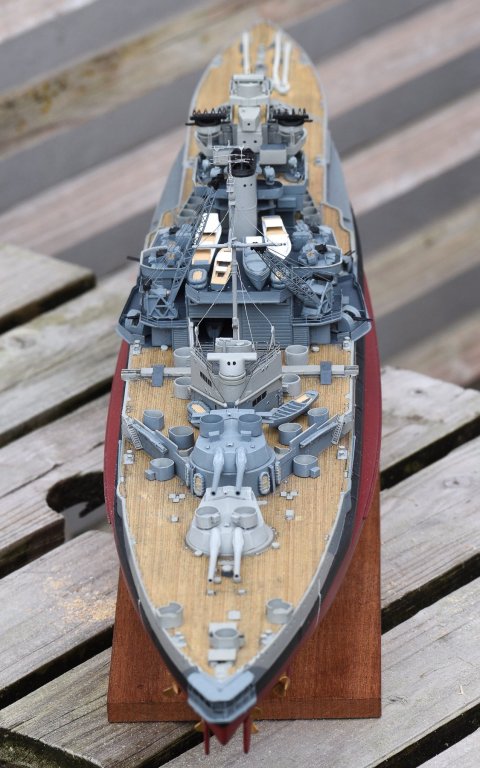
Good day all, just a small update today - I painted up both A and B turrets and weathered them slightly then glued them inplace. I took the ole girl outside and took a few shots with my dslr. OC.

-
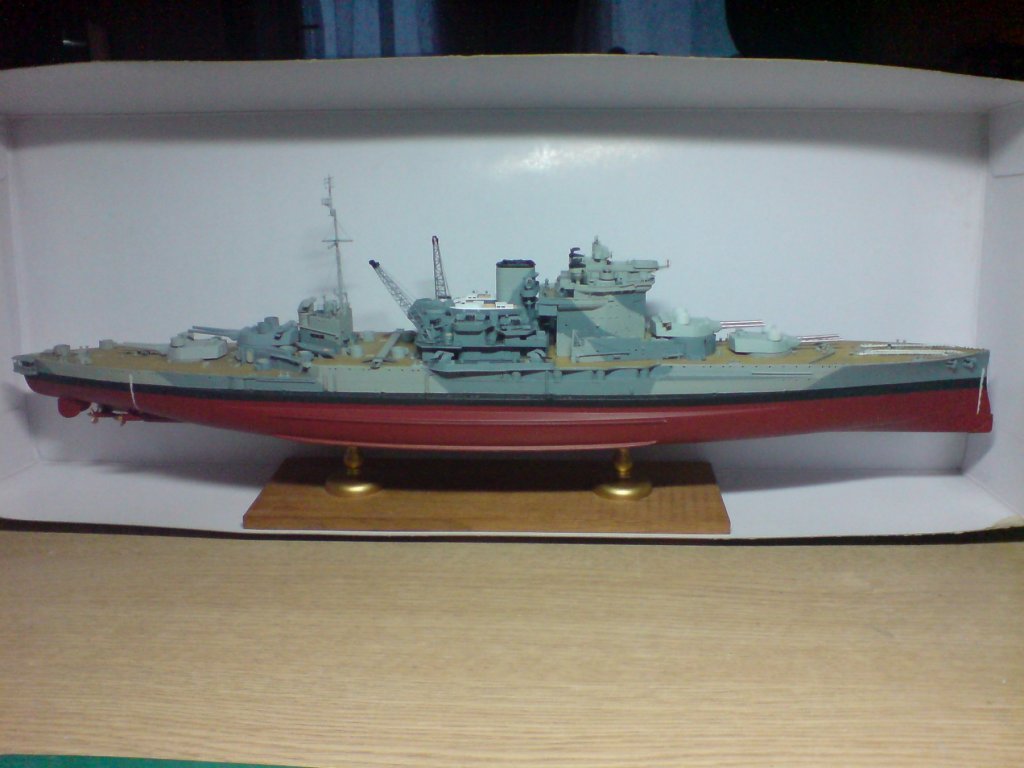
Good evening all, after a day off I decised to get back to the ole girl, so next step was to construct A and B turrets with the associated bits and pieces that go on them (just the same as X and Y turrets. I took a few pics of all the bits sofar dry fitted and put inside the box (I will keep it like this but with the front with some clear covering) OC.


-
This might be of help - https://www.cnet.com/pictures/take-a-tour-of-the-114-year-old-japanese-battleship-mikasa-pictures/ OC.
- 467 replies
-
- 6
-
-
- mikasa
- wave models
- (and 1 more)
-
Thank you for the idea pat but a bit to much work as I will be placing her in a proper case around xmas time when I can buy one. OC.