HOLIDAY DONATION DRIVE - SUPPORT MSW - DO YOUR PART TO KEEP THIS GREAT FORUM GOING! (Only 13 donations so far - C'mon guys!)
×


Old Collingwood
-
Posts
12,098 -
Joined
-
Last visited
Content Type
Profiles
Forums
Gallery
Events
Everything posted by Old Collingwood
-

HMCSS Victoria 1855 by BANYAN - 1:72
Old Collingwood replied to BANYAN's topic in - Build logs for subjects built 1851 - 1900
Loving your work pat, very tidy work and such amazing detail. OC.- 993 replies
-
- 3
-

-
- gun dispatch vessel
- victoria
- (and 2 more)
-
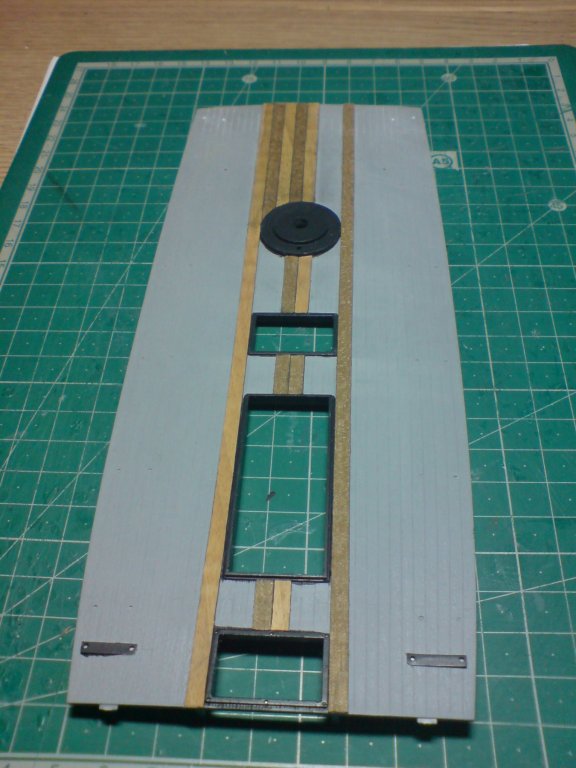
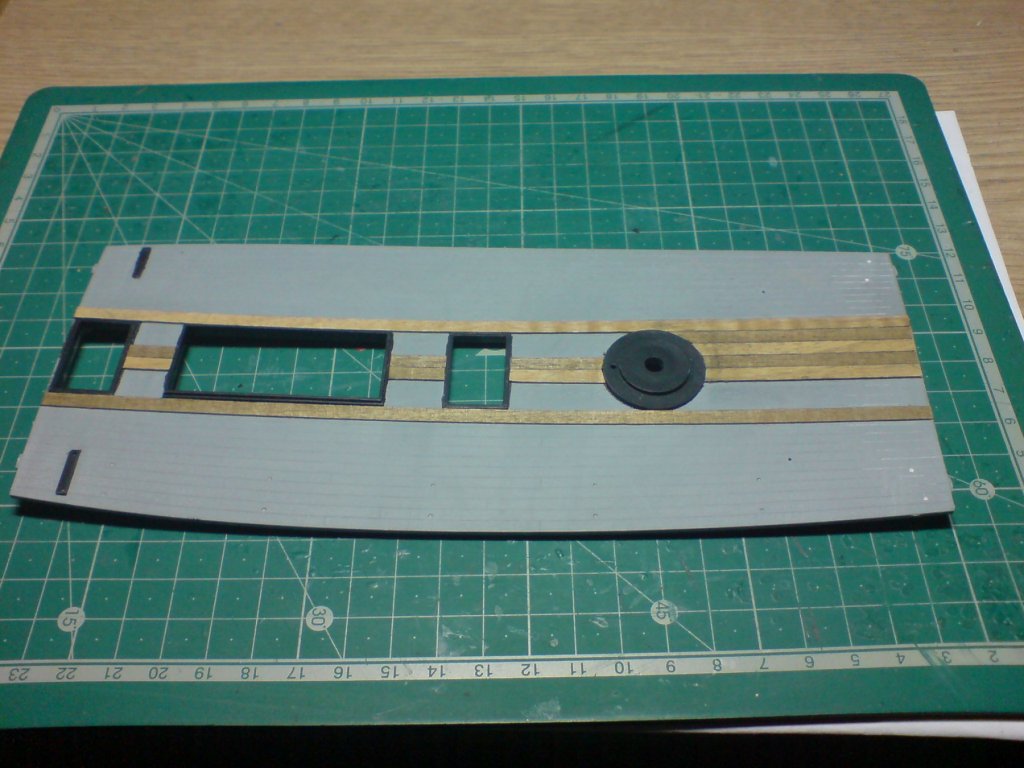
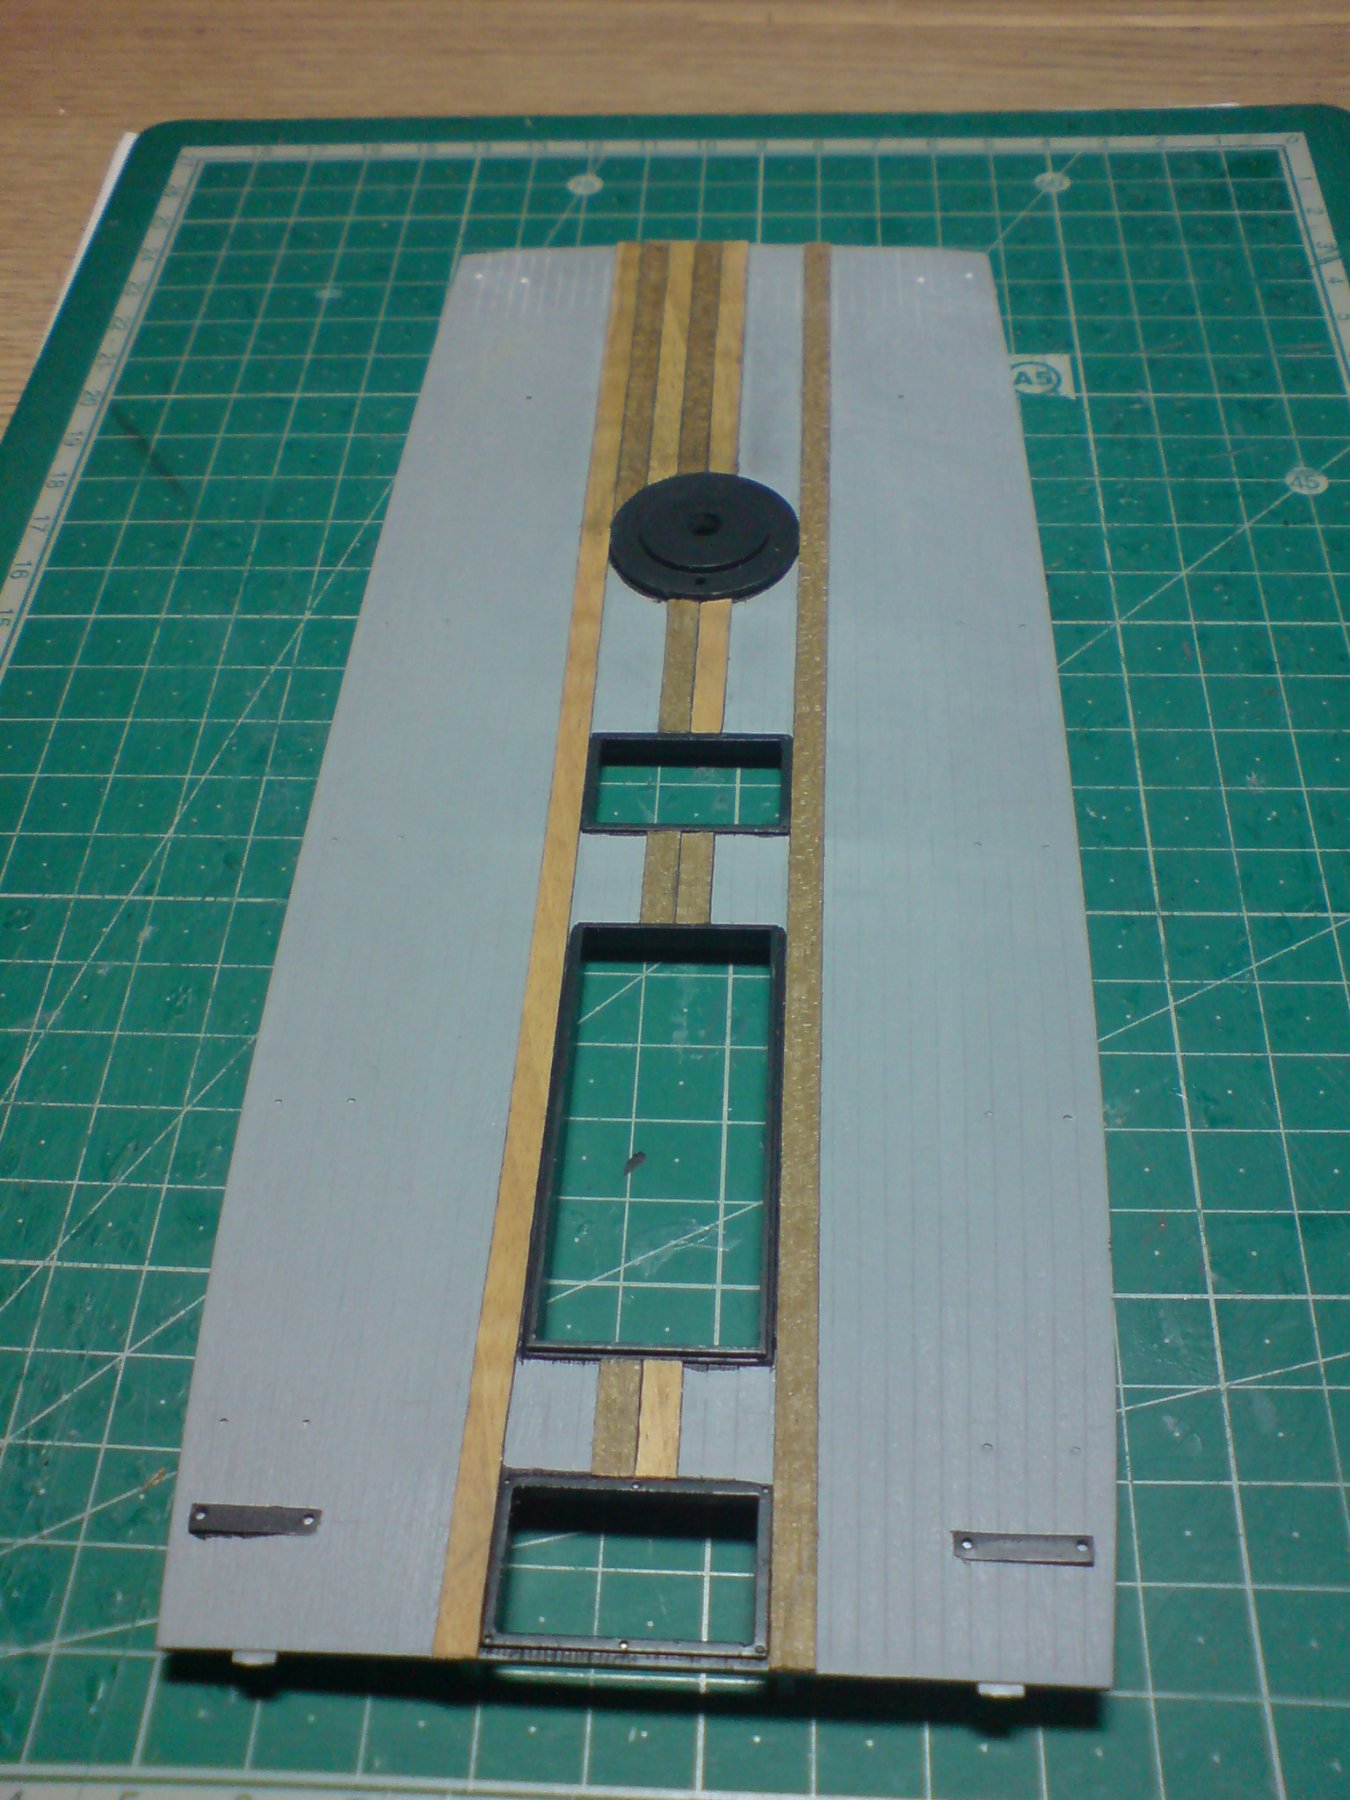
A bit more progress today - first I seperated some of the parts that had been painted prior to fitting in place, this will make it easier instead of contructing it first, after cleaning up some of the edges I set about doing some dry brushing with buff and white paint. After doing this I set them aside and turned my attention to the main deck - I am planing the decks with my wood stock but I have had to vary my planks of different shades from different wood materials (this wont hurt as I will be adding dark washes to the planks when they are down) first I painted the fitted plastic hatch way frames, then starting from the center I put a few plank runs down. Here is the progress so far - OC.
-
Hi denis, thanks for looking in, yep its the Revell kit that arrived at my door last week, its a great kit very accurate and goes together very very well, im just putting my own style on it by adding wood where ever I can. OC.
-
Hi kevin, Im just using the old fashioned method of using my acrylic paints - buff and flat white, using a wide brush dipping the brush in the paint then wipping nearly all of it off till the cloth wipes clean, then brushing onto the parts of the model, backwards - forwards till I get the desired amount of highlighting. OC.
-
Next stage before I start attaching the hull sides to the lower - I will do some shading with dry brushes of tans, and whites to give it a faded burned look. OC.
-
Yep it was nice, I cooked a nice curry for us and even washed up afterwards, so that got me a few browny points allowing me a few hours at the table, the admiral was engrosed by her knitting and watching girly tv (Soaps) OC.
-
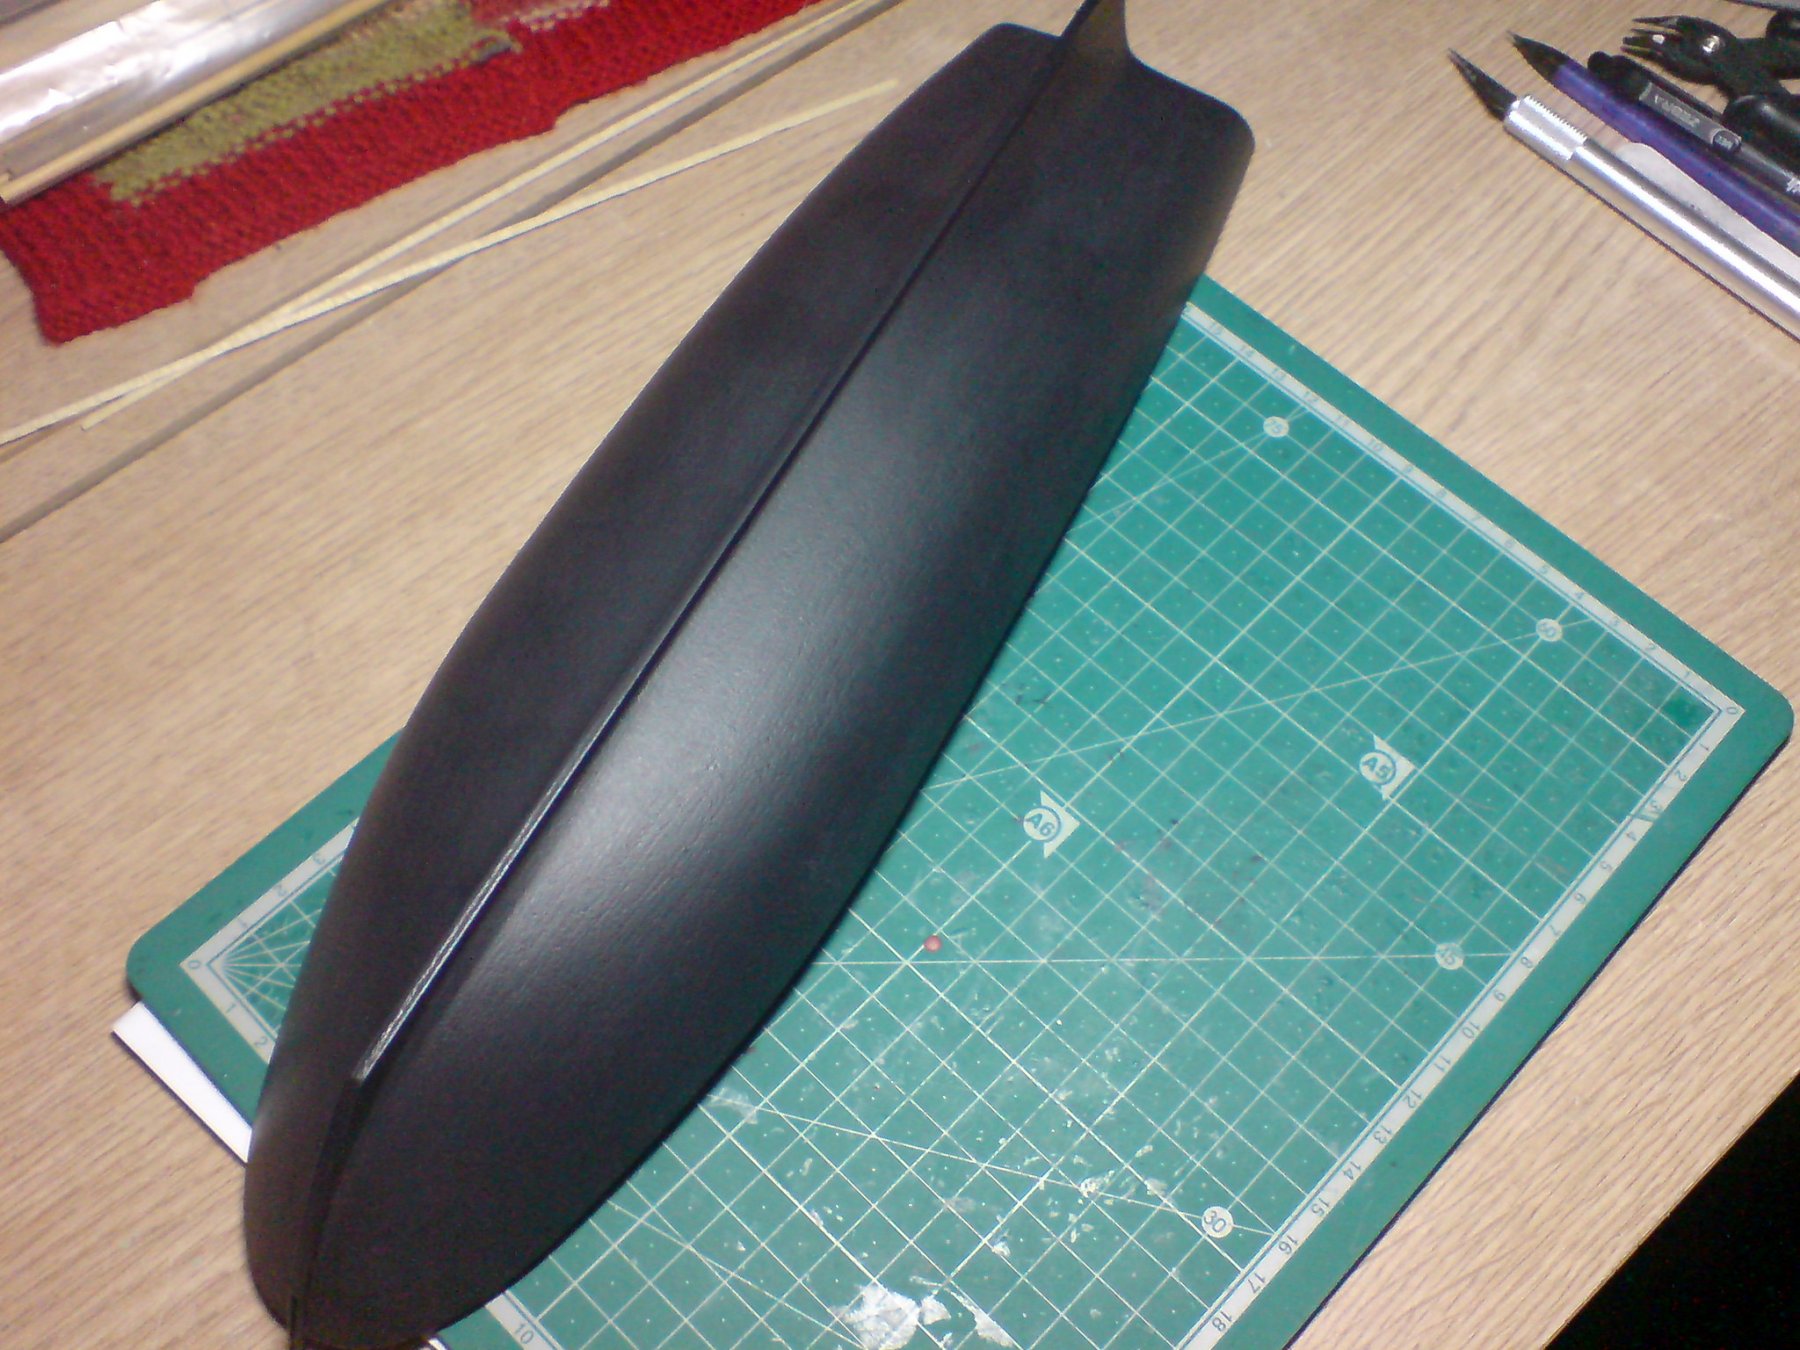
A small update folks in between attending to a birthday day for a family member - so I have assemled both bottom hull parts and added the two supports inside, then I mixed a brown/grey/black paint and gave the lower hull several coats, after this had dried I dug out my tamiya acrylic flat top coat and gave the hull and other pre-painted sections a coating with the flat clear. Oh, I also gave the cabin bulkhead a couple of coats of my made up black. Just the two pics today. OC.

-
They decided after doing some research on her paint pigmants that her yellow ocre is more of a peach/pink shade than the yellow ocre we have all come to know, and the black is less dark more of a dark grey/black. OC.
-
That is some repetative work there, are you going to paint her in the new color they found for her? OC.
-
Fantastic work kevin she is looking so life like really impressive build. OC.
- 1,319 replies
-
- 5
-
-
- caldercraft
- Victory
- (and 1 more)
-
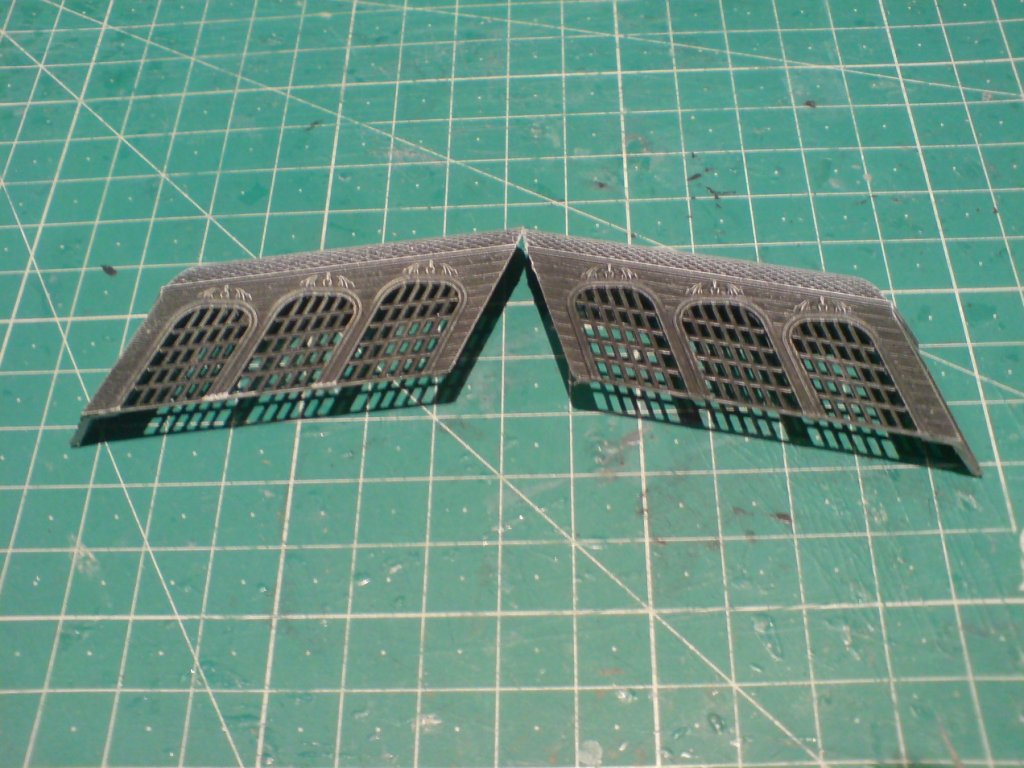
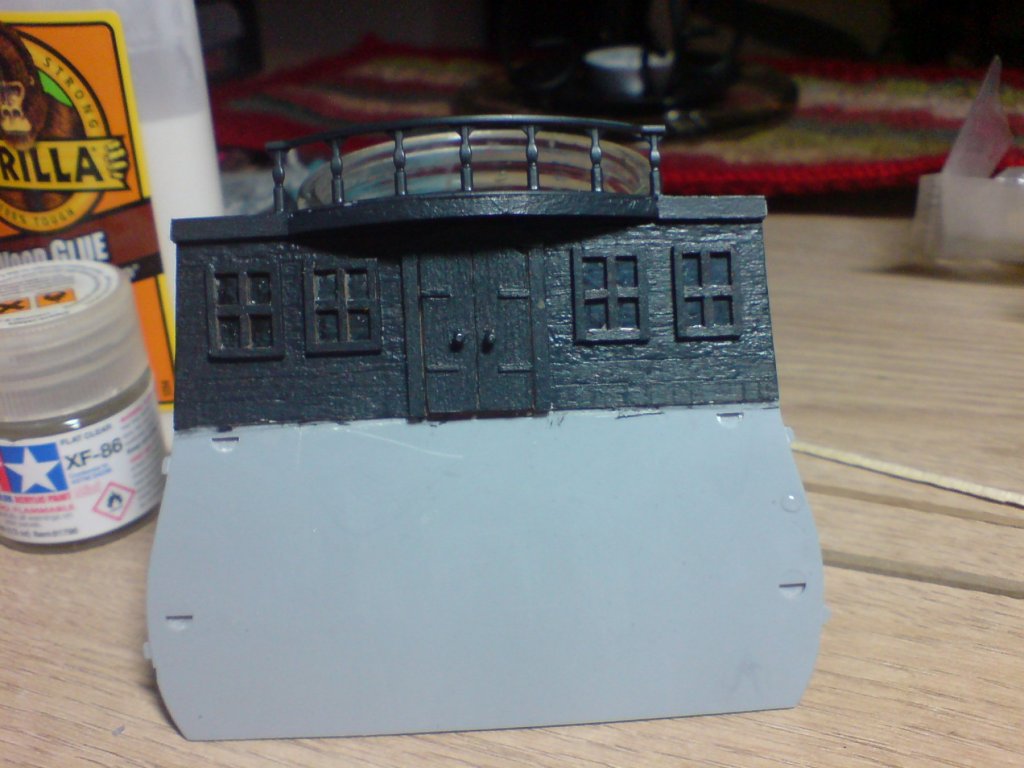
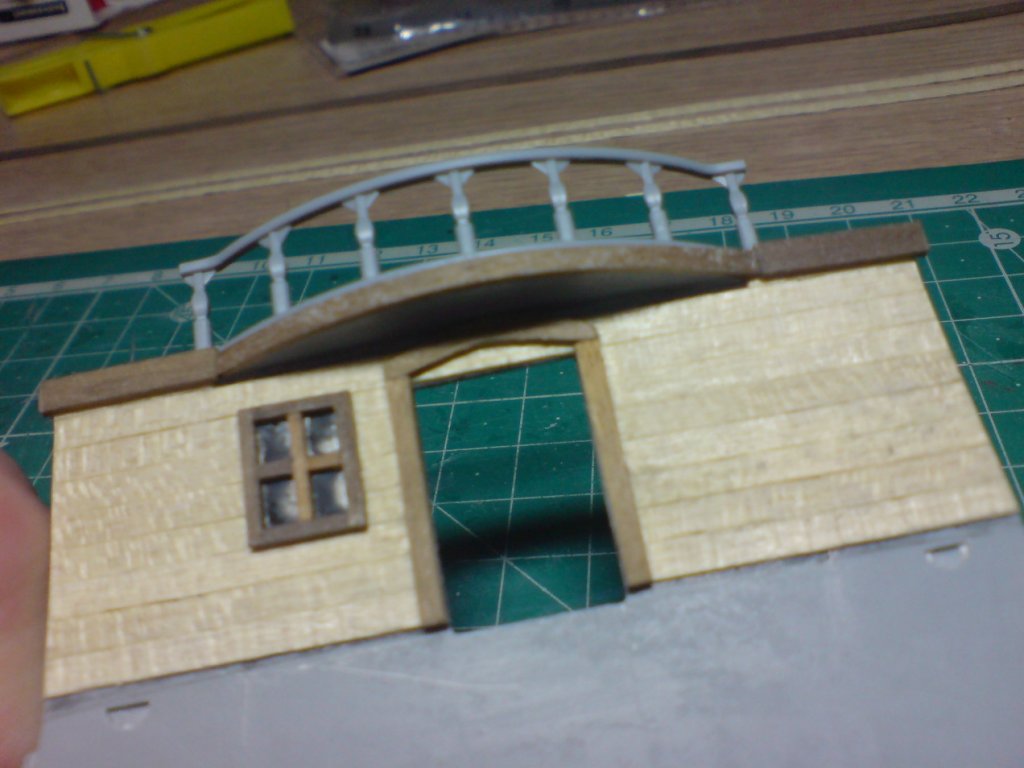
Good evening all - sincere thanks for all the likes and comment. Right More work on the cabin bulkhead and its nearly finished - I made and fitted all four windows including making the two outer ones 2mm thiner, I then set about making the two doors - these were made by fitting two thin planks onto a cut piece of card, I then did the same to the other side casing the card between two layers of planking, I then sanded the profiles on the top and added some scrap wood to represent hinges, I then fitted a couple of braces on the back and glued them in place. Just the two pictures. OC.

-
Could be your phone that is saving them as a portrait (longways upways) and doing this by default in the settings. OC.
- 209 replies
-
- 2
-
-
- constitution
- revell
- (and 1 more)
-
Interesting - I thought it might have been a photo editor (if you use one) that defaults the camera angle to how you took the shot, but no my editors save the image however I change the perspective of the photo - Landcape/Portrait etc, so its not that. OC.
- 209 replies
-
- 1
-
-
- constitution
- revell
- (and 1 more)
-
You have your work cut out there, but respect to you for what you are doing, all the extra detailing will sure make a huge difference. OC.
-
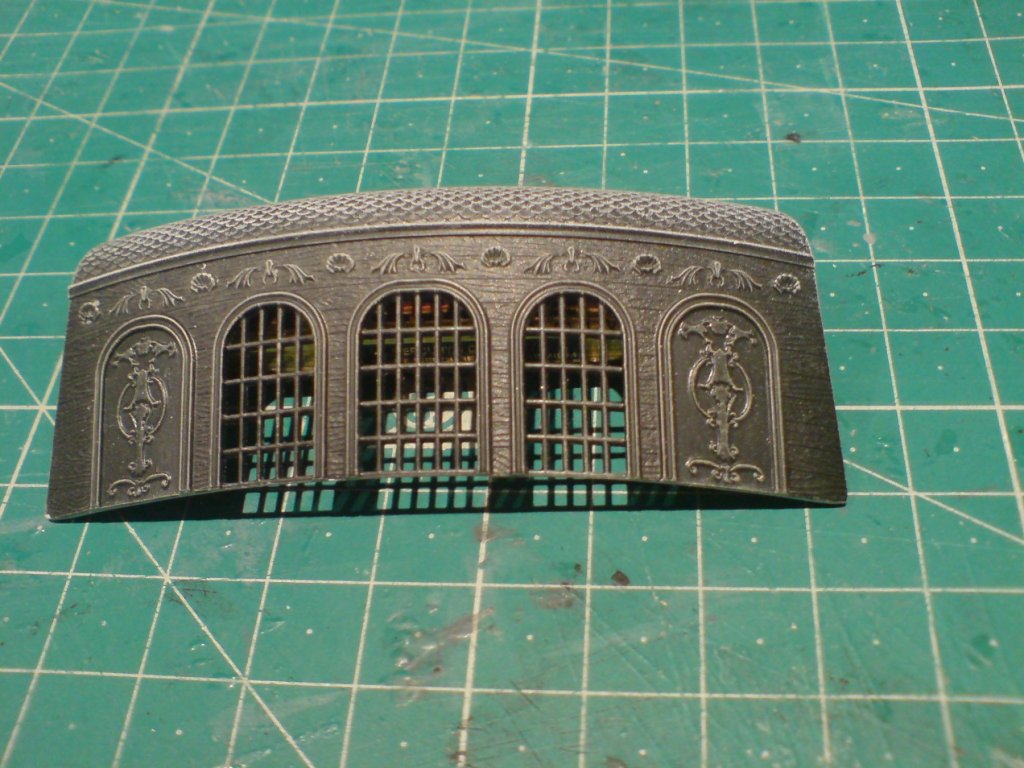
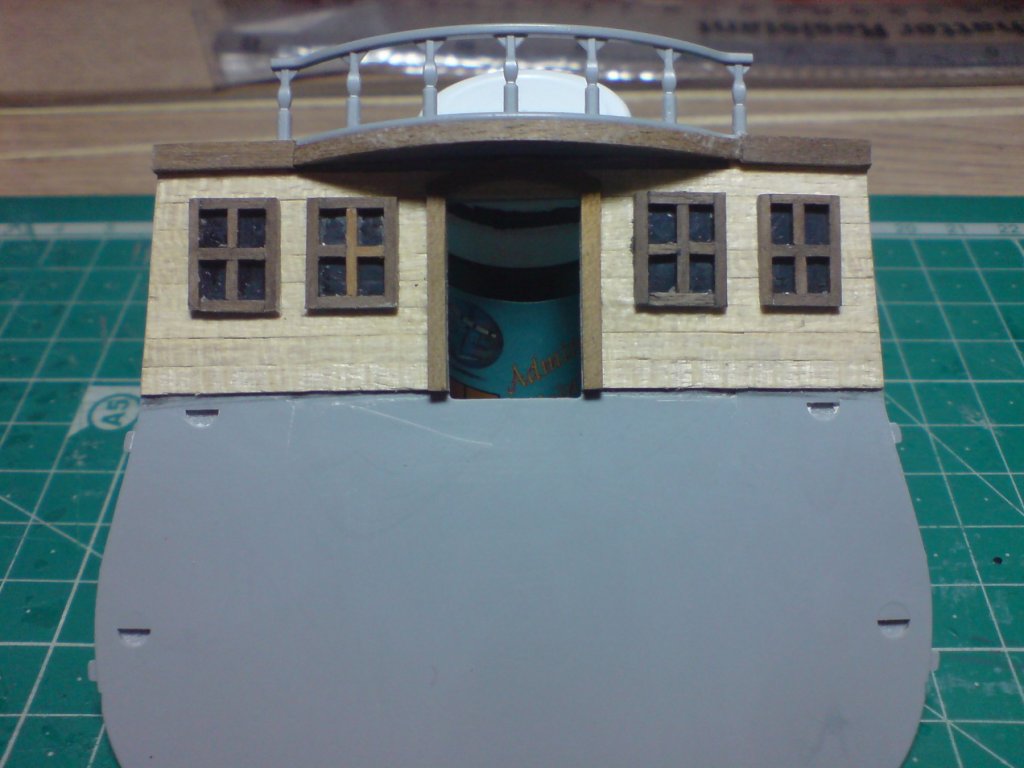
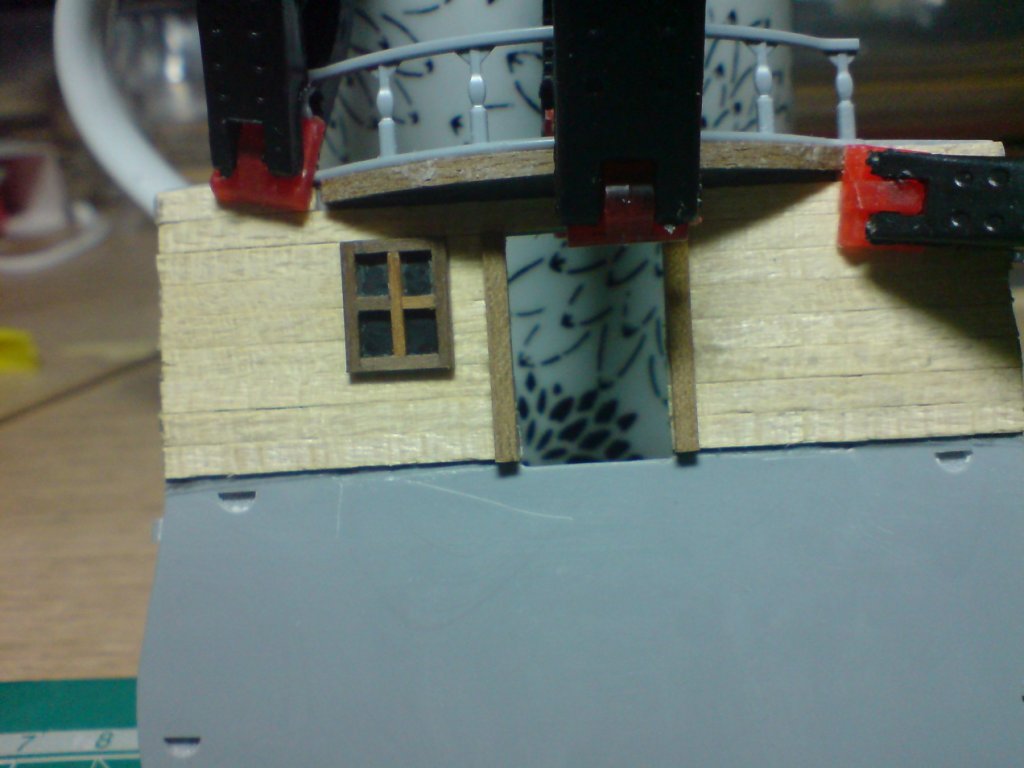
Evening shipmates, more progress with the cabin bulkhead - I fitted a wood facier around the curved roof section, and while this was sticking I decided to attack the door frame, this has a curved top but after several attempts at bending some 2x1mm strip against the grain with water and heat tool - no good, so plan number two was to do the sides sepaerate and the top by two pieces joined together then sanded to shape. While this was setting I turned my attantion to building the first of four windows - I went with square windows but decided to fit some clear plastic behind to simulate glass - this was done by laying the plastic sheet on the cutting mat and adding each window frame in turn to the sheet, then with gorilla glue and seven frames later a window was formed. I touched up the rear of the window with black paint then when dry glued the first one in place on the bulkhead, next of I added some wood trim to the top that follows the line under the curved rail. So next off will be three more windows - A few pics to show the progress. OC.
.thumb.JPG.0ba16ddac2ffb121021f89a98c20a68d.JPG)


-
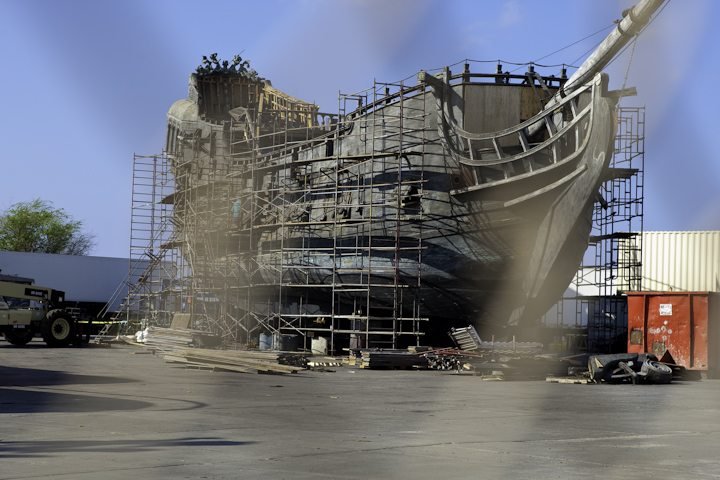
Yep, thats the pearl after she was altered for the last film - she has had anothe layer added ontop of here poop deck kind of a "Poopy poop deck" OC.
-
A shot of the actual ship curtosy of Hawi'i magazine shot in 2011 for one of the later films. OC.
-
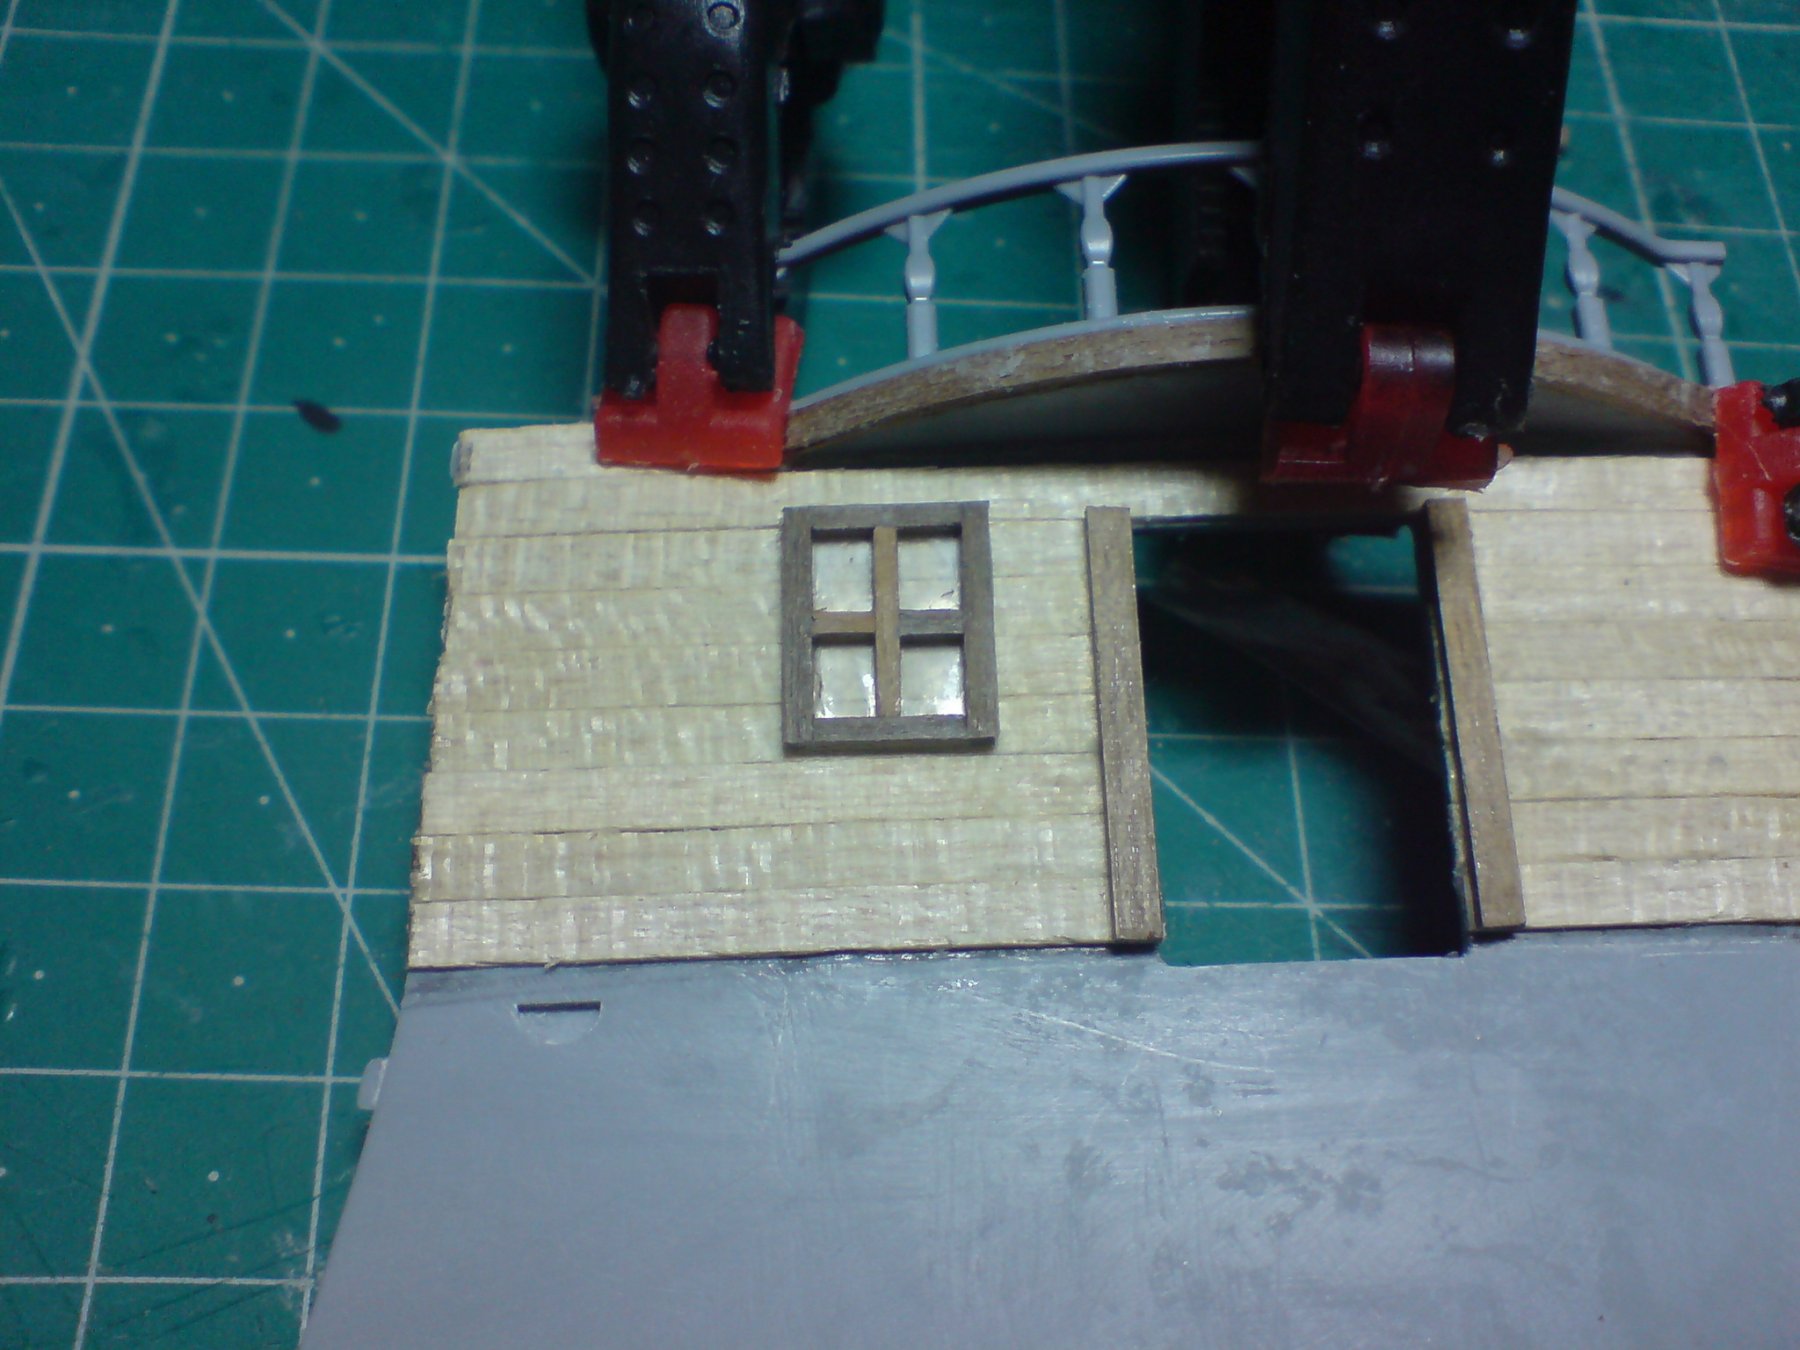
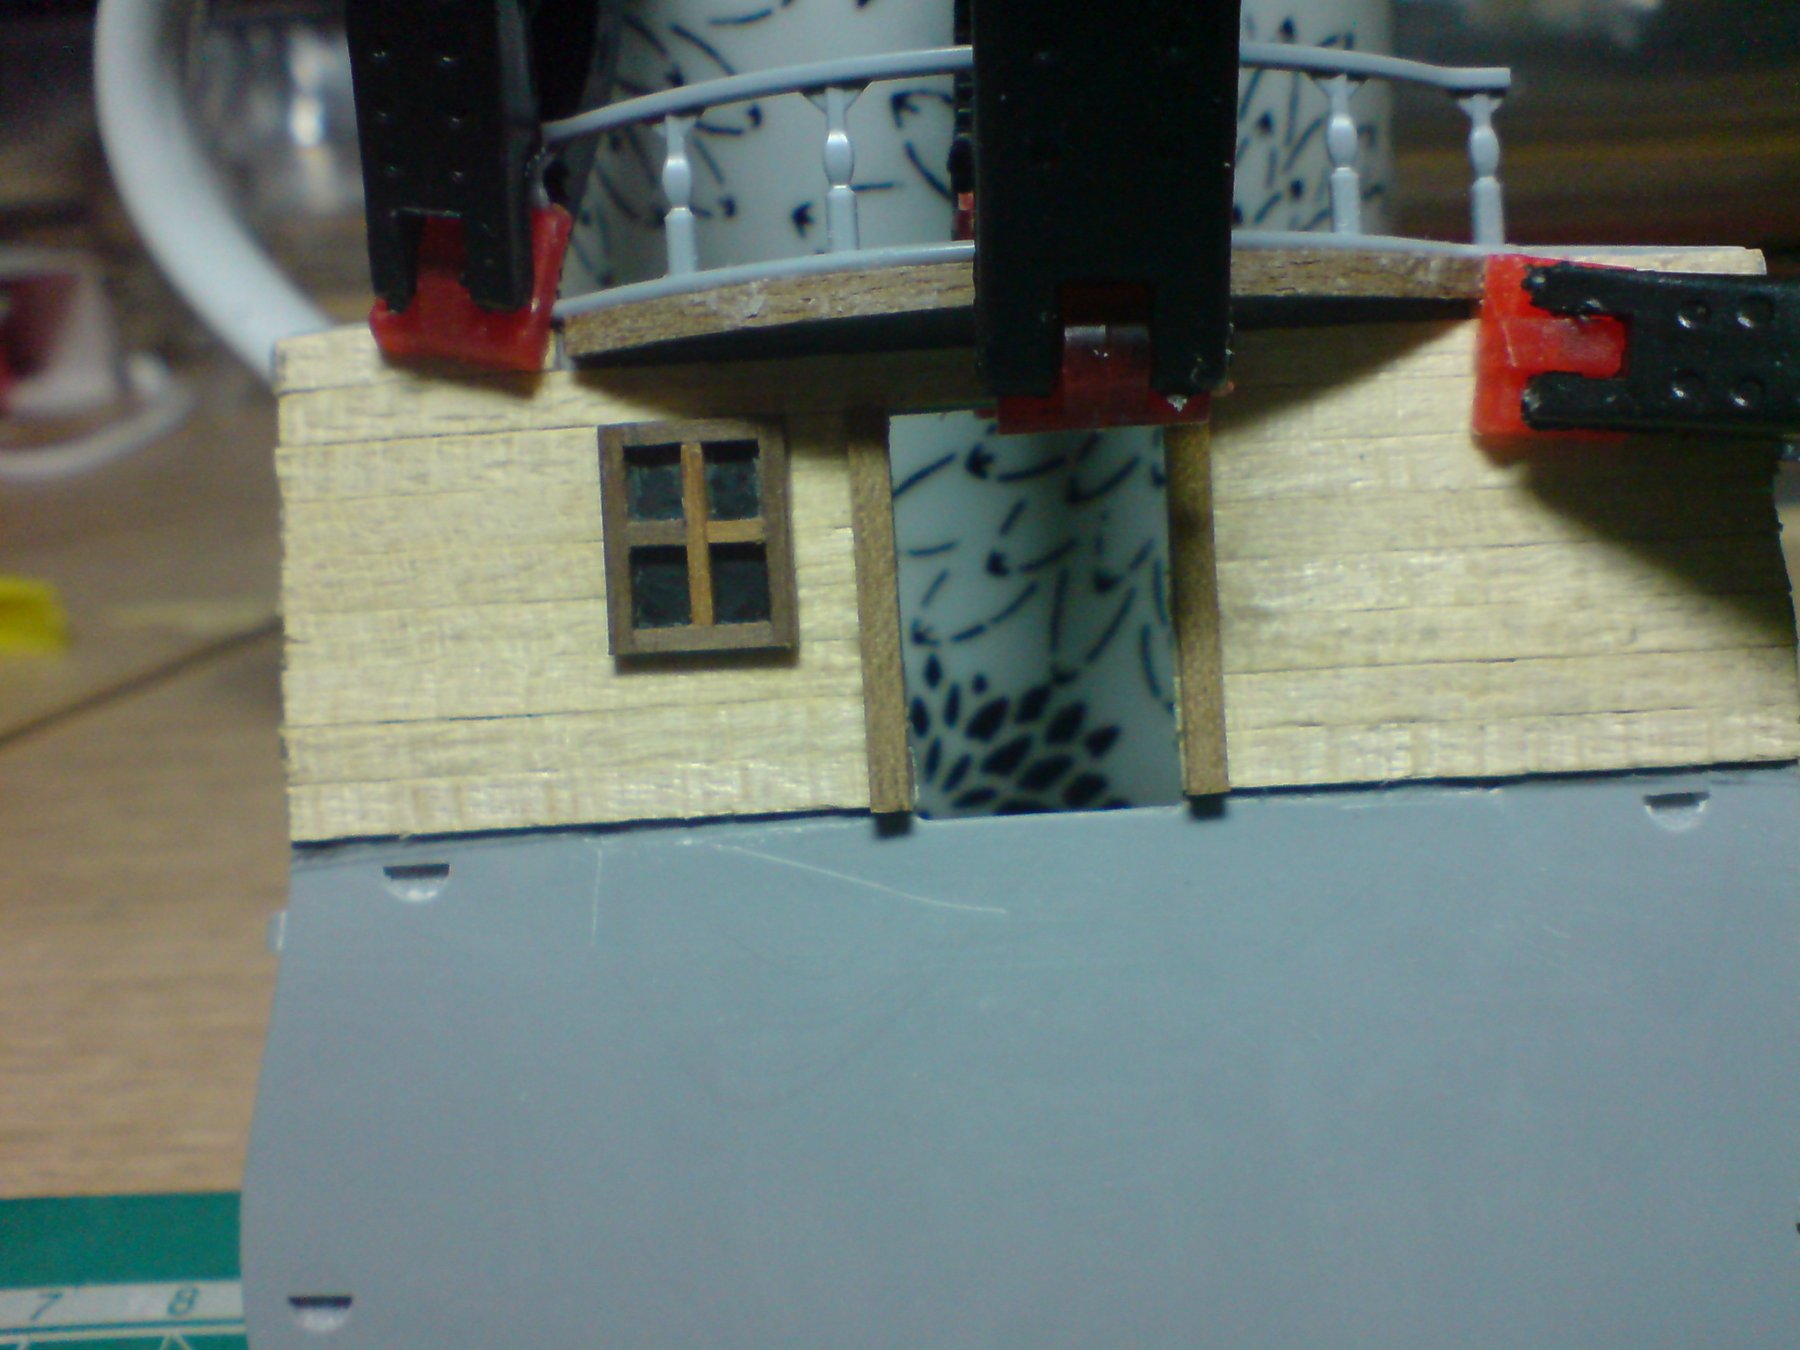
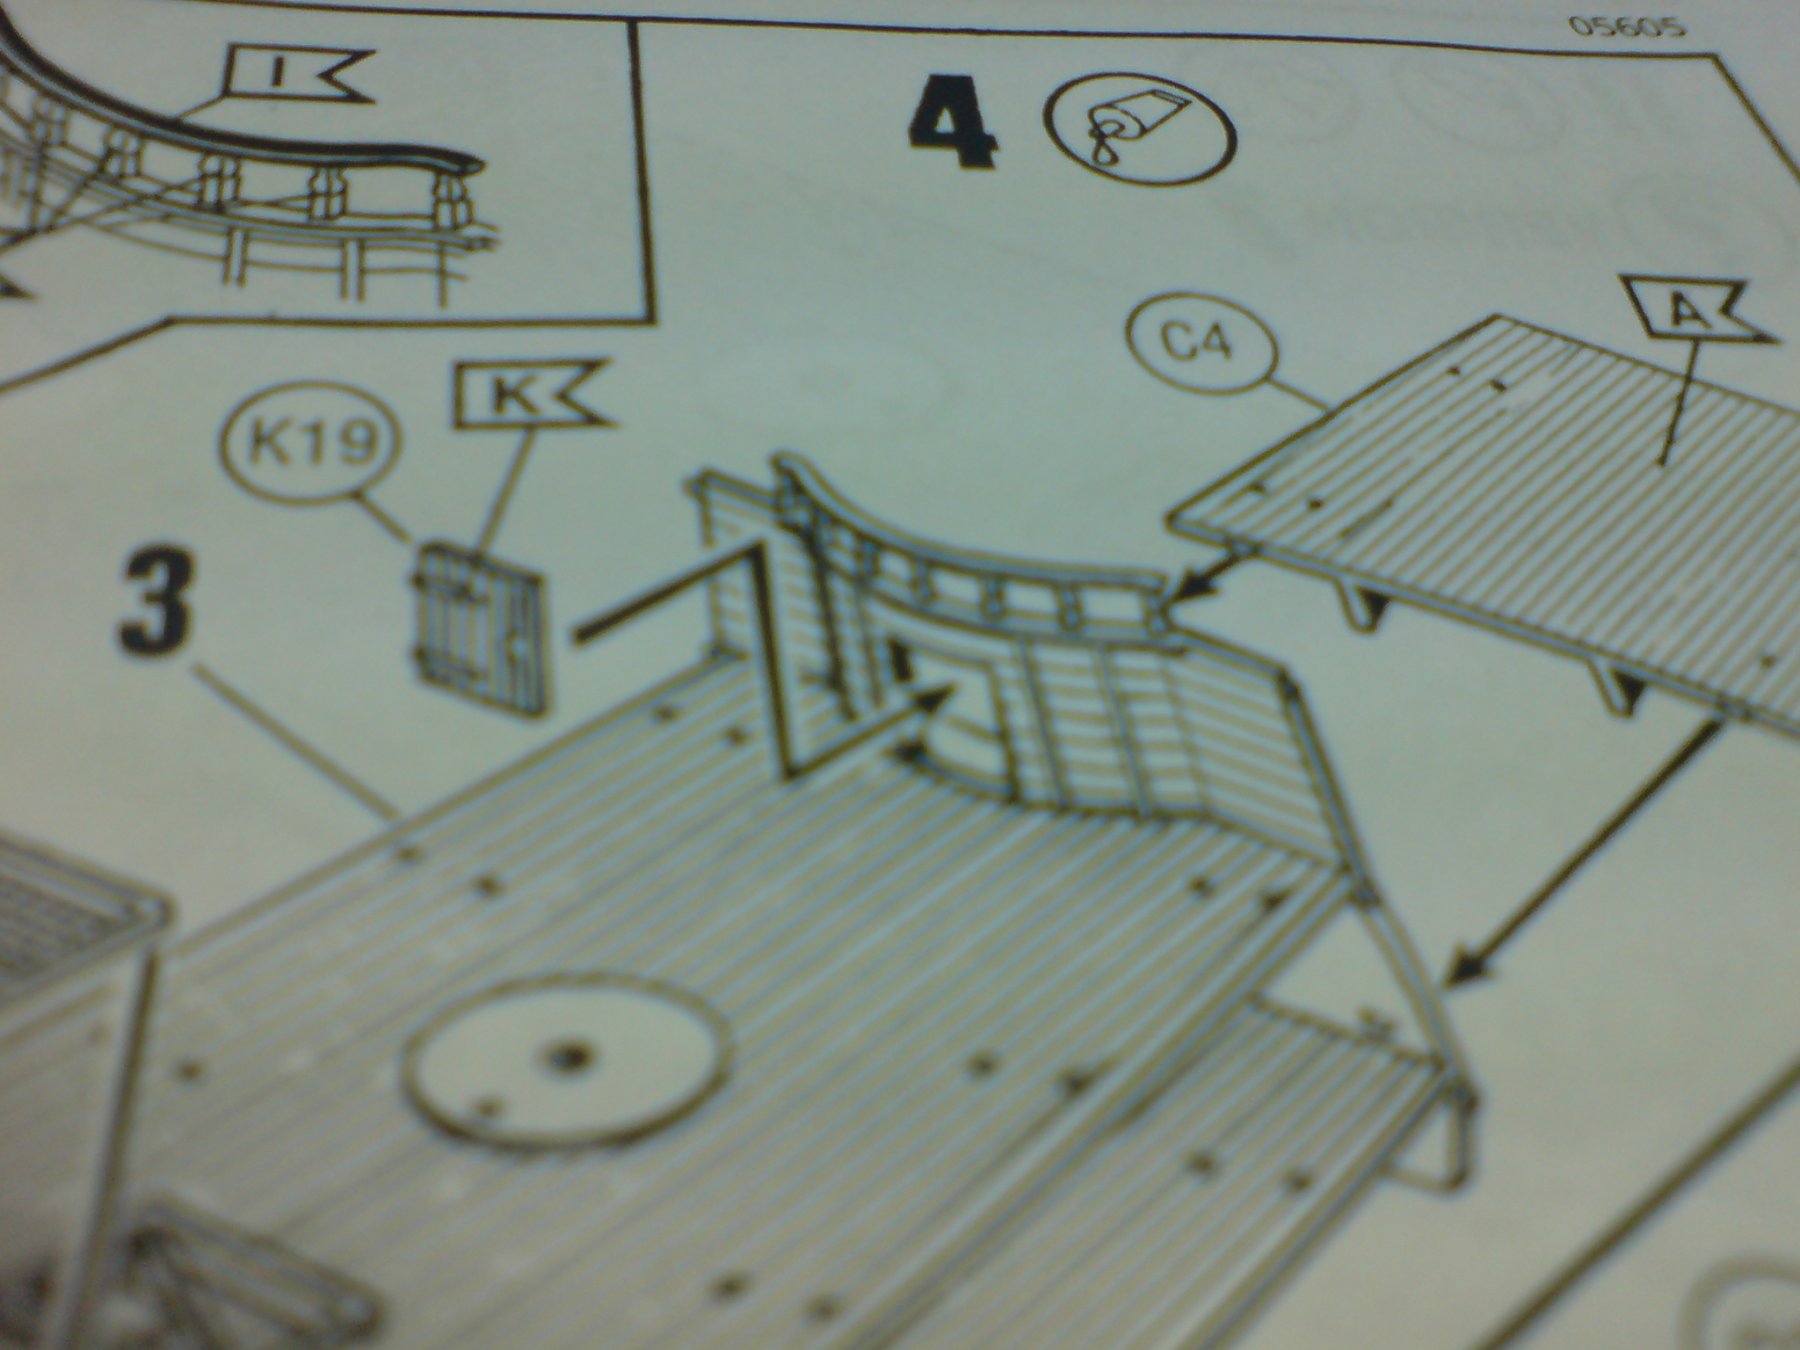
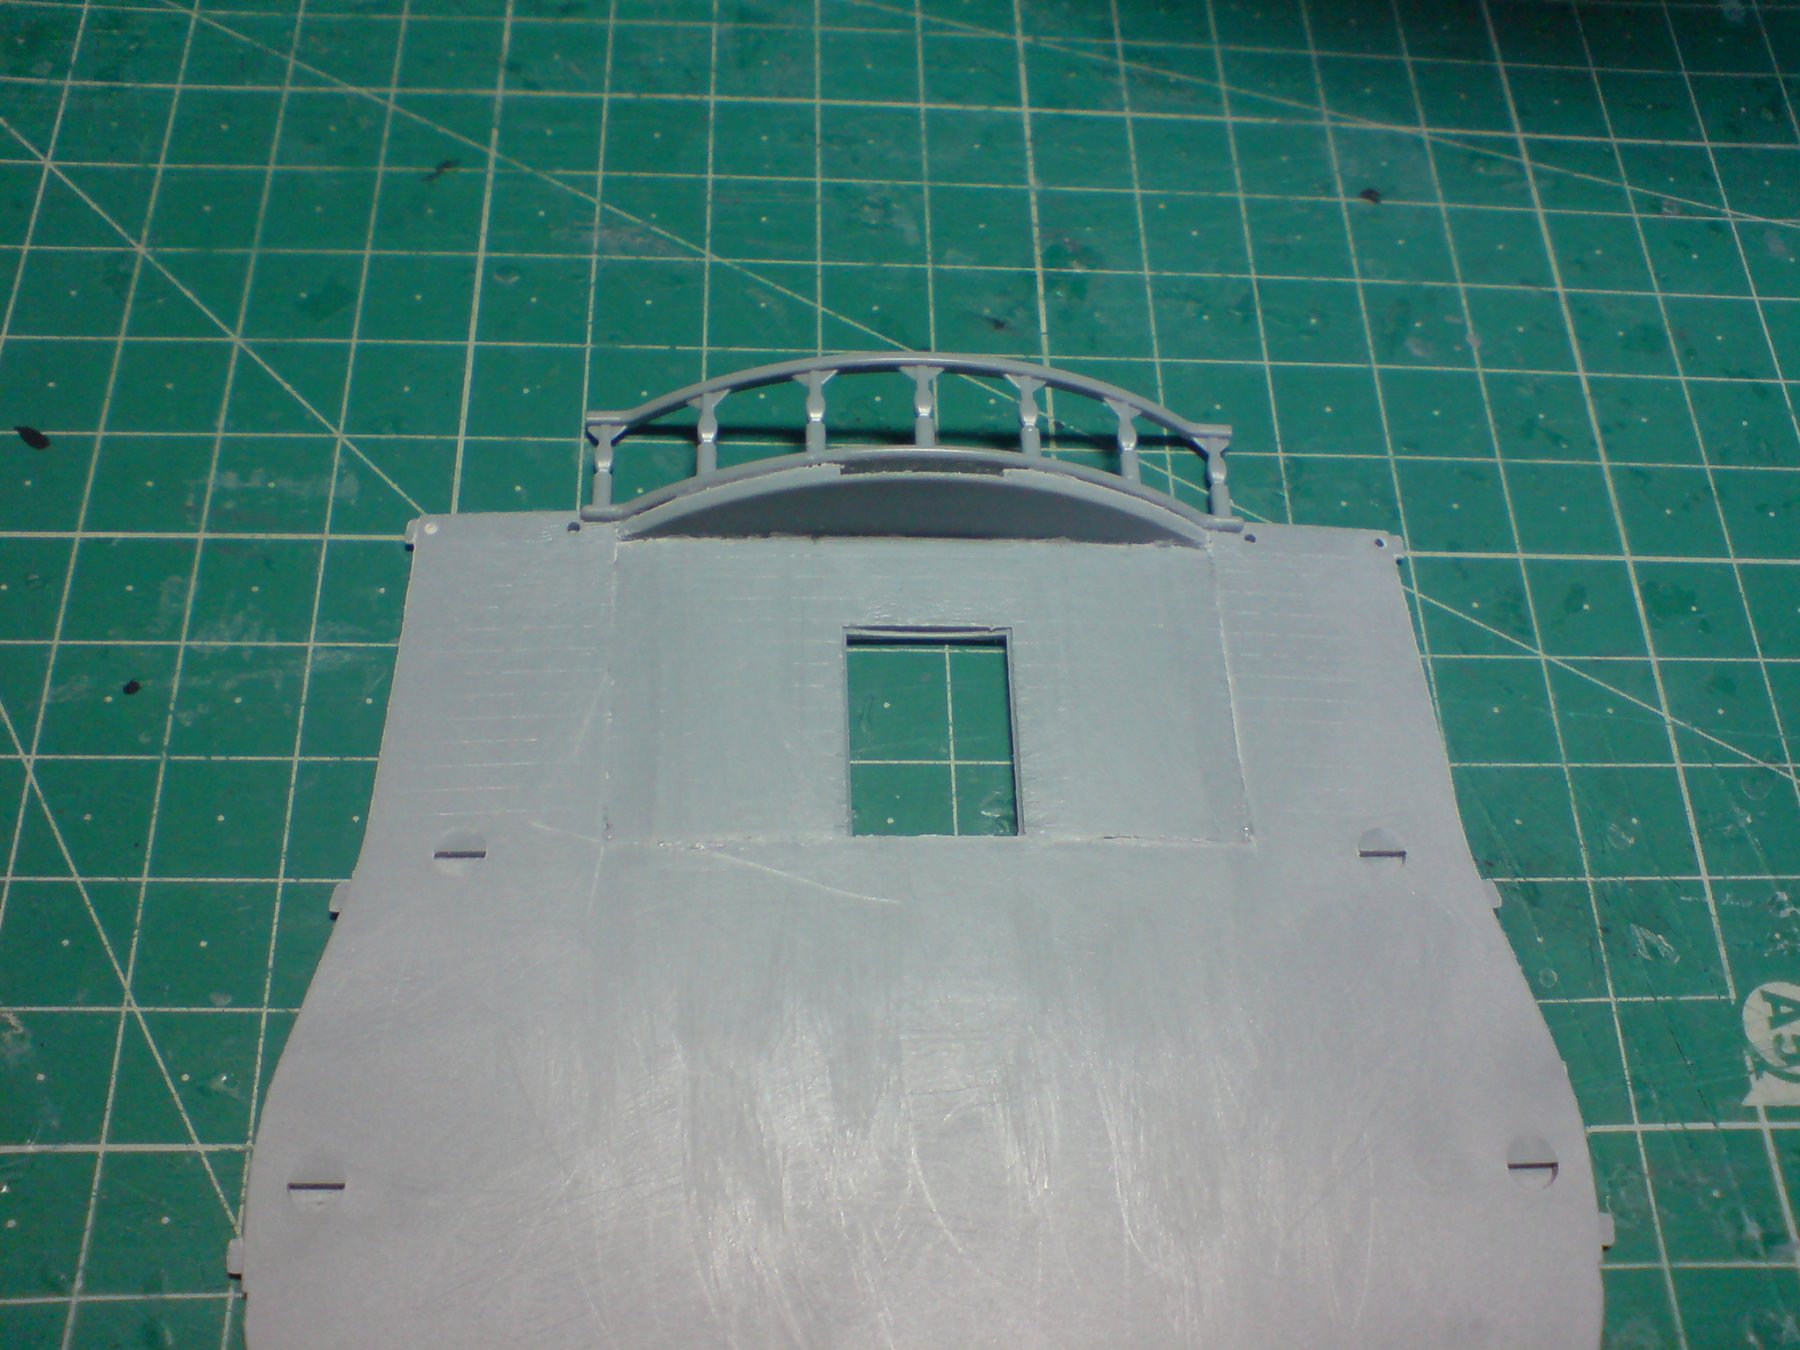
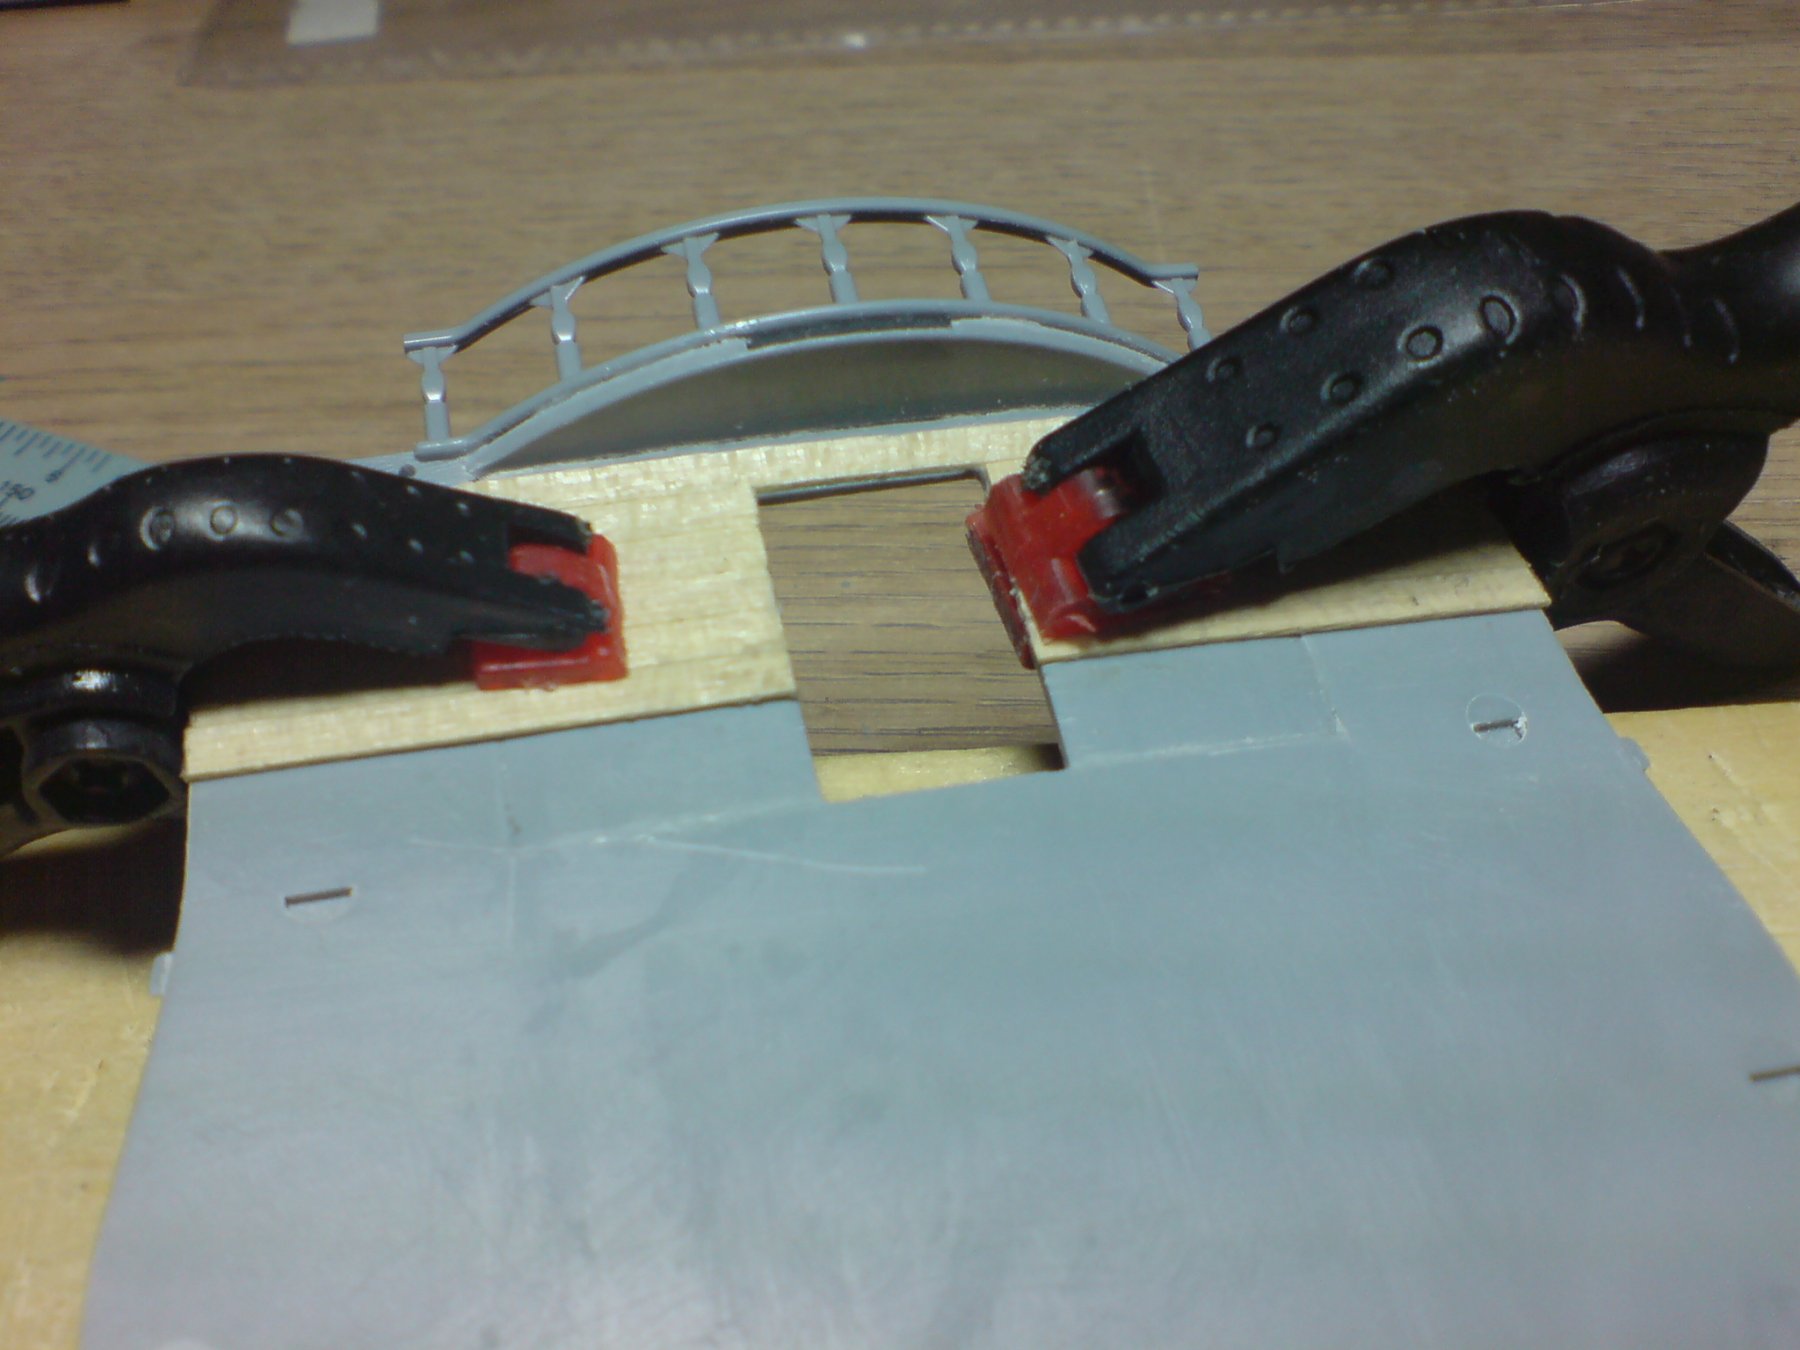
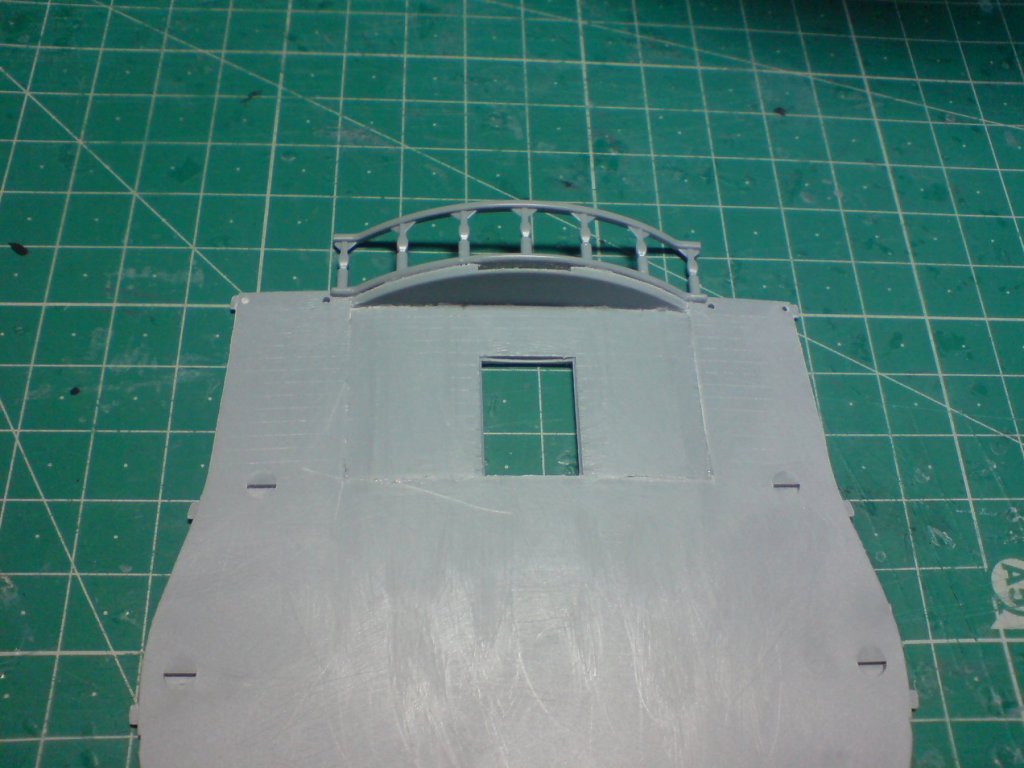
Good evening all, today I started working on some of pearls details - in the kit the molded rear bulkhead that contains the captains cabin door and windows is wrongly shaped infact even the door is best suited to a mouse as its way to small, so first thing to do was a bit of butchery by cutting out the curved section, I found using my sharp scalpel was best to do this, after cutting it away I decided to apply some heat with a hairdryer to the piece removed, then on the table I was able to flaten it, then after trimming some of the ends I was able to glue it back in place (but as a flat bulkhead not rounded). Next was to increse the size of the mouses door so humans could use it, I filed it till it gave me a scale size of abut 5.5 ft tall and 3 ft wide, this will have a double door attached to it after I make them and also a few windows. I also decided it would be fitting to make the bulkhead fitted with wood planks - so I set about measuring-cutting and fitting these - I have gone as far as a plank or two from the deck - I think its a nice improvement over the plastic bulkead. Here are a few pics showing the instructions with the wrong curved bulkhead and the flatened fitted bulkhead then the planking going on. OC.


-
Very nice work denis, that decking looks really nice. OC.
-
Wowzer! no good asking me I know as much about sprayers as I do Rap music. OC.
- 209 replies
-
- 2
-
-
- constitution
- revell
- (and 1 more)


.JPG.39c3d487c9d54ff3cbcbc504958fa84f.JPG)