


RMC
-
Posts
933 -
Joined
-
Last visited
Content Type
Profiles
Forums
Gallery
Events
Posts posted by RMC
-
-
Thanks very much Kevin - most helpful. You've done a lovely job.
Bob
-
Thanks Kevin. I'll take a look.
-
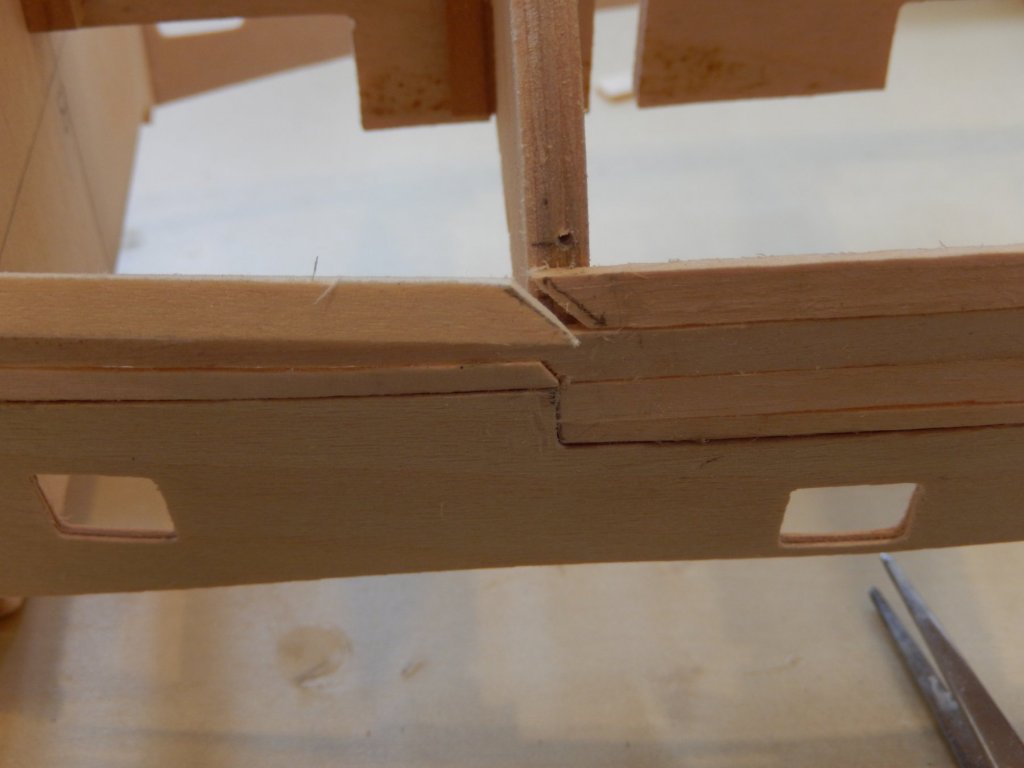
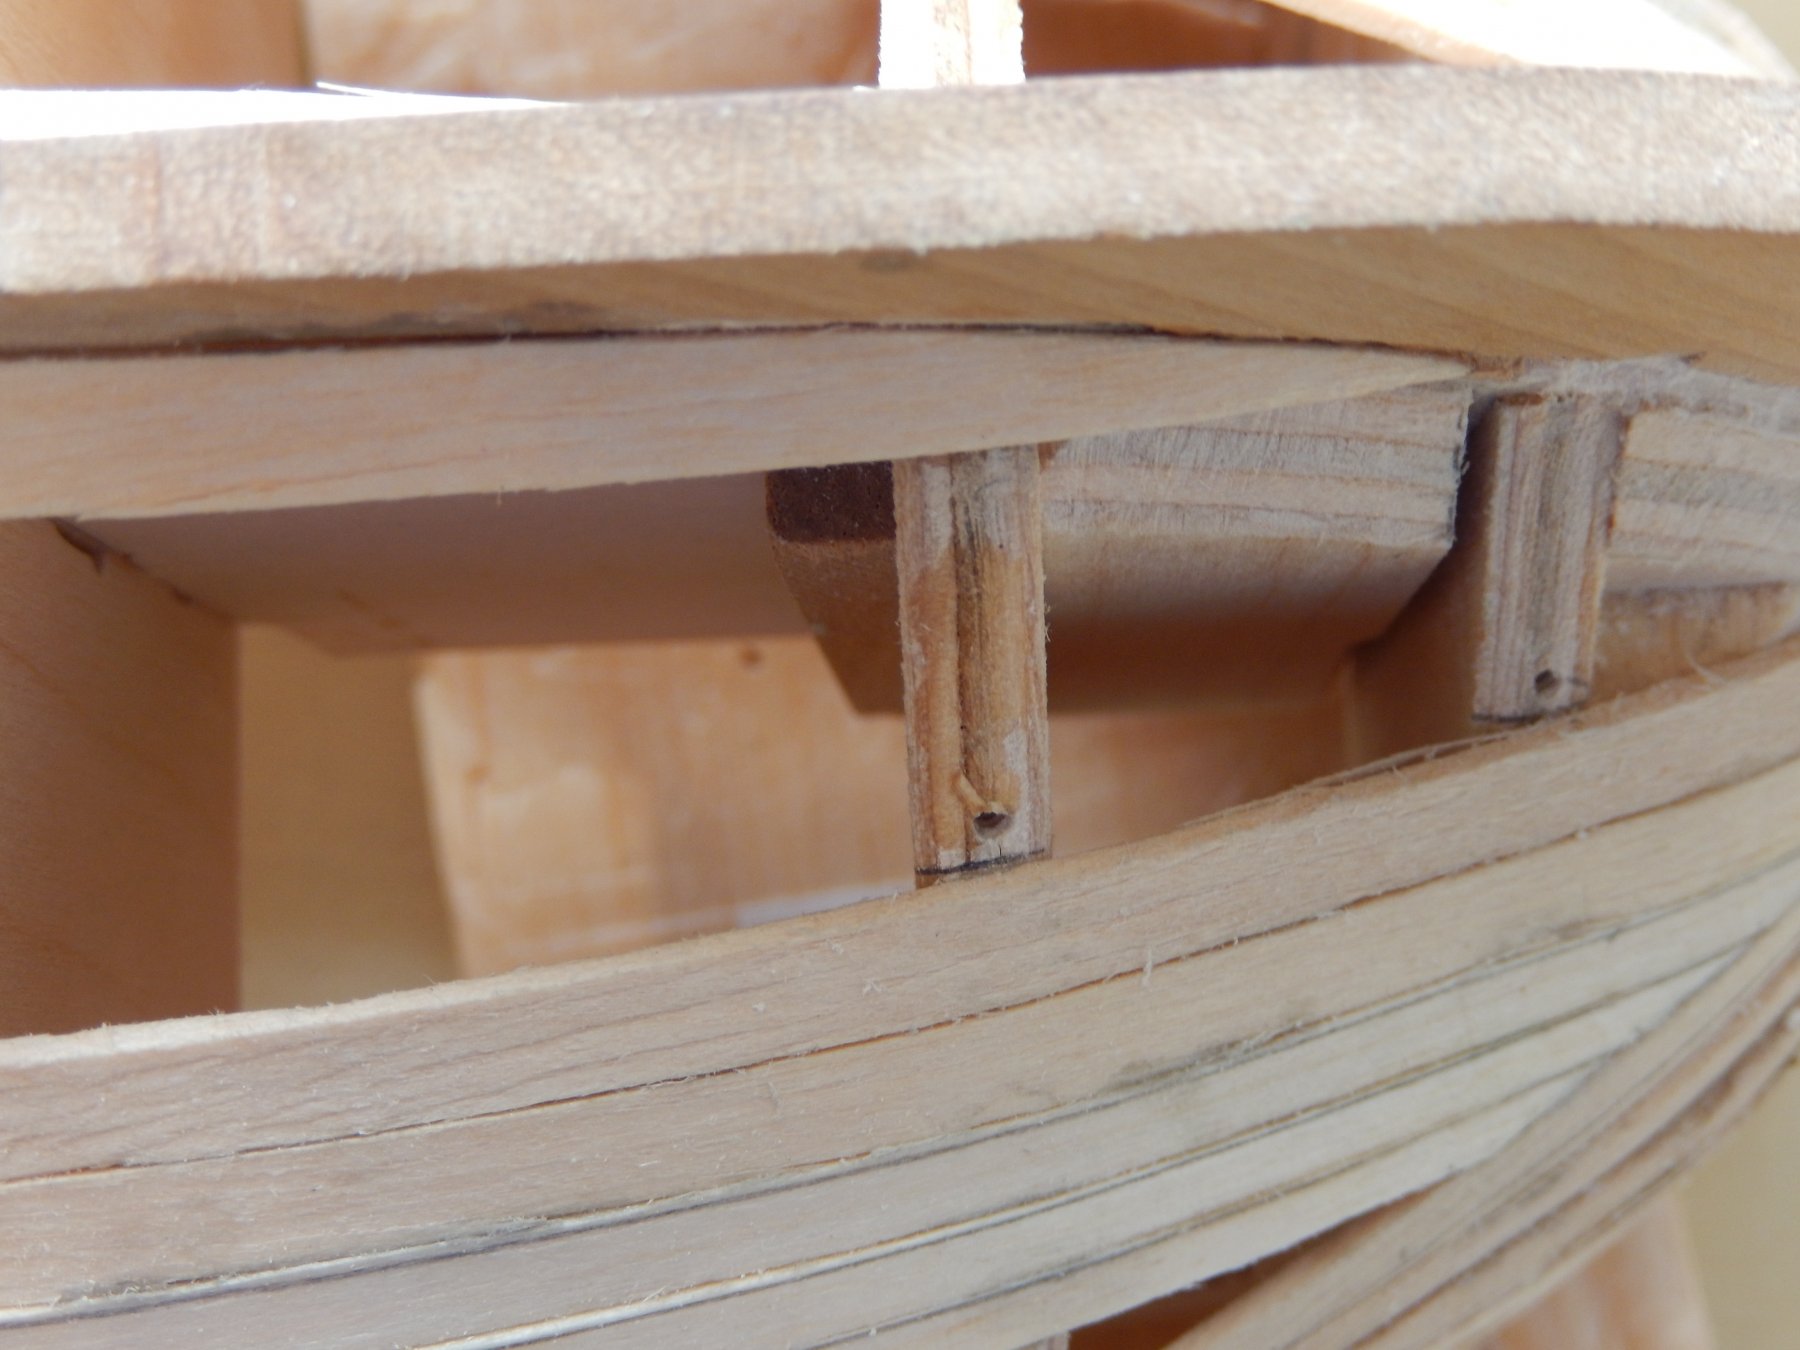
The second planking is not going particularly well. The boxwood is certainly easier to work with than walnut. However the stains I have tried to make it slightly darker are not really satisfactory, so I will go with the raw wood. As there may not be enough boxwood to complete the whole job, I have used to walnut for the wales.
The dentist drills have proven to be perfect for making the rabbets. (Why the preceding sentence is underlined and why I can't get rid of it is a mystery.)
The wales have now been painted (photos to come) and the second planking is proceeding - not all that satisfactorily.

-
Thanks Rob and Rich for taking the time to help. I'll see what I can do.
Ragrove: I remember some time ago a reference to poor quality screw clamps similar to the ones I am using. The actual screws (ie: the part you screw in) on mine are black and I have had them for three modeling builds over quite a long time. They are good as new and have not shown any tendency to split the bulk heads - either MDF or ply. You do however need to drill holes for them slightly larger than 1mm (say about 1.2 or 1.3mm - but definitely less than 1.5mm). I think the screws on the poor quality clamps were not black, but were otherwise very similar to look at.
-
Thanks for your comments Bob and Joe.
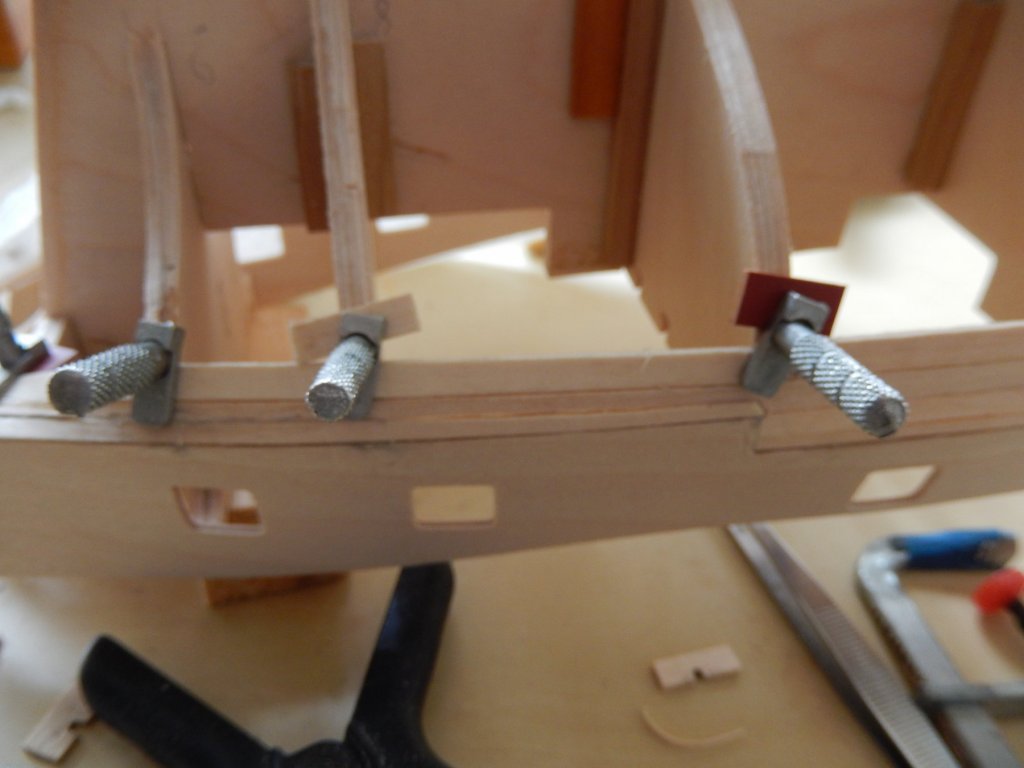
Having avoided it as long as possible, I've now started the first planking. It starts from the lowest plank on the wale which is located by very precise measurements from the bottom of the keel. (Incidentally, I have found the instructions for the Granado are far superior the those for the Vanguard; the plans for the Vanguard are far better.)
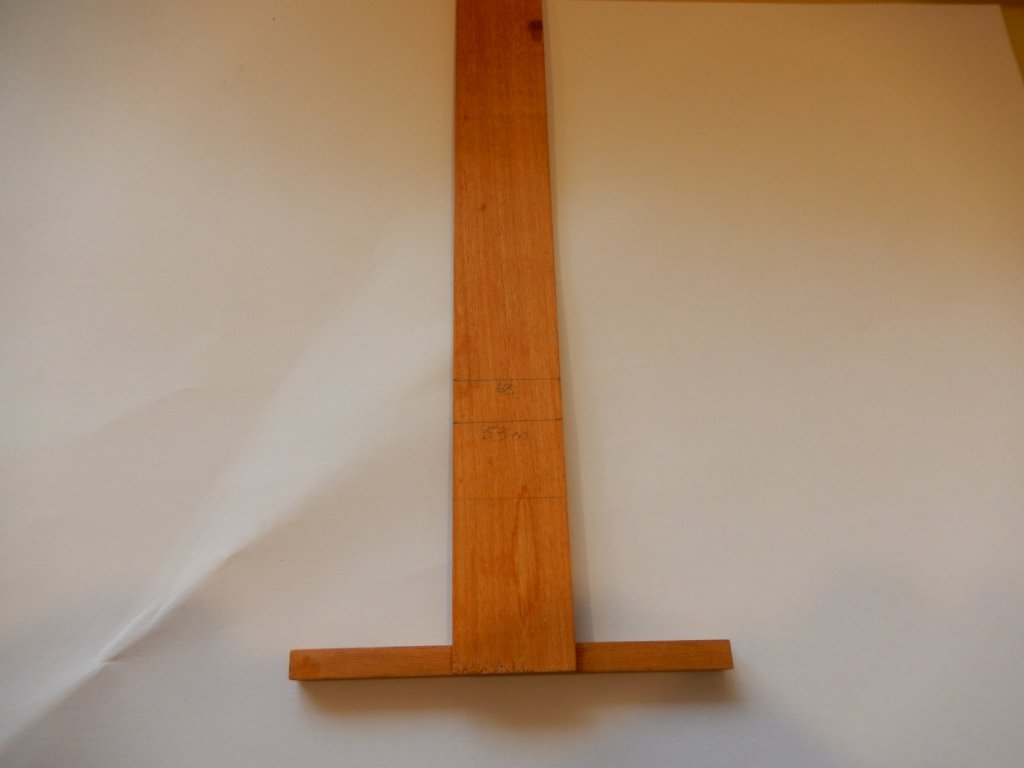
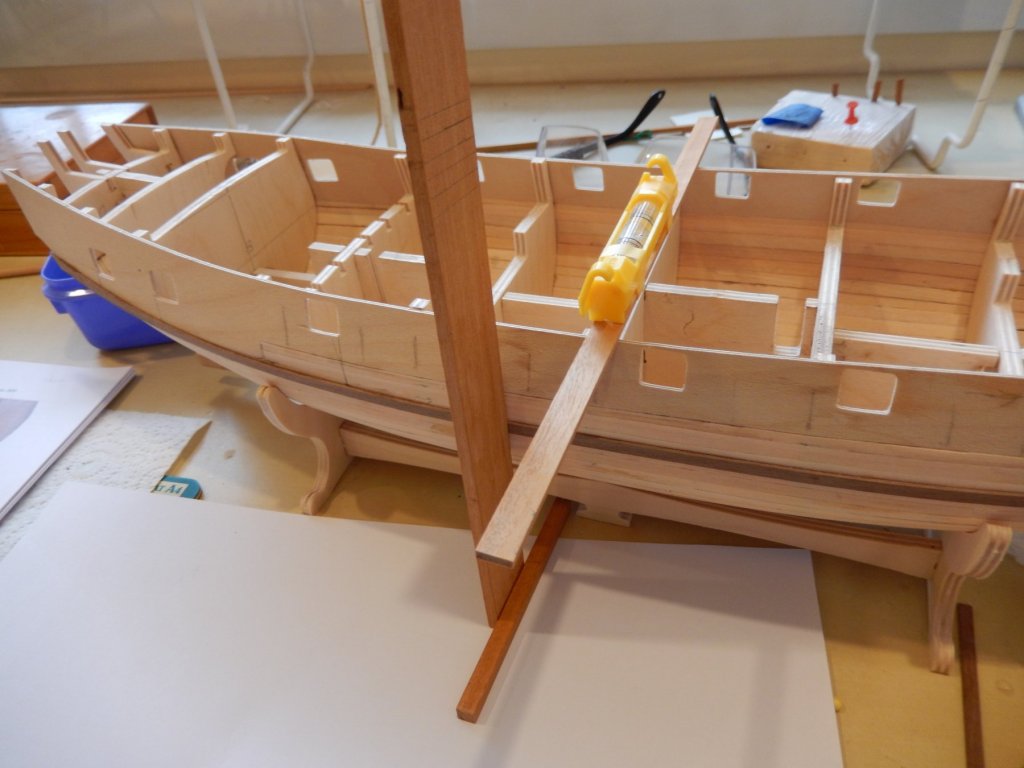
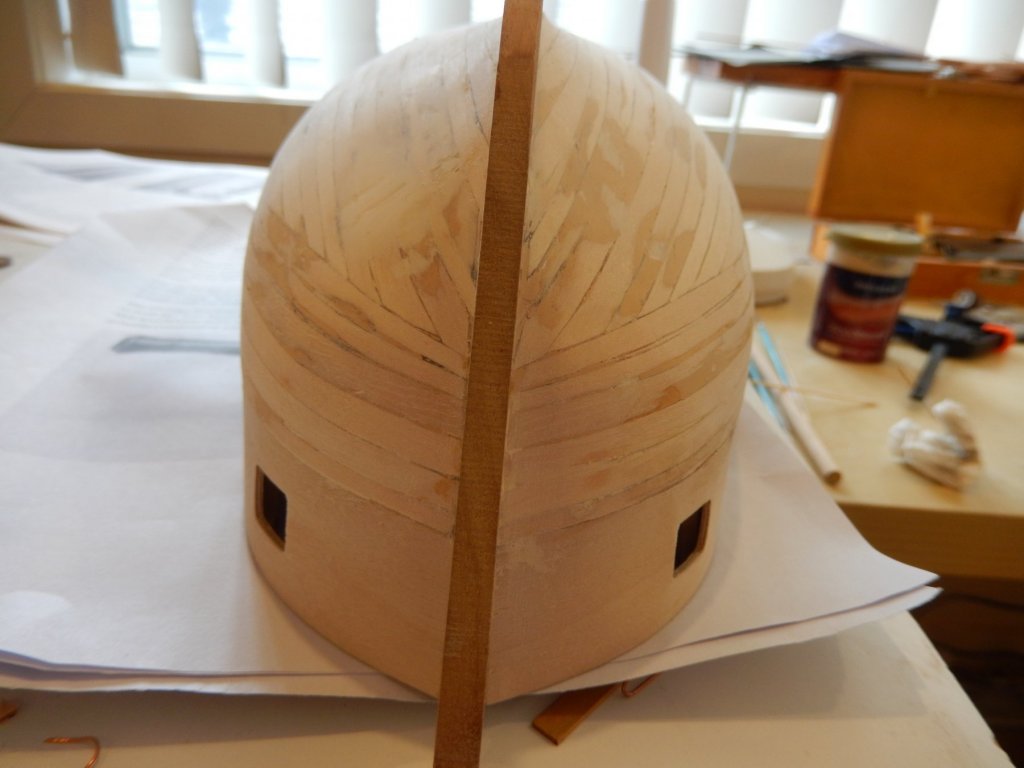
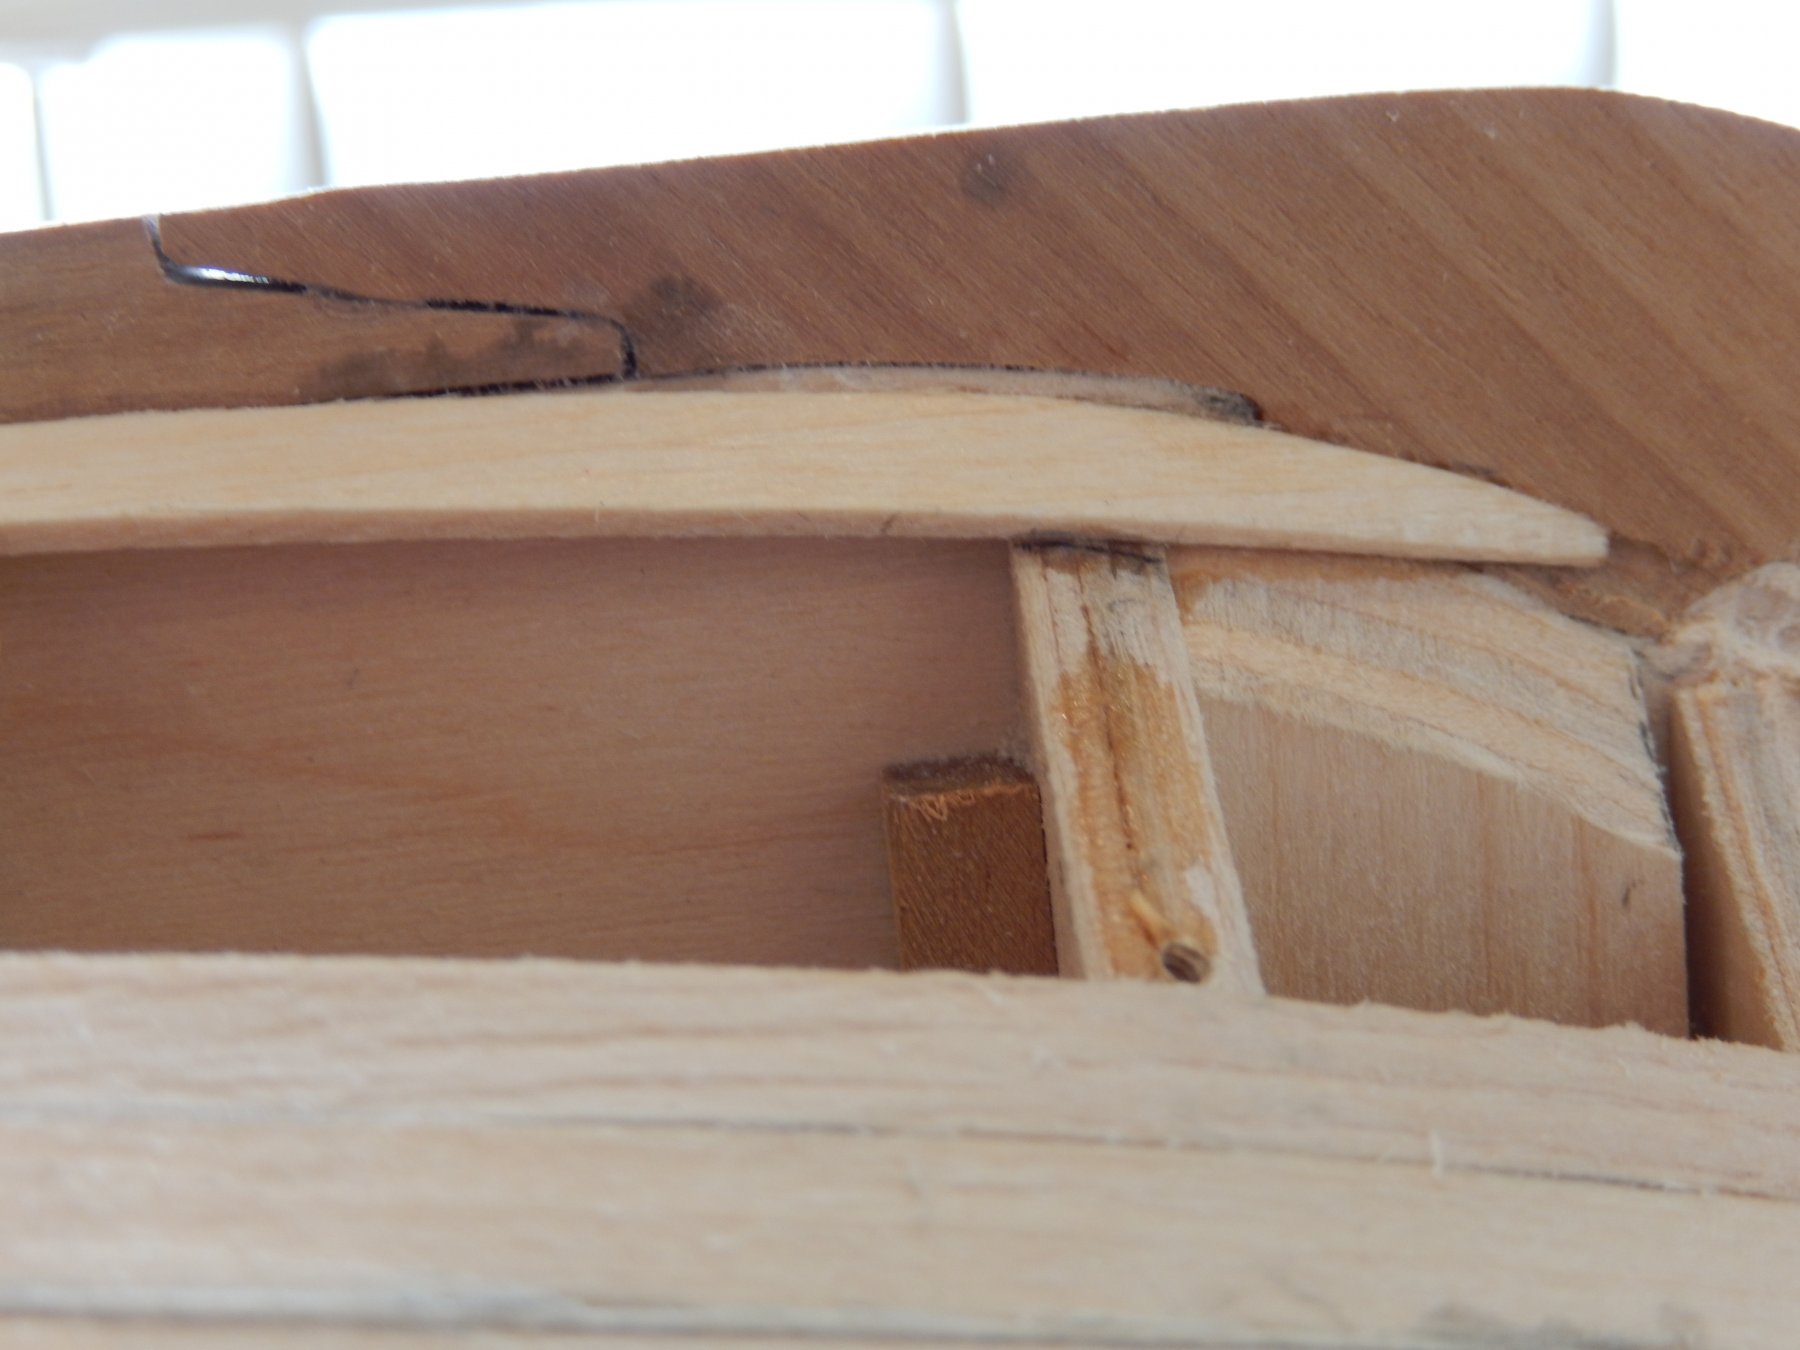
Here is the means by which I measured the appropriate distances of the wales from the keel (at the time the model was not in its cradle as shown in the photo). As the boxwood strip may be only just sufficient to complete the entire planking, I decided to use the walnut for the wales as they are to be painted .
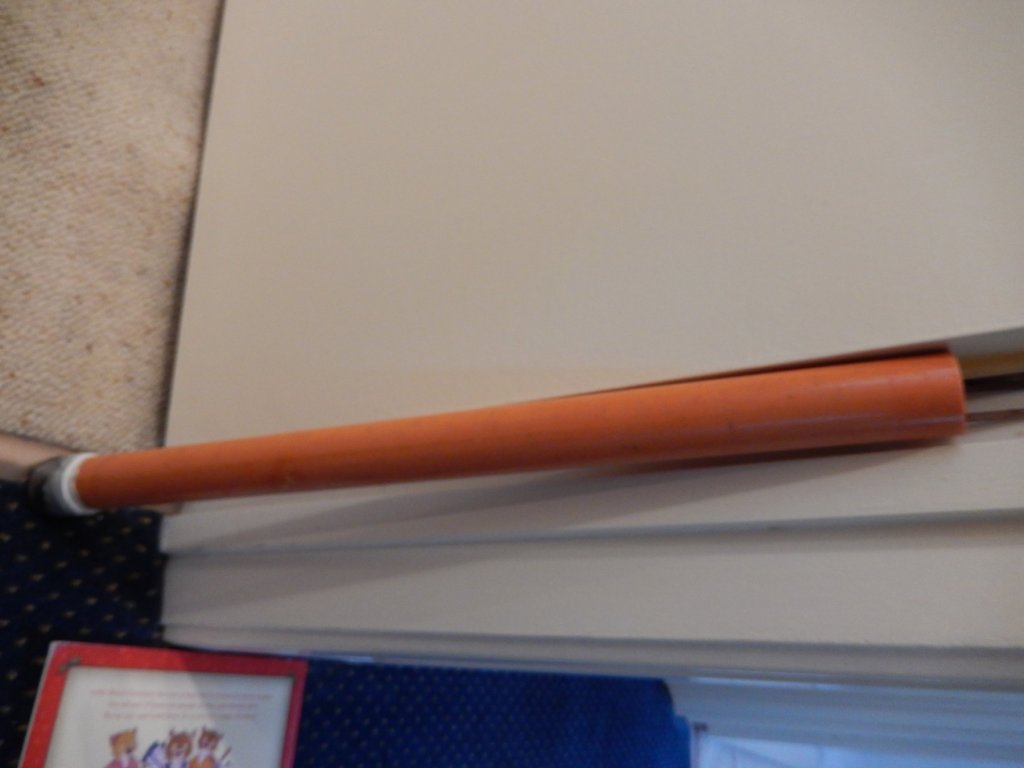
The walnut is more difficult to bend than the boxwood, so a good soaking is needed. I have use a piece of PVC pipe as a 'soaker' (I have rotated the image, but for some reason the rotation has been lost).
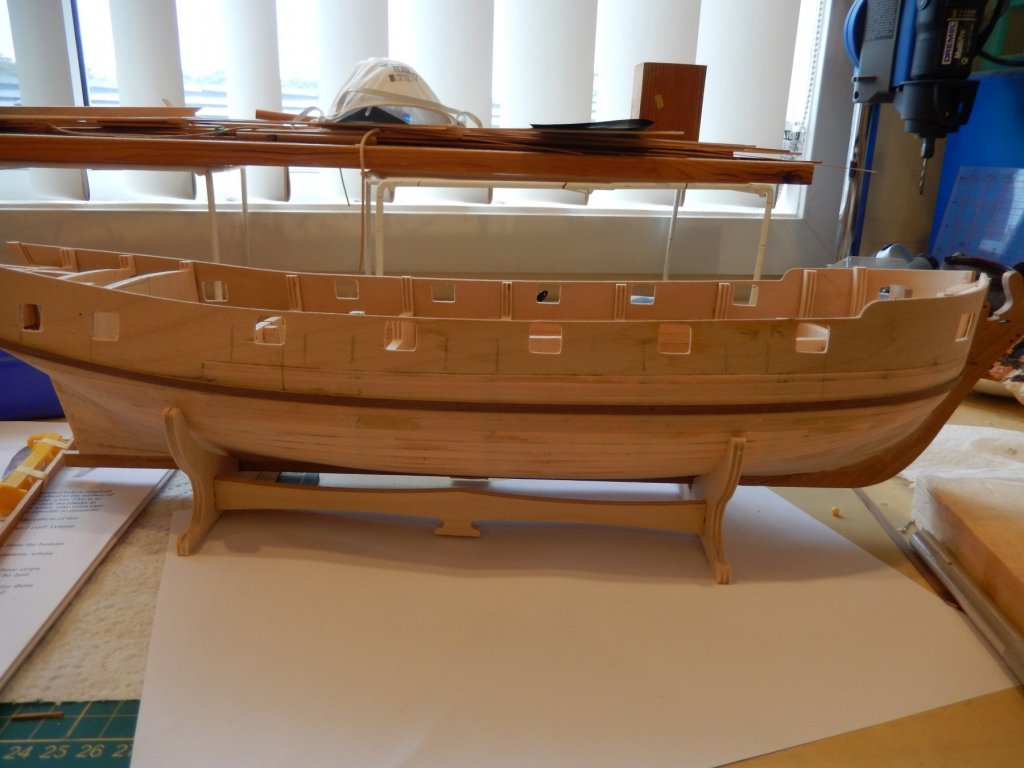
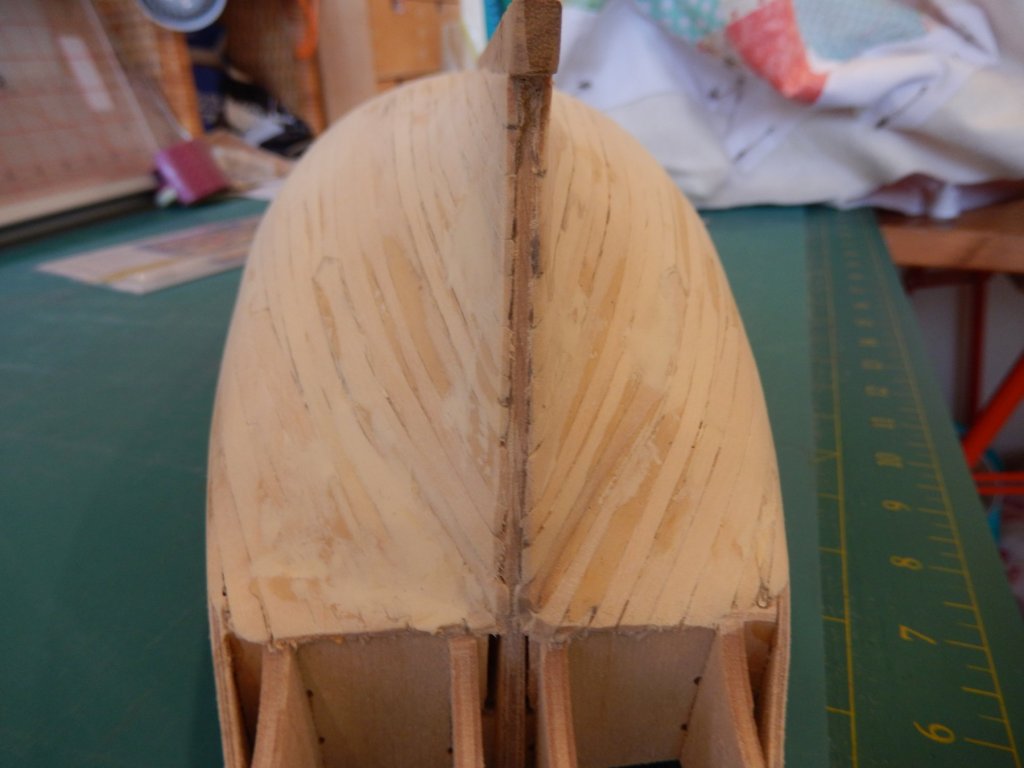
Here is the result of the first plank for each wale.


-
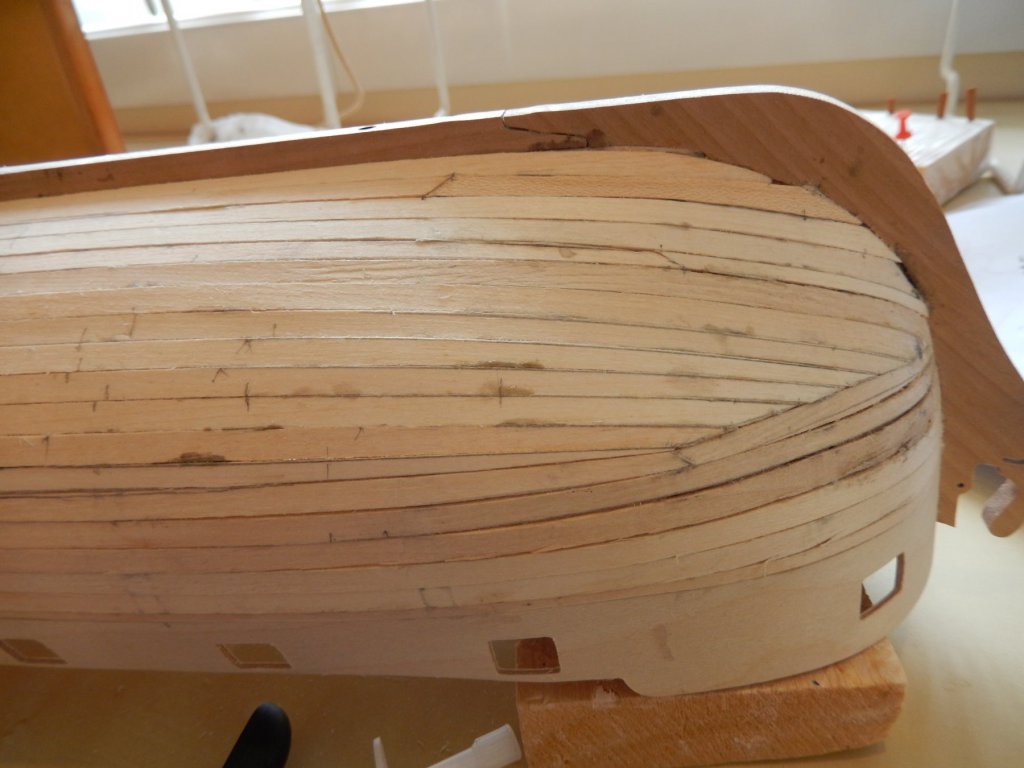
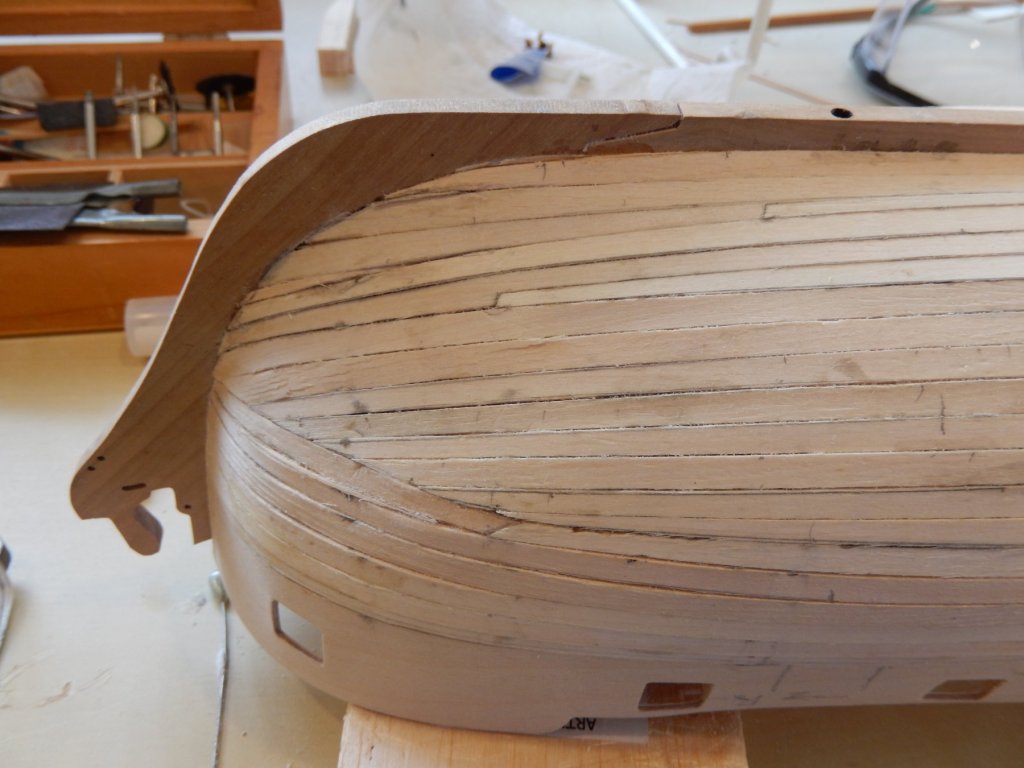
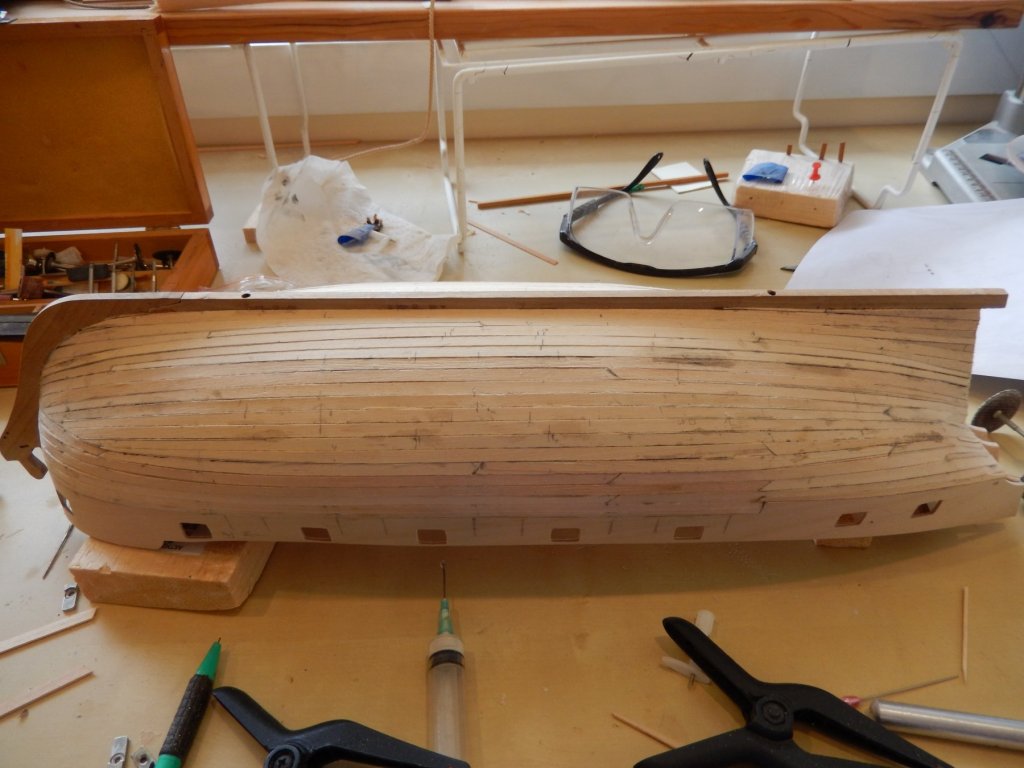
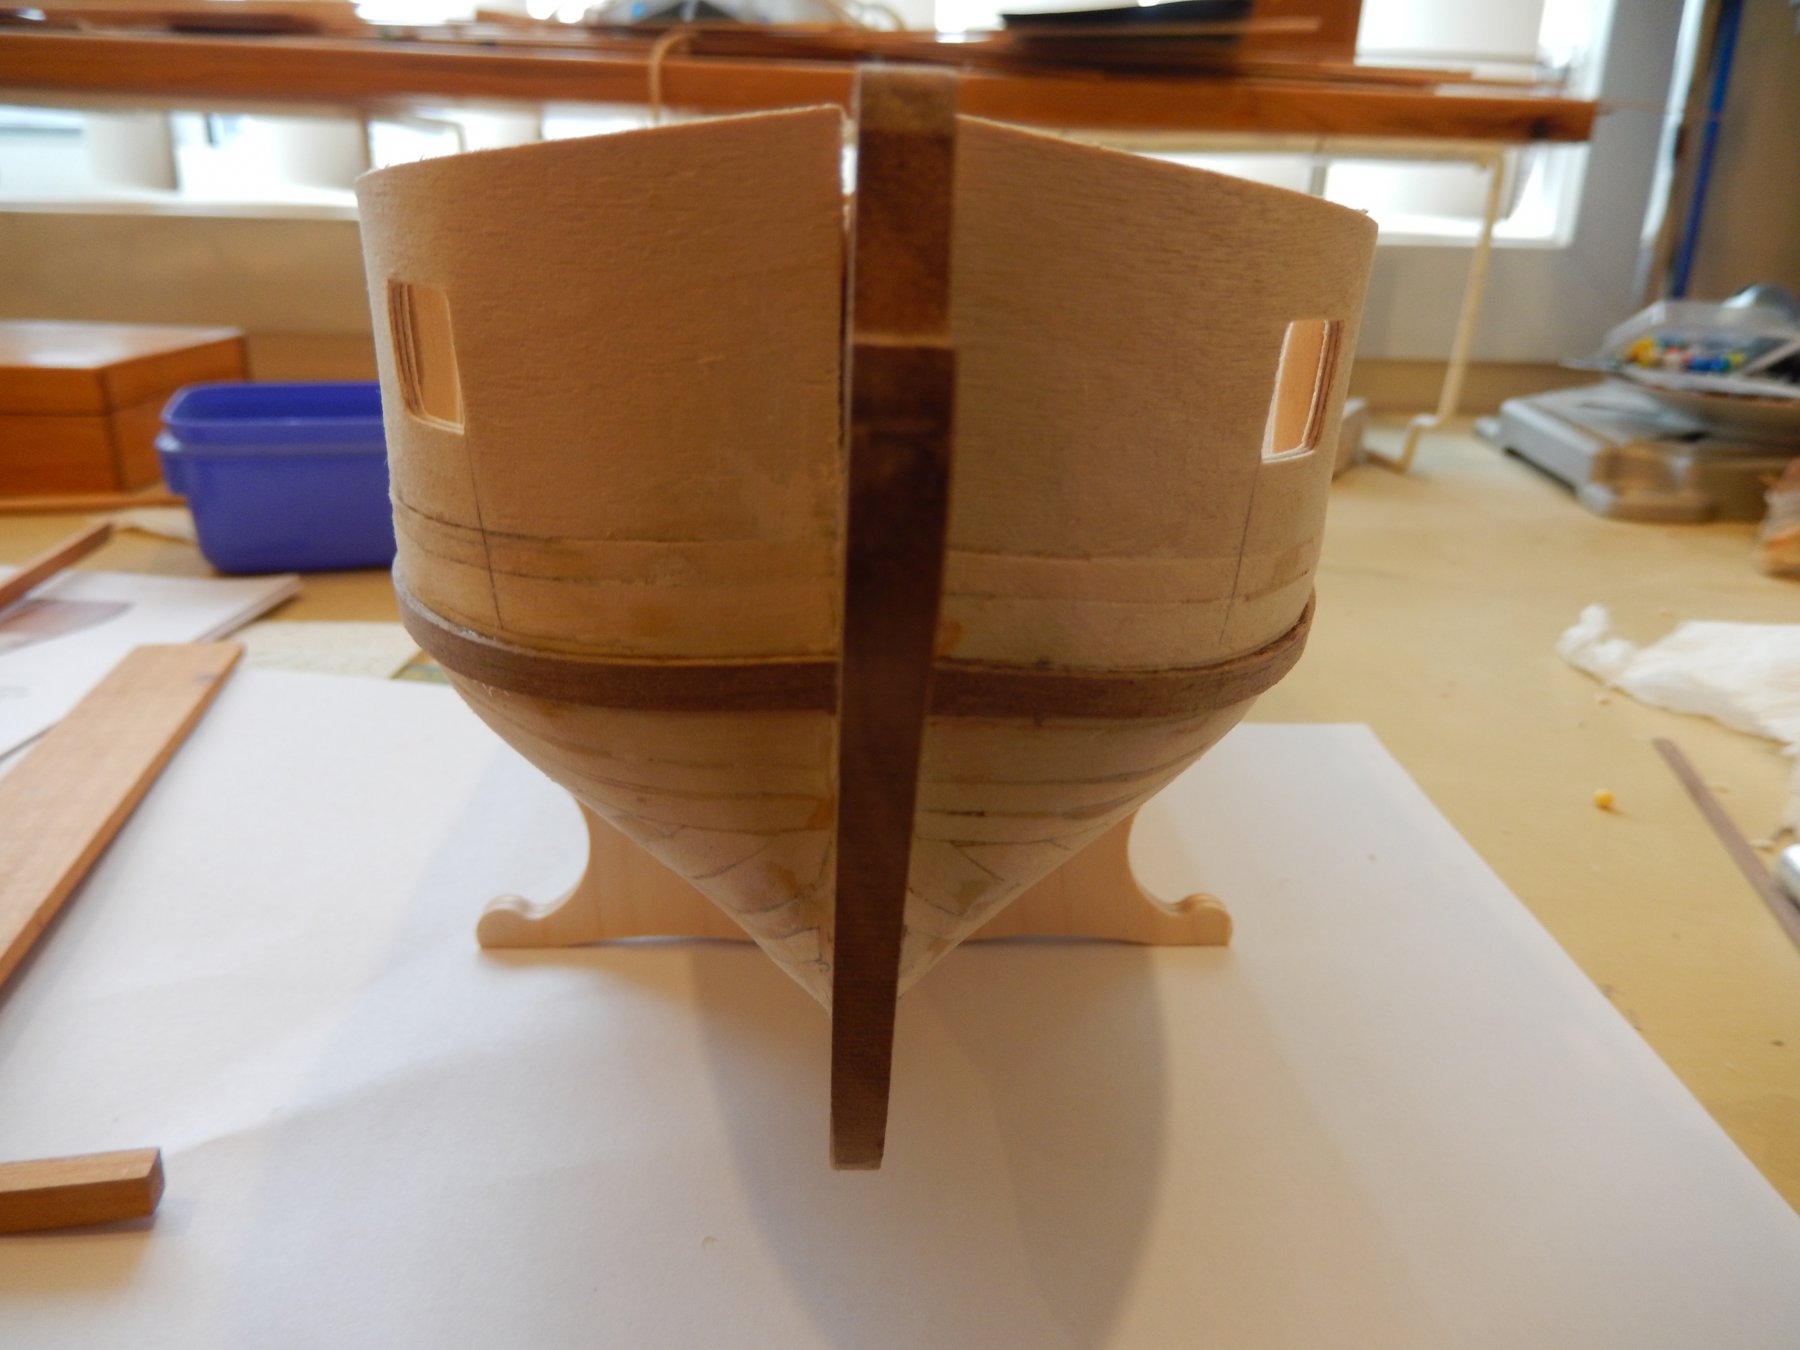
The first planking is finished. The result is adequate as a basis for the second planking and I hope that process goes a little more smoothly.
I found the gun port patterns above and near the gun ports had a tendency to distort. I used a very wet paint brush to wet the affected area, clamped a fairly stiff piece of wood strip over it and left it overnight - joy!

Here is the result - unfortunately I didn't think to take a 'before' shot which would have shown quite a bit of distortion.

I couldn't resist a two for the price of one shot, though unfortunately it is not very clear.


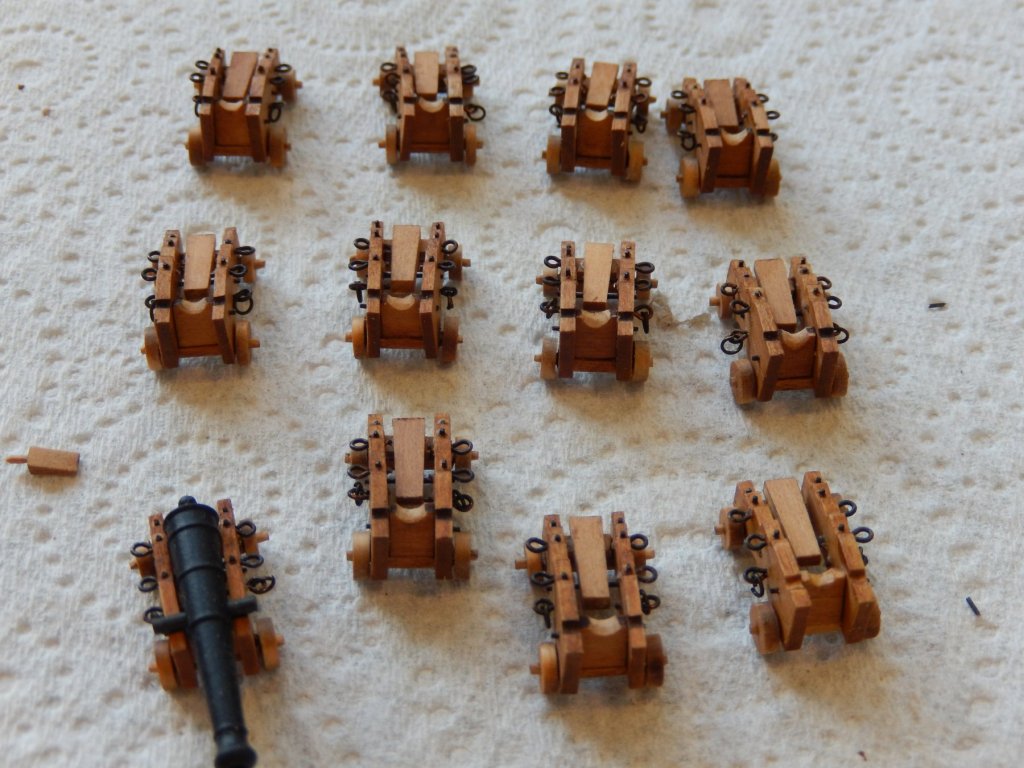
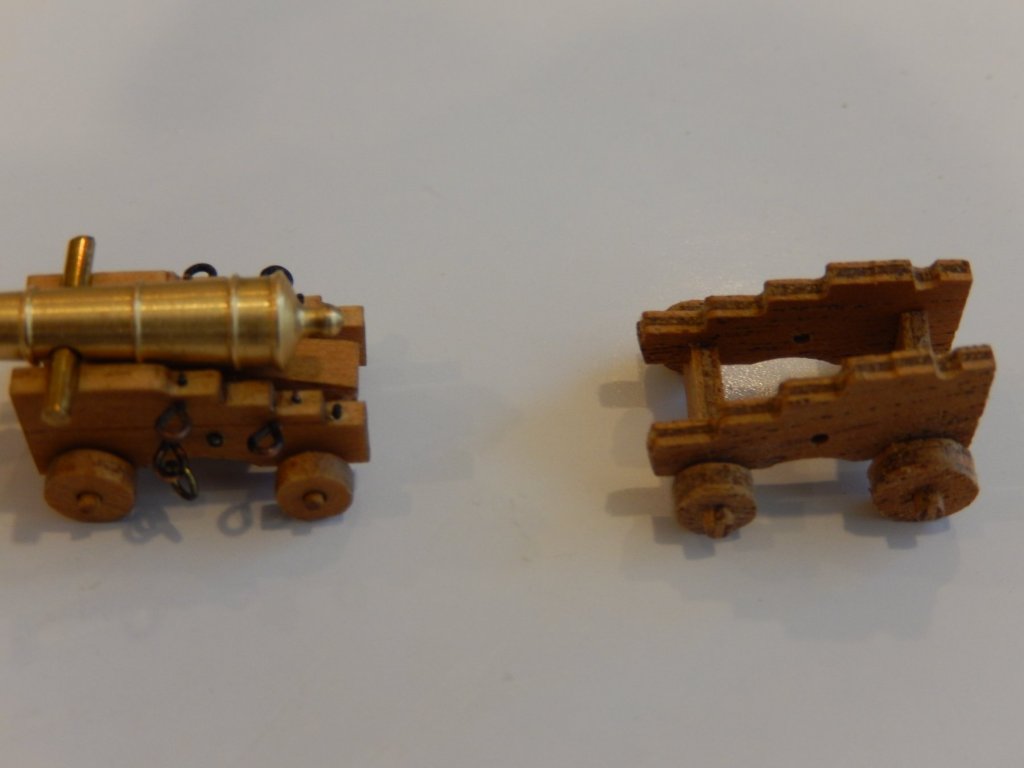
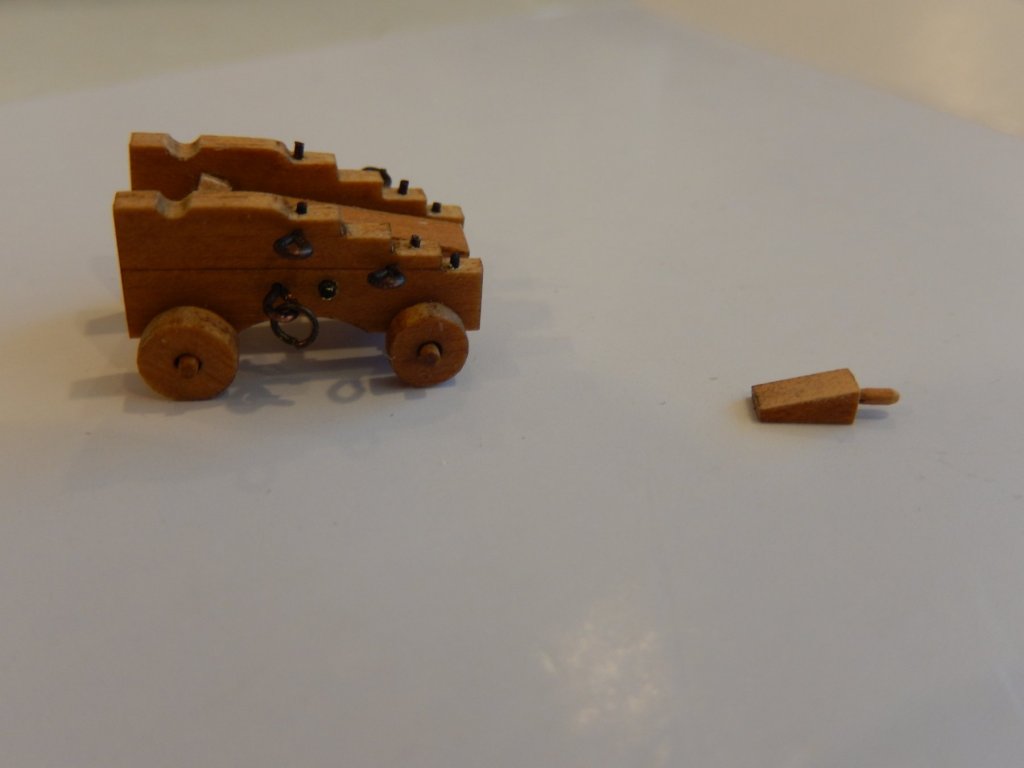
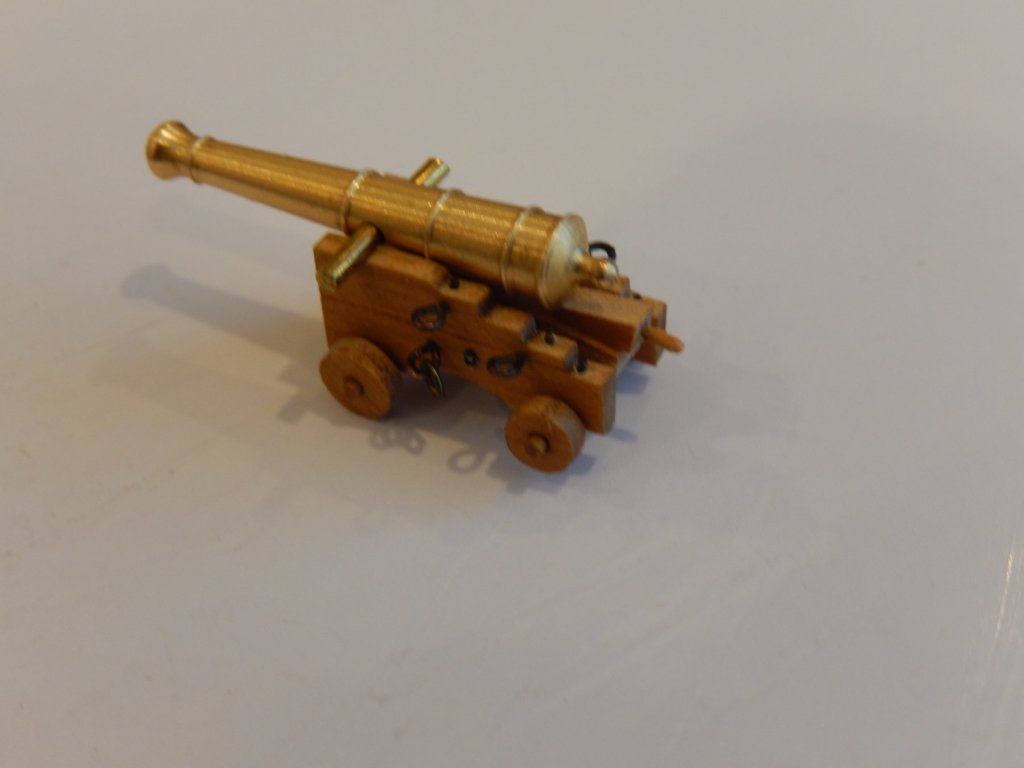
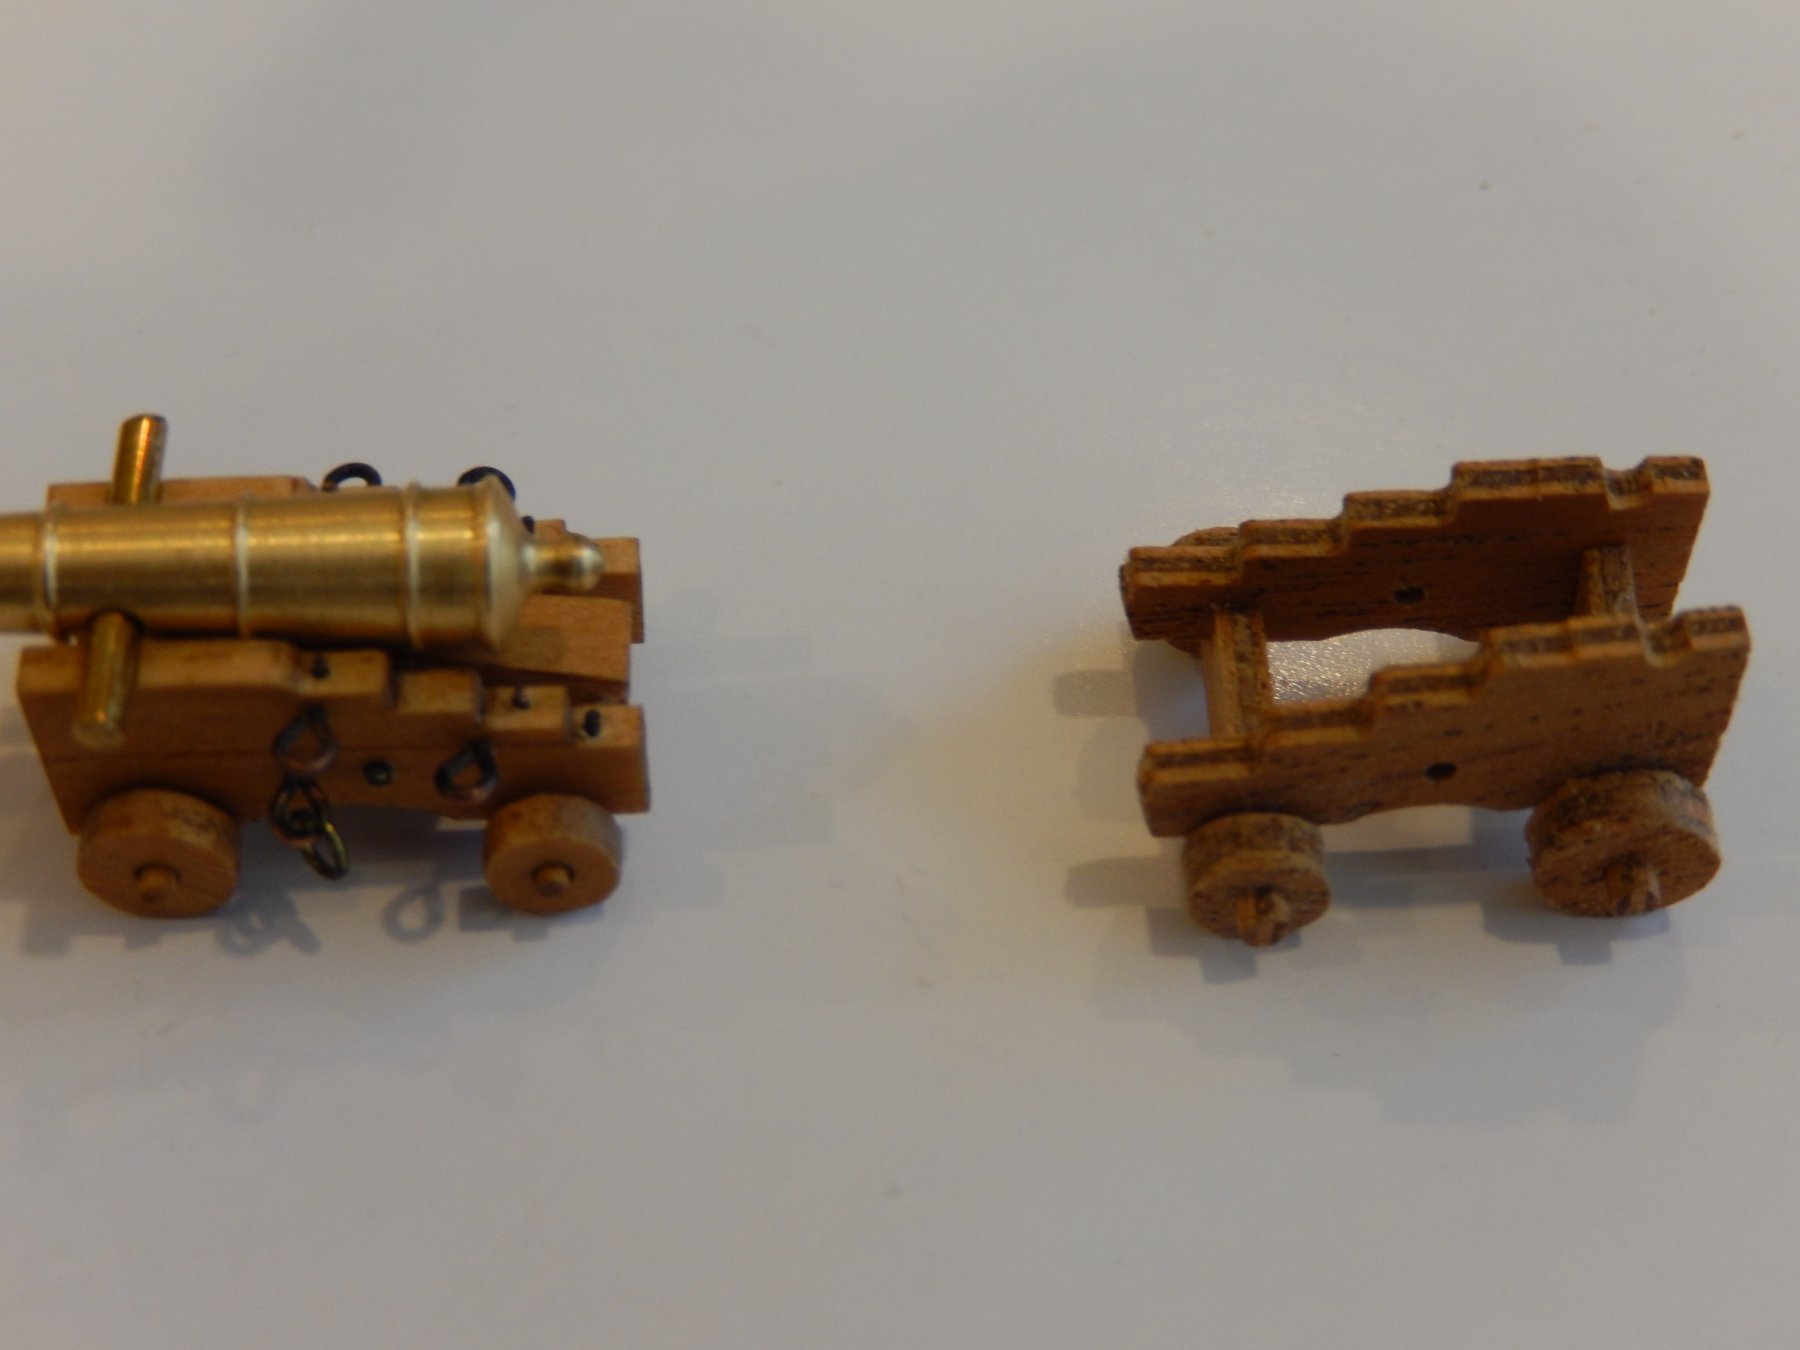
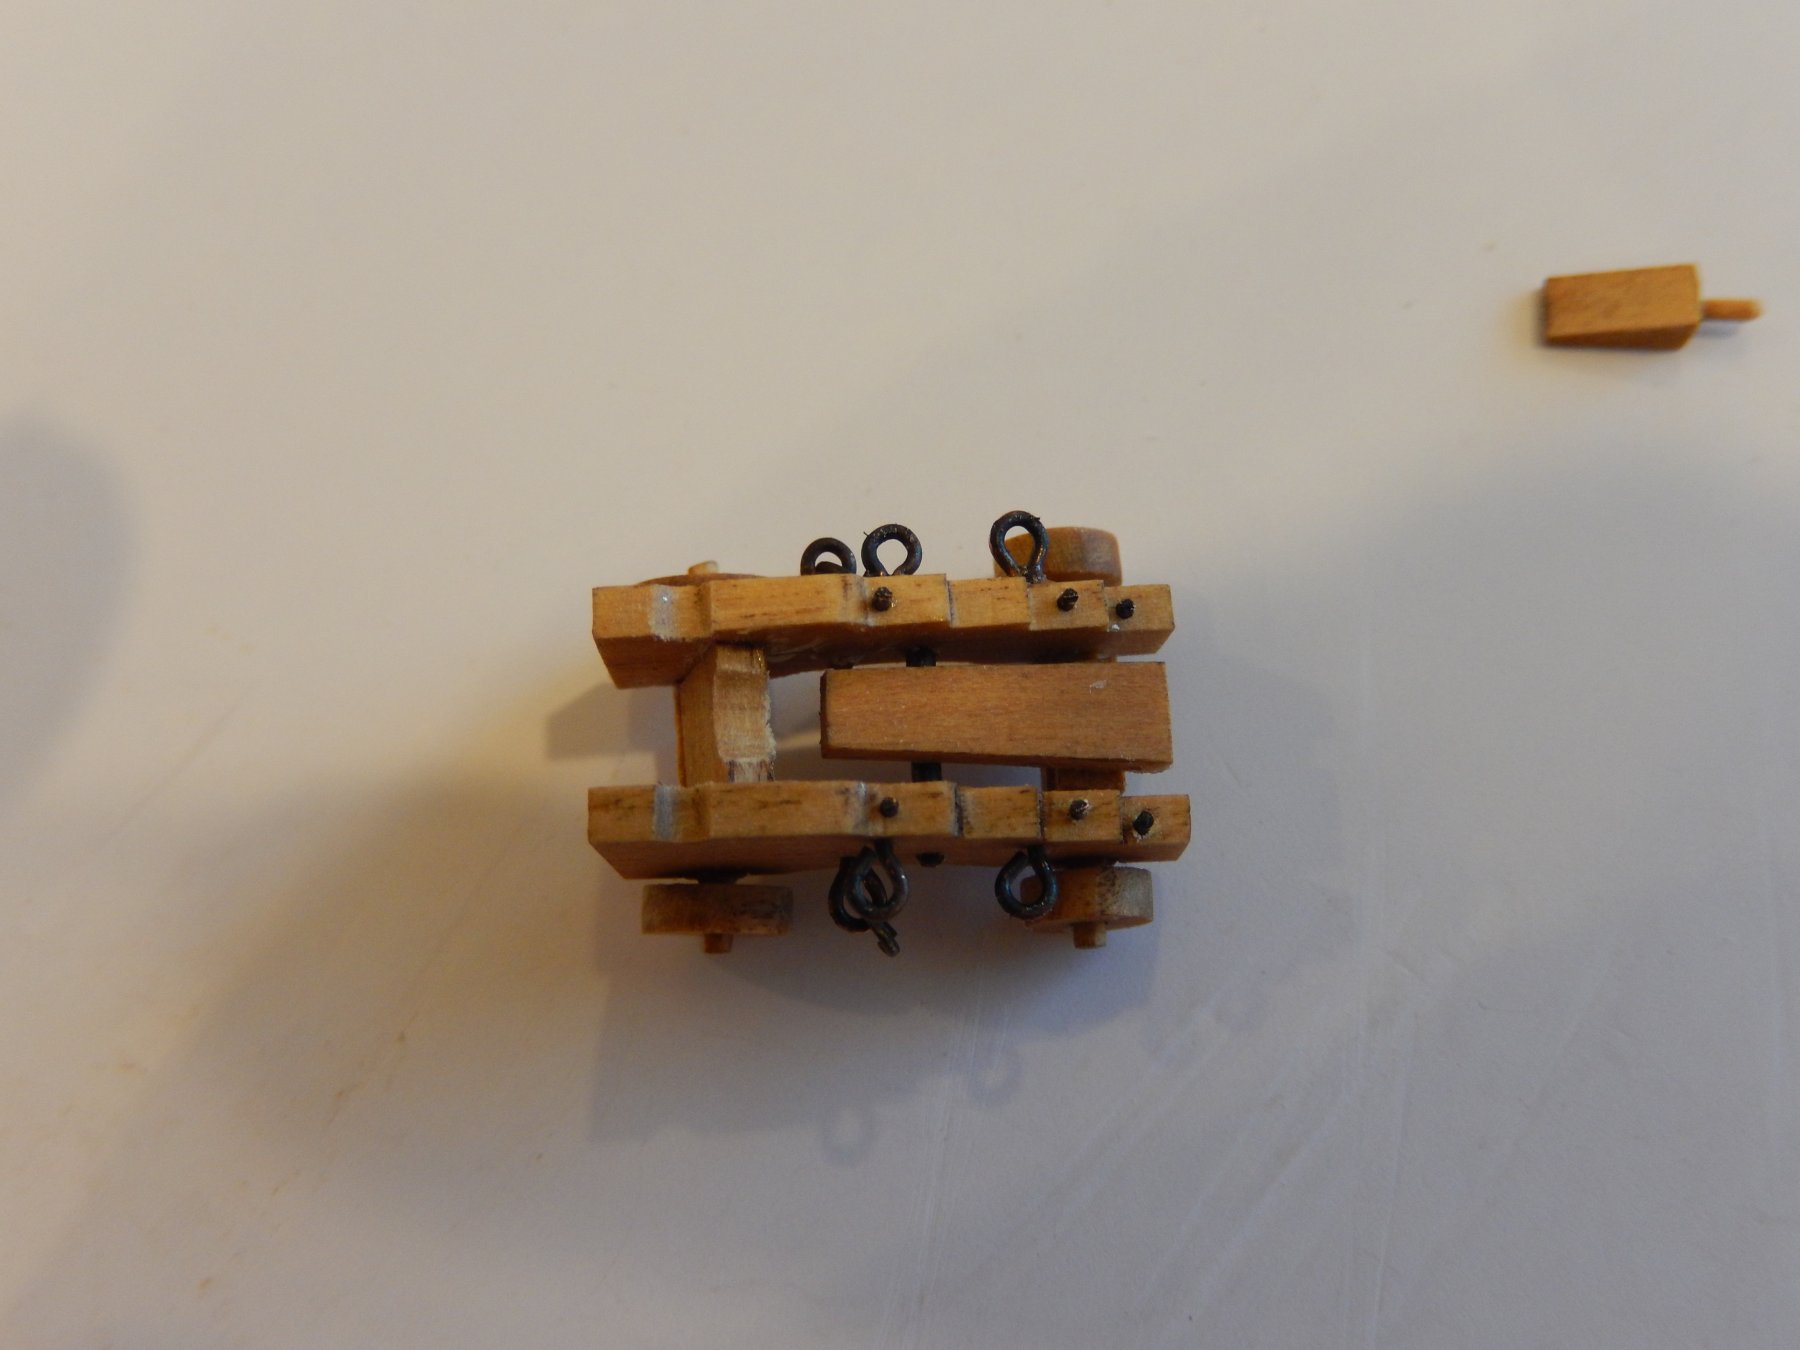
Here are the Syren gun carriages all but finished. They are quite awkward to put together but the result is far better than the carriages supplied in the kit. There are 10 on the ship and I have 12 of these - the two worst will be left on the dock. One of the quoins is shown on the left of the photo below.

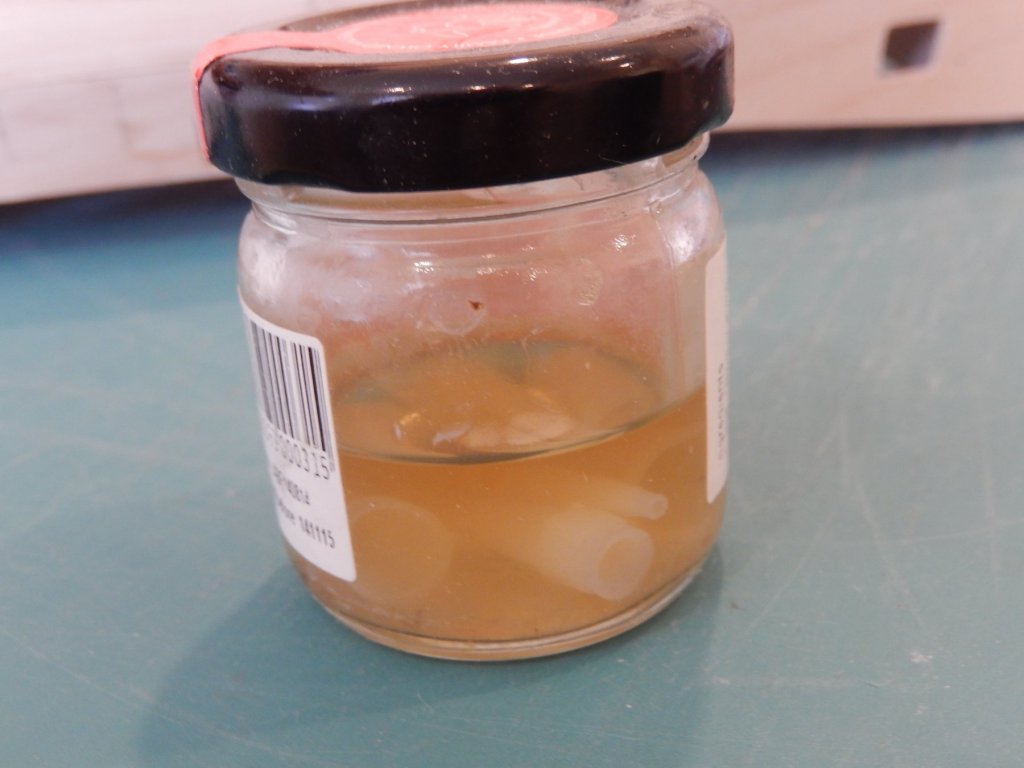
Just a note if you use CA and the nozzles and caps become clogged with hardened glue - I now put them in a small jar of acetone after use. They are then completely clean for the next use.
- rafine, JayCub, Peter Bloemendaal and 5 others
-
 8
8
-
Peter: you're very welcome to come for the ride. However I find at the moment I'm suffering 'Vanguard withdrawal', so I don't know how enlightening the trip will be.
-
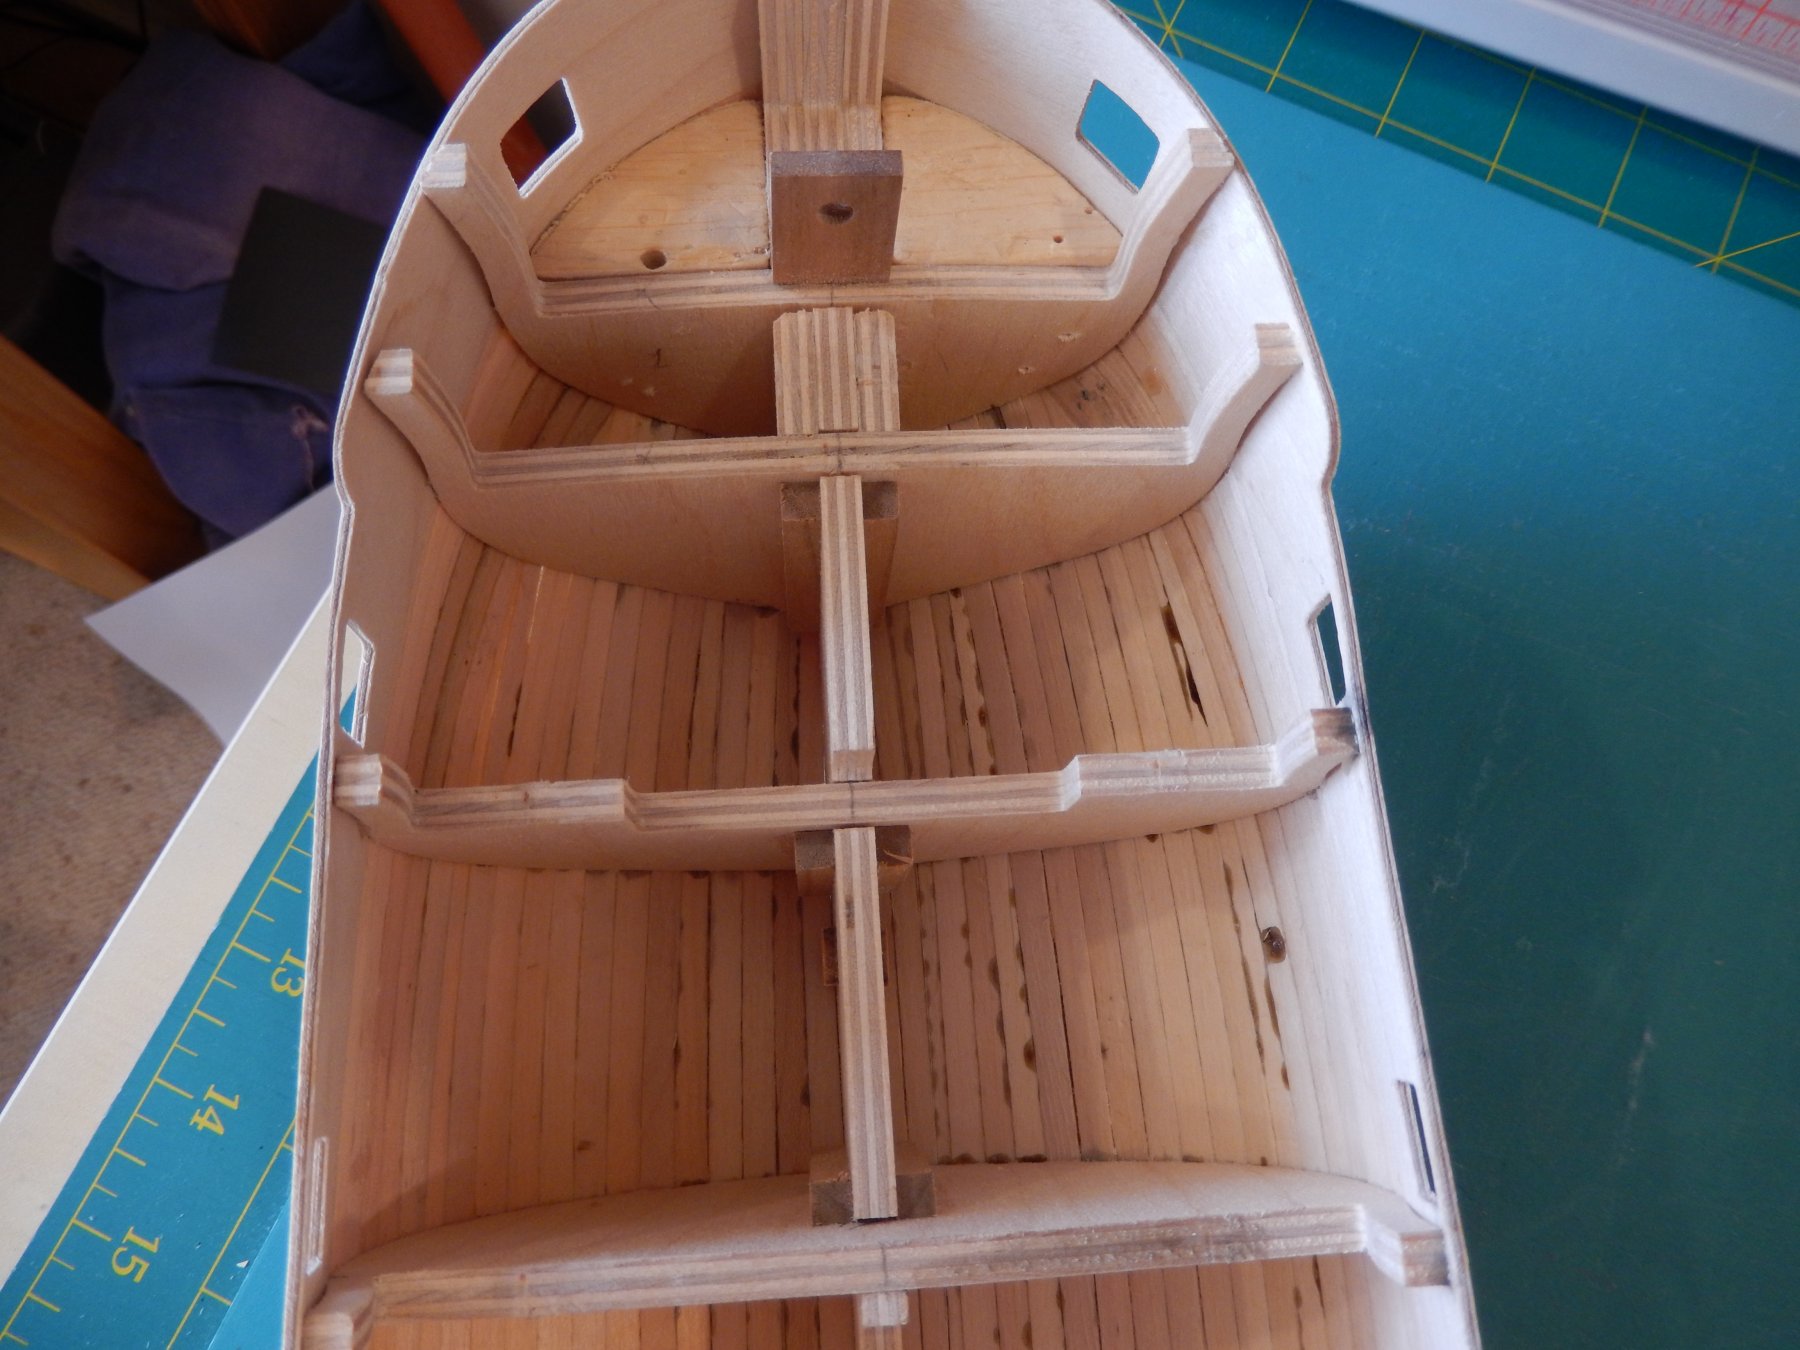
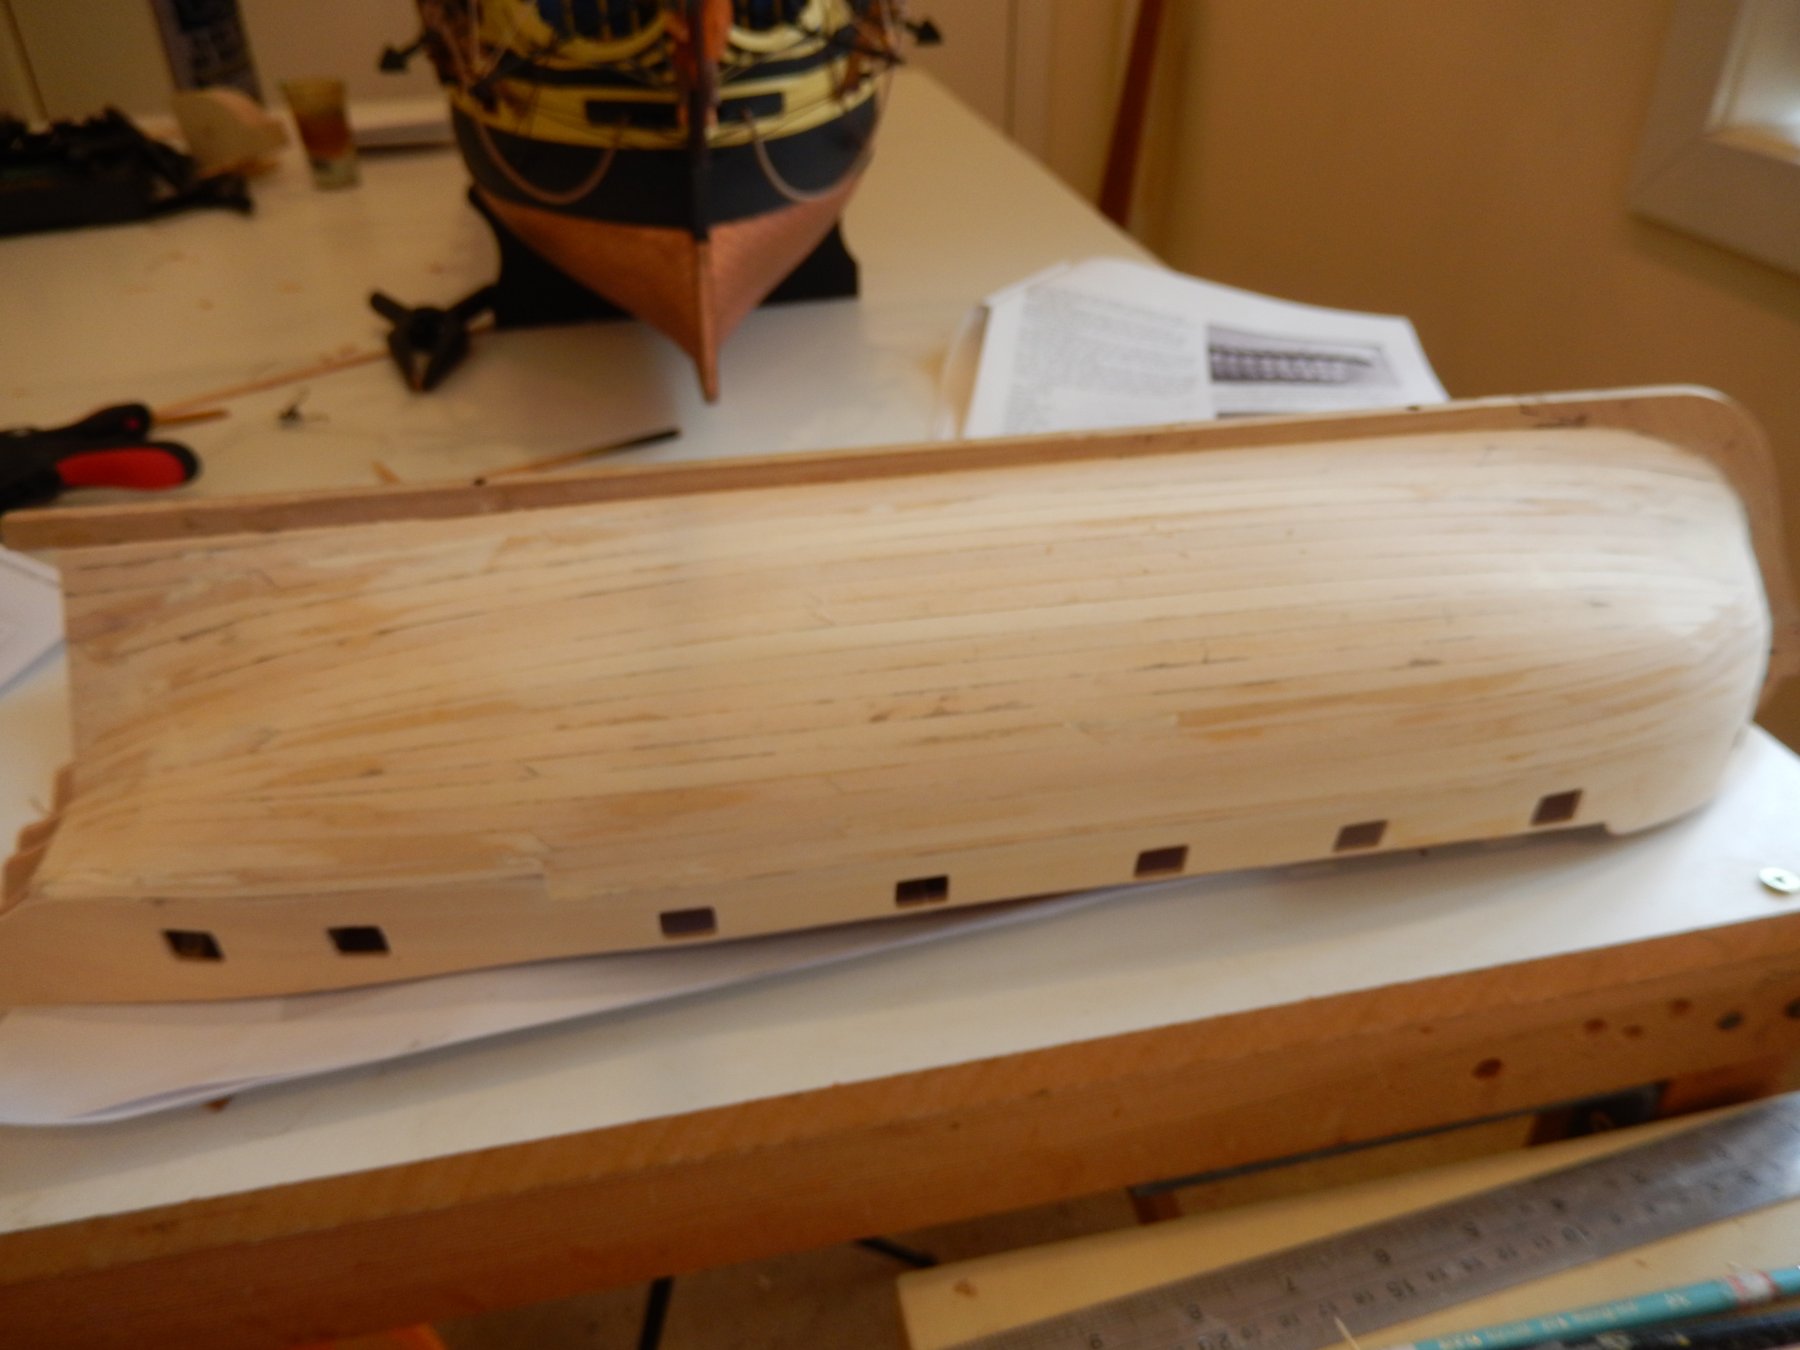
January for one reason or another has not been very productive for boat building with the holiday season and the hottest summer I can remember. I have finally finished the first layer of planking, though I am not very pleased with the job. I had intended to do it by the correct method, but a couple of silly mistakes at the beginning of the process put an end to that. The result however, will be an acceptable basis for the second planking, and at least I'll be more careful next time.
The dark marks shown in the photos are pencil marks.
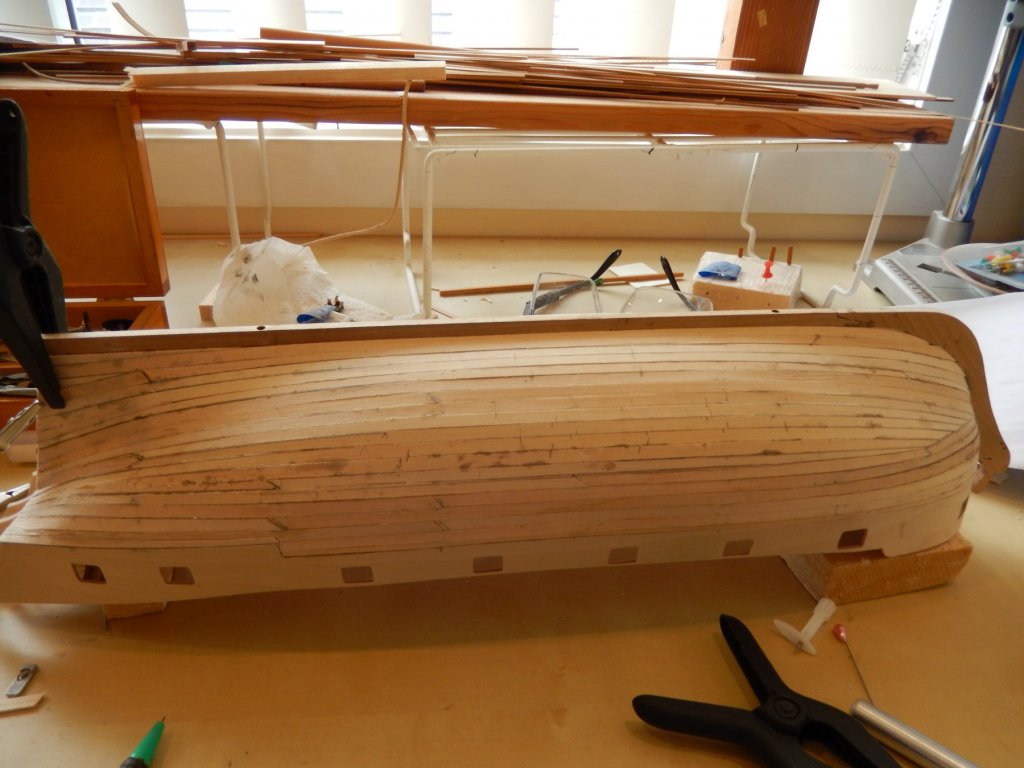
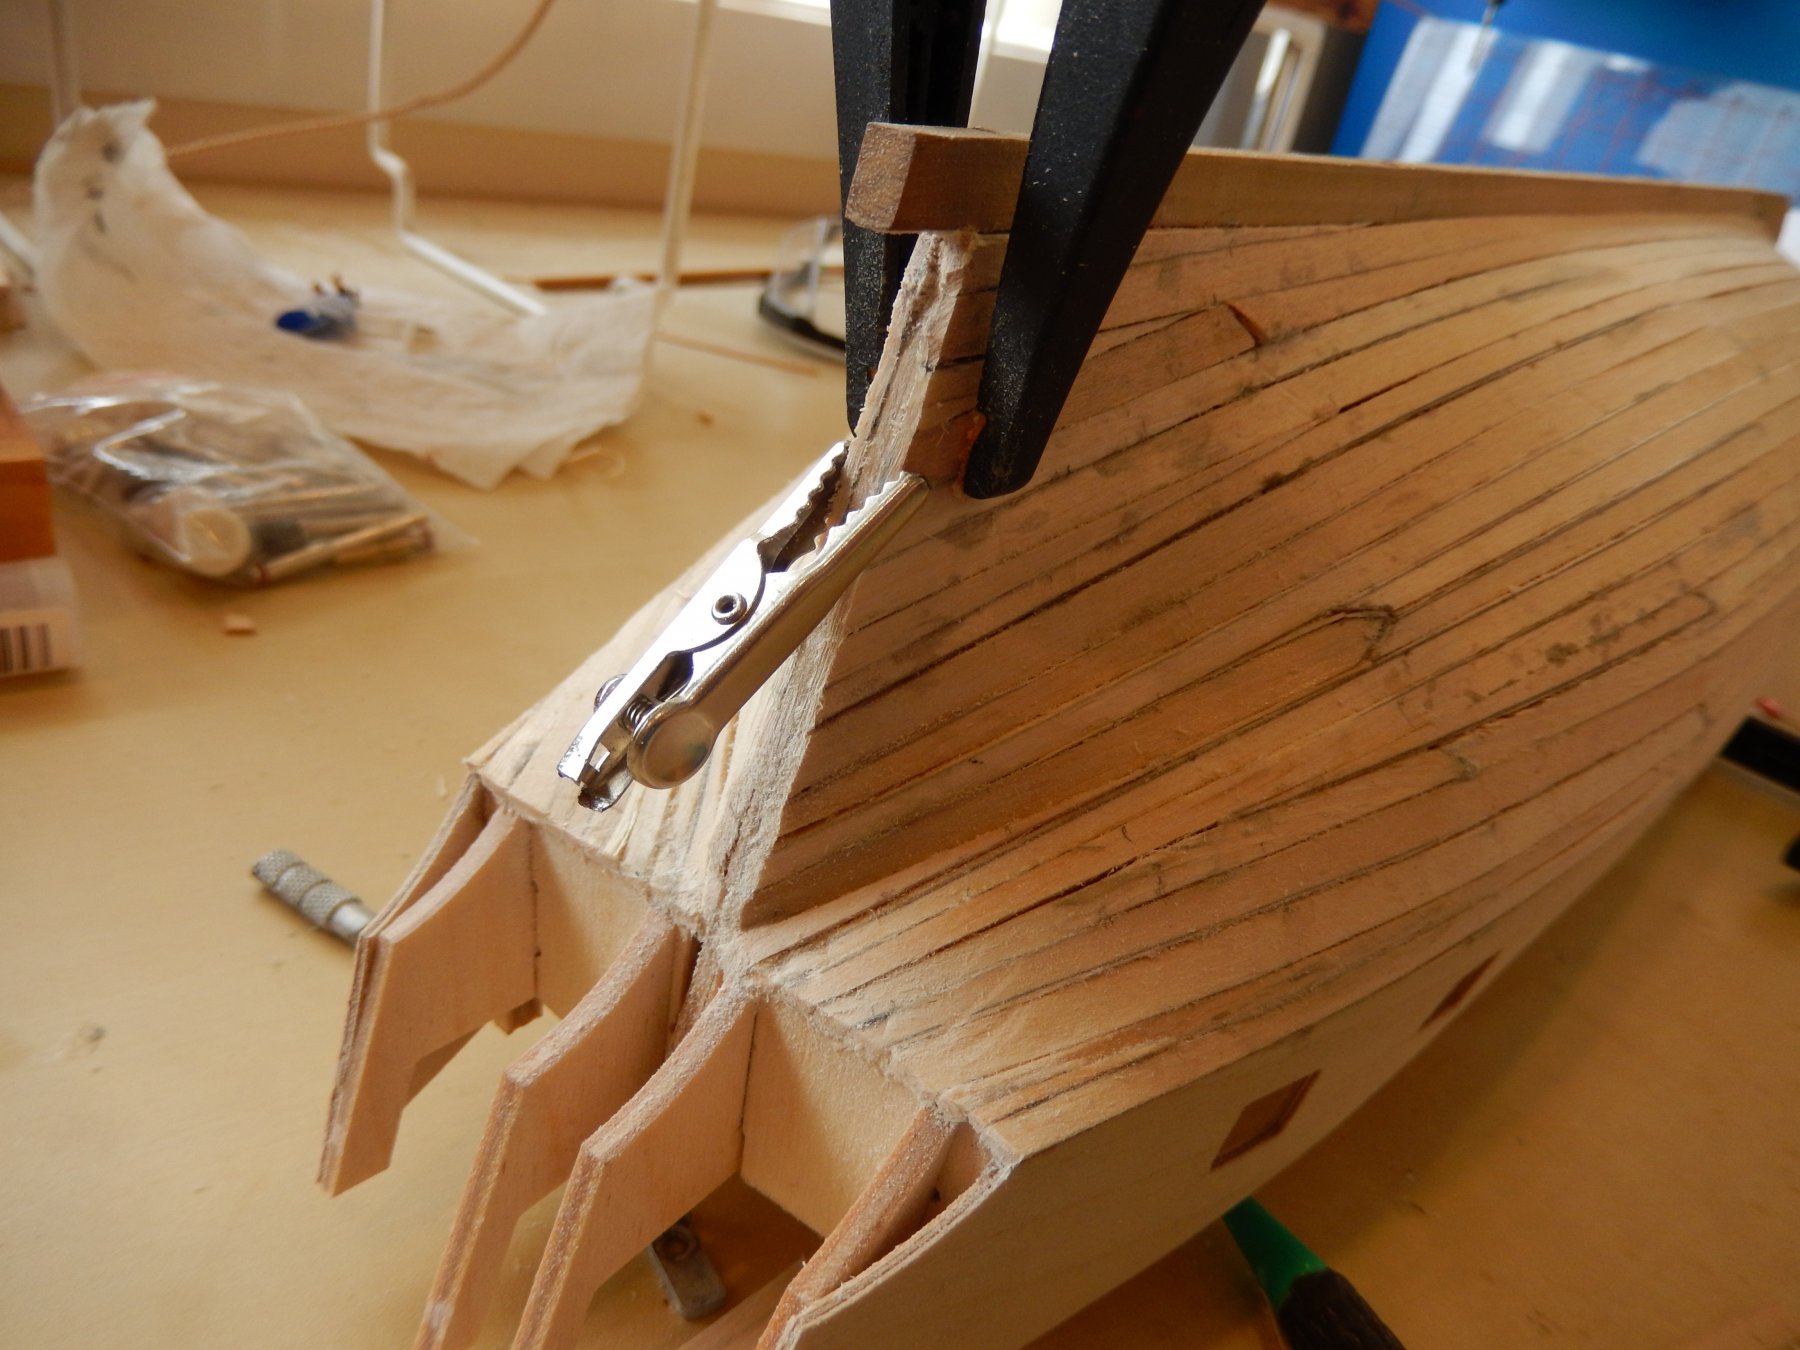
Alligator clips were the only way I could find to clamp the stern. The little teeth hang on for dear life.

The box wood for the second planking has been delivered and is of excellent quality. It is very light in colour - almost white - and I would prefer it to be a light brown. I have some brown stain so I will experiment with colour over the next few days while I do a bit of sanding.
-
I have finally found a boxwood supplier - Float a Boat in Melbourne. They are however only enough for about 4/5ths of the second planking. I will do the remainder in the walnut supplied. It will be painted anyway.
The first planking is going slowly and only moderately well. I made it hard for myself by not tapering the top planks early enough. I should have known better.
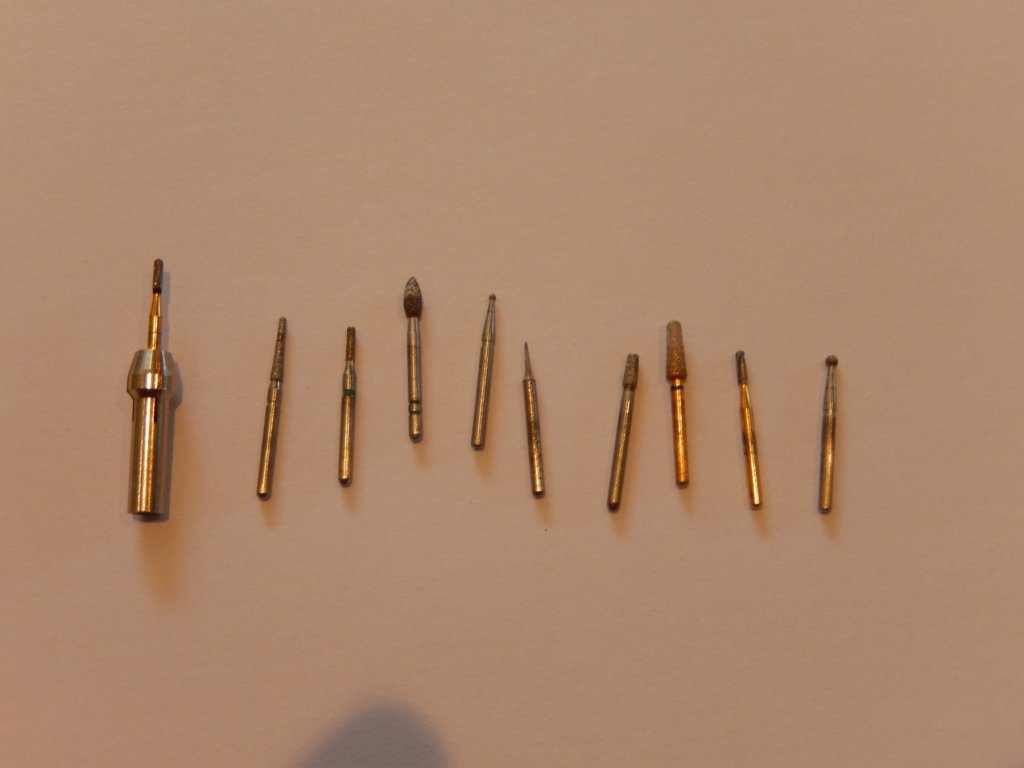
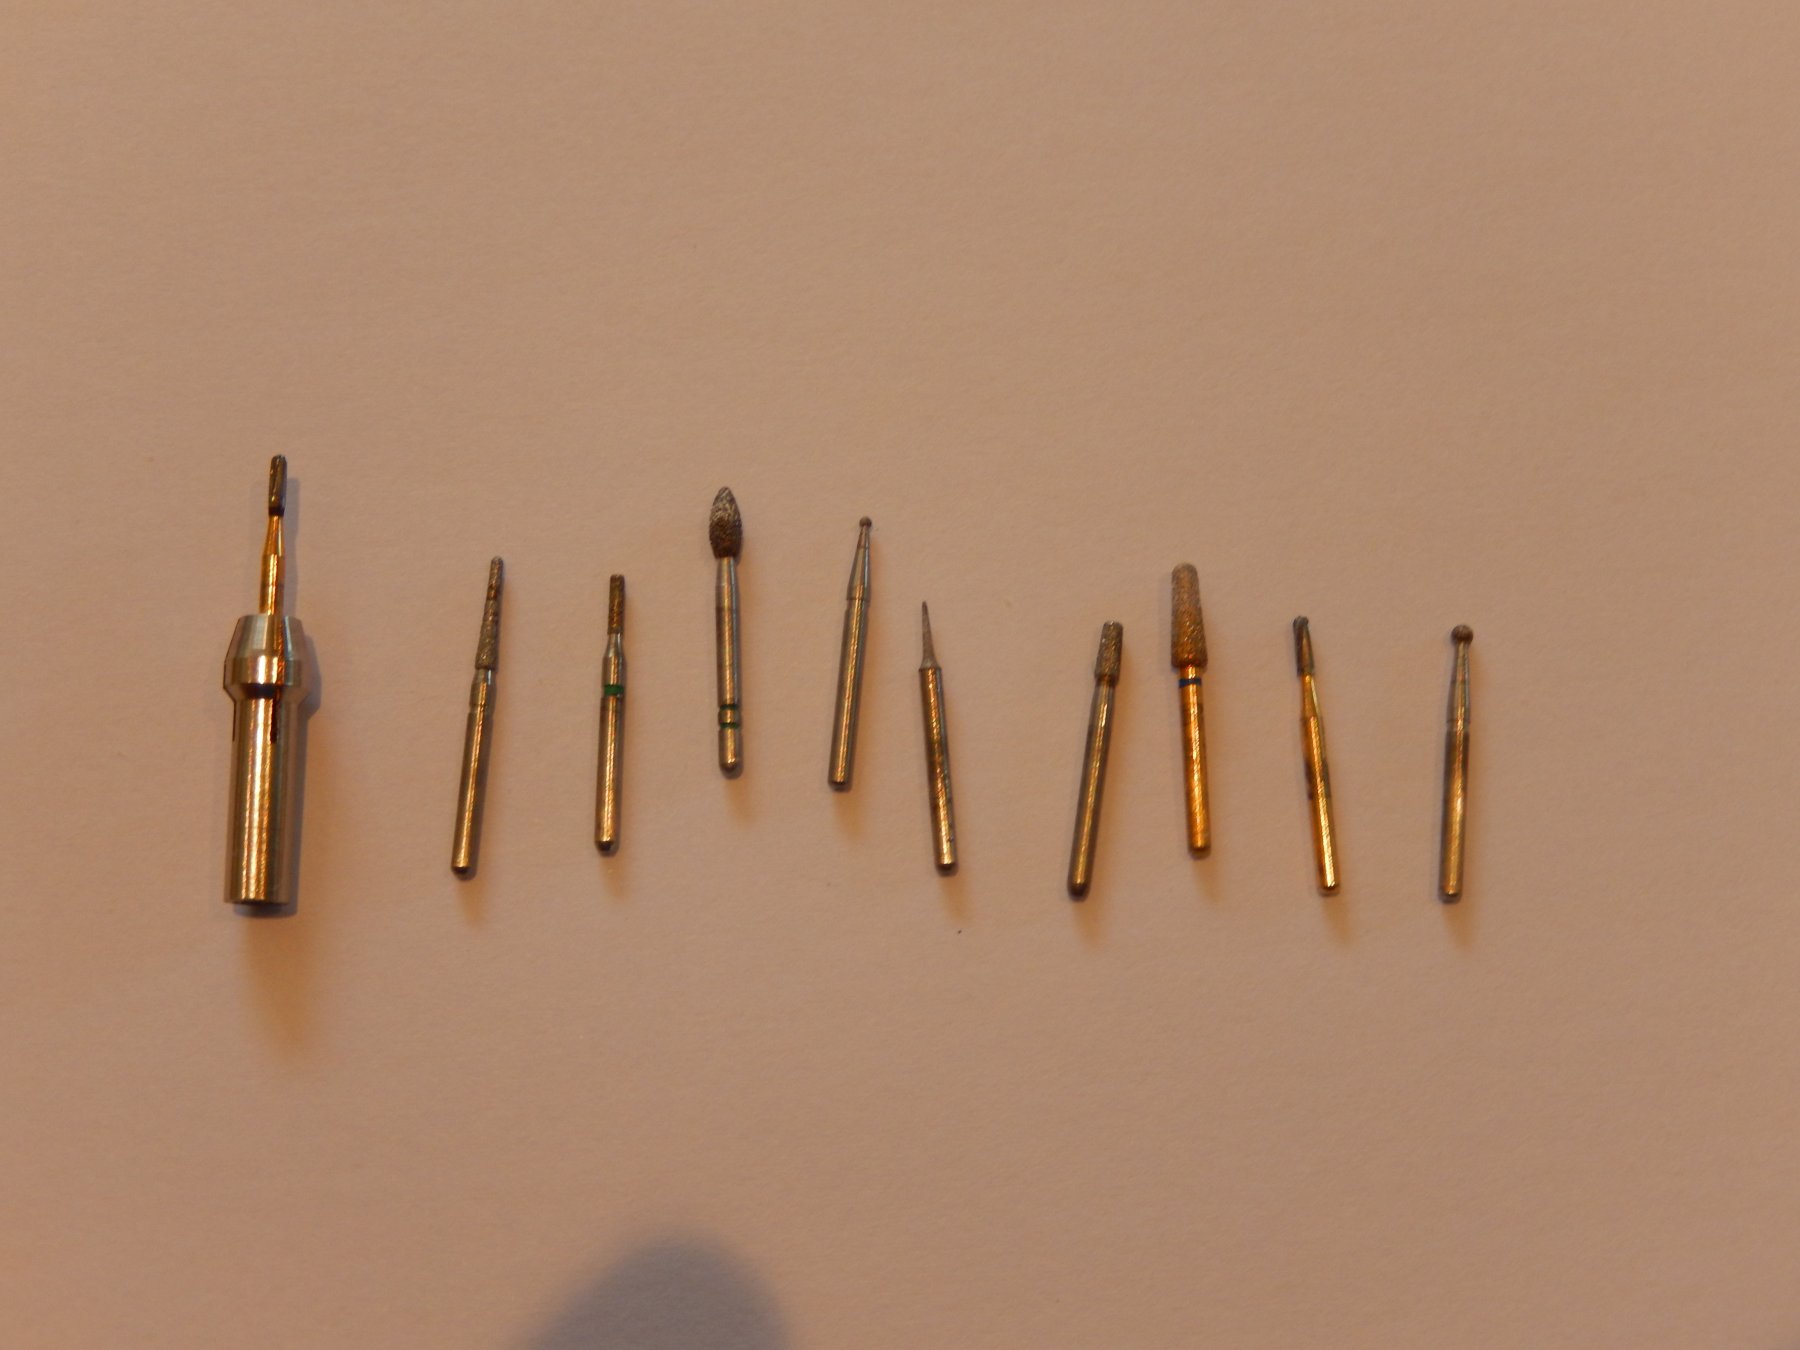
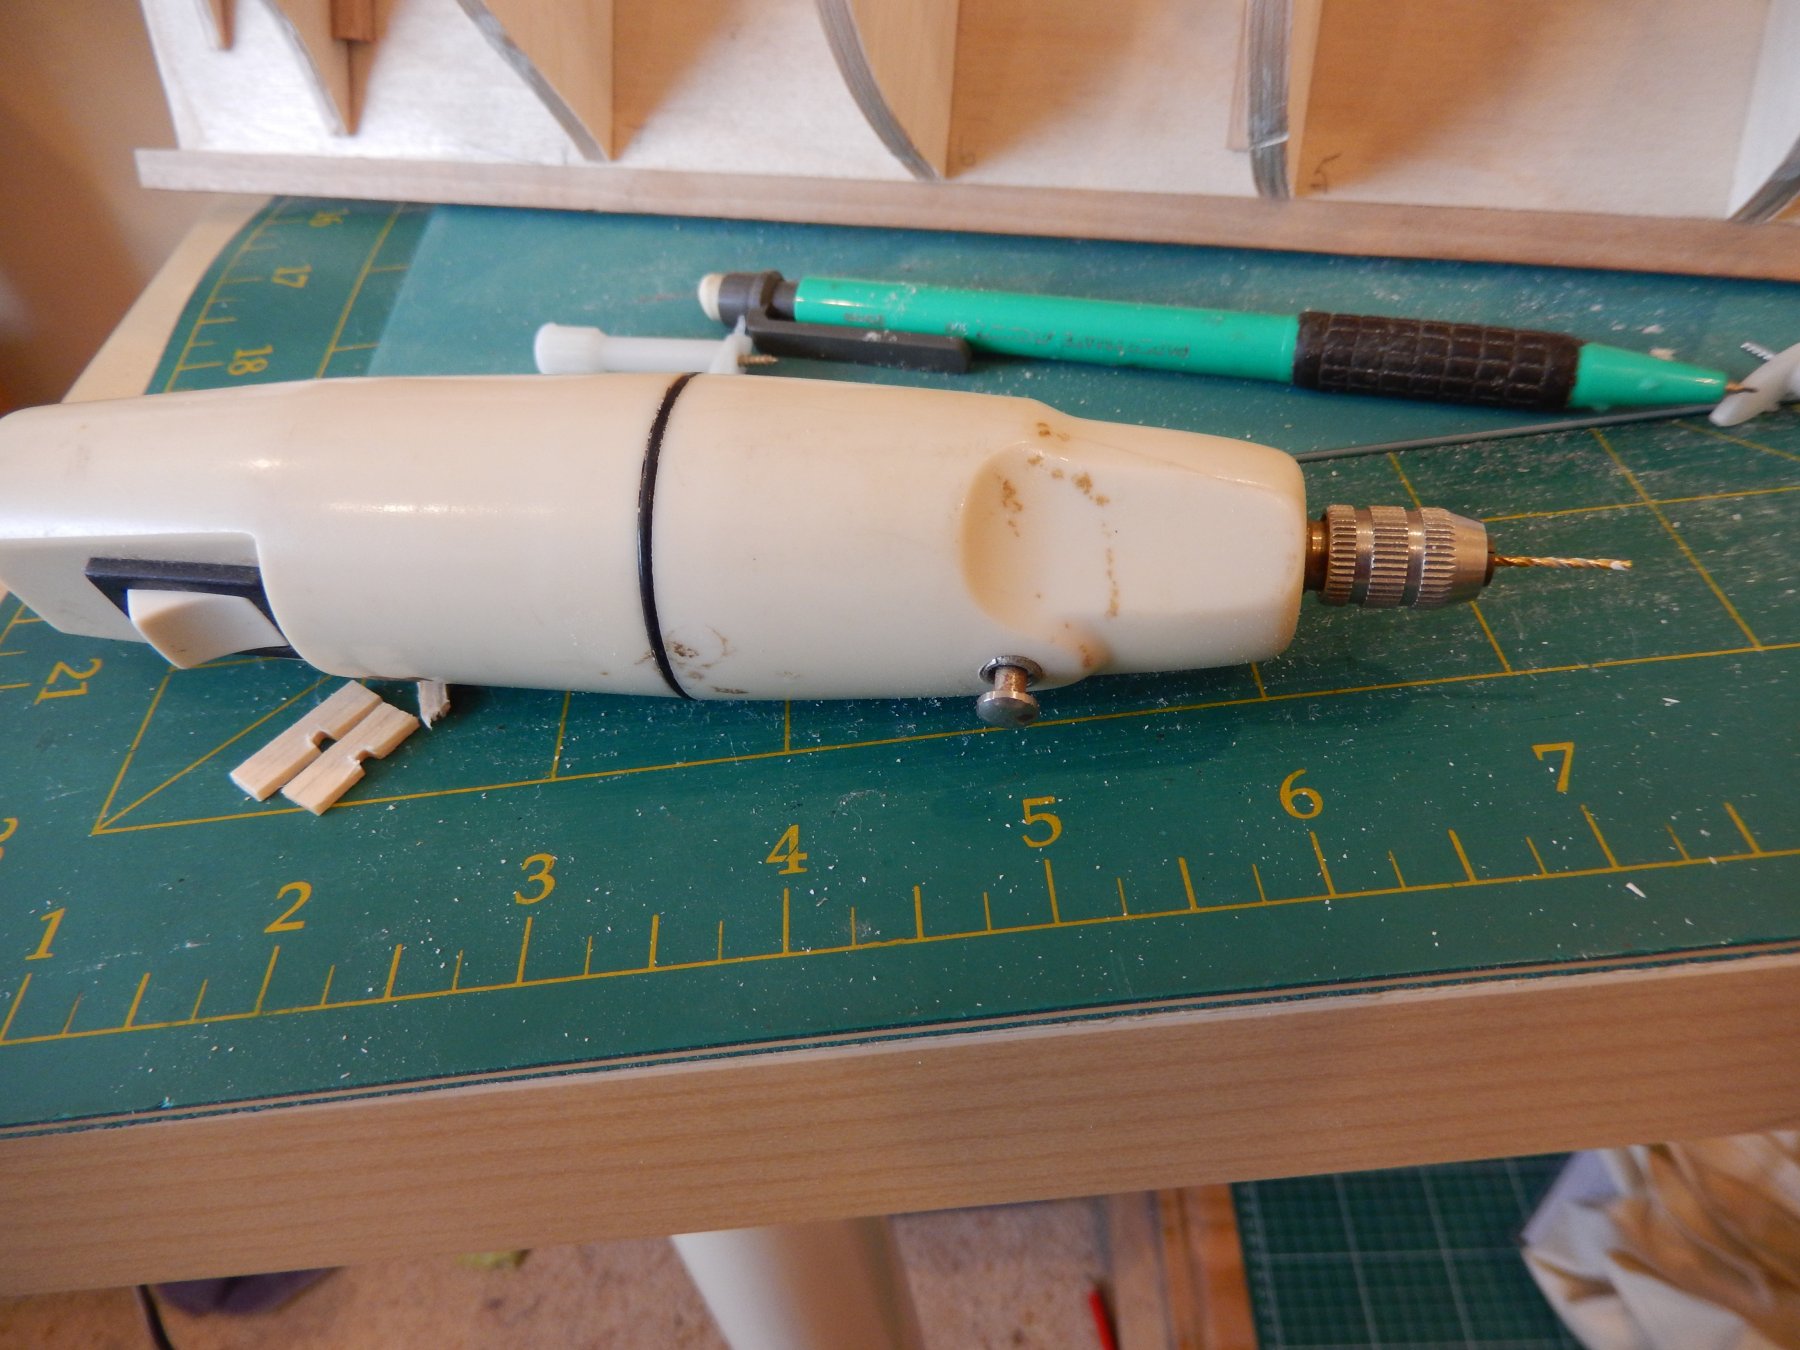
I have, however, made a valuable discovery. At a recent checkup I asked my dentist if there were any old dental drill bits lying around. Were there ever! I am now the proud possessor of around 100 bits of all shapes and sizes. While they mightn't be so good on teeth now, they work a treat on wood. I may also go in for cut-price dentistry.
Below is a very small sample, some of which are ideal for making rabbets. The photo makes these look far larger than they are.

- CaptainSteve, flyer, robdurant and 2 others
-
5
-
Joe and Bob: thanks for your replies. You have given me something to think about.
I have tried quite number of Australian timber suppliers regarding the availability of boxwood (until I began looking at this website, I had never heard of boxwood, and holly would never have occurred to me) - no joy. I am a little hesitant to use the 0.6mm x 4mm tanganyika (would prefer it to be1mm thick - provides a bit more leeway if mistakes are made), but will do so as a last resort. I will do a bit more hunting.
-
Joe and Bob: your substitution of boxwood for the walnut supplied in the kit really worked out well. Unfortunately boxwood appears to be an alien species in Australia. As far as I can see the nearest I can come to it is tanganyika (sp?) which appears to be a light fawn colour. The problem is that is comes either in 4mm x 0.6mm or 5mm x 1mm sizes, rather than the 4mm x 1mm specified in the kit. What sized timber did you end up using?
I am not happy with the walnut supplied. It's very dark indeed, and any tree nailing will not show up well at all.
- Canute and Peter Bloemendaal
-
2
-
-
Joe: I have looked at your Granado. It's very, very well done indeed. I hope you don't mind if I steal shamelessly from your work. Your paint work, in particular is really impressive.
The first planking is taking far longer than I thought. The instructions are particular in specifying PVA for gluing the planks to the bulkheads. Waiting for it to dry properly is a bit frustrating. In previous build I have use medium CA.
While waiting I have been putting together the gun carriages. Taking off the char from the laser cutting is tedious and in particular the char on the wheels is a bit of a pain.
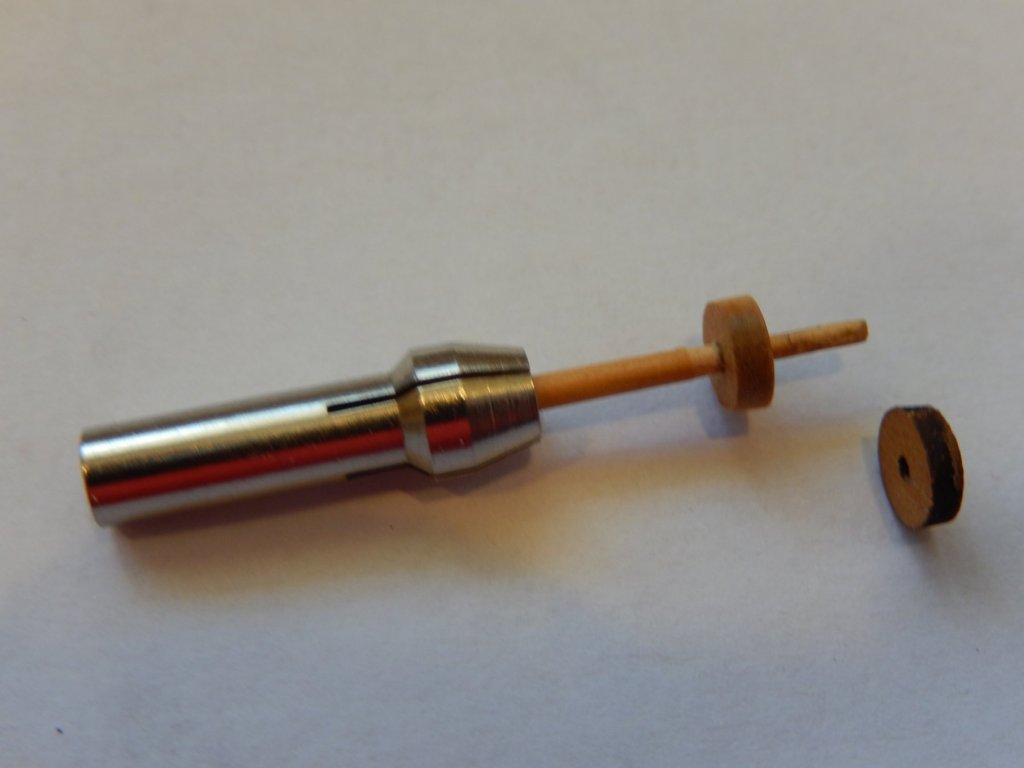
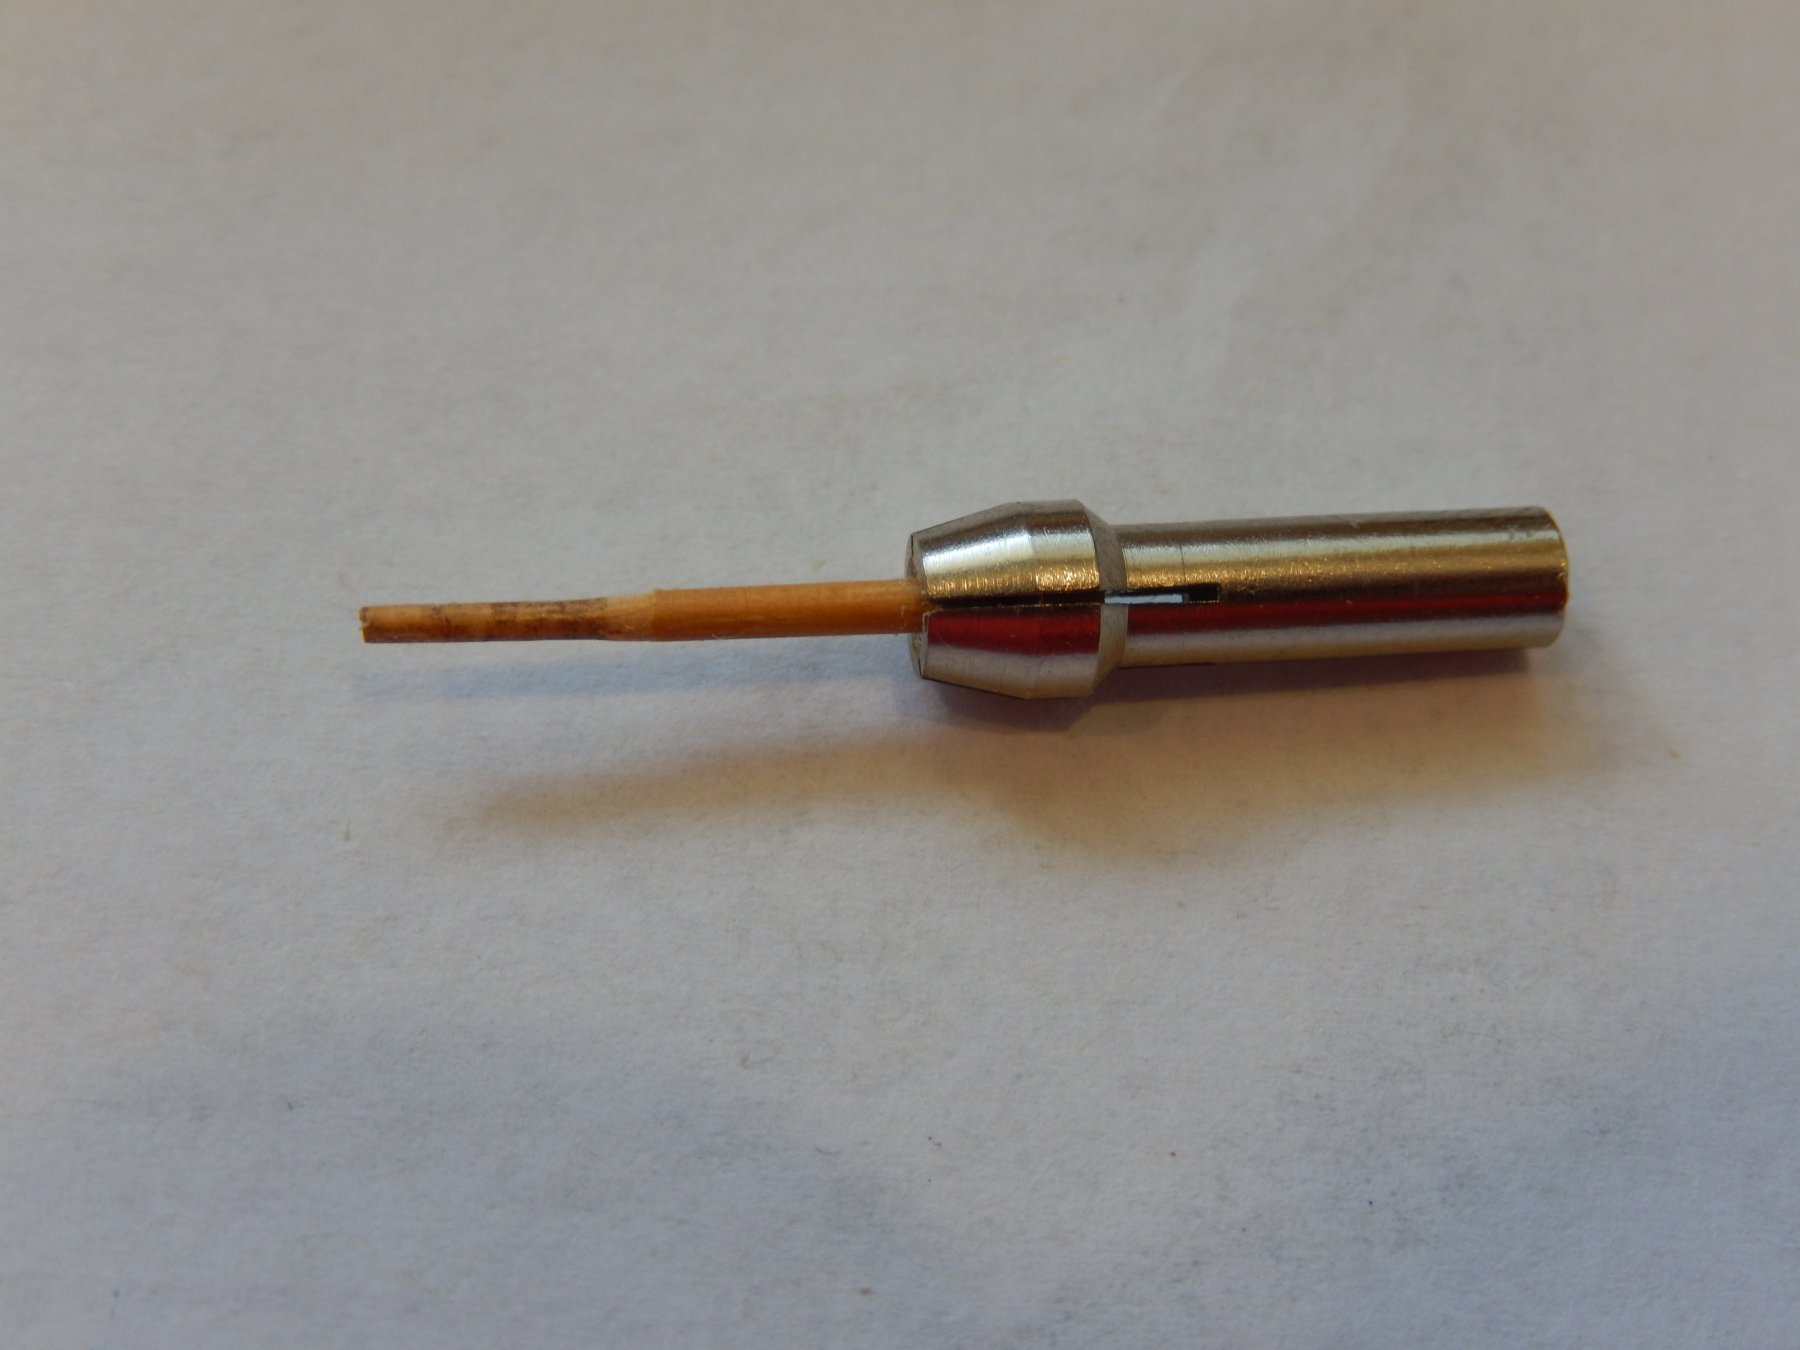
Here is a relatively painless war of 'decharring' the wheels.
I had piece of 2mm dowel that I had tapered to about 1mm. I further reduced the 1mm end so that it fitted the axle hole. The hole and the dowel must be very snug. The dowel and wheel are fitted to the collet of a Dremel or similar - switch on and very lightly apply the turning wheel to some 400 glass paper. The second photo shows the result.

- leginseel, robdurant, Rik Thistle and 4 others
-
7
-
Joe: Whoops - it is Caldercraft! After the time spent with Victory models it's hard to get used to. Sorry about that.
Rob: thanks for your interest. I don't think the difference in scale will prove all that significant. It was though one of the things that attracted me to the model. I found with Vanguard that you could provide more detail than in the plans, though most of it is below deck and is now obscured. At least I know it's there.

Jorgen: I bought them quite some time ago and can't remember where I bought them. That's age for you. I do remember that there was a discussion of this type of thing in the tools section of this site. It would be some years ago though.
Thinks: they may have come from a ship modeling shop in Melbourne in Australia. I do have their website somewhere and I will try to find it. However it will have to wait until next week as I will be away for the next few days.
Peter: good to hear from you.
At the moment I am doing battle with Windows 10 again and agai it is far ahead on points. I'm going to try to upload a couple of photos now. At least as a pessimist I'm rarely disappointed. Well, well. It worked.
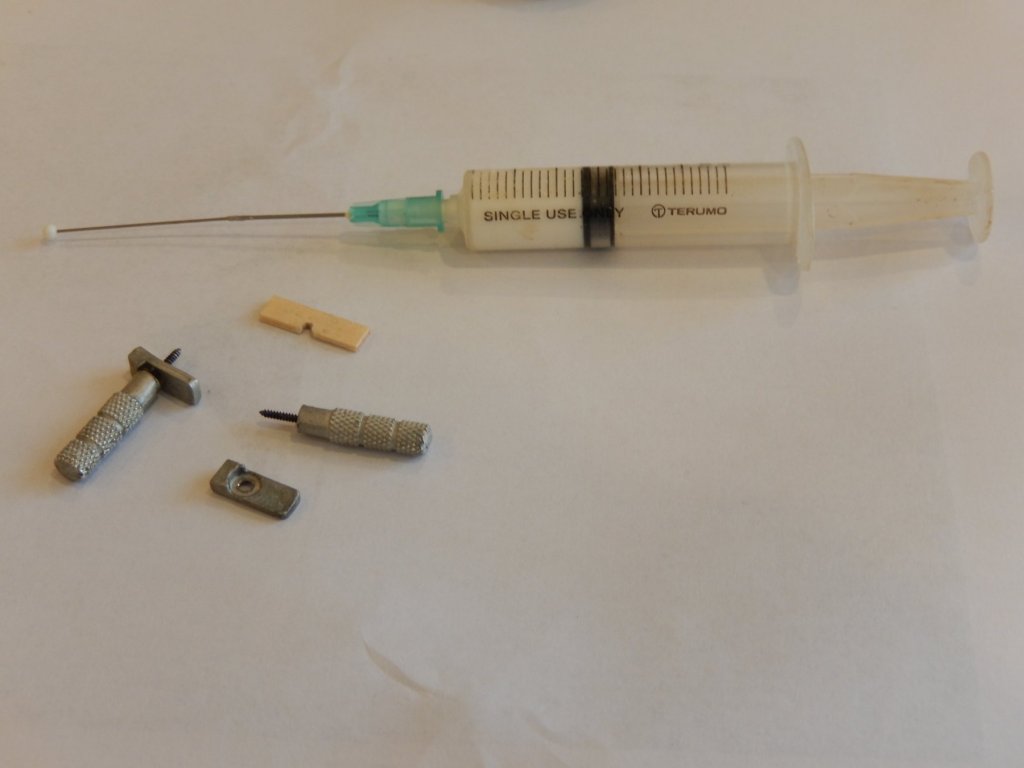
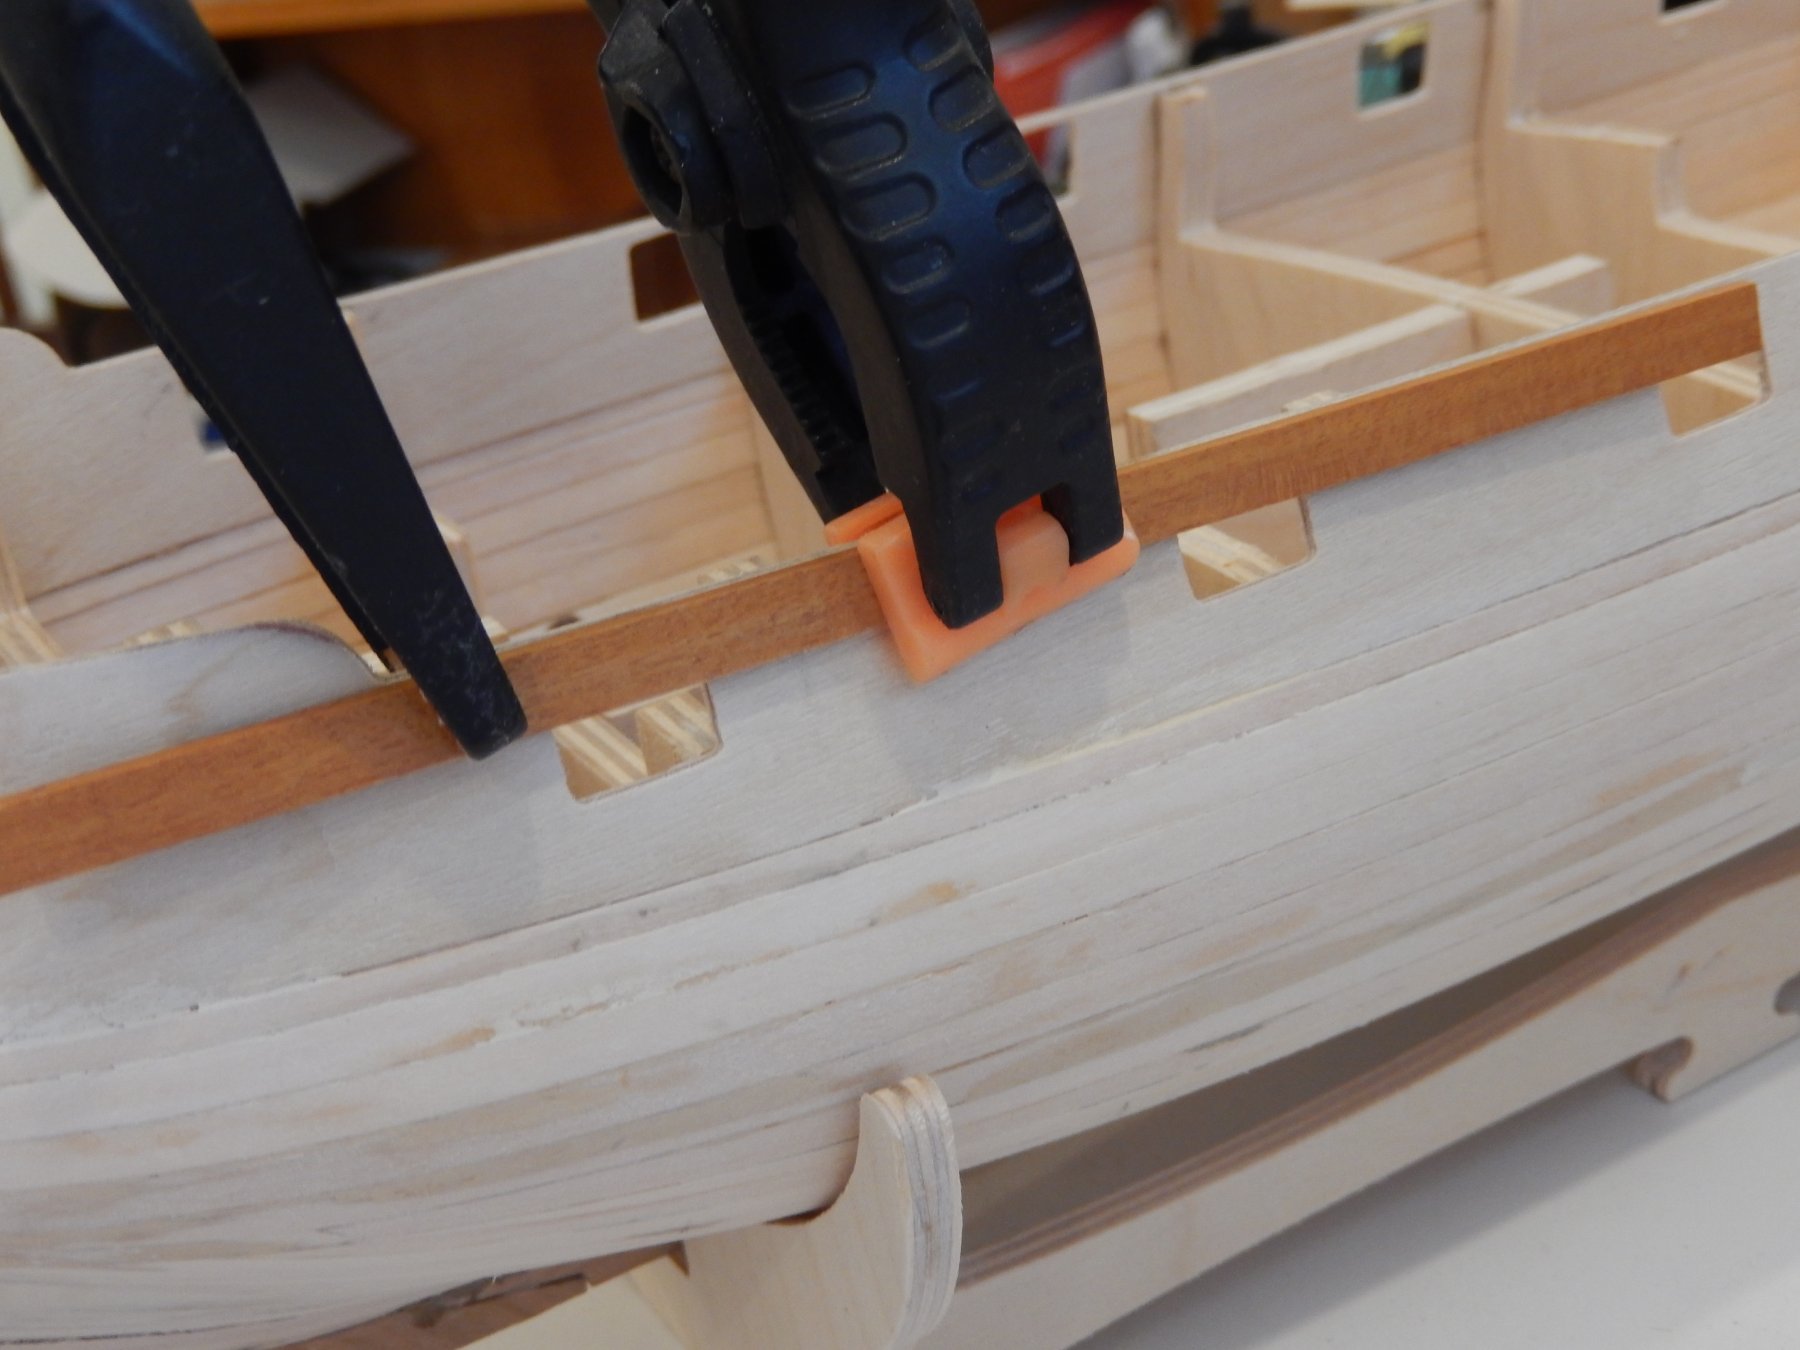
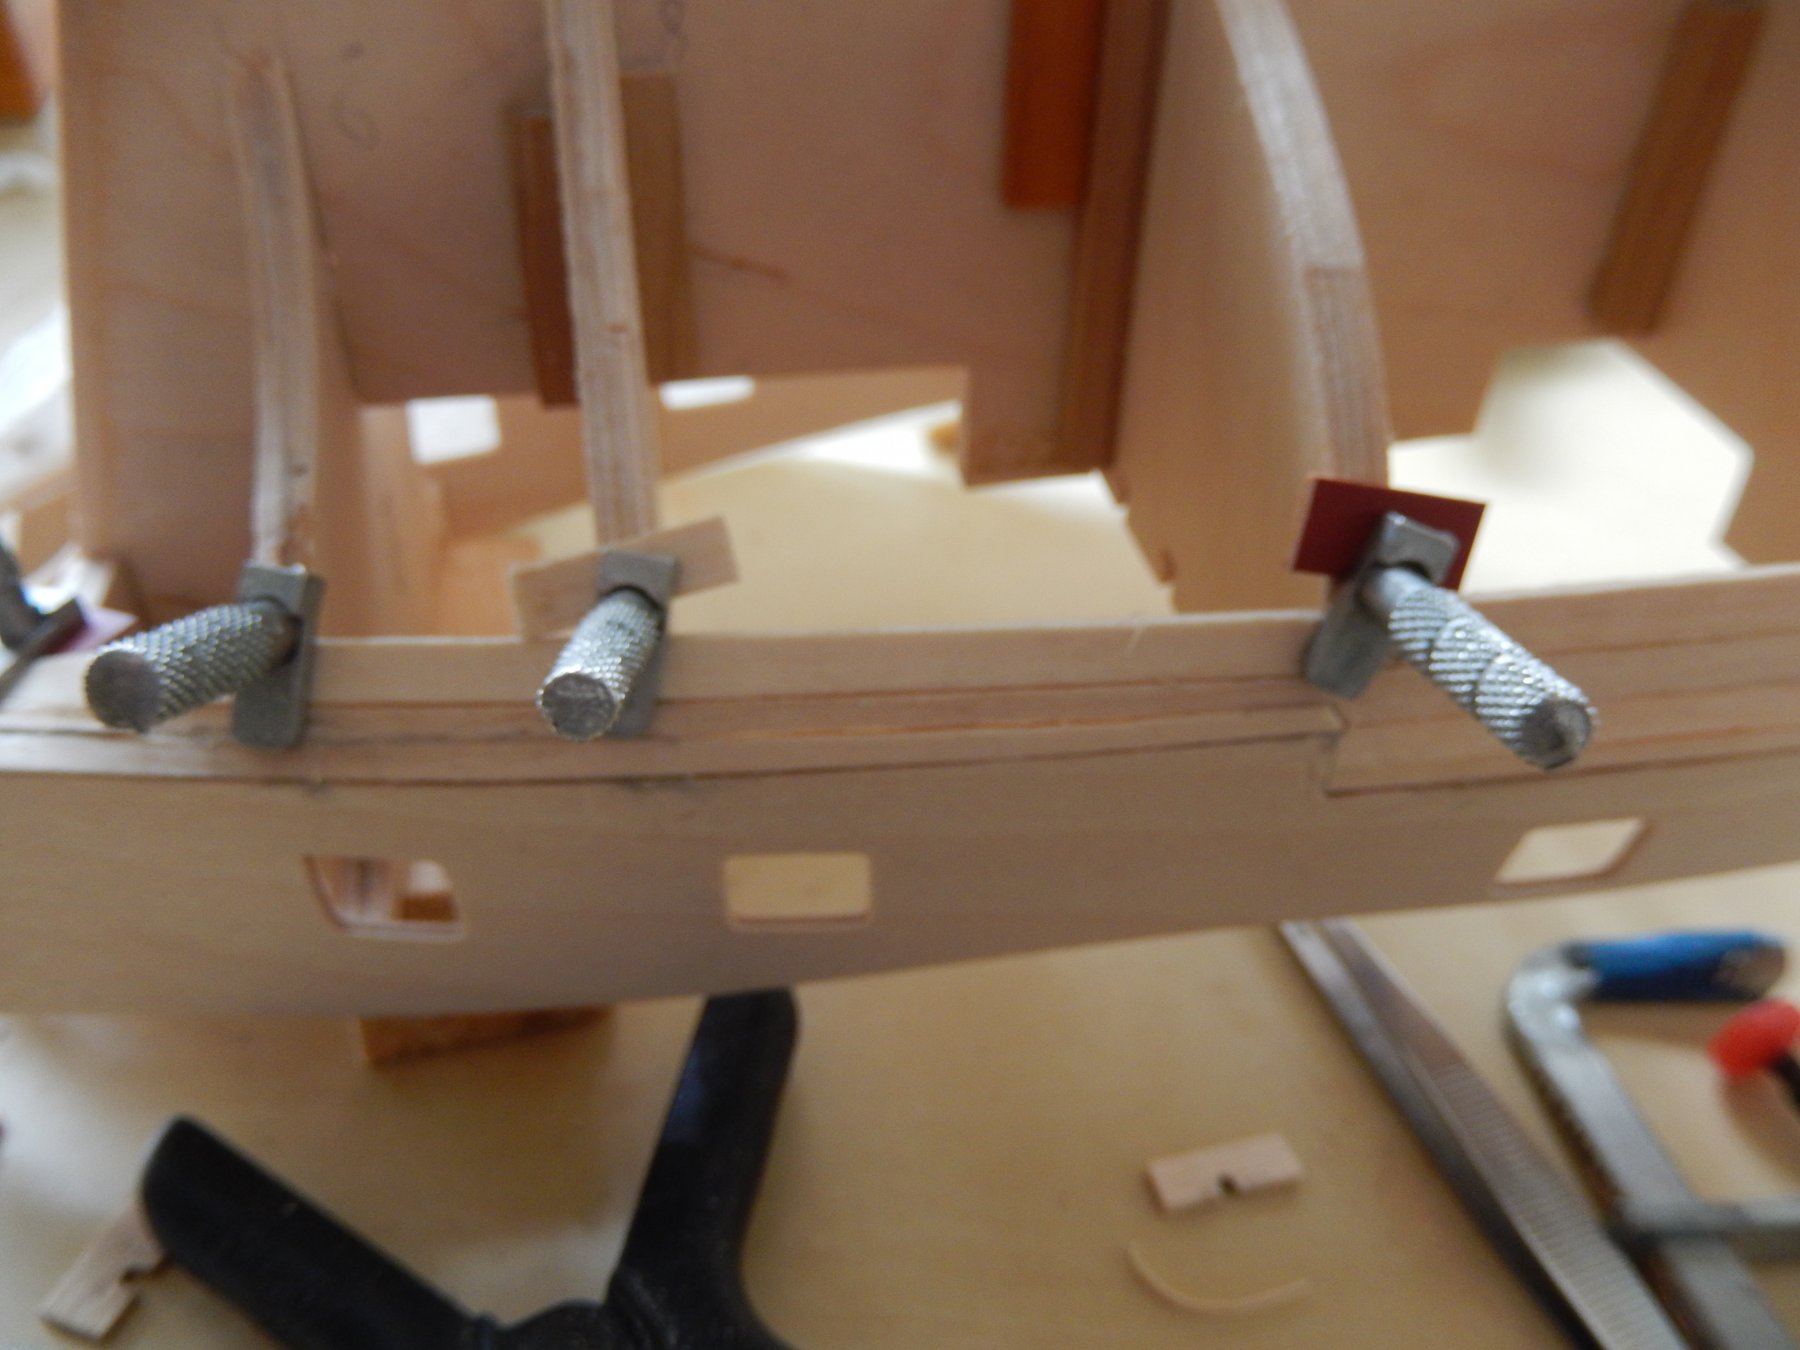
For what it's worth here is a detailed picture of the clamps (they may actually be called something like 'planking screws') and the piece of scrap strip I use to help position the clamps.

I use a standard hypodermic syringe for gluing with PVA. In this country you may buy then at a chemist shop. I then grind off the sharp tip. The glue keeps indefinitely provided you stick a pin in the tip after use.
In the first planking I cut joins at about 45 degrees. - it makes it easy to keep the new plank correctly aligned, especially as the plank is obscured when the clamp is applied.
The plank is glued and clamped ....
-
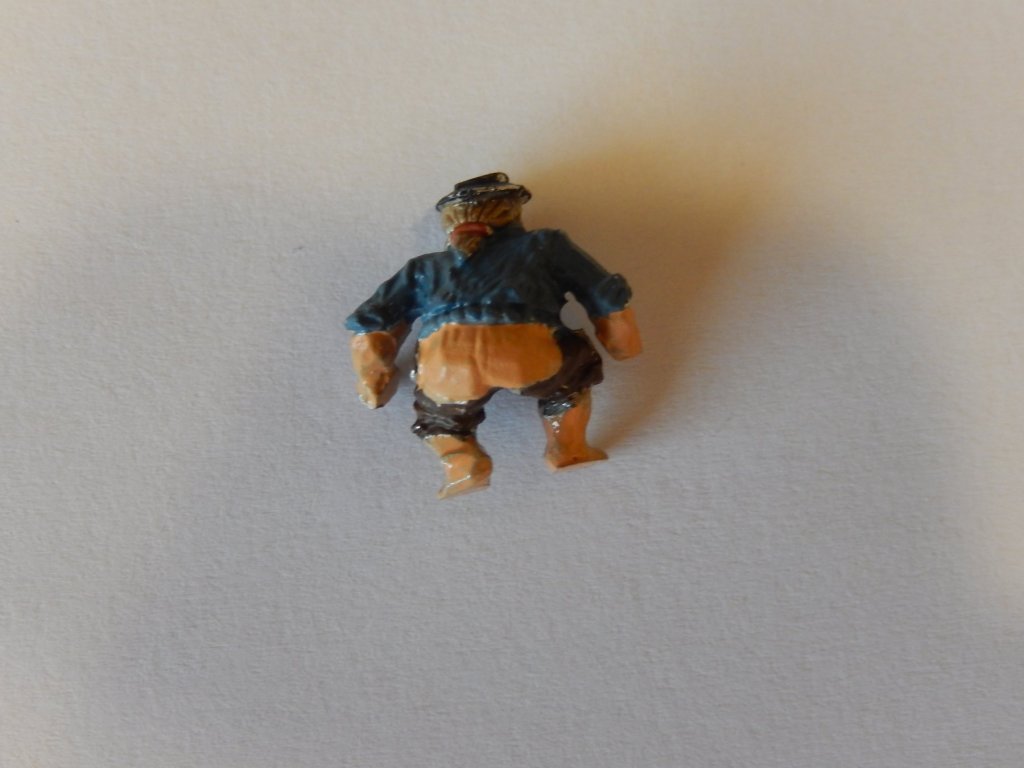
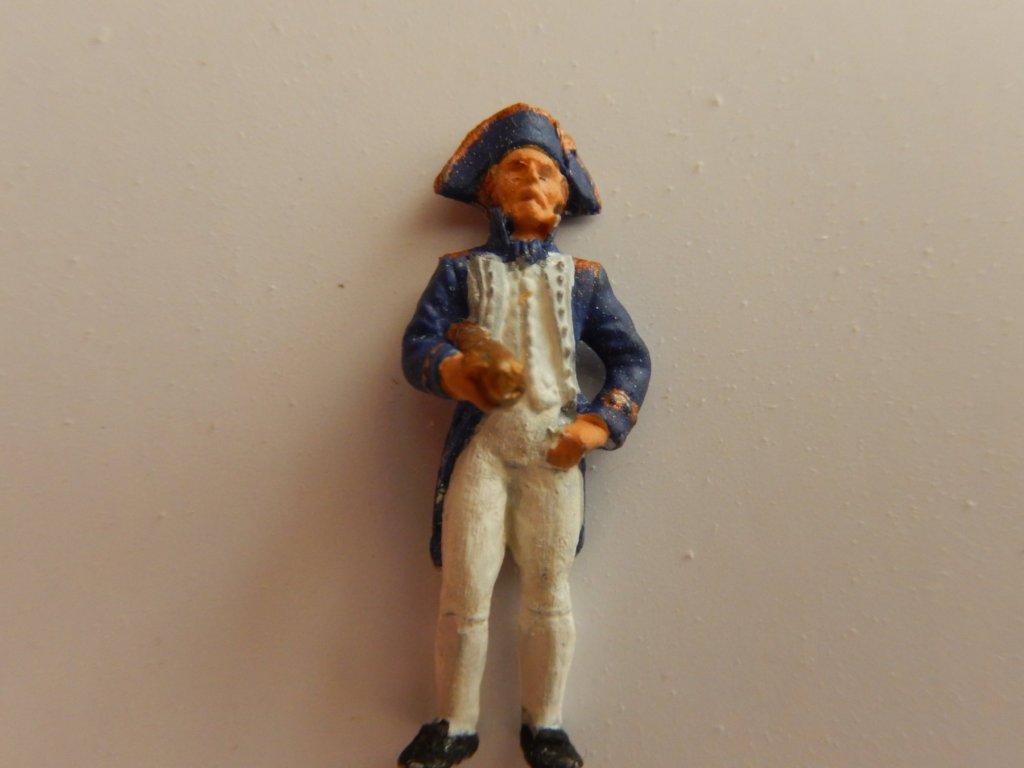
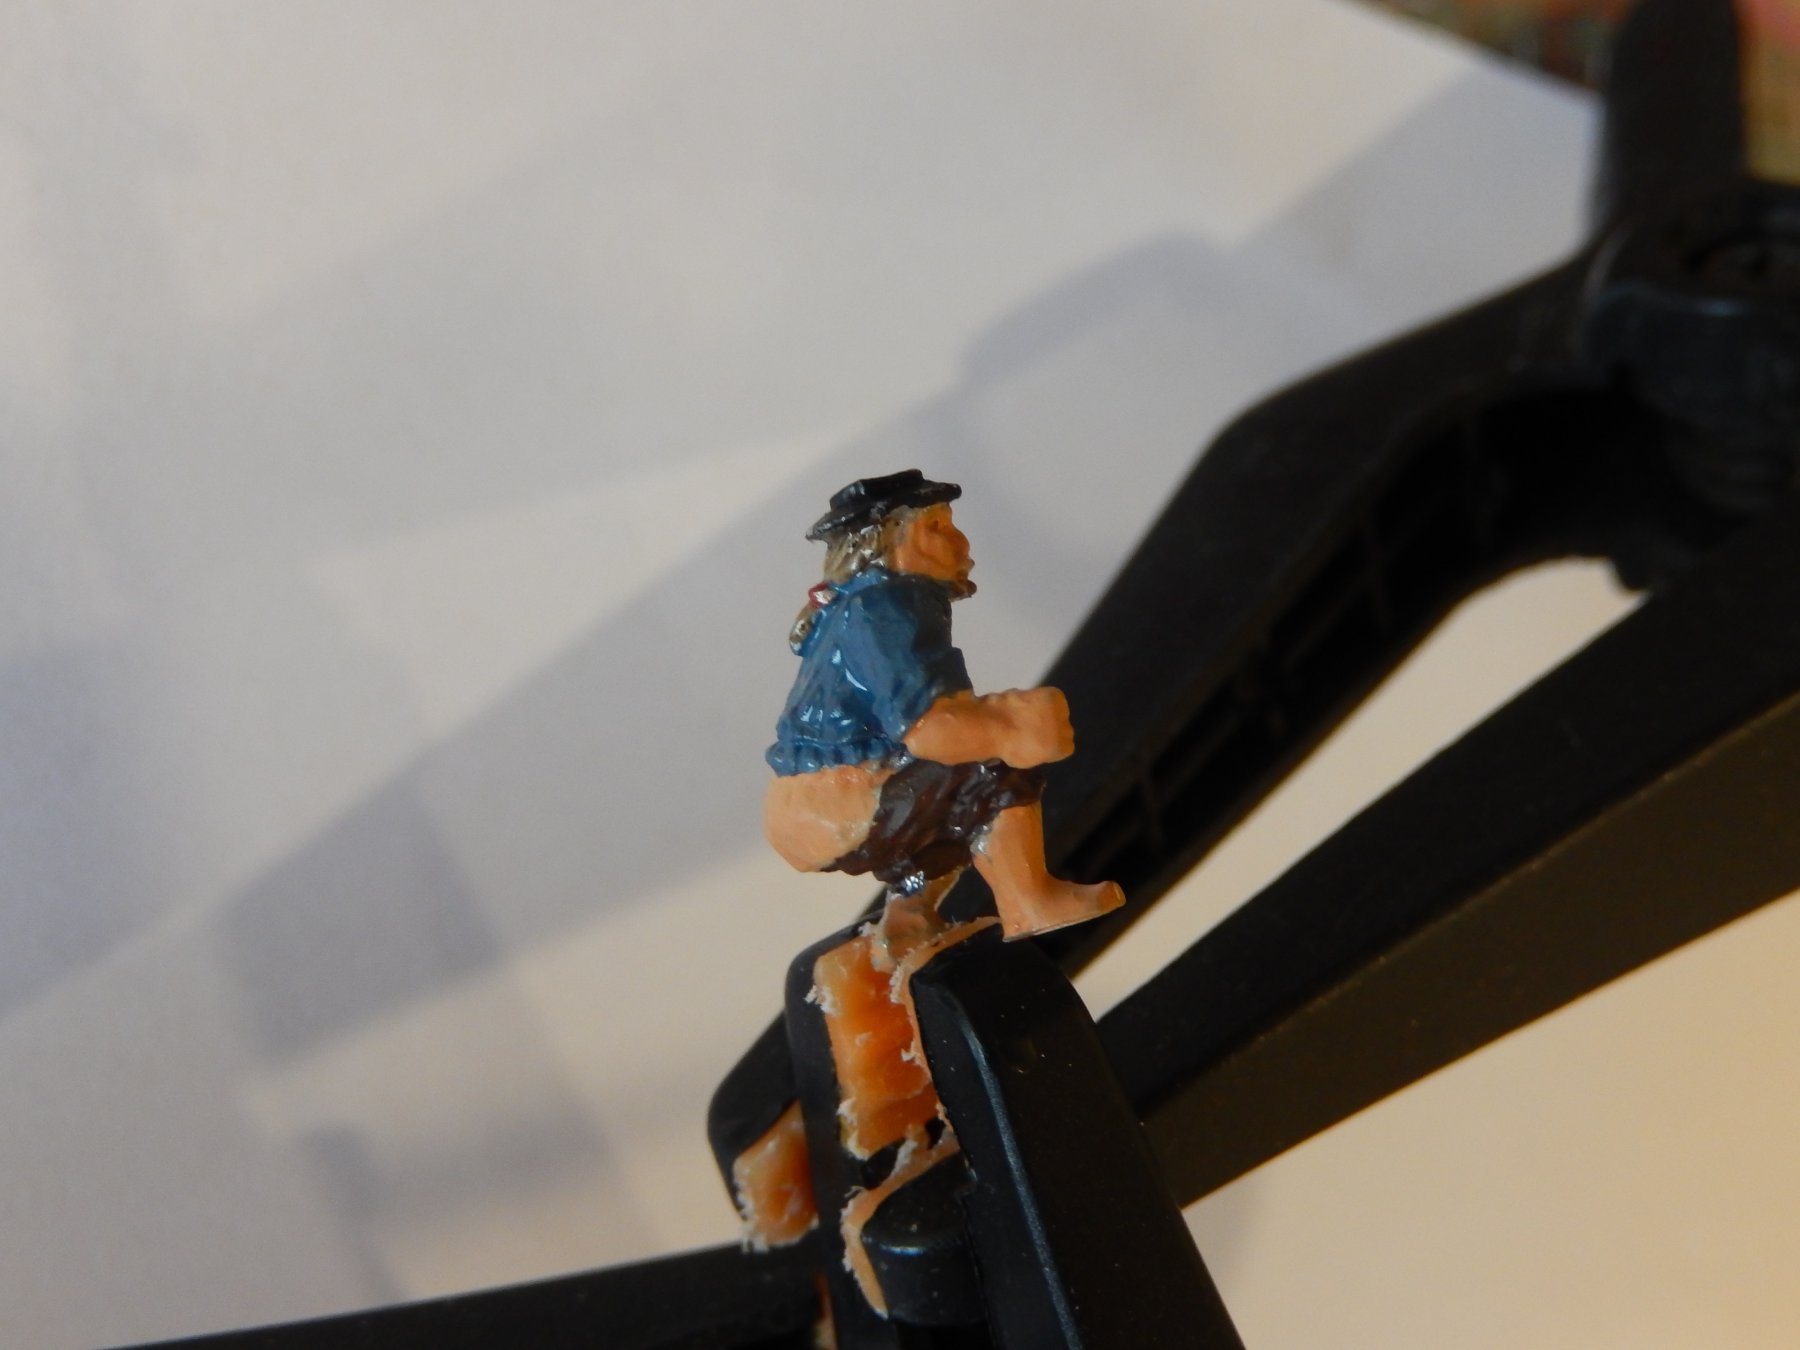
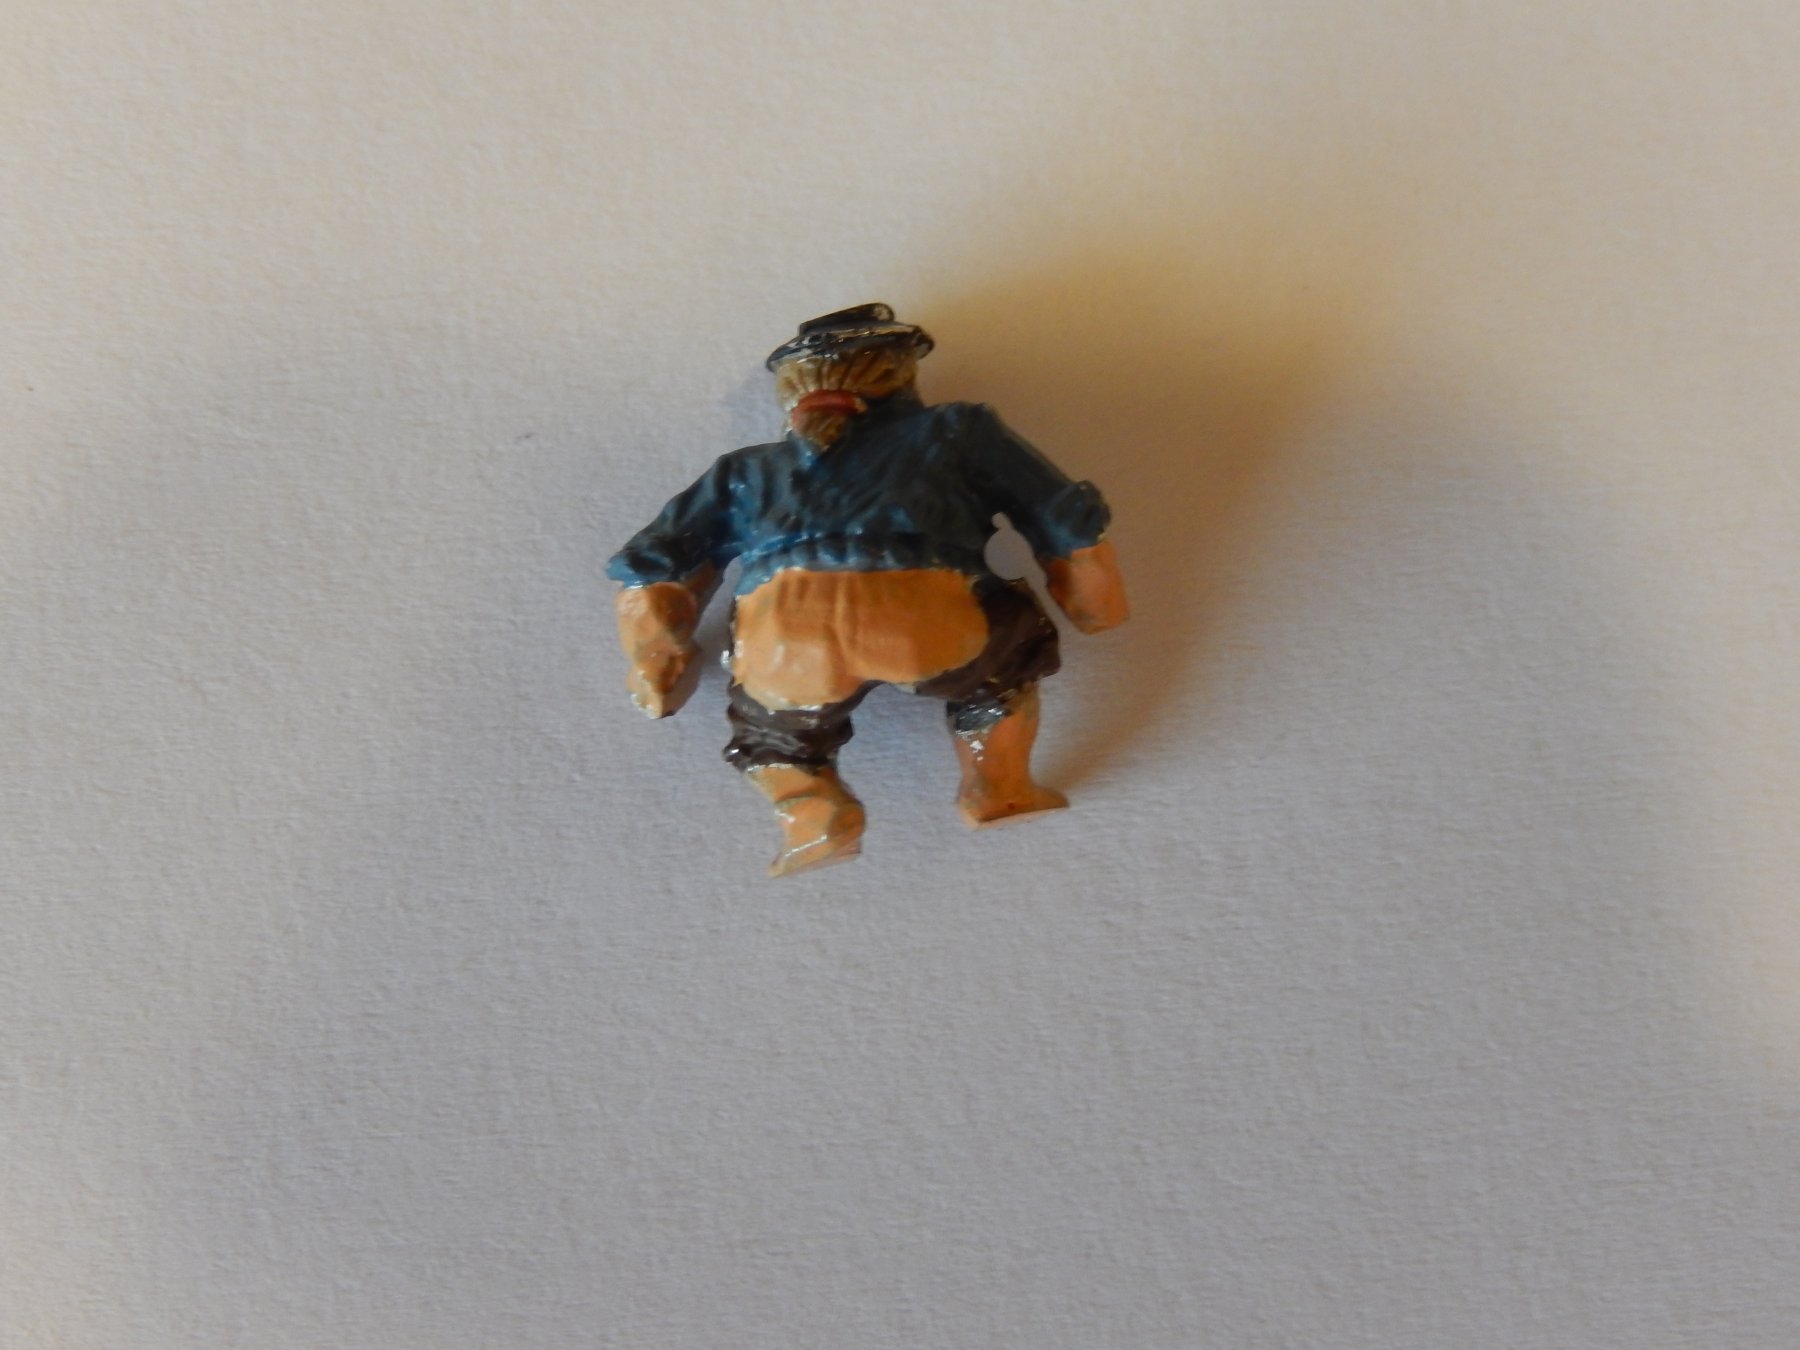
I have finally got around the starting a Granado log for anyone interested. I have just finished painting my small unhappy sailor and will seat him where he belongs - photo to come.
-
Having just finished 5 years or so building Amati's Vangard, I have decided to do something quite different: the bomb vessel Granado. There are a number of good logs for Granado on this website and I don't know if I can add much to them, but you never know.
Most of the materials in the kit seem to be of good quality, though I am working on the first planking now and have found the wood strip splintery and cross-grained. The gun carriages could be improved and consequently I have substituted Syren carriages which are excellent though rather fiddly to put together (photos in my vanguard log).
Here a few photos of the very beginning of the building process. I hope to have something a little more interesting soon.
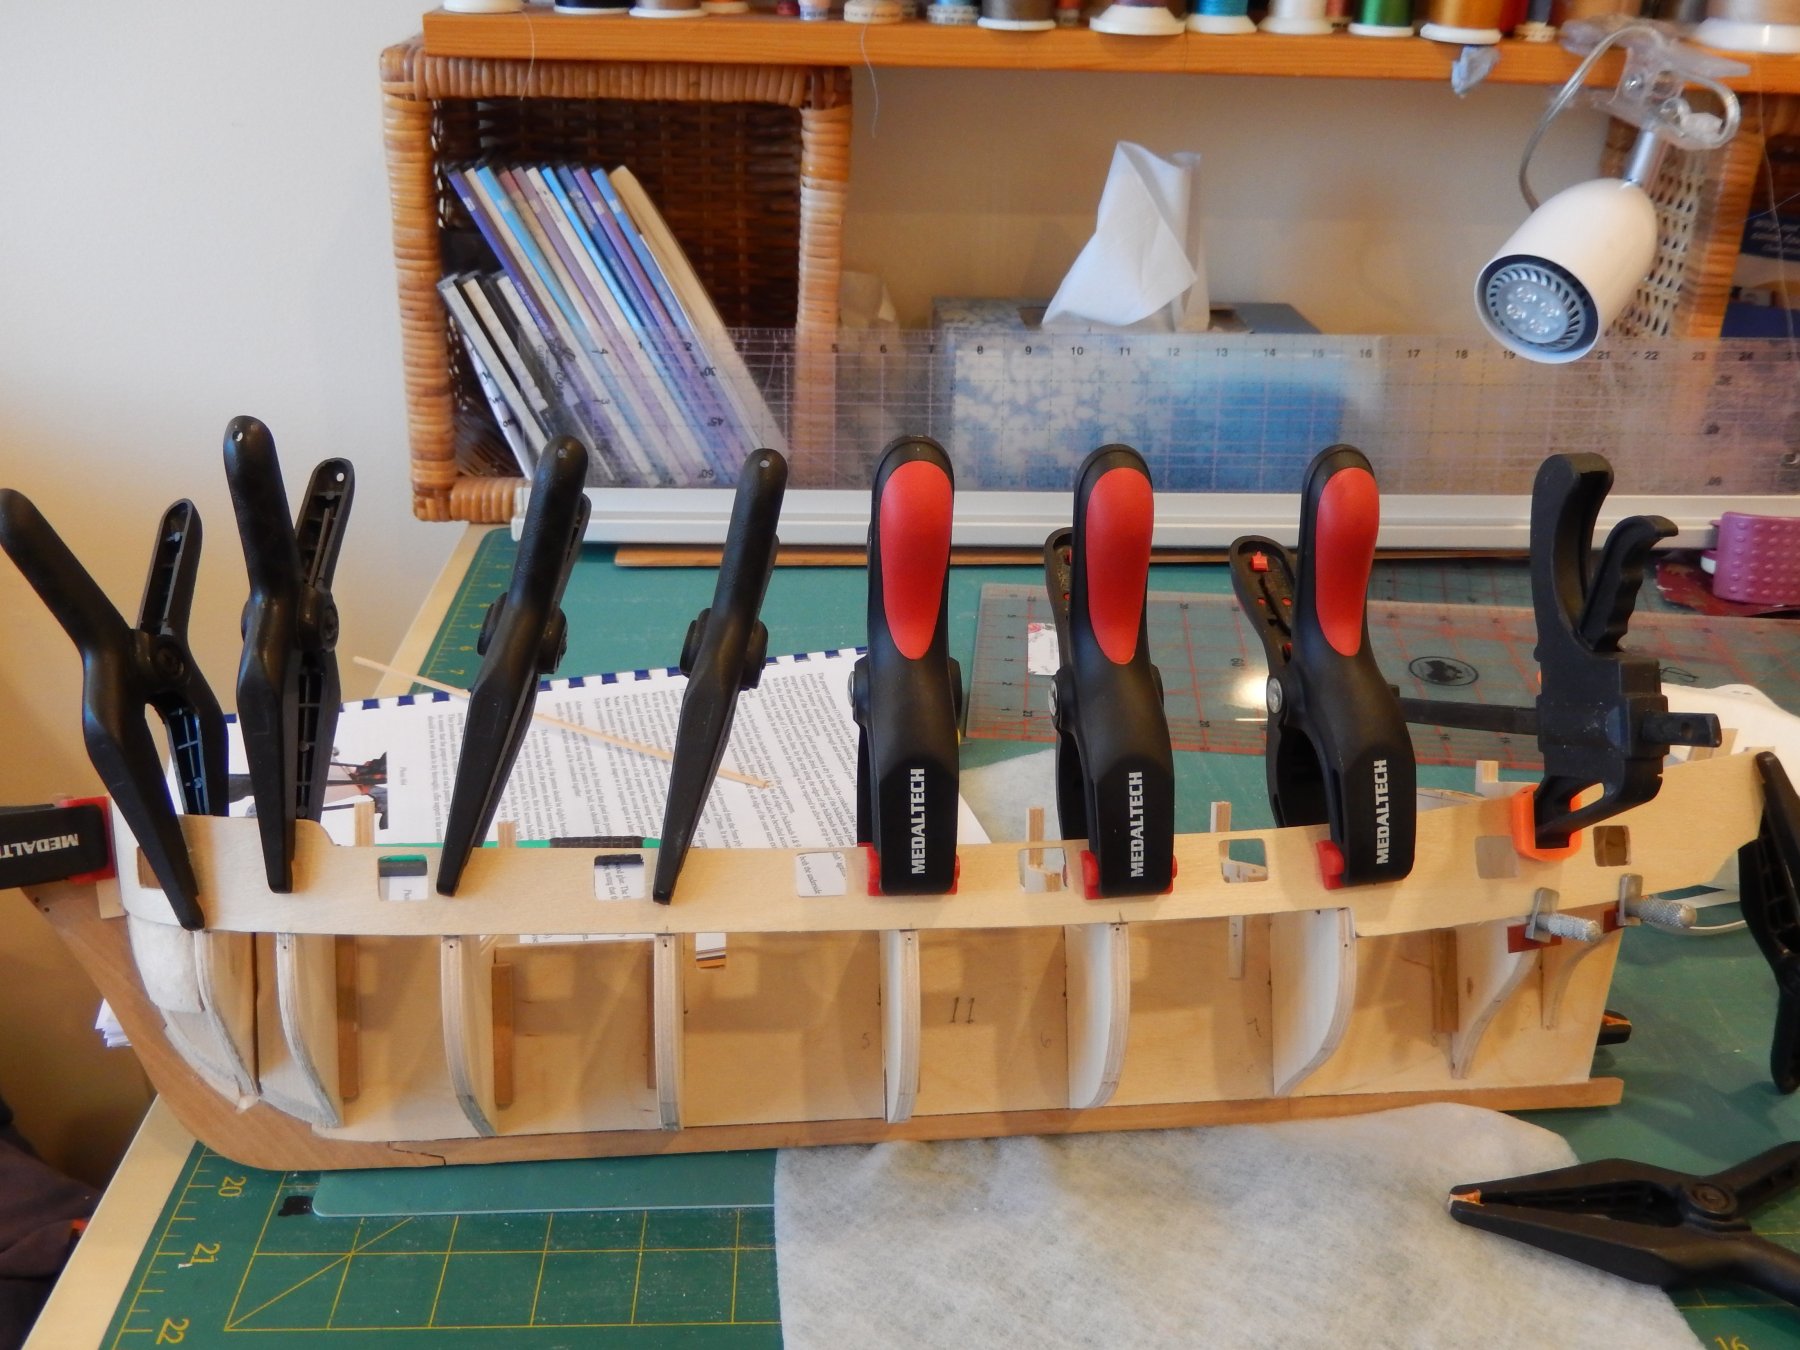
Having I hope, installed the bulkheads squarely The gunport patterns are next having given then a good soaking in warm water. The red-handled clamps are particulary strong and were necessary to made the pattern conform with the curved bulkheads

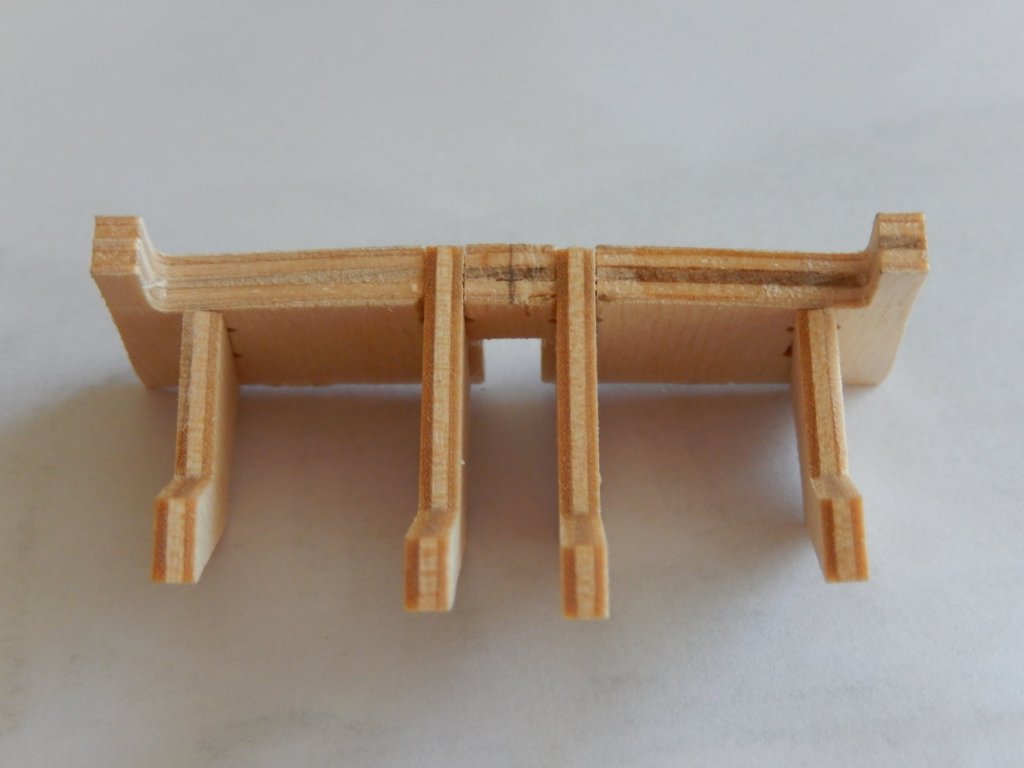
Bulkhead 10 is rather more complicated than the rest. It has 4 extensions, two of which are at an angle, and is best completed off the model.
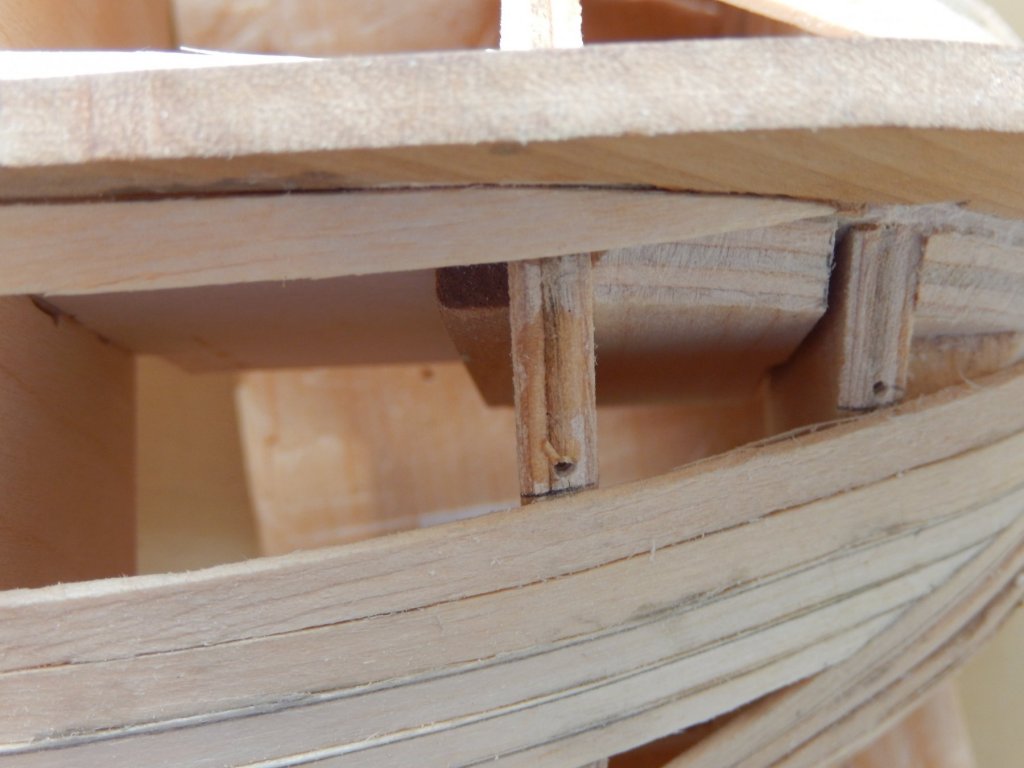
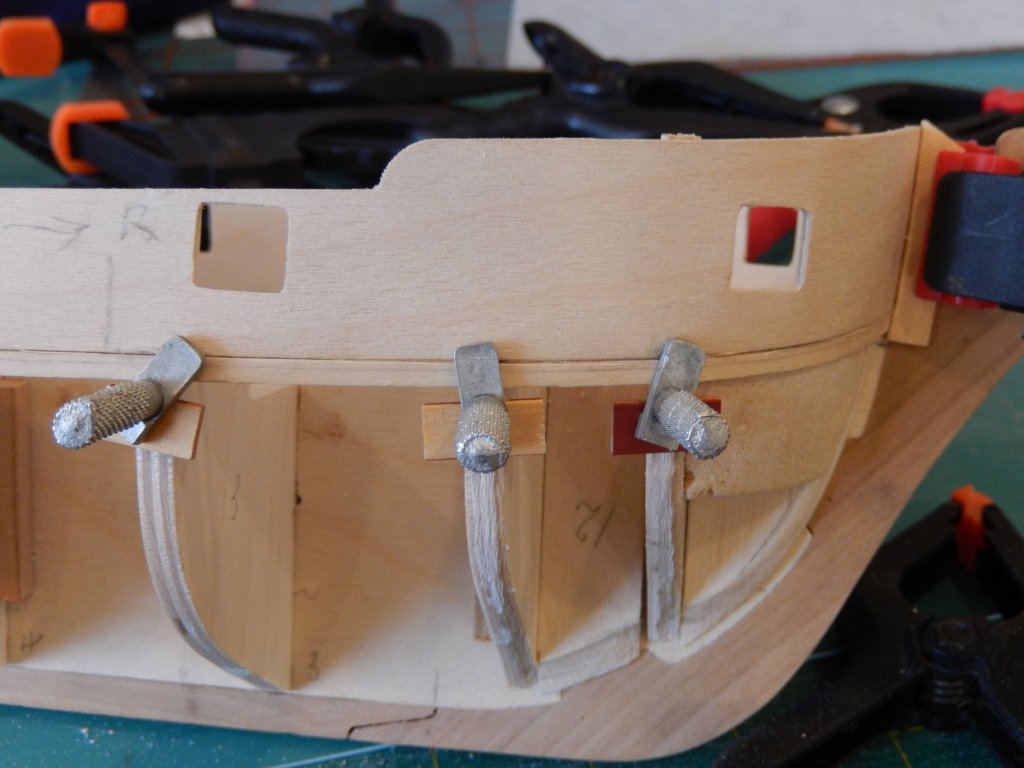
Here is the bow. I have installed a balsa guides to help shape the wood strip around the bow. The screw-in clamps I find a far better than nailing the strip to the bulkeads.
I have tried to upload a couple of other shots, but for some reason the uploads failed.
I find that I have photographed one of the small drills I use mostly in preference to my Dremel. I have two of them and they save time and annoyance switching tools. Also shown are couple of the small pieces of wood strip with notches which help position the screw in clamps.

-
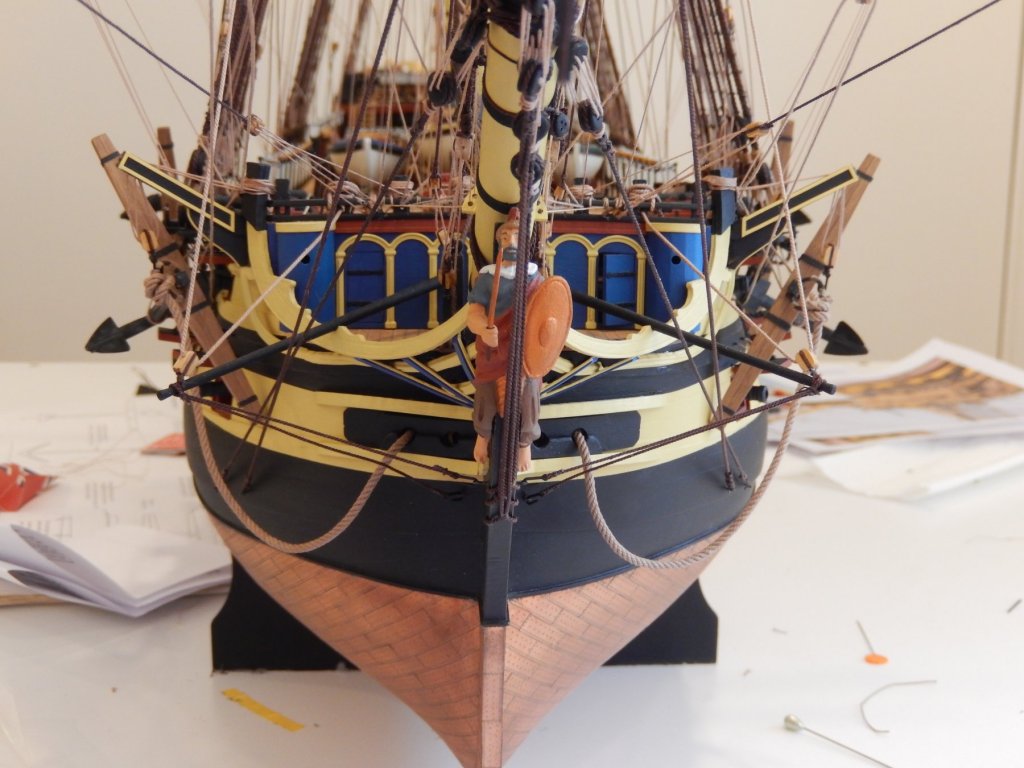
Alan: here are a couple of photos that may help you with the 'seat of ease' issue. My small, rather unhappy sailor needs a bit more work, but that will have to wait a little. He does, however look better in the flesh (as it were) than the photos suggest. This week is rather busy and his final paint job will have to wait for the new year. I hope it gives you the idea though - and what a great idea
 .
.
For every one who has looked at this log, or may in the future, a happy Christmas and a happy and healthy new year.
In the new year I will start a Granado log for those who may be interested.

-
Alan; I have found a small sailor who is likely to be just about right for the seat of ease. He has the right posture and certainly looks to be making an effort.
 I'm painting him at the moment and will post a photo when finished.
Here is what is likely to be the last Vanguard photo - the hoists for the small boats.

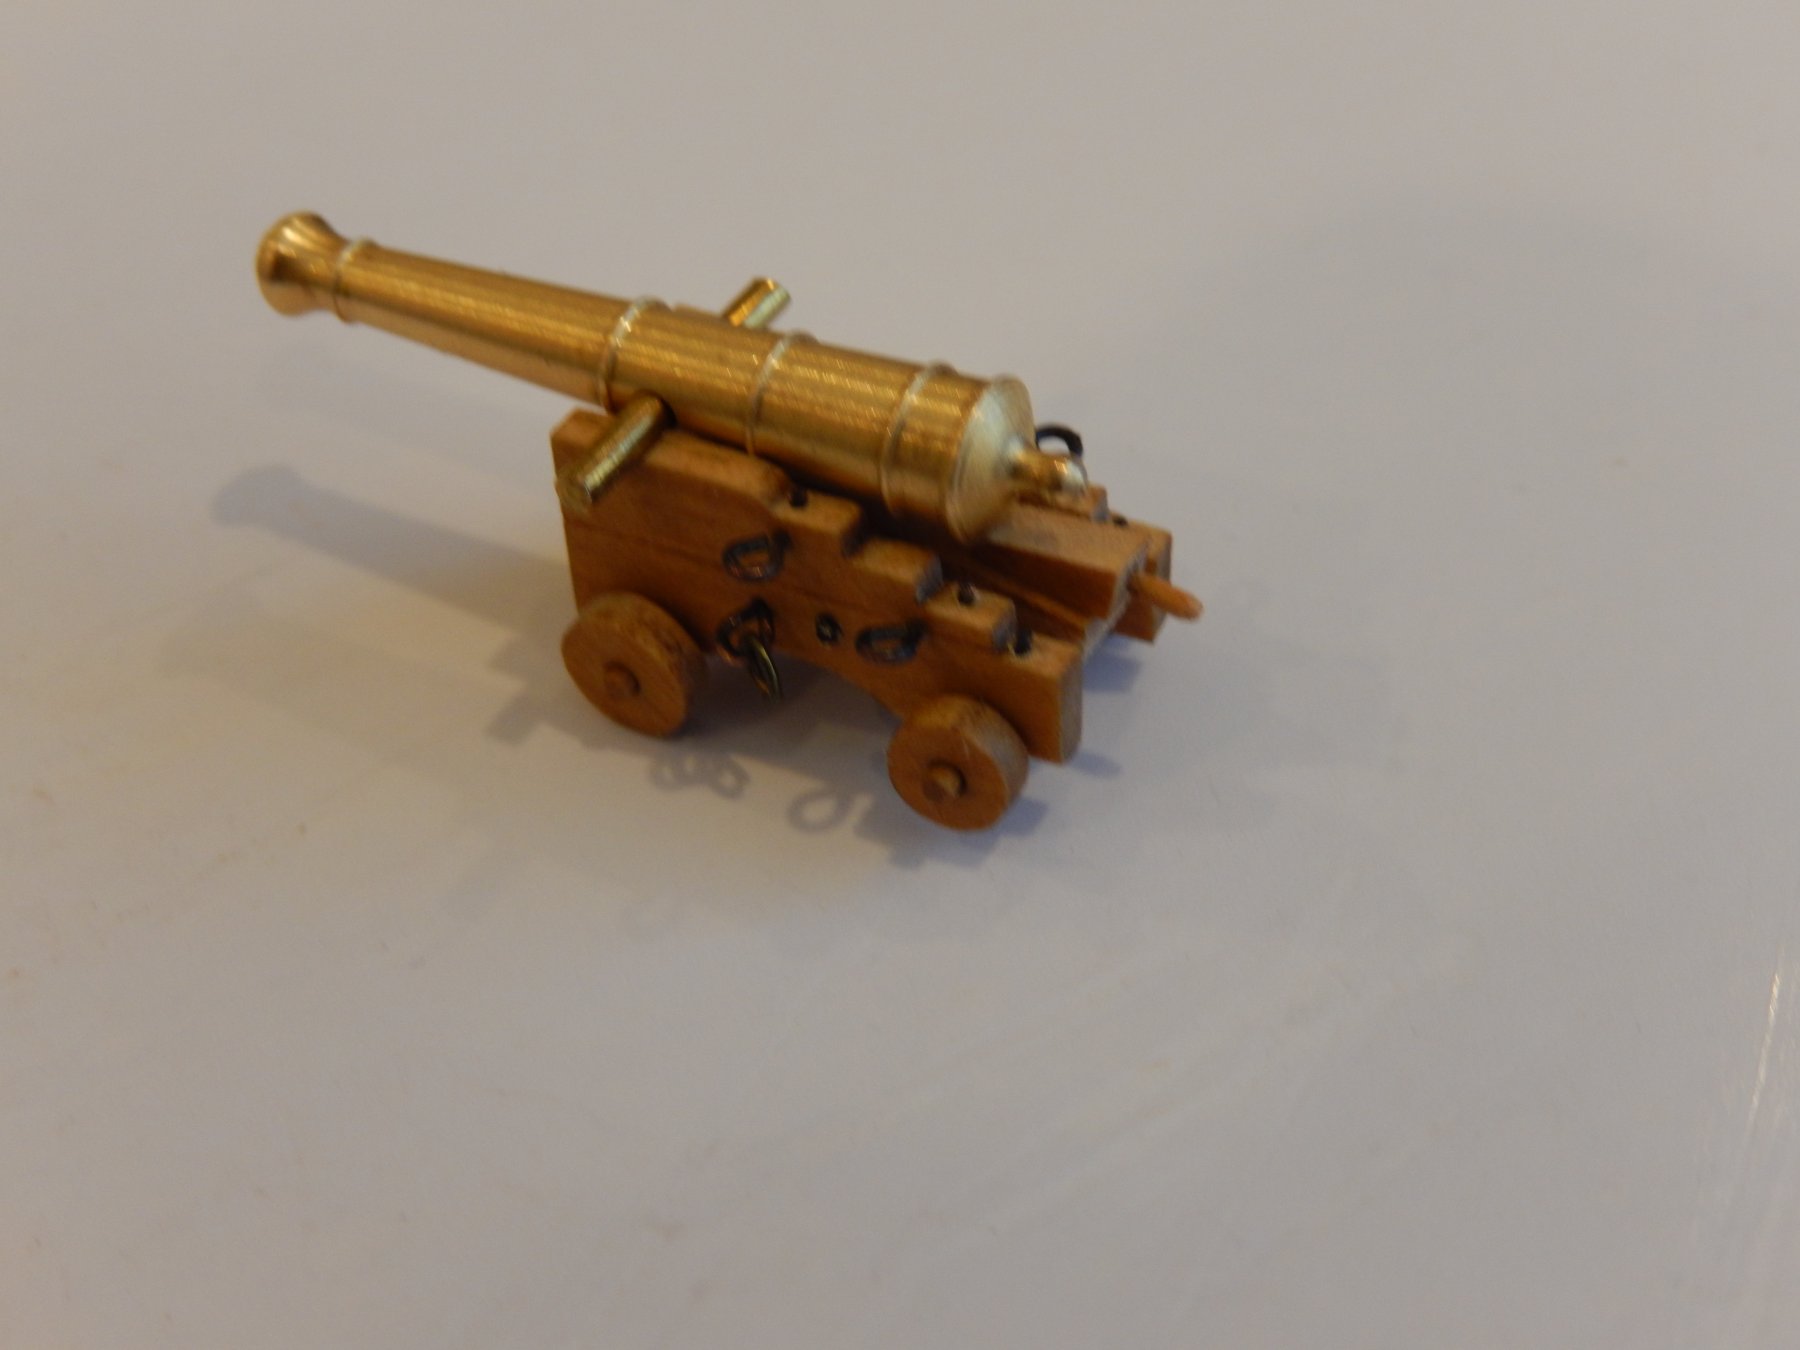
Peter. I have received the Syren gun carriages and for your information have put together the Syren and Caldercraft carriages for Granado. Obviously the barrel needs to be blackened and the whole thing will be coated with polyurethane. I'm quite pleased with the way it has turned out, though there is of course a down-side. Removing the charred wood from the laser-cut parts is tedious and time-consuming, and assembly is quite fiddly. Including time to correct a silly mistake It, took a day more or less for the result you see. Only nine more to do - very gradually.


- AON, Altduck, Old Collingwood and 1 other
-
4
-
Rob. Thanks for your kind remarks. I'm glad Nelson's eye patch is a myth. Painting one onto my small sailor doesn'y bear thinking about.
Alan. The seat of ease is genius. I wish I had thought of it. Getting a figure with his pants around his ankles may be a problem though.
Peter. You're right. The really good thing about this site and this hobby is the contact made with people who, in my experience, are invariably helpful and encouraging. Chatting is a good idea.
Incidentally, I realised this morning at 3.08, that I have not put on the lines to lift the ship's boats. I'm going to have to get rid of that digital clock.
-
I suppose I will have to get around to putting 'finished' on this log. I will spend some time in January among other things, trying make an ensign thanks to some information Alan (aon) kindly sent me. As we,ll I have a couple of tiny sailors who I may put on the model to illustrate scale. I guess the poop deck is the appropriate place, or else the fore deck looking out at the enemy.
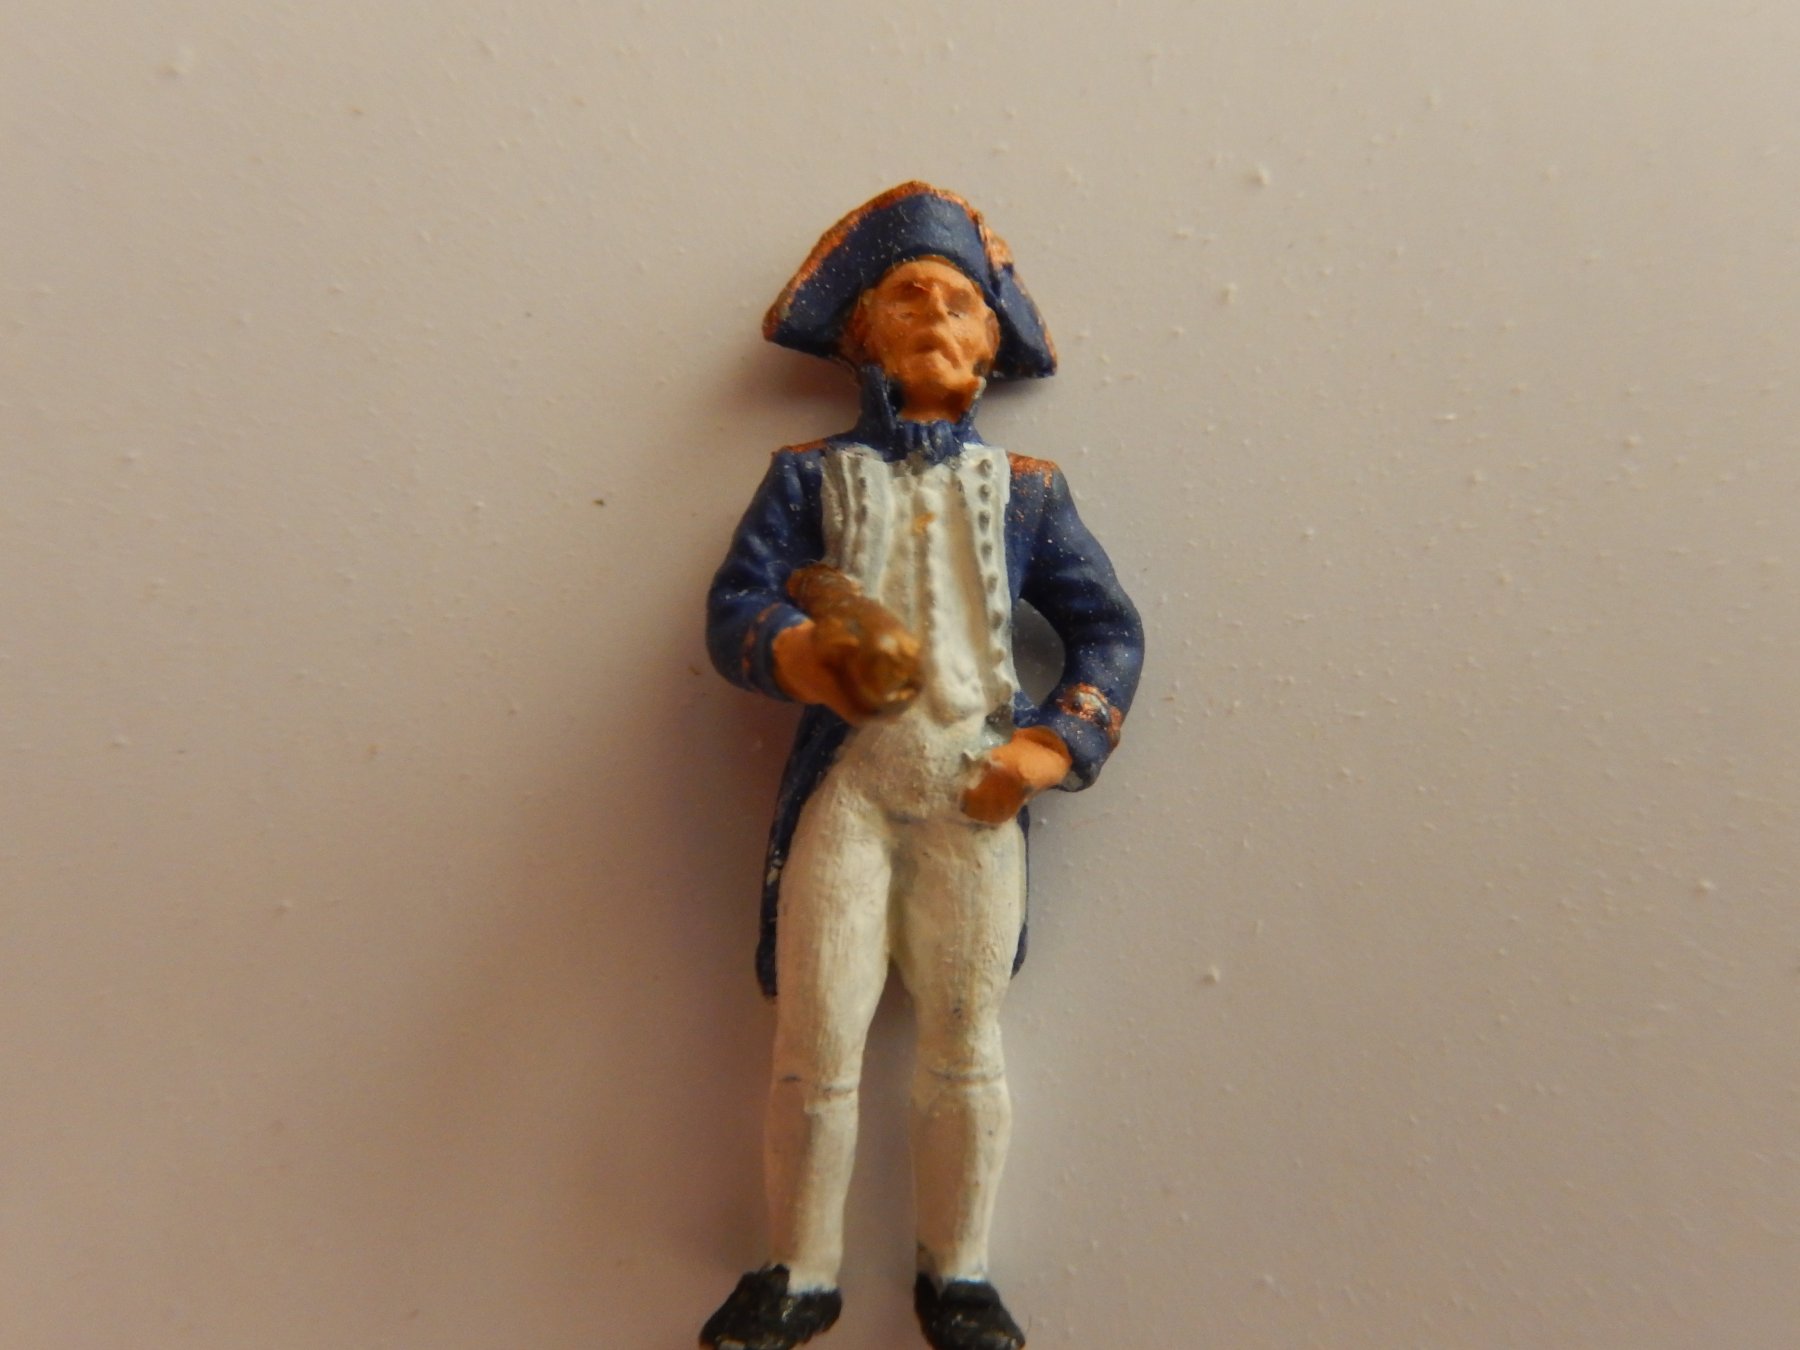
Here is Nelson, though I guess I need to give him an eye patch. He certainly looks a bit grim, though as he's only 22mm high it's understandable.
I am undecided about whether to do a log for the Granado. There are already two or three excellent logs already and I don't know that I can add much to them.
- GrantGoodale and mort stoll
-
2
-
-
Thank you to all those who posted 'likes' throughout the build. It certainly does provide (sometimes much needed) encouragement. And thank you to those kind people who posted their congratulations:
robdurant
martin
Nigel
zappto
Peter* and
Mort
It's very much appreciated.
There are a number of people who helped greatly in solving particular problems. If I tried to name them I would almost certainly miss someone. So I won't - but you know who you are.
")
* Peter - having gone to the trouble of replacing the Granado gun carriages - I ended up ordering the wrong size - so that's $50 down the loo. I would rather have spent it on the bottle of champagne (well actually I spent it anyway).
 I certainly haven't started Granado on the right foot. When I get the replacements I'll post some photos comparing the kit carriages and those from Syren for your info'.
-
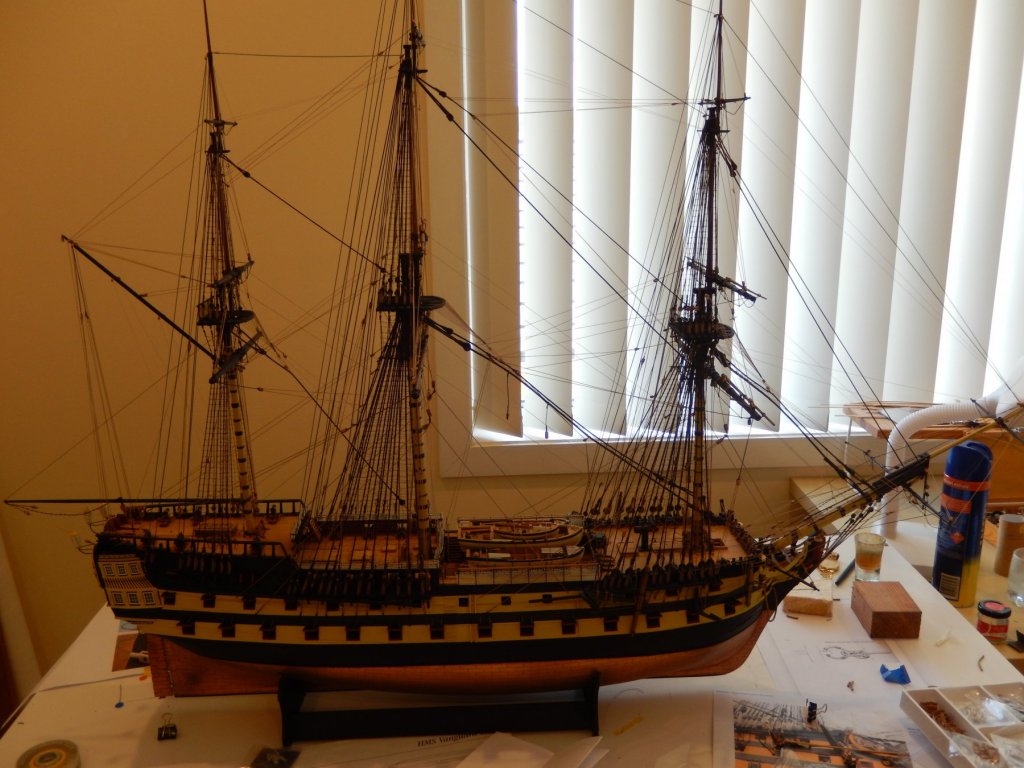
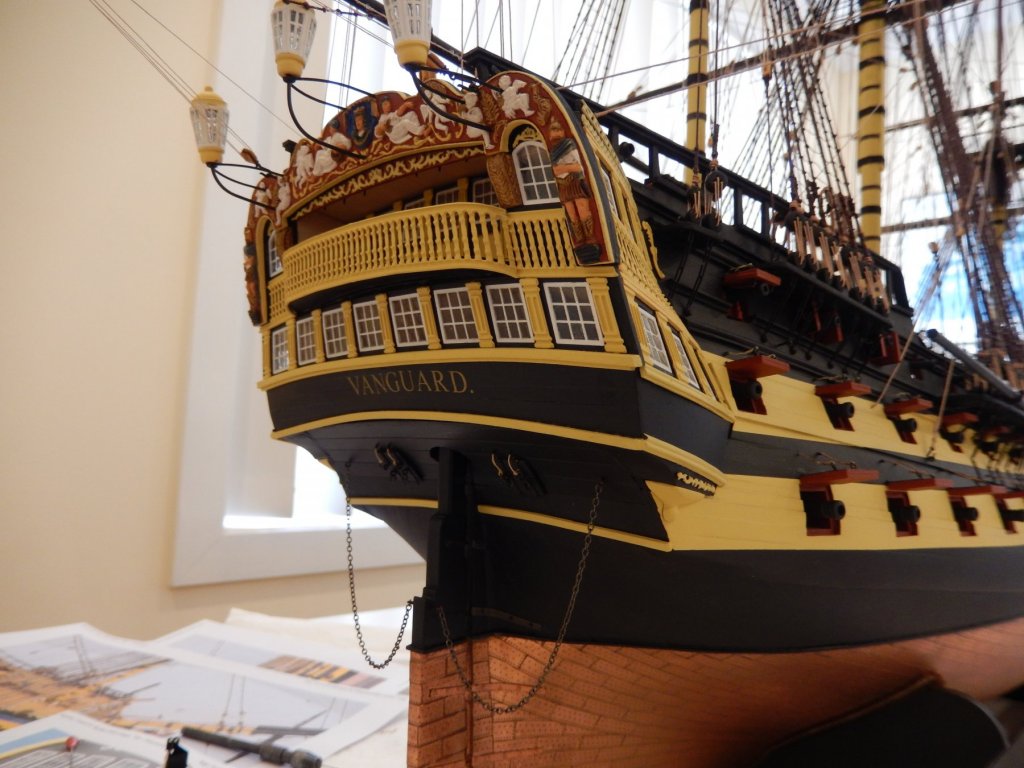
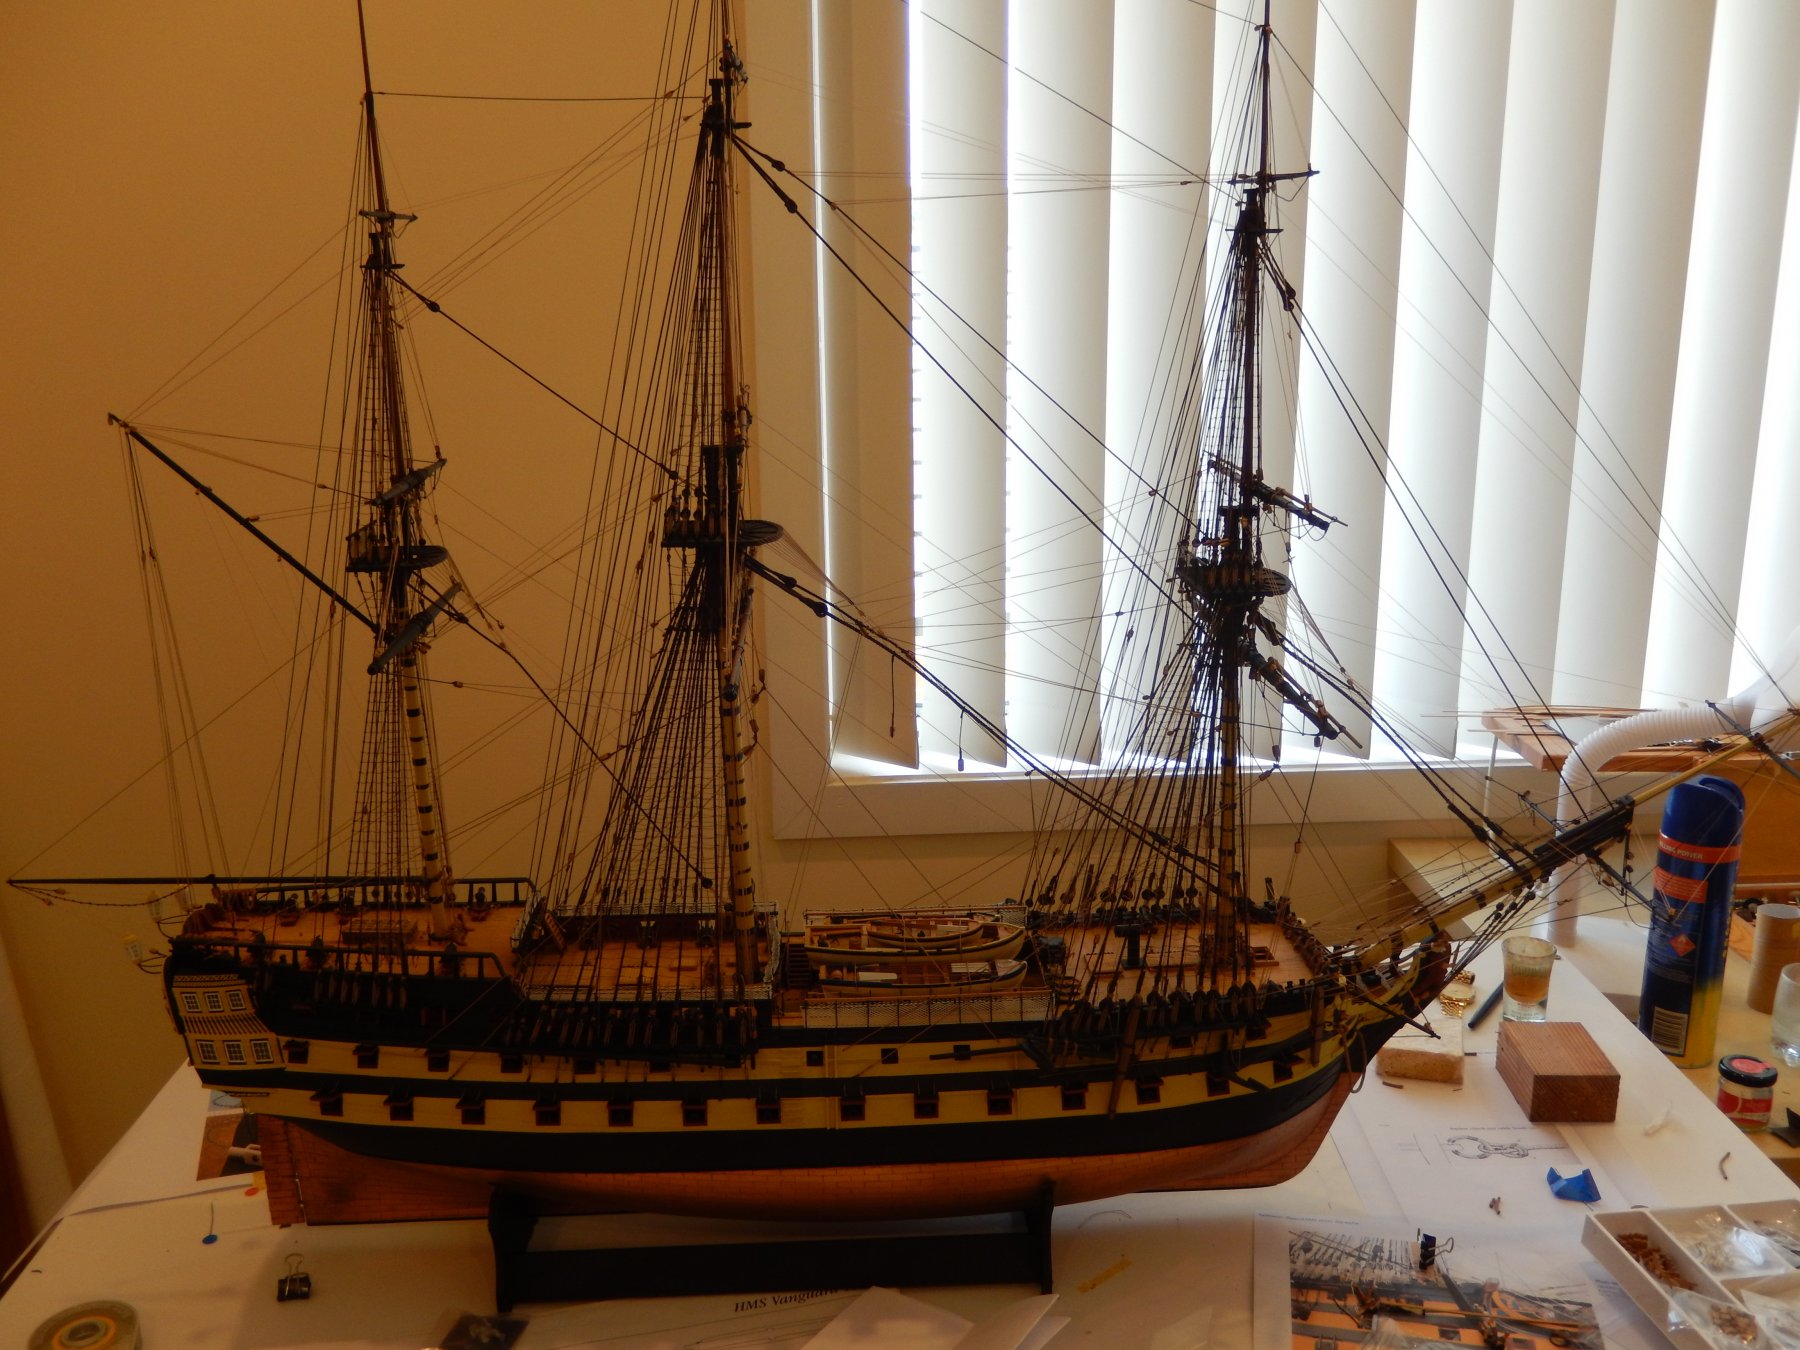
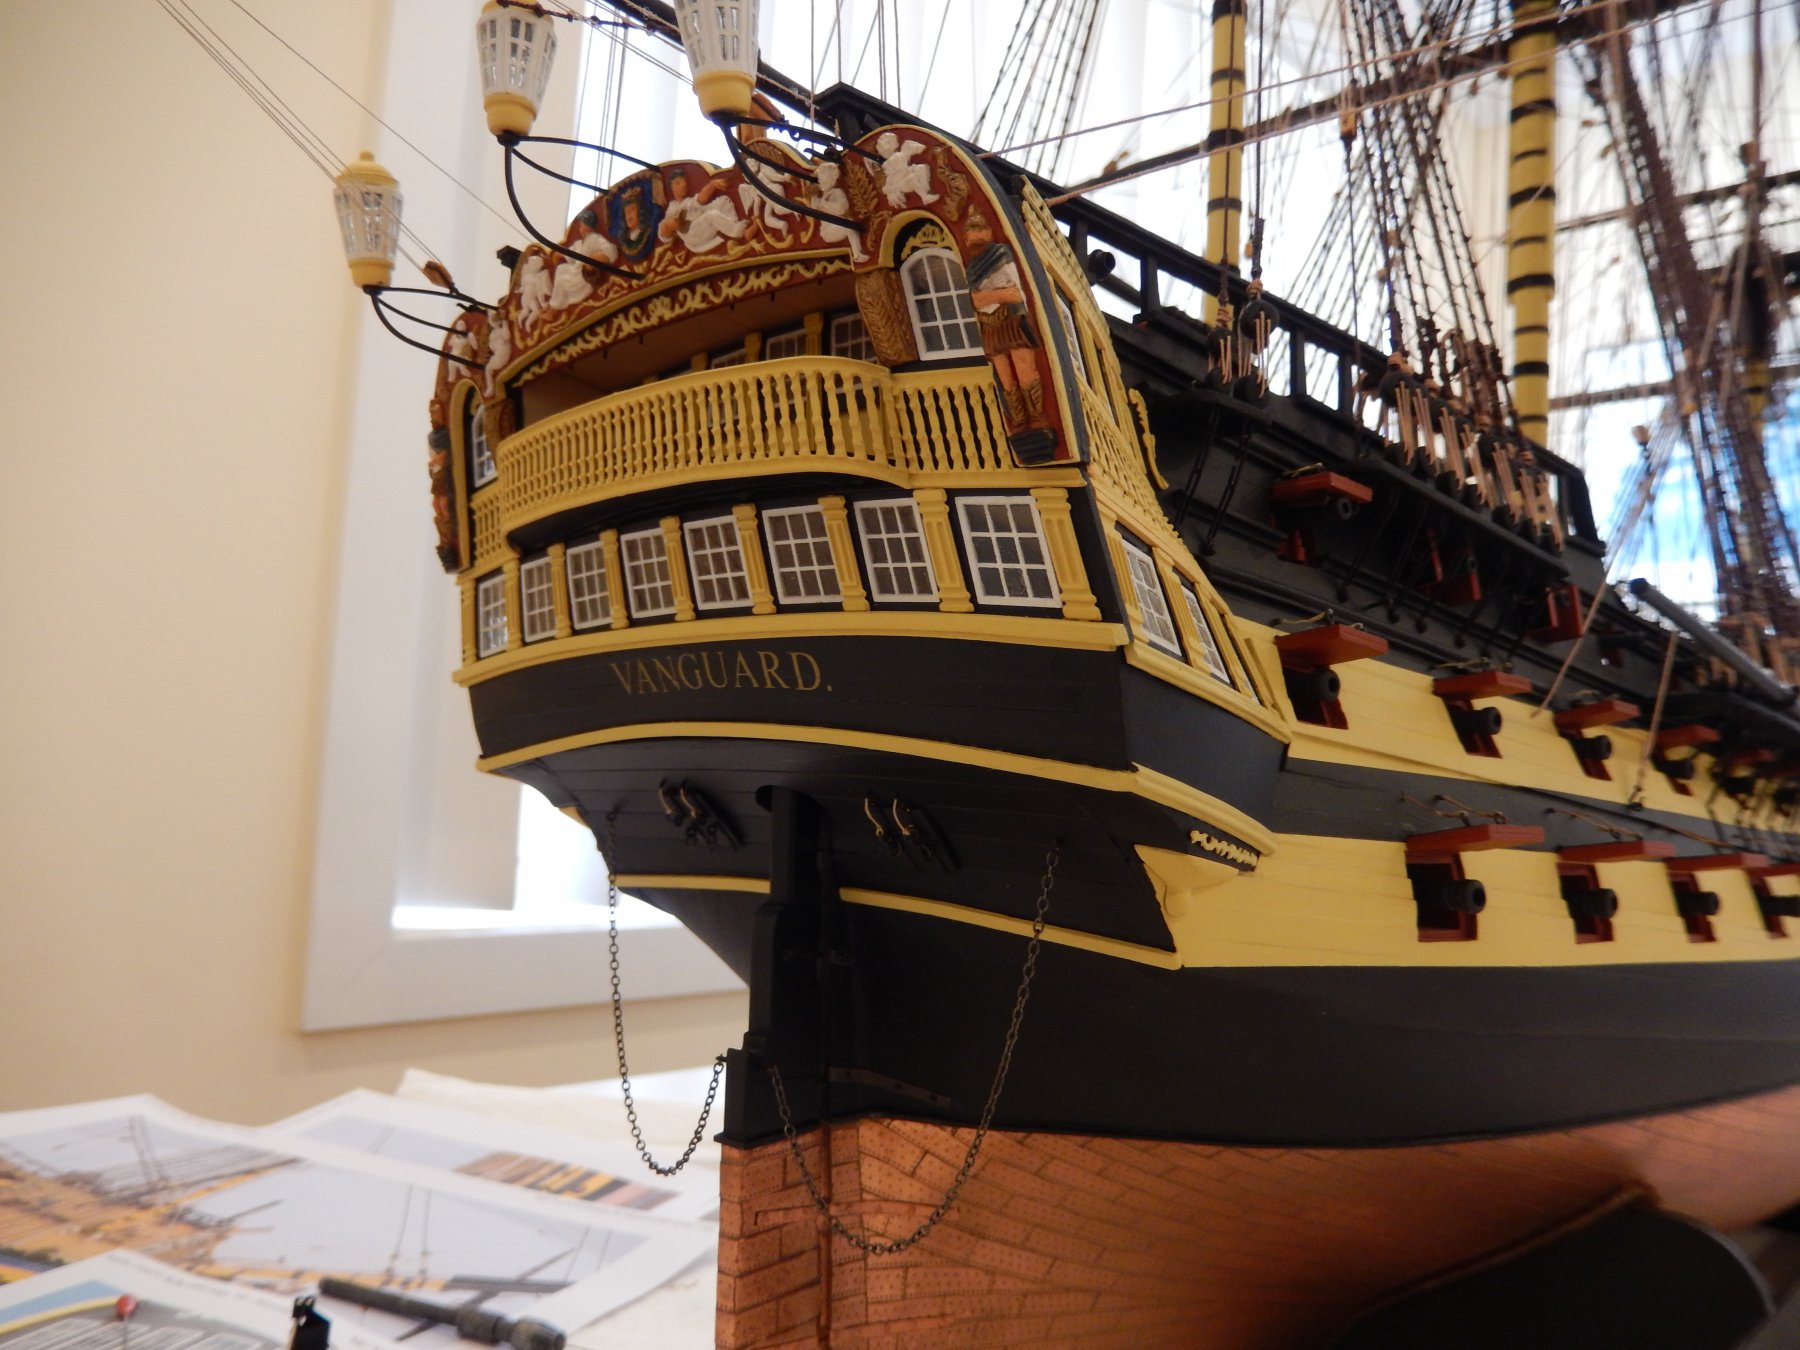
Well it's finally finished.
Both sets of anchors are now on (this was a really rotten job), and the rudder is on, chains and all. Joy - and the whole thing only took about five years.
The rudder and chains may be easily removed to transport the model to wherever it ends up. At the moment I have no idea where.
Here it is in all its glory....
There is no ensign. I decided that the double-layer ensign earlier hoisted on it was too heavy, making it foul some of the rigging. I will buy a couple of single layer becc ensigns to see how they go, If I'm unhappy with them the ship shall remain ensignless.
Here are the two port anchors.
The rudder -

Just a note on the Granado gun carriages. I received the Syren carriages a couple of days ago. They are very good quality indeed, but unfortunately just too large. I will have to go with the Caldercraft carriages. I made a couple up over the weekend and they turned out reasonably well, though the ply shows. A couple of extras were supplied so I will experiment to see if I can improve the result.
I will post a couple of pictures when I get around to it, but aside from this, this is the last post.
-


Granado by RMC - FINISHED - Caldercraft - 1:64
in - Kit build logs for subjects built from 1501 - 1750
Posted
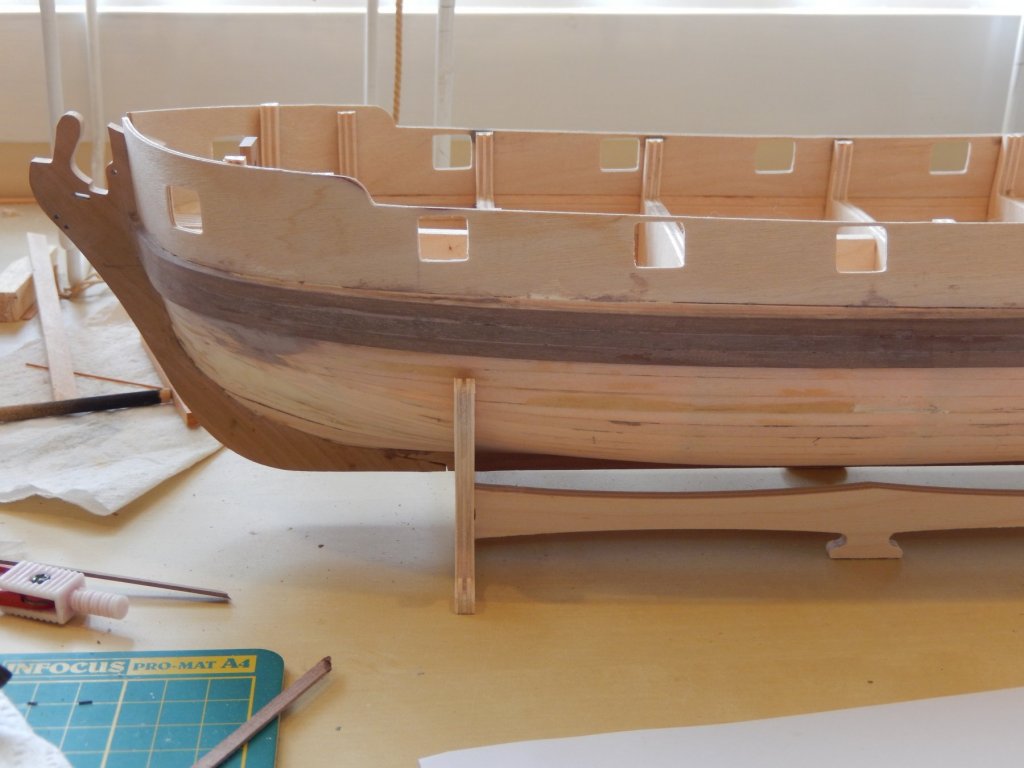
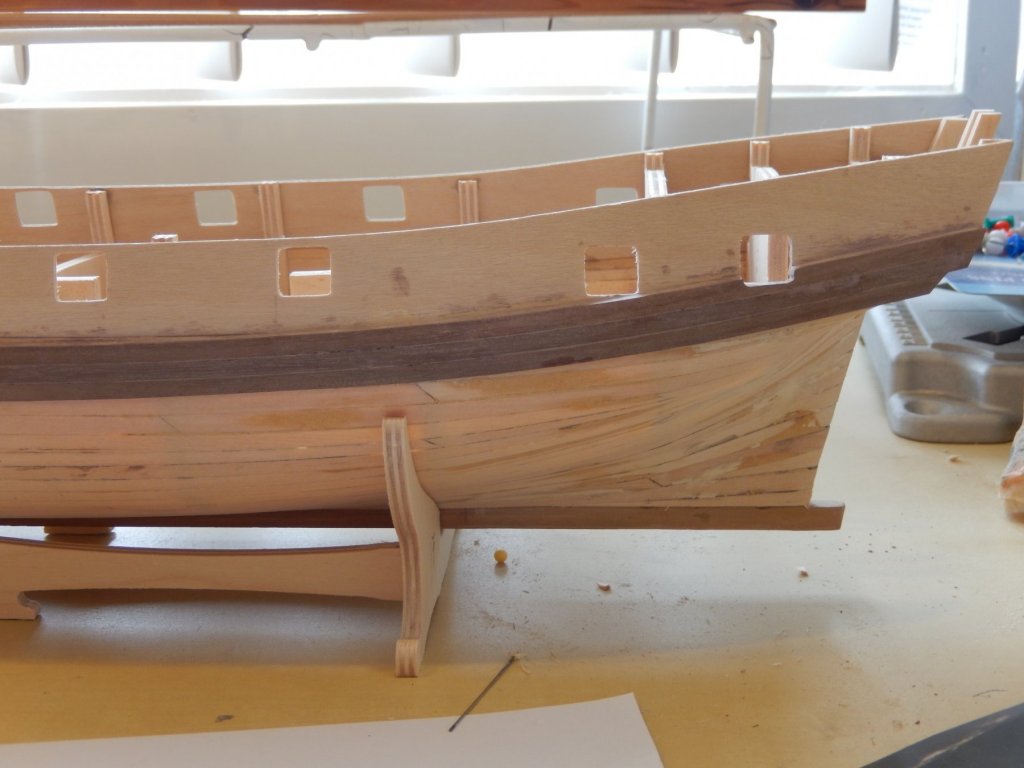
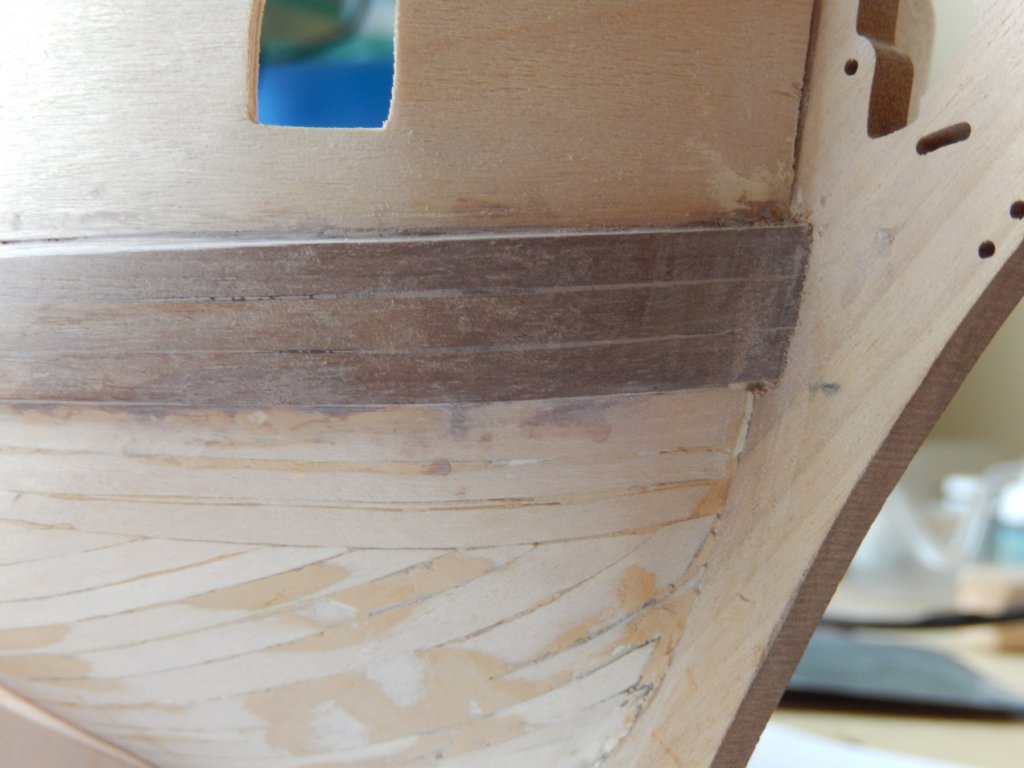
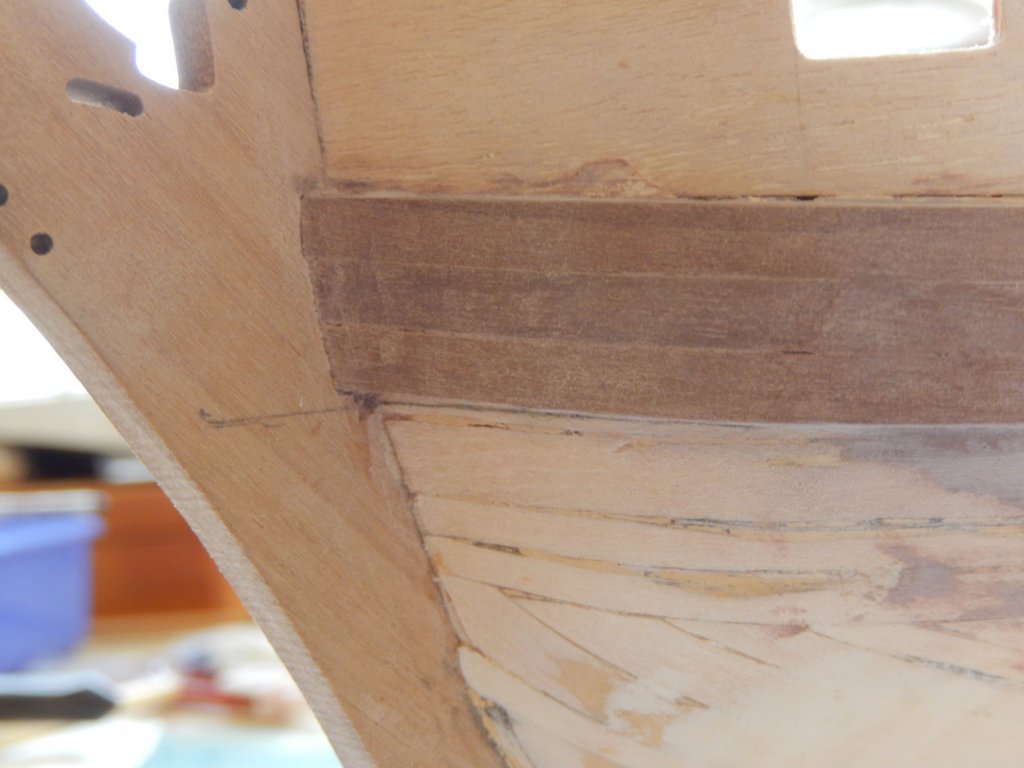
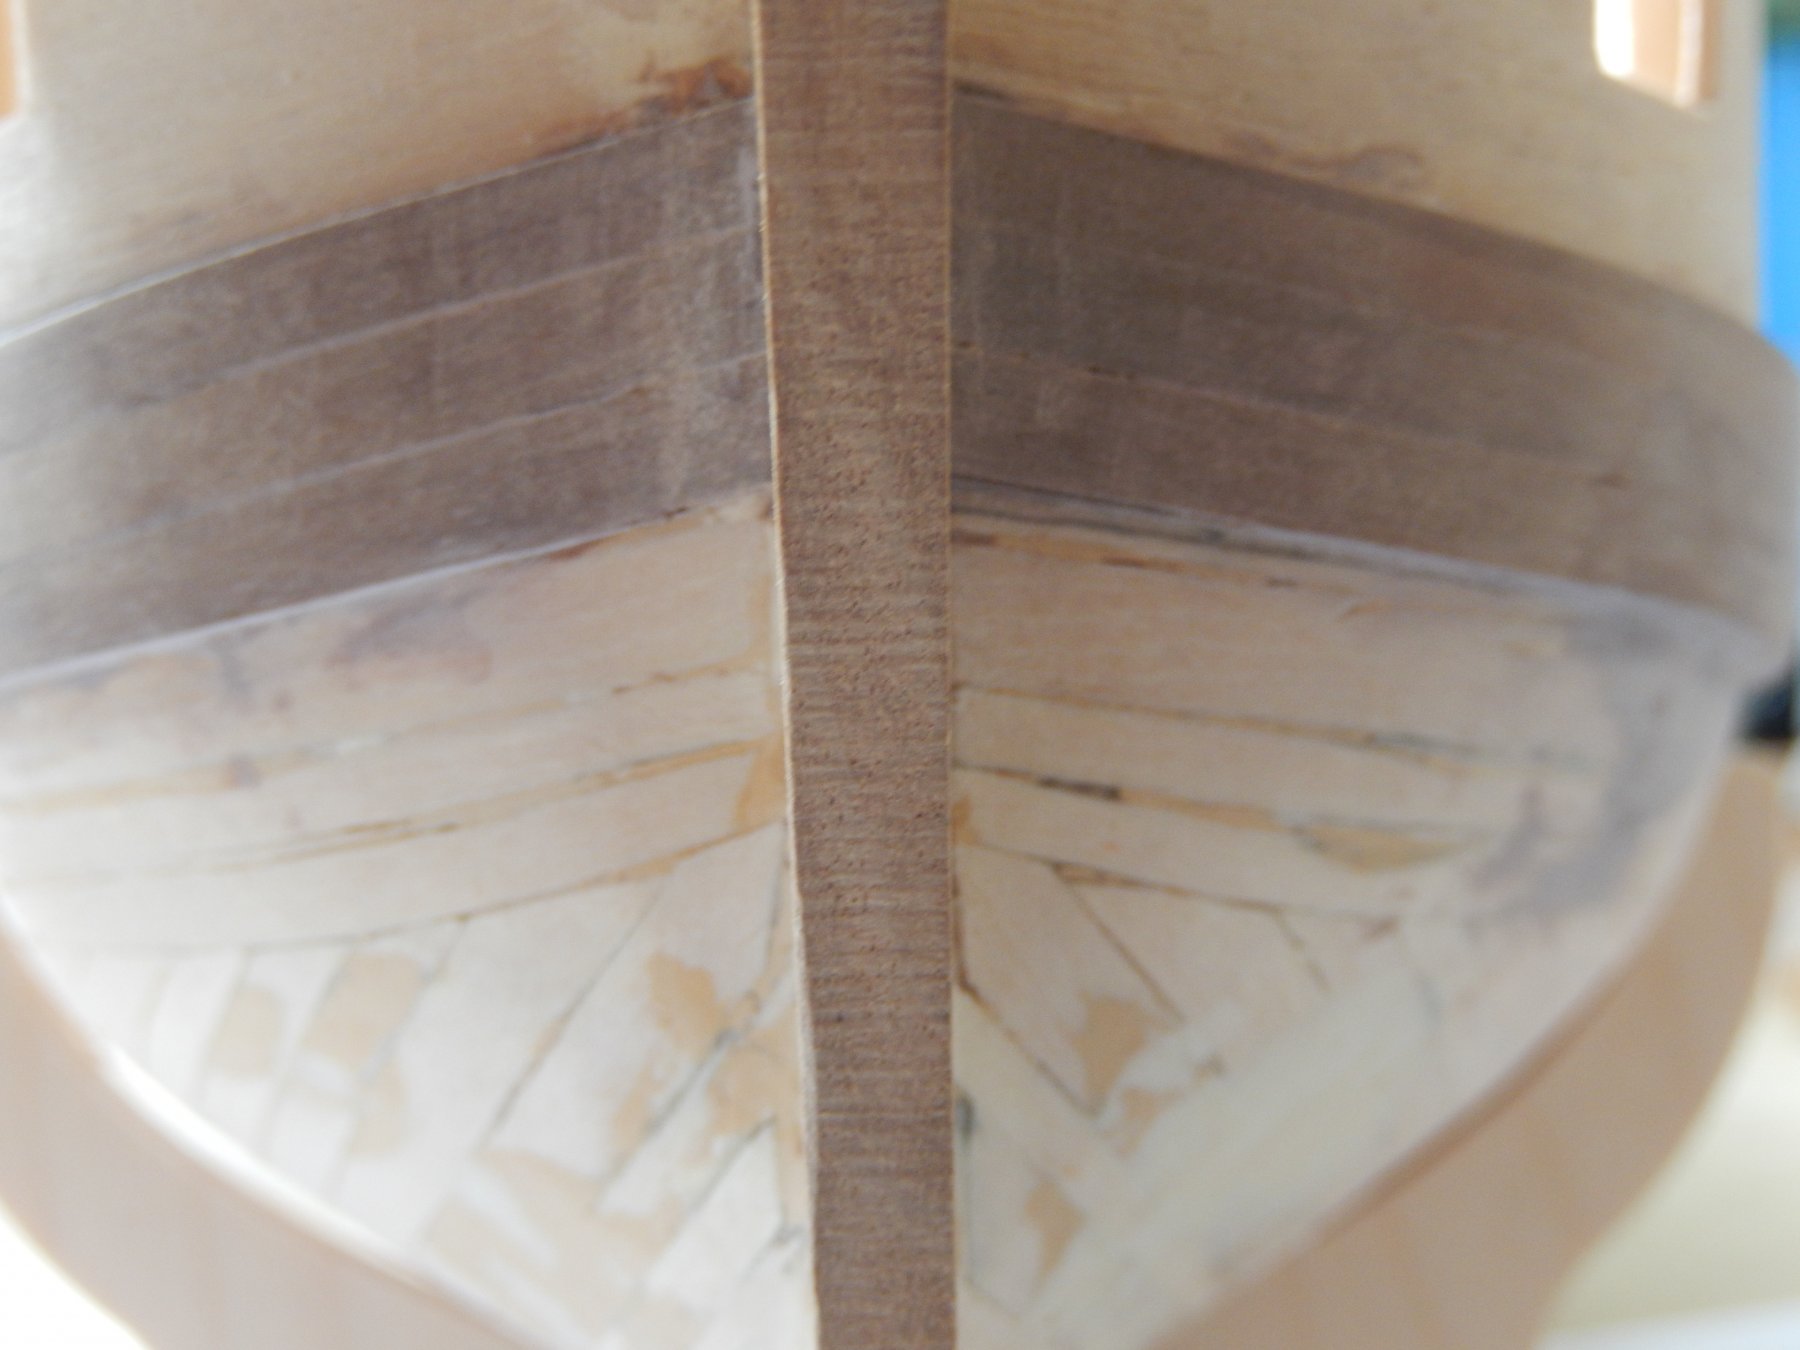
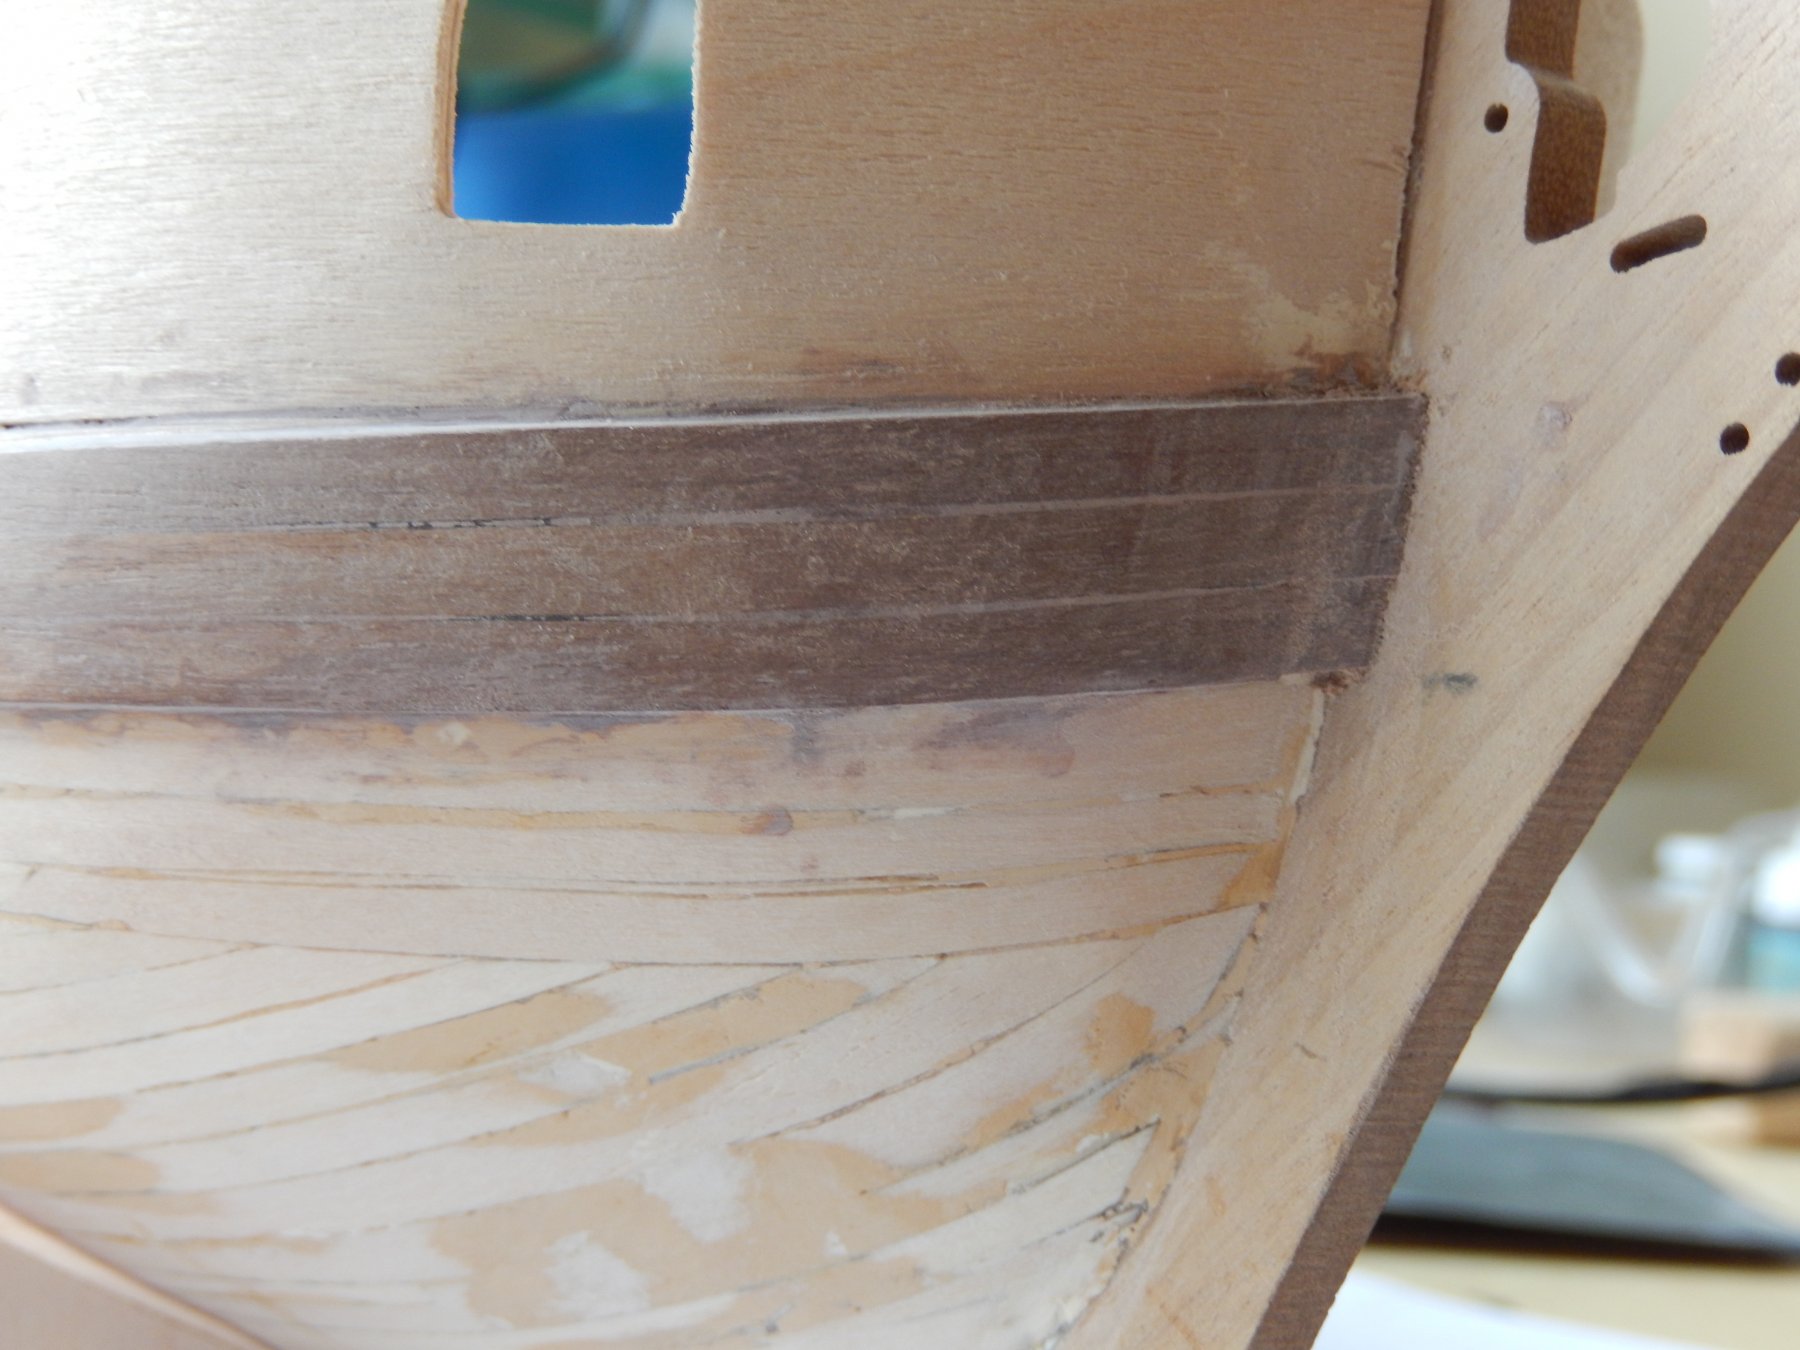
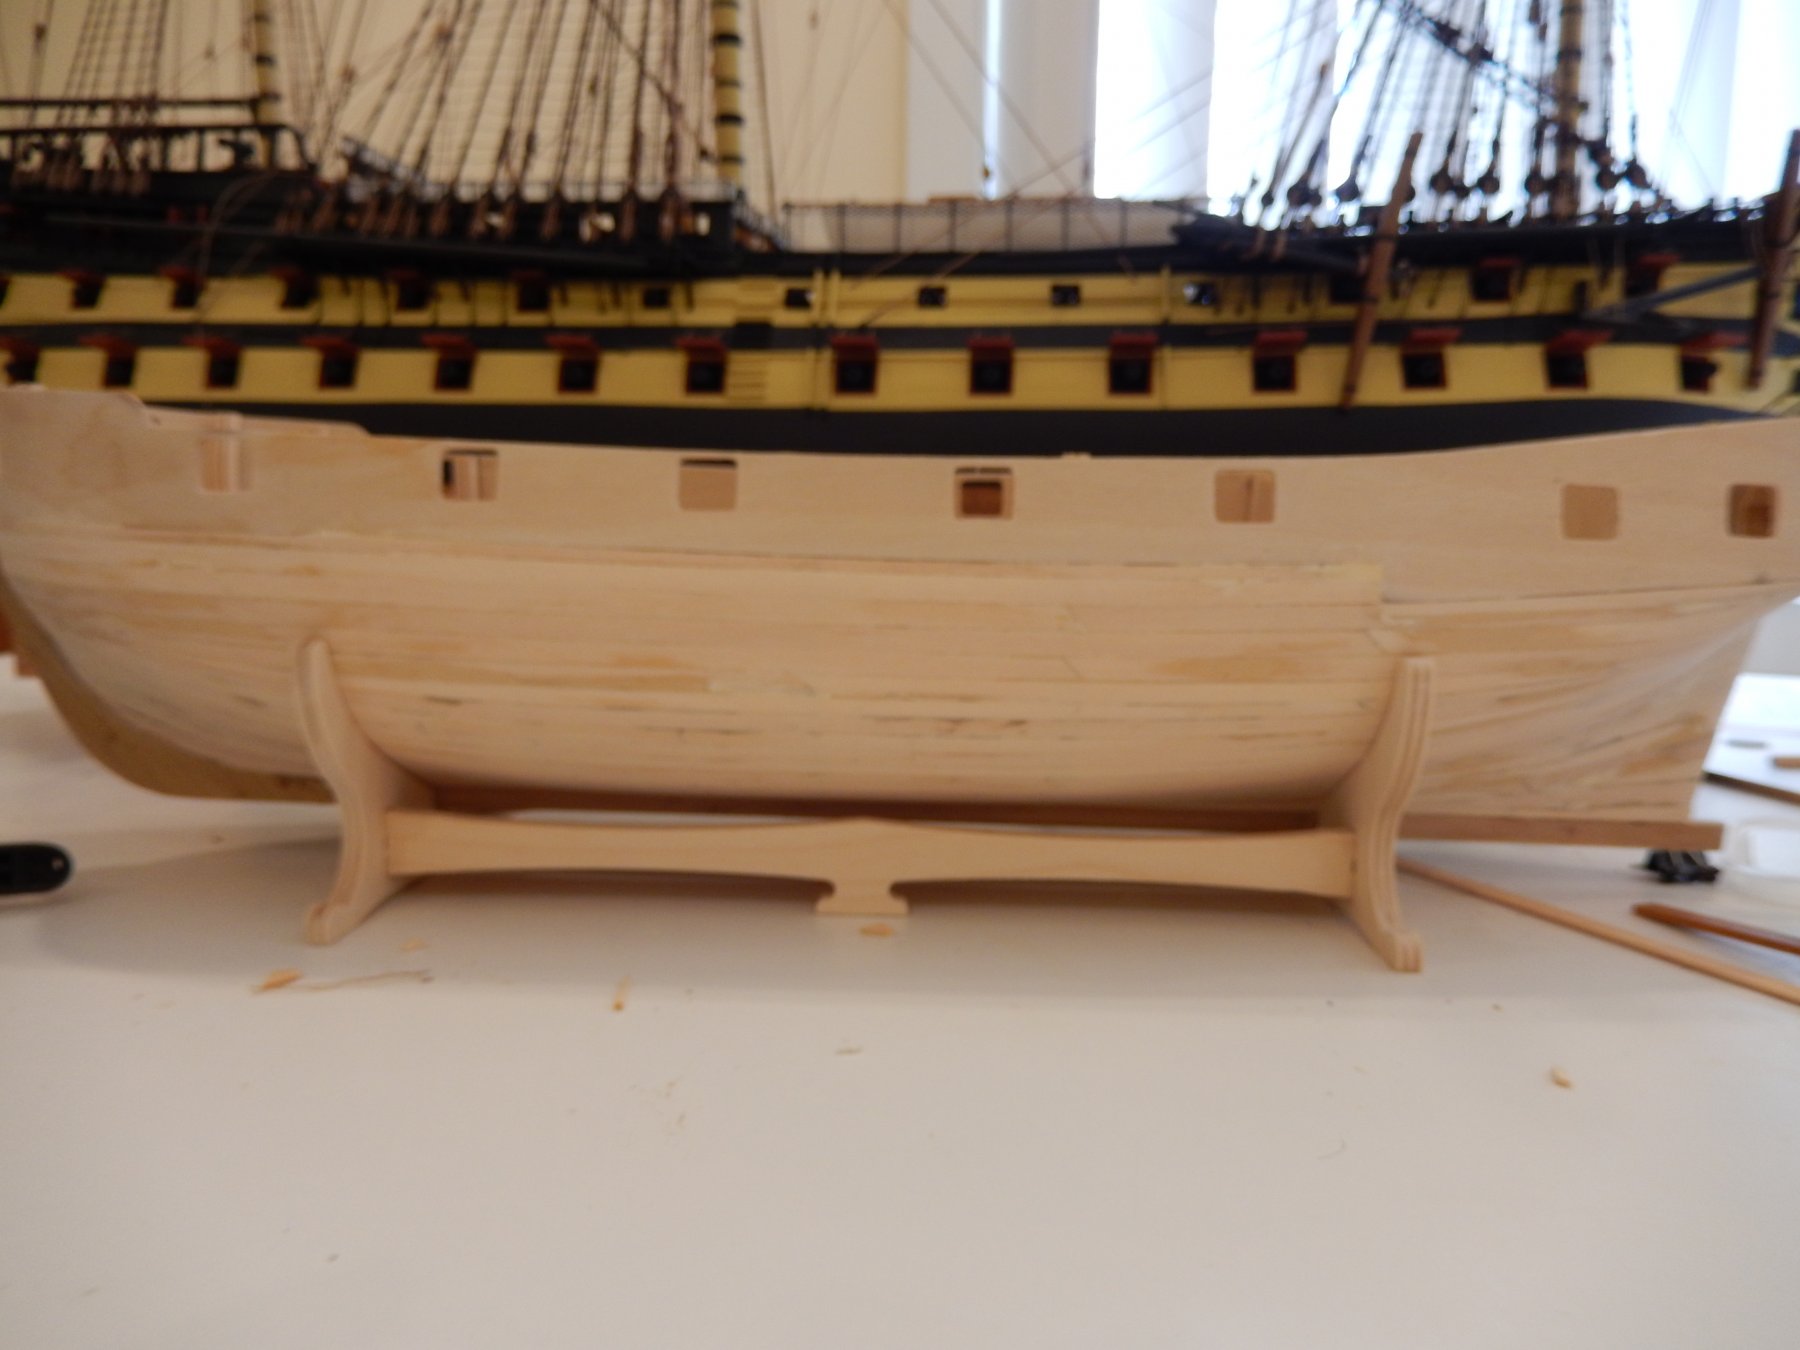
Here is progress. The wale has received six coats of paint so far and a protective coat of polyurethane. I will eventually put on some fake tree nails then another couple of coats eachof paint and poly.
This shows the first four of the second planks. Though the second planking will probably turn out acceptably, it's fortunate that below the wale most of it will be painted as the planking is not going all that well. The yellow masking tape marks the approximate position of the waterline.