HOLIDAY DONATION DRIVE - SUPPORT MSW - DO YOUR PART TO KEEP THIS GREAT FORUM GOING! (89 donations so far out of 49,000 members - C'mon guys!)
×


scrubbyj427
-
Posts
1,690 -
Joined
-
Last visited
Content Type
Profiles
Forums
Gallery
Events
Everything posted by scrubbyj427
-
 Thank you Glenn. Thank you Fred, she’s just a little bit short of surf board status but close, no doubt. Thank you Brian. I guess I never really thought about the mast positions, I just went for the low point and the high point up front to give an accurate deck curve, but they did end up right in that area. JJ
 -
ancre Belle Poule 1765 by j.guydal
scrubbyj427 replied to j.guydal's topic in - Build logs for subjects built 1751 - 1800
Incredible work! -
Very Nice Glenn! Your planking on the bow and QD is perfectly done! Beautiful.
- 840 replies
-
- 3
-

-
- winchelsea
- Syren Ship Model Company
- (and 1 more)
-
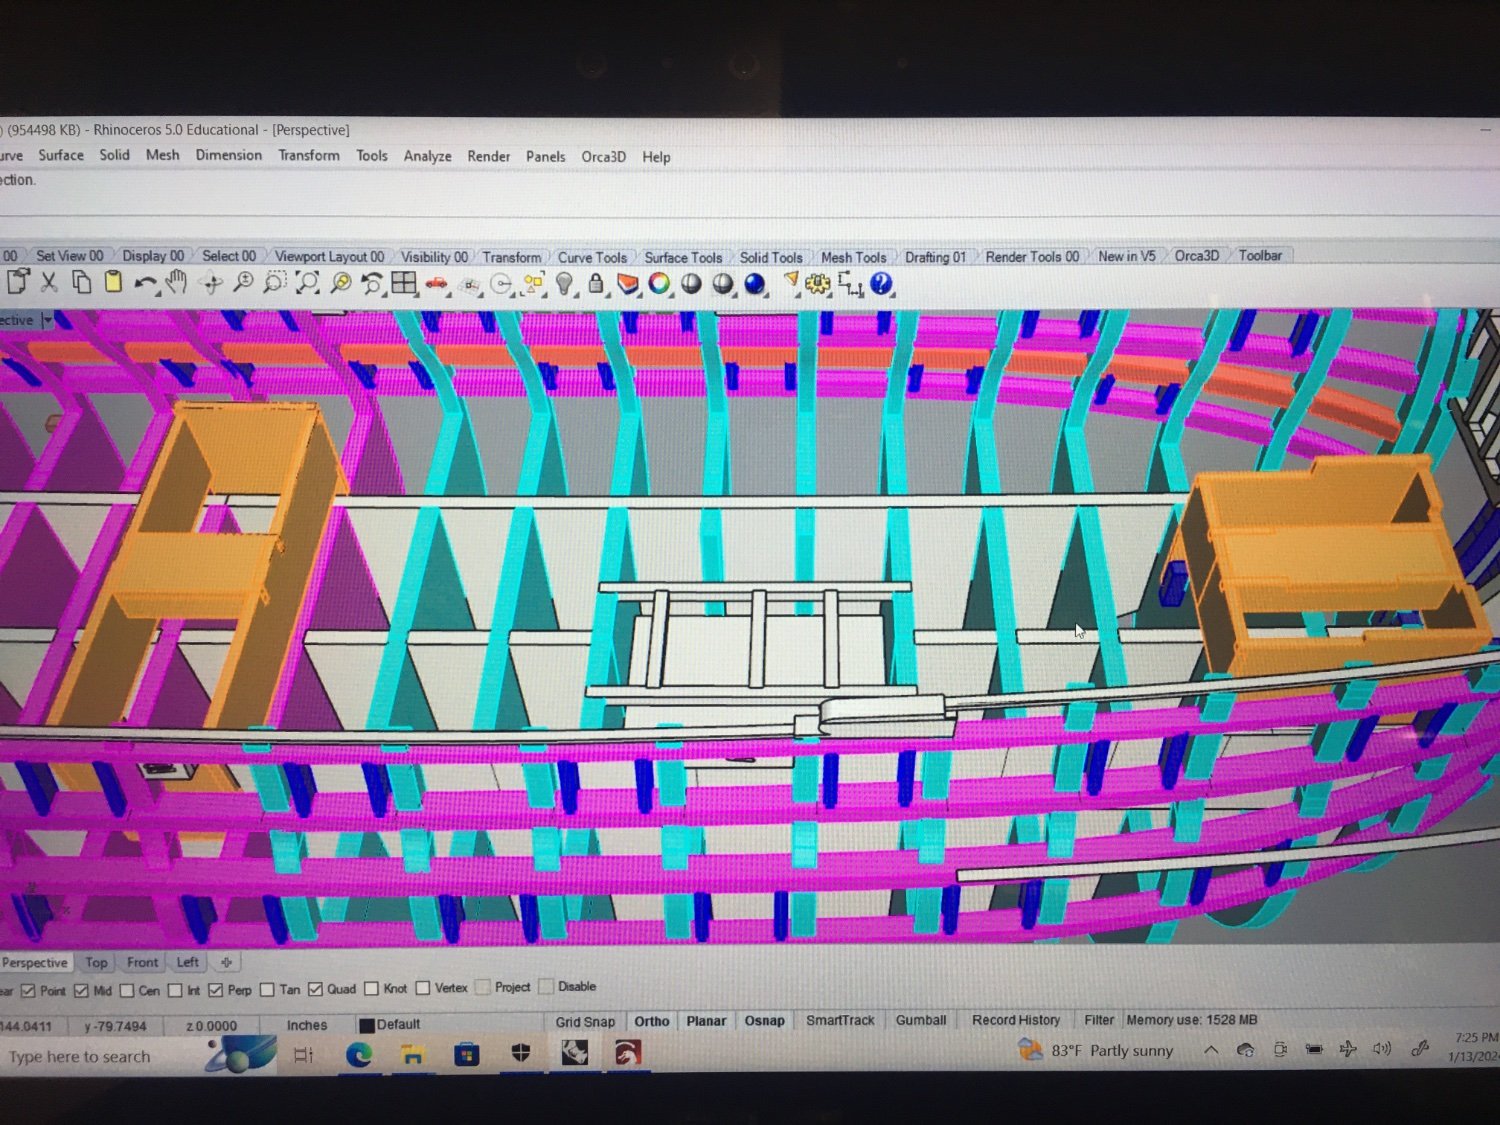
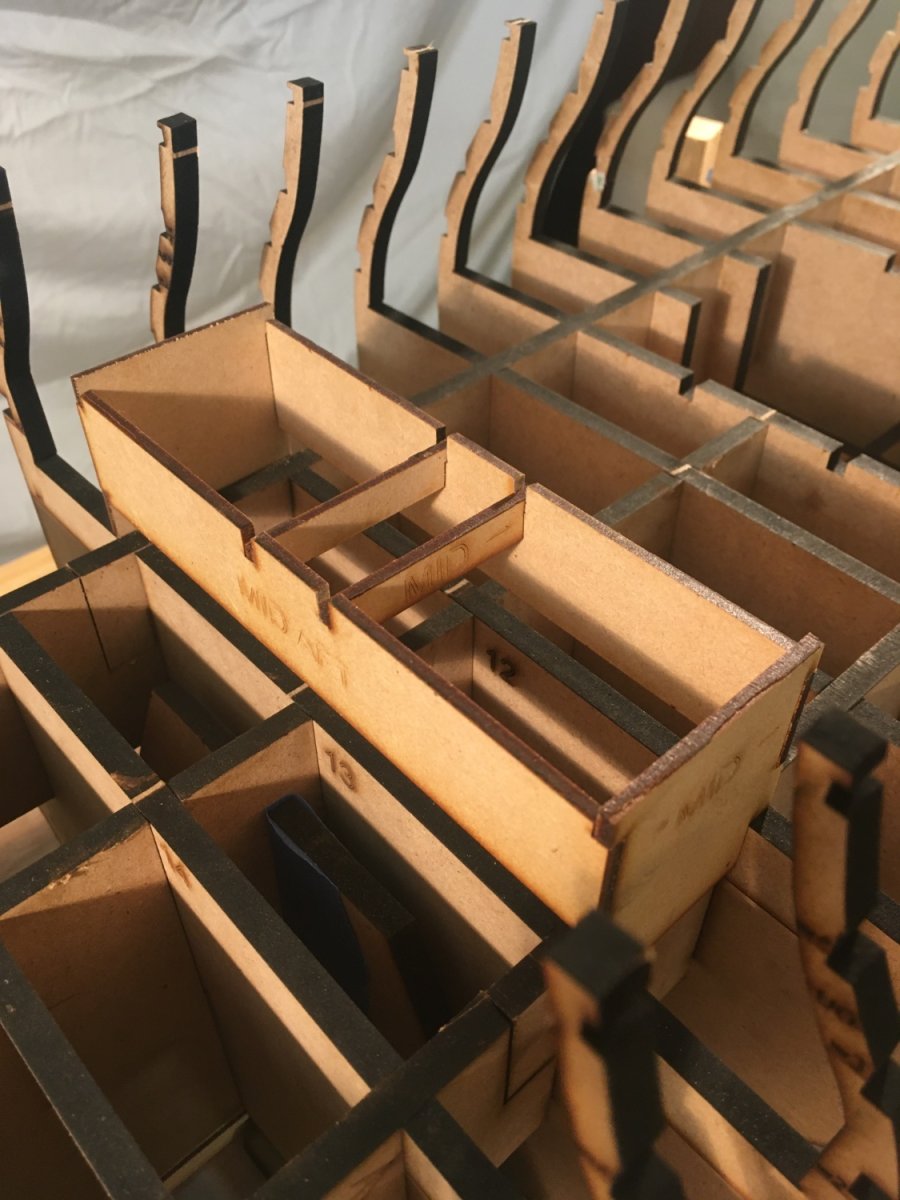
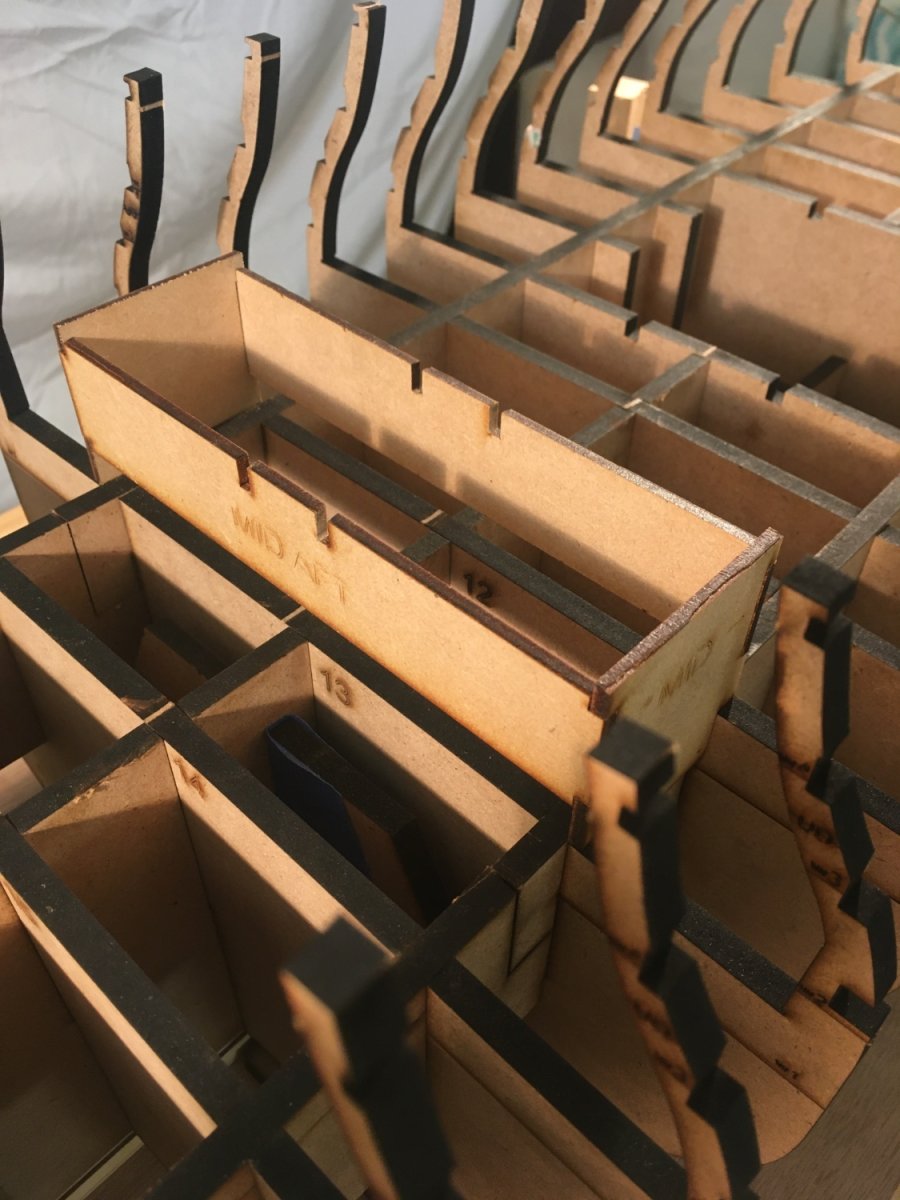
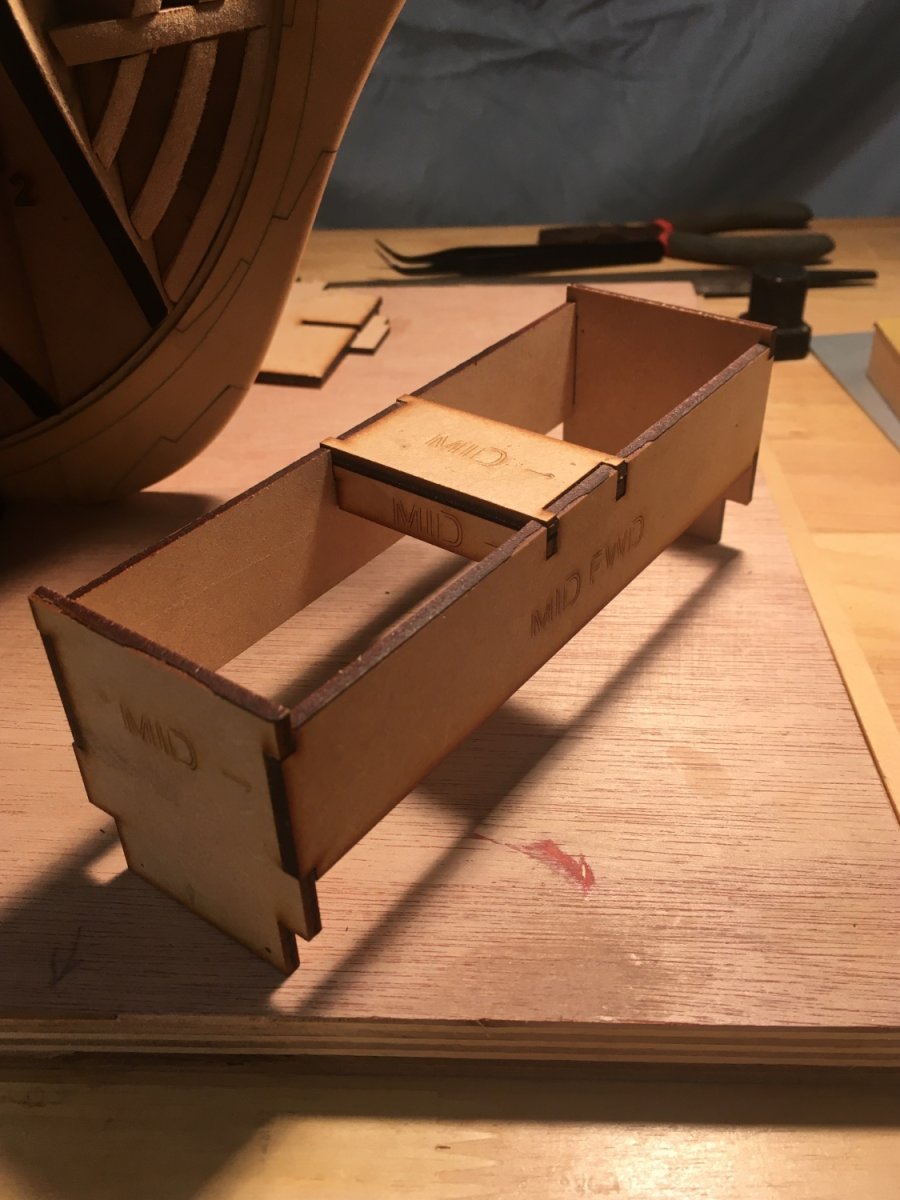
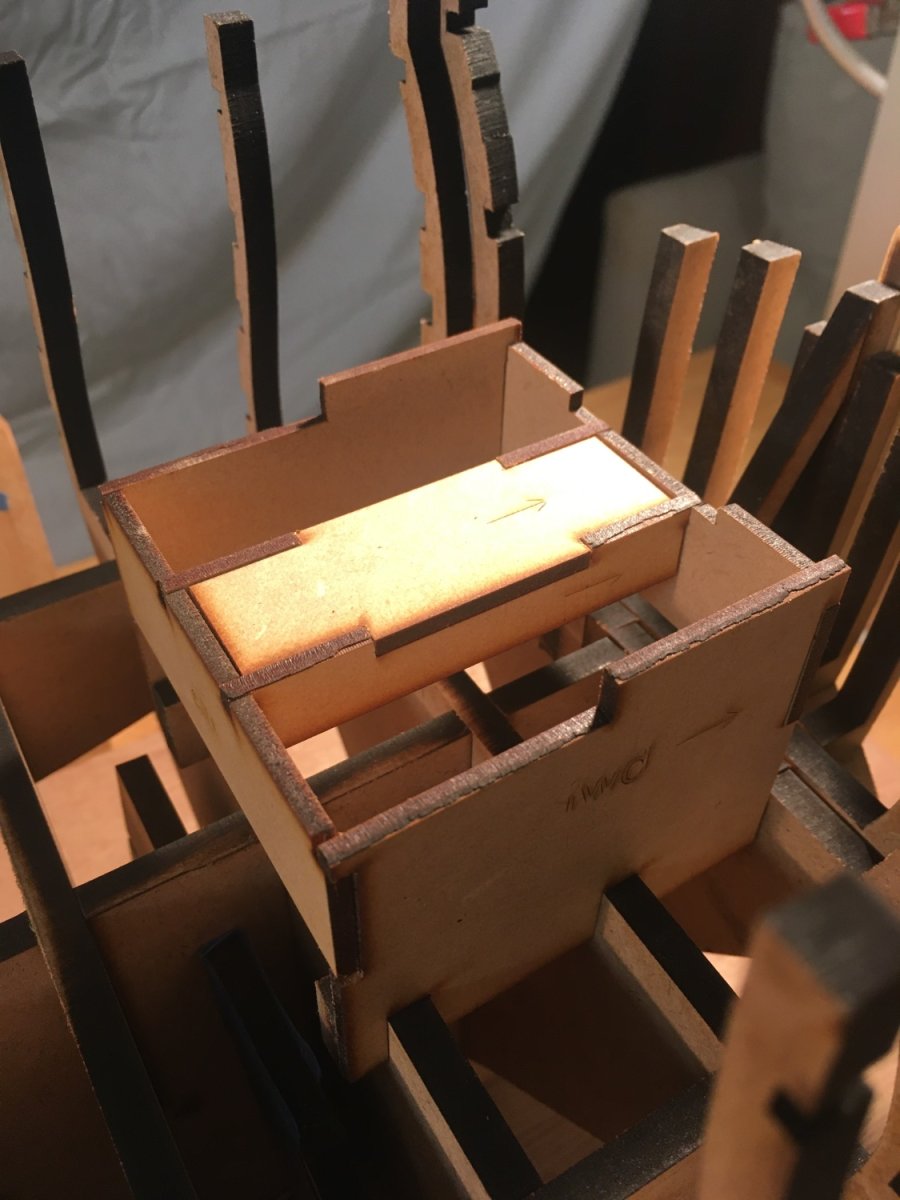
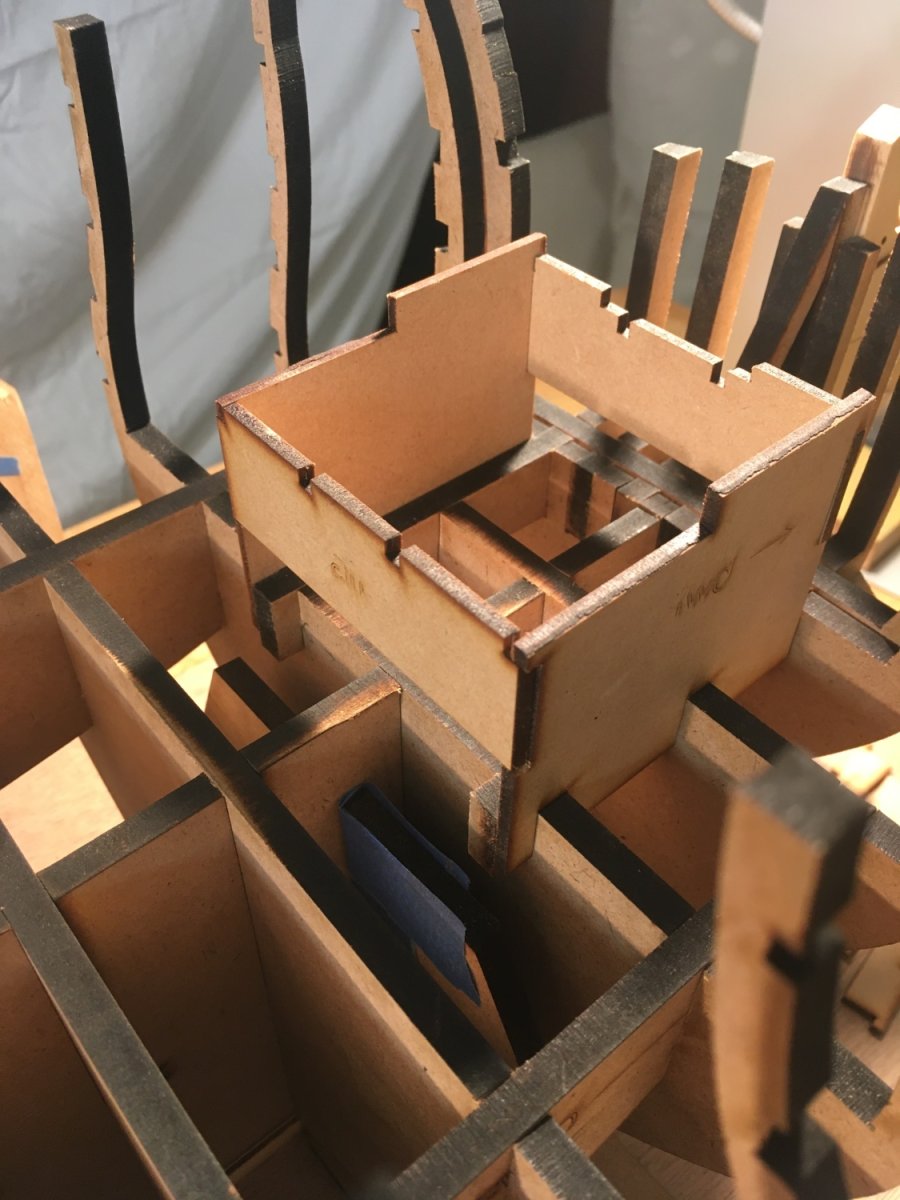
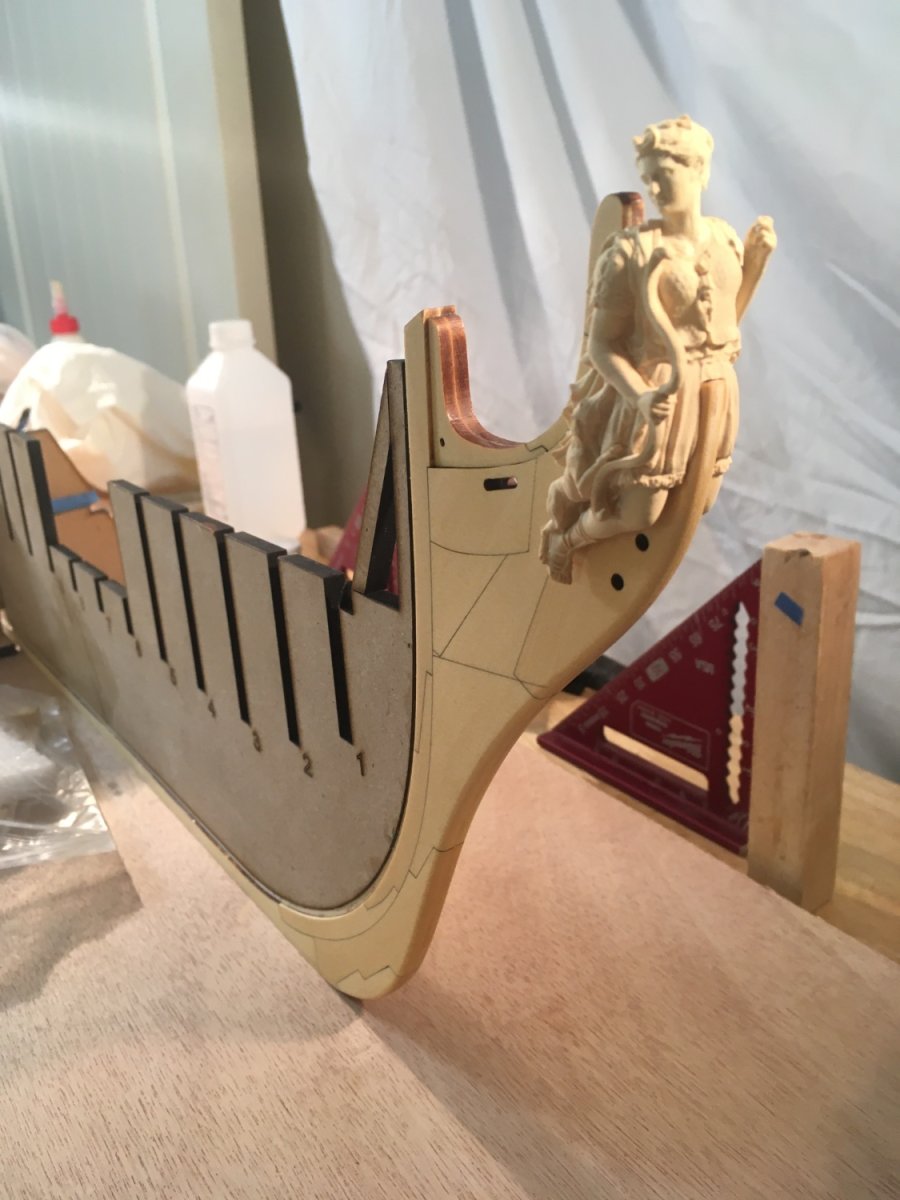
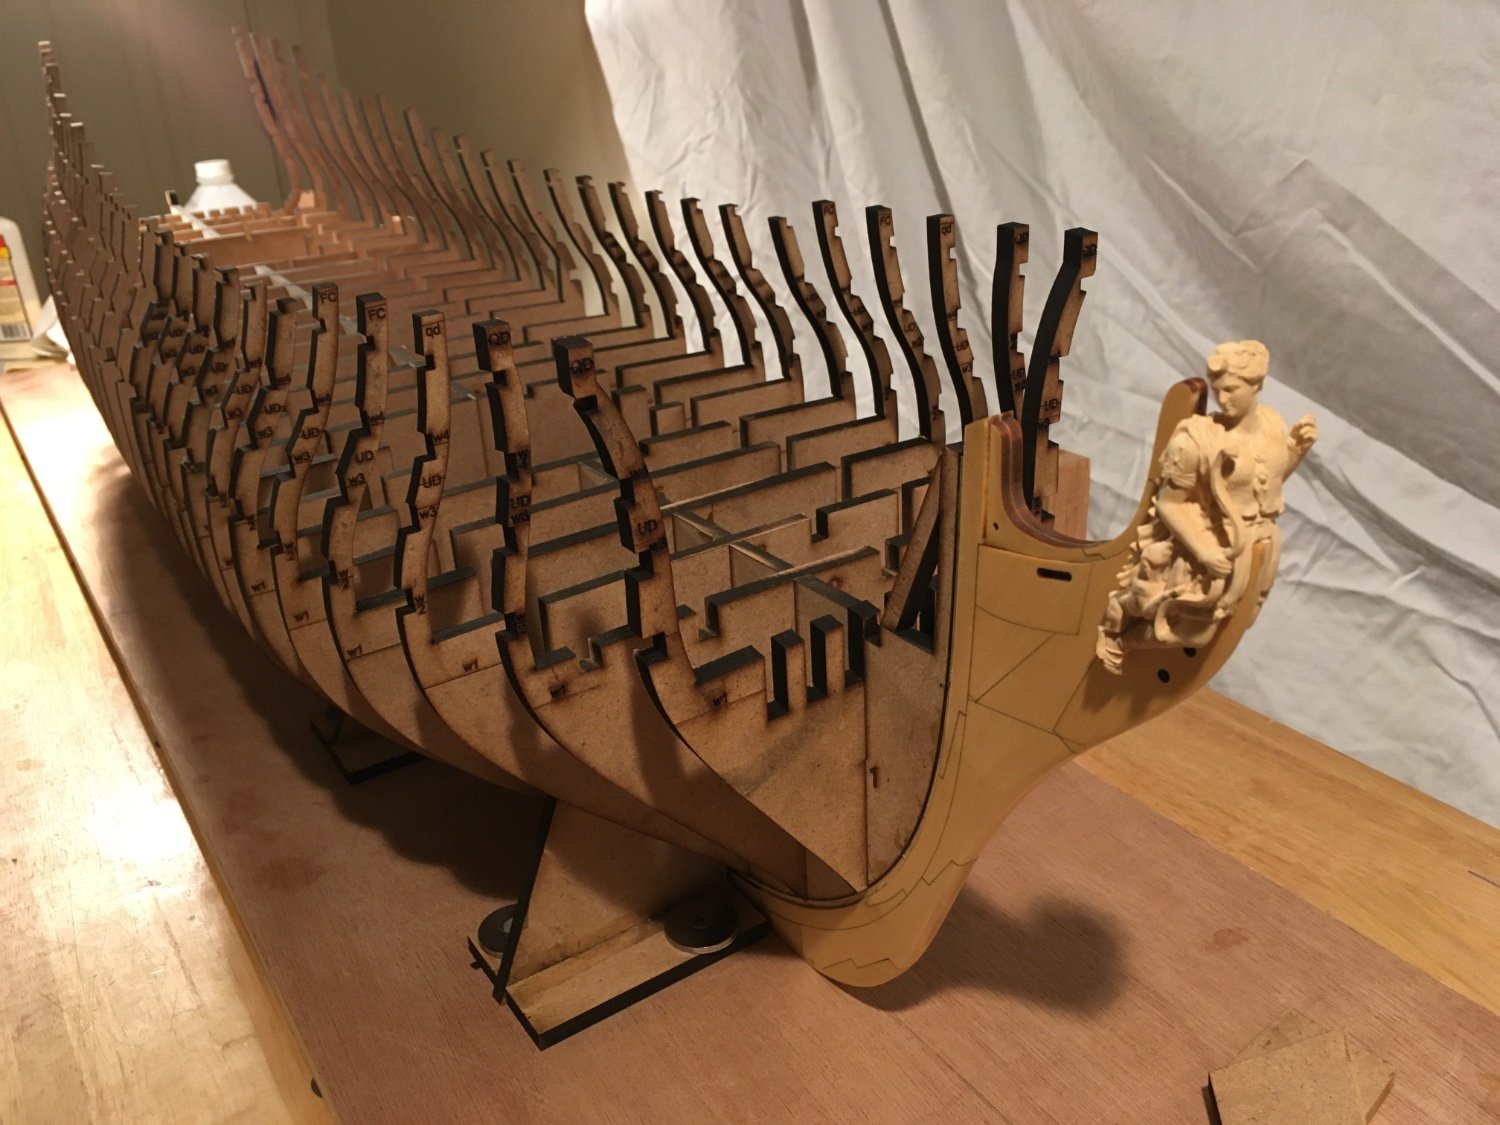
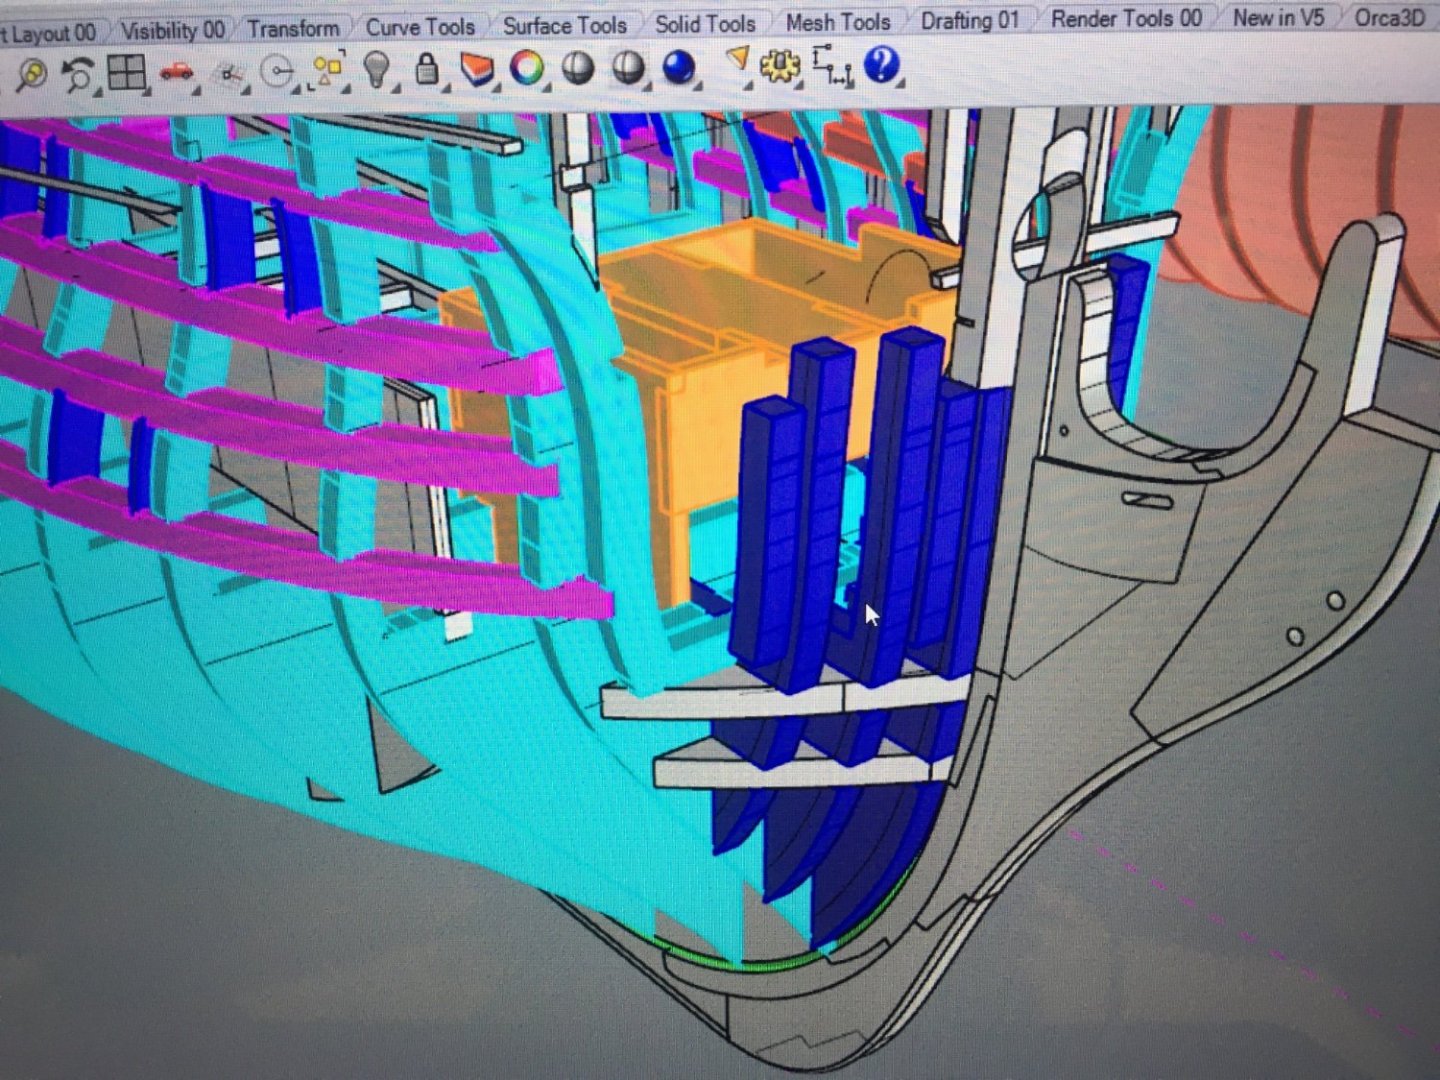
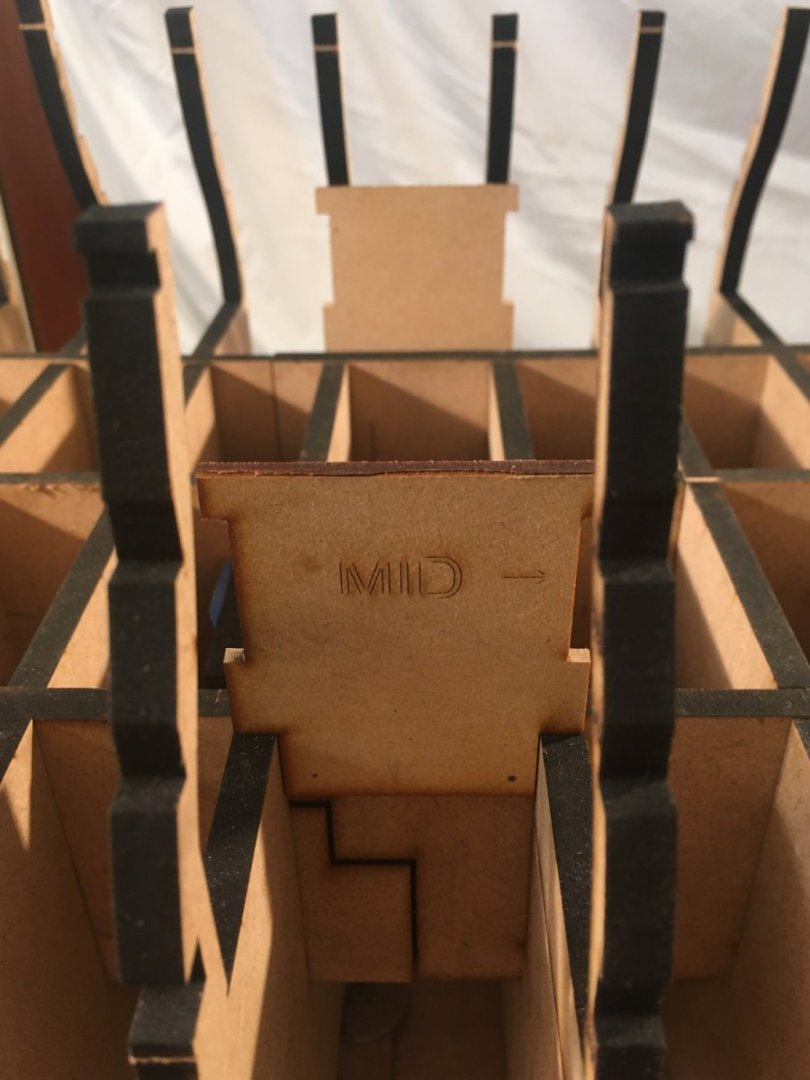
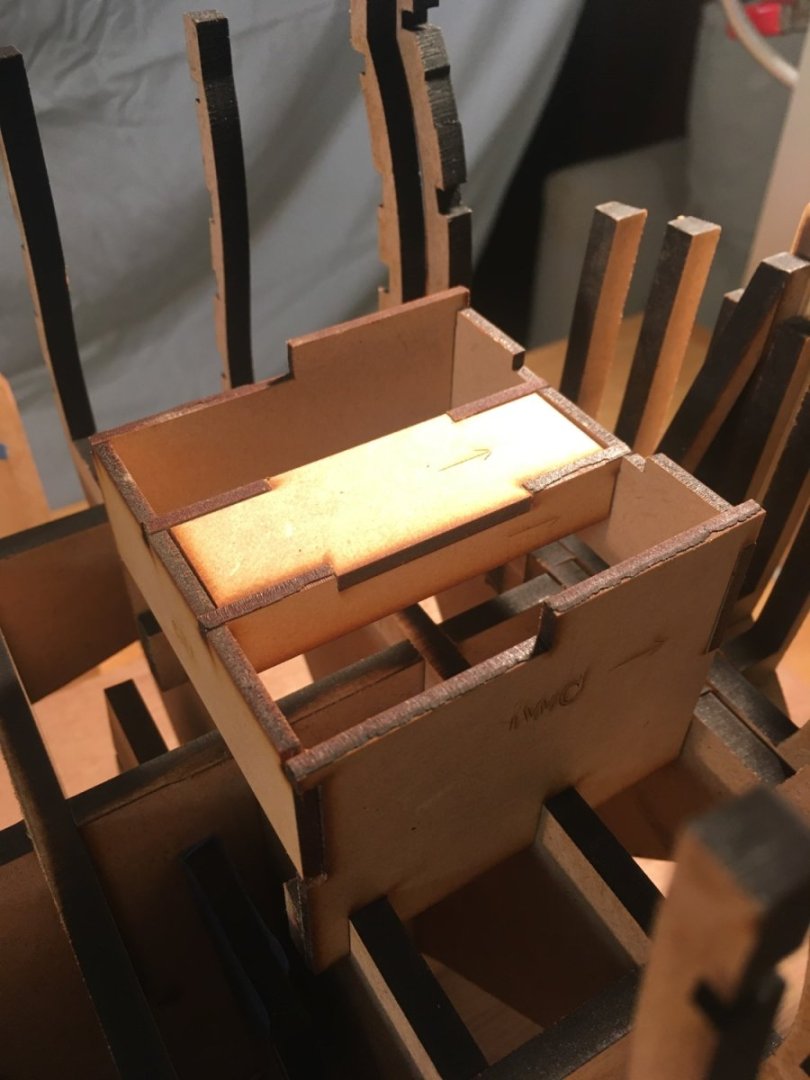
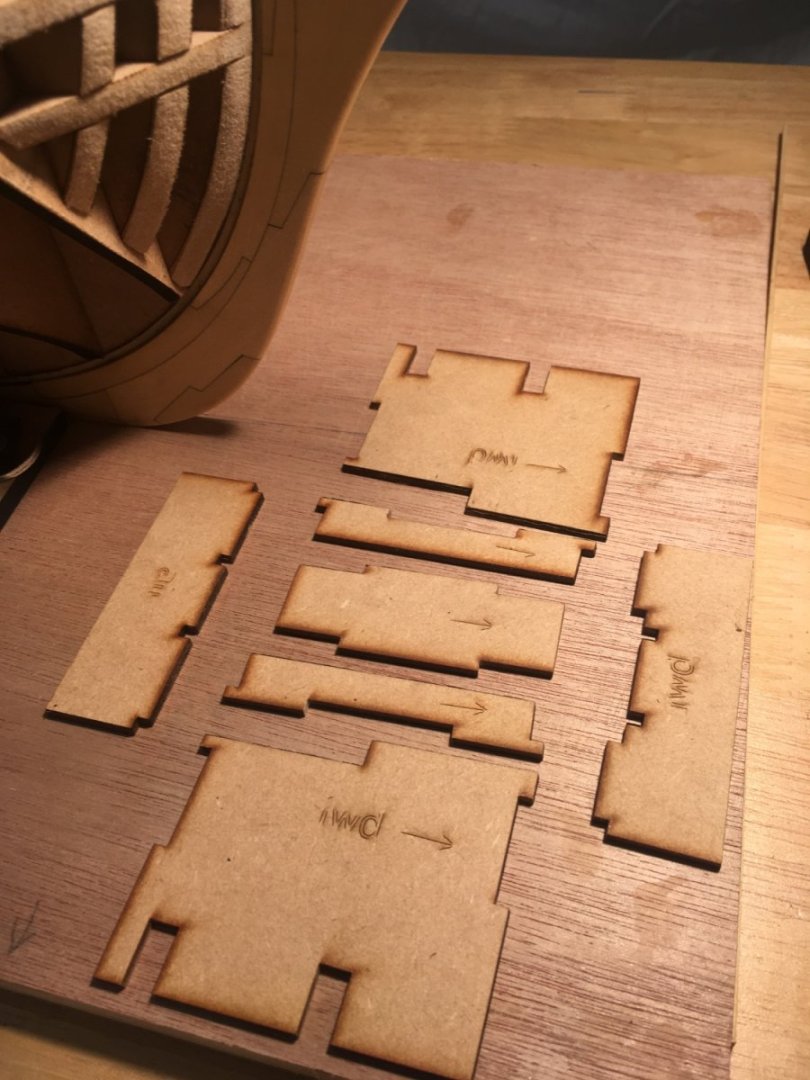
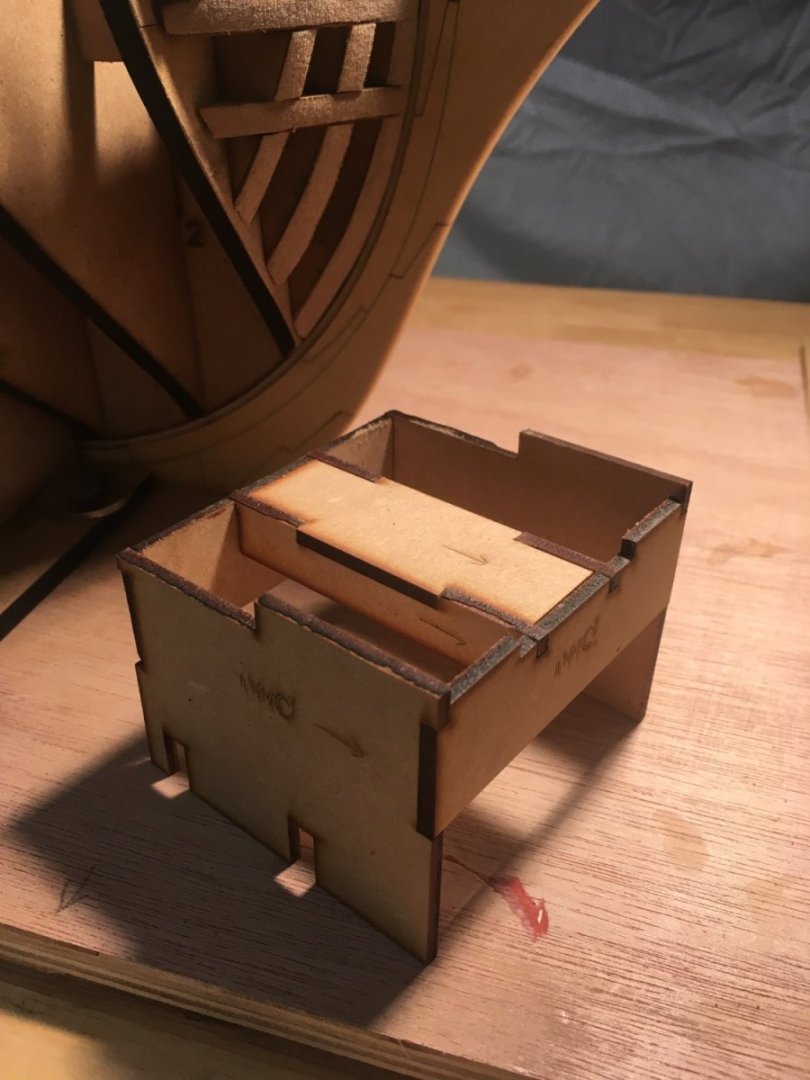
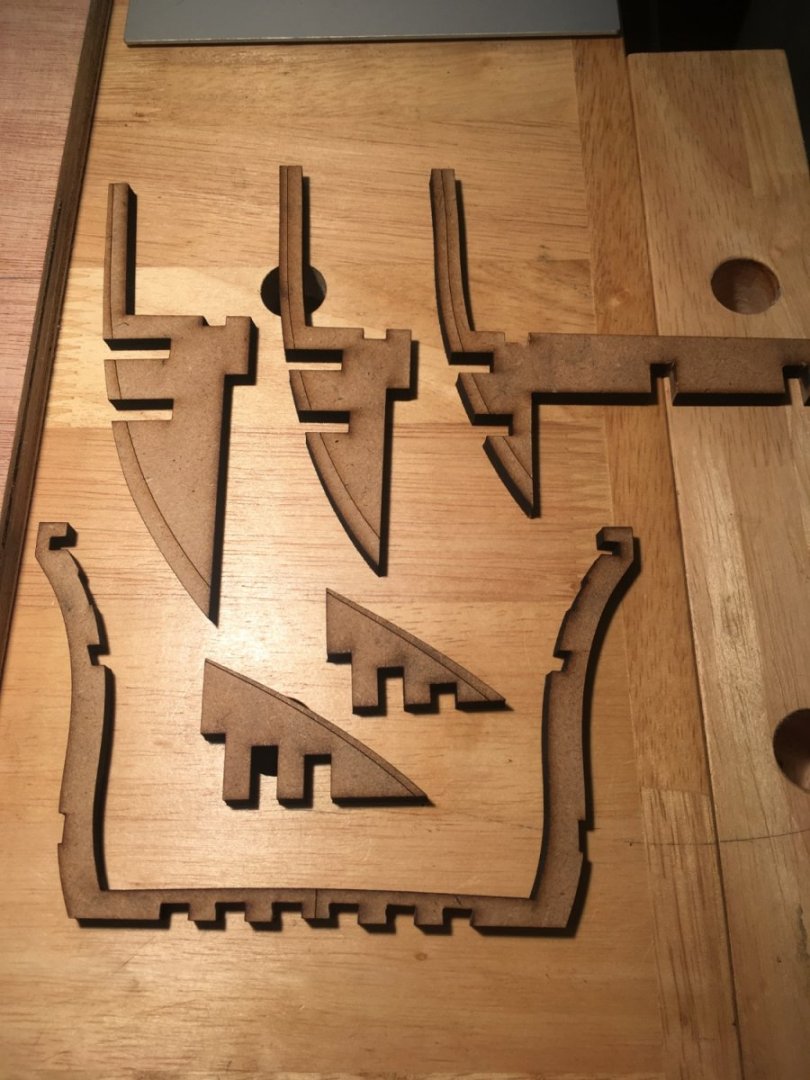
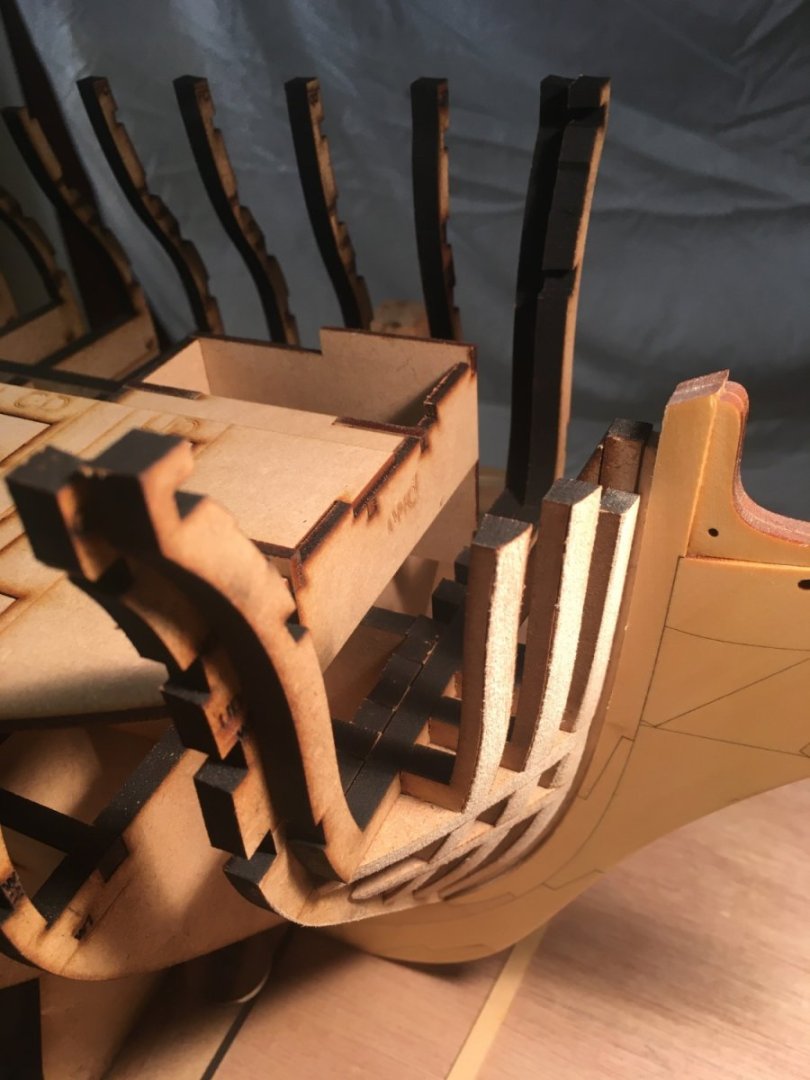
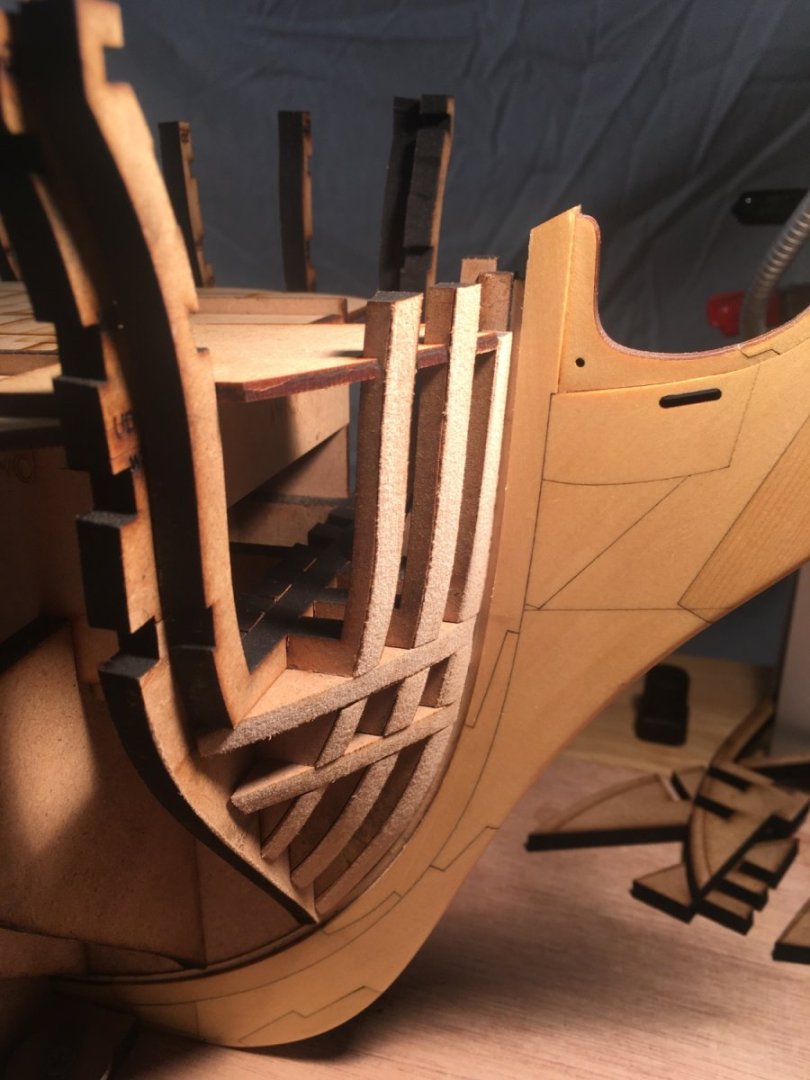
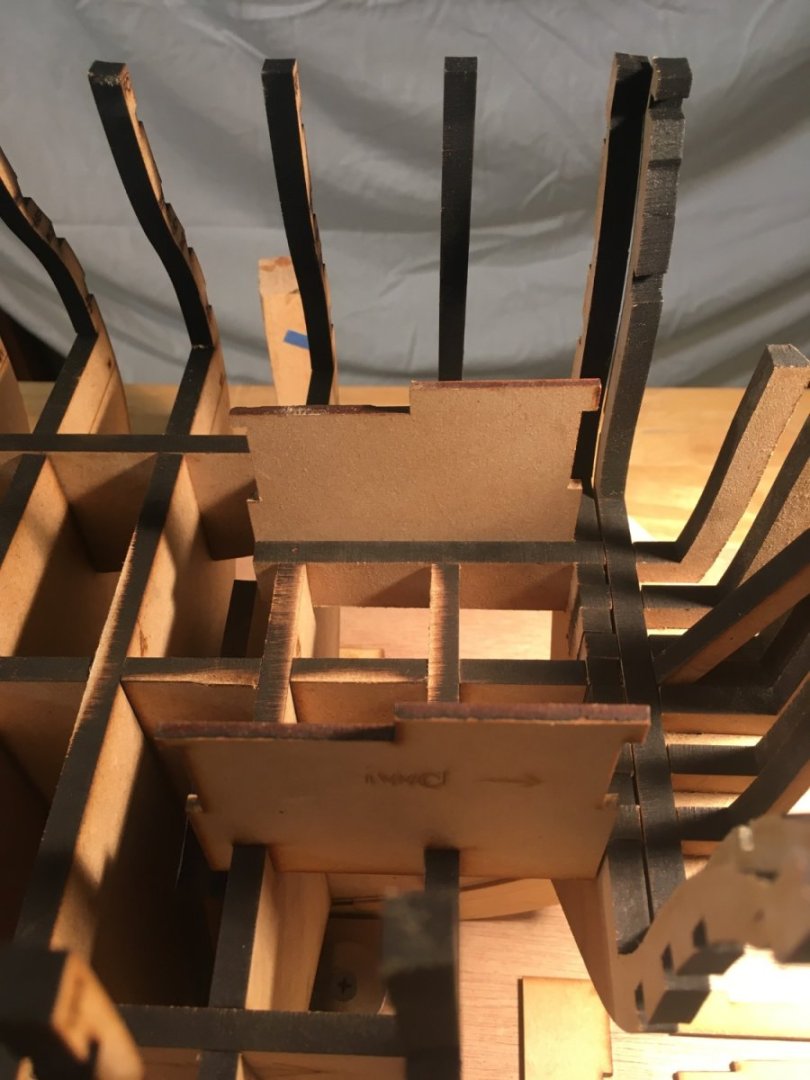
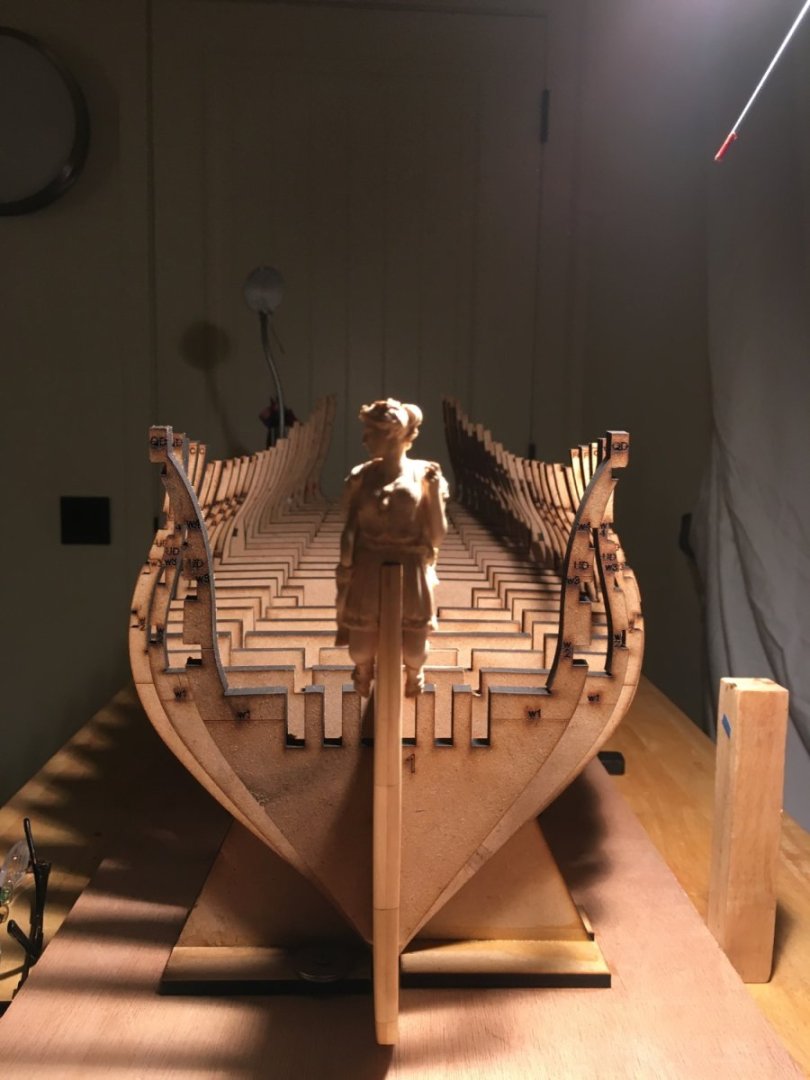
So I worked on some support jigs today along with the forward frames. There are three total jigs that are placed on the structure, these will remain there until the planking is completed and all the frames are supported. This is a large model with lengthy unsupported frames sticking up just asking to break off, I didn’t feel comfortable fairing and planking these without some major support through the process. The first jig is forward, it will support a larger piece that will lock the frames together and the second is in the middle it will also support this piece, both of these are represented in orange. Below you can see the forward frames in blue, I’ll cover these first since the forward jig is dependent on these. The pieces below are for the port side, they have fairing lines etched in already, I just sanded them carefully and test fit until I was happy. The frame you see is the forward bulkhead and timber support, this will go in last. I had already compleated the starboard ones and installed them with the fwd bulkhead frame, I did a little bit of fairing once installed and I’ll probably have to do a little more when I fair all the bulkheads. All three jigs are a pretty tight fit but I want them to be sturdy and keep the frames true, so some sanding and filing may be required, the assembly of the first one is shown below The two pieces above fit snug on the outboard side of the fairing frames on frames 1,2and 3, they are all marked with arrows facing forward so you get the direction right I should add that the flat piece on the center of each jig is there to attach the bulkhead jig to, I had intended to just screw it down to this piece but may glue it in and just break it out when it’s time to remove. all of this will come out once it serves its purpose. The middle jig is similar and you can see below, it fits between frames 12 and 13. Once the jigs are complete, the large piece that stabilizes the bulkheads will go on, it also acts as a parts tree for the gunport frames as well as the gunport cutouts to help you get the frames installed at correct angles. I will cover this in detail much more later as i still have to build the third jig which also supports the frames, unfortunately I forgot to cut some pieces and bring them back with me. JJ


- 396 replies
-
- 27
-
-

-
Nice work Dusan, impressive toolmaking. JJ
-
Nicely done Keith, I’m just now catching up on this build. Interesting subject as well. JJ
-
🤦♂️I see…apologies. I’ve only had one cup of coffee this morning, so far.
-
That looks nice Chris. Perhaps I’m seeing things or it’s part of the stand, but are those daggerboard keels on the bottom?
-
Off to a good start Matthias, this looks to be an interesting subject. Looking forward to following along.
-
Nice work Fred, planking looks good. It appears your filler blocks paid dividends, you have a nice and fair hull. You’re moving along nicely.
-
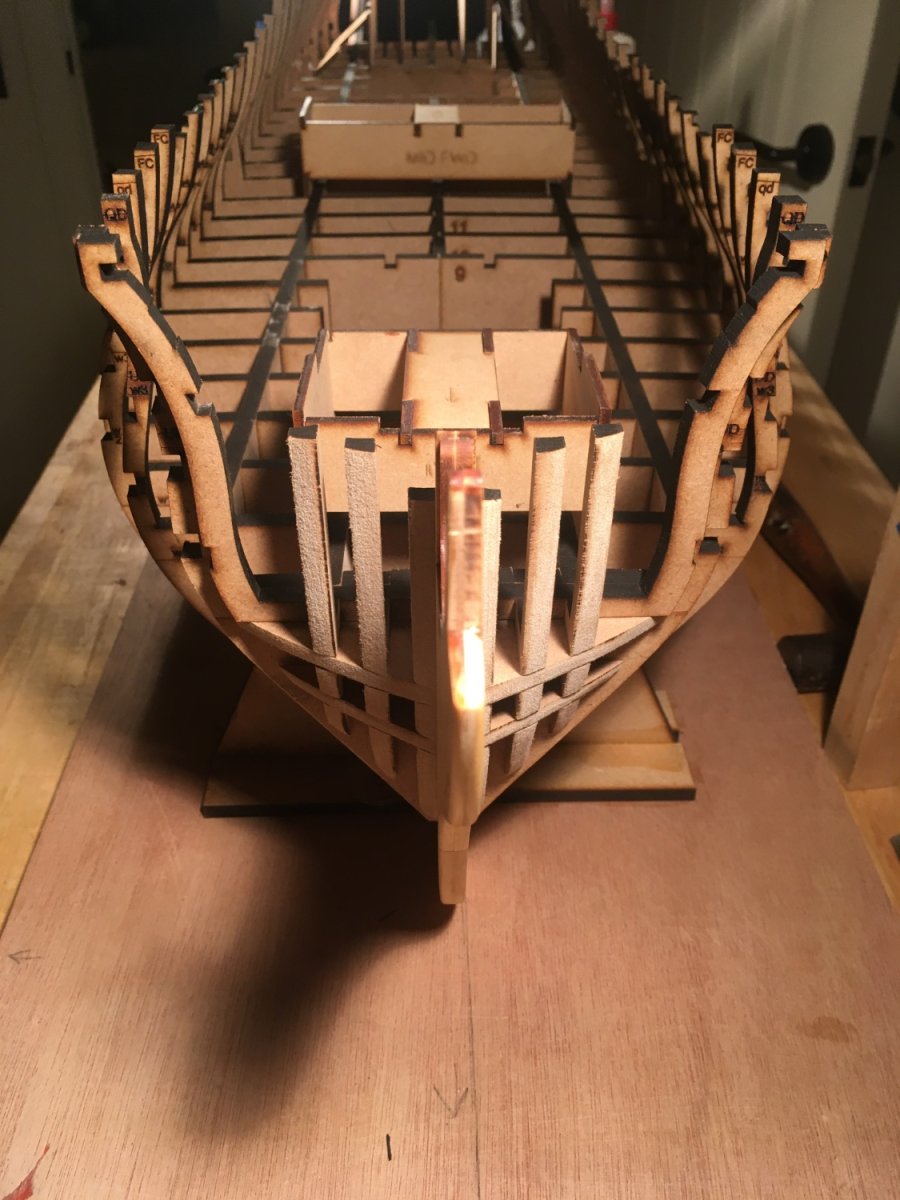
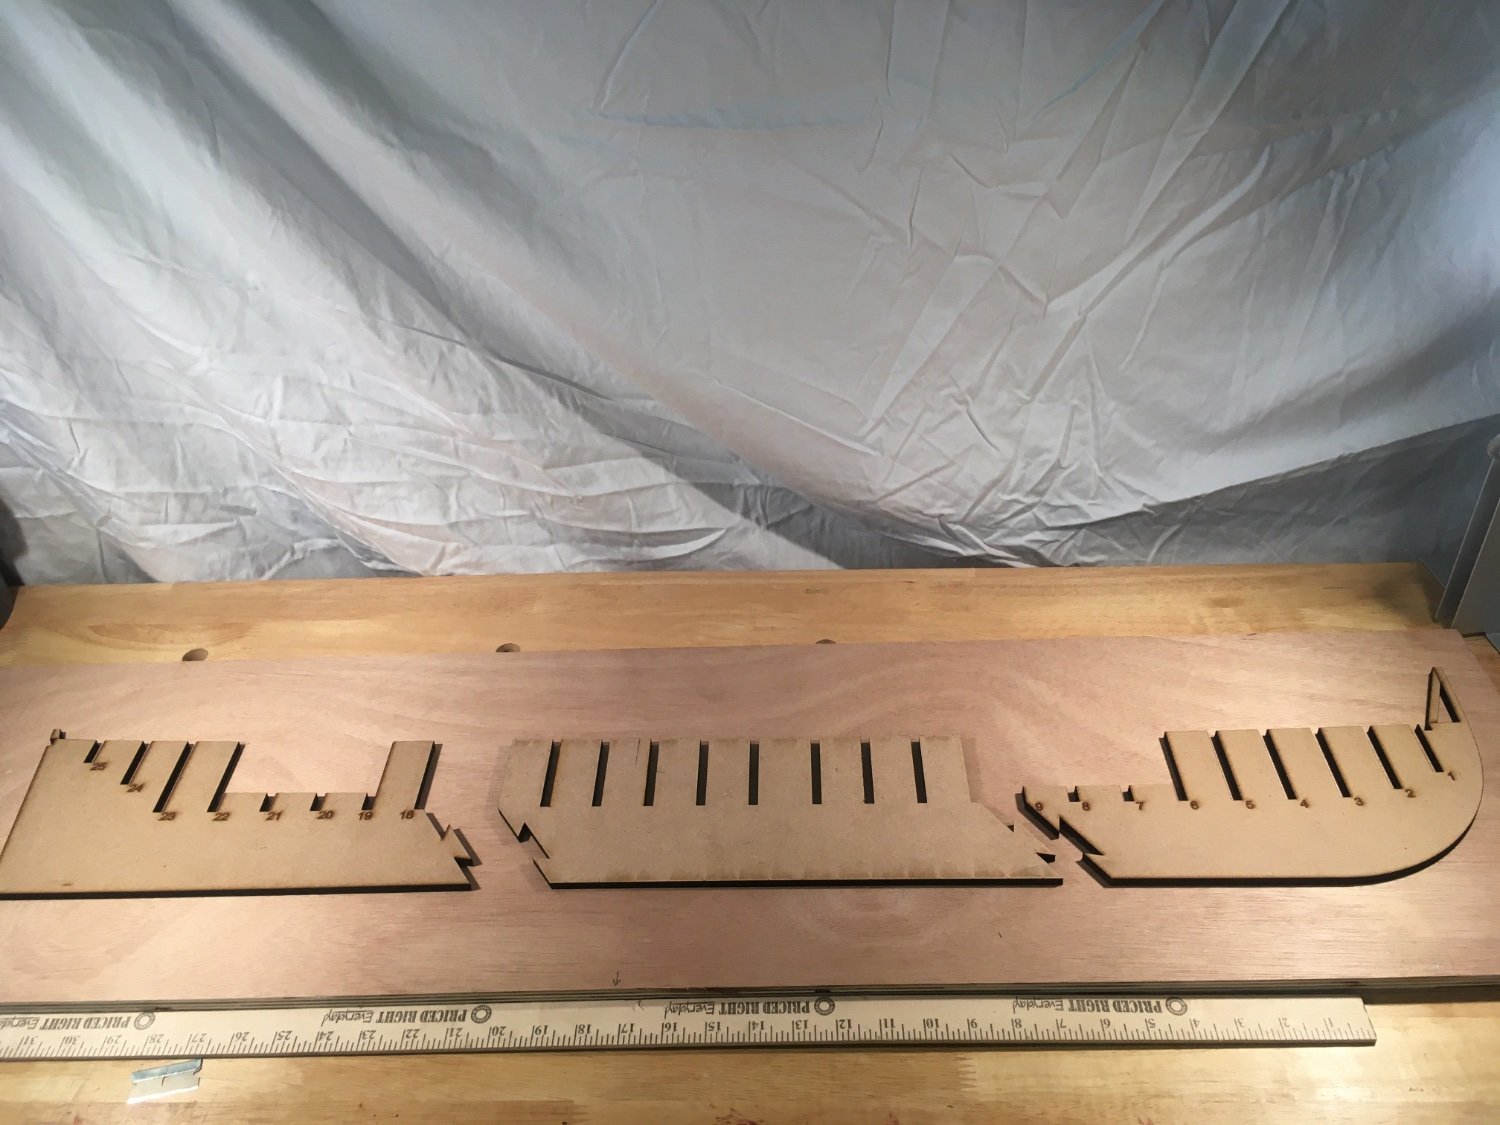
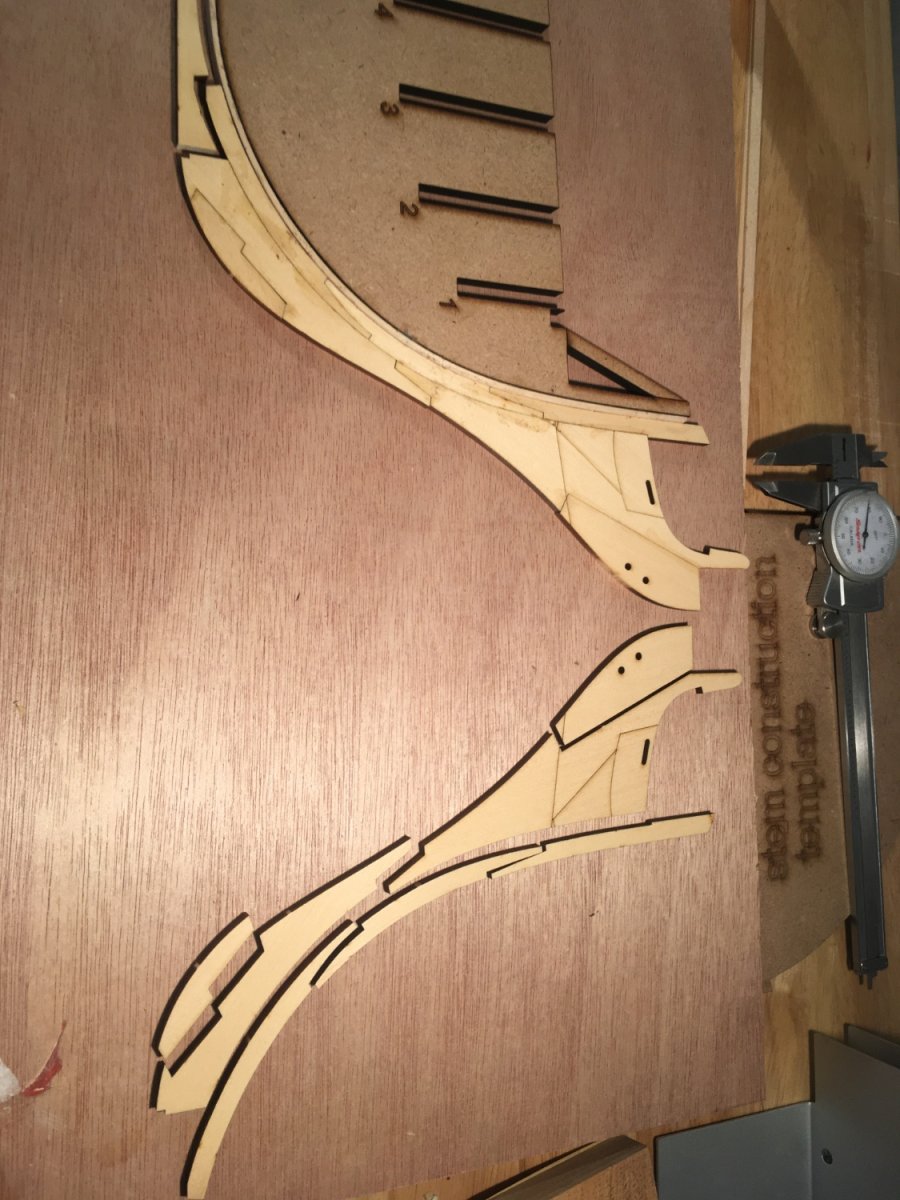
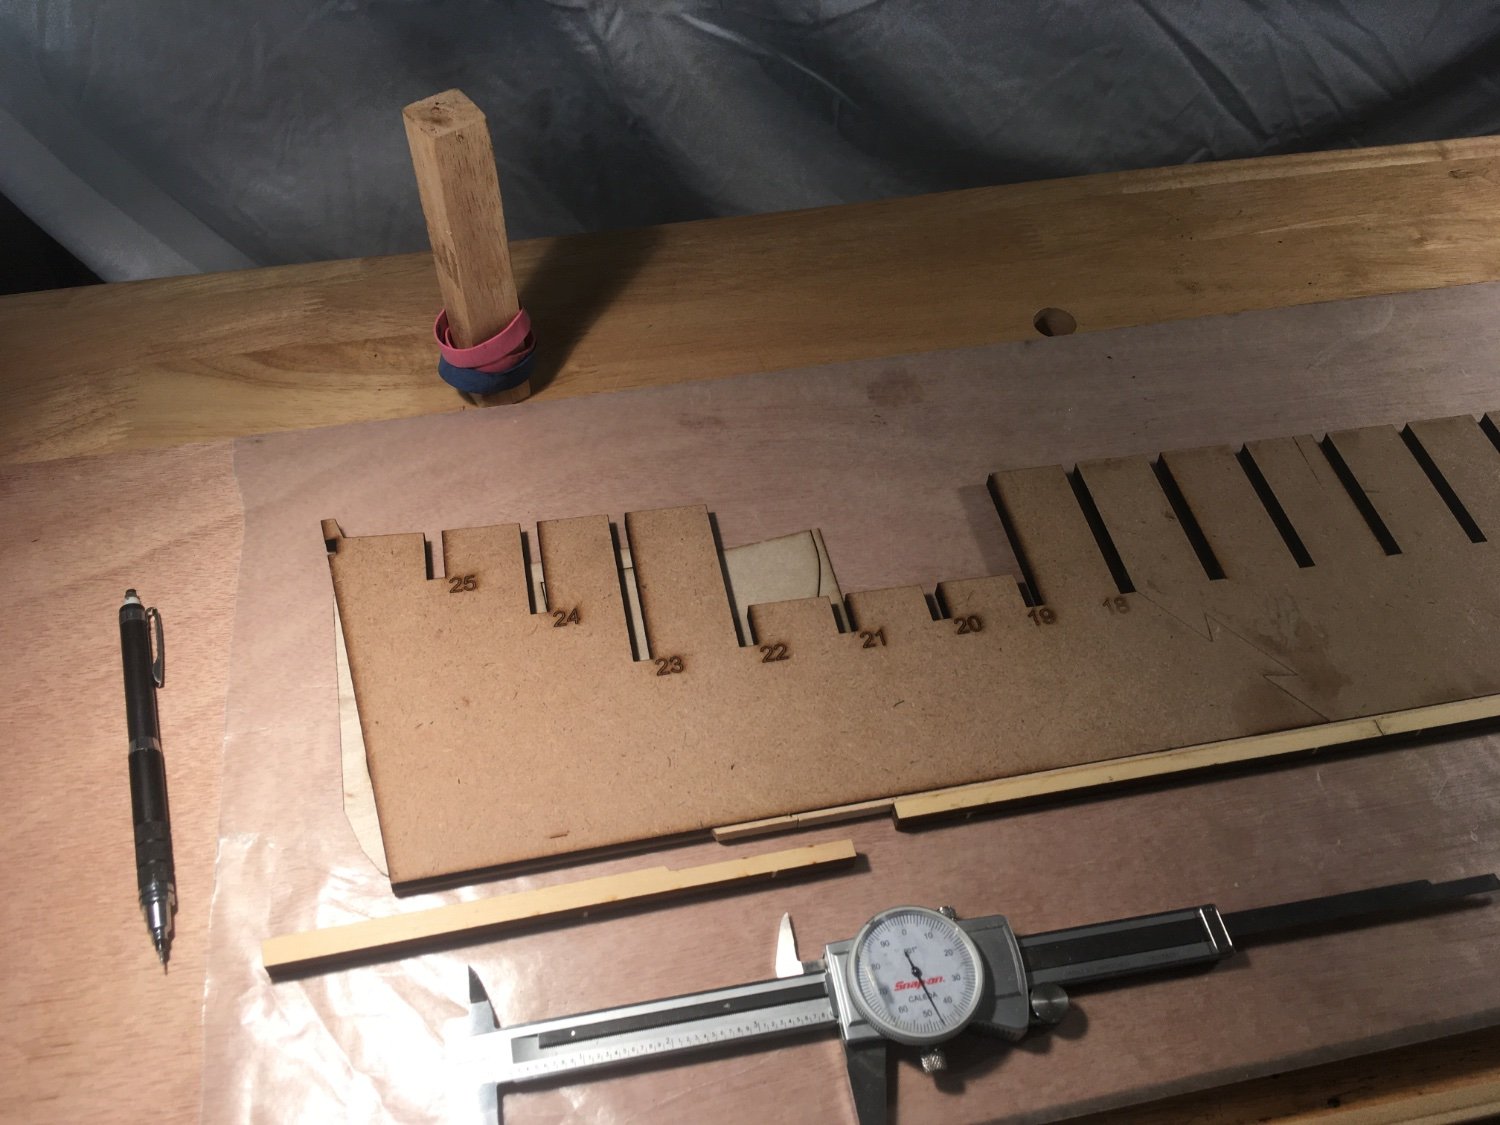
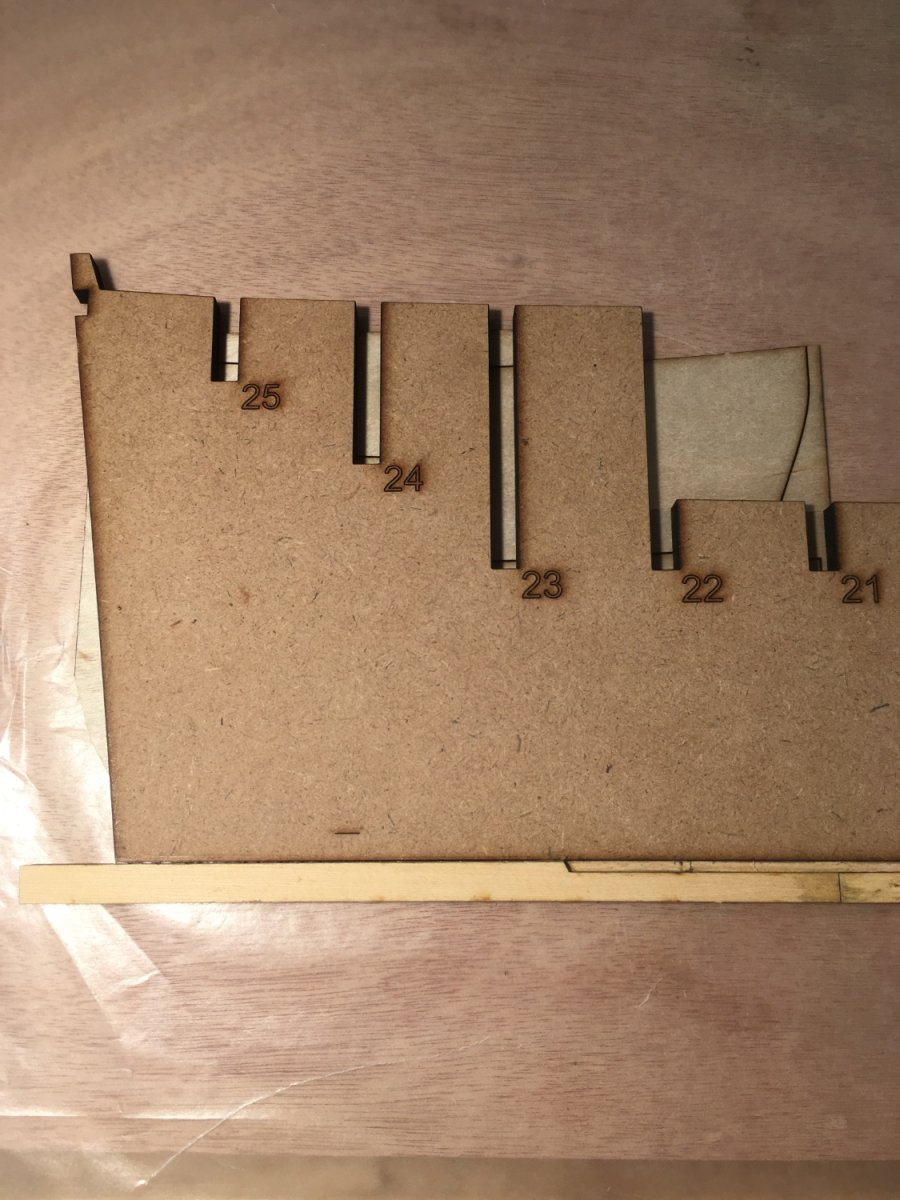
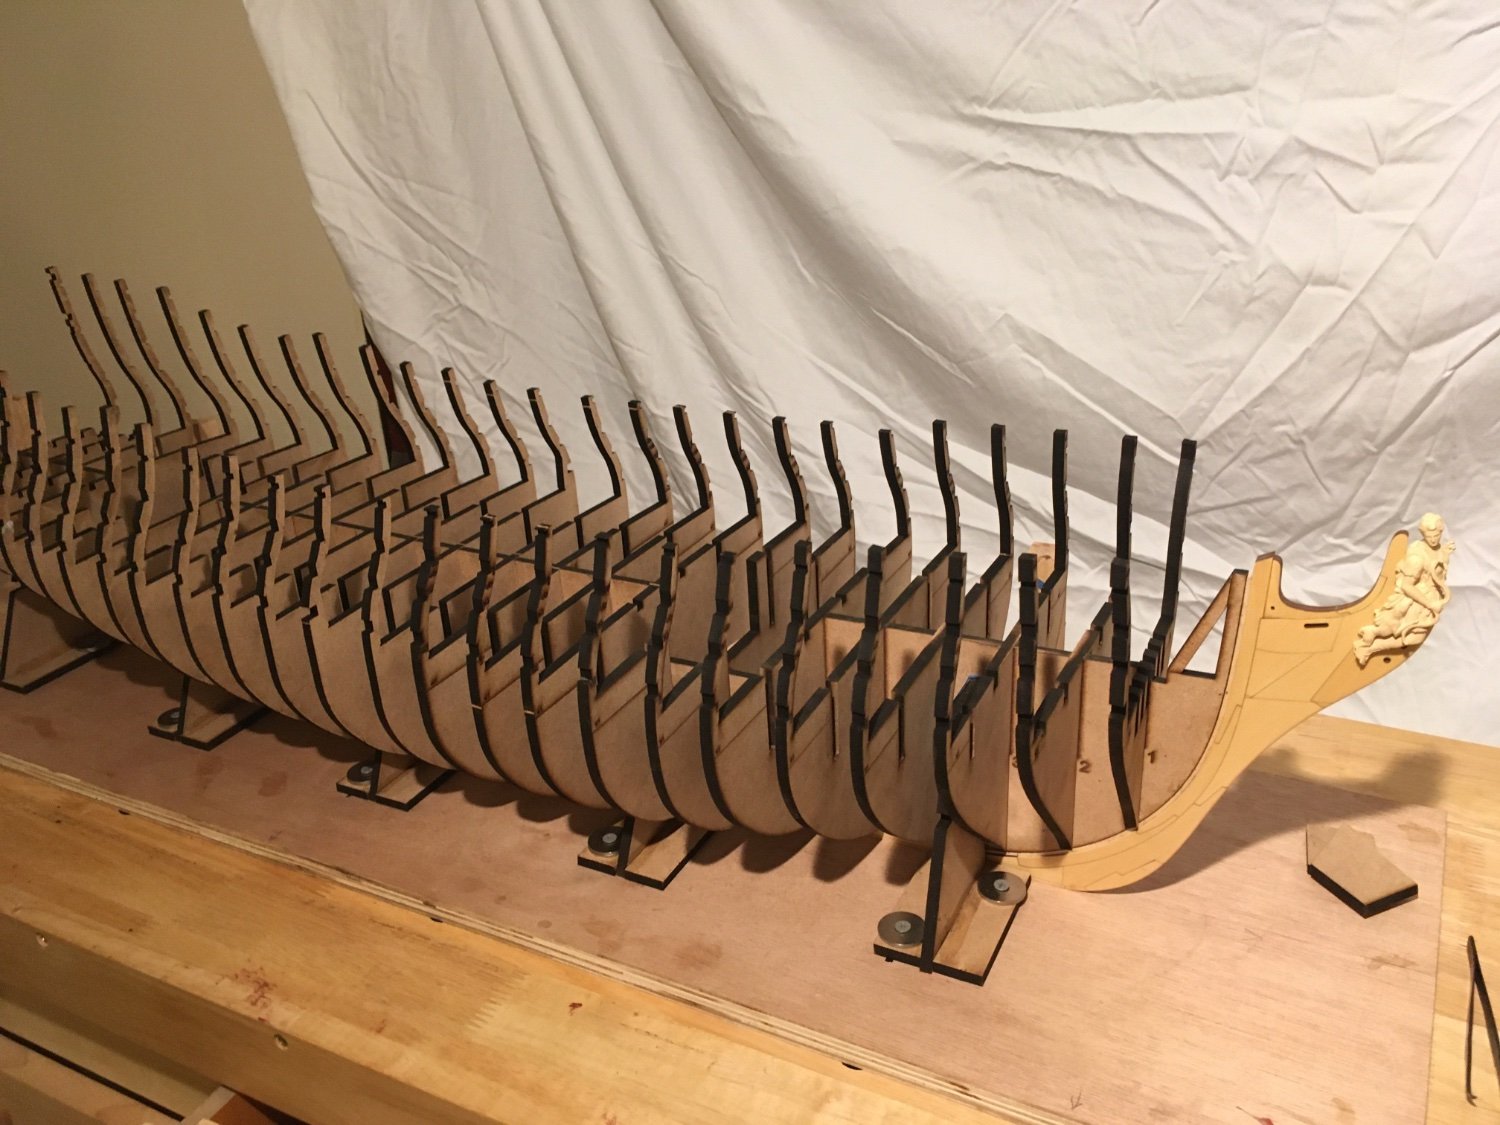
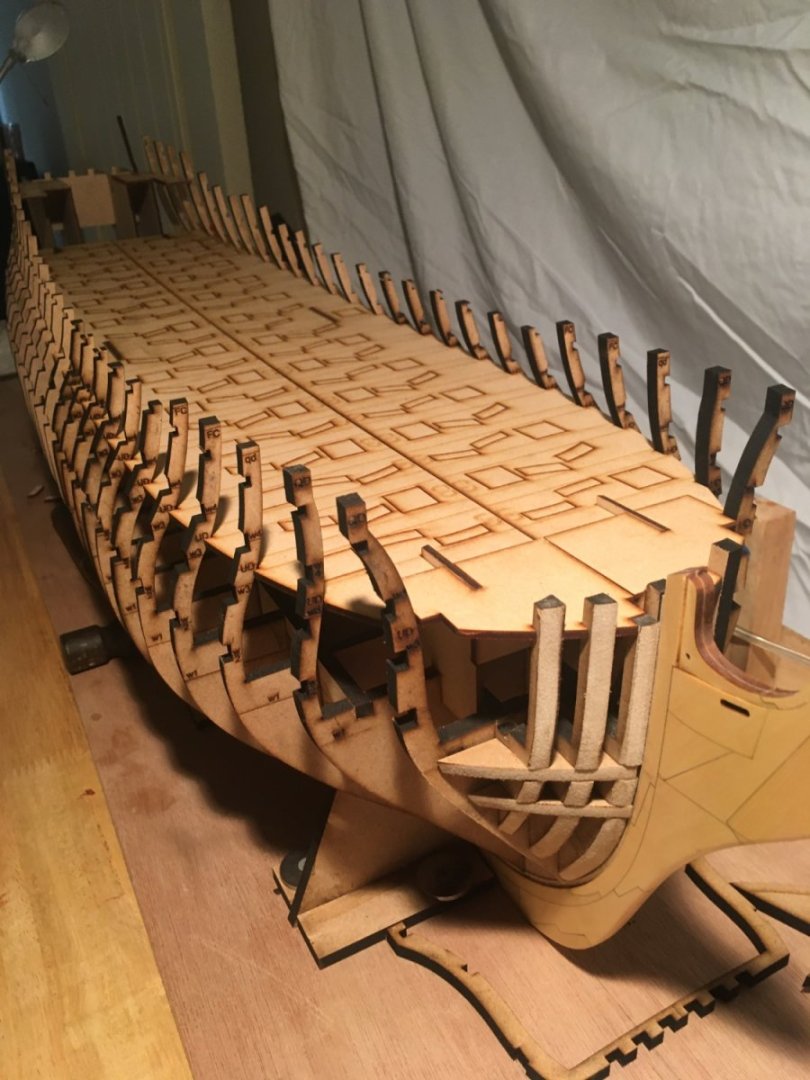
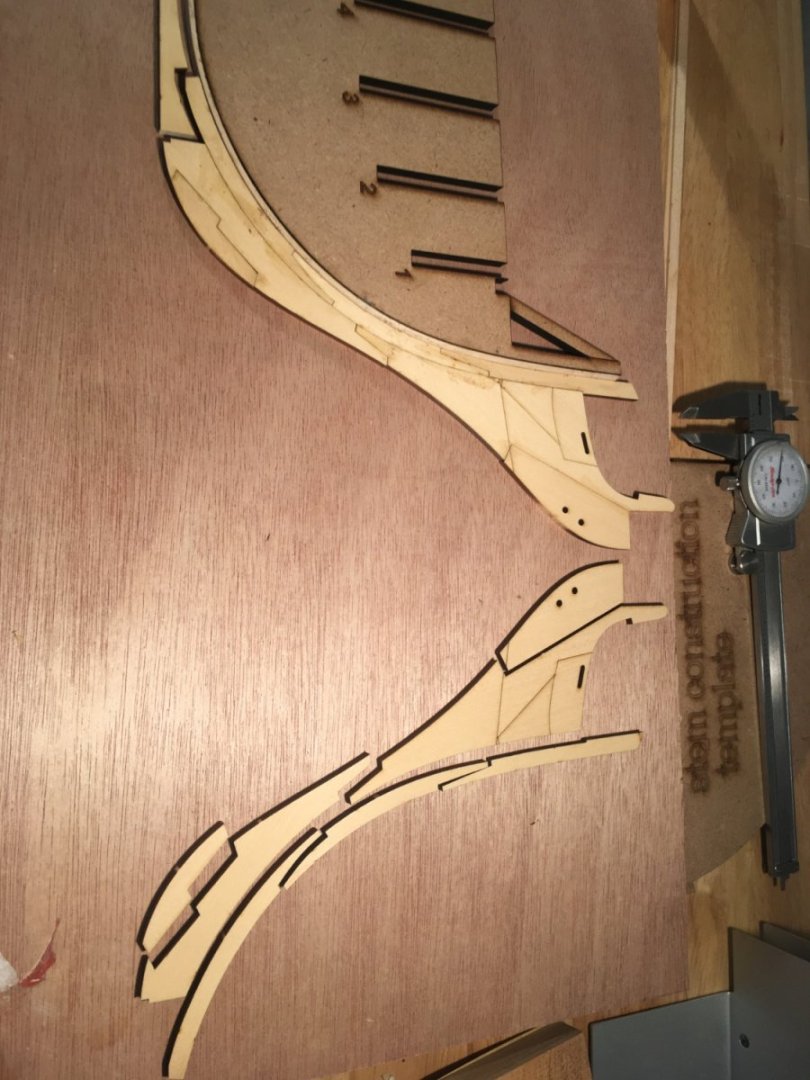
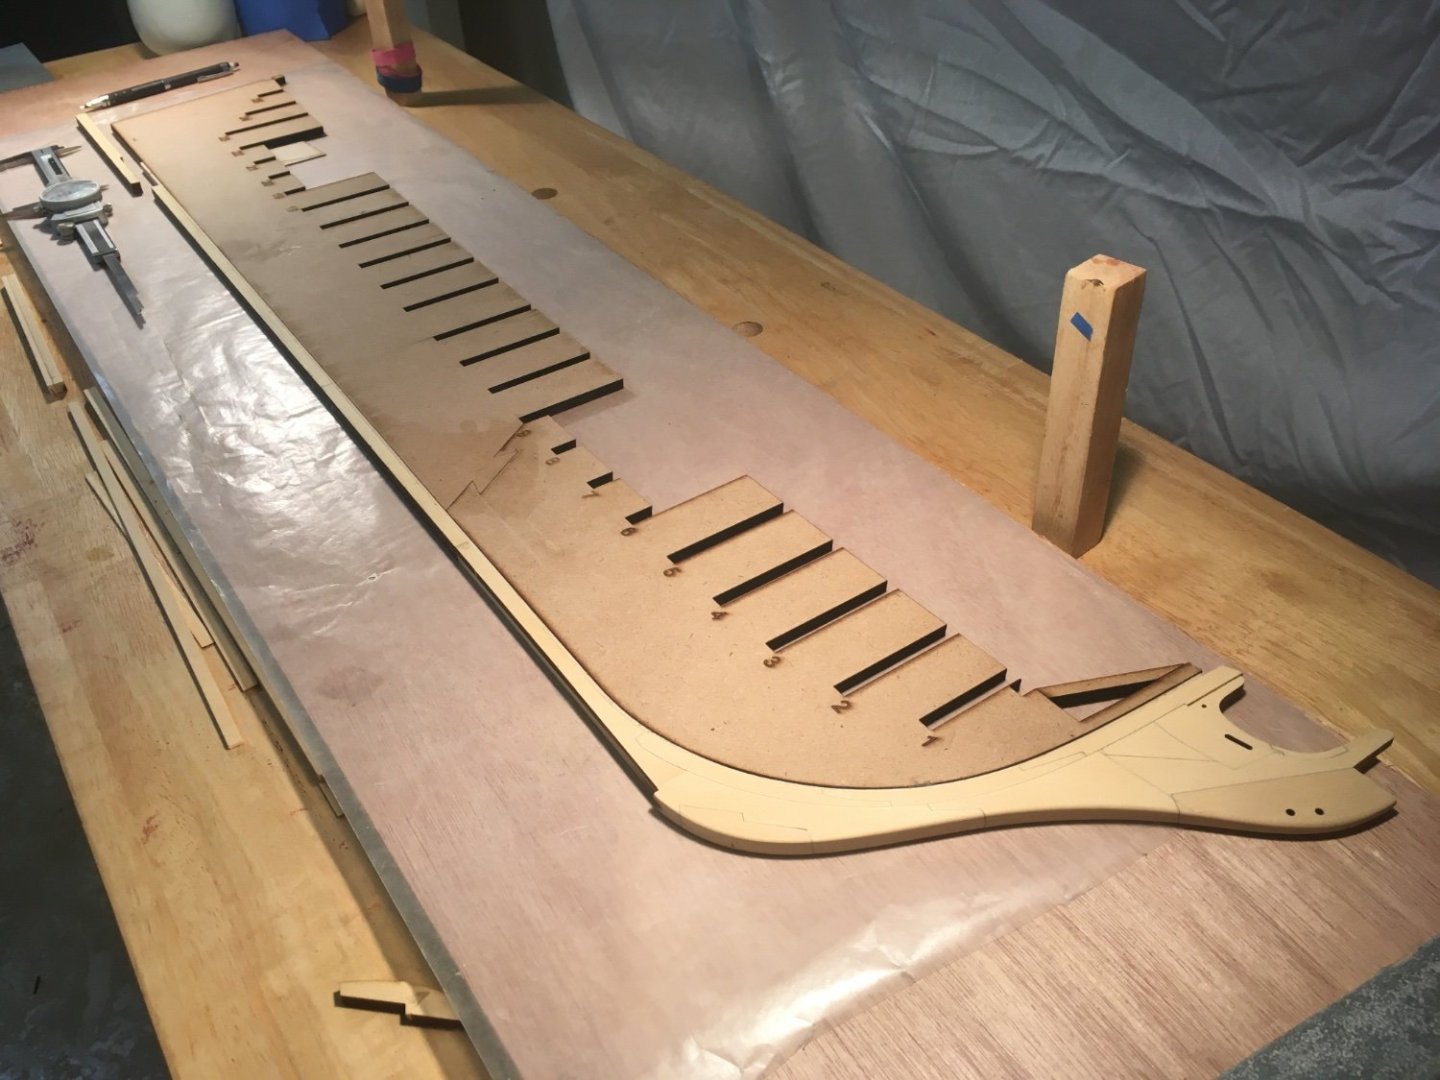
So after a week of waiting on some parts to show up that I had cut wrong prior, I was finally able to get back on track. I started by assembling the bulkhead former, this is in 3 pieces but I’m toying with switching to two or possibly even one if I can find a box large enough. This goes together pretty easy, I used wax paper and smashed it in a vise until the joint was dry and then repeated until complete. I also added a rabbet strip, this was just basswood I cut on my saw, it required slight heat on the bow to make the curve easier. Next is the knee, at 1/48 the knee and the false keel parts are just shy of 5/16 which is great, it will leave you some room to sand the parts and that’s what I did, now all these parts are two pieces of 5/32 AYC glued together, cutting 5/16 in one shot just had too much angle to it, it made assembly pretty difficult, but I’m still working on trying to improve the laser cut, perhaps I’ll get it in one piece someday but not for this model. As you can see i just etched some of the parts on to the main part of the knee, this is actually pretty convincing, I did however toss in a reference line for the paint and where the wales meet the knee, I don’t like it and probably won’t keep it there, but it will get painted over on this model anyway. Once the knee and all the false keel parts were assembled I measured the width of the former and subtracted it from the cedar pieces, using this number, roughly 1/32, I layed the former down with the 1/32 spaced sheet underneath and glued the knee and keel parts onto the rabbet. This kept everything in line and centered very well. I carefully sanded the AYC with 100, 220 and finally 320 and gave it a quick bath in some WOP just to protect it from my filthy hands. Next I assembled the stands and lined them all up with a level and glued them down, the next set I screwed down, otherwise I’d never be able to lift the model out. From here I just dry fit and tested all the bulkheads, some required a bit of filing from different laser settings, the production parts will not. Tomorrow, if I have any time, I plan to start installing the longitudinal frames to lock it all together, from there I’ll build the new stern jig and start installing the frames. JJ


- 396 replies
-
- 26
-
-
-
I would be interested in this at 1/48 for sure. Im sure it won’t scale down easy though
-
Lovely work. What’s her LOA?
-
Absolutely beautiful work! Well done!
-
Lovely work Mike!
-
That’s a nice table, my needs would require a smaller version but I definitely am interested in one.
-
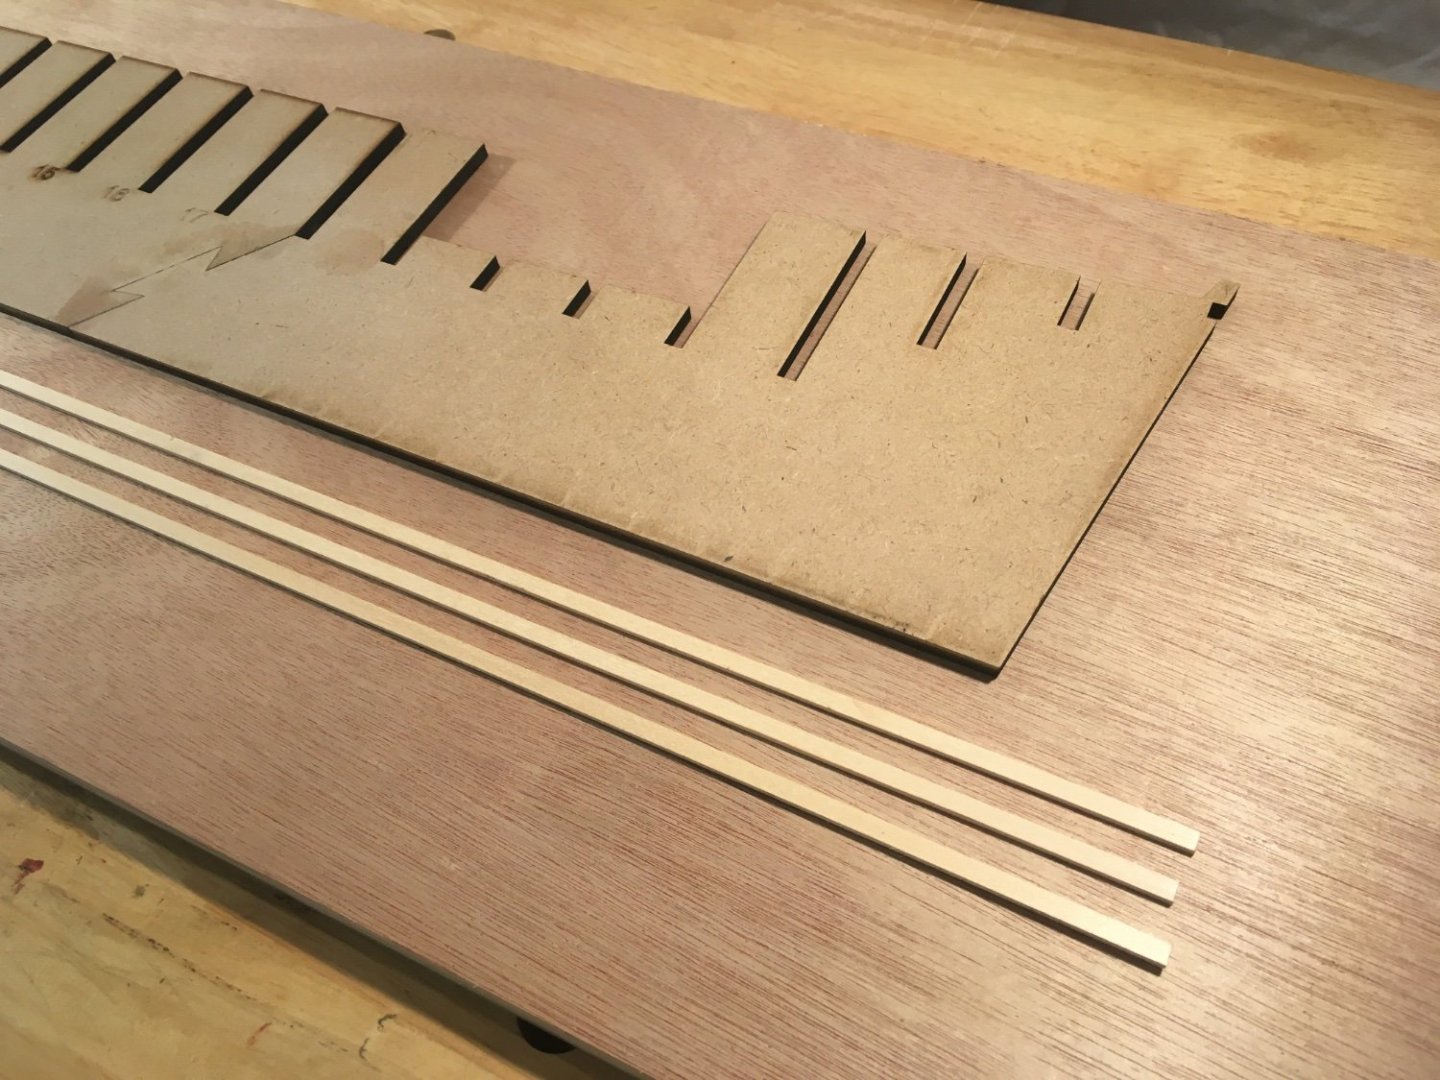
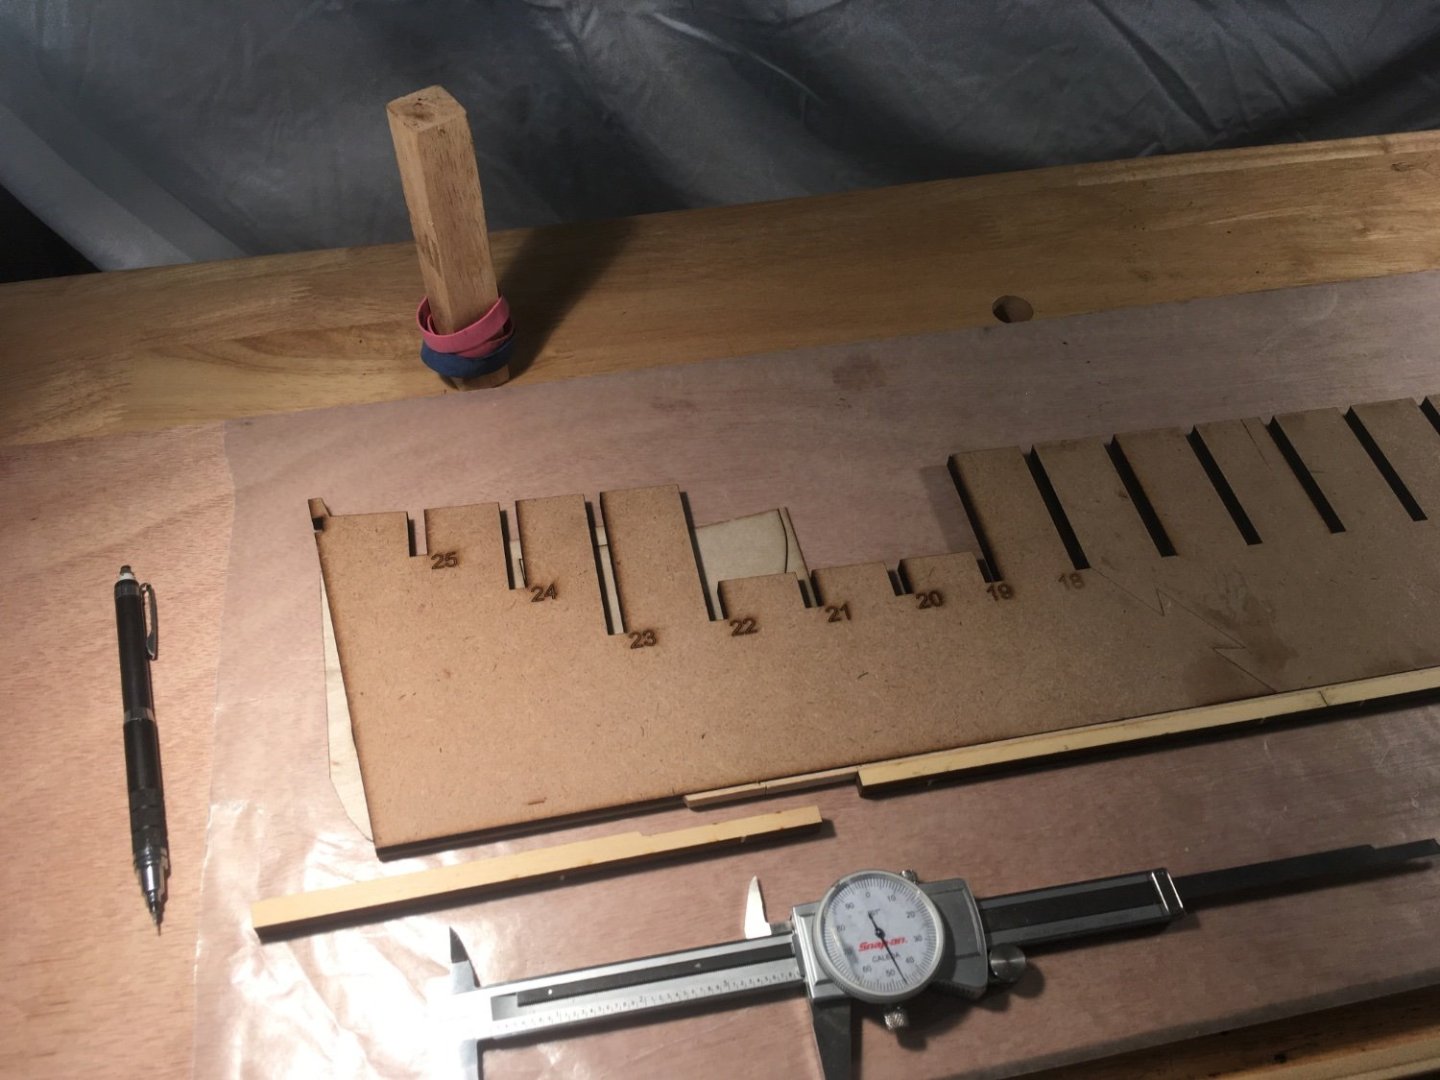
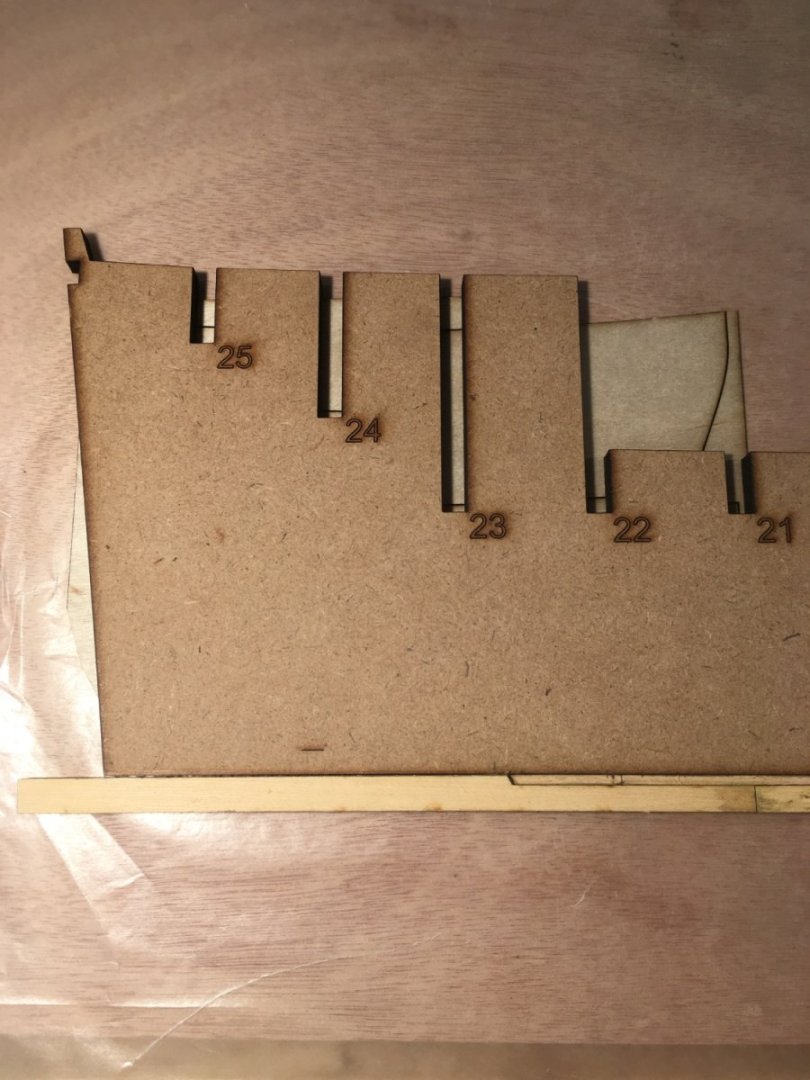
Those look really good, how do you keep the bit from kicking the piece across the room? Tabs? My laser can also conquer steps like that, you just have the char, but there’s no chance of the pieces flying out. These steps were done in Boxwood at 1/32 by Chuck for his Winchelsea kit, the mortises are also laser cut, after some light sanding they are very convincing.


-
Beautiful! I’m buying one.
-
Curious to see how these turn out, I may buy a small CNC for this purpose. What does the cutting bit look like? What size?
-
Very nice work on your Indy, Glenn, very crisp and clean. Your decks and fittings are very nice and precise. Excellent build. JJ
- 587 replies
-
- 4
-

-
-
- Indefatigable
- Vanguard Models
- (and 1 more)
-
I agree with Druxey, it appears to be a perspective view. Can you confirm?
- 99 replies
-
- 2
-
-
- ancre
- La Mahonesa
- (and 1 more)
-
I would be interested. Where are you located?