HOLIDAY DONATION DRIVE - SUPPORT MSW - DO YOUR PART TO KEEP THIS GREAT FORUM GOING! (89 donations so far out of 49,000 members - C'mon guys!)
×


scrubbyj427
-
Posts
1,690 -
Joined
-
Last visited
Content Type
Profiles
Forums
Gallery
Events
Everything posted by scrubbyj427
-
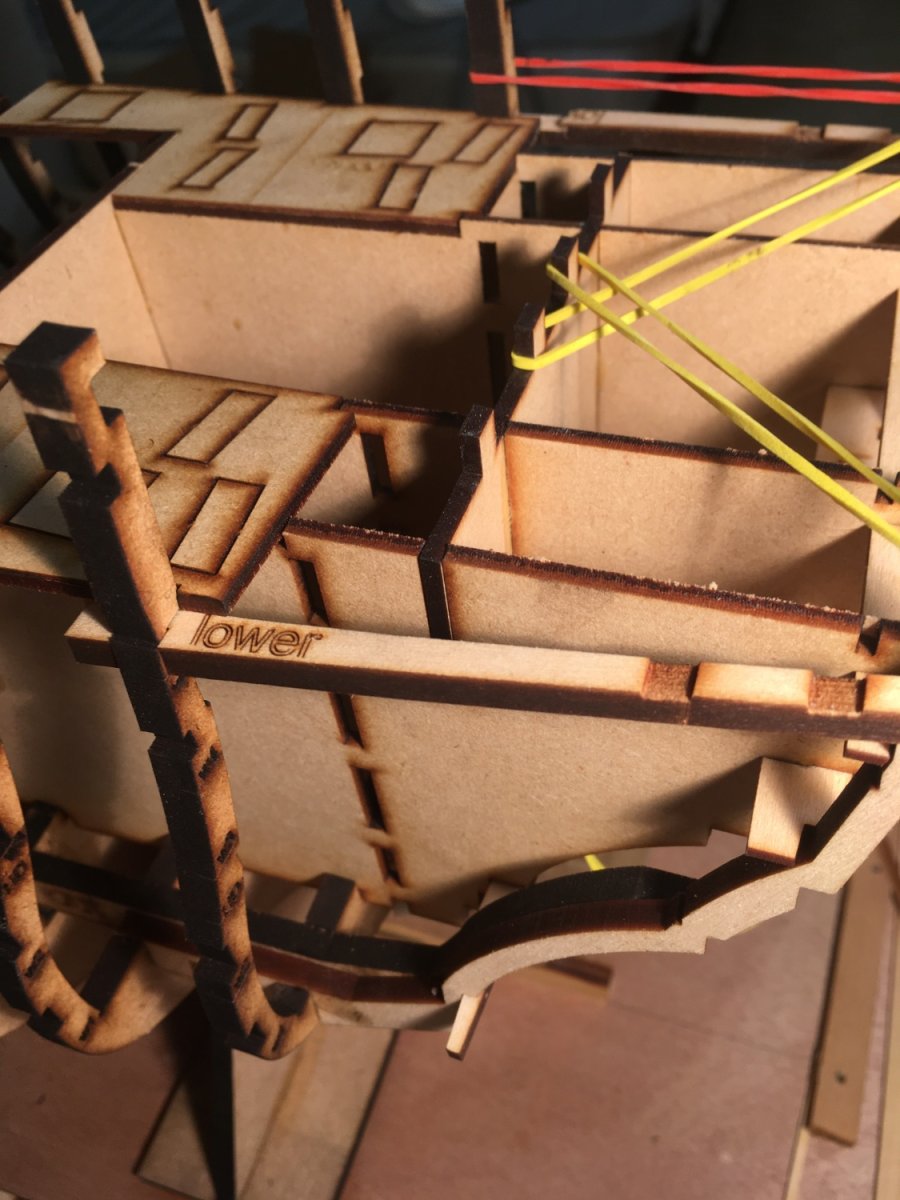
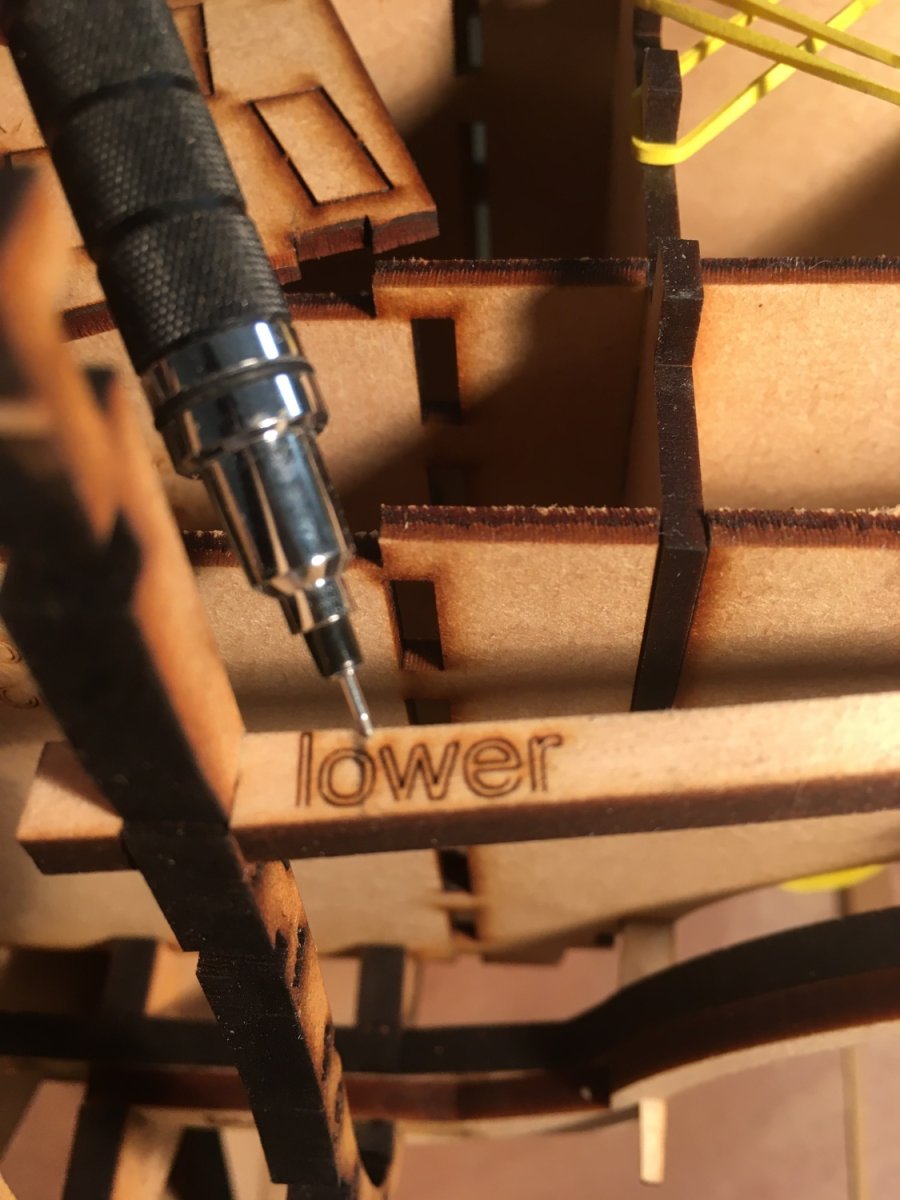
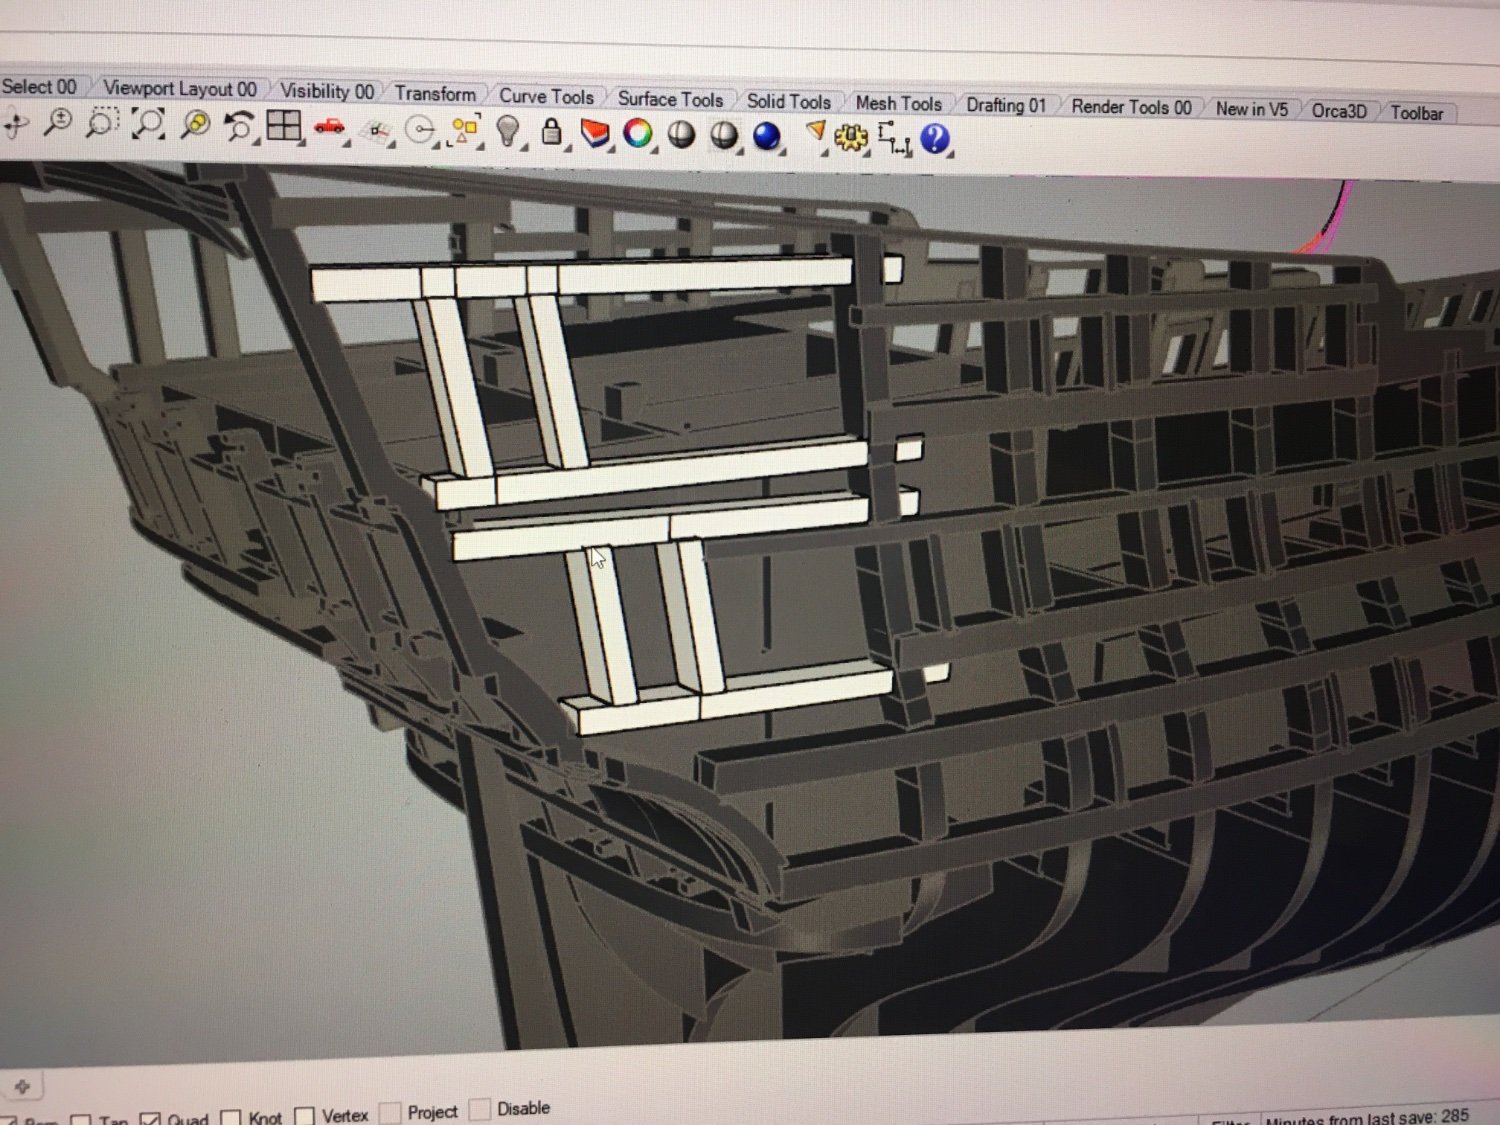
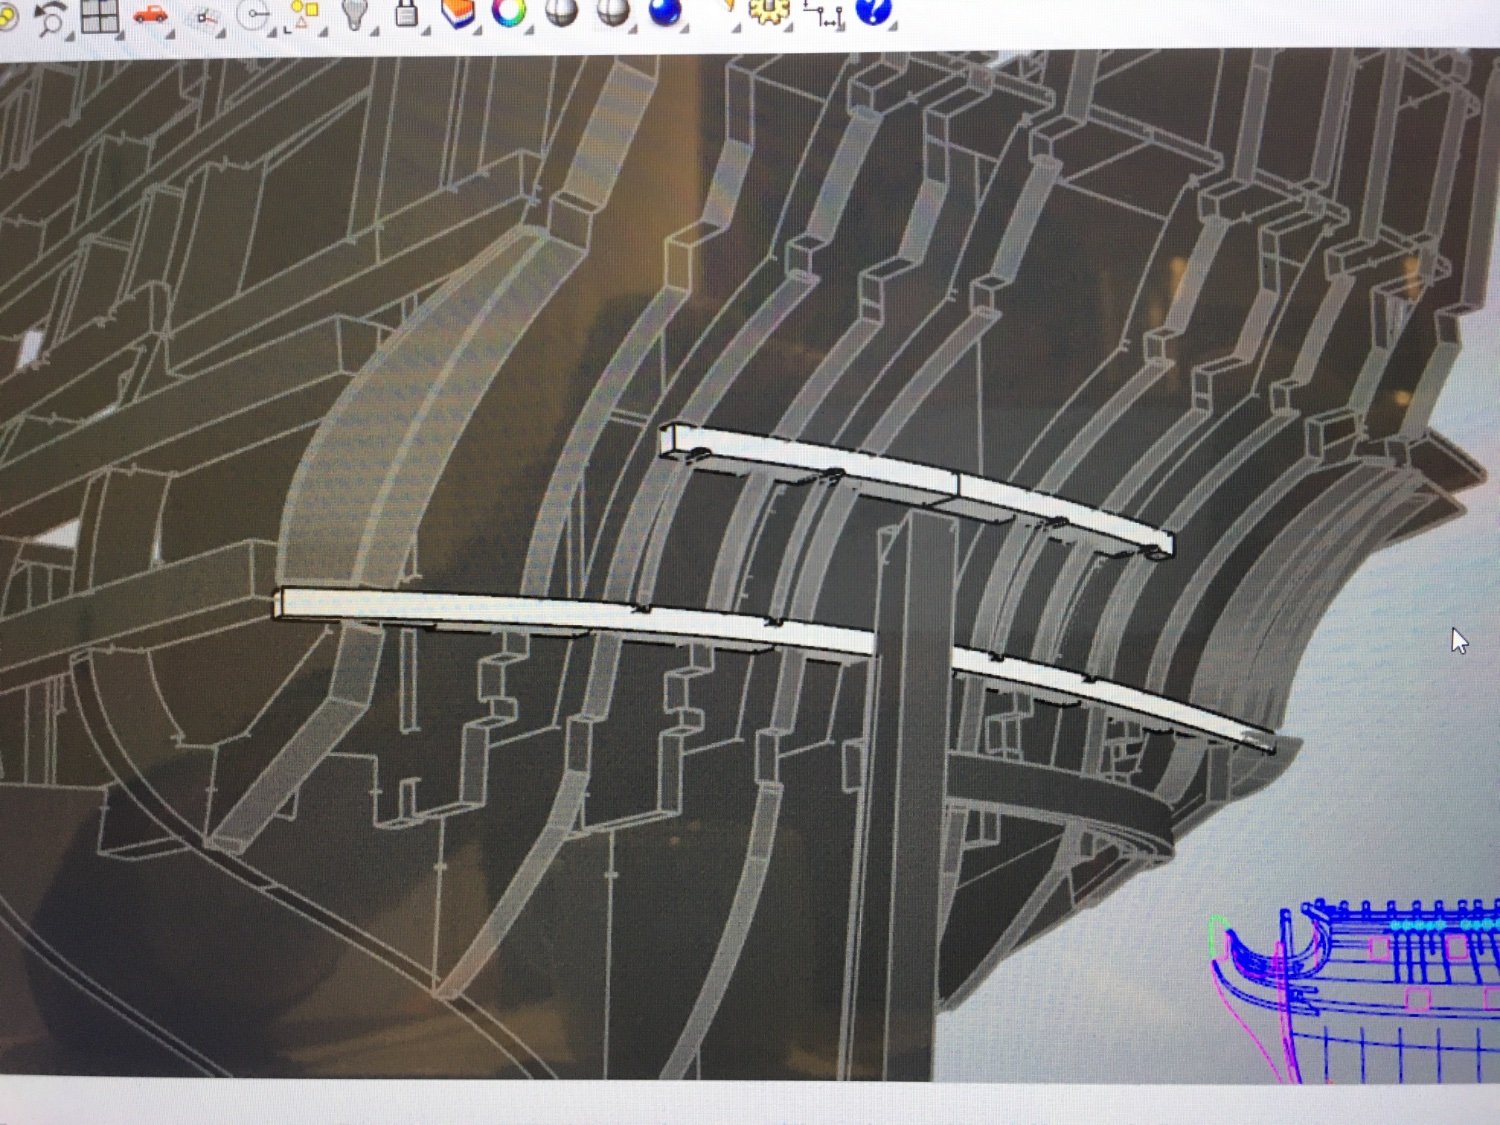
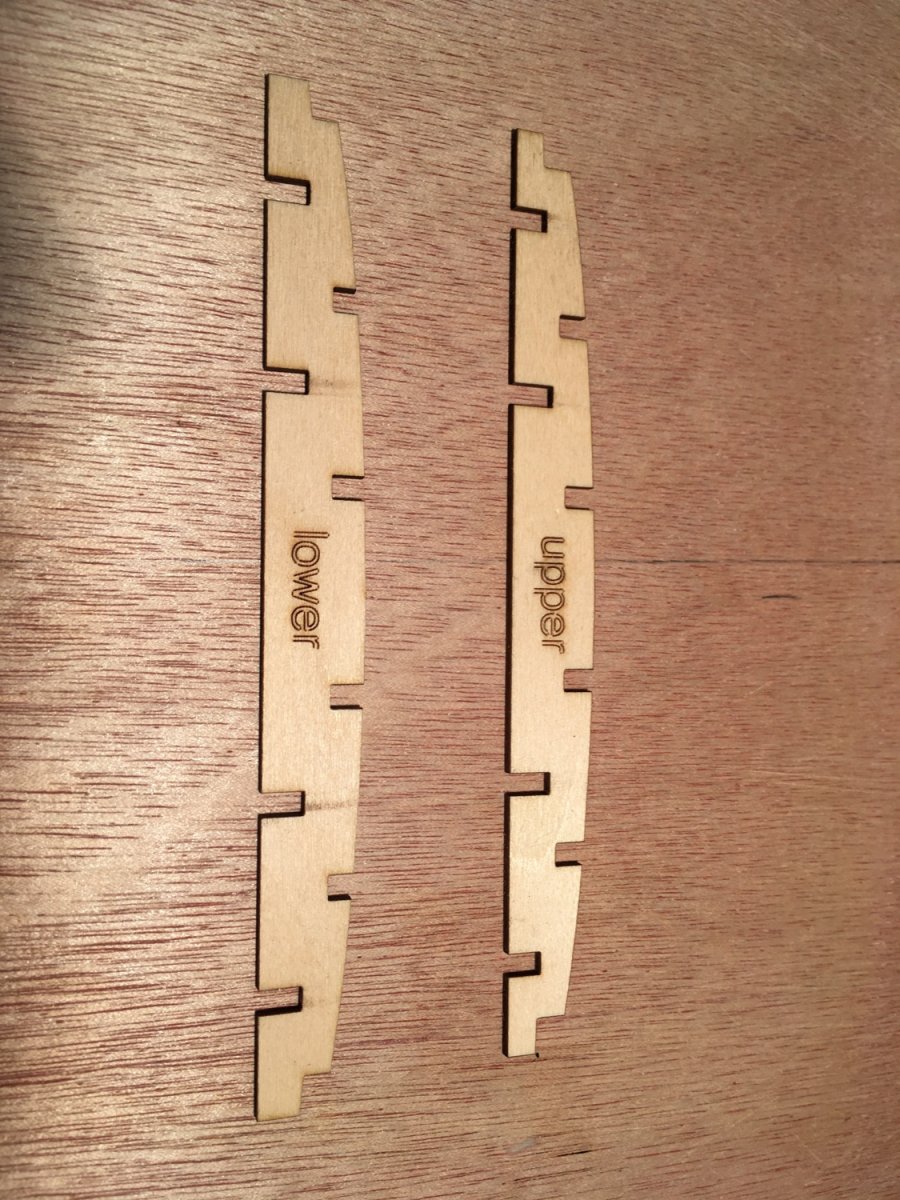
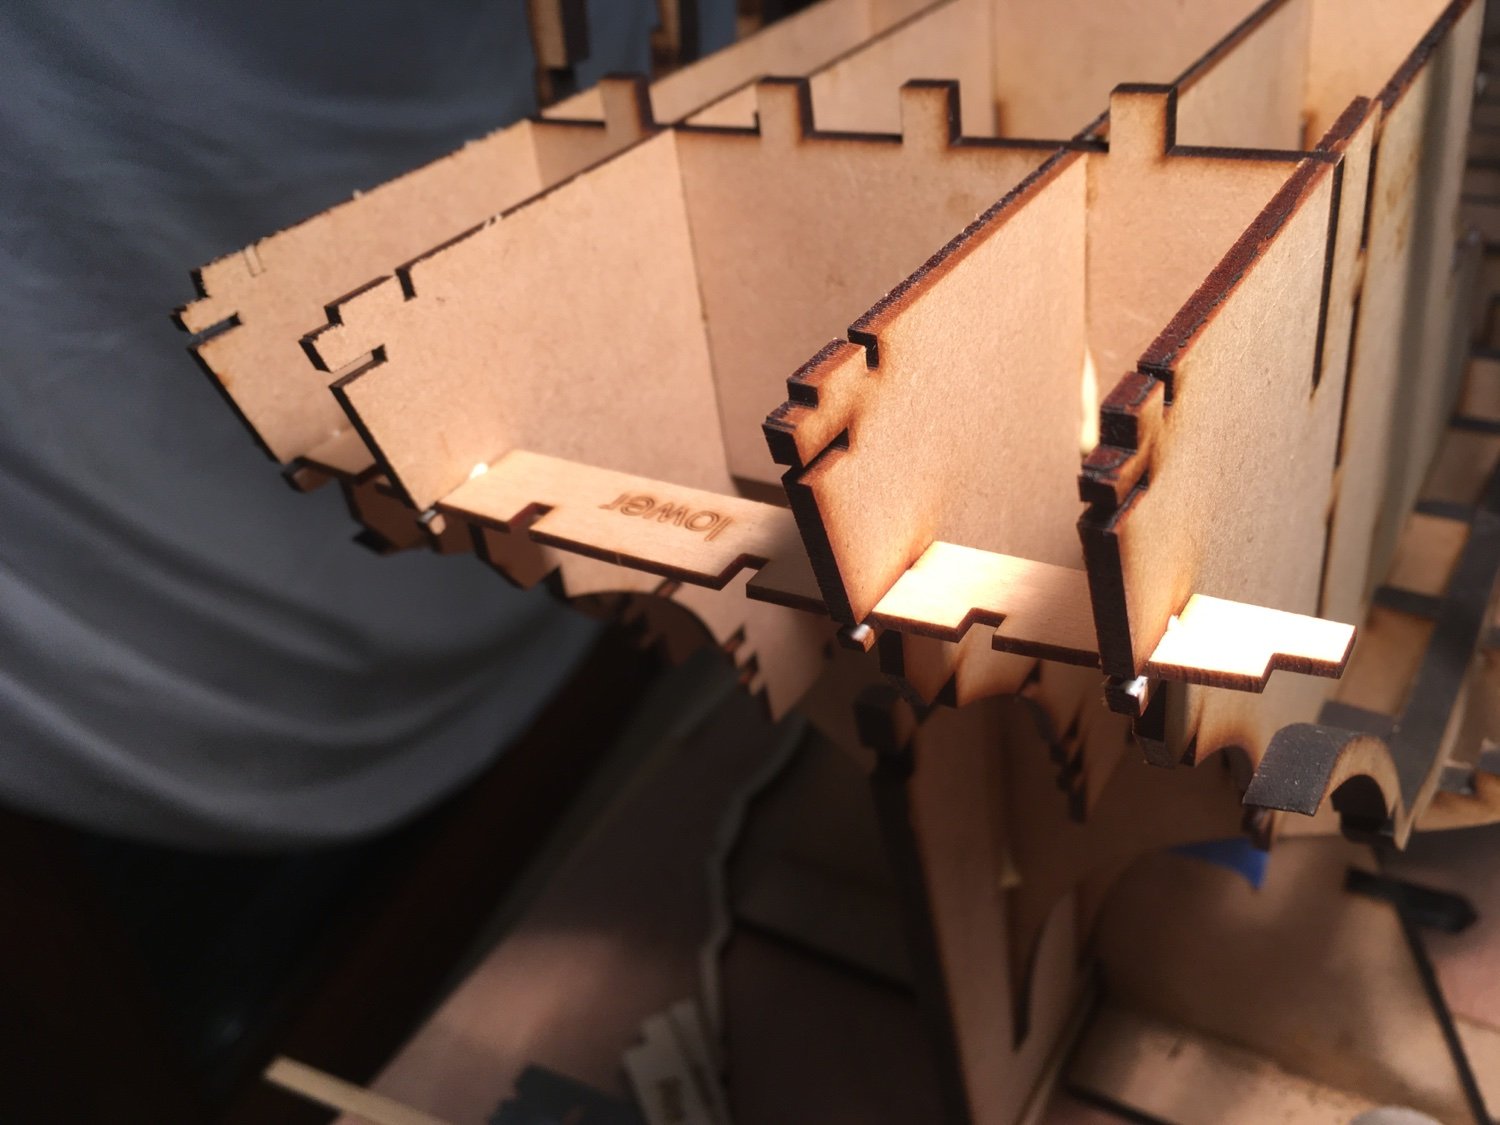
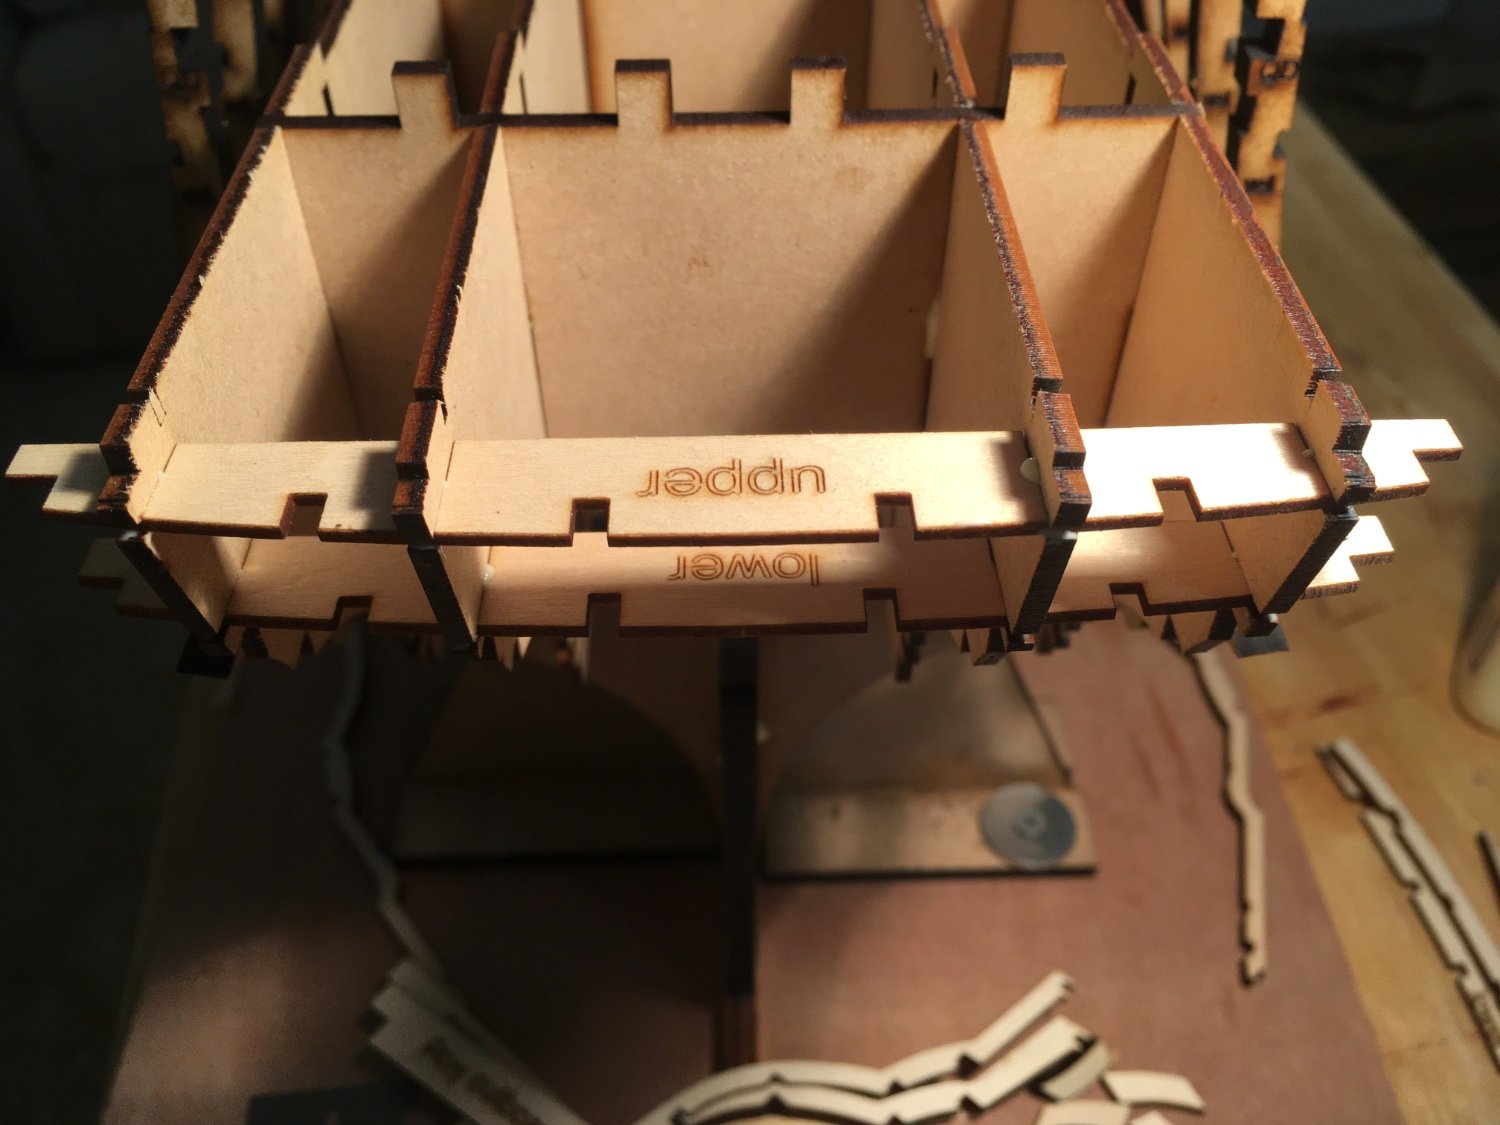
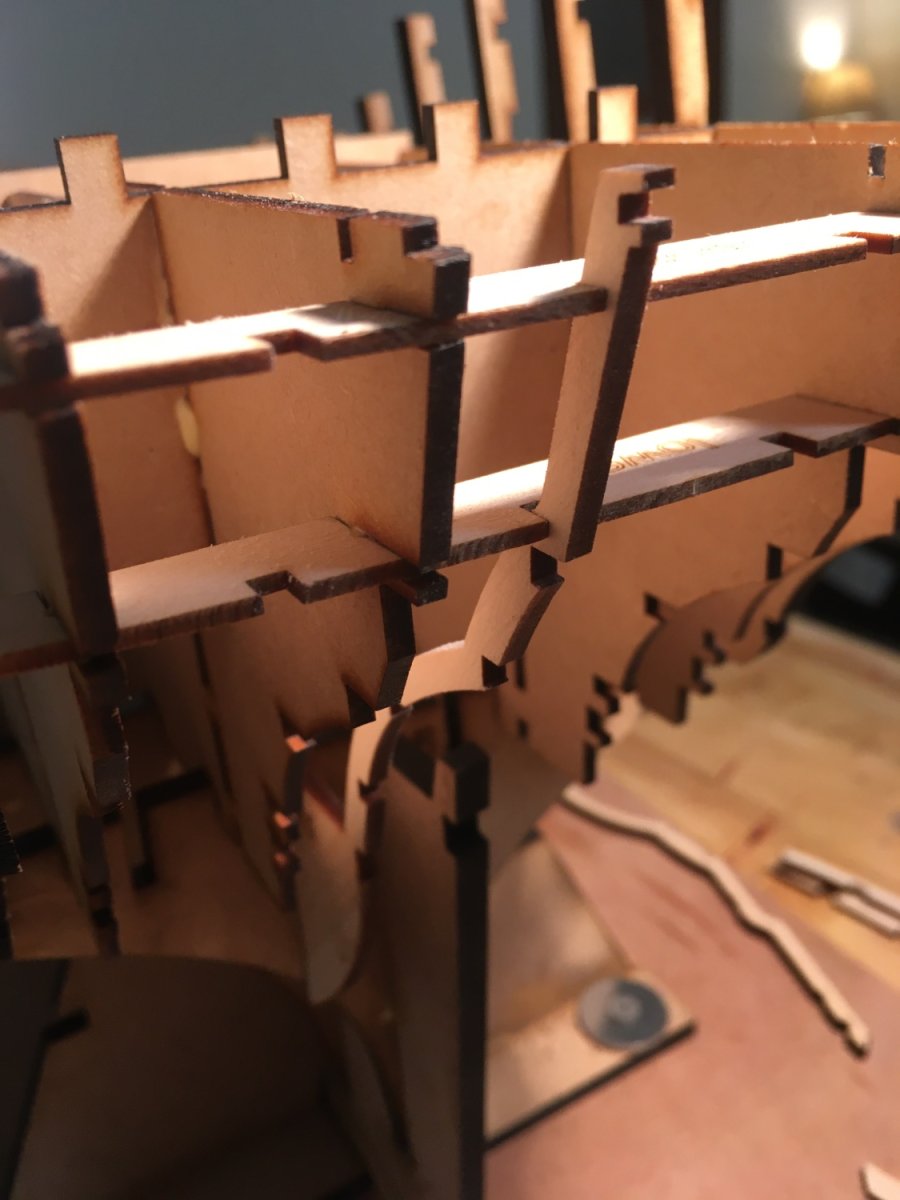
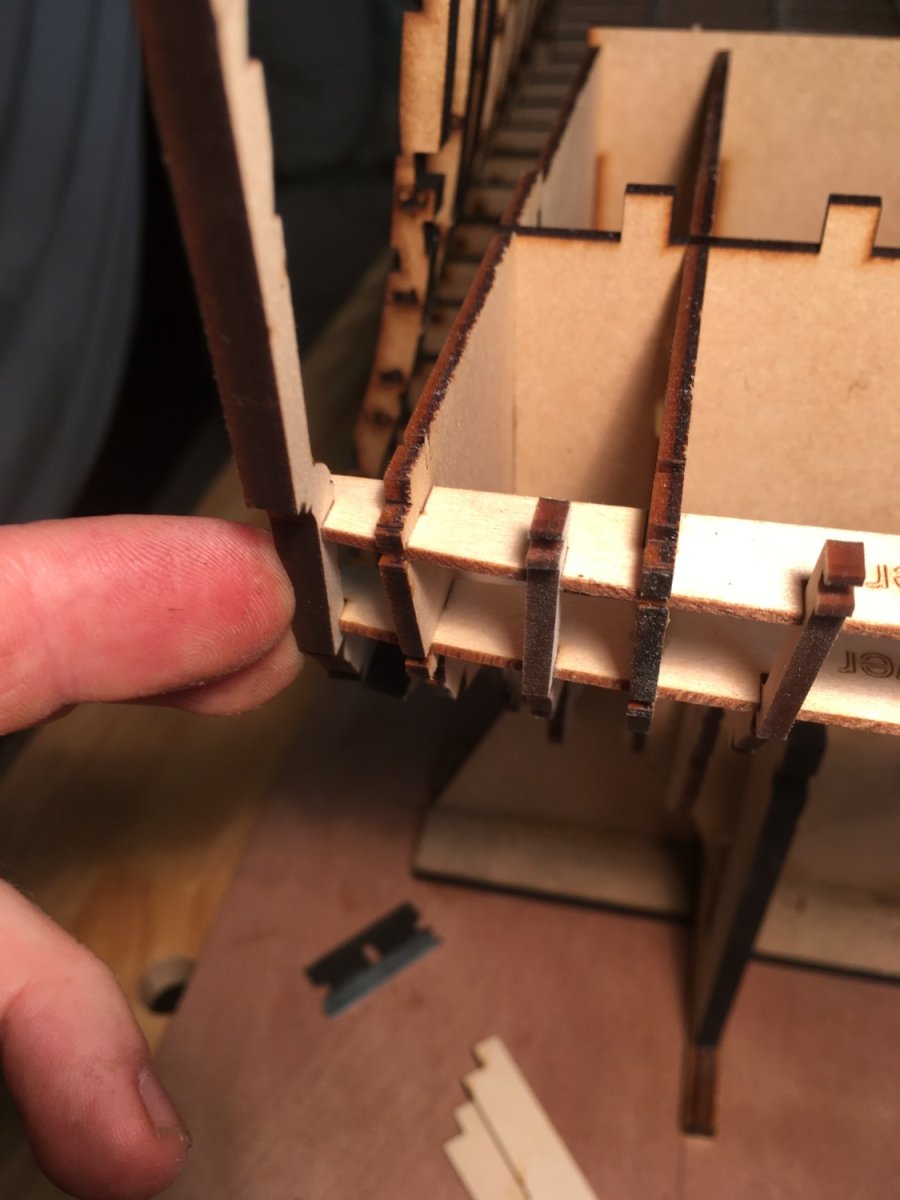
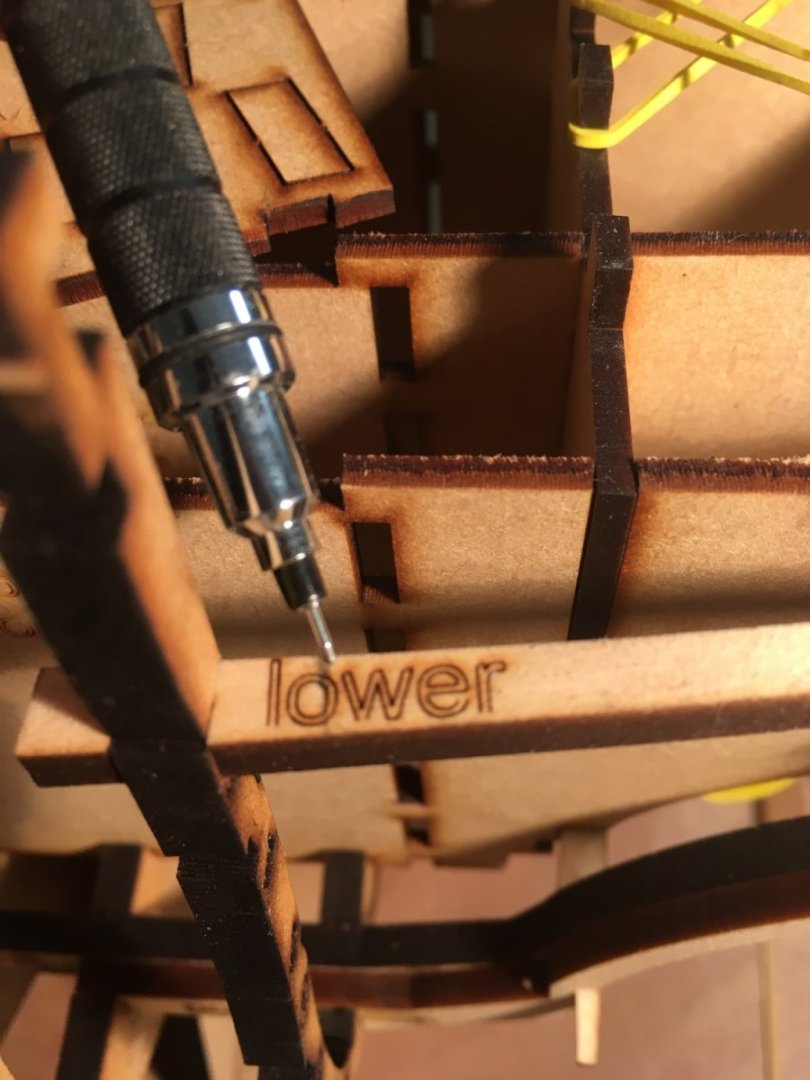
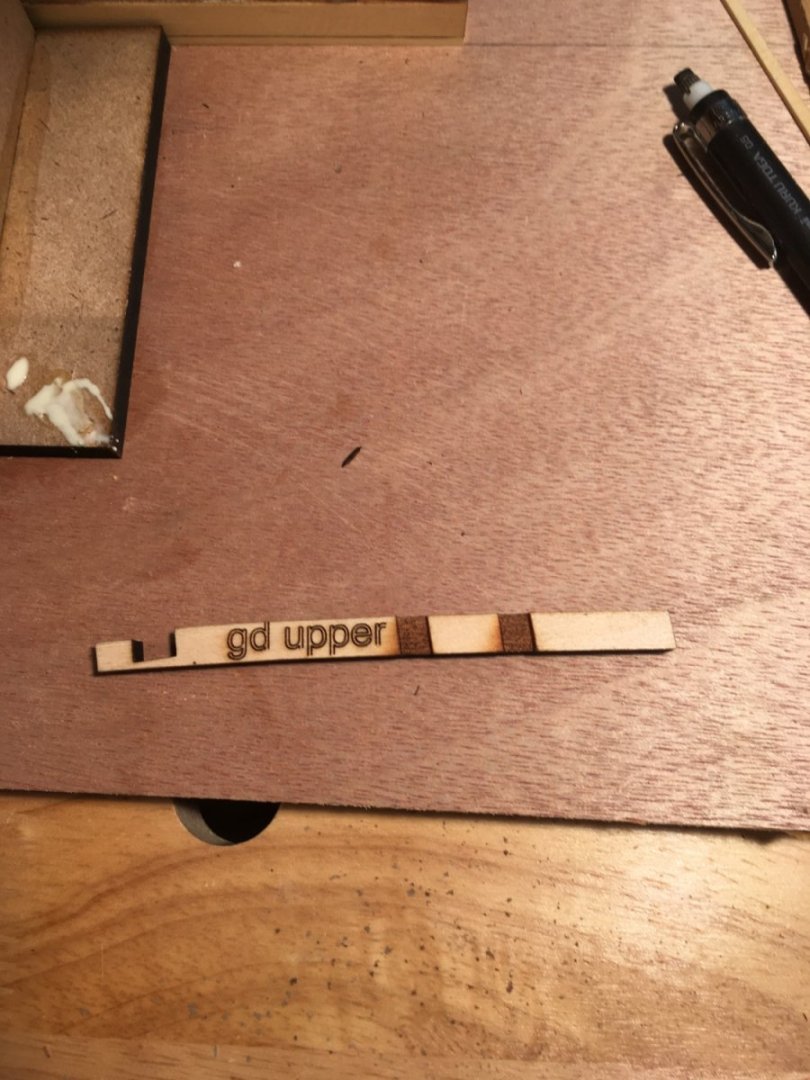
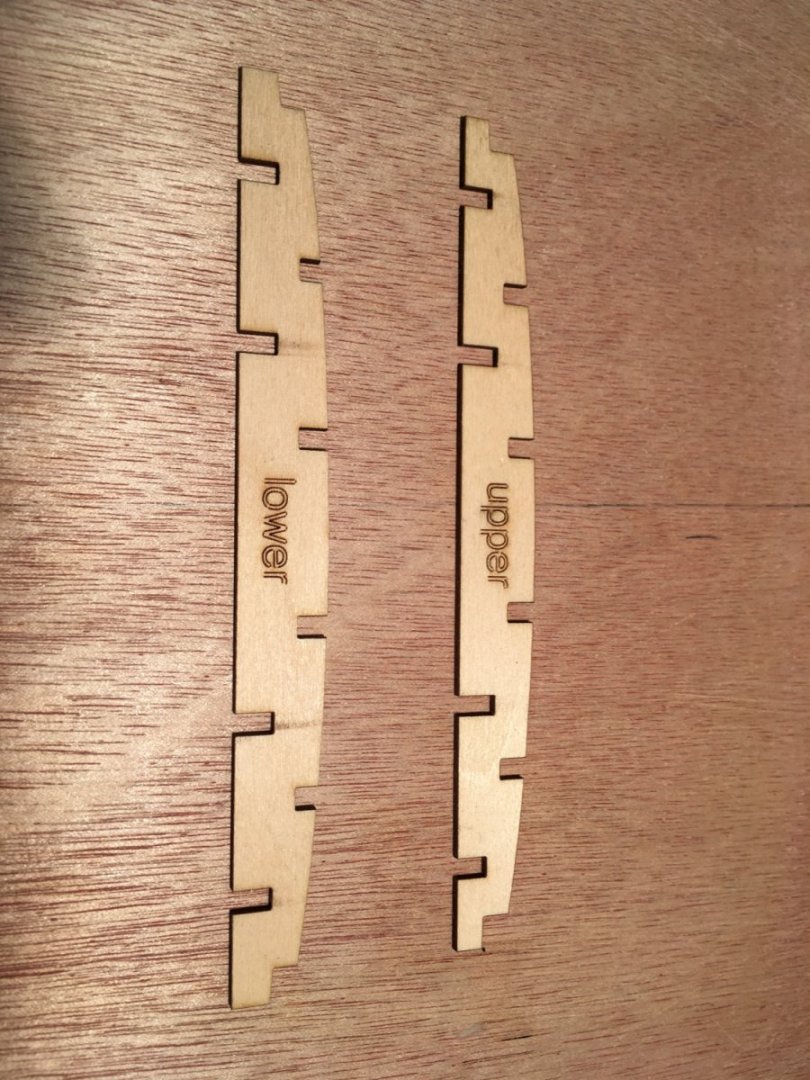
 Today I installed the QG door frames, these are simple, but require a little work, there’s a lot of business going on in the back so some parts need to be trimmed but your saw will make quick work of this. I started at the upper gun deck and worked my way down. the outboard stern frame has a ledge cut in it for all the door frames to rest on, they also slot into frame 25, no modification should be required on the upper most and lowest frames. Make sure that the notches face each other as seen below The frame marked “GD upper” requires a little trim in order to clear the stern frame jig, I just marked it and ran it through the saw and cut off about 1/16” the same applies to the frame marked “lower” as It has a slight interference with the upper frame support jig I did the same here as well, I just trimmed off about 1/16” on the table saw and glued it in place with all four pieces in I just ran some scrap AYC through the saw to 1/4 x 3/16”. Take a measurement and adjust your saw to cut them at the right angle, then cut to the right length. I cut all 4 the same and they fit right in the slots. Next I will cover the main frame support that will hold all those pesky frames in place while I build all the gun ports and plank the upper parts of the model. Thanks for looking in. JJ


- 396 replies
-
- 18
-

-
I’m pretty sure a 1/72 victory with rigging will be larger. Portland comes in at 43”. I think Fred has the right idea, always ask for forgiveness rather than permission.😂
-
Wow that does look much better. Unfortunately I used the eyebolt method on my Winnie, still looks ok but this is definitely better.
-
Nice work Jim, that’s an attractive little side project. Looking forward to some Winnie progress. JJ
-
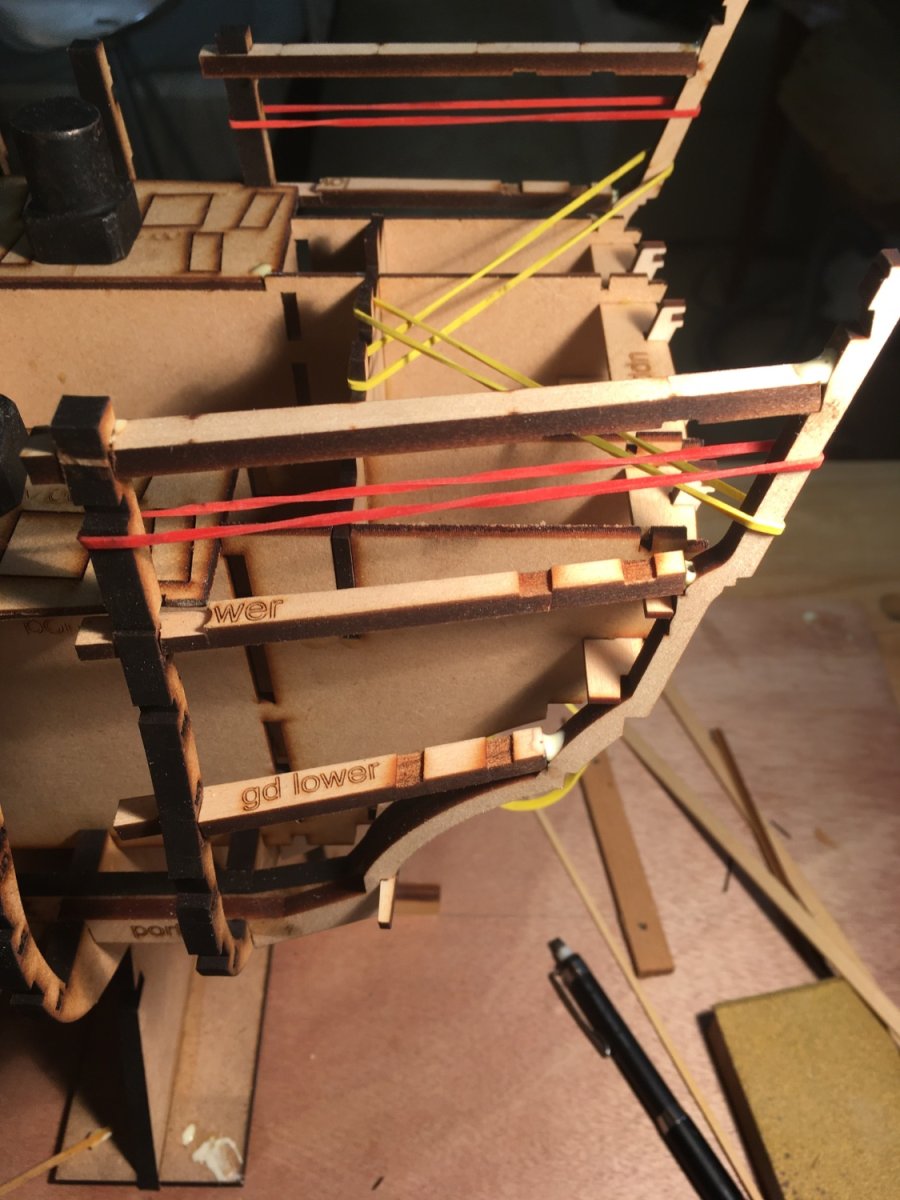
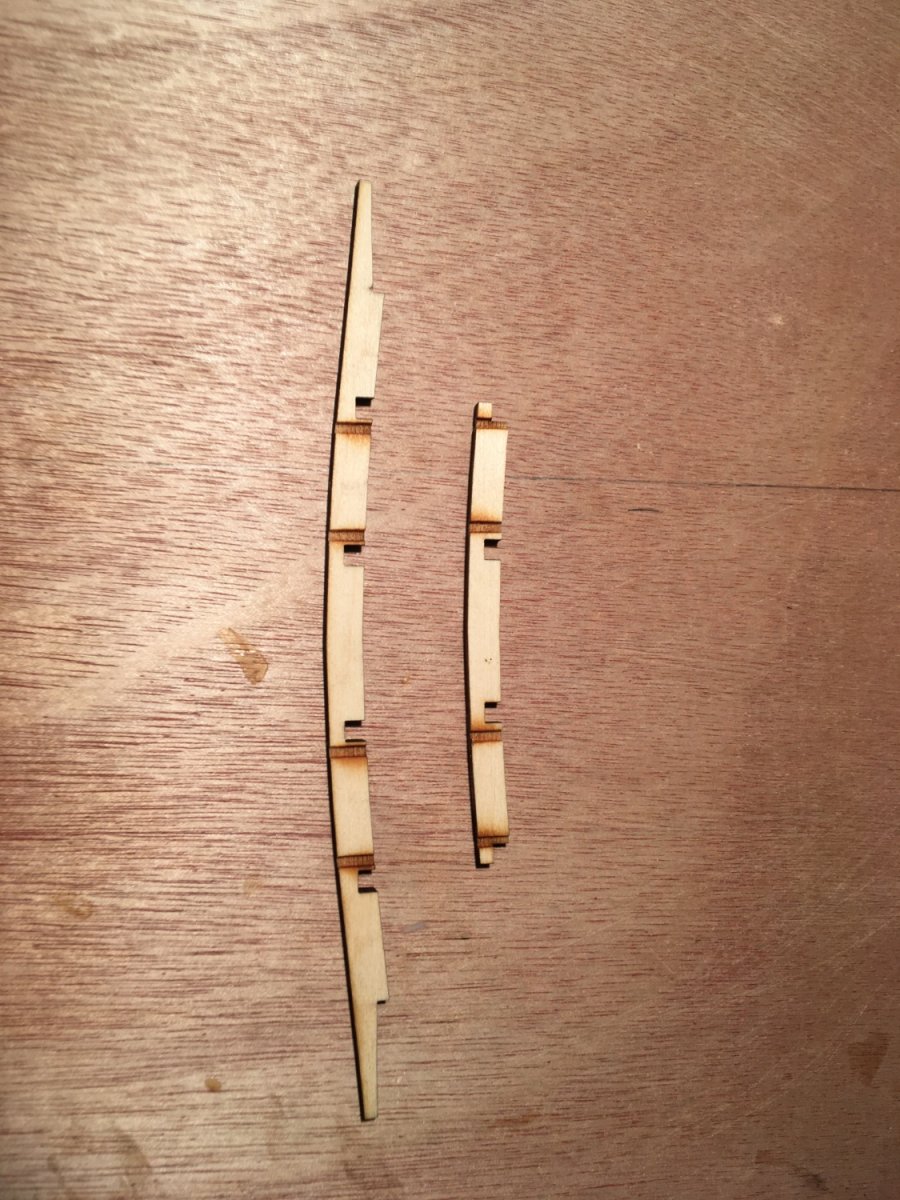
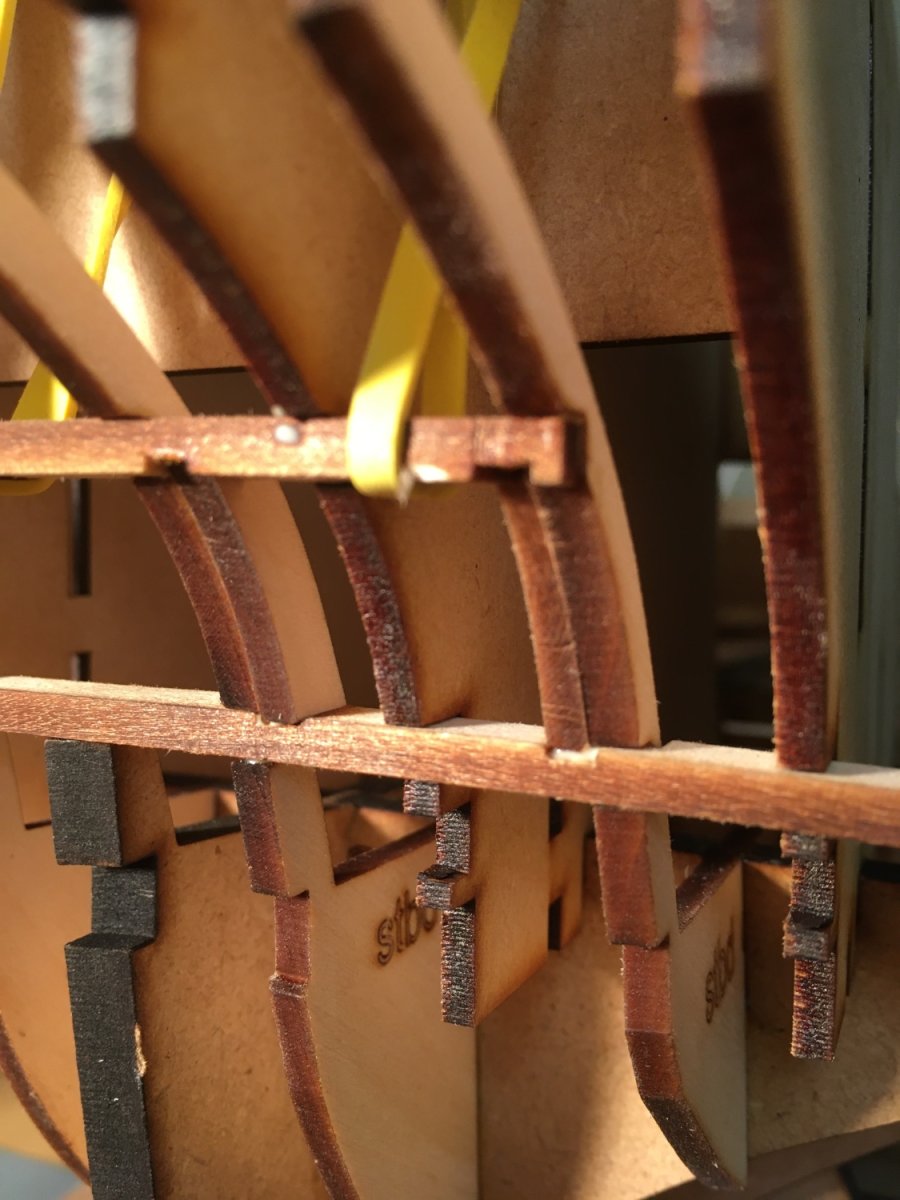
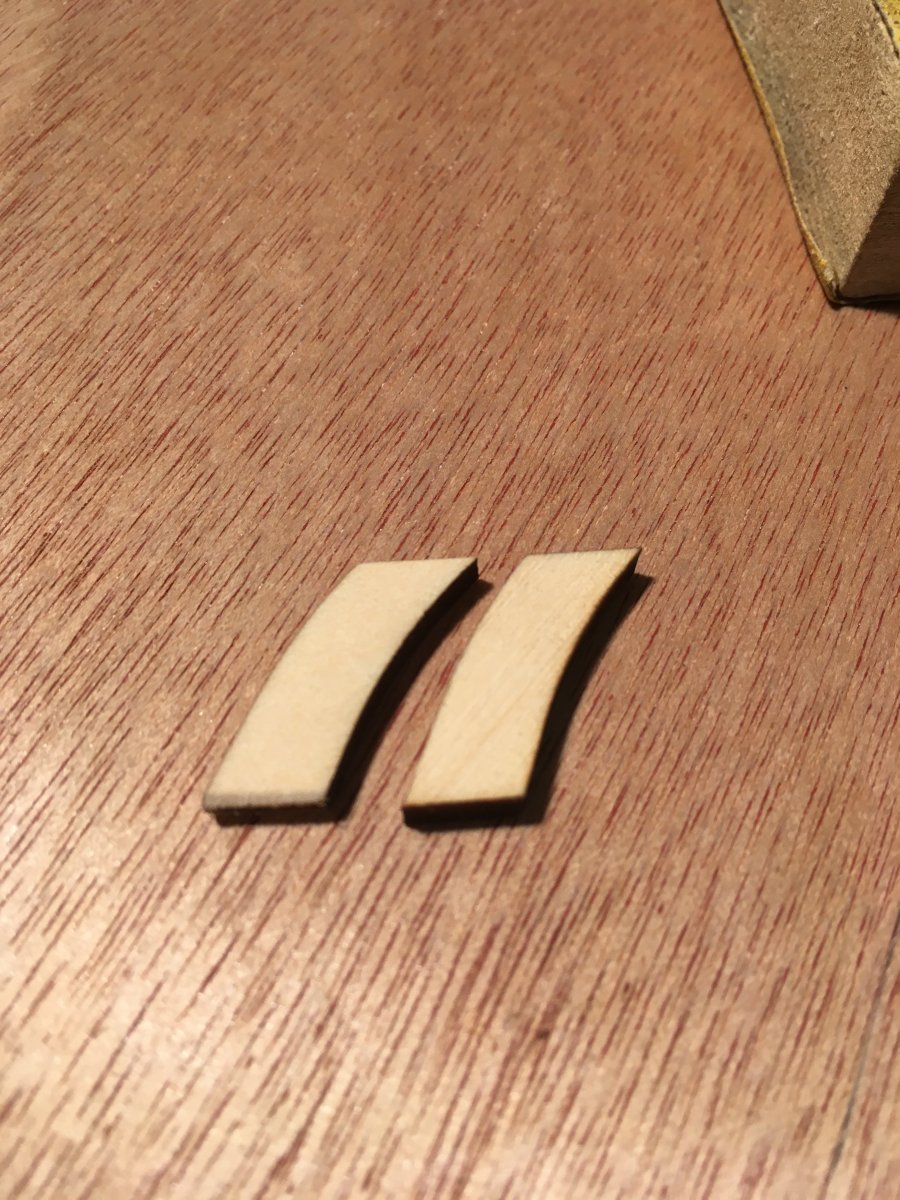
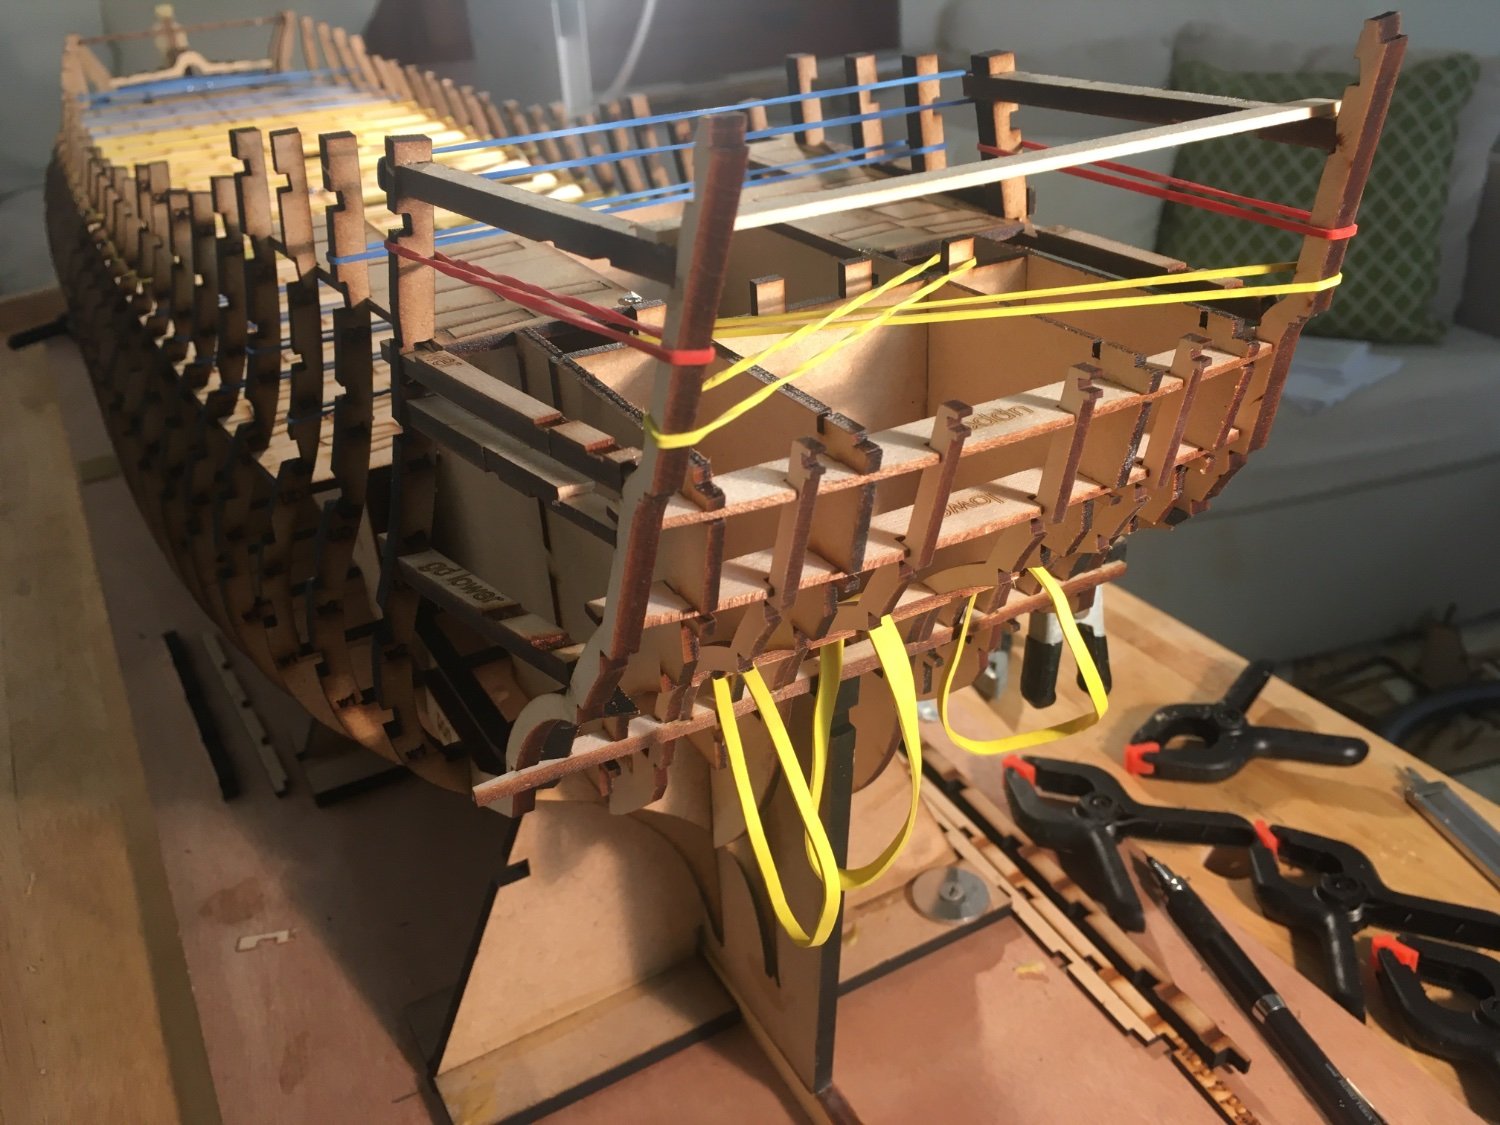
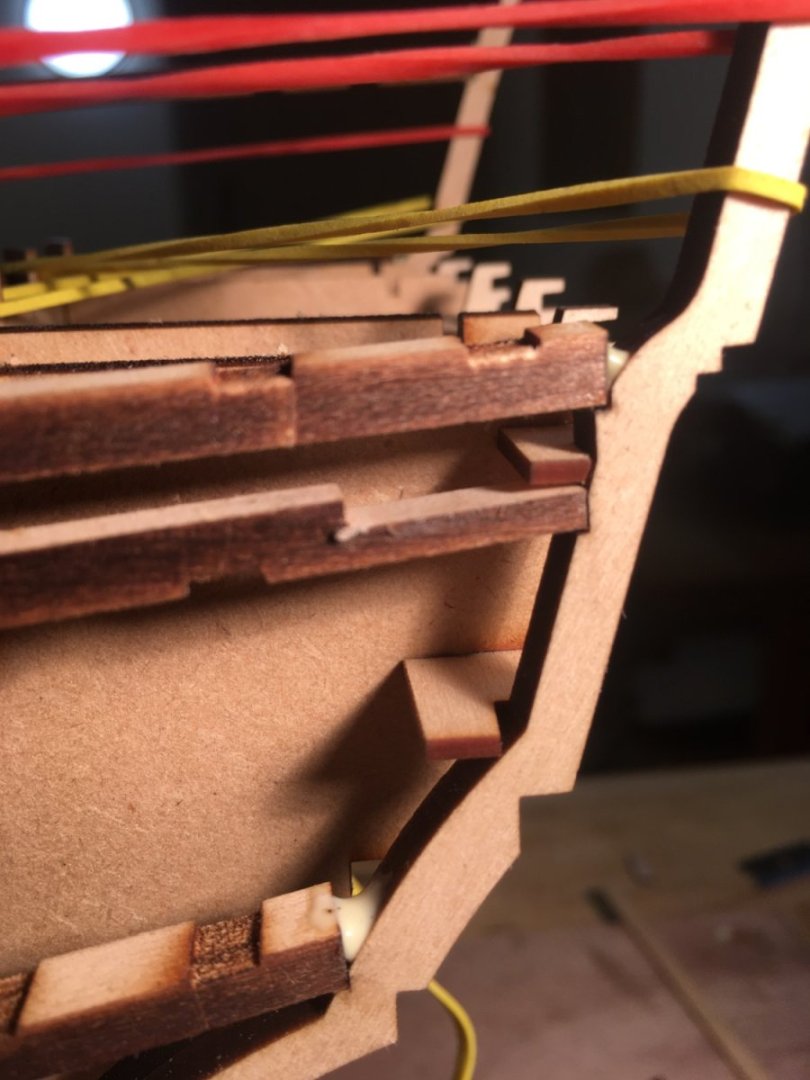
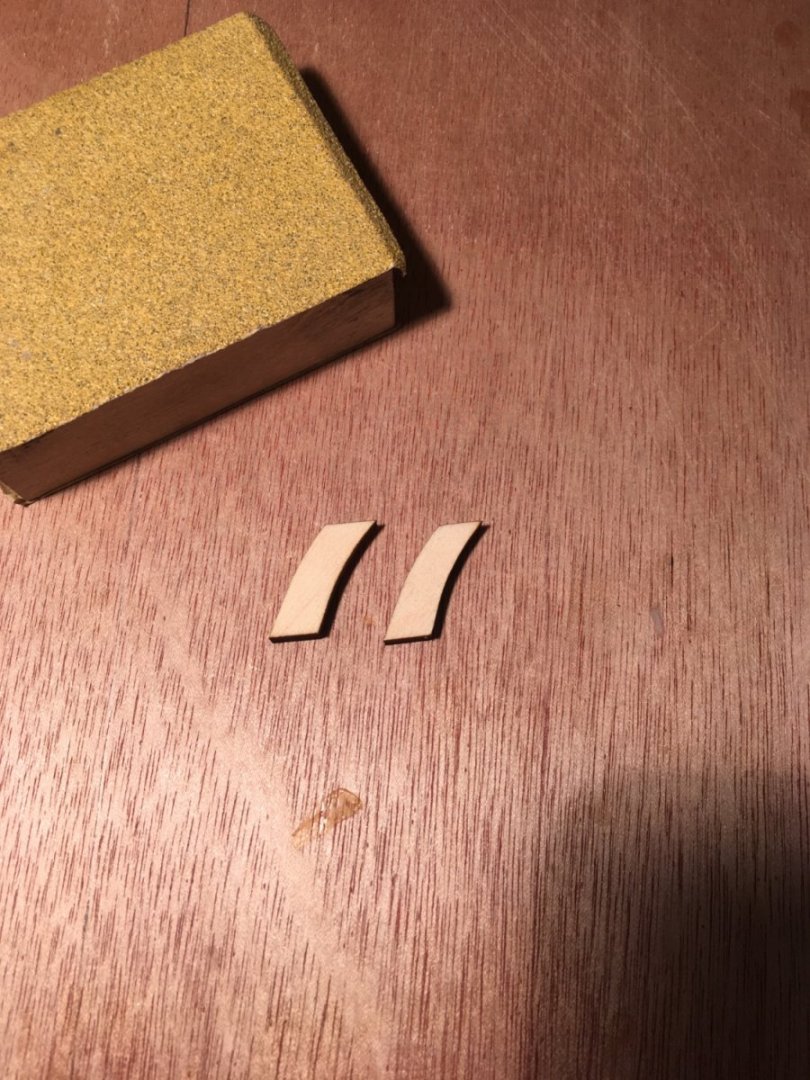
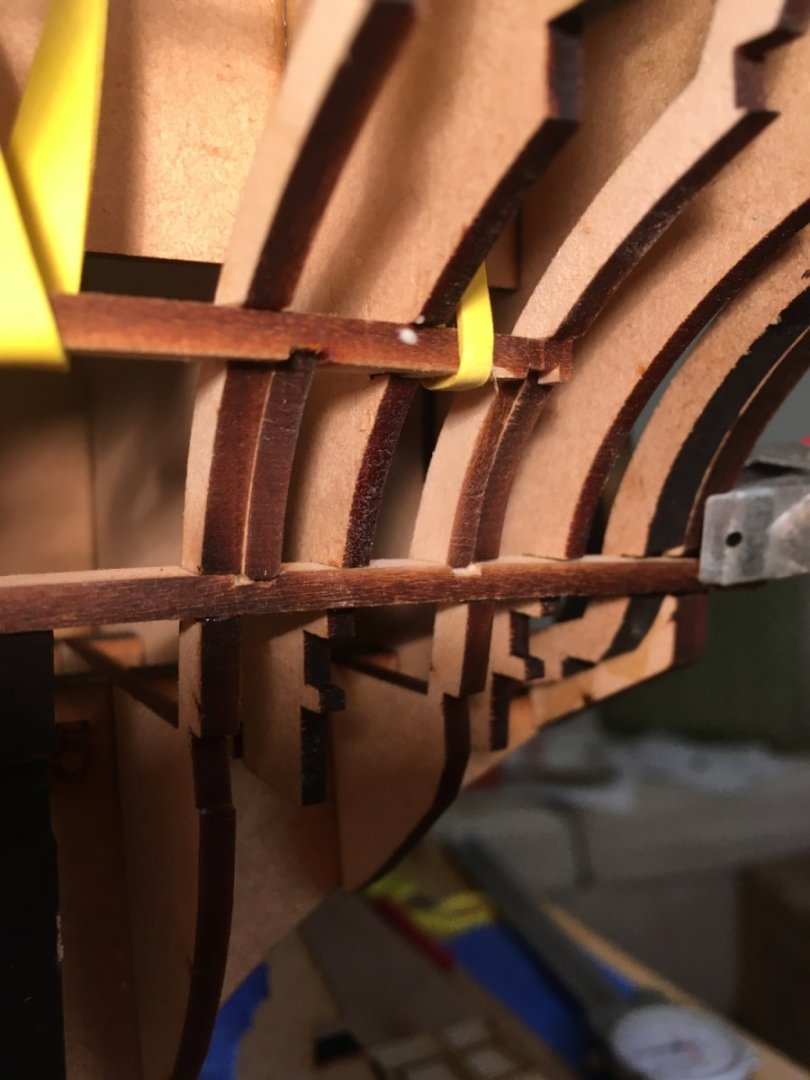
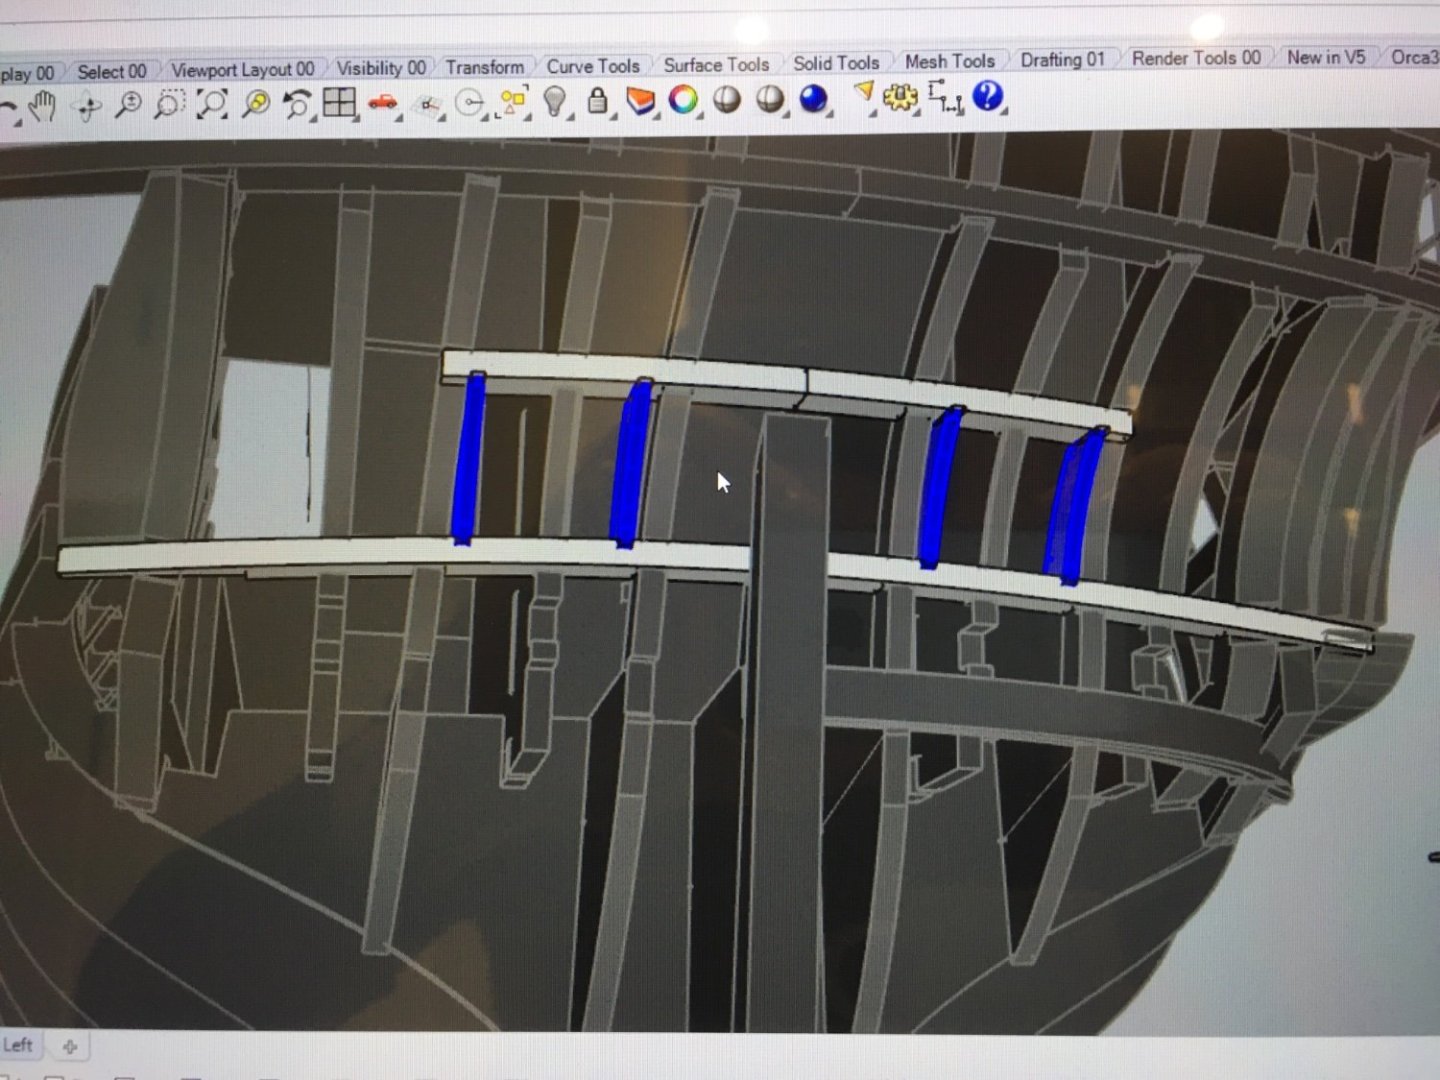
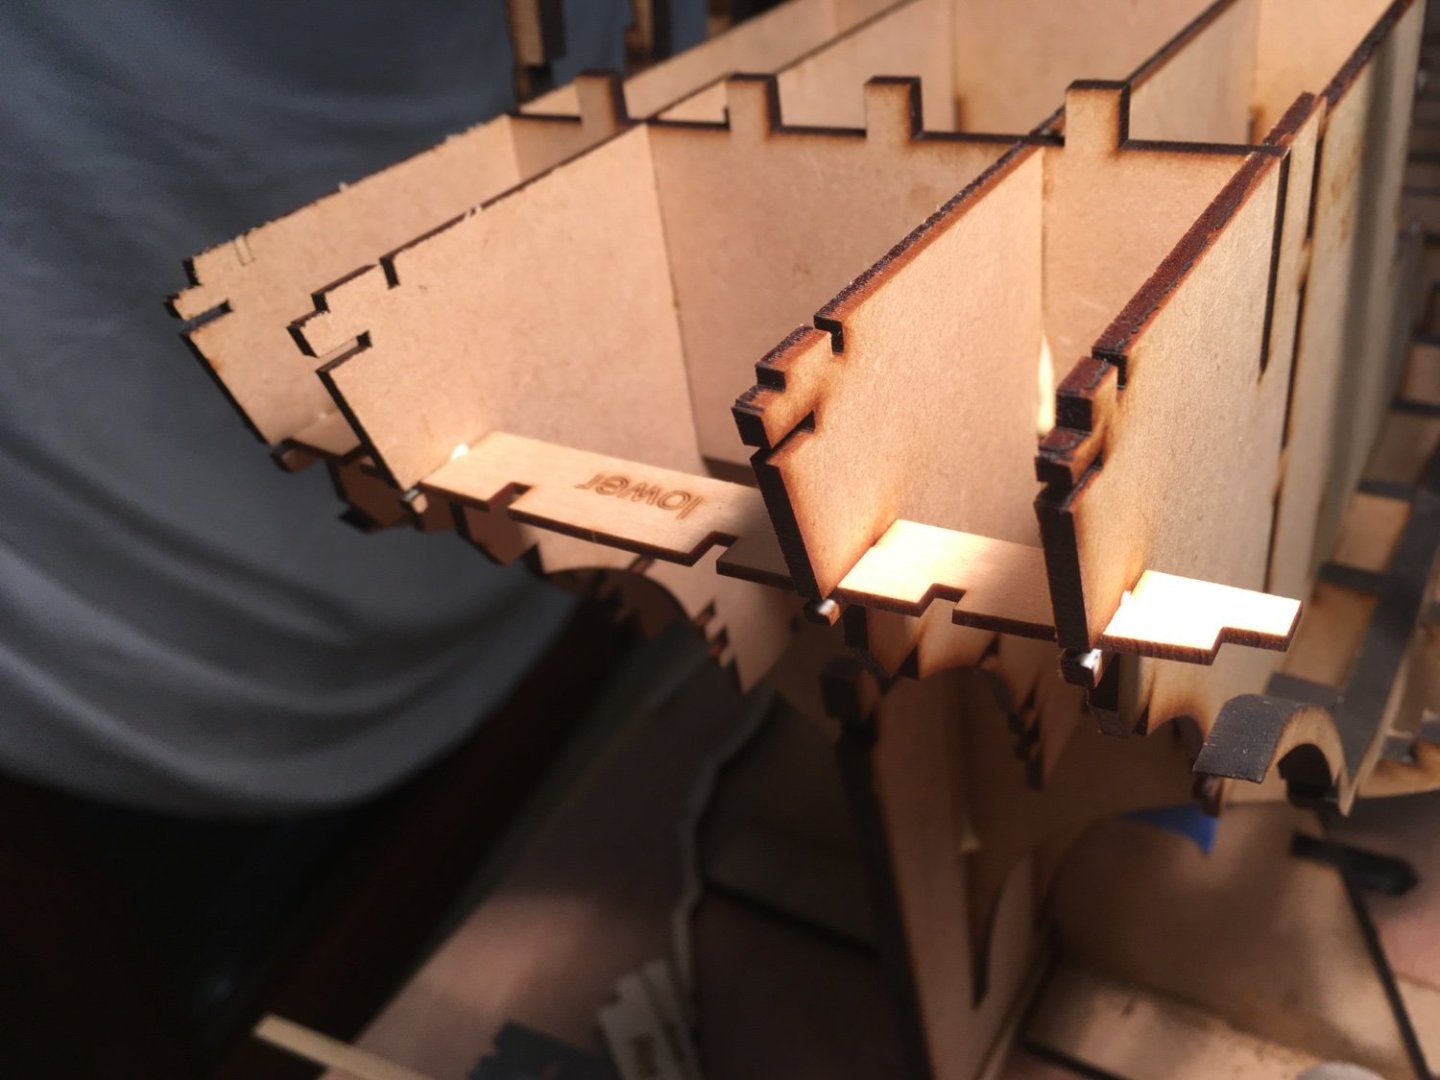
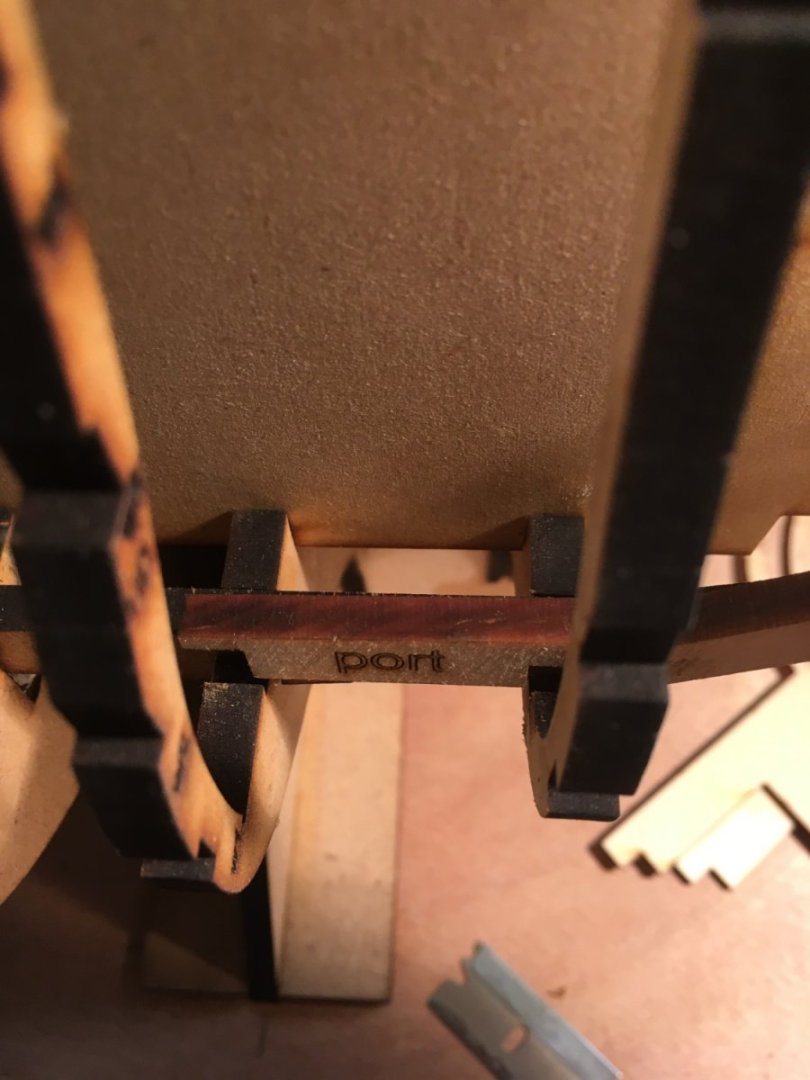
I worked on more of the stern framing last night, there are two pieces that make up the stern chaser framing, the longer of the two is the lower one and it faces up. You can see both are etched to receive the gun port frames. this piece will fit in the jig and that will align it with the slots on the frames. I utilized rubber bands for the upper piece to keep it in place and help manipulate a nice smooth curve into it. The frames will help define that curve as they are slotted to fit. As you see above the lower piece will define itself without assistance. The gun port frames are laser cut and should slide right into the slots, you may have to sand them a little to get them to fit. I put a slight bevel in the top and bottom. The wider of the two go inboard. There are 3 more pieces that span all 6 frames but we can’t add these until after the hull is faired up.


- 396 replies
-
- 13
-
-
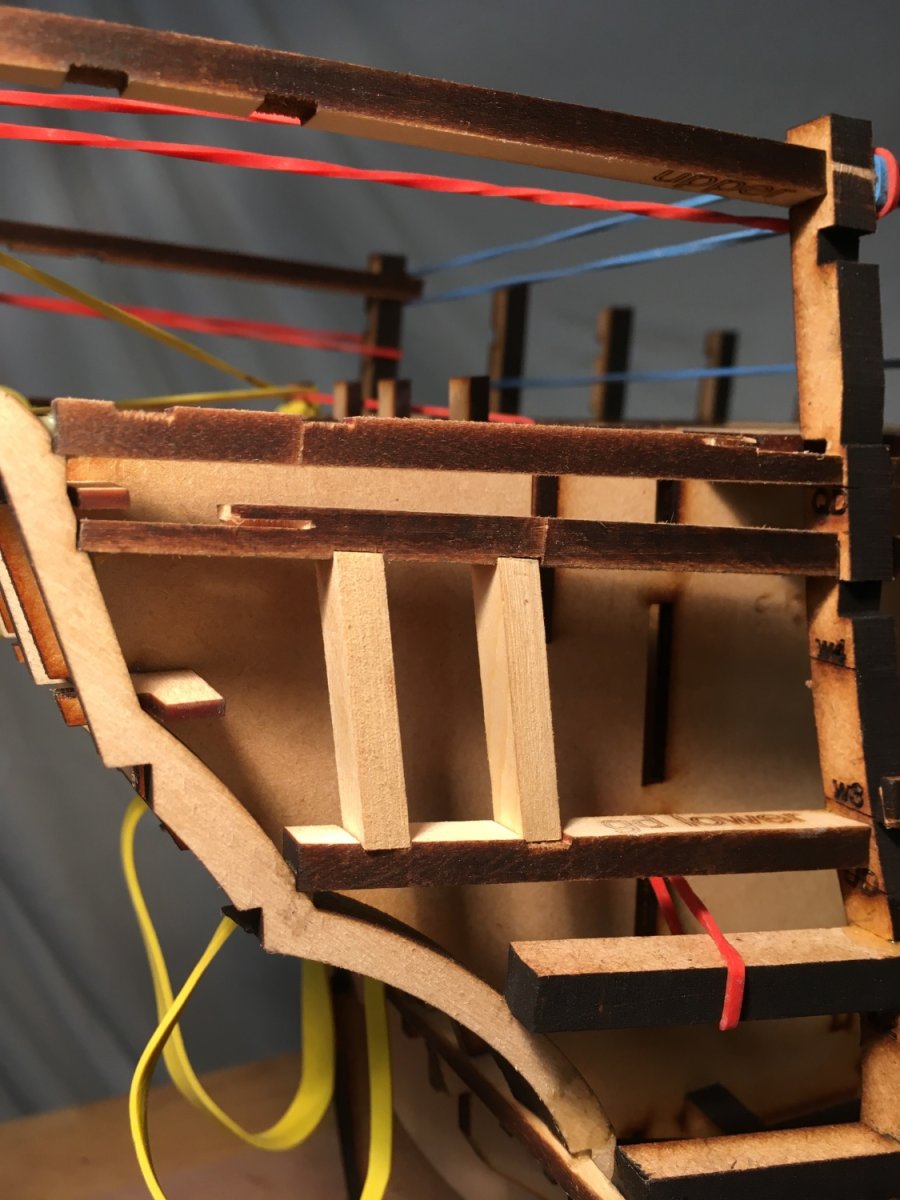
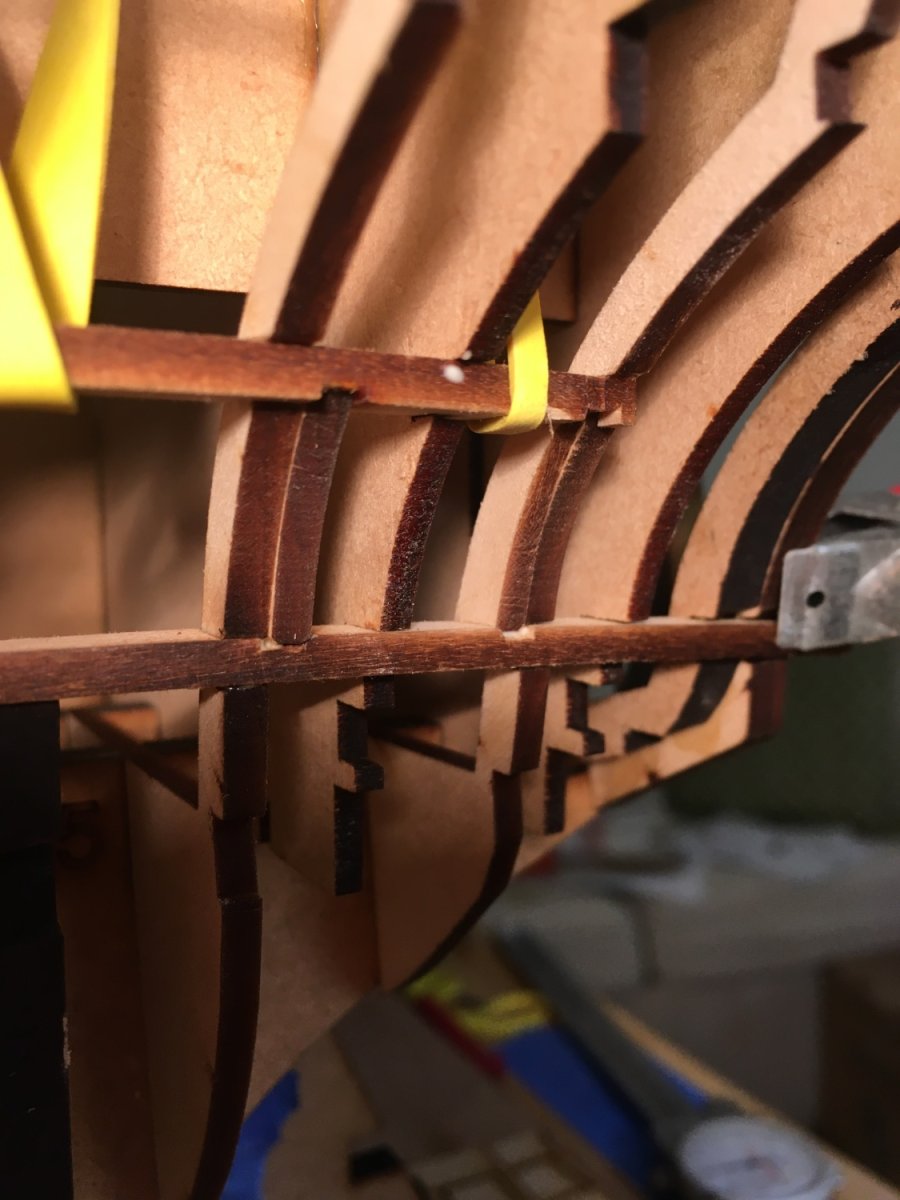
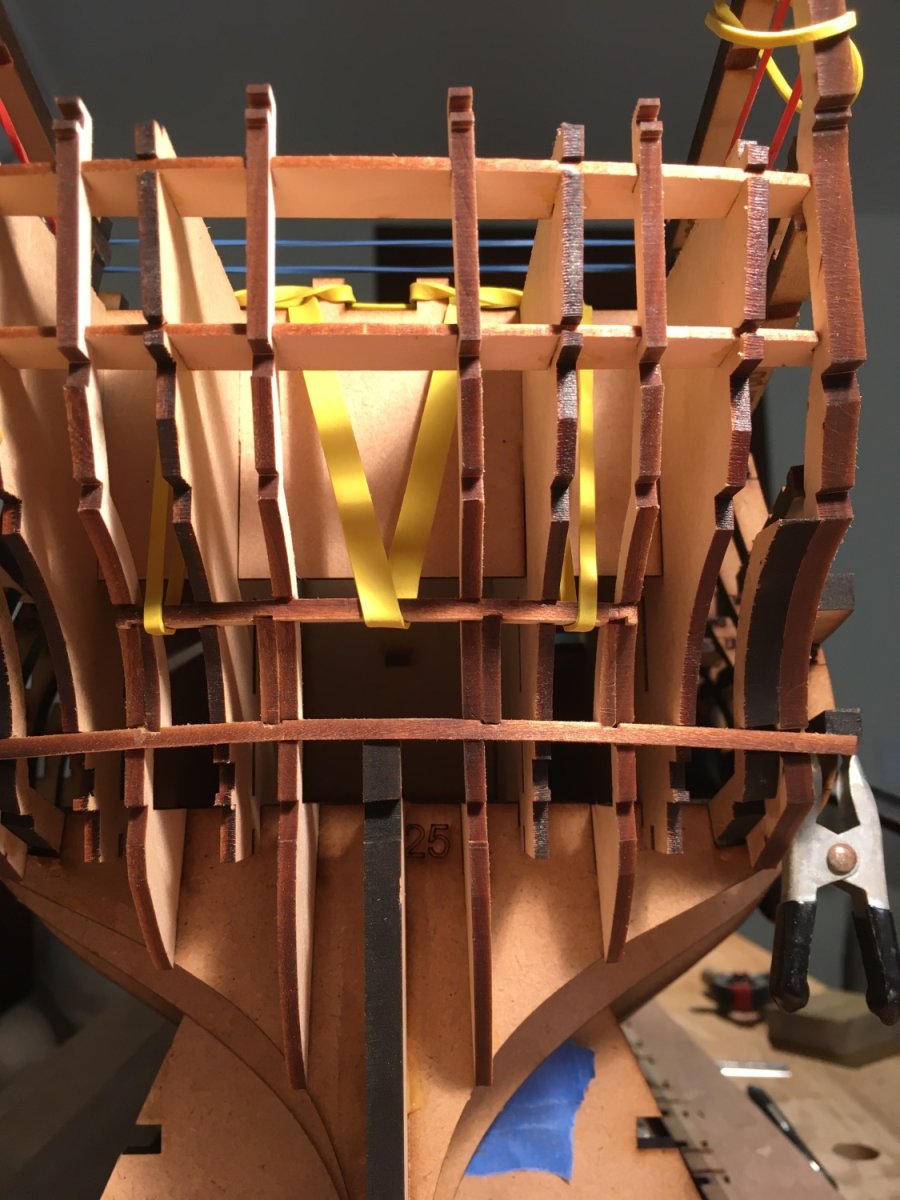
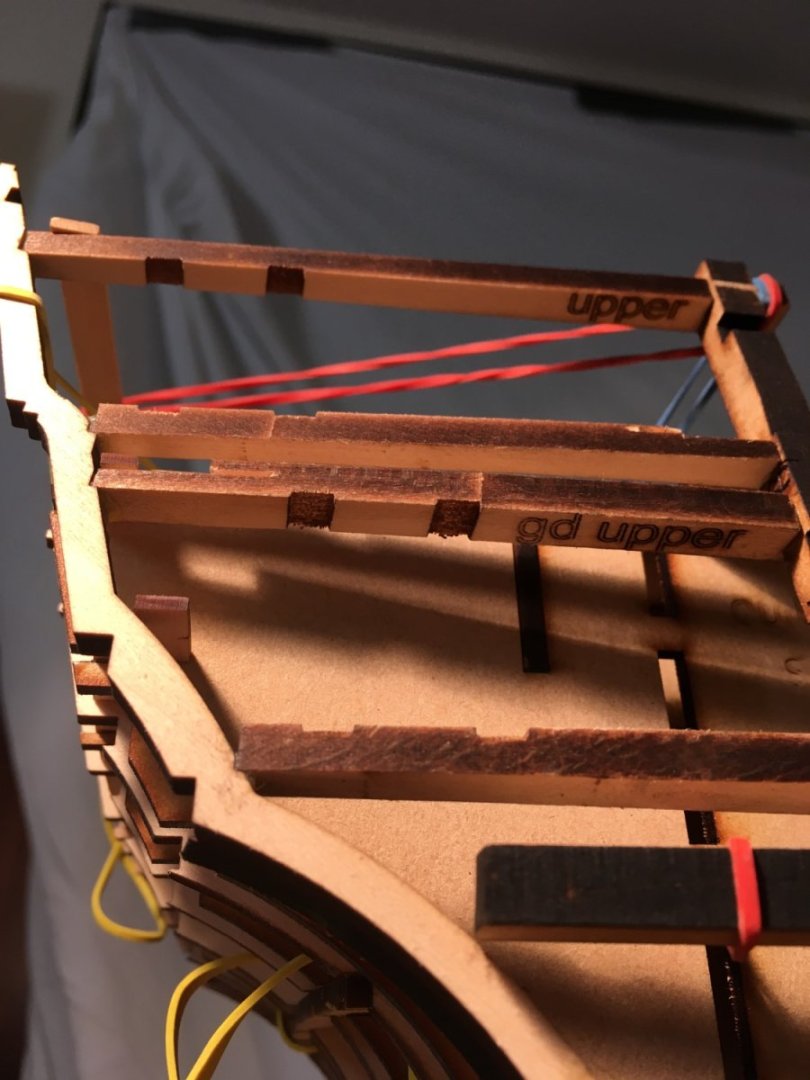
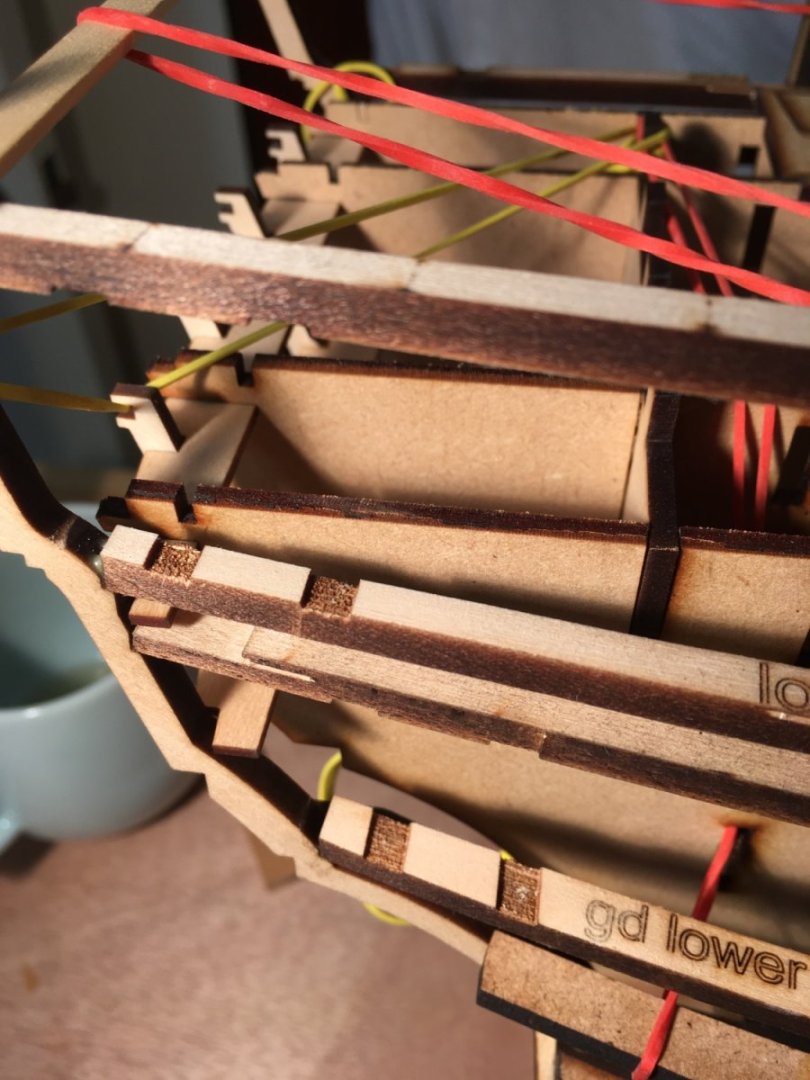
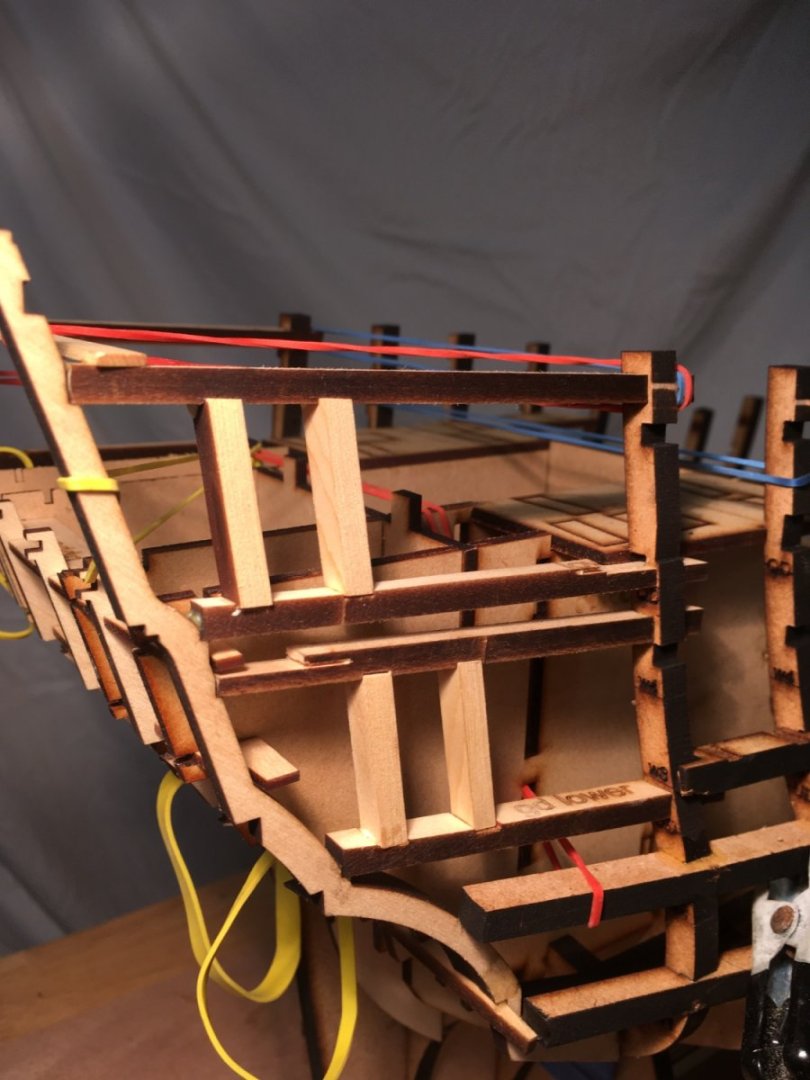
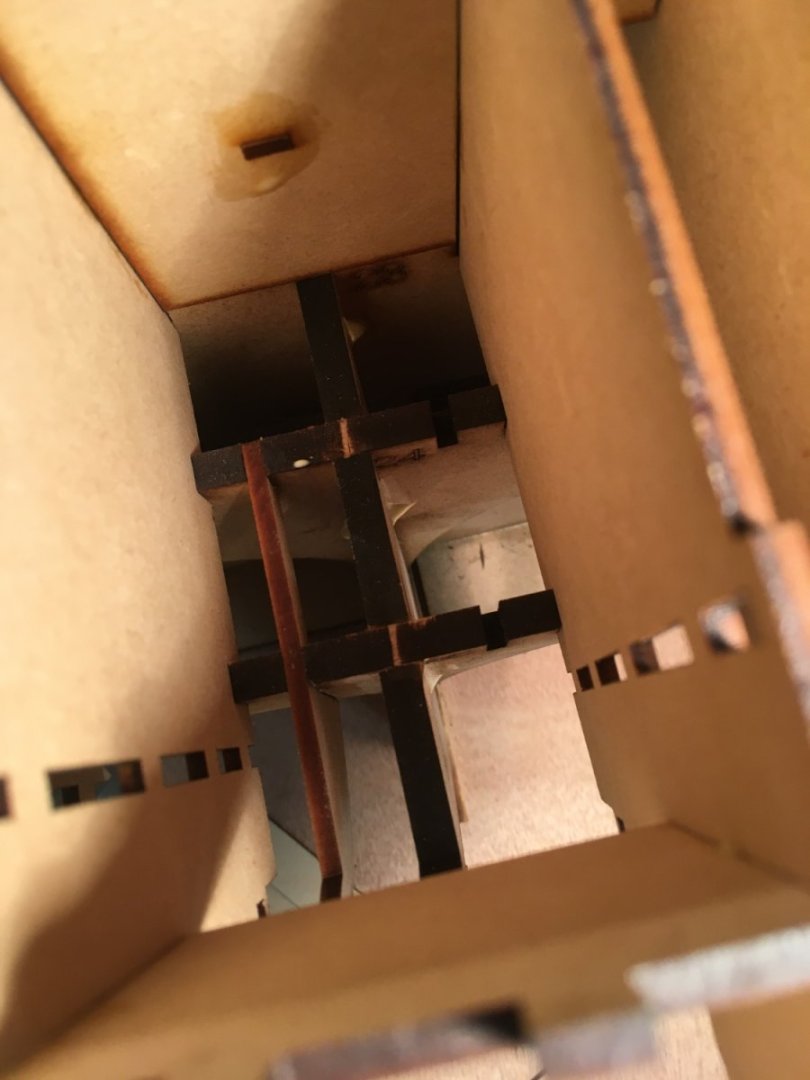
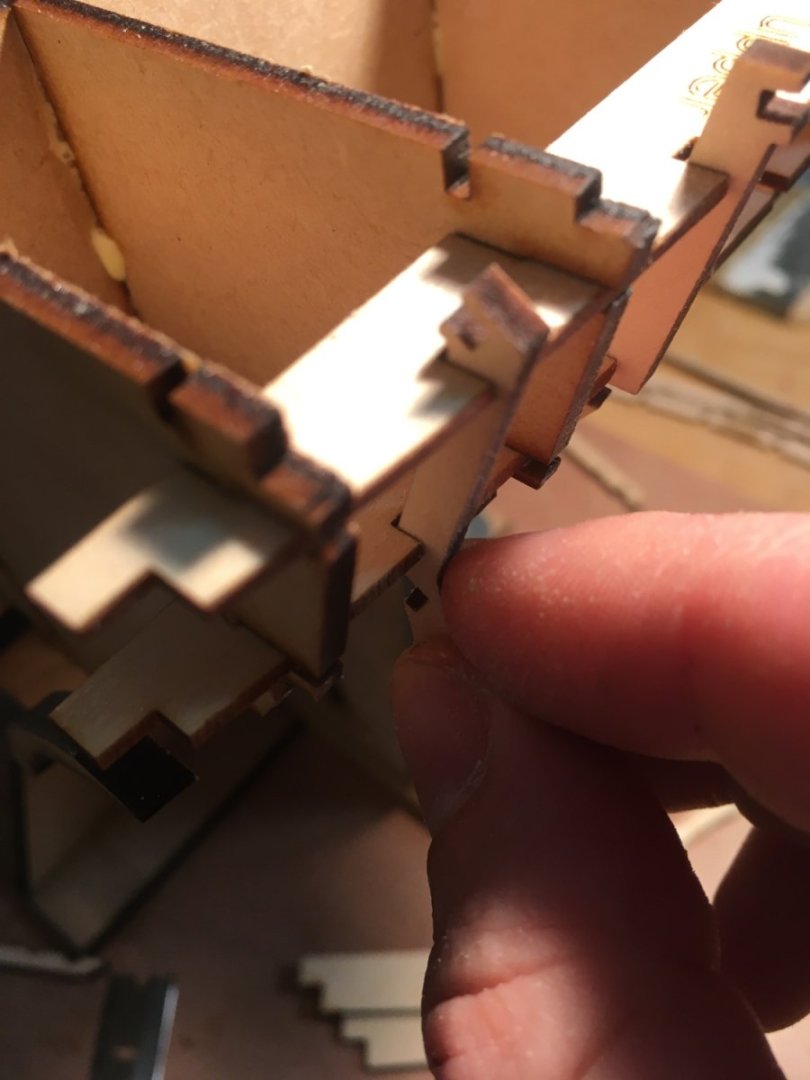
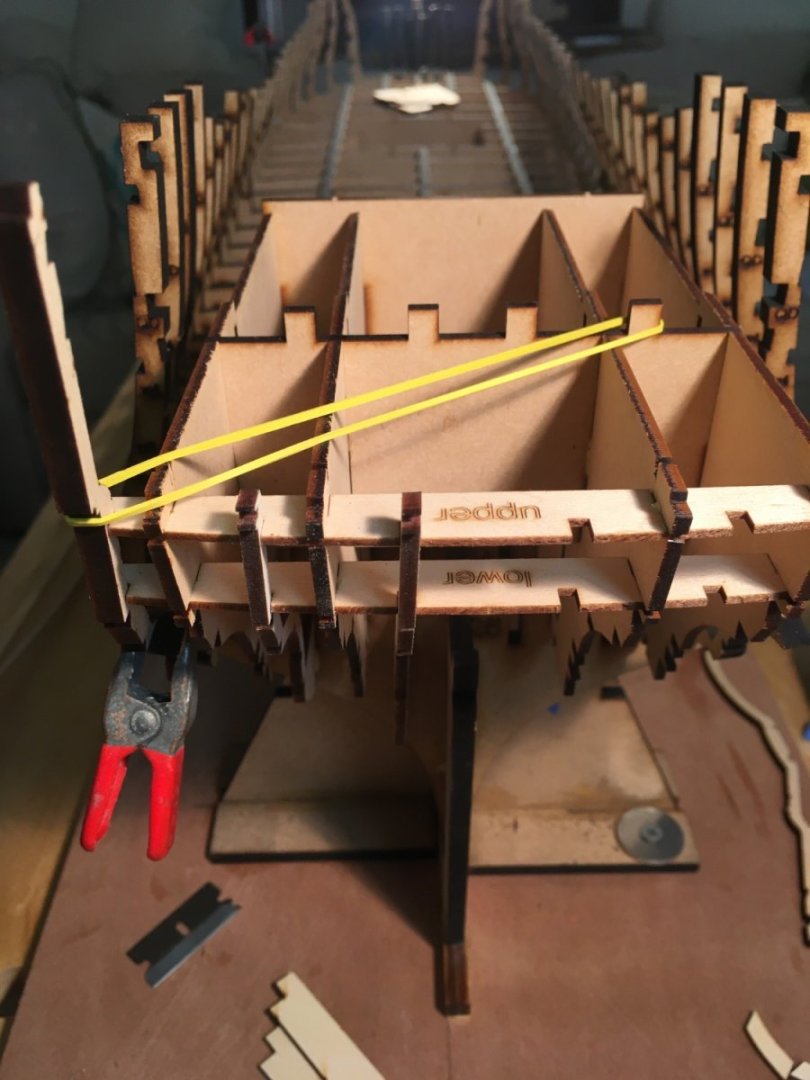
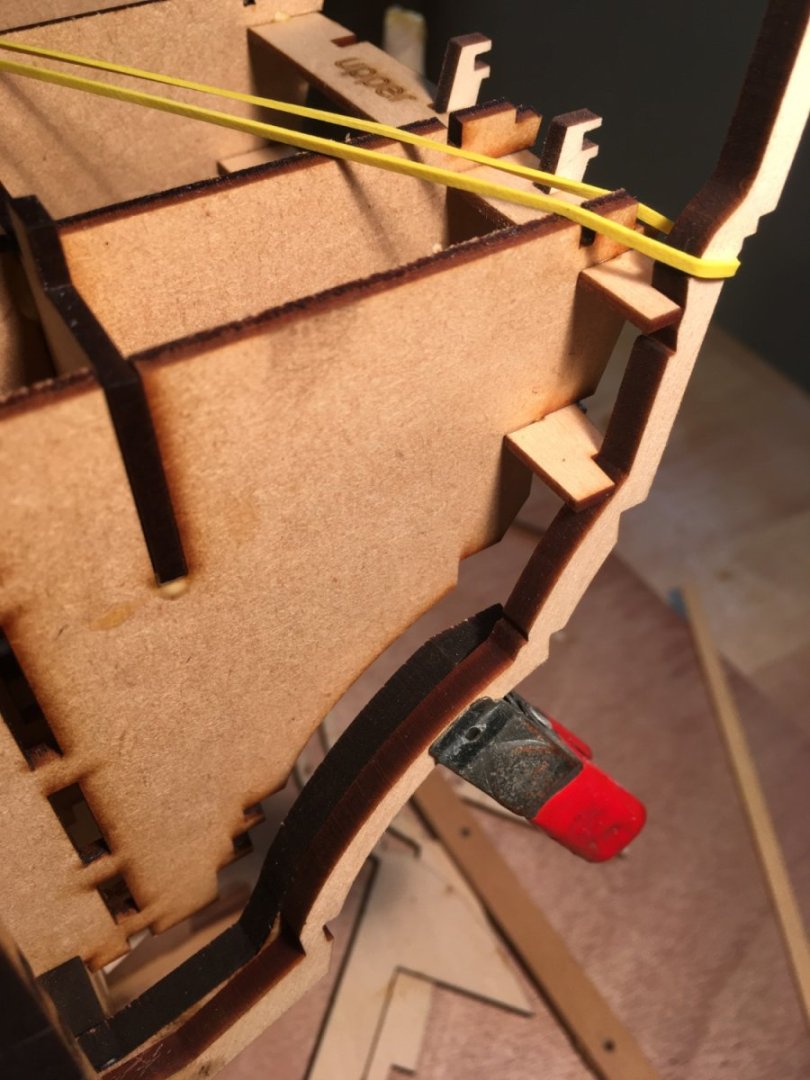
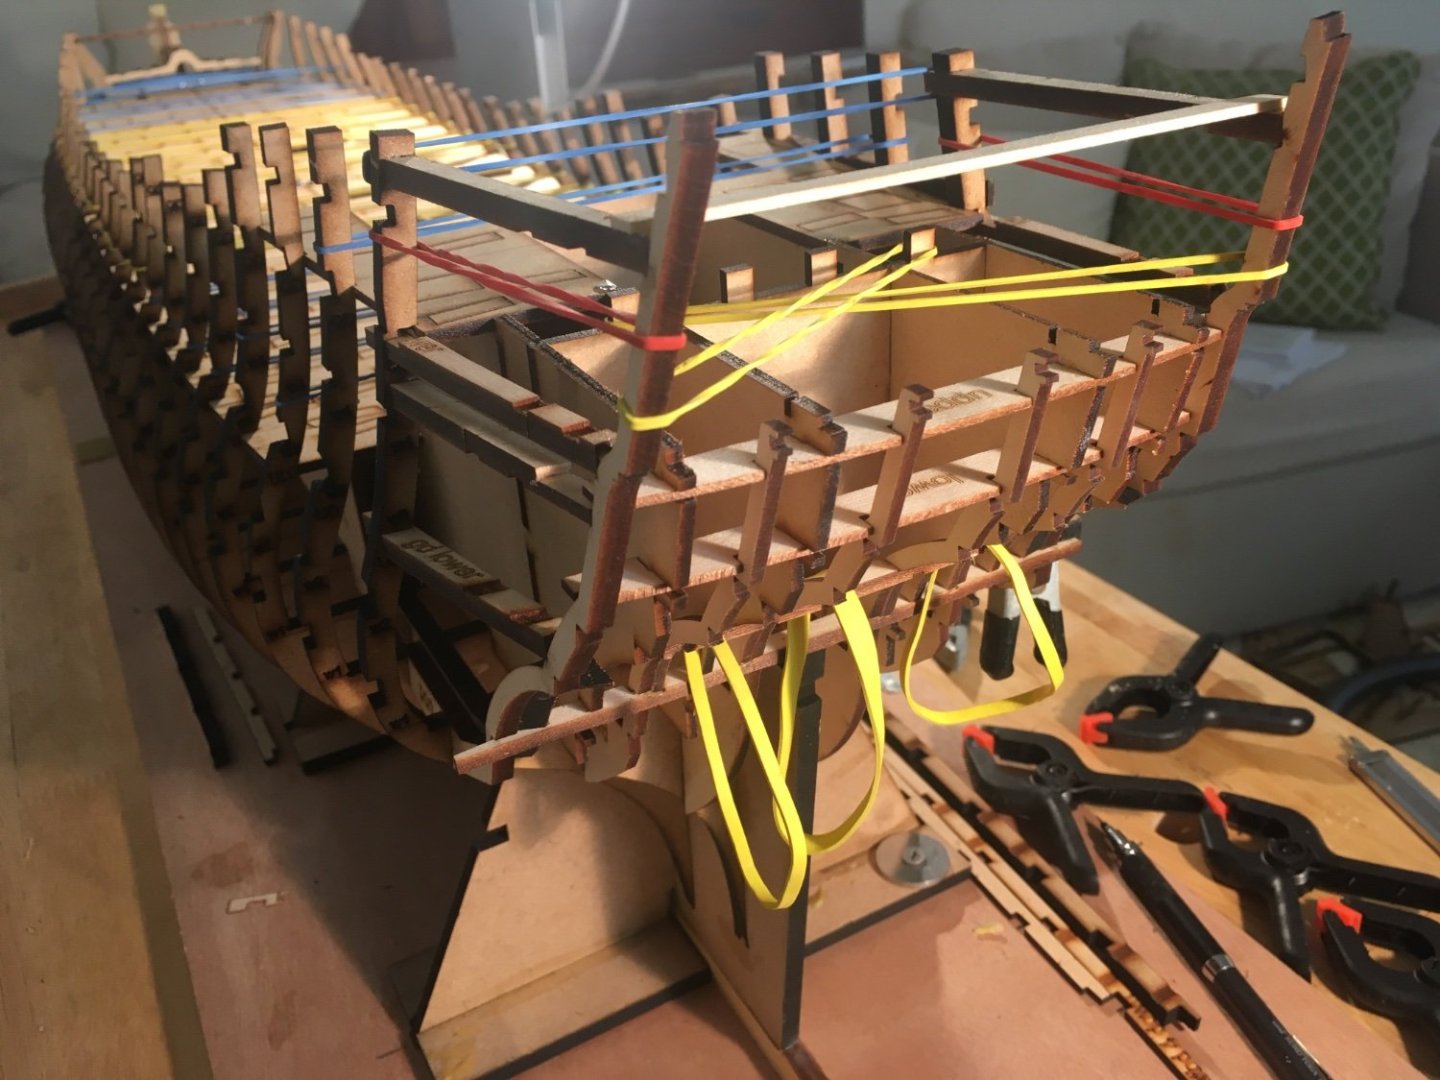
I finished assembling the stern jig yesterday and began installing the stern frames, you can see below the two pieces that fit in the main jig to align all the frames First you install the lower piece, it should fit pretty snug, so very little glue necessary, just make sure it’s pushed all the way in and even on both sides. the same goes for the top piece as well, snug and pushed in all the way, just a little glue necessary. Once you have the jig fully assembled you can begin to install the stern frames. I began with the inboard frames and worked my way out. Be sure to test fit the frames into their slots before you try and push them in otherwise they will break, I sanded them gently to reduce the thickness just slightly so I had a good fit but not too tight. Do not modify the jig, its designed to hold the frame exactly where it needs to be, so just keep it snug. . once you are happy with the fit in the jig and frames 25/24, go ahead and glue the frame down. Do not glue it to the jig! There are other pieces that will hold these all together permanently. You will have to use a small piece of scrap wood to gently push the middle two frames in from above. Finally the most outboard frame can be fit and installed. You can see below that it just drops right in next to the MDF frame and it’s the last open slot on frames 24-25. It should sit about 1/32” below the outboard edge of the last MDF frame. The frame should fit nicely into its jig, check to make sure both sides look even. Once everything looks good glue both outboard frames in position on frames 24 and 25 only. The frames can be secured with rubber bands while drying, there will also be some transverse structure going in to permanently tie them all together which I will cover next. Below you can see the frames installed and rubber bands everywhere! This is a very delicate operation so take your time, it will pay dividends. It’s actually very simple, the jig does all the hard work. The jig will press down tight between frames 23-25, make sure it’s sitting down correctly and you shouldn’t have any problems. I just lightly glued it down as it will be removed after planking is complete. JJ


- 396 replies
-
- 22
-
-
Amazing! Absolute perfection.
-
That looks great Ron, very tidy. Well done.
-
Nicely done Alan, I really like the coin idea. I’m going to have to include that in my build now. JJ
-
Very impressive! Awesome job Chuck.
-
Looks fantastic Glenn! I noticed your reds and blacks have a slight semi gloss finish, are you using WOP on all your paint finish? I really really want to finish my Winnie now.
- 840 replies
-
- 2
-
-
- winchelsea
- Syren Ship Model Company
- (and 1 more)
-
Good God that looks incredible! The coloring is spot on. Wow
-
Very nicely done Gary, congratulations! A great addition to your fleet. JJ
- 389 replies
-
- 2
-
-
- winchelsea
- Syren Ship Model Company
- (and 1 more)
-
Incredible! Outstanding results!
-
Making all that tackle is tedious indeed. Well done Ron, they look good.
-
Very interesting subject, Ab. These Dutch vessels always grab my attention, I will be following with interest. JJ
-
Nice work Chuck! That looks really good.
-
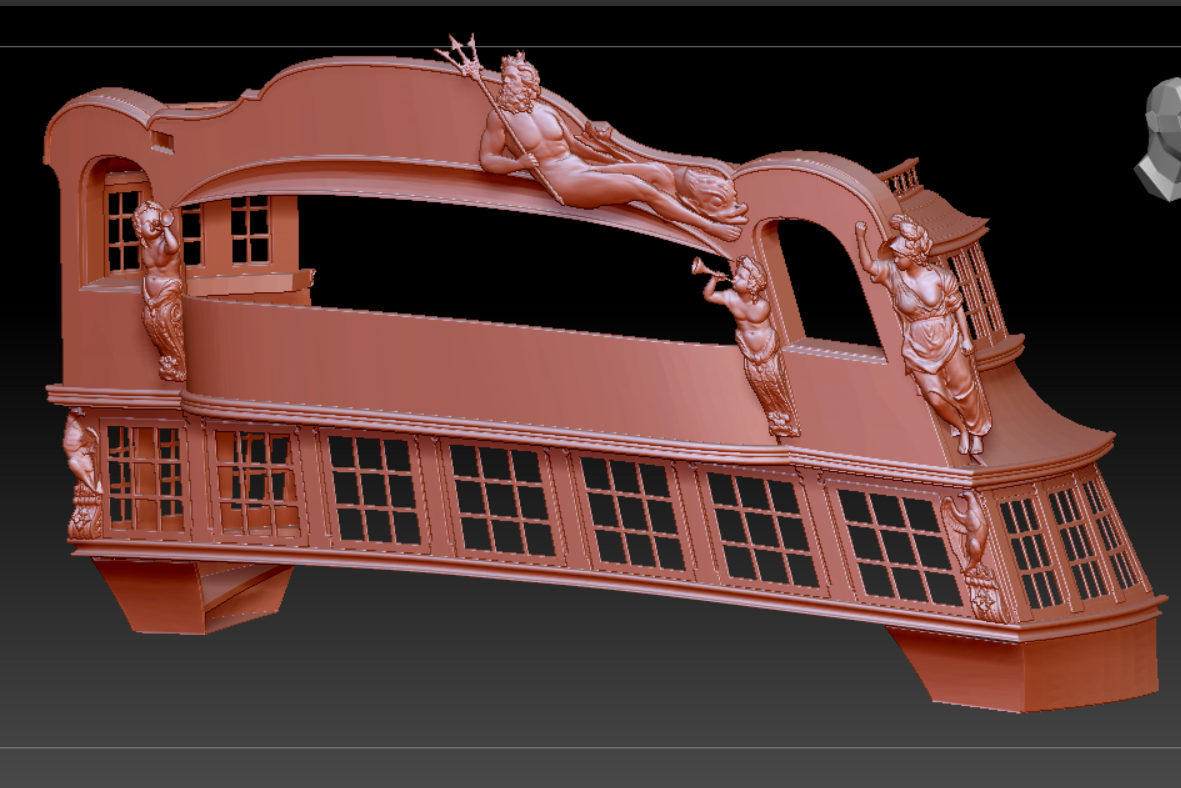
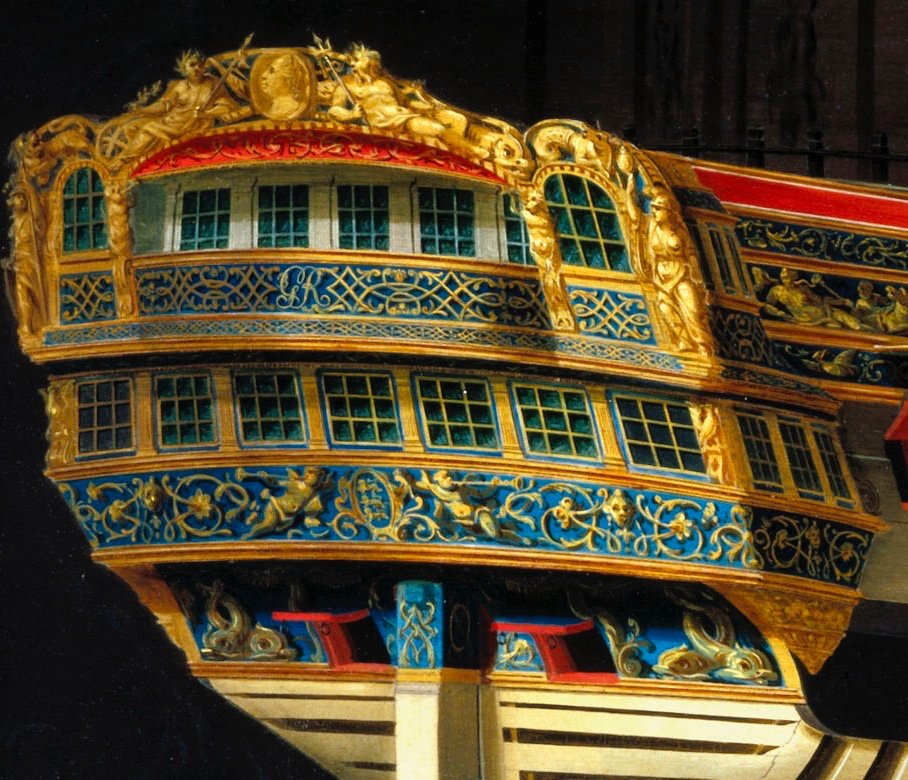
Small update on the stern carvings for Portland. The carvings are all based on the Marshall painting of the contemporary model, from 1774. these are all Greek mythological characters, most of which can be found on other contemporary models, sculptures and paintings all over the web. This has been useful in bridging some of the gaps on the painting. I should have a complete set of boxwood carvings and printed quarter galleries before I complete the planking. More updates to come soon. JJ
- 396 replies
-
- 21
-
-
Very nice work. Looking forward to seeing the complete rigging. JJ
- 587 replies
-
- 3
-
-

-
- Indefatigable
- Vanguard Models
- (and 1 more)
-
Very nice design work Matthias, everything is coming together with ease. Can’t wait to see how you tackle the quarter galleries. JJ
-
Lovely work Mike. Looks really nice. JJ
-
Very nicely done Matt, you spent some time sanding char off and it paid off. The bright work looks really good. JJ
-
3D Printing Cannons in Resin
scrubbyj427 replied to thibaultron's topic in 3D-Printing and Laser-Cutting.
Impressive work Ron, thanks for sharing.