HOLIDAY DONATION DRIVE - SUPPORT MSW - DO YOUR PART TO KEEP THIS GREAT FORUM GOING! (83 donations so far out of 49,000 members - C'mon guys!)
×


scrubbyj427
-
Posts
1,690 -
Joined
-
Last visited
Content Type
Profiles
Forums
Gallery
Events
Everything posted by scrubbyj427
-
 Very nice Chuck. Are you using a different red than what was used on Winnie? Looks a bit more burnt.
 -
Another incredible model Siggi, I will be studying your Dragon build as well. So many similar elements to the Portland class. Well done. JJ
-
As always, great job Siggi. Very inspiring build. The Parquet floor is becoming very interesting to me, I’d like to do something similar on Portland. Have you found a good source of other examples elsewhere? JJ
-
Spectacular job Dusan! I really like the contrasting bulkheads.
-
Looks really good.
-
Beautiful work Chuck! How are you getting the beams in with that Plank above the clamp? Carefully bending them into the notches? JJ
-
Beautiful work Siggi. Is there an example of that floor From a contemporary model or source that you are using? JJ
-
Very Nice Fred. I like how you pulled up all your fittings. I wish I had taken that route, I spent an incredible amount of time trying to carefully sand around the deck fittings. One easy block sanding and you’re all set now. Great job on the fixed blocks as well. JJ
-
No need to be, but the finish line is in sight. Sure wish I could finish mine while glue drys on Portland.
- 840 replies
-
- 2
-

-
- winchelsea
- Syren Ship Model Company
- (and 1 more)
-
Looks really nice Glenn, so many nice details on the QD and with the gun deck below it really brings it to life. You’re almost there. JJ
- 840 replies
-
- 2
-
-
- winchelsea
- Syren Ship Model Company
- (and 1 more)
-
Allan, for scantlings I found that the deck plans were a great source. The resolution of the scans really allowed me to zoom in quite far in CAD and produce accurate copies. They also worked well in correlation with the inboard profile of Portland. I kept the dimensions of the Timbers very close to the original drawings (keeping modeling and wood production in mind), I ended up with a good representation of what the drawings show.

- 396 replies
-
- 12
-
-
As the guy designing Portland, I’m really hoping he didn’t make it up lol. I suppose we can look at his other works and compare them to their existing contemporary models and or their existing drawings and come to conclusions on how reliable Marshall’s work really was. Since that series of paintings was ordered by King George himself, I’m betting Marshall did some of his best work, I know I would have. 😂
-
That looks very nice, Ron. Well done
-
It is certainly possible that some license was used. But I would have to think that a drawing similar to Bristol side profile (ZAZ1749) would have existed for Portland as she was the lead of class, that would have given an accurate example of her carvings and friezes, but who knows, it was 250 years ago that the paintings were made. Who knows what was lost in that time or what is yet to be discovered.
-
Hi Allan, thank you for the compliment, I’m glad you like the project So far. So to answer your question, in short, I used a lot of sources. Yes you are correct, I did lean on the IB profile (ZAZ1720) for much of my deck layouts, but I also used this as a springboard into the deck plans for Bristol (ZAZ1751 and ZAZ1750) which without I don’t think I could have pulled this off. As stated in the beginning, I took a keen interest in the two marshal paintings, Chuck had advised me to research a subject that had a contemporary model still in existence but as far as I know there is no model of Portland, at least one hasn’t surfaced yet, however I felt that between the paintings and the available drawings for the class, that if I did my homework I could come up with a solid representation of what Portland looked like and I think I have. If you take what we have of Portland starting with ZAZ1718, ZAZ1720 and ZAZ1719 you can get a pretty good idea of her layout compared with the deck plans for Bristol (ZAZ1750,51), I also used Bristol and Isis profiles, both very detailed (ZAZ1749 and ZAZ1831) and compared with Portland IB profile. From here you can start to spot differences between the three ships. Luckily Bristol was built in the same yard as Portland and right afterwards so they are very close so I was able to borrow a lot from not only the plans but also the contemporary model (what I could see of it). Also if you really start to study the paintings and compare it with ZAZ1718 you’ll see a lot of consistencies which to me, really validated the paintings which also made me very confident in using the paintings as a guide for the friezes and all the sculptures as well as topside details…that I can see. You can also see some similarities between the Bristol model and Portland paintings this led me to conclude that at some point there was and possibly still is a contemporary model of Portland for which these paintings were based on, and likely built just before the Bristol model, by George Stockwell. Also I have to note that the diagrams of Leopard in Winfields book were very helpful, and again, they compared really nicely to the Bristol drawings, which helped me arrive at cabin arrangements. Could things have been different on Portland than Bristol regarding her deck layouts? Of course, but if they were I don’t believe it would be a significant difference. I was able to find some differences in the QD bulkhead arrangements between Bristol and Portland by using the painting, ZAZ1718 and ZAZ1749, this is represented in the 3D model and will show up on the prototype. Should new discoveries be made, which I have found a few since beginning the design, I will modify and implement into the design/build. Until additional drawings or a contemporary model surfaces I feel confident in saying that I have a pretty good representation of what Portland looked like especially her outside appearance. JJ
-
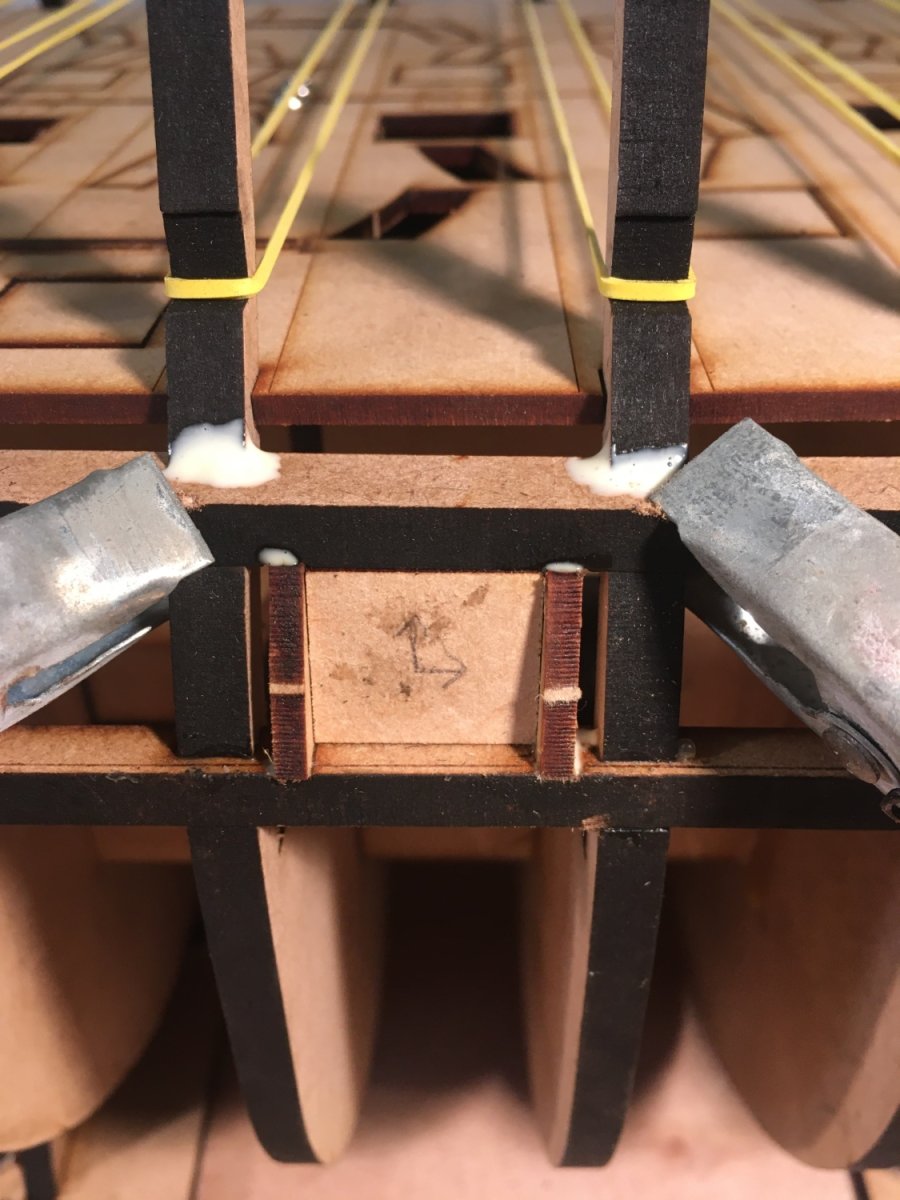
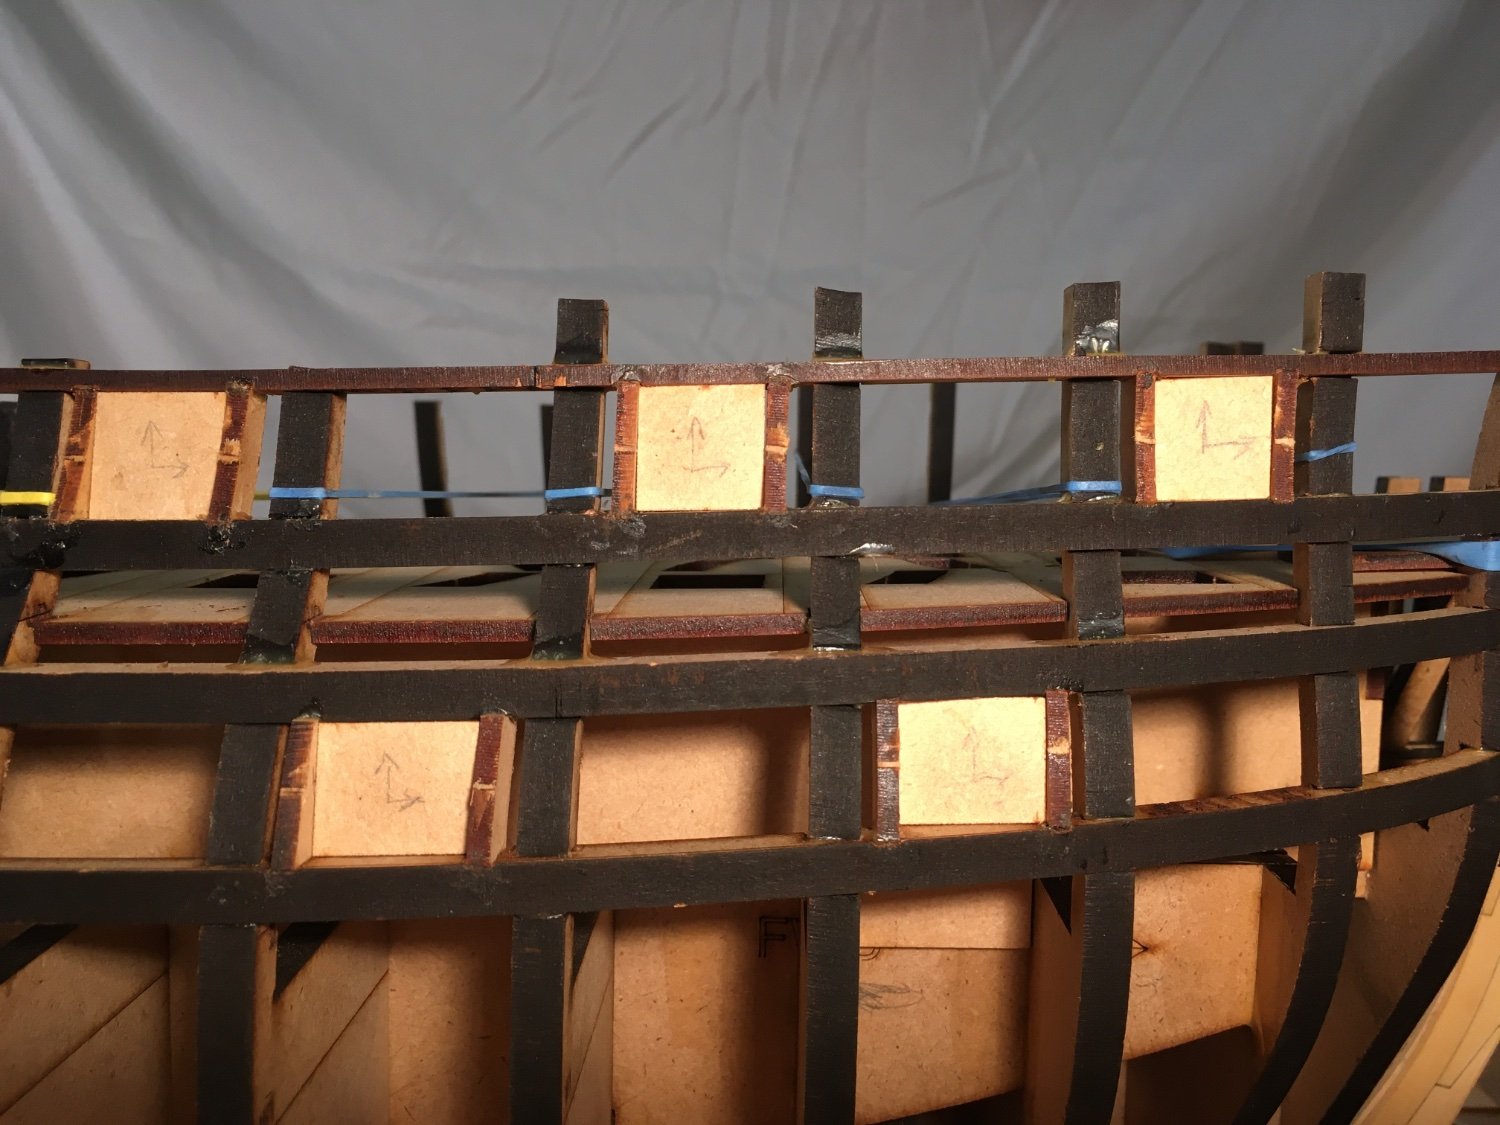
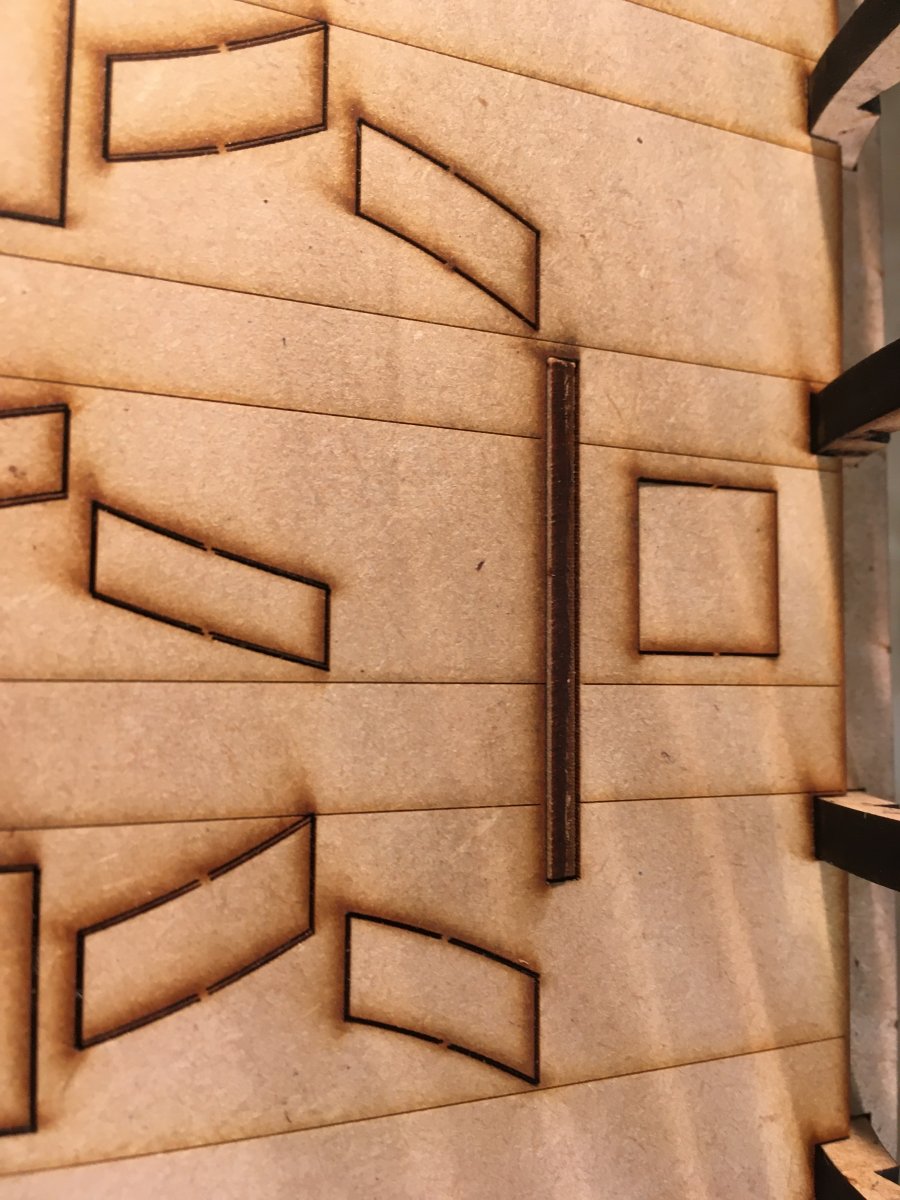
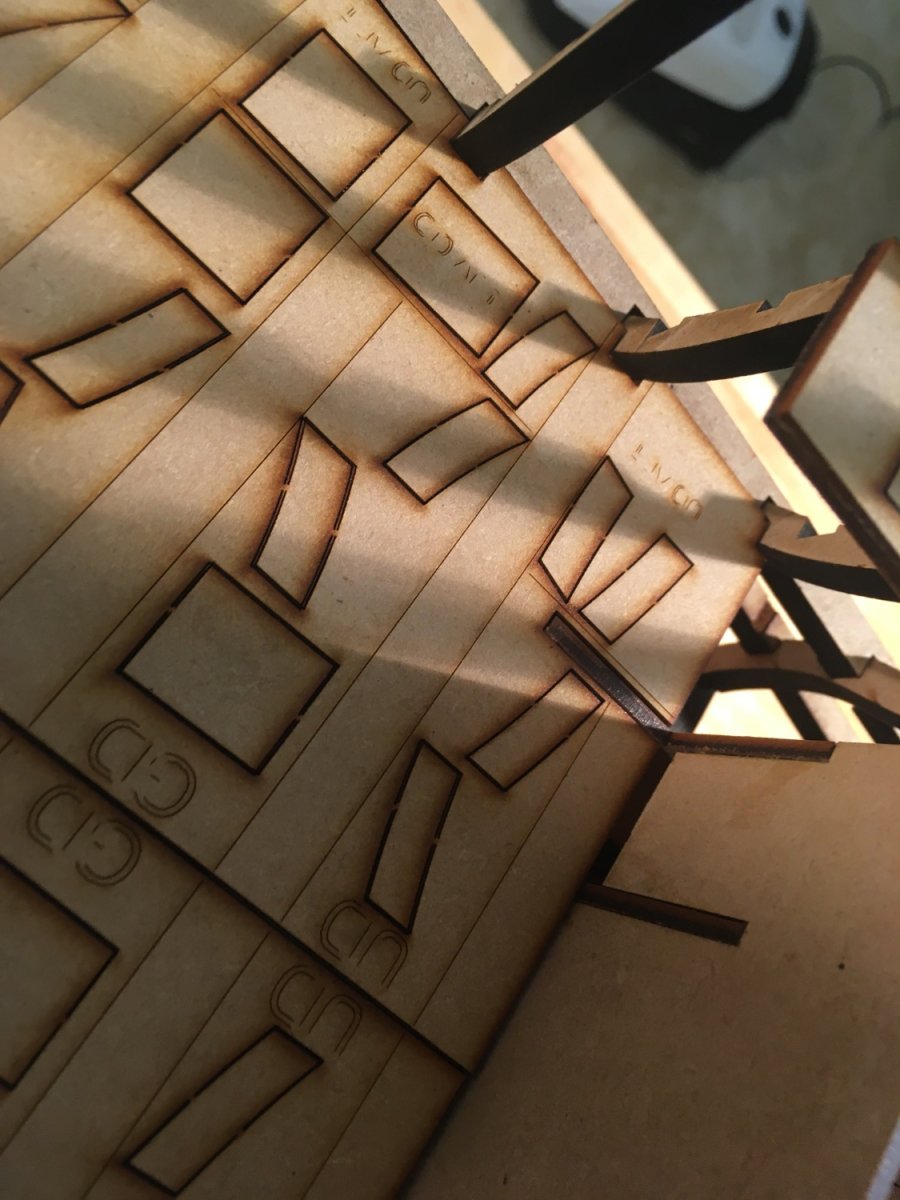
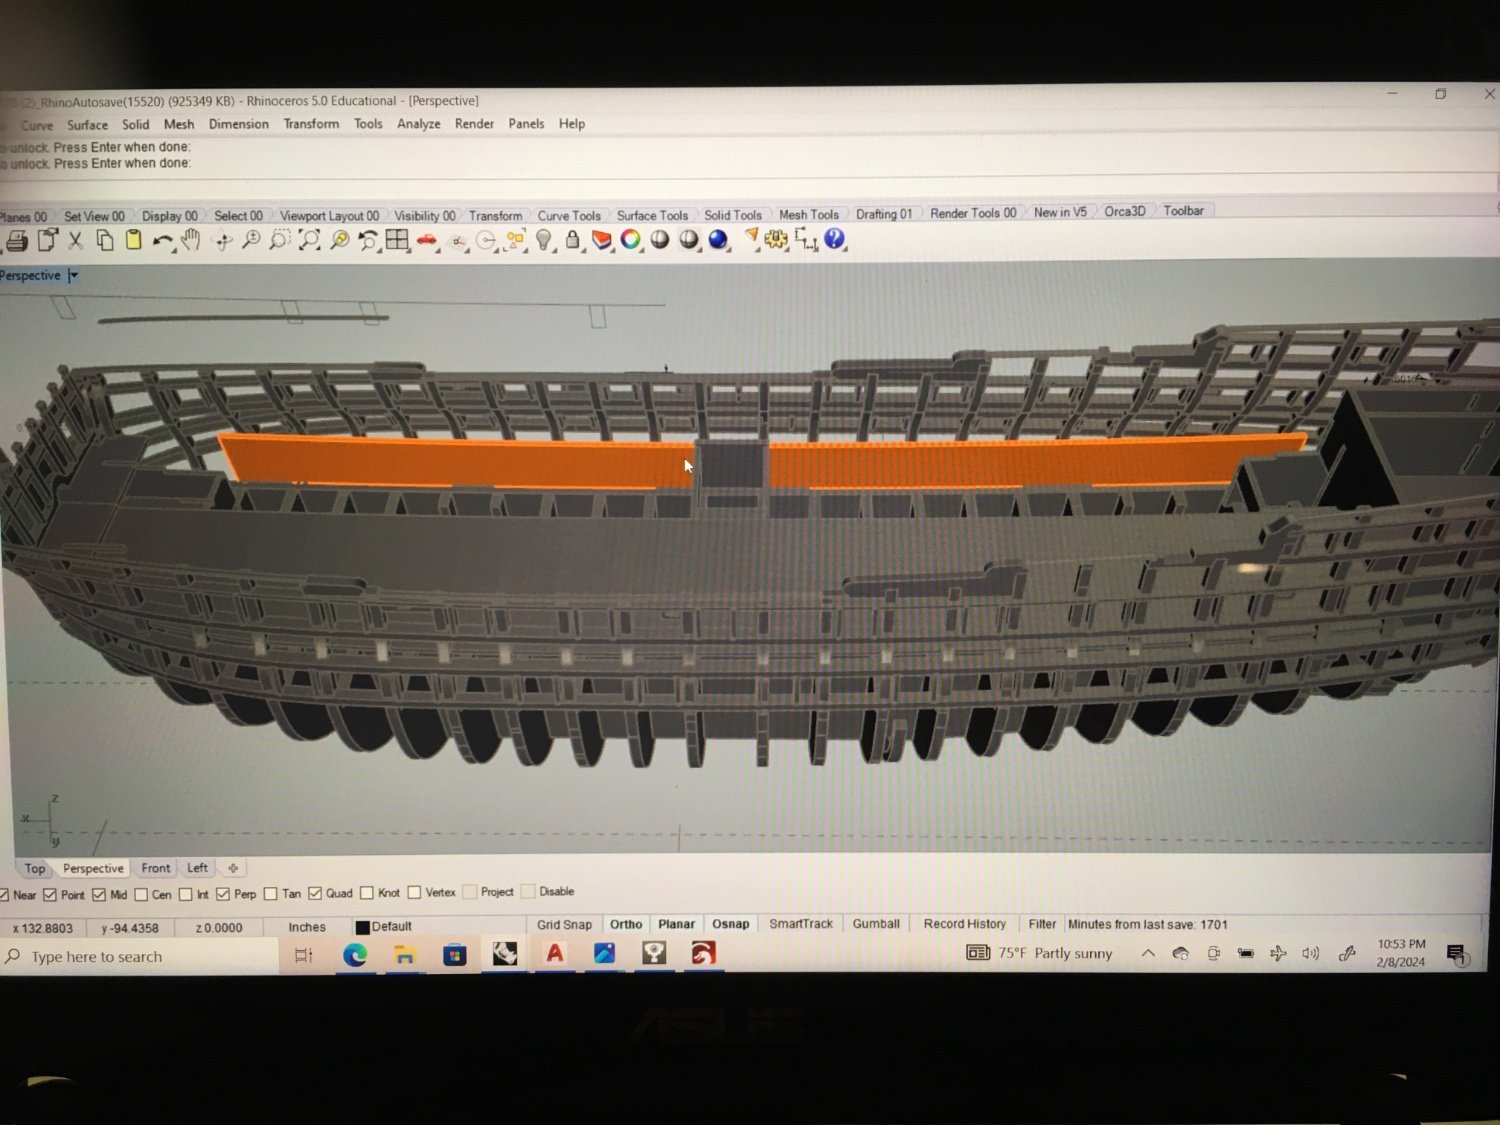
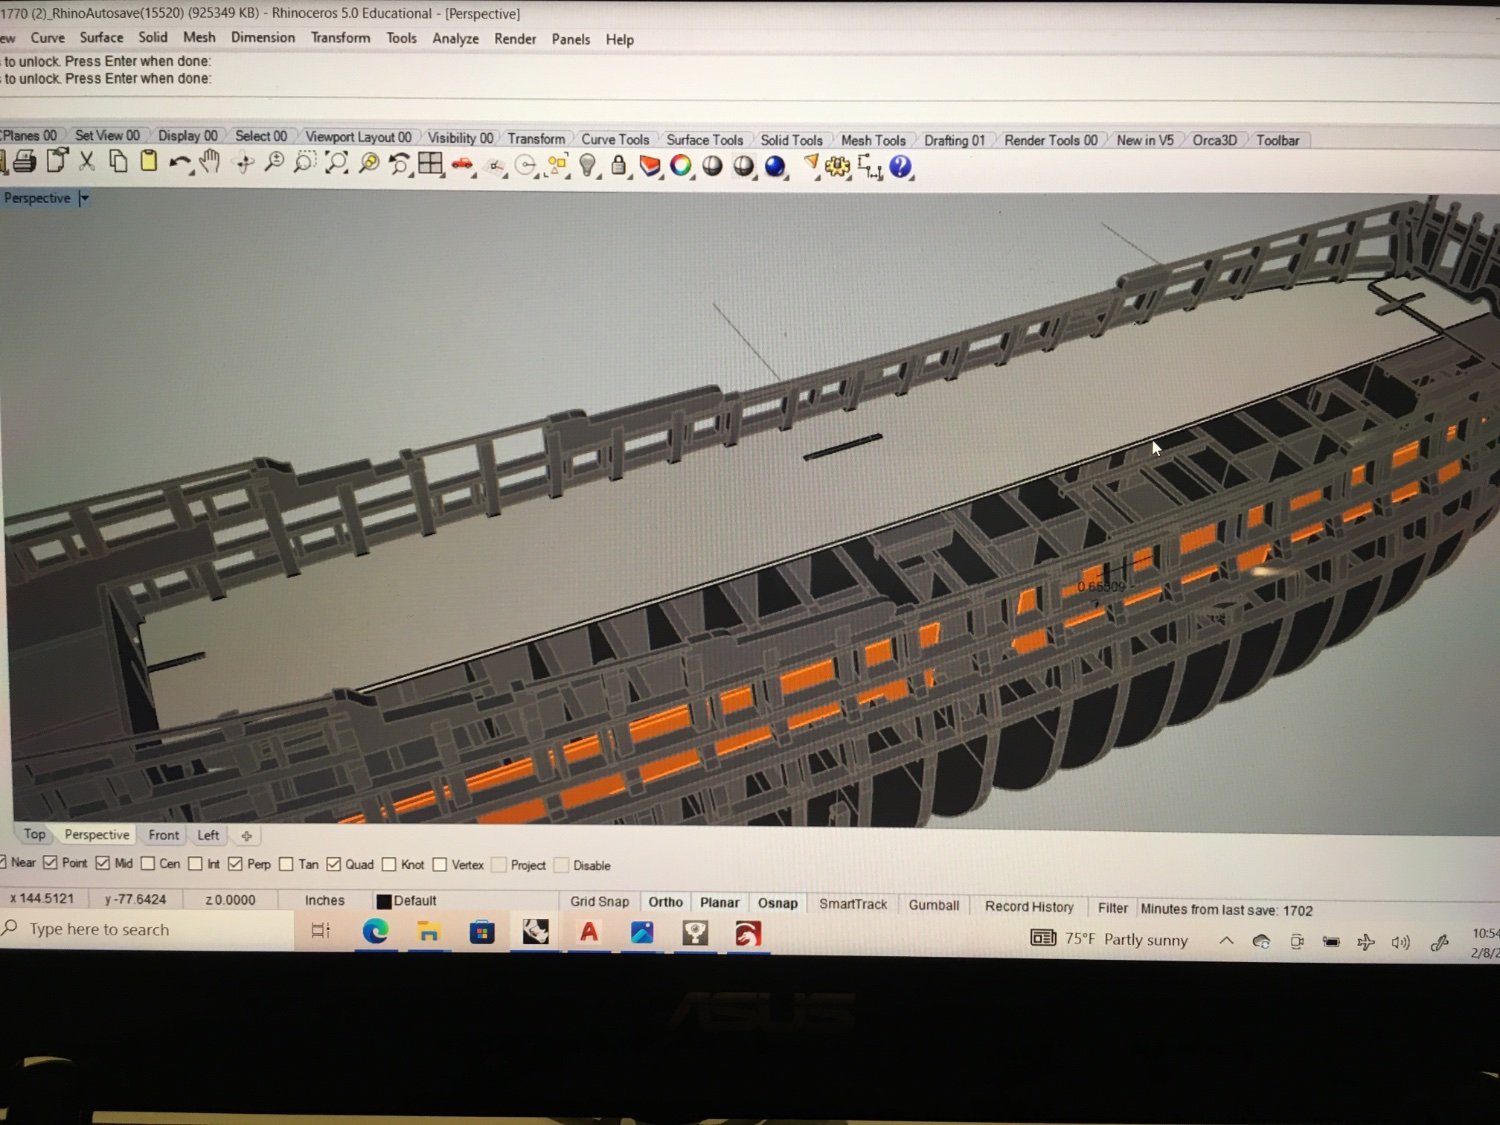
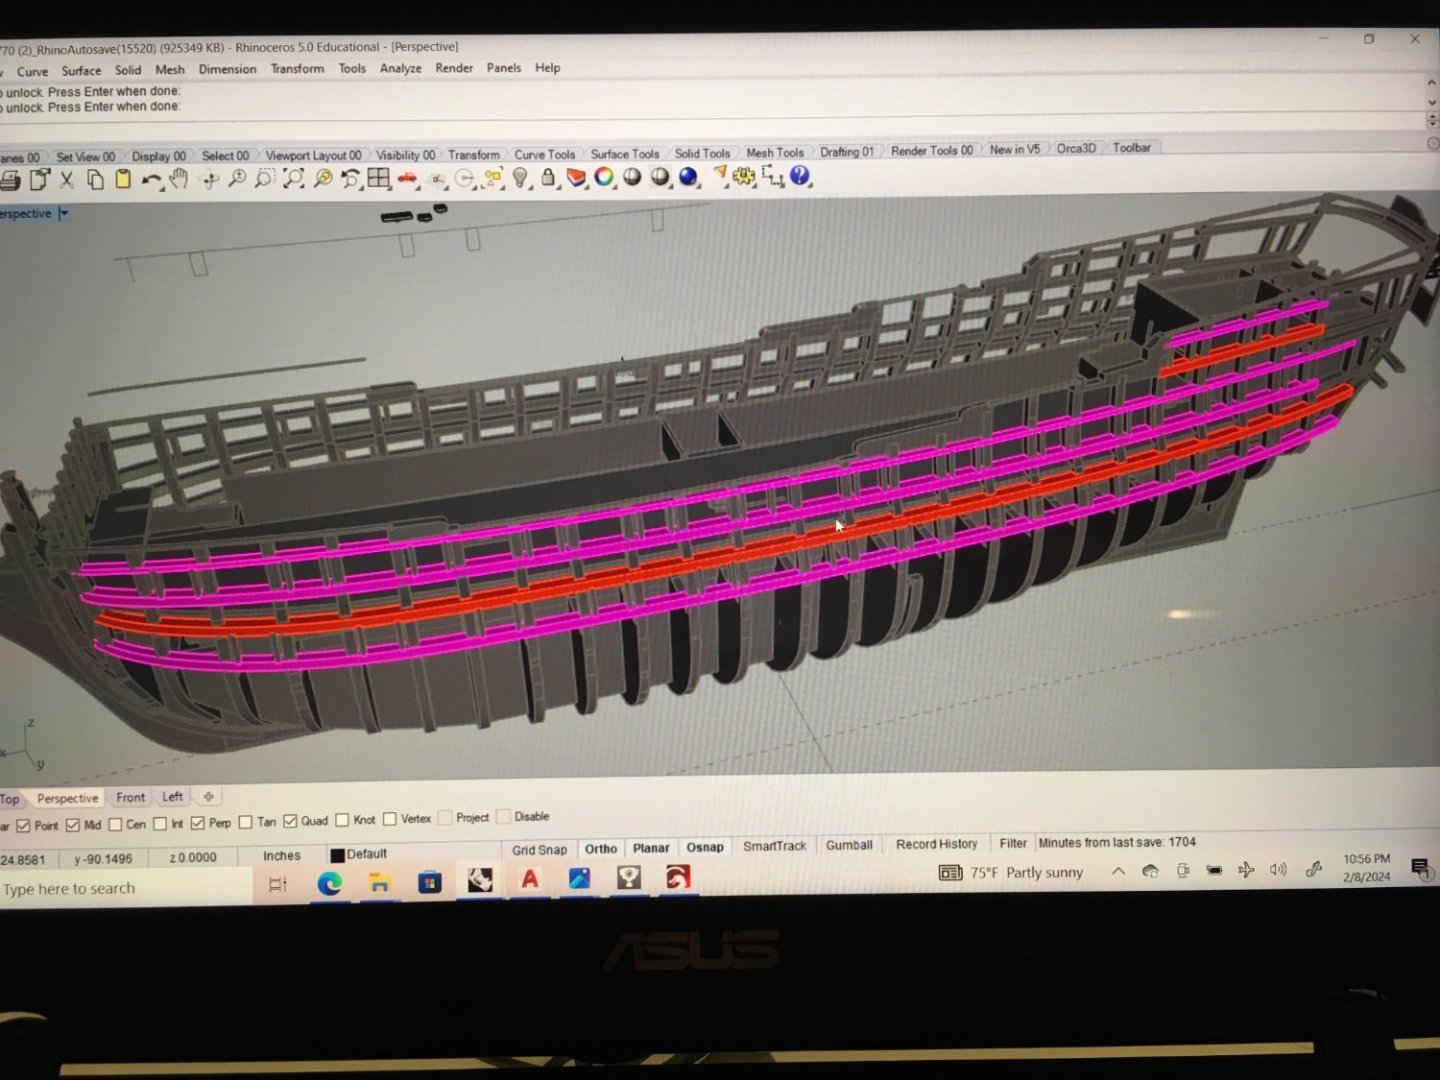
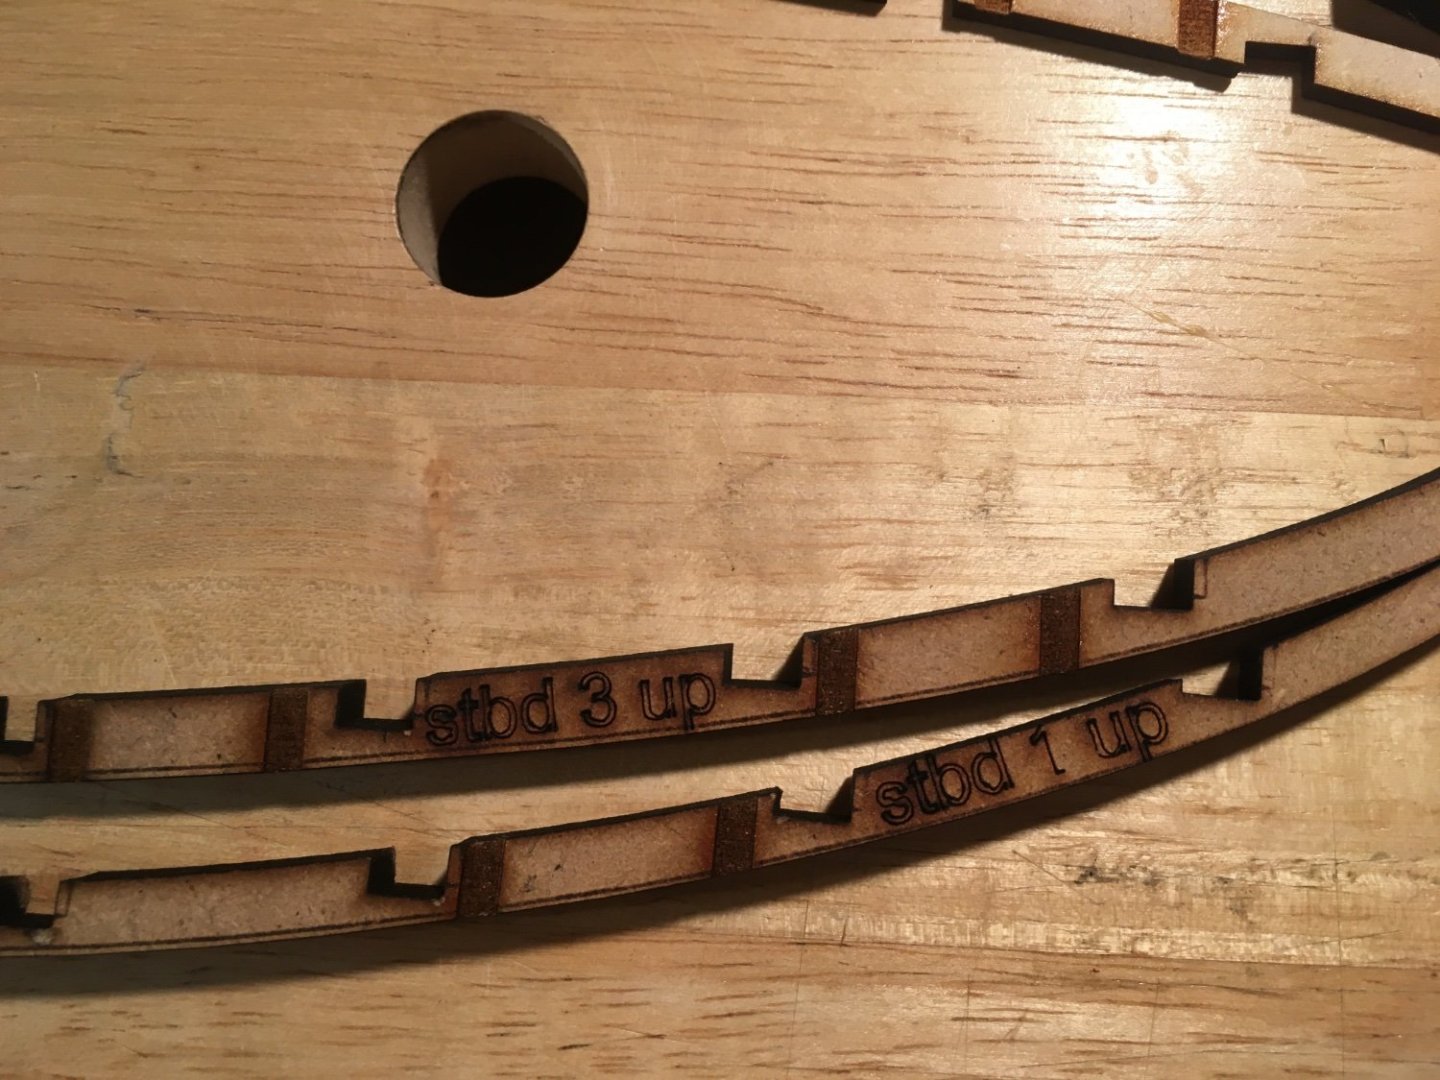
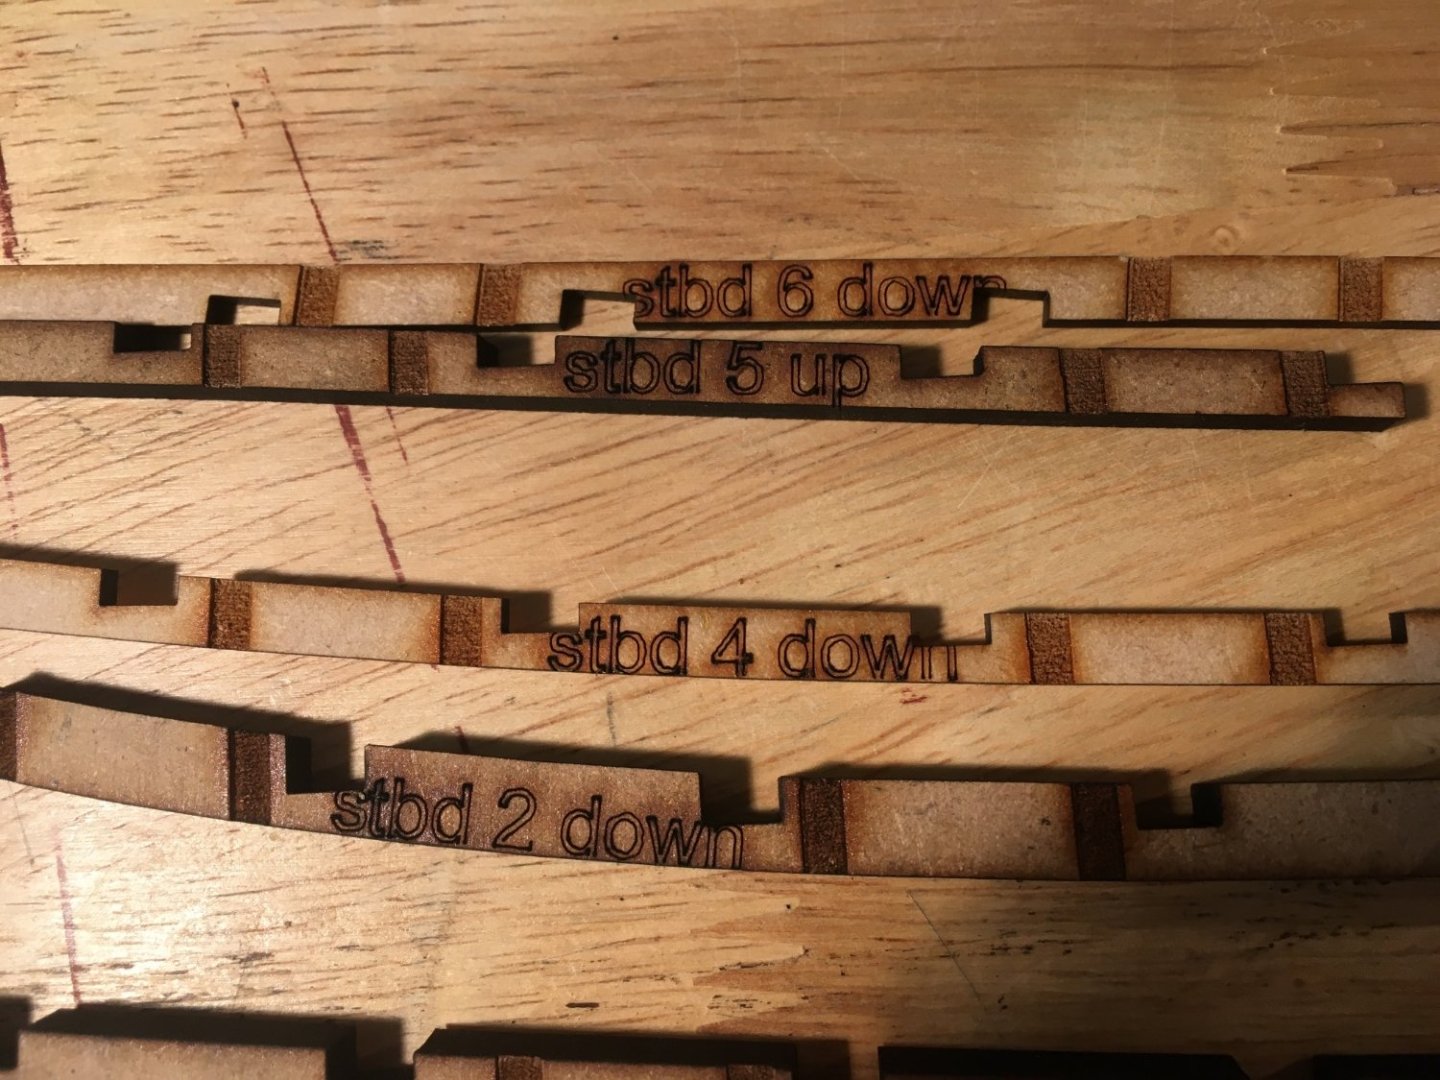
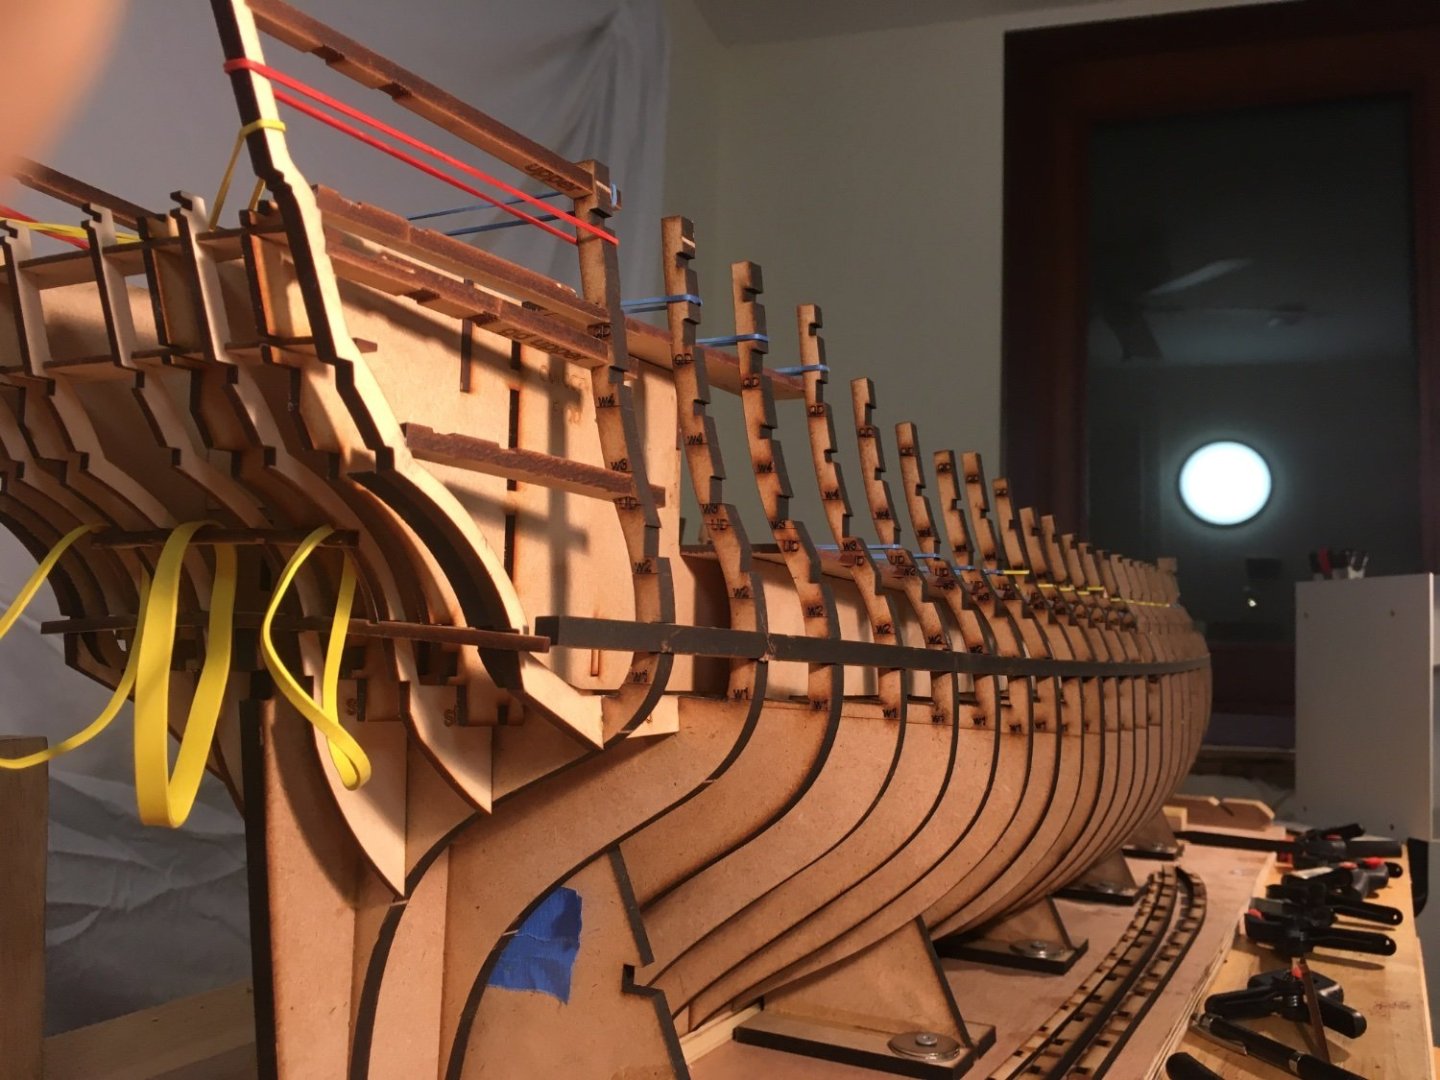
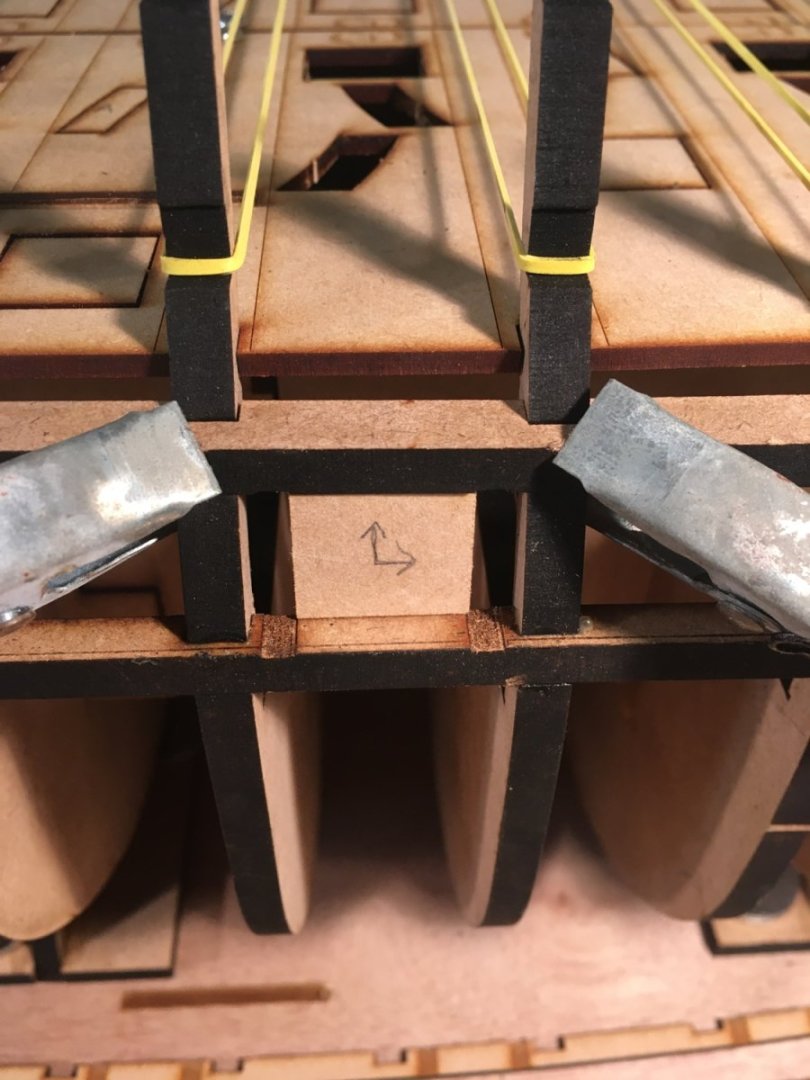
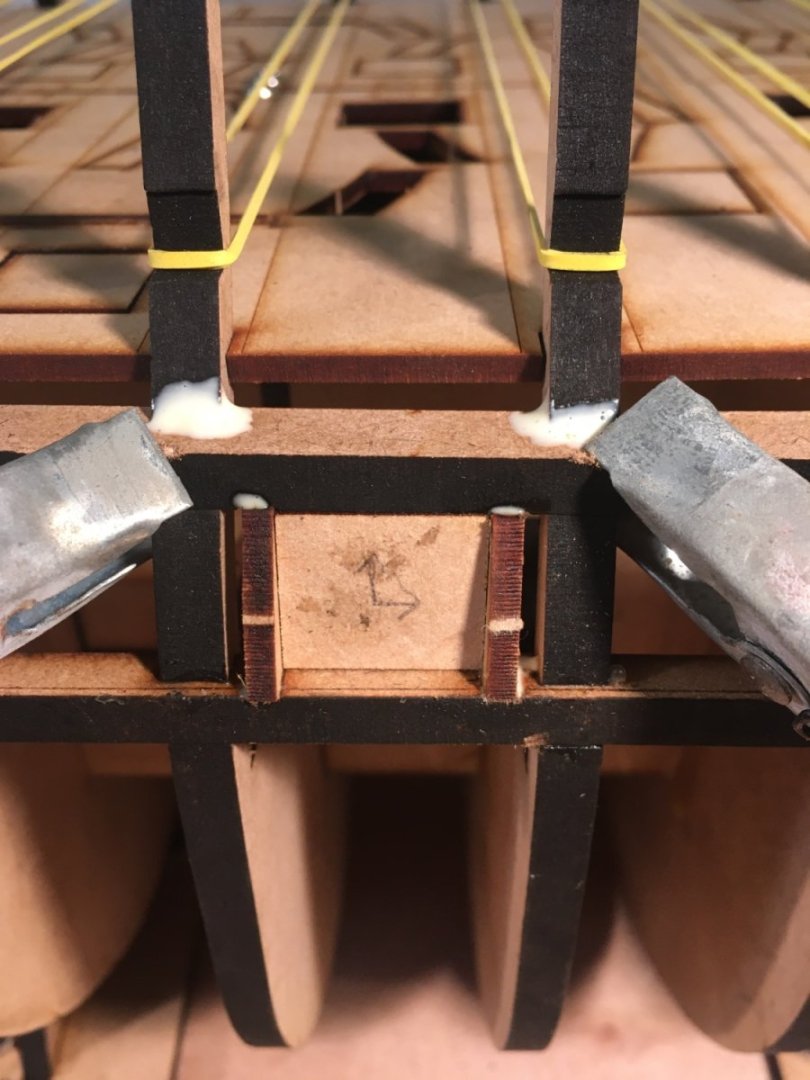
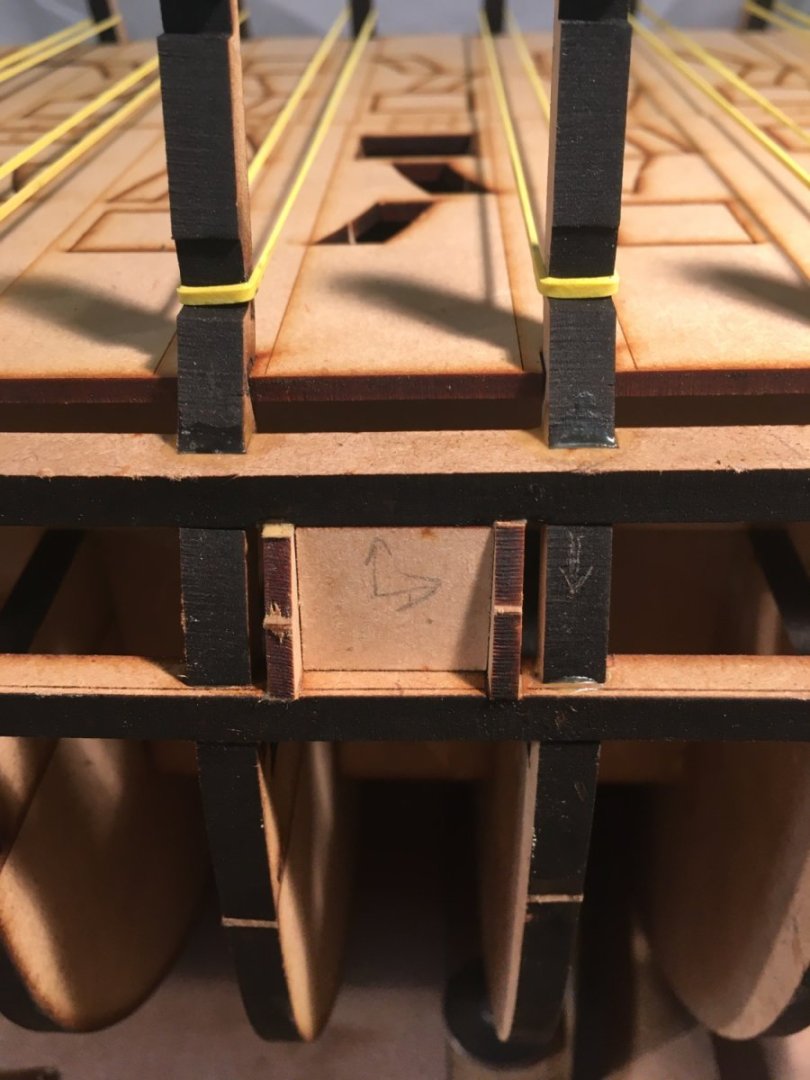
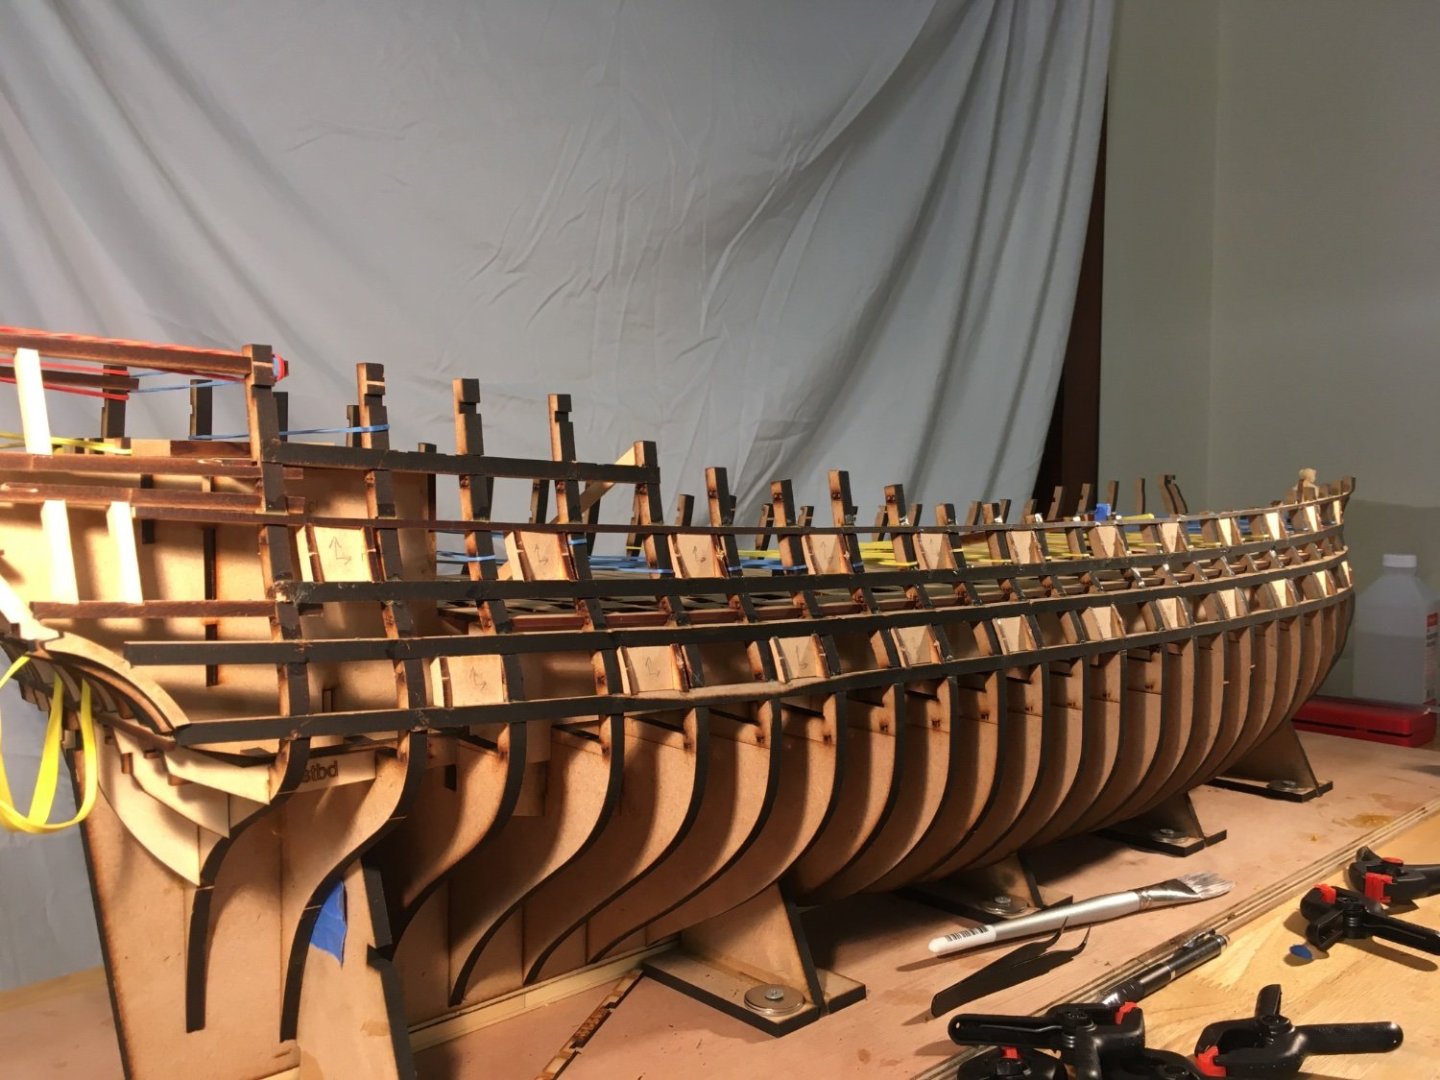
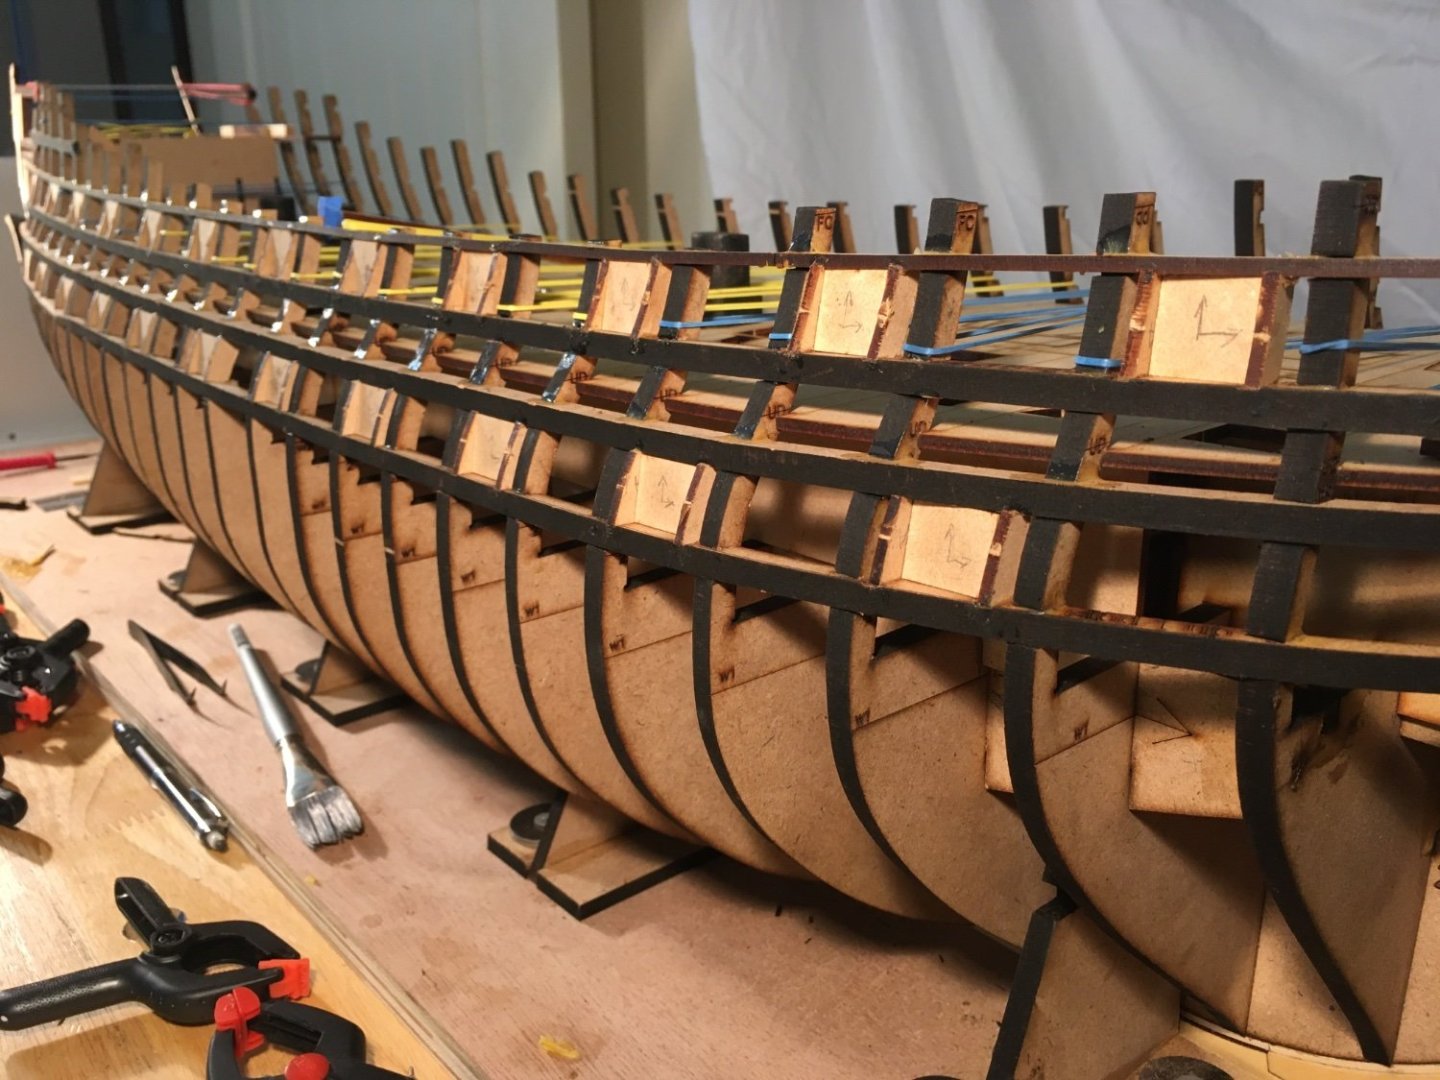
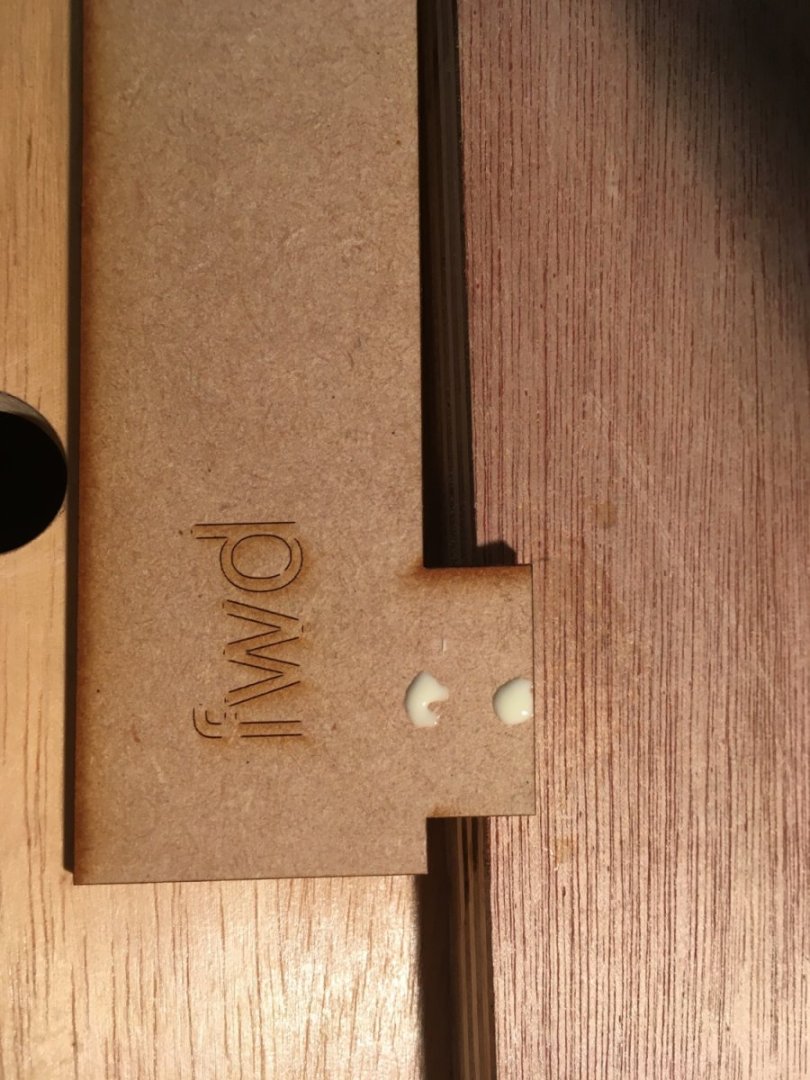
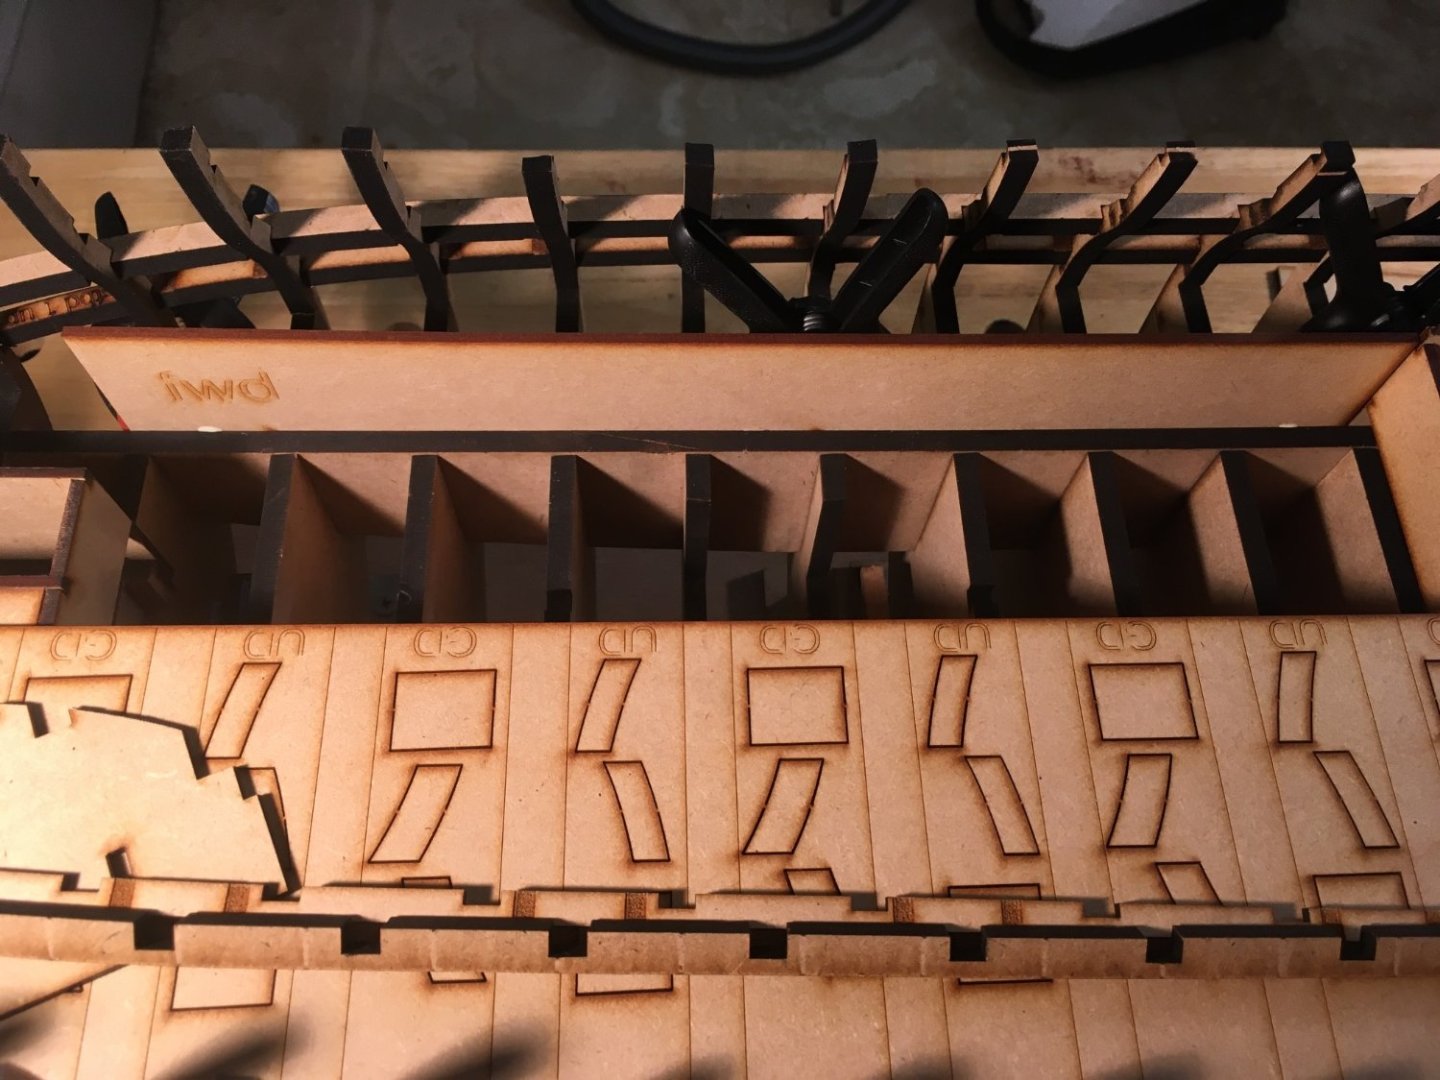
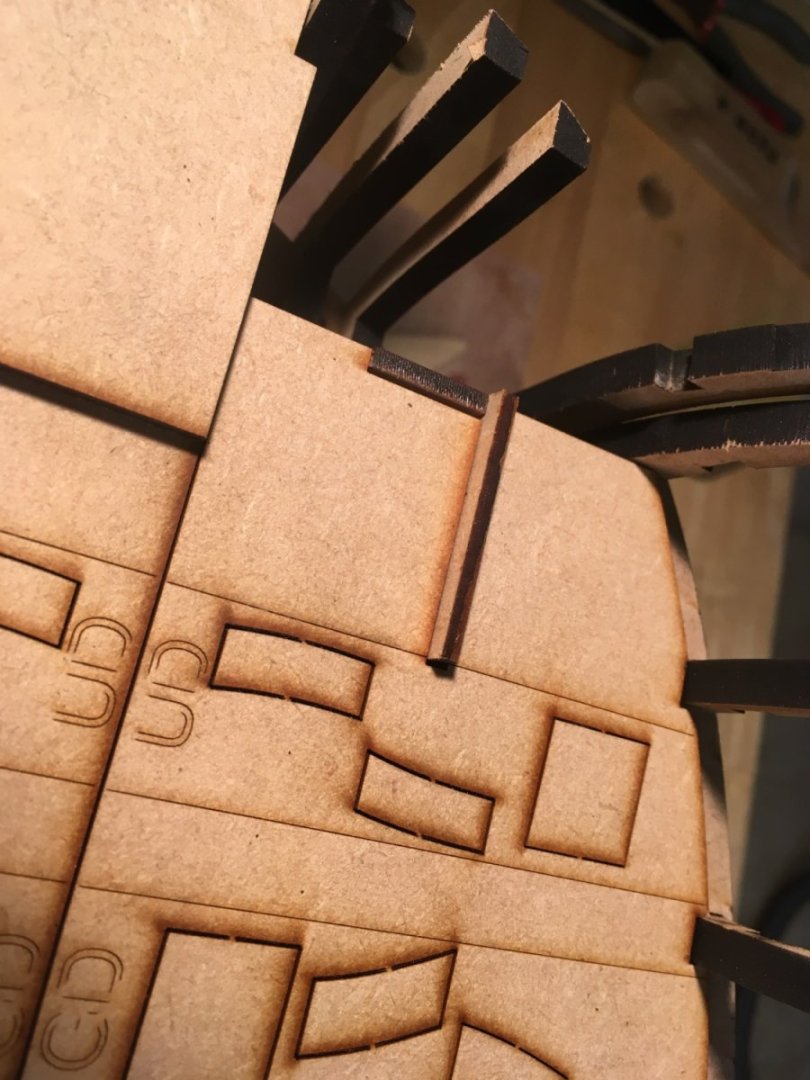
Starting the gunport framing is the next step once you have all the frames stabilized in the jig. These are all cut to fit in to slots on the bulkheads, they are also etched to receive the port framing uprights, there are a total of 6 of these pieces/side , you’ll notice they are labeled side specific and the direction they face The three labeled “up” are the bases for all the gun ports and should be carefully installed with a smooth curve up and down the hull, You may have to sand the slots here and there to adjust the height at some of the bulkheads to achieve a nice run. Once satisfied go ahead and glue it in and let it dry, go over to the other side and do the same while you wait. Do the same with “port/stbd 2 down” but do not glue it in, just get it snug and in its place. i found that if you attempt to glue it all in at once, some of the gun ports could be off a little and you won’t be able to adjust properly. so what I did was start adding the uprights and the gunport template to make sure everything looked ok, once everything fit well and lined up with the template I glued in the uprights and clamped if necessary I also added some glue around the bulkhead upper port frame to attach it firmly to the bulkheads. You’ll notice above that I’m pulling these parts from the frame jig, this also doubles as a parts tree for all the templates and port frame uprights if you look above the jig has UD and GD etched in it with parts contained within etched lines, these correspond to whatever port is directly outboard. The one pictured above says GD and you’ll see that it corresponds to the gun deck port etchings right below it. The uprights are also facing the direction they belong, either a forward or aft upright. I’m going to add more etching to further clarify as well as directional arrows for the port templates. Be careful not to glue the templates in! Take your time with this and make sure everything lines up and the same applies to the upper gun deck, line up and glue “port/stbd 3 up” to the bulkheads and carefully glue down “port/stbd 4 down” one gun port at a time. It should turn out pretty nice when complete. The hull is almost ready to lift out of its base and begin fairing it all for planking, there are just a few steps left. Thanks for looking in. JJ


- 396 replies
-
- 23
-
-
Thank you Christian, I’m still thinking of ways to simplify them but as of now they get the job done as intended.
-
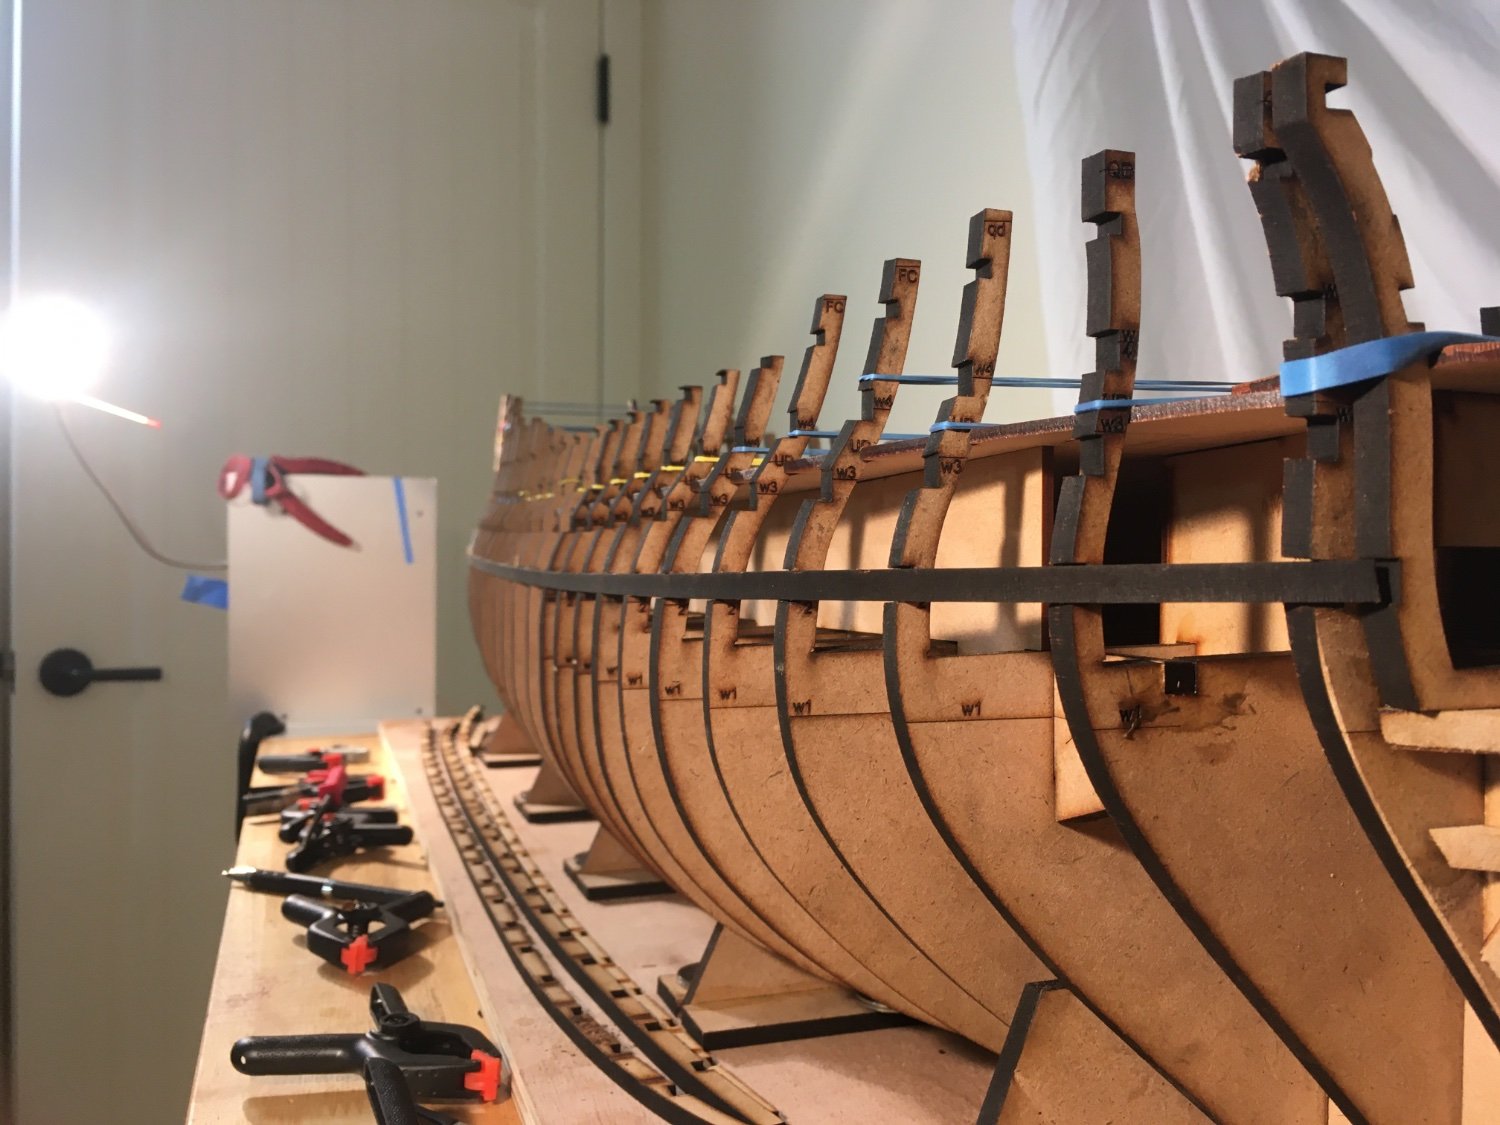
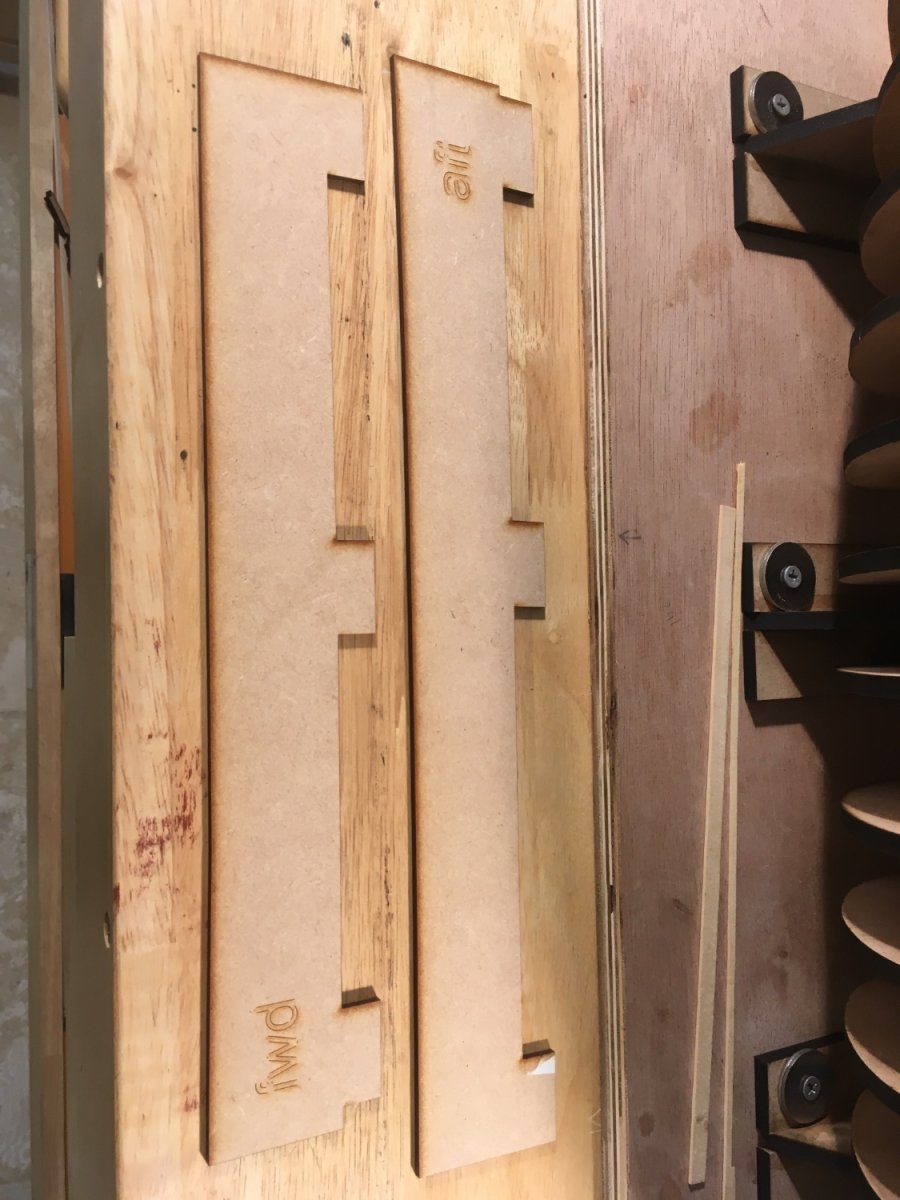
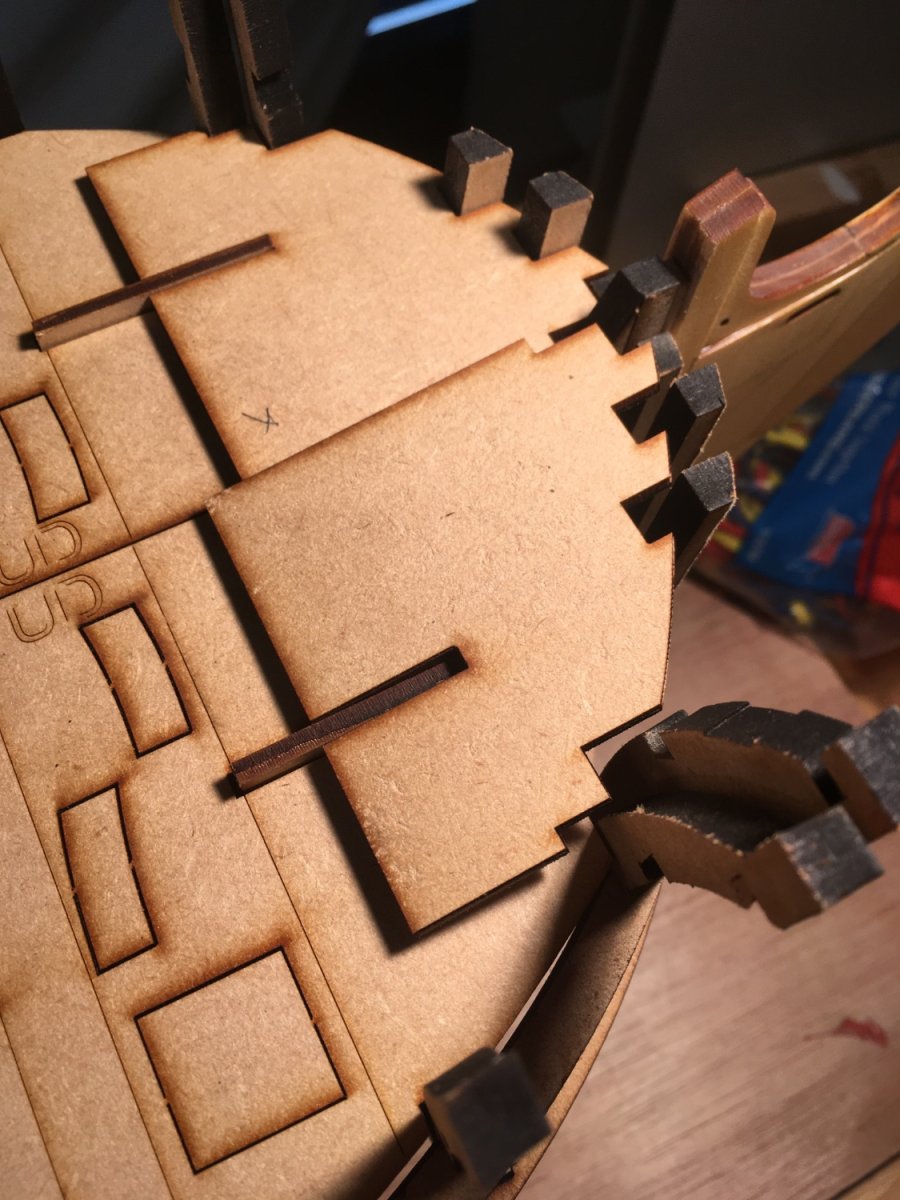
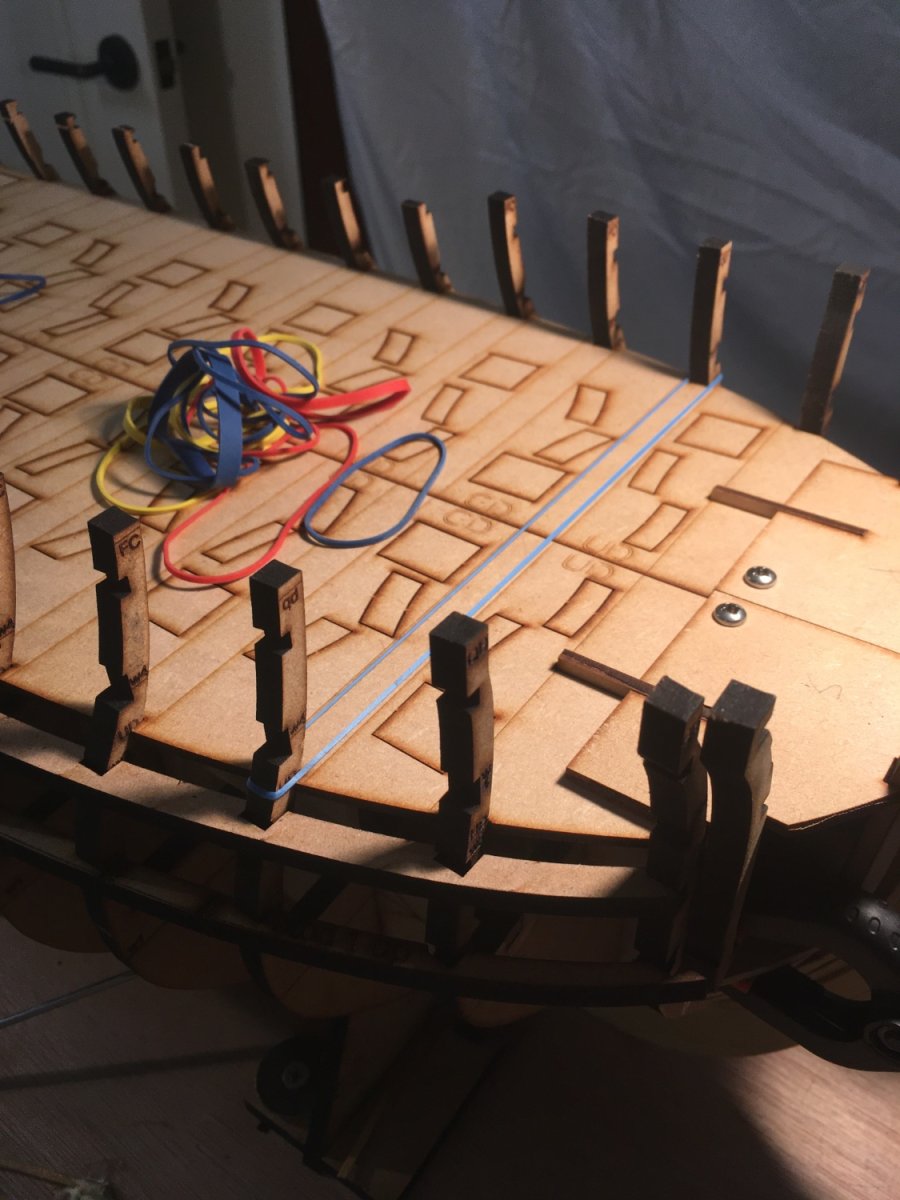
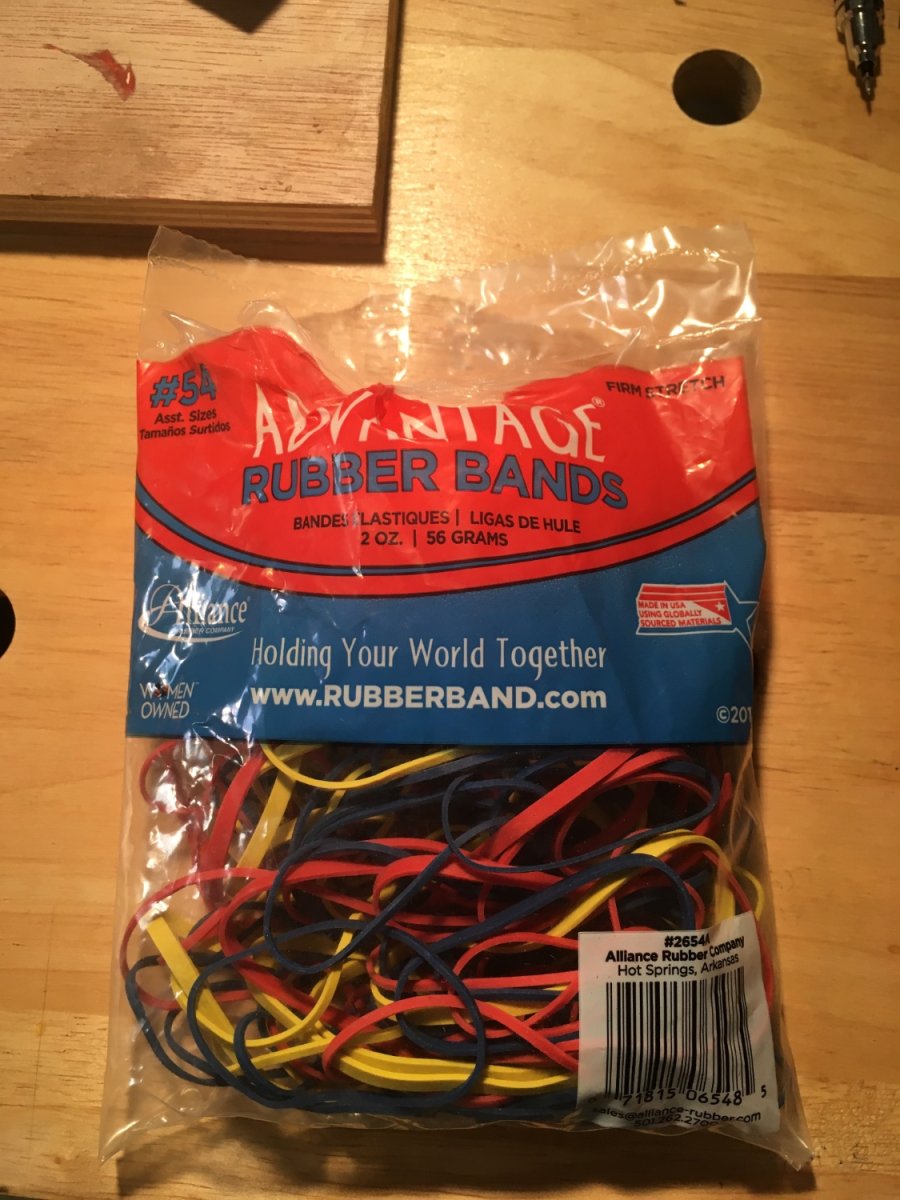
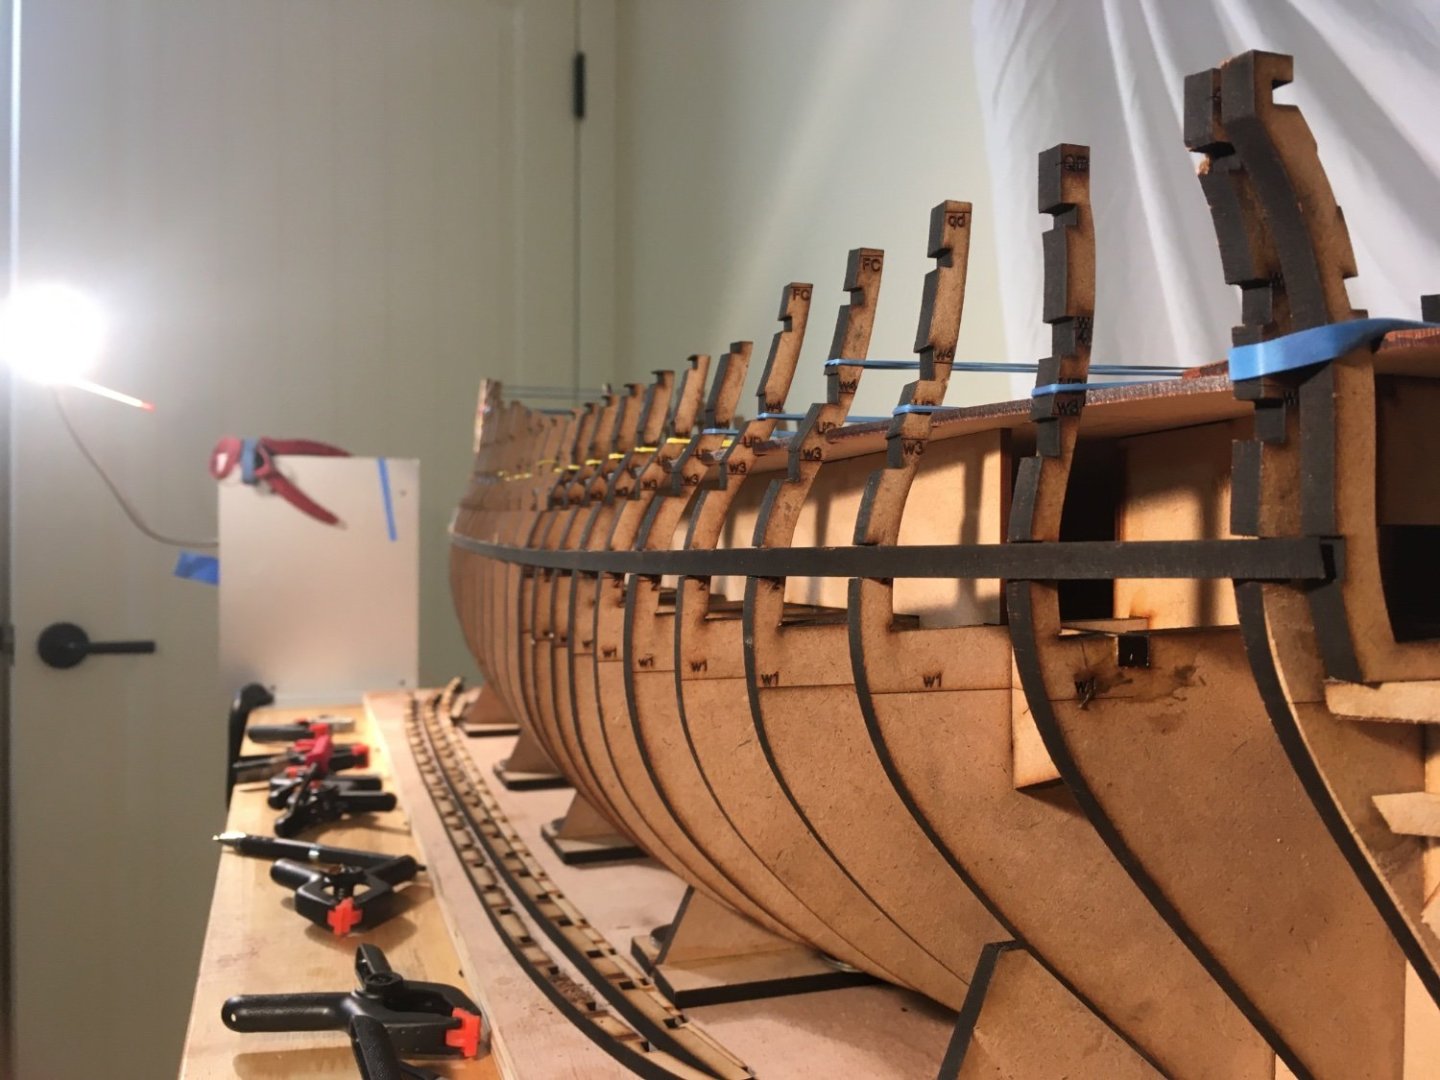
I decided that I needed something to support the frames, some of these things stick up over 5” from the gun deck! I covered some of the jigs earlier, this final one attaches to them all and is what spans the whole model length and beam to support all the frames until it’s planked and solid. You can see half of it installed below. These two final pieces are intended to keep the jig at the proper height, they should both fit tight between both ends of the middle support jig They are marked fwd and aft with the marked end facing all the way forward and the aft mark facing all the way aft. I just very lightly glued them in so they will be easily removed later Just carefully work them into position and make sure they are on the outside of the longitudinal bulkhead stiffener once both sides are complete you can begin to add the top frame jig if you lift it up slightly and slowly work each frame into the slots it will easily set right down. it has slots that should allow it to fit down snug, you can see on each of the three jig bases below there is one more small piece to support the forward Timbers, it has to slide in going forward, there was just no other way to get it in or out once in, it will support the two forward frames as well as the forward cant frames once in place, I screwed down all the jig pieces to the lower jig structure. These will need to be removed later so I wouldn’t recommend gluing them down. i bought a ton of rubber bands from Home Depot and started going to town on pulling all the frames together into their slots, Most of them are pretty close and just need a little pull to stay in place. Now it’s time to move onto the gunport framing, I promise this will start to look like a model ship soon! JJ

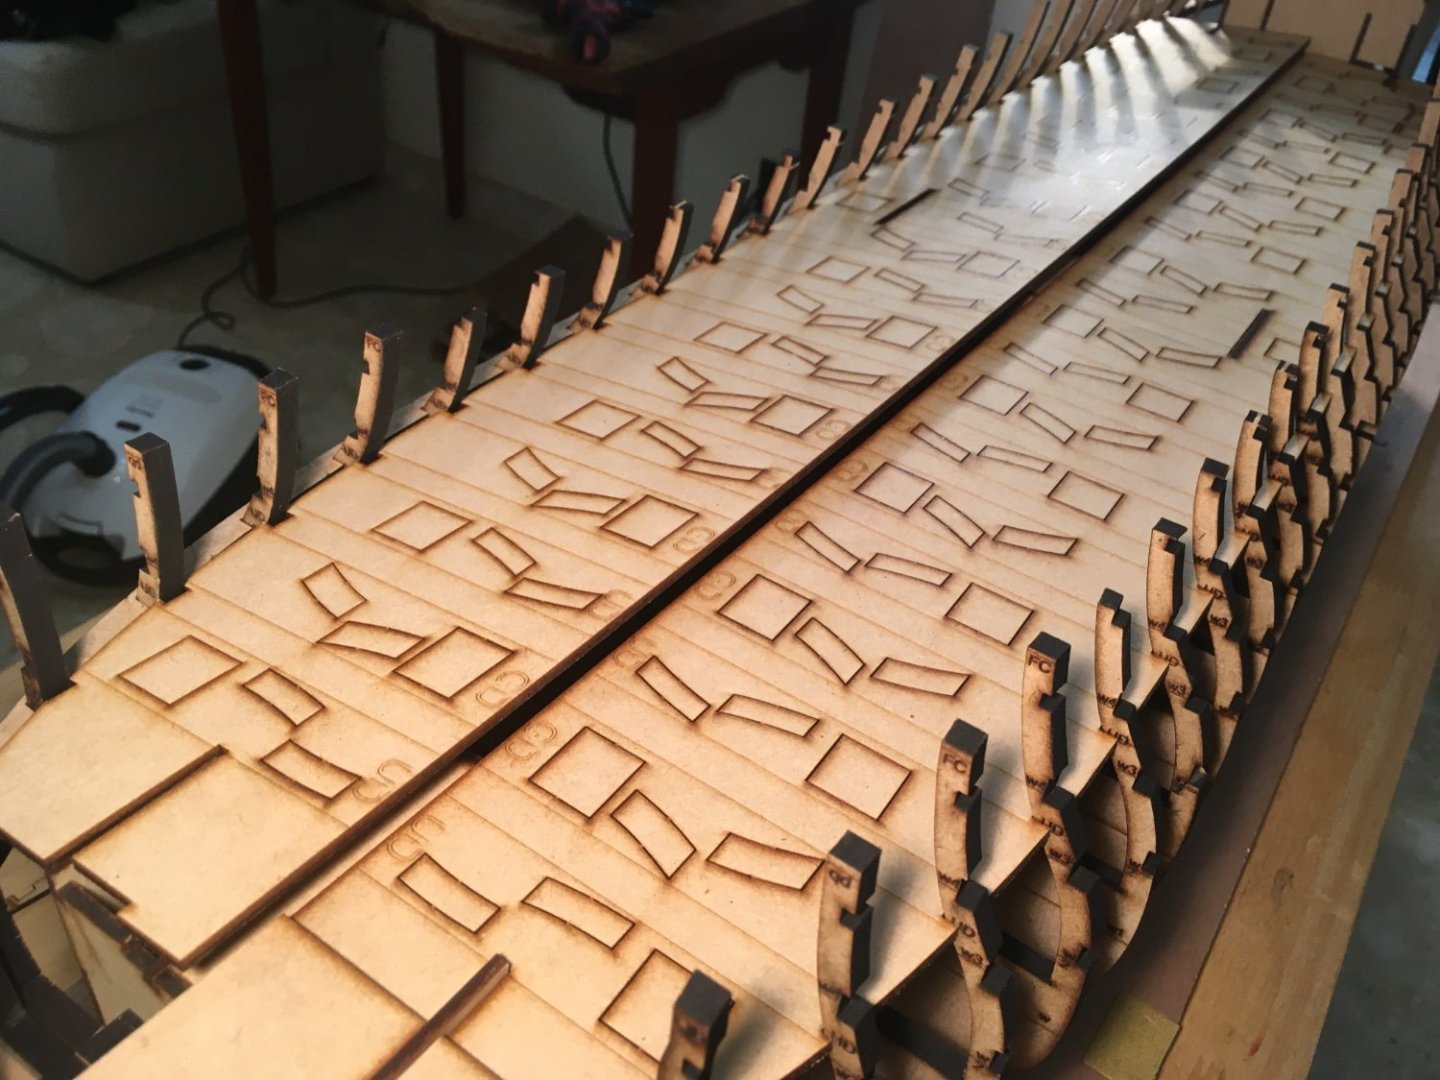


- 396 replies
-
- 10
-
-
Thank you Ken, turns out they are quite handy and I will be using a lot of them on this model.
-
USS Constitution by mtbediz - 1:76
scrubbyj427 replied to mtbediz's topic in - Build logs for subjects built 1751 - 1800
Nice work on the capstan! That looks really good. -
Thank you Kenny, I’ll be following along on your Winnie build. It looks like you are off to a great start. Take your time with chapter 1 and 2 (in fact take your time with all of the chapters) and it will definitely pay off as you progress. Winnie builds into a wonderful model, as you have probably already seen. JJ