


Peterhudson
-
Posts
97 -
Joined
-
Last visited
Content Type
Profiles
Forums
Gallery
Events
Posts posted by Peterhudson
-
-
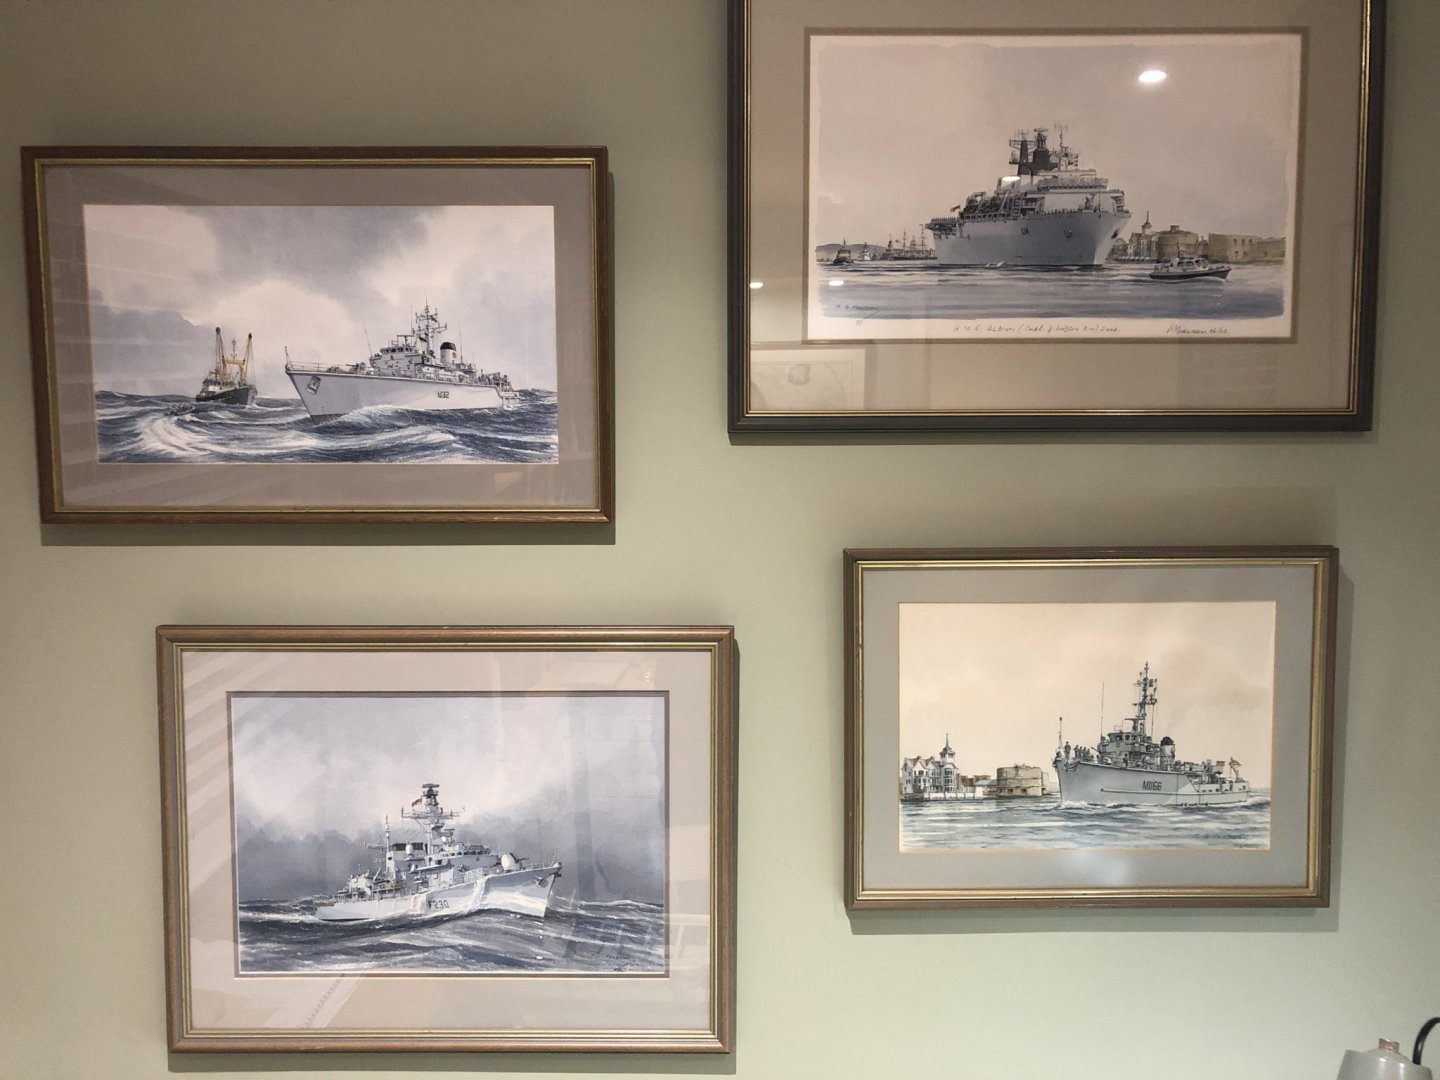
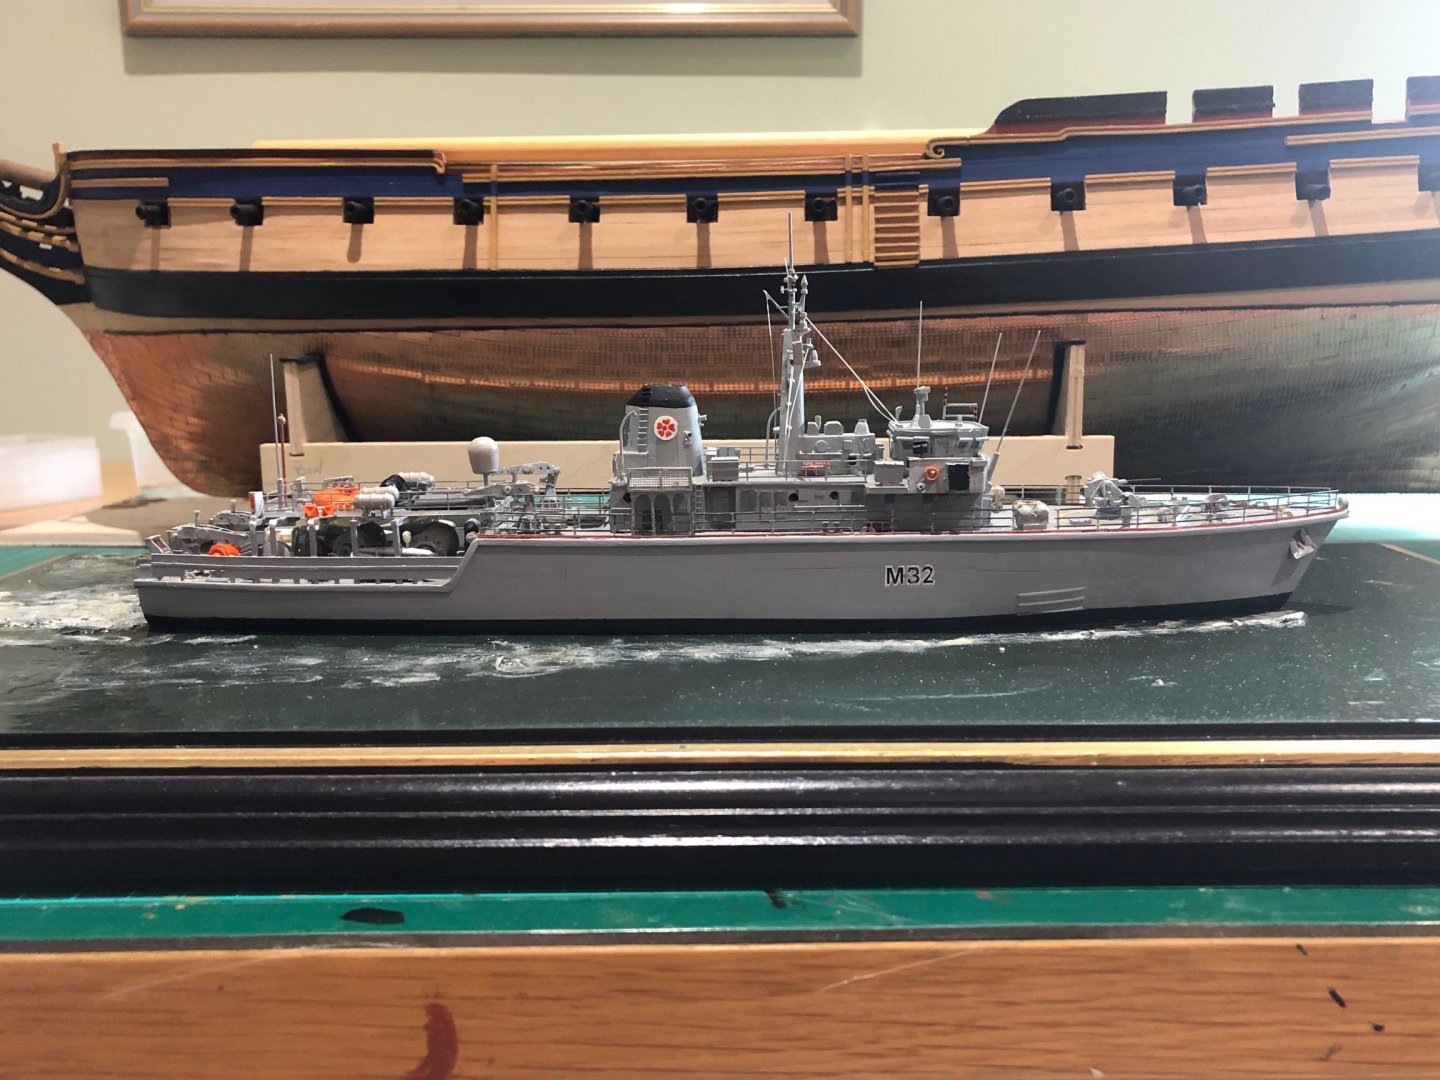
someone asked about the ships on the wall - these are pictures of my various seagoing commands in the RN: top left clockwise: HMS COTTESMORE - HUNT Class MCM ship; HMS ALBION - Assault ship; HMS NURTON - Ton class minesweeper; HMS NORFOLK - T23 ASW Frigate. Great ships. A dear friend, Eric Dyke, made me a scratch model (in plastic) of HMS COTTESMORE which really ignited my interest in the hobby - he is to blame for the modelling mess that bedevils my study all the time! Desk bound now....
- coxswain, gieb8688, Beef Wellington and 5 others
-
 8
8
-
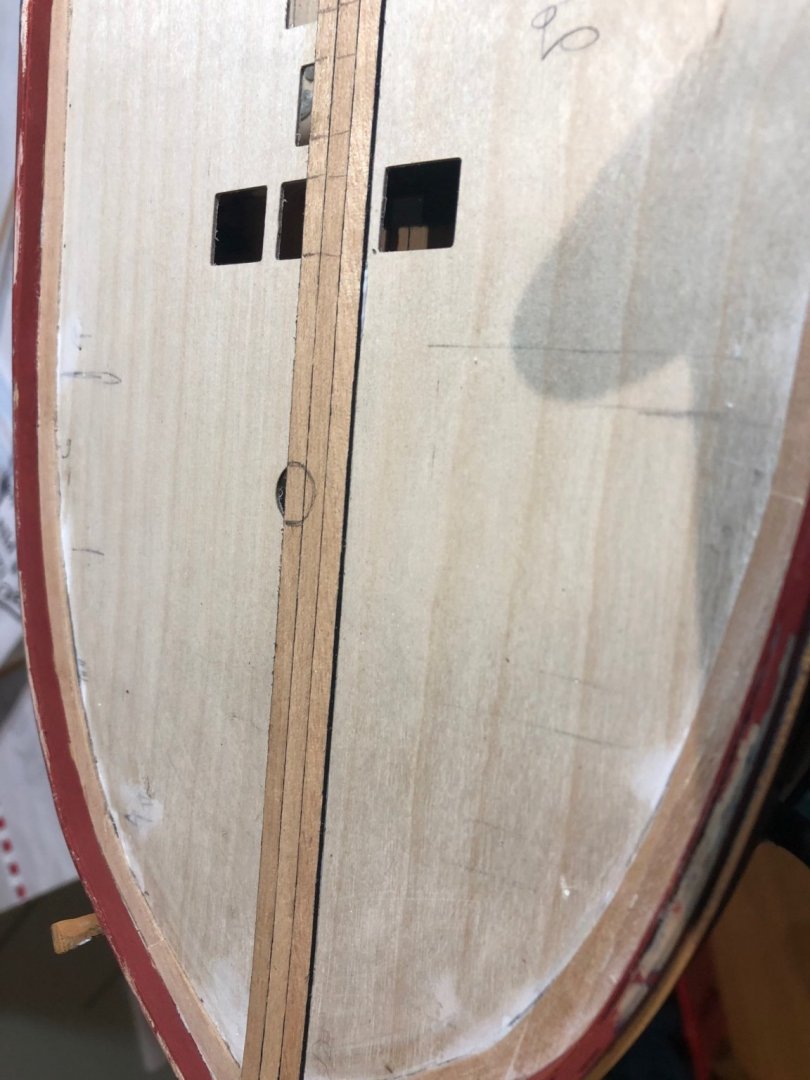
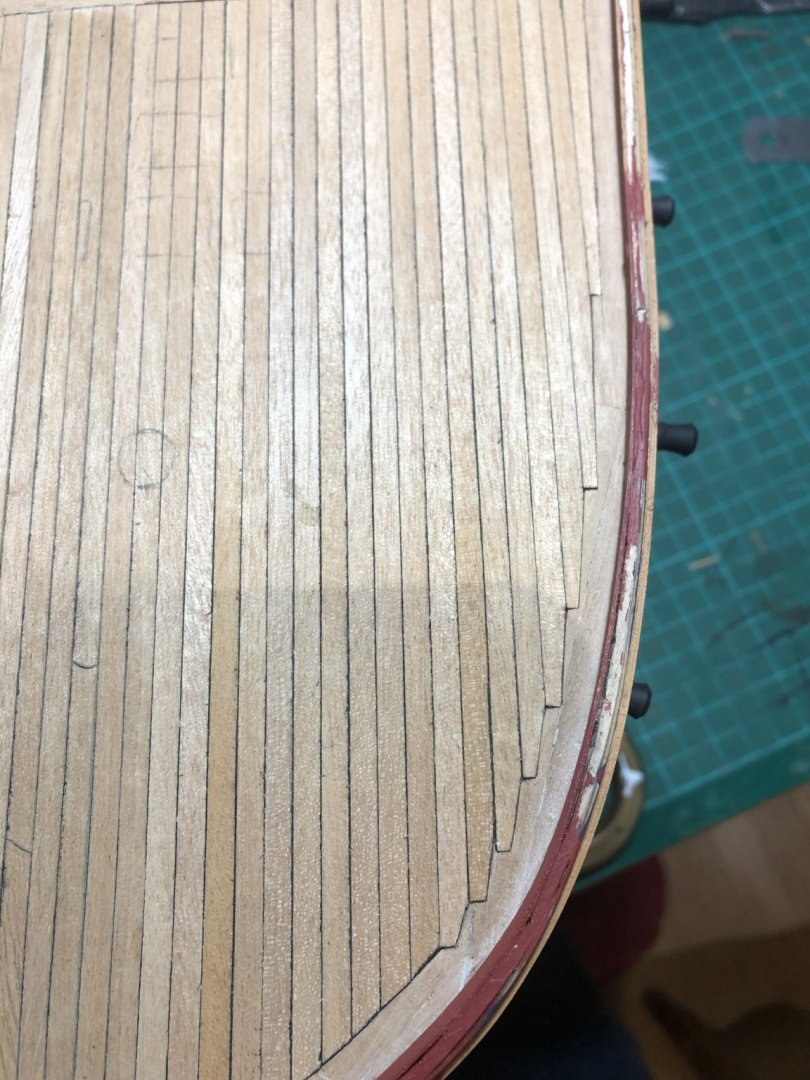
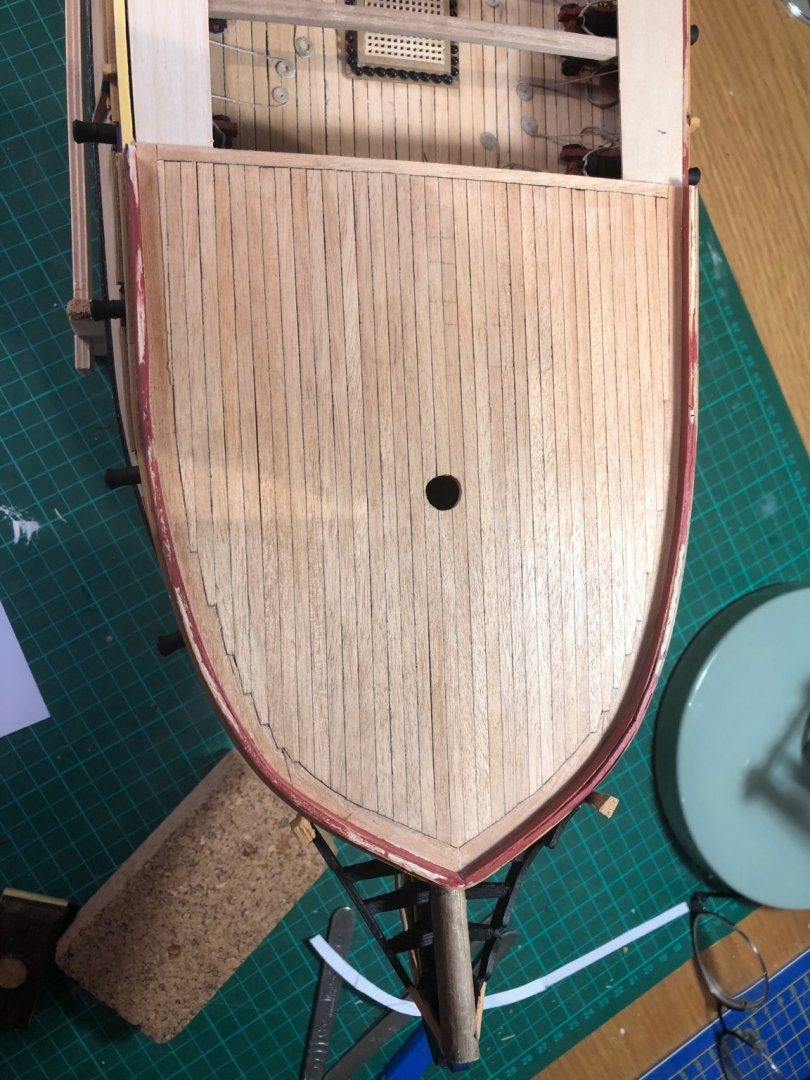
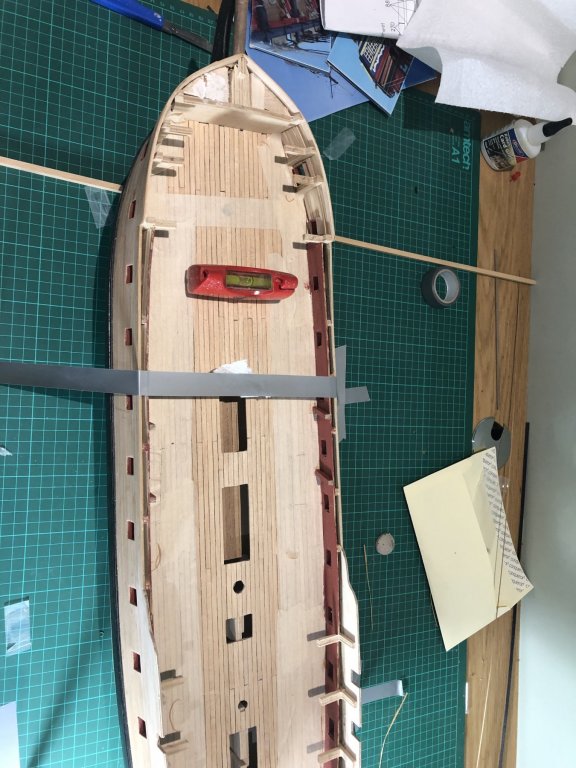
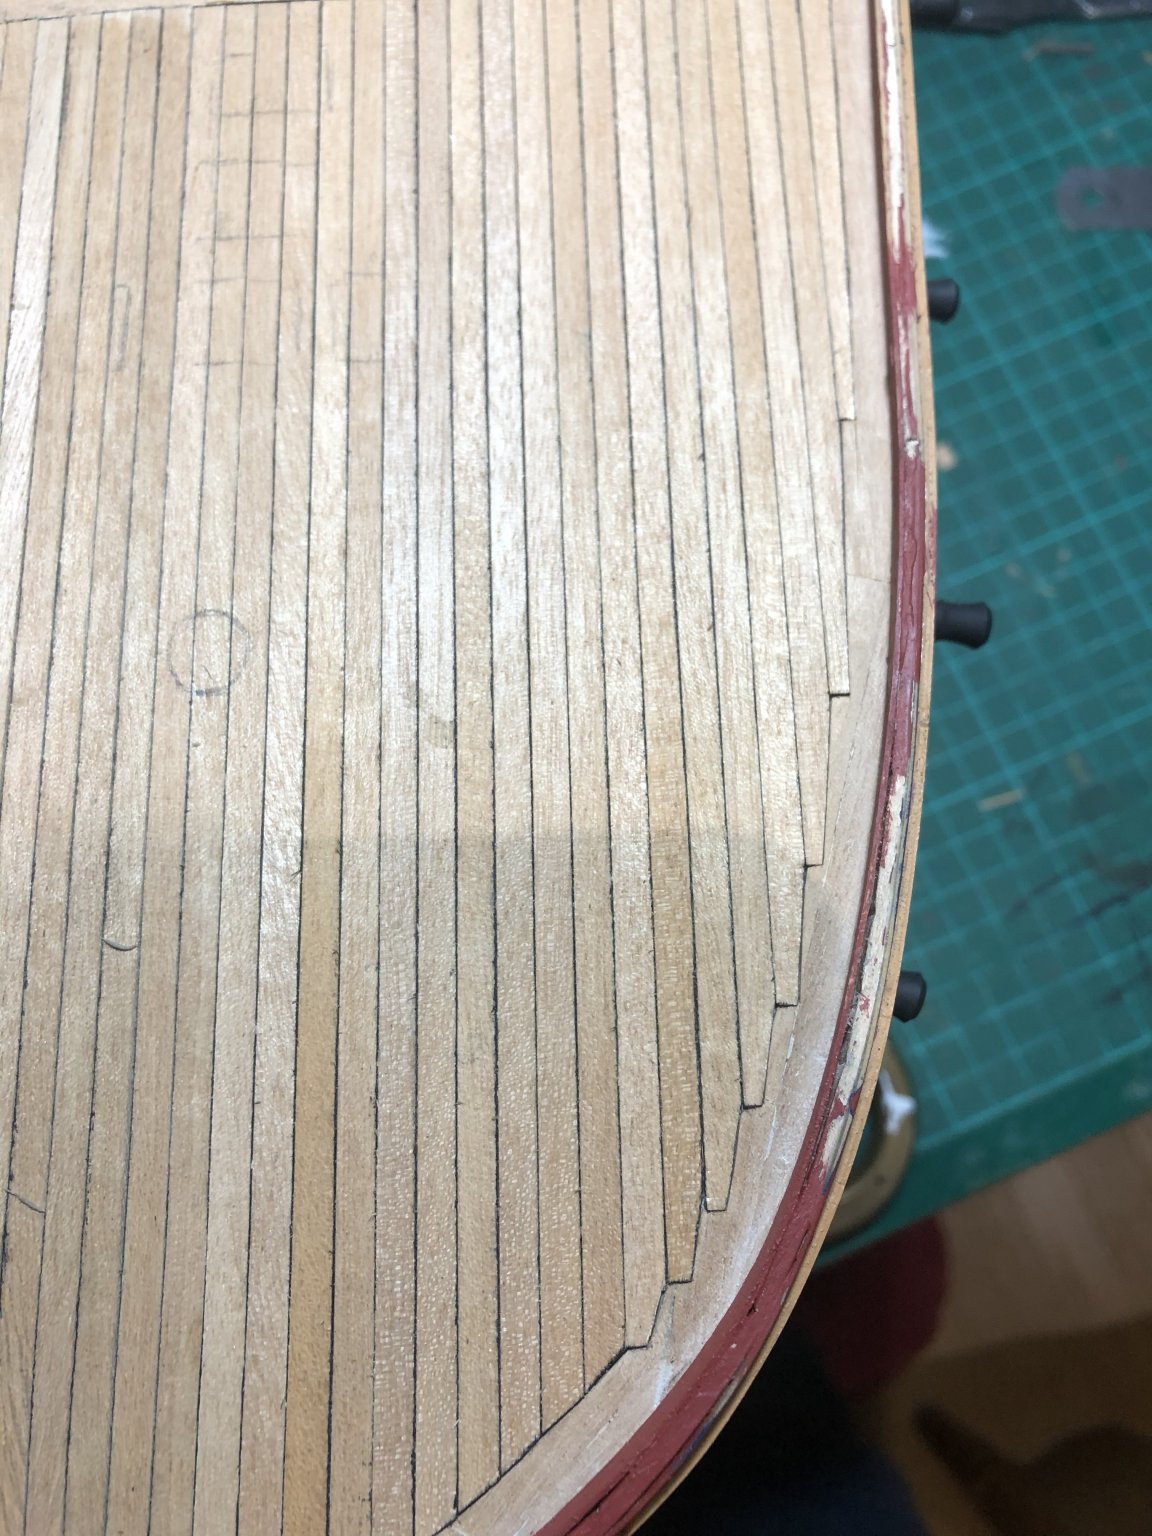
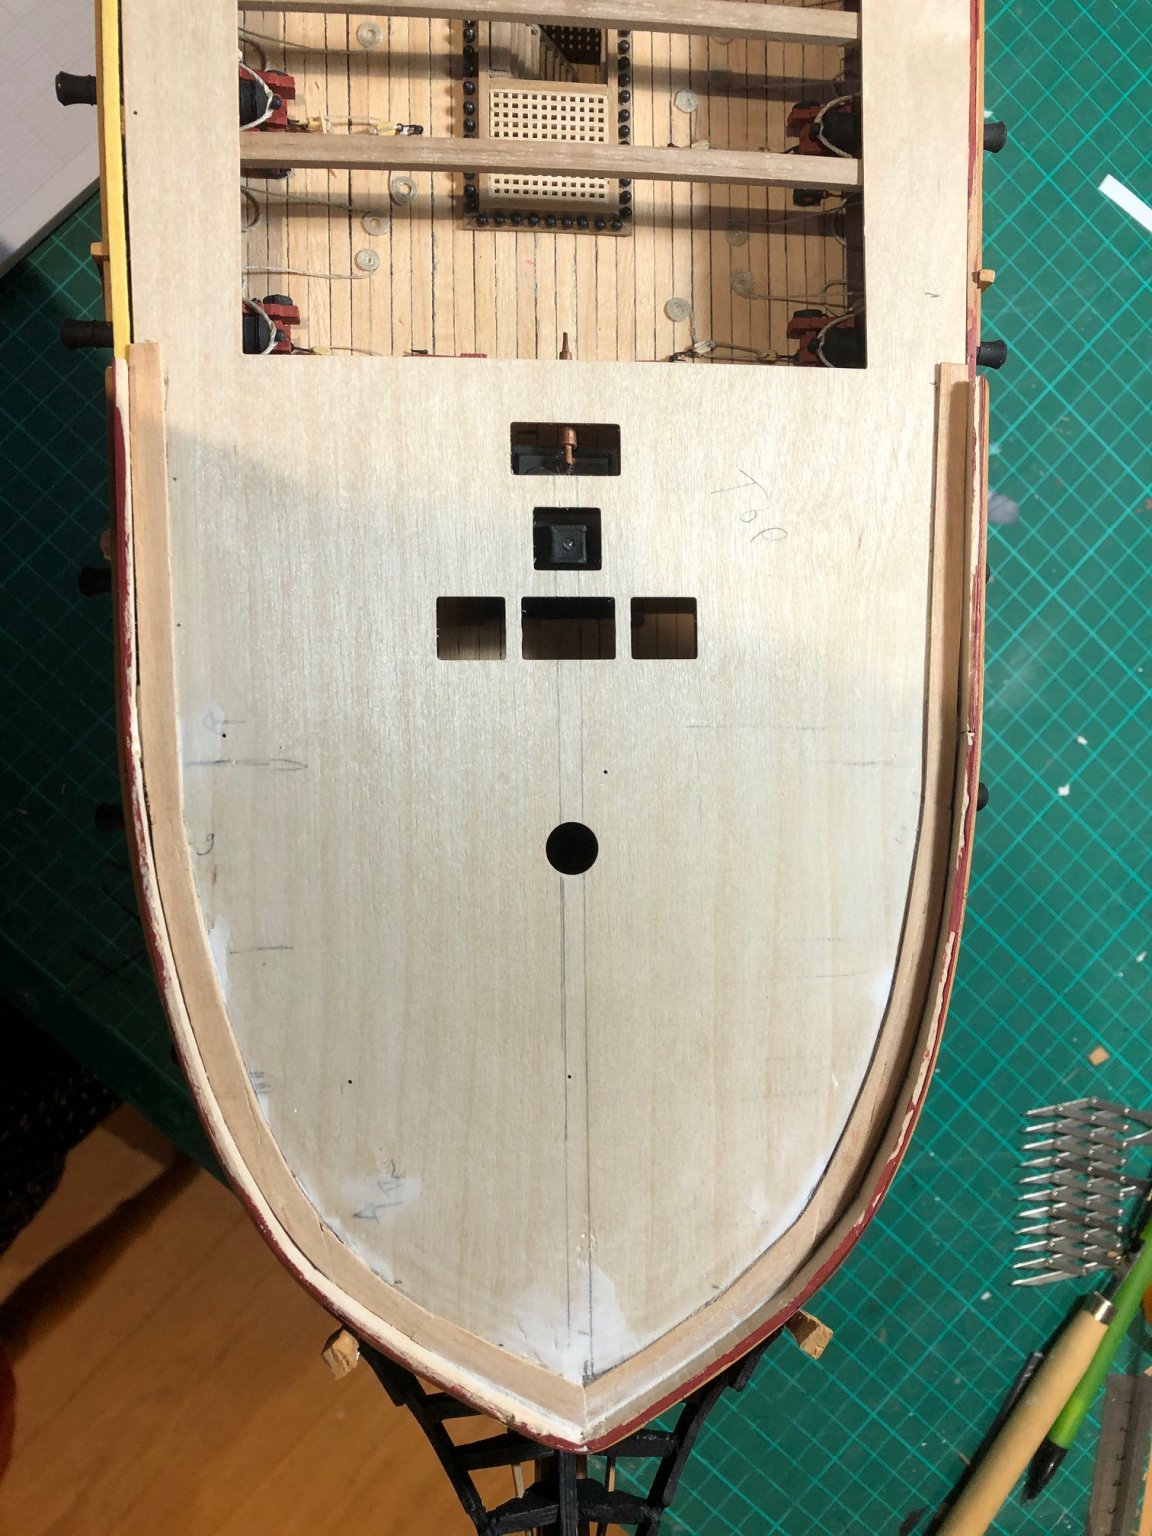
Having sanded and carried out a little gap filling, I planked and then painted the inner bulkhead. I then began to plank. I required 10 4mm planks either side of the centreline plank before I need to commence the joggle cuts. The guidance I followed referred to half width of the plank being cut into the margin and then shaped; some recommend a third plank width but I thought that would be quite fiddly and difficult to achieve an even look on both sides of the deck. Slow and methodical - it needs a thought to keep the sequence - was the approach and it turned out well. The deck was then sanded and a couple of coats of matt varnish applied to seal the wood. Whilst I was at it I finished off a little more of the head rails. Im now planking the remaining parts of the upper deck...slow progress though! Speak soon. P
.thumb.jpg.27c0d3abbc6a1a69217eaccf986c6862.jpg)
.thumb.JPG.2f59c7b8bc22c68c54eab554cea1280d.JPG)

-
First of all thank you to Rob and Jason for their wise advice; I have now procured some of the Casey's Brass Black and will try it at varying levels of concentration when I come to attach the next set of fittings: the tip about cleanliness of the brass is very good - white spirit at the ready!
The enforced lockdown has allowed me to do a little more modelling although the amount of work that I have to do from home seems much higher than when I pottered into the office. The garden also needs attention...there never seems to be quite enough time. Regardless - we need to nail the virus and slowly get back to normal.
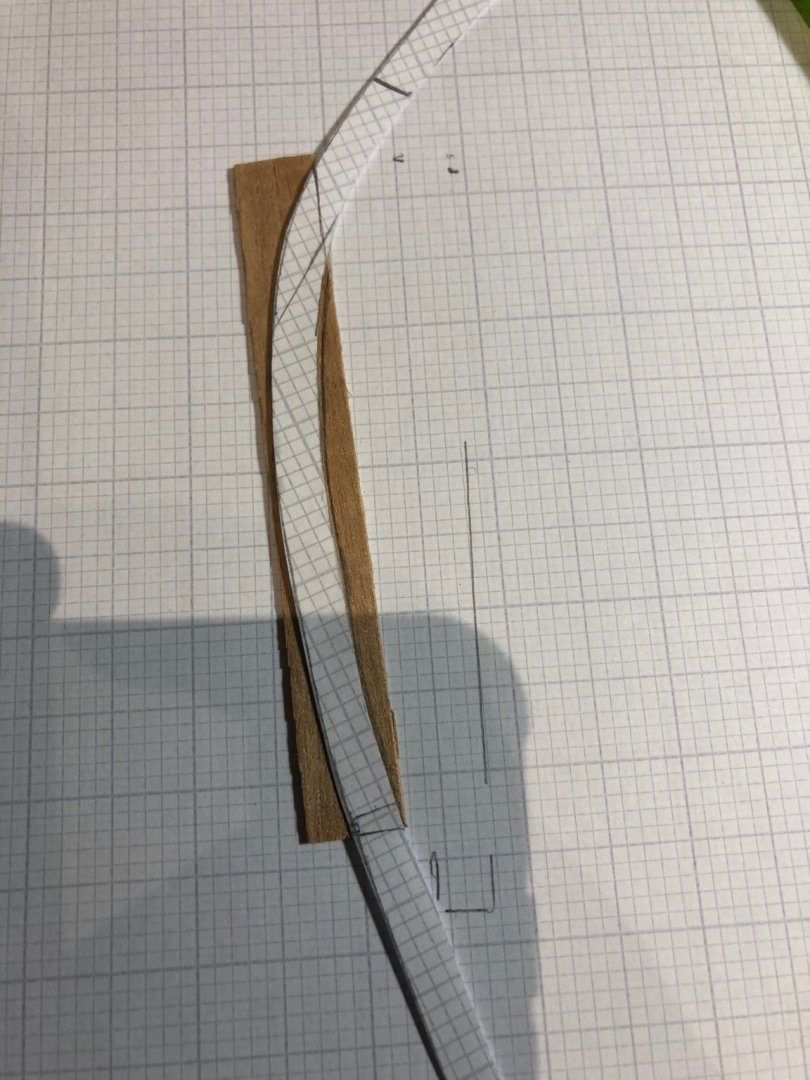
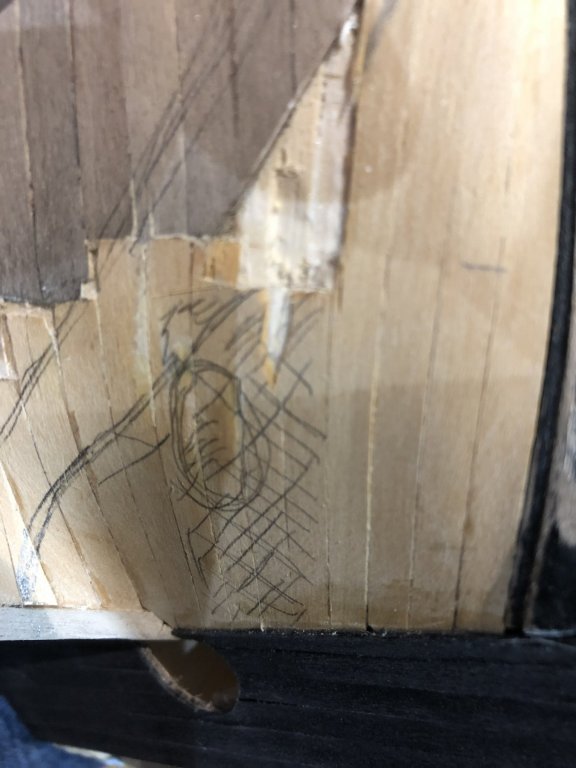
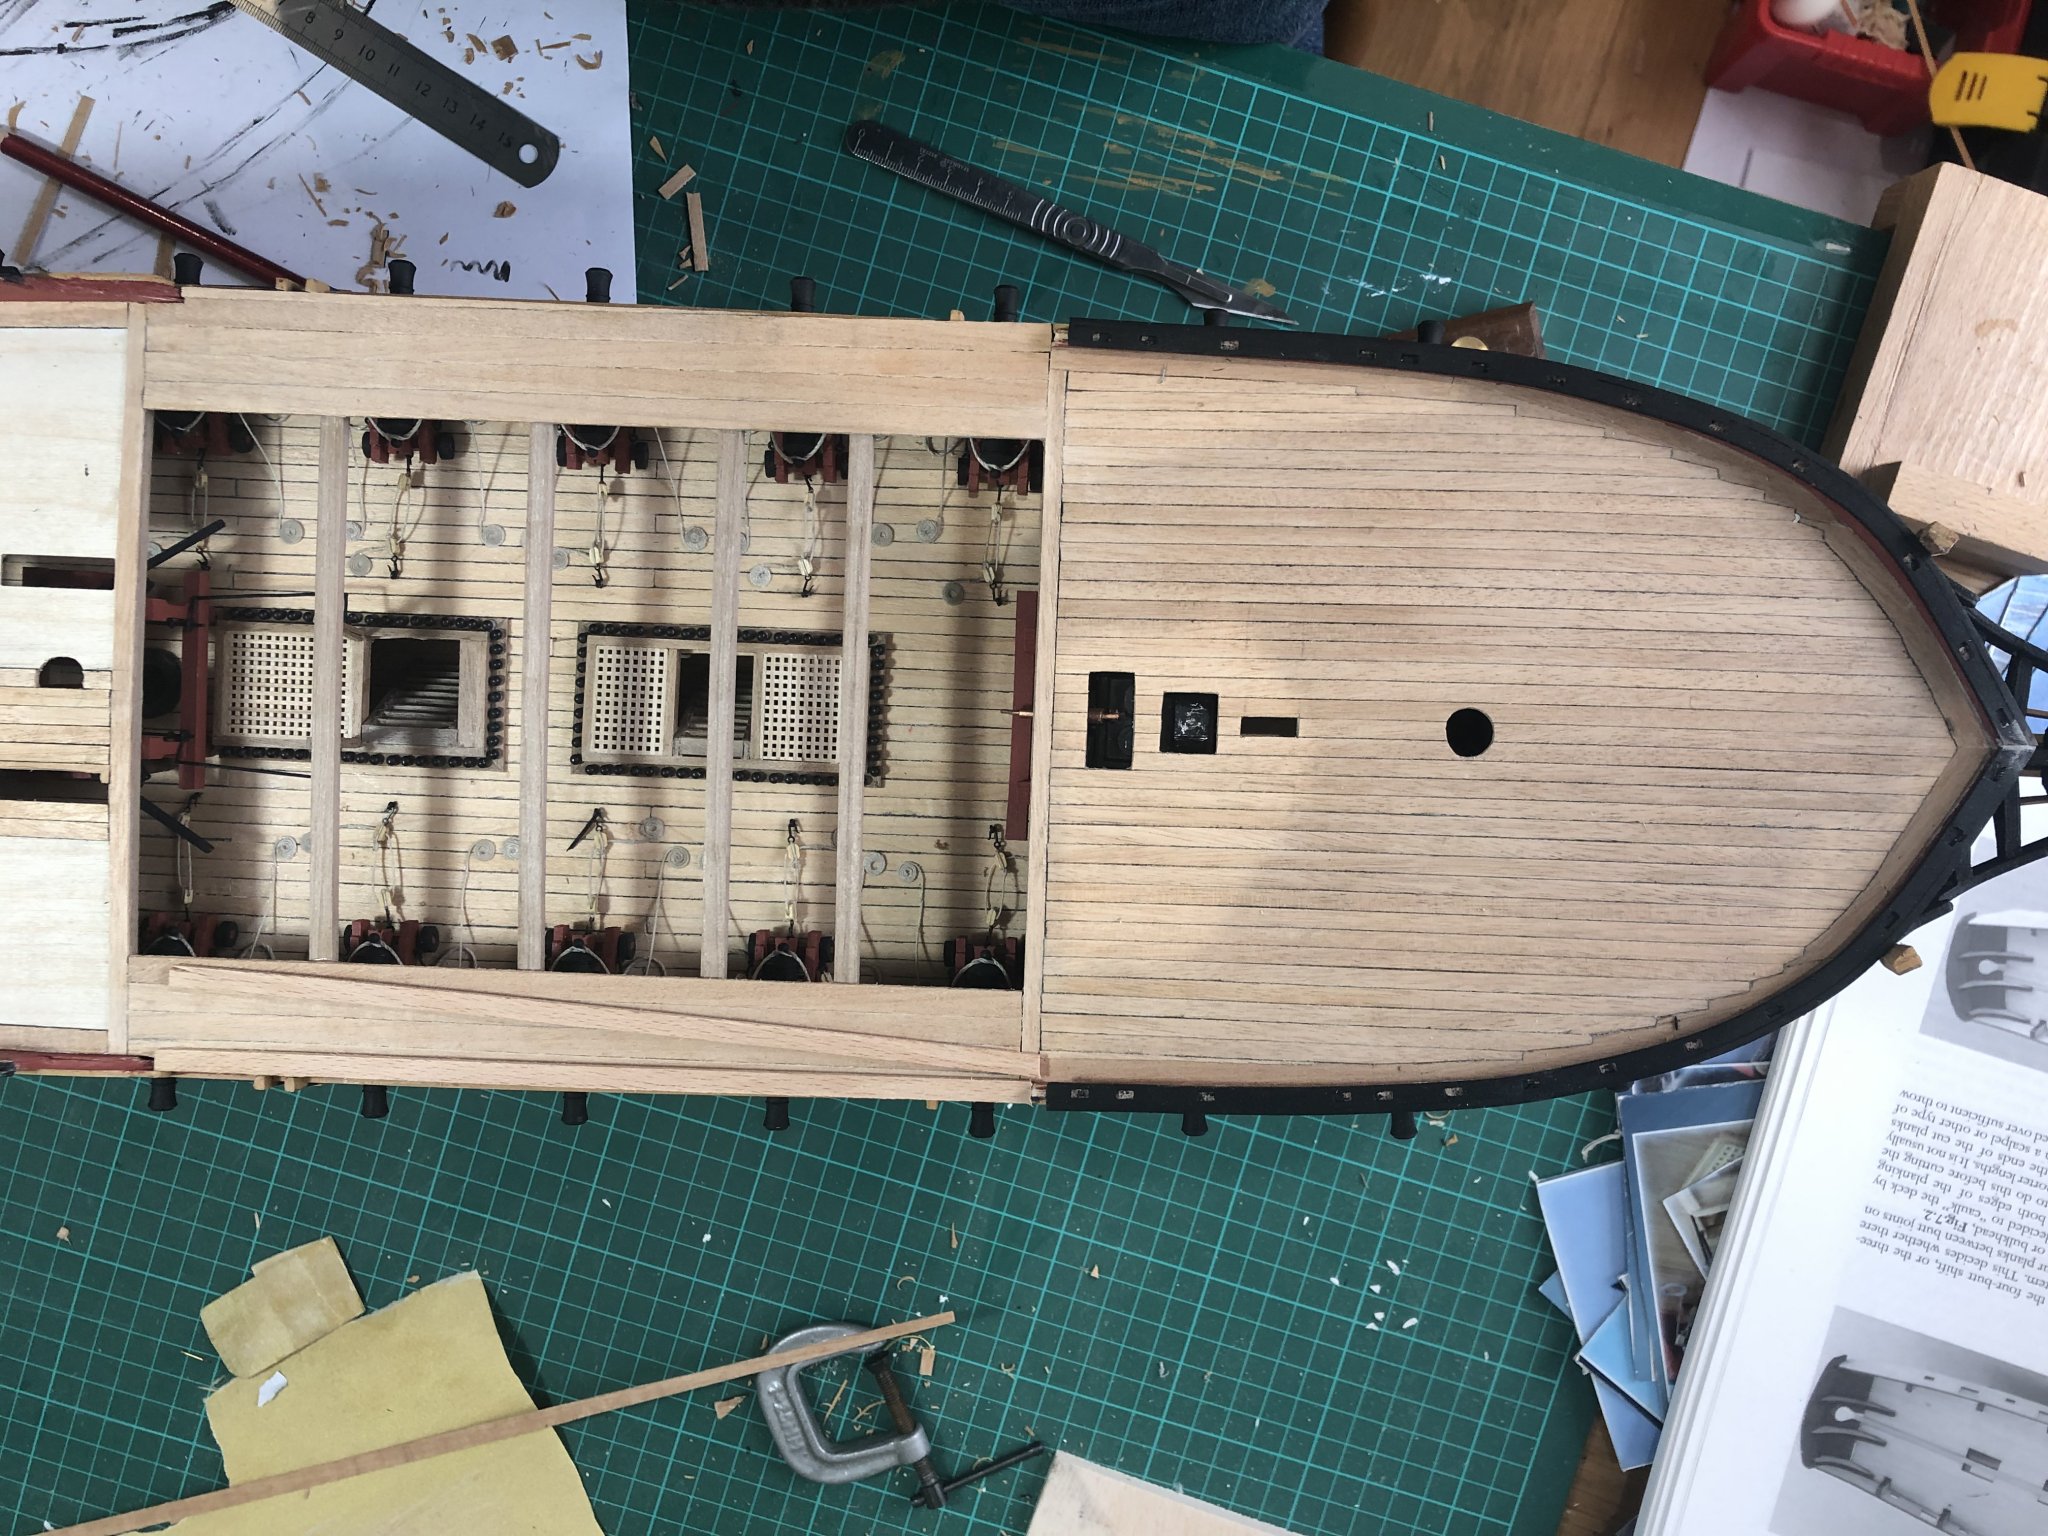
Having gazed at the gundeck for long enough, I fitted the topdeck, removed the bulkhead tops, used a bit of wood fill in the gaps and got ready to apply the first planks. I decided to try my hand at Joggle planking and after some research ( https://www.modelerscentral.com/blog/how-to-do-deck-planking-on-wooden-model-ships) decided to attempt it on the foc'sle. I only had 6mm wide Tanganyika (bought online from The Model Shop) with which to make the water margin plank so with a template and some gluing of planks, I managed to make and fit a margin plank for both sides.


- robdurant, JpR62, Edwardkenway and 1 other
-
4
-
A few more piccies. keep smiling in the bizarre CV19 era.


-
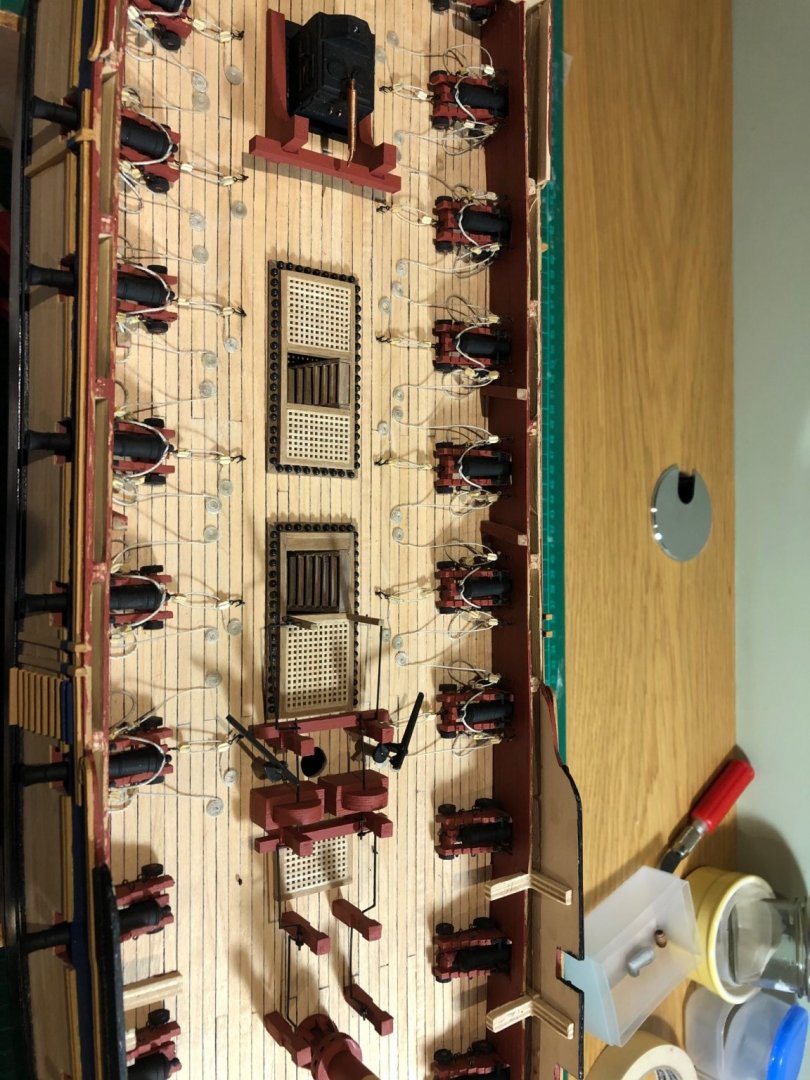
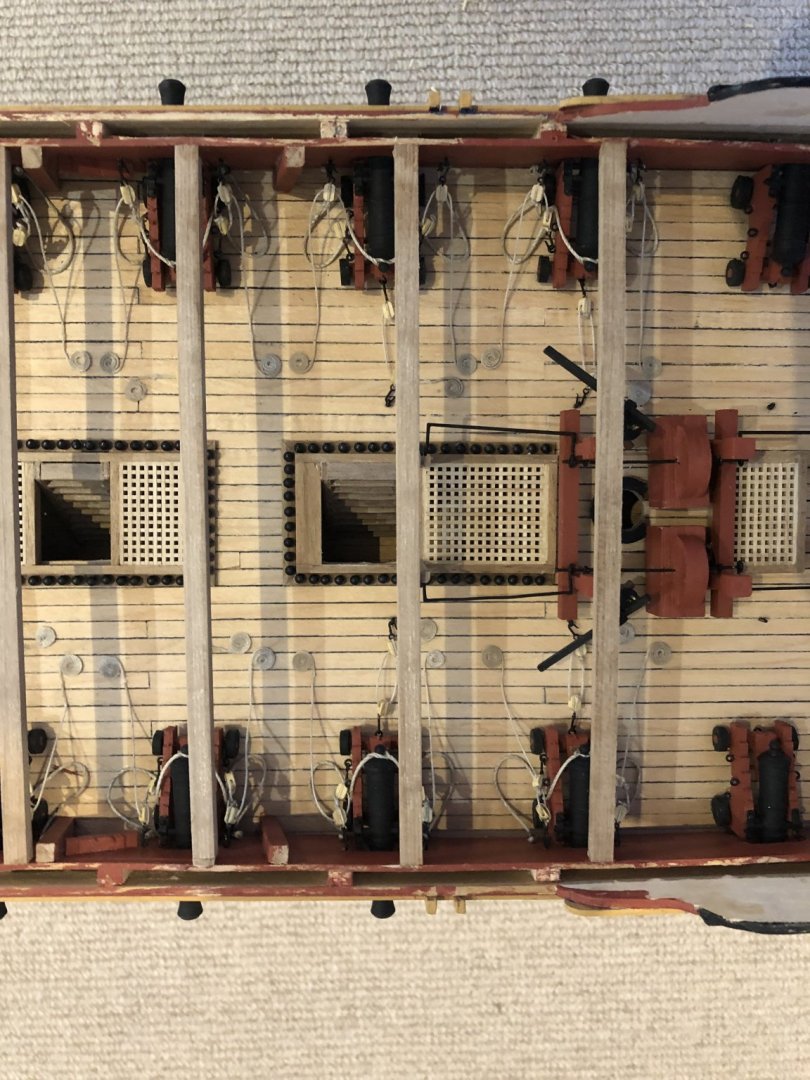
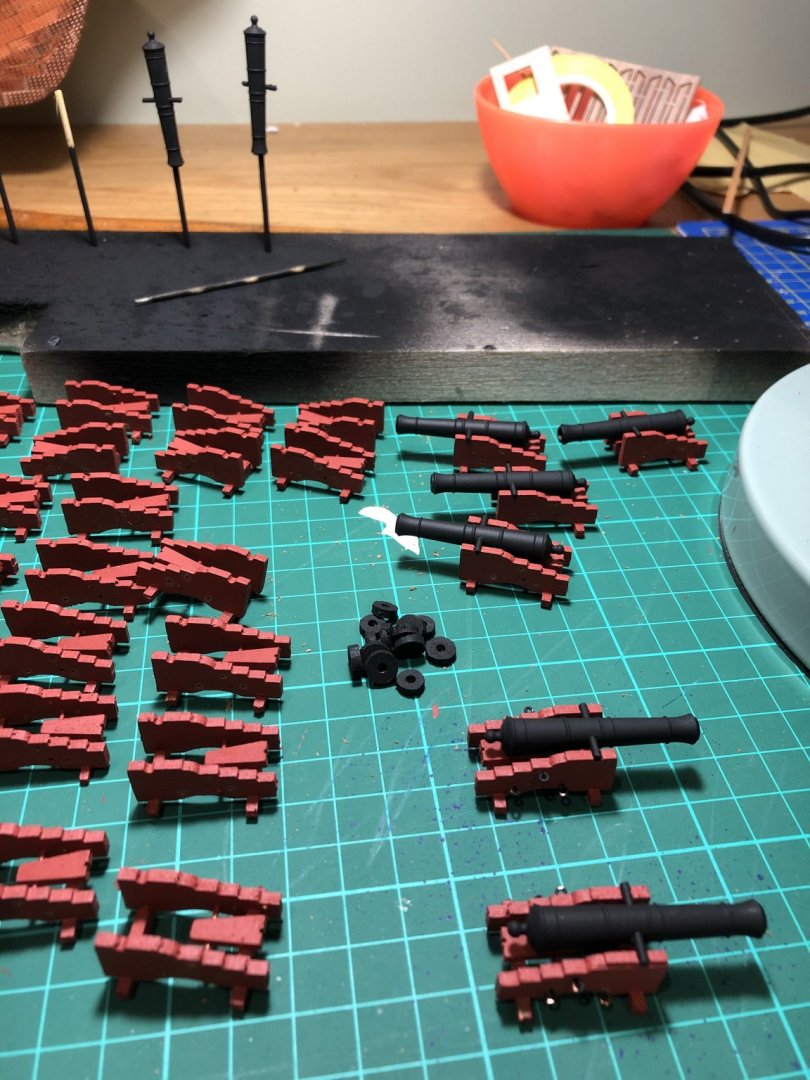
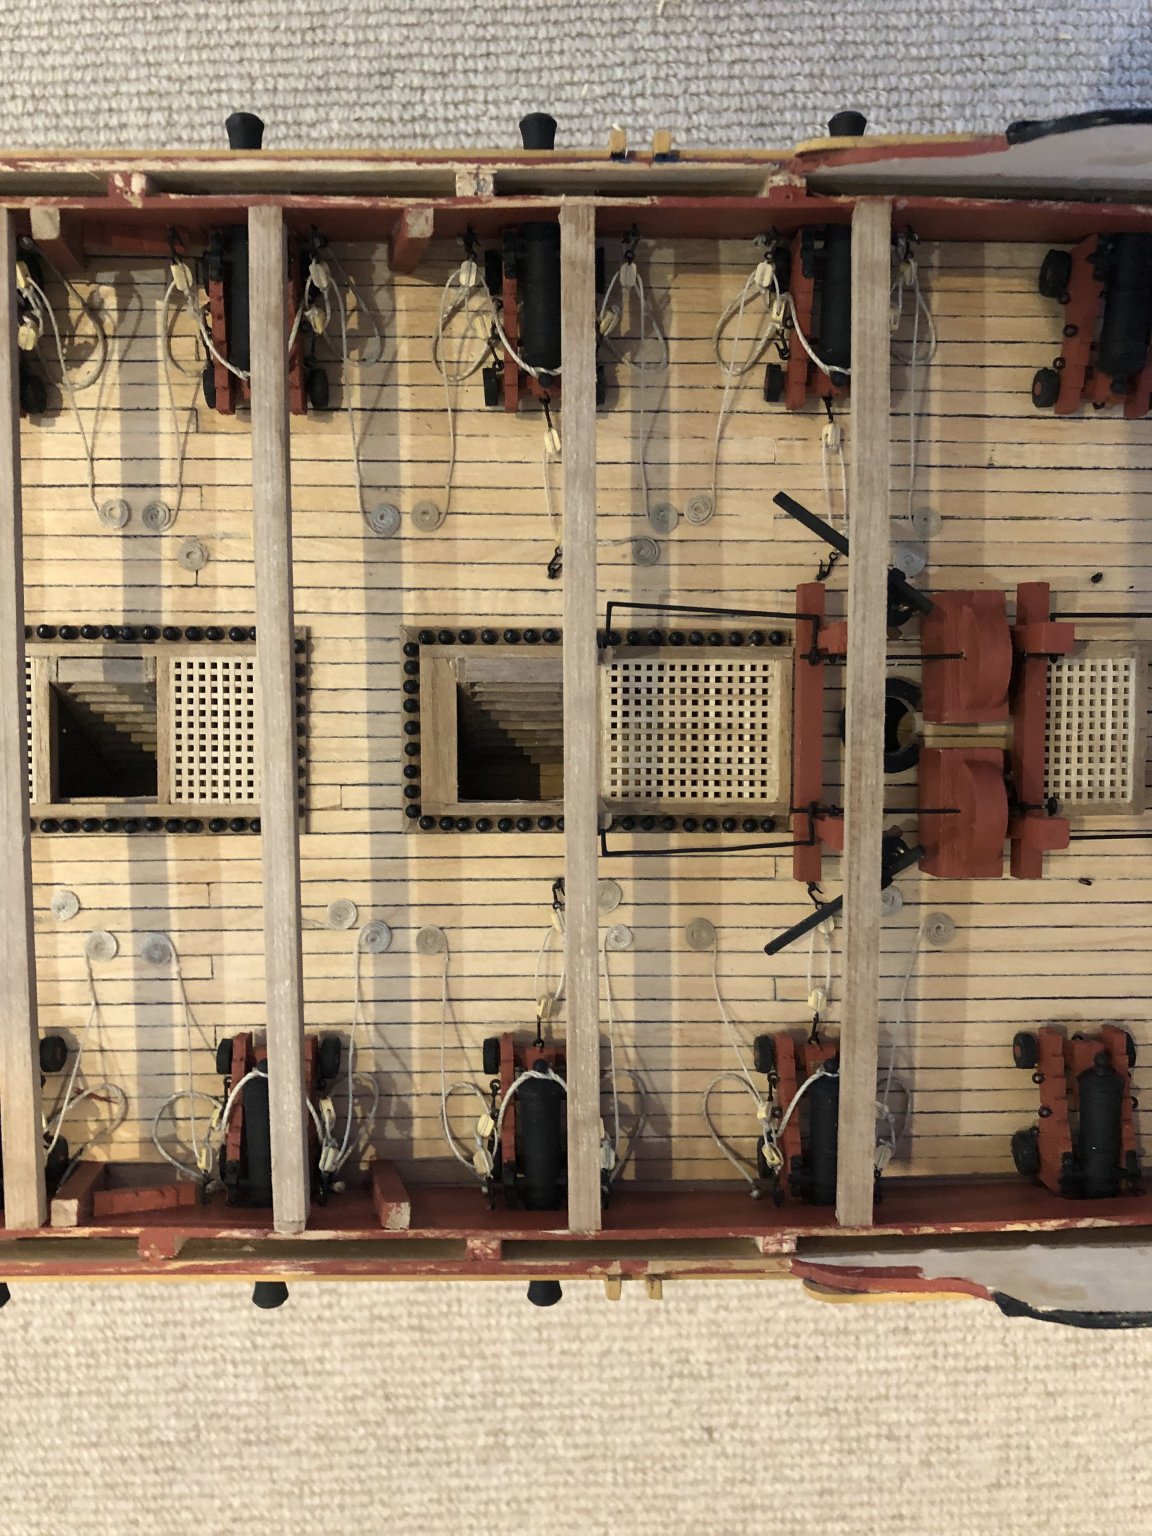
I did guns No3 to No8... that was enough!
I then finished the rest, stuck the wheels to the deck so they wont move during the rest of the build. I then aligned the muzzles on each side by inserting a few quoins - not all needed them. A coule of cannons (at the rear, needed a small sliver of wood inserted under the wheels to get the muzzles at the right level - they were too low.
I then used a little dab of super glue to fix them all in situ - I know I will knock them at some stage and once the main deck is fitted, they can't be accessed.
I built the rest of the deck fittings - all covered in other blogs especially Rob's and Ray's: plagiarise with impunity!
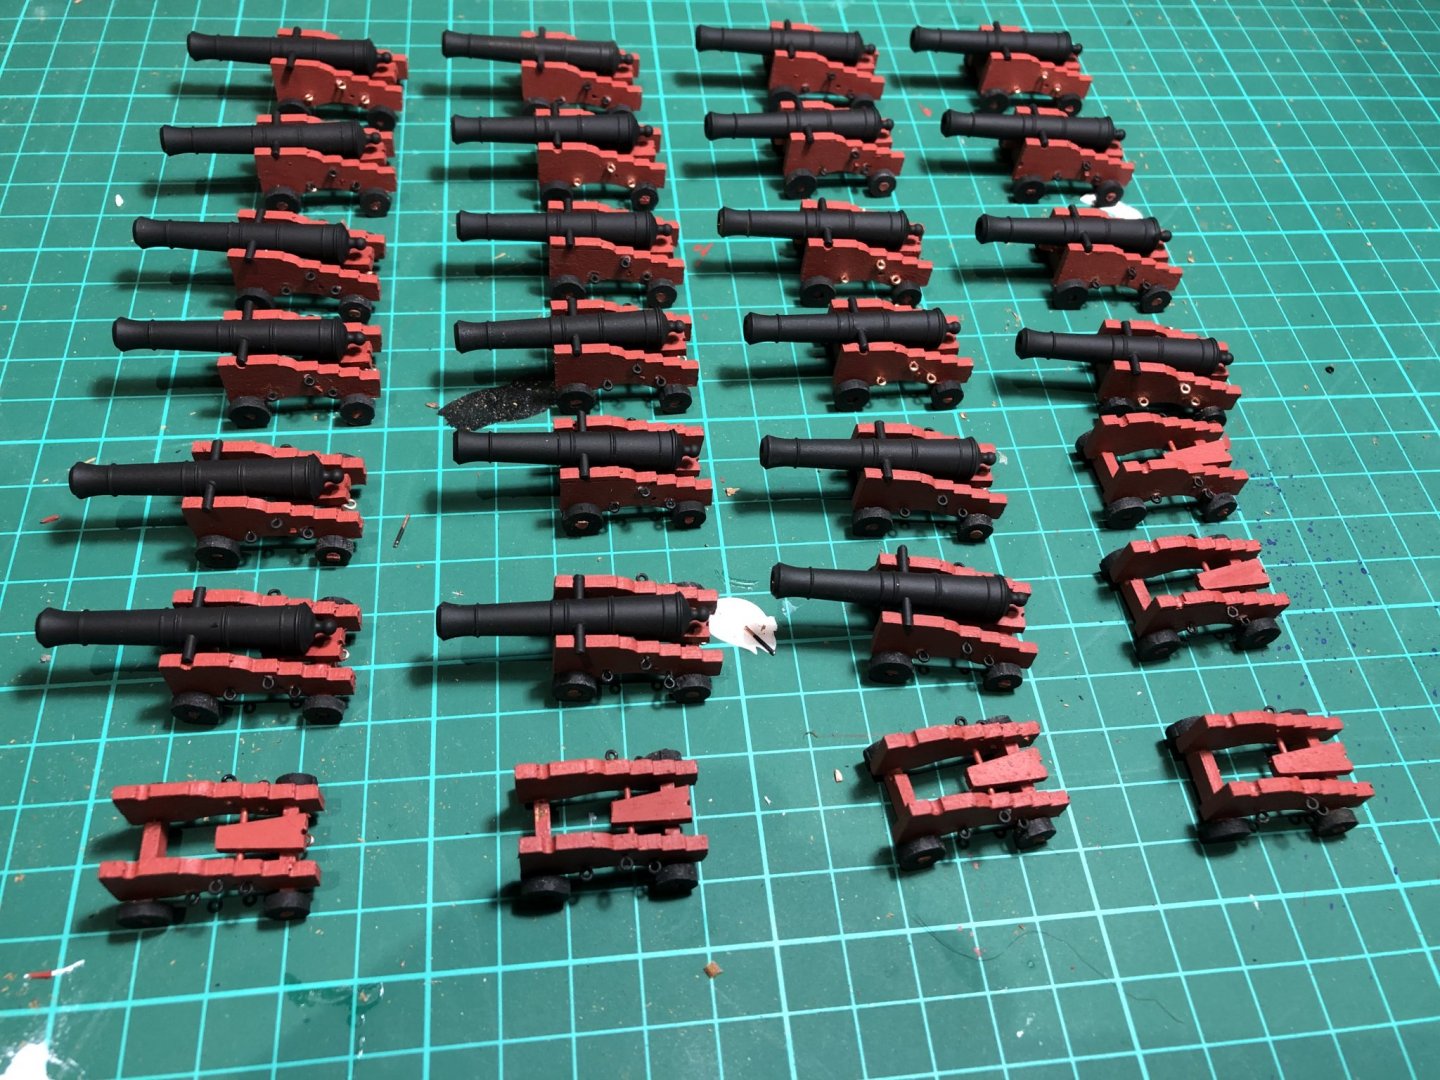
The end result is not too bad.
-
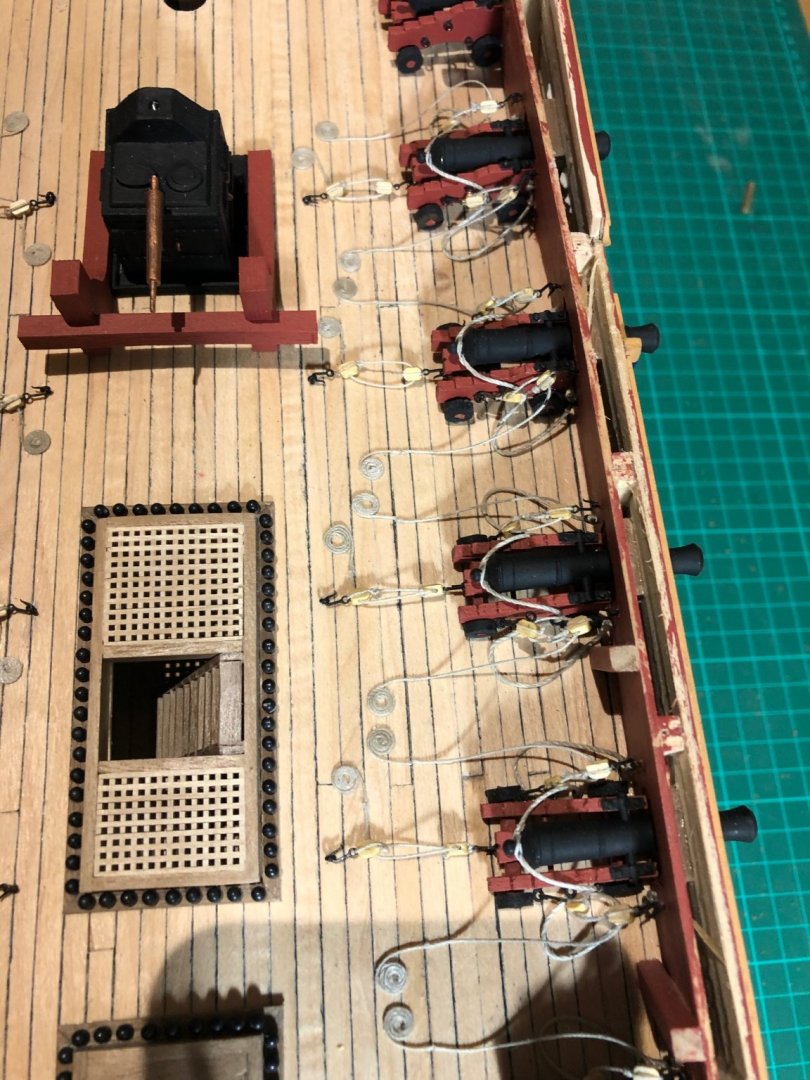
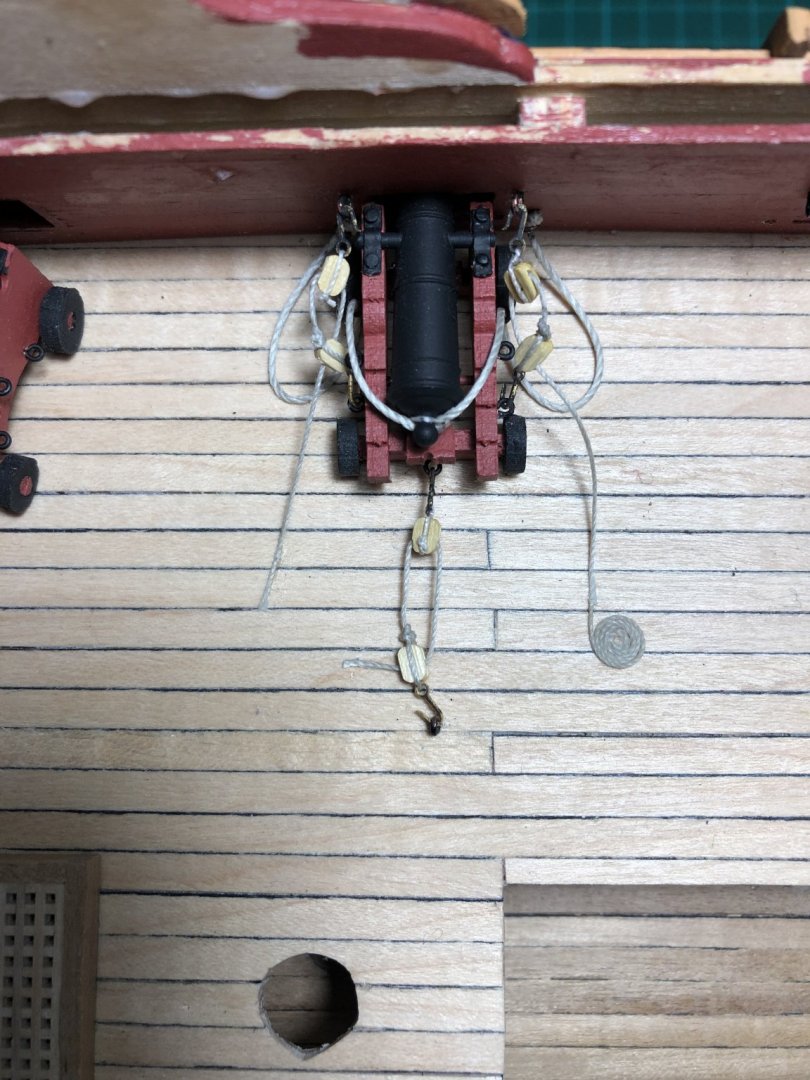
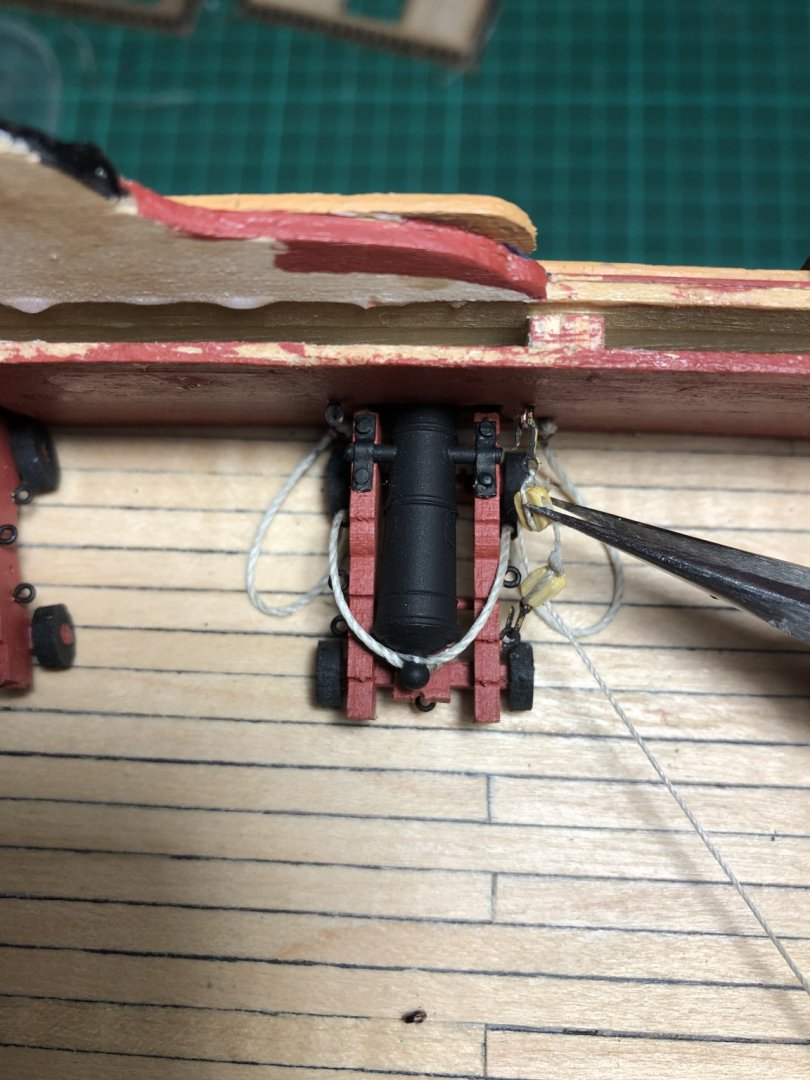
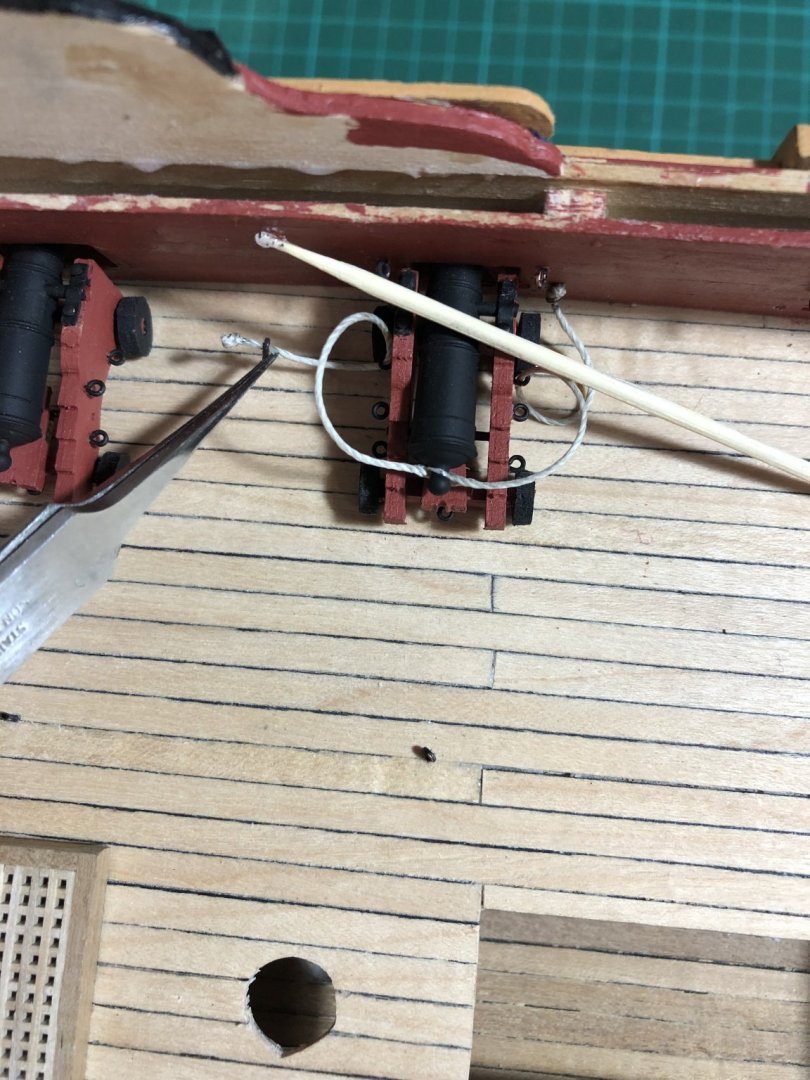
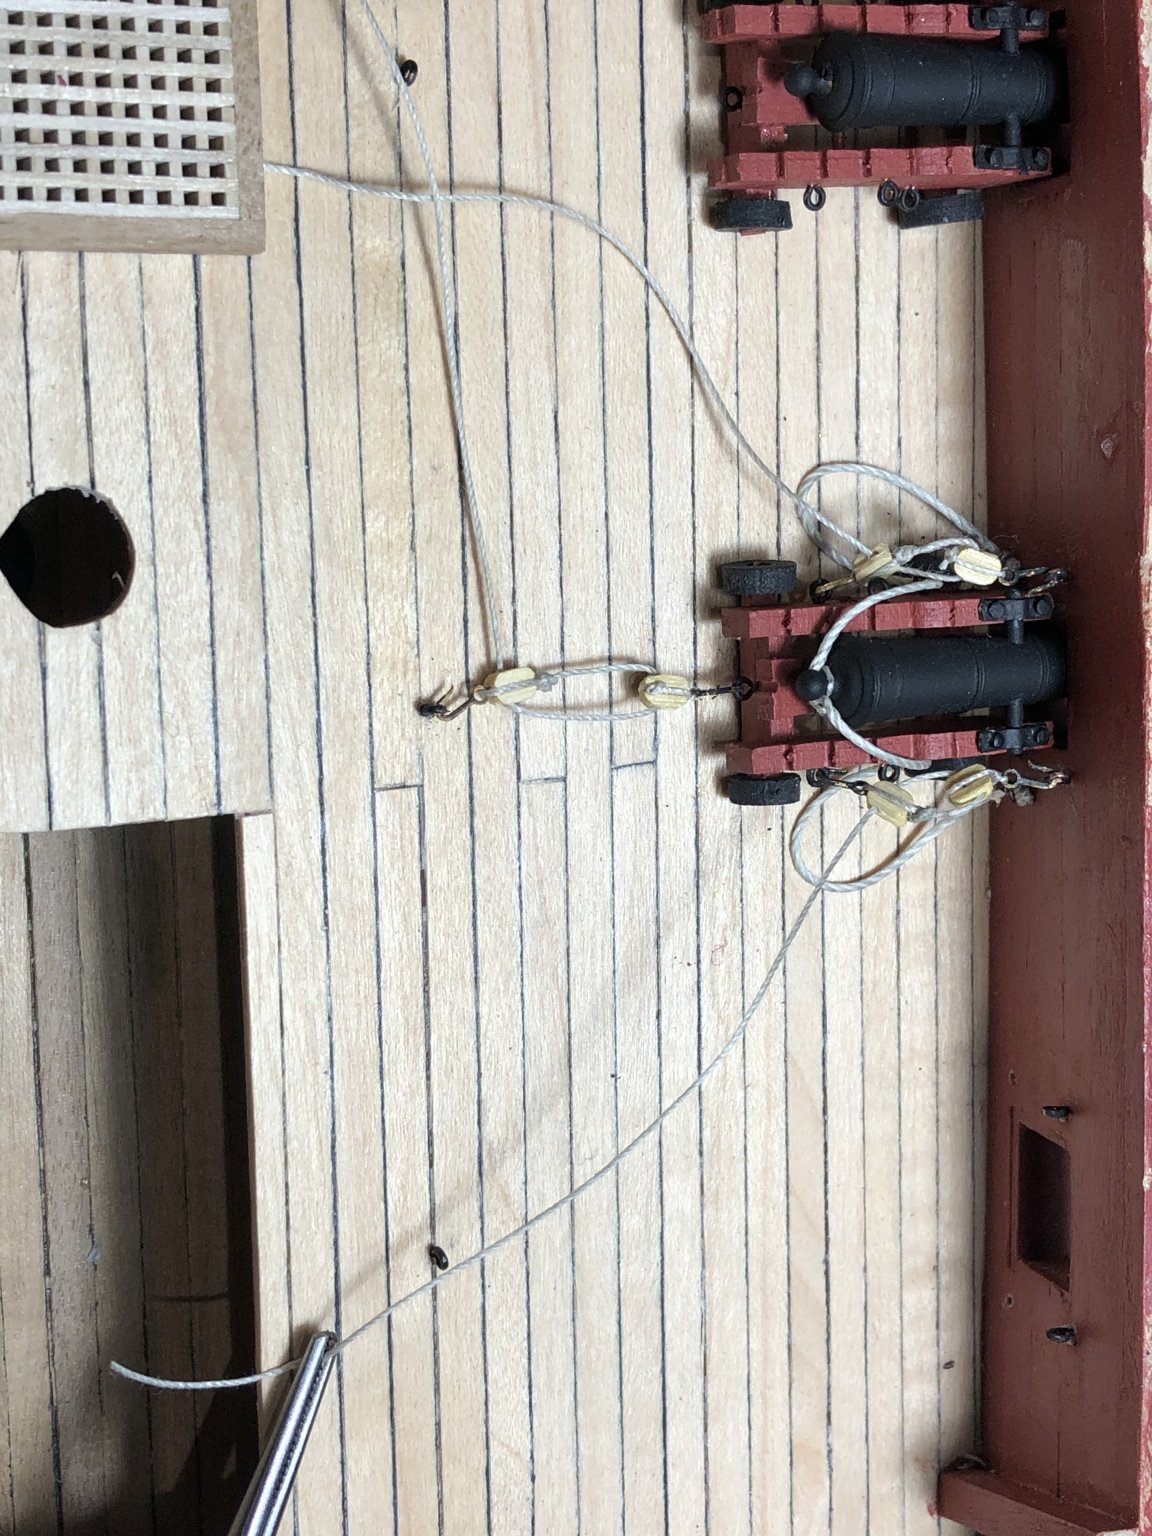
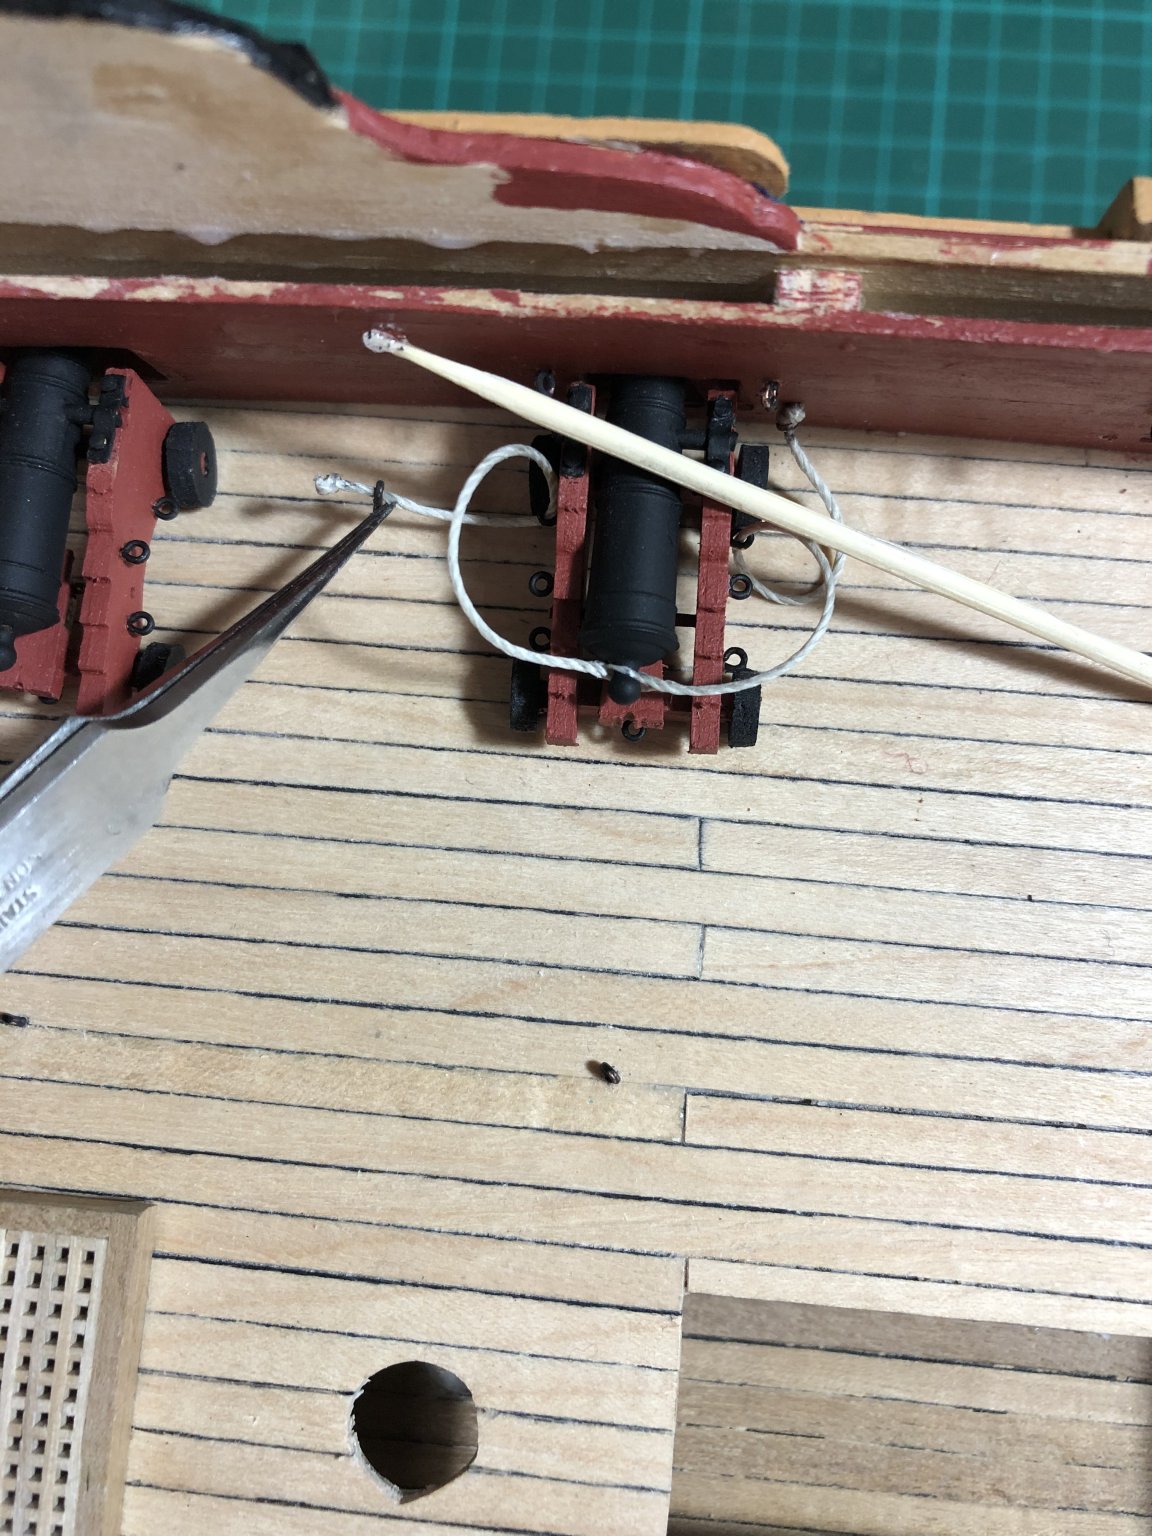
The two sets of gun tackles and the training tackle were assembled and fitted next. Ensure the block is positioned so that the tackle rope is pointing outward from the gun so that it can then be laid back and made into a neat coil. Bizarrely we call this 'cheesing a rope' in the RN. I followed the well articulated method of making them on masking tape, seal with PVA then glue to the deck ensuring the lines are...aligned!

-
Right - mad moment - pressed the post button instead of tab!
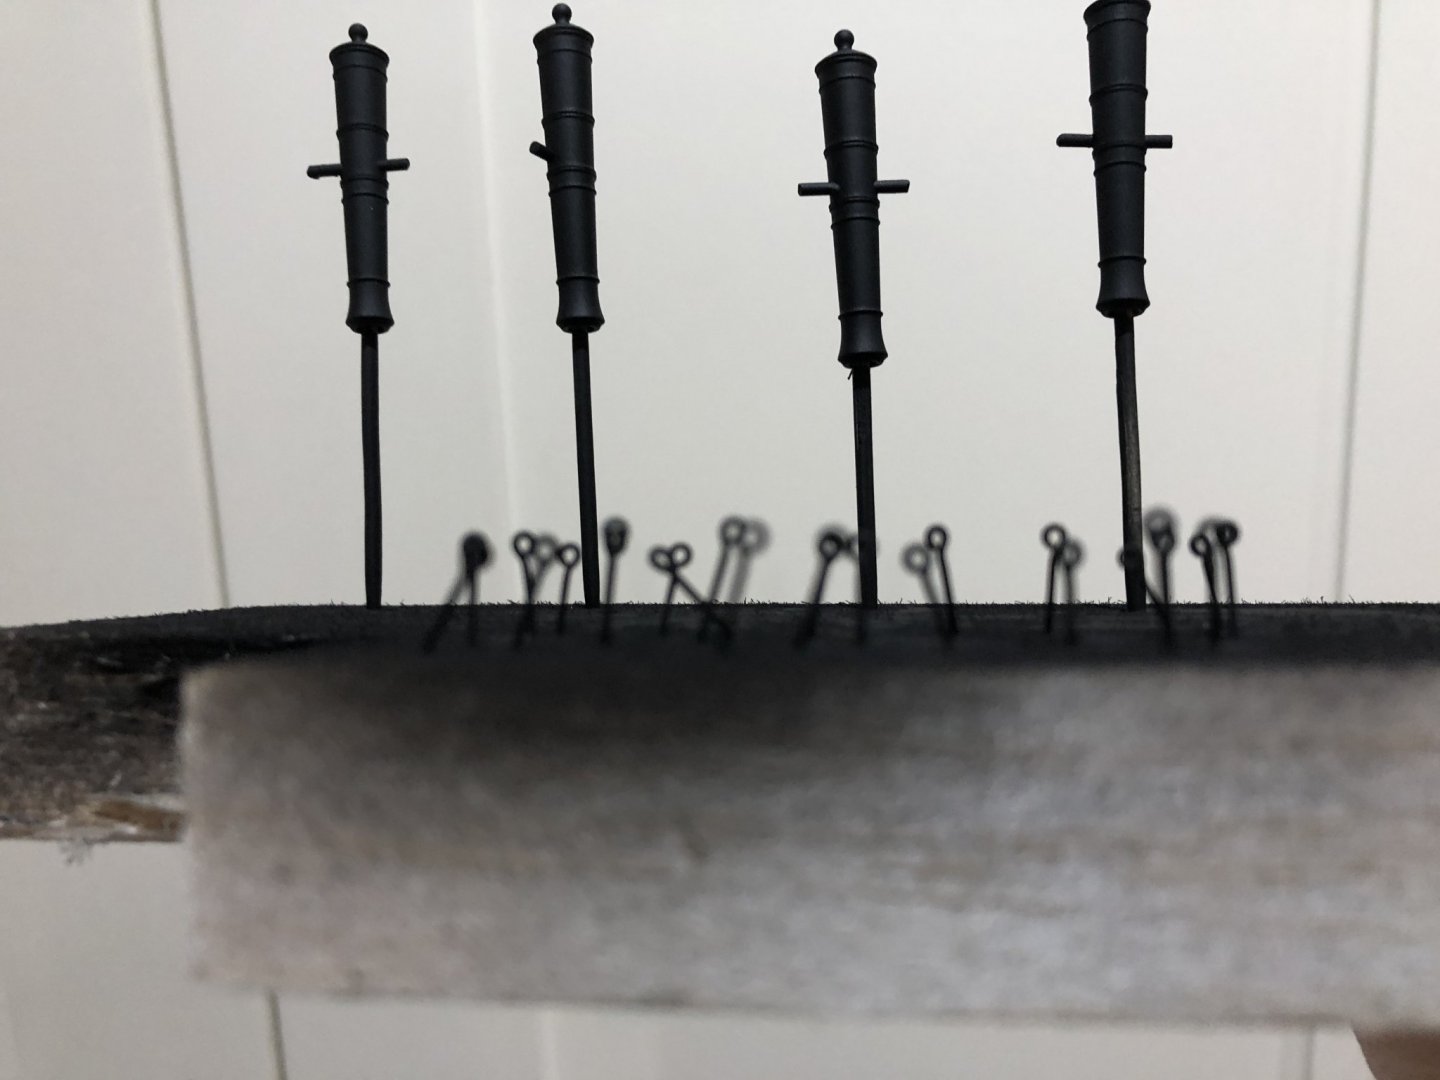
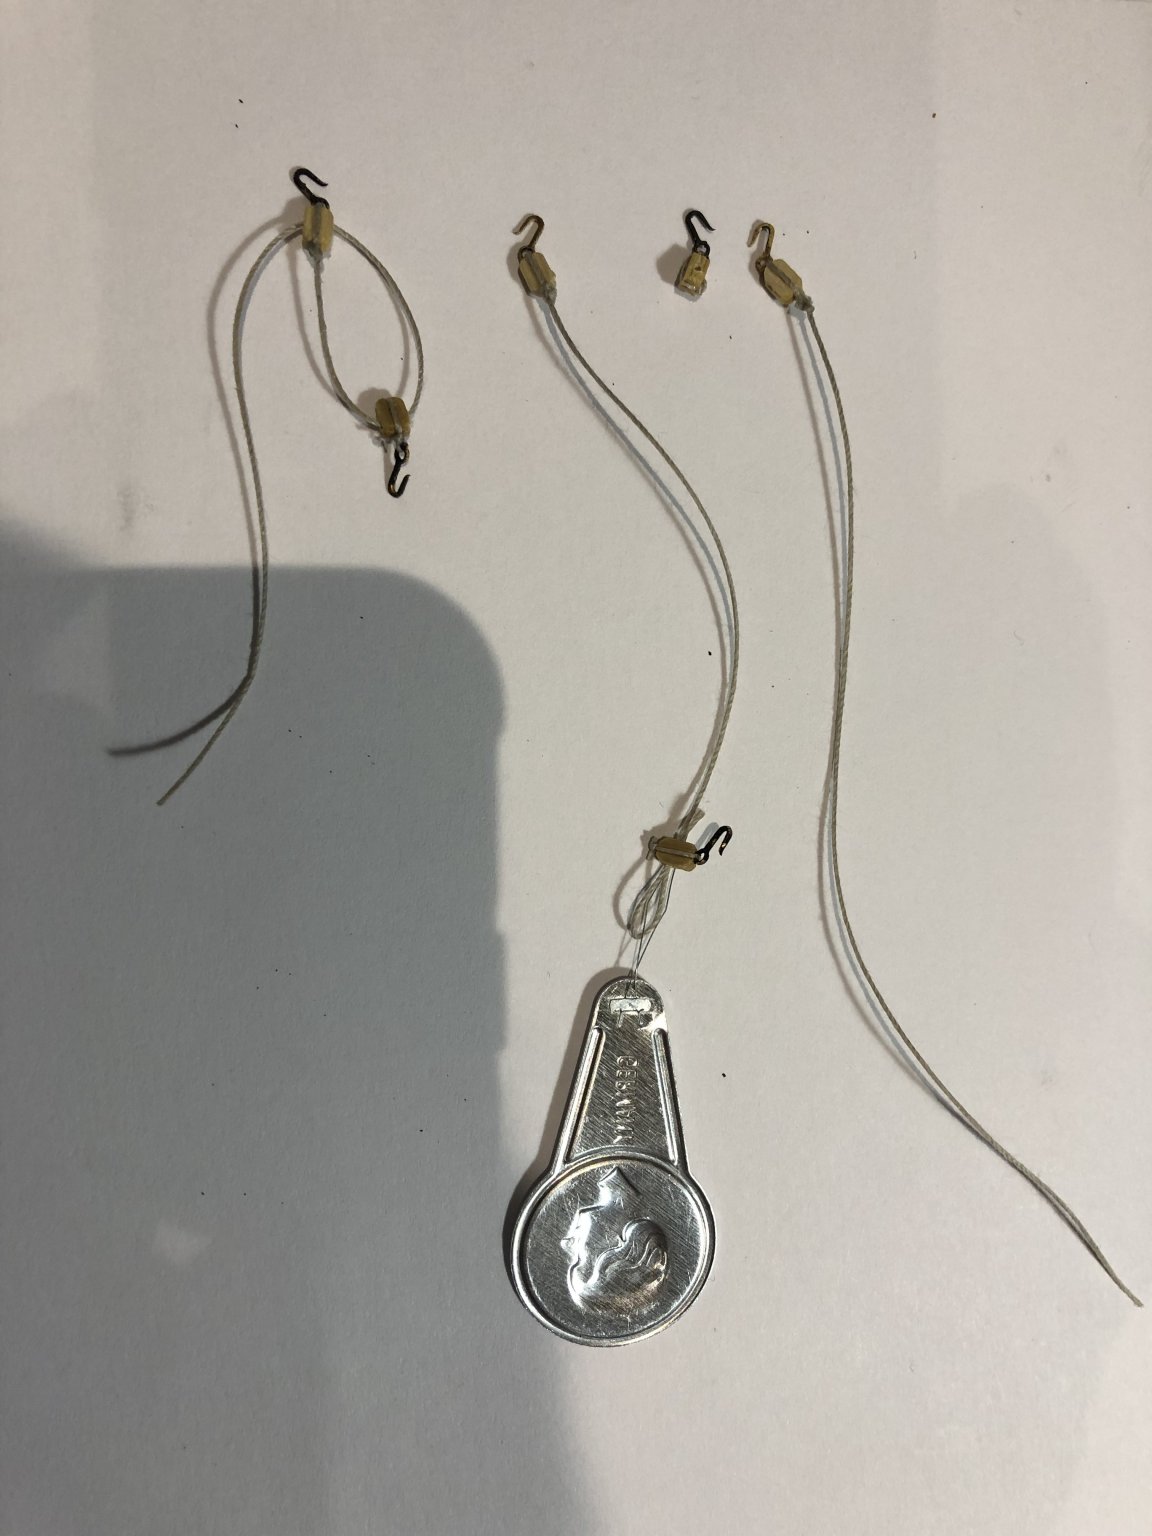
I used cocktail sticks placed in a piece of balsa to provide the stable platform to attach the hooks. I had bought these 3mm hooks from Cornwall Boats as the ones supplied were far too large. I tried brass blackening in advance however, just like paint, it came off! I ended up painting them all just before placing them in position.
I then attached the blocks to the tackle lines - I used 0.5mm line for all these which, in retrospect, was too thin - 0.75 might have been better. 1:64 scale means 0.75mm equates to 48mm which is a closer representation (even then is a little small). I will use 0.75mm on the upper decks.
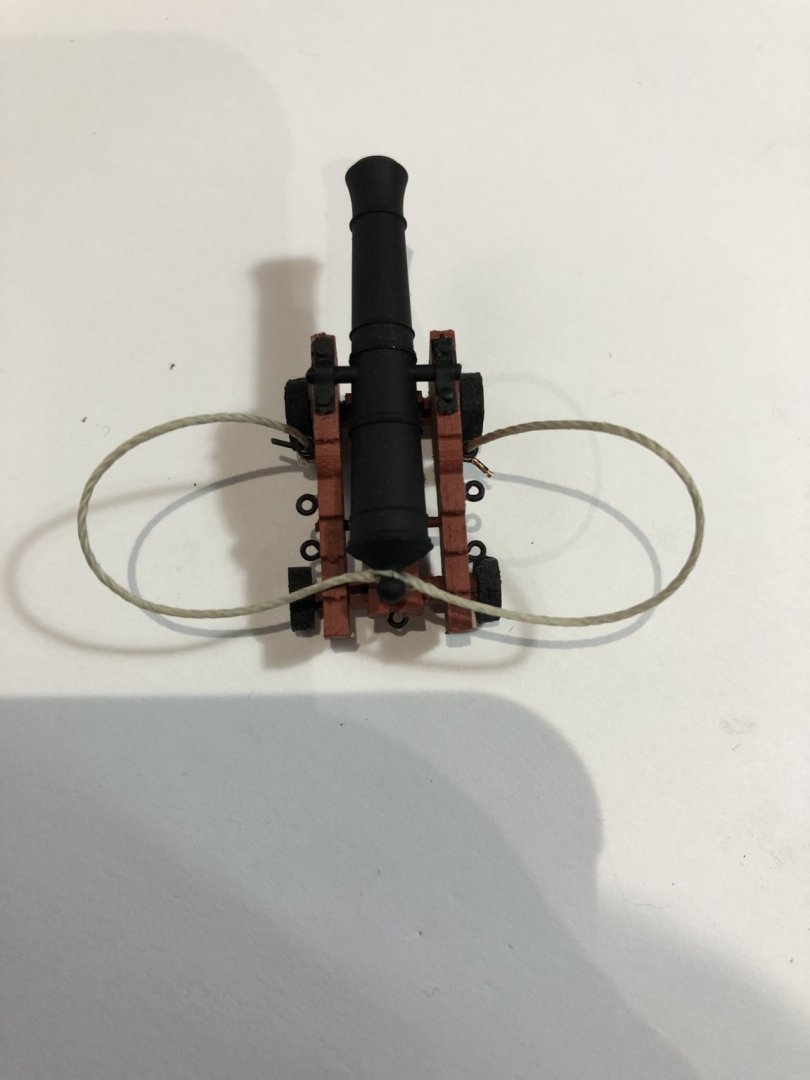
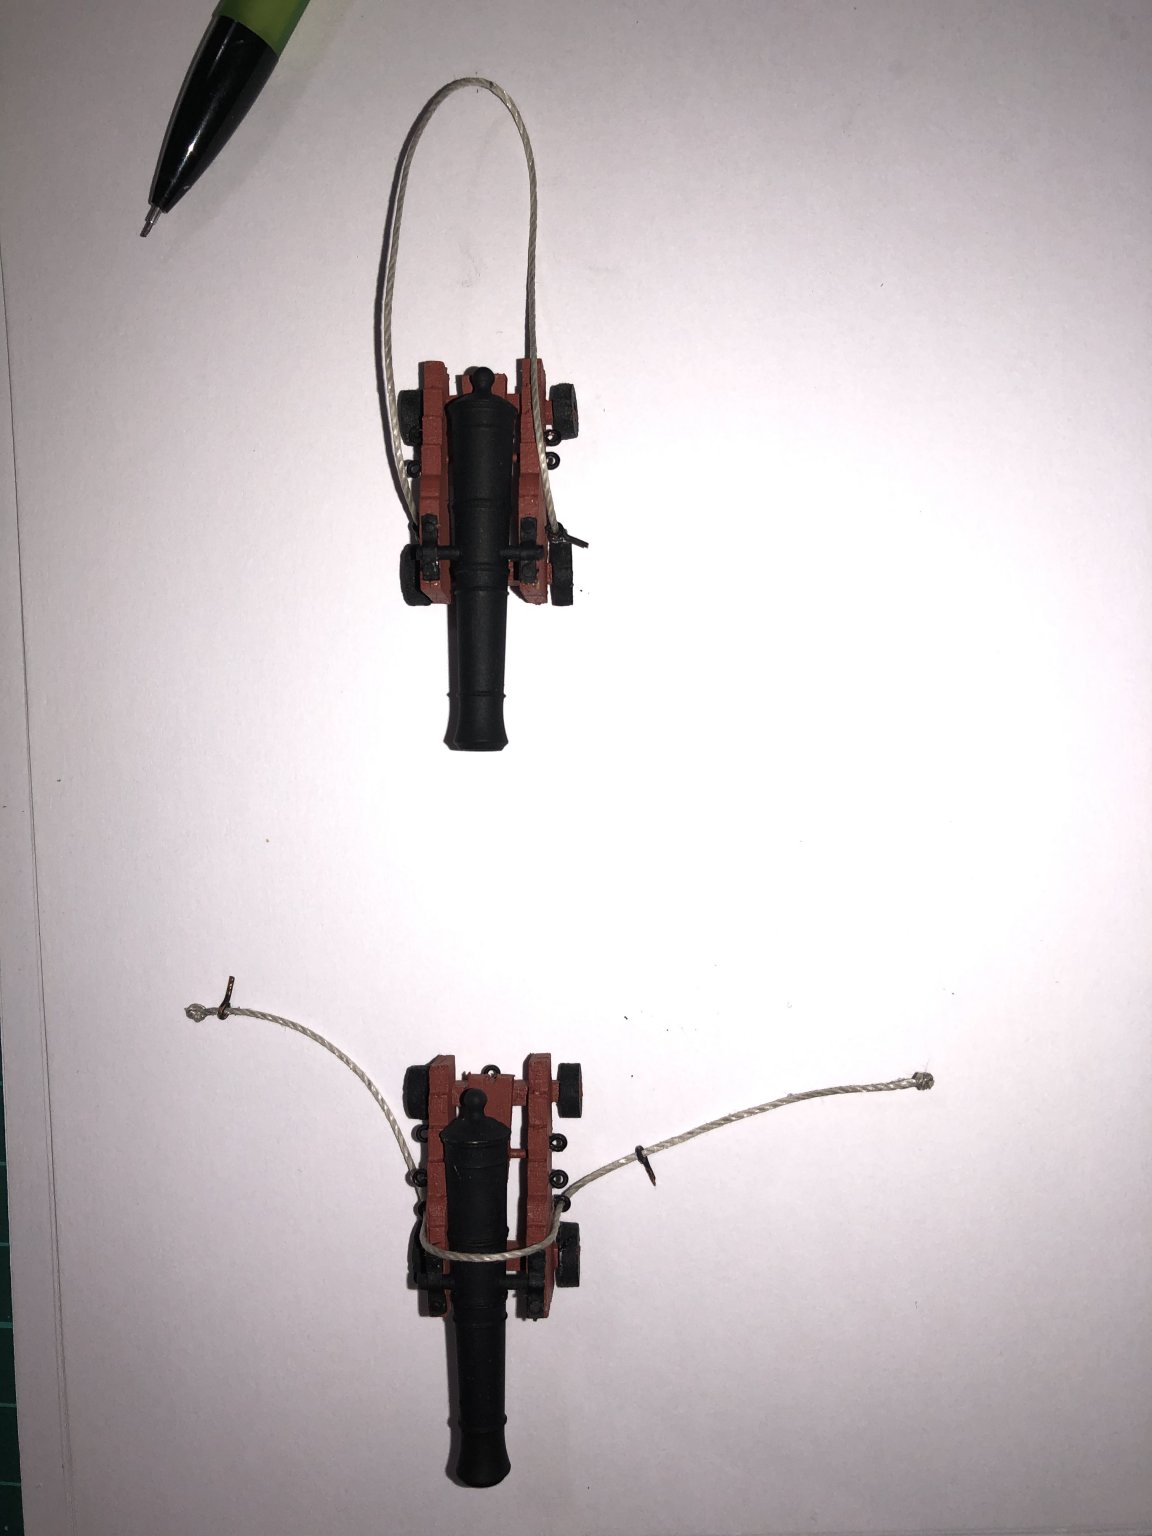
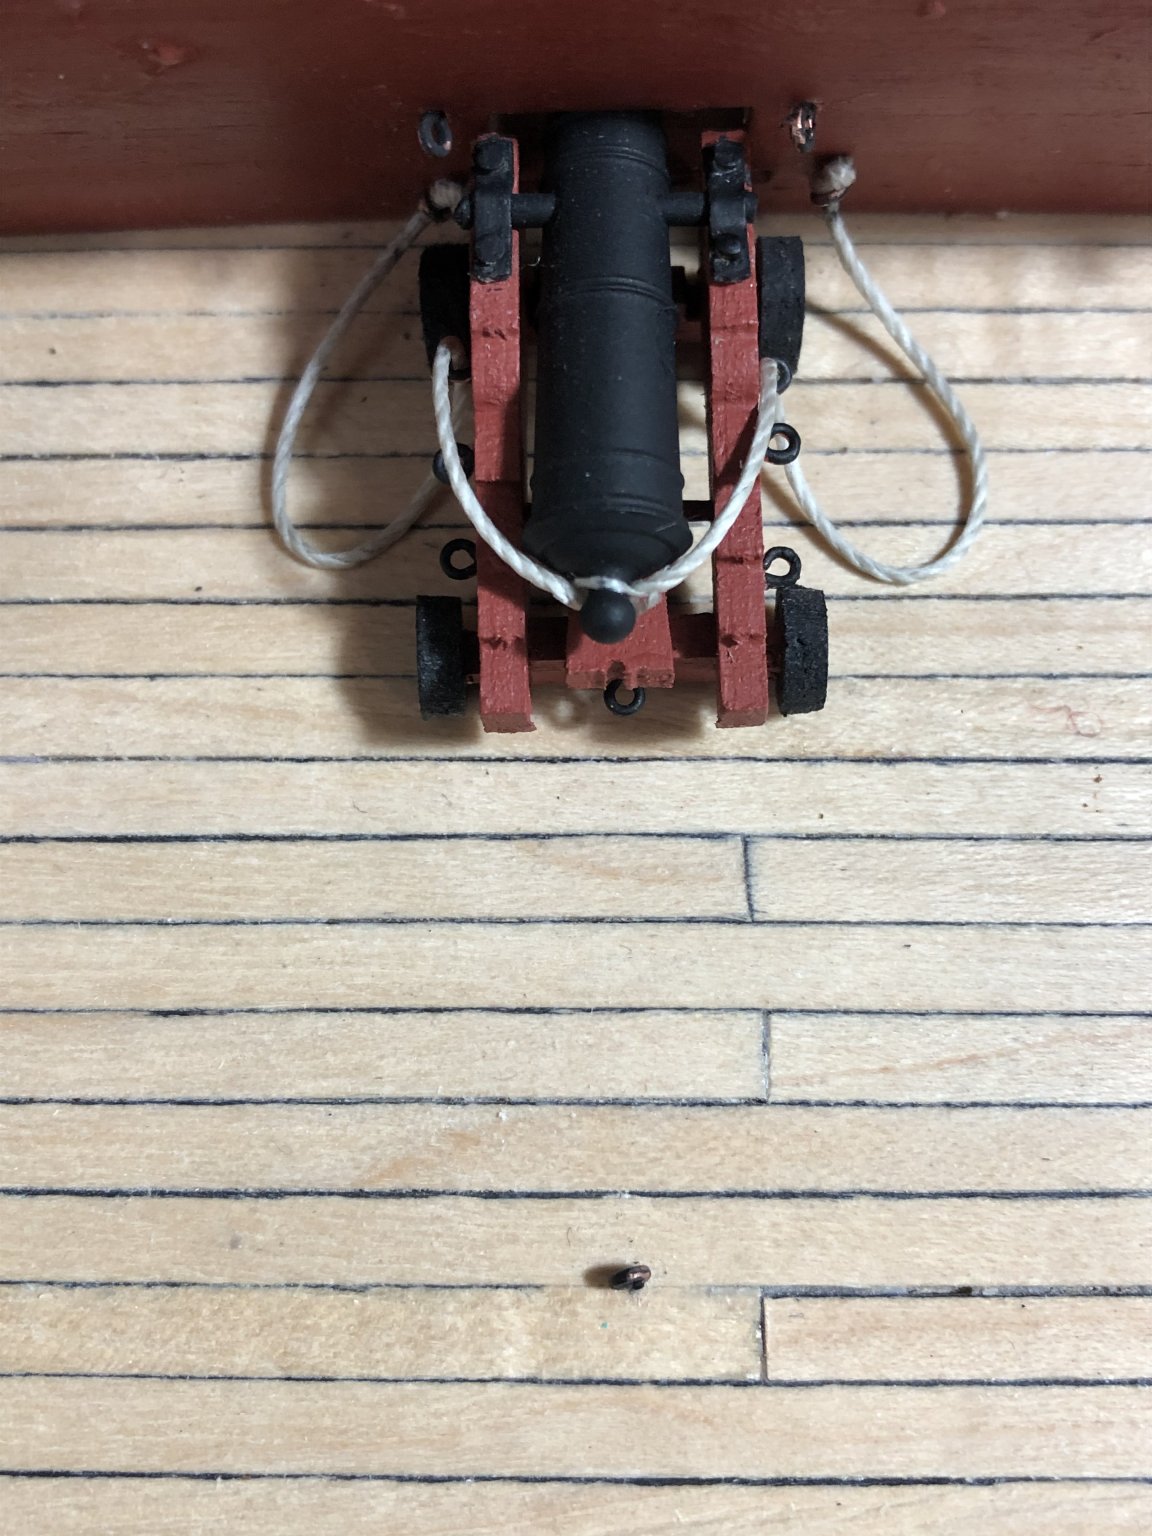
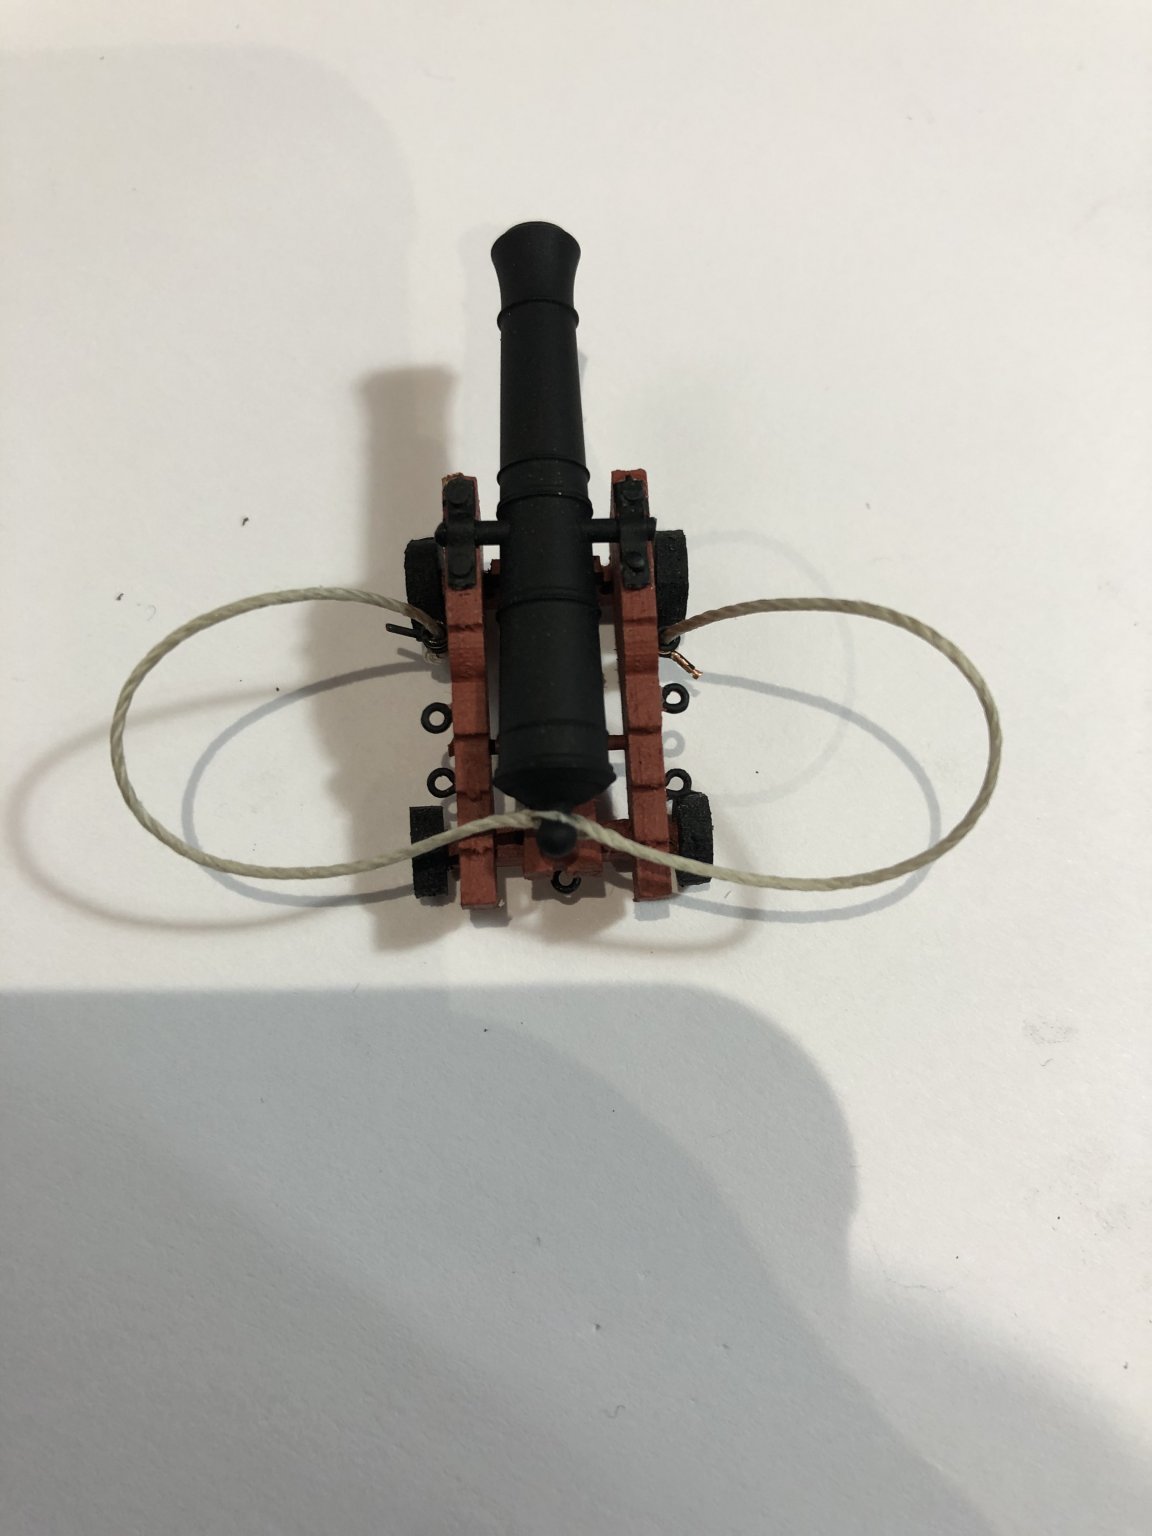
Next I prepped the breeching tackle and fitted it over the rear of the cannon using 1mm rope - 14.5 cms long fits the bill. Sequence: knot one end: add an eye, insert rope through the forward eyelets on the cannon, add another eyelet, knot. As shown in the first photo, Then the mid point of the line can be slipped over the knob on the cascable. Then carefully affix in position as shown.
Fiddly but straightforward. The rope was then washed in watered PVA to get the correct lay on the deck and secure it.


-
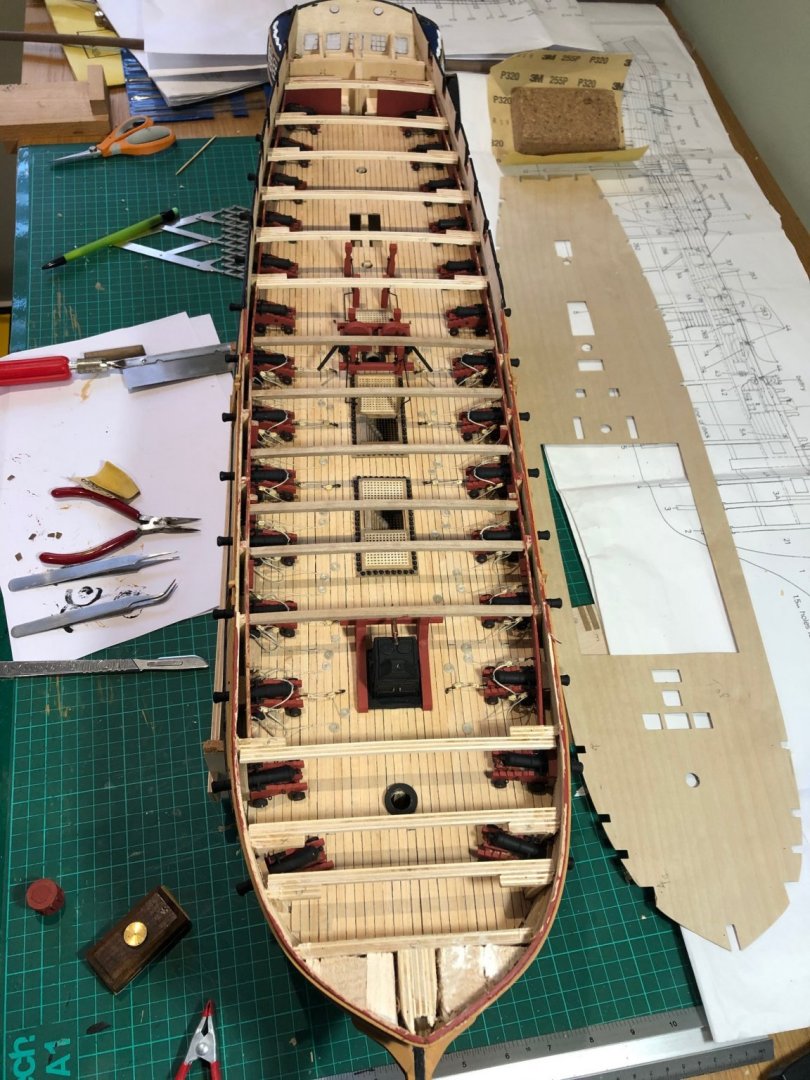
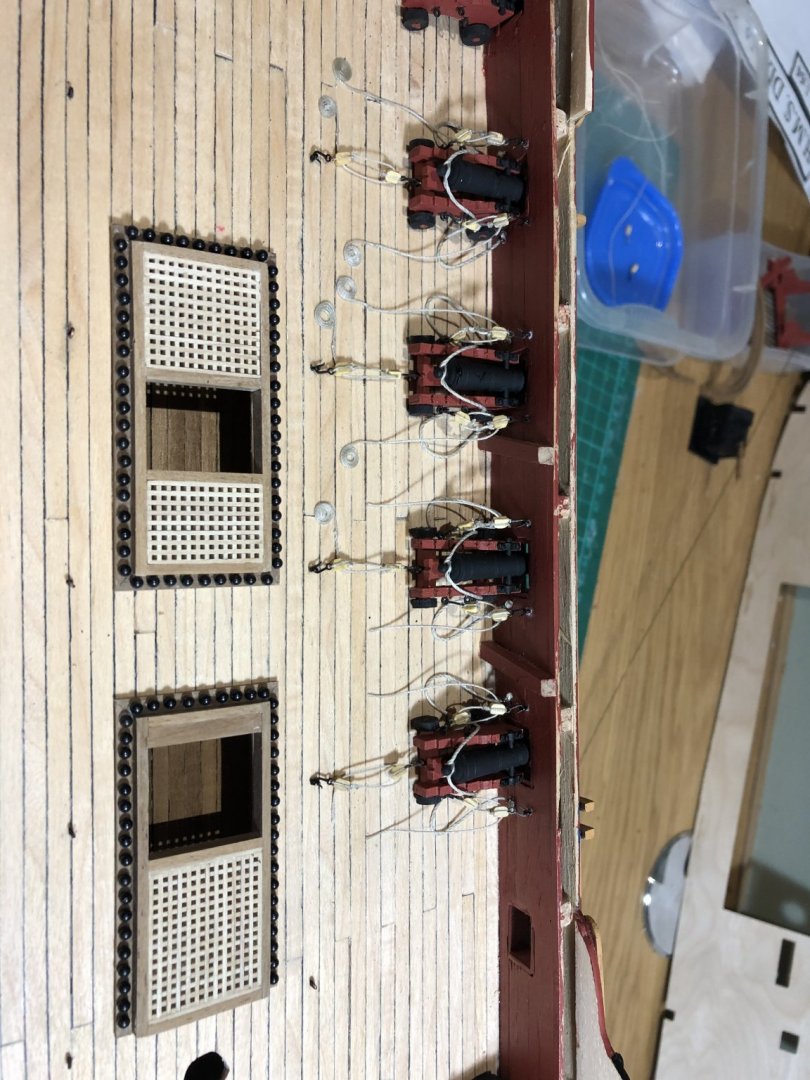
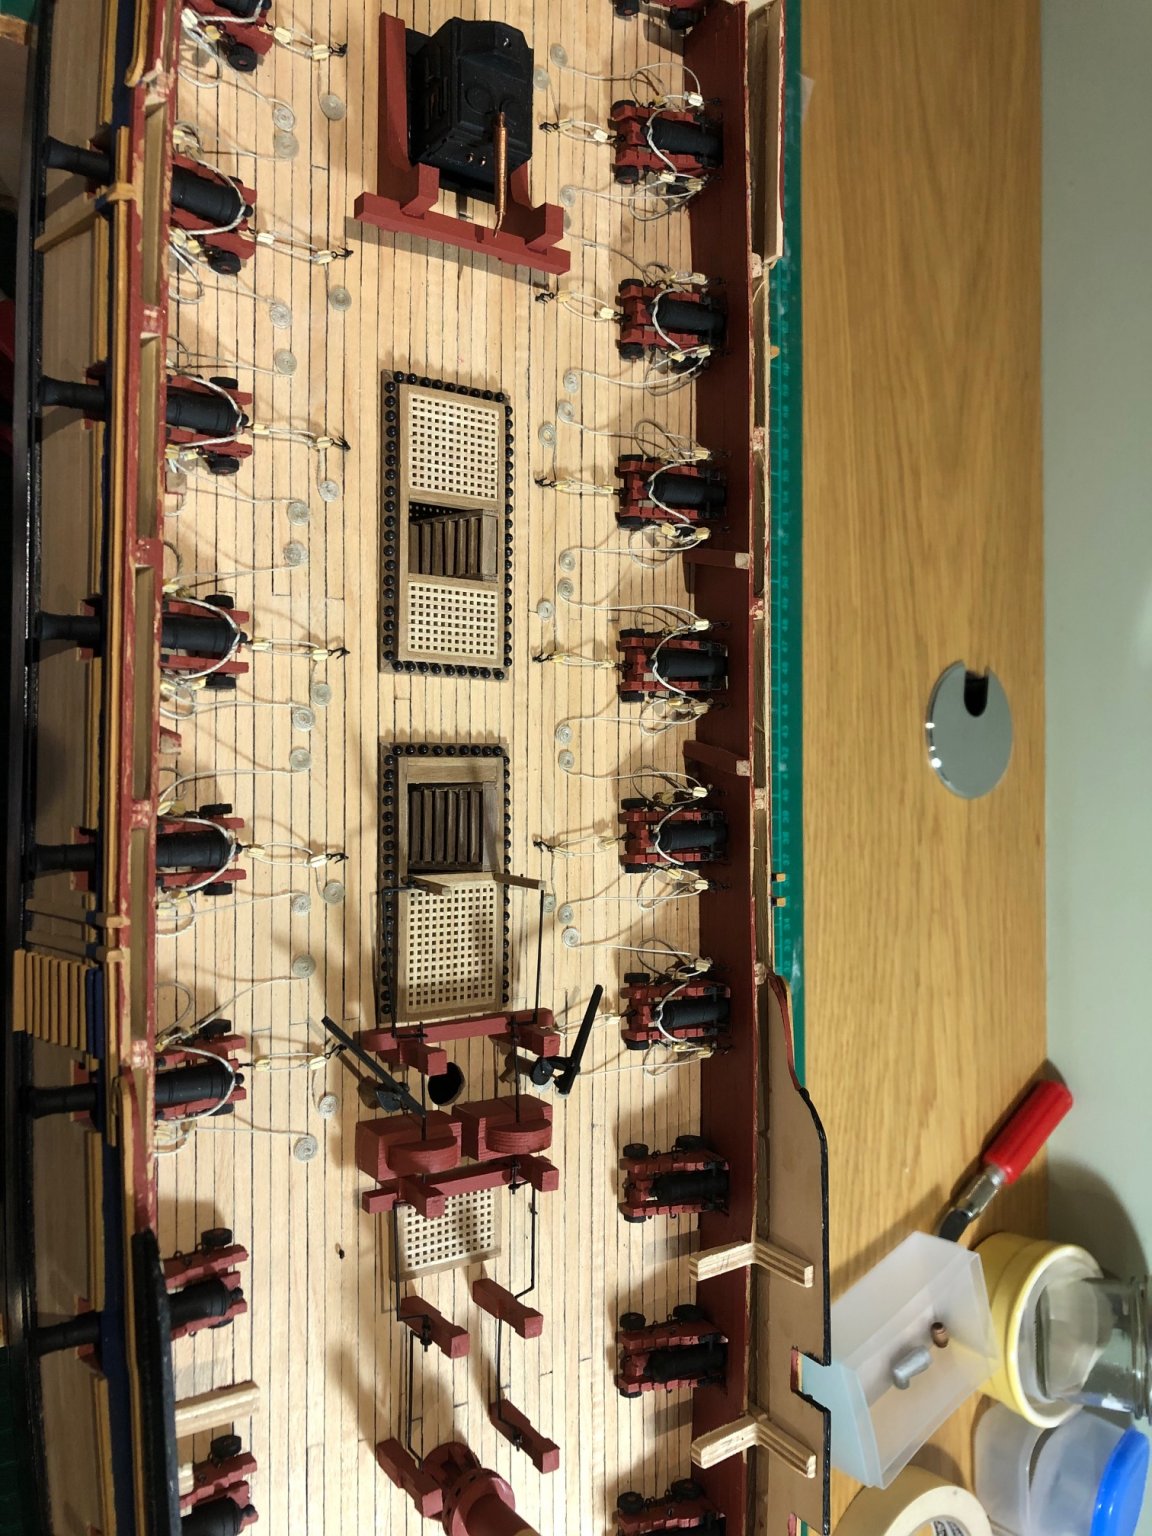
I note that I haven't posted an update for a while; probably because building guns can get a little bit repetitive but I'm through all that now and have finished the gundeck. I found this comparatively straightforward but needed careful pre thinking to ensure the sequence of build was correct - and practical to do; there are bits in the build instructions which are counter intuitive and the absence of rigging instructions irritated me.
Rigging the guns was time consuming and, having never done this before, indeed having never really thought about neatly attaching very small (2mm) blocks; I was at a little of a loose end as to how to proceed. I got some advice from elsewhere in the site and gave it a good. I attach a few piccies:
a.

-
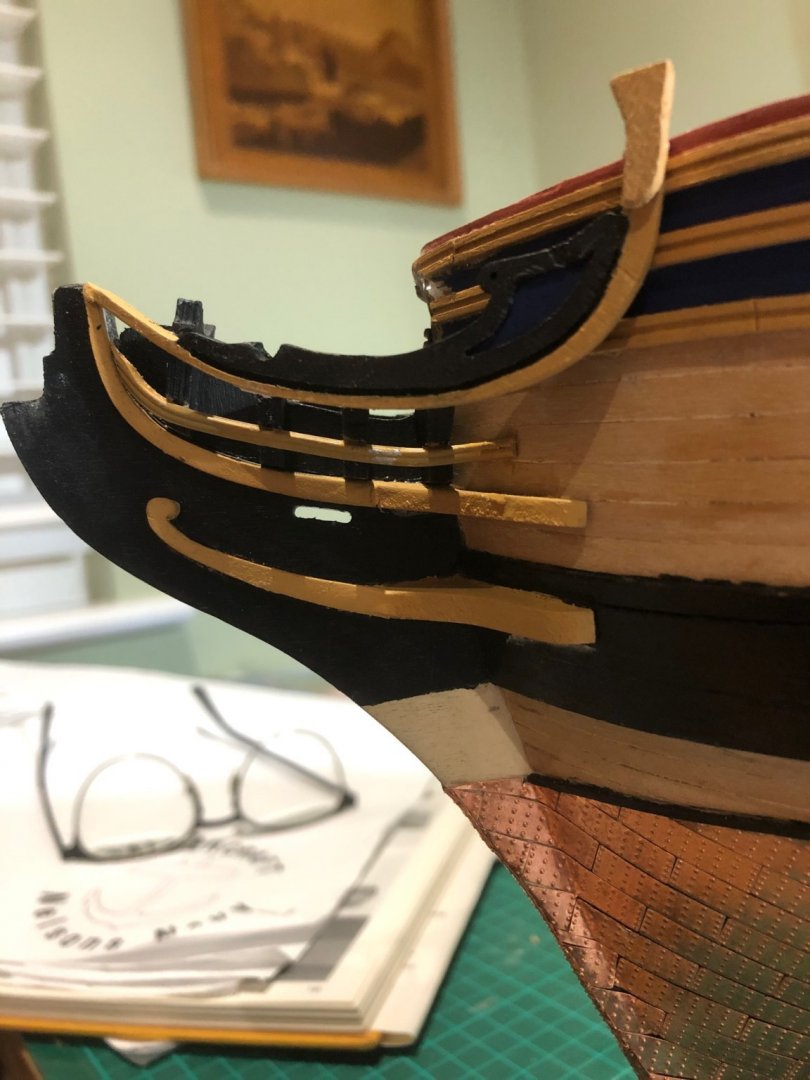
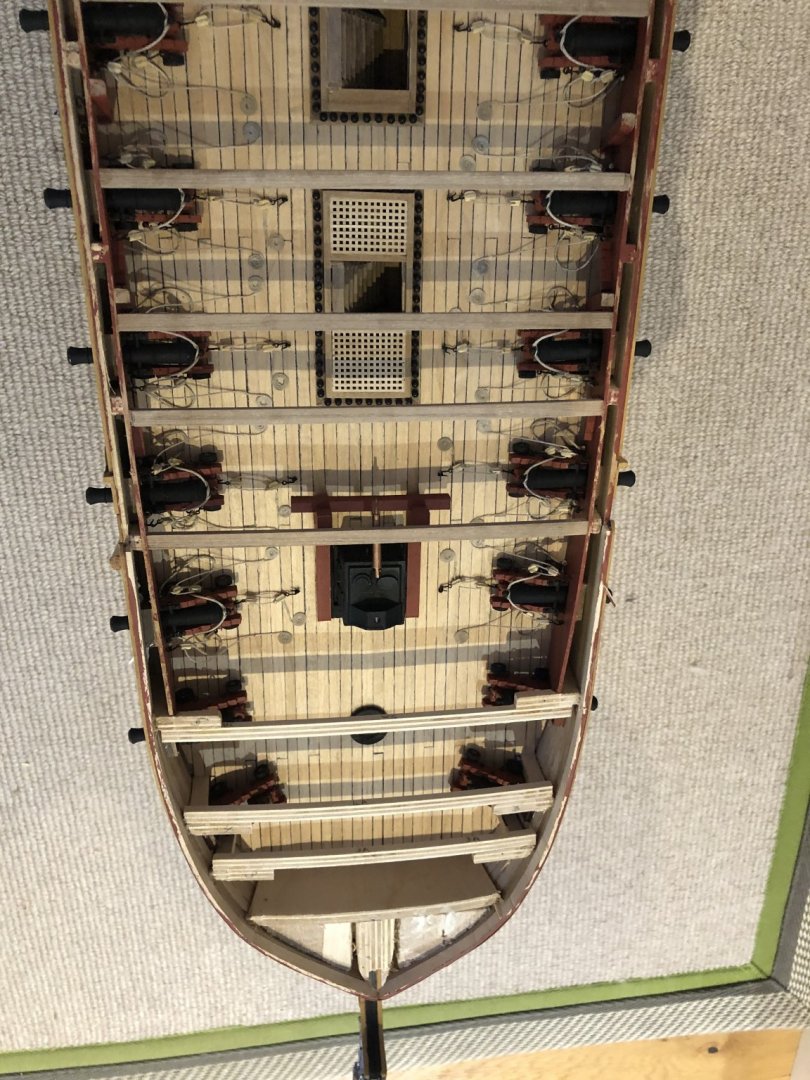
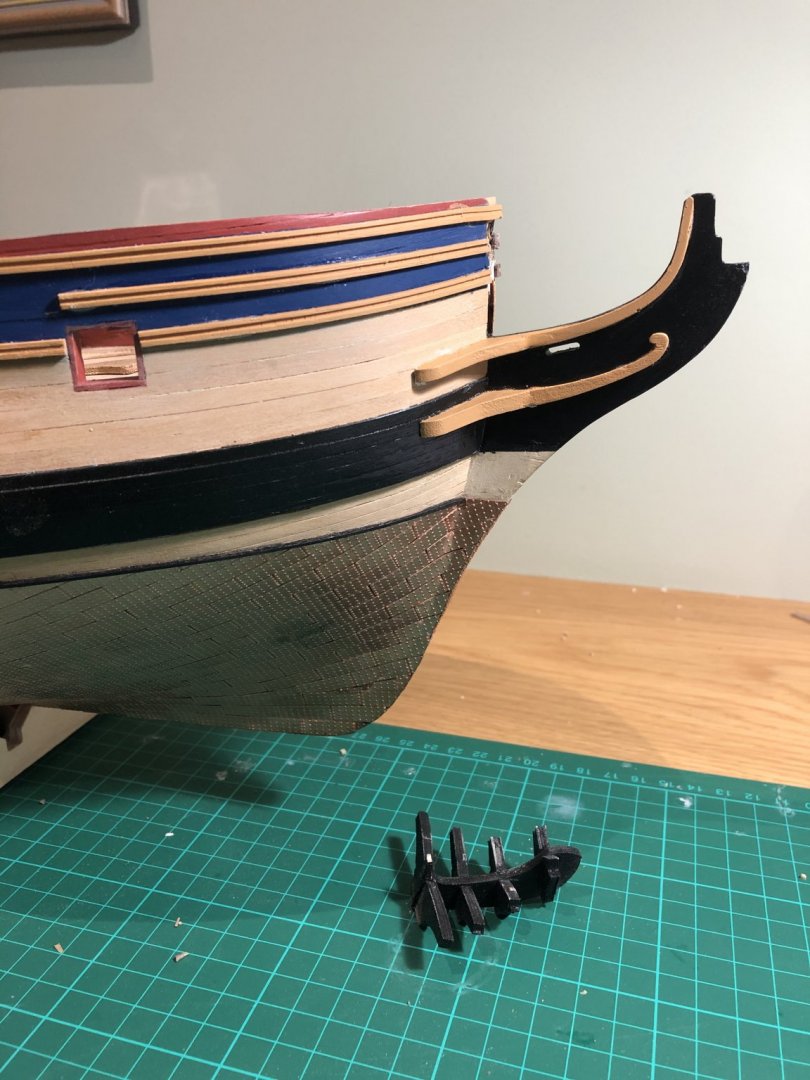
Okay - update due. I continue to make slow but steady progress. After the completion of the various wales, the instructions send you forward to complete the bow area. I did do some of this but stopped once the cheeks had been attached - I got the sense that when complete, the various head rails and the cat heads would be quite delicate and, as the various other sections around the bow were assembled, be prone t damage. So I followed Ray’s advice and decided to complete the gun deck area beer the forecastle.
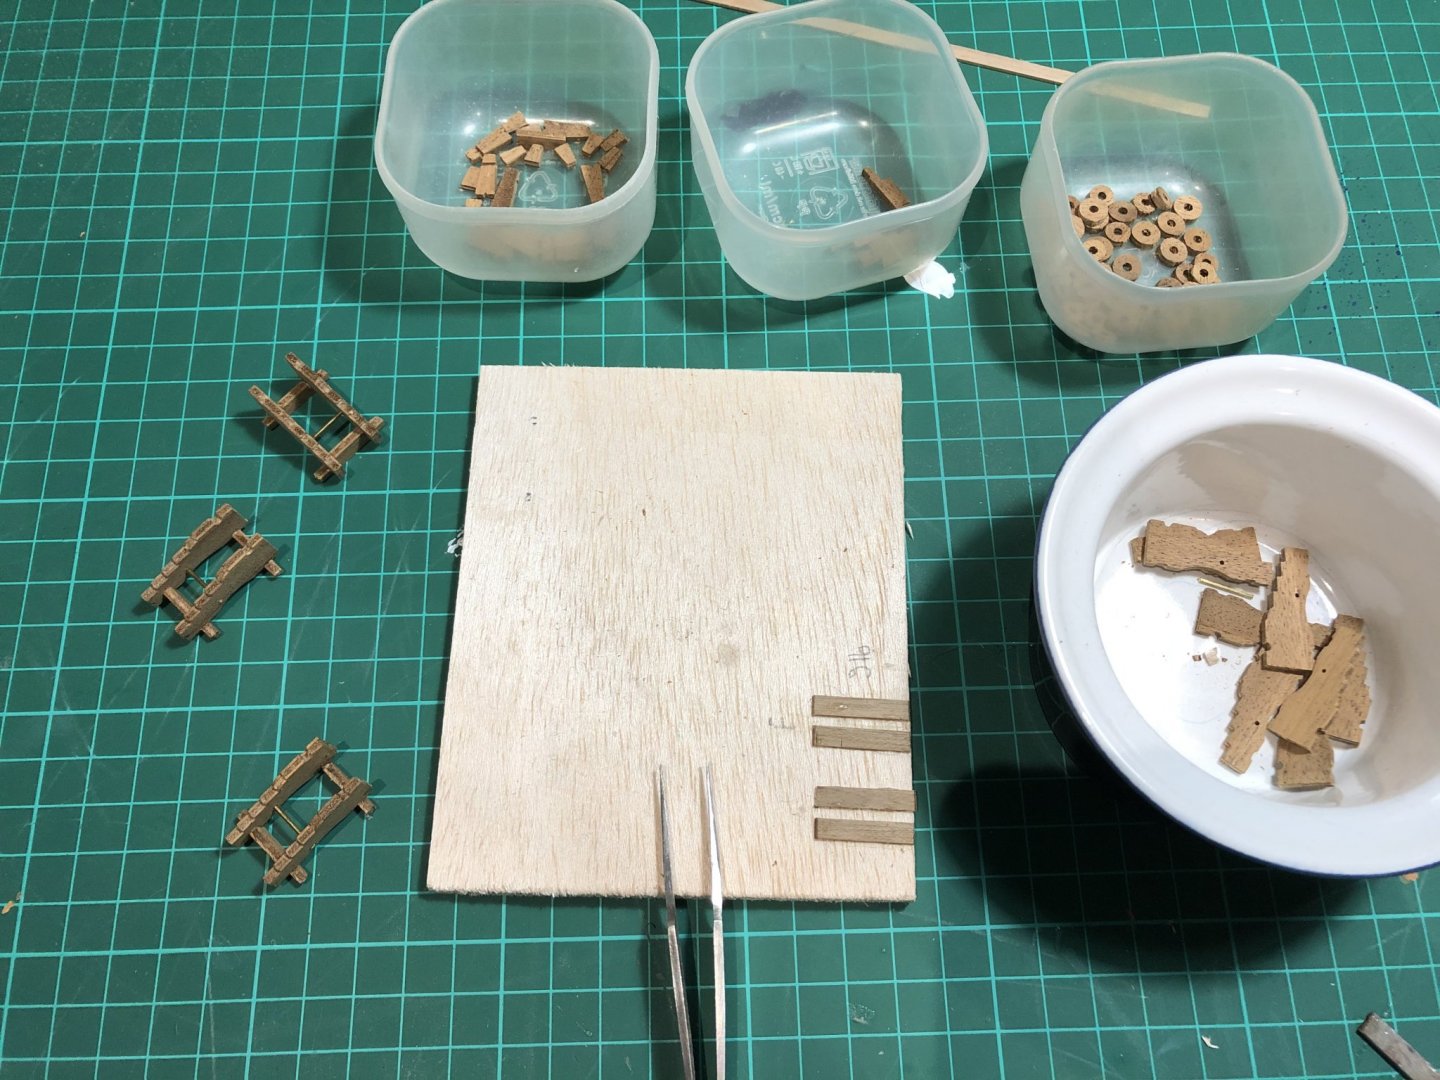
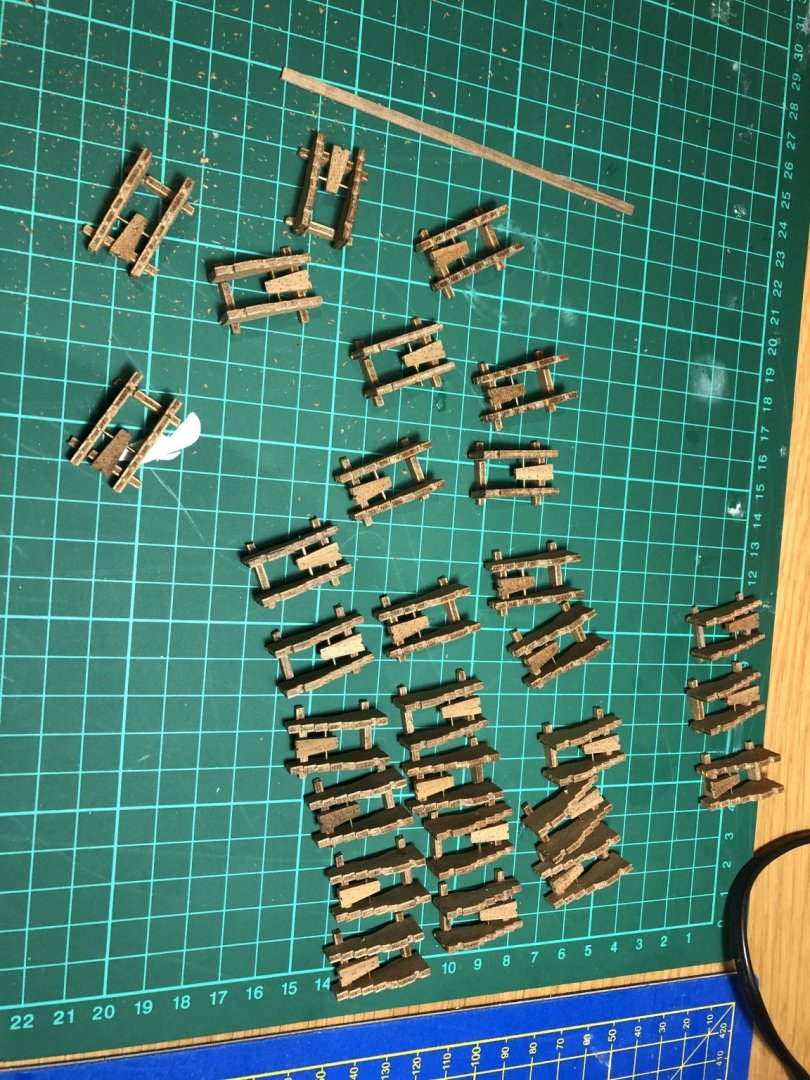
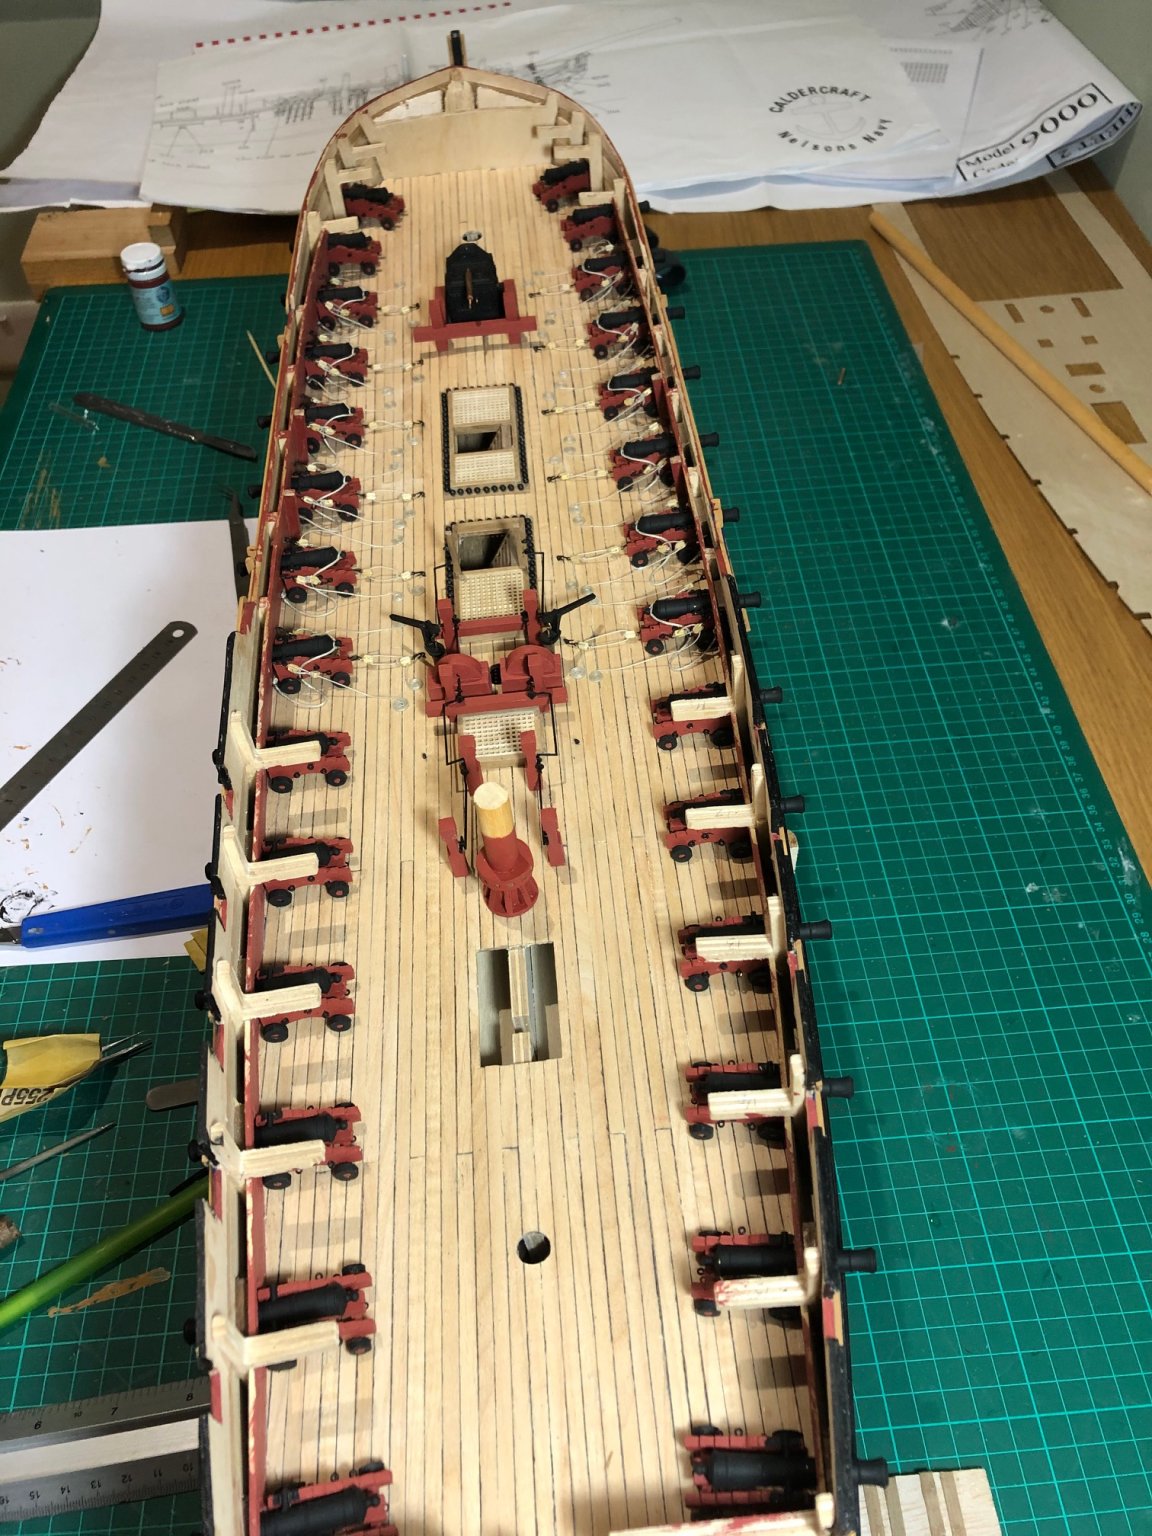
I have assembled the grates and ladders and made a start on the guns. The guns were straight forward albeit a bit repetitive. Tips: be wary using a paint spray on the wheelers: I tried this and the pressure from the nozzle set them flying around my garage during which I lost three - remade by hand!
The barrels were sprayed in Matt black having cleaned them in white spirit to remove greasy finger prints. The wheels were strung on some fishing line and cracked in two batches. The irritation is the size of the axle to the wheel - too big so each axle had to be sanded down to allow the wheel to fit on. I tried spraying the cooper pins which make the eye bolts - waste of time as it all rubbed off when fixing the pin to the carriage. Very fine brush came in handy to paint the 180 odd pins on the various carriages.....double vision.
I will fix the quoins when I fit the guns onto the deck - I need to adjust them individually to get the barrels all on the same level.
Ill finish them all this week then look at the rigging to secure them tot the bulwarks.
Fiddly but bizarrely satisfying. Be careful to really sand each piece smooth, the paint is unforgiving at highlighting uneven surfaces: I did much repeat work.
So far so good. Where do you suggest I go to read up on how to neatly secure blocks to lines?
Peter


-
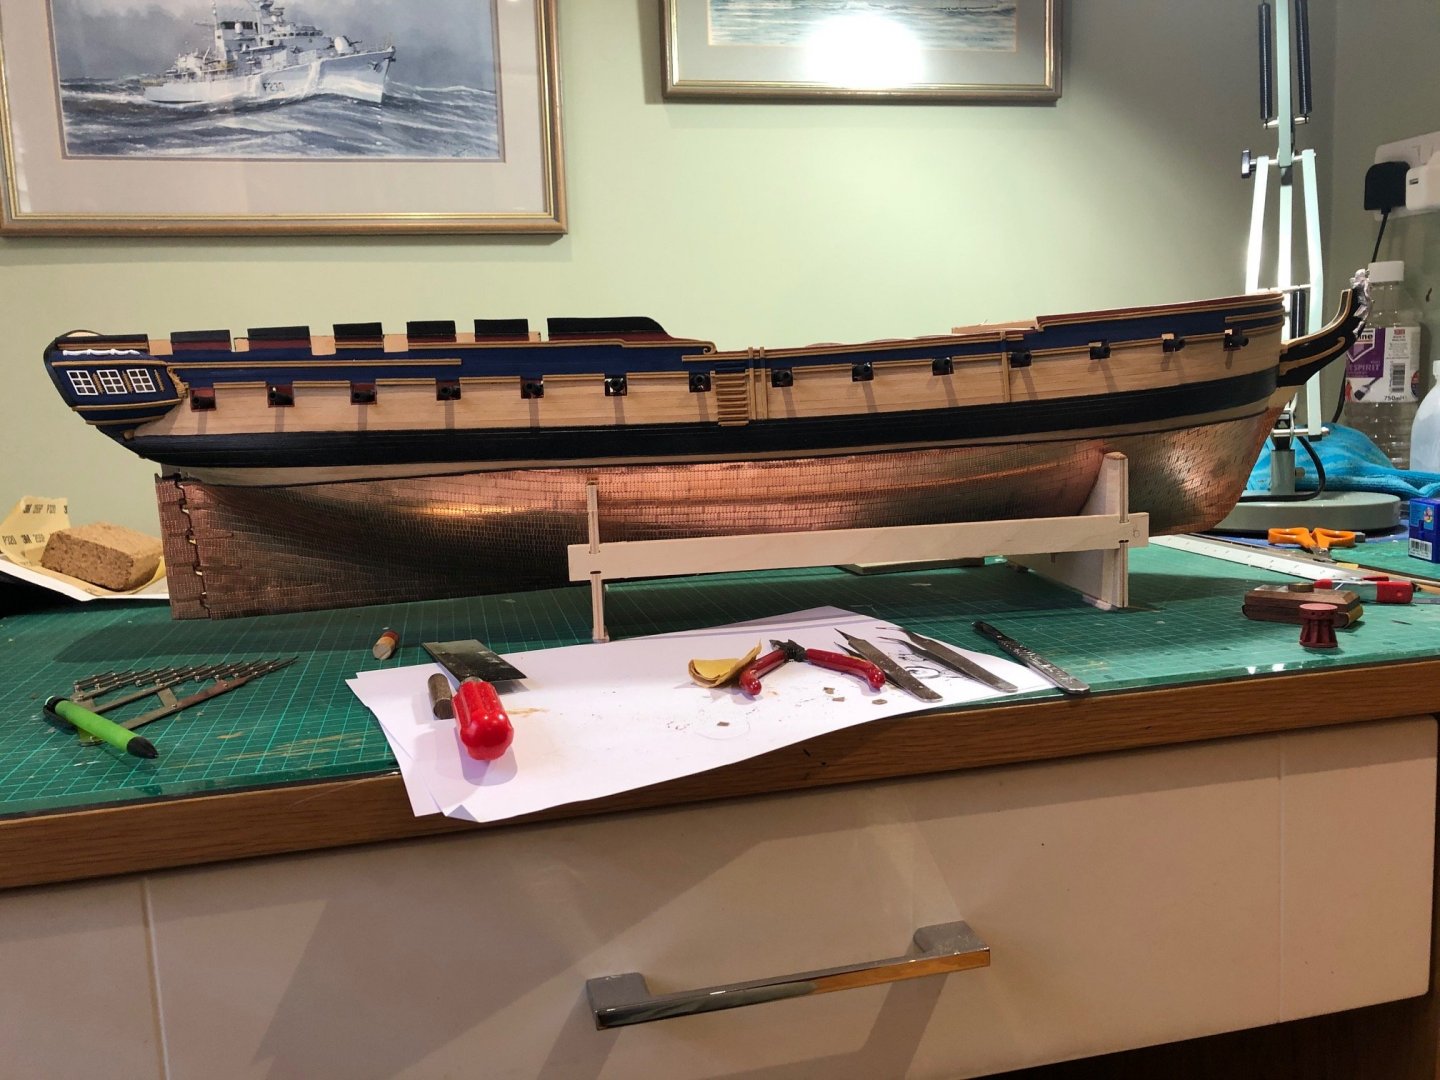
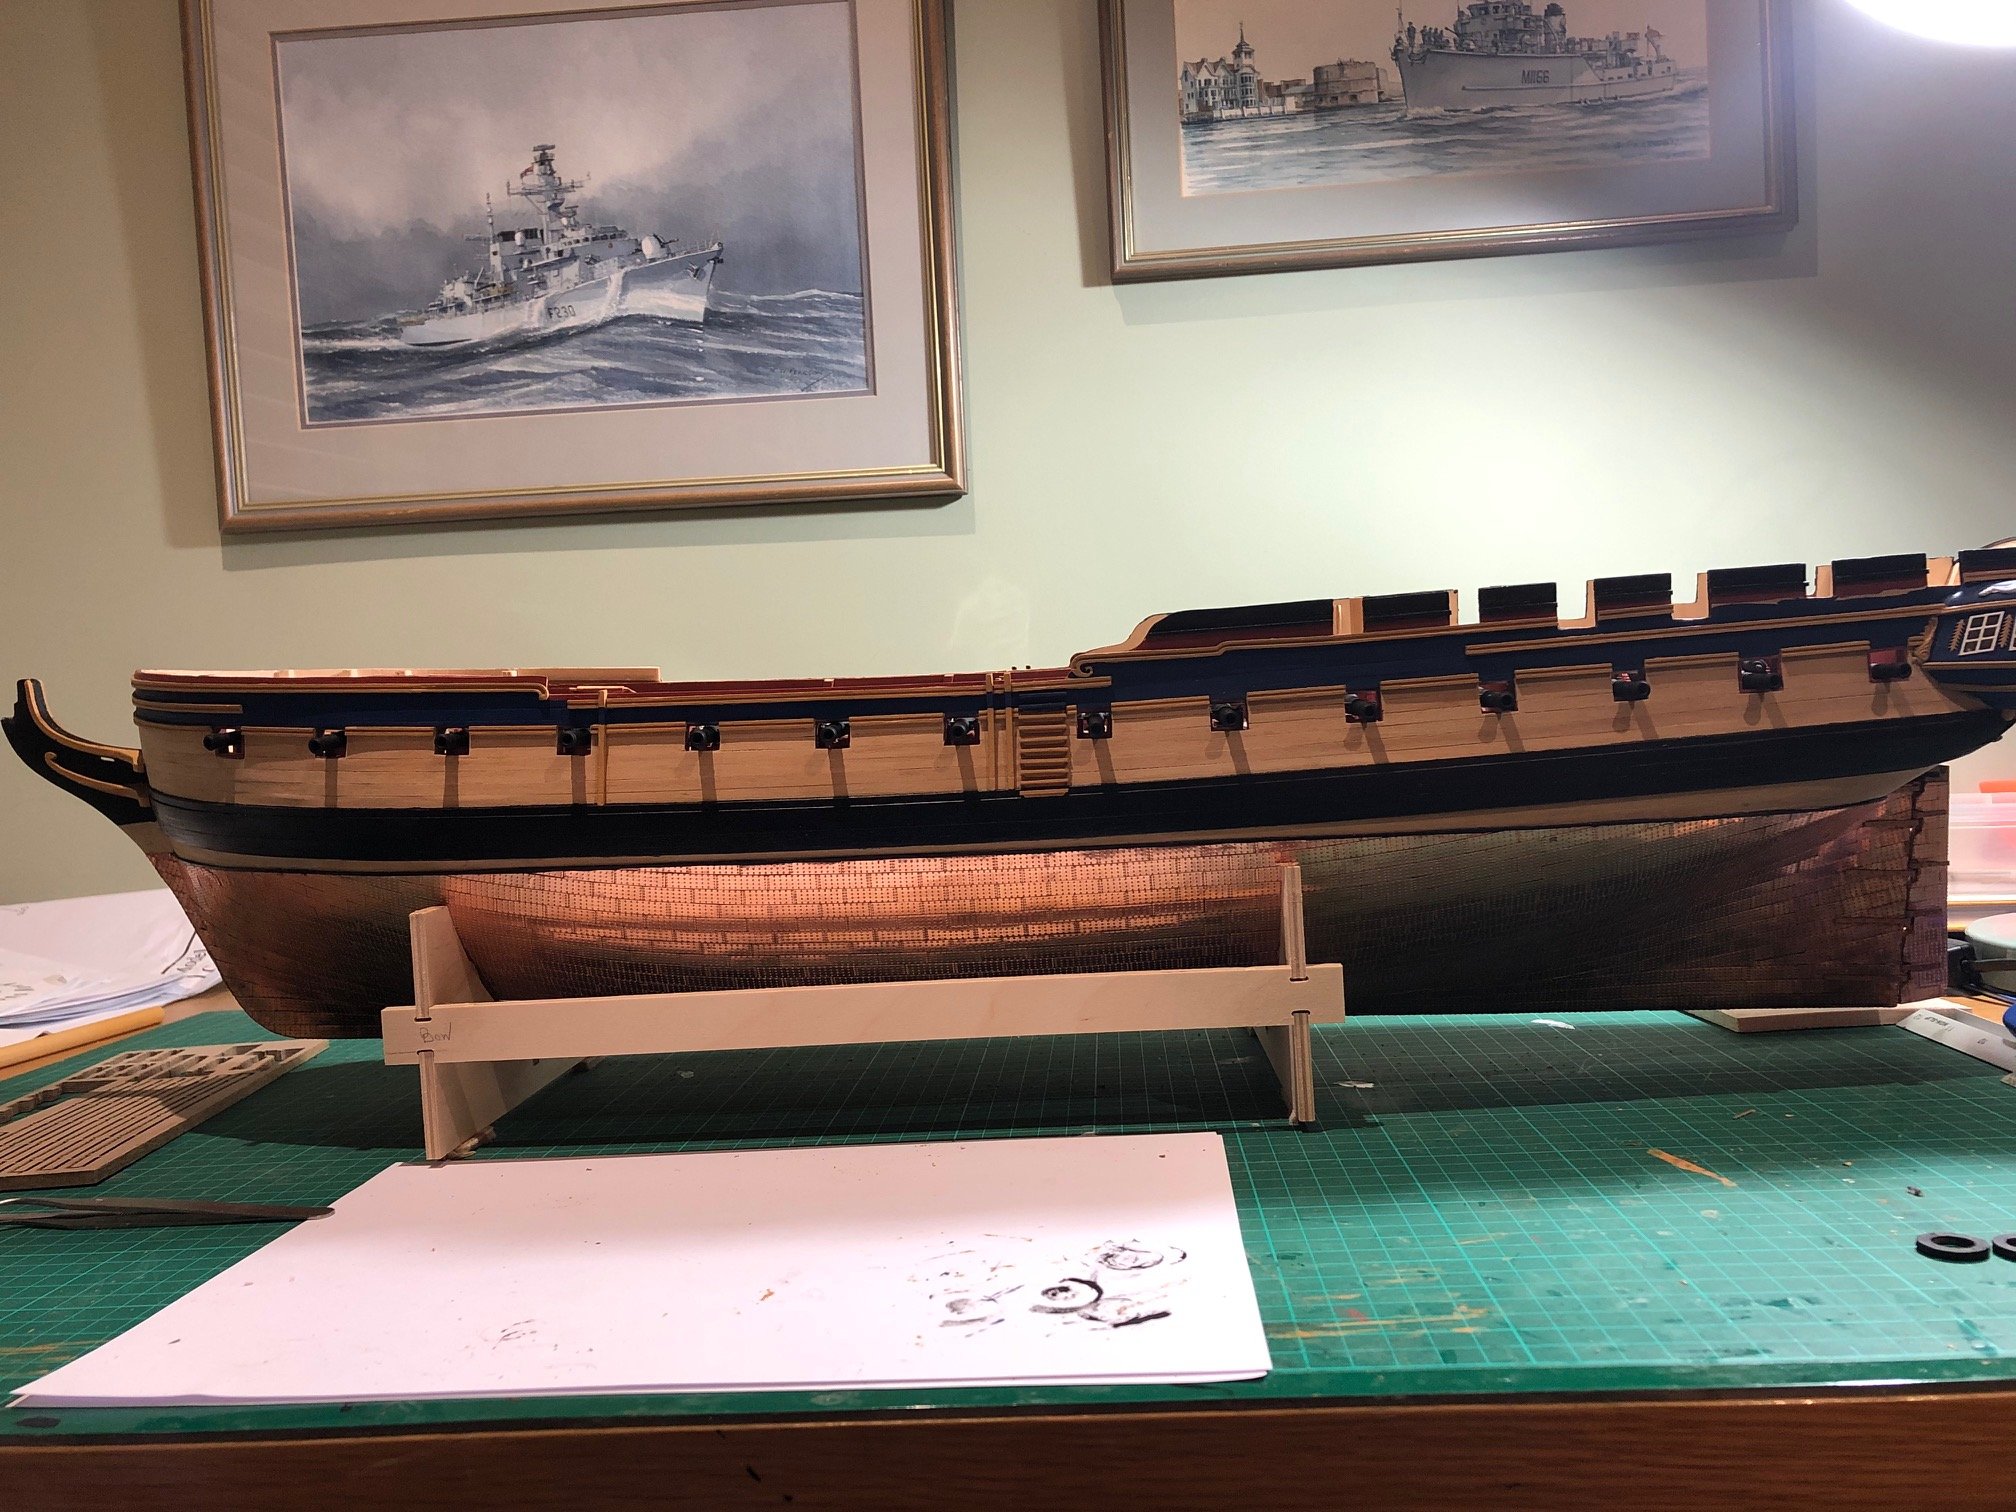
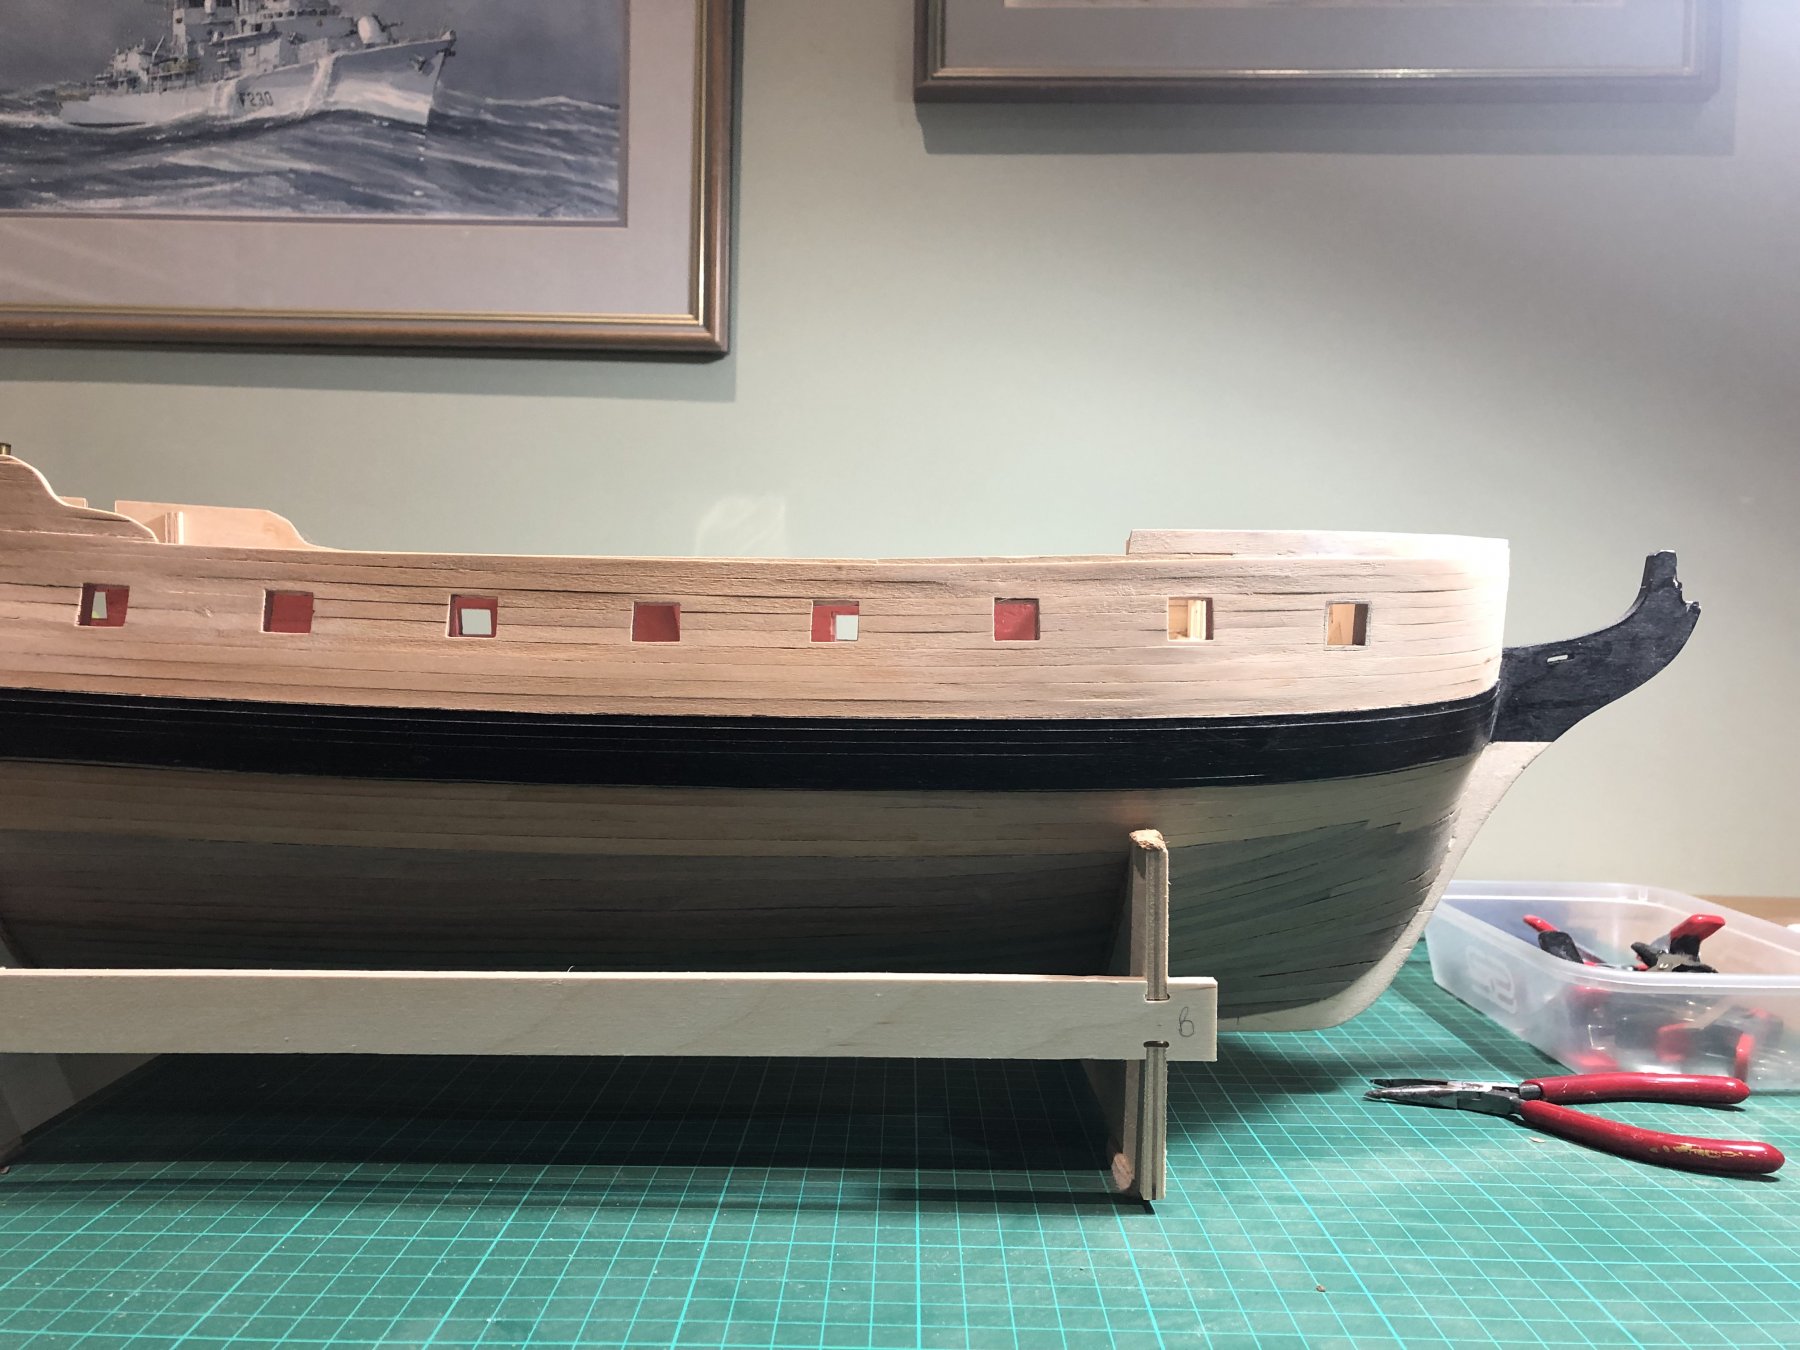
The wales were next. The key here was to keep thing parallel and decide when to do the background painting...the answer is to do it early! I marked each of the wales with masking tape and then applied a first coat of paint as per the kit instructions. I suffered a little when the tape was not applied sufficiently firm and the paint slipped behind the tape requiring careful sanding to remove. This phase took about 2 weeks off and on. I used wood glue throughout as it allowed individual sections to be adjusted to keep things straight!
I found out that I had made an error in and around the bow. When finishing the first planking I cut the bow section down at frame 4 ( you can see in the earlier phots) - when I checked the positioning of f'wd capping rail, it was clear I had got it wrong. I inserted a correct section so that the rail now sits snugly.
The wales were not difficult, just time consuming! I have the embarkation steps to fit (the wales are only lightly glued in that section) then the head rails next.


-
I haven't posted in over a month - time for an update.
I have finished the stern area as well as coppering and attaching the rudder. The rudder was very fiddly! aligning tiles with those on the hull, attaching the hinges and affixing the pintle straps seemed to be unduly hard! The straps didn't, and still don't, seem to stick tot he rudder or hull particularly well even when using superglue...gluing to nobbles on the tiles doesn't give much binding area.
Eventually it was on, so I started marking up for the wales.

-
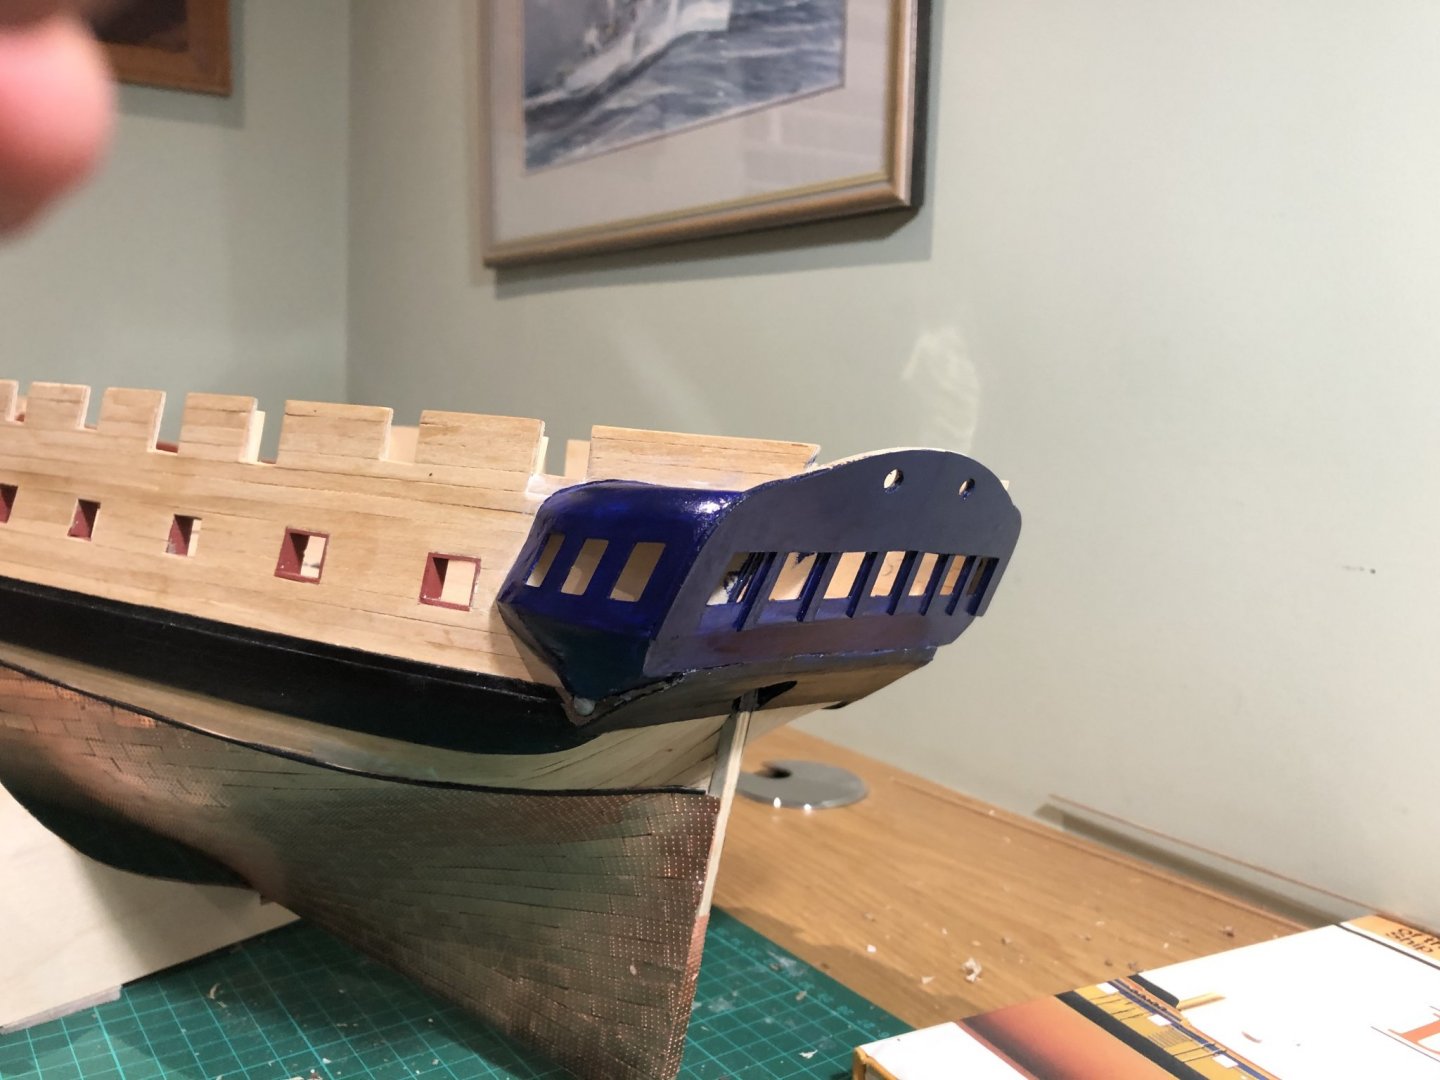
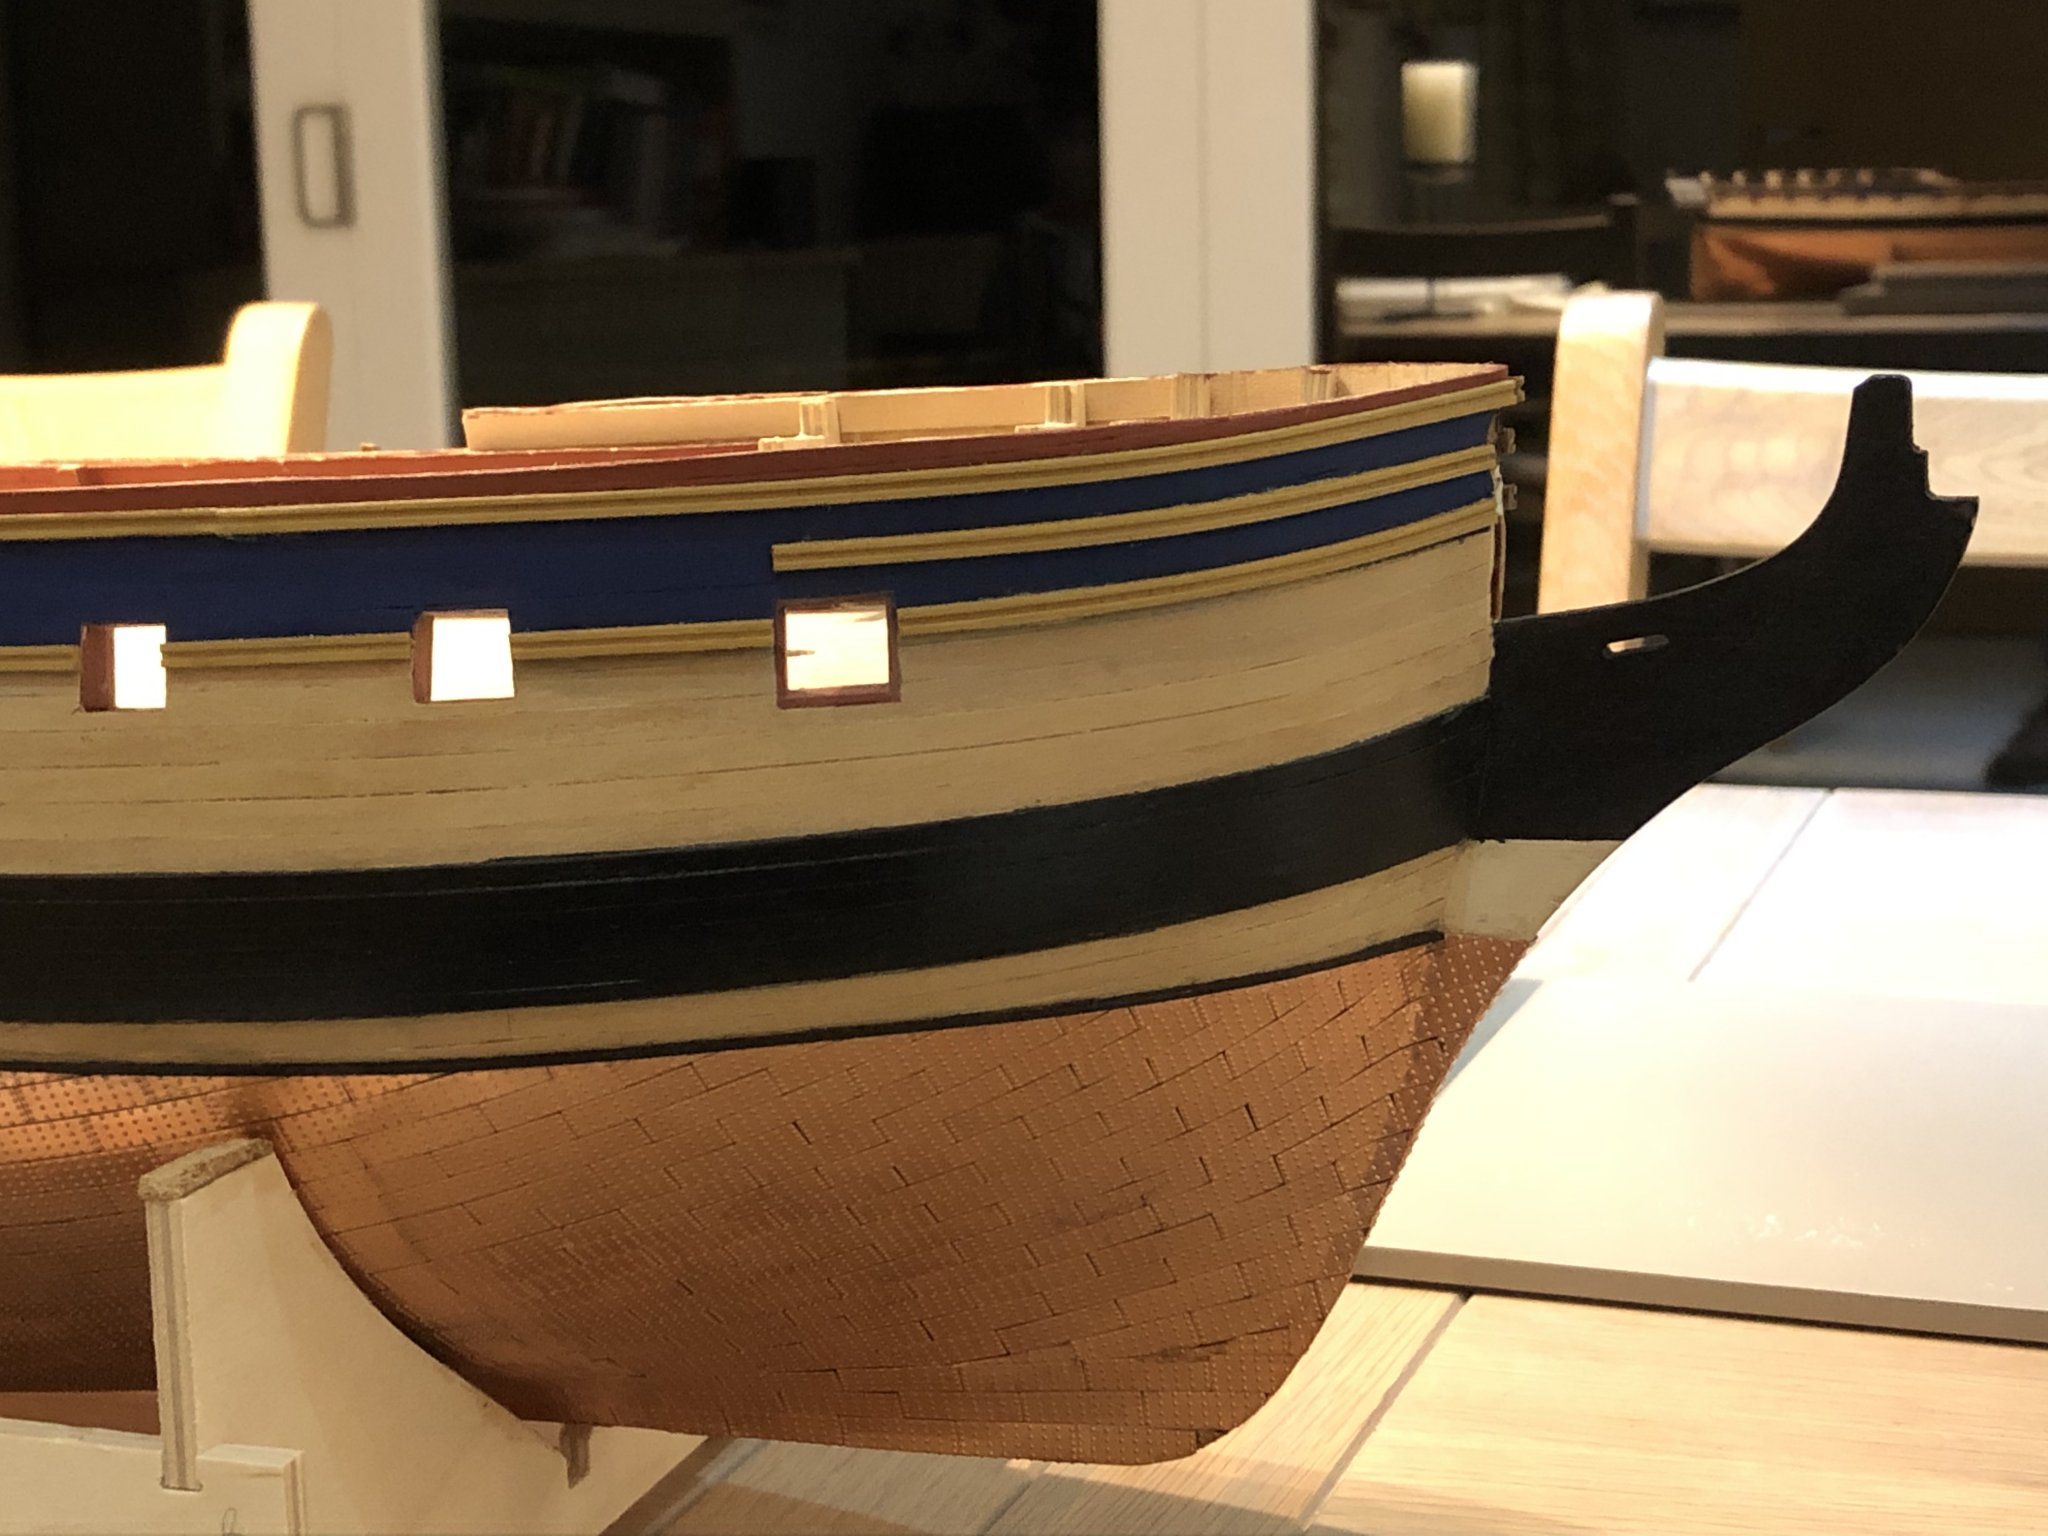
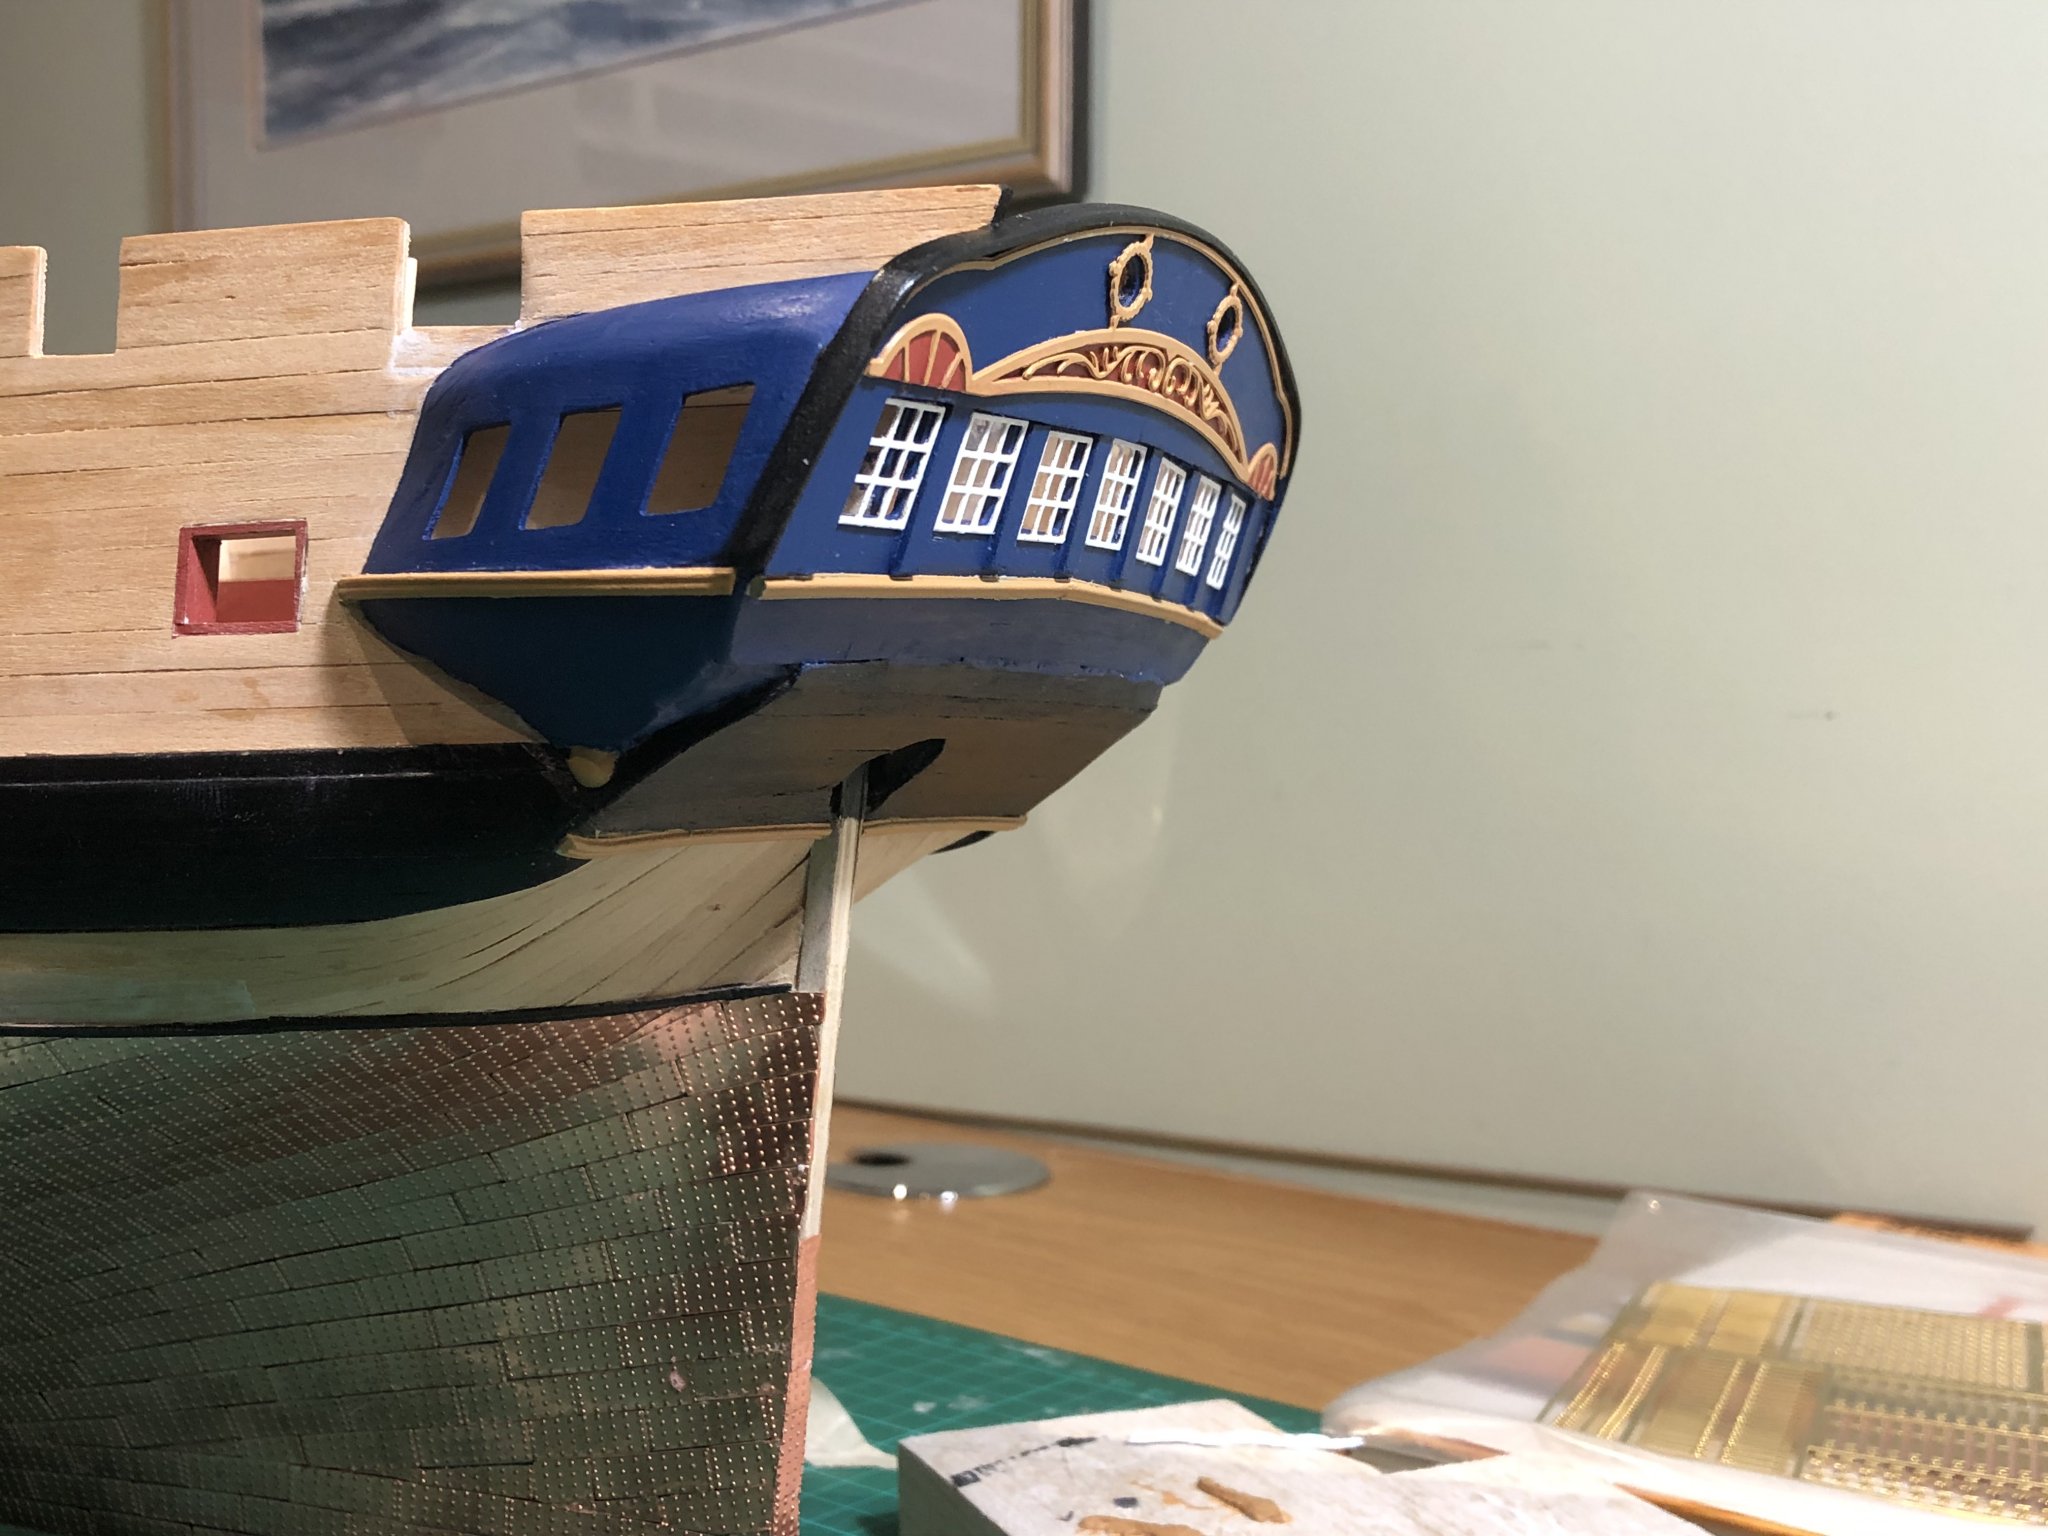
Okay, I have now almost finished the stern area. methodical, slow and steady with care on paint, glue and sanding - all were watchwords but the finished product looks okay. I changed the paint to a Tamiya Flat-Blue XF-8 which I found just a little more balanced than Robs Mid Blue, but only just, both are fine and much better than the Admiralty Blue in the accompanying caldercraft paint set. Despite my best efforts the misaligned levels are still apparent when looking at the quarter galleries where they are at slightly different levels. I will have to live with it. I will affix the final pieces of metalwork later and final guard rail over the transom as shown in drawing 7: these will be easily knocked as the model progresses.
Lessons: the levels need checking early in the build. Paint as much off the model as possible (save contamination) and test before applying; get a very fine super glue applicator to avoid misplacing the stuff (Gorilla do a very fine nozzled tube).
I now need to check wider hull painting patterns (I note Rob's efforts) before applying the various sheer rails. I will do place the rudder before doing those. So progress is being maintained....albeit slowly. Must retire then I could assign a bit more time.
Keep smiling. Peter
.thumb.jpg.2073052b0d19cd3fbd148f8e28d72212.jpg)
.thumb.jpg.5d04e9f64b615e99cc9acc8bc0229bf5.jpg)

- KARAVOKIRIS, BenD, Old Collingwood and 8 others
-
11
-
thanks Rob - off to get some!
P
-
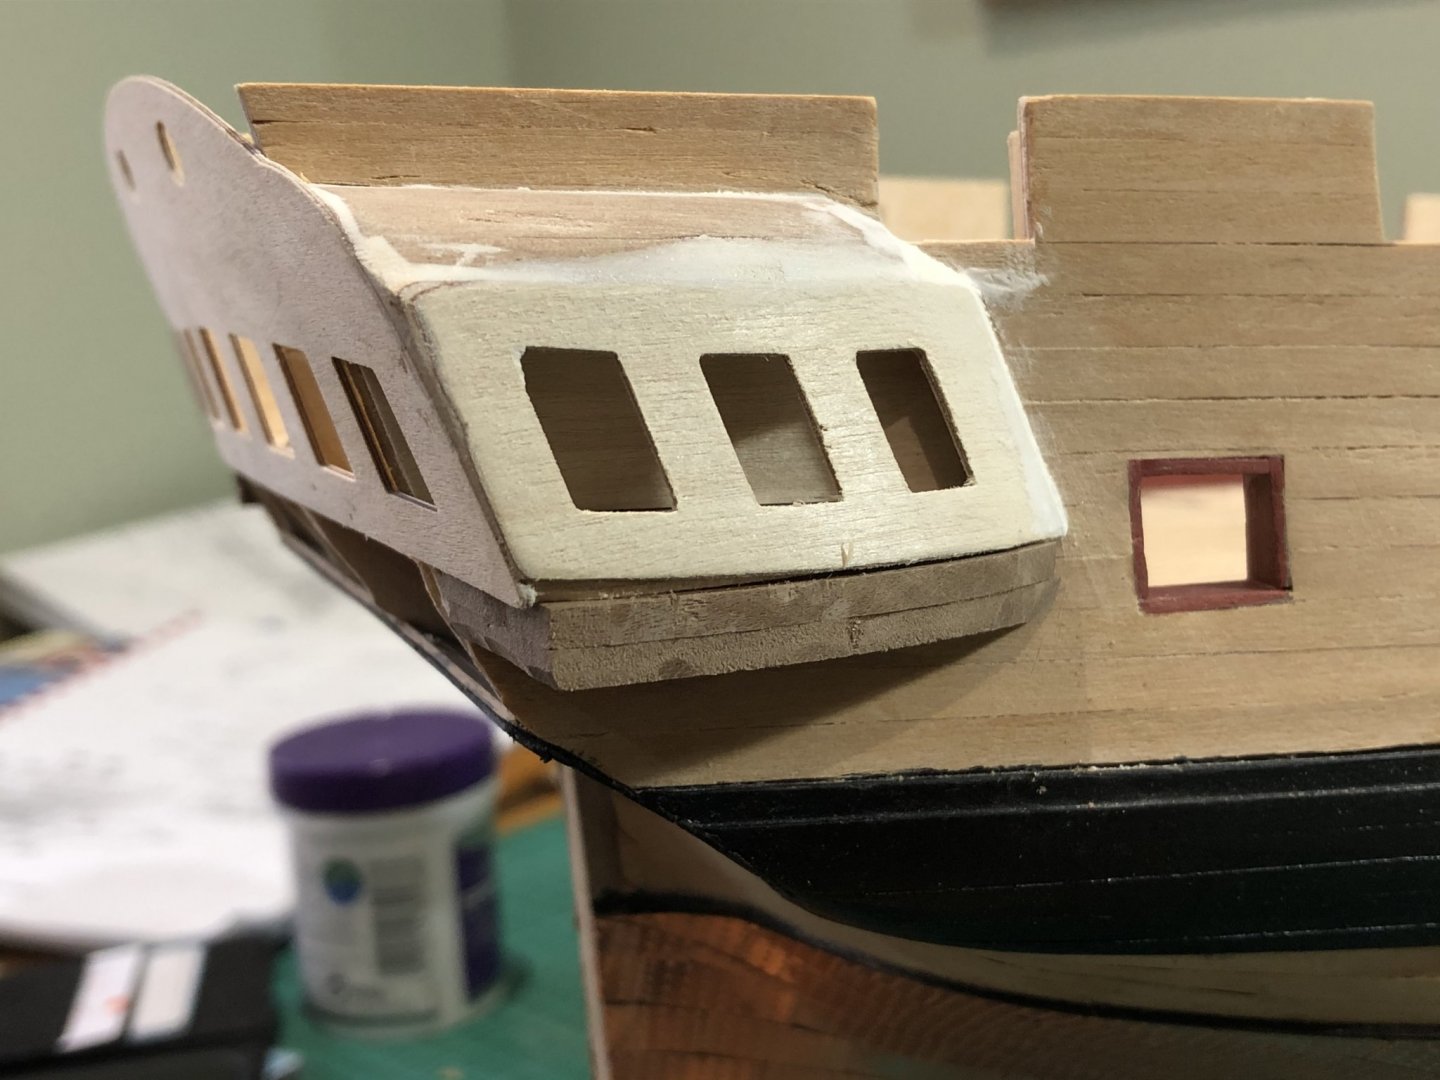
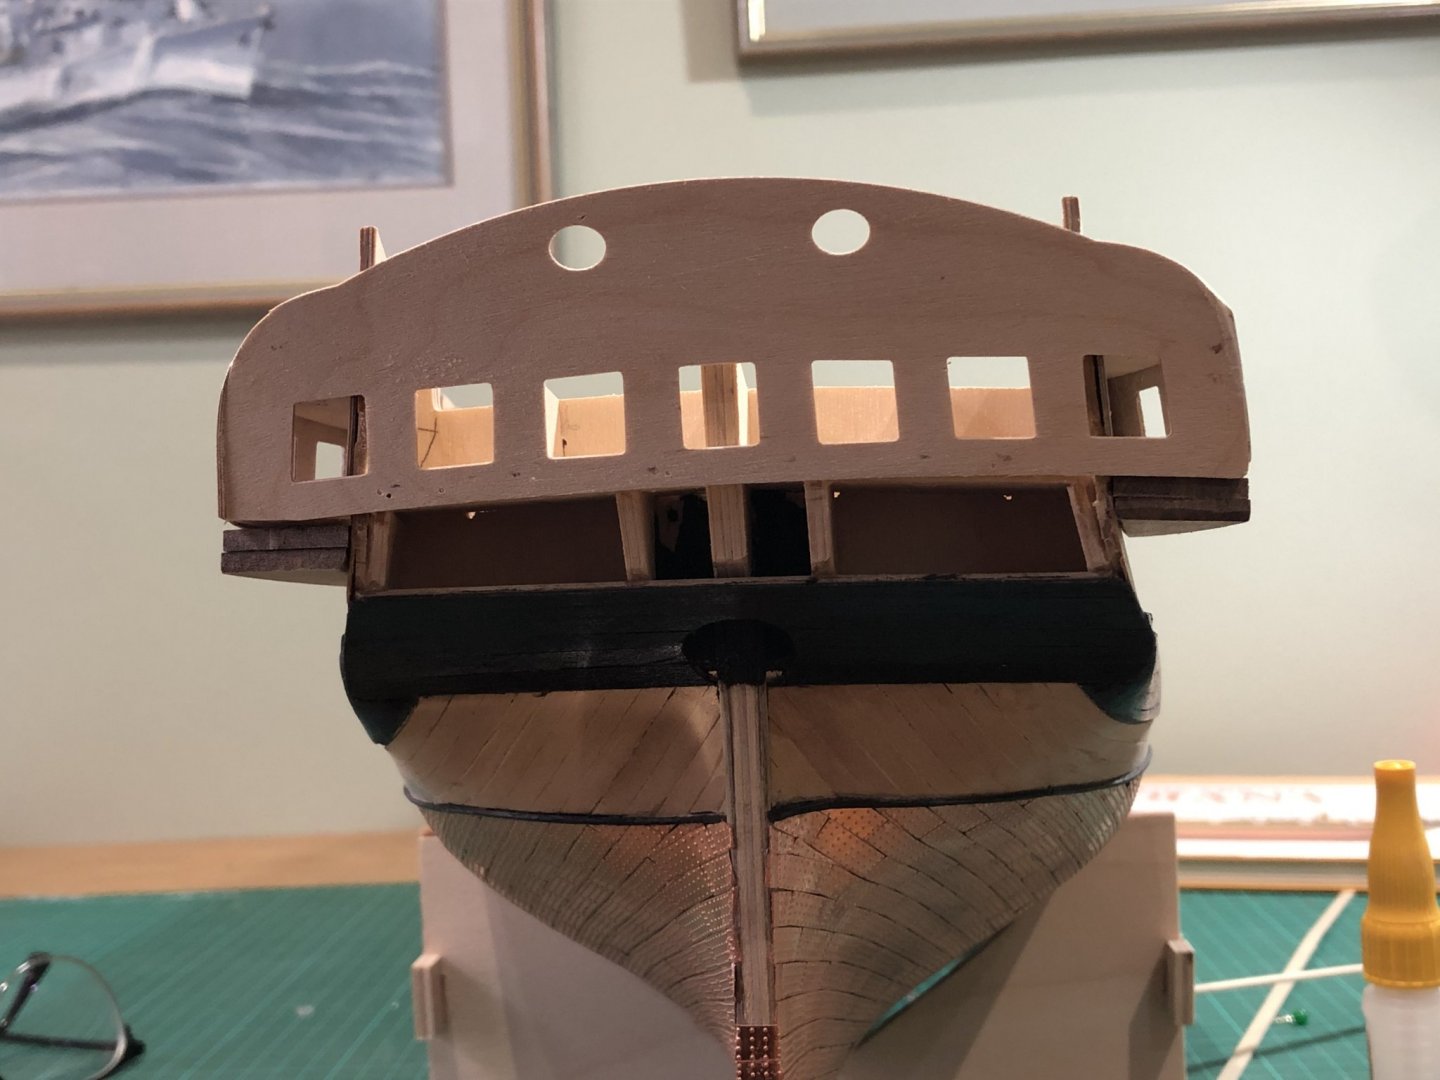
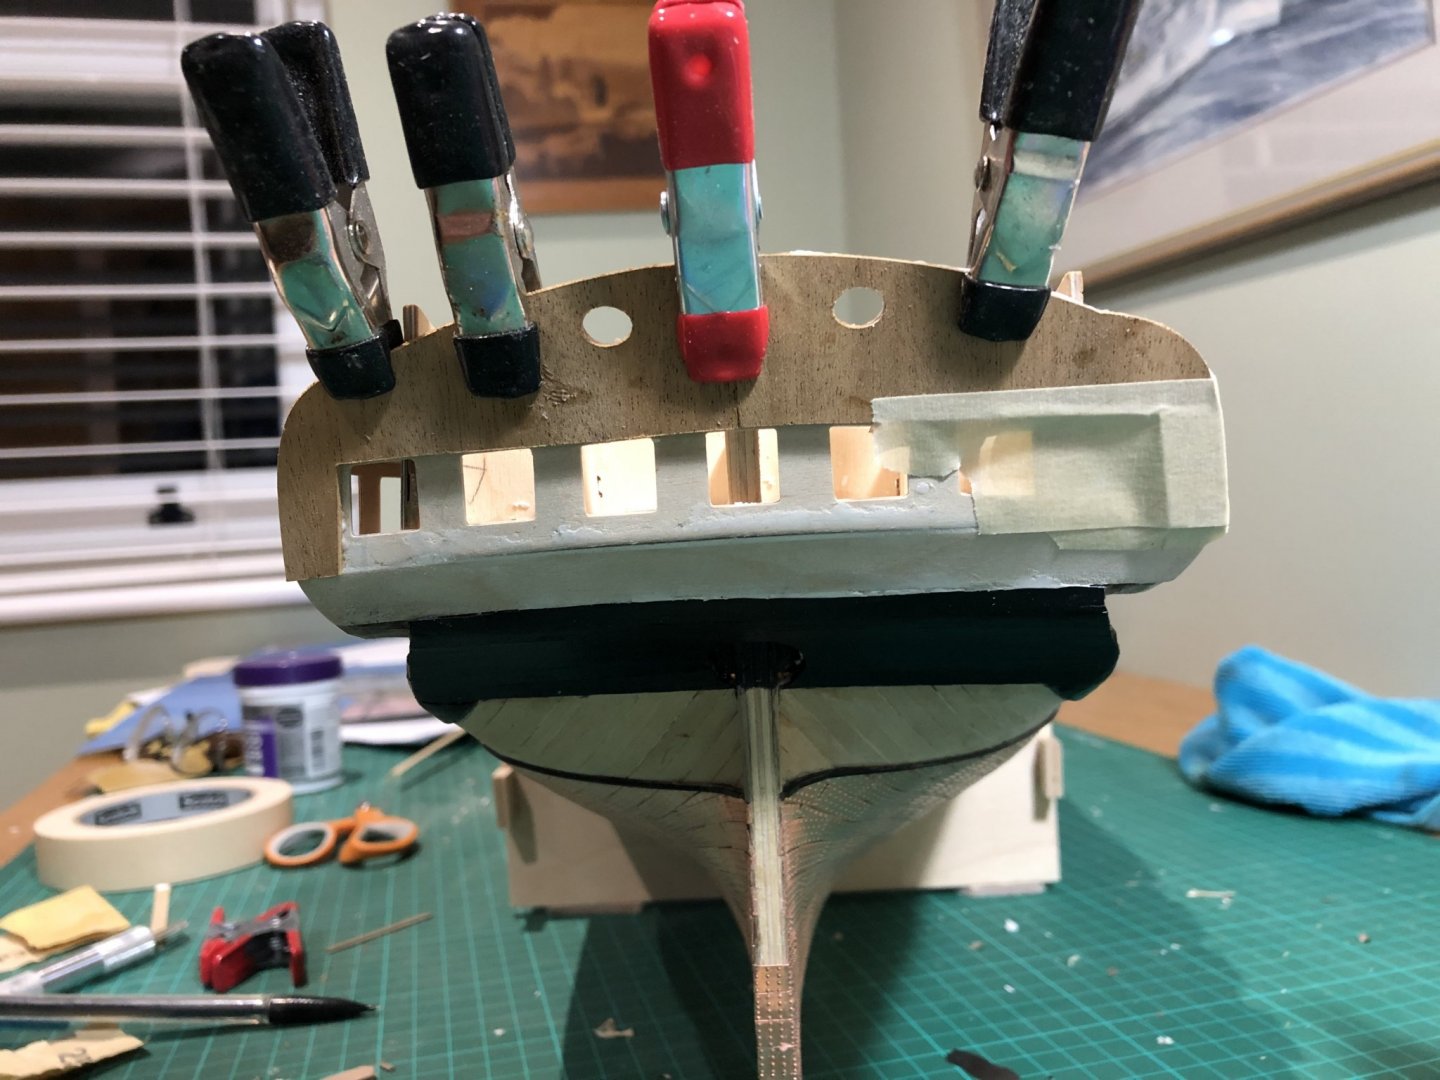
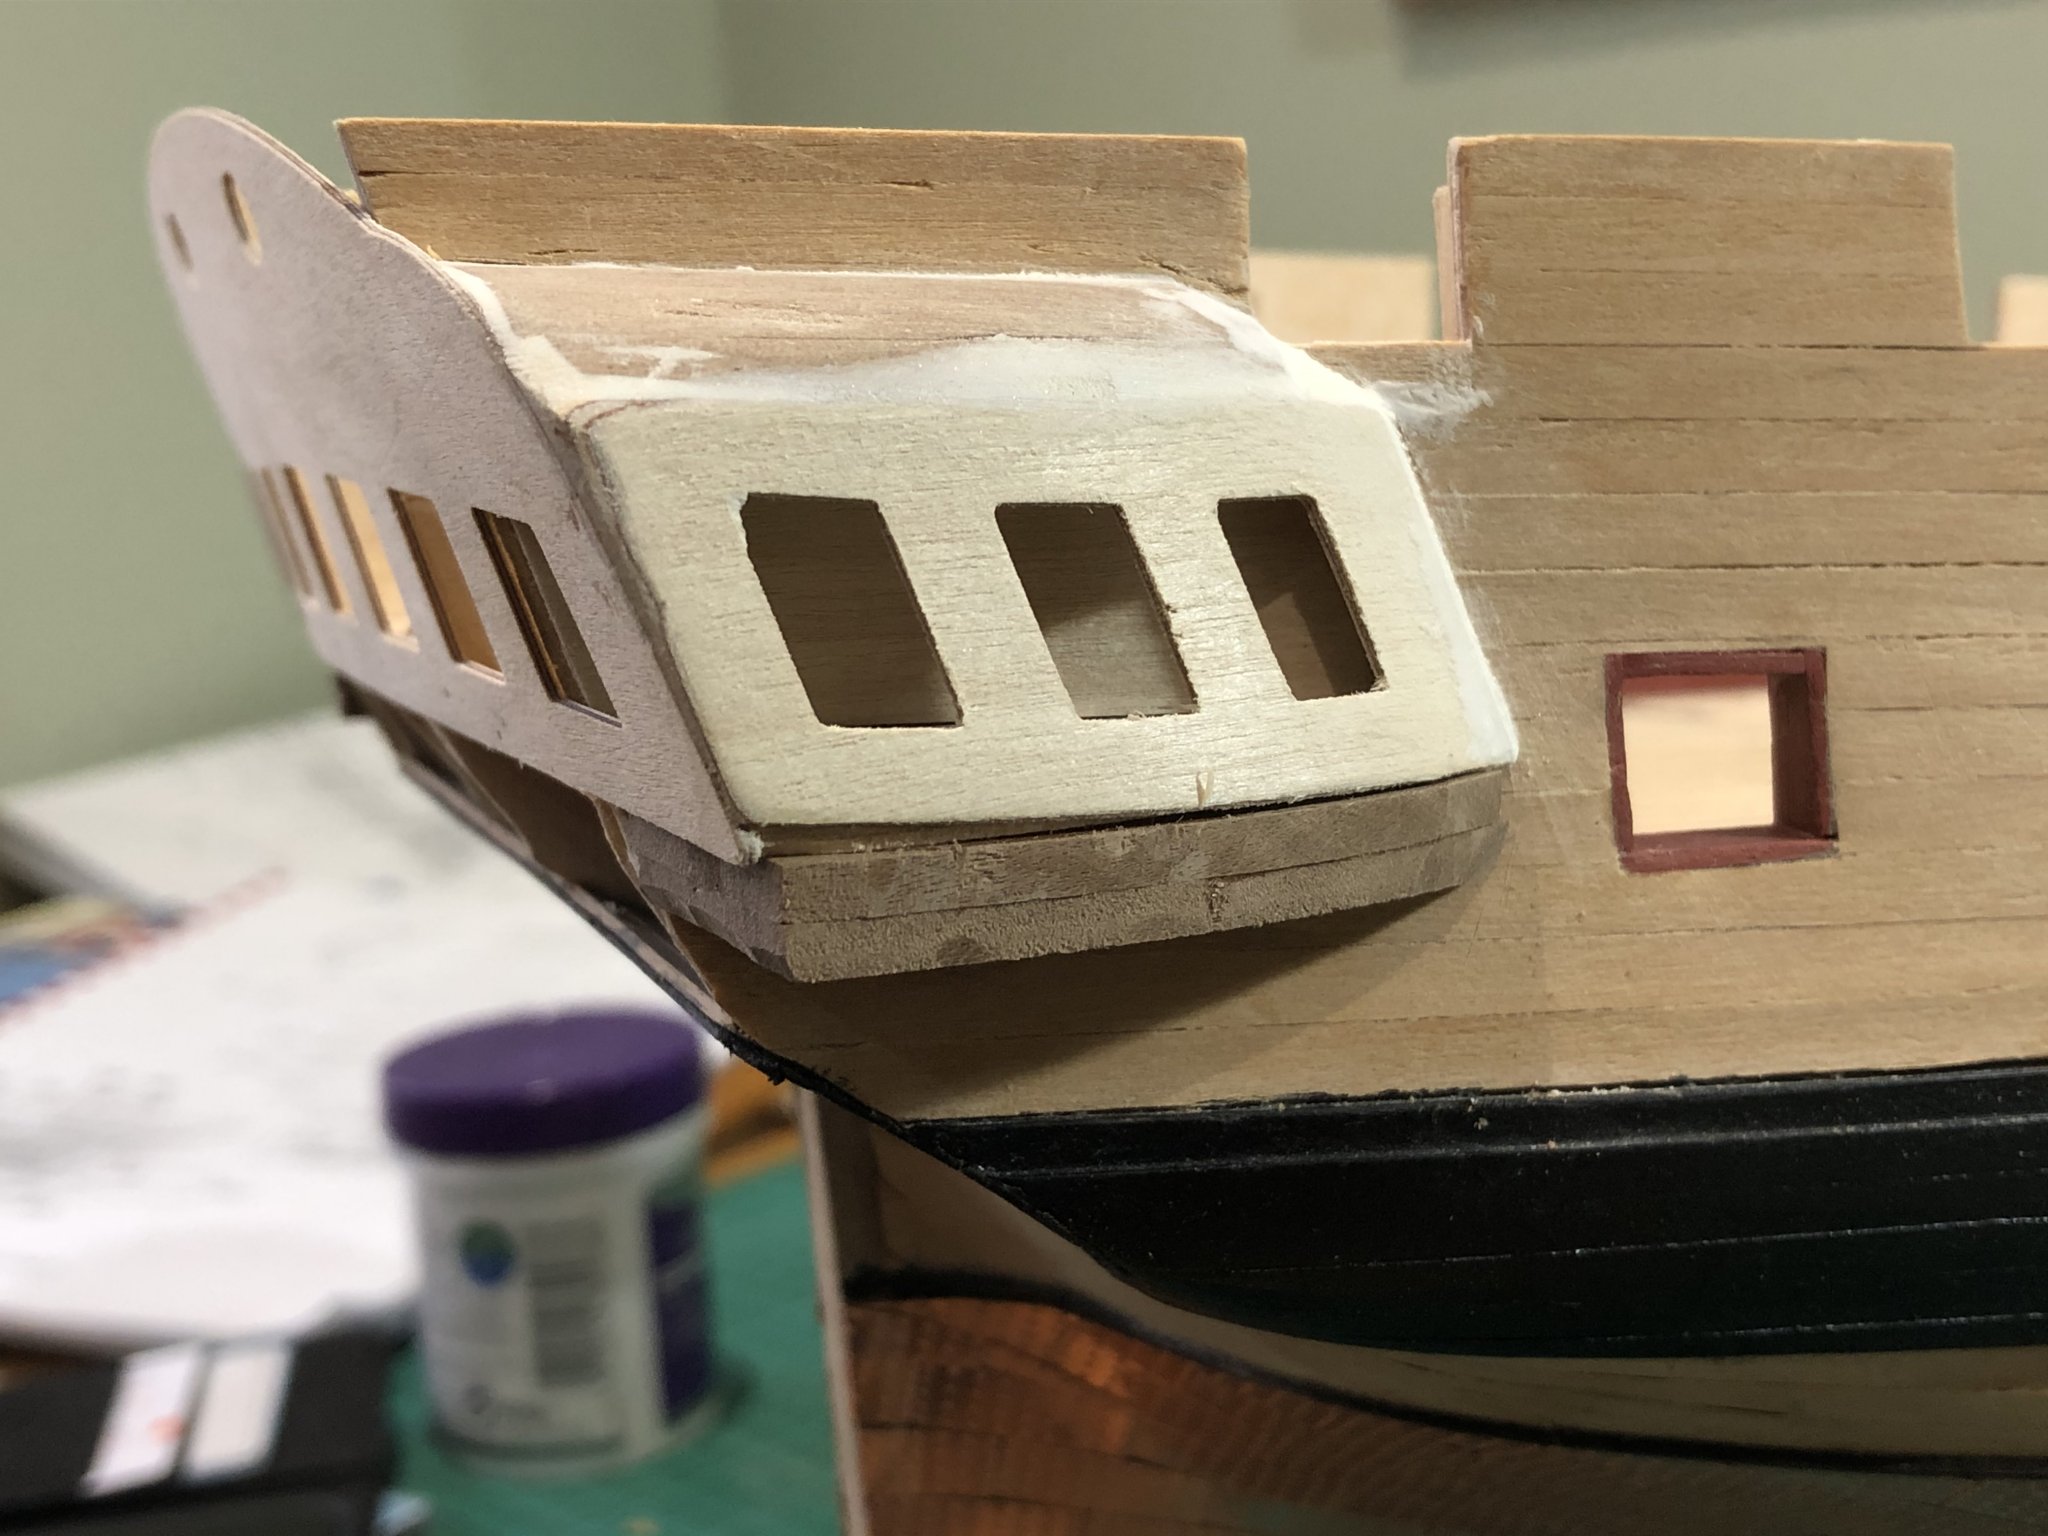
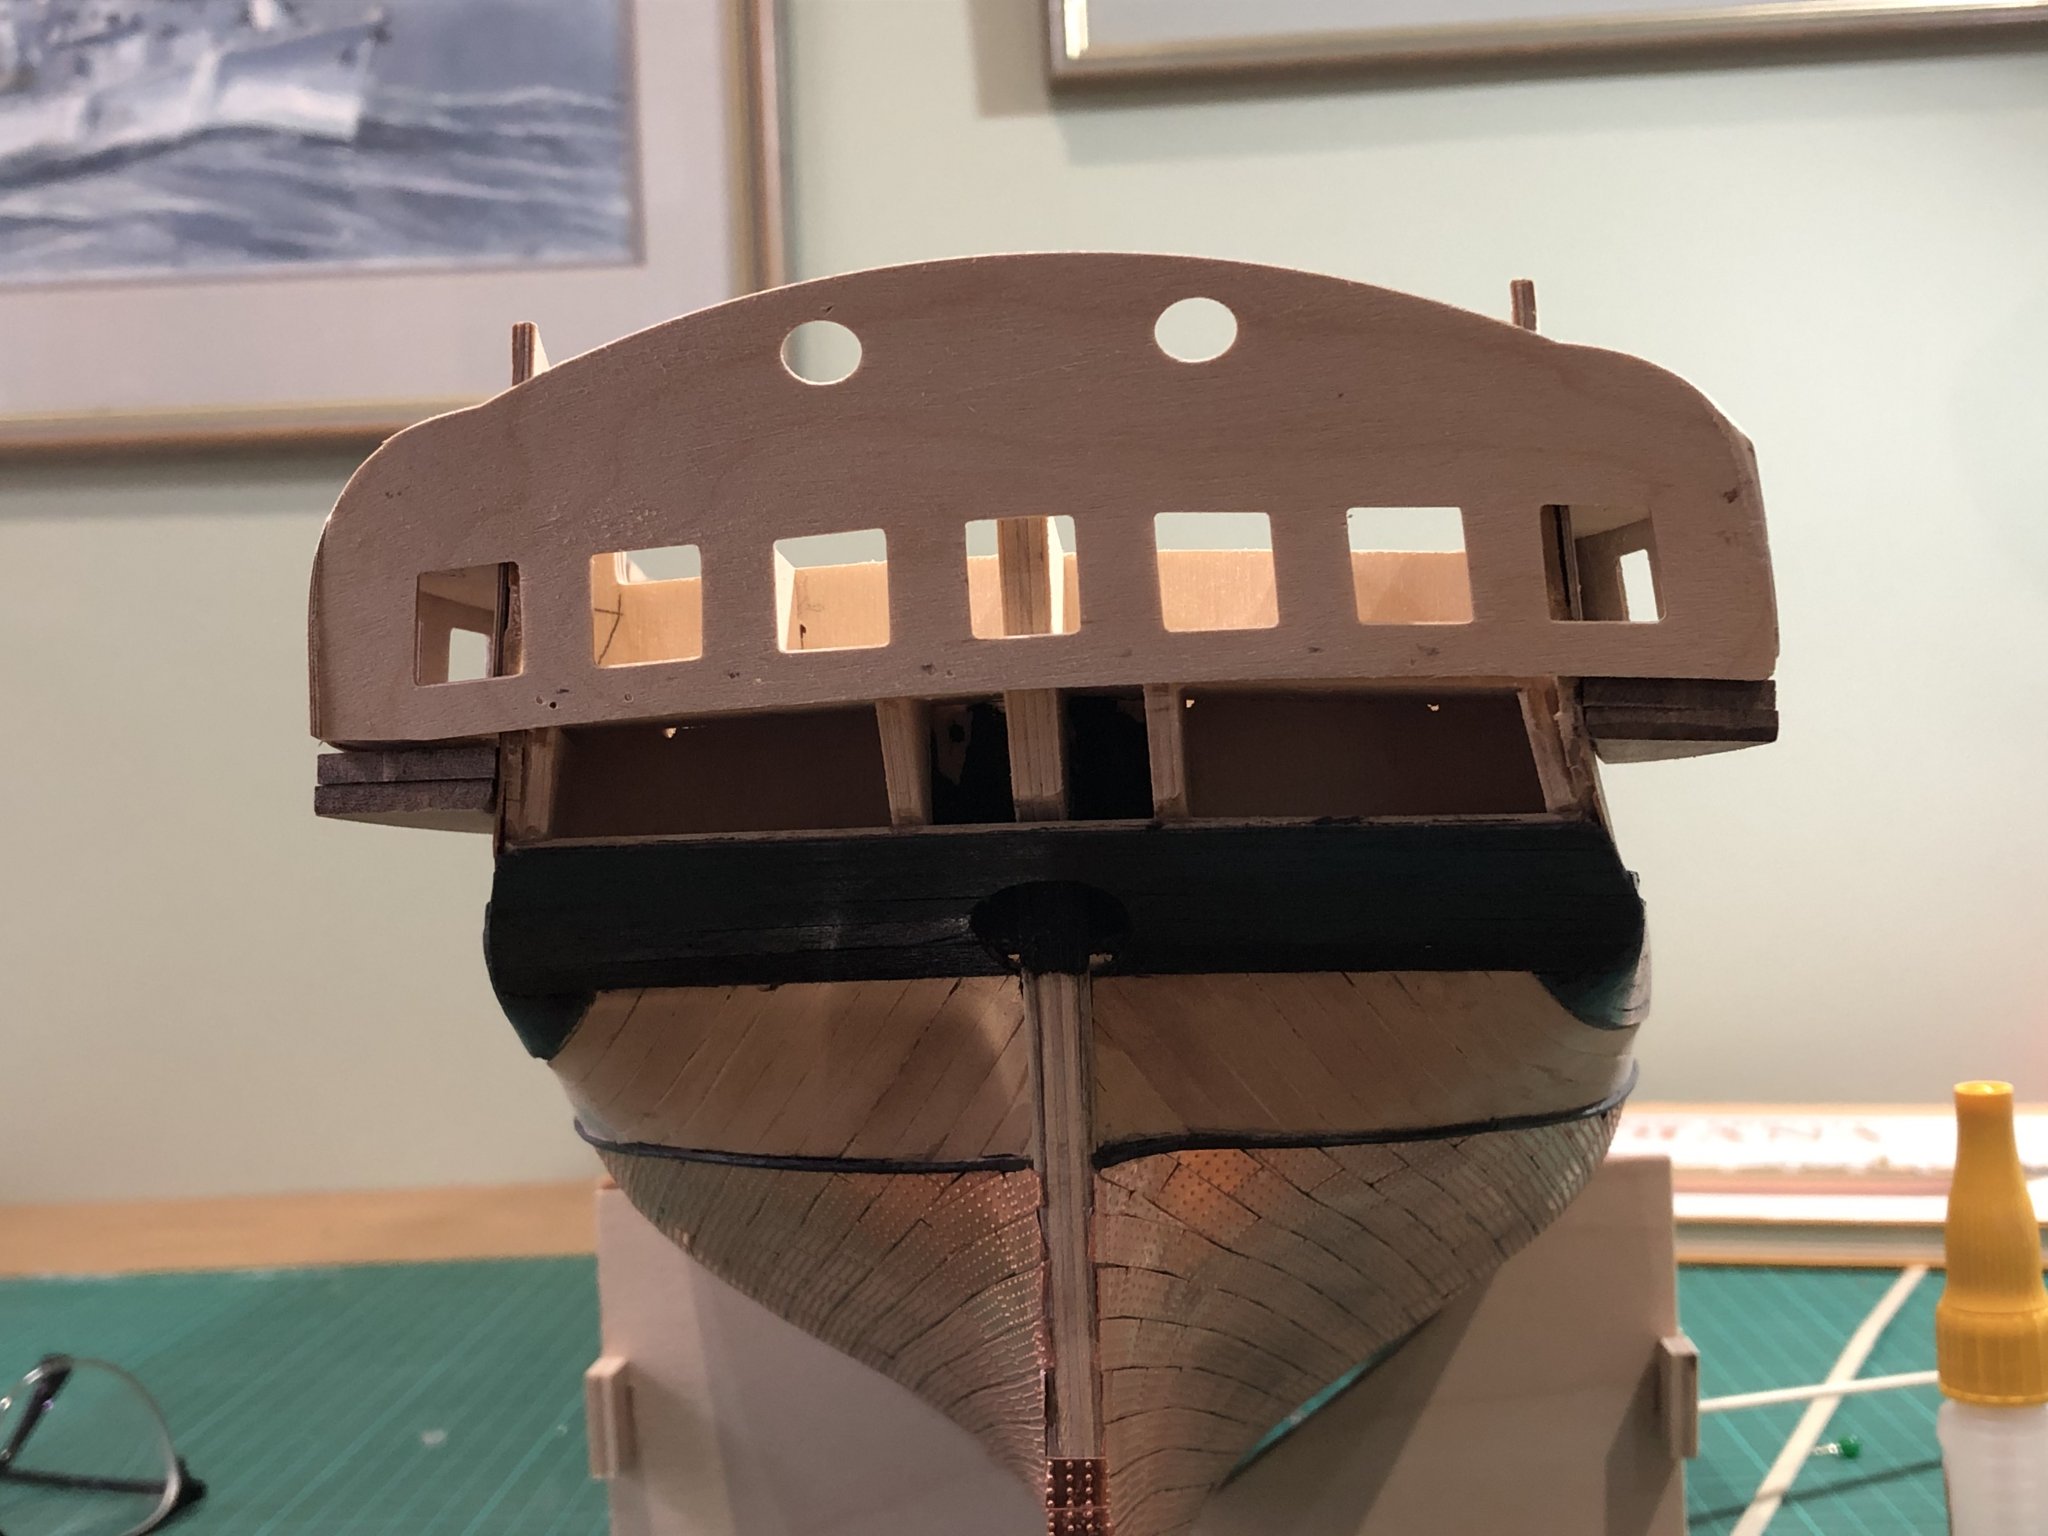
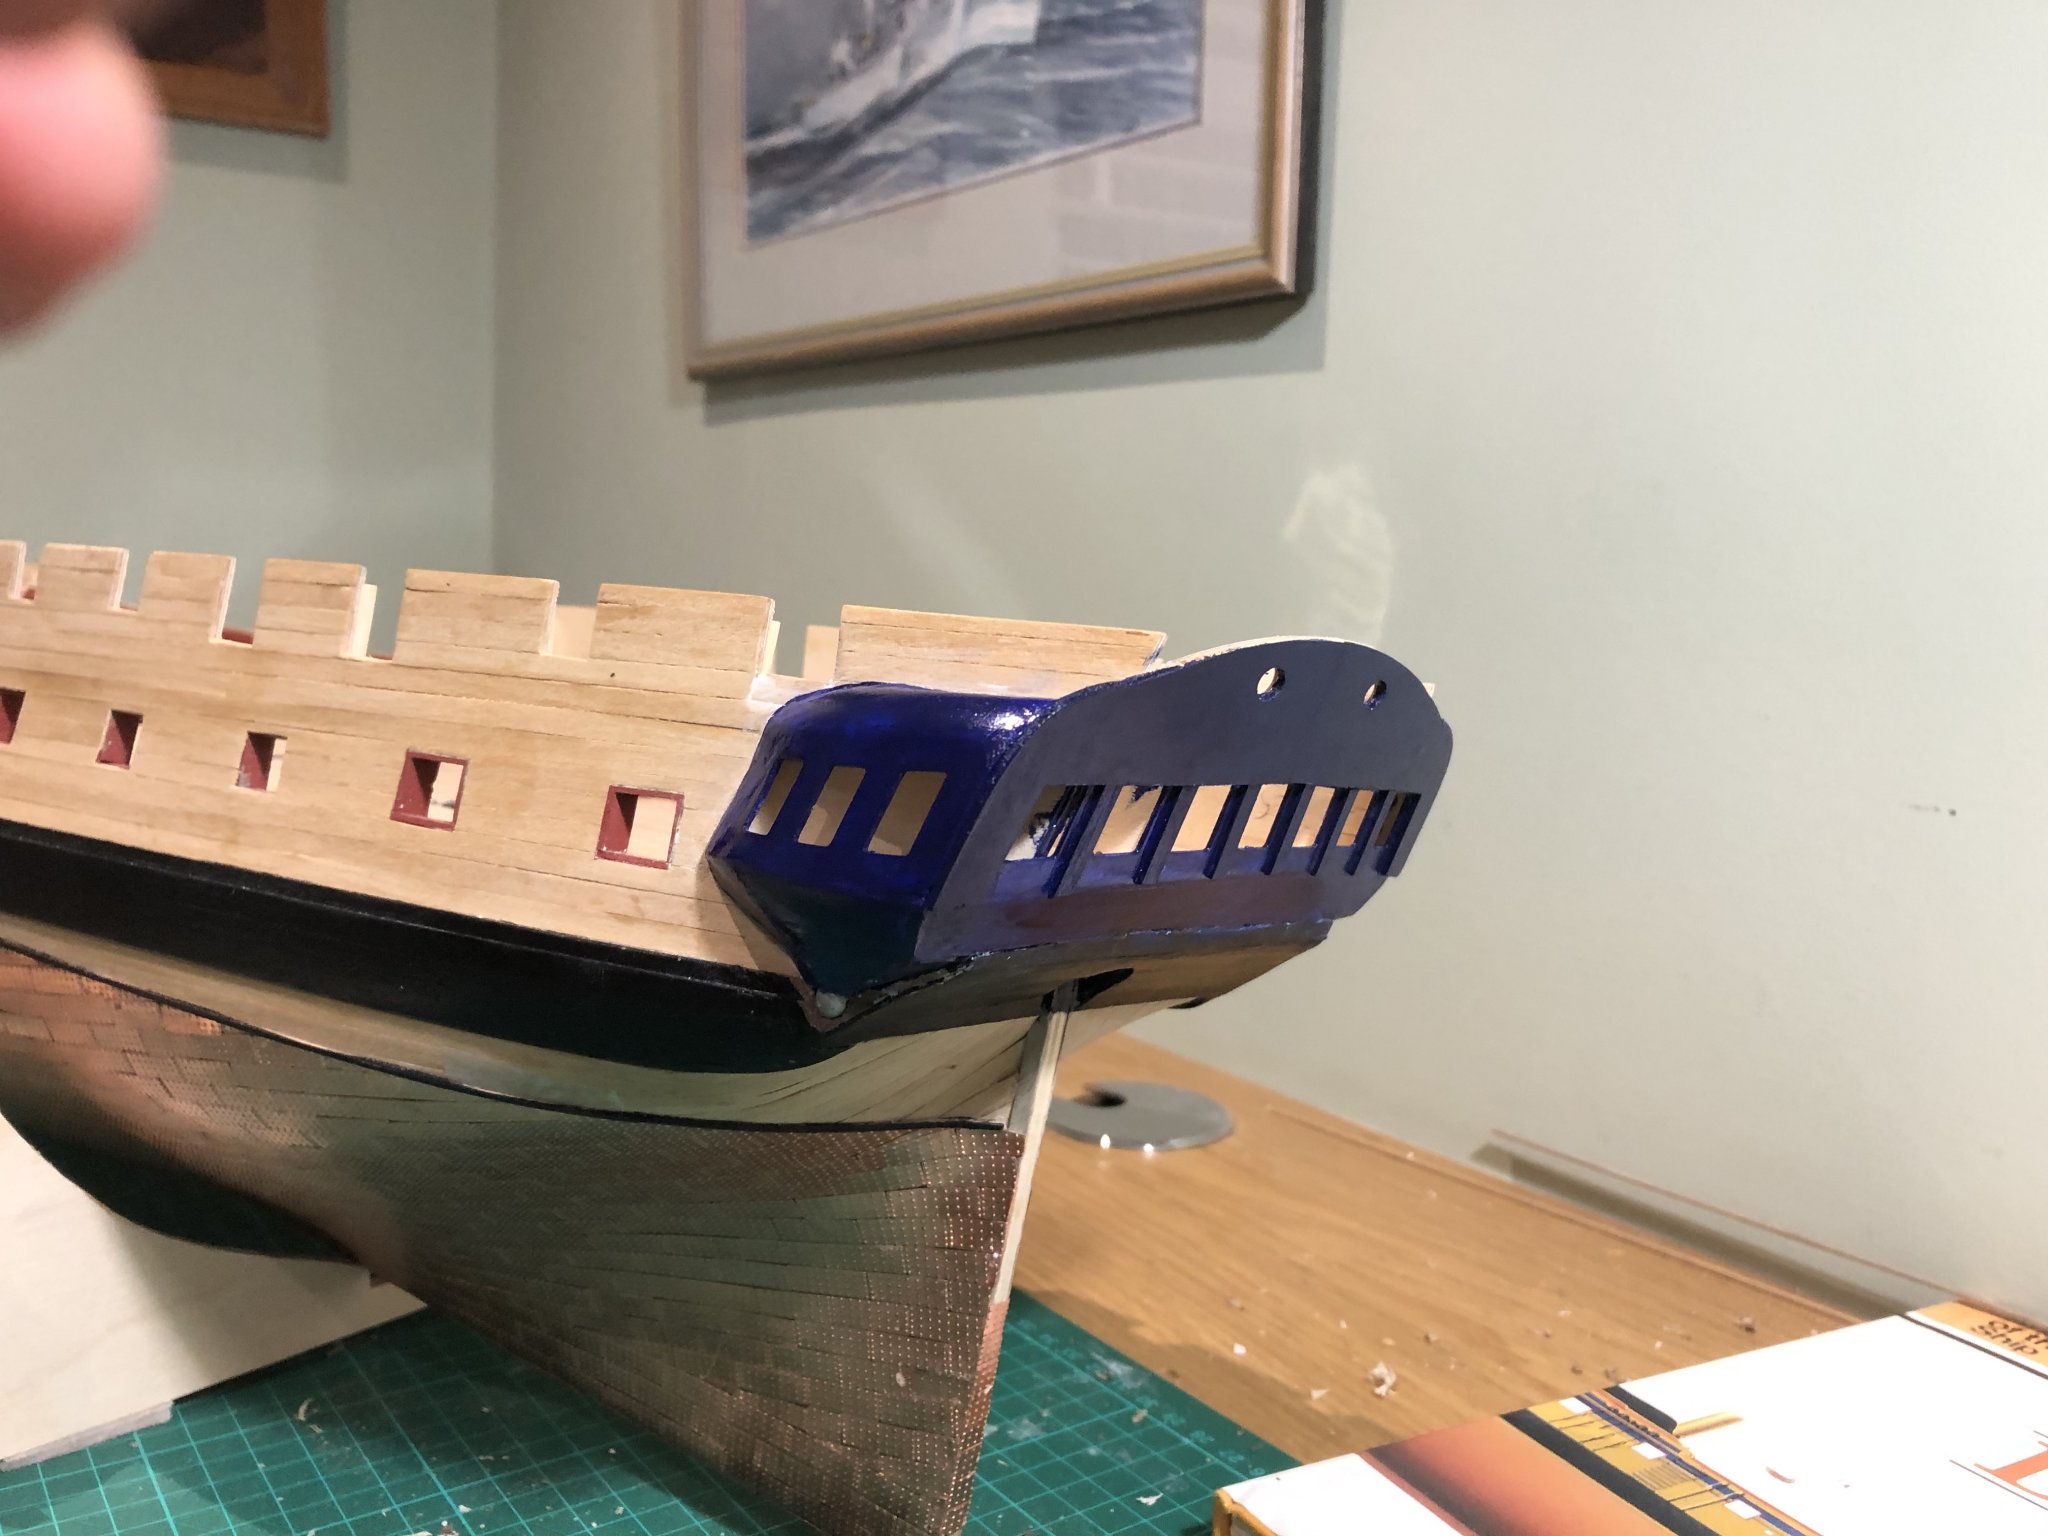
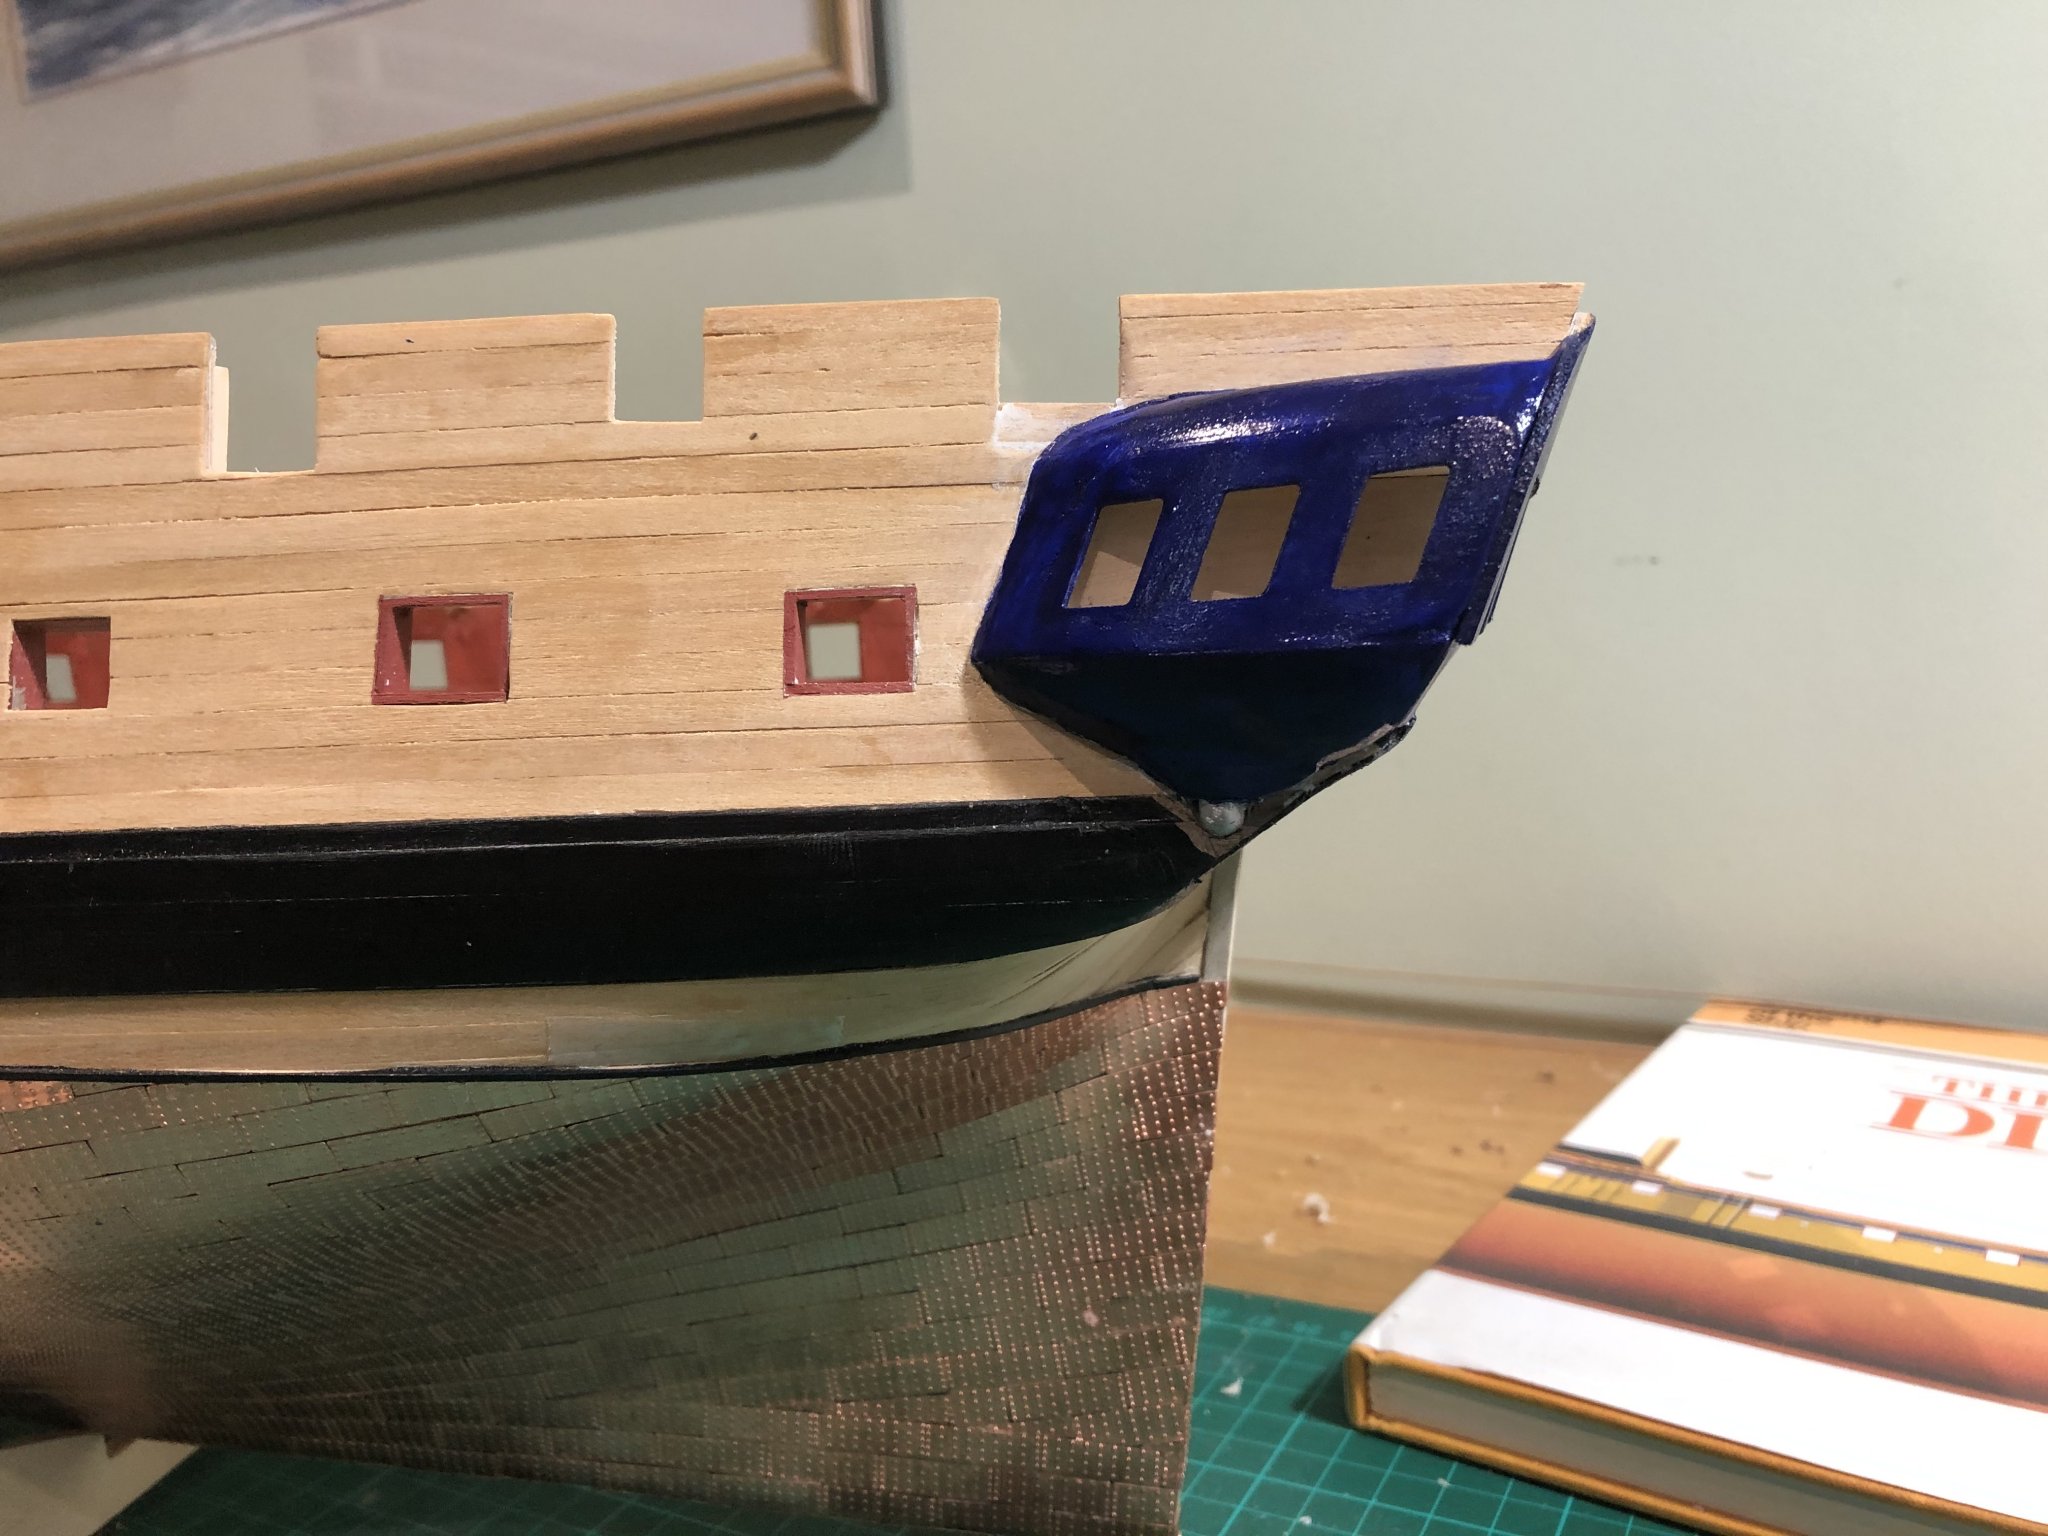
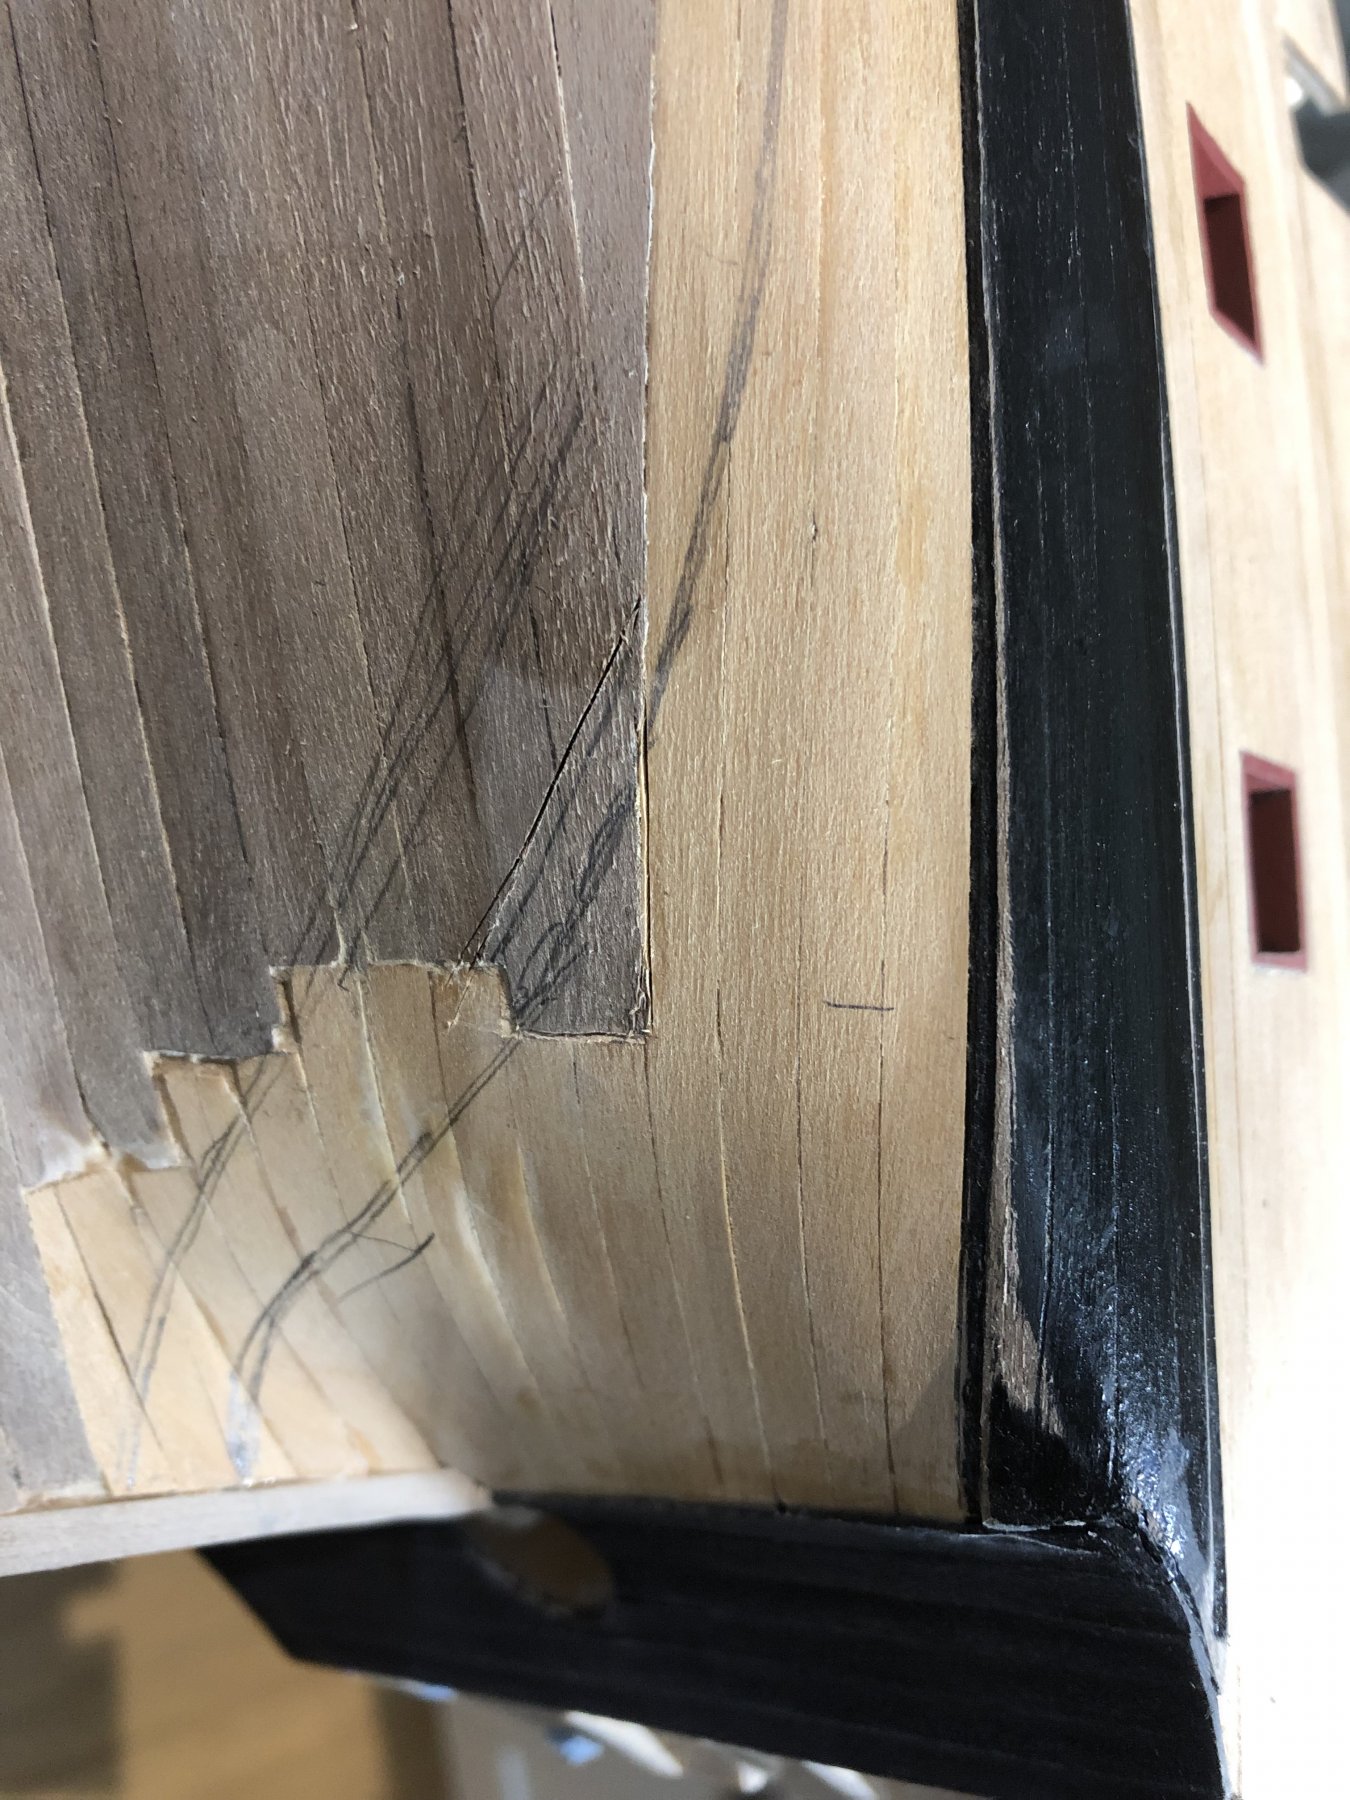
I have now turned my attention to the transom area - a little trepidation as many of you have commented extensively about ensuring the levels, balance and profile were correct. I followed the booklet instructions tot he letter (as best I could) and assembled slowly. the first issue was highlighted immediately - by securing the edge of the stern galley fascia along the edge of the upper stern counter, it was clear that the was a 'list' to port! A list that I couldn't correct as the frame was well and truly sealed and I didn't want to try filing or fudging the stern fascia. After reflection it was clear this would not be fatal, as I could correct the visual impact when I attached the wing transom by aligned the lower edge with the waterline and infilling the gap between the wing transom and the stern counter with black boxwood; when I did this I was able to remove the visual effect of the skew.
The side galleries were carefully carved into shape but again the misalignment re-emerged when upper counters were shaped and glued: whittling with a sharp knife and sanding the get the required curves - result: lots of nicks in my finger, luckily no blood on the boxwood! - they overlapped the aft gunports by about 3mm. They appeared too high despite all the sides being as per the assembly instructions. Not wishing to have alarge piece of stern woodwork in the port, I have raised the lower part of the two gunpots by inserting 3mm piece of boxwood which re-injects the balance and, to the casual observer, will not be noticed when the model goes on display. The upper parts of the bulwarks will be painted so the repair will not be visible when complete. The 'drops' didn't fit snuggly over the main wale forcing the piece to sit at an odd angle, so I carved a small slot for the drop to sit within which will be touched up with black idc.
Before I attached the various fittings - windows etc, I painted the stern blue, again as per the instructions and with the supplied Admiralty Blue paint. It is woefully shiny, almost gloss, which is no good - any thoughts as to which paint is a good substitute? Once that is resolved I can add the various fittings, the windows in the phot were just placed in for sizing to ensure sufficient room is left when the walnut strips were applied.
Its not a patch on Rob's excellent work but is okay for my first attempt. Much learning taken away, including the need to do that fascia alignment early in the process!
Rudder next.
peter


-
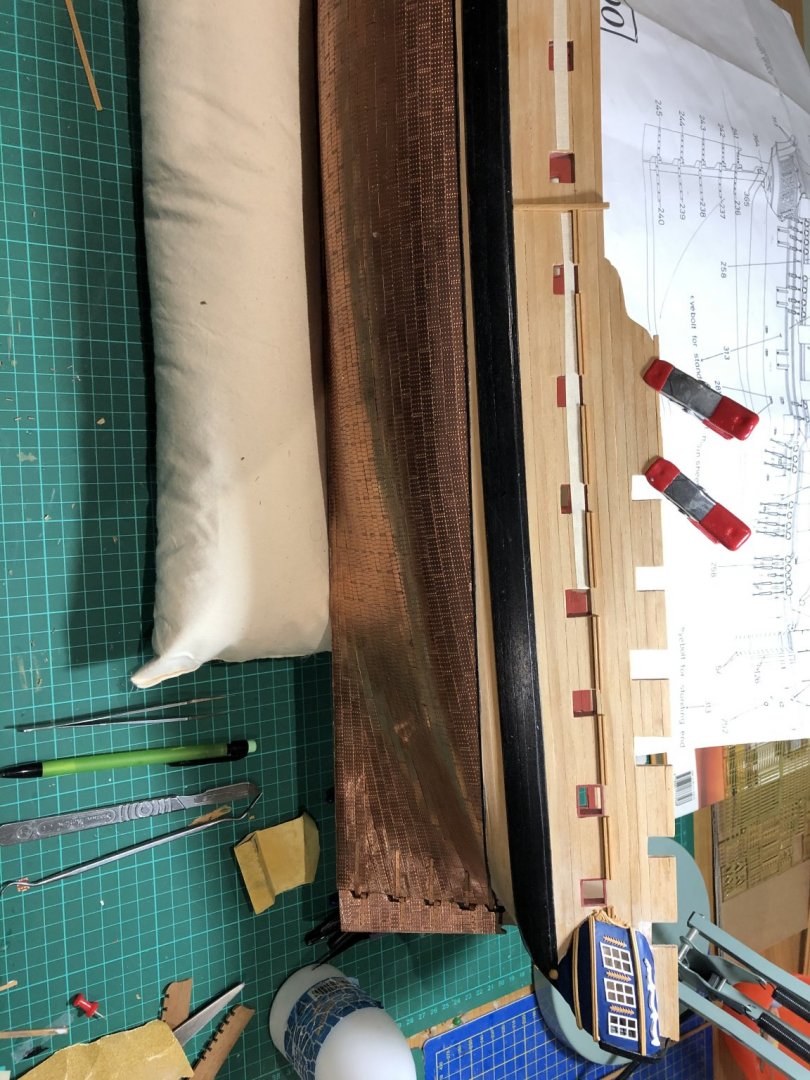
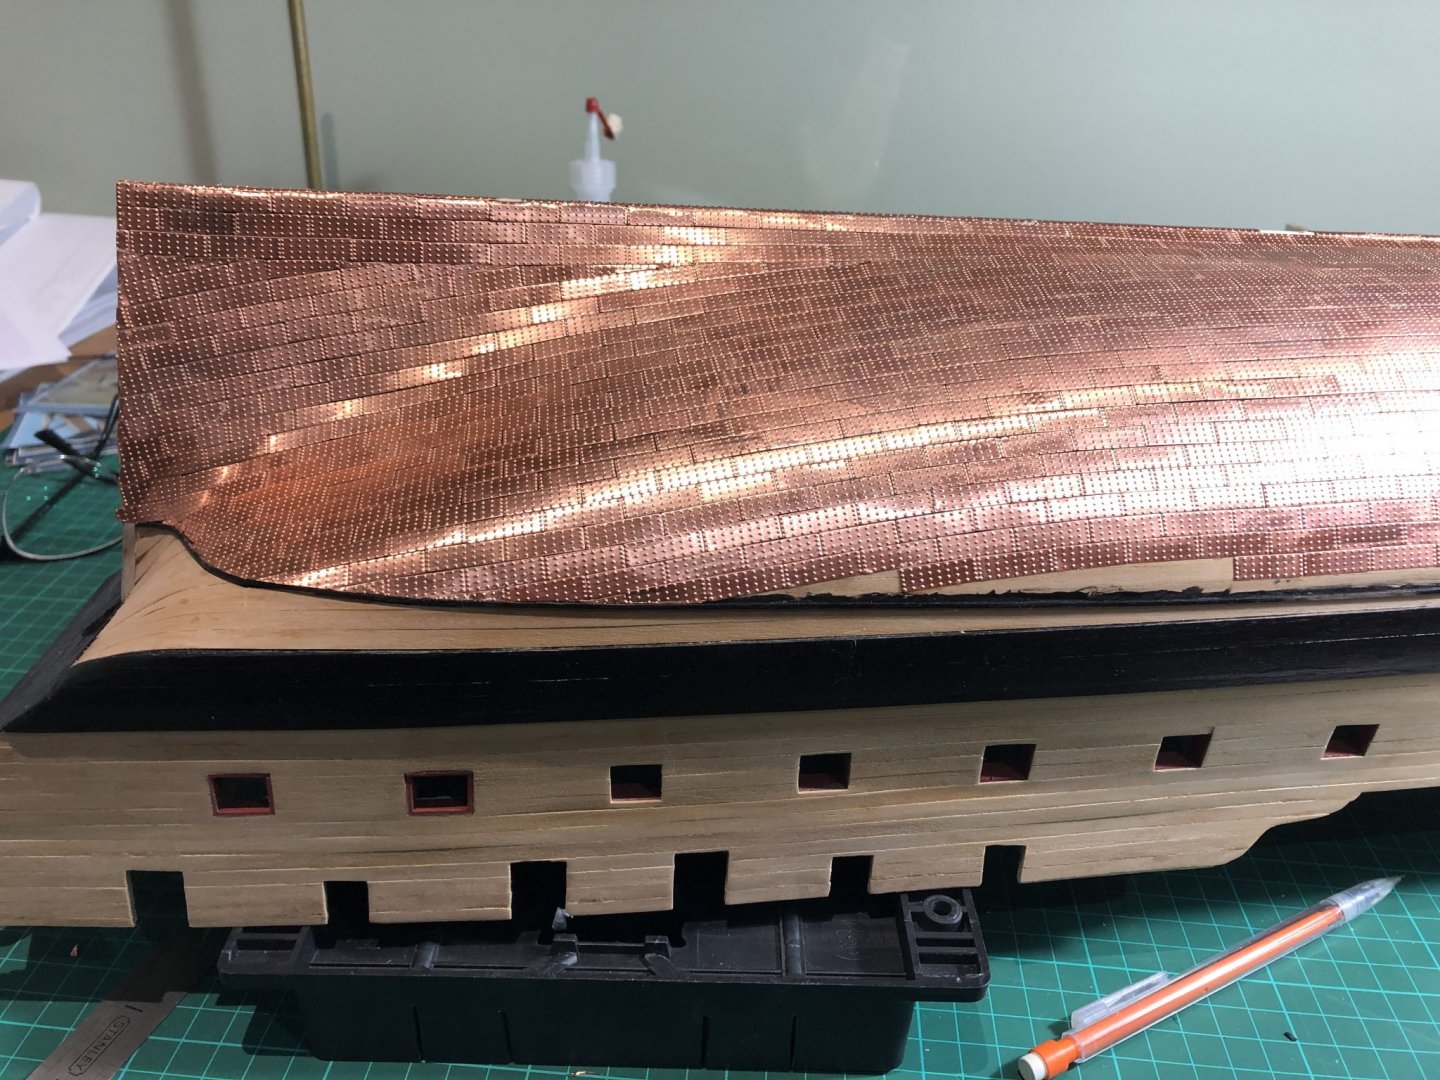
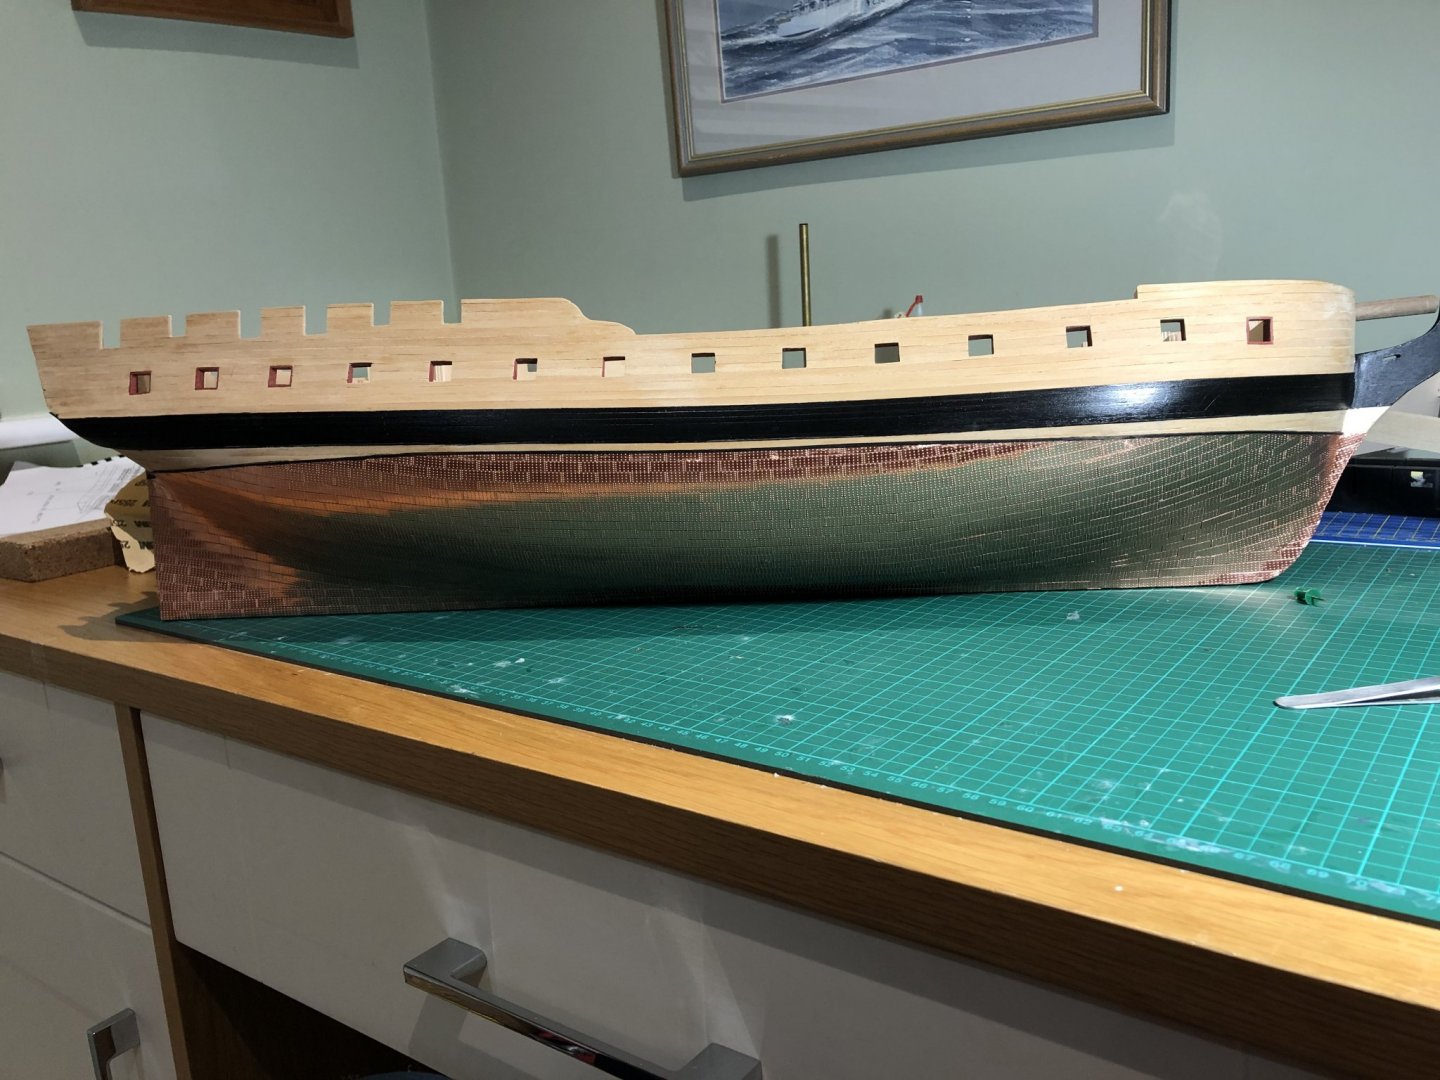
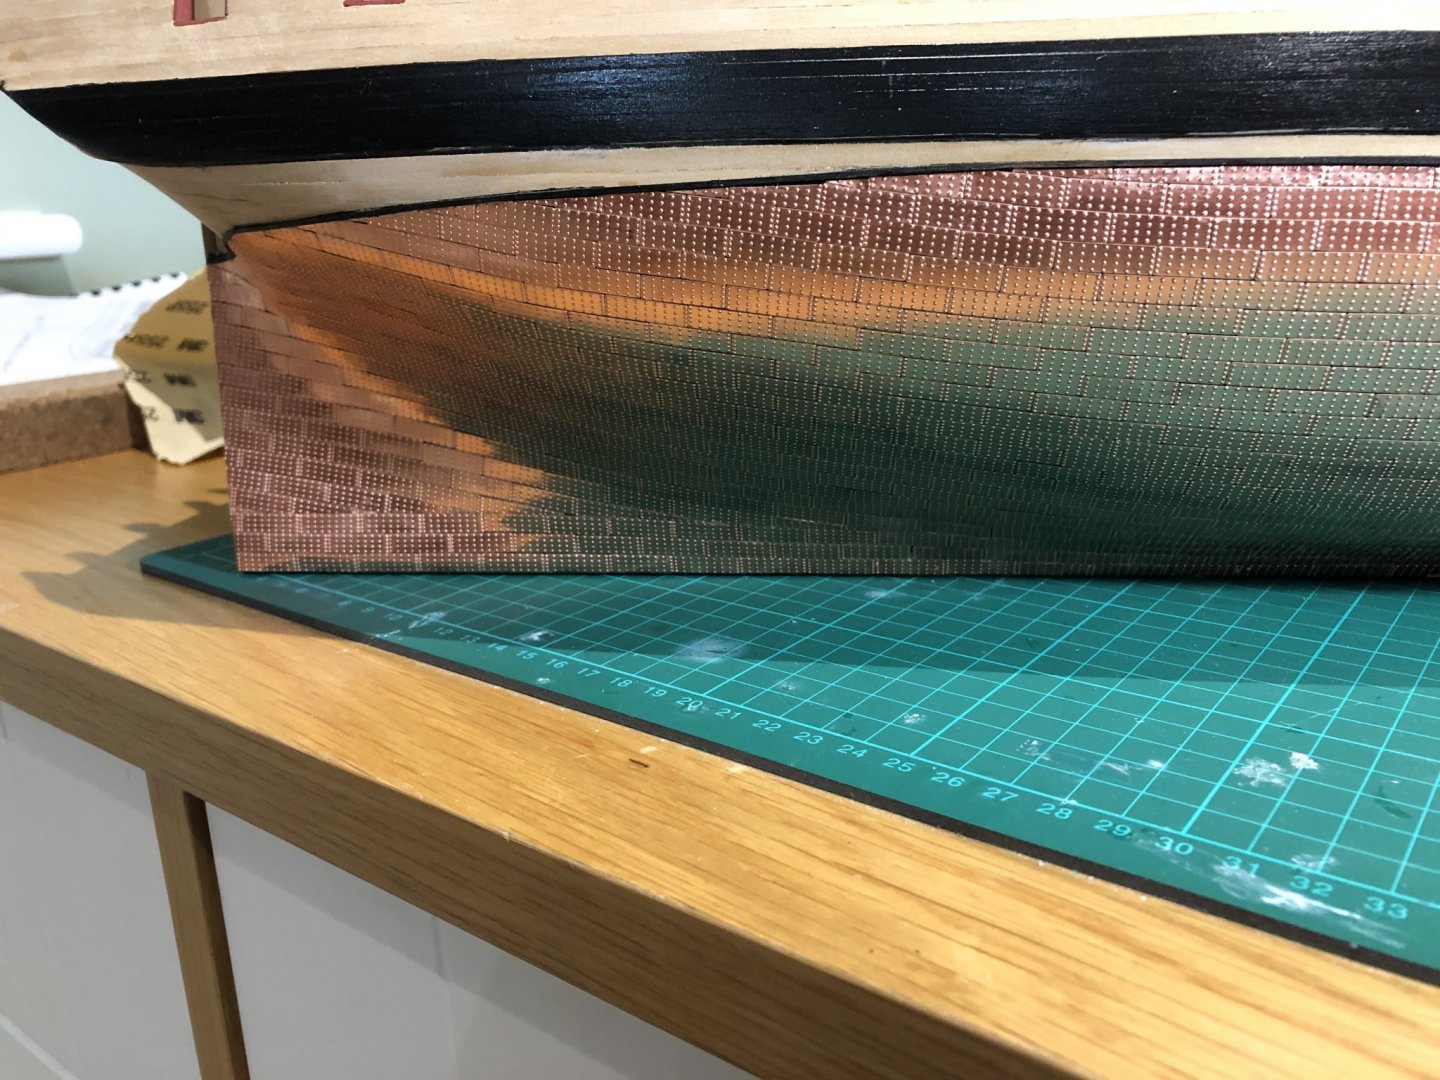
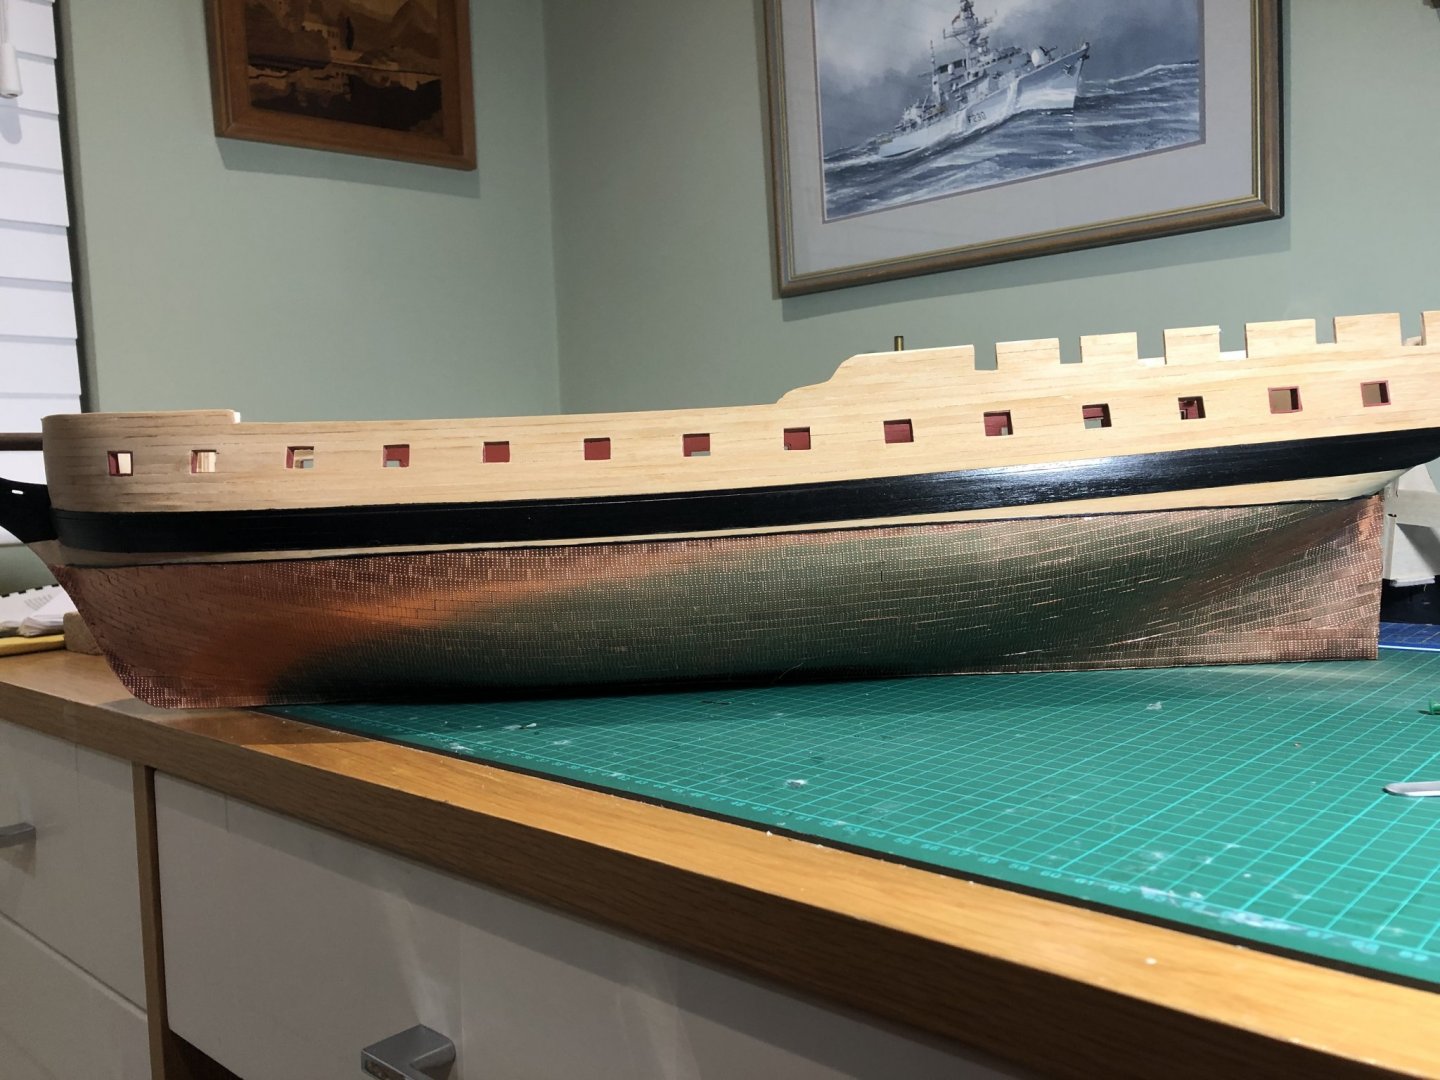
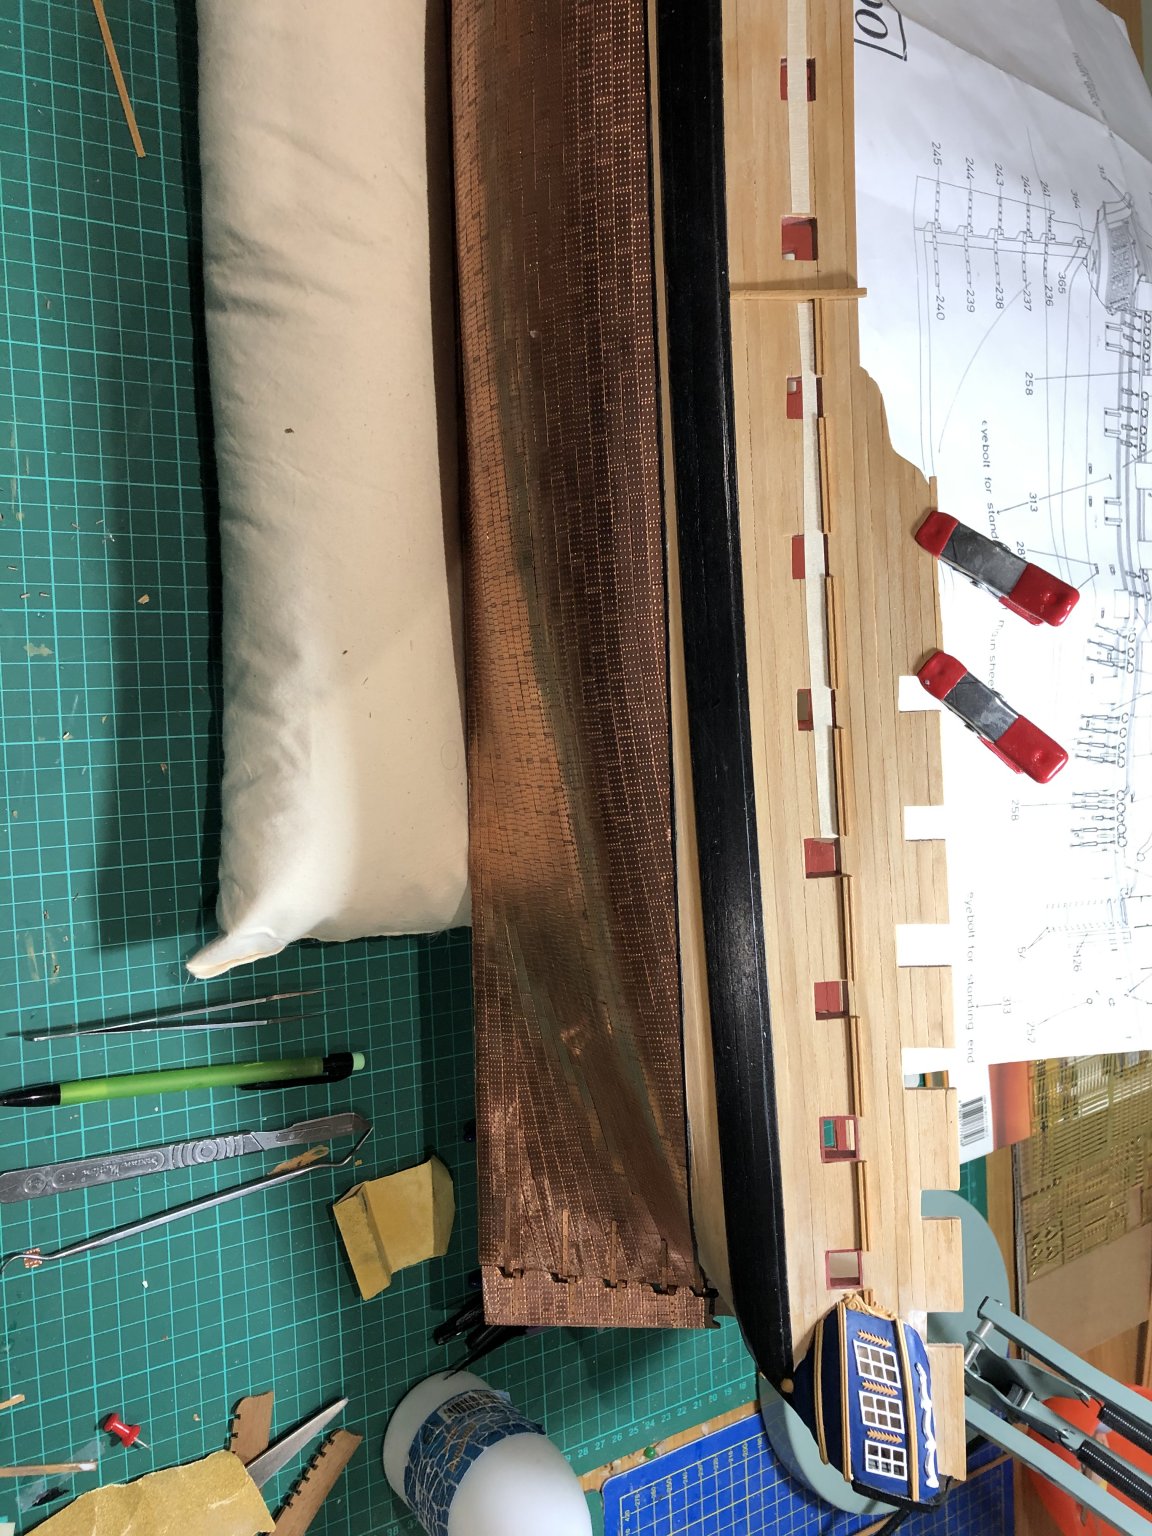
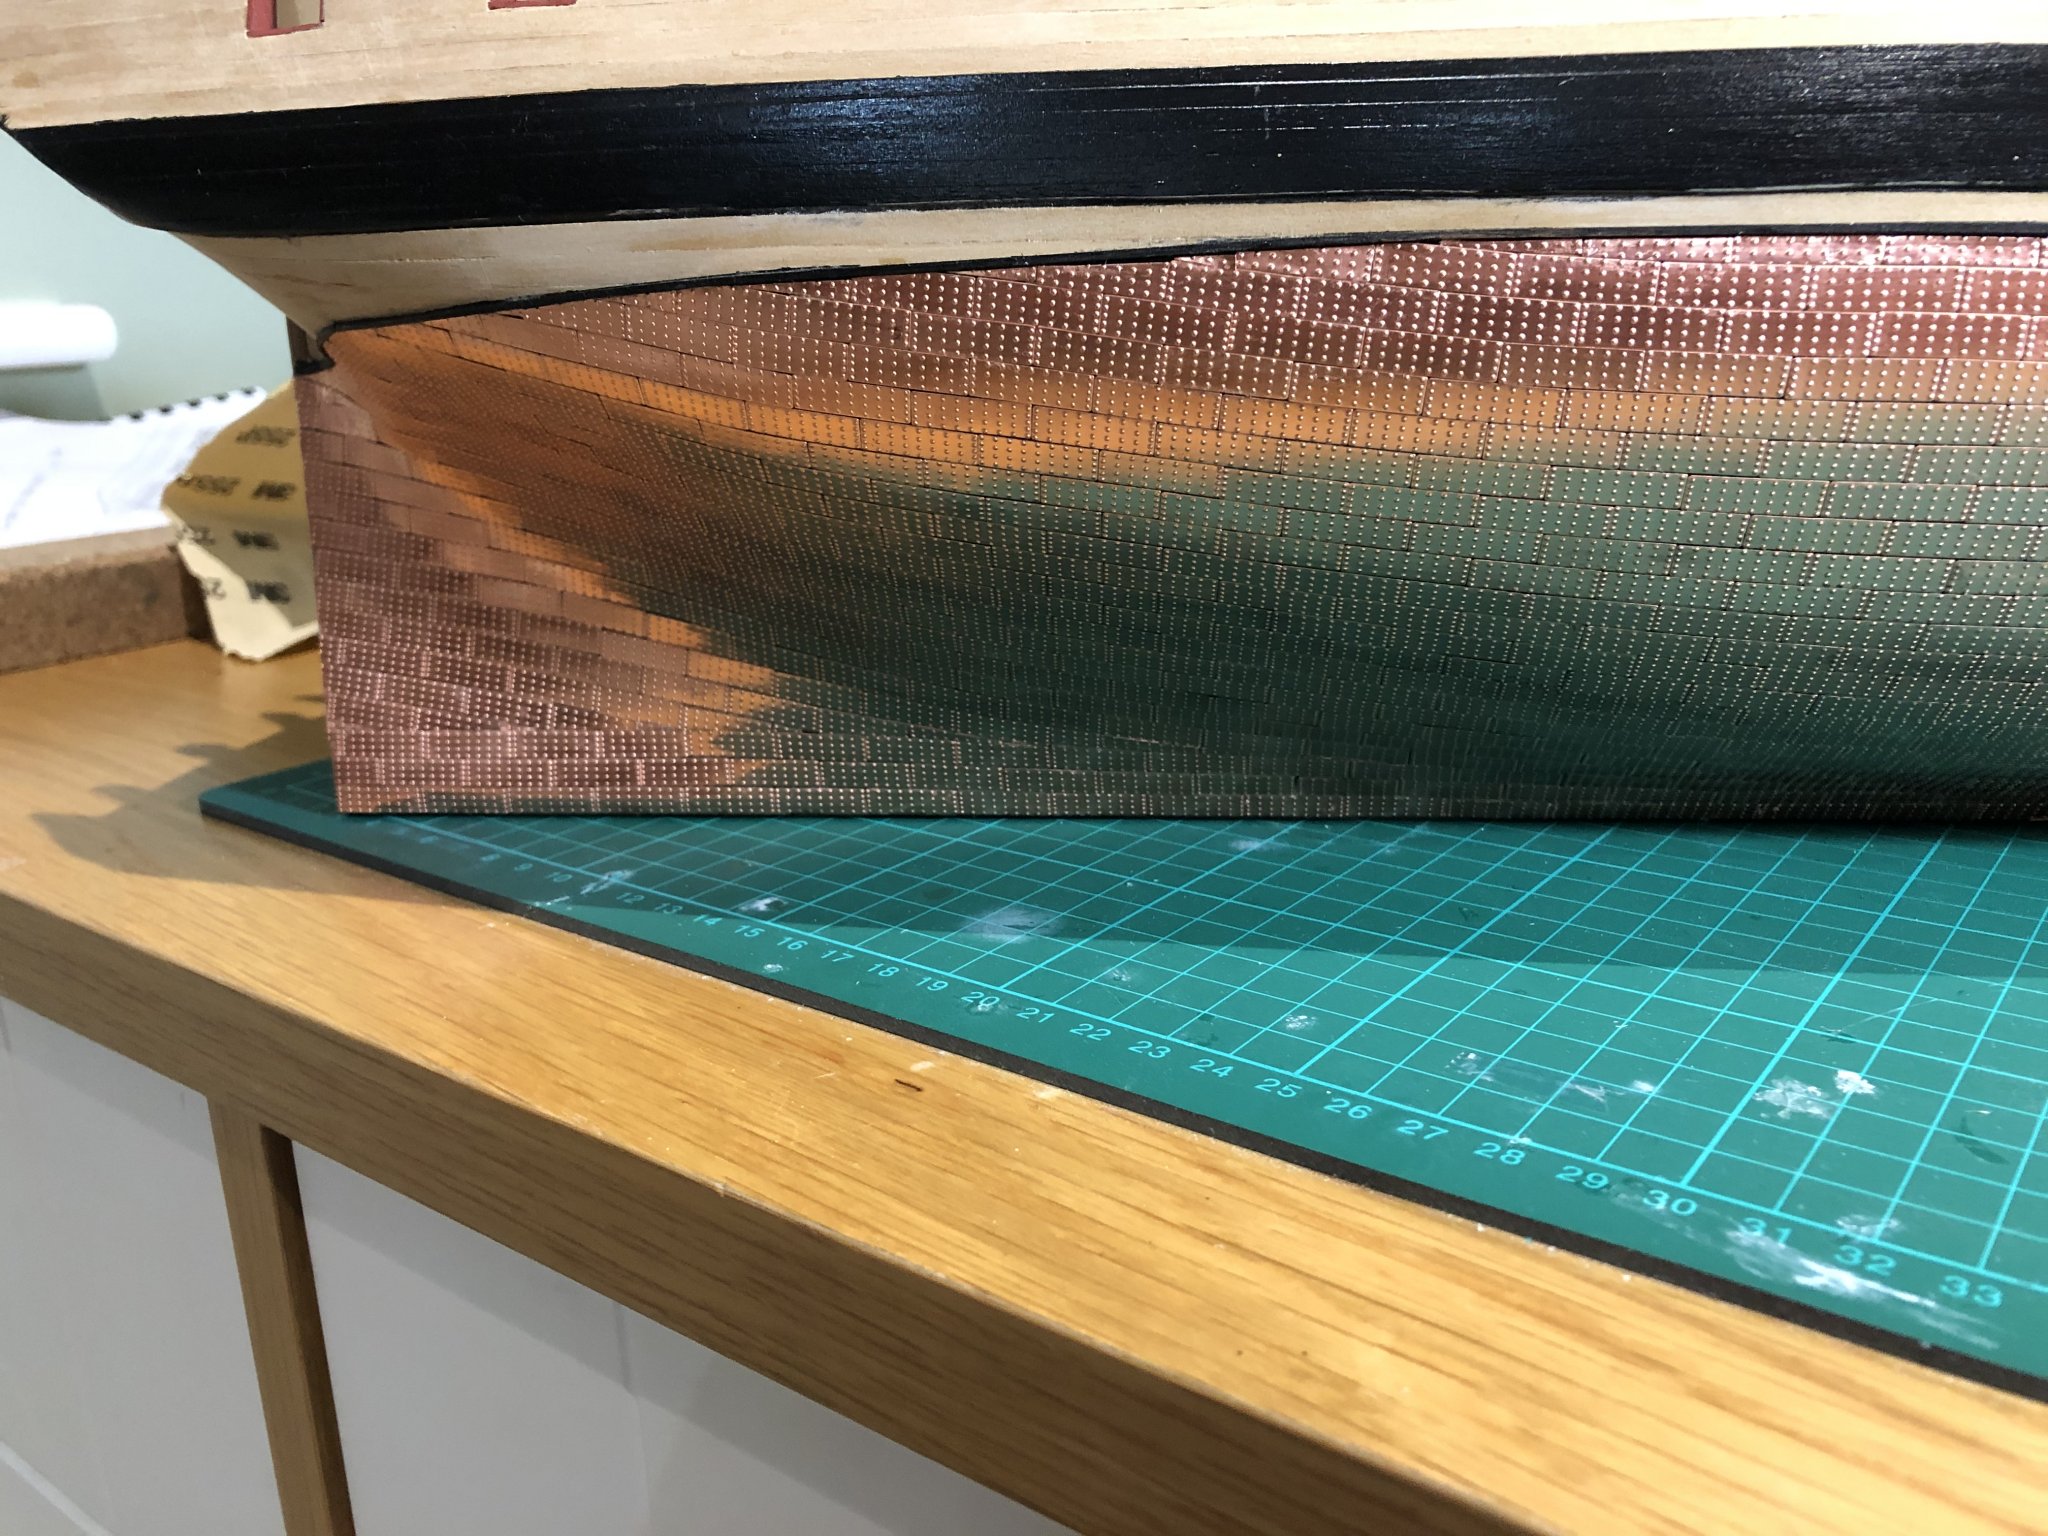
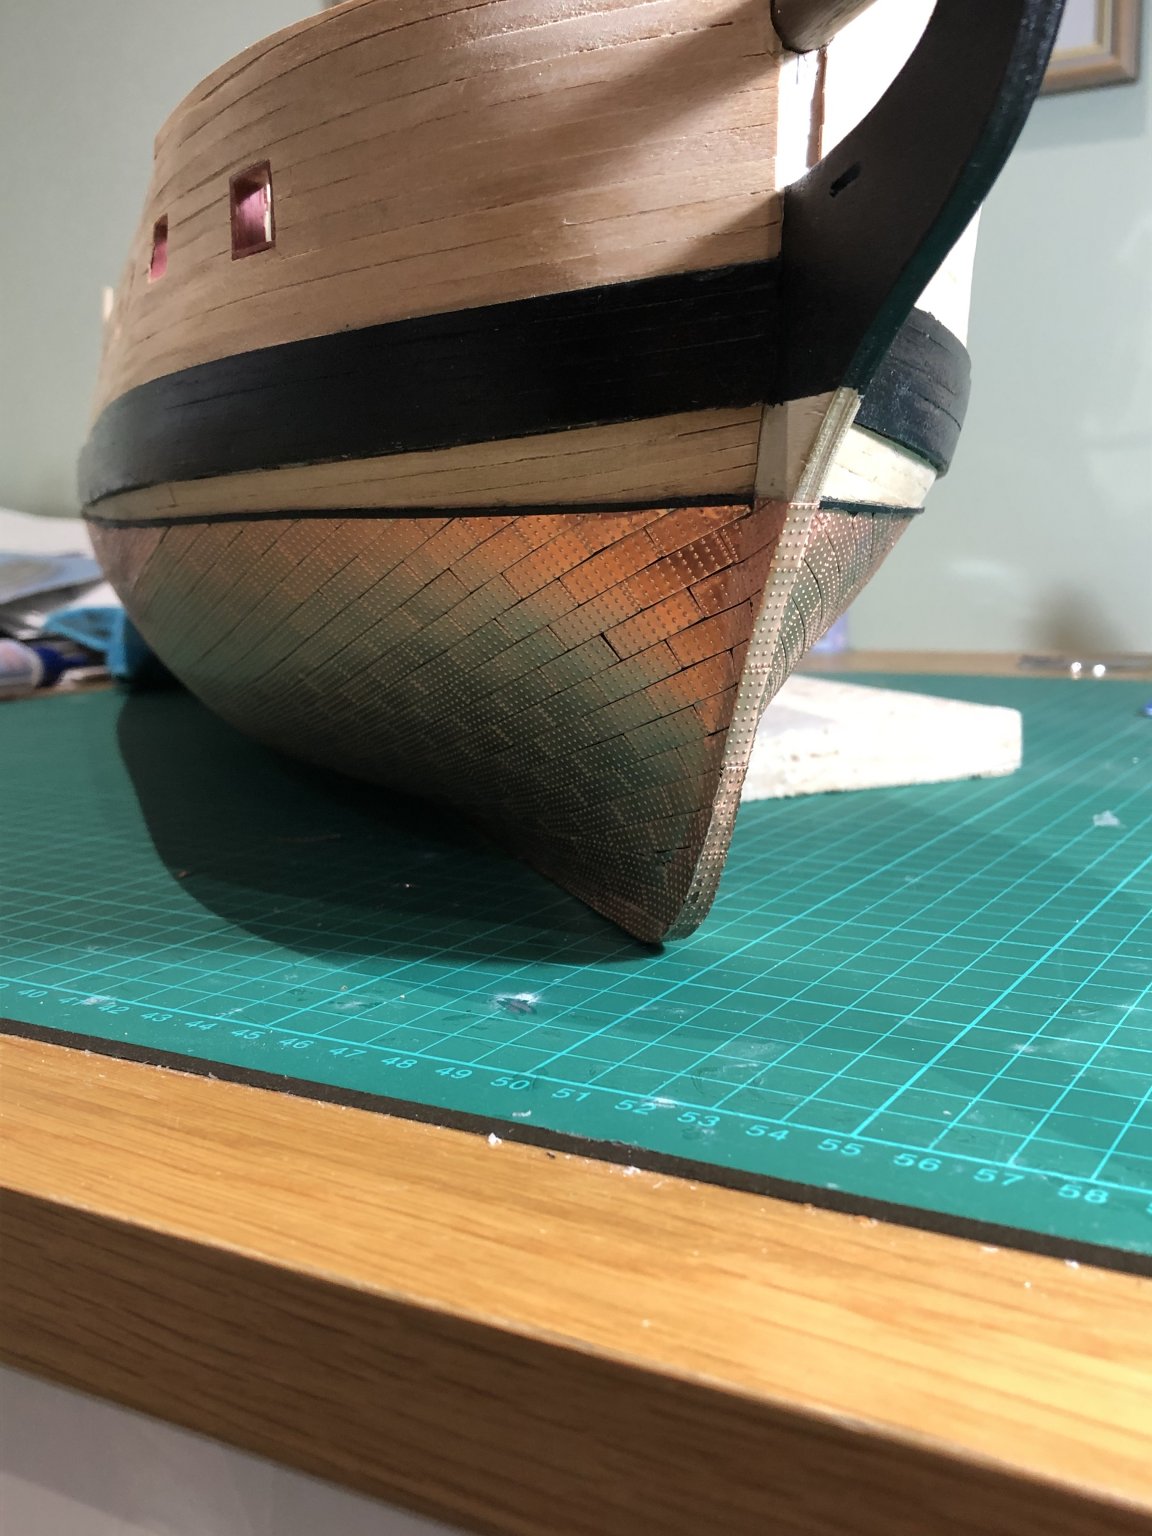
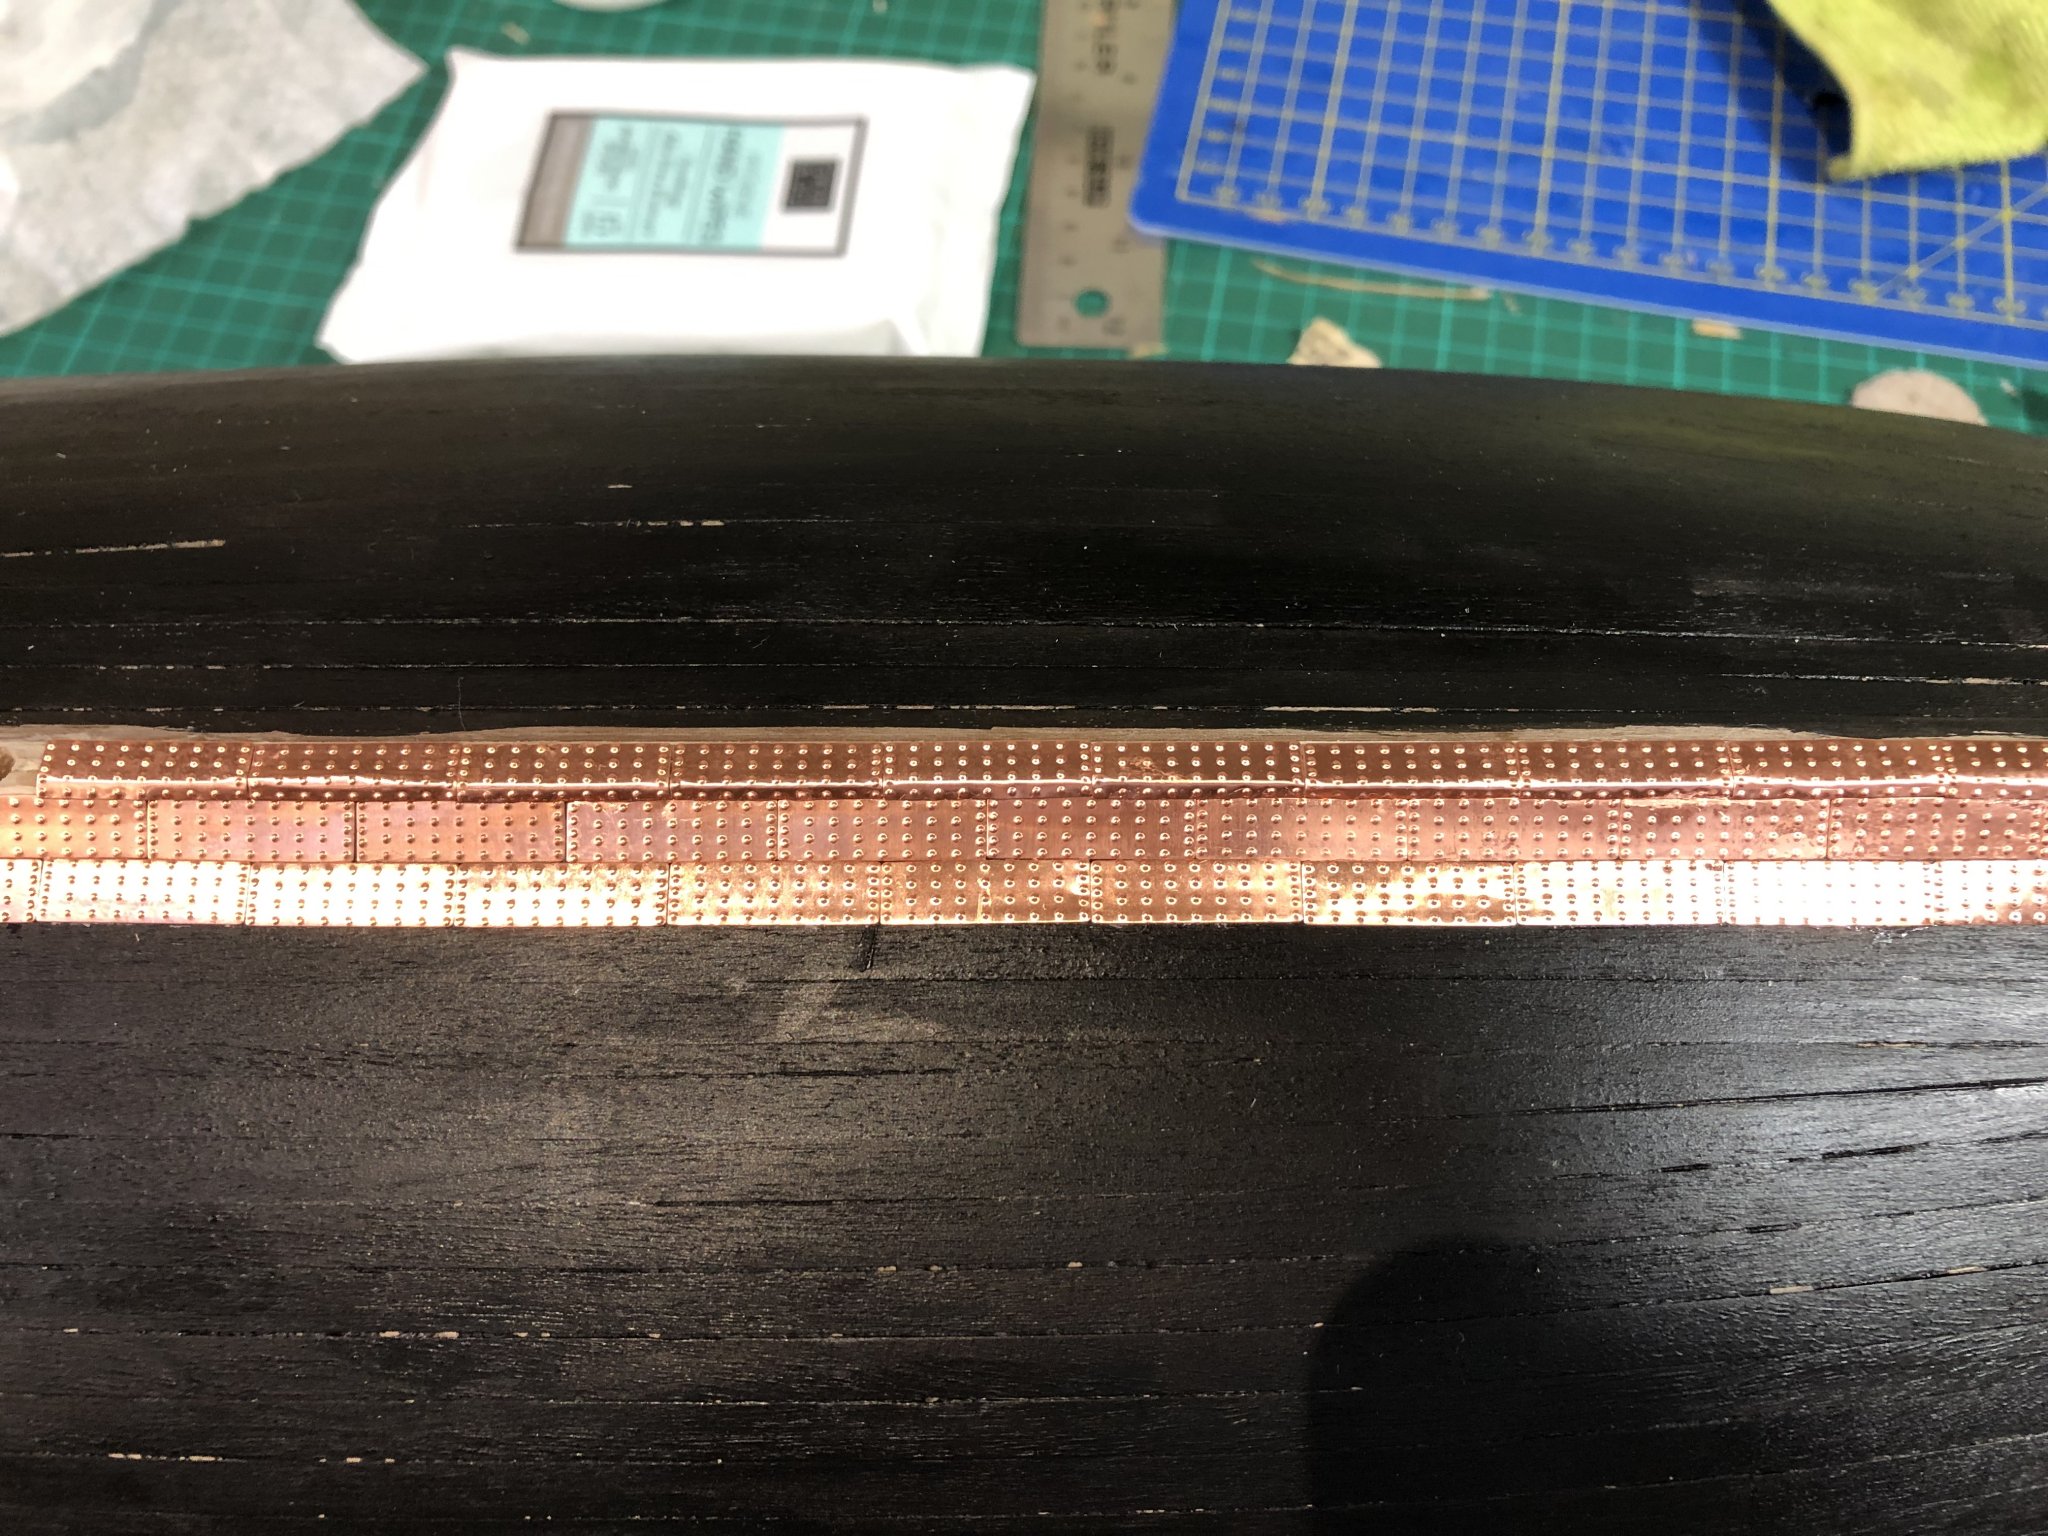
I note that my last post was released in late September when I had achieved a few rows on the Port (not starboard as stated) side. I have now finally completed coppering the hull - phew! The whole thing took longer, and was harder, than I imagined when I set off on this phase of the bid. It is easy to rush the sticking on of tiles, to cover the place in glue and to lose the parallel lines leading to a messy looking hull which will detract everytime you look at the ship. I went steadily along and I think have made a reasonable job of the task - it was after all my first time attempting coppering. A couple of points to reflect upon.
a. Don't rush. Someone on another blog set a target of 3000 tiles an night...madness unless you are extraordinarily slick which I wasn't.
b. Work out the lines carefully to ensure the curve is natural _ the gore line is important.
c. I used Gorilla superglue with a brush and fine nozzle which allow even spreading of glue. Its easy to put too much on the tile so be careful. I sealed the hull with diluted paint to give a better bind and reduce the amount of glue used. Nevertheless it still took two pots to apply them all.
d. Try as you might, you will still get glue on the surface of some of the tiles; it is inevitable. I used a lint free cloth and 100% acetone to remove the glue. It had the added advantage of just taking the glare and excessive shine off the tiles as well: they look a little more natural.
e. Cutting is easy with very sharp scissors; too large a pair and the edges curl. They can of course be flattened but it adds time. I used a dressmakers 2" pair which were ideal. The dimples on the tiles alos make it reasonably straightforward to gauge the shape.
f. I applied a 1x1" walnut beading to signify the waterline, painted it black which gave a neat a neat edge to the tiles and doesn't look out of place.
g. Be careful not to get glue on the finished boxwood - tap it up!
I am happy with the outcome. I will next look at the stern galleries before fixing the rudder. Happy days.

-
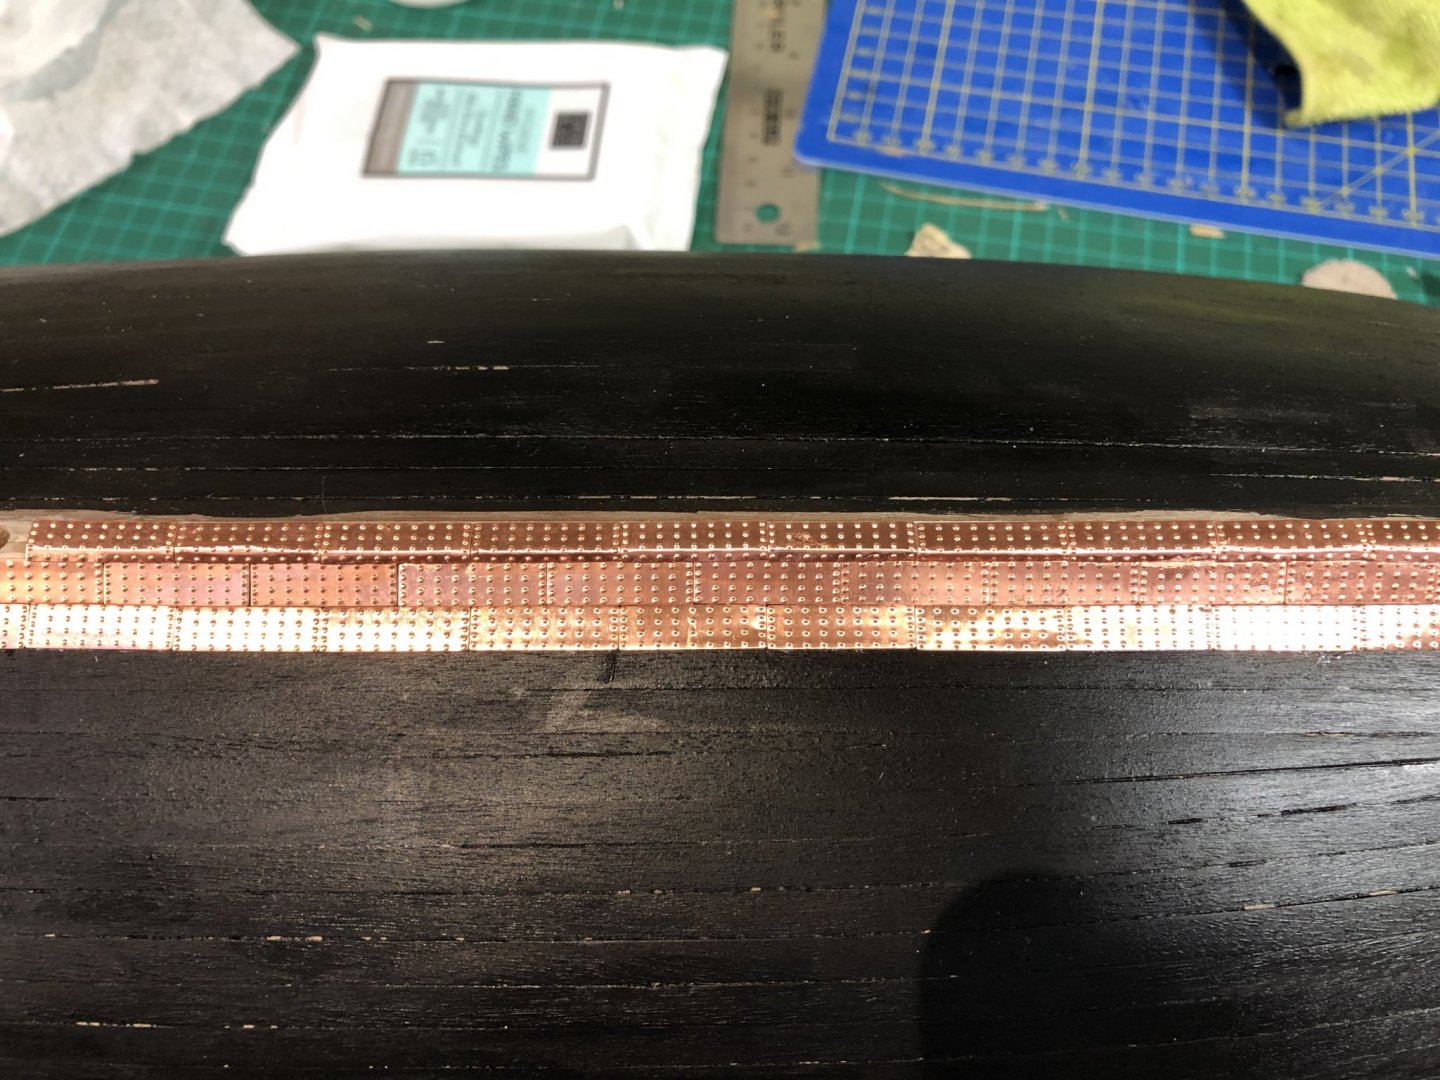
A manic summer which has precluded me doing much work on the model. It has however started to rain, the nights are drawing in and I can get back to the boat. Unfortunately I have to crack the coppering before moving onto building again....very dull. I have been applying steadily and have, over the last week or so, cracked half of one side! Using plenty of glue despite sealing the hull before hand and finding that acetone used with a cotton bud or wet wipe is ideal to remove the inevitable superglue oozing - seem to get build up of glue on the tweezers which also doesn't help.
.thumb.jpg.46a5c33824755034711d7b8c5f6106c2.jpg)
I'll be back when I have cracked the starboard side! Peter
-
Rob - Thank you; a small gap remains between to planks which I am mulling over what to do with, either leave as is or try and infill with a sliver of boxwood....not sure.
I am coppering the hull and have heeded your advice on the facemask and acquired a vapour mask which will help. I have started the work and am just about to position the first gore lines. I have 1x1mm beading which I will affix once the plating gets well up the sides.
Question: when, and with what, did you varnish the boxwood? I don't want to damage it when I start to fiddle with fixtures and fittings so am minded to do it after the copper is complete.
Grateful for your distant support.
As ever
Peter
- Beef Wellington and gieb8688
-
2
-
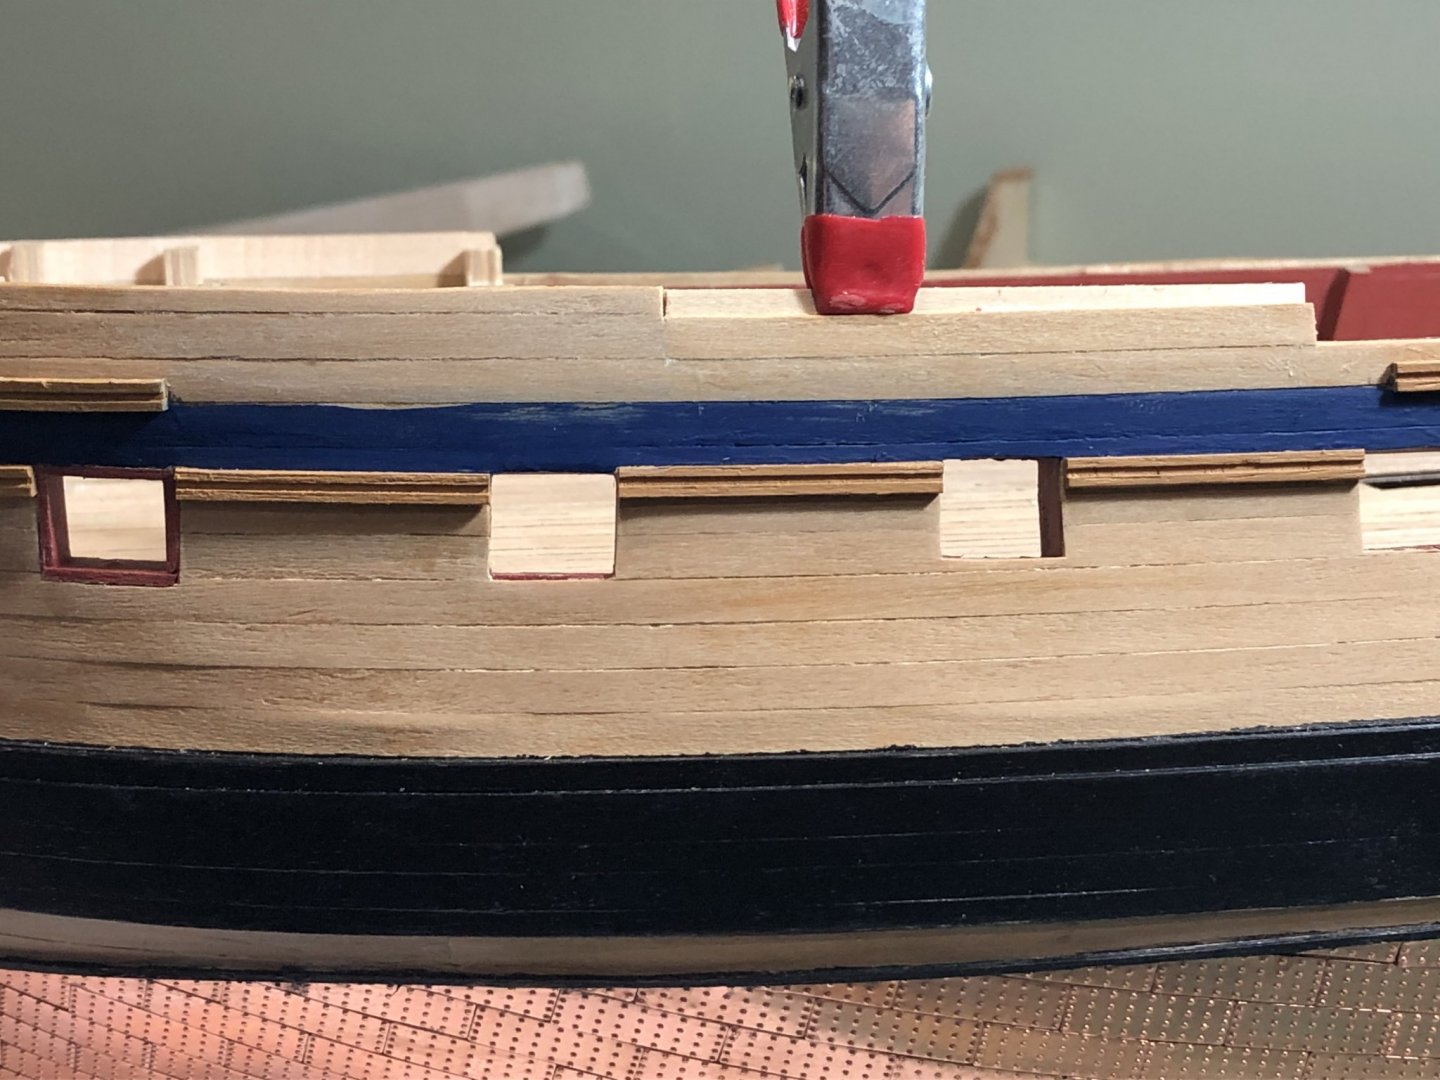
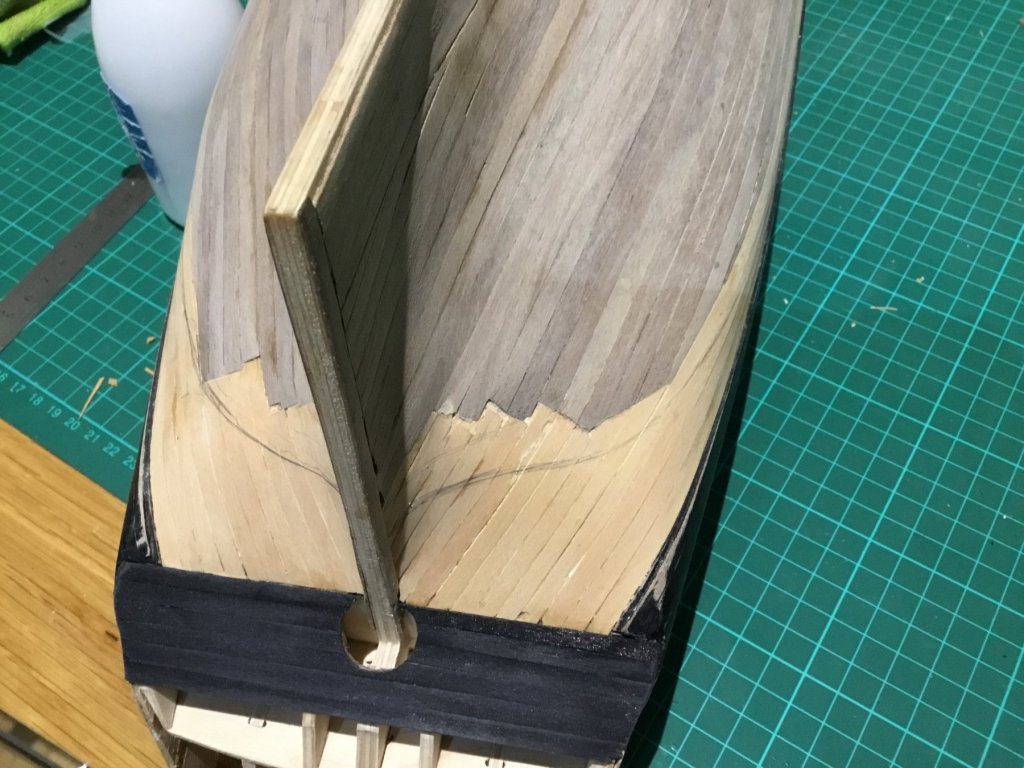
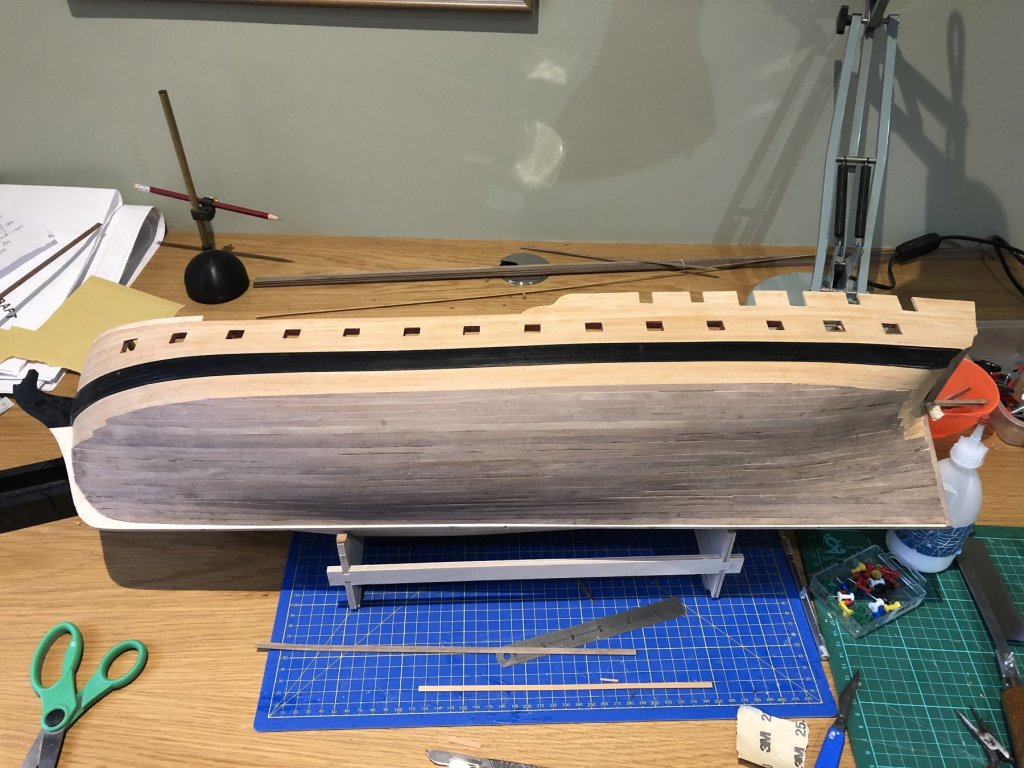
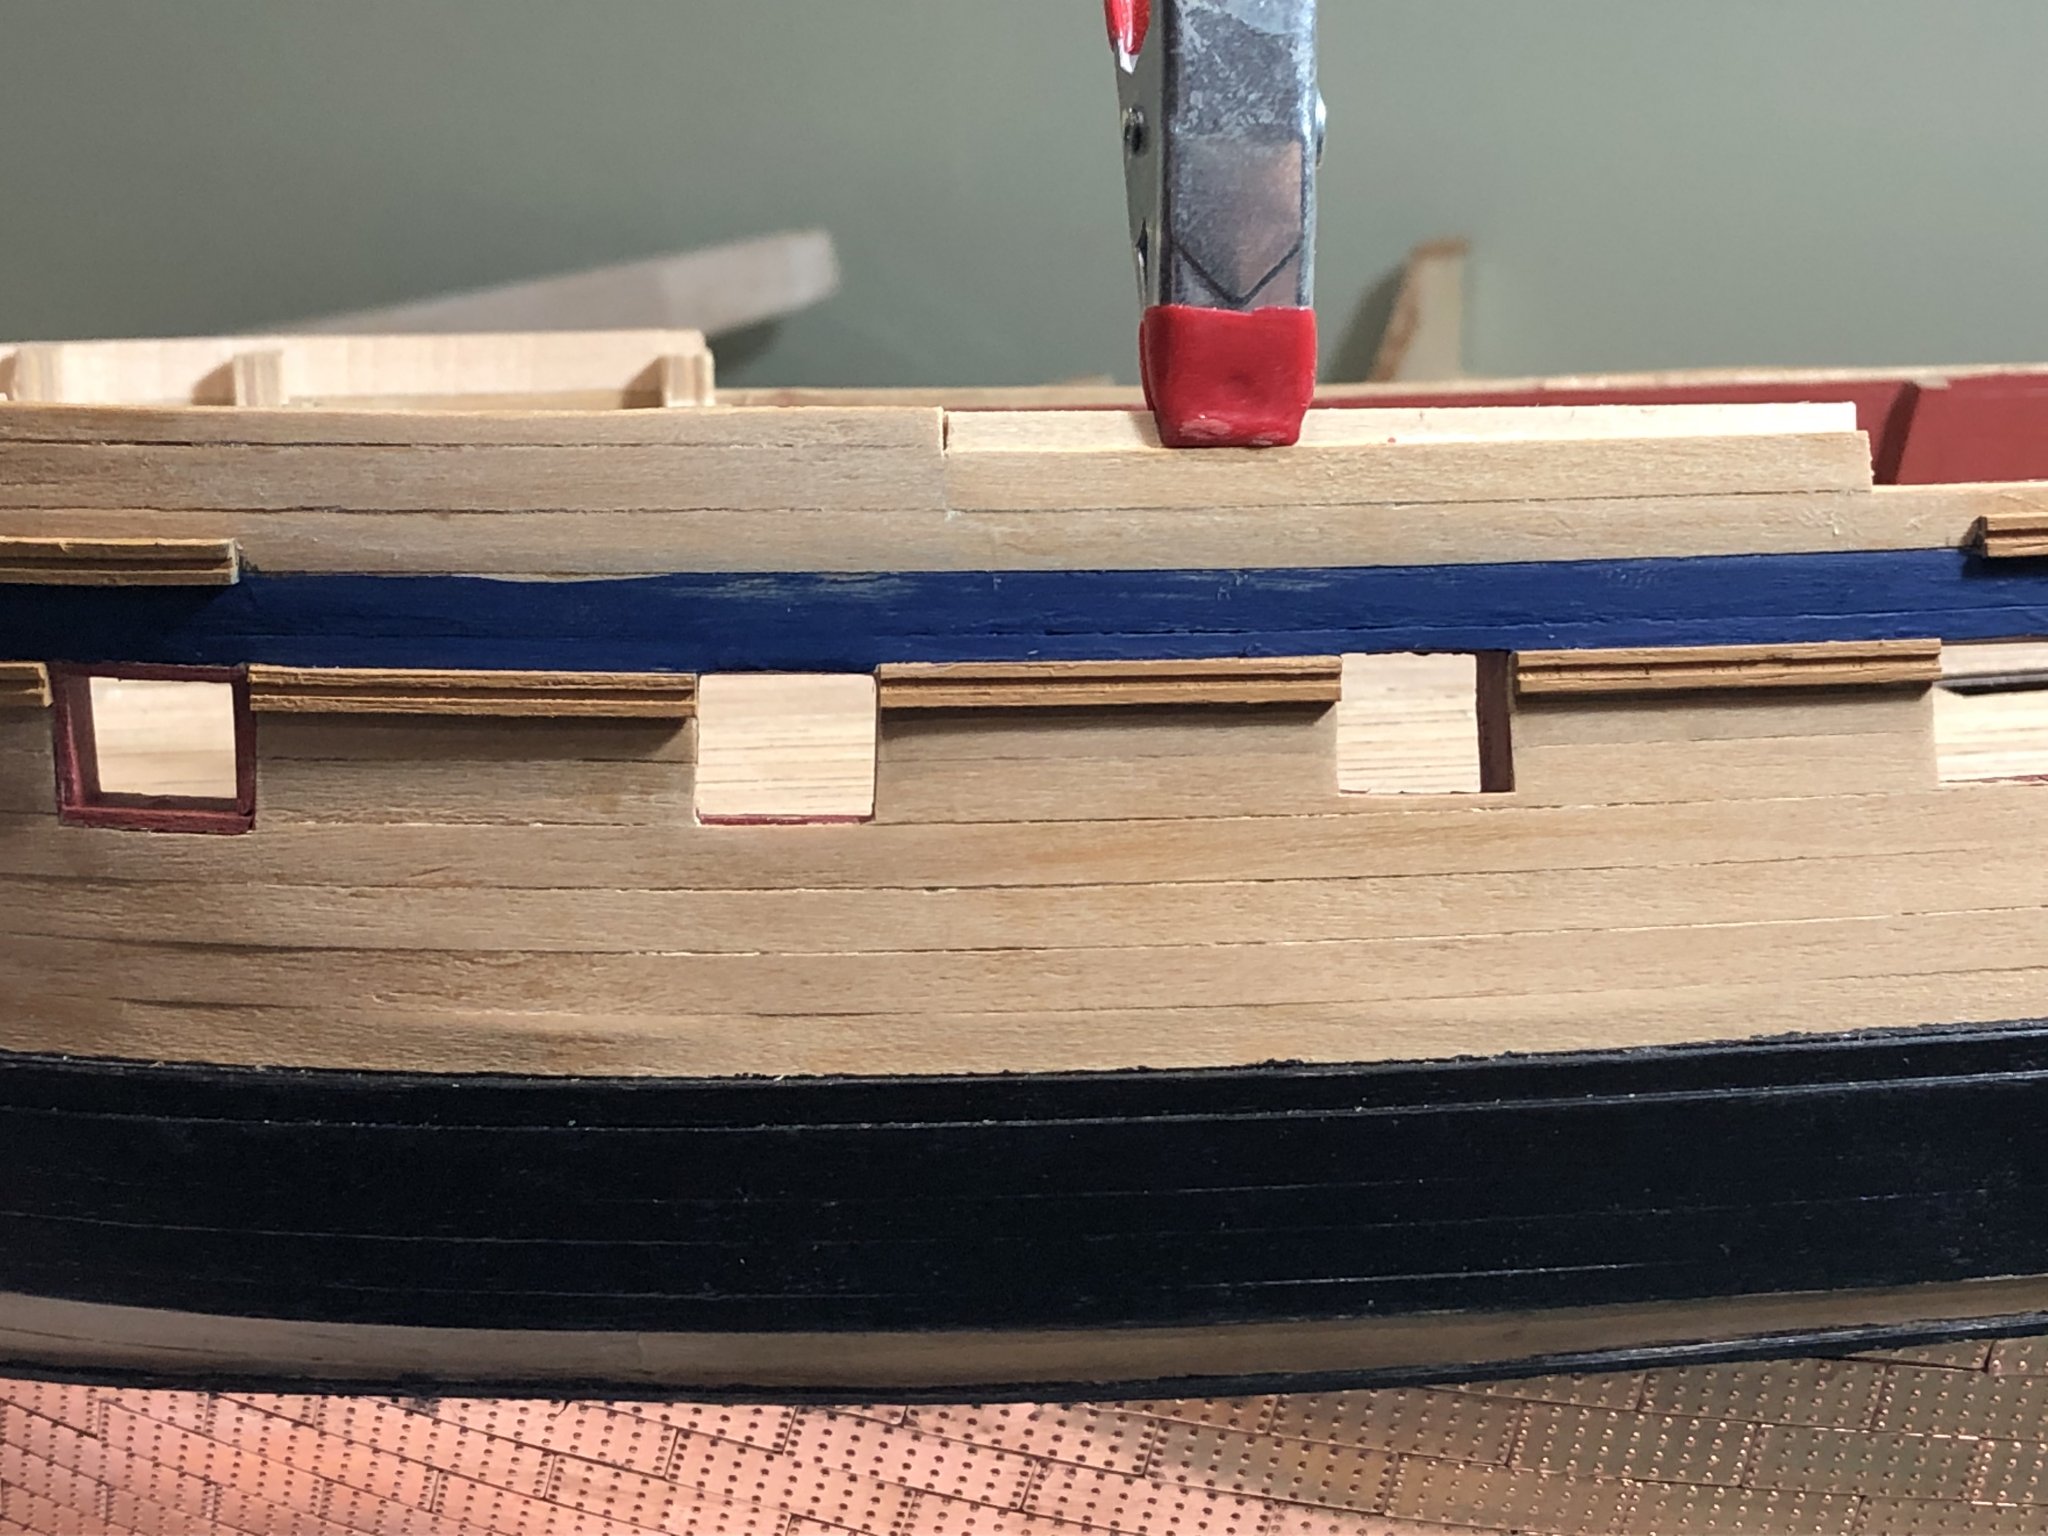
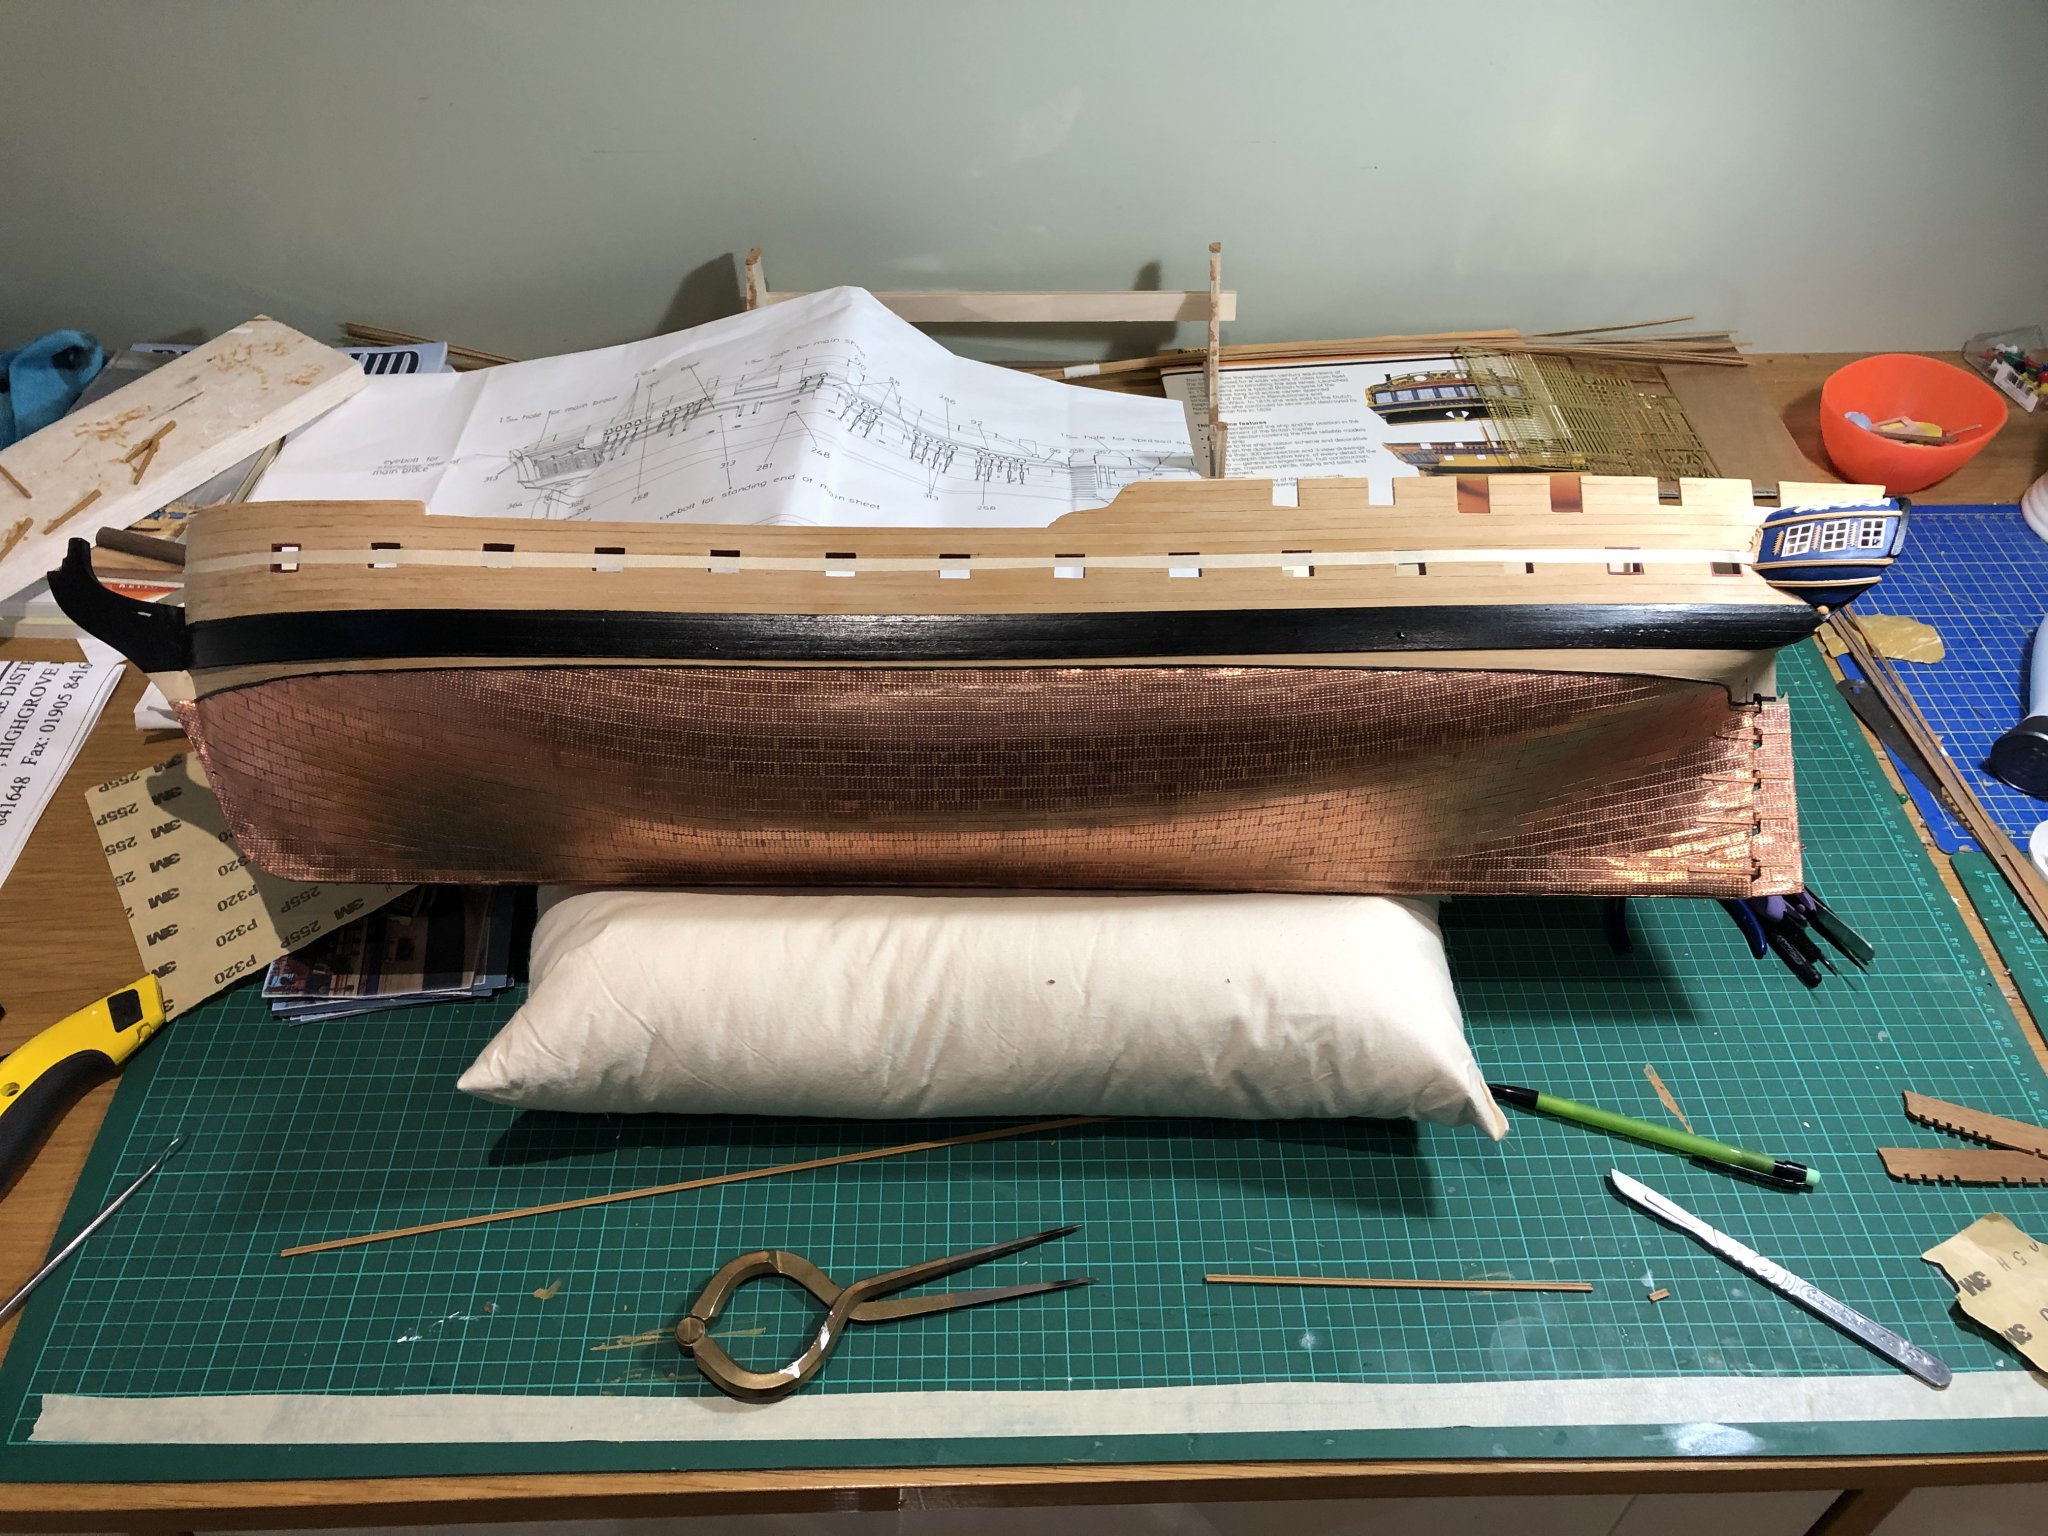
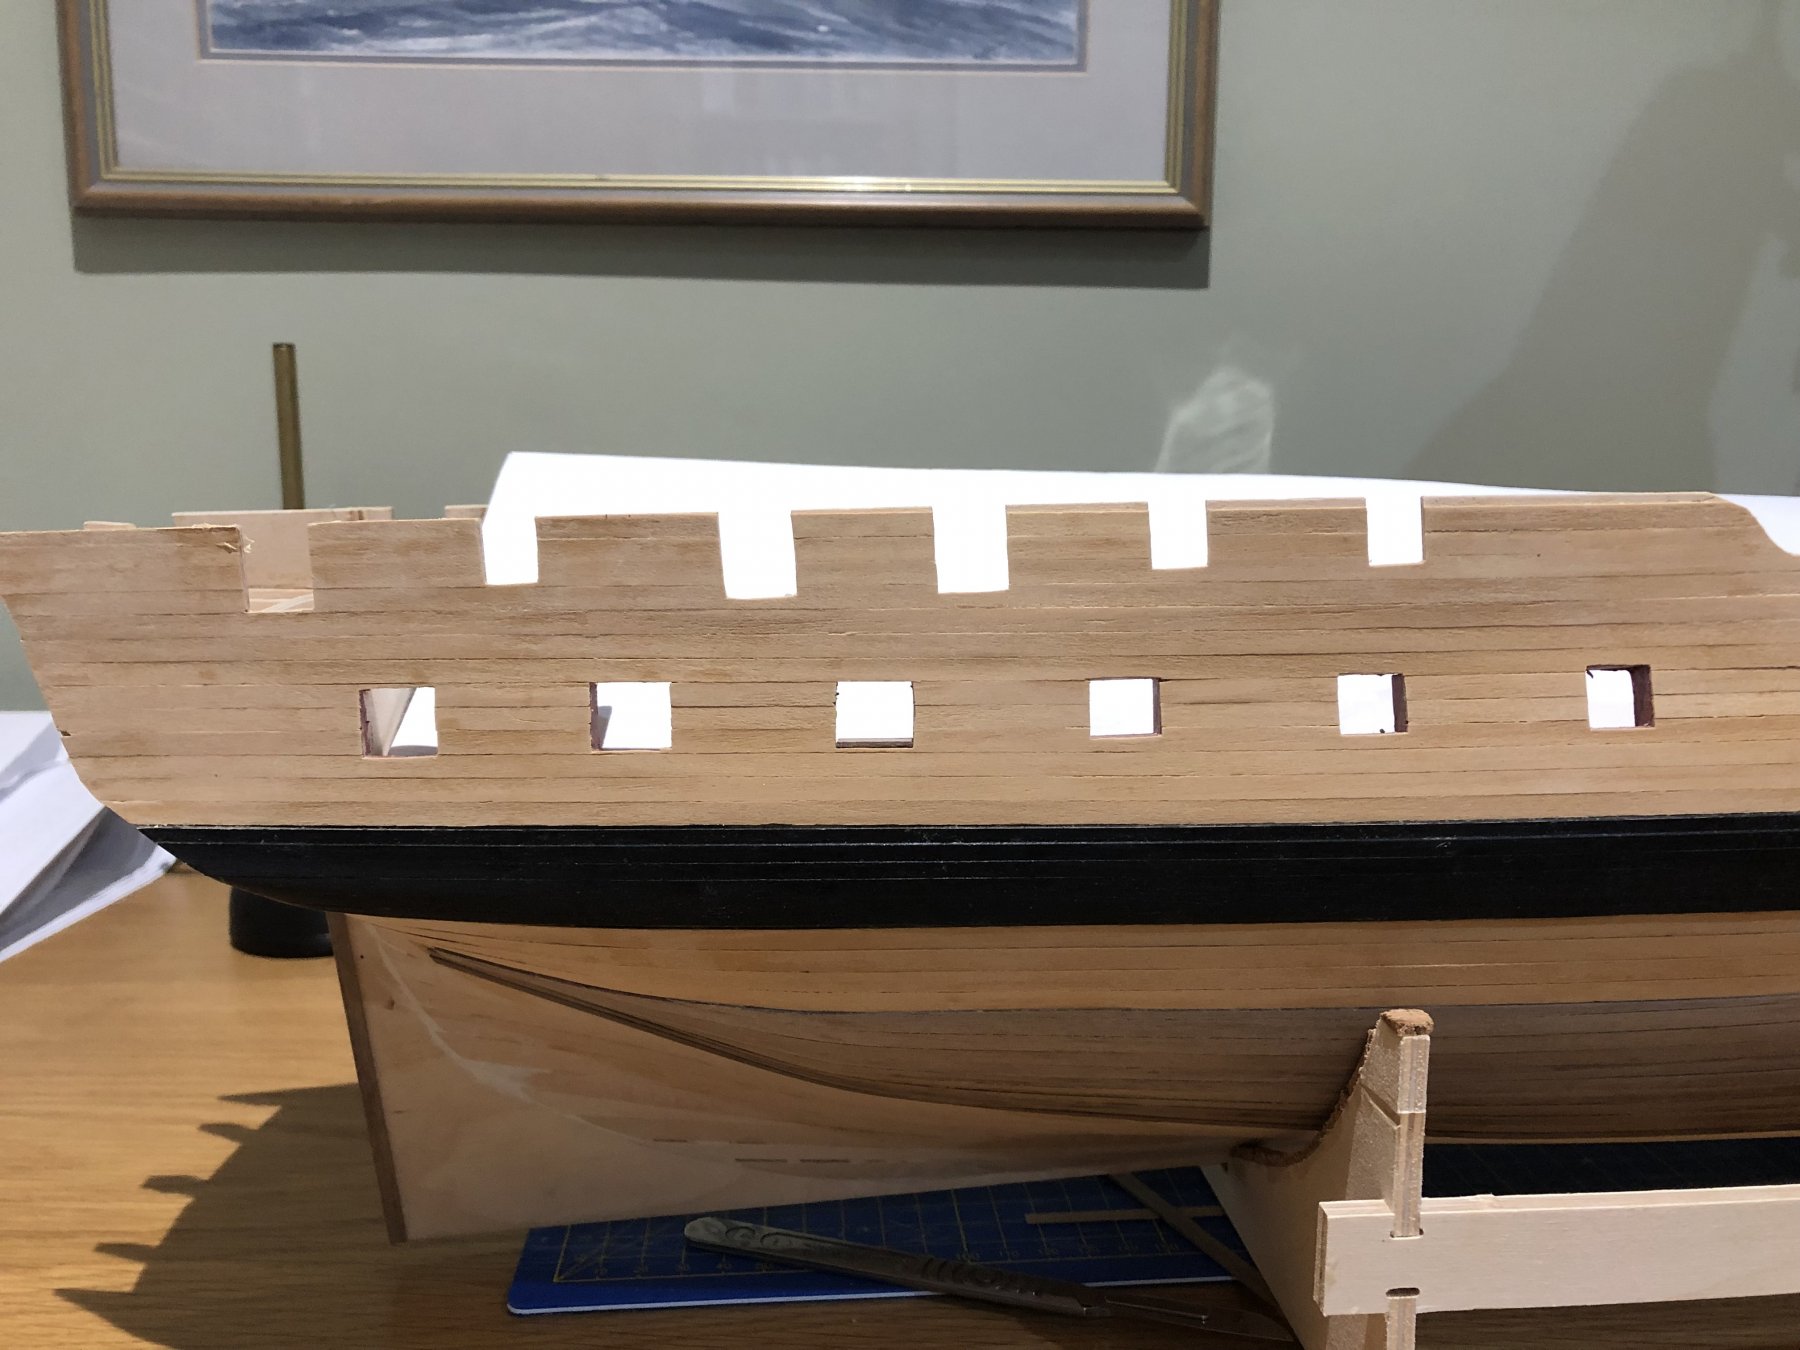
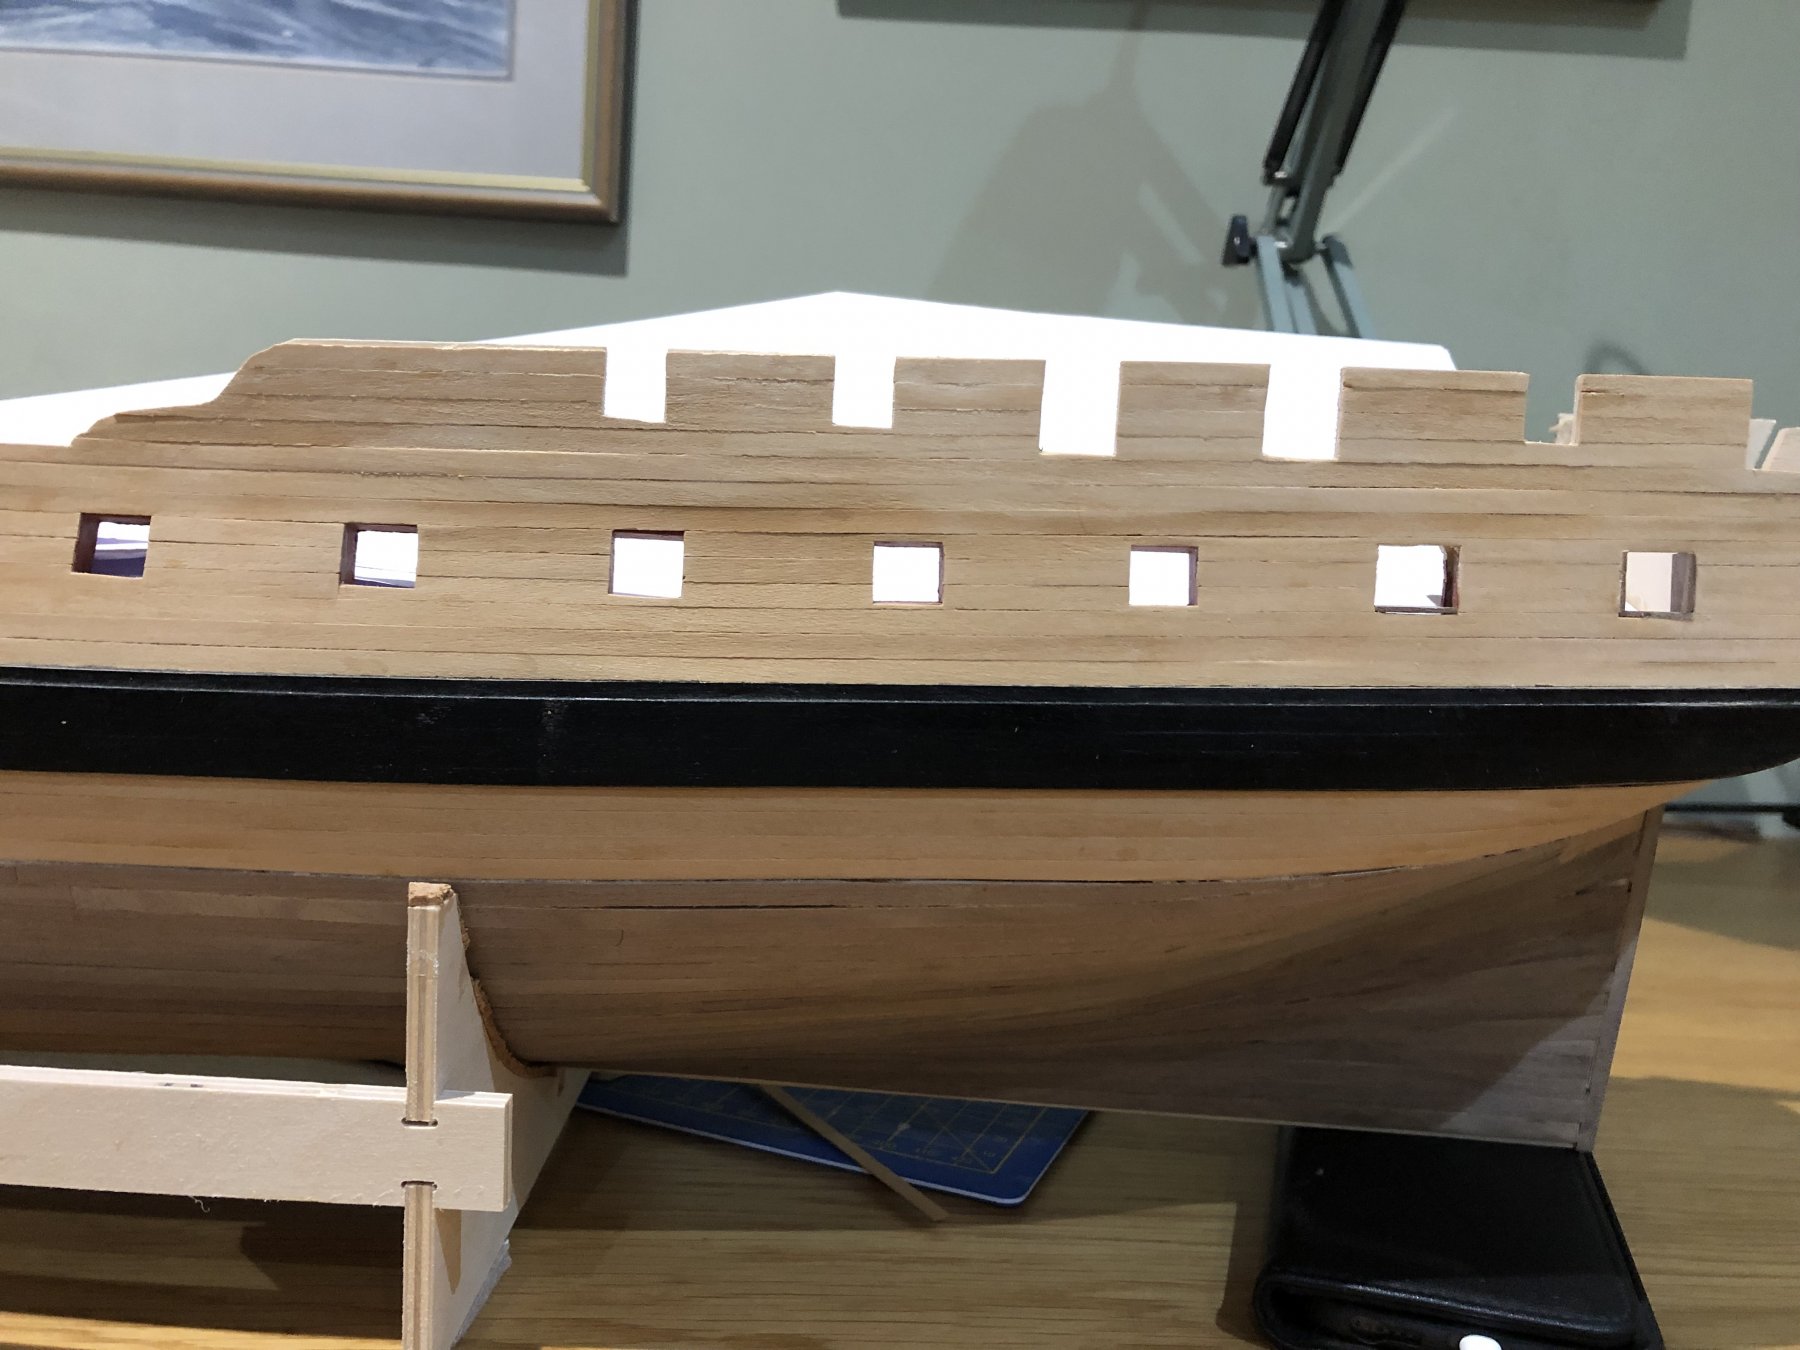
I did say this was a voyage of discovery. I have finished the last bits of upper planking, carved the 10mm hole into which the bowsprit will seat and completed he second layer onto the stern counter area. The next task was to mark the waterline. In doing so I realised two things: the gunwale - which looks good - isn't entirely parallel and thus when I drew the waterline using a mounted pencil, it looked odd but I can tweak to get the visual aesthetics right. The major snag was that the walnut planking around the stern area, i.e. below the boxwood and the area to be covered by cooper tiles, was too high and would show above the waterline! I had to do a few adjustments to remove some walnut and replank in boxwood. I think this will suffice. I did mark a waterline before second planking but obviously didn't connect thus...another error.
The only upside is that I will have to make another one to prove to myself that these mistakes are one offs.
Peter


-
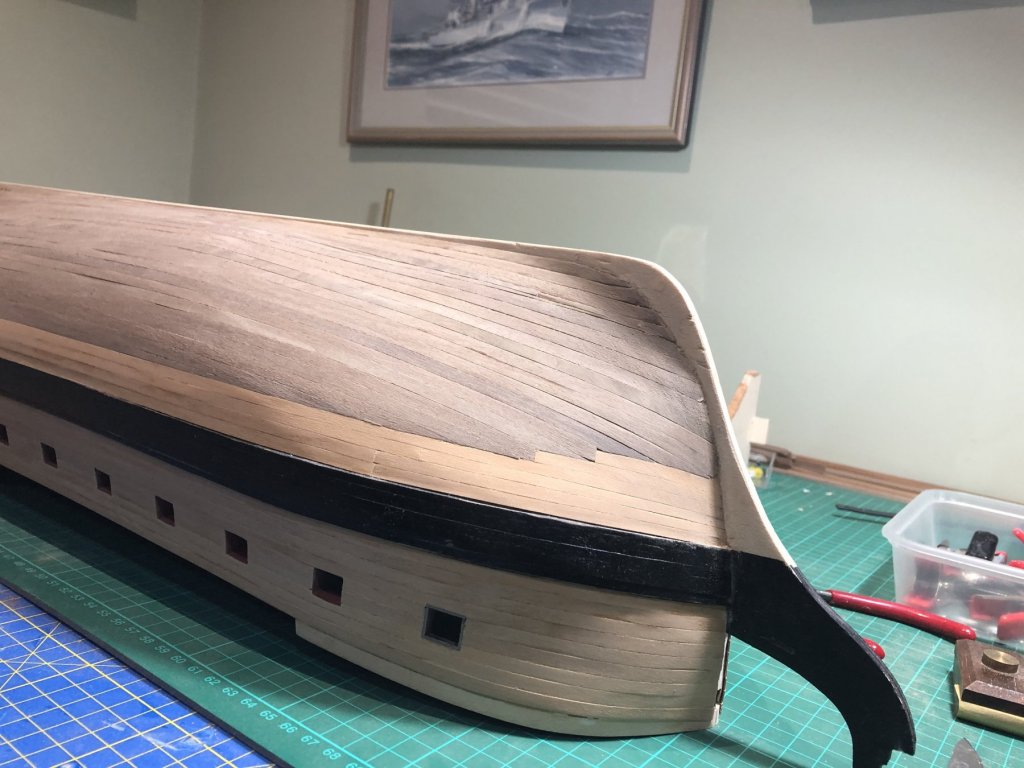
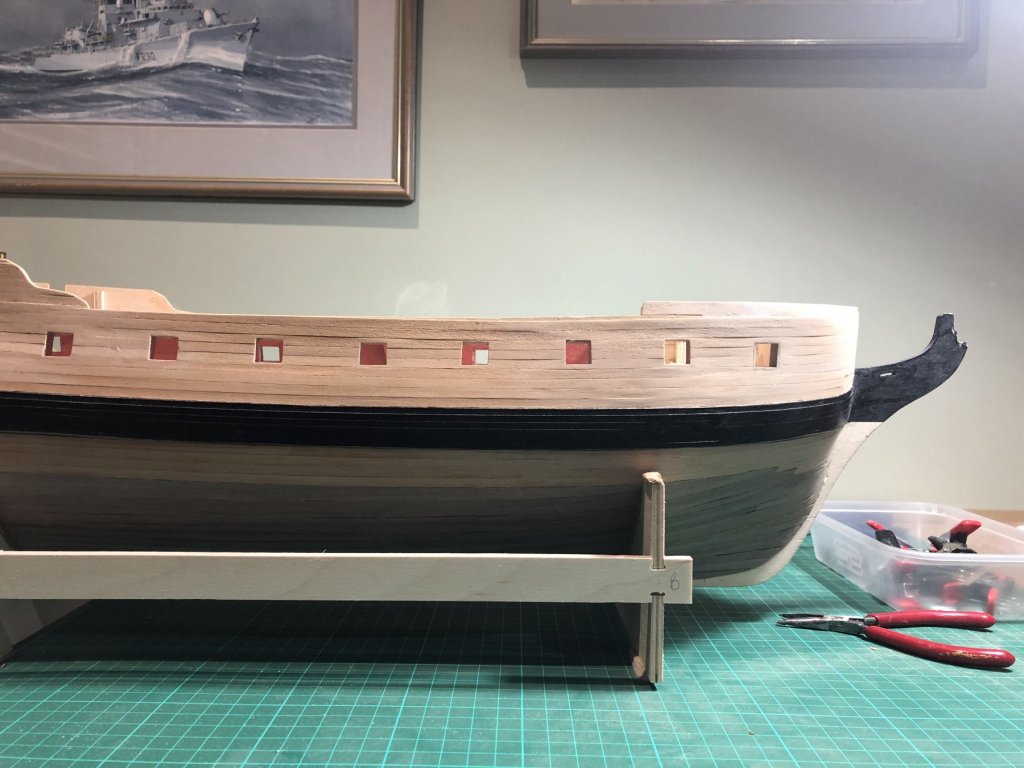
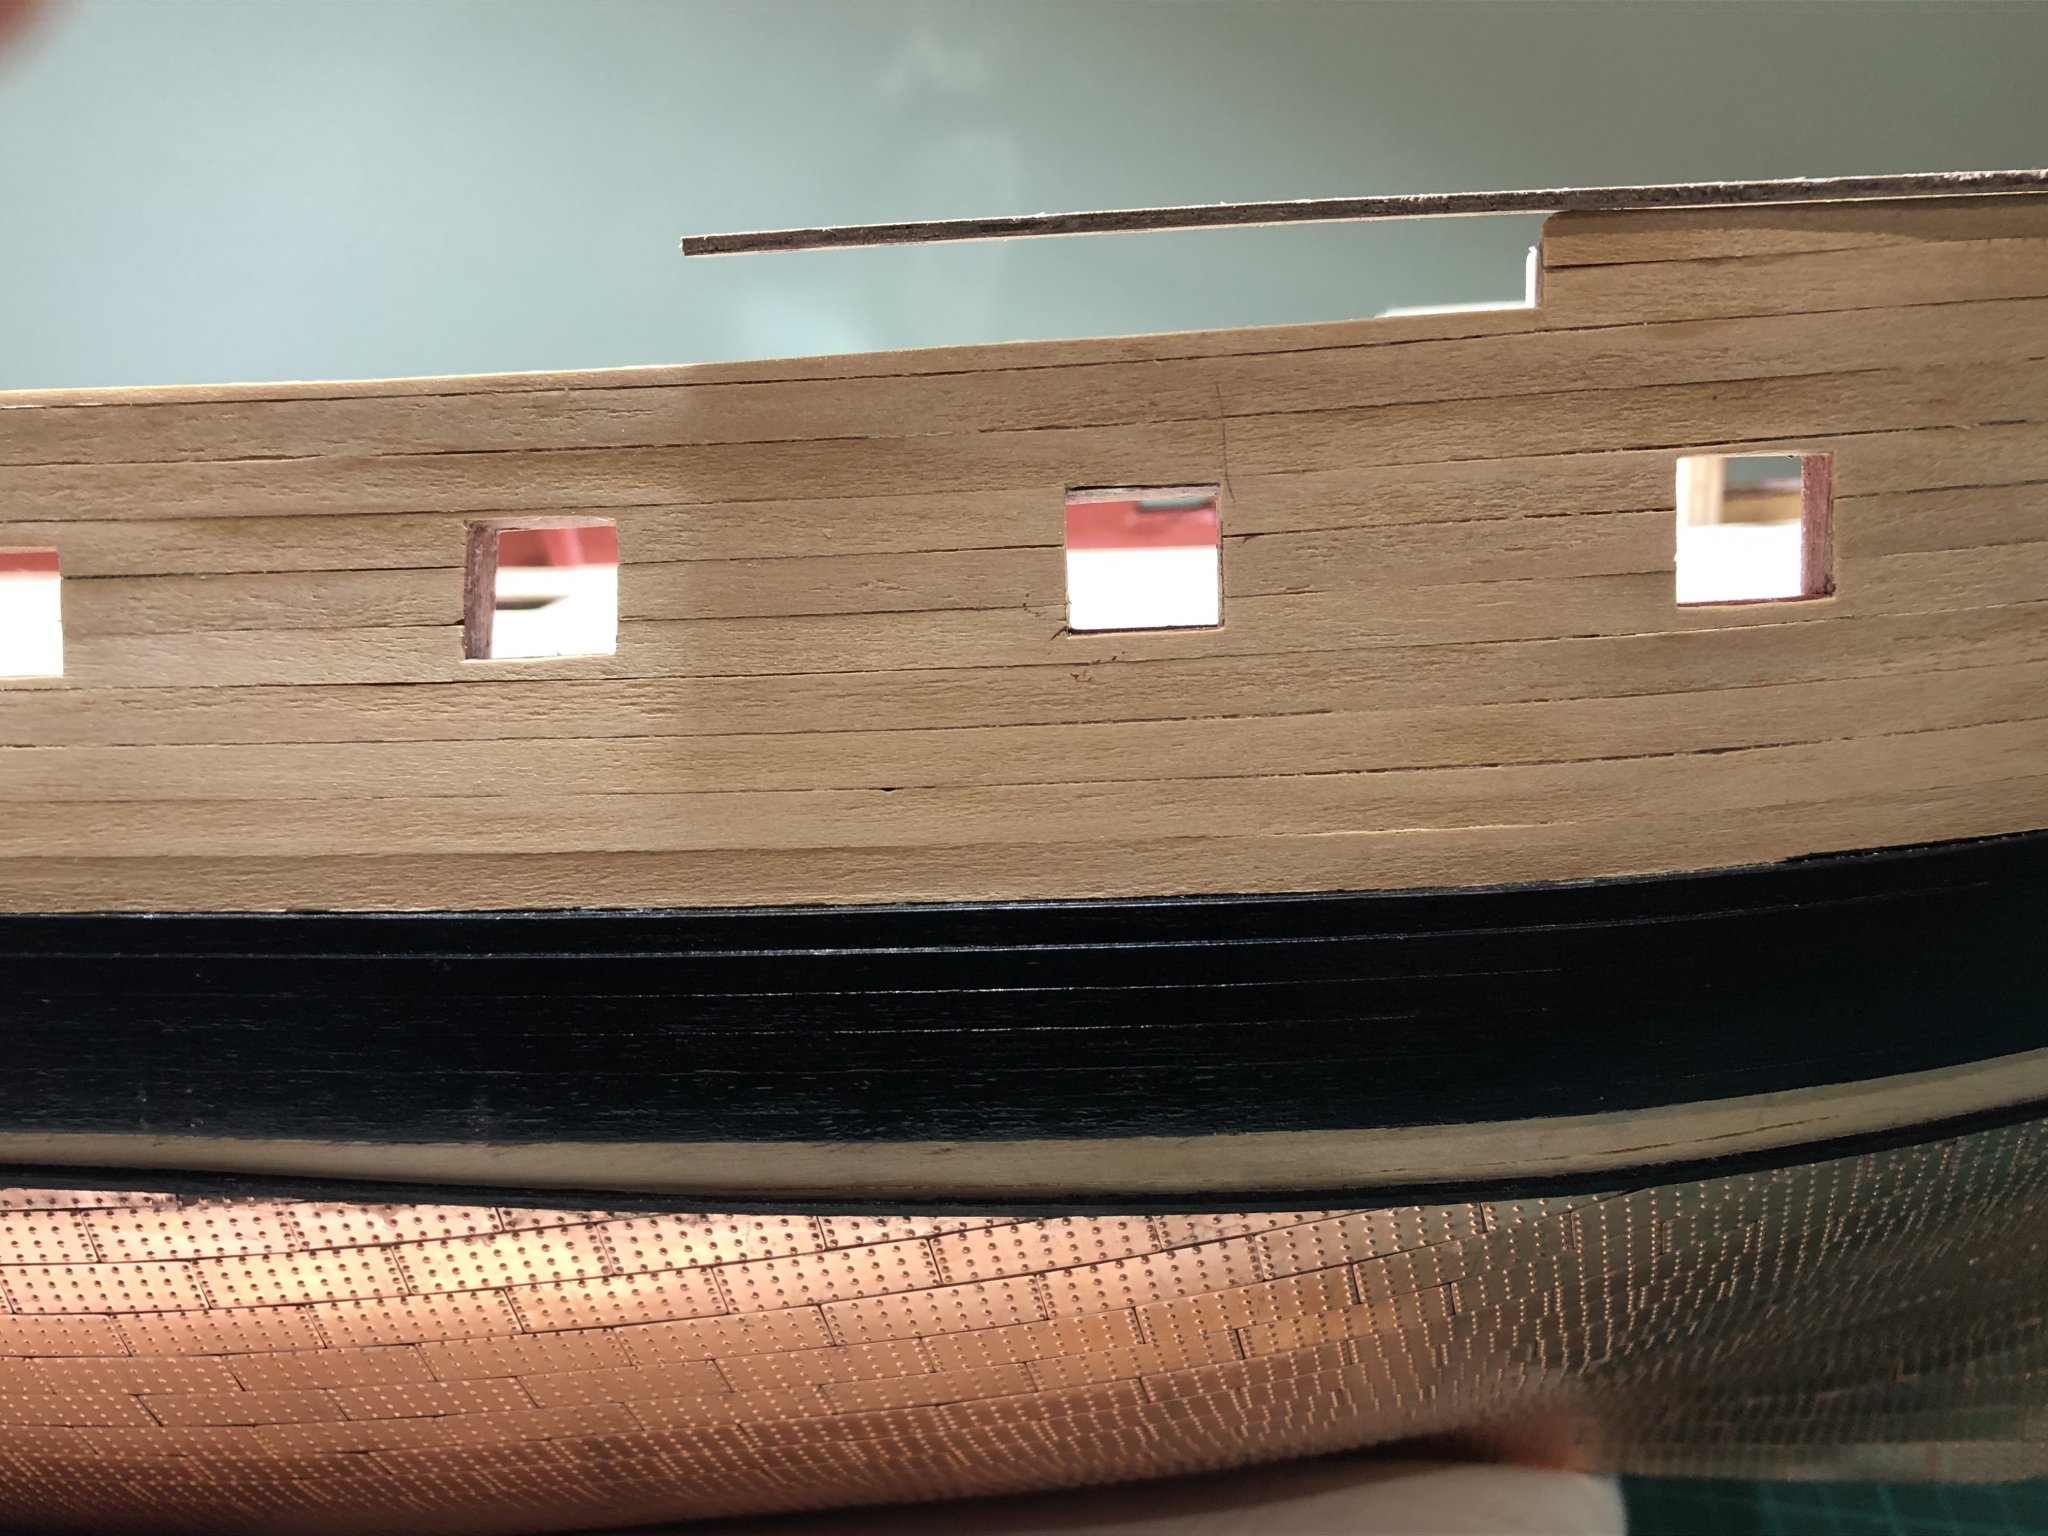
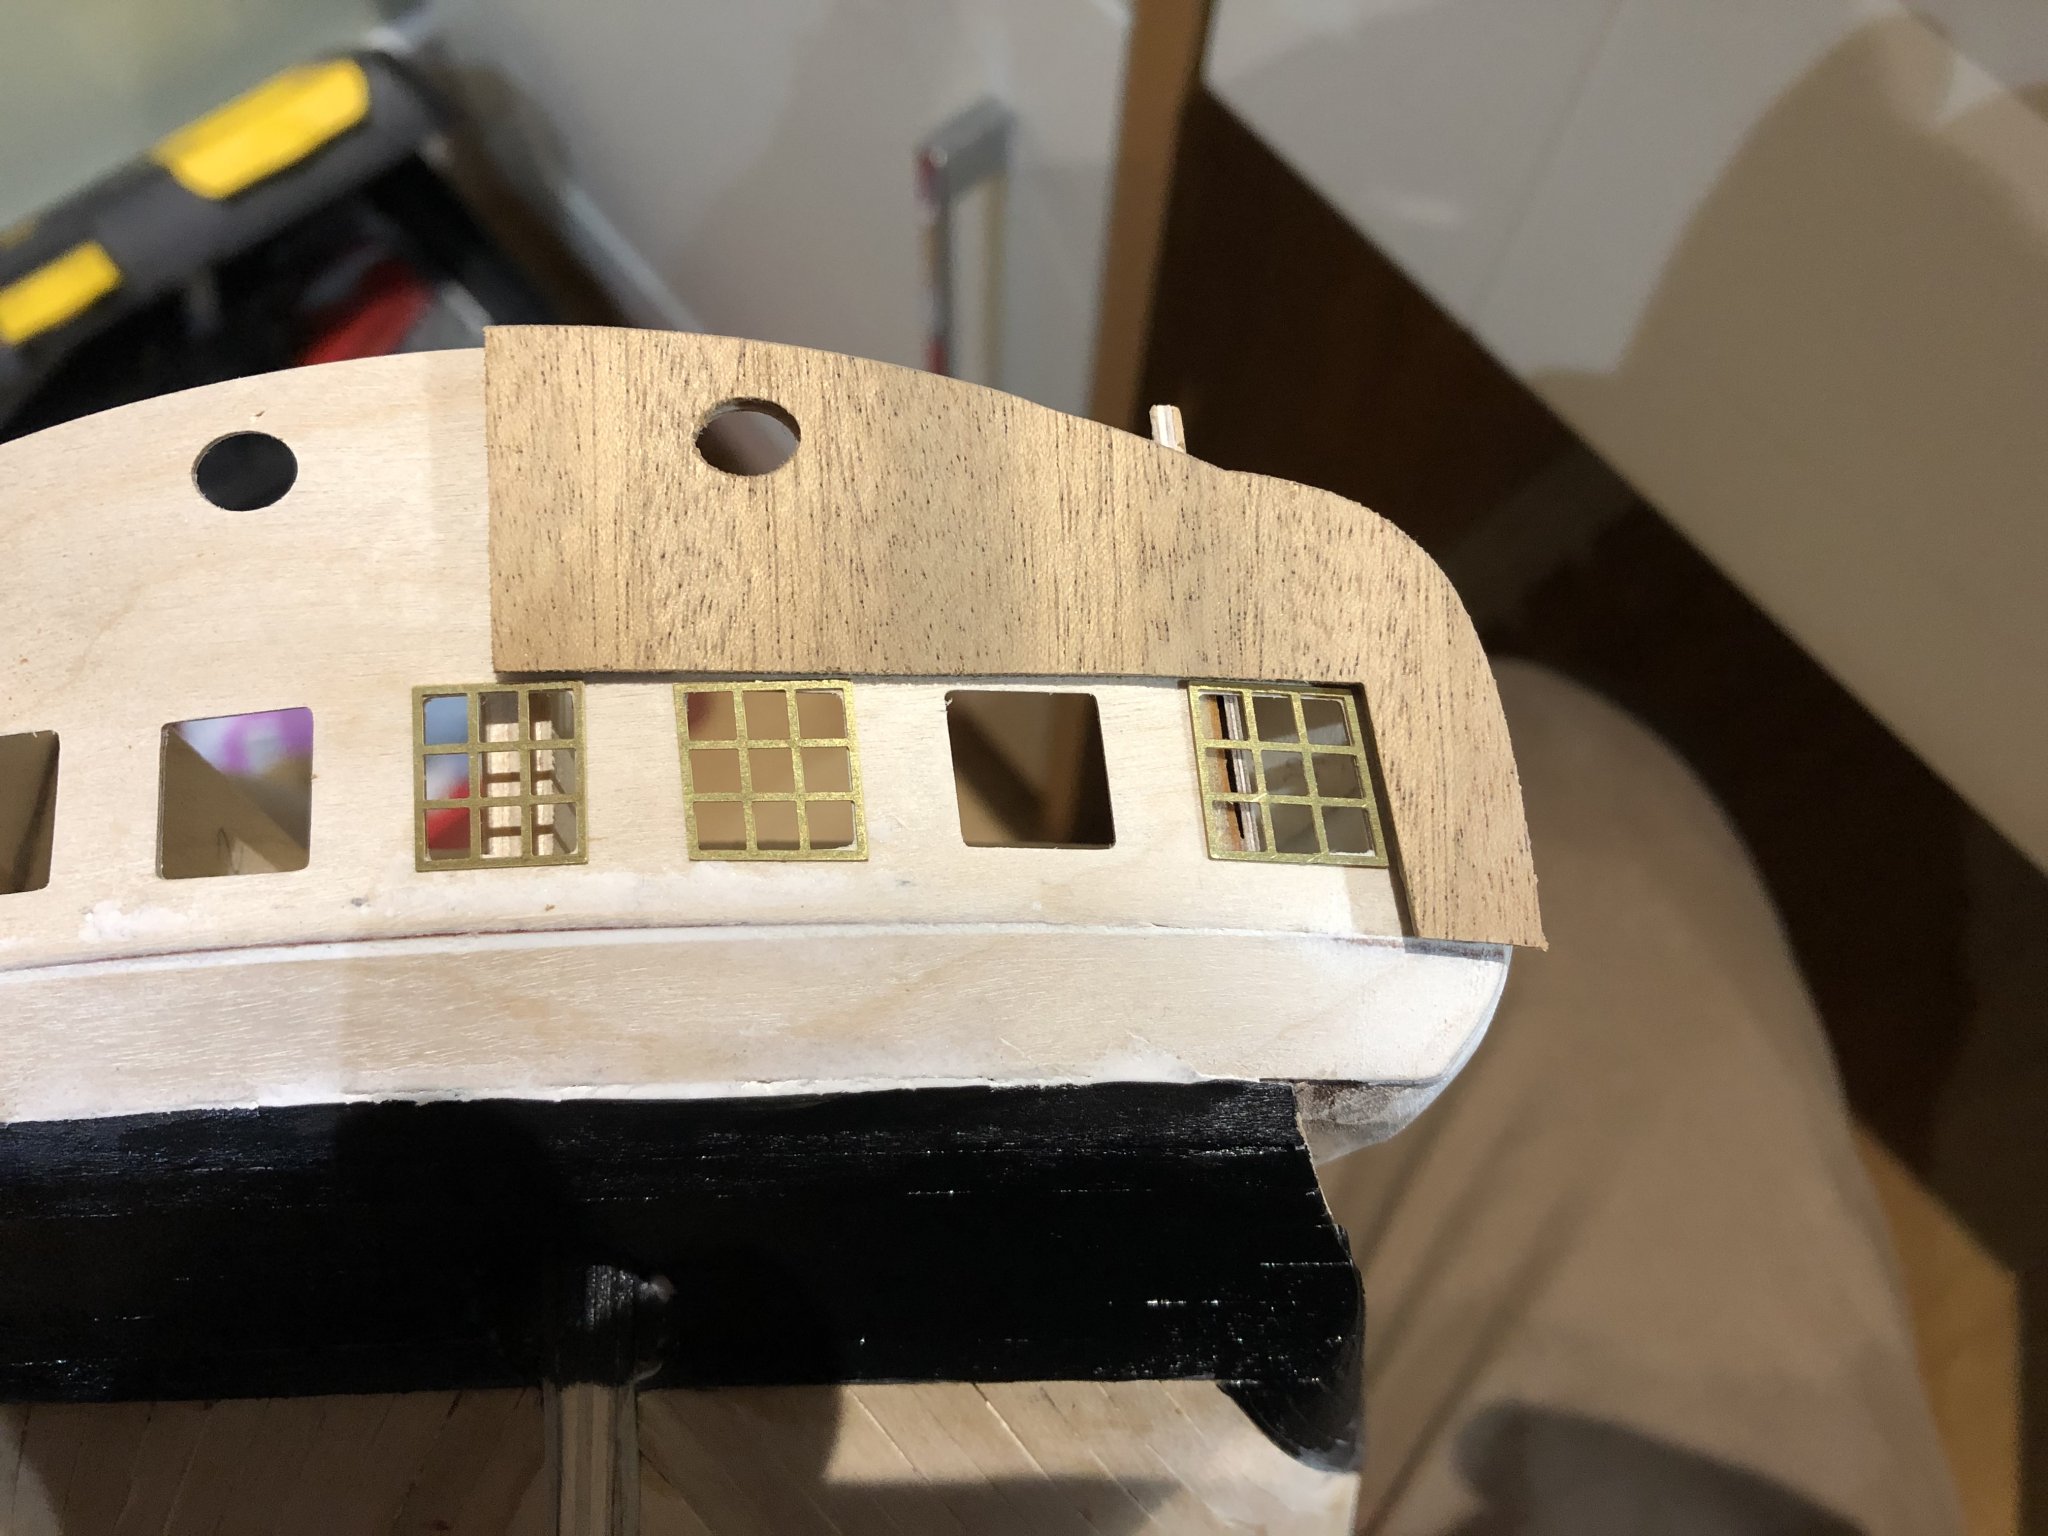
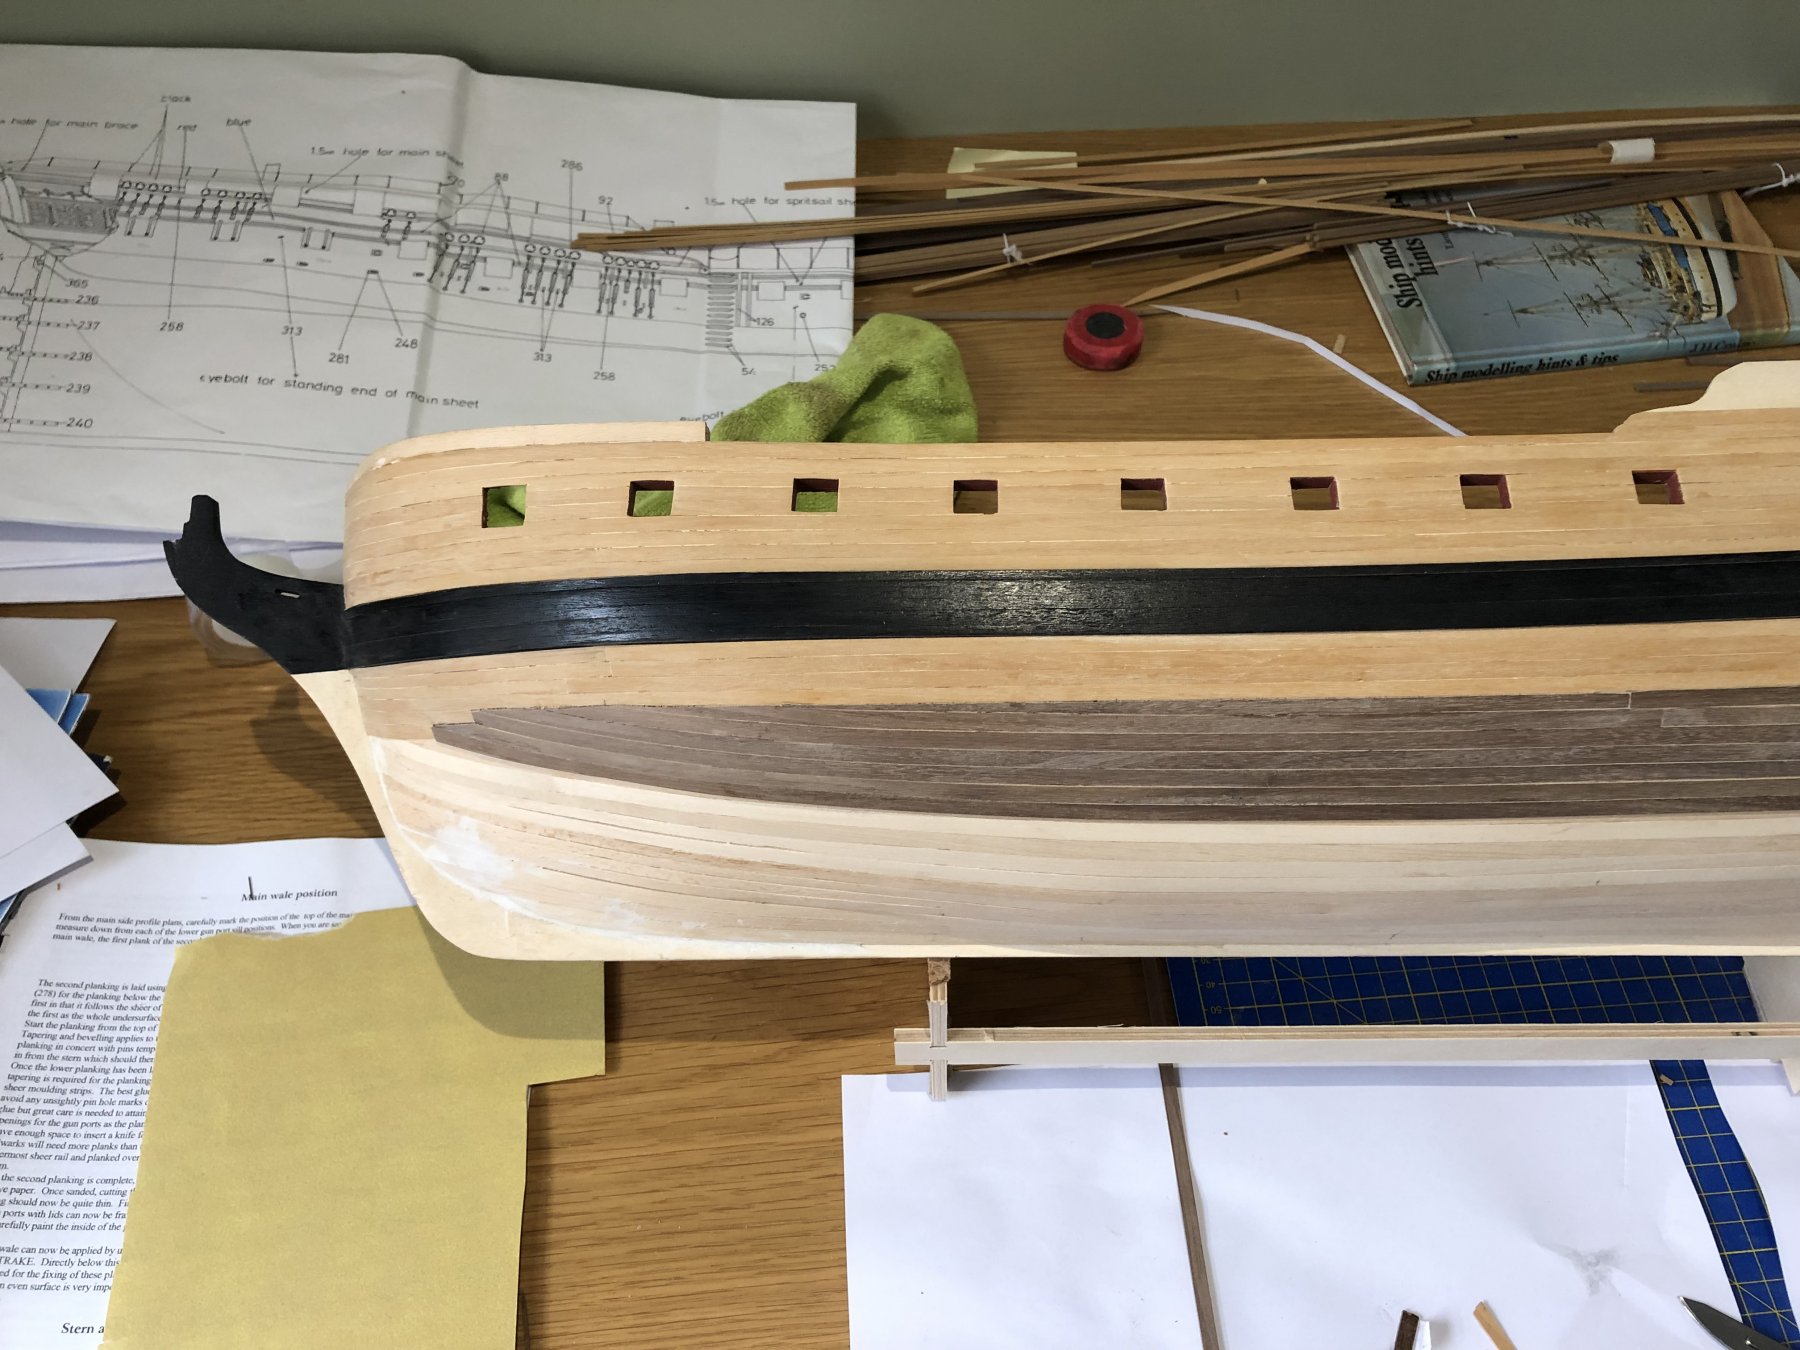
I appreciate it has been a while since I updated you all on the progress of my DIANA build; as I mentioned before, the summer has too many attractions and sitting in my study whittling with a bit of wood seems to drop down the priority list when the sun is out! That said it has been wet in the UK for a few weeks so in between work and responding to 'management' direction to do stuff in the garden (in a coat), I have been able to grab a few hours here and there to maintain progress. As you can see below, I have finished all the hull double planking, it has been sanded and I've shaped the transom area around the rudder entry port (shaped by a 1p piece); the rudder fits well. I have completed the gunport lining and have painted all the areas in the appropriate red. To my irritation and despite Jason's prompt in early June, I failed to leave the 1mm lip for those gunports which have lids - arrgghh! I looked at cutting back but concluded that it would look a mess so have left them as is - I will examine the overall aspect when I come to affix the lids...they may end up without them, however whilst I am aggrieved, I am not sure that when she is on display on my upstairs landing, many people will pick up on the error.
I have bought some 1x1mm walnut and will affix this on the waterline as a template for the copper plates which I will fix in the near future.
Before then I have to sort out the transom/stern gallery. I have begun to prepare the stern counter area by applying a second layer of planks, this time 0.7x4mm boxwood stained black. this allows me to make the junctions between hull planking and stern galleries neat and to finish properly the joints between the gunwale and stern. Once all is complete, I will apply a coat of admiralty black to eradicate the boxwood sheen.
I offered up the stern galley fascia and was reasonably surprised when it appears to fit. Not perfect but close enough for me to work around it; the portside does protrudes into the last window so I may need to judiciously place a curtain to shield the slight misalignment. The various pieces that make up the side galleries are somewhat daunting, I am mulling over whether to do the coppering first before I assault the back....not decided: pehaps I could do both to break the tedium of sticking plates on the hull.
So in the next few weeks: finish the counter stern, check rudder alignment, finish the upper areas of the f'csle, affix waterline beading, start plating and commence assembling the stern area (dry run first) and finally repaint the black. Enough to keep me busy...unless it stops raining!
Peter
.thumb.jpg.d8cda51bd89955aa2890d398d771a1f5.jpg)
.thumb.jpg.755d416558371f9d761cc4b8a48952b6.jpg)
-
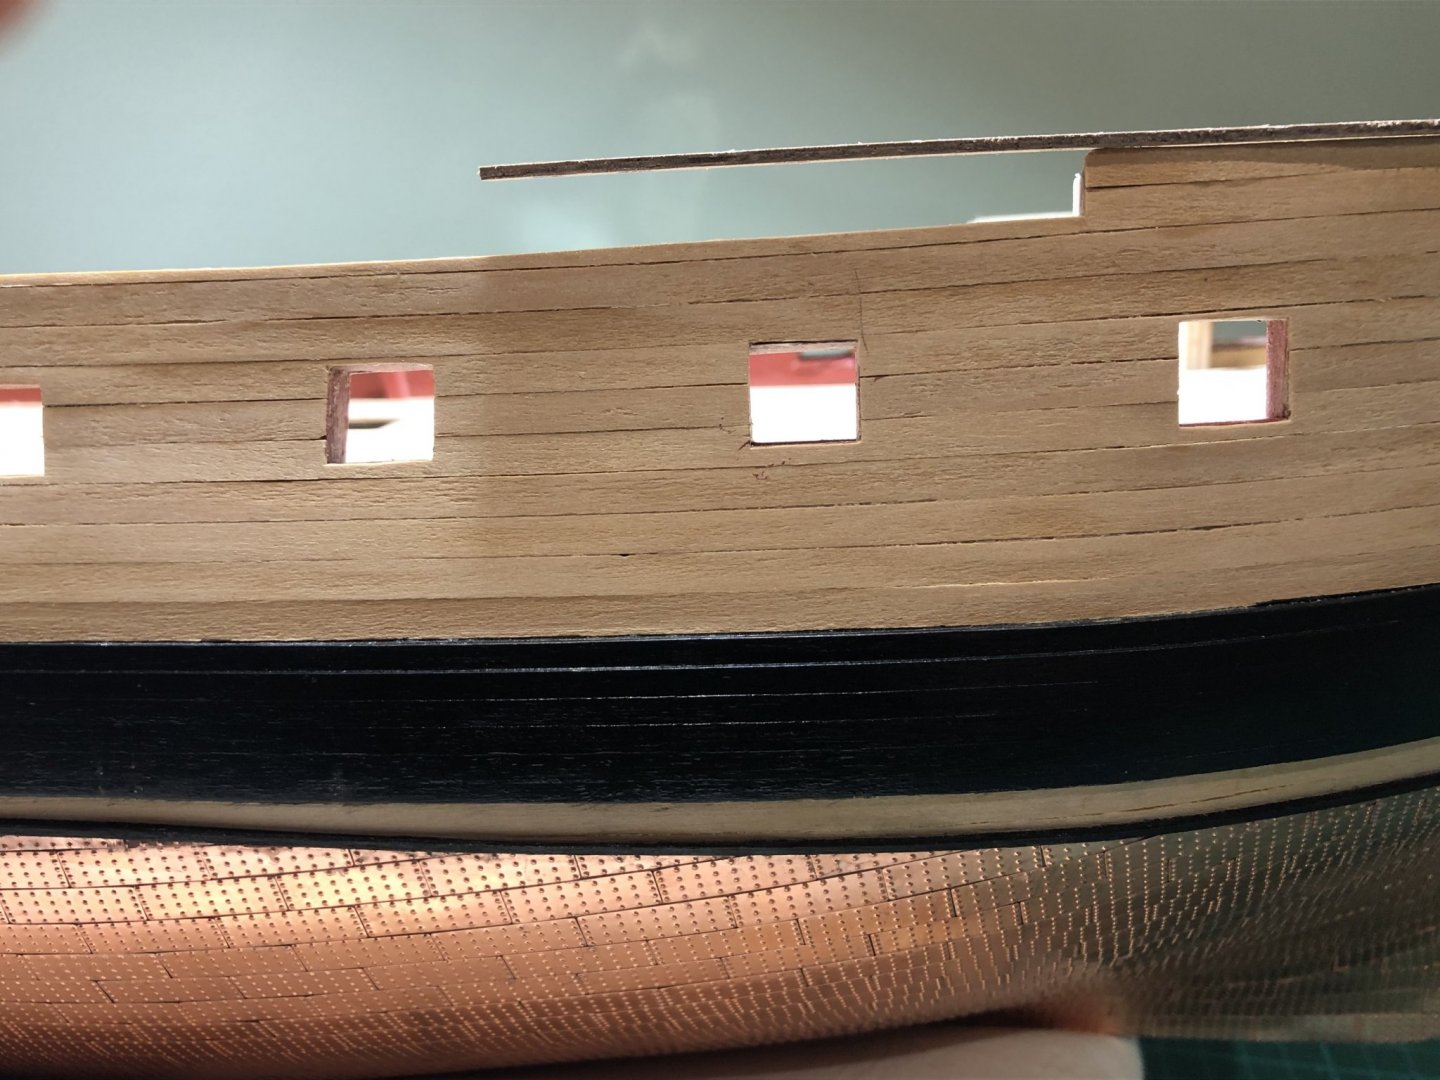
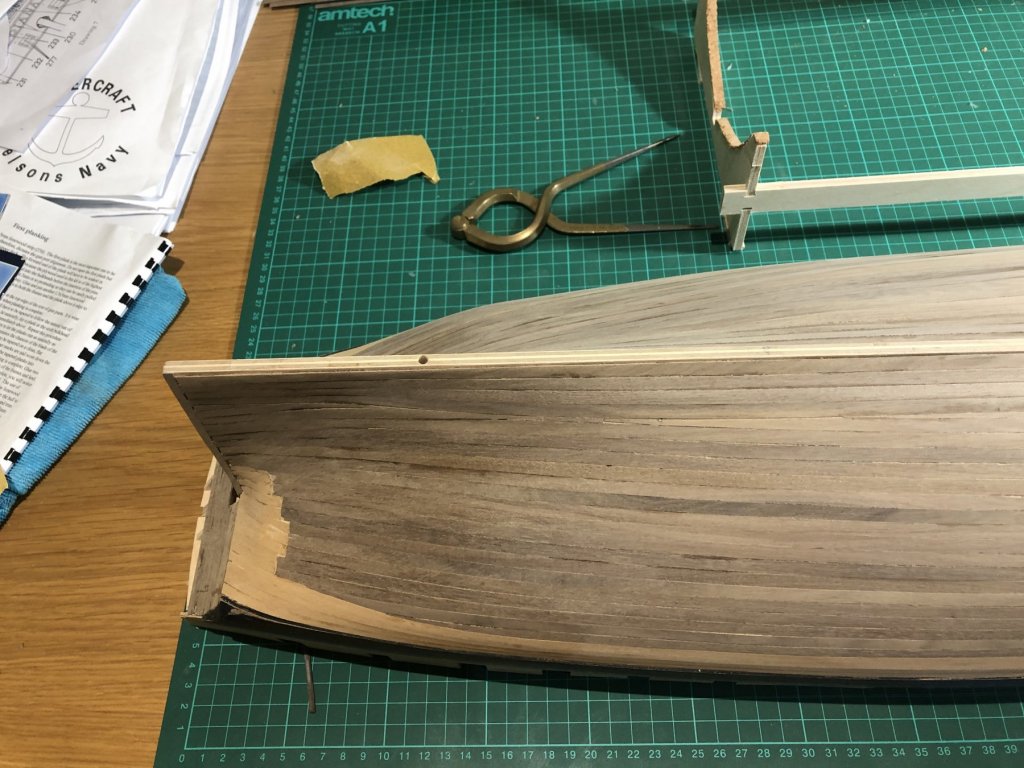
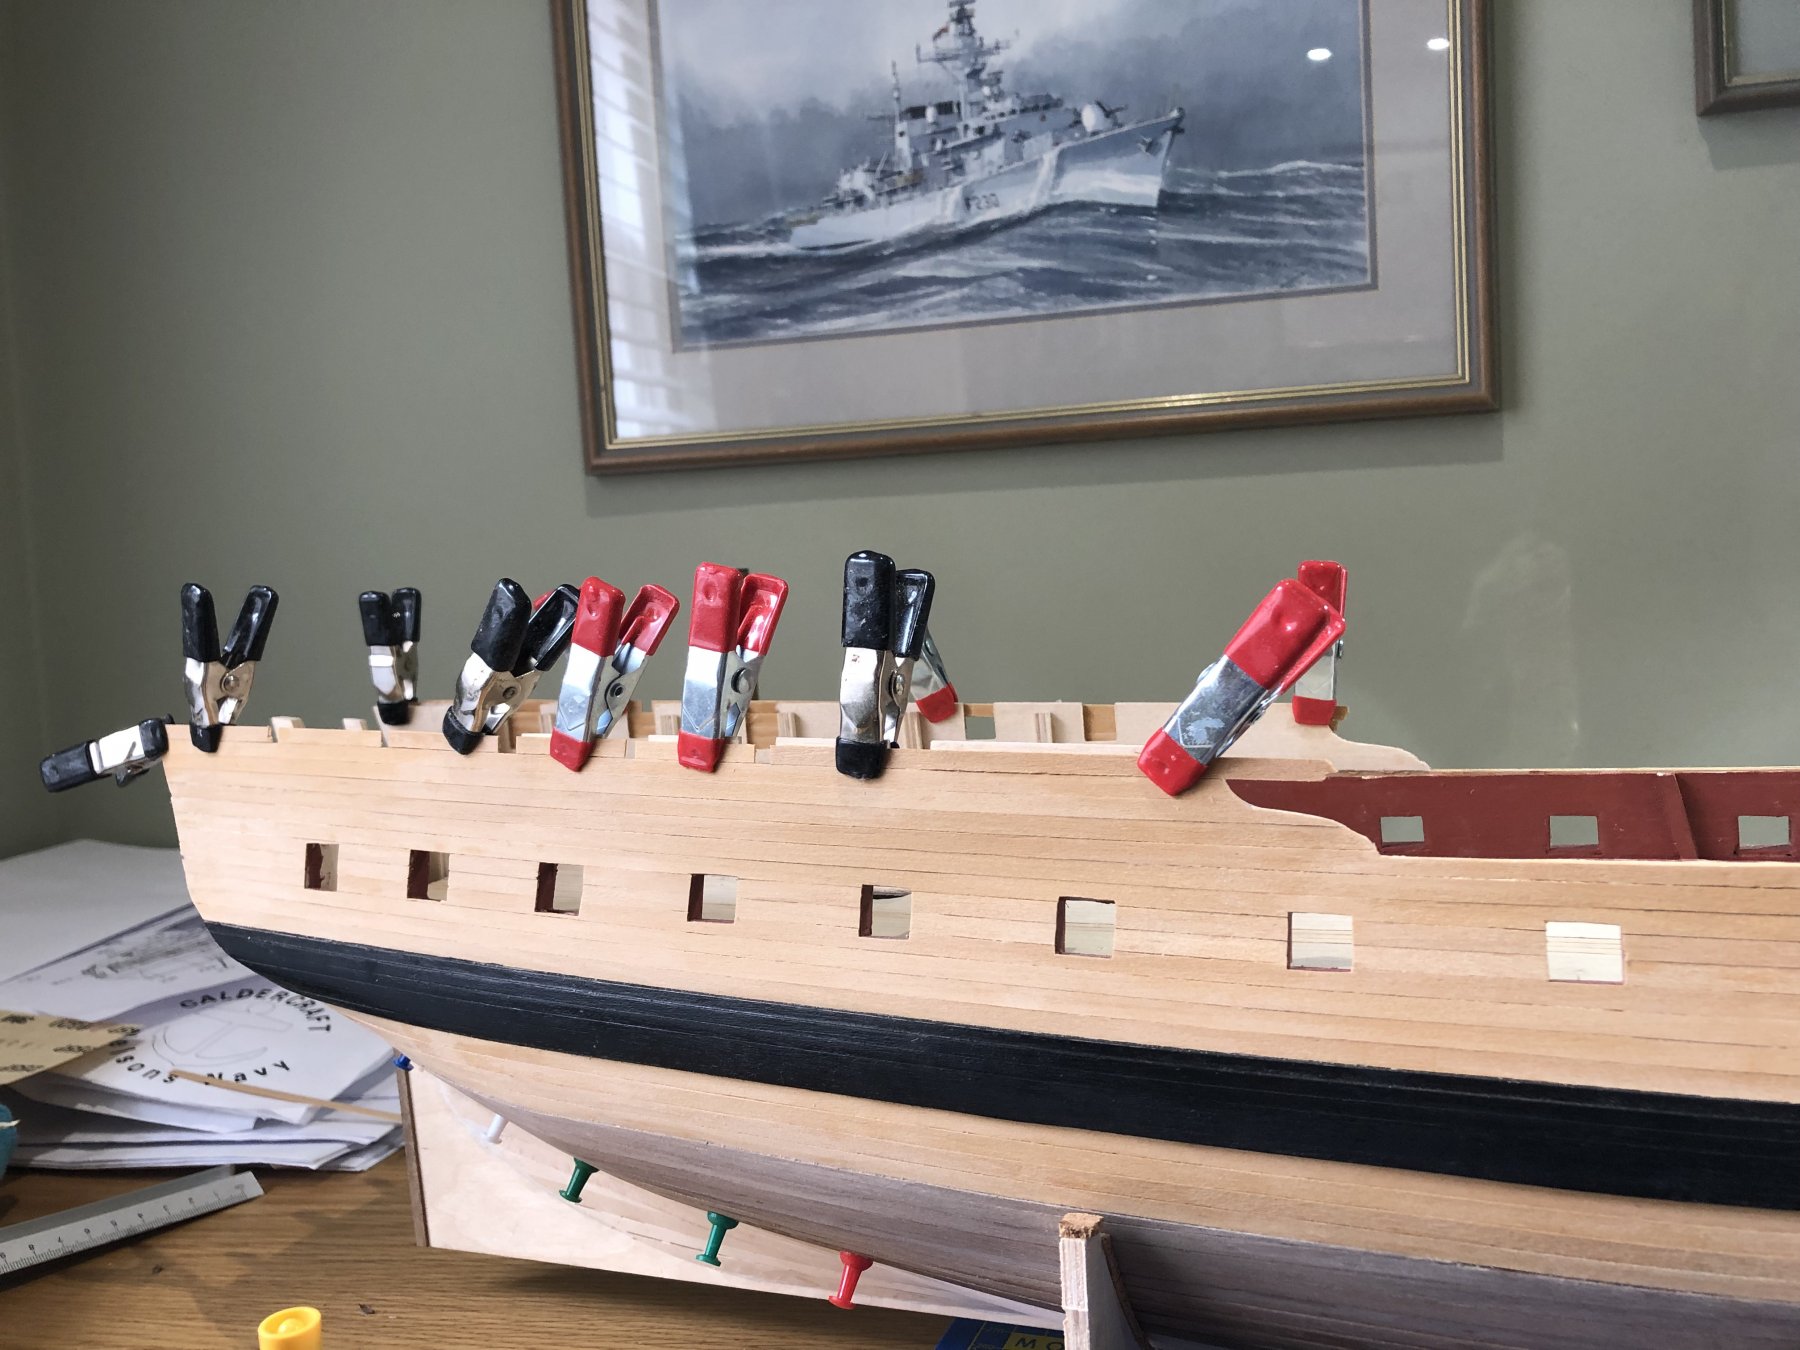
Okay: the upside of the british summer is that you can play cricket, go biking, fishing, sailing, on holiday and hold BBQs; the downside is that time spent on the model gets eroded. The result is that progress has slowed...but not stopped. I have been slogging on with the second planking of the ship. My ambition was to be precise and use the process as a learning experience - improve my planking skills. in reality I accepted that all this will be hidden under copper plates therefore whilst absolutely important to ensure the shape and flow of the hull is correct, the actual planking is of secondary consideration. I have finished the portside and am halfway down the stbd side. I have lined some of the lidded gun-ports and finished planking around the upper bulwarks. I have noted one error which will irritate me for many weeks to come. The upper gunports, those around the quarterdeck, have, I believe, been fitted correctly, they are level with each other and in the correct position but the edges of the ports are not vertically parallel with those cut into the ships side for the lower gundeck. I'm not sure how it came about but suspect the cutting of my lower gunports is to blame especially on the port side where I should have been more disciplined in setting the vertical references. I'm not sure there is much I can do about this. A model always has a 'best side' and I think I've just discovered that mine will be a starboard girl!
I have to tiddly up some of the woodwork around the lower ports and just file/square the upper ones - the photo is slightly worse than the actual model is! My plan is to complete the planking, finish the gunport linings, sand and then take stock on how she looks. First stumble - hey ho. All learning process.


-
Dmitry thanks for your kind words - the boxwood is very smart. This model is a big step up in scale and complexity for me. I haven’t made many in the past: SUPPLY and THERMOPYLAE were both smaller kits but I got the bug. I have been a bit slavish to the instructions, deviating slightly where people have suggested better solutions or effects and have yet to build the confidence to branch out and try differing techniques. Once I complete DIANA I think my next model might be a bit more adventurous and I will look at planking (deck and sides) in a more systematic manner and stagger as well as butt nailing. As they say - one thing at a time.
Good to to have you along - do shout if you think of any other good ideas; I’m keen to learn as every day is, after all, a school day!
Peter
- robdurant, BenD and DmitriyMarkov
-
3
-
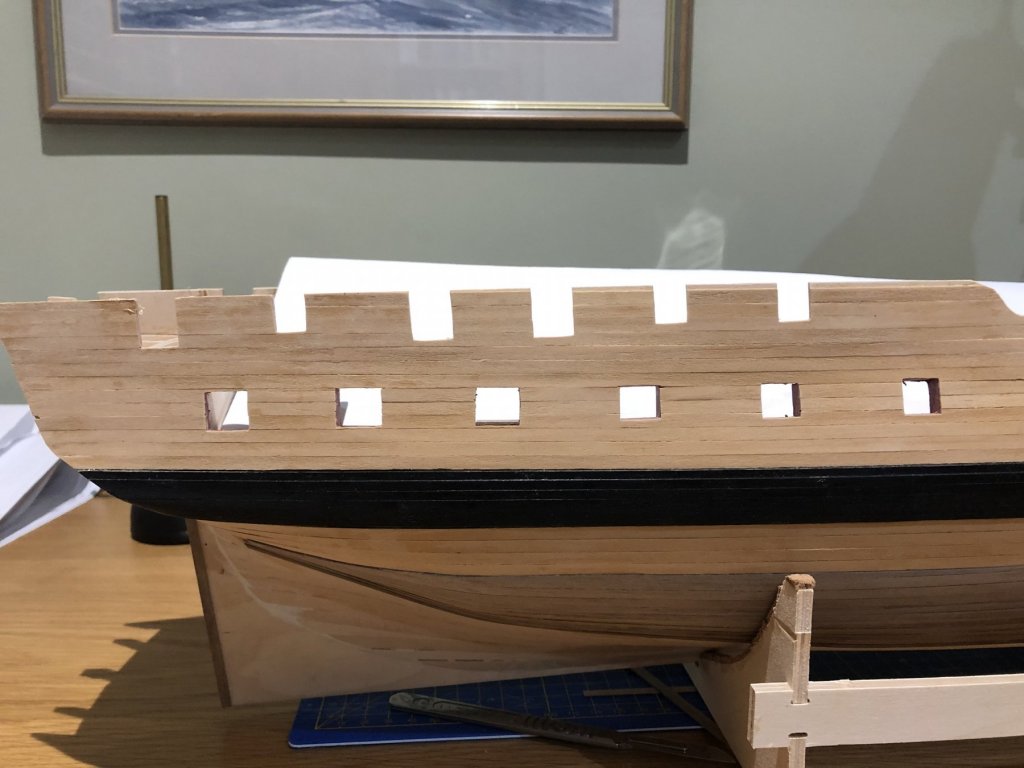
Update. Not much to add really. I have had a free morning so finished the majority of the
.thumb.jpg.9e5d36dd81f6b584ffb959ba5f388d9f.jpg)
 upper section of the second planking in boxwood on both sides. I will do the quarterdeck and the trimming around the transom area later. I then cracked on with some walnut planning on the hull that will be below the waterline and will eventually be covered by copper tiles. My planking is not great so I am using this to get practice and improve even though my labours will be masked in due course. I think this phase might take some time!
-
Thanks Jason. 'The Lip?' okay, I have, I think followed the instructions which state @ the gun ports with lids, can now be framed using the same method and material as the others, but stepped in from edge by 1mm'. So, having looked at Ray's snaps, I interpreted that as lining post second planning which would leave the 1mm of the lining visible around the interior of the gunport and not masked by the second planking as in the other ports. maybe I got that wrong!
Peter
-
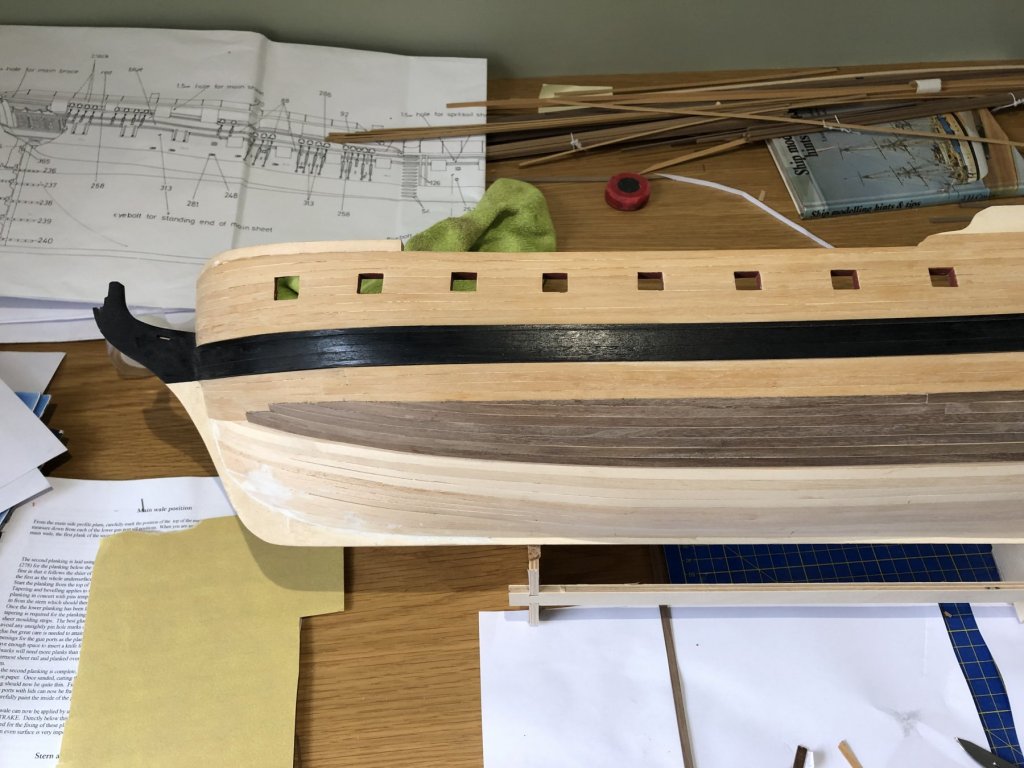
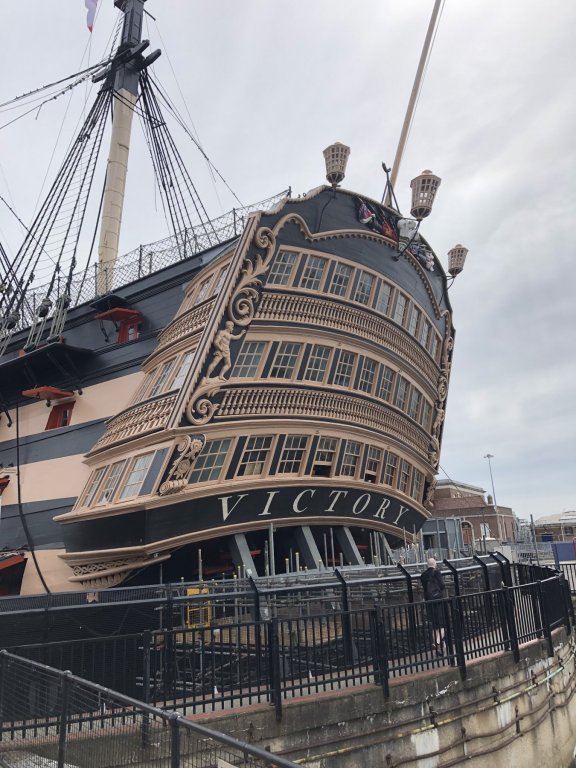
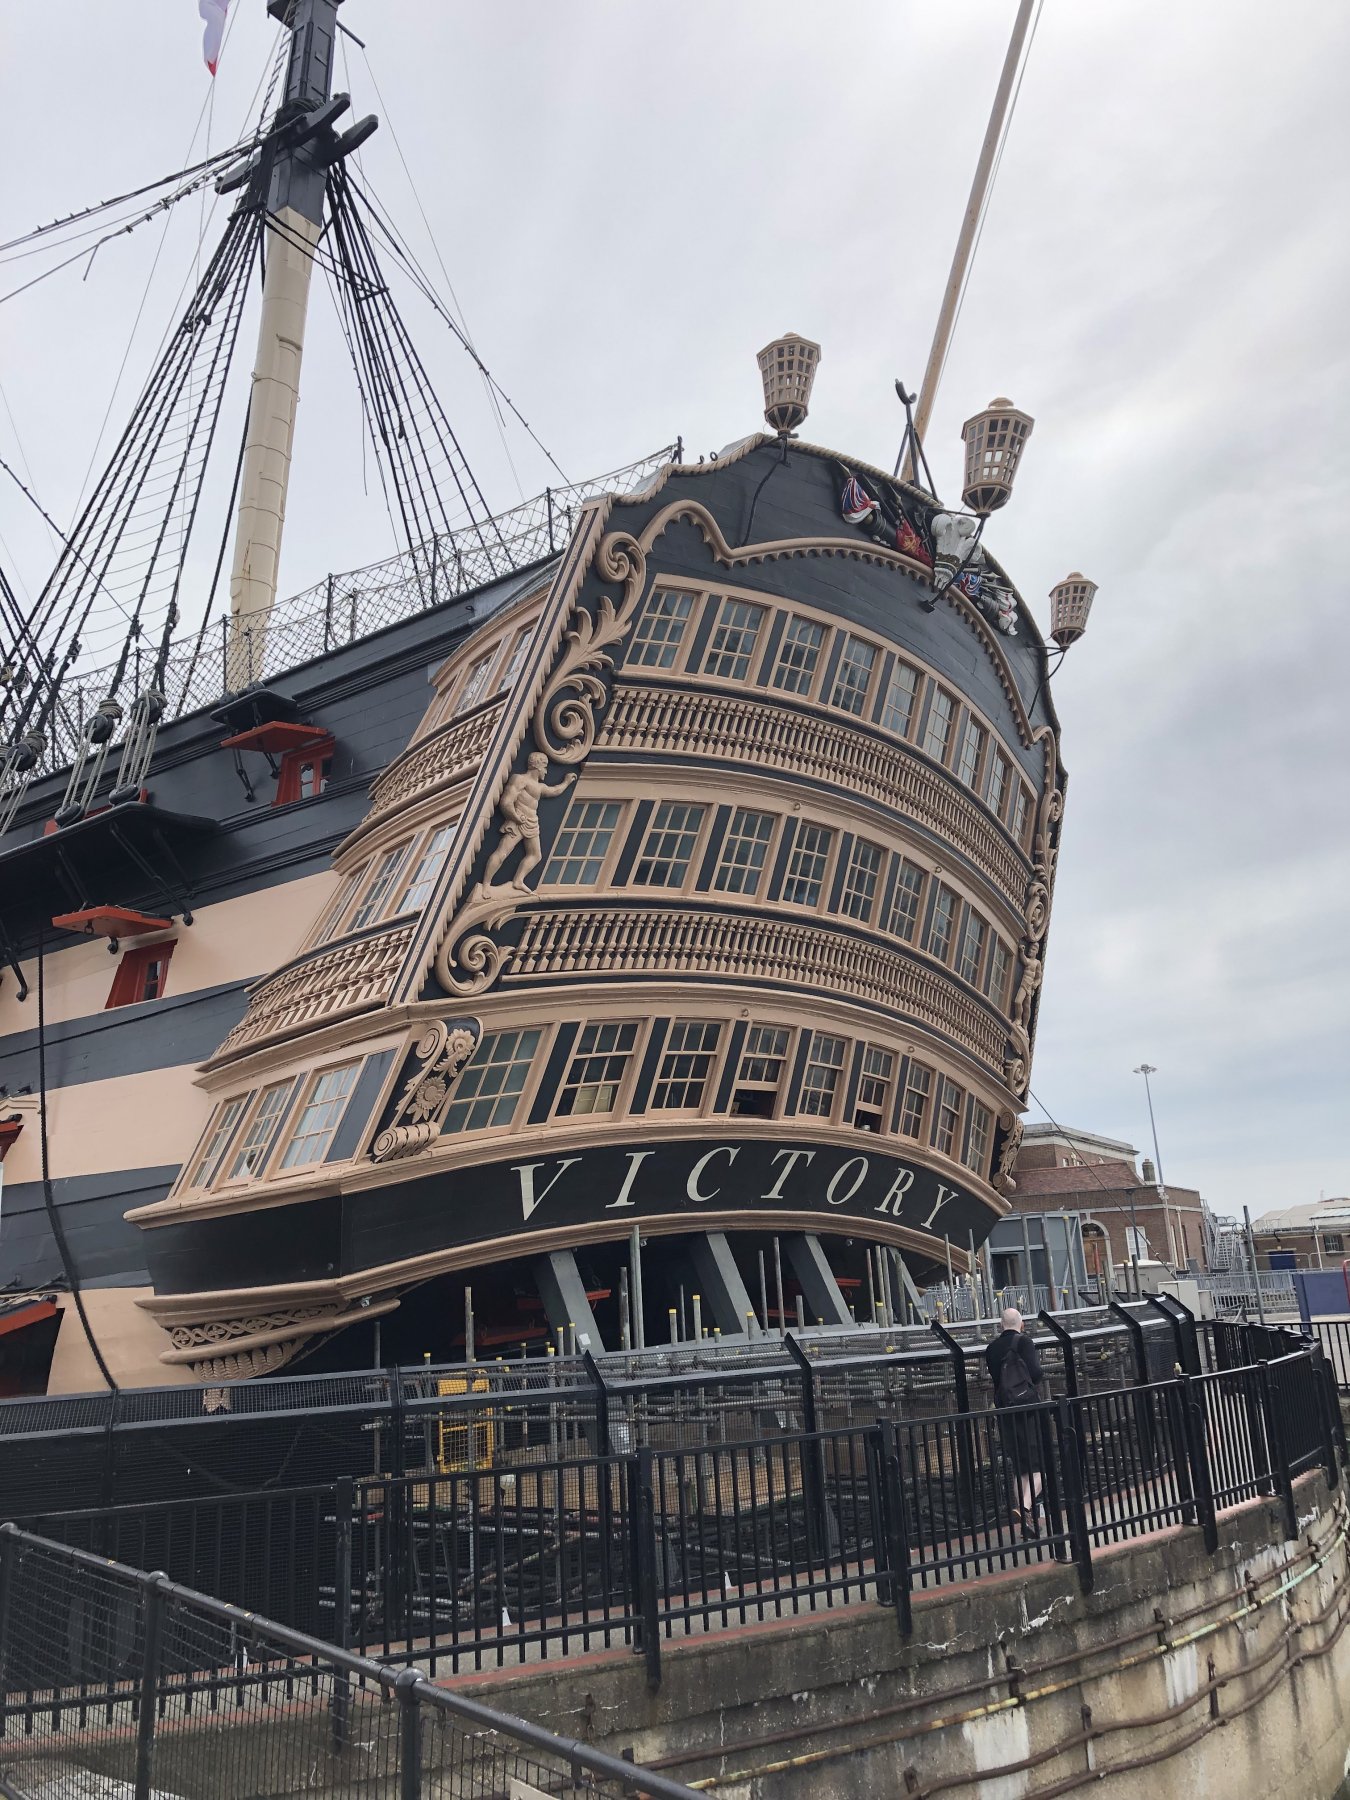
I have the luxury of living close to Portsmouth dockyard, so I went to have a look at VICTORY's transom to see how the masters delivered the various fusions of wood. She is undergoing restoration at the moment so scaffolding was present, but you can make out clearly where the gunnales and planking aligned. One to mullover when I get to the back...
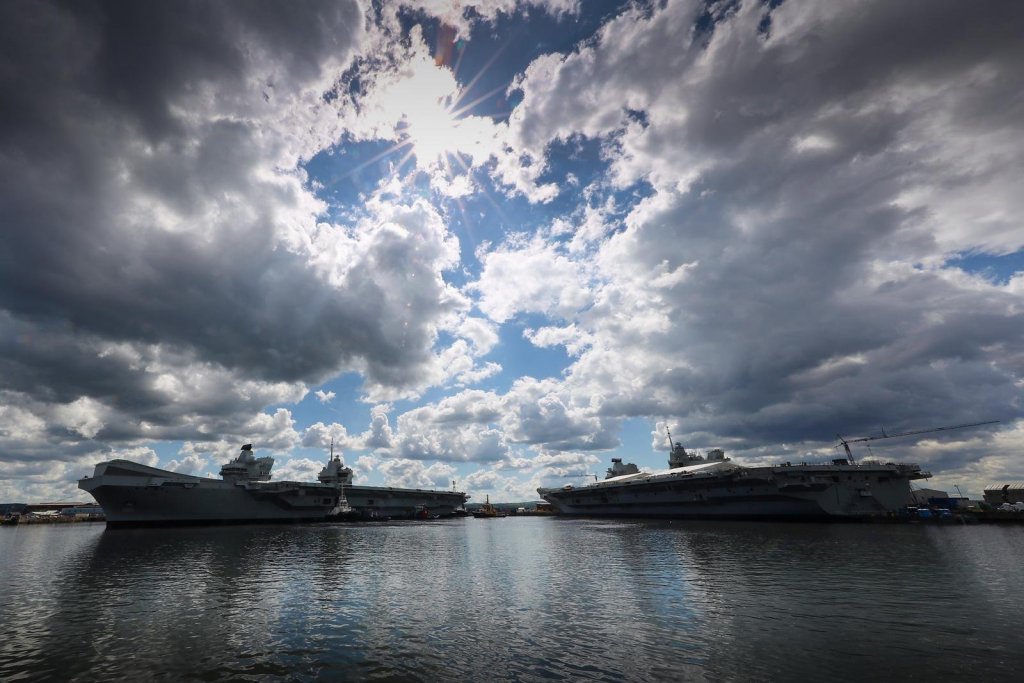
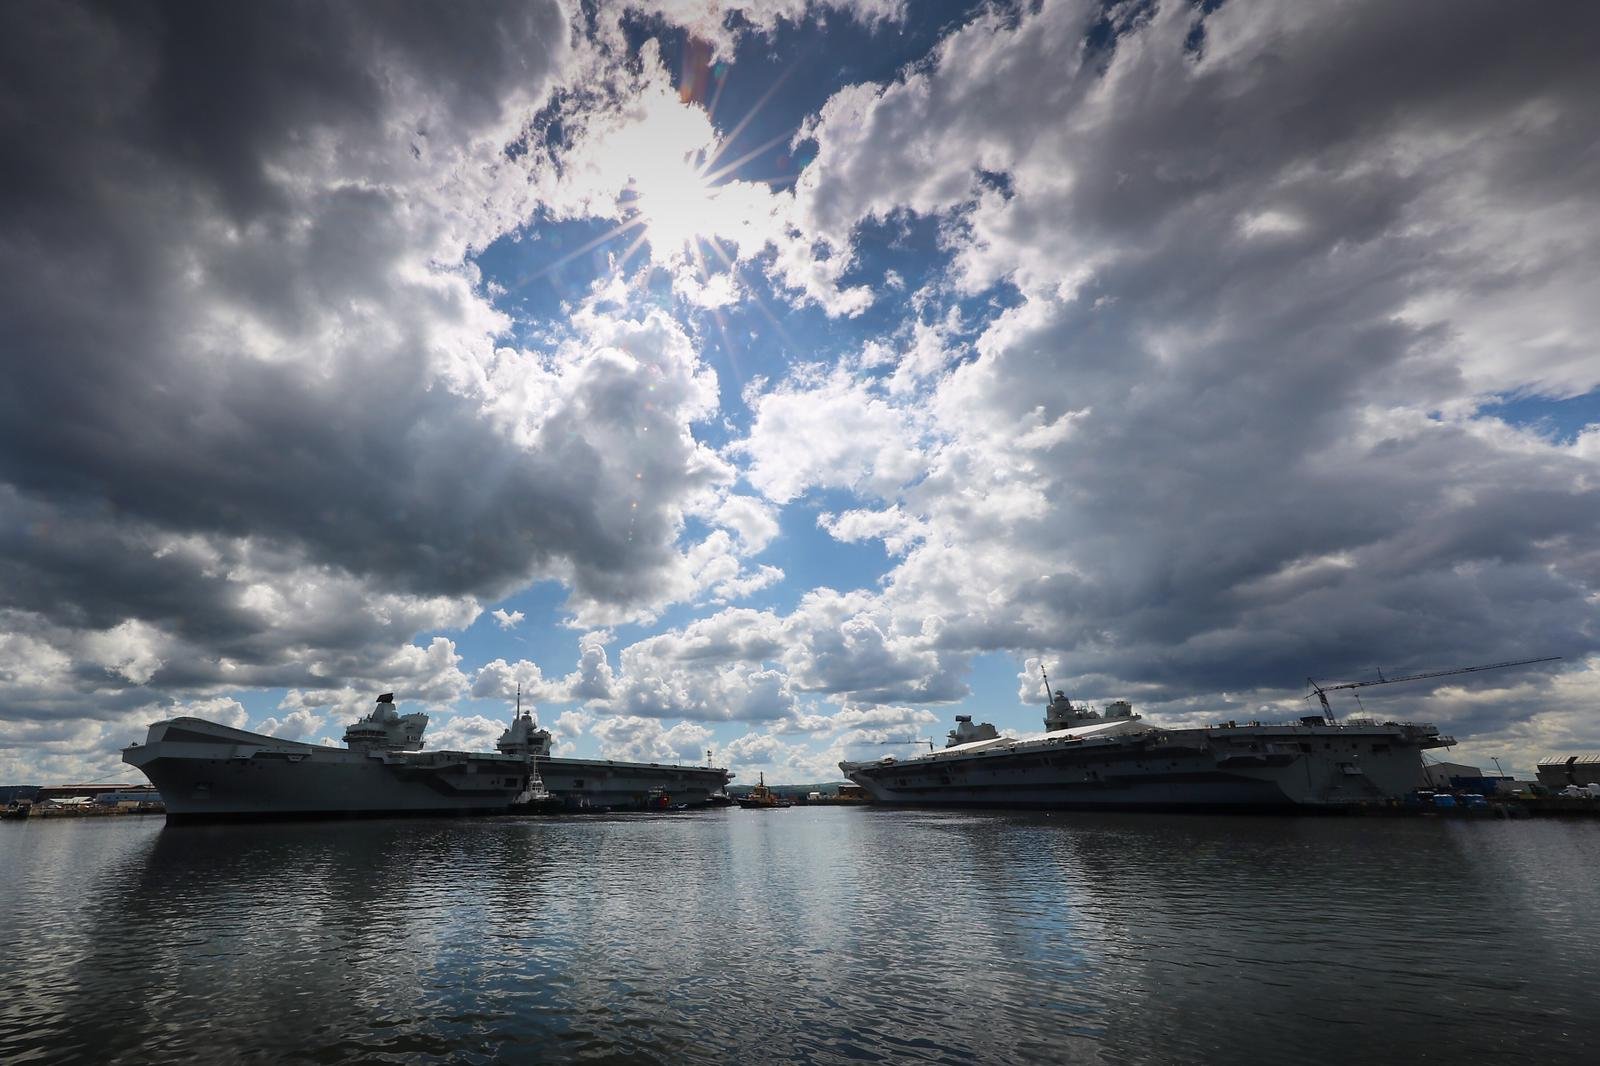
Plus a couple of ships I made (helped) earlier. HMS QUEEN ELIZABETH and HMS PRINCE OF WALES.
Back to gluing planks and thinking!!
Peter
.thumb.jpg.ccdb1476807c3bffb34ea25b9e02854e.jpg)
.thumb.jpg.e0092b218840e3b994371ddd51d96f90.jpg)
.thumb.jpg.942bf4812123232f2230a8b701618e7e.jpg)
.thumb.jpg.f6f30d74b4844e9cd9965d296552b43c.jpg)
.thumb.jpg.f1c967941468b7bc47108dd8c54feeca.jpg)
- paulsutcliffe and Haliburton
-
2


.jpg.f0c232762e1f0410befd0832e6224f61.jpg)


.JPG.e51fdd4f2a2d6e4ba07e62c978733d9a.JPG)


.jpg.2f8d31b0bfa6927a5e5d2ca931466e6b.jpg)
.jpg.1f655daf8e3492a777b0a0cb23450f5e.jpg)


.jpg.740e1a4c4f3ece78e1196263f2422607.jpg)


.jpg.cfa1cd28899999b6ff82c27f8451de2f.jpg)
.jpg.c49bdffe56ed33ce364d0f9eab1db919.jpg)

.jpg.b0ea2ac3b66088e23db0ad1f9f615e46.jpg)
.jpg.d97c9a77178195ee950c268f0c126a89.jpg)
.jpg.8c7c2a7b8b47dca806f432567512d582.jpg)
.jpg.ce4917009c49bb0758fe0949cb8c4781.jpg)
.jpg.04fdb83a89c4dda58d9a6f5d2457d683.jpg)
.jpg.65e5e233272ad68caf2bf022fd0ebb5e.jpg)
HMS DIANA by Peterhudson - Caldercraft - 1:64 Scale
in - Kit build logs for subjects built from 1751 - 1800
Posted
Interesting: DIANA model is 1:64 - COTTESMORE (the Hunt class) is around 1:200. In reality DIANA was 173 feet long at her extremes and had a crew of upto 315; COTTESMORE was 197 feet long with a crew of 40 and I thought she was pretty full!