


Kevin
-
Posts
6,925 -
Joined
-
Last visited
Content Type
Profiles
Forums
Gallery
Events
Posts posted by Kevin
-
-
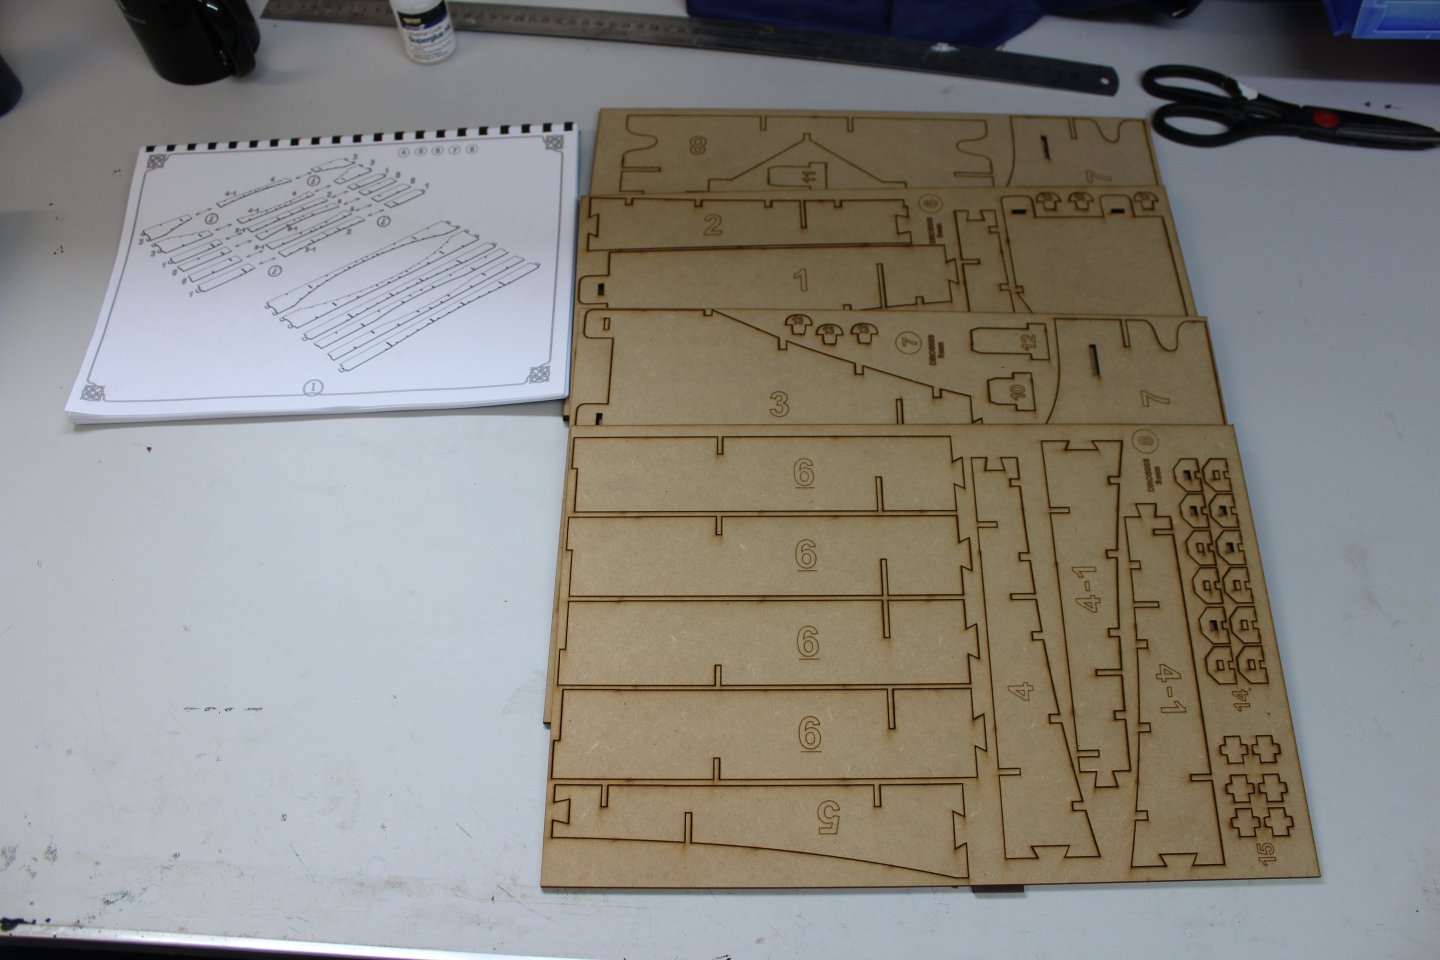
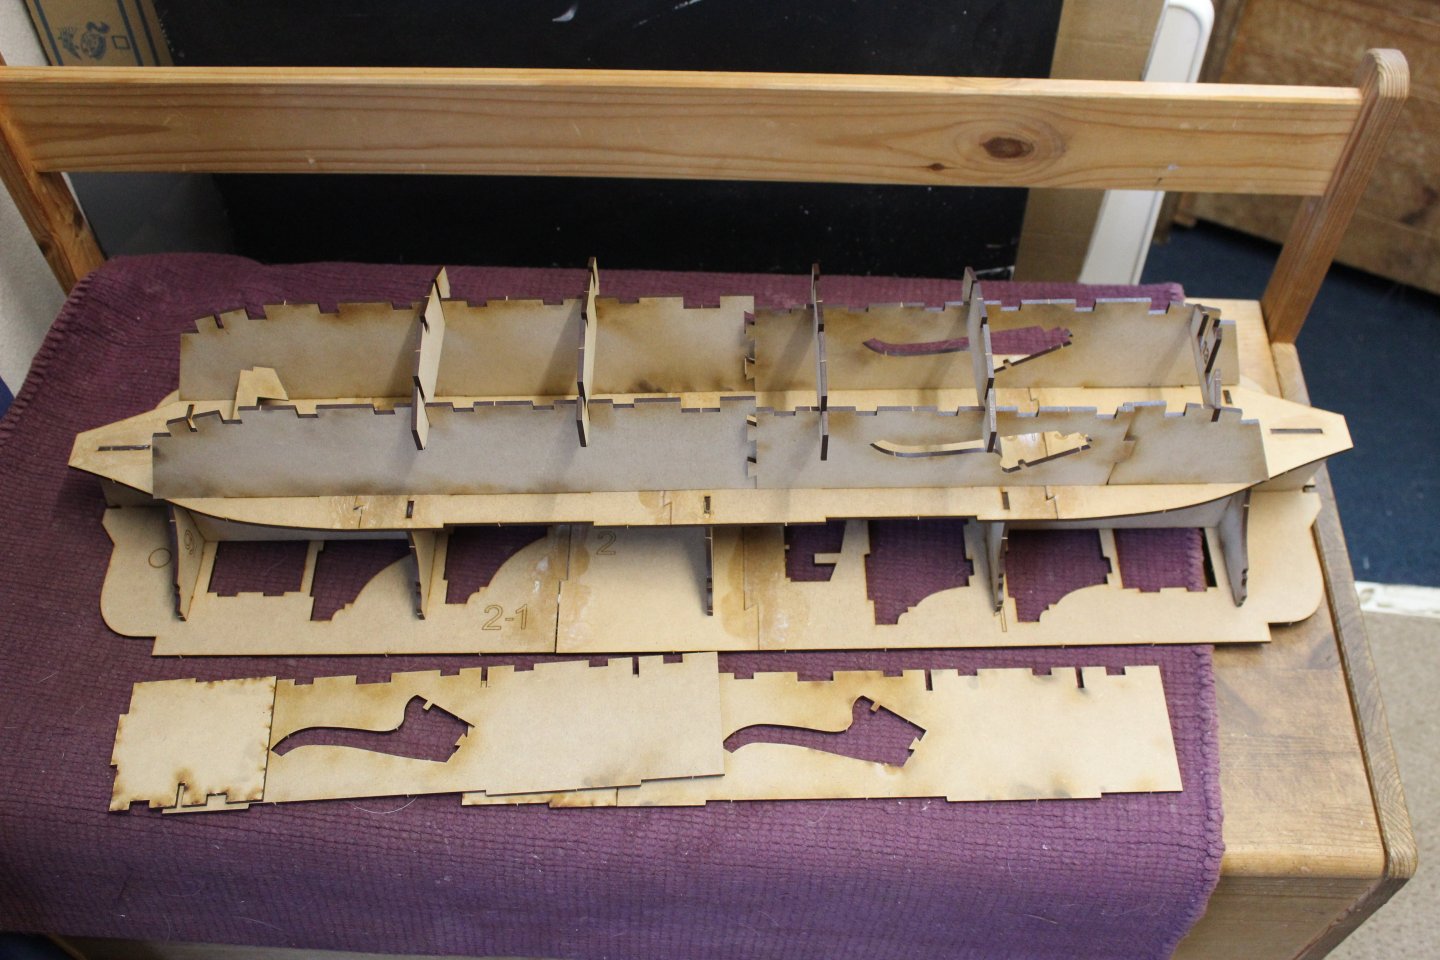
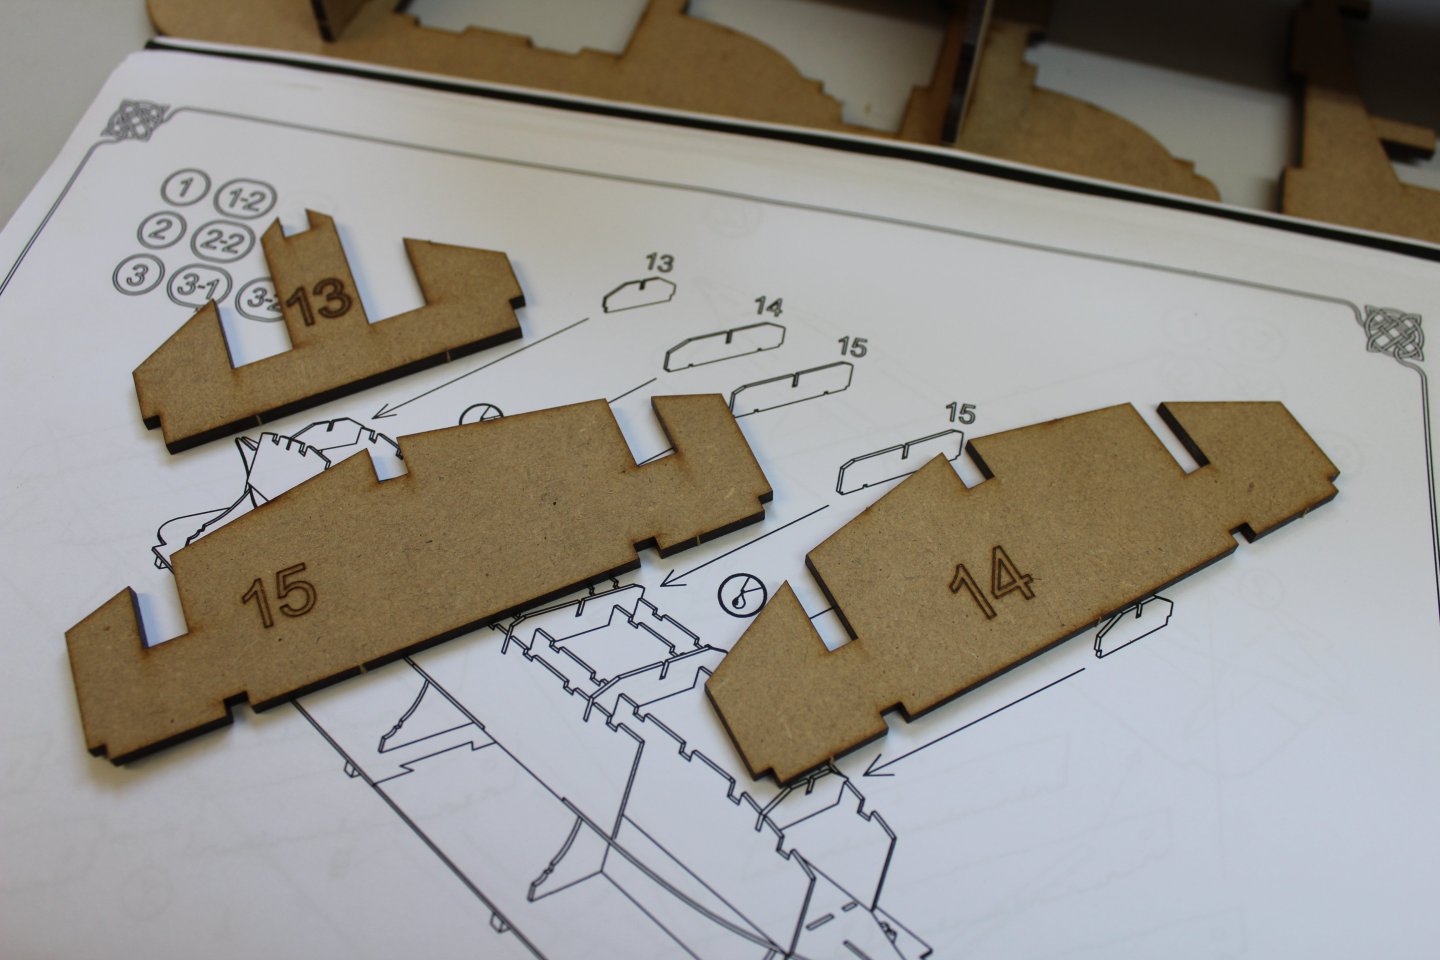
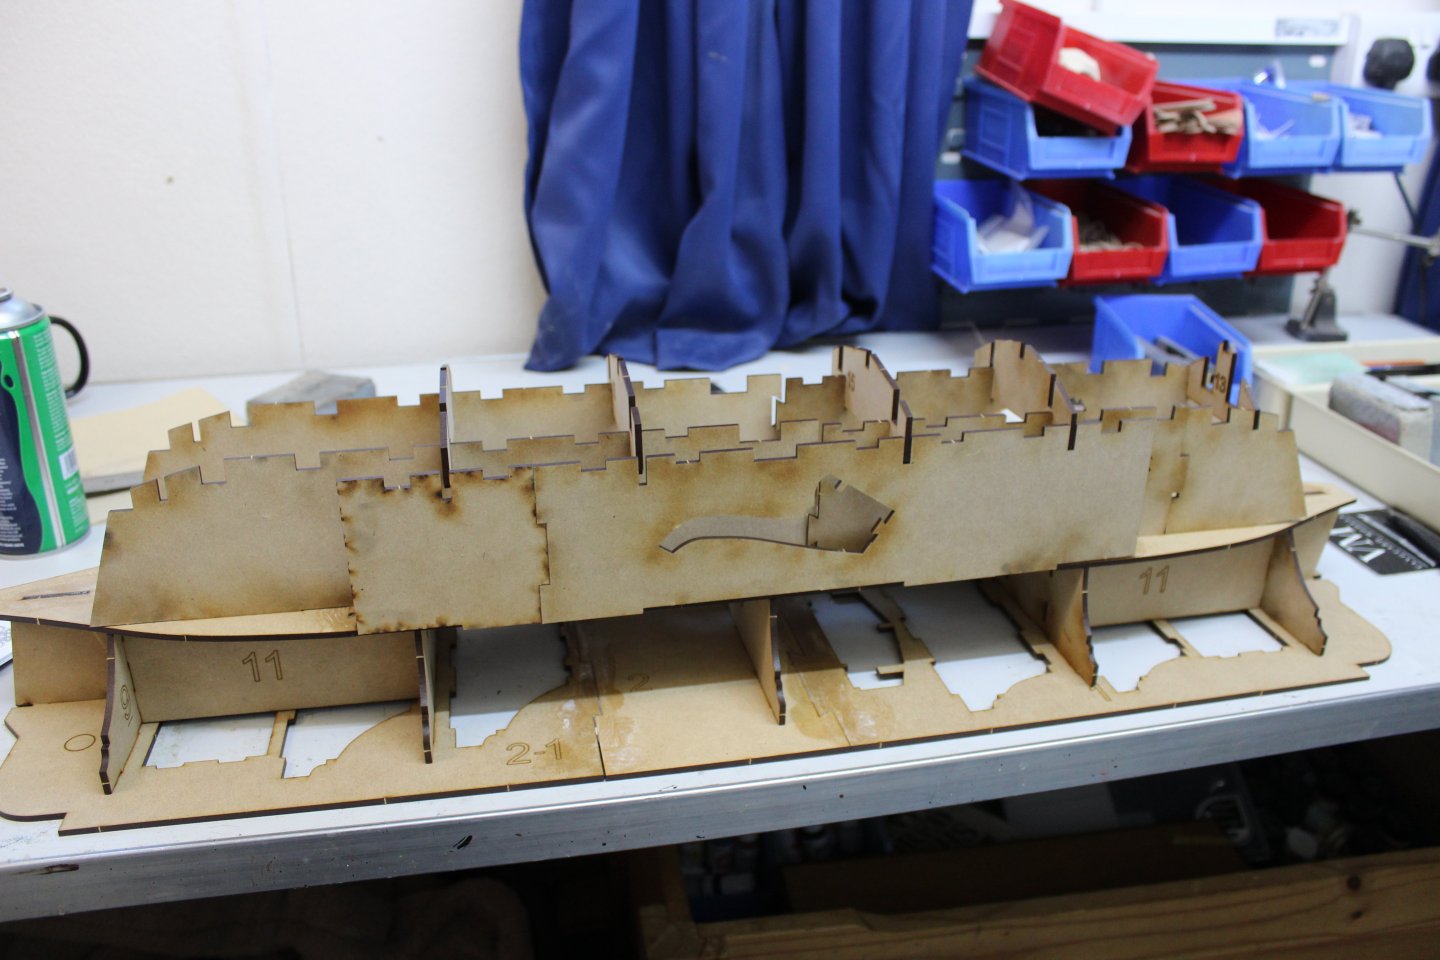
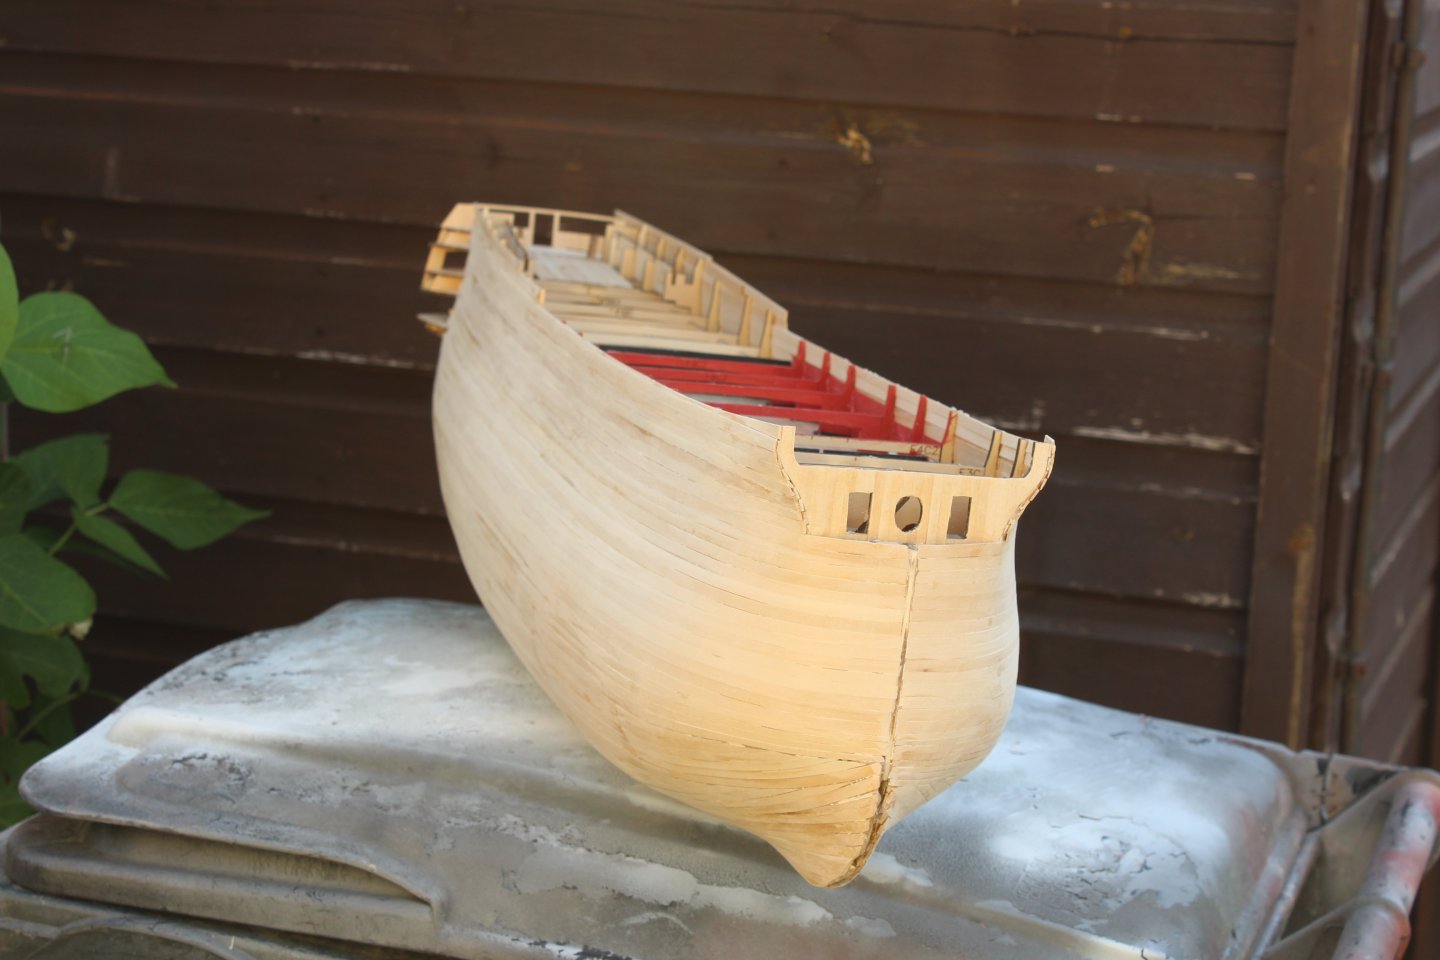
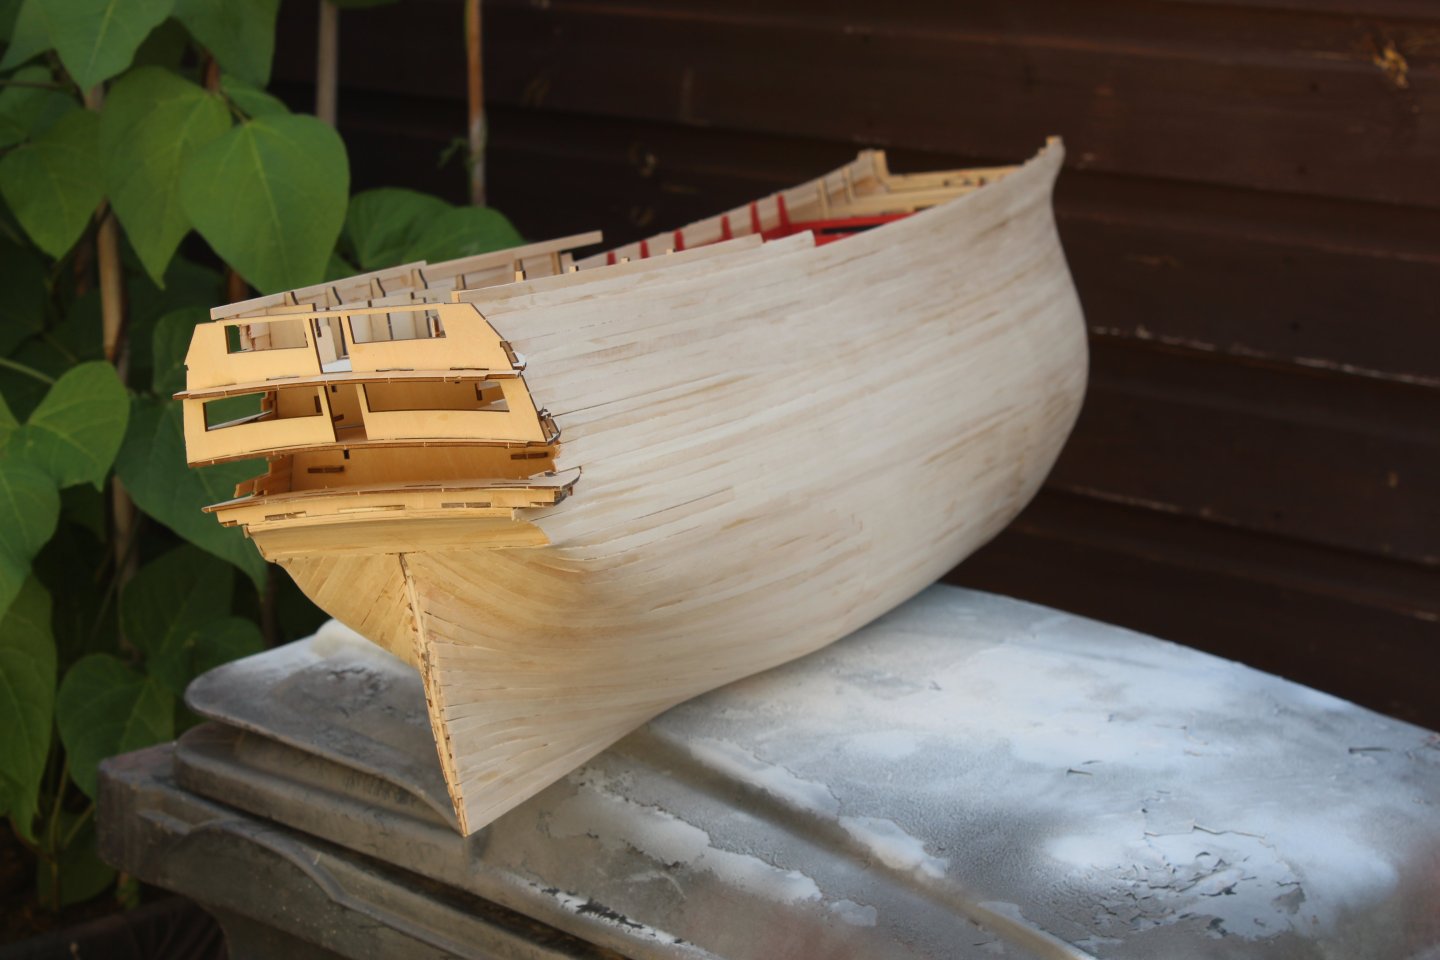
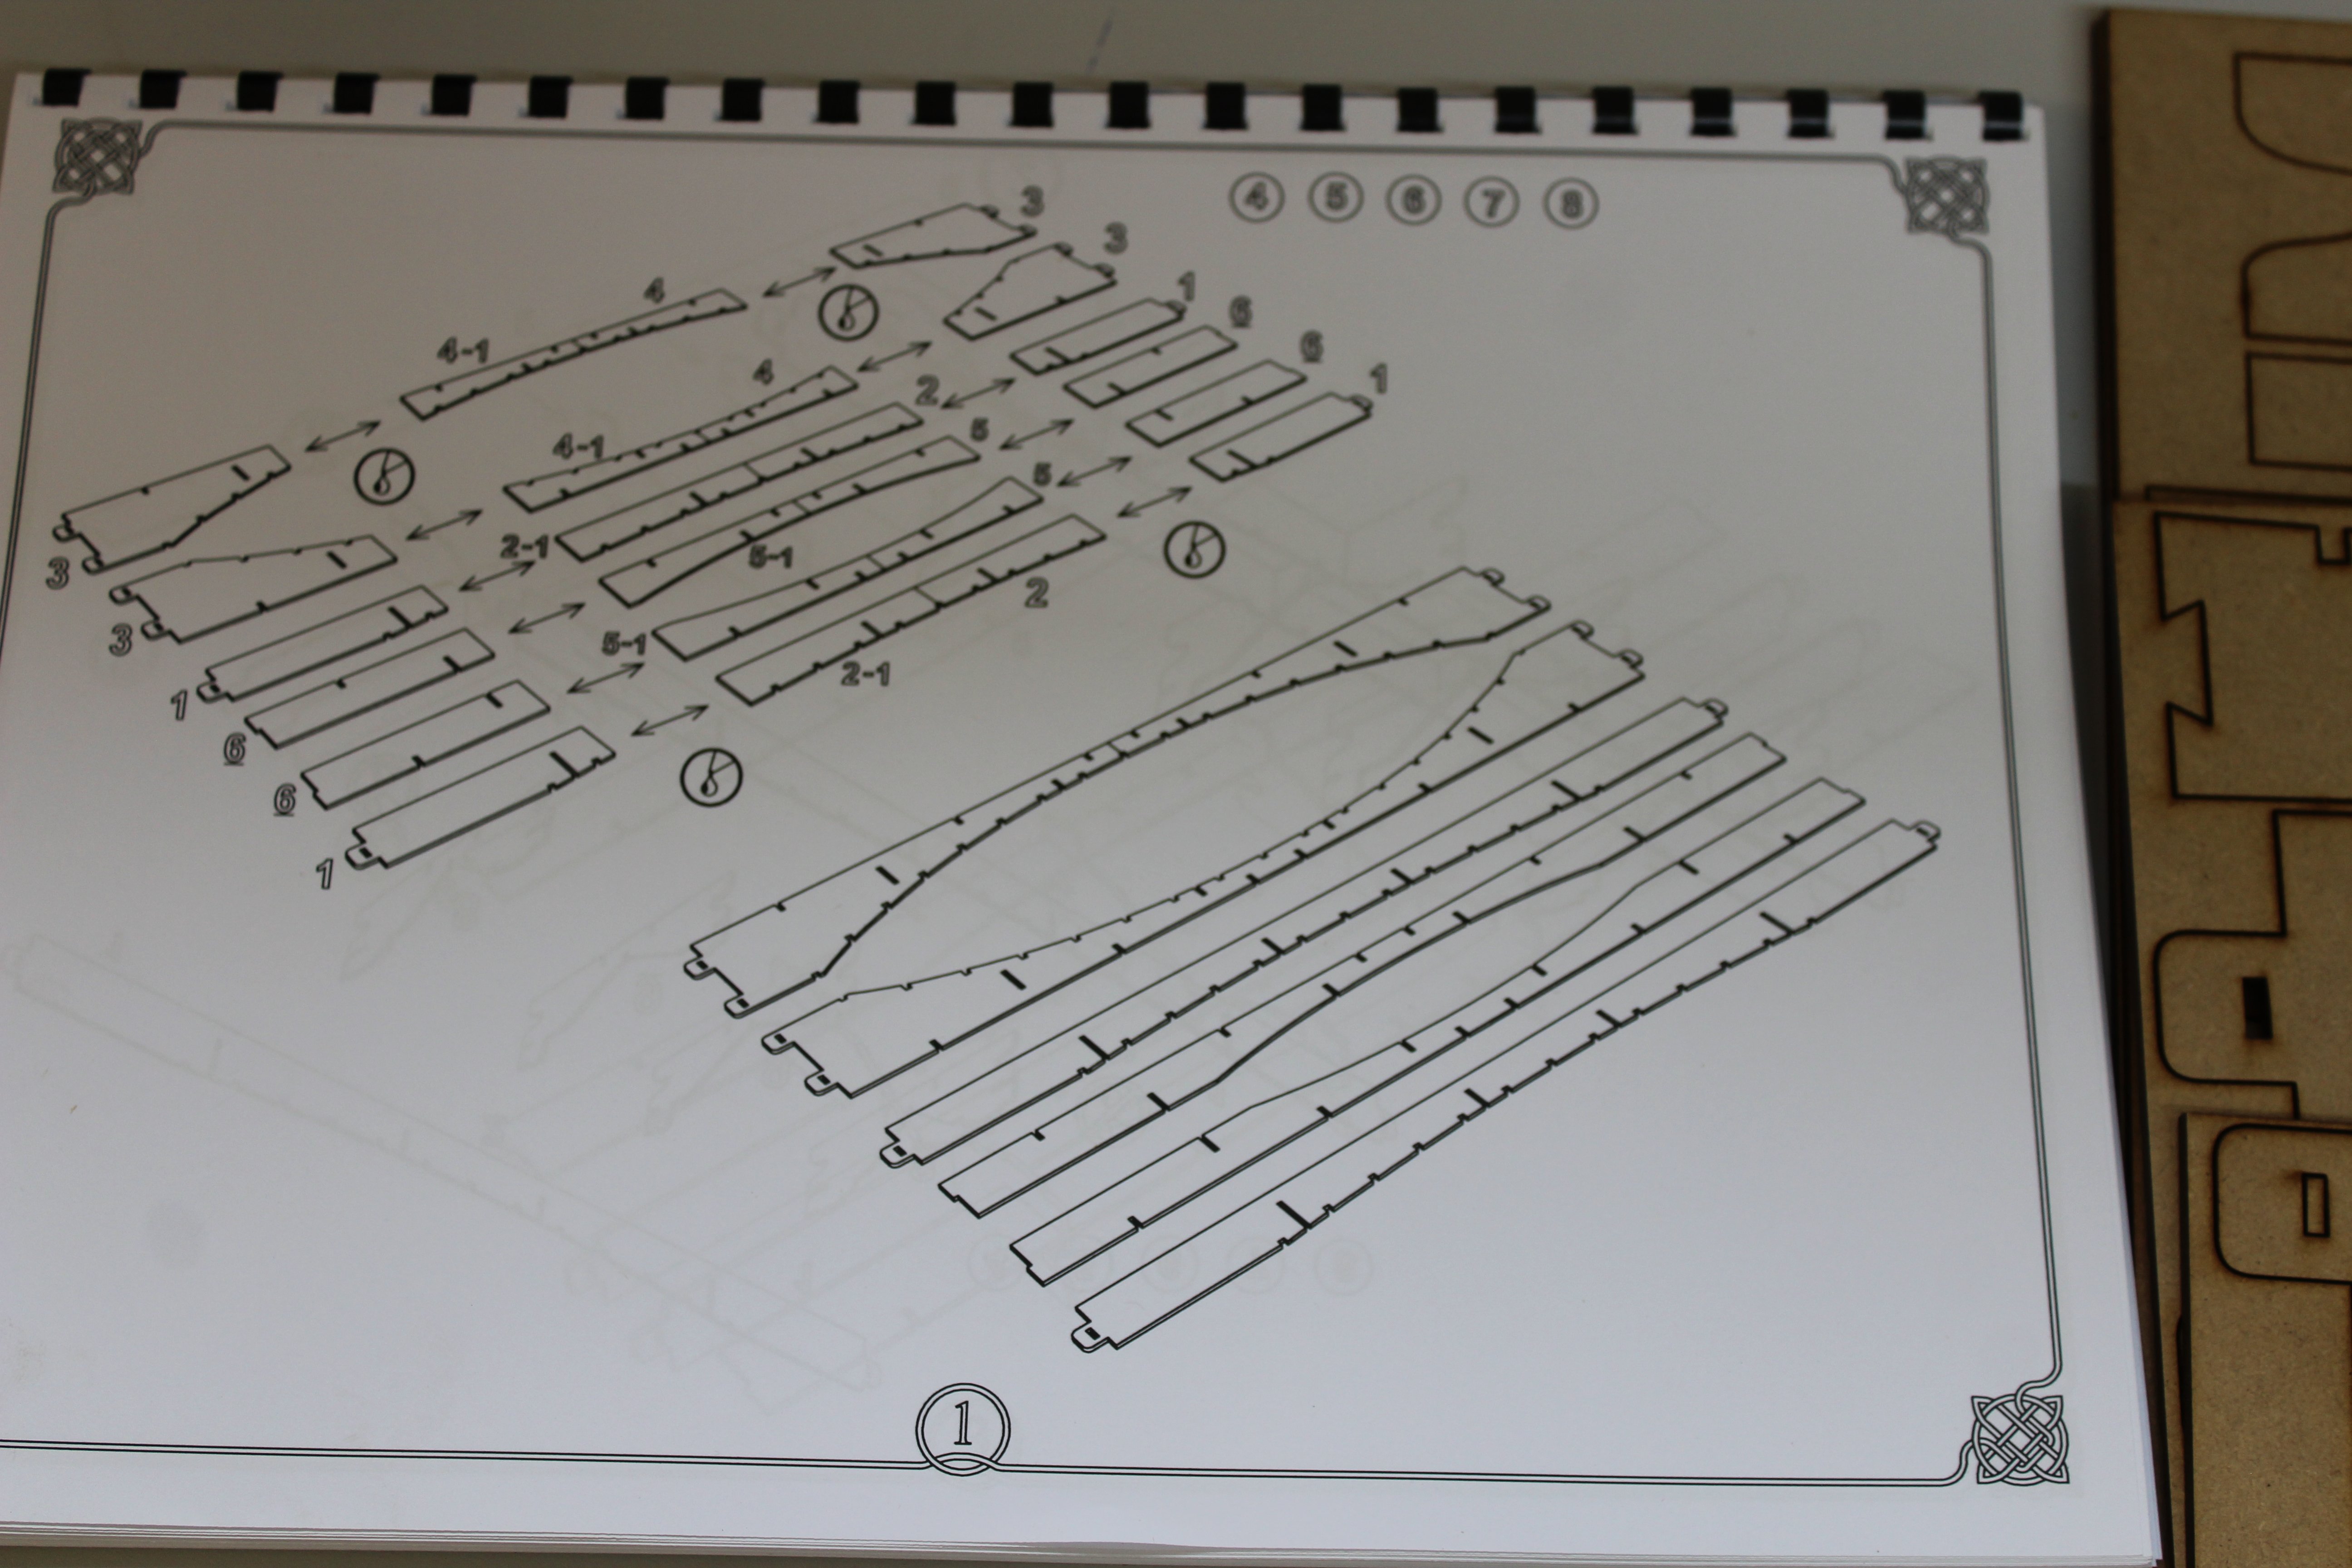
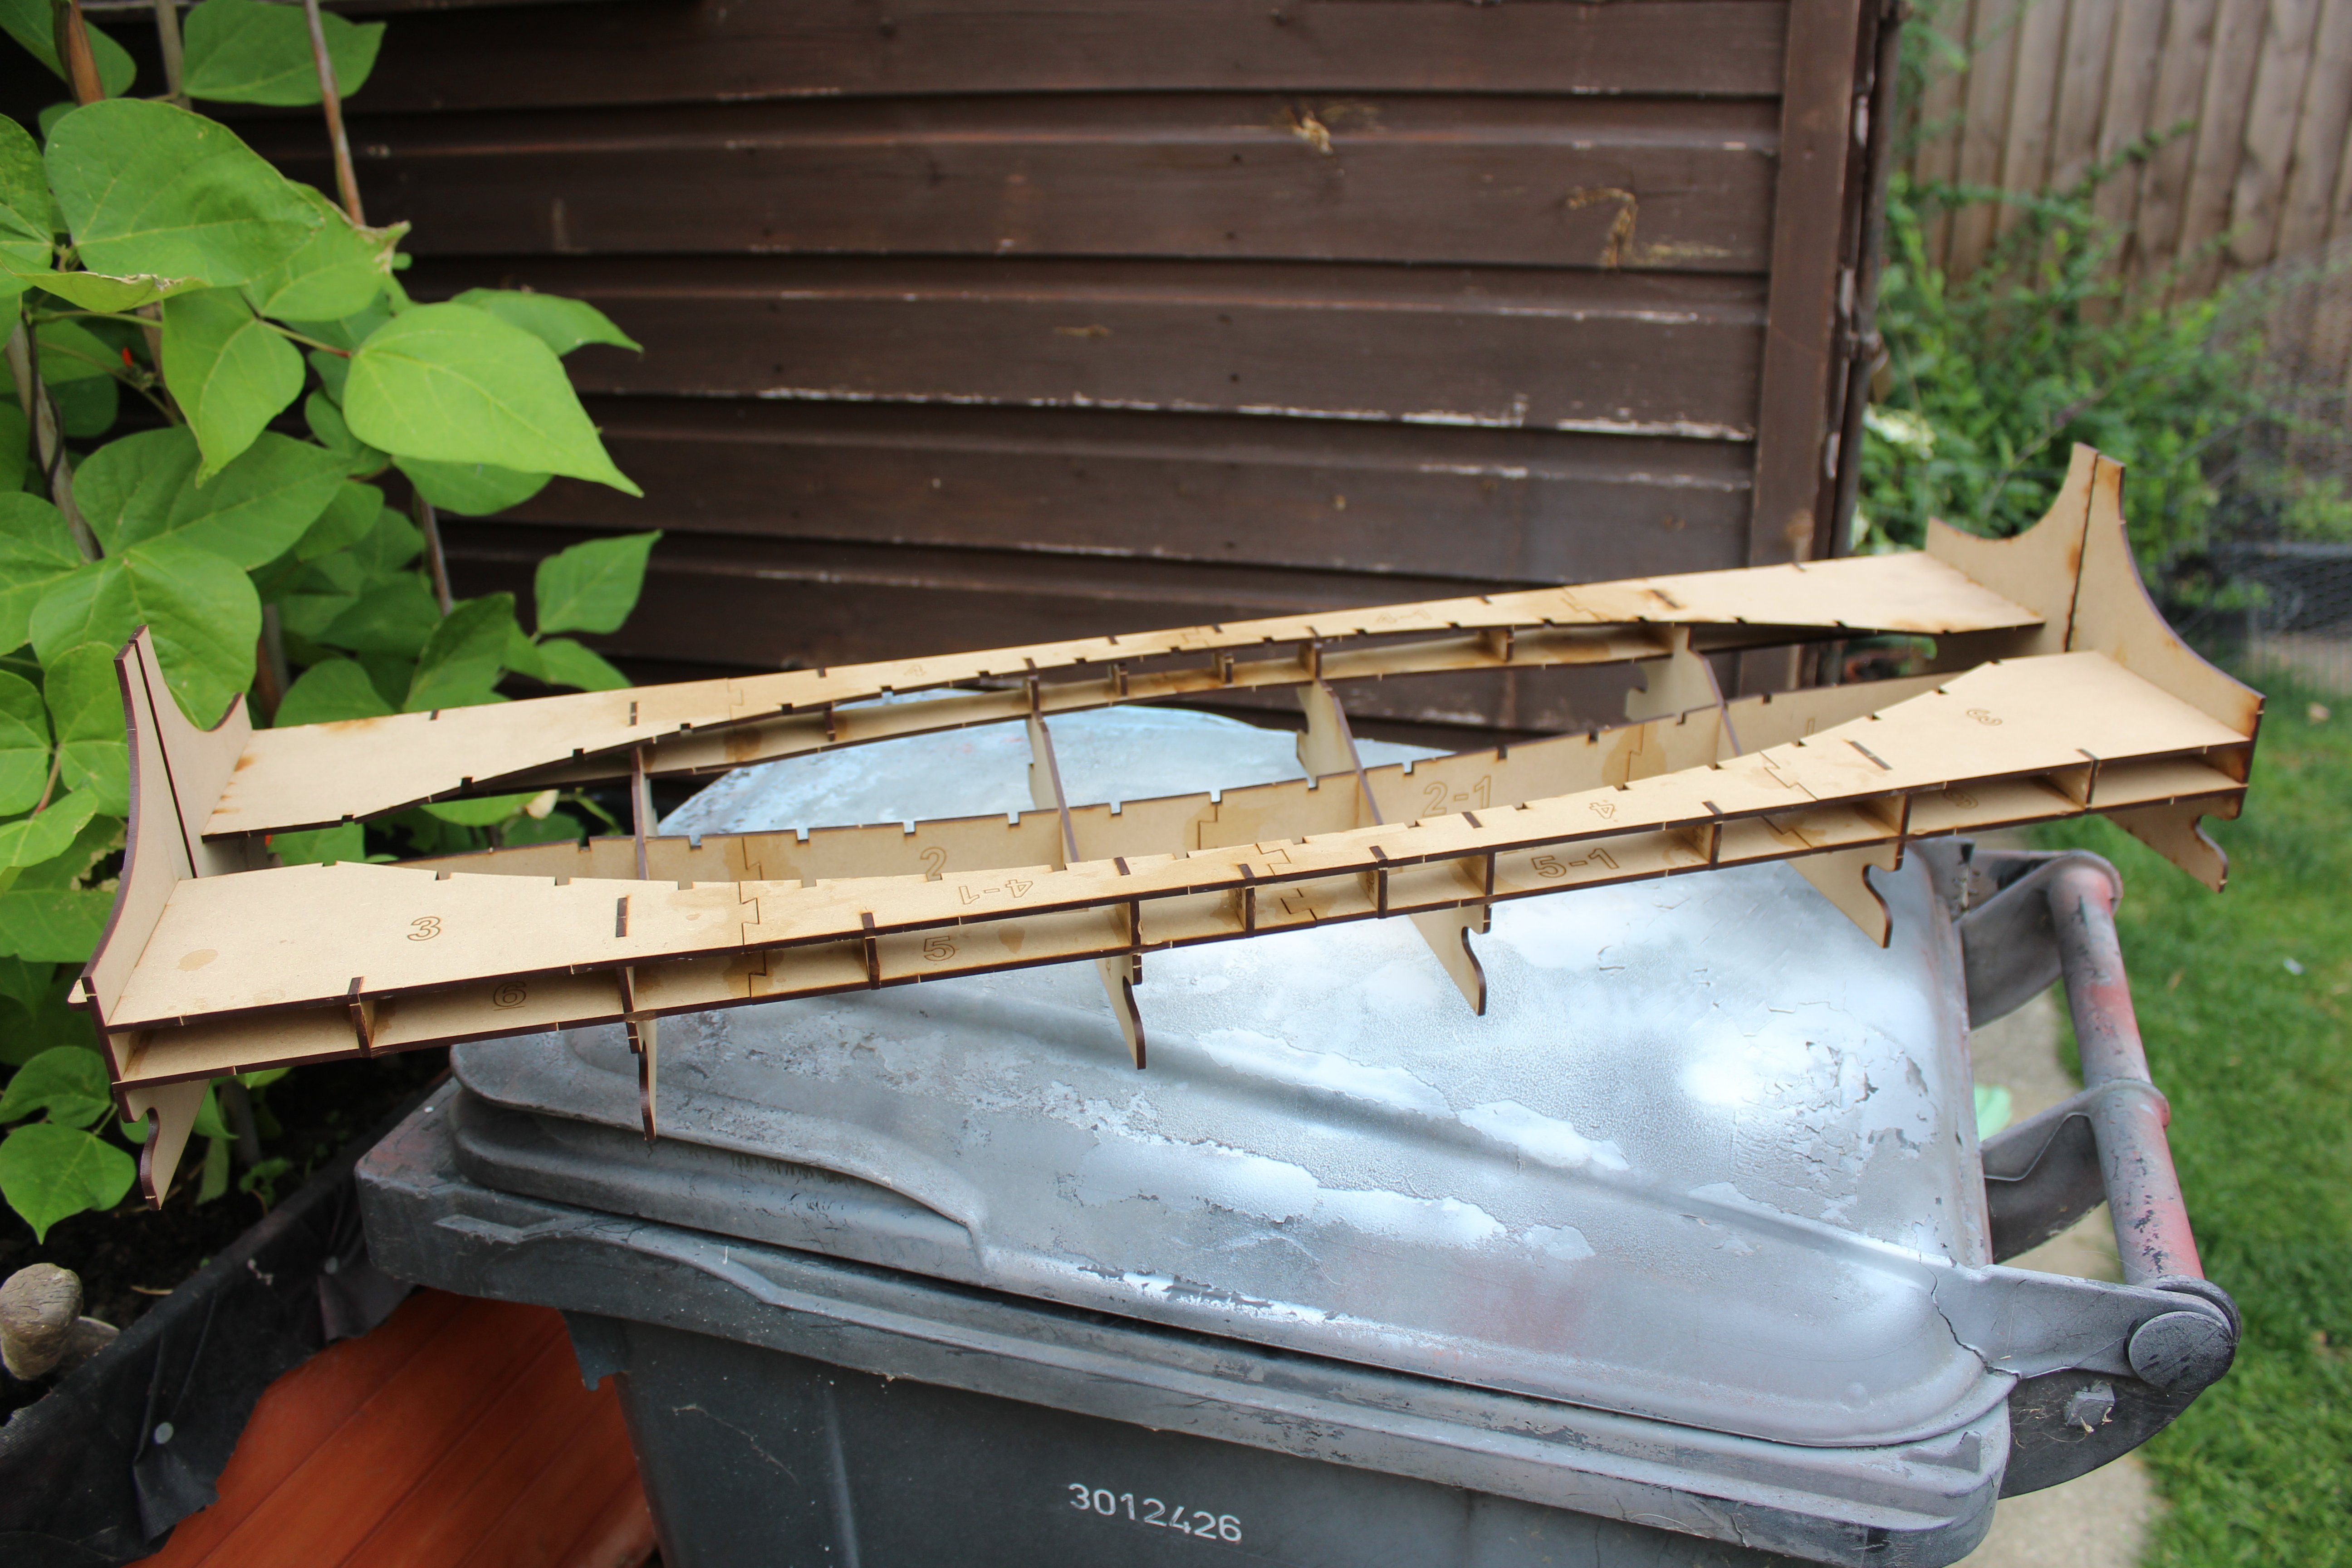
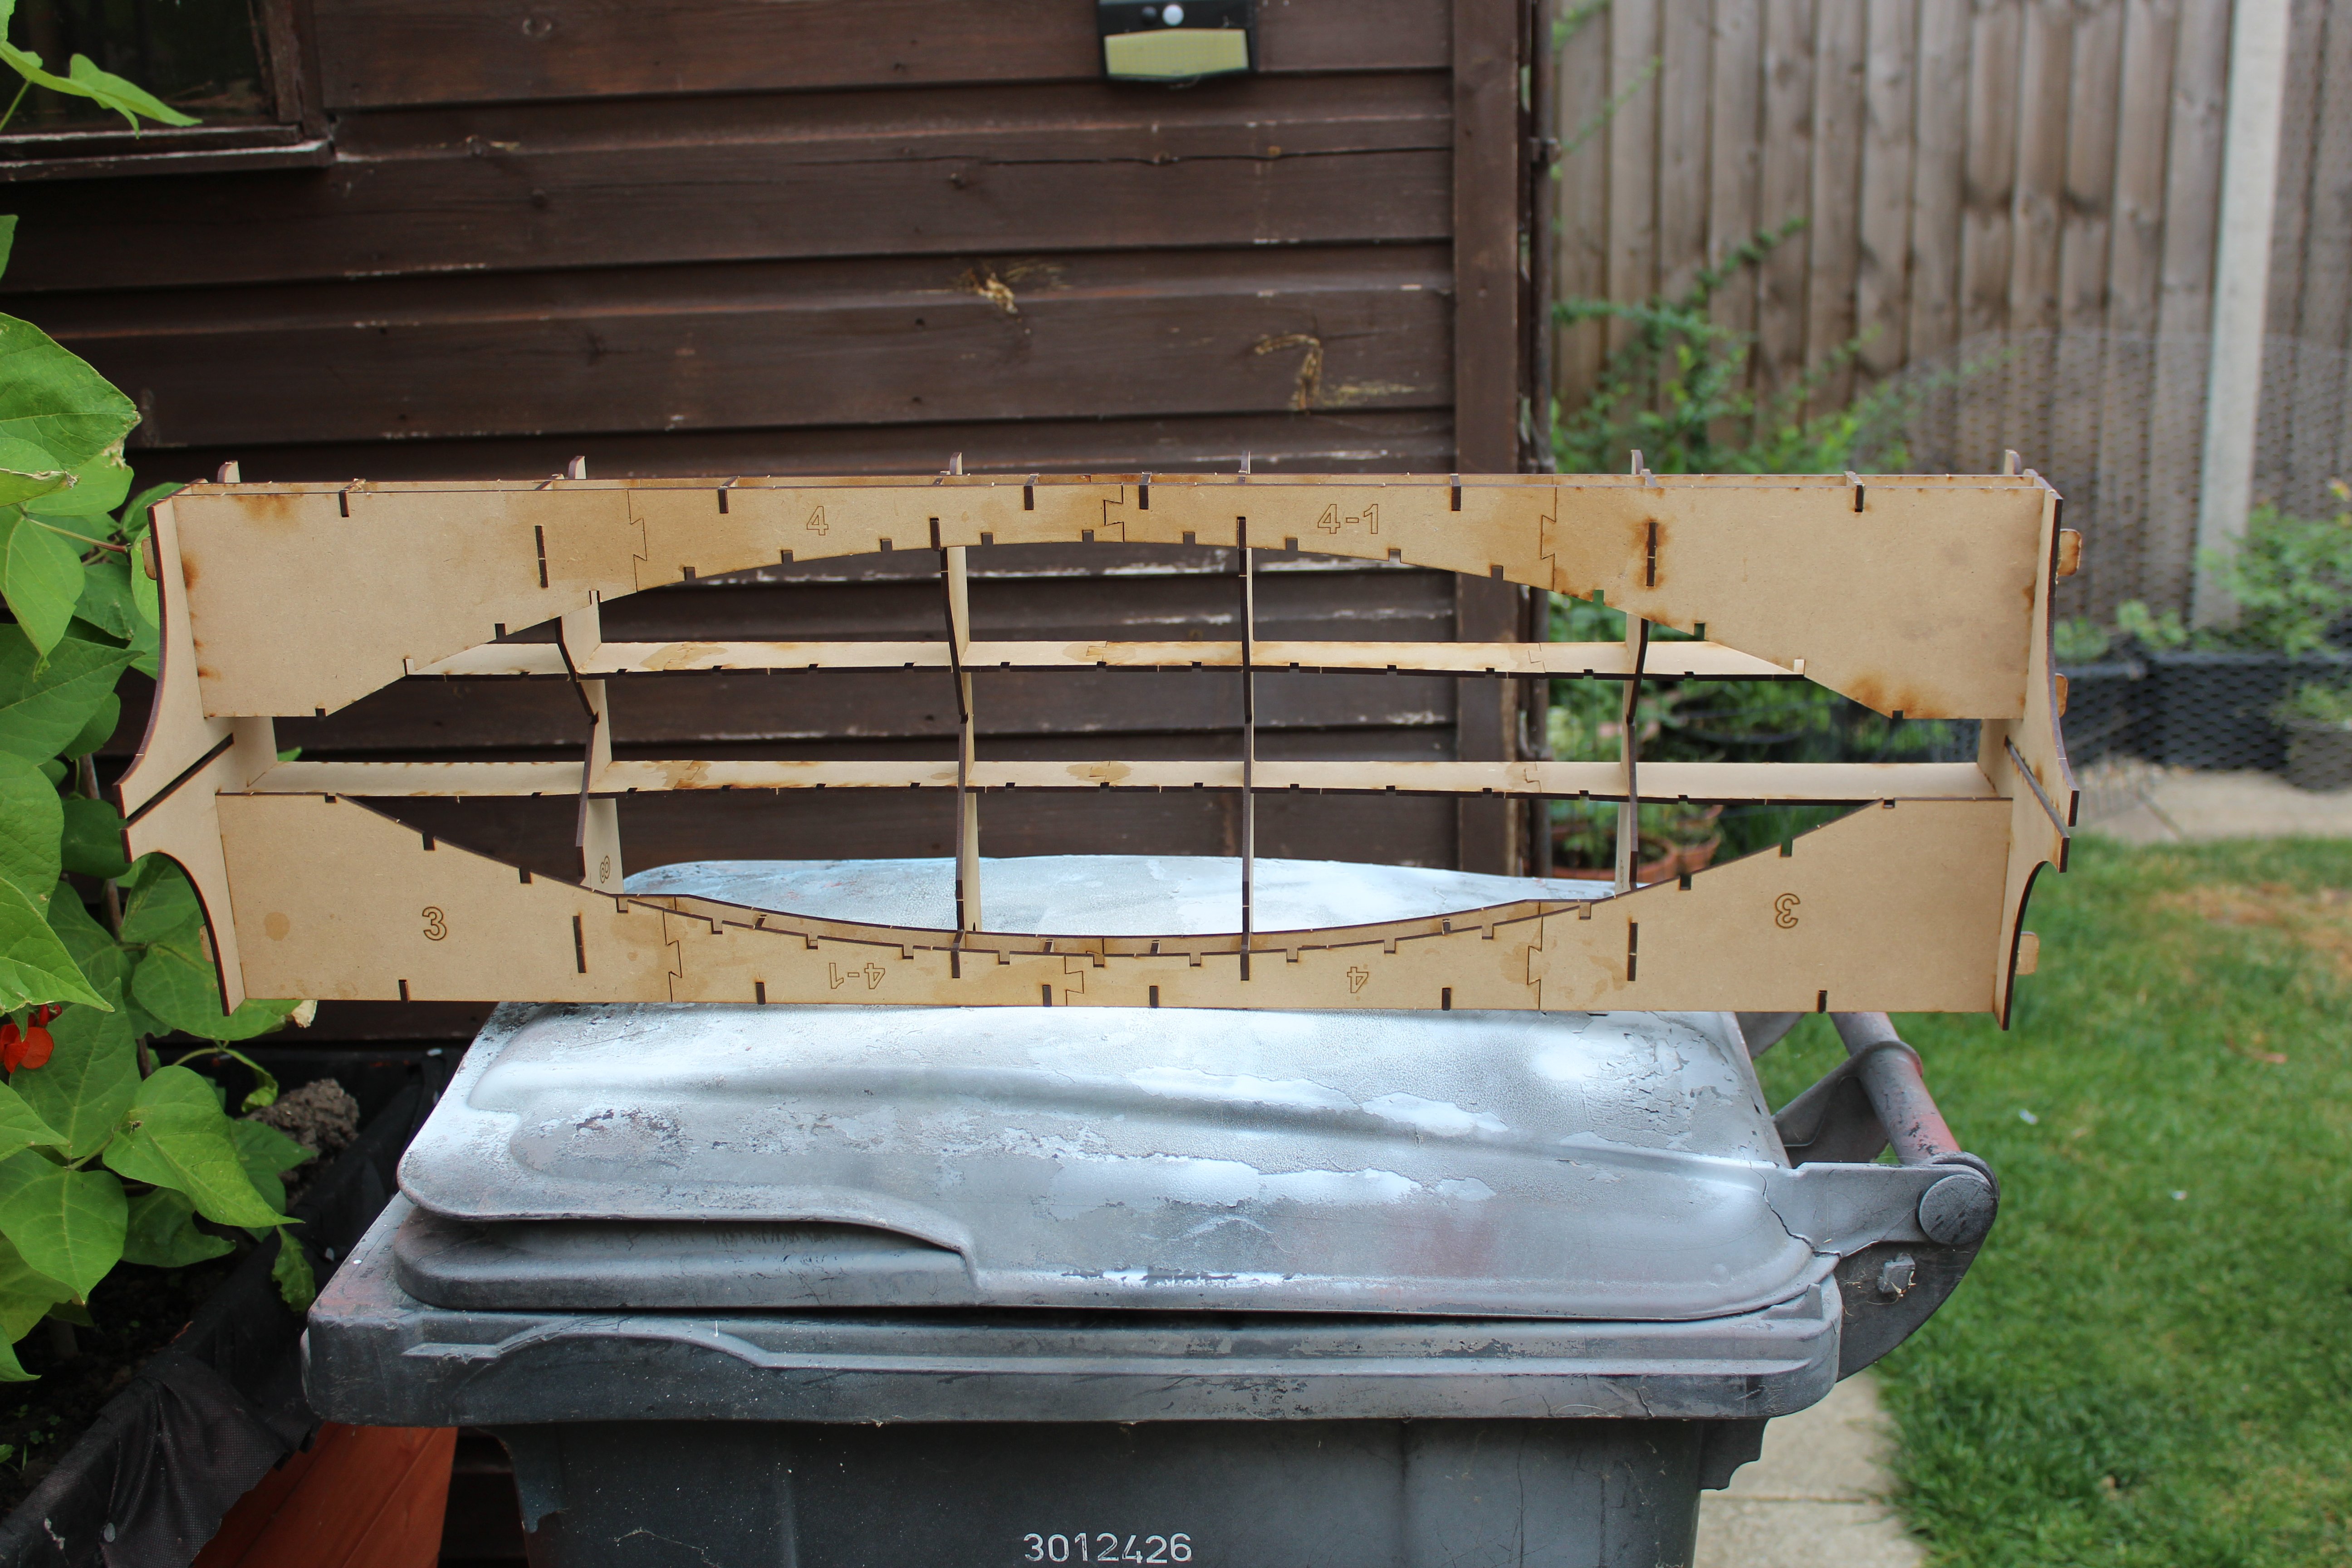
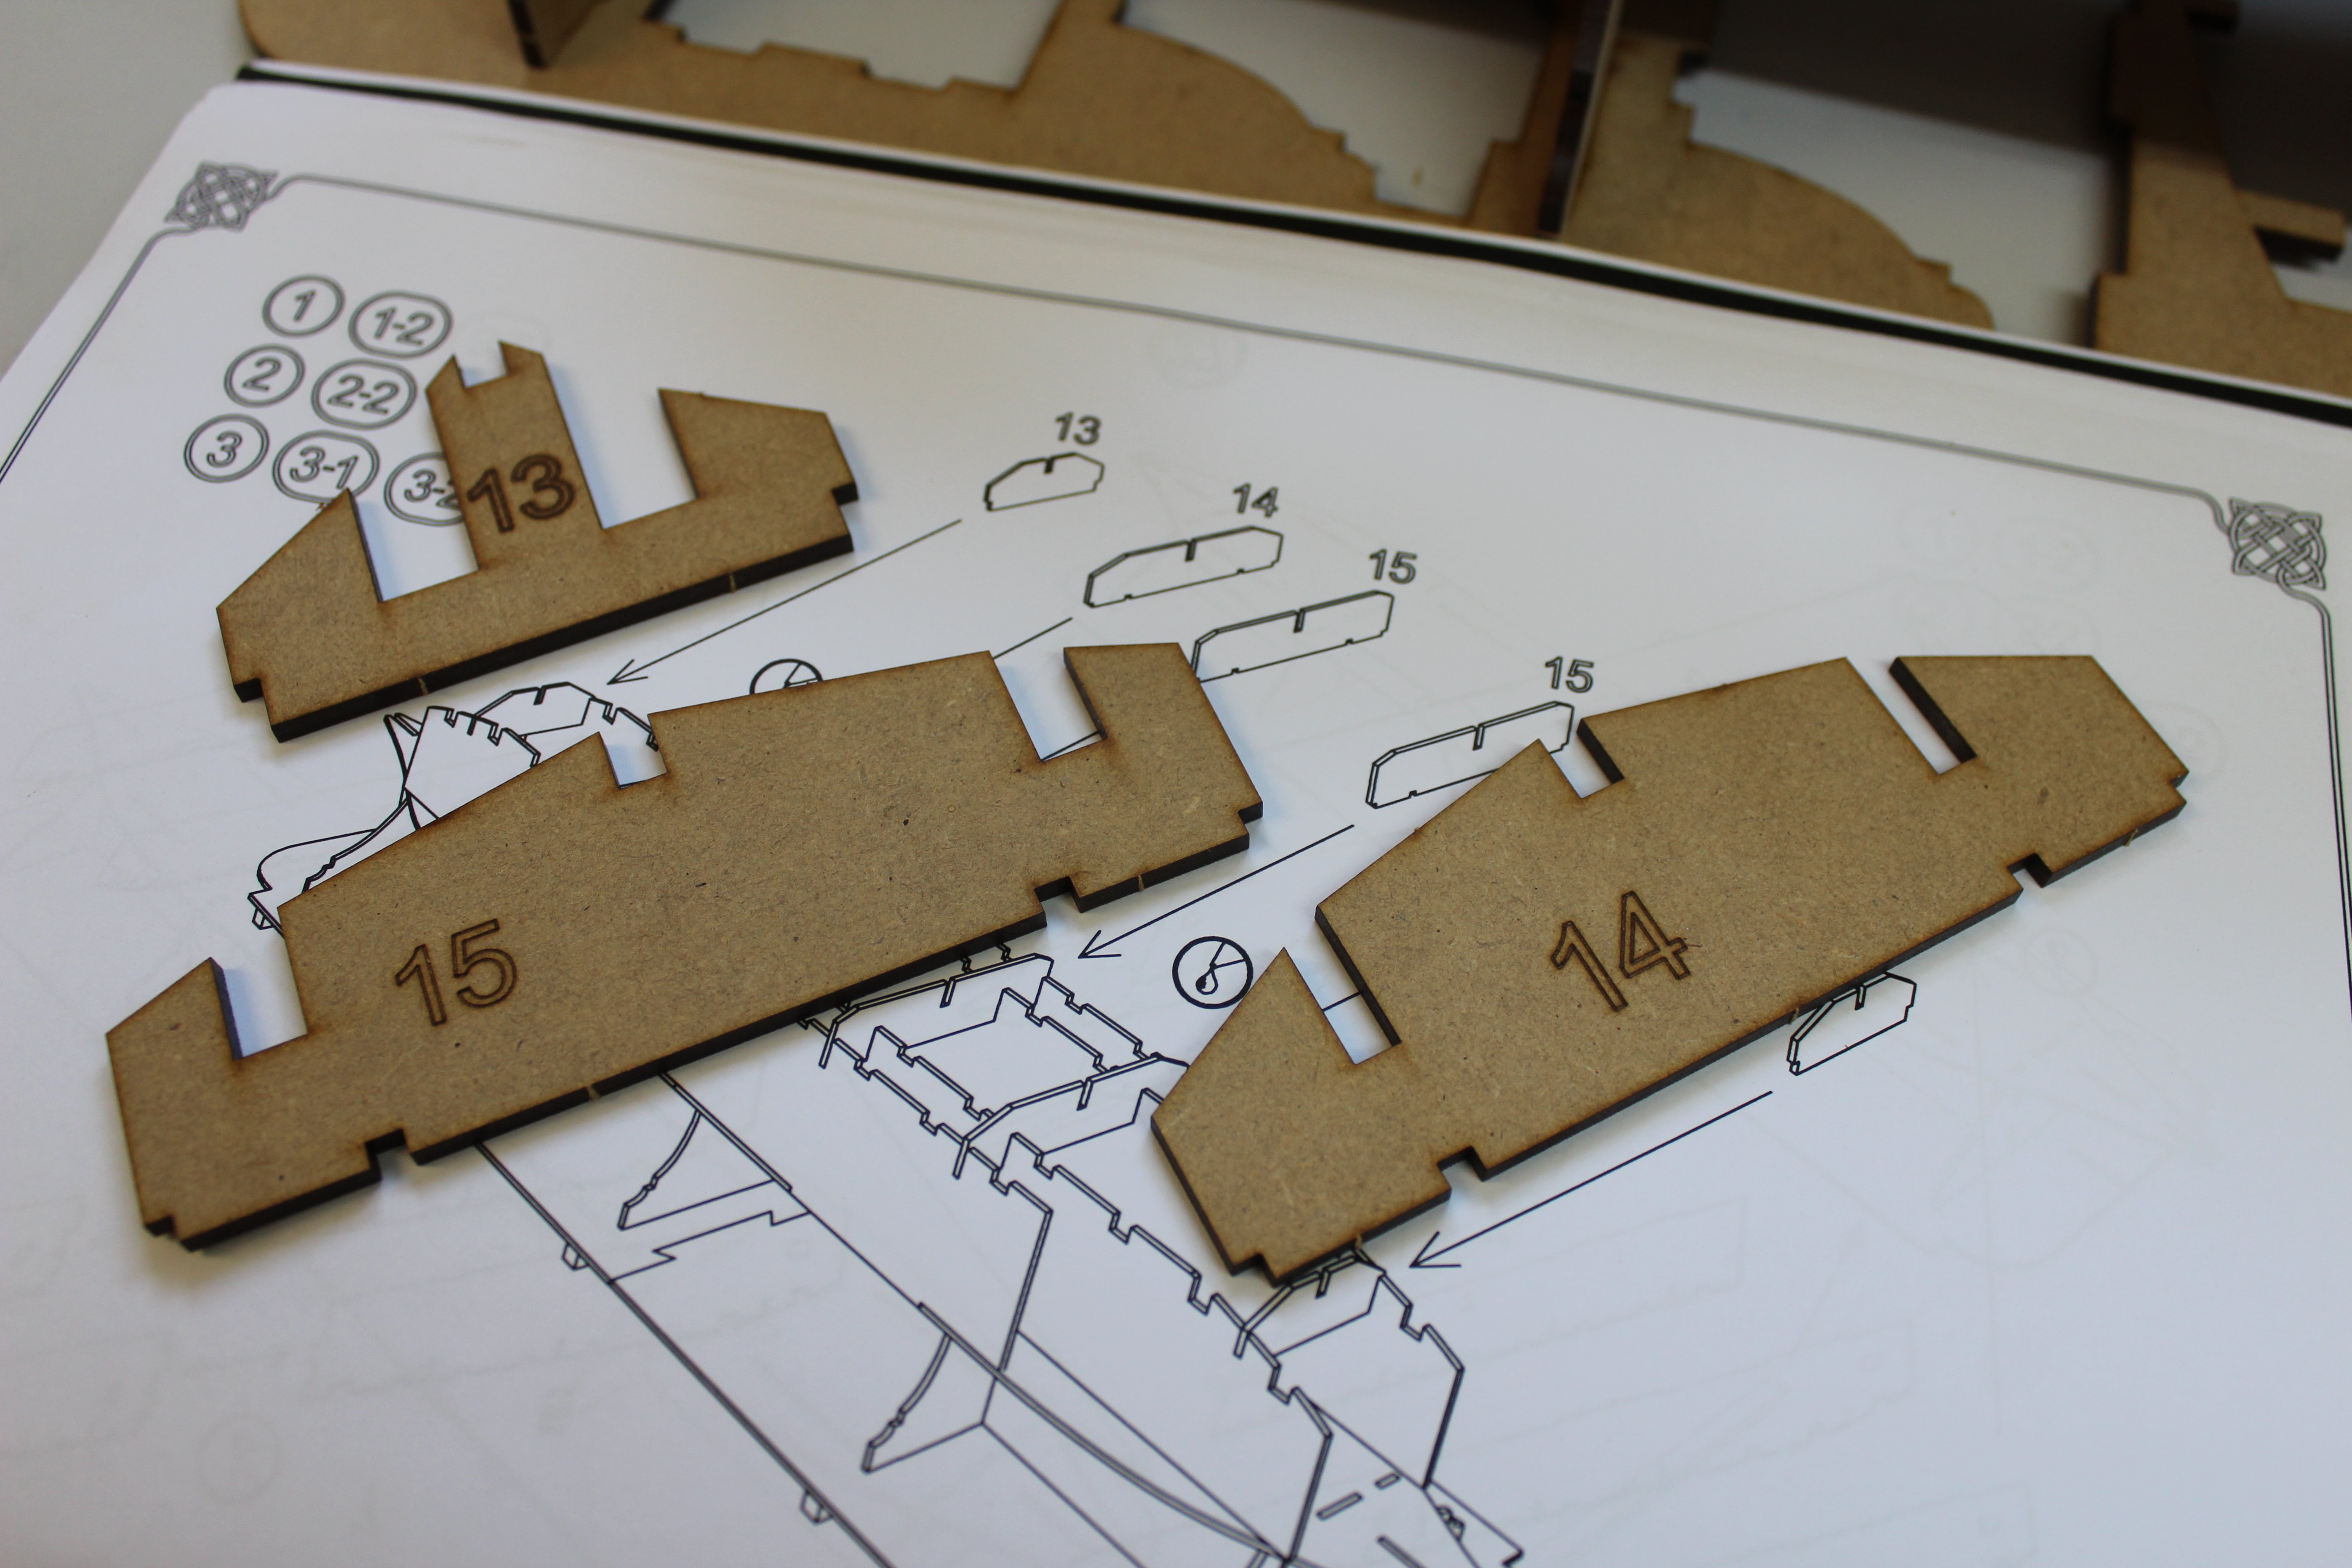
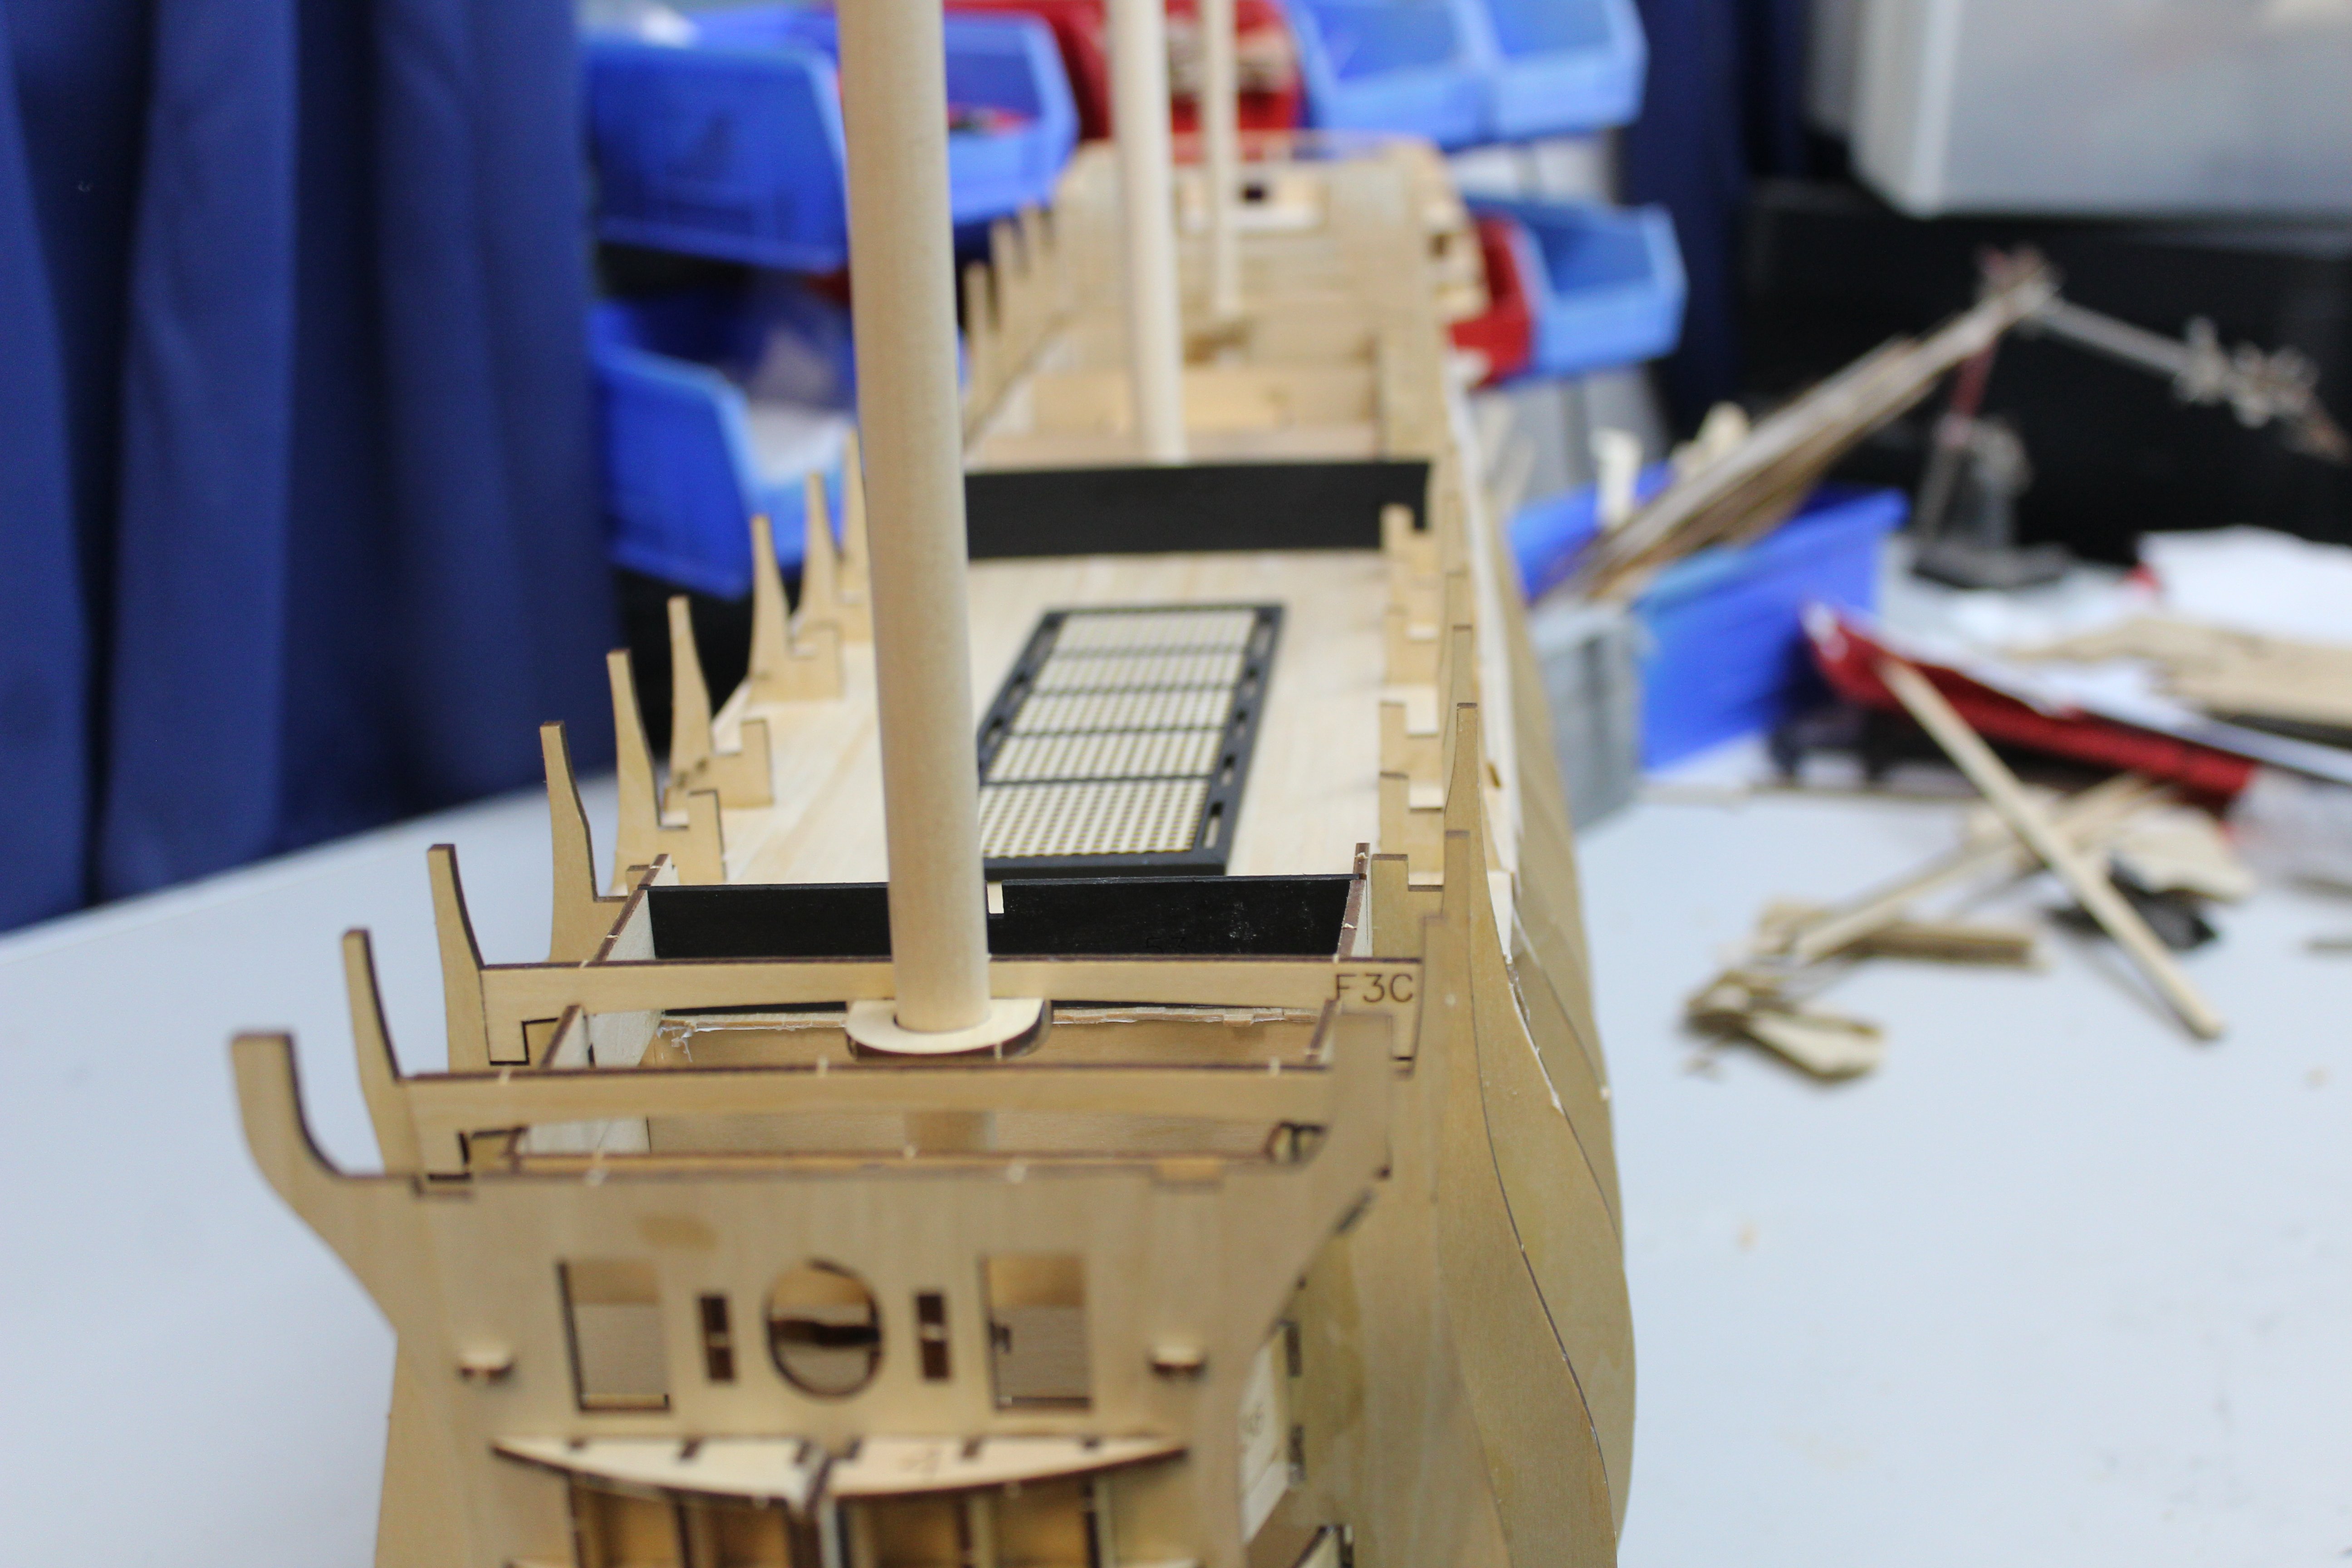
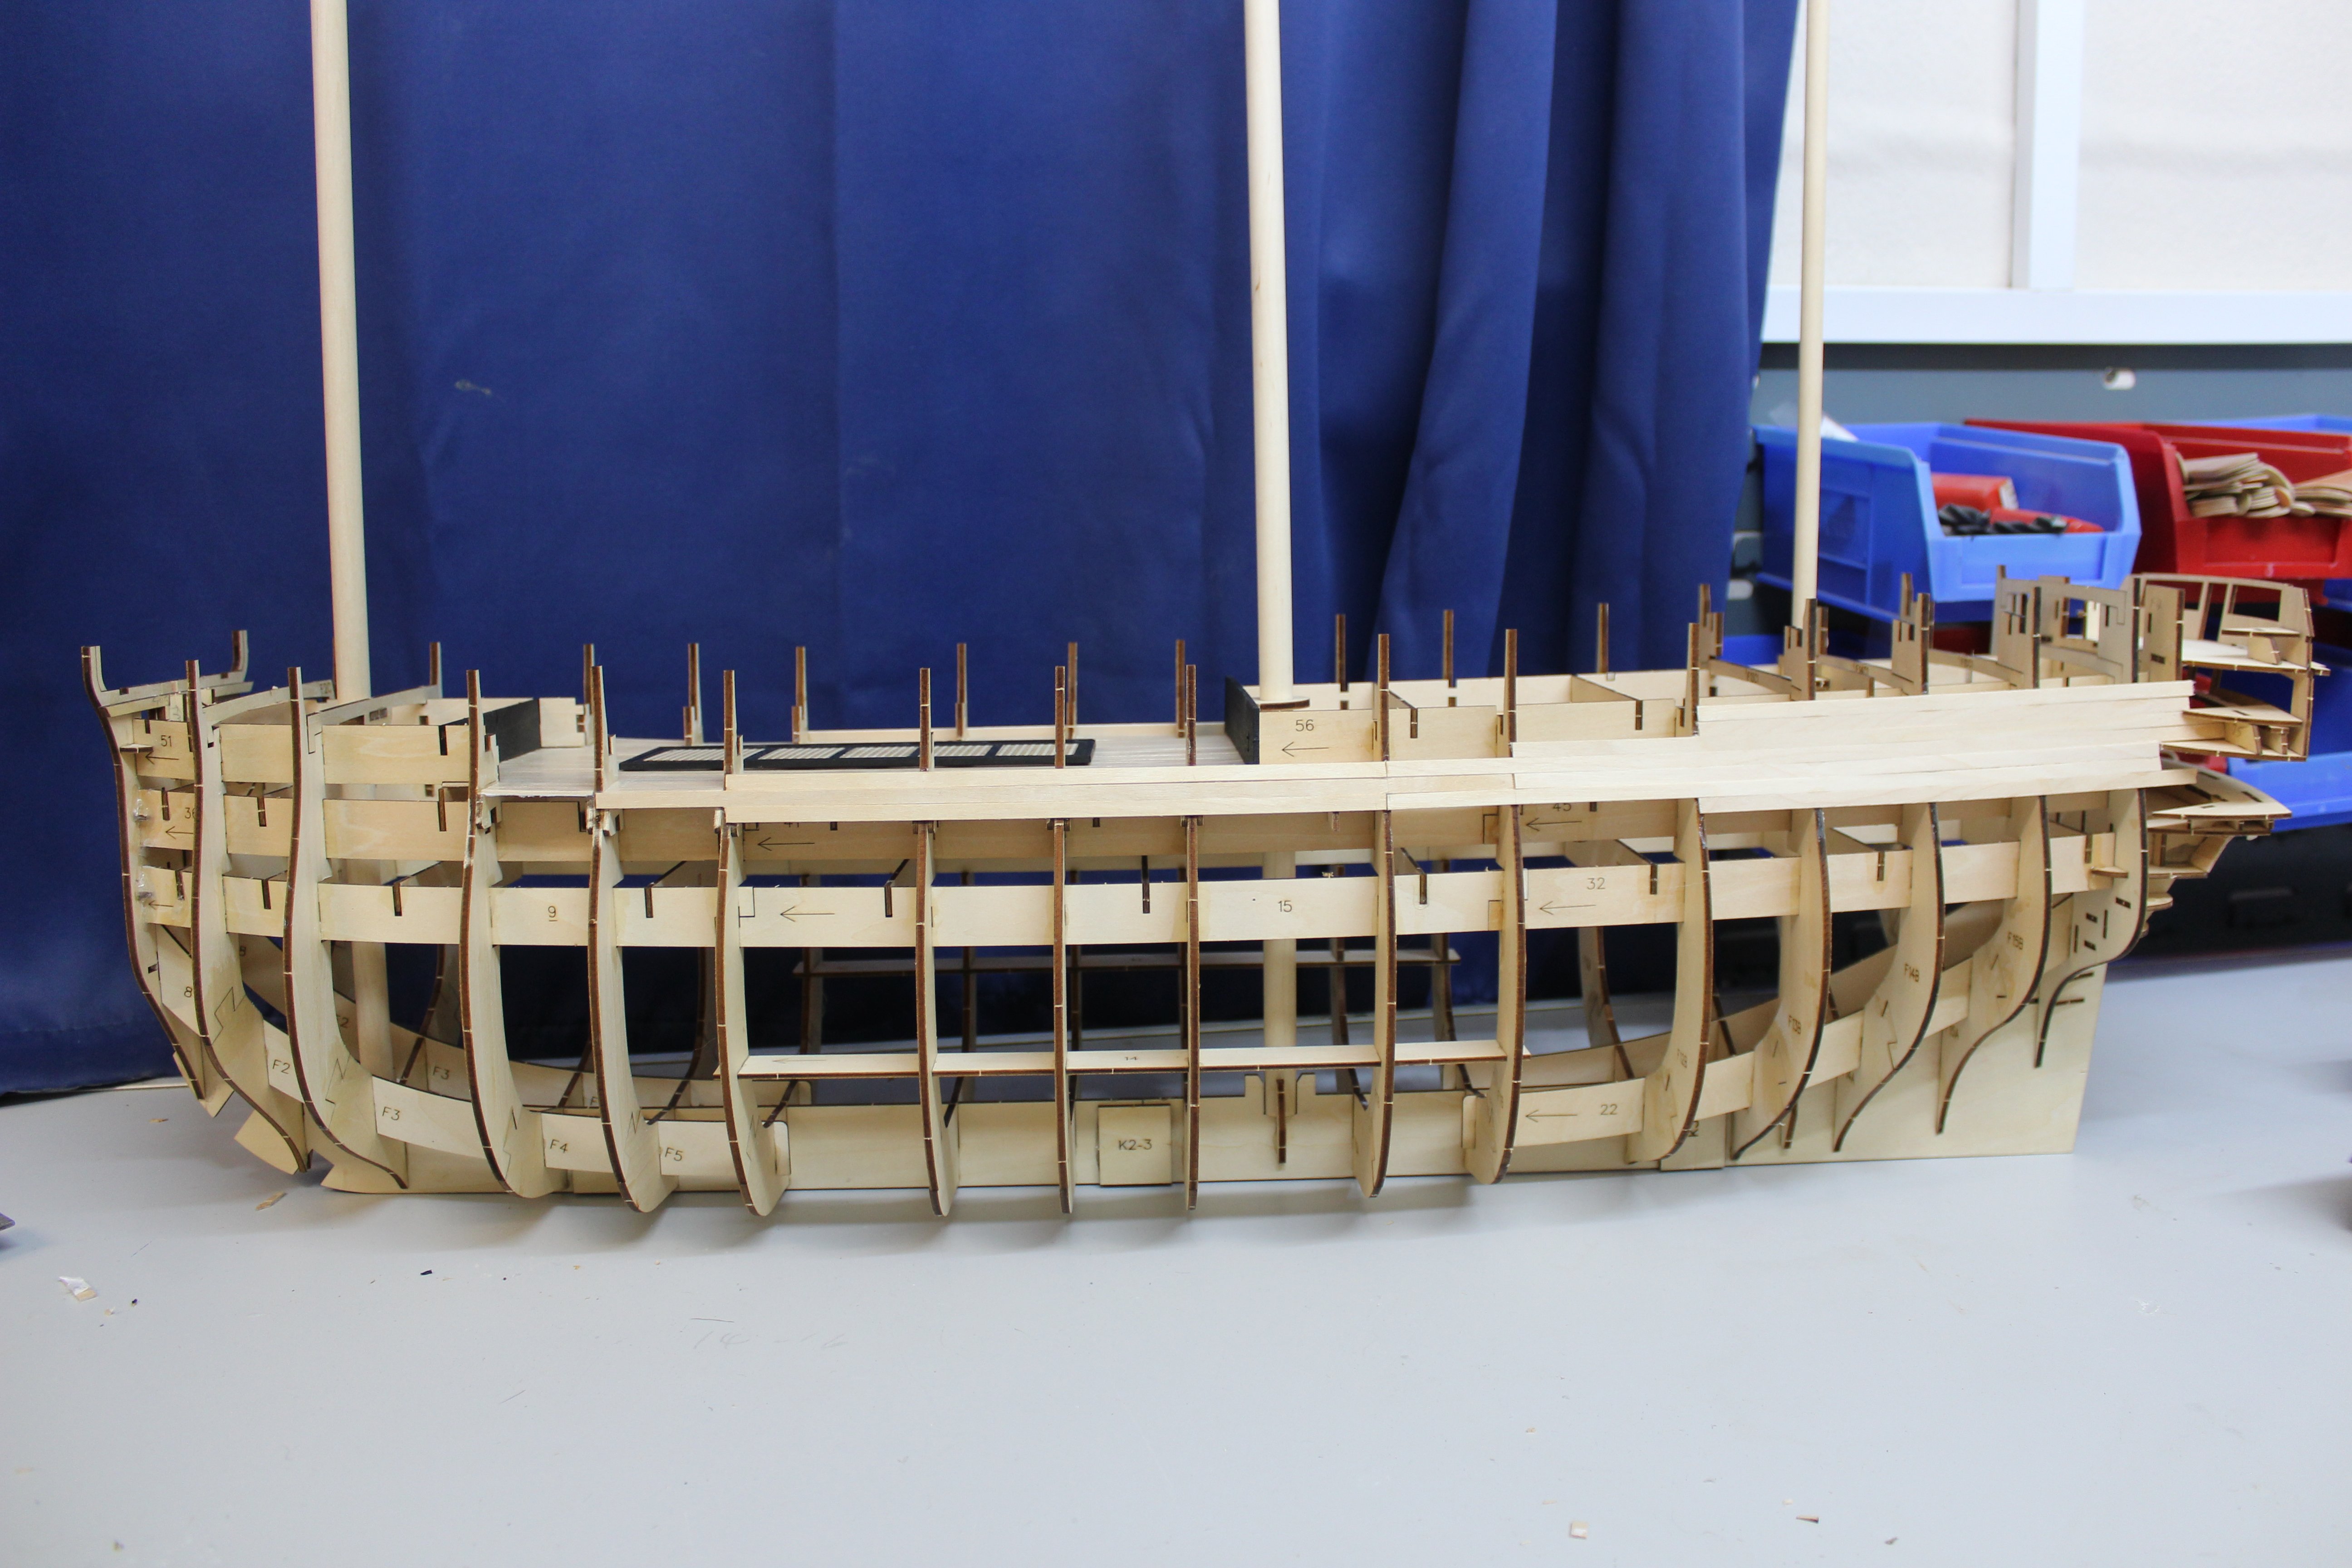
Day 1 building jigs
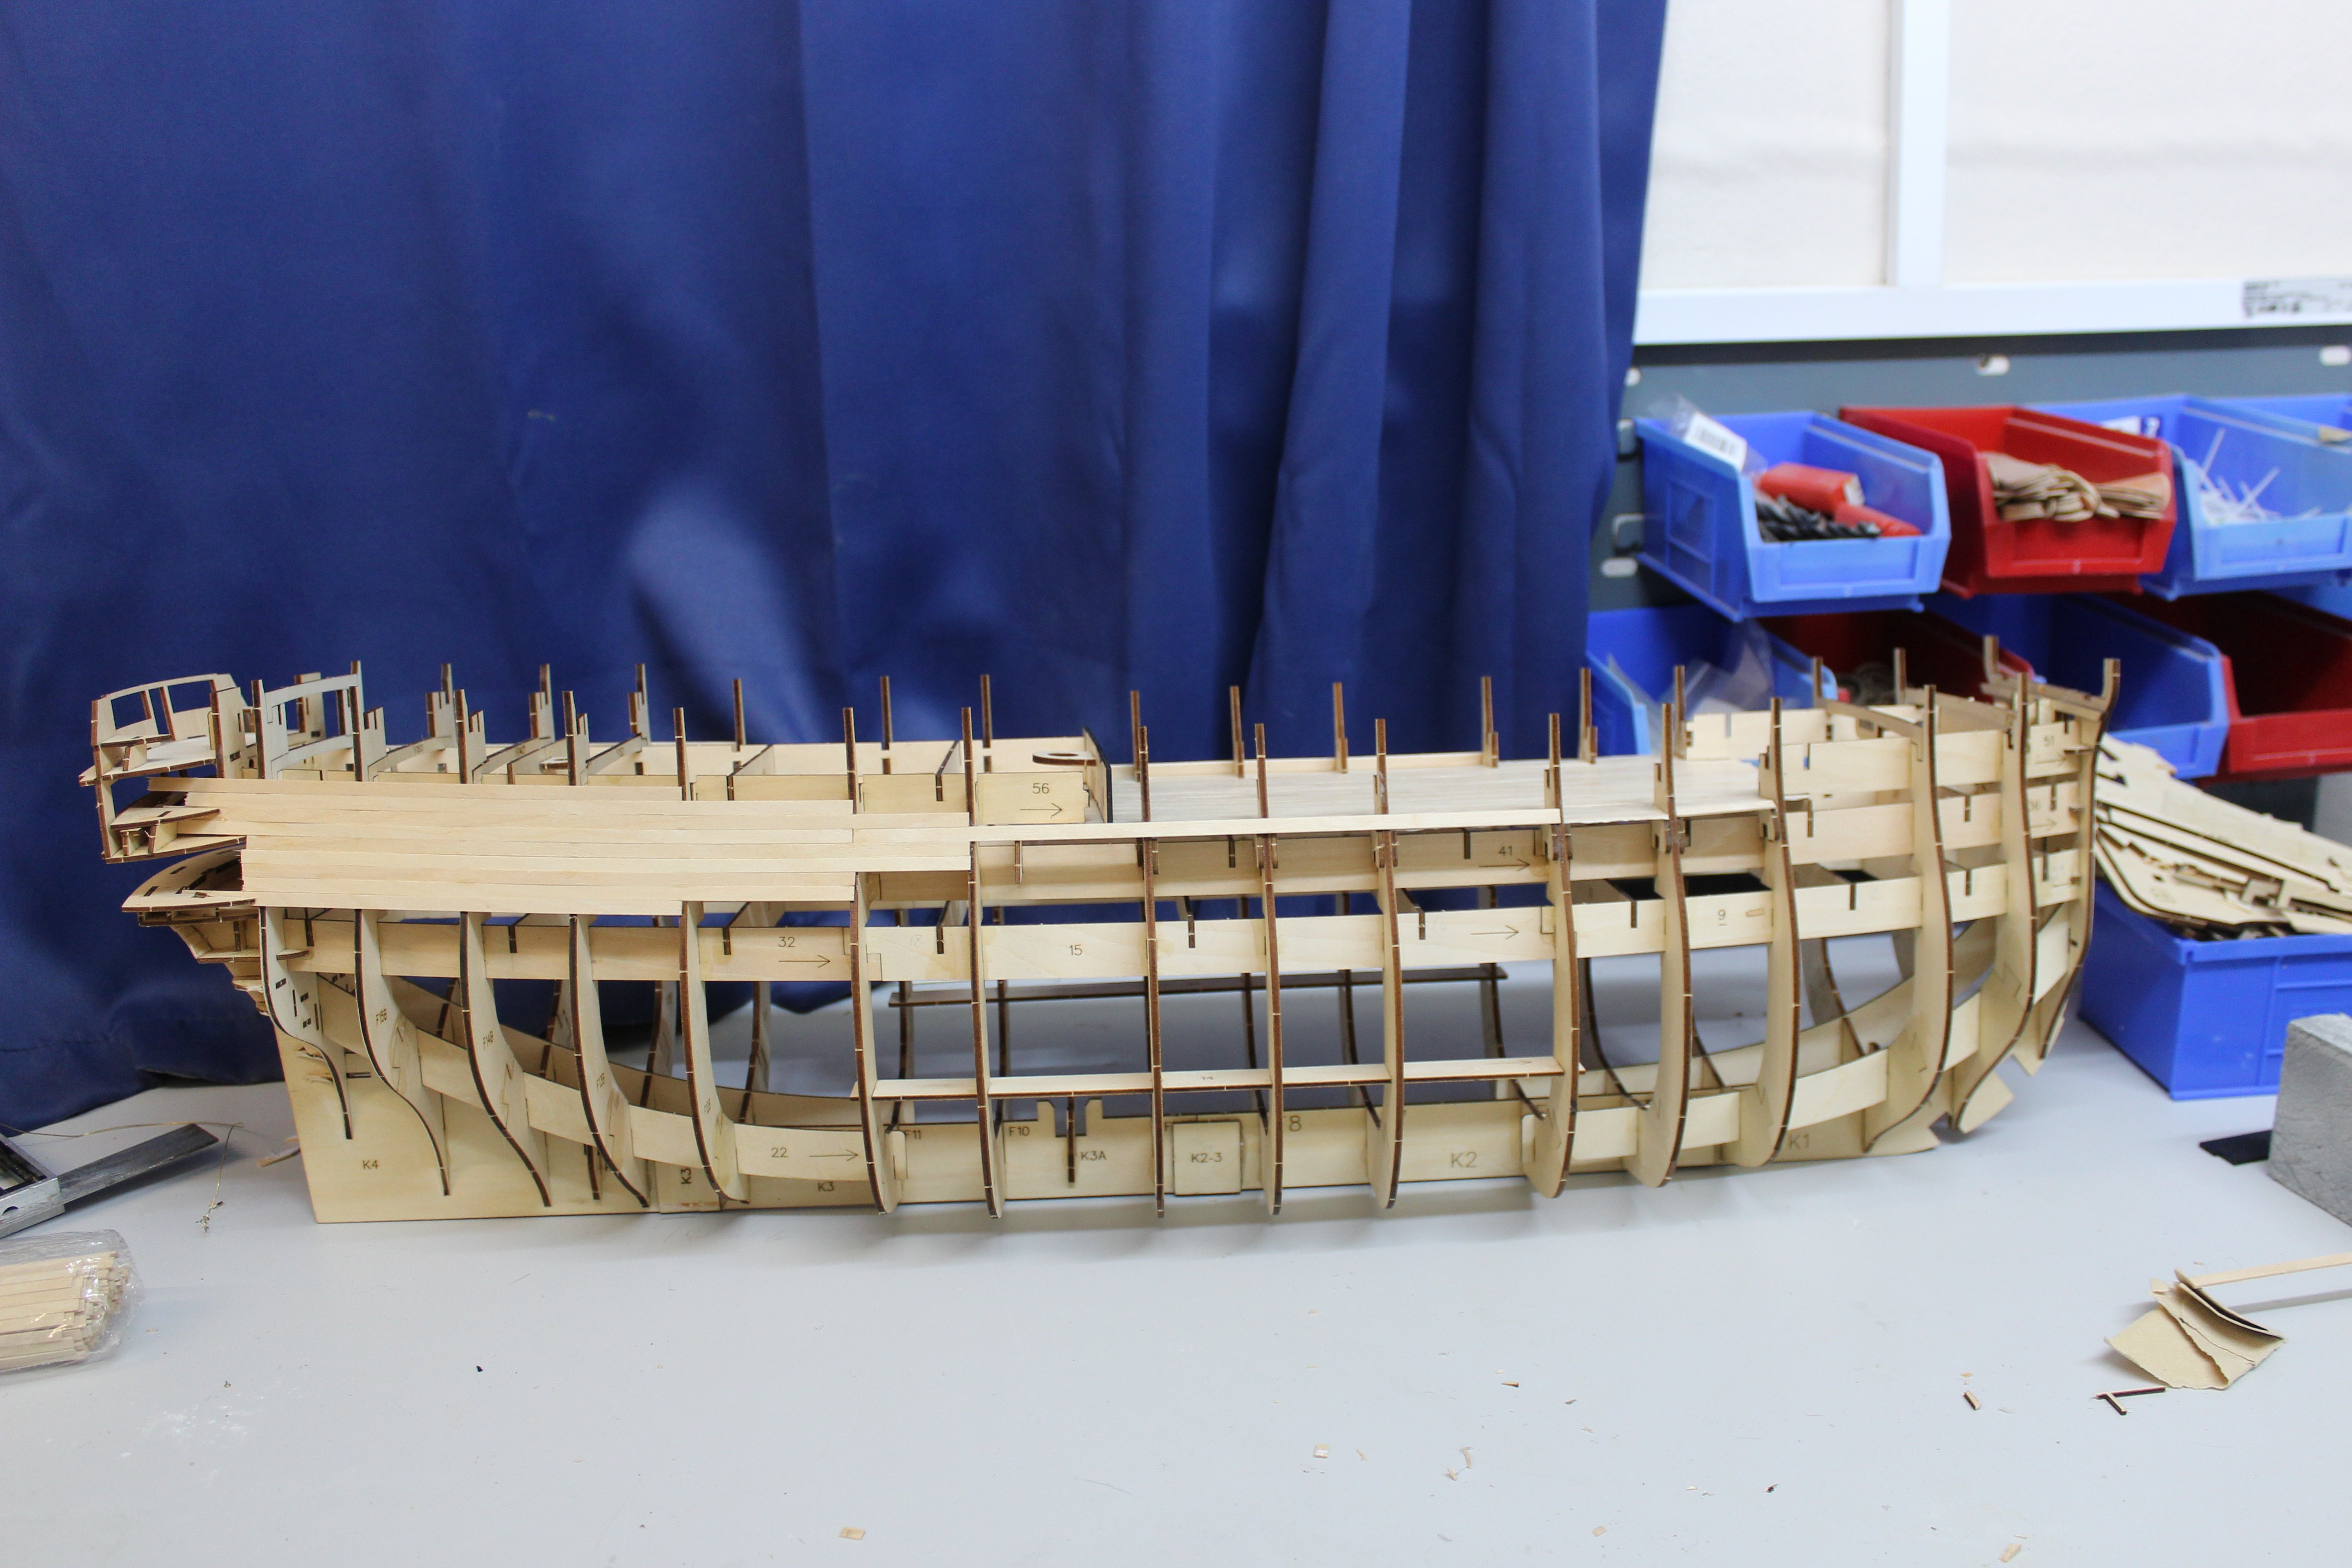
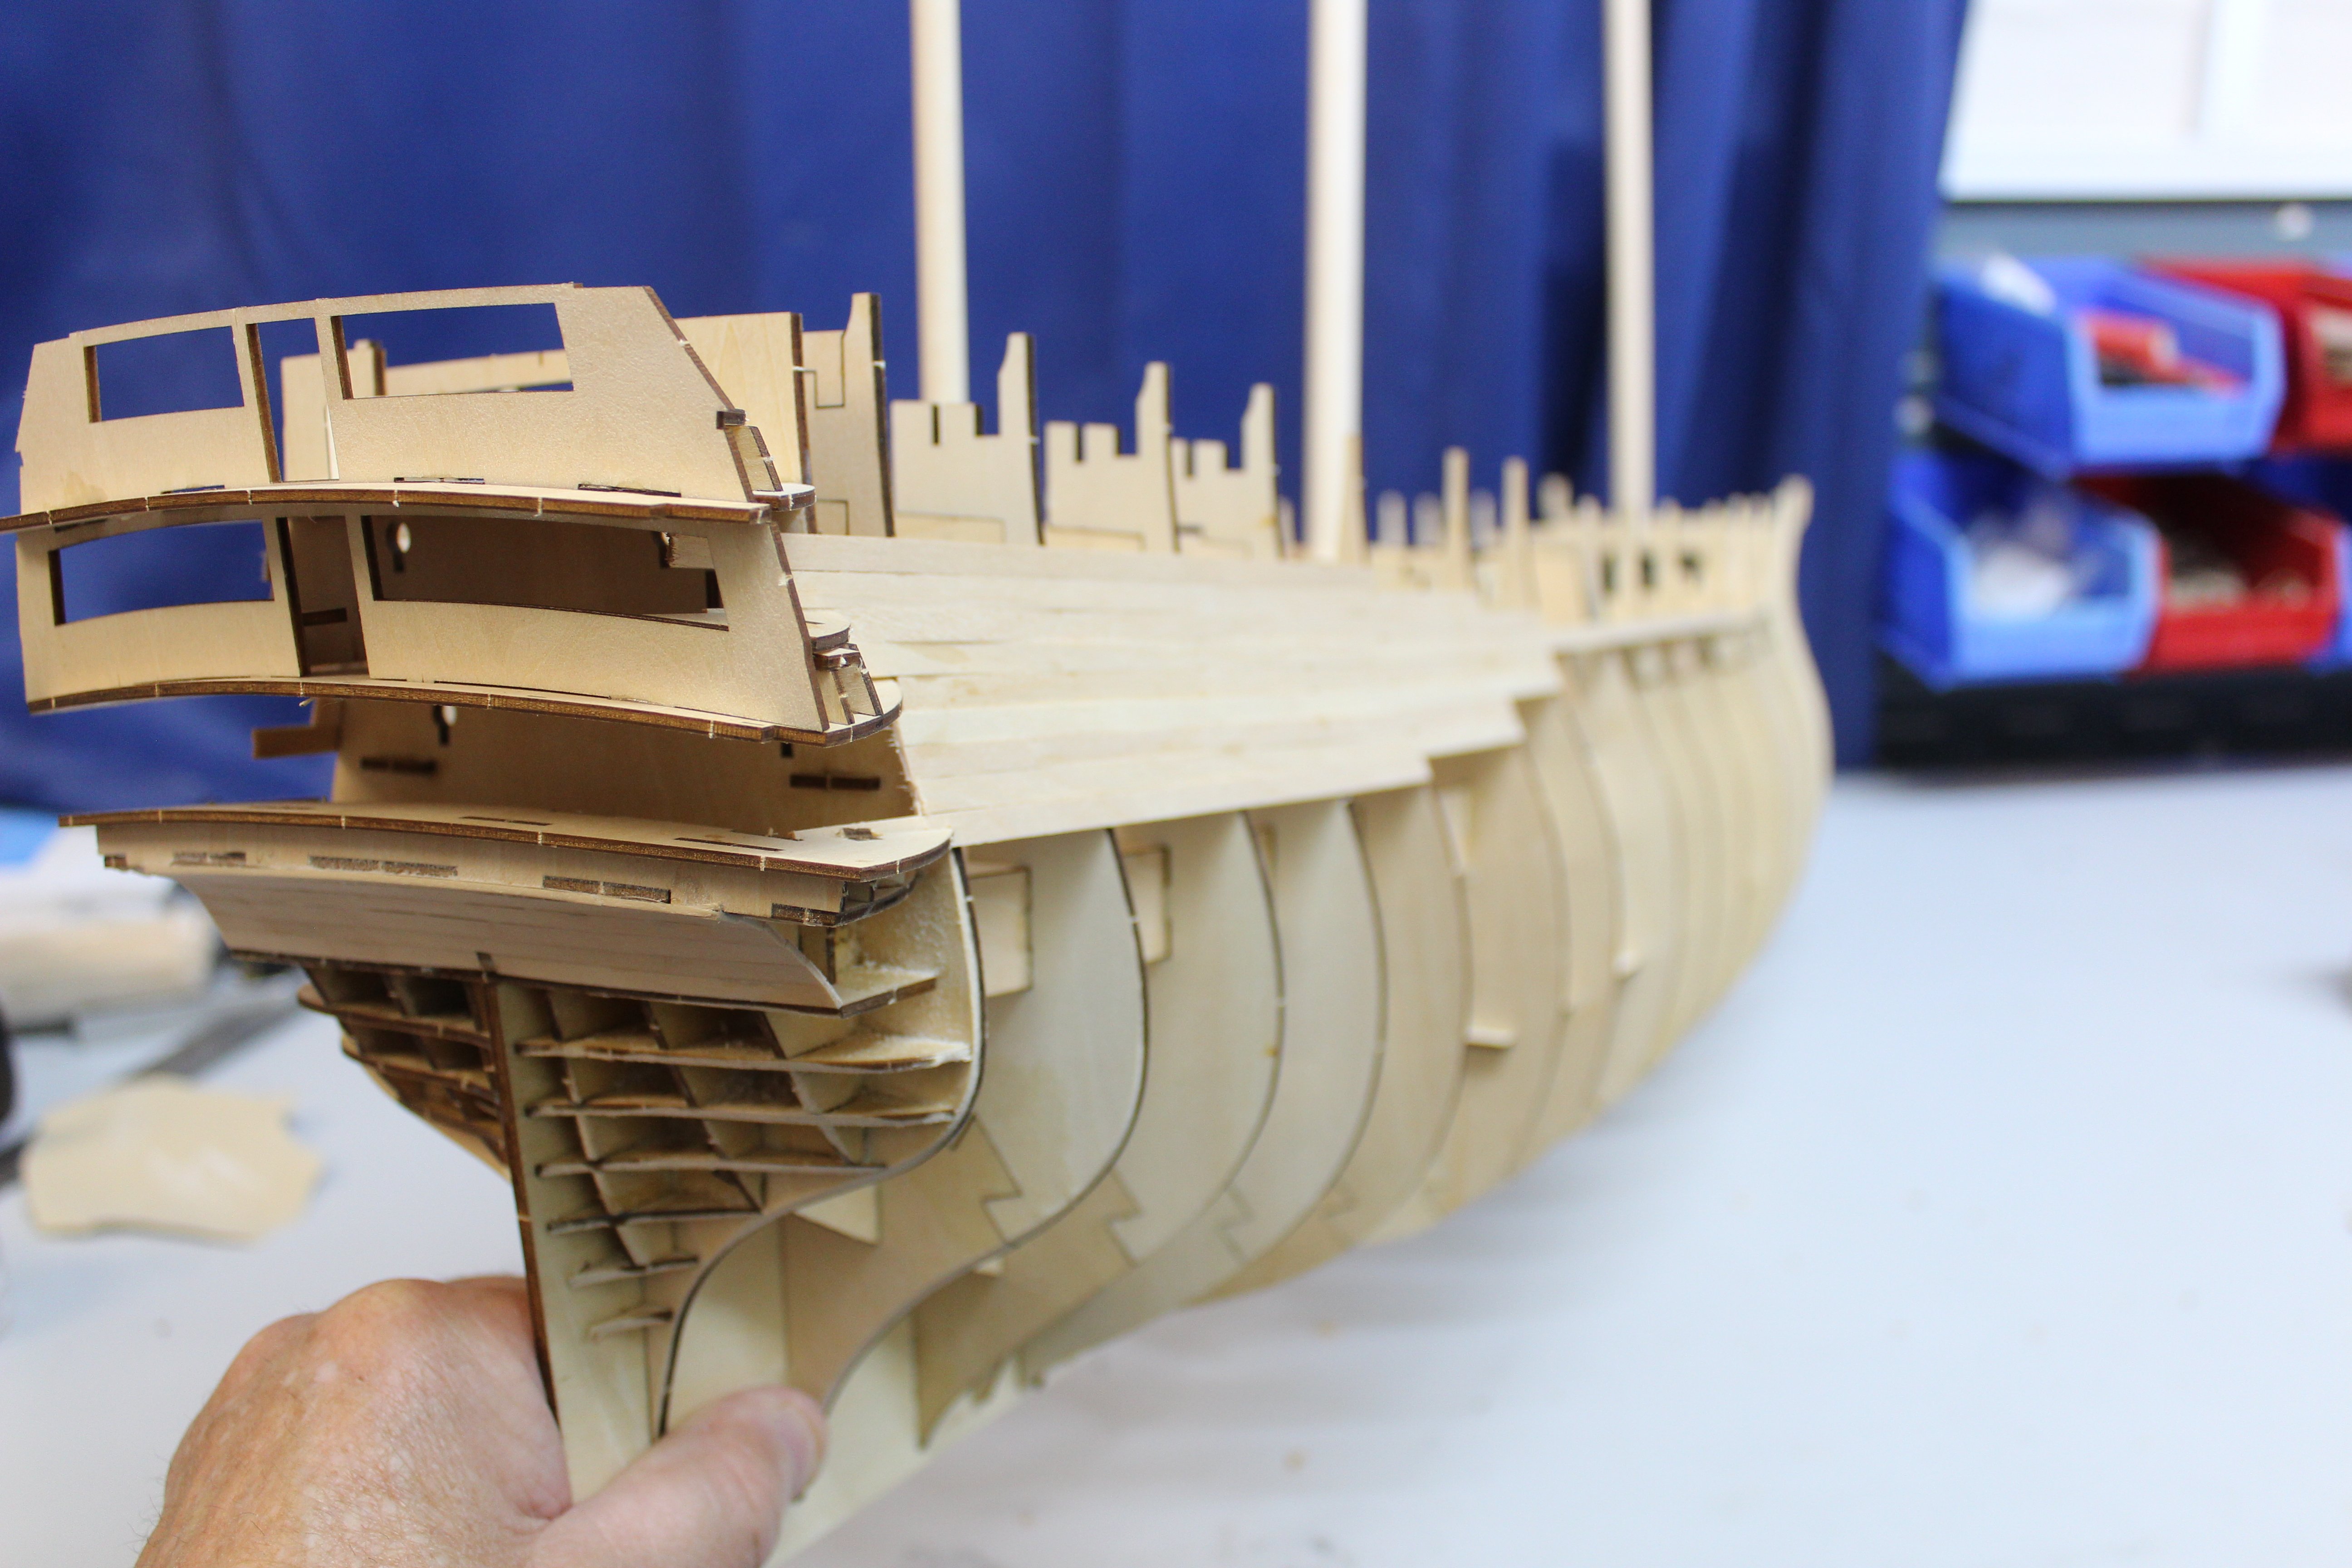
made from mdf, the instructions are easy to follow, but, not all steps are covered, and some of the parts are different shapes to that shown, ideally, the best bet is to work alongside the excellent online video
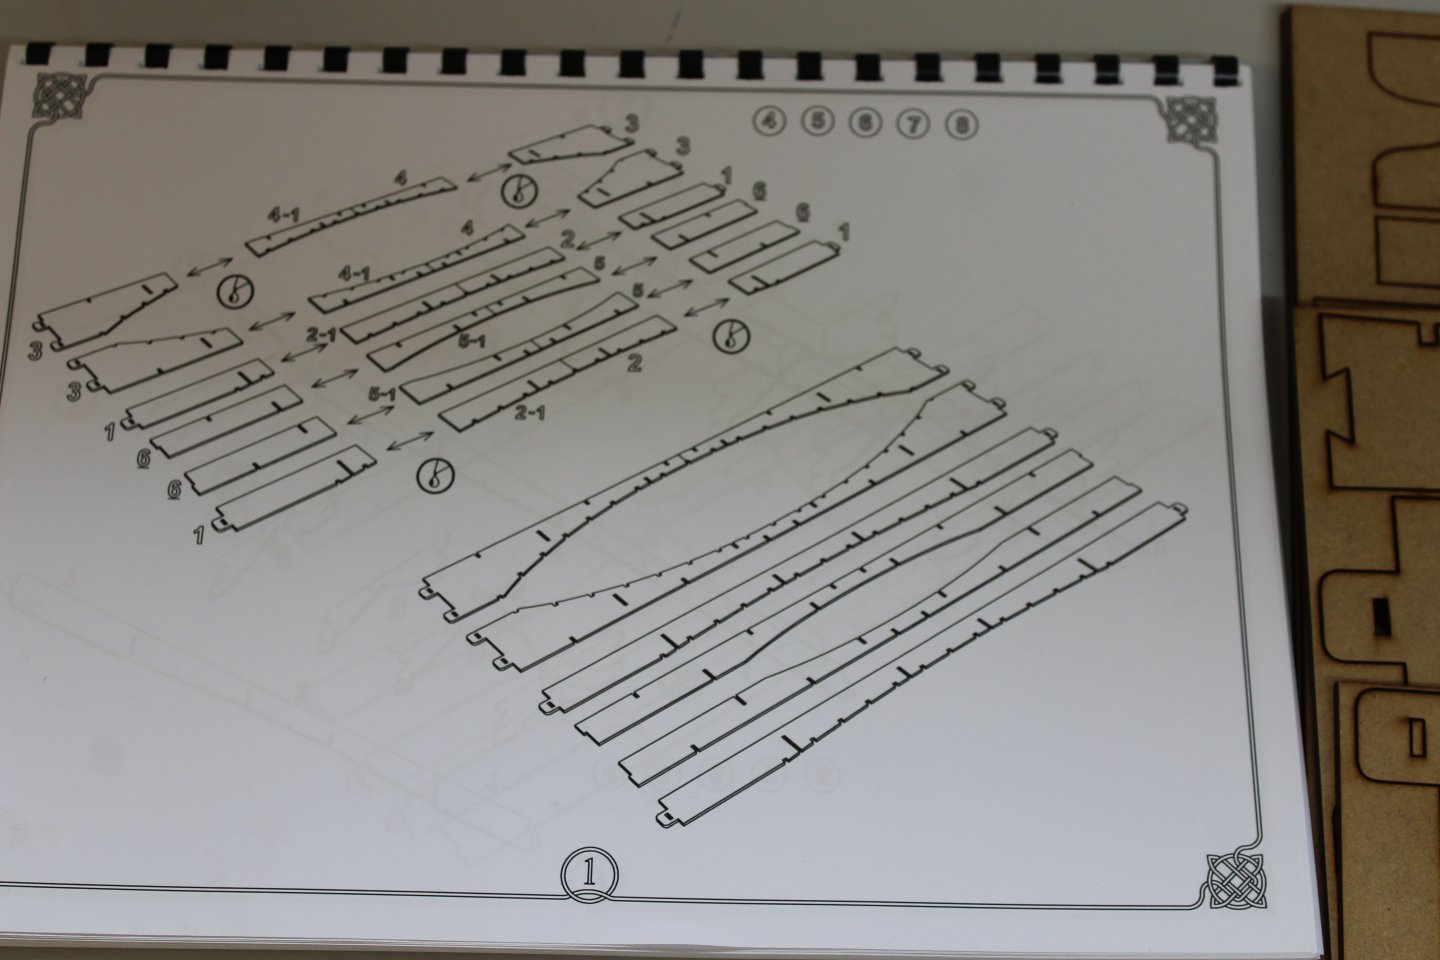

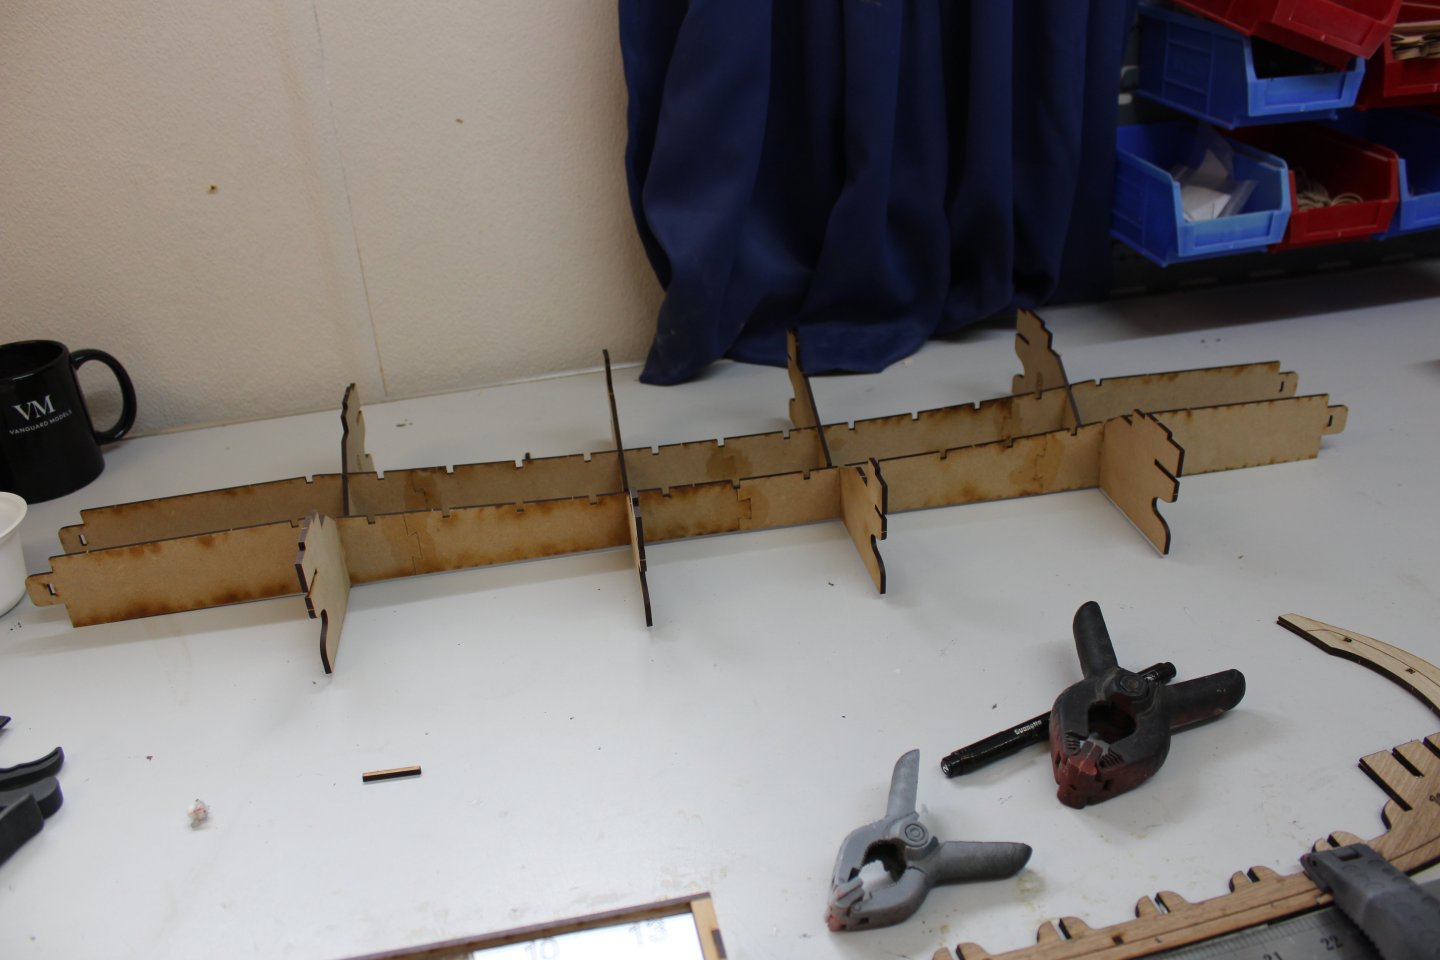

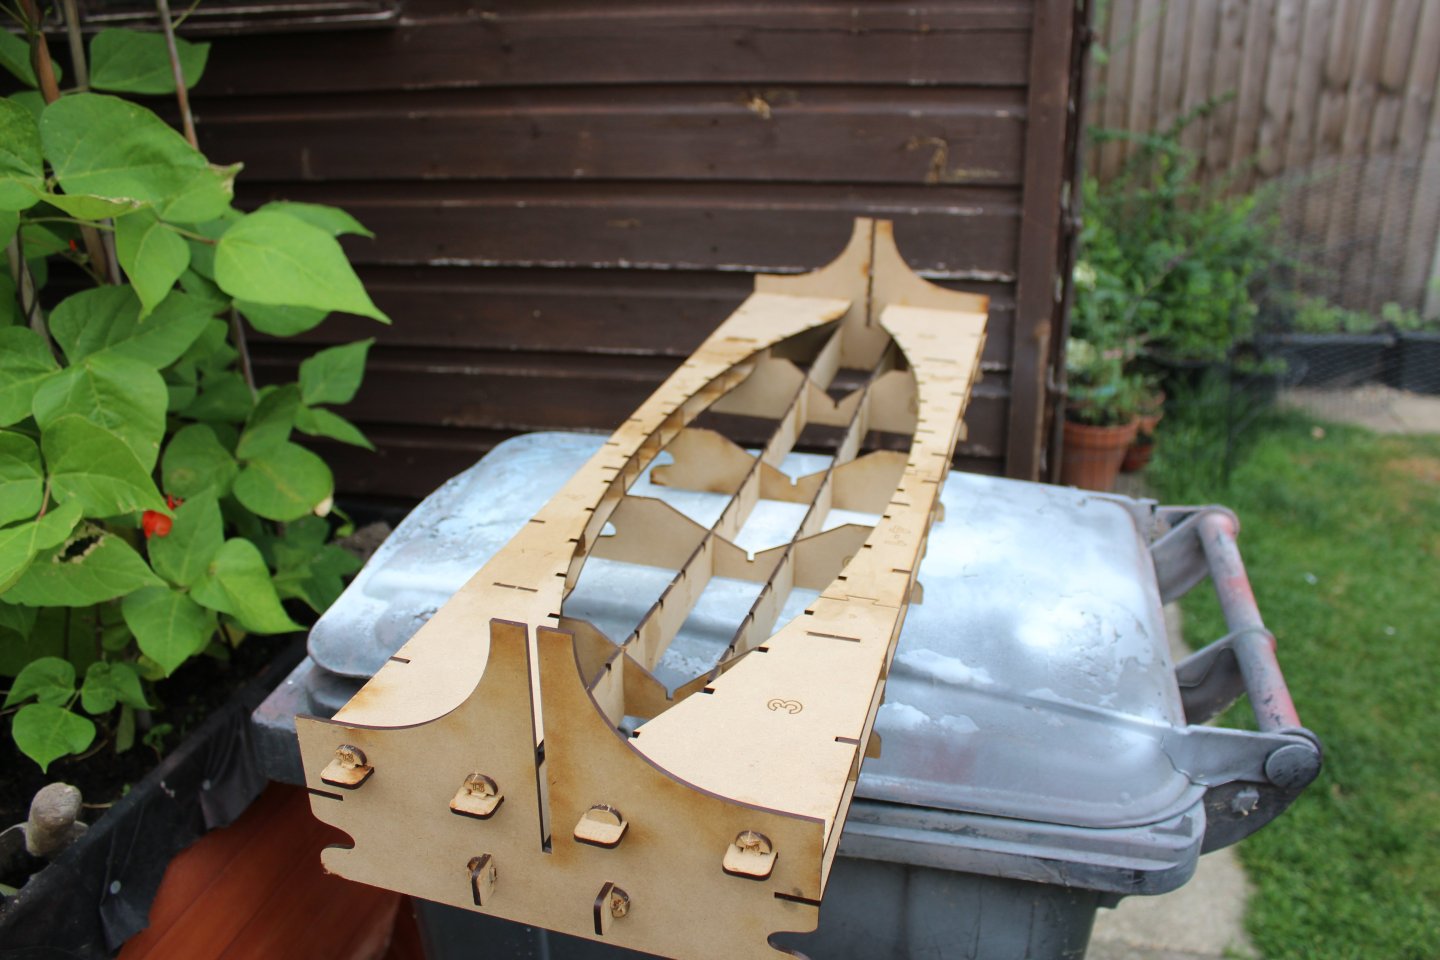

Jig 2 is used after the keel and frames have been removed from jig 1 the hull is turned upside-down placed on top to allow hull planking

- TJM, Ronald-V, Ryland Craze and 1 other
-
 4
4
-
Good evening everyone
Having recently completed two large builds, Belle Poule and Indefatigable, and jumping straight in with the Santissima Trinidad, i wanted a quick build, just to reset myself, i wasnt even going to create a log, it was to be a build going on in the background, something i could play about with and if it went all wrong, no one would ever know, well what changed your mind, I hear everyone ask? well space, to do this the ST had to be put away, therefore for as long as this takes me, the other log has to wait.
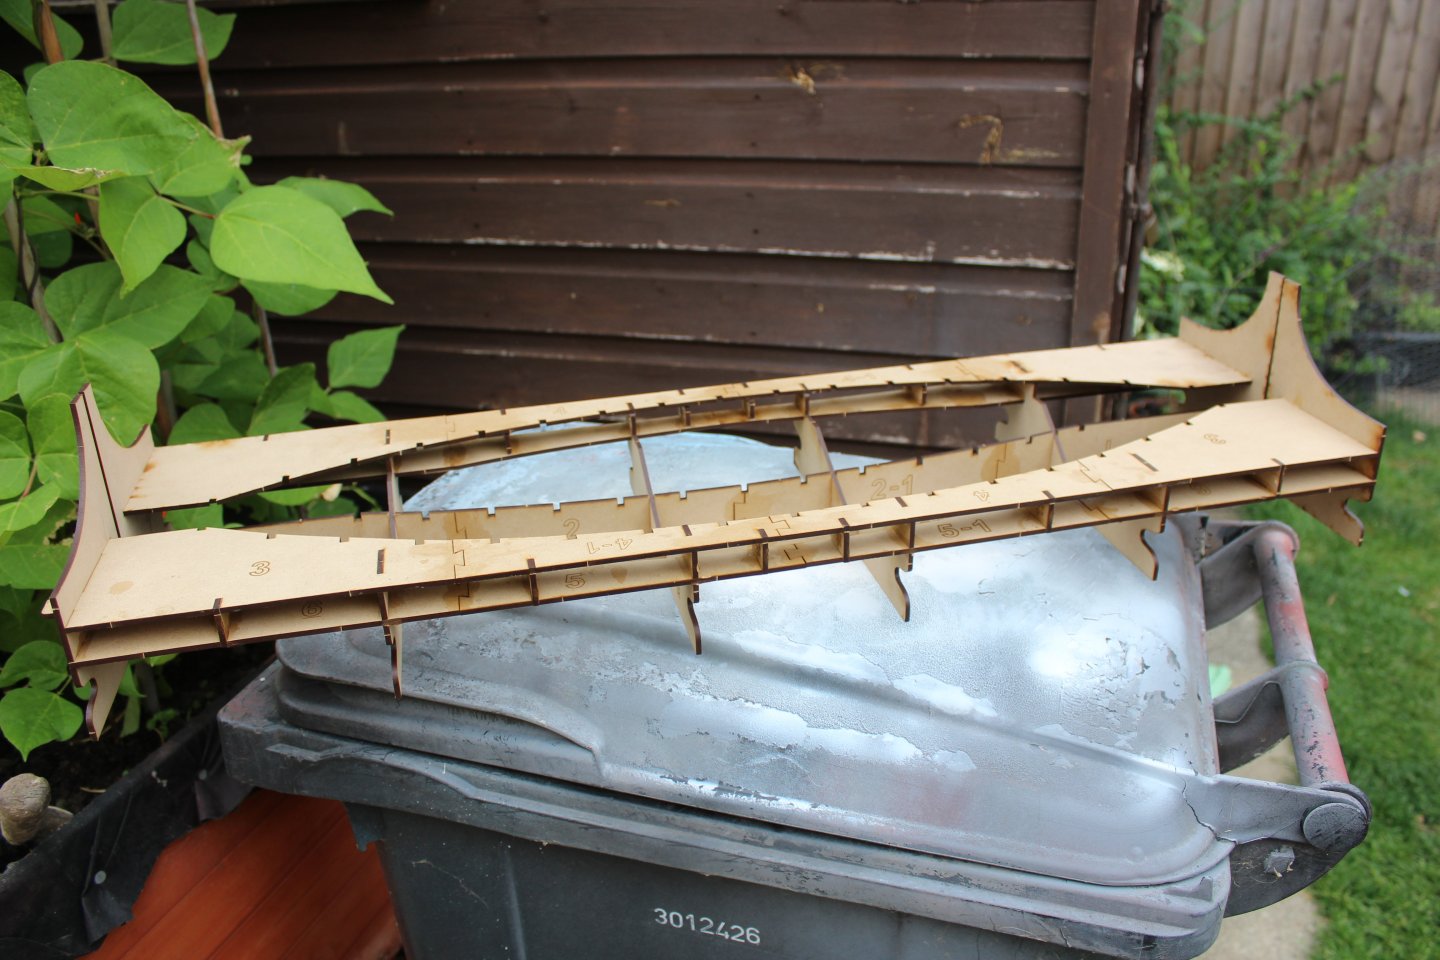
i bought the kit from @chris watton at Vanguard Models a few weeks ago and started her 3 days ago, so far i am real impressed, very heavy box, most of the weight though is from the MDF which makes up the two slipways, i actually built both of these up on day one, so lets go on another of Kevin's messy and cluttered journey, as i tackle this project
-
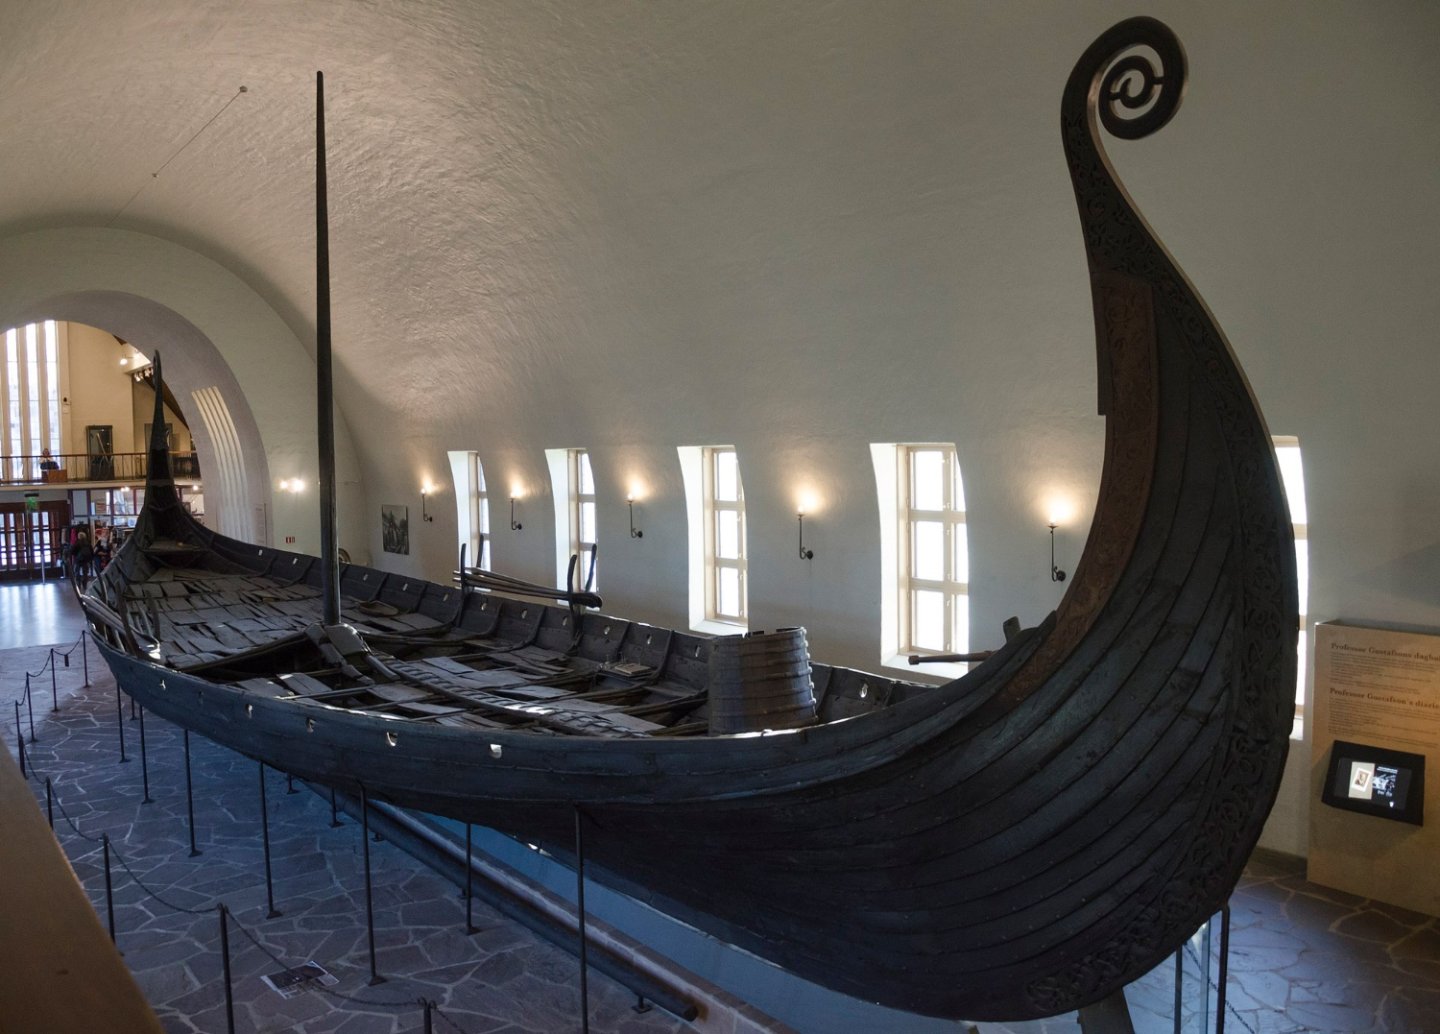
1:25 Drakkar ‘Oseberg’ V3
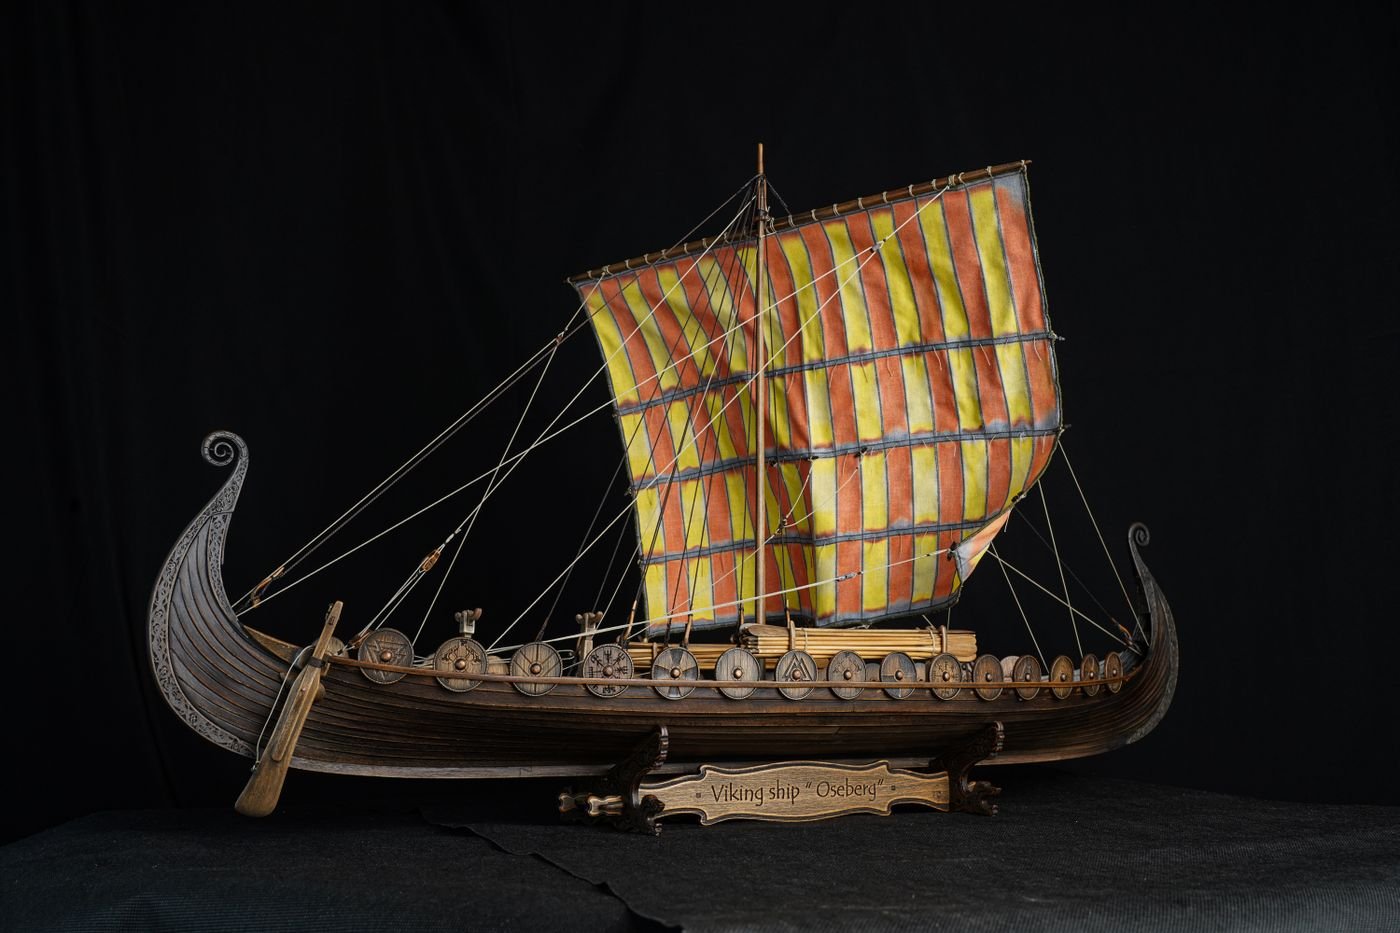
History
It is believed that the word “drakkar” originates from the Old Norse words “dreki” and “kar,” which mean “dragon” and “ship,” respectively. The warship acquired this name because the head of a dragon or another mythical creature (like Jormungandr) usually adorned the ship’s bow. The shape of the ship was also long and narrow, resembling a sea serpent. The Vikings constructed drakkars out of pine, oak, or ash wood. They used a special technique for splitting trees along the grain. They then watered the planks and held them above a fire to make them more flexible. The shipbuilders put the parts of the ship together with iron rivets and nails and bound them with cords and ropes. After that, they tarred the whole structure and caulked it by plugging holes and gaps and making the seams watertight. The sail was rectangular or square. It was made of sheep’s wool and covered with grease so that it didn’t get drenched. If there wasn’t a fair wind, the Vikings used oars – 20 to 35 pairs of them.In the Viking age, few ships could compete with a drakkar in terms of sheer speed, but drakkars were also very nimble. Thanks to the drakkar’s shallow draft, the Northmen could easily sail along rivers and fjords. They could land in places that were very difficult to access and attack their enemies unexpectedly. These warships were also barely visible between the waves because of their low sides. This helped the Vikings catch their enemies unawares, even in the open sea. Drakkars were created for more than just war, however. They were solid and capacious, so the Vikings sometimes used them for trade and to transport goods, but more often these ships were used for sailing long distances. How far did the Vikings travel? They reached the shores of Iceland, Greenland, and North America, to name but a few destinations.
copied from the kit review by @James H
the full review can be found here
1:25 Drakkar ‘Oseberg’ V3 - Ships of Pavel Nikitin - REVIEWS: Model kits - Model Ship World™
-
1 hour ago, yvesvidal said:
Crazy...crazy....It is time to call the White Coats.... !!!
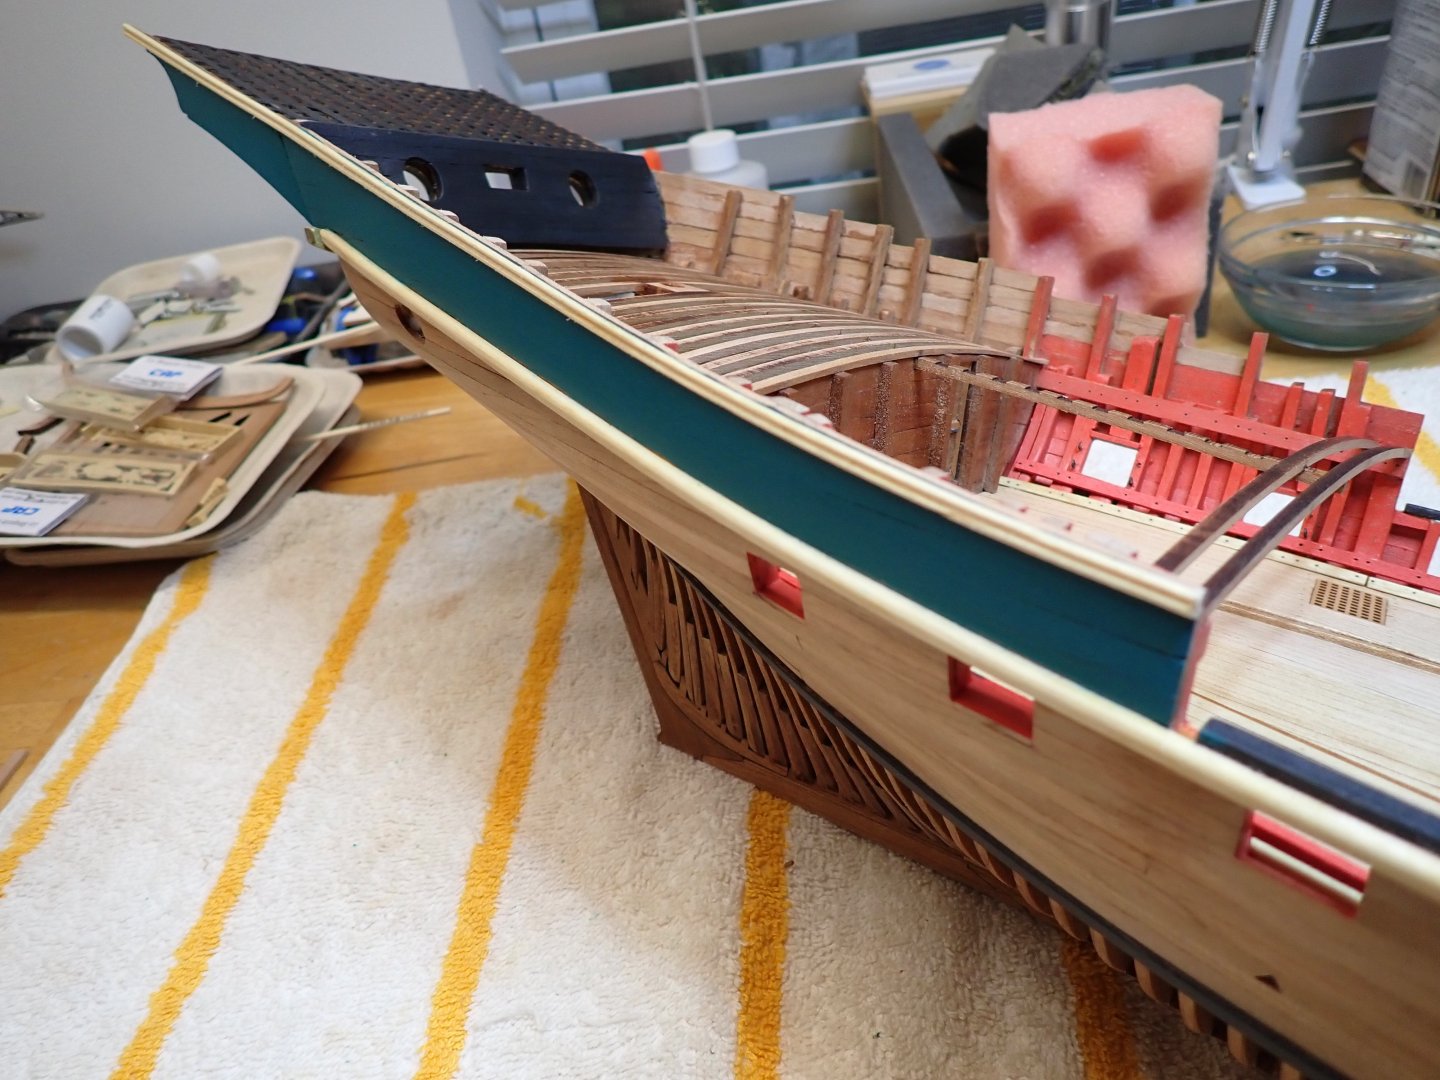
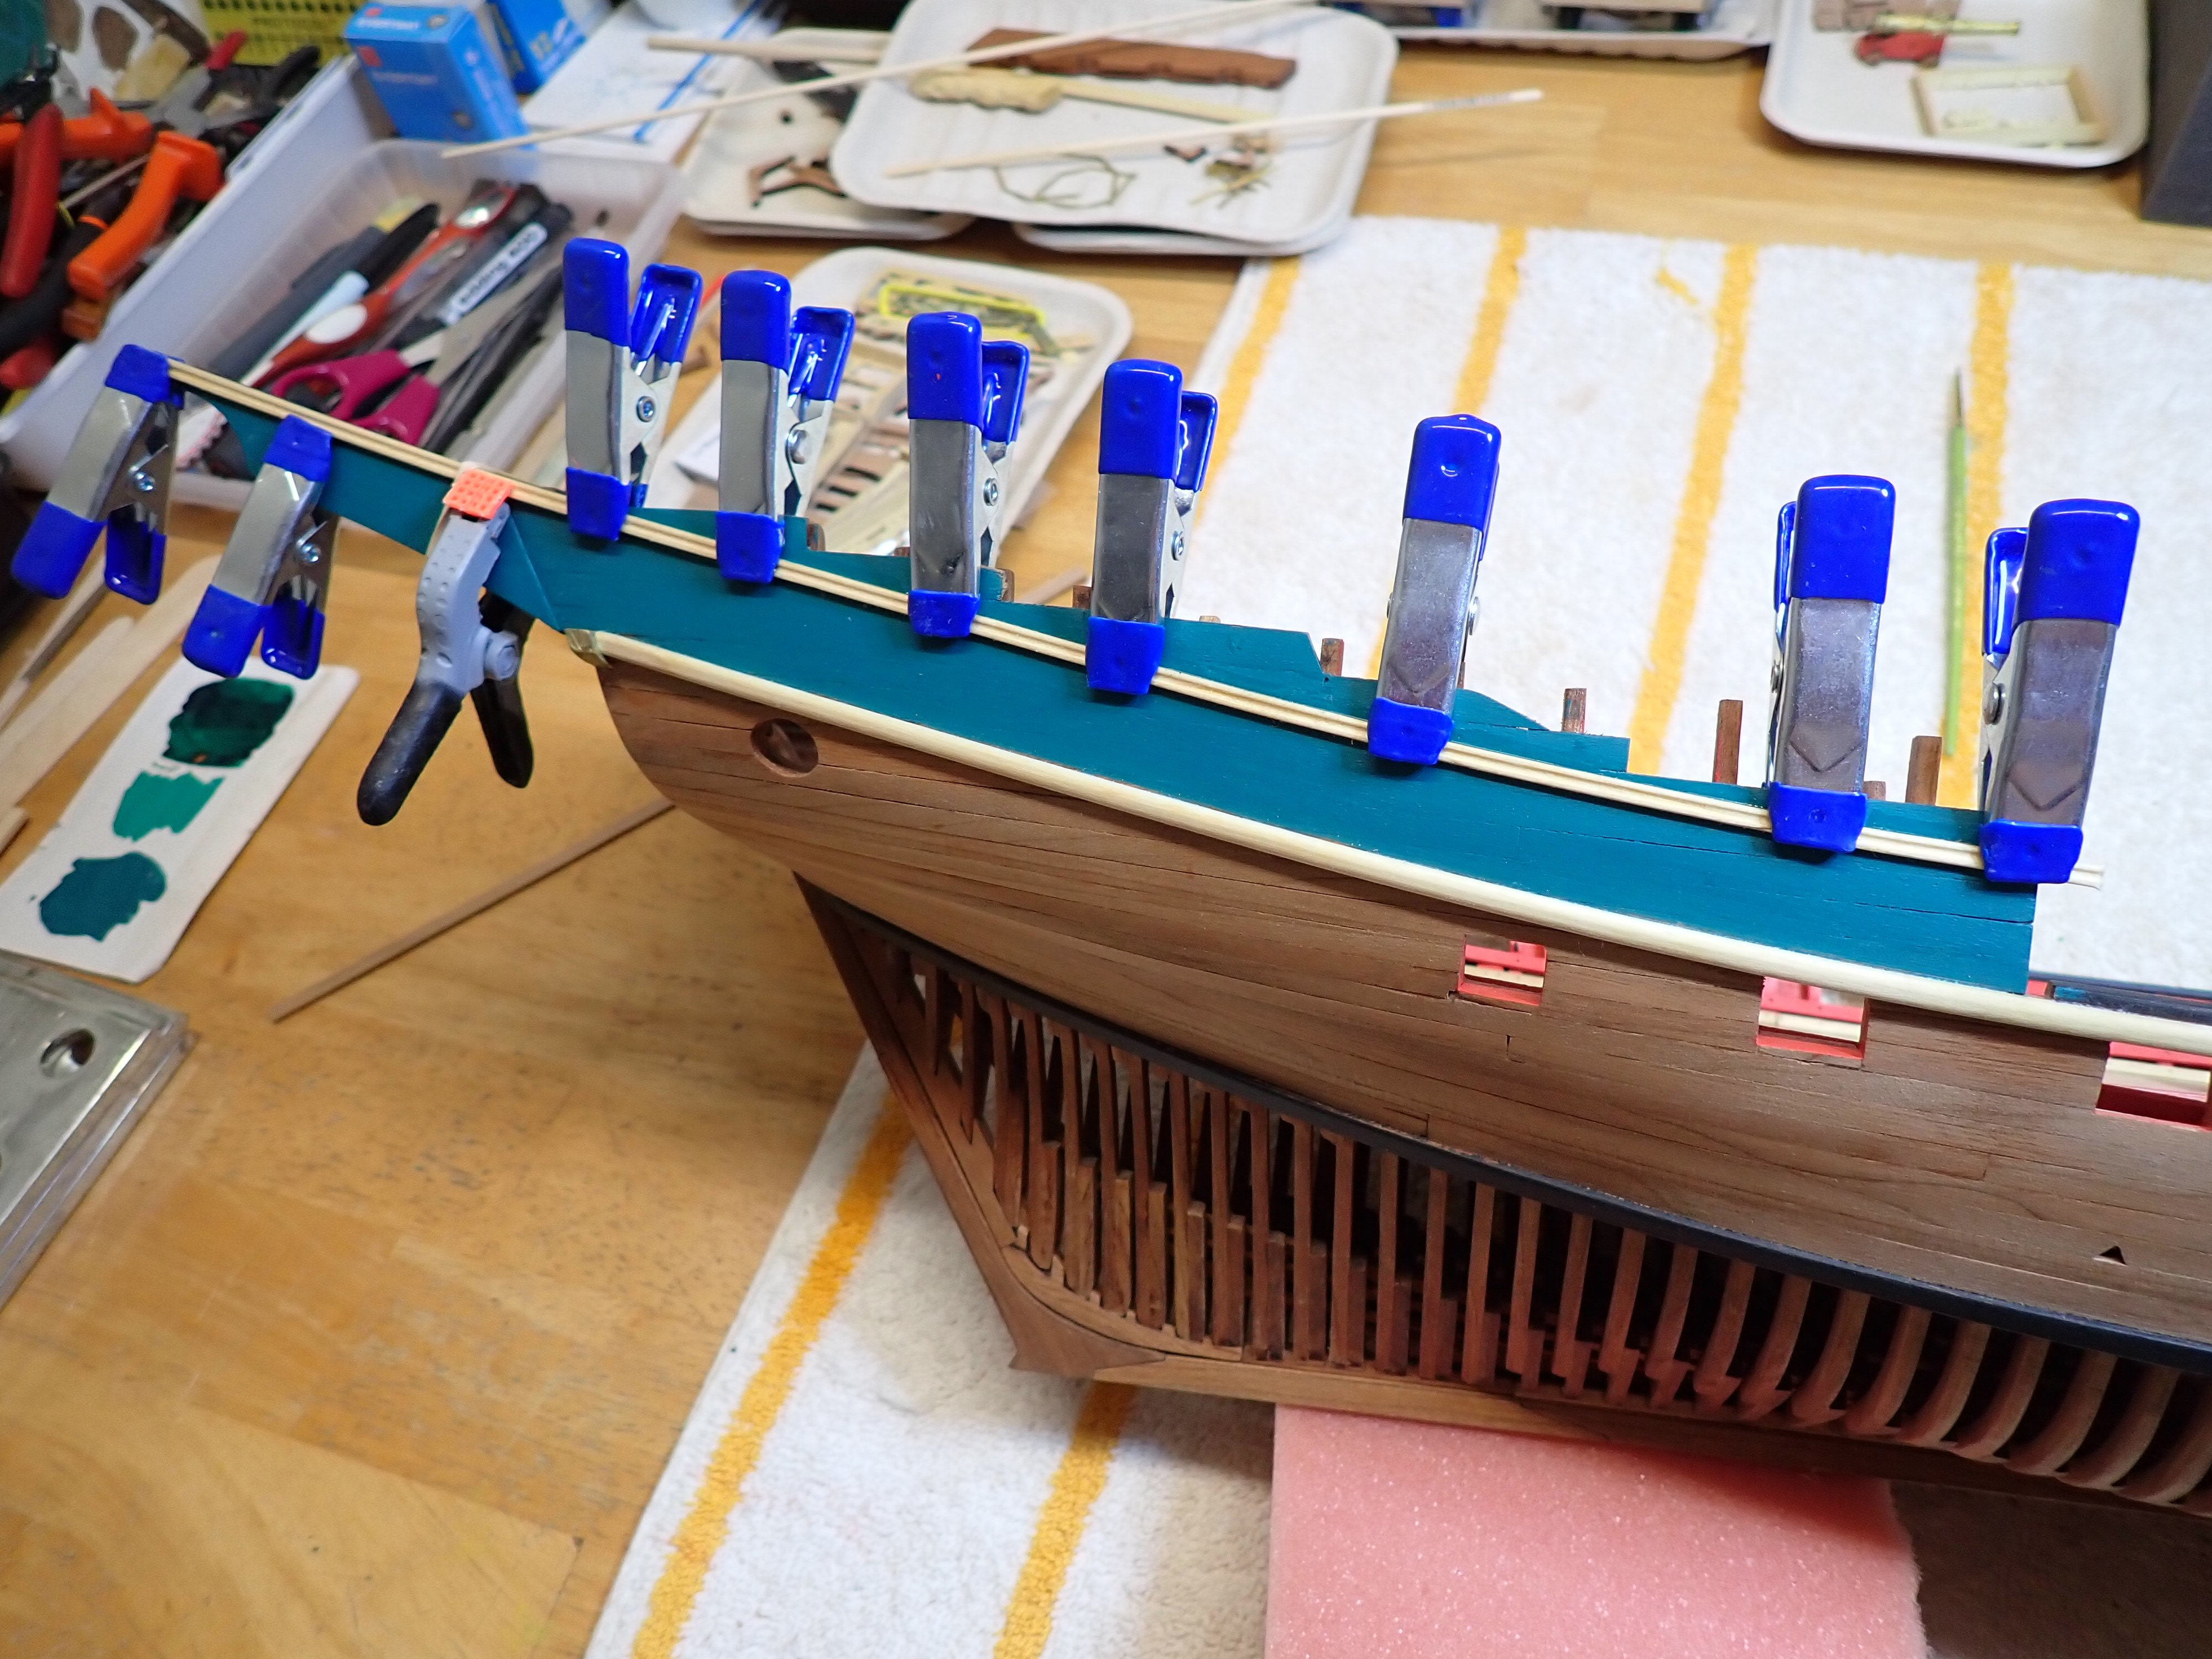
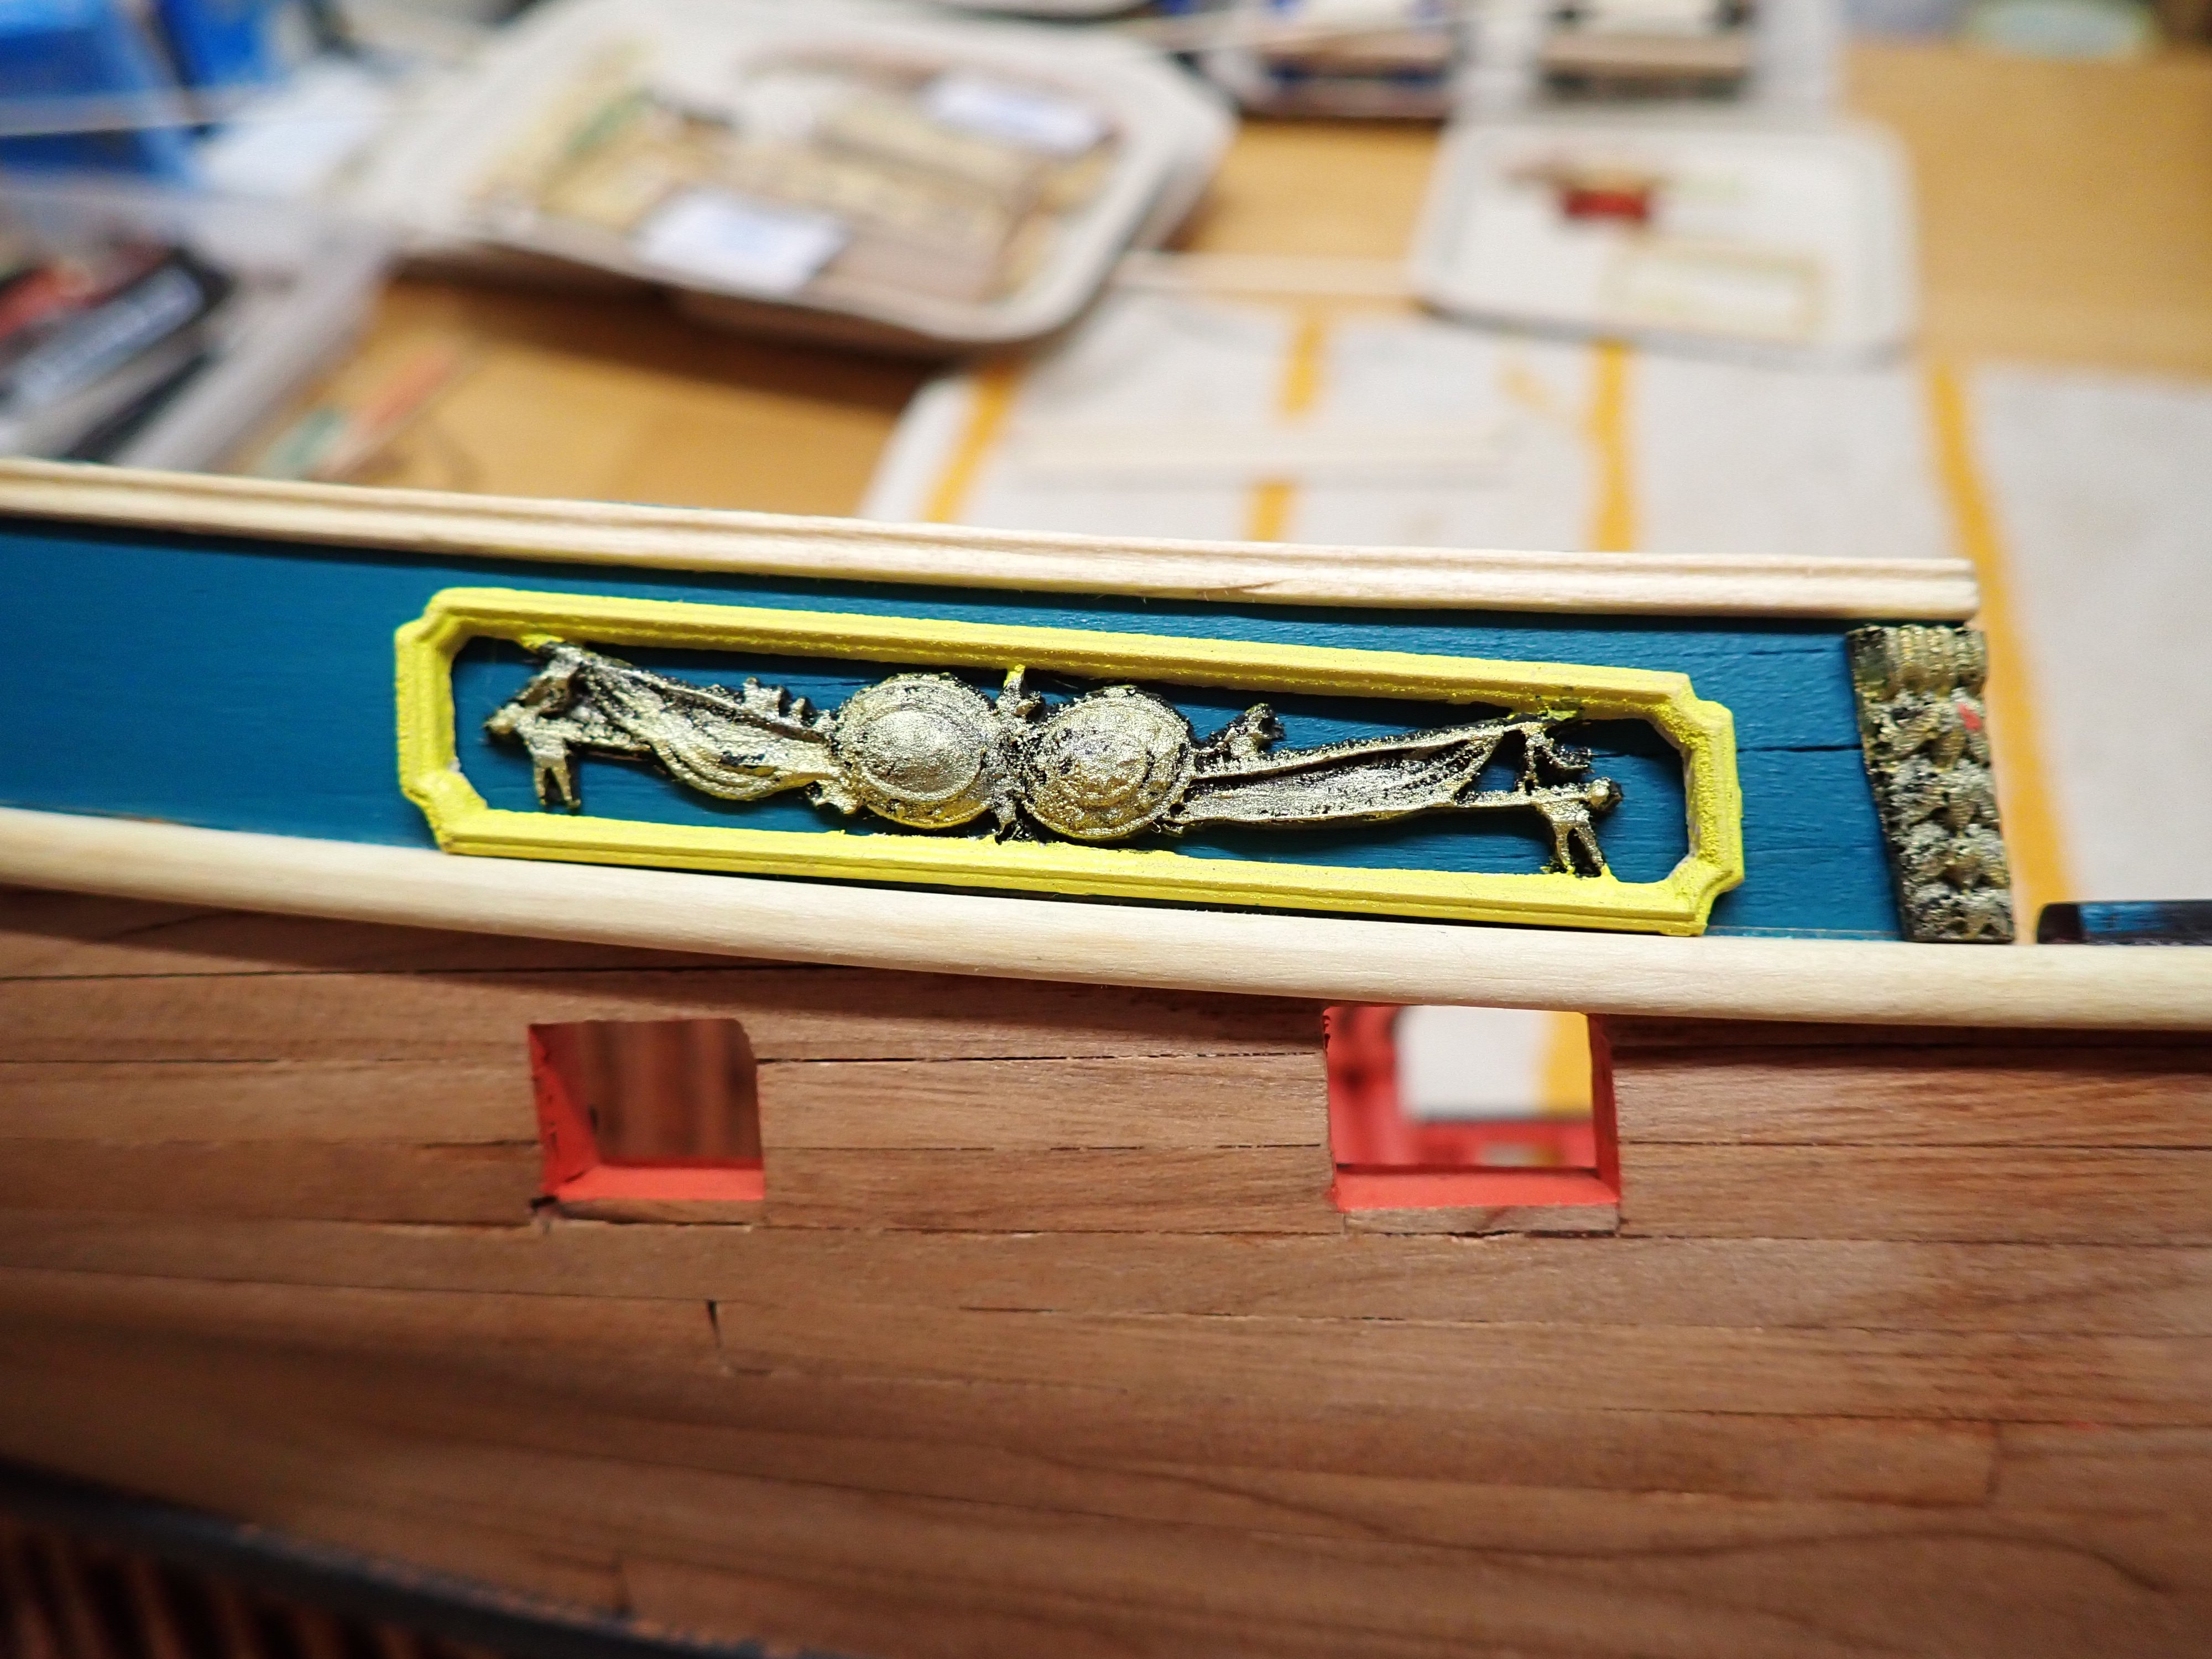
I have been thinking about the railing of the rear quarter deck. If the planking was done in a curved and harmonious way with stealers and all the necessary stuff, the shape of the planking would follow the curvature of the railing. That is a view of the mind and it does not happen too often.
So, after postponing this stage for a while, I decided today to jump into it and go "Crazy".
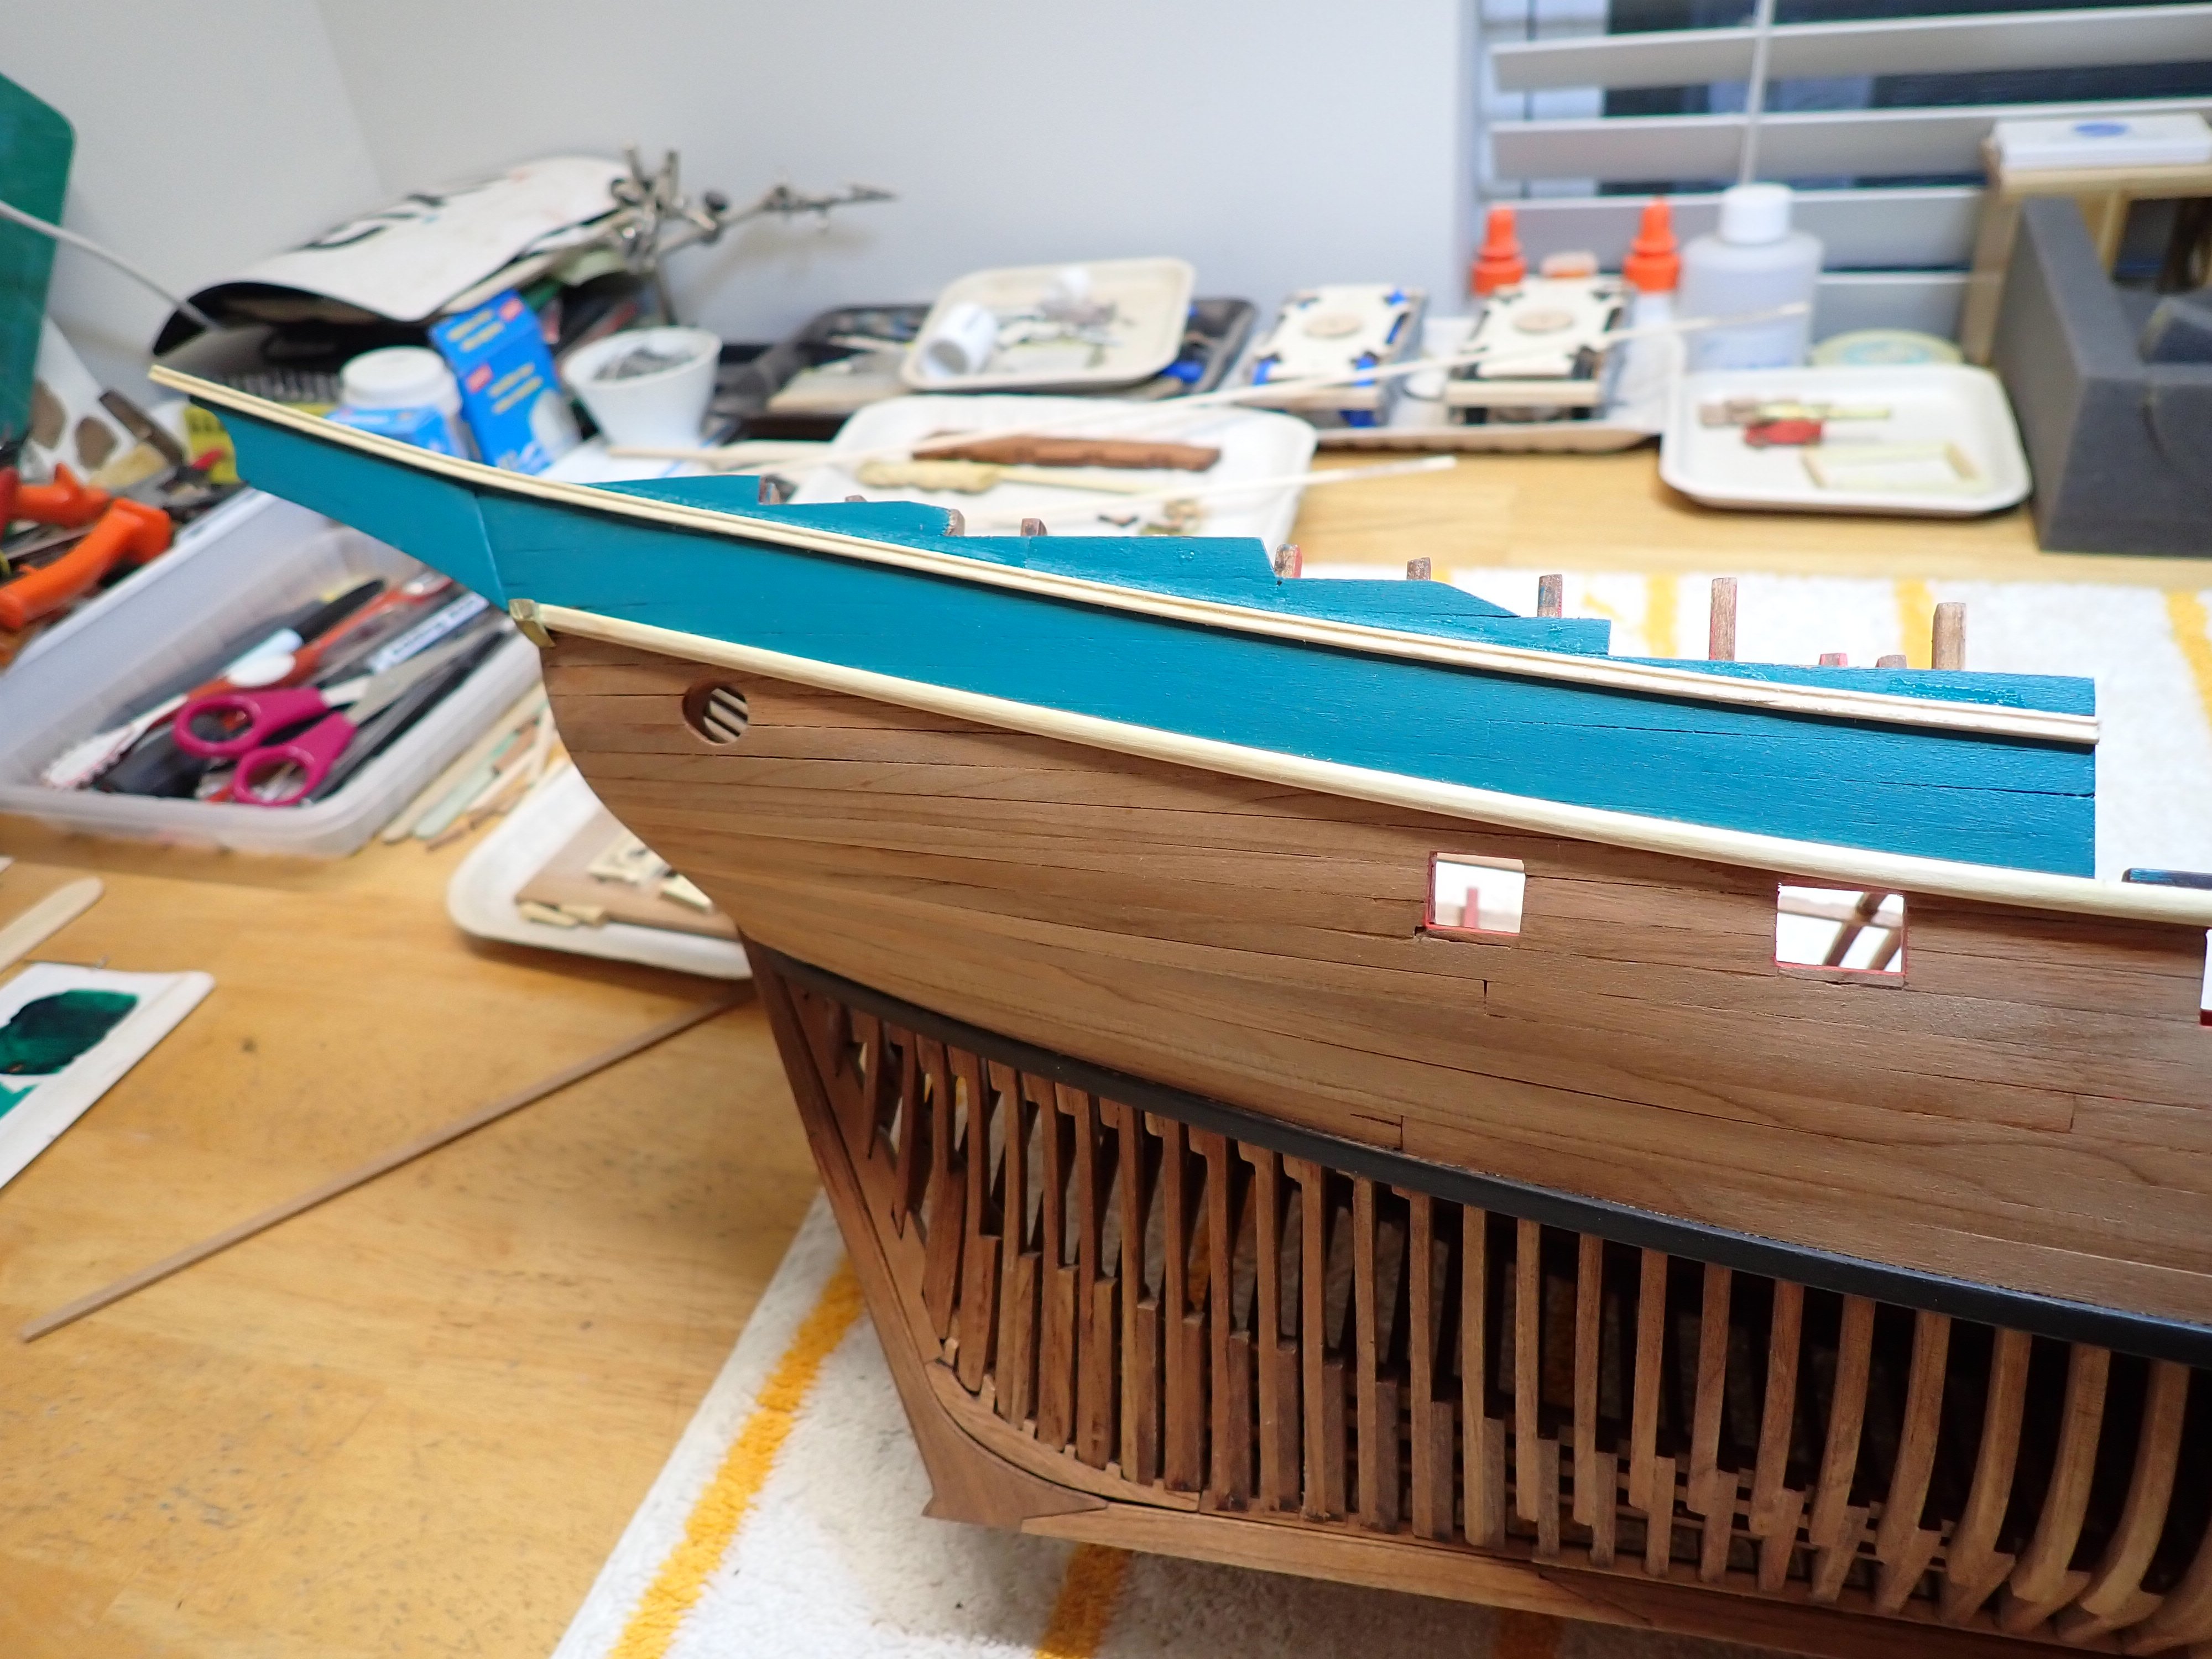
The first thing to do is glue that nice strip (not included in the kit) that is supposed to delineate the hull from the railing. That is done after many dry runs and positioning of the freezes and ornaments. The rear of the hull is painted with that rare greenish blueish color described in the Monograph and that was in fashion at that era, in the French harbors. The strip is then positioned, secured and glued with liquid CA (1-3 seconds), carefully dropped from the top. The glue runs gently following the strip, without leaking underneath. I have used that technique with the HMS Bellona and the strips are still holding fine.


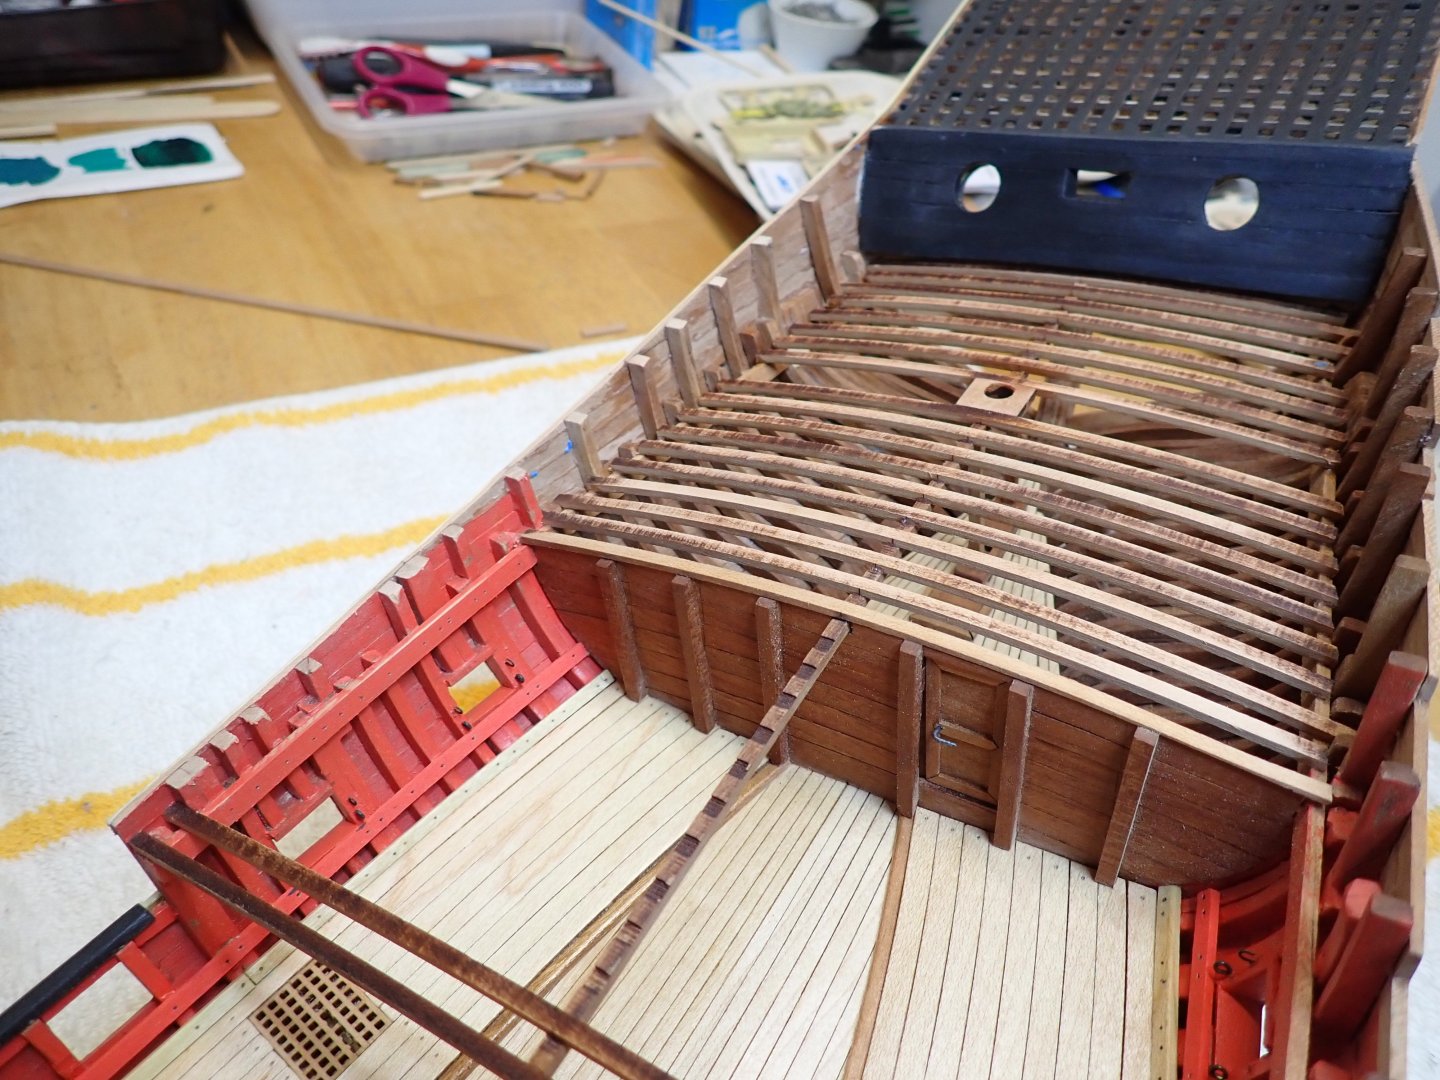
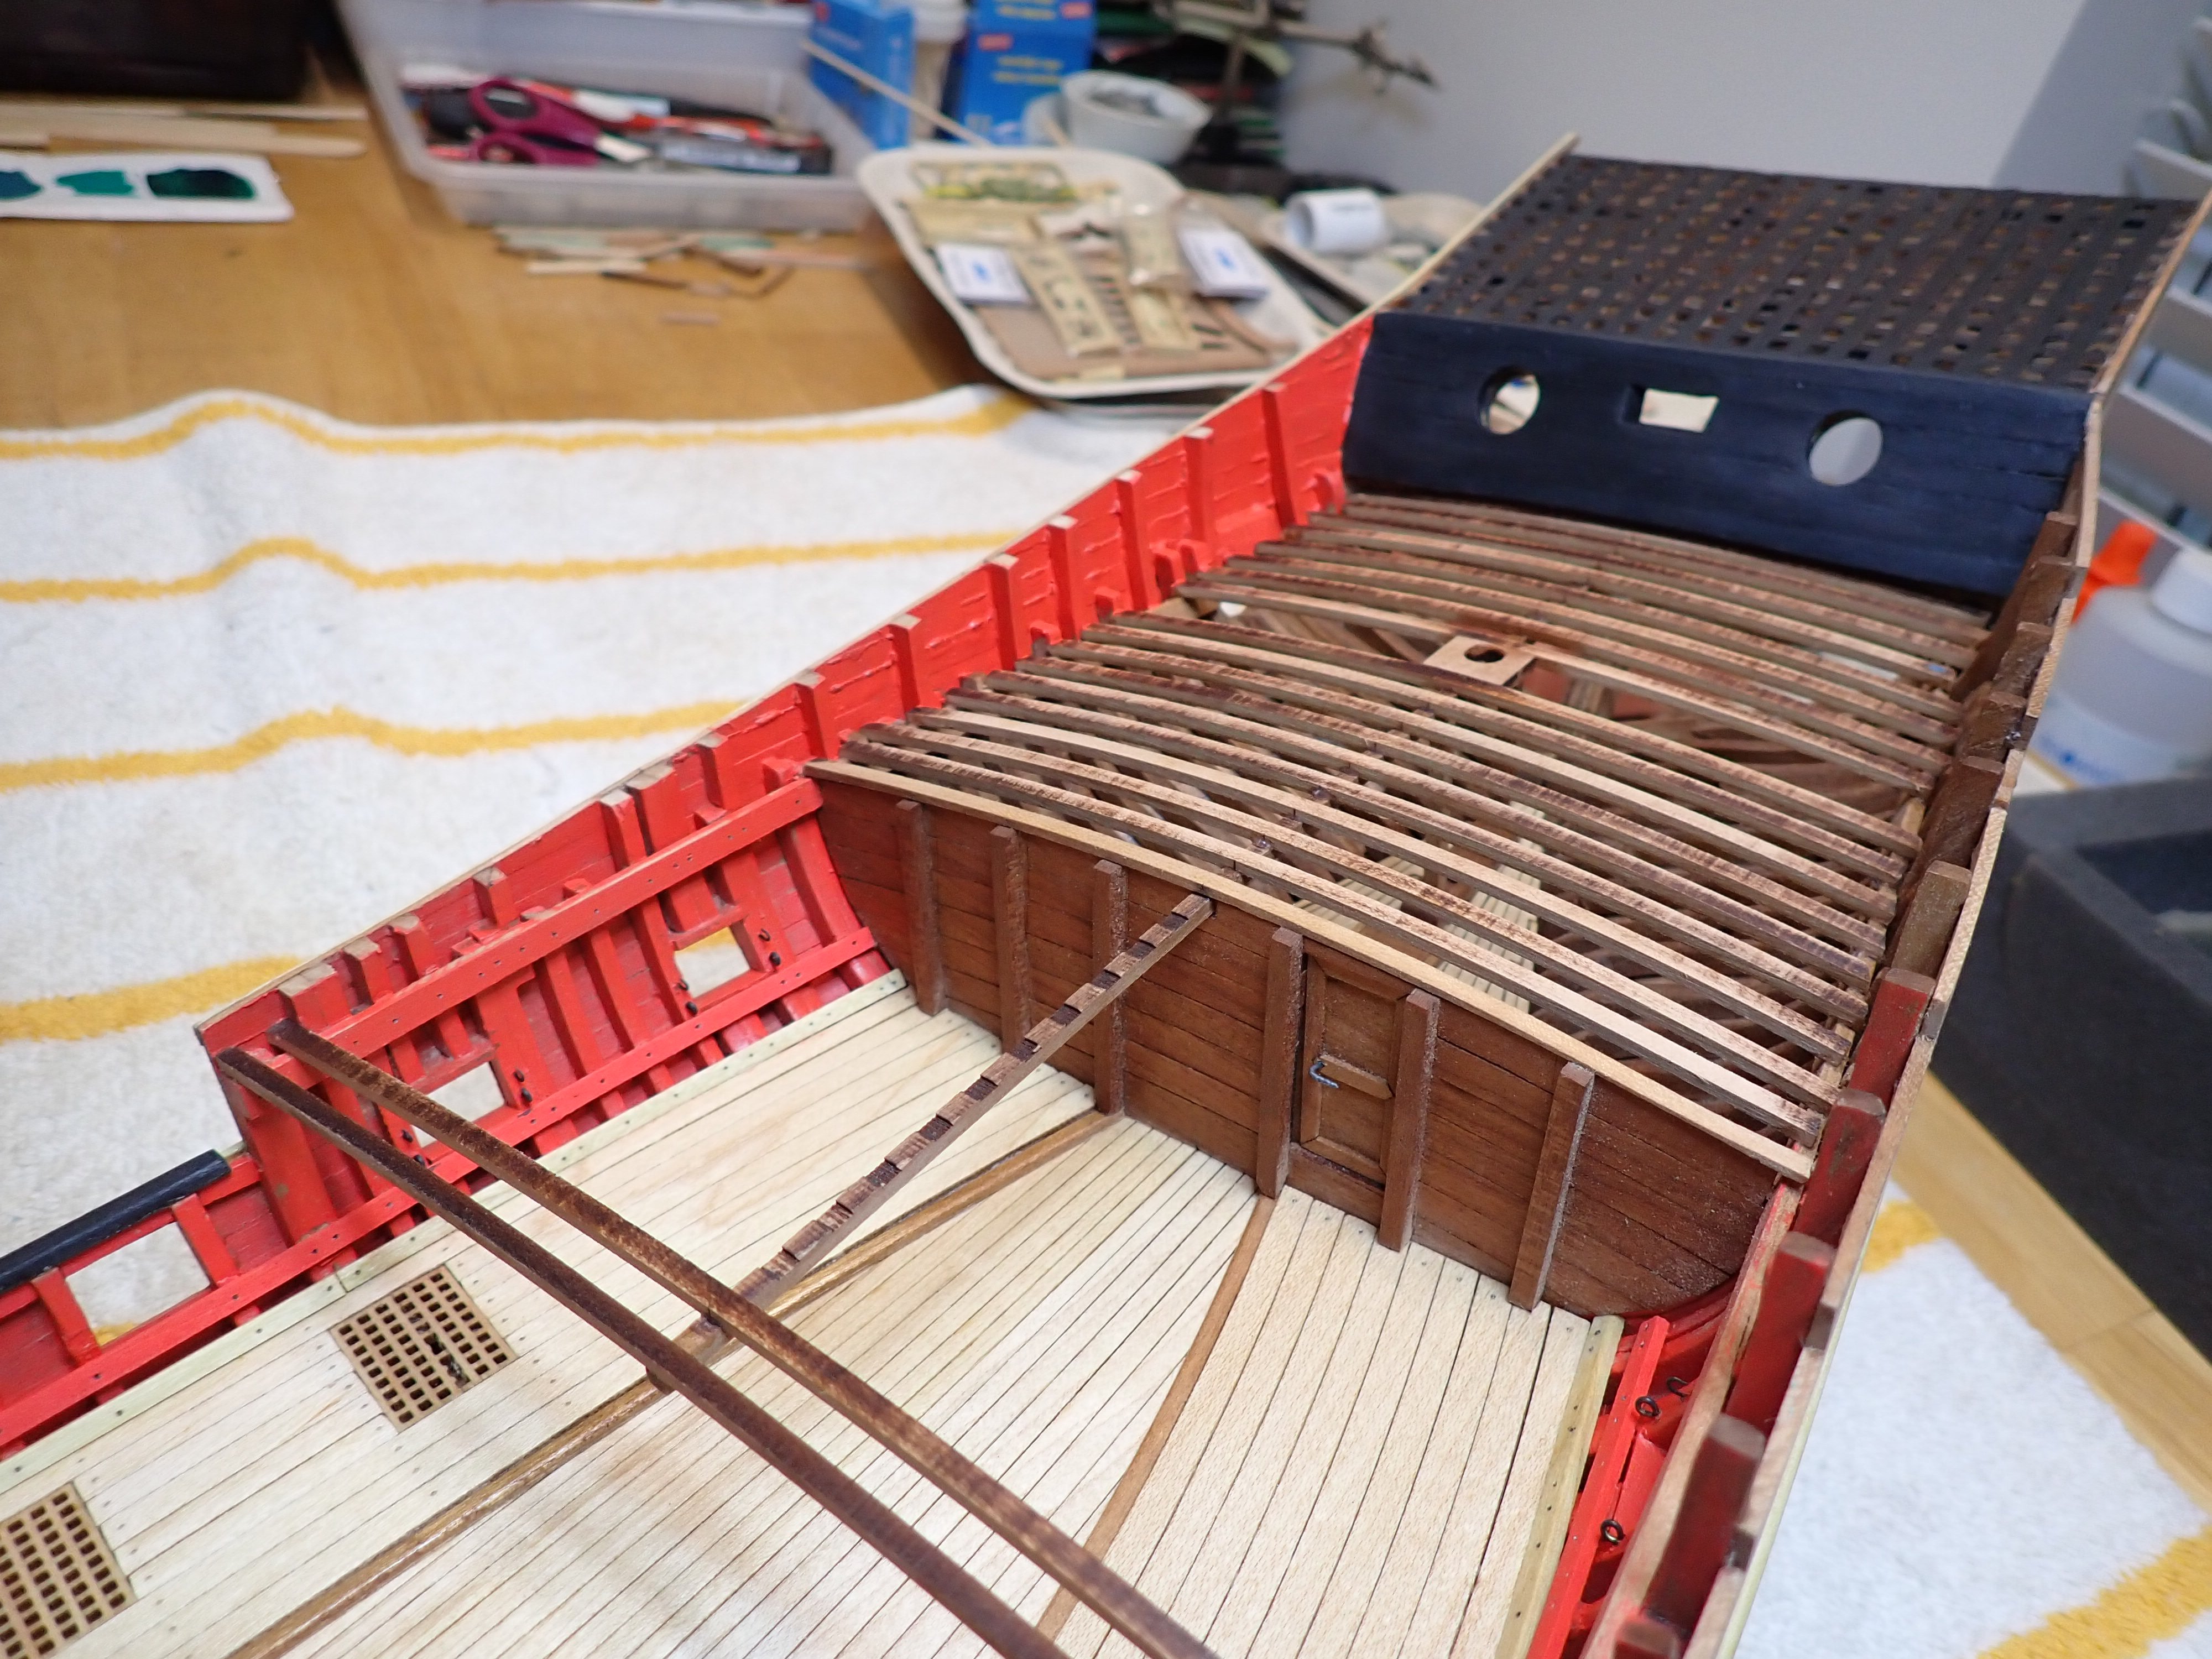
Another final checking that all the ornaments are fitting between the two strips..... And then we go crazy..... Using my Dremel with a cutting disk, I am butchering all the planking and framing above the top strip:
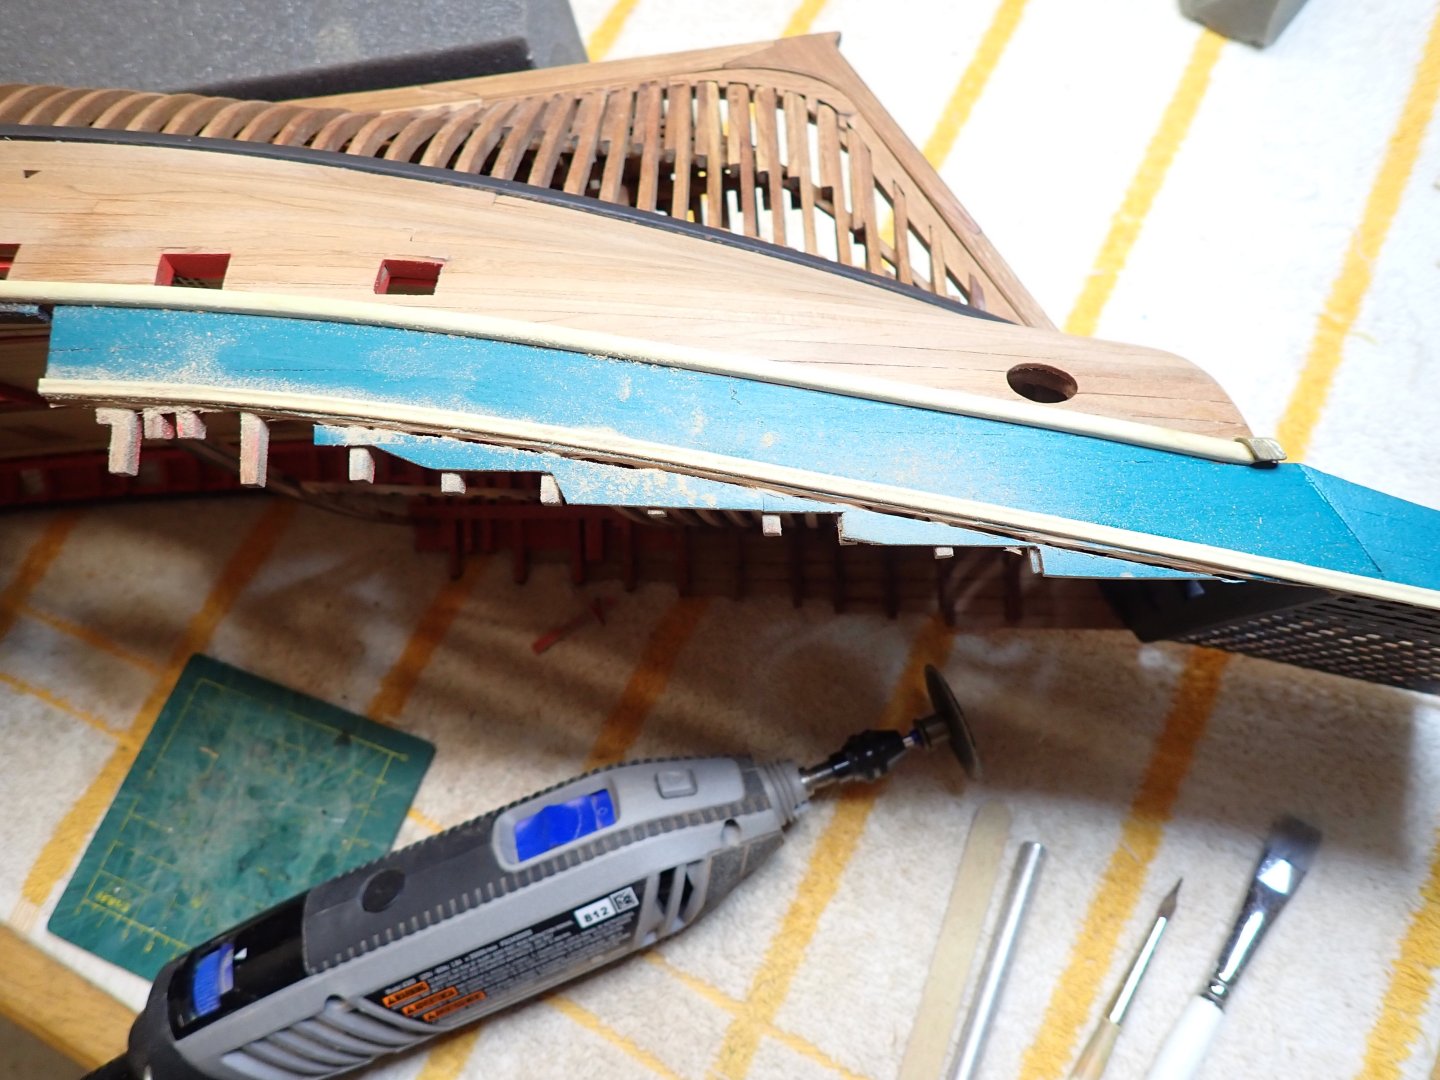
You have to be super careful and hold your Dremel with two hands to prevent an irrecoverable slippage of the cutting disk....
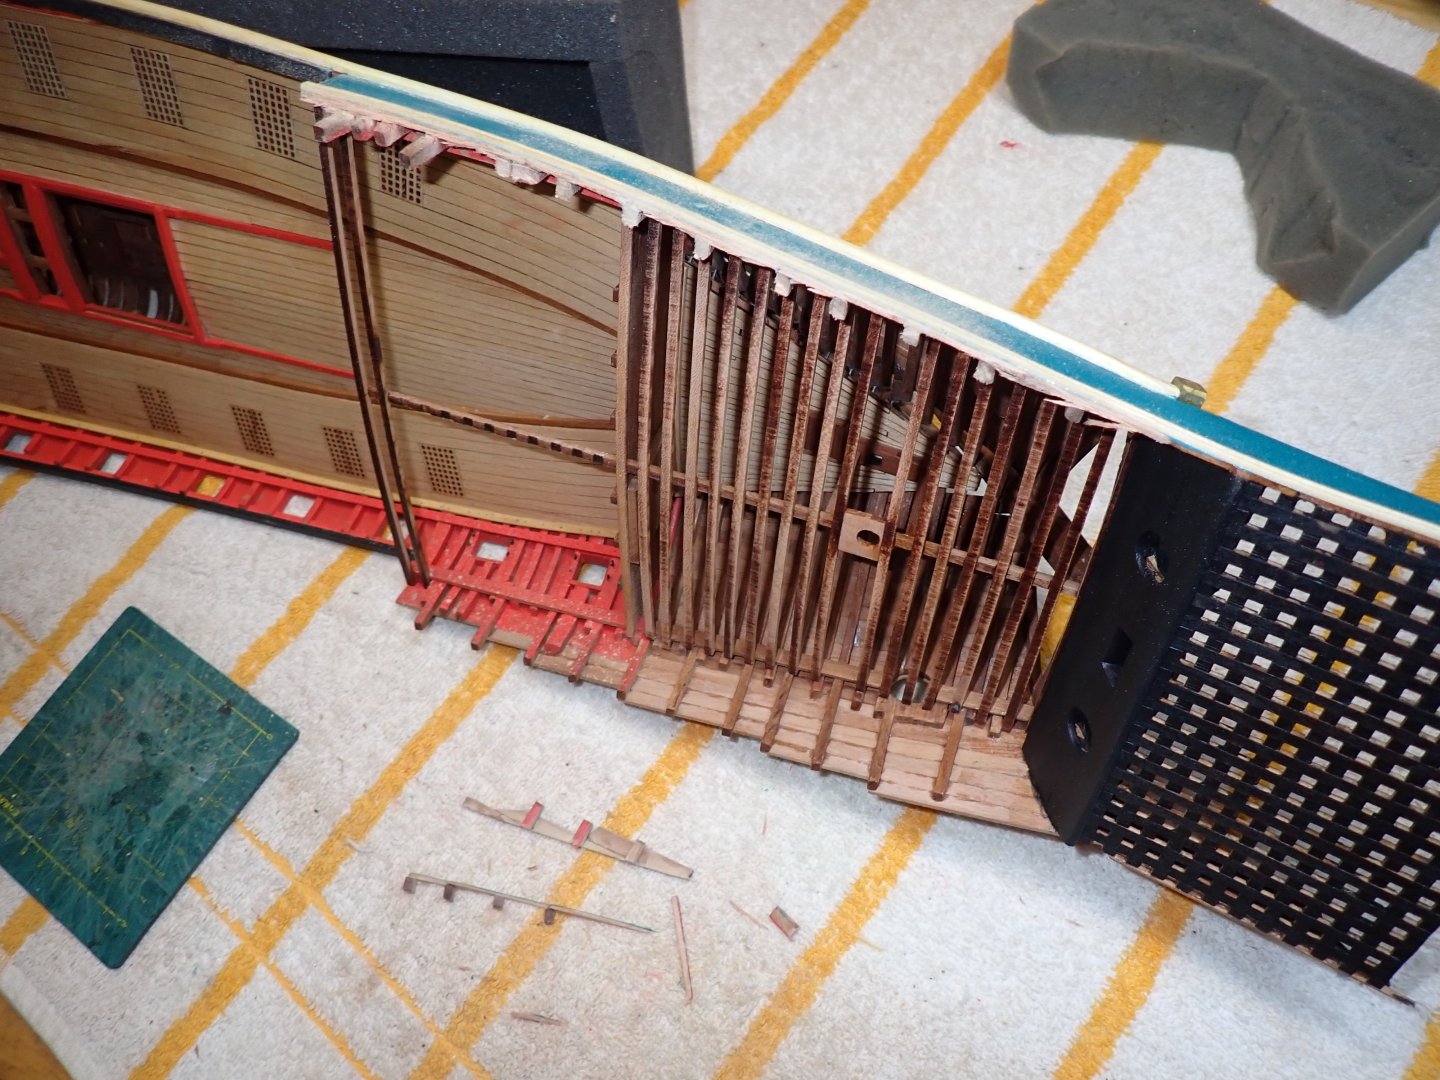
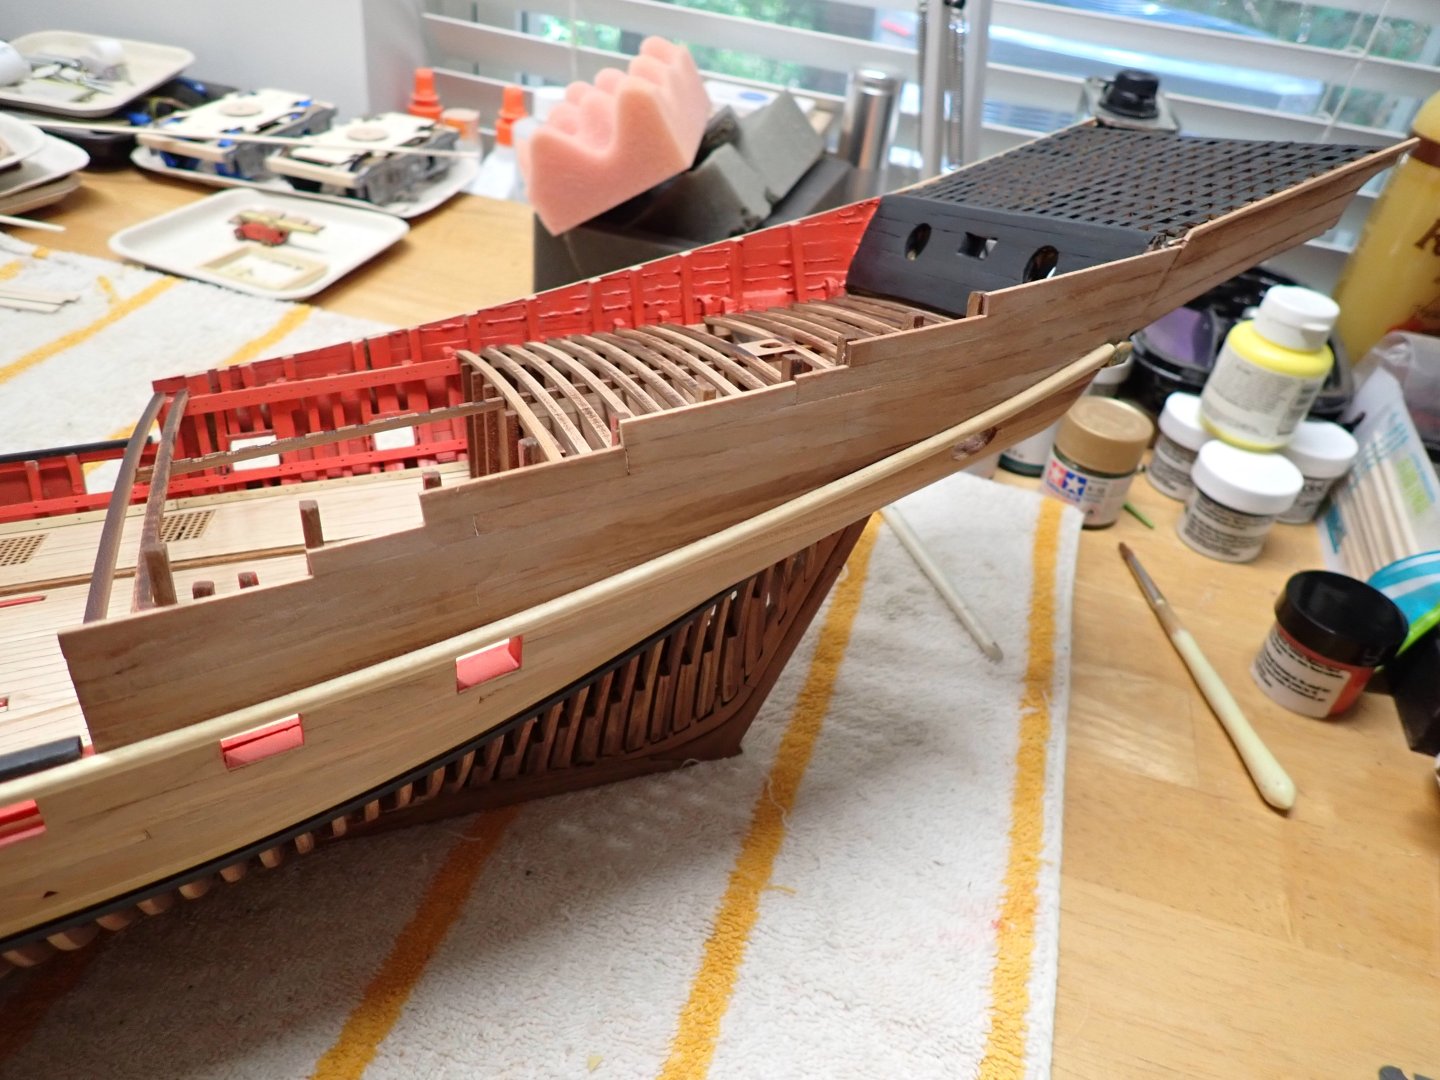
This is it. Now, we have to sand to bring everything to the level of the top strip.

From that point, I will install a flat rail that will be my base for building the decorative railing comprised of freezes and other CNC carved parts. The original ship (and the kit) uses the frames as holders for the railing. My model will not have that. I think I can live with its absence.
A little bit of painting, to make things more elegant:


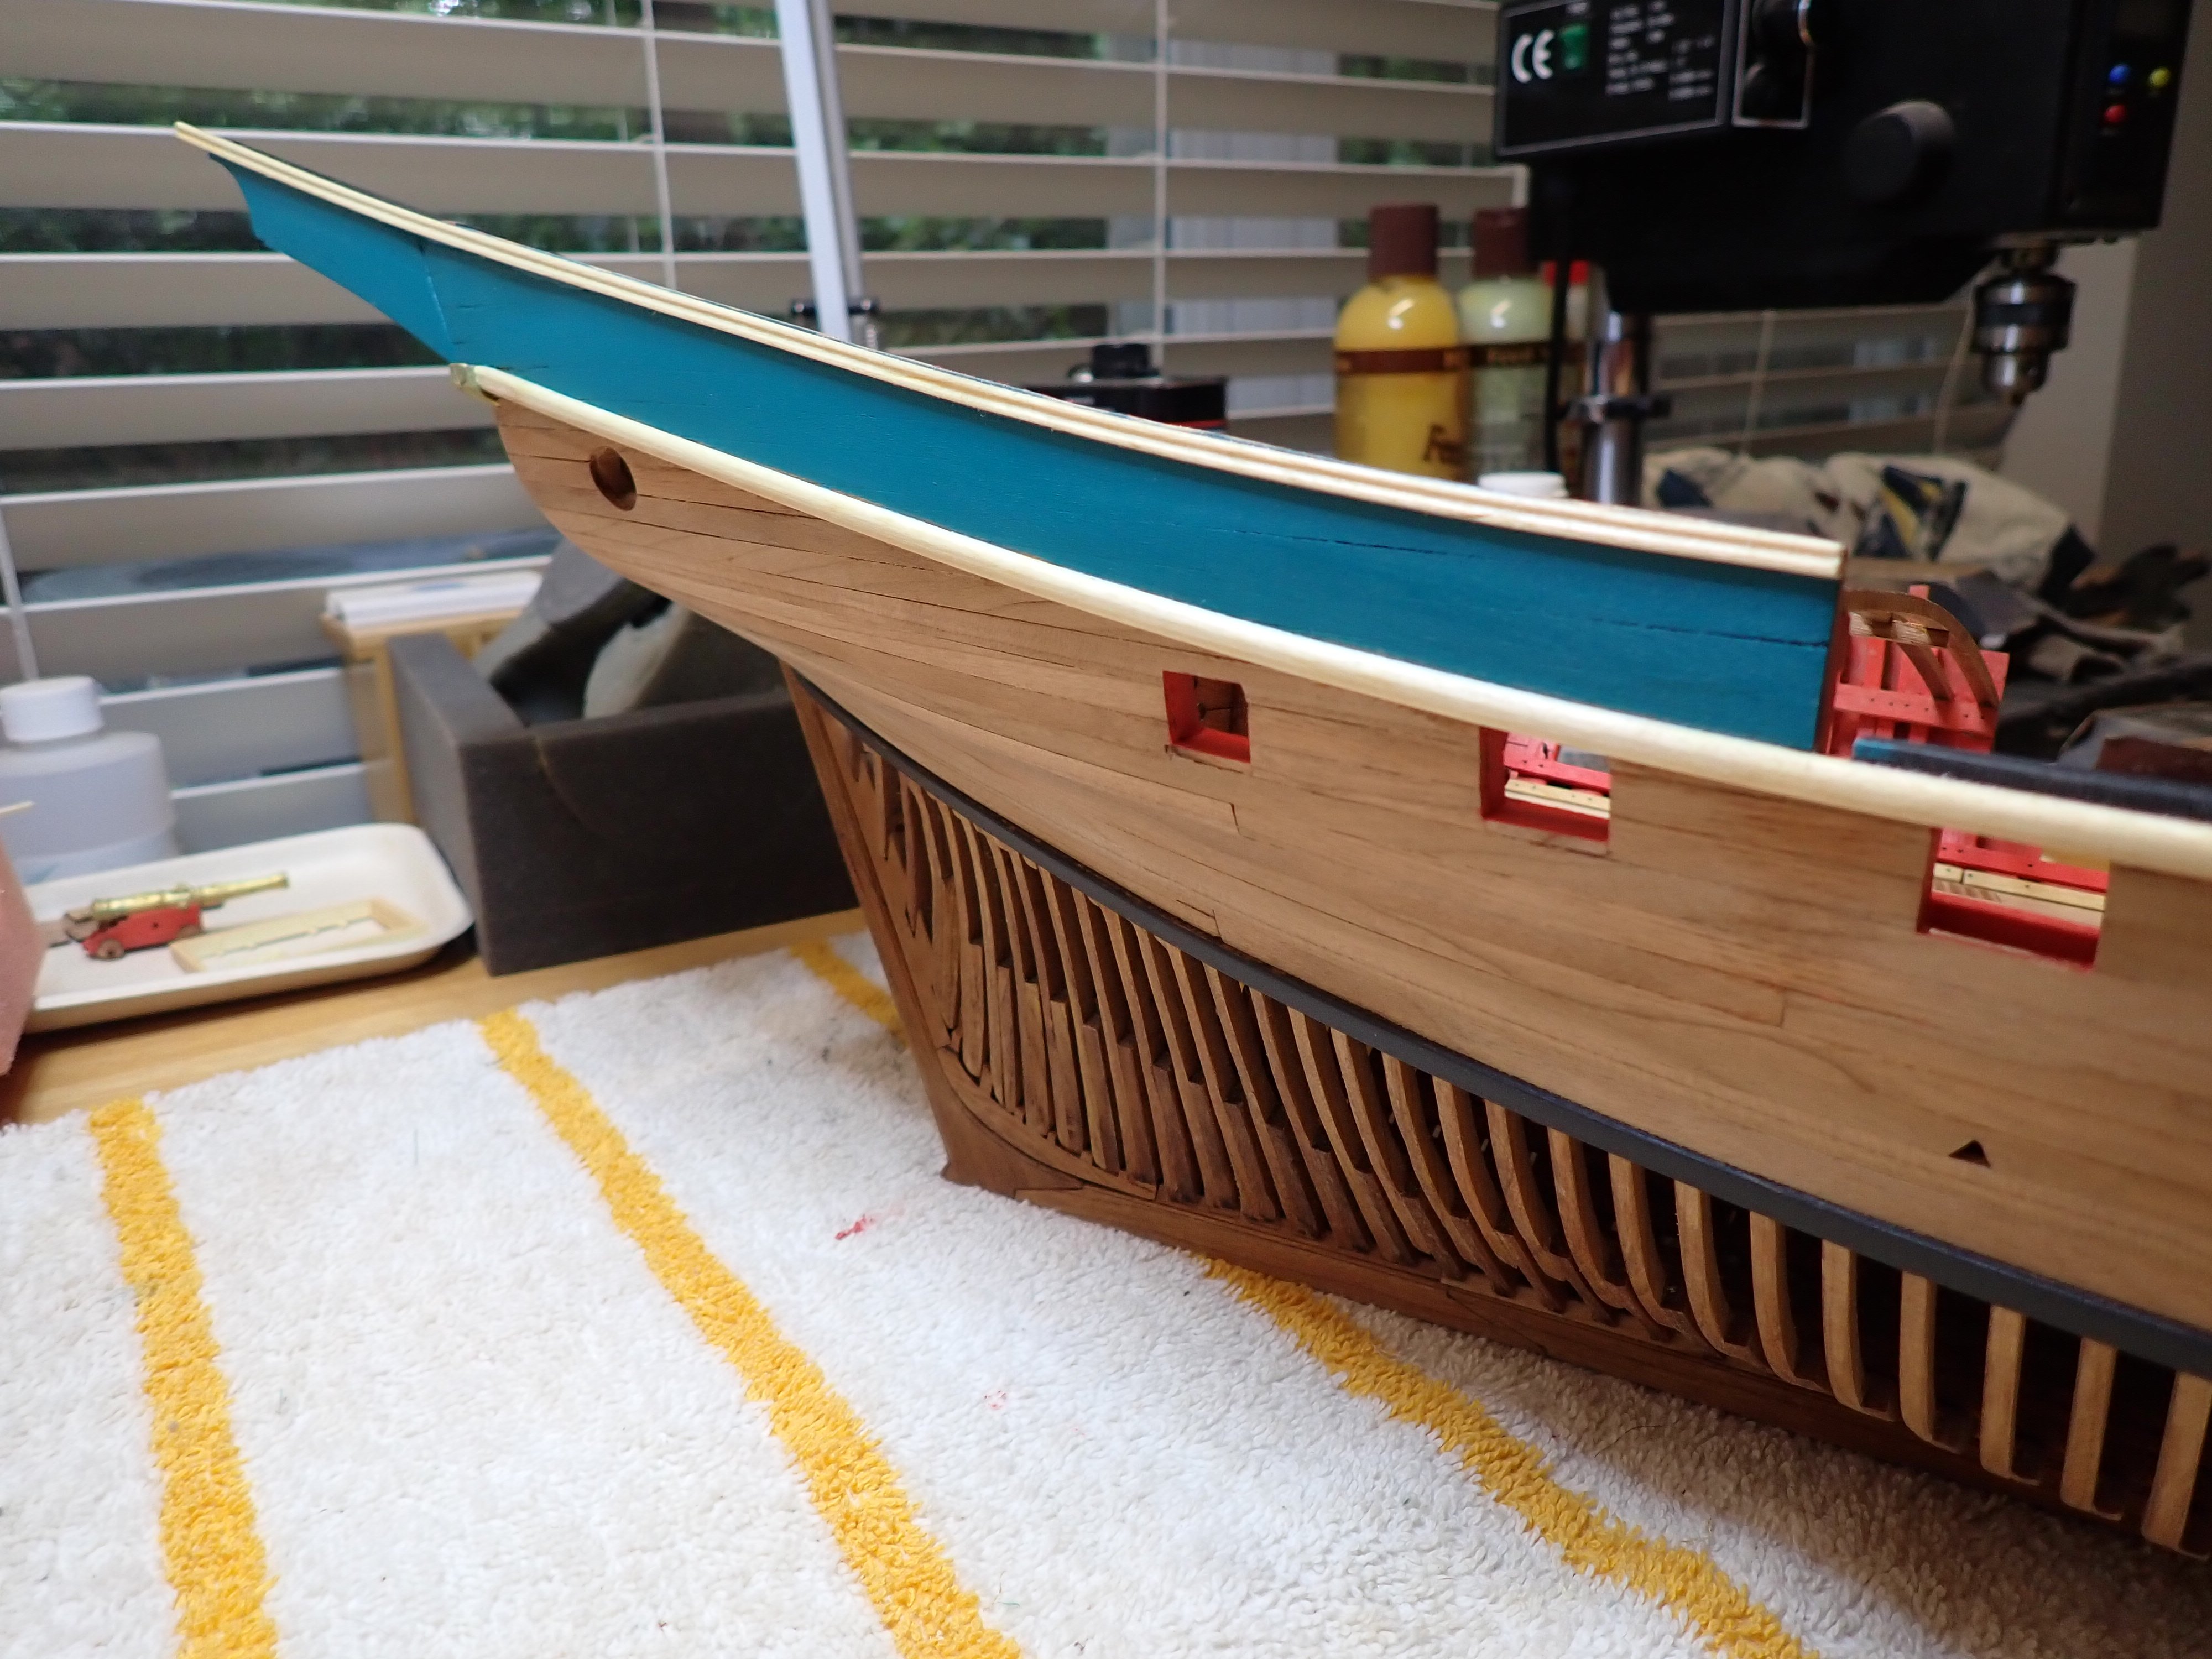
I kind of like that deep cobalt blue/green. Below is the other side, which has not been butchered yet. You can clearly see that the planking would never align with the elegant curves of the stern.

To make your mouth water and as an appetizer of what to come (it will be a while...), here is what it will look like:

The White Coats have arrived and I must go....
Yves
i have paid the bale money, you are free to leave the white coated community
love the green, the dremmel has certainly helped with the stern shape
- Paul Le Wol and yvesvidal
-
1
-
 1
1
-
i love this build, something different, and well built
- MAGIC's Craig and yvesvidal
-
1
-
1
-
good morning everyone
thank you for comments and likes
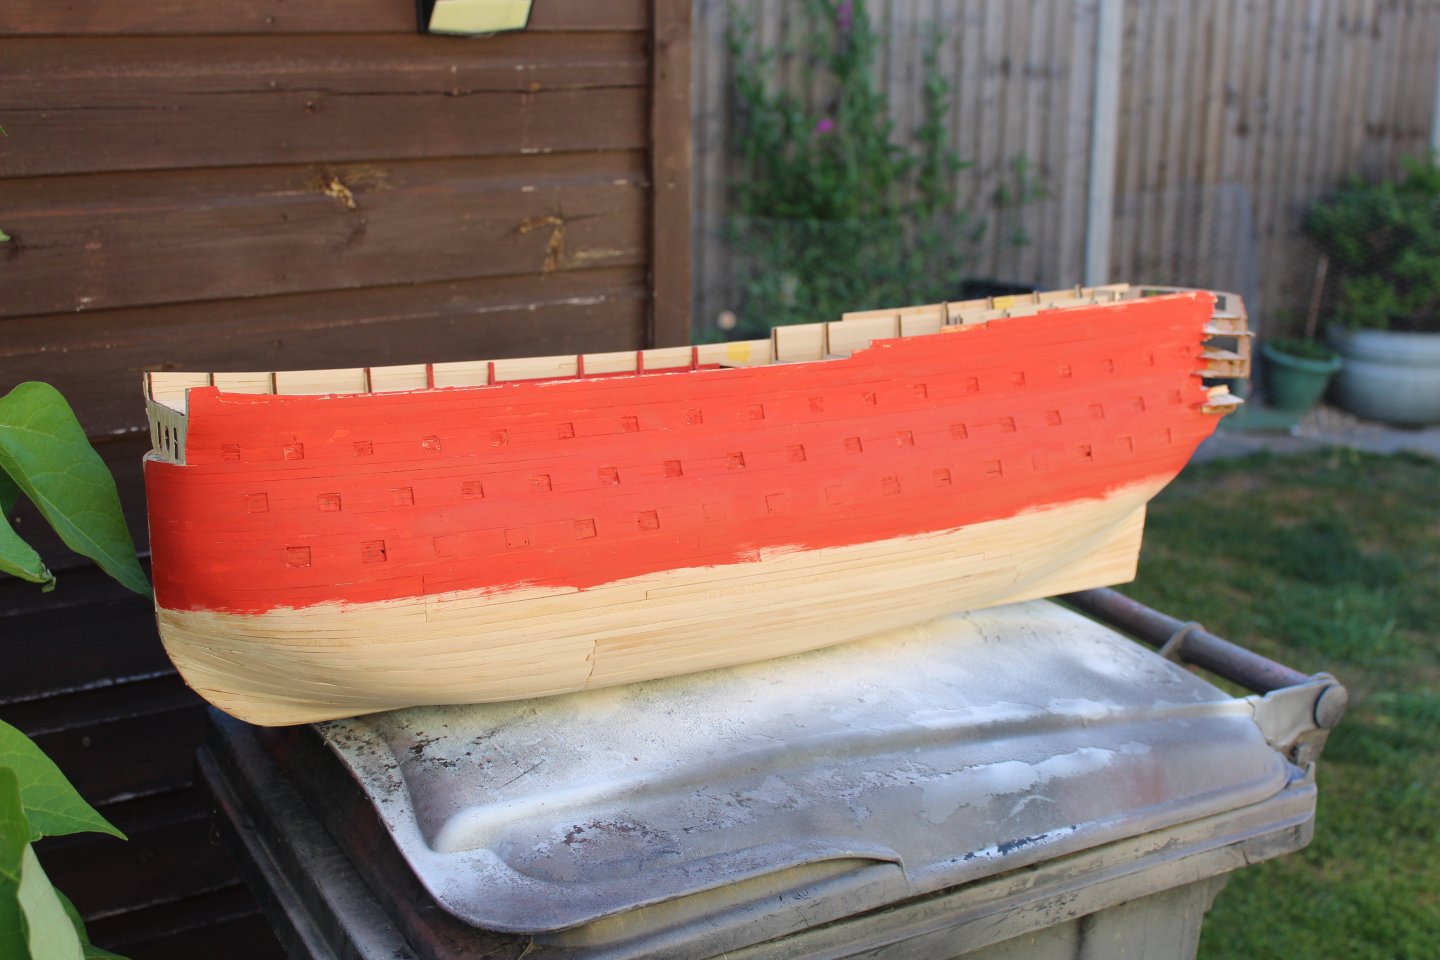
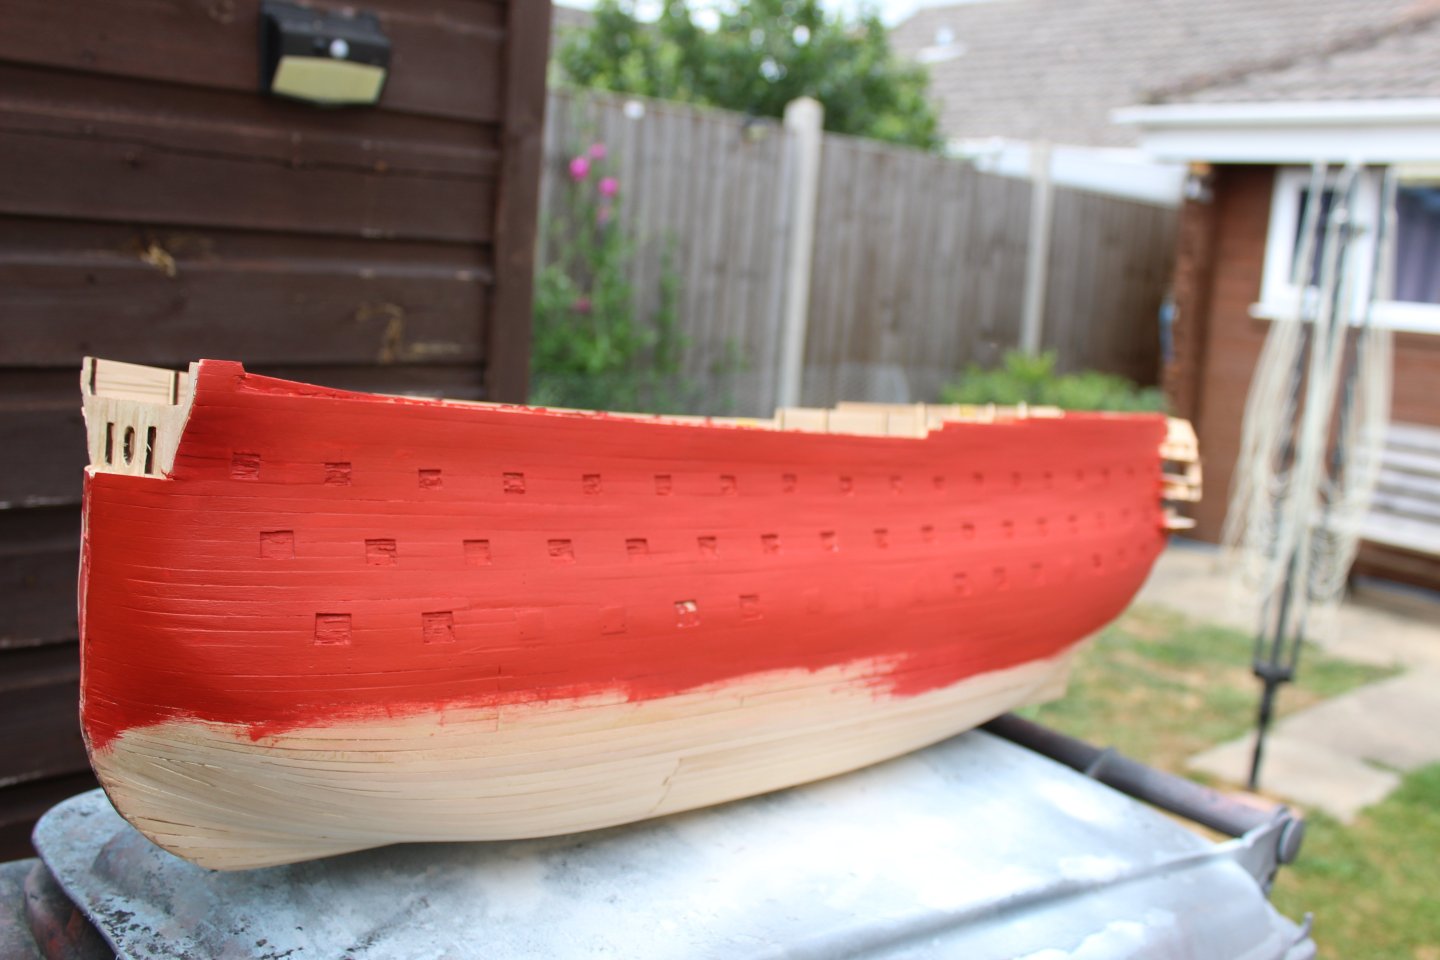
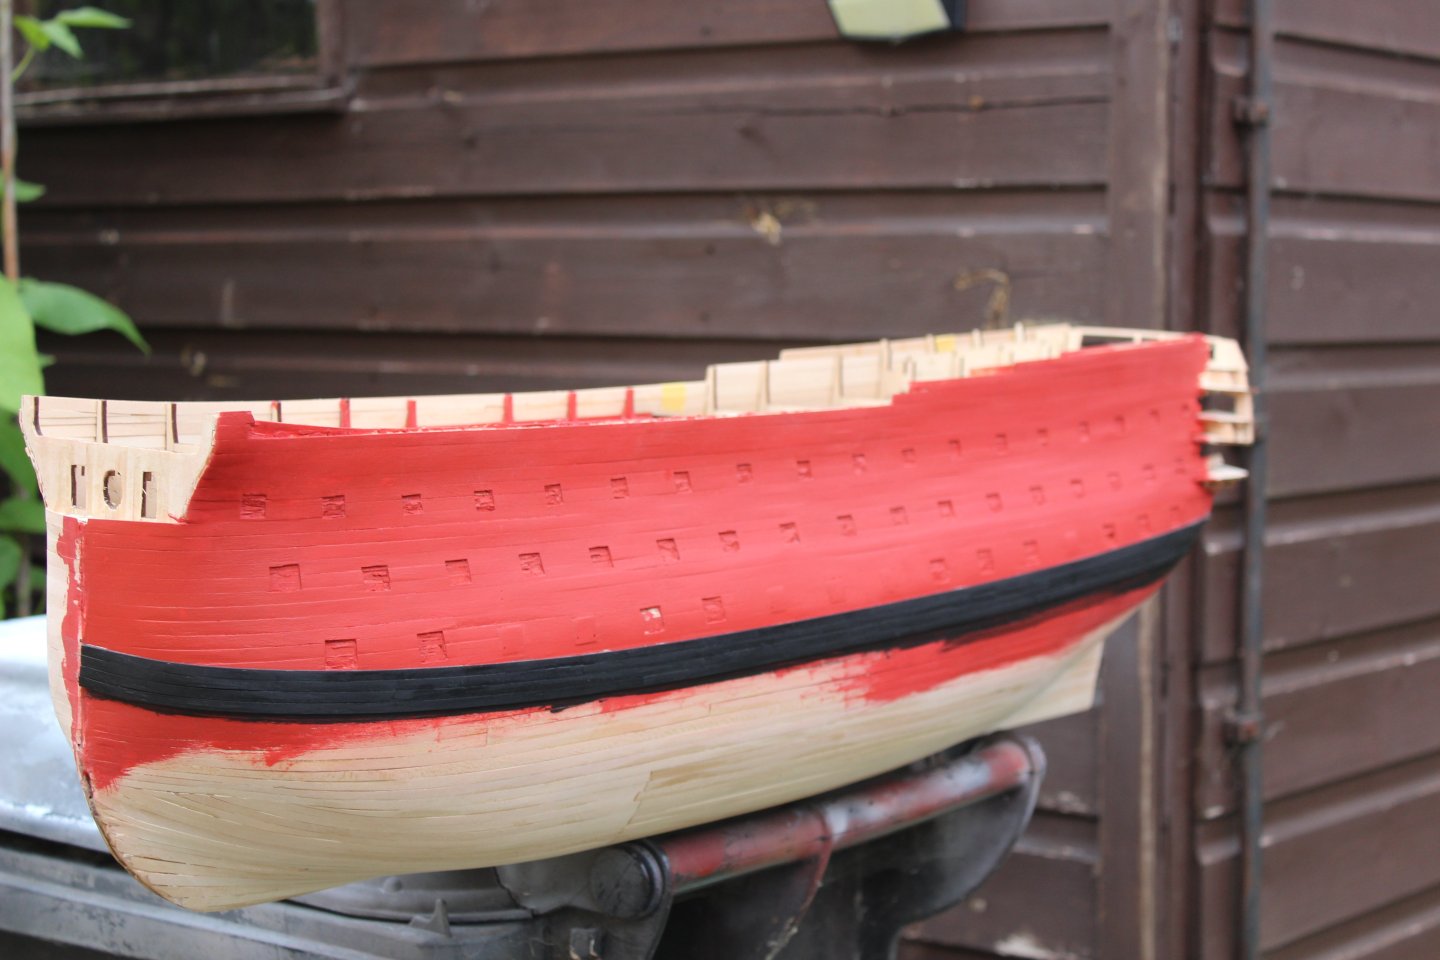
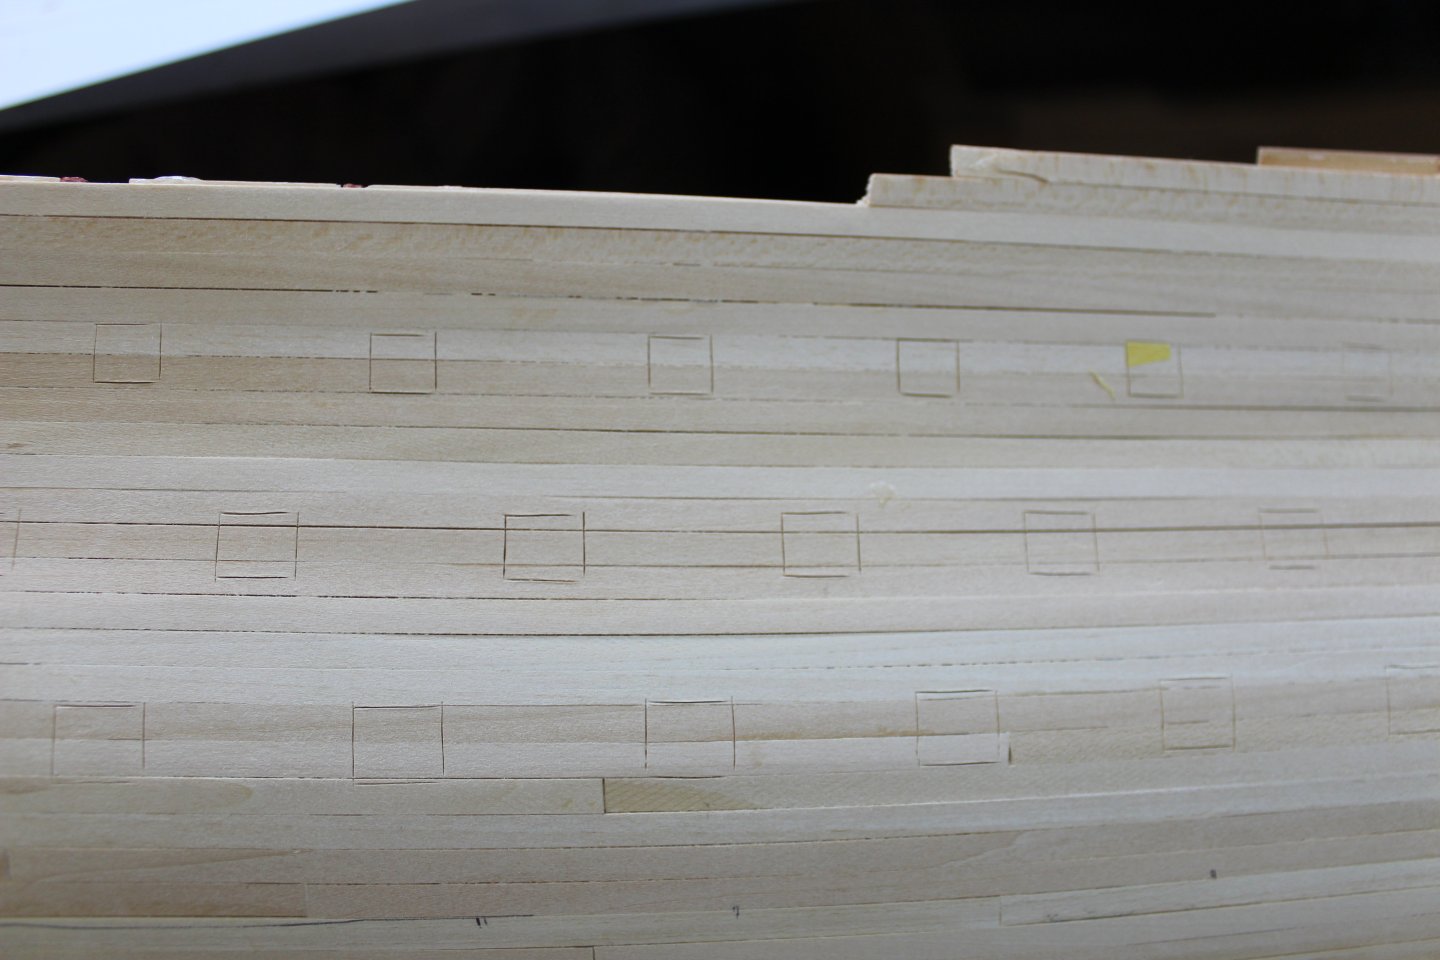
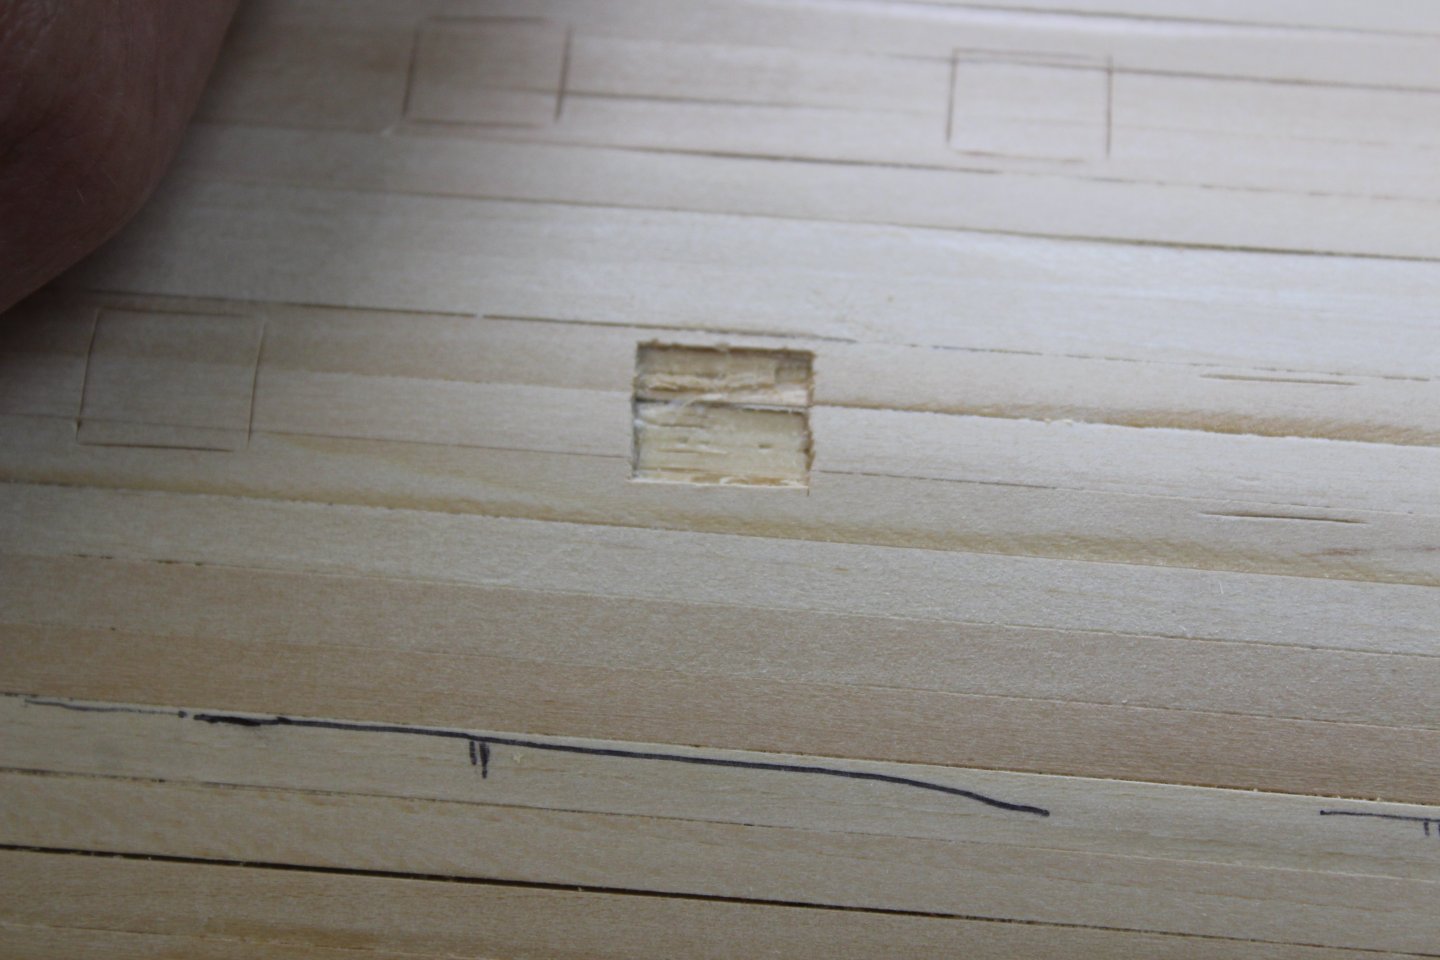
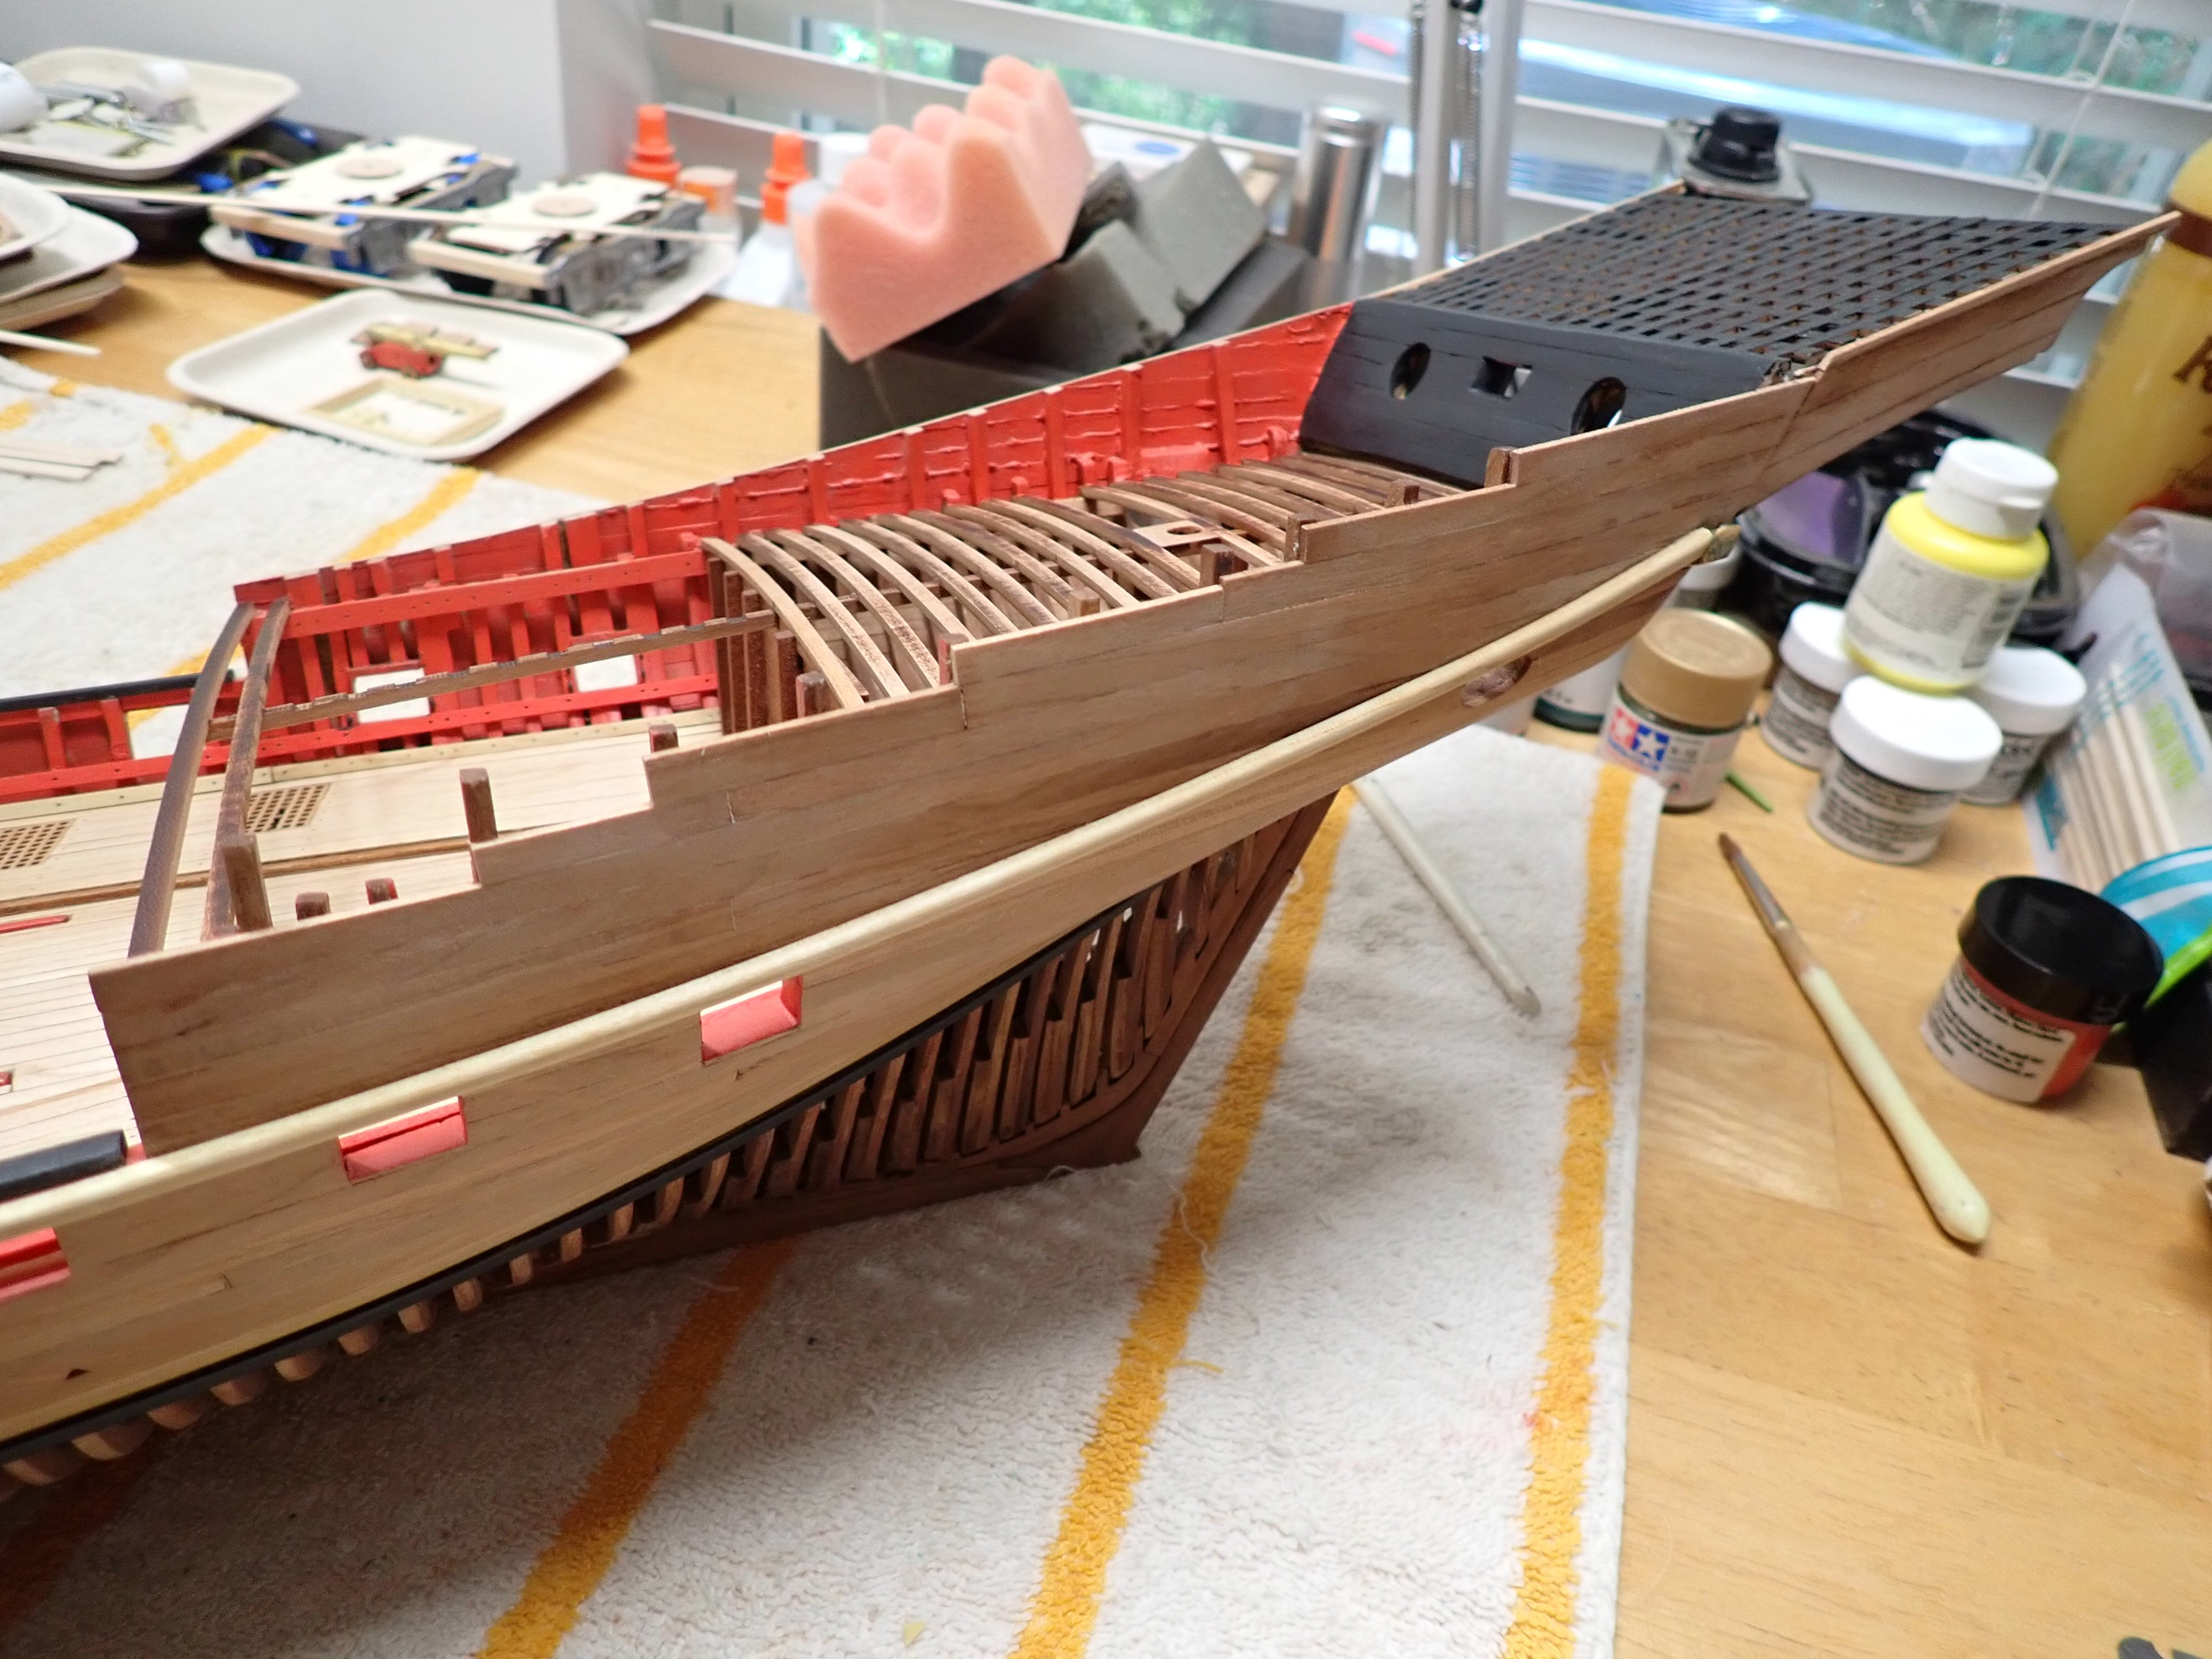
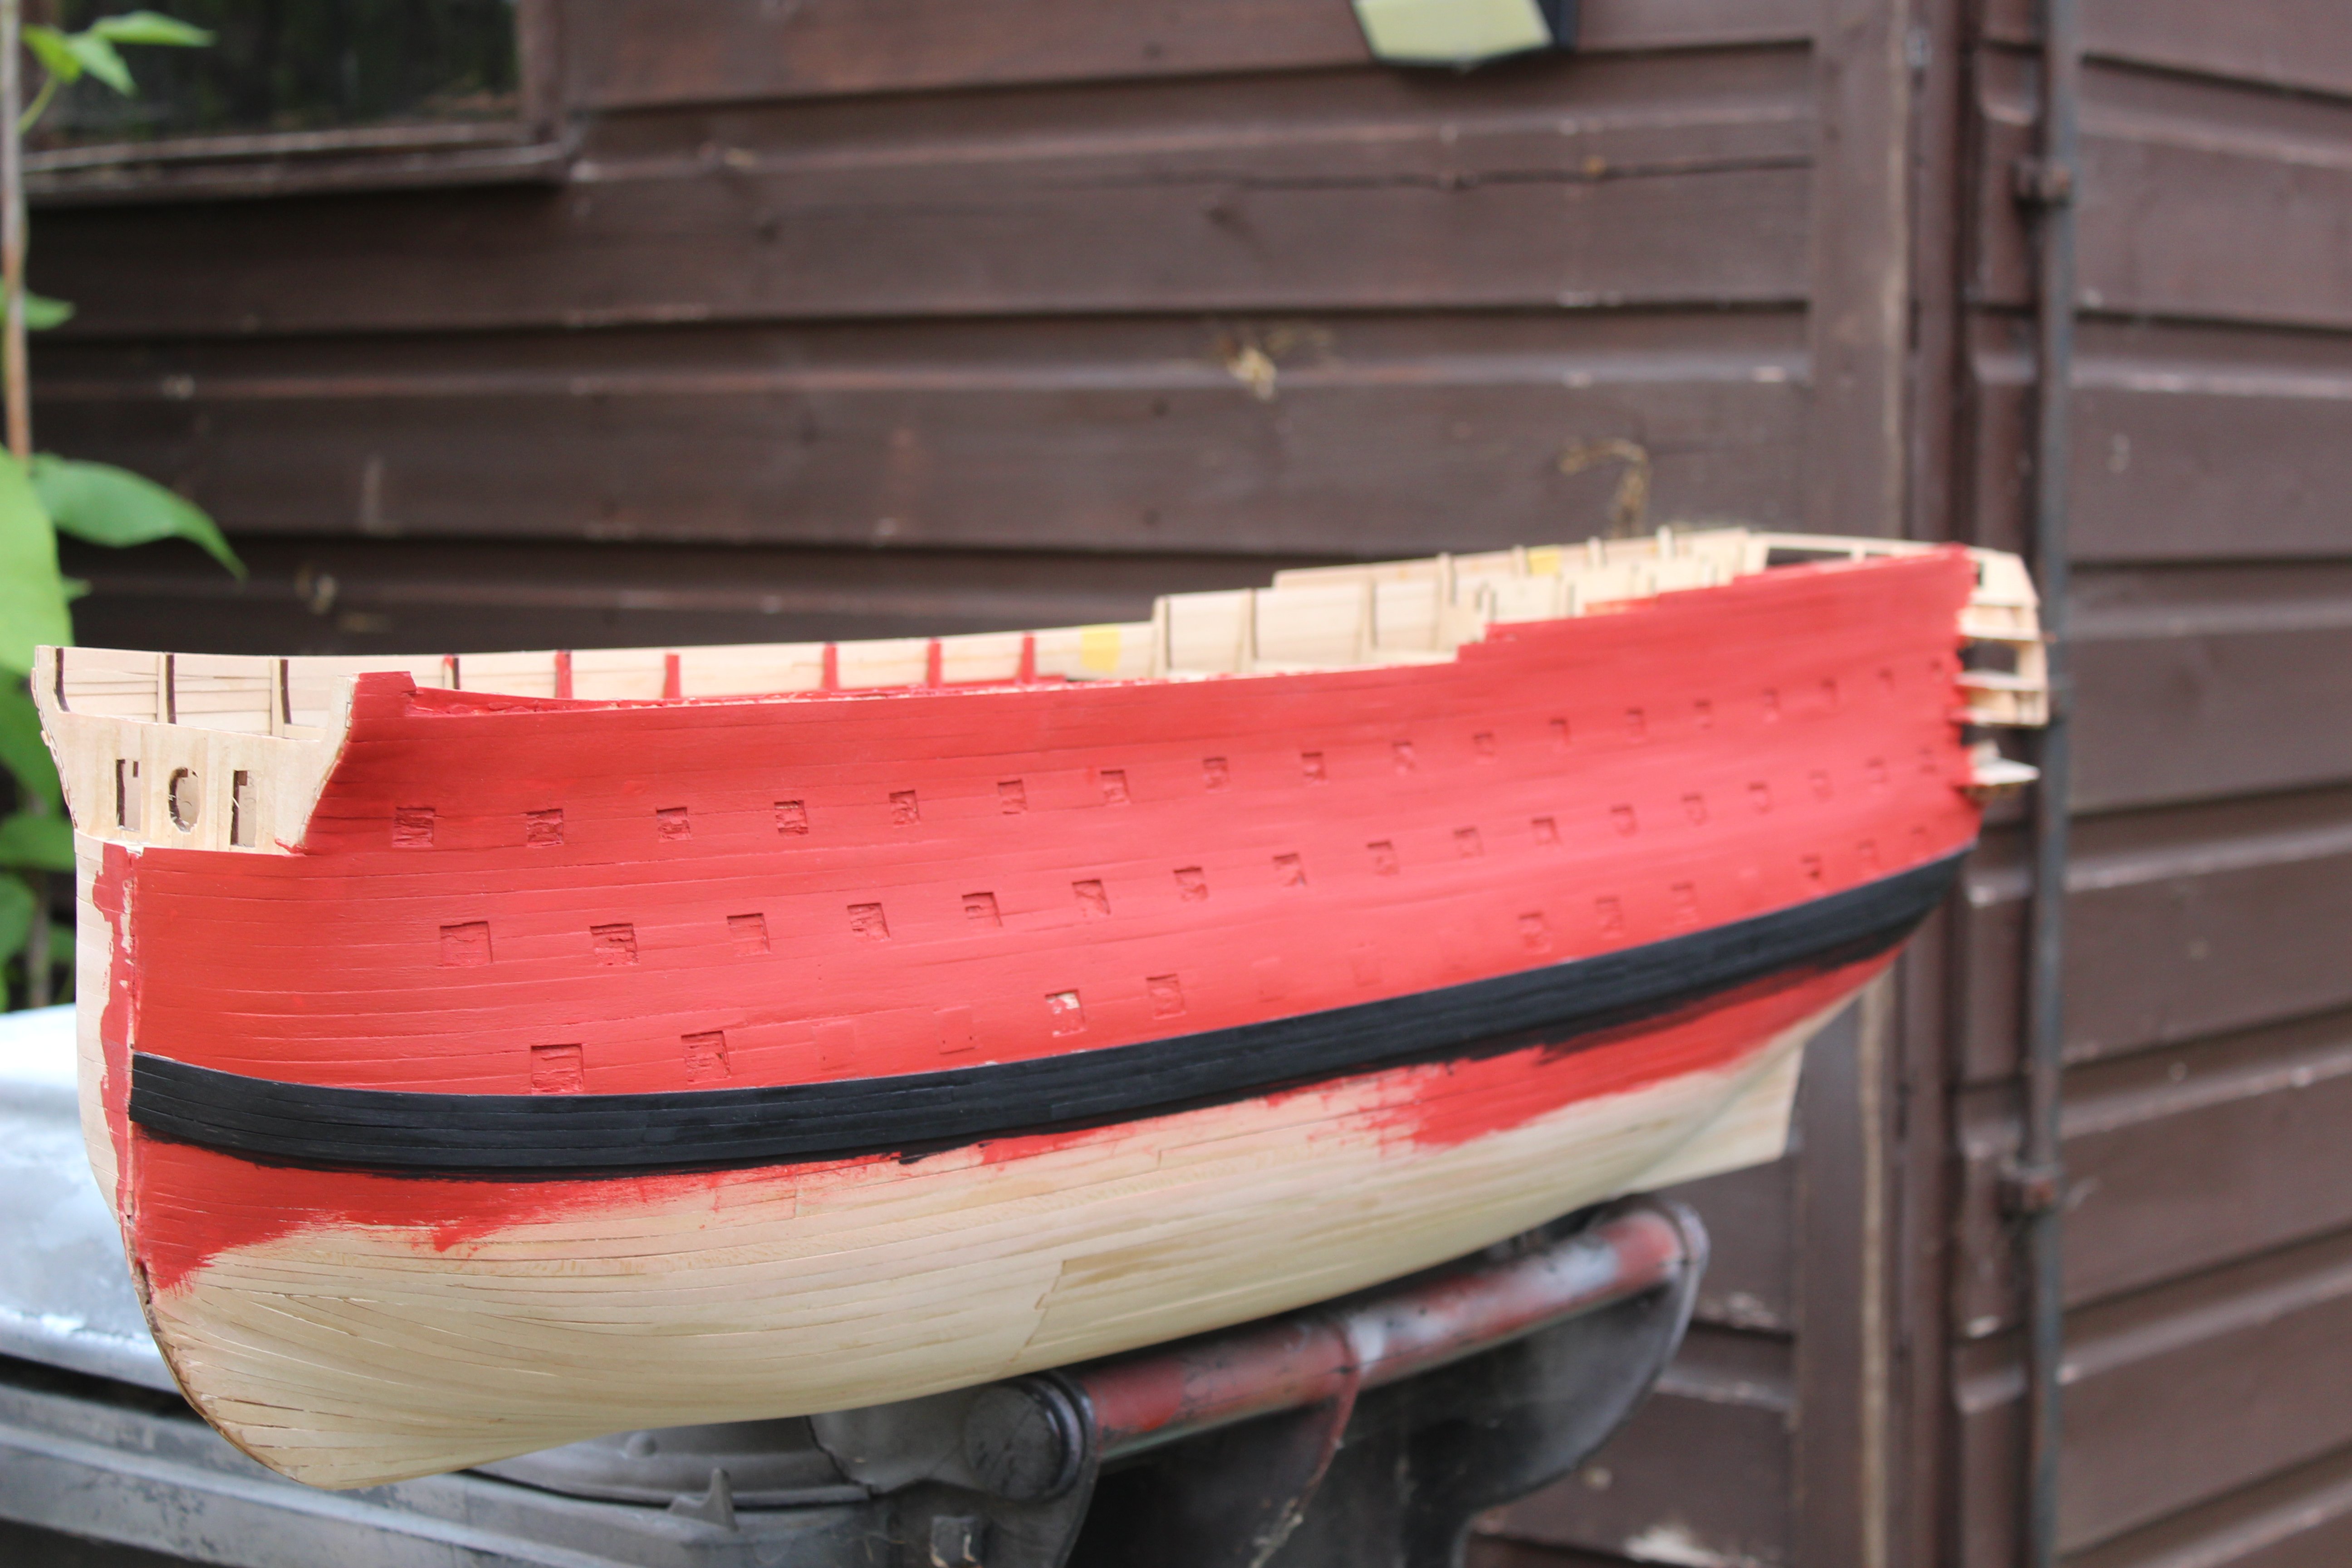
Wednesday day 22
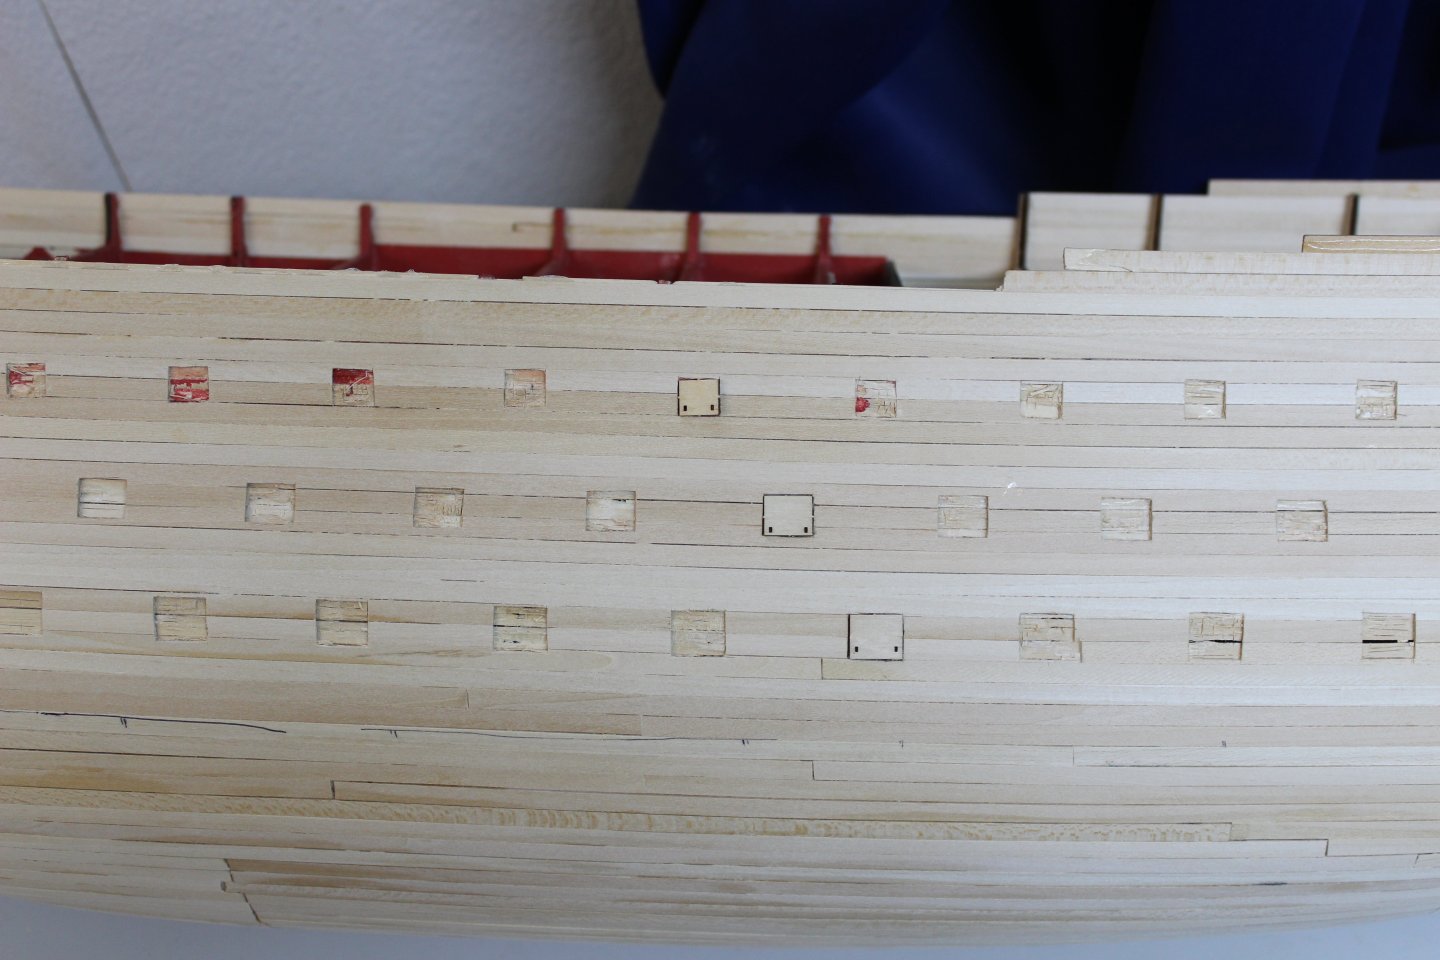
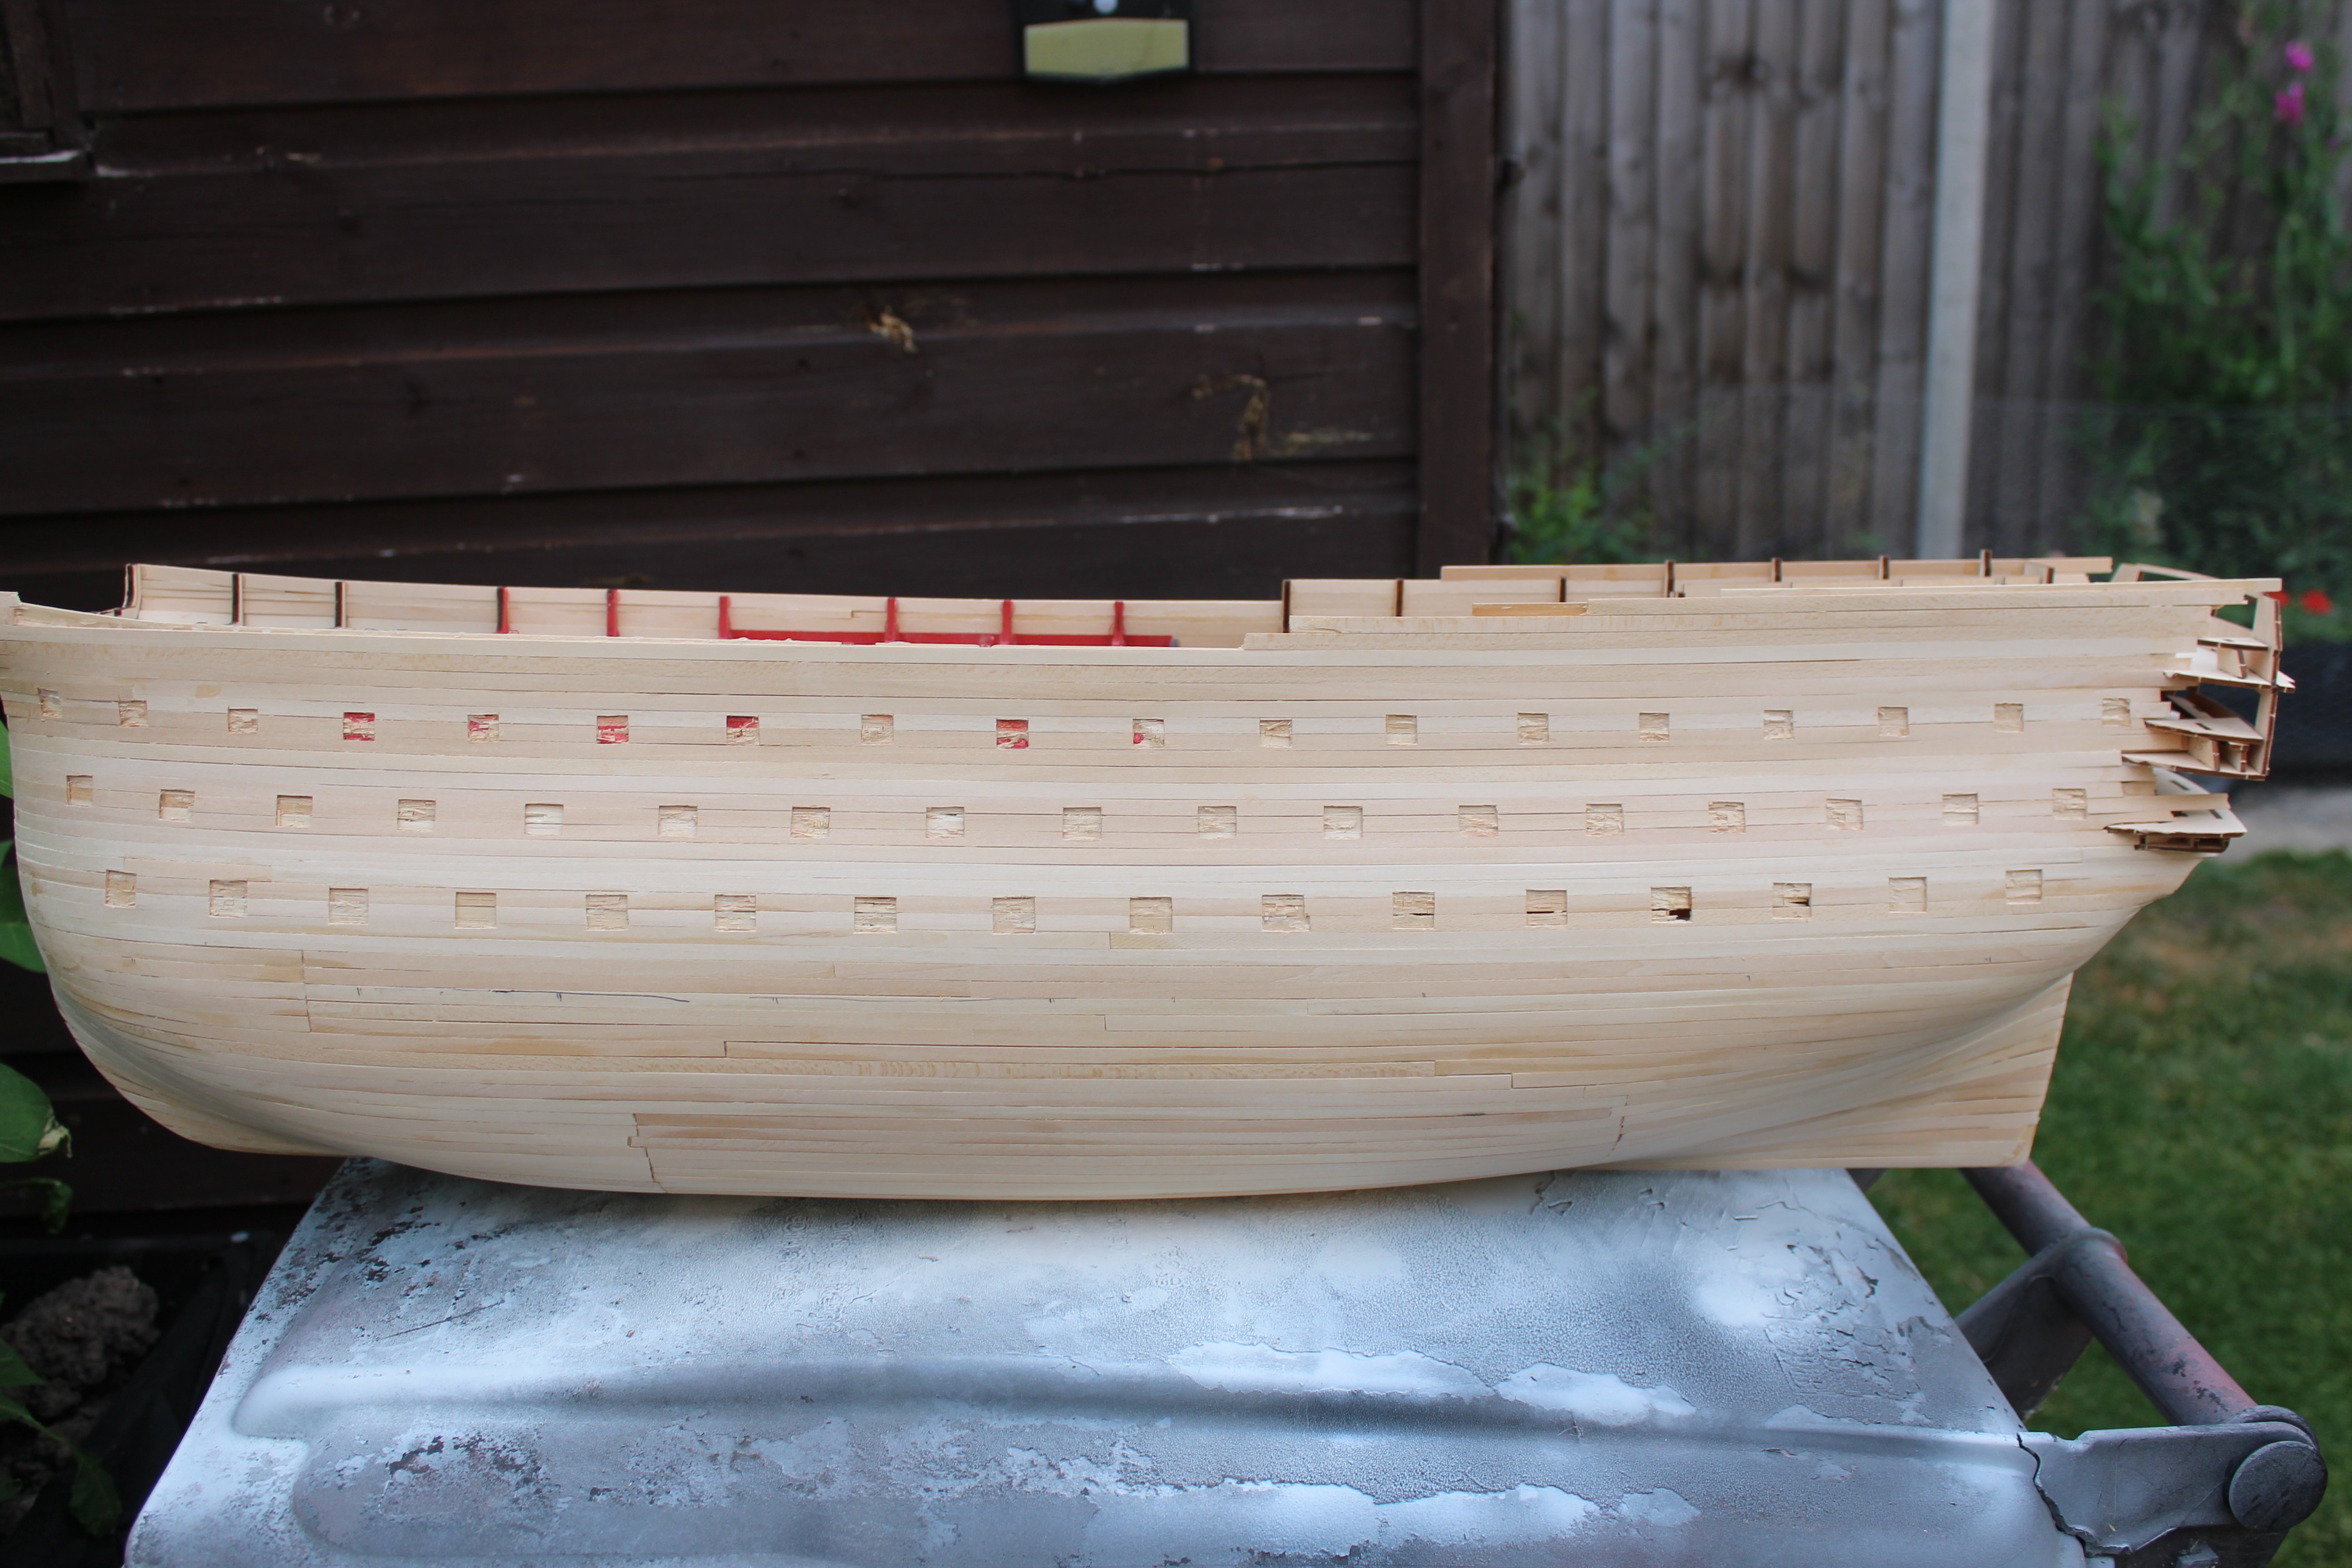
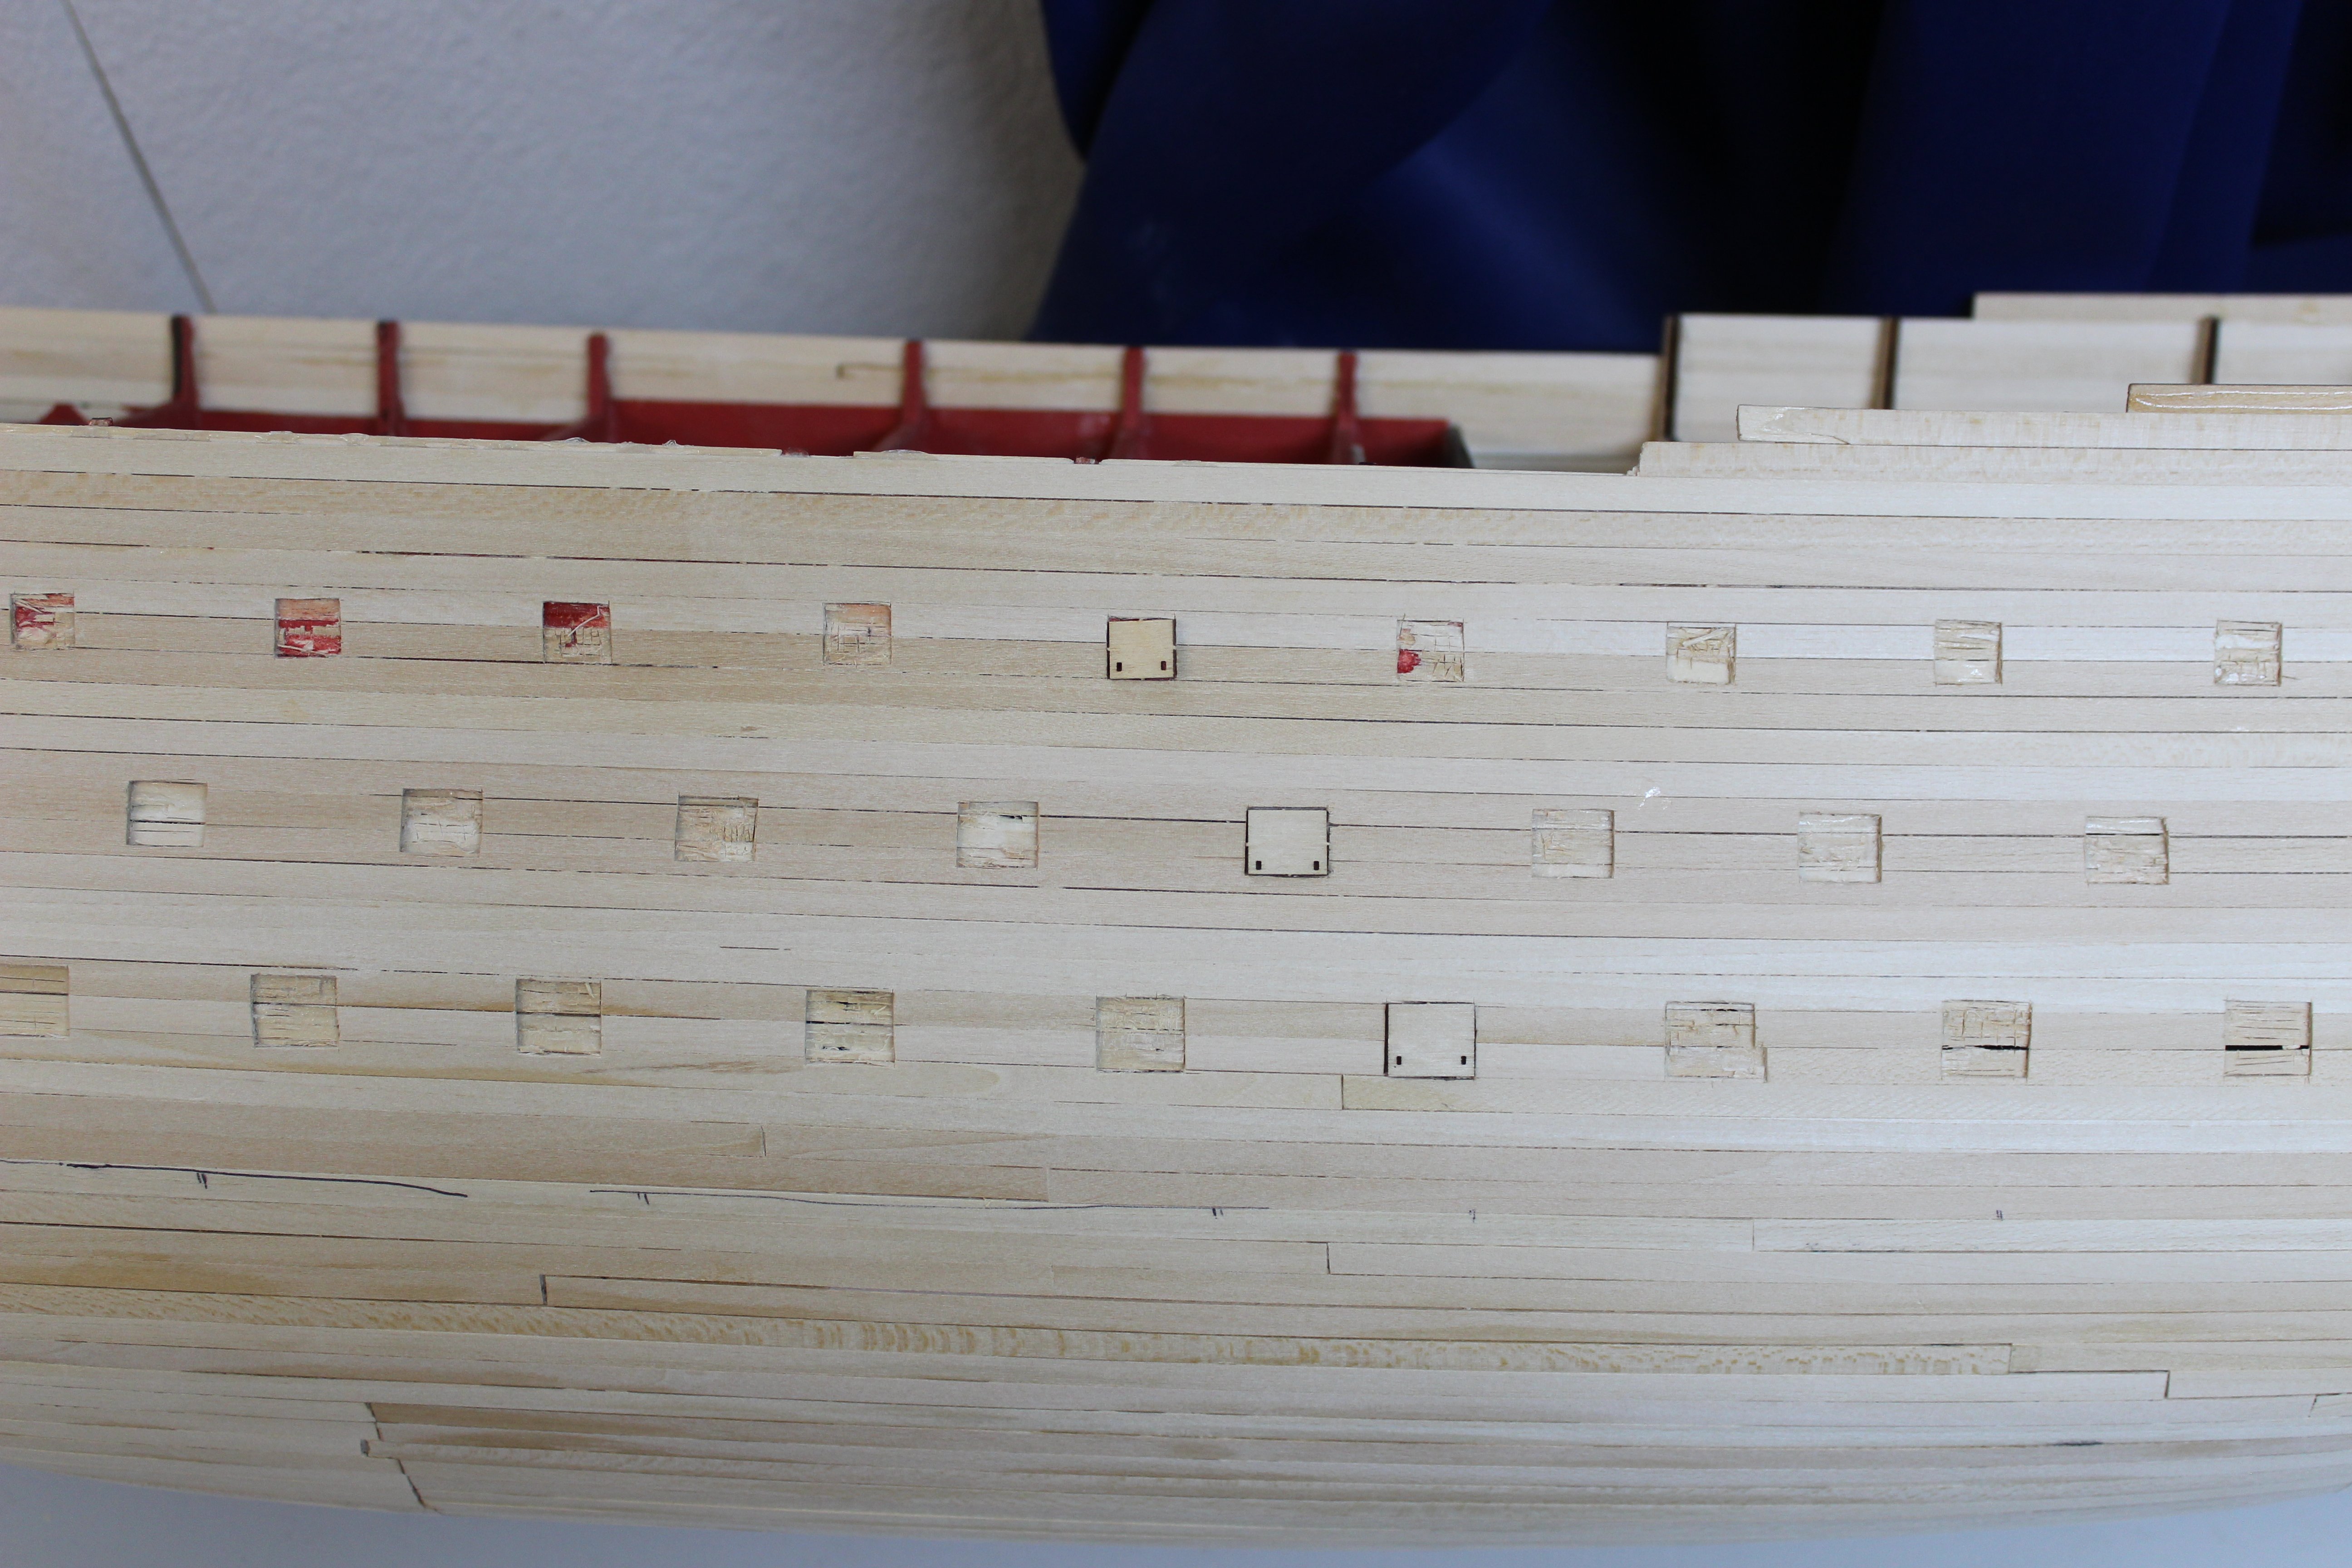
having marked out where the gunports go, a lot of them have been rebated to accept the lids in the shut/closed position, i quickly realised these lids are going to have to be put on at a later date, because i was finding that the sanding of the hull was hiding them. Not regretting doing them like this, but i can understand people questioning my logic behind it, (lol i dont want all guns run out, when under full sail).
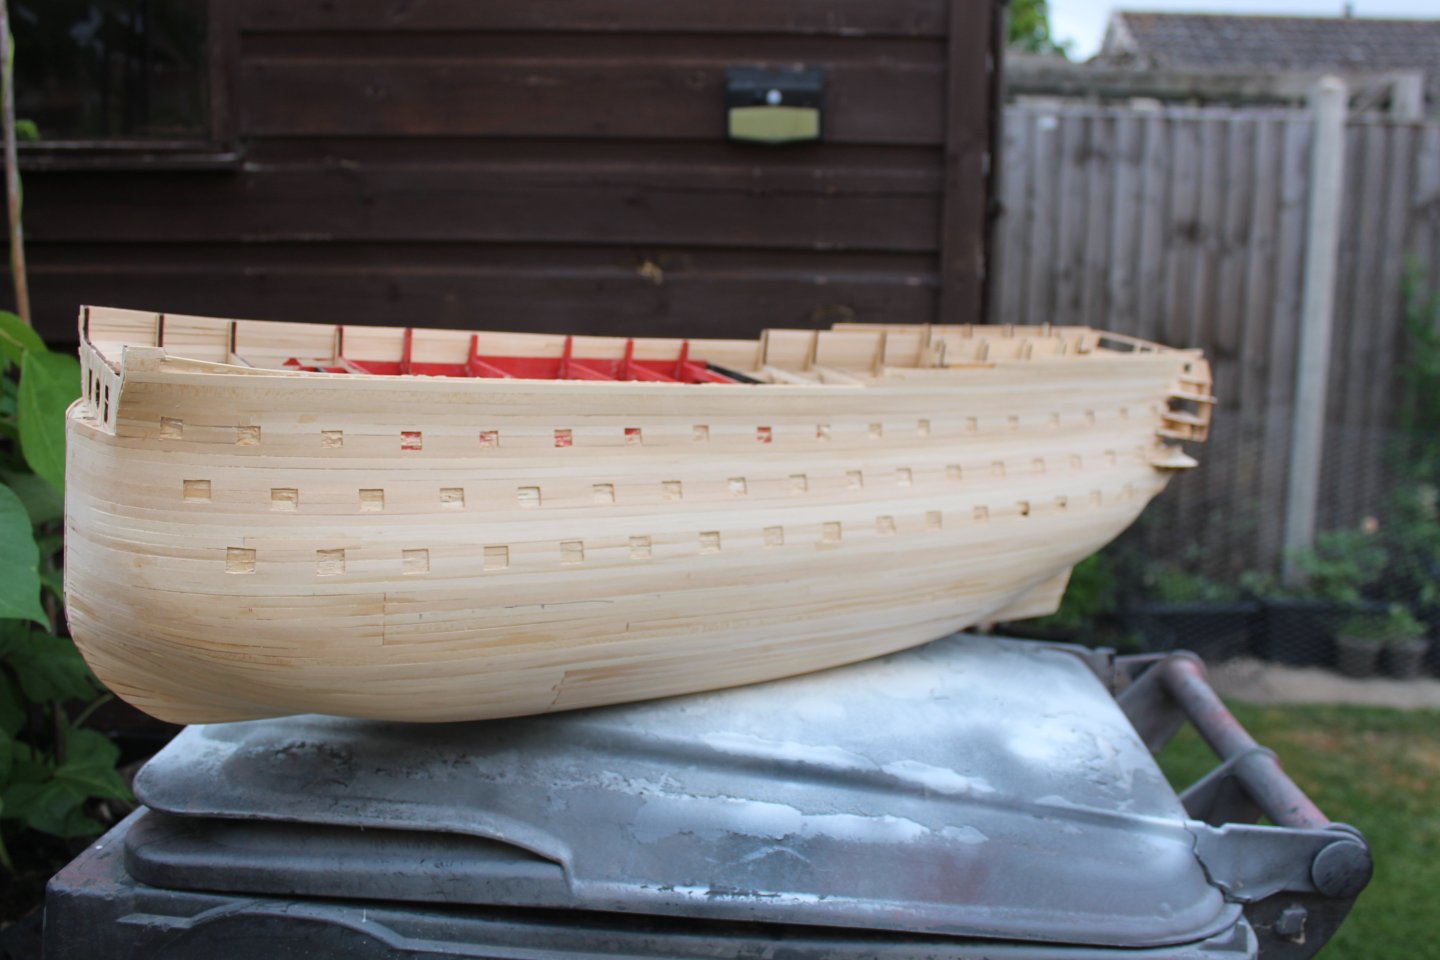
lots of paint added, and i am still sanding areas that refuse to look good, lower wale added to just give me the warm fuzzy feeling that i have most things in the right place
this idea does not work for me, putting the lids on and then finishing the hull, as the gaps fill up and they become invisible


-
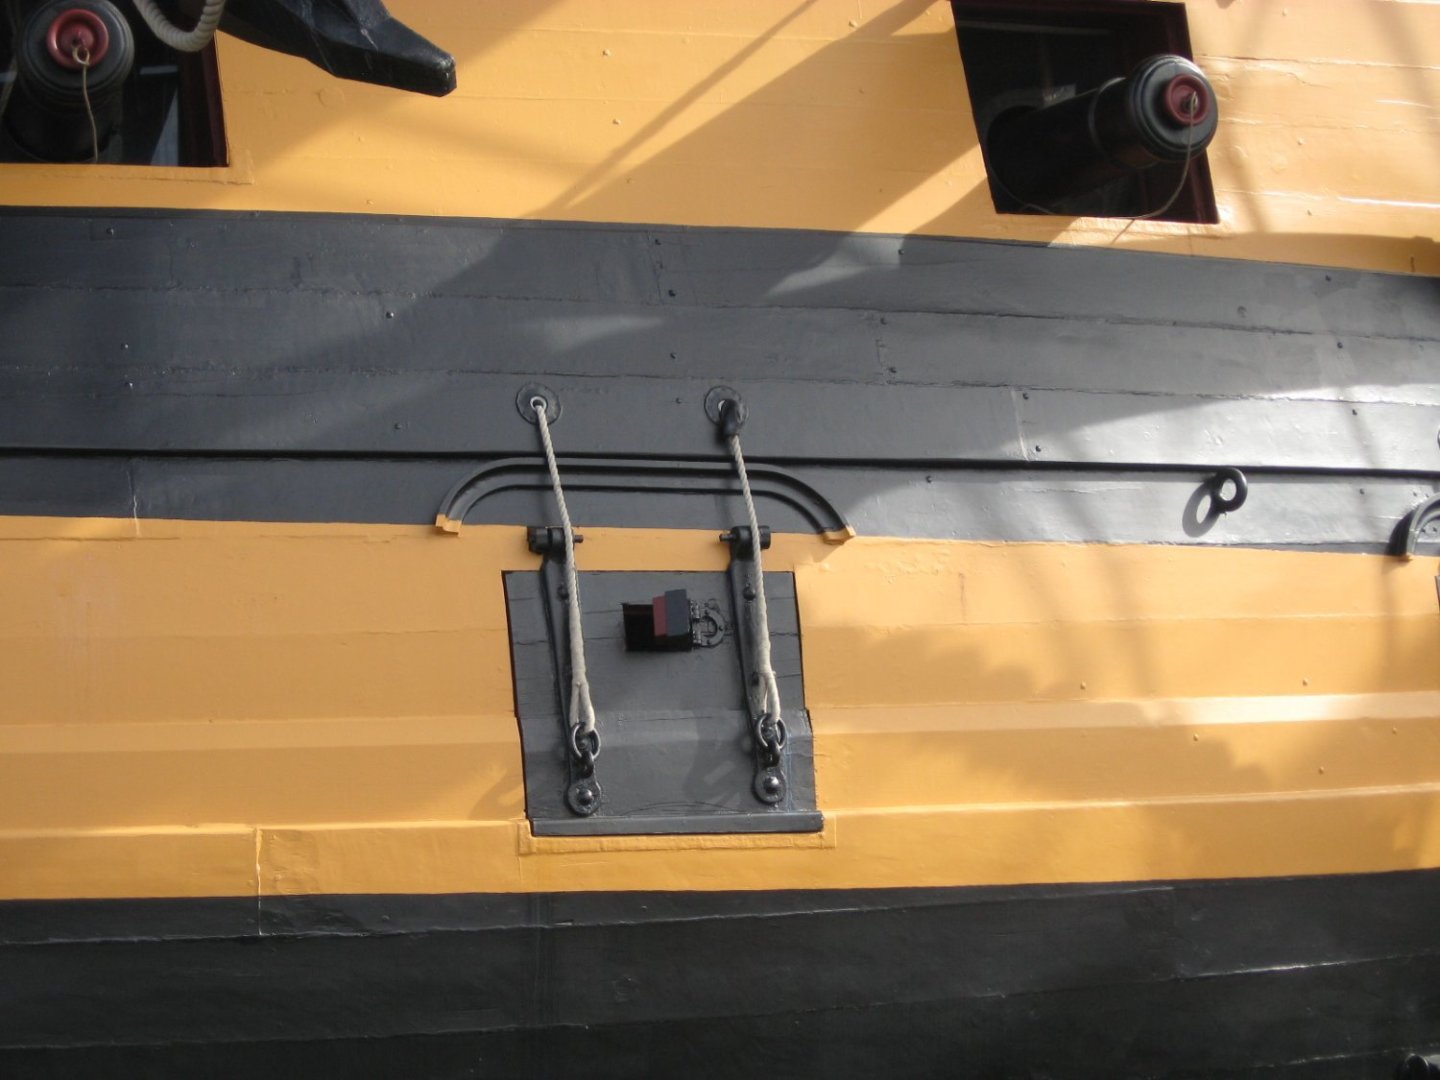
in a continuation to this thread, Victory had, vents fitted, was this common practice,
-
-
Good evening everyone, thank you for comments and likes
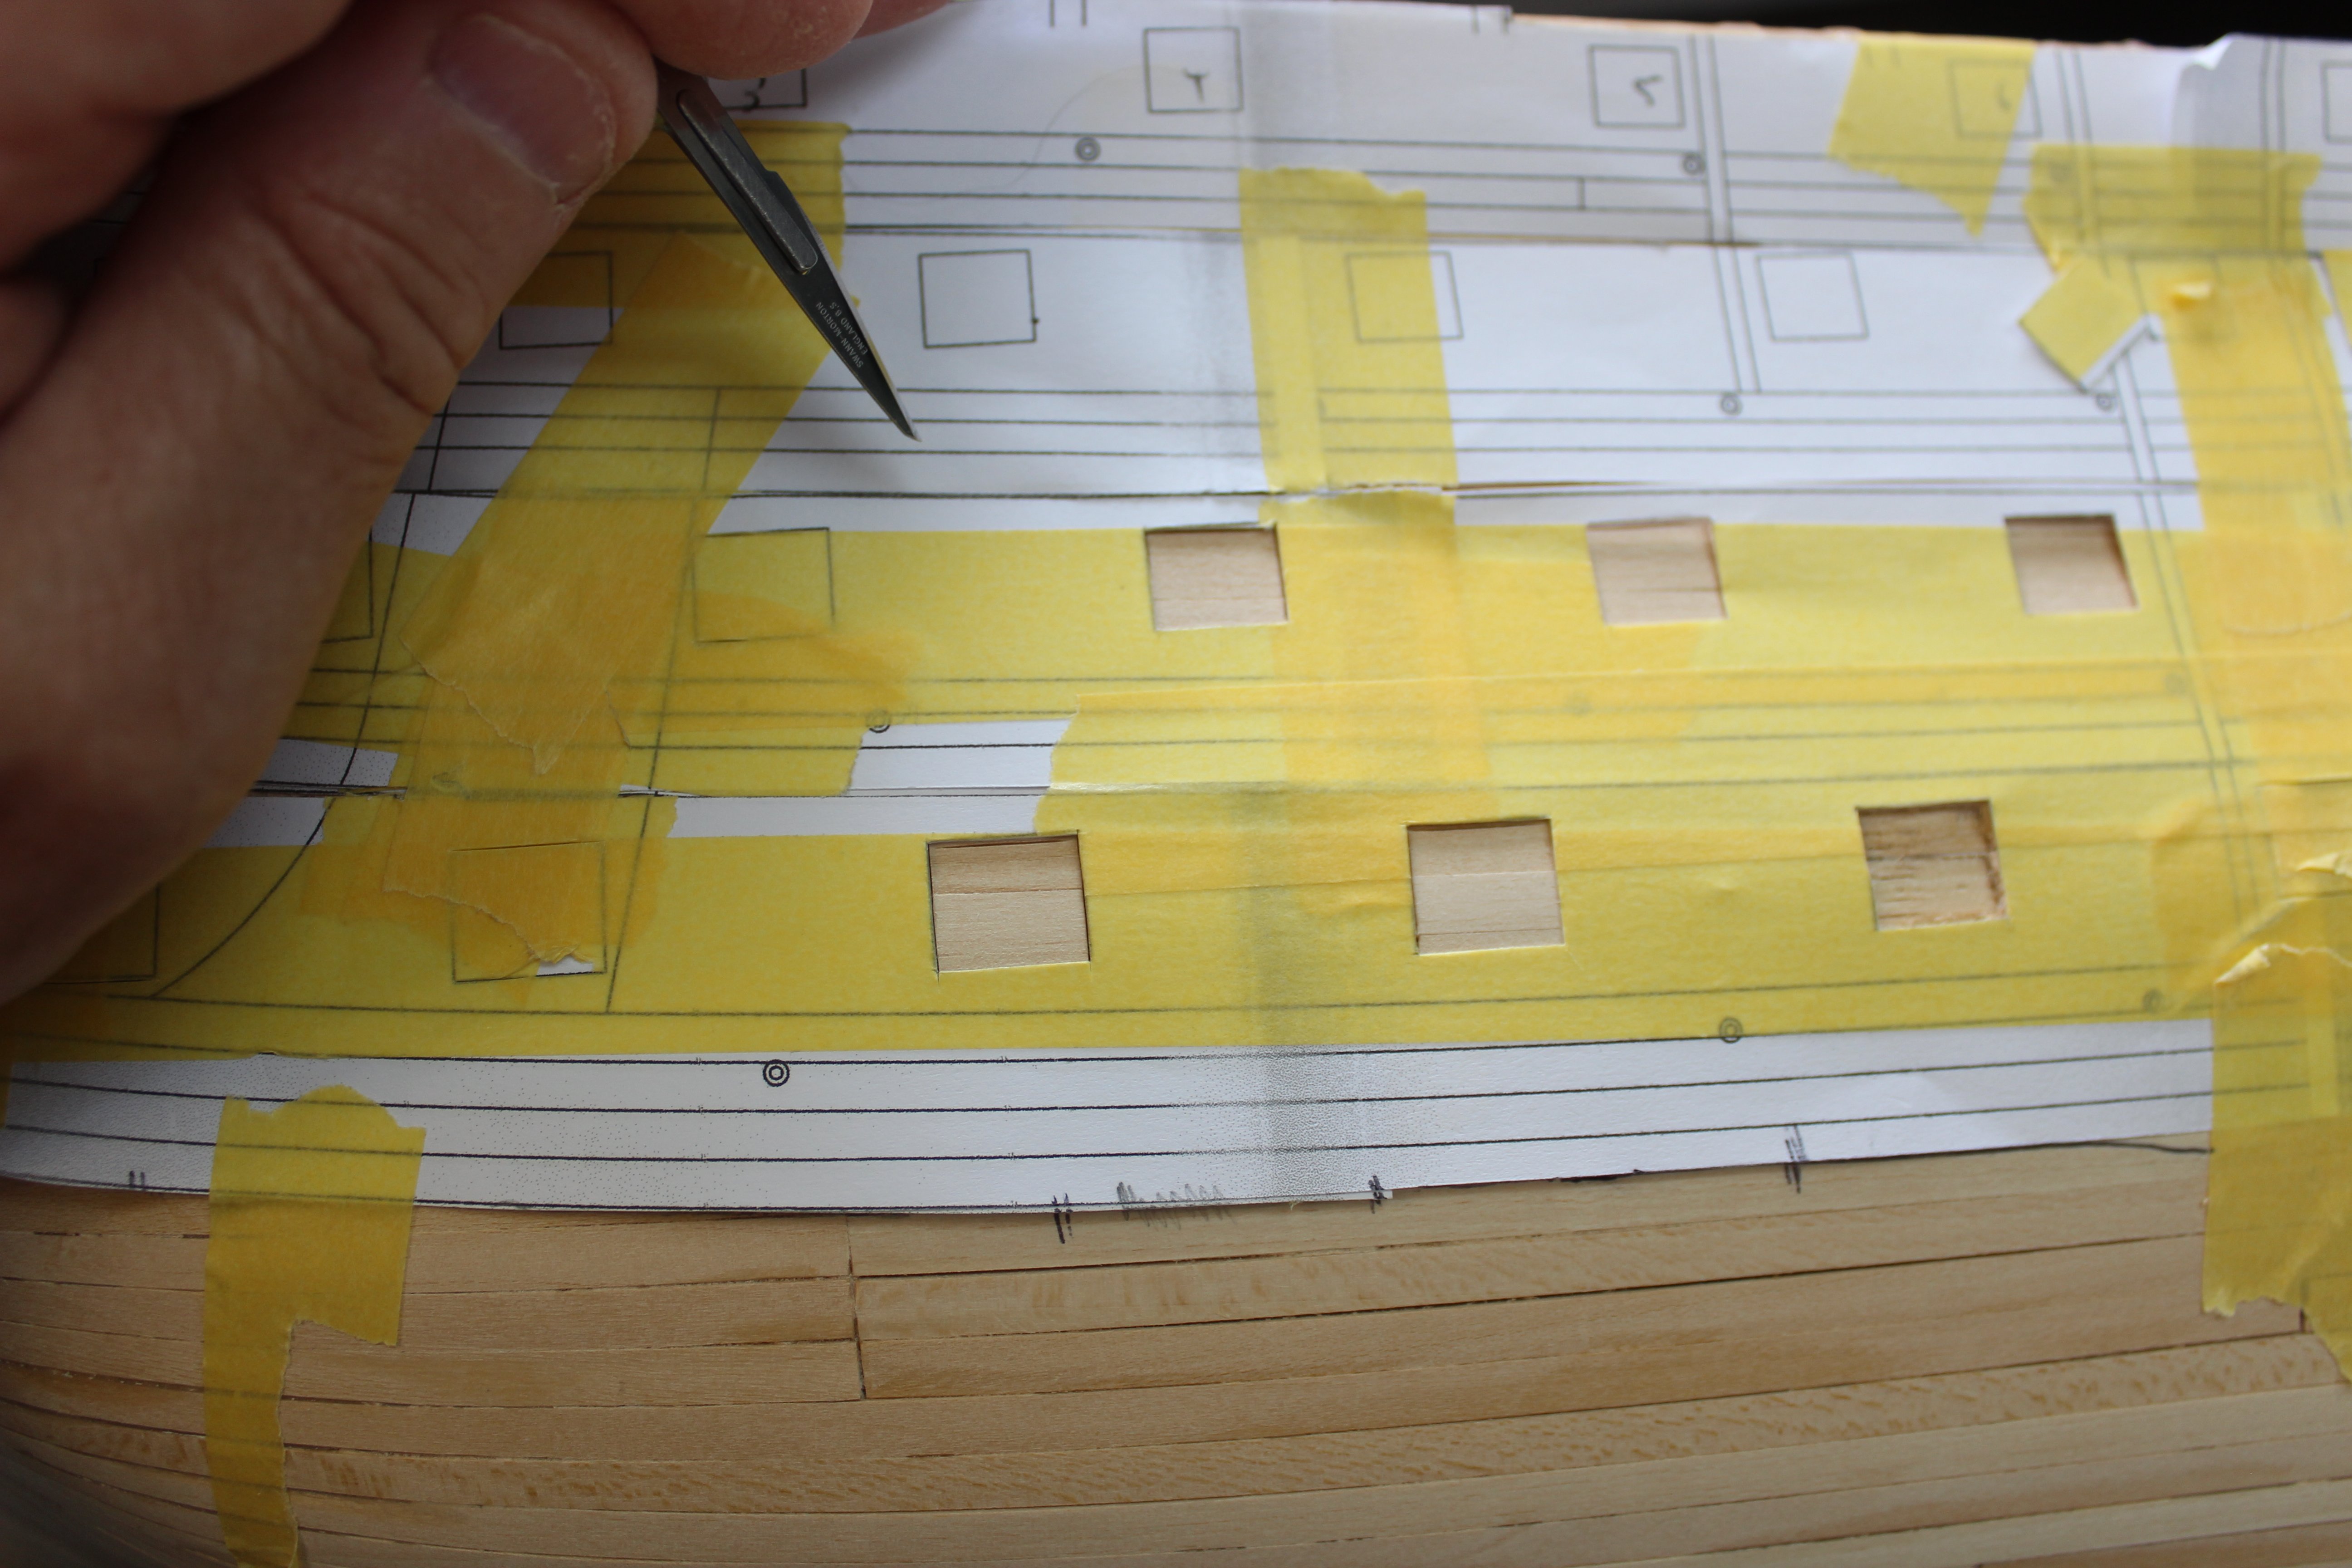
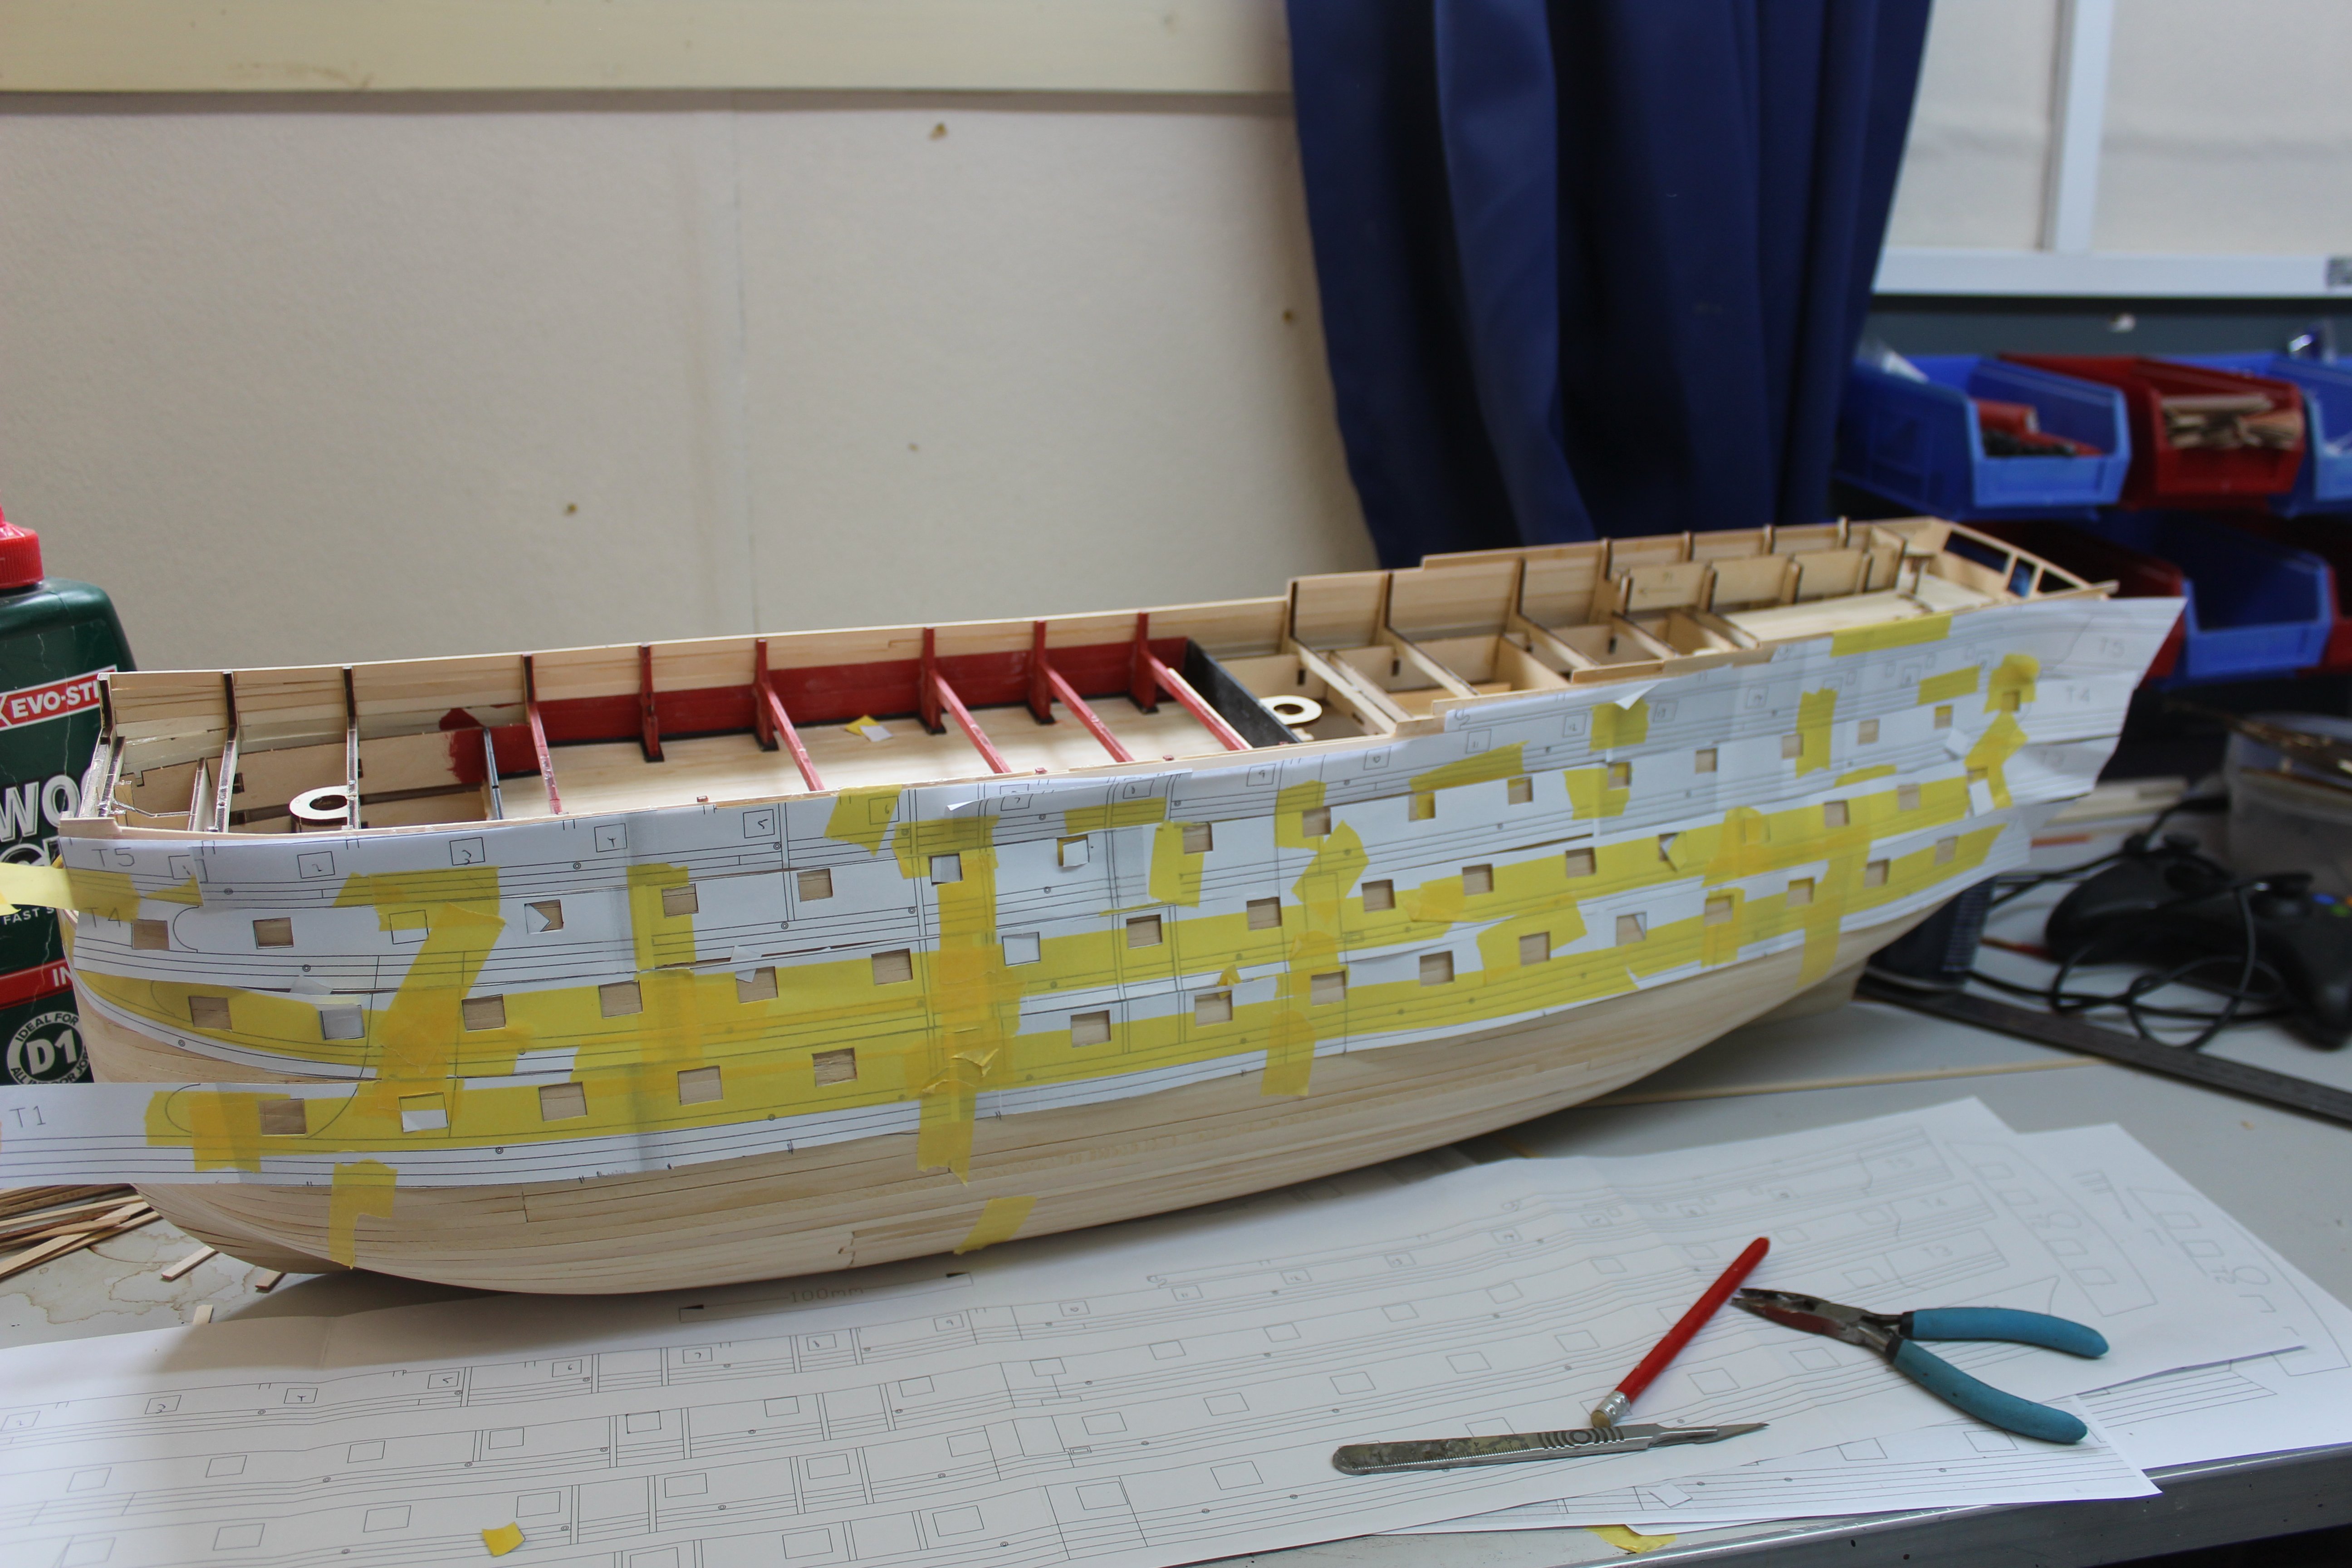
day 19- a recipe for disaster
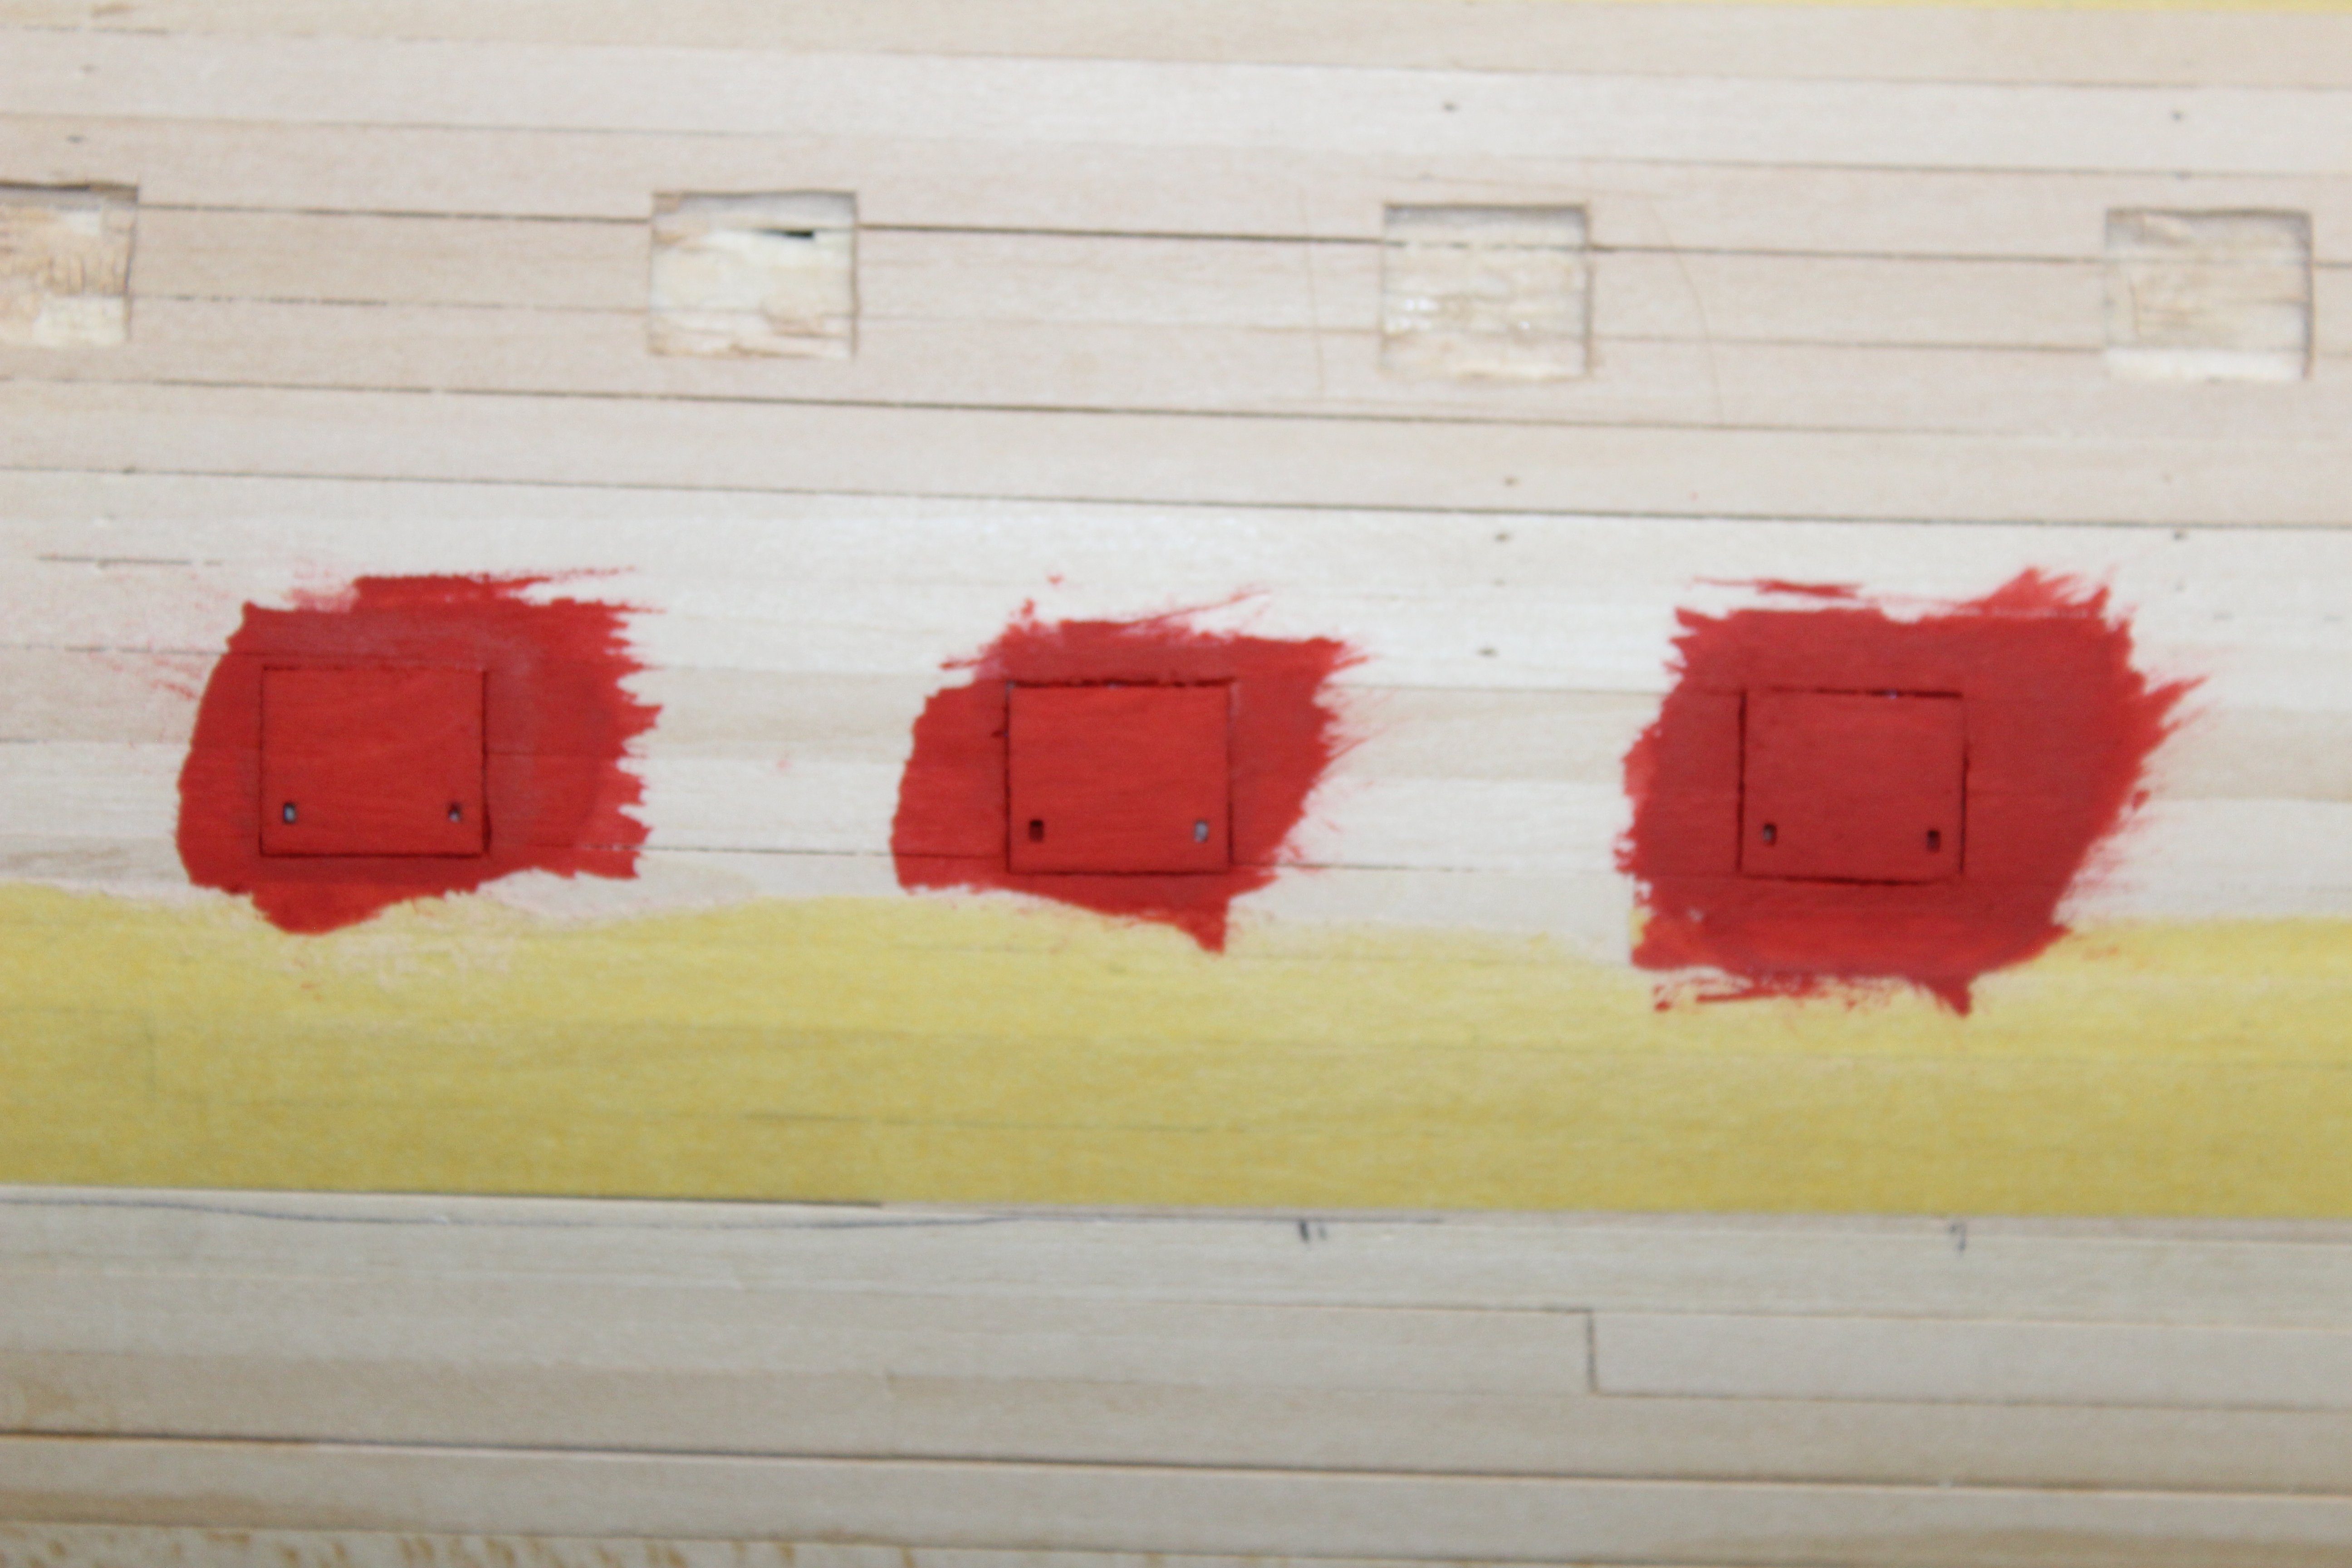
but so far avoided- hinged gunports
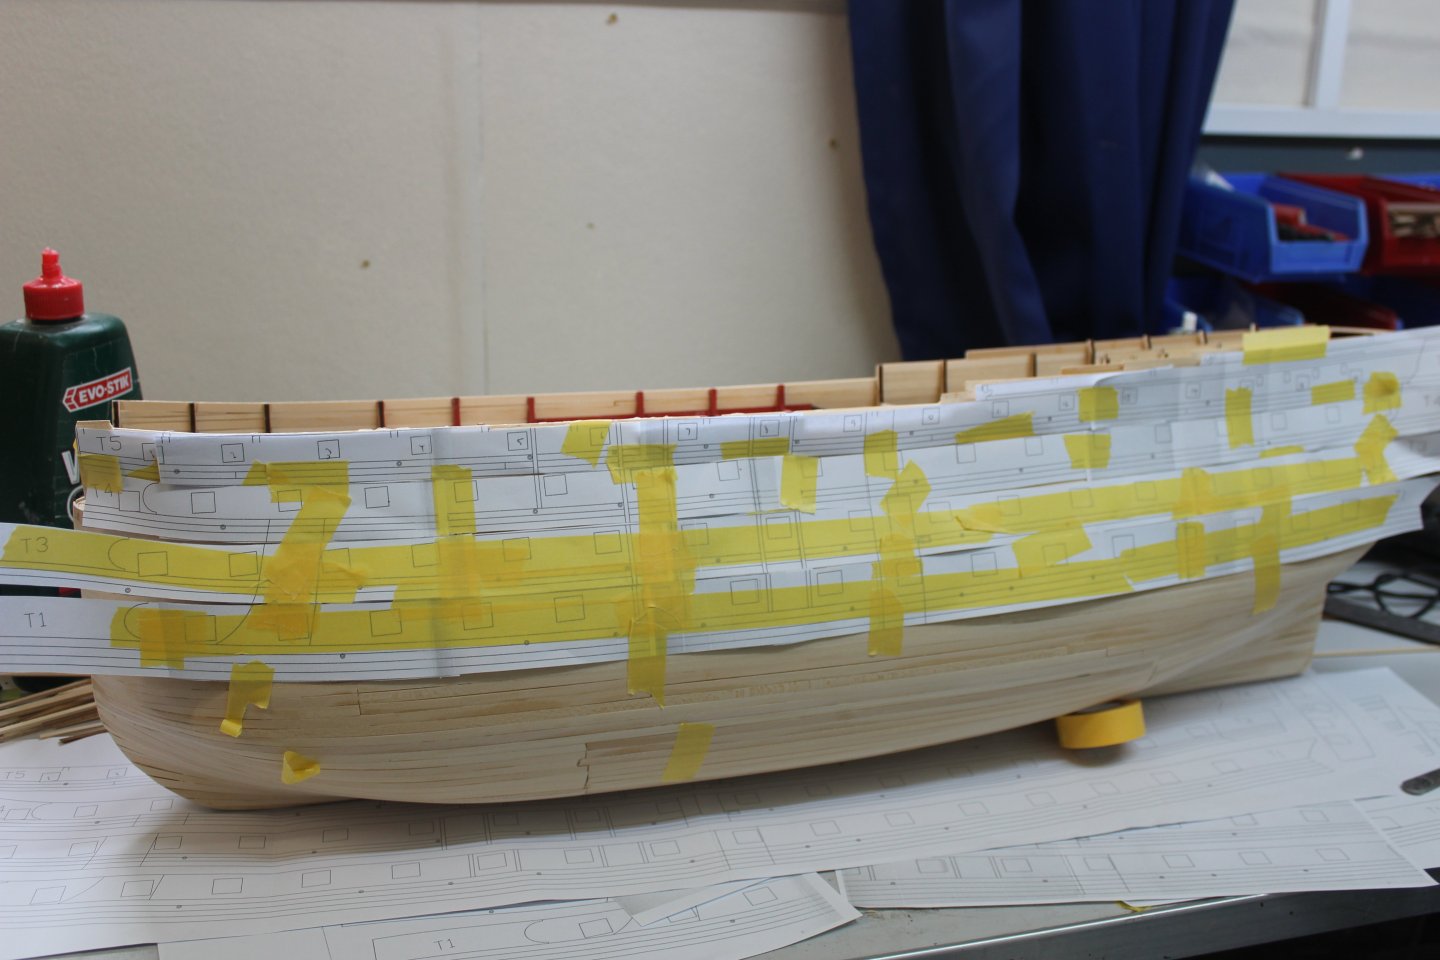
Come on AL there has to be a better way for a gunport template
I copied the template onto printer paper, cut them out and built them up on the original template,
took a lot of messing around to hopefully have them in the right place
as non of these are going to be open, i just had to remove the top planking, this side has now been roughly removed, and require some tidying up to get the lids to fit
free flood ports still to be marked out


-
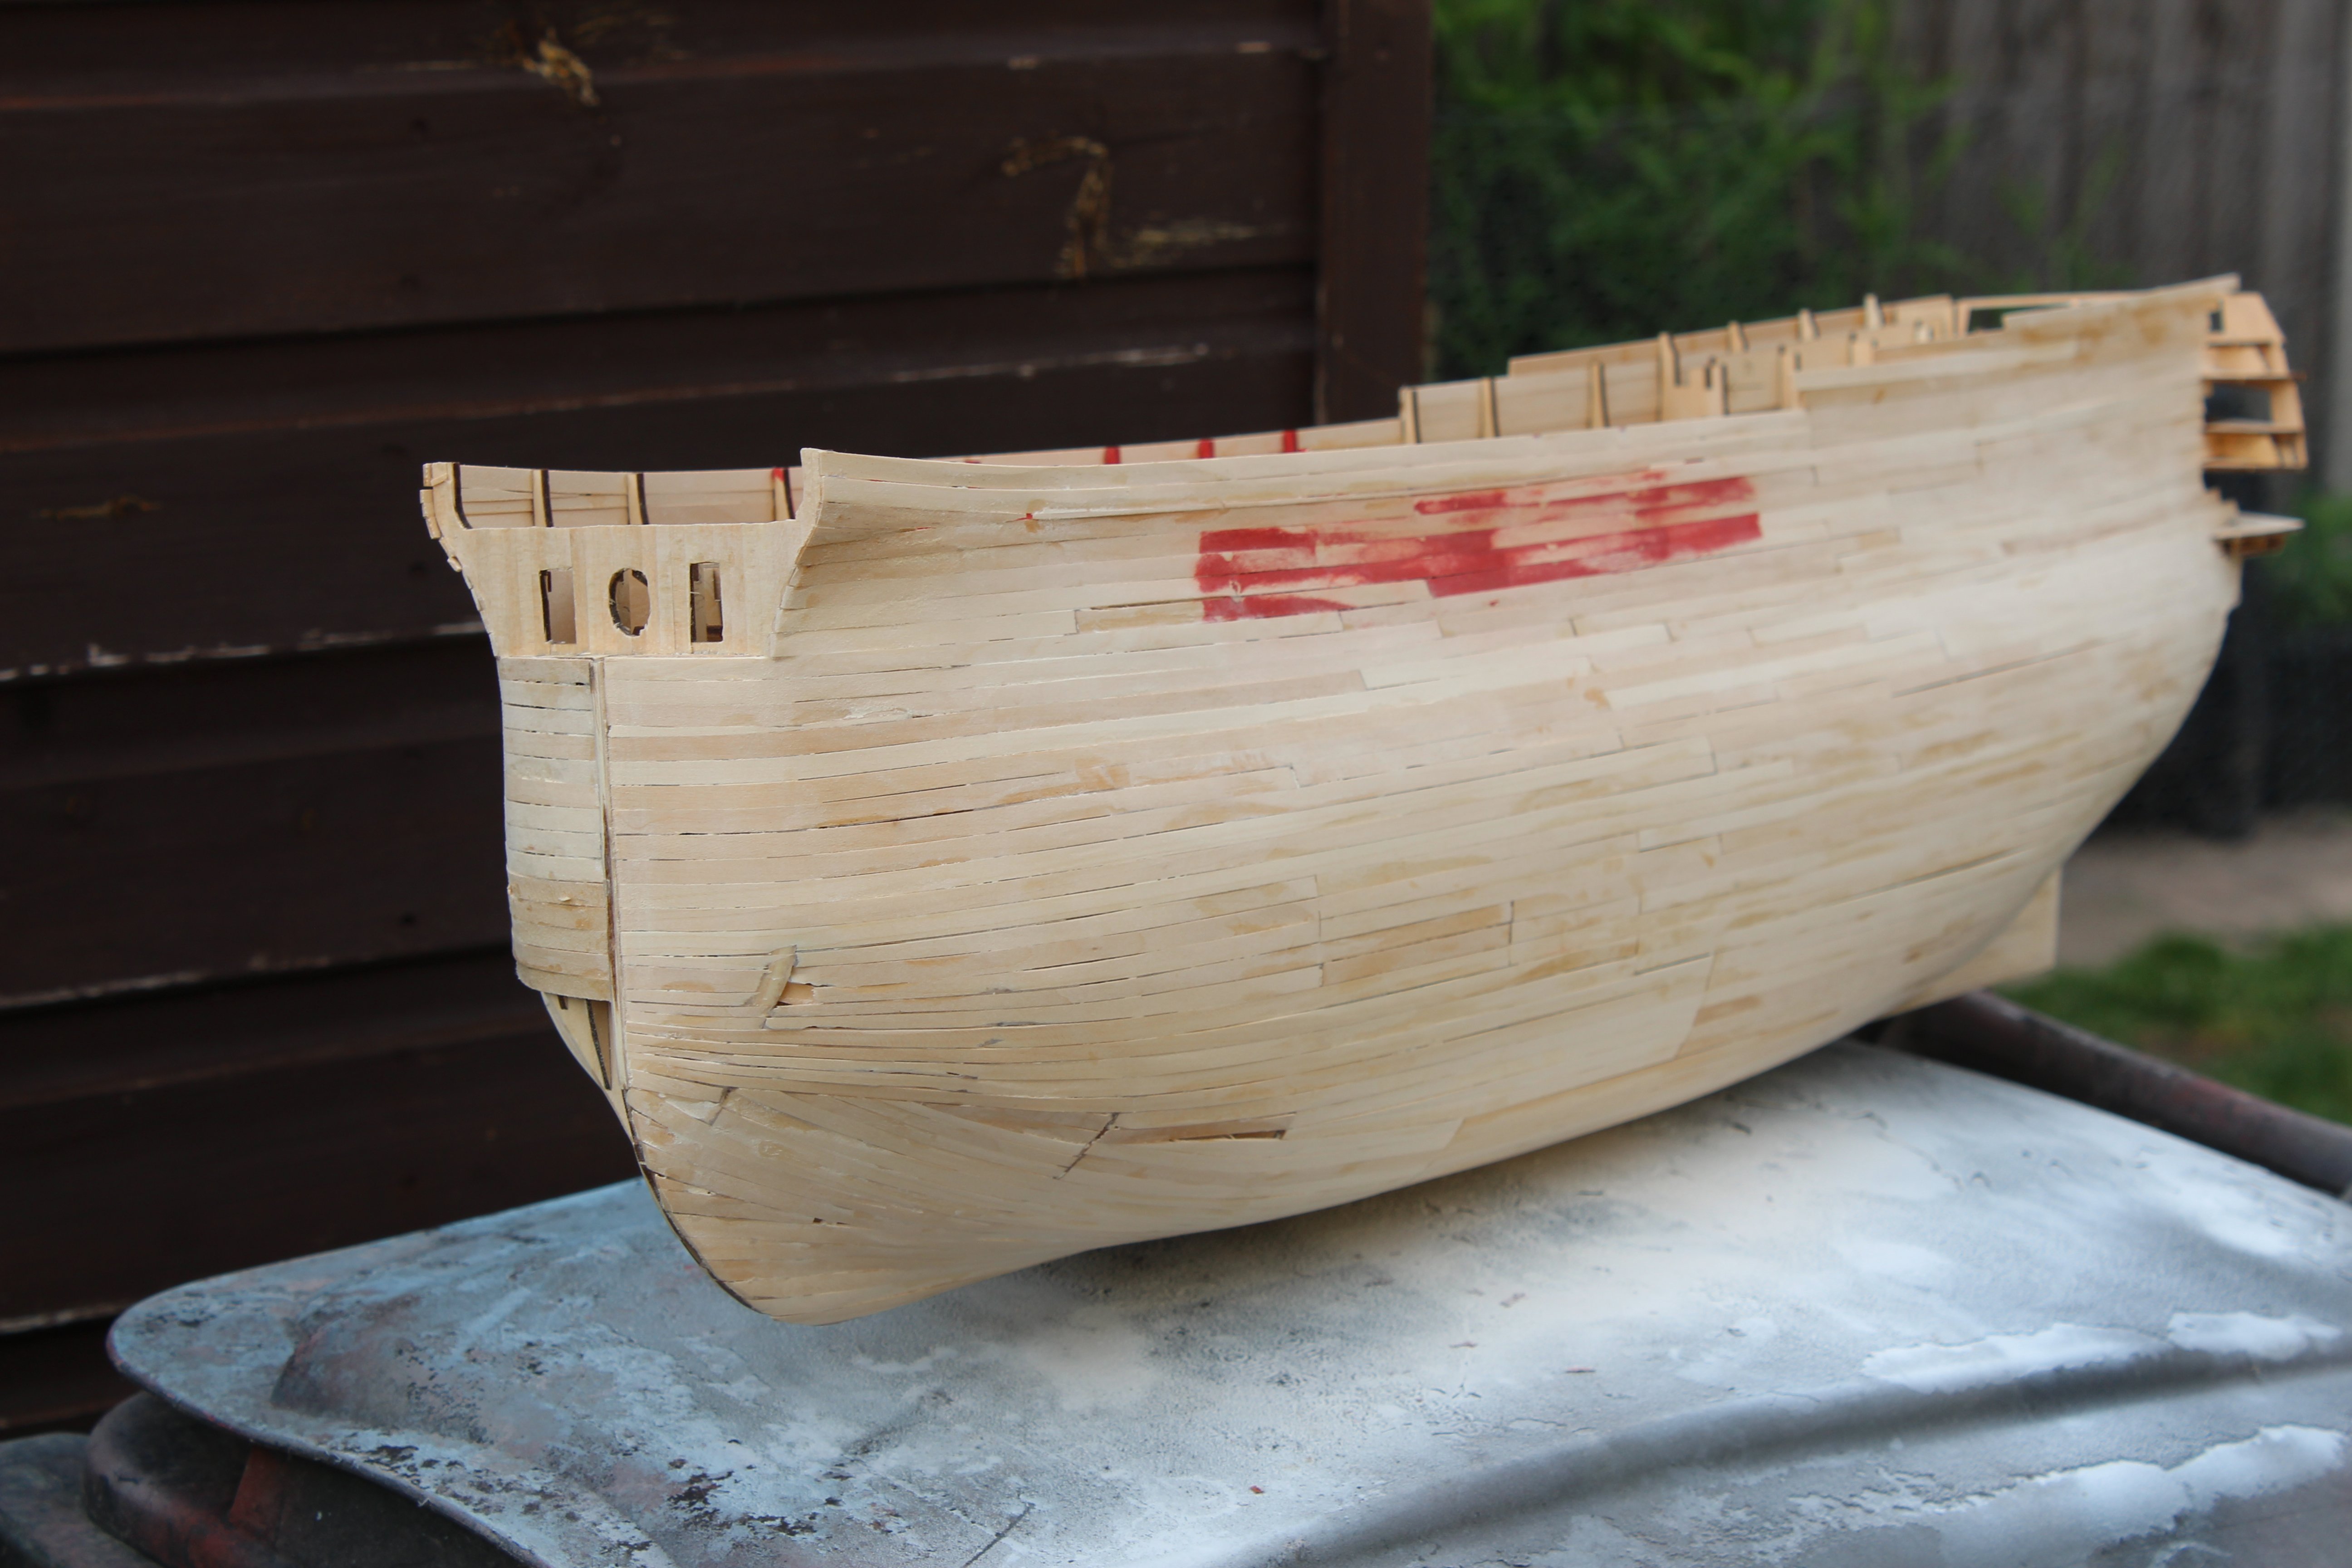
good evening everyone
thank you for comments and likes
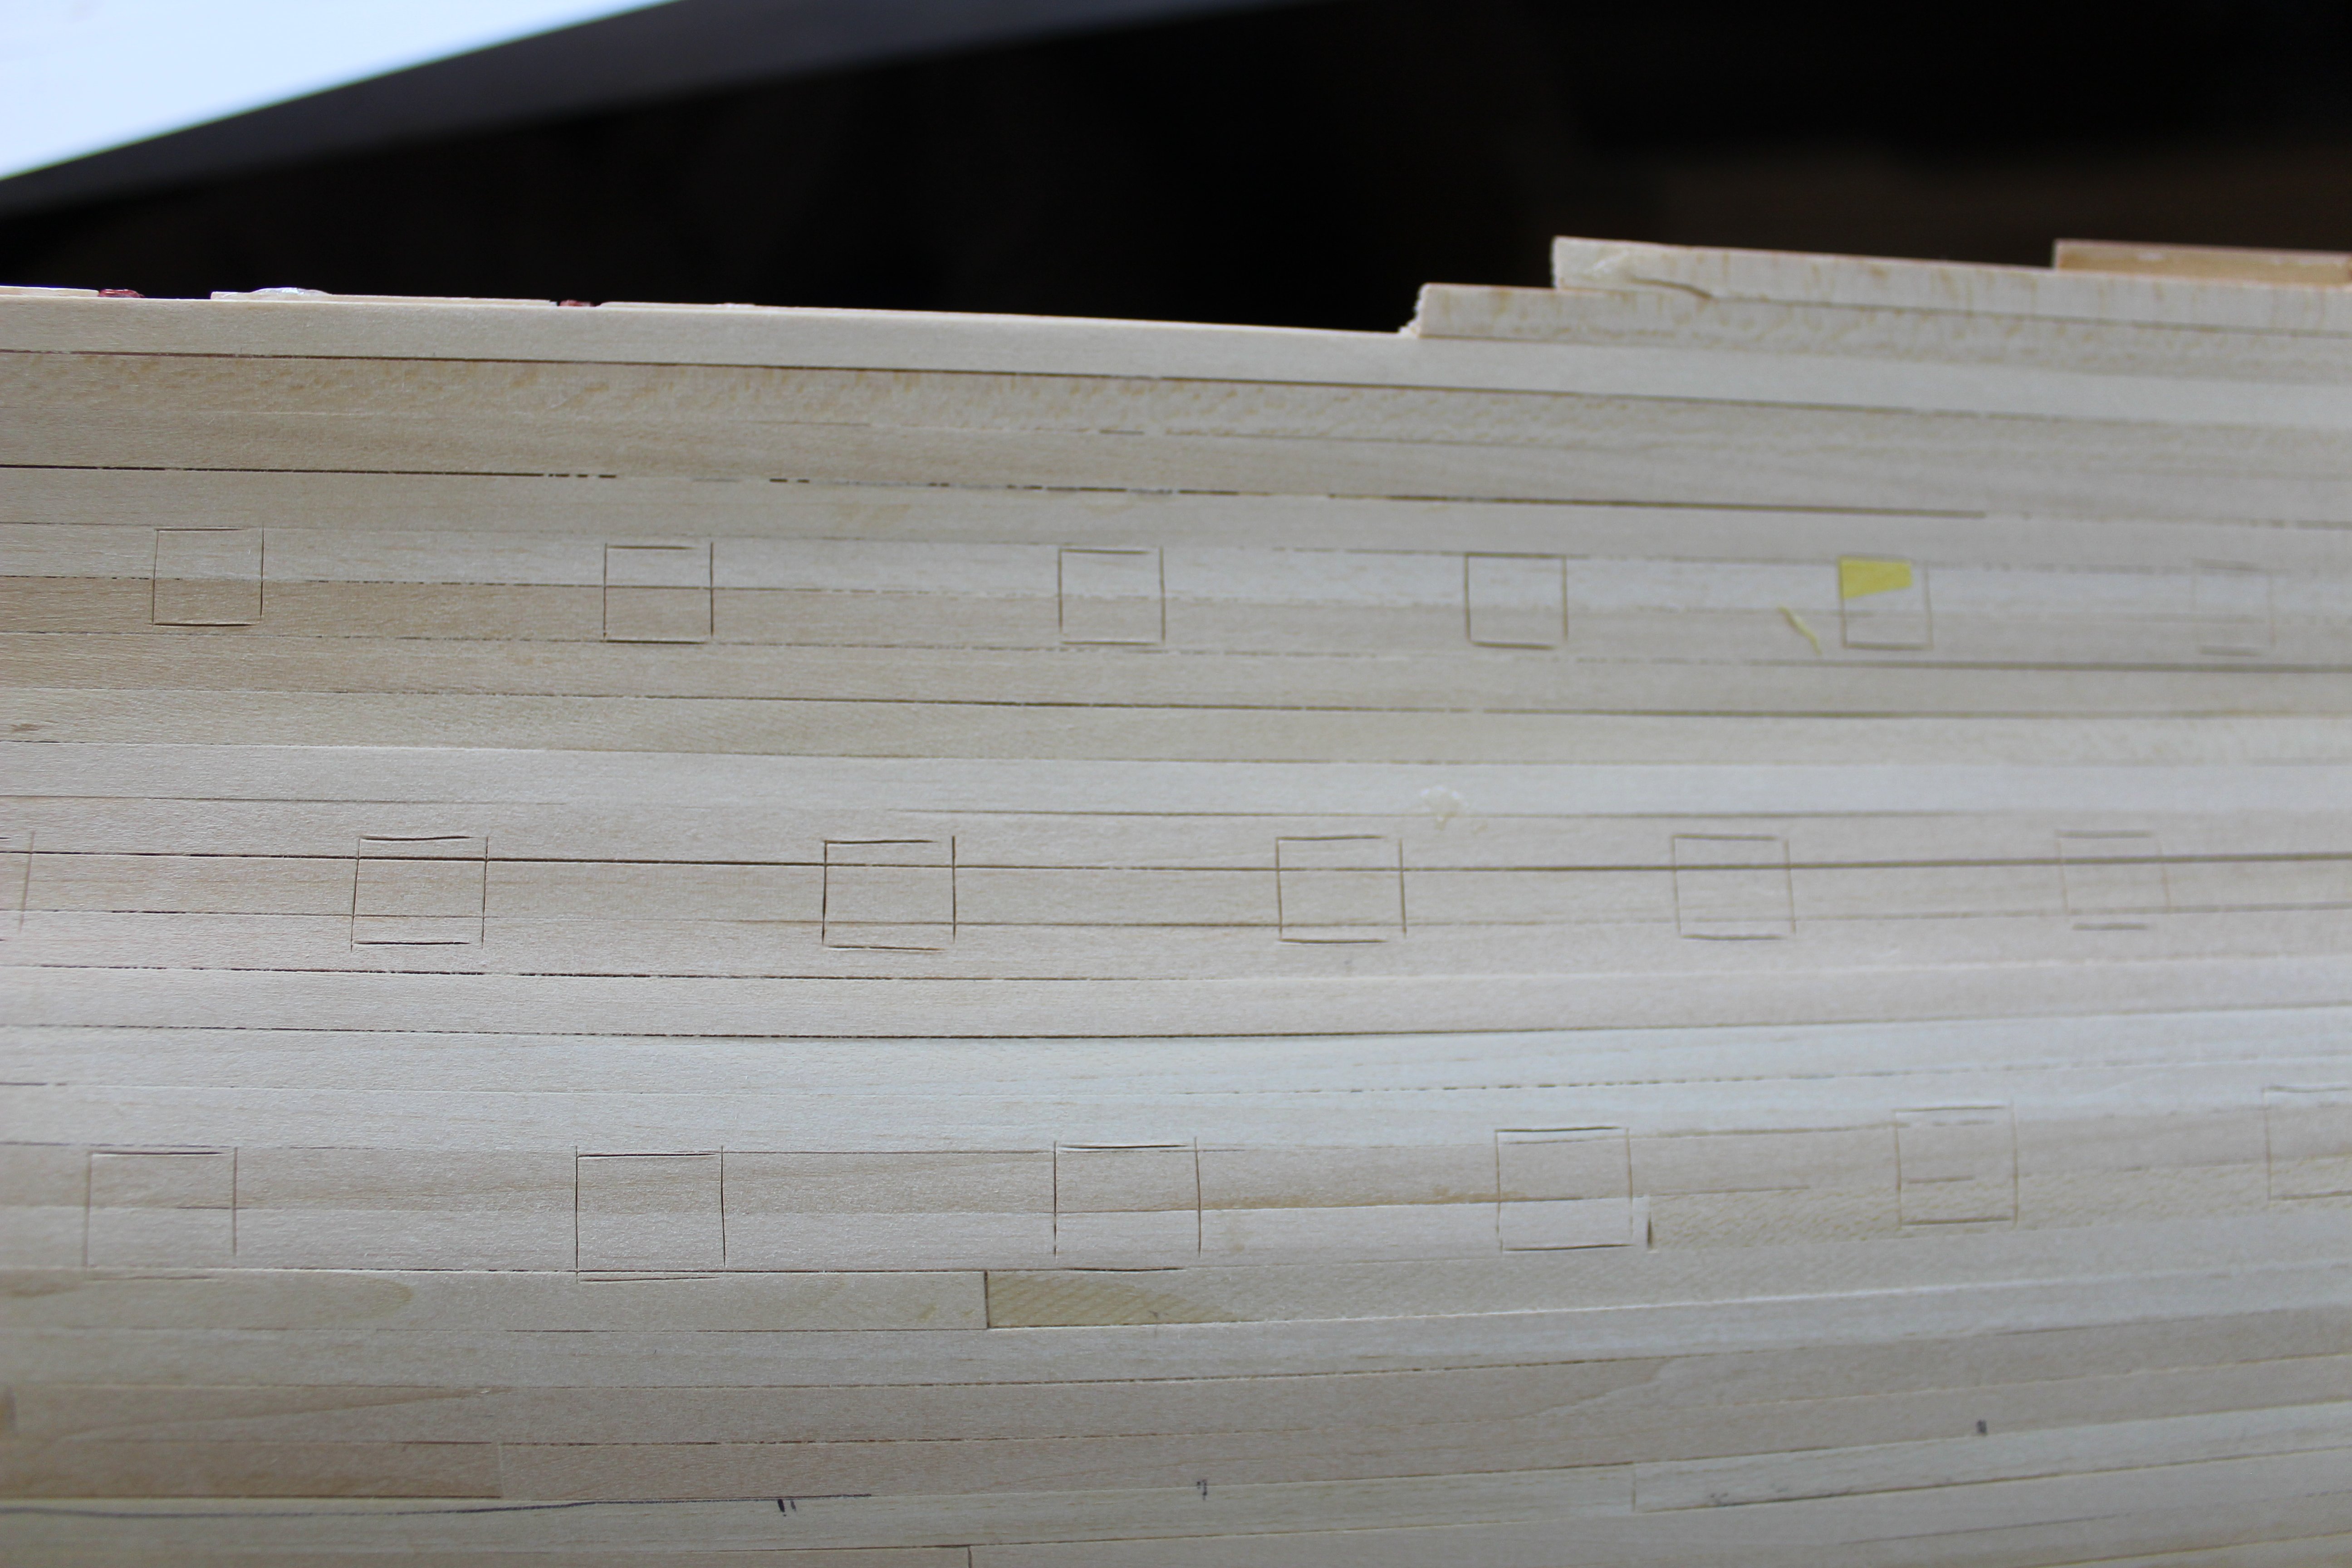
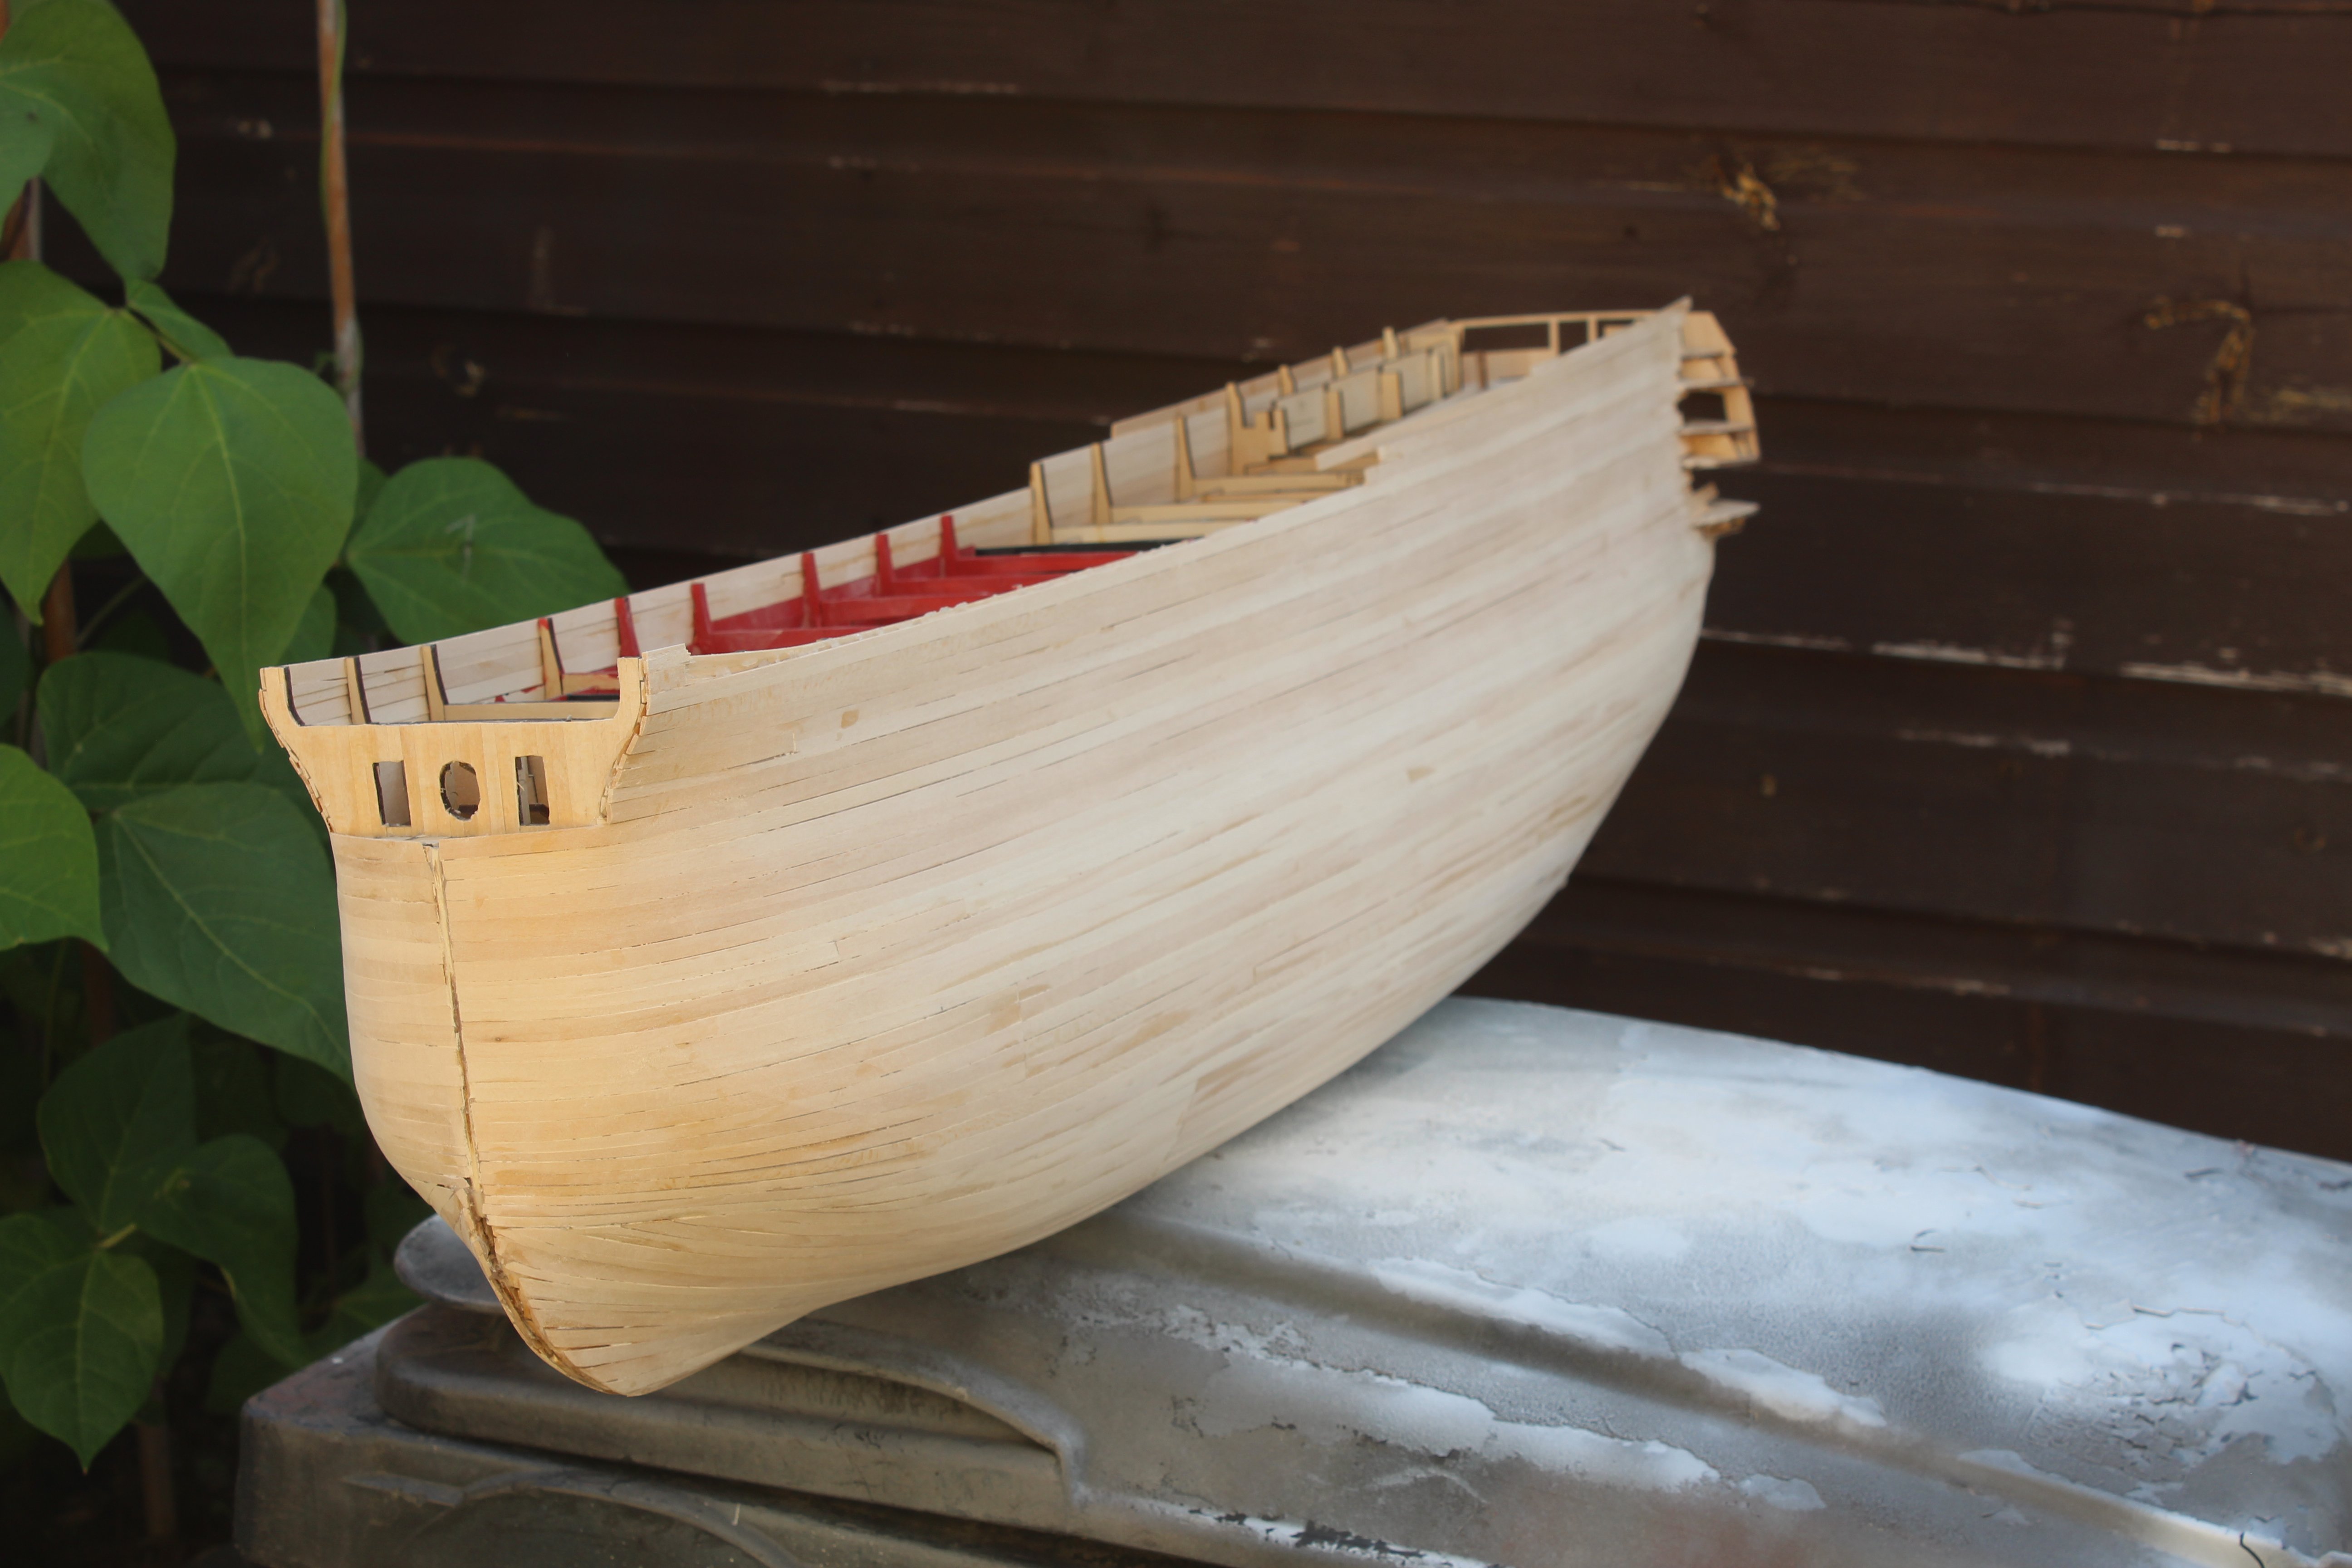
Day 18 completed 2nd planking
not in a hurry to do that again, double planking using 1mm x 5mm used appx 150 meters
sanded using 240 grit, will do again later with a finer grade after touching up a few places, like the stern where the rudder post will eventually go, worse to come soon (gunports)


-
there is certainly nothing wrong with that, it looks fantastic
- yvesvidal and Paul Le Wol
-
1
-
1
-
9 minutes ago, yvesvidal said:
Now, I understand why you went with a full planking of the hull. I suffered with the 72 guns of the HMS Bellona and I understand perfectly your position with 96 guns or more. That ship was a monster, similar to the modern Cruise ships that are haunting the Caribbean and Mediterranean seas.
Yves
i will still have to rebate the lids into 2nd planking, but none of the 140 odd liners needed, apart from the upper deck ones, i doubt very much that with a full set of sails there would be many lids open,
Sails to get right will be the issue on this build, was going to do then on a 1/64 Cutty Sark, but thats not available for now
-
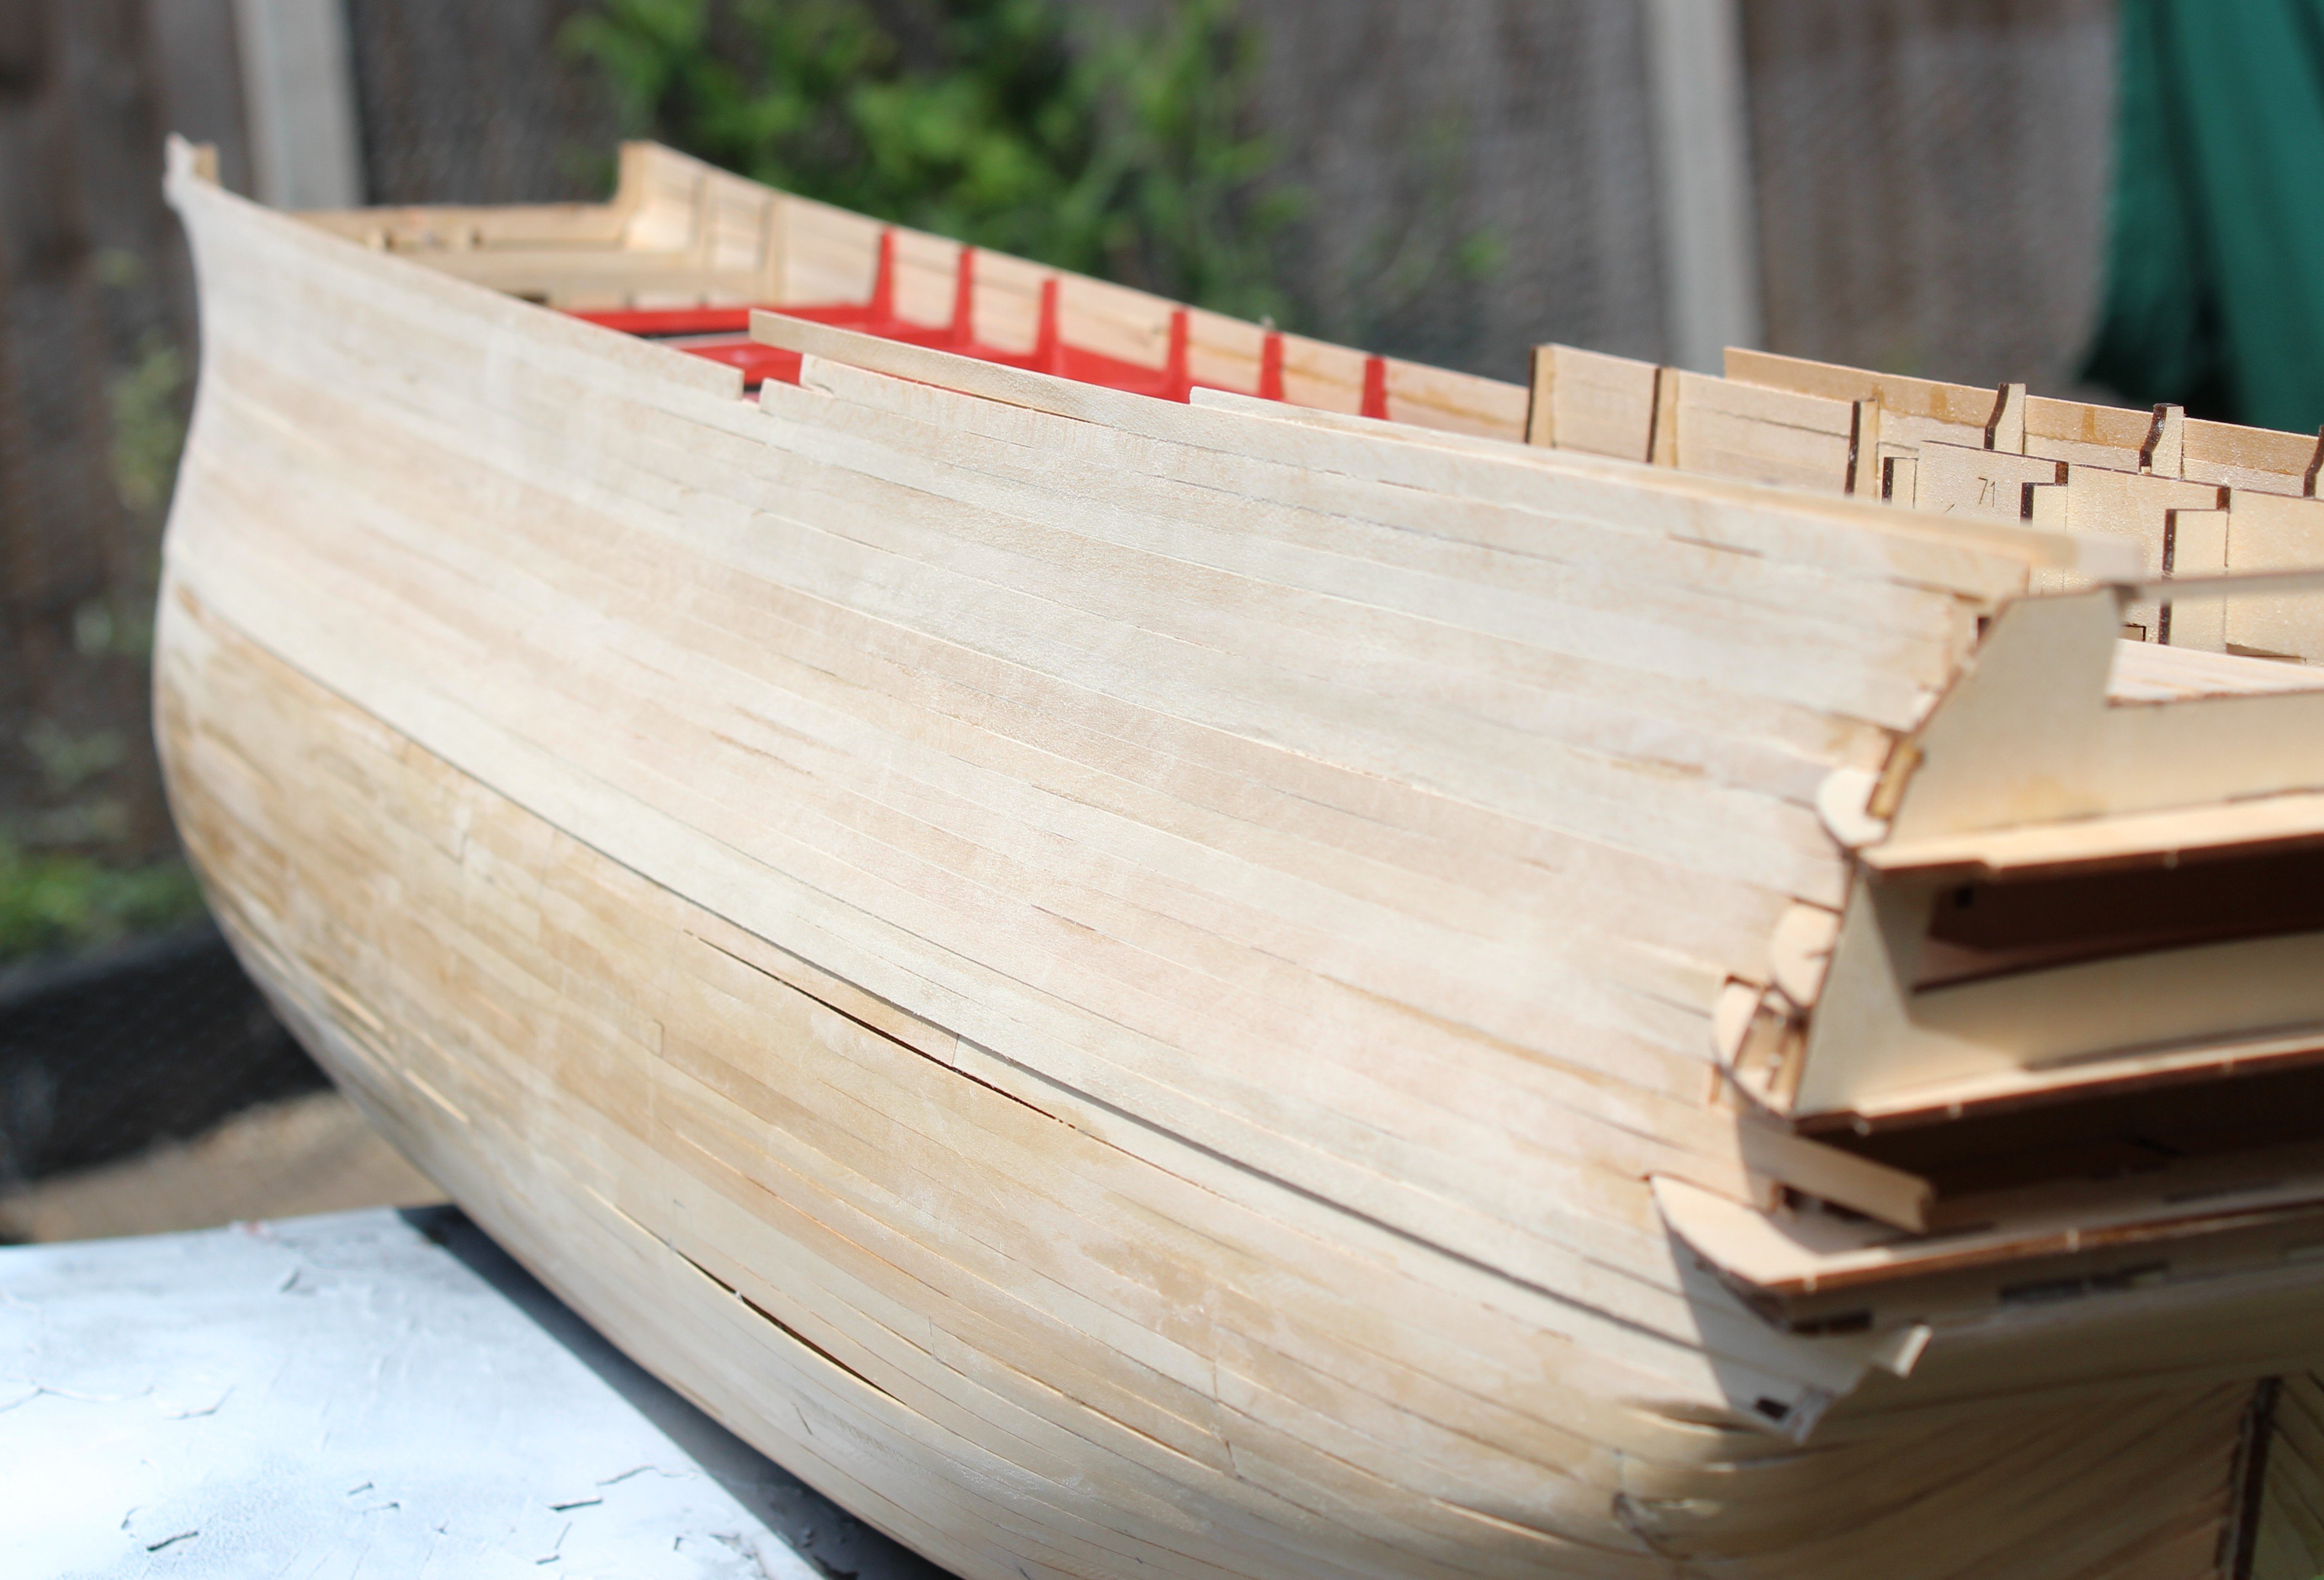
Good evening everyone, thank you for comments and likes
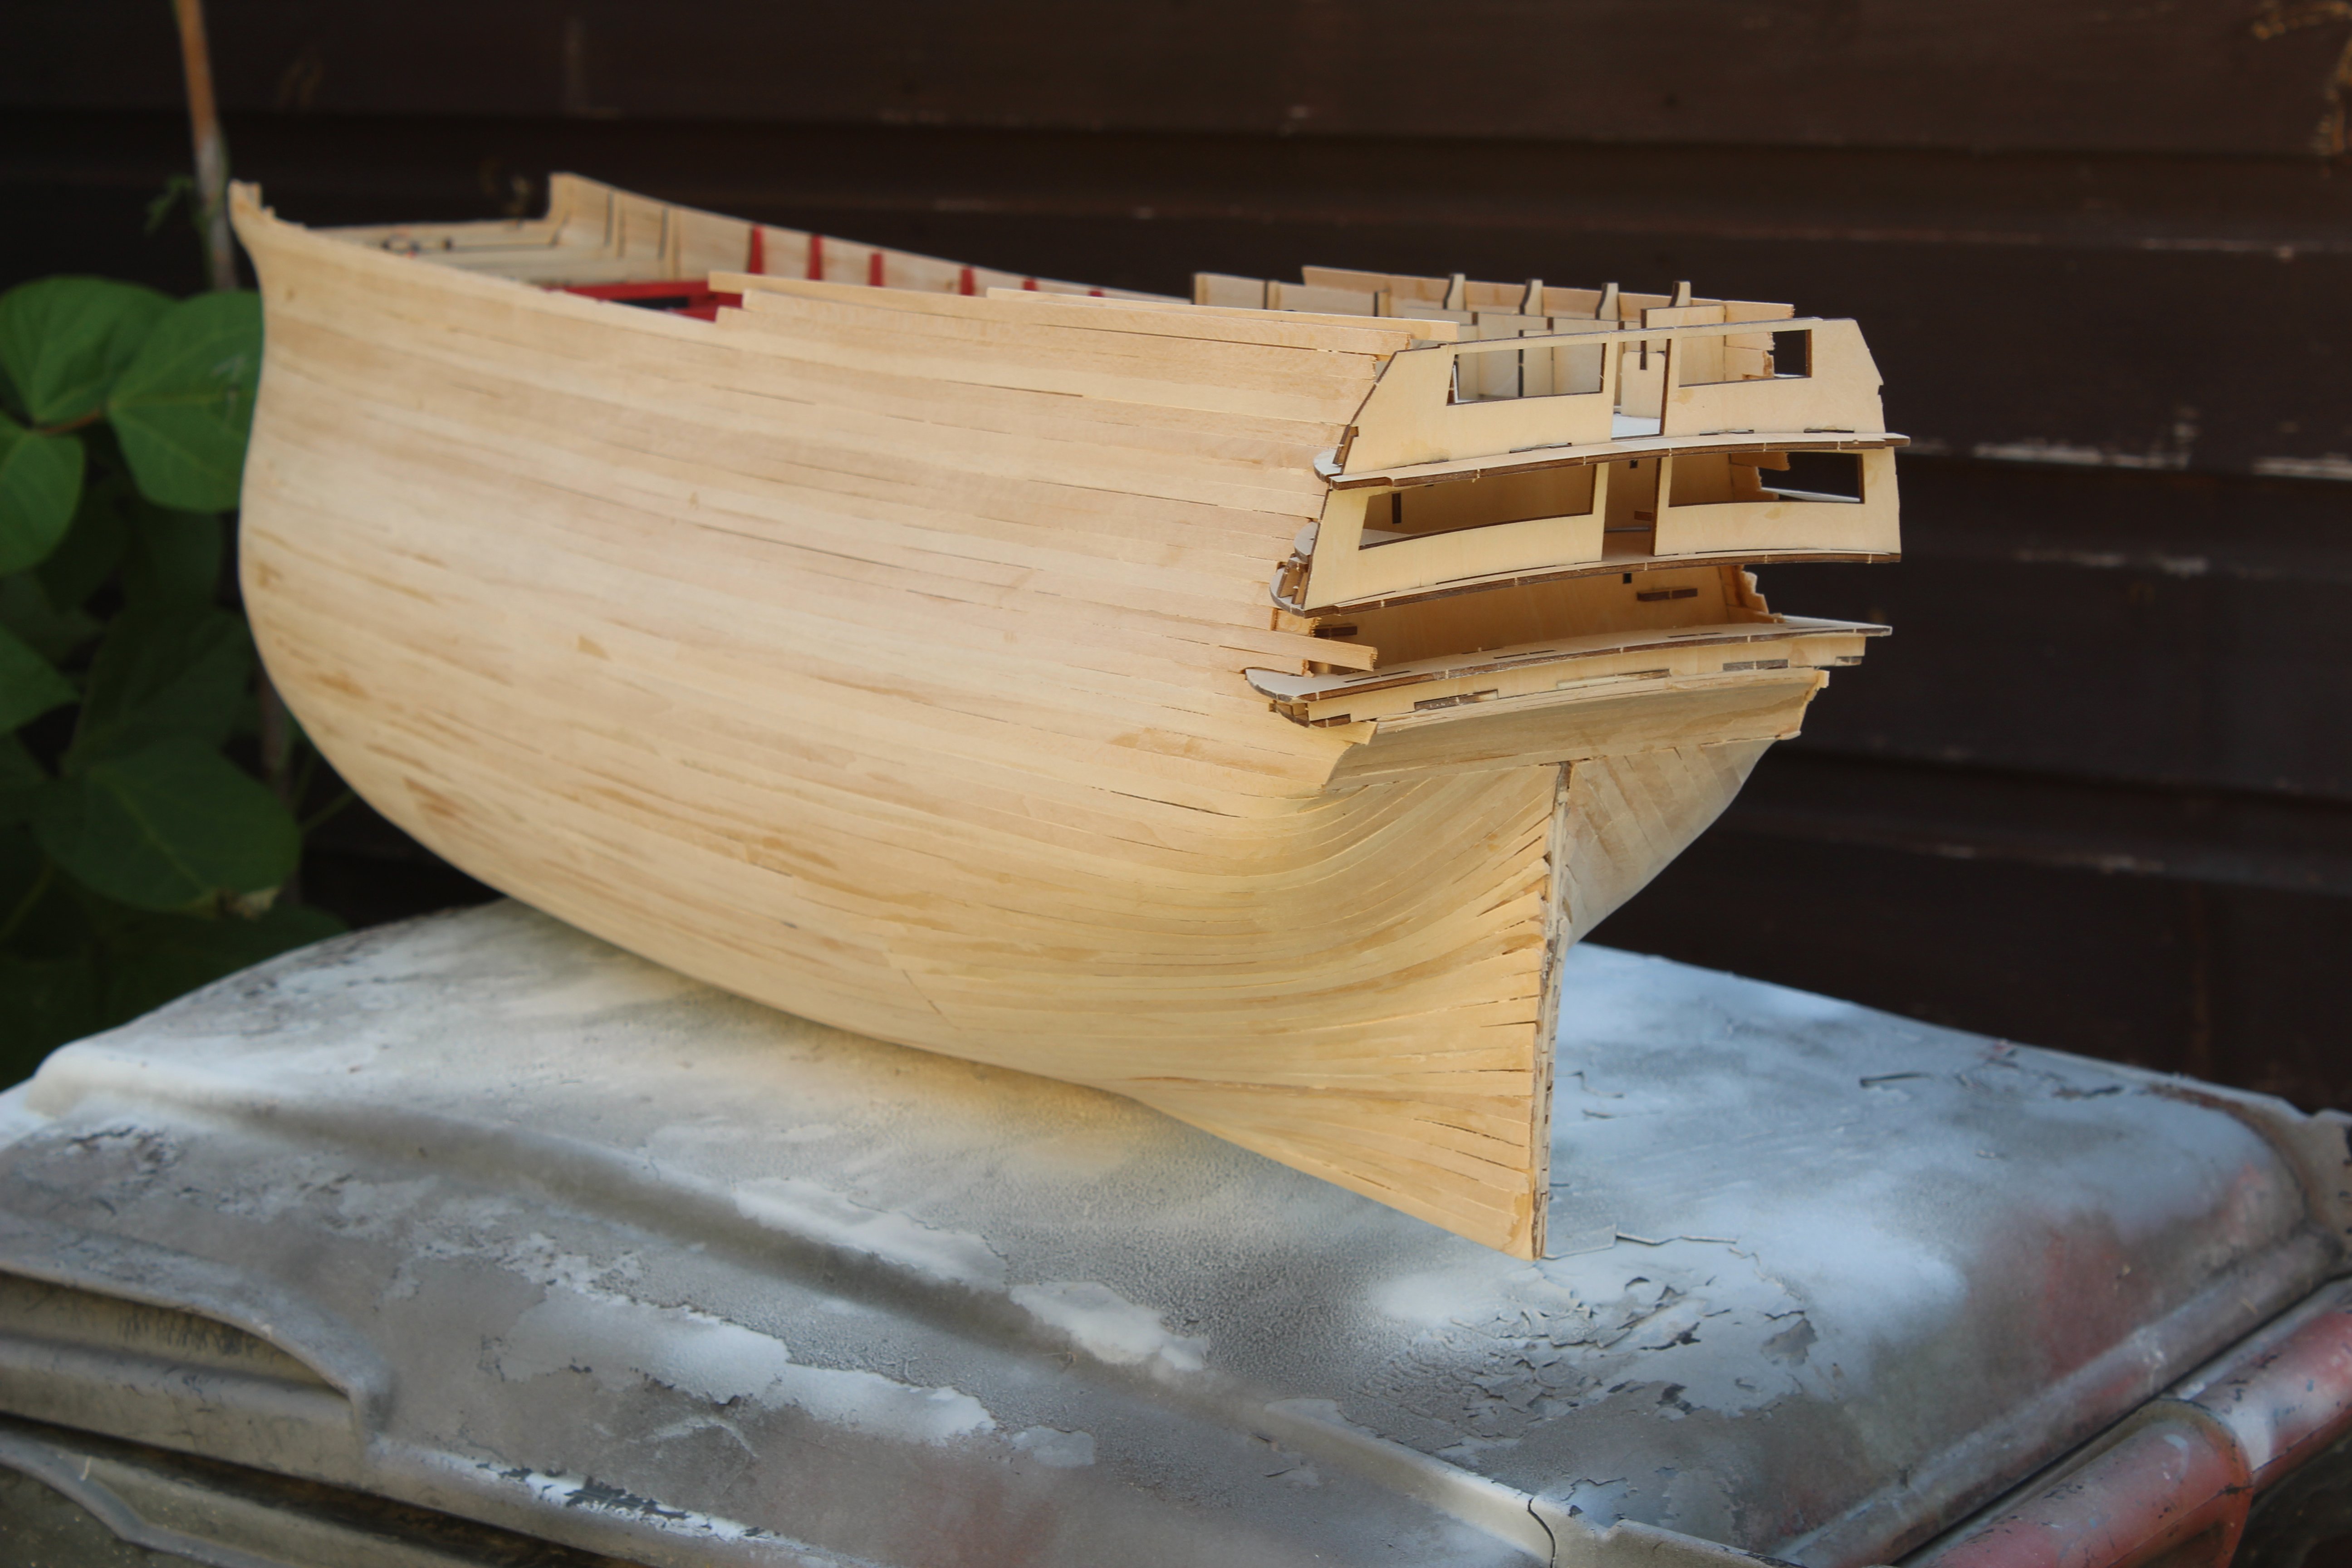
day 14 started 2nd planking
Well the 1st planking was very messy, but it was so very well worth the trouble to do it, im not a lover of planking in the first place, but with 16 frames using 2mm stripwood in 300mm lengths would have done me in
i have thought quite a bit how i would like to present this build and have decided - wait for it......................
A all gunport lids will be shut
B i will attempt to do sails on her, whether to use the kit supplied ones or do my own, still to be decided
C_ put some lights on her


- Ronald-V, GrandpaPhil, ccoyle and 4 others
-
7
-
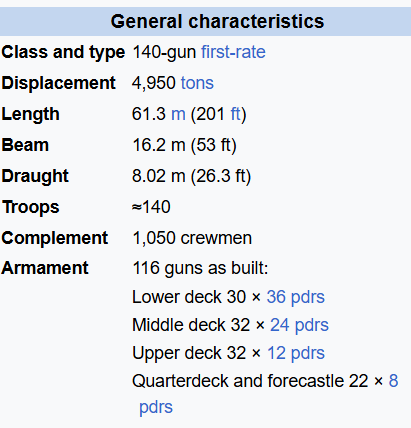
18 minutes ago, Ronald-V said:
She is a bulky lady!
thats my wife, LOL
apparently she was over 4000 tons compared to just over 2000 tons for Victory
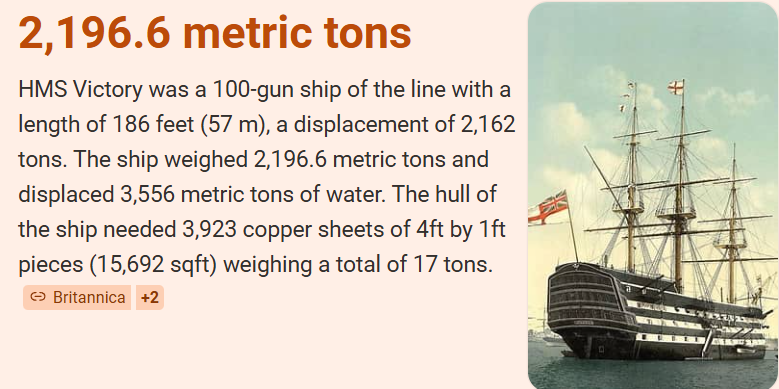
Santísima Trinidad
- GrandpaPhil, AJohnson, chris watton and 3 others
-
5
-
 1
1
-
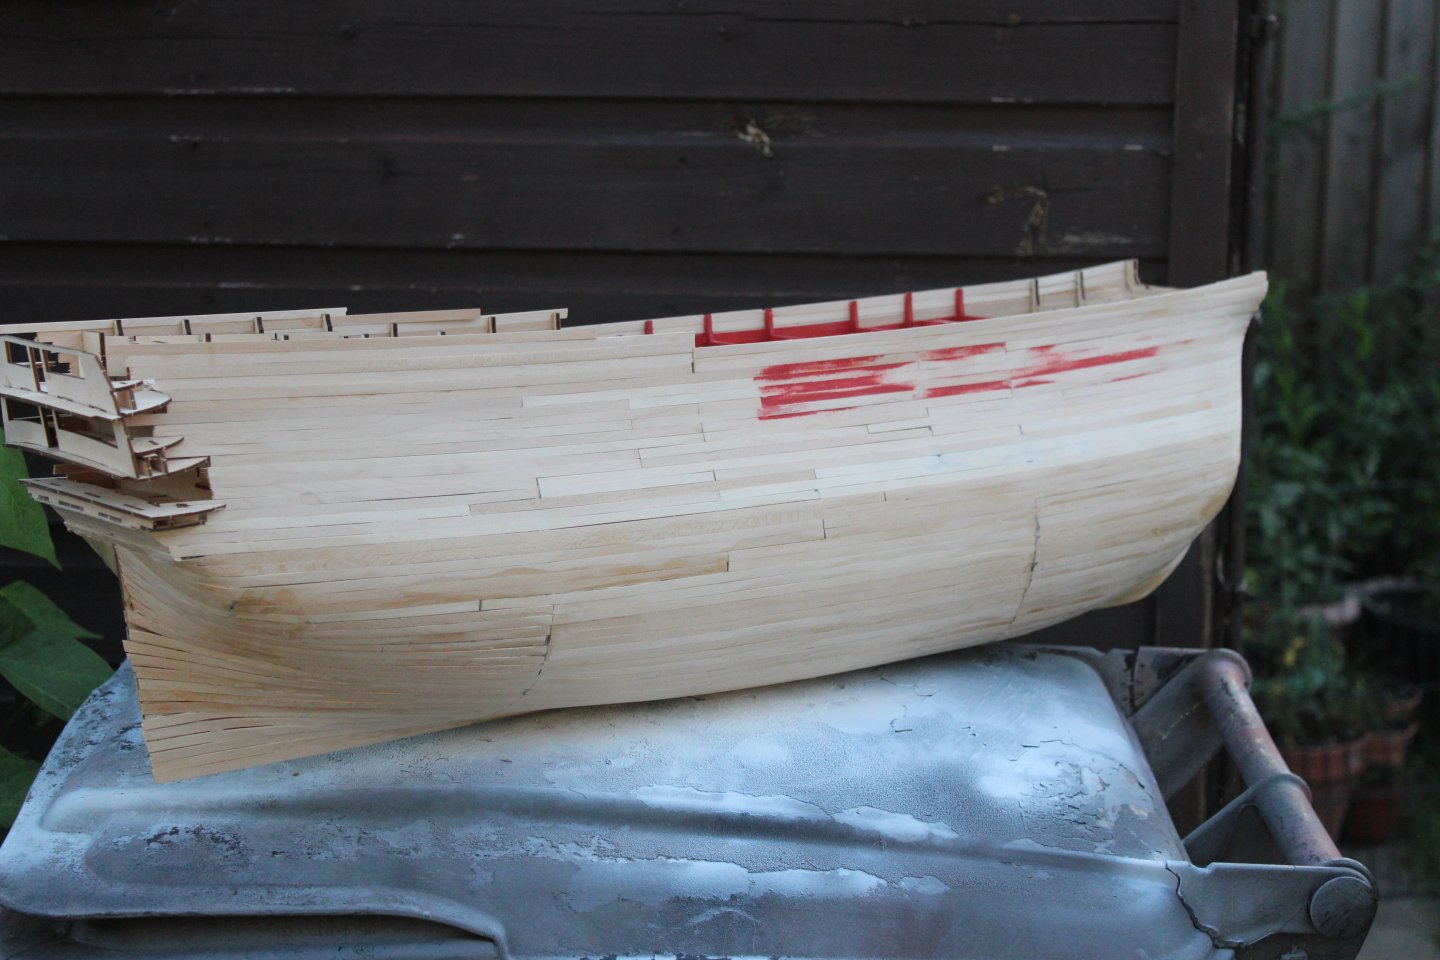
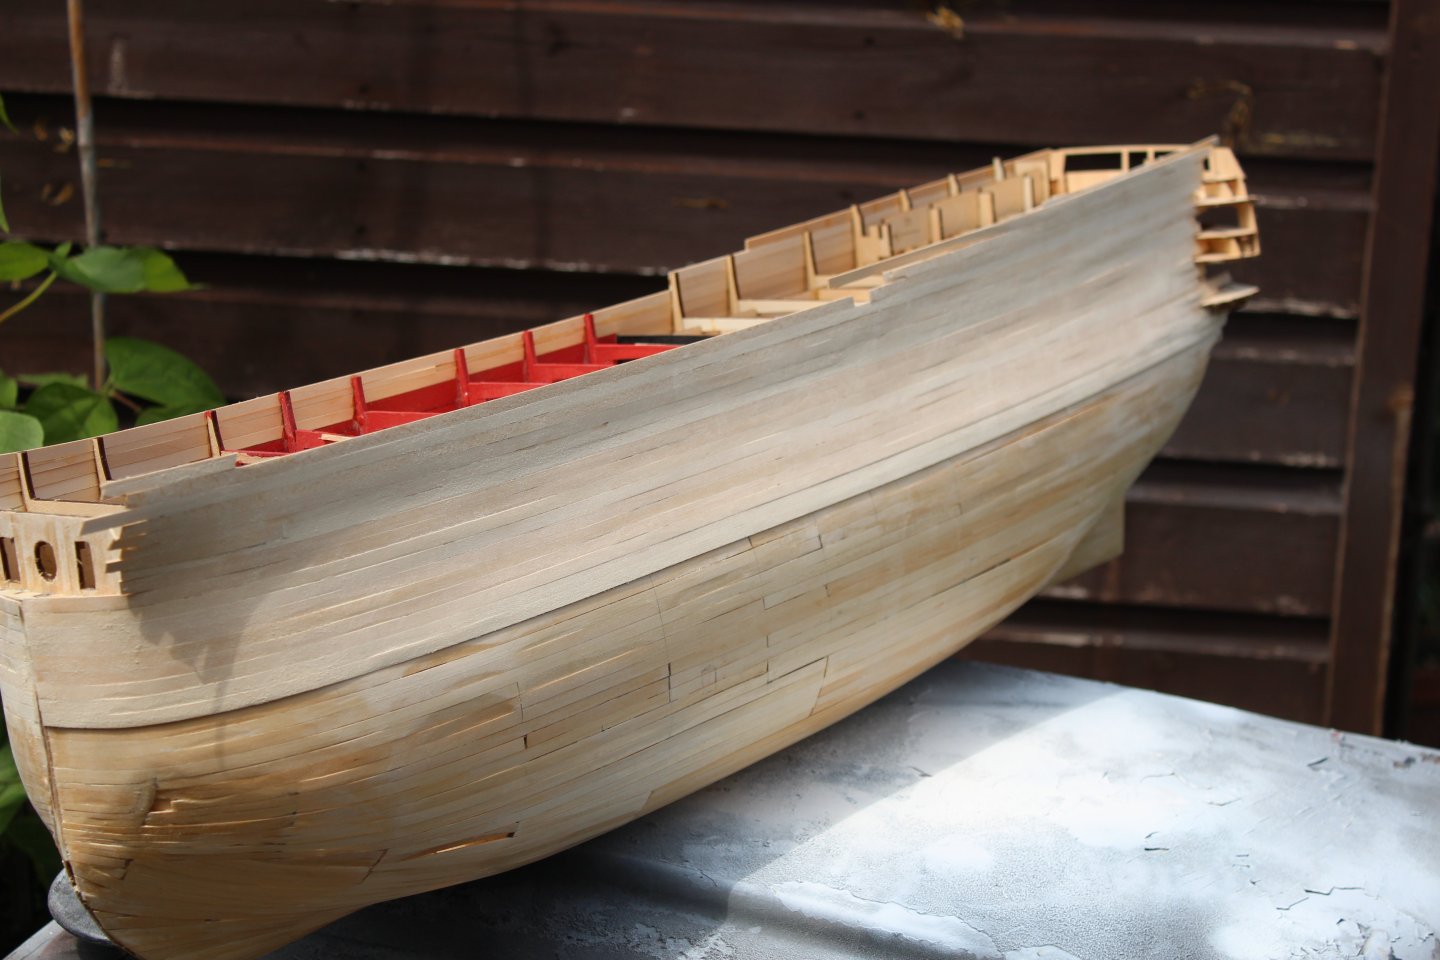
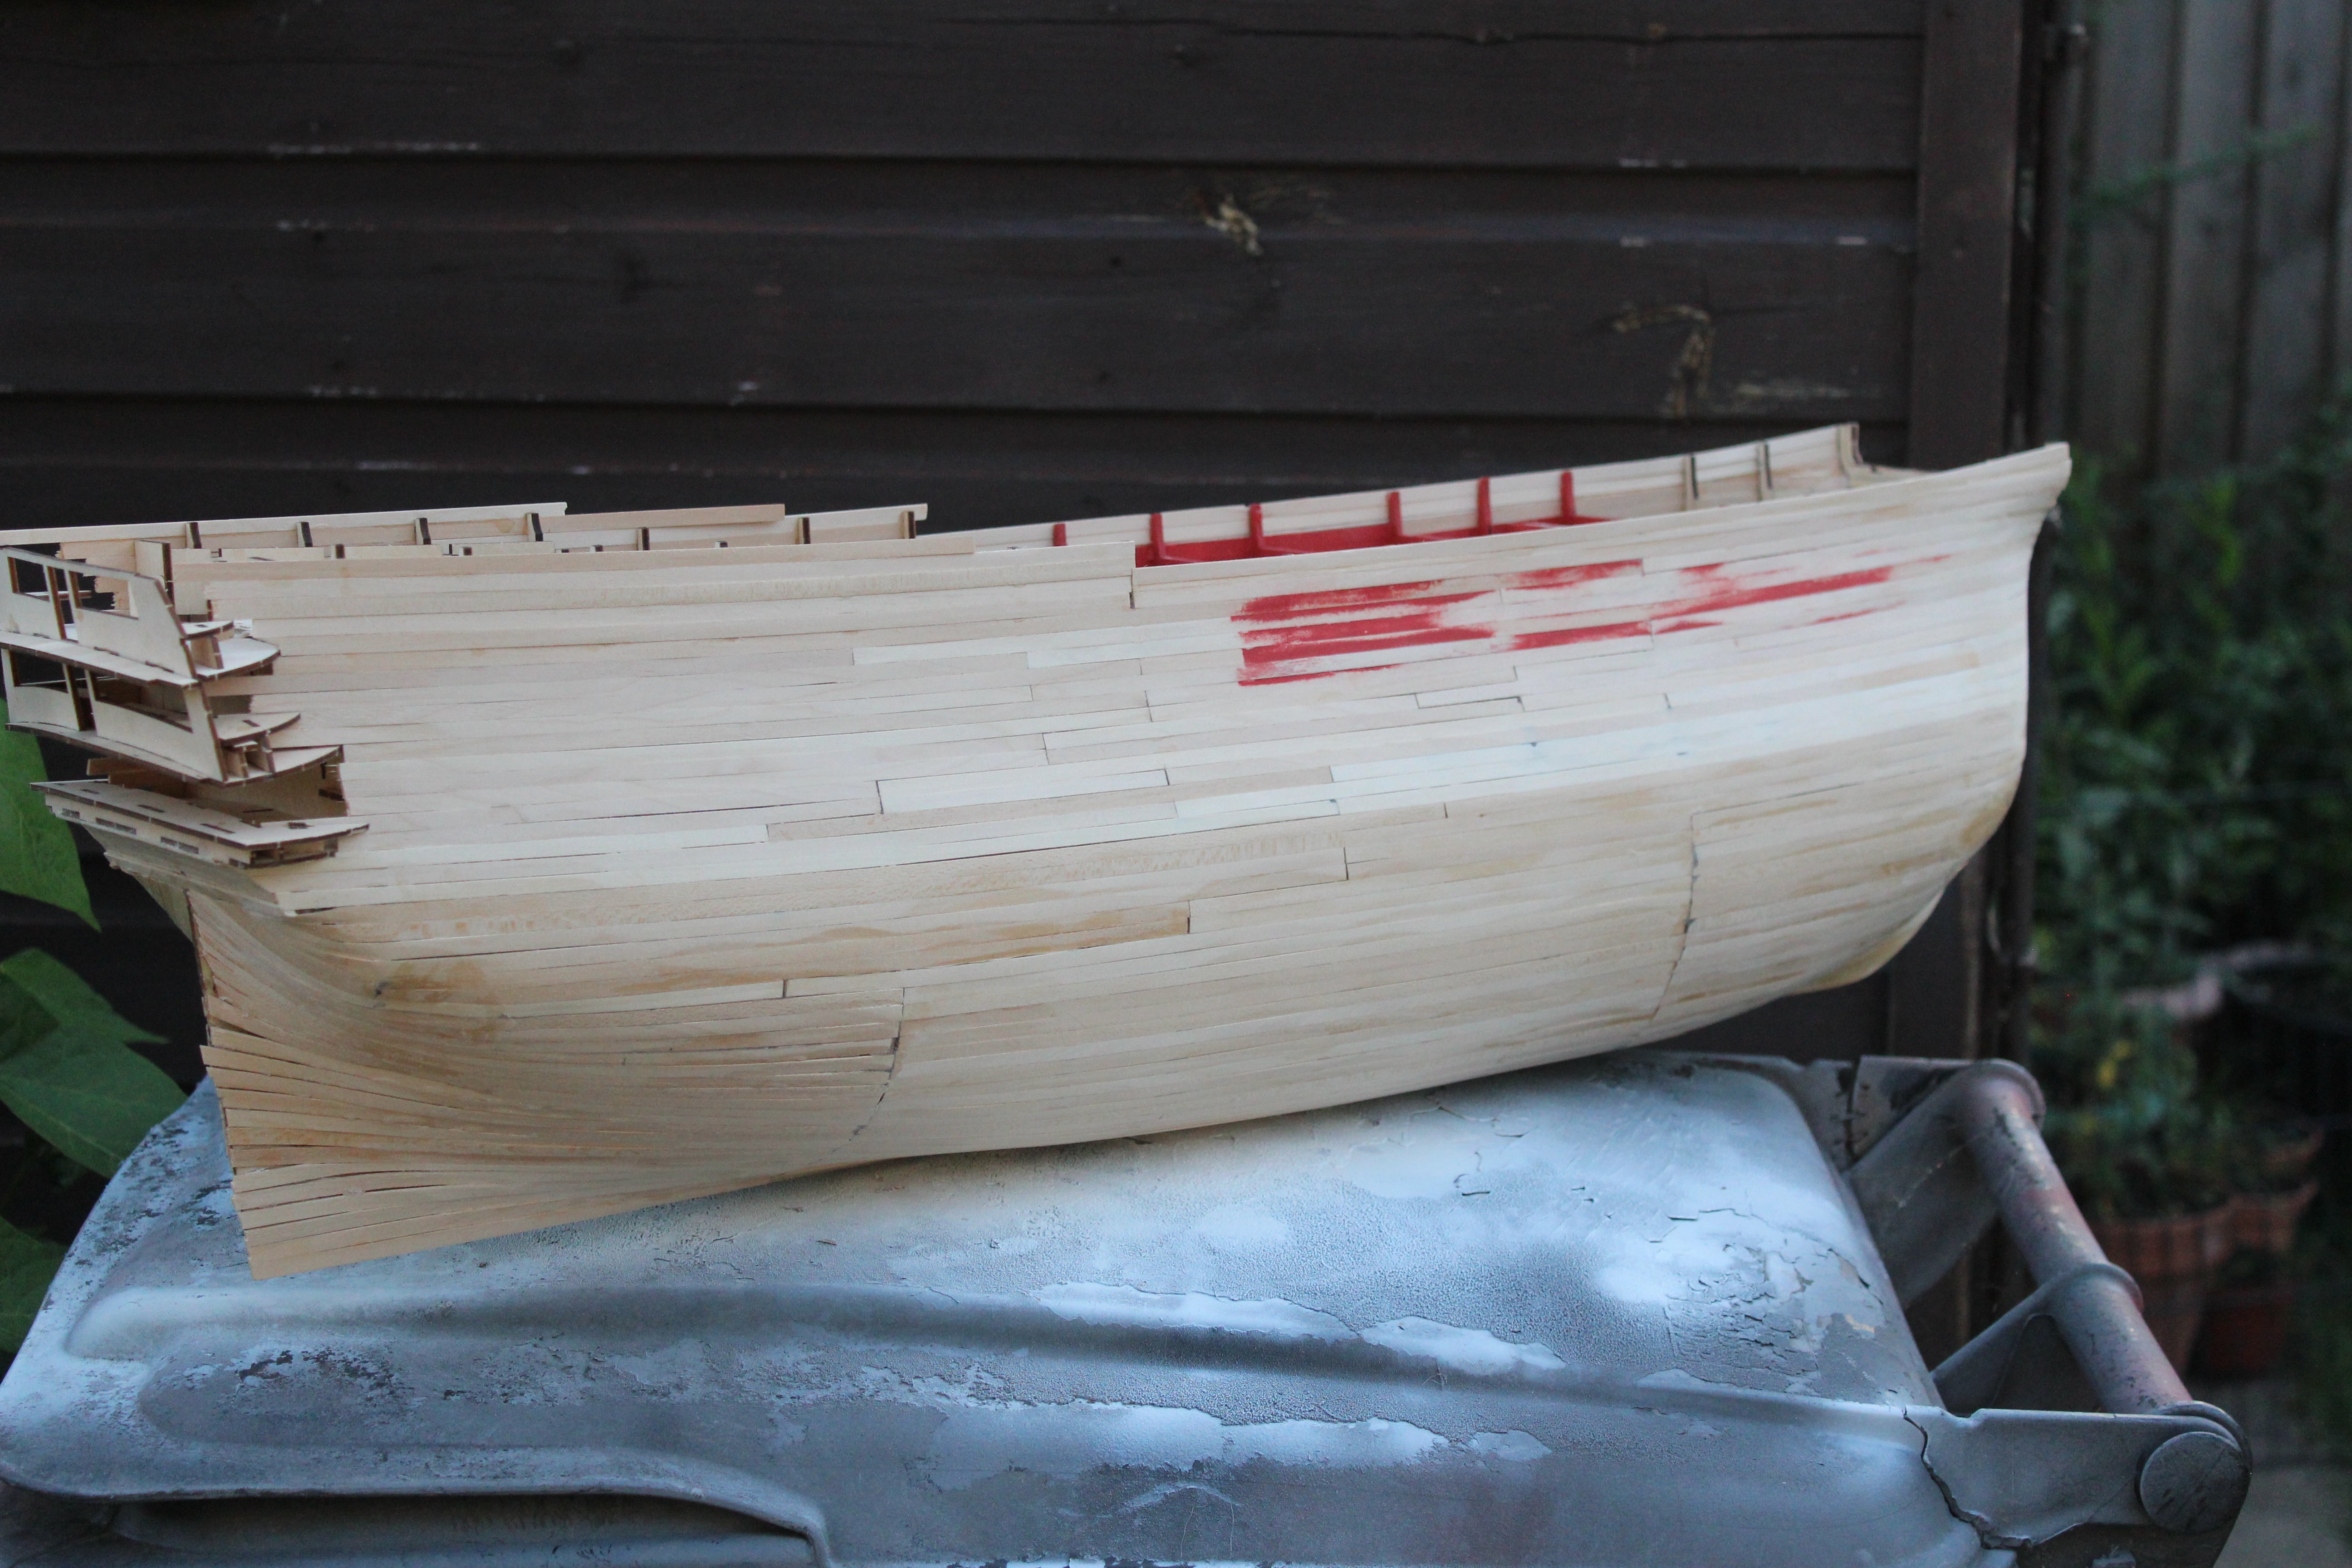
good evening everyone
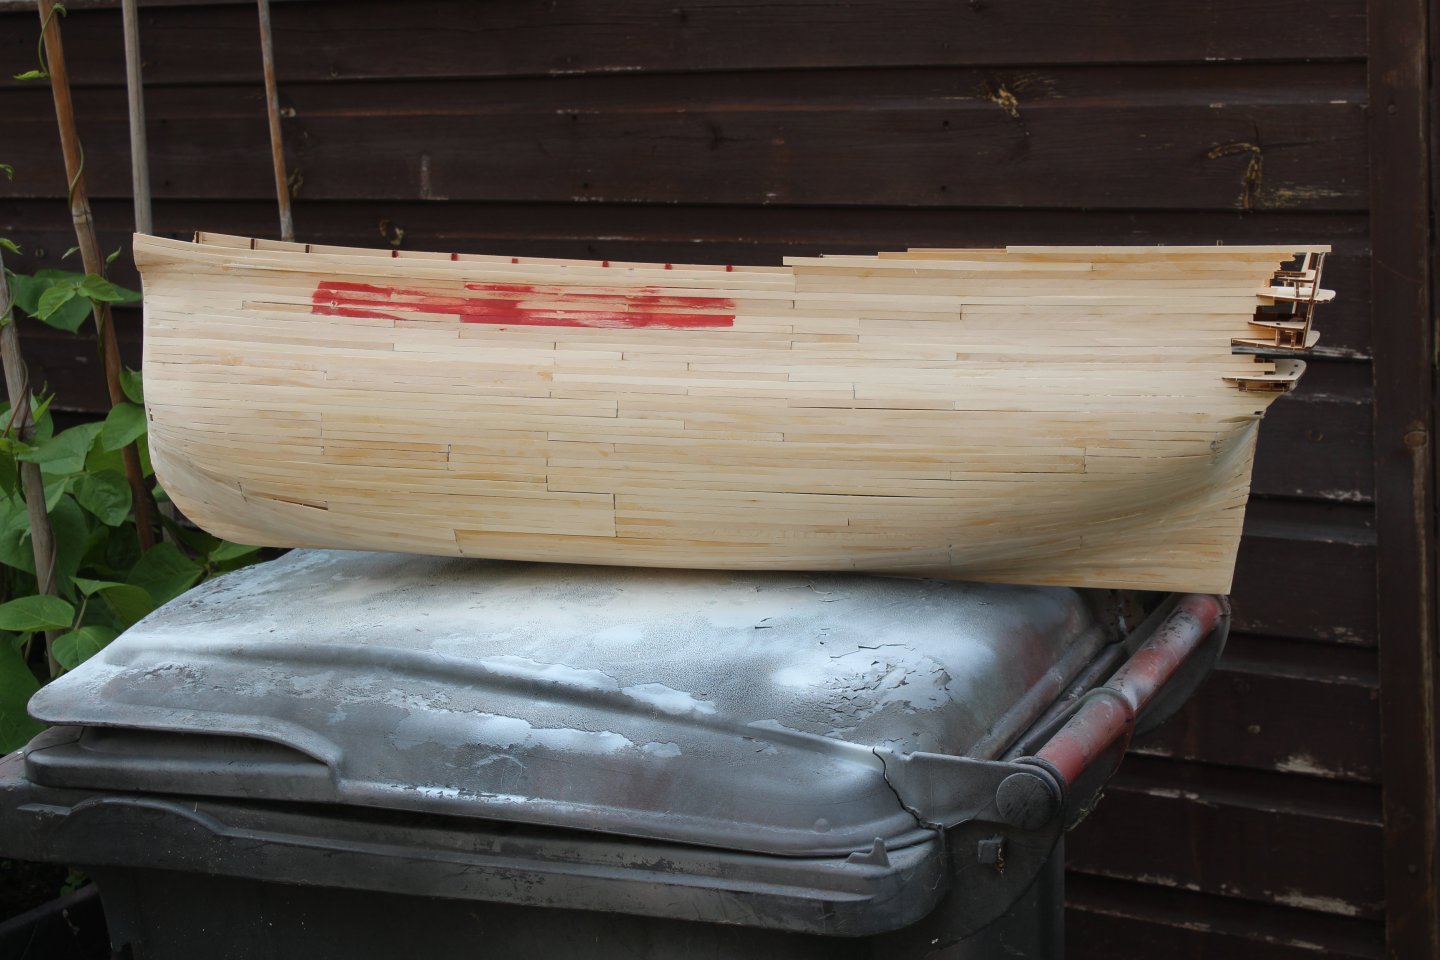
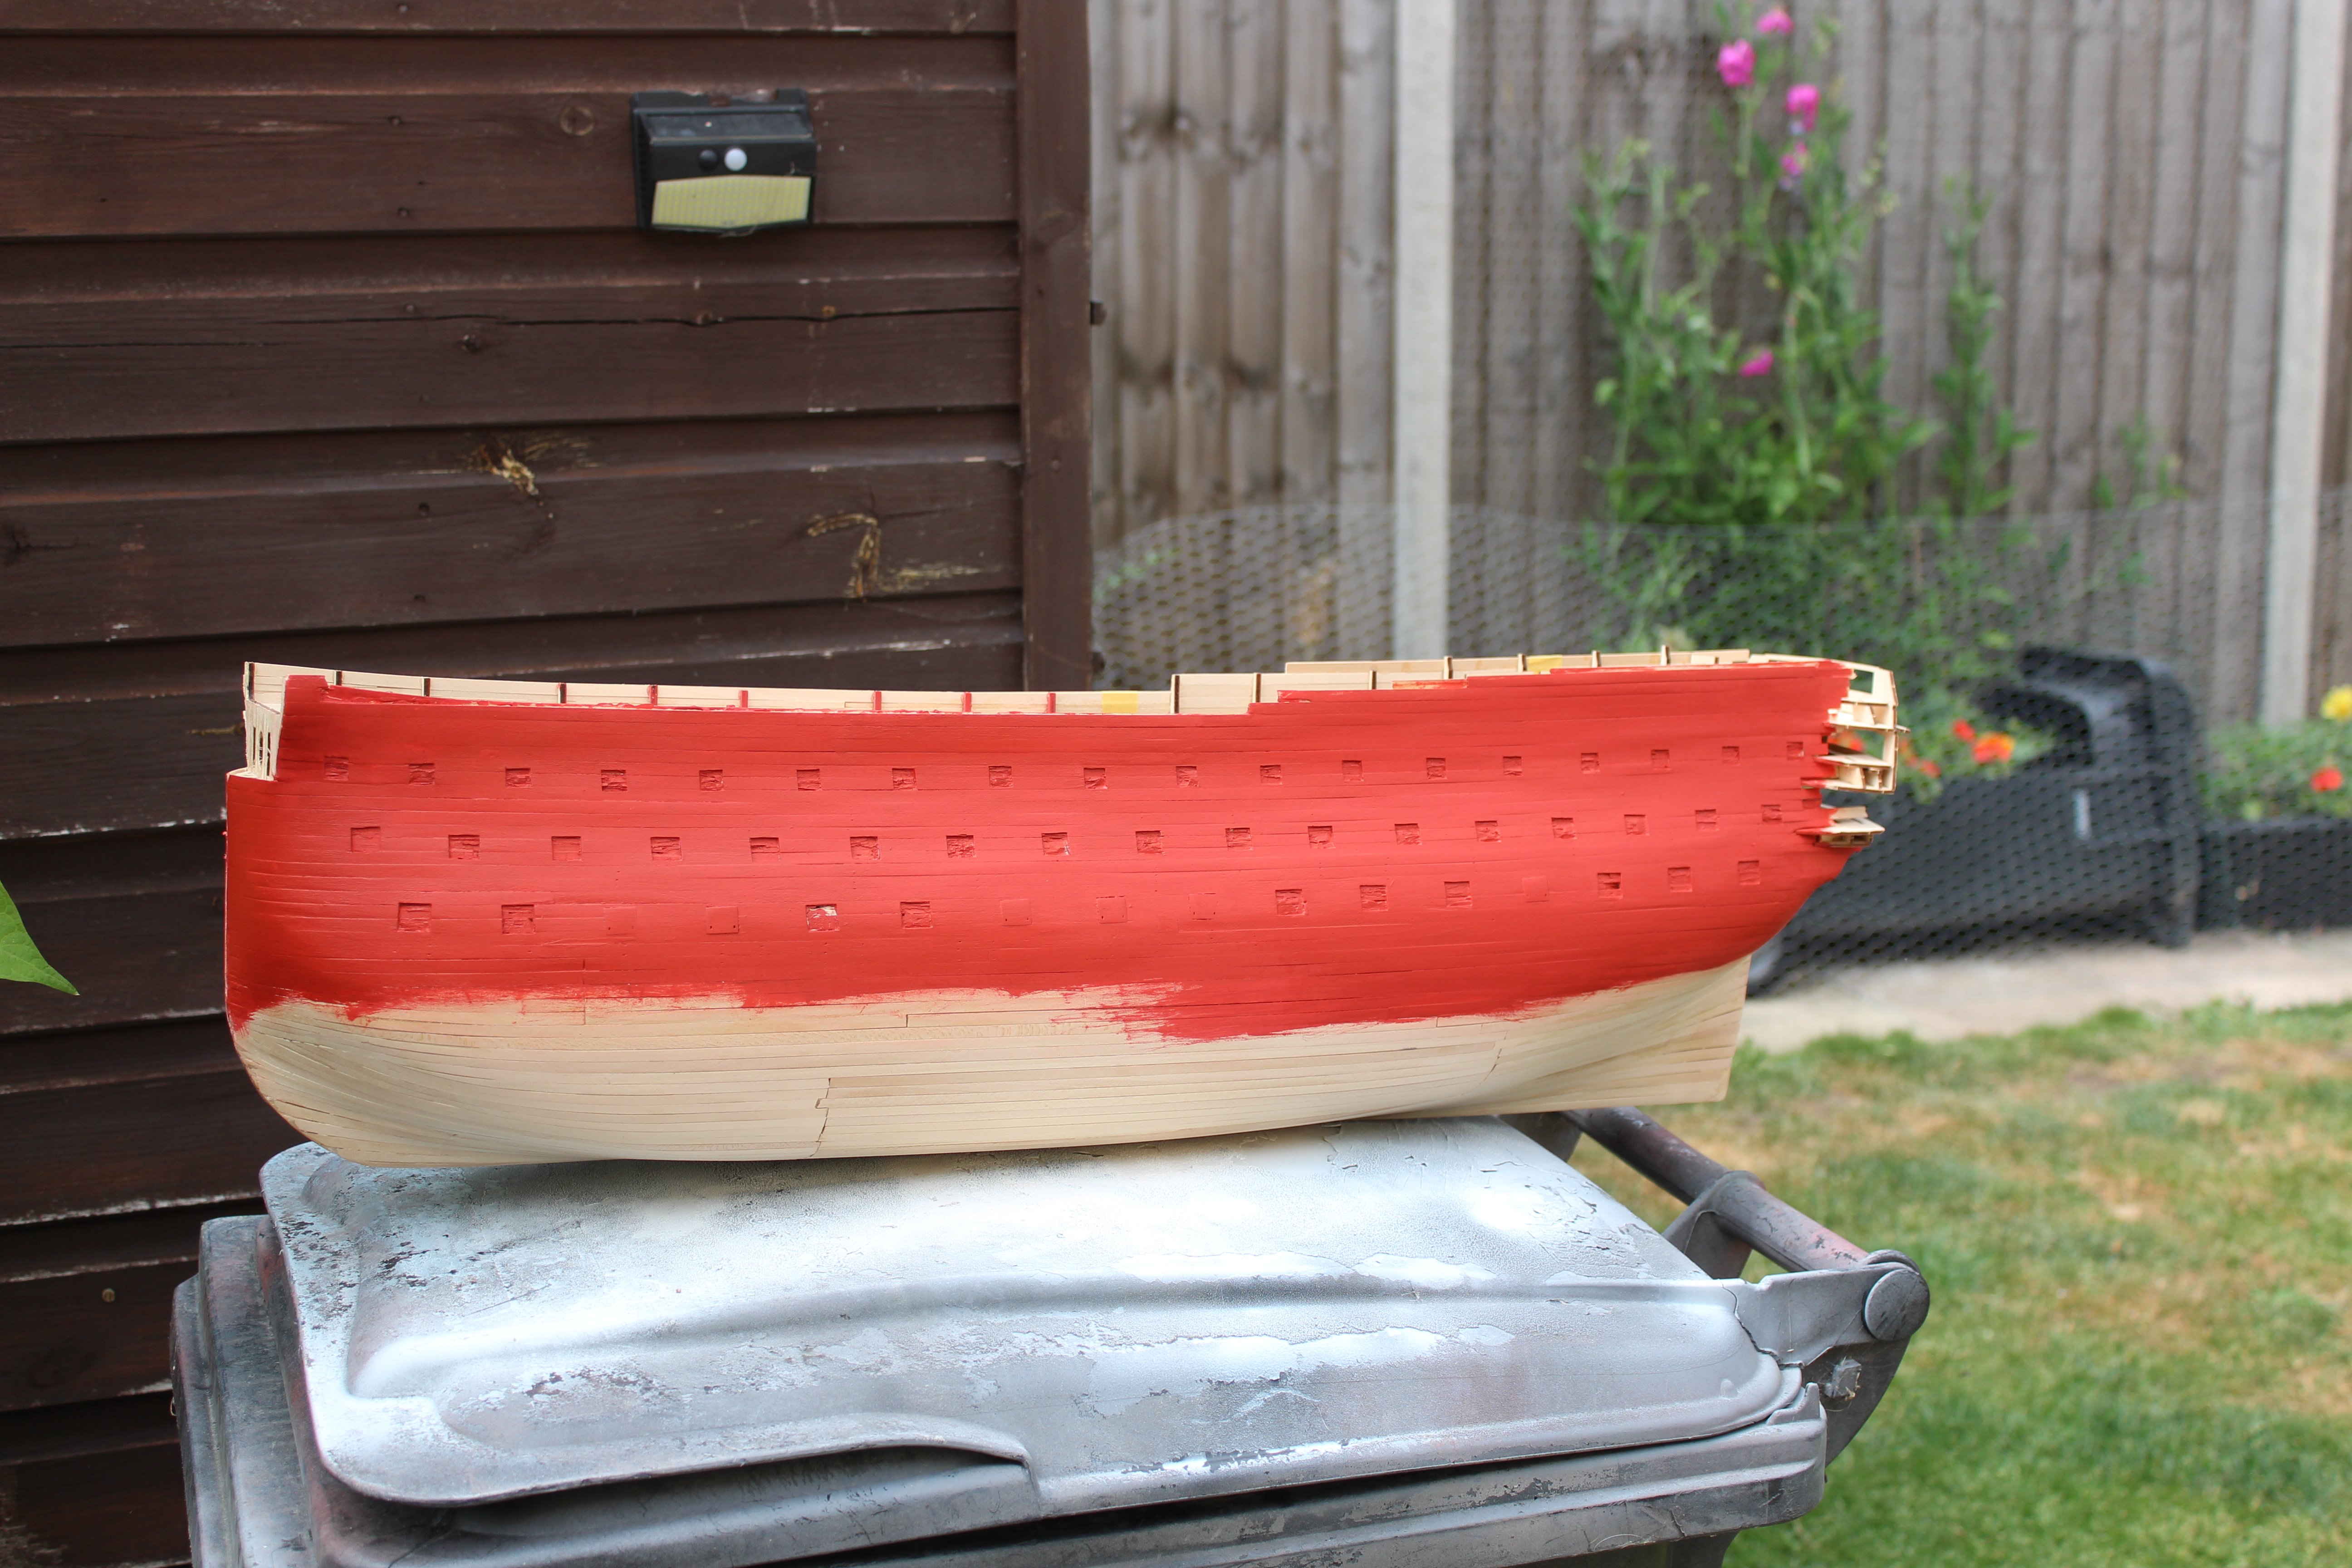
Day 10 1st planking port side complete
thank you for comments and likes
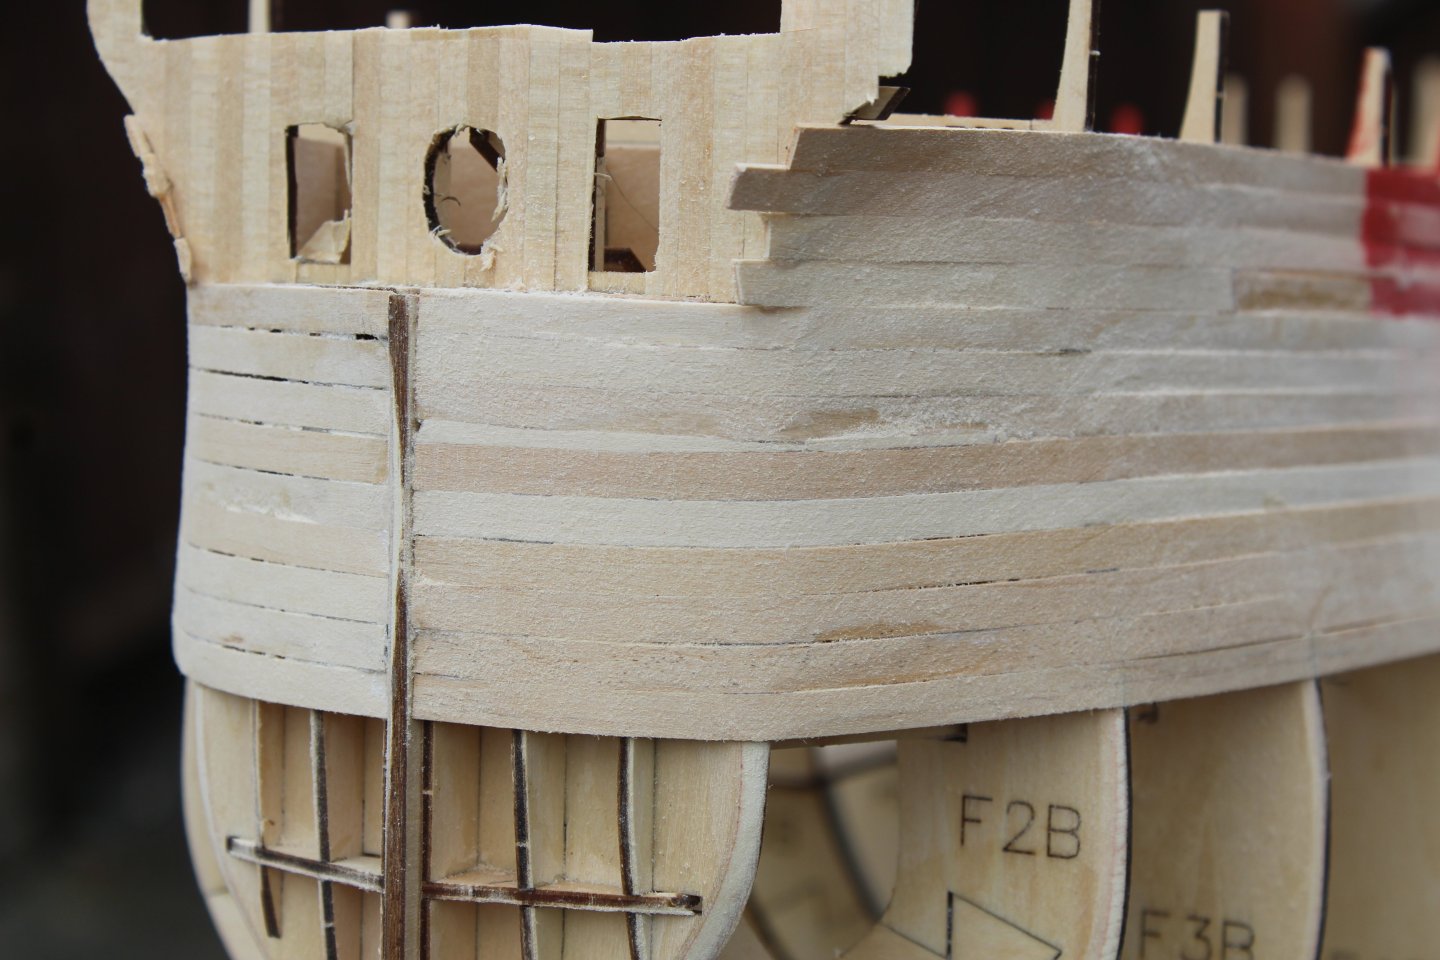
this build is quite the monster, i have just finished 1st planking the port side and she has taken 50 lengths of 1x5mm lime strip, the other side is progressing.
Although a slightly smaller scale than the 1/72 Victory she looks a far bigger hull. (i need to check that fact out), will certainly dominate the display area when completed
The planking is not pretty at all but gives me a lovely base for the next layer once the planking is complete i need to mark out the gunports over 4 deck levels

- Knocklouder, Ronald-V, BLACK VIKING and 7 others
-
7
-
3
-
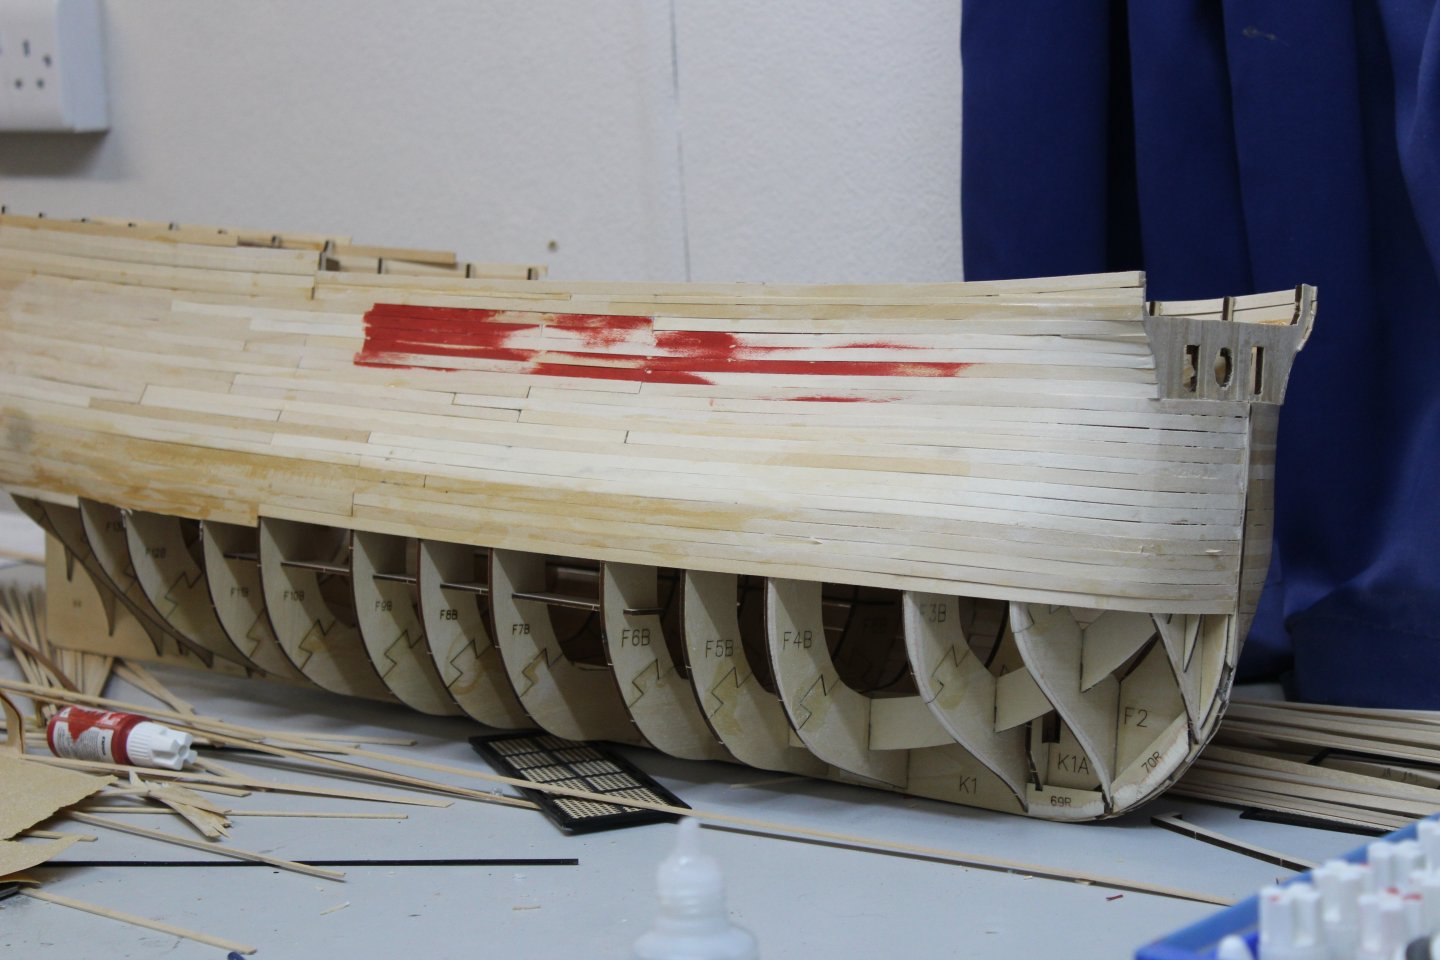
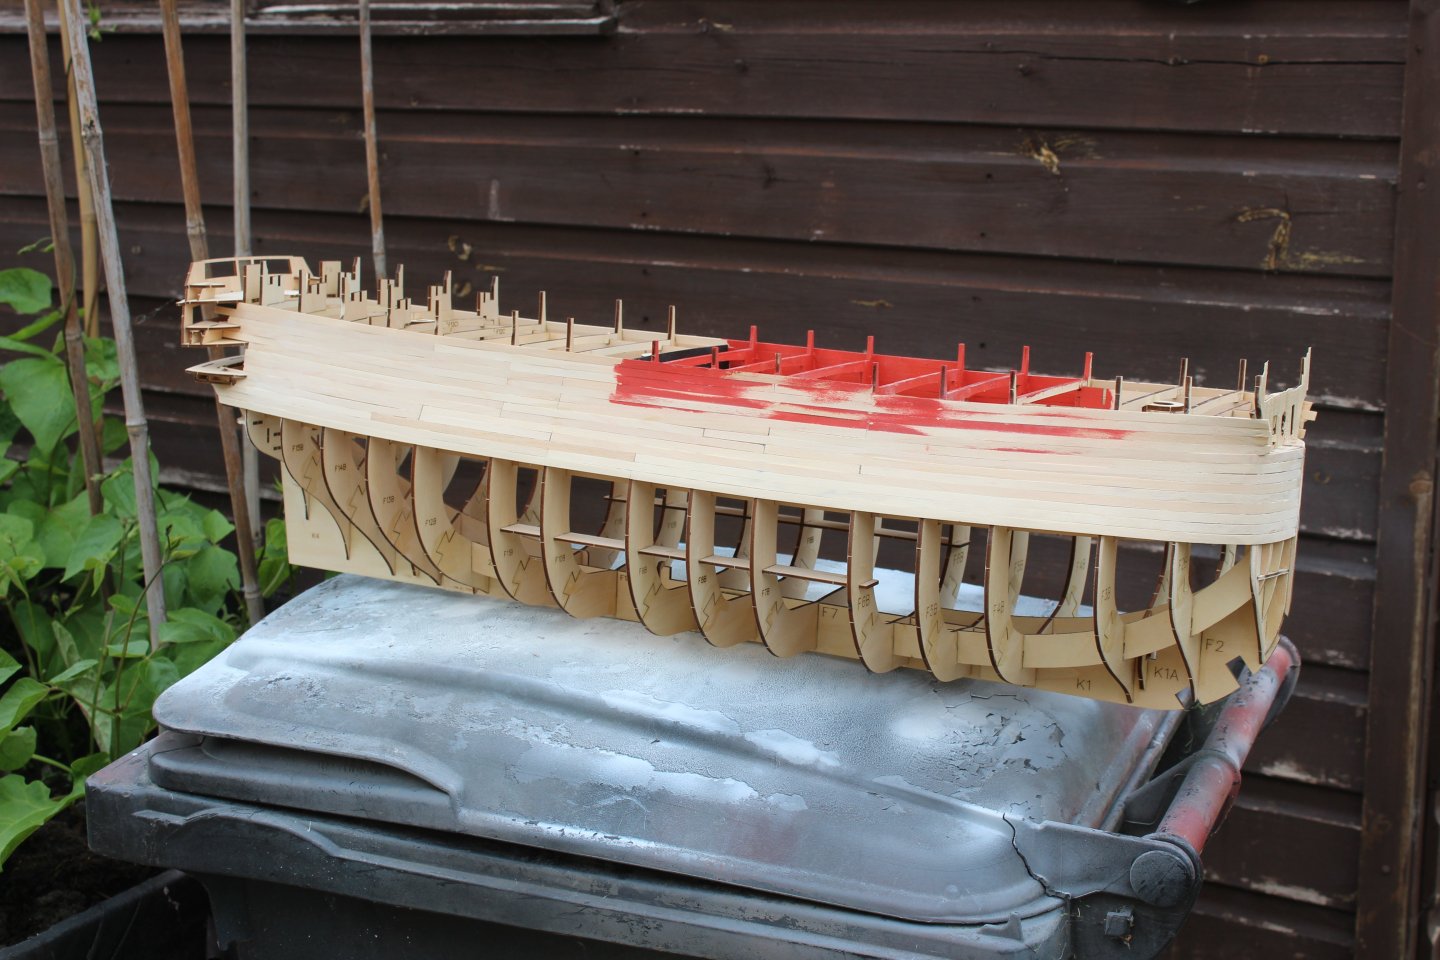
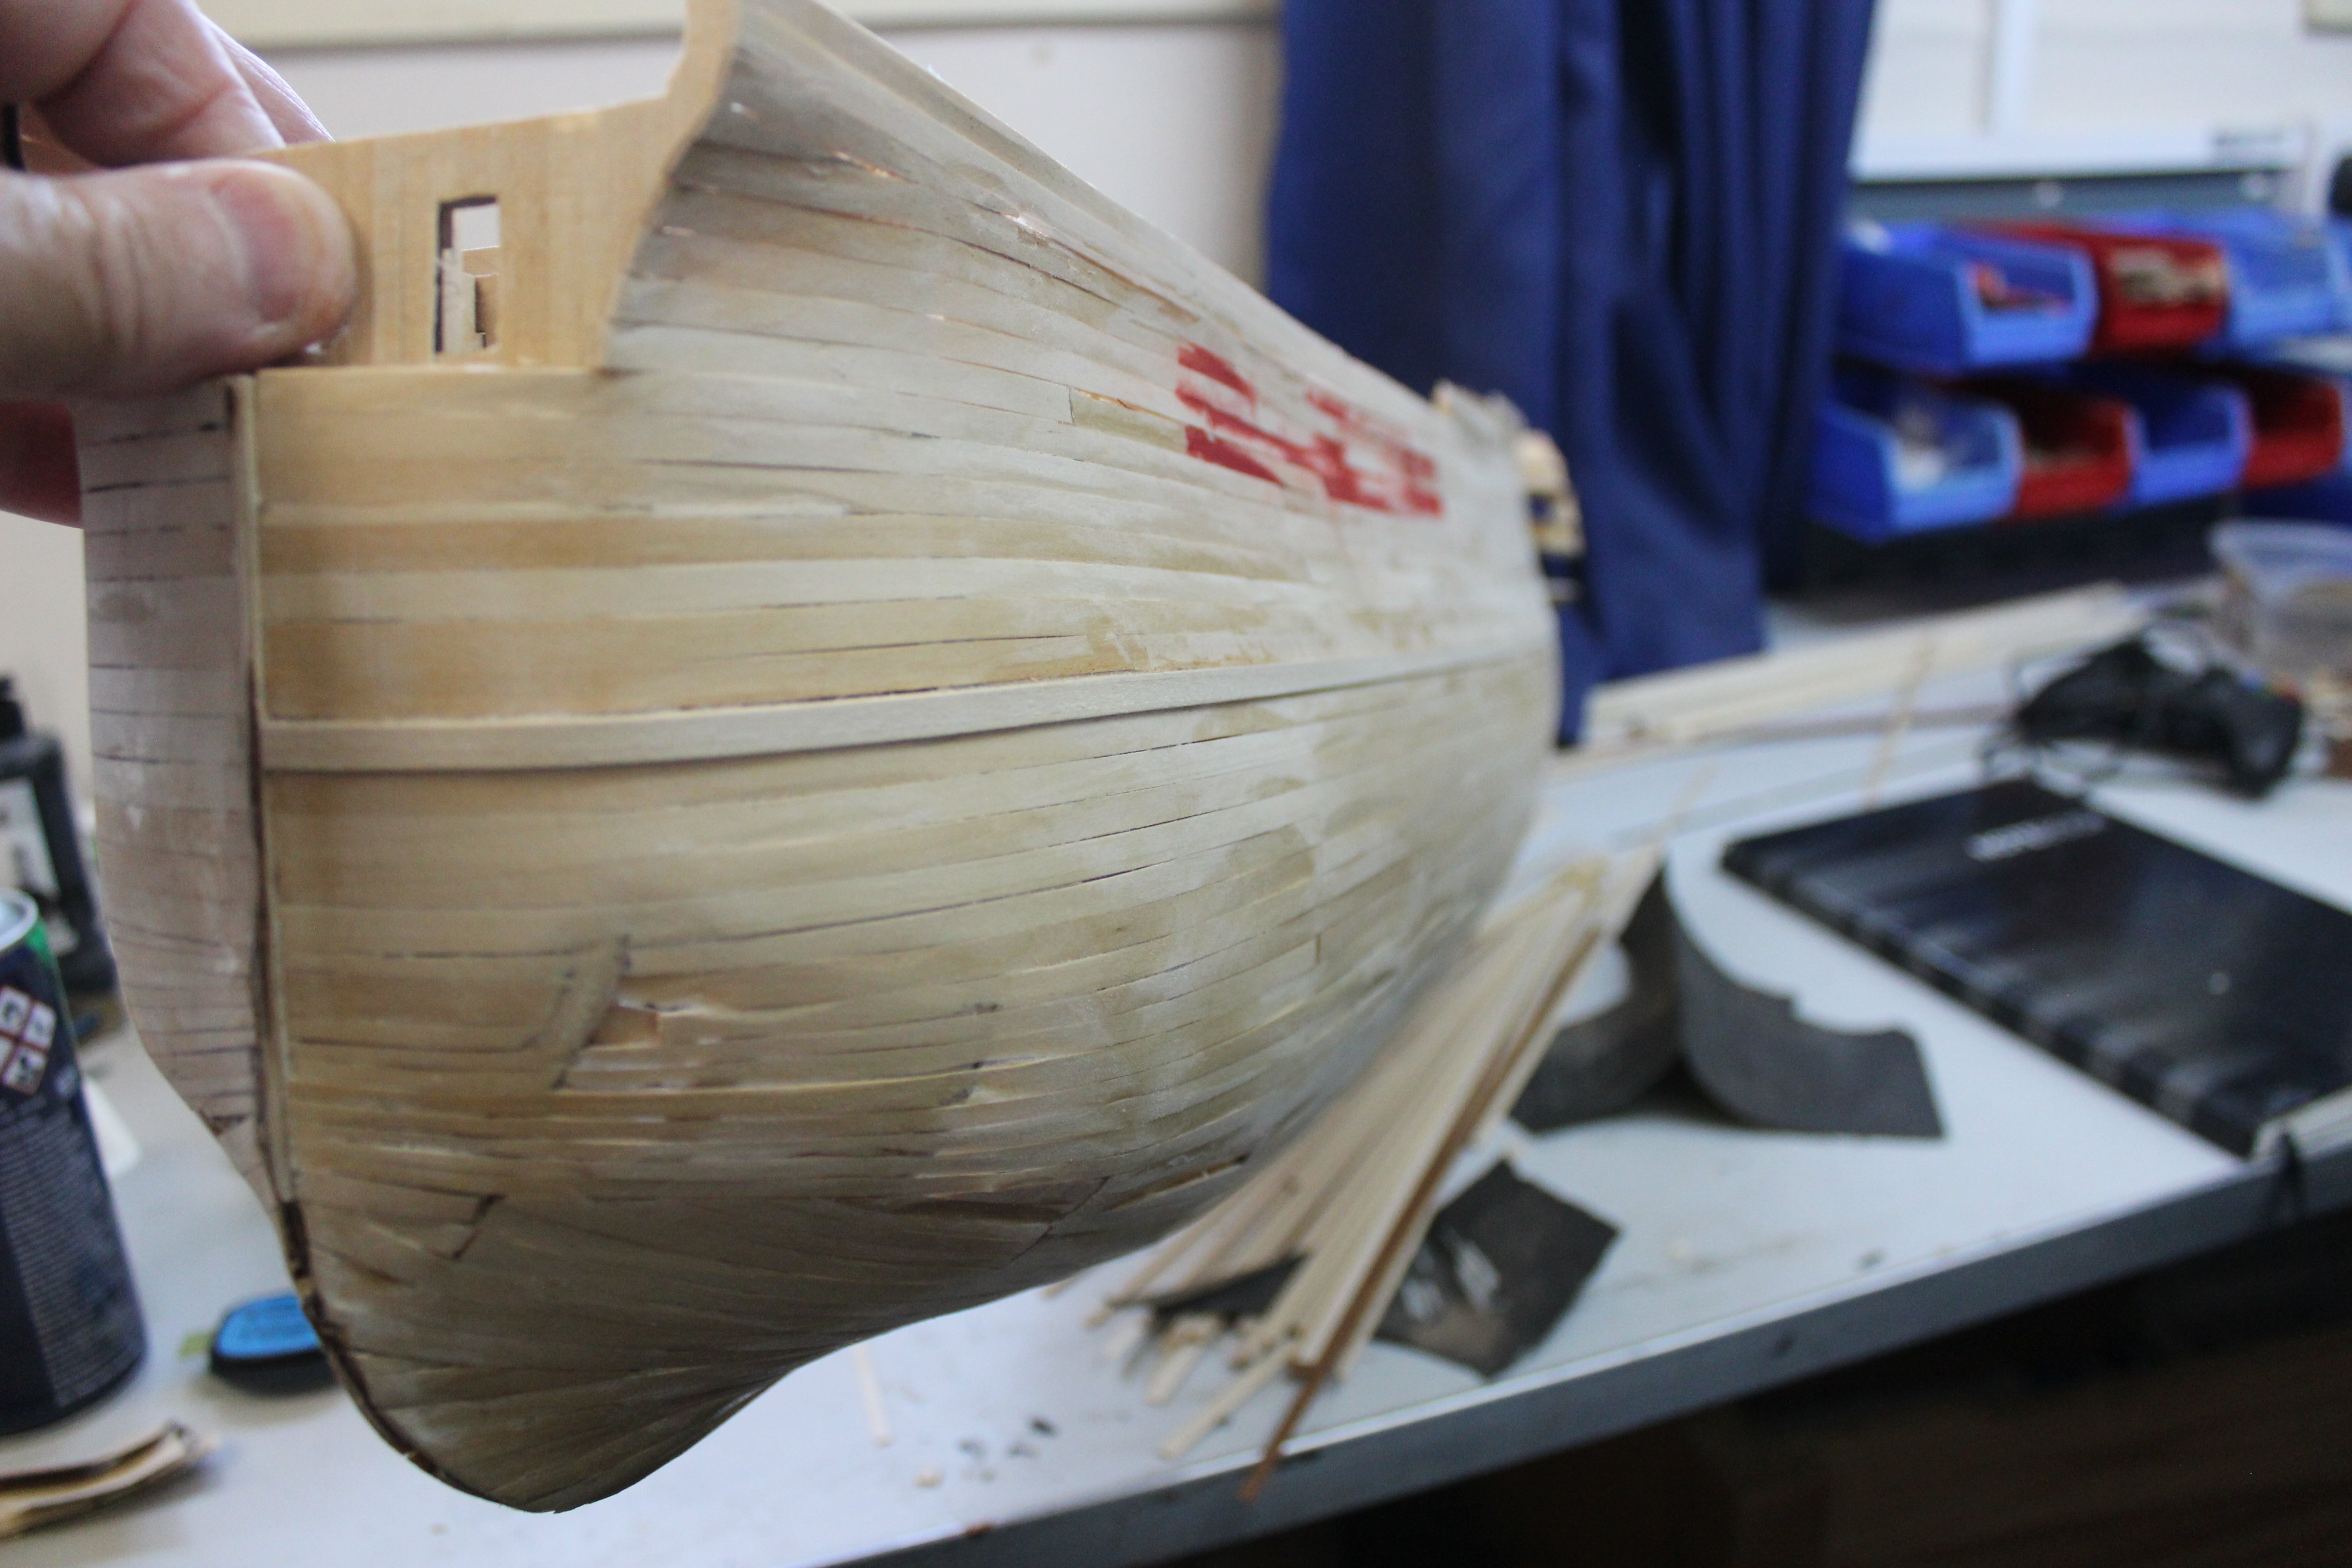
day 6 1st planking
good evening everyone
no regrets at all on changing the planking from single to double, i have 100m of 1x5mm lime strip on its way, might need some more, at present im using anything left from previous builds
gave her a bit of a sanding, starting to look like the instructions now, working on the gundeck before it more of less gets covered over


- James H, BLACK VIKING, GrandpaPhil and 13 others
-
15
-
1
-
-
20 hours ago, ccoyle said:
Welcome aboard!
At the risk of ruining any future good name you might have acquired among this august company, might I suggest you take a look at card models? They do not require lots of time, space, tools, or capital outlay (a big plus for starving students). You can check some out by clicking here.
Cheers!
unless you try the Marcle SD14 cargo ship
- Nirvana, AJohnson and Keith Black
-
3
-
welcome from the person who has lots of ships, and hardly ever finishes them
- Keith Black, Nirvana, Mashuno and 1 other
-
4
-
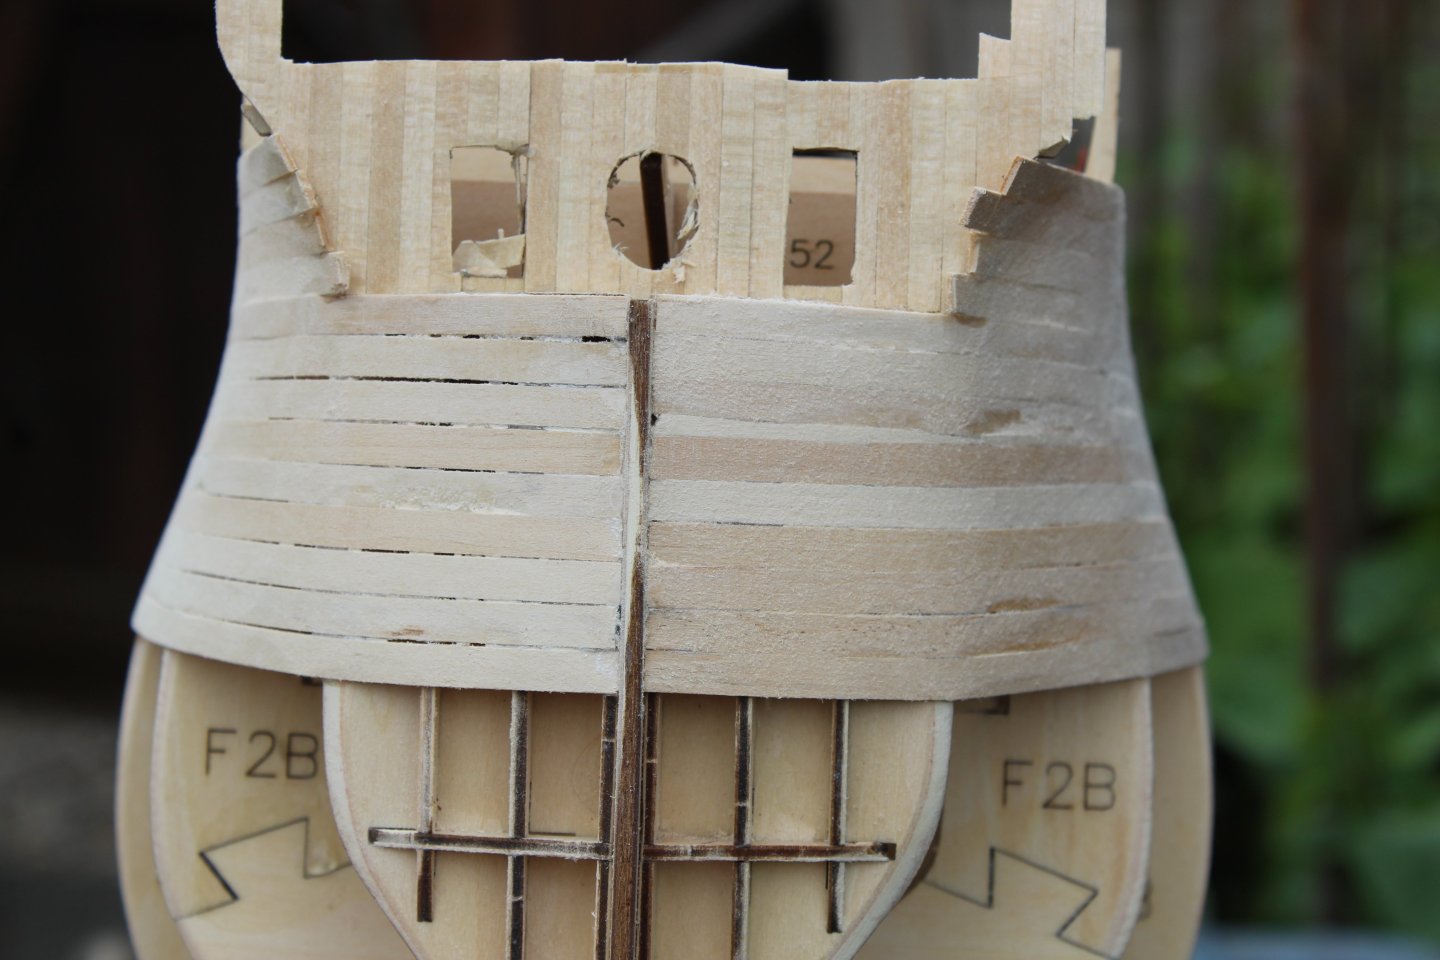
24 minutes ago, James H said:
Doing some planking BEFORE fairing?
Looking real good. Watching with interest.
no fairing required at all in that area, to wet outside for sanding, had the planks been longer than 300mm i would have had to do some
-
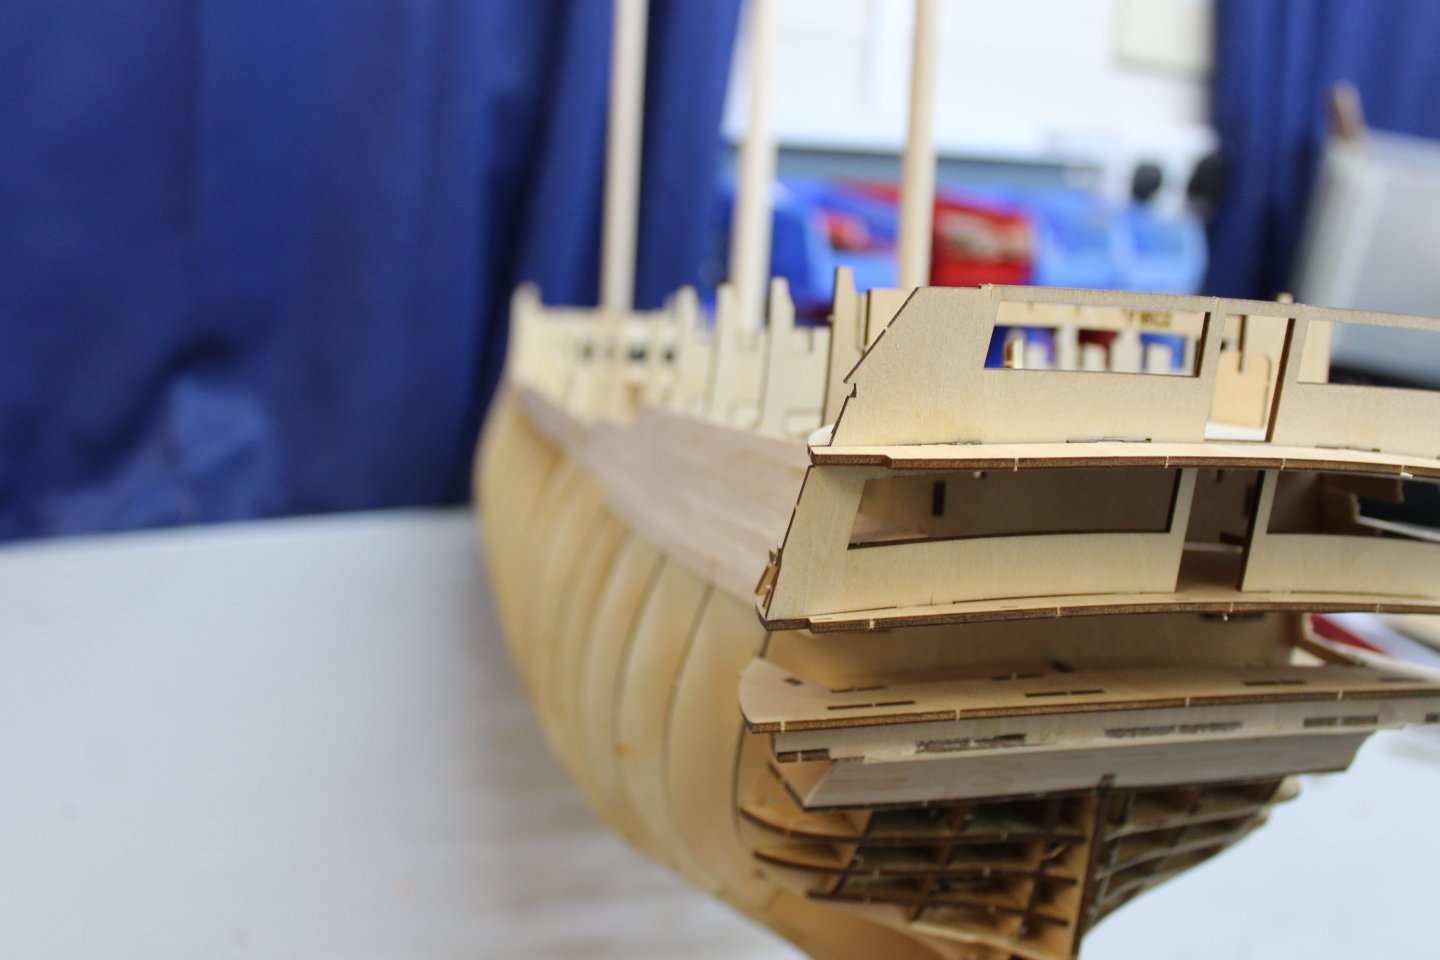
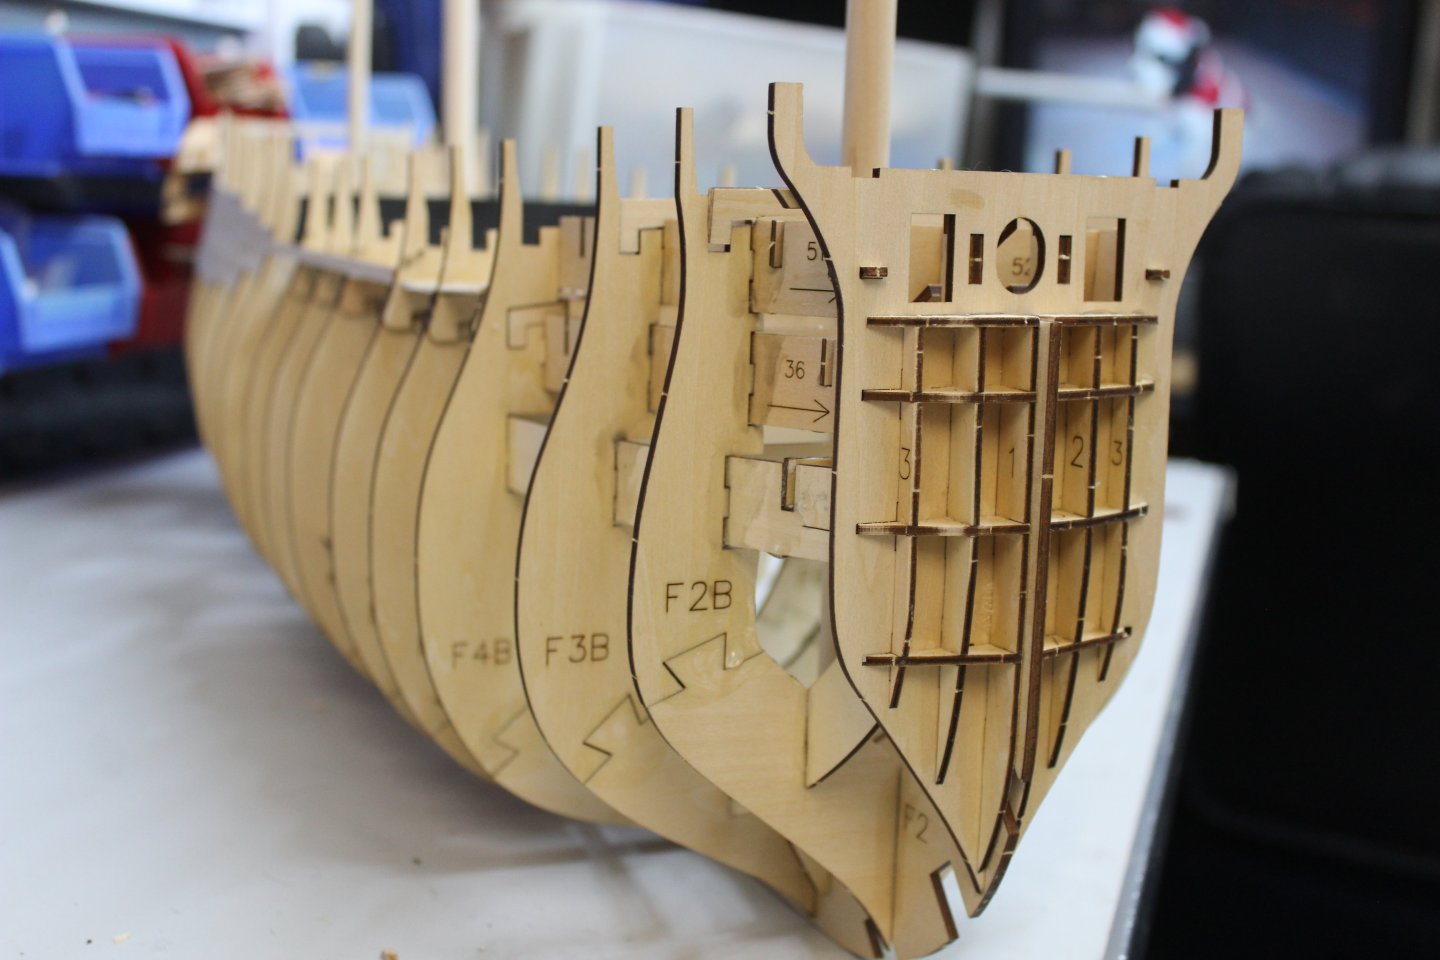
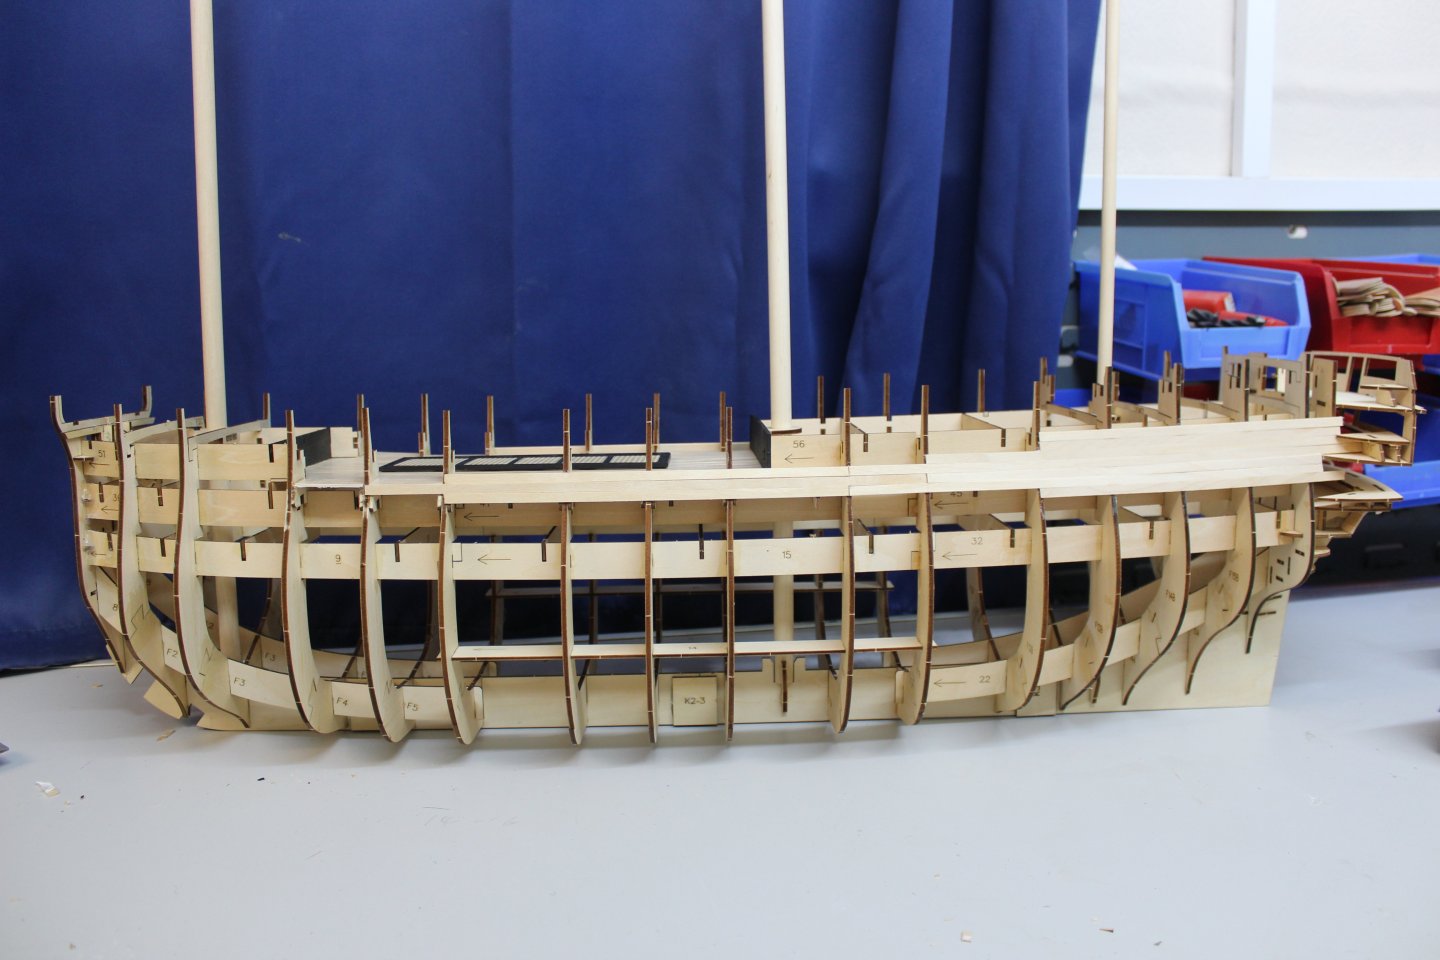
good evening everyone
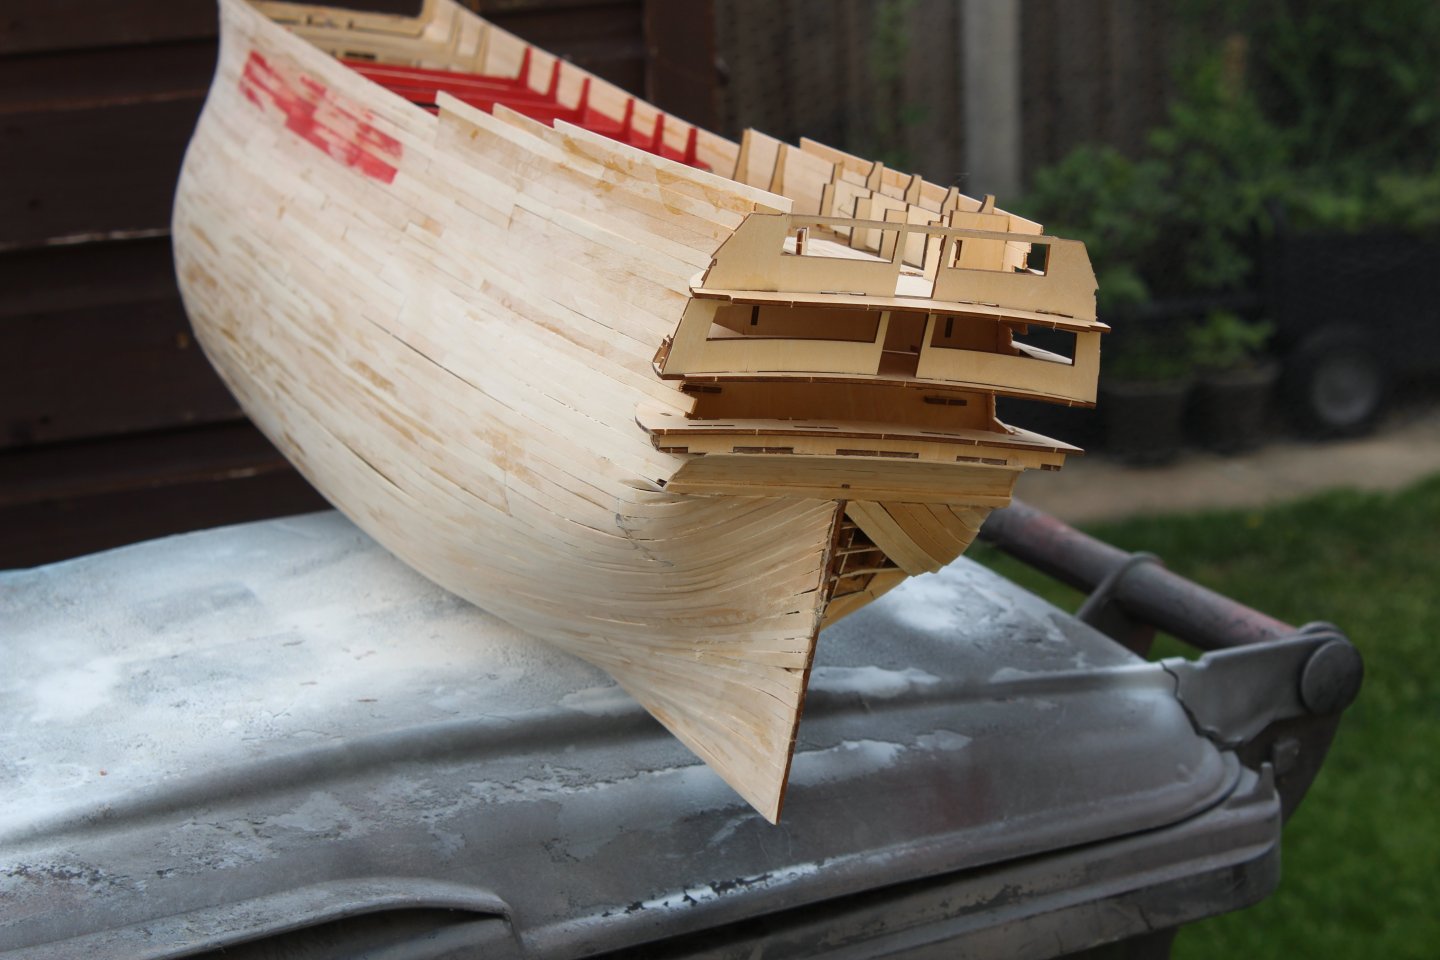
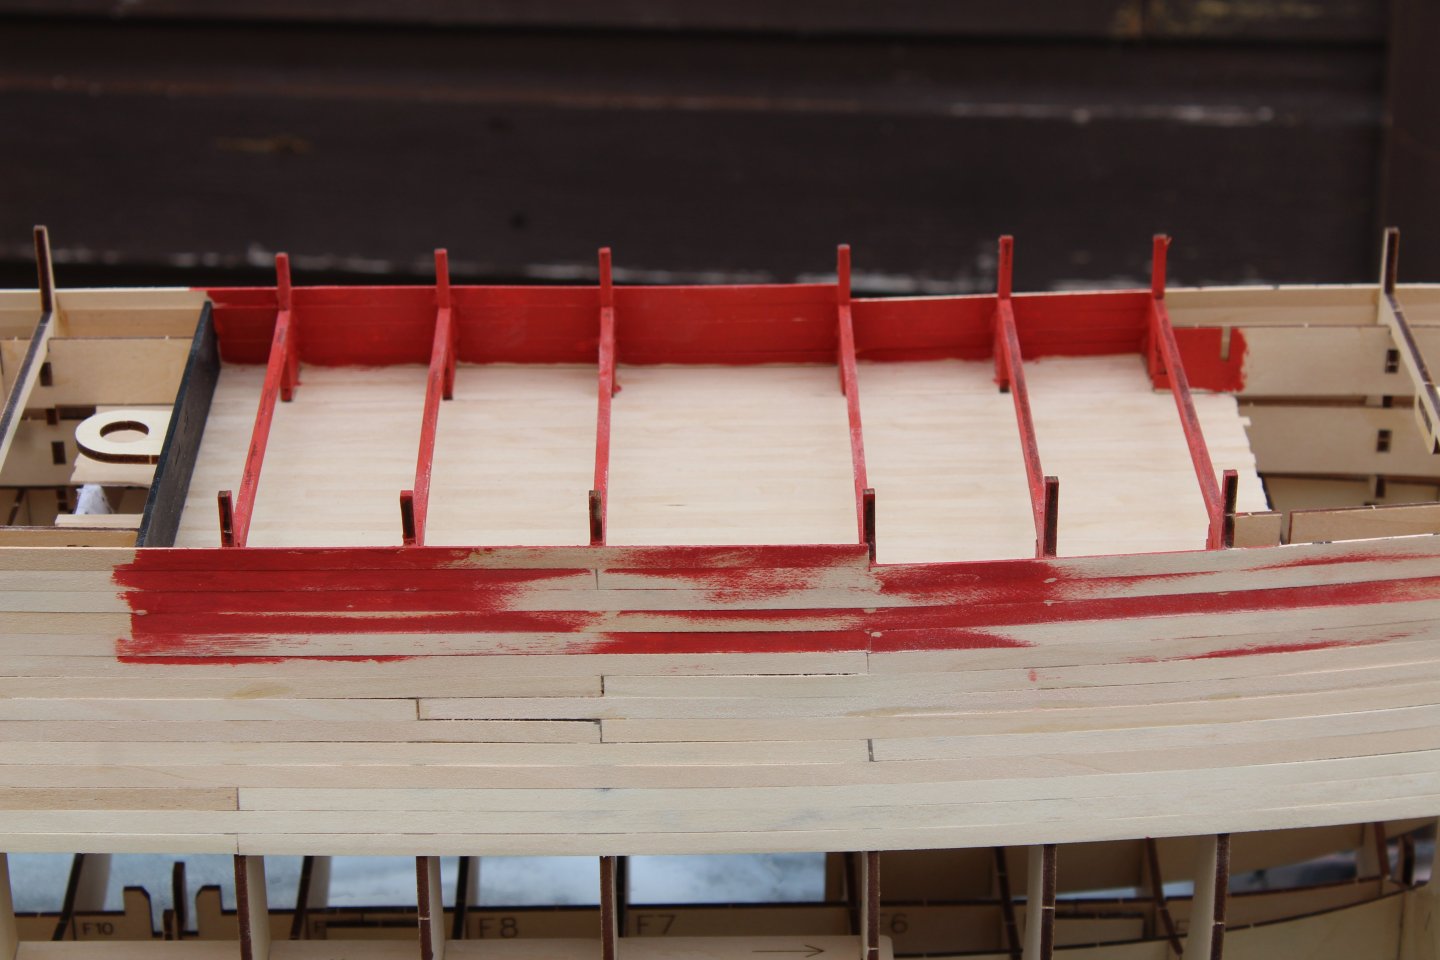
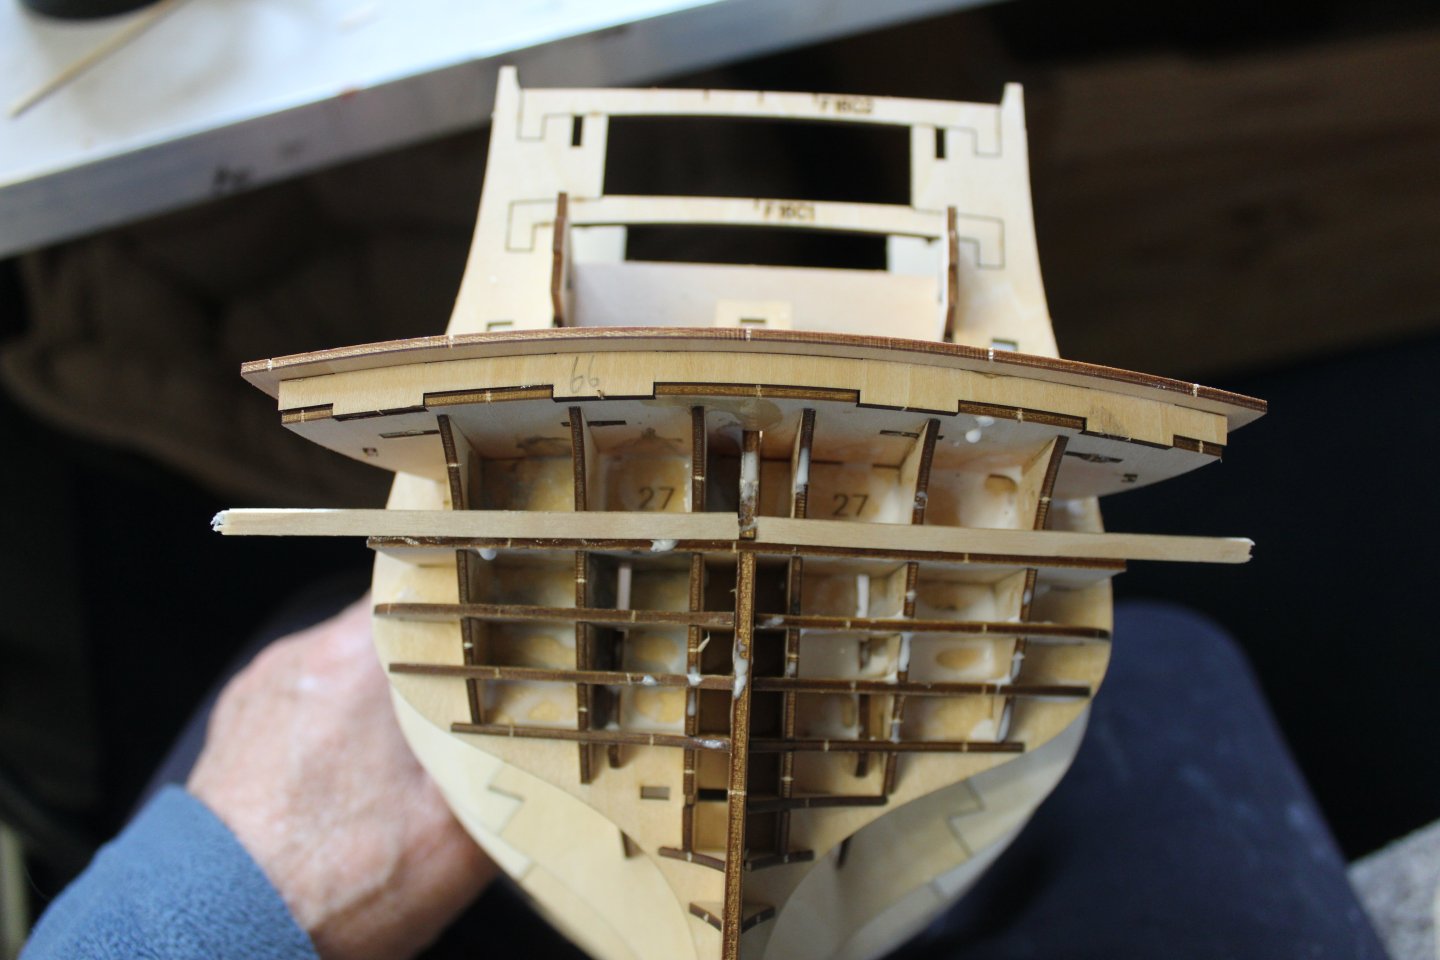
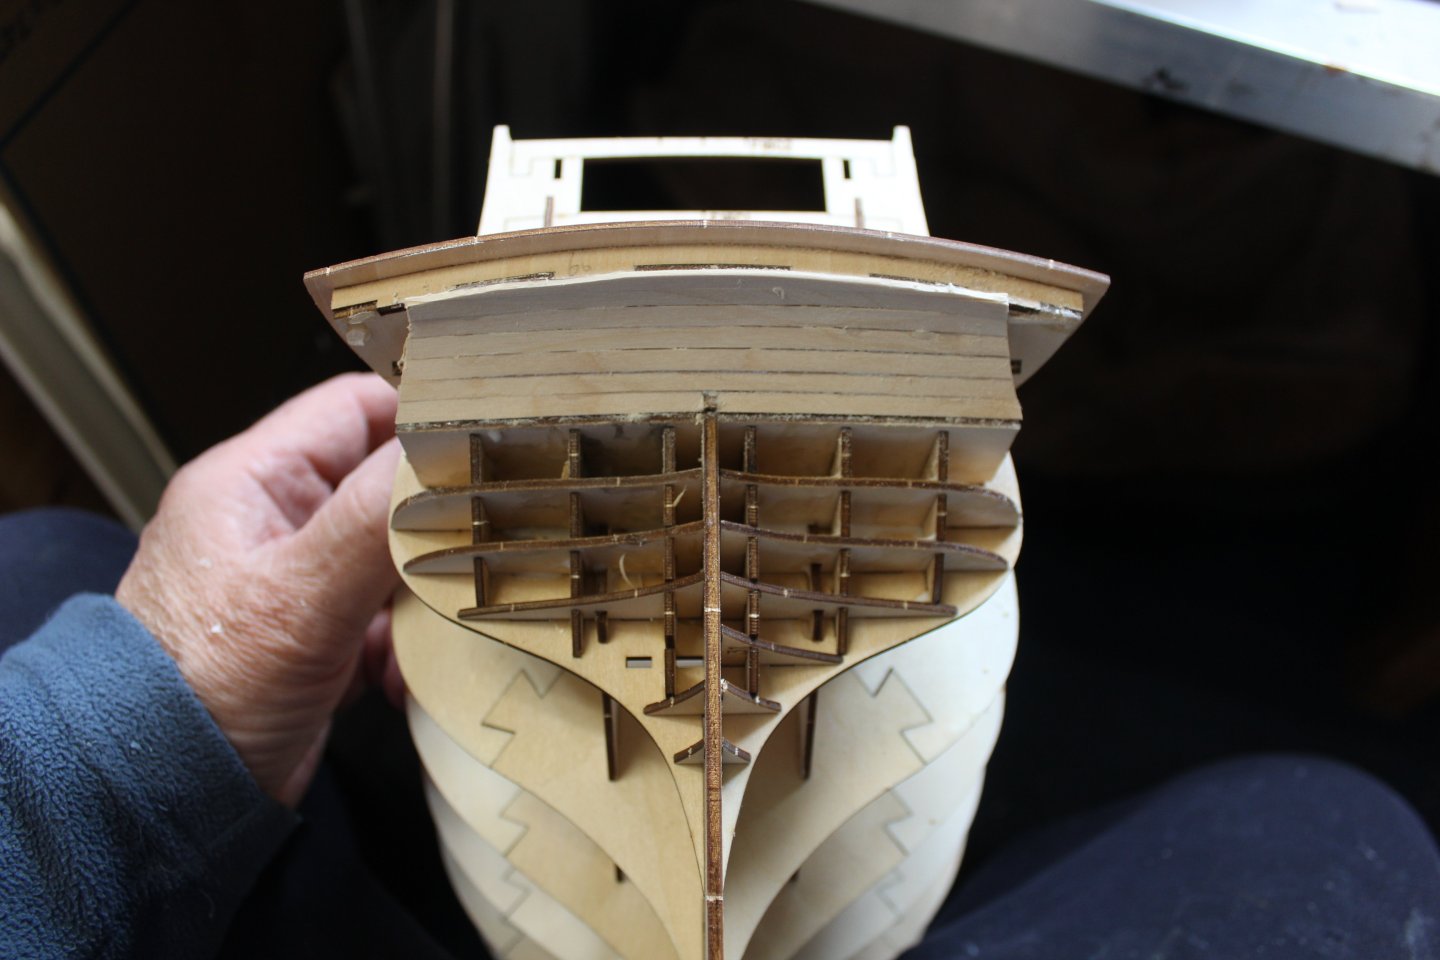
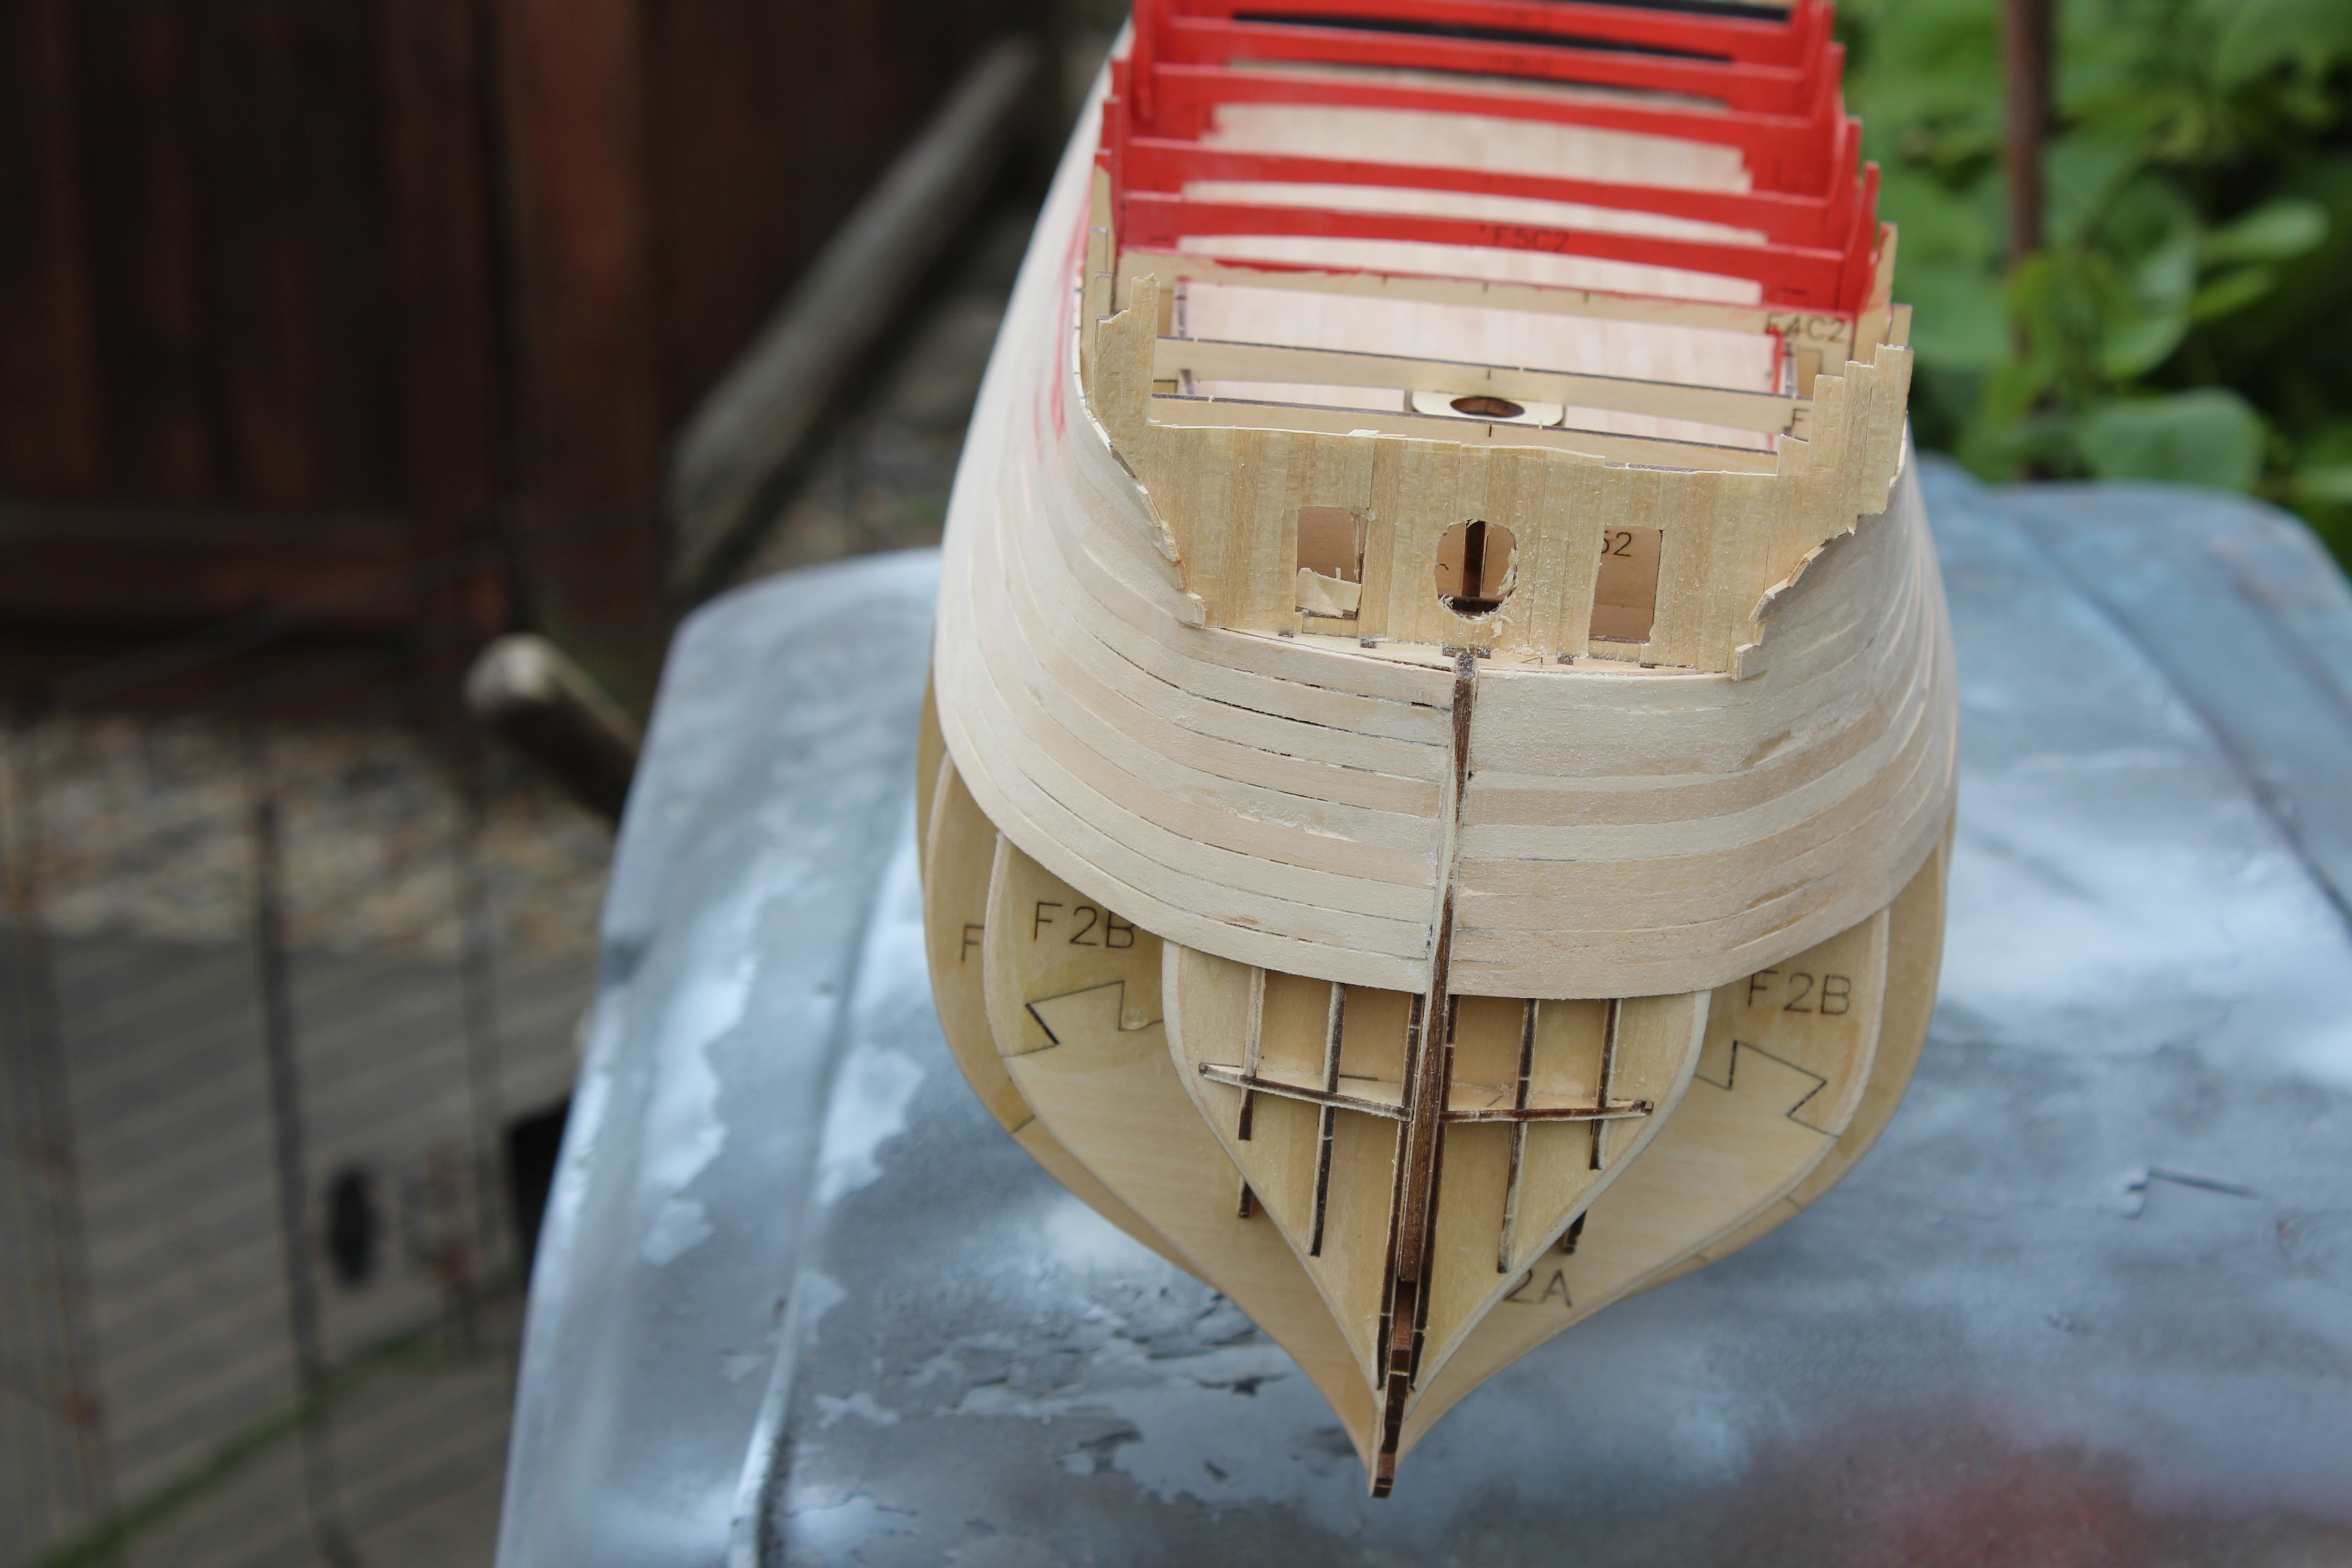
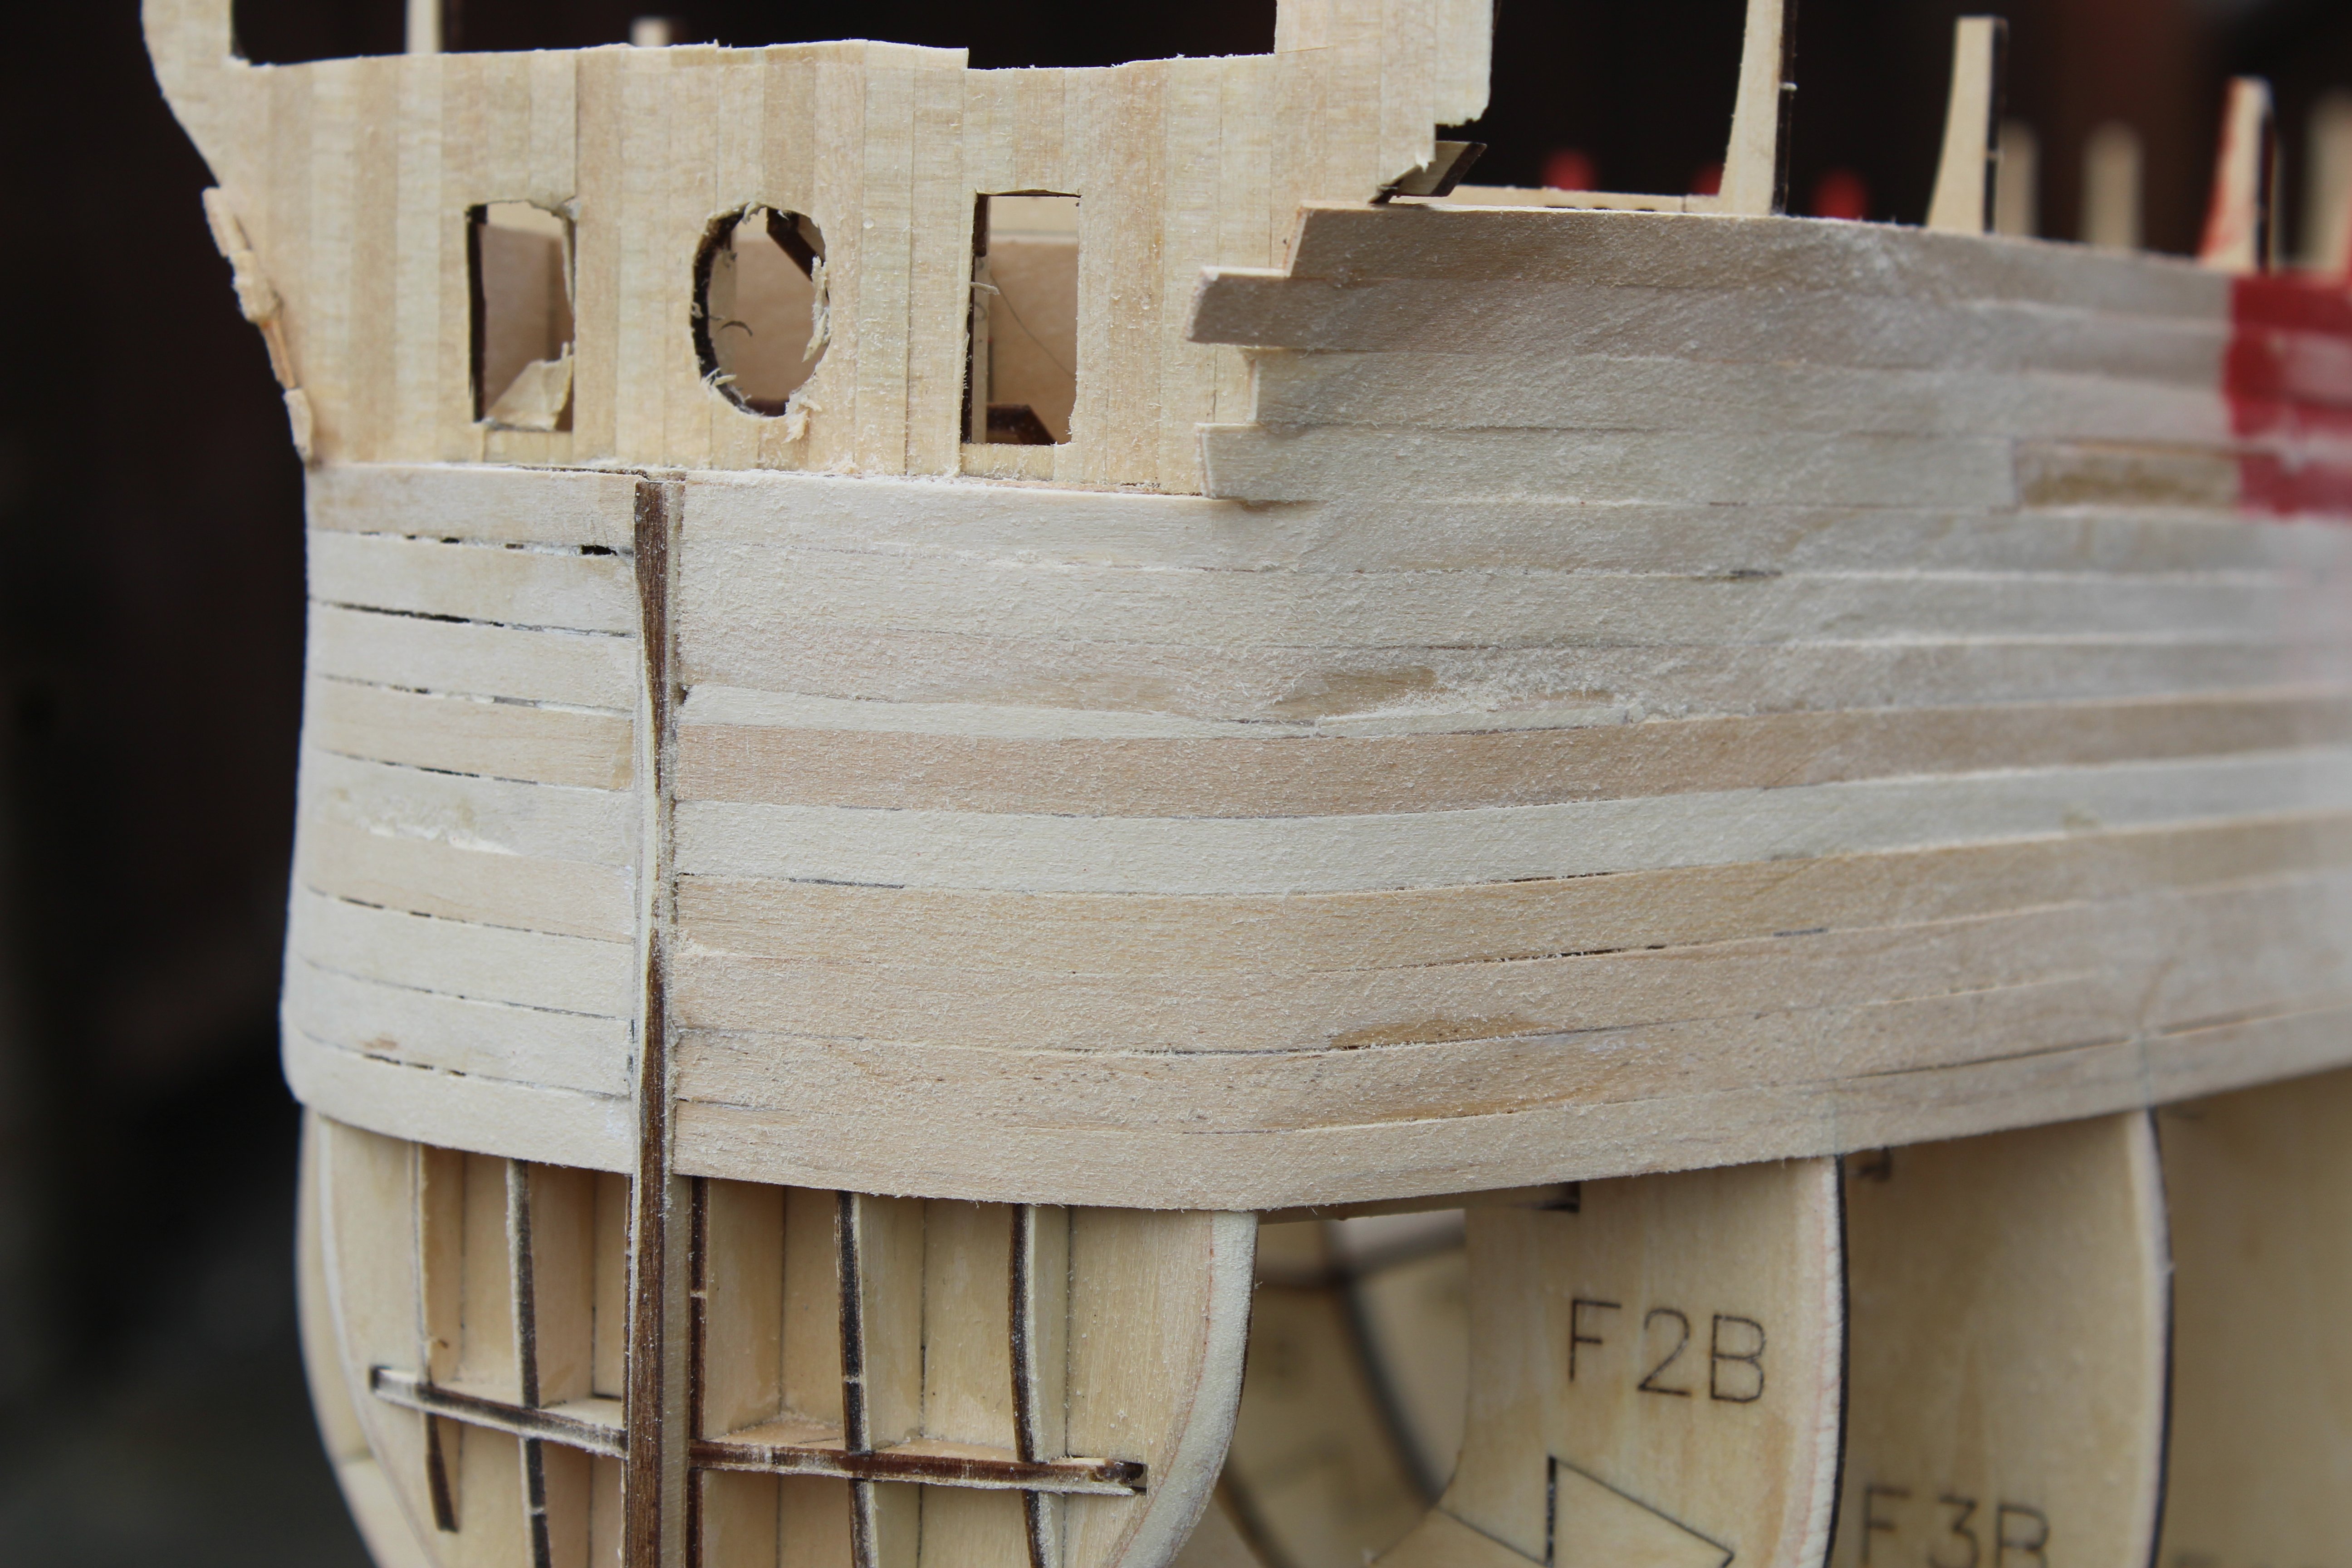
day 4, hull build up, and galleries, with some 1st planking
pleased with myself on how this id going so far,
90% of the frame is complete,
stern galleries have been made up
i have changed the kits requirement from singe planking to double, therefore using the kits 1x5mm in the wrong places until my ordered stock arrives.by planking the galleries now, i can protect them better, by going to double planking i think i will be in a better position to display the gunports shut, without having to do the lid linings
the light kit arrived today, Thank you @chris watton and i will be possibly sorting that out in a couple of days
that pretty well sums it up for today


-
6 hours ago, mtdoramike said:
Absolutely stunning work on the Victory with only one criticism: Why have such a magnificent ship as the Victory with all those 100 plus cannon and not have them all showing loud and proud? To me, that is the best part of building the victory.
i had planned for her to be with a full sail set, then changed my mind, also i had not seen one in that configuration, and my latest build will be the same,
-
wonderful work, so very clean and tidy
- Paul Le Wol, yvesvidal and cotrecerf
-
2
-
1
-
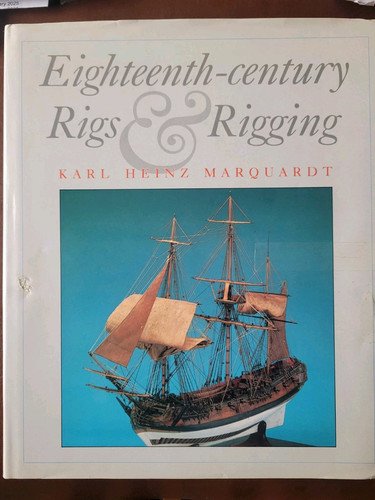
on recommendation i have now purchased this
EIGHTEENTH - CENTURY RIGS& RIGGING. KARL HEINZ MARQUARDT. IST ENGLISH EDITION...


Oseberg Viking Ship (v3) by Kevin - Pavel Nikitin - 1/25 - started June 2025
in - Kit subjects built Up to and including 1500 AD
Posted
Thanks guys,
i believe from what @James H has said, the there is quite a difference for the better on the V3