HOLIDAY DONATION DRIVE - SUPPORT MSW - DO YOUR PART TO KEEP THIS GREAT FORUM GOING! (Only 66 donations so far out of 49,000 members - Can we at least get100? C'mon guys!)
×


Kevin
-
Posts
7,010 -
Joined
-
Last visited
Content Type
Profiles
Forums
Gallery
Events
Everything posted by Kevin
-
 hope you will post the build log on here, we are a bit short on mountfleet kits
- 337 replies
-
- 2
-

-
- finished
- mountfleet models
- (and 1 more)
-
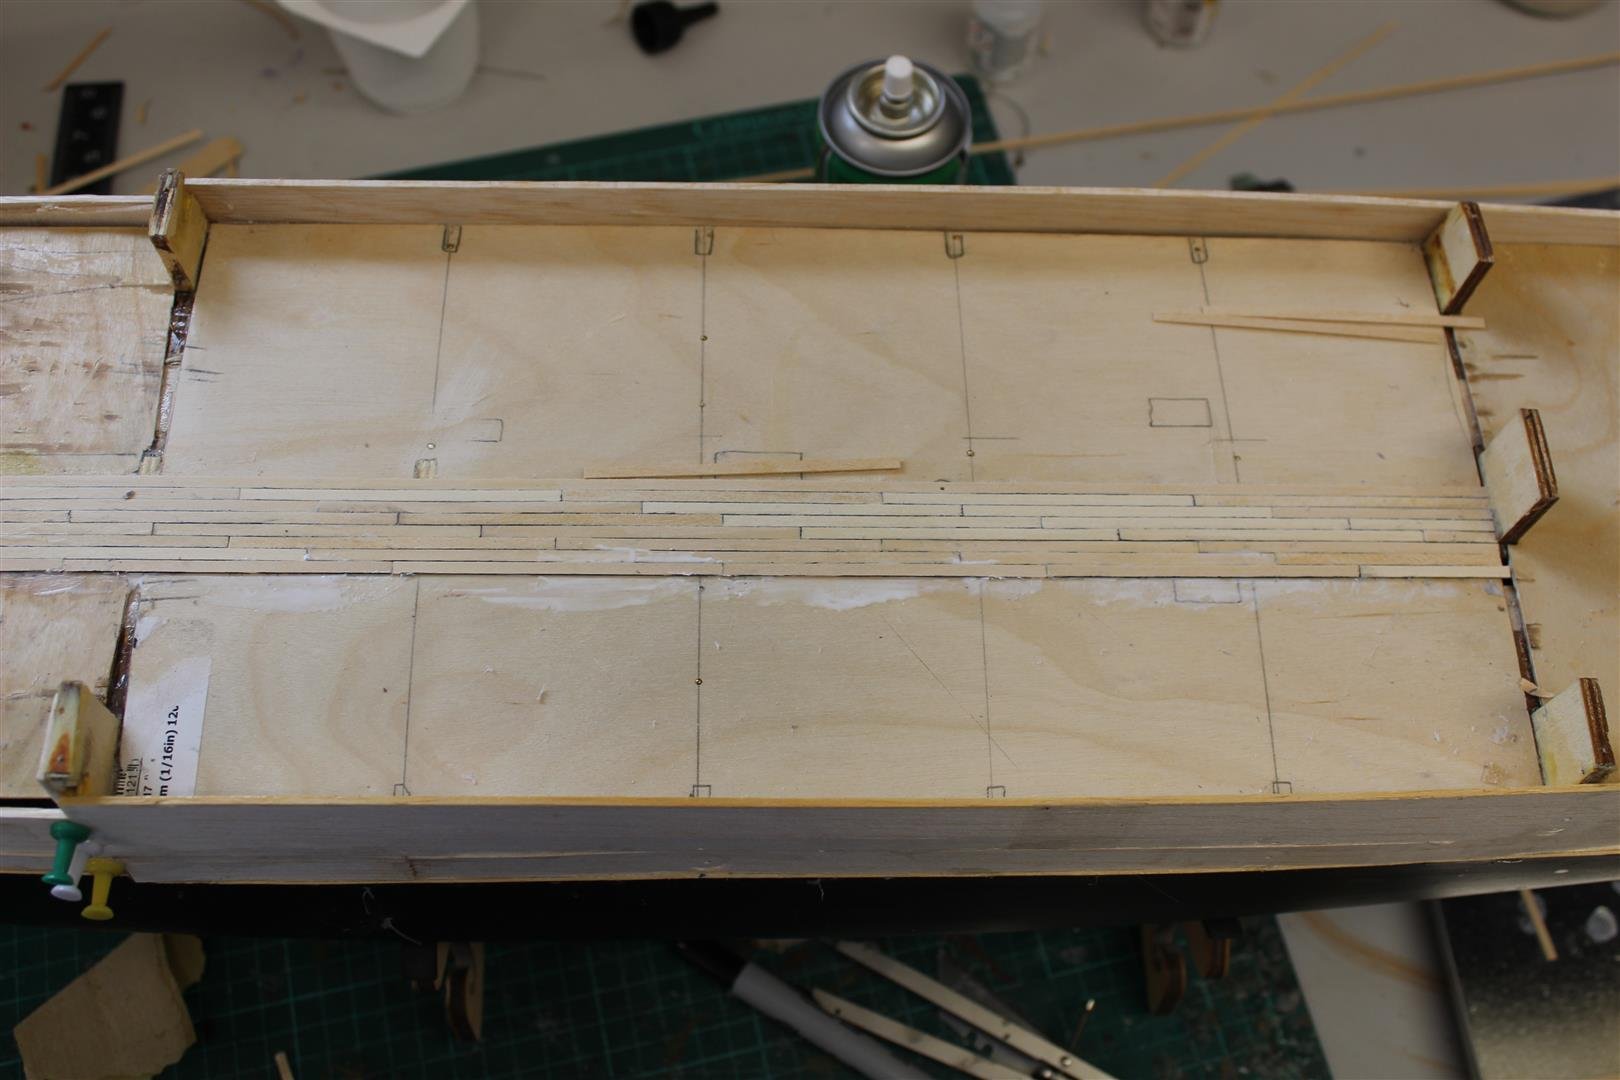
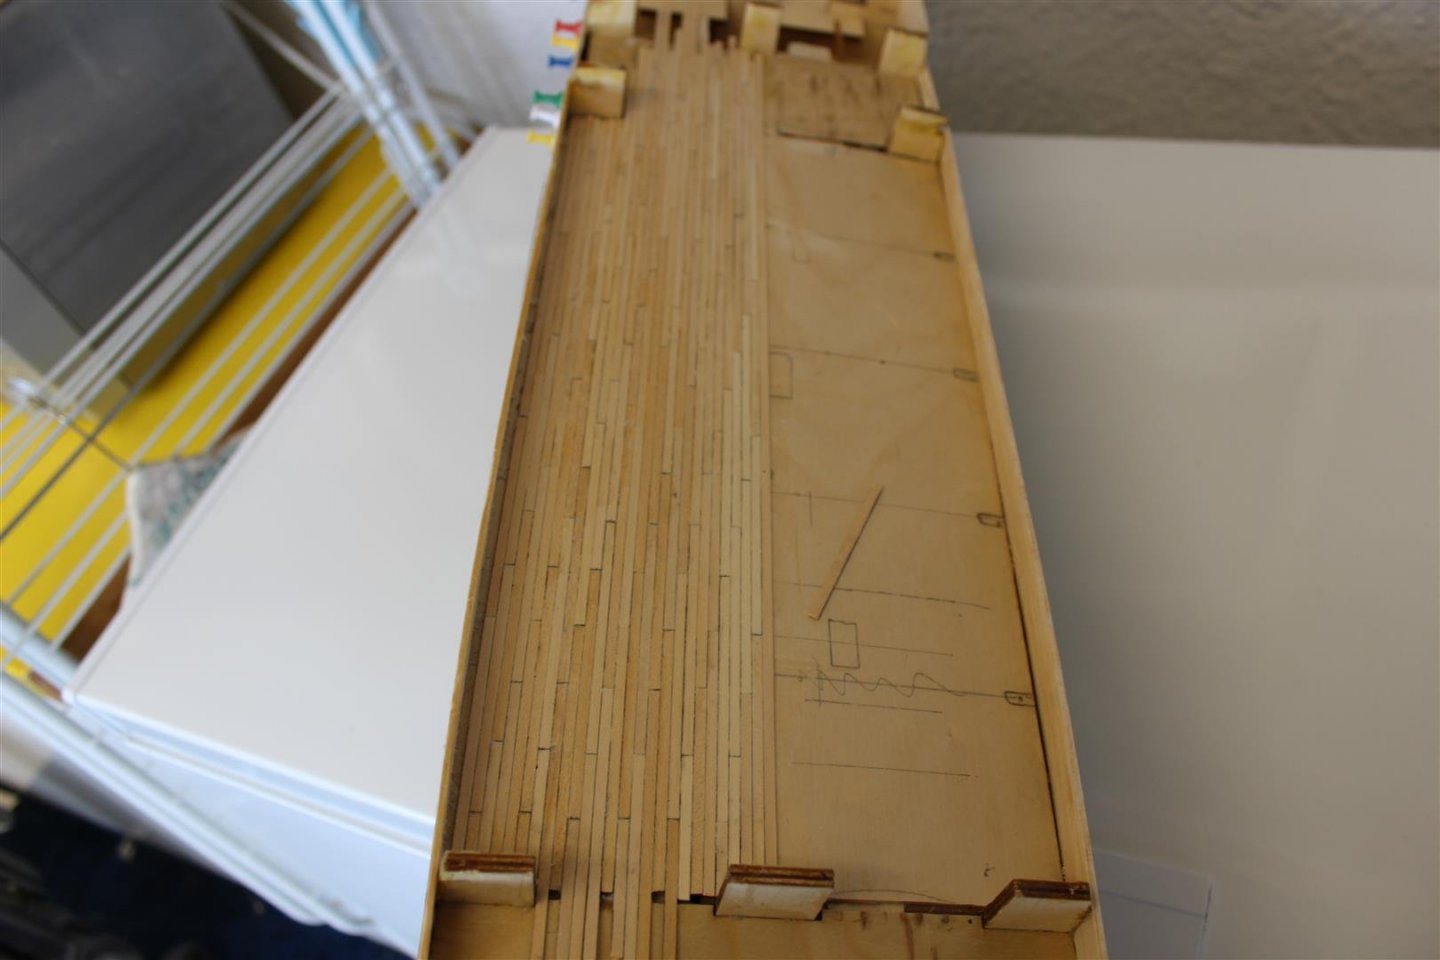
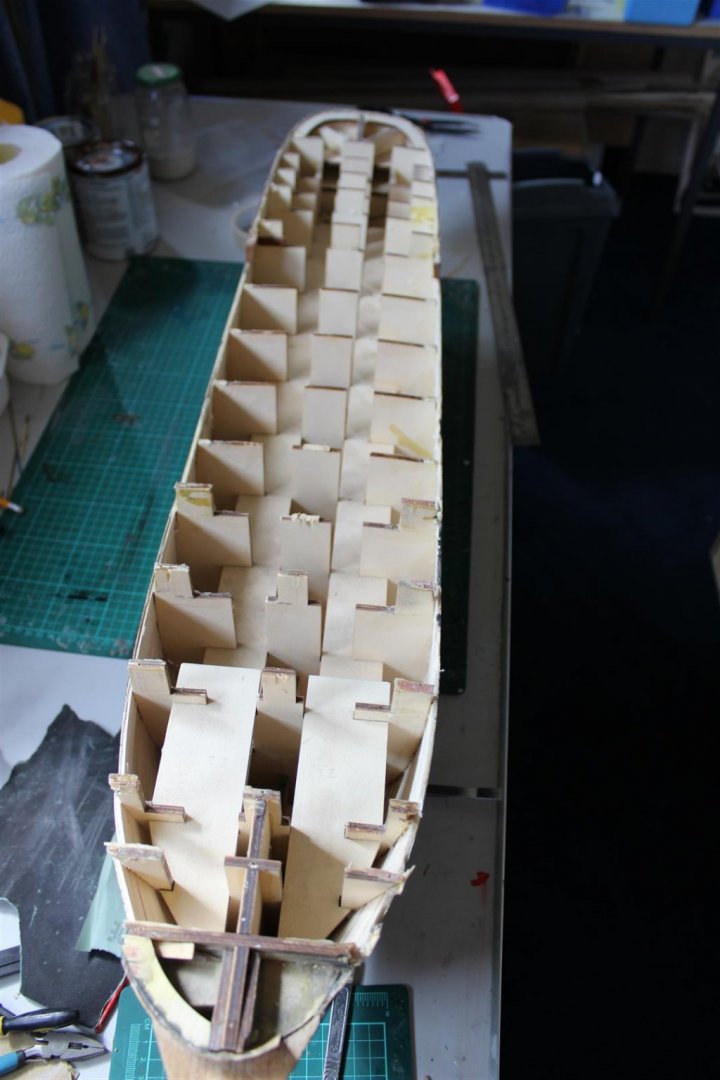
well most of the first planking is complete, however it surrounds the two upperdecks, and i wanted to deck the midships section, so i have delayed that, The deck planks are Lime 3mm, as i find the supplied 3mm brown strips very brittle and to dark for my liking altogether, this is working out very well, everything is fitting better (well im happy anyway)


- 273 replies
-
- 9
-
-
- panart
- amerigo vespucci
- (and 1 more)
-
im sure if you contact them now, they will be ready for customers, its normally about six weeks from ordering to delivery
- 337 replies
-
- 3
-
-
- finished
- mountfleet models
- (and 1 more)
-
much better, and im sure you meant 8cm lengths and not 8mm. i have just started laying the main deck in lime
-
Matthias from Berlin, Germany says Hello
Kevin replied to victory78's topic in New member Introductions
welcome to MSW -
lovely work, its going to be a very fitting tribute
-
i deleted the message after i posted and went to find the book to give the info, but it has been put away, so juat taken a photo of mine, no doubt thats wrong as well, but i went by mcKays and others, the fact that mine is the caldercraft should make no difference
-
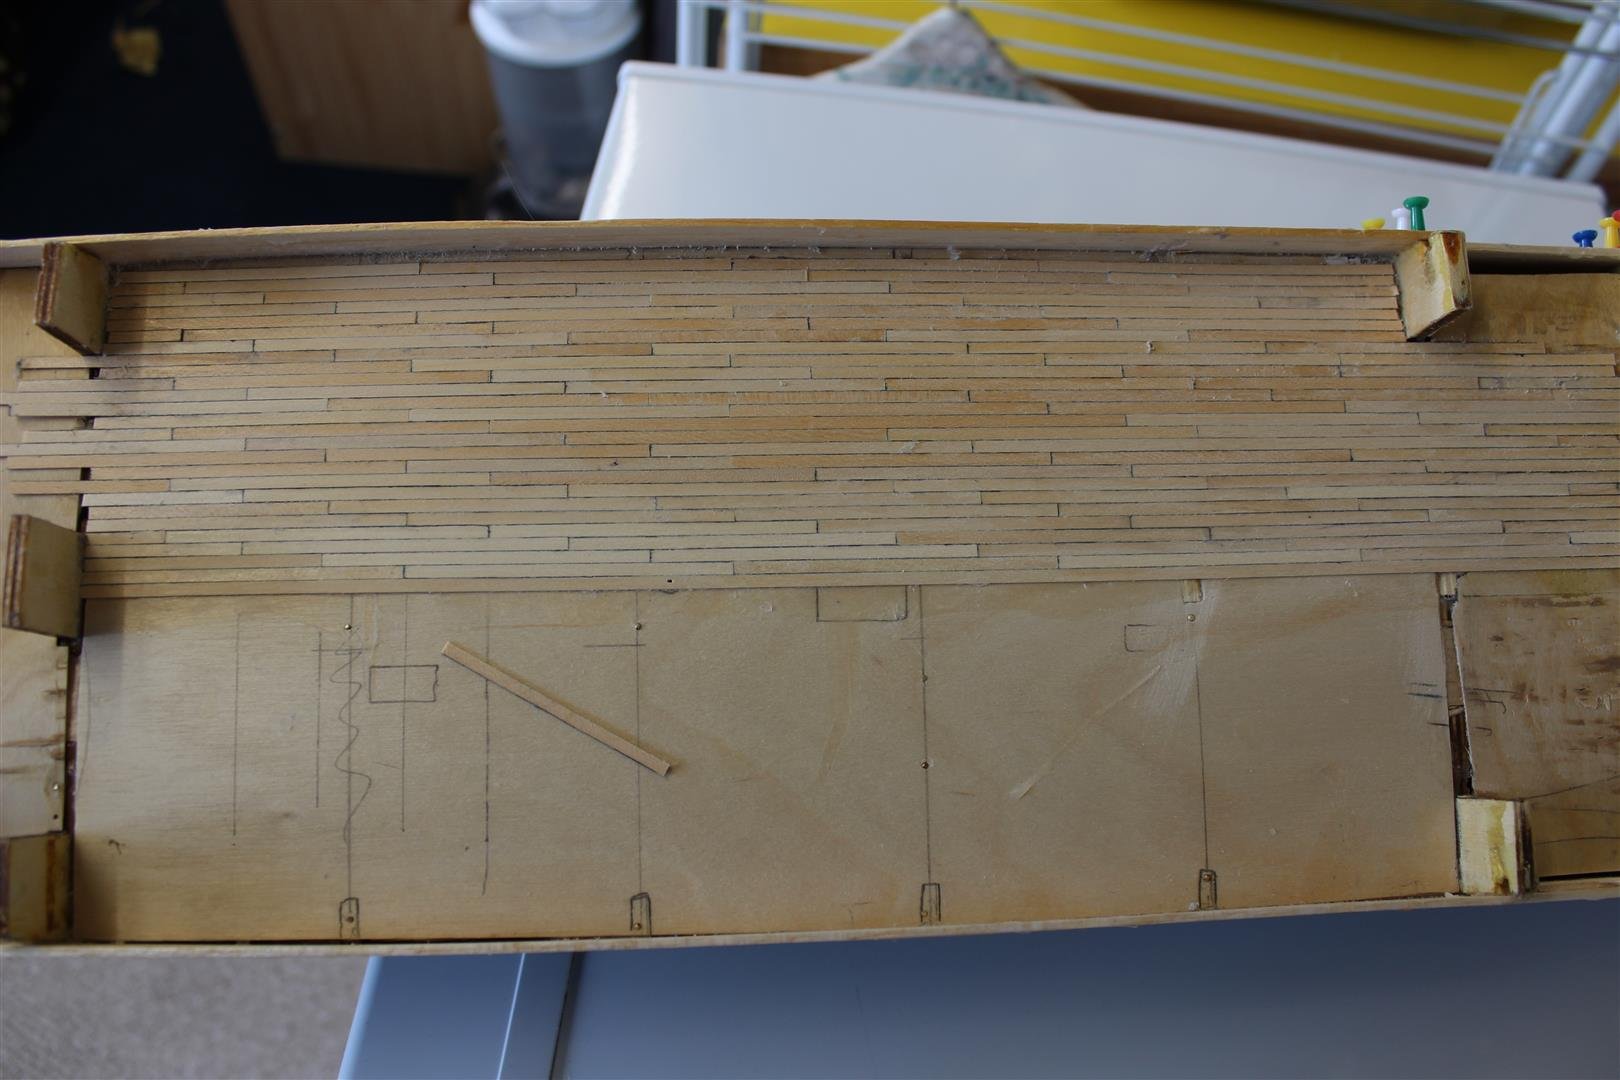
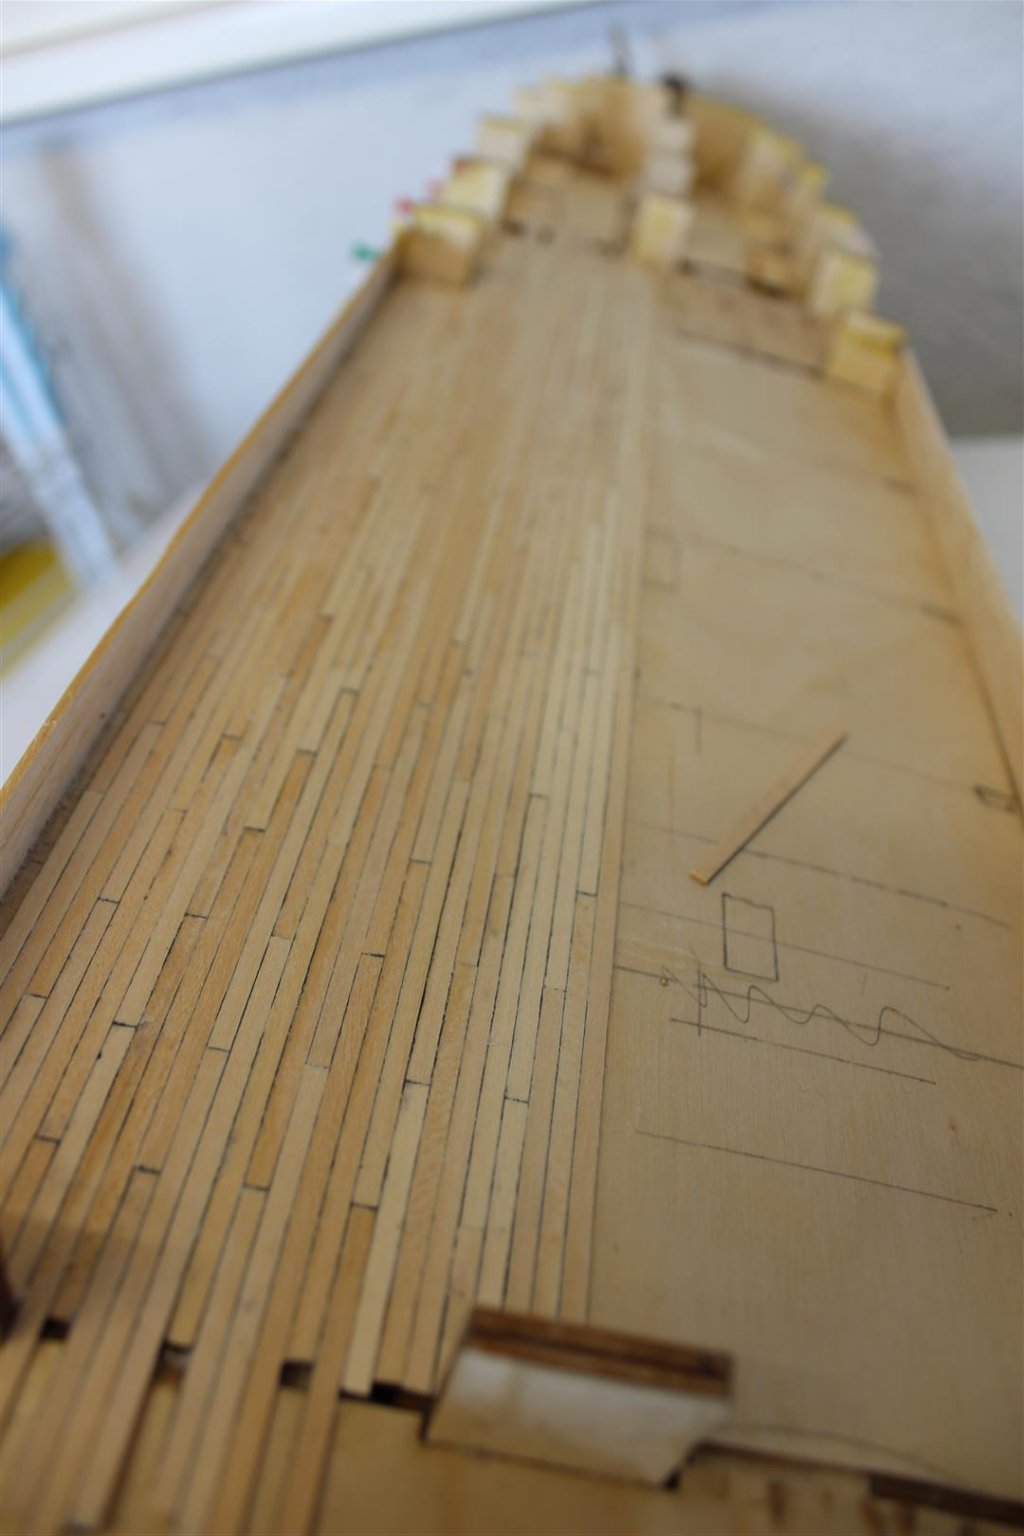
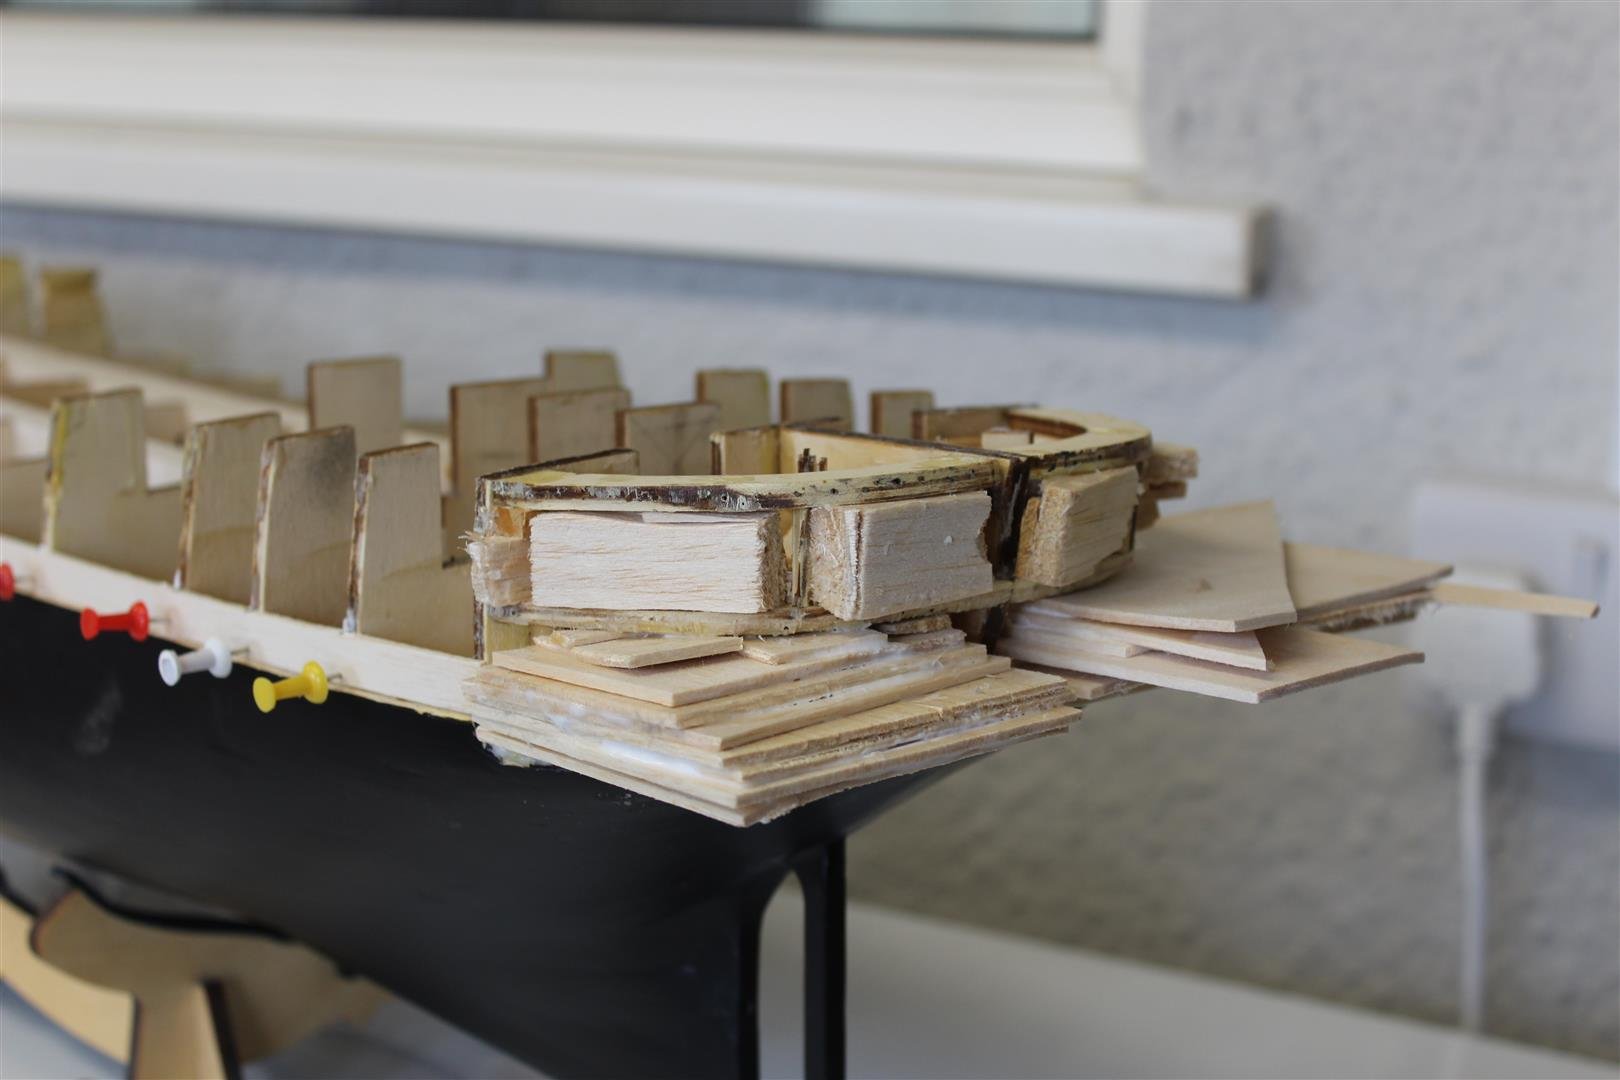
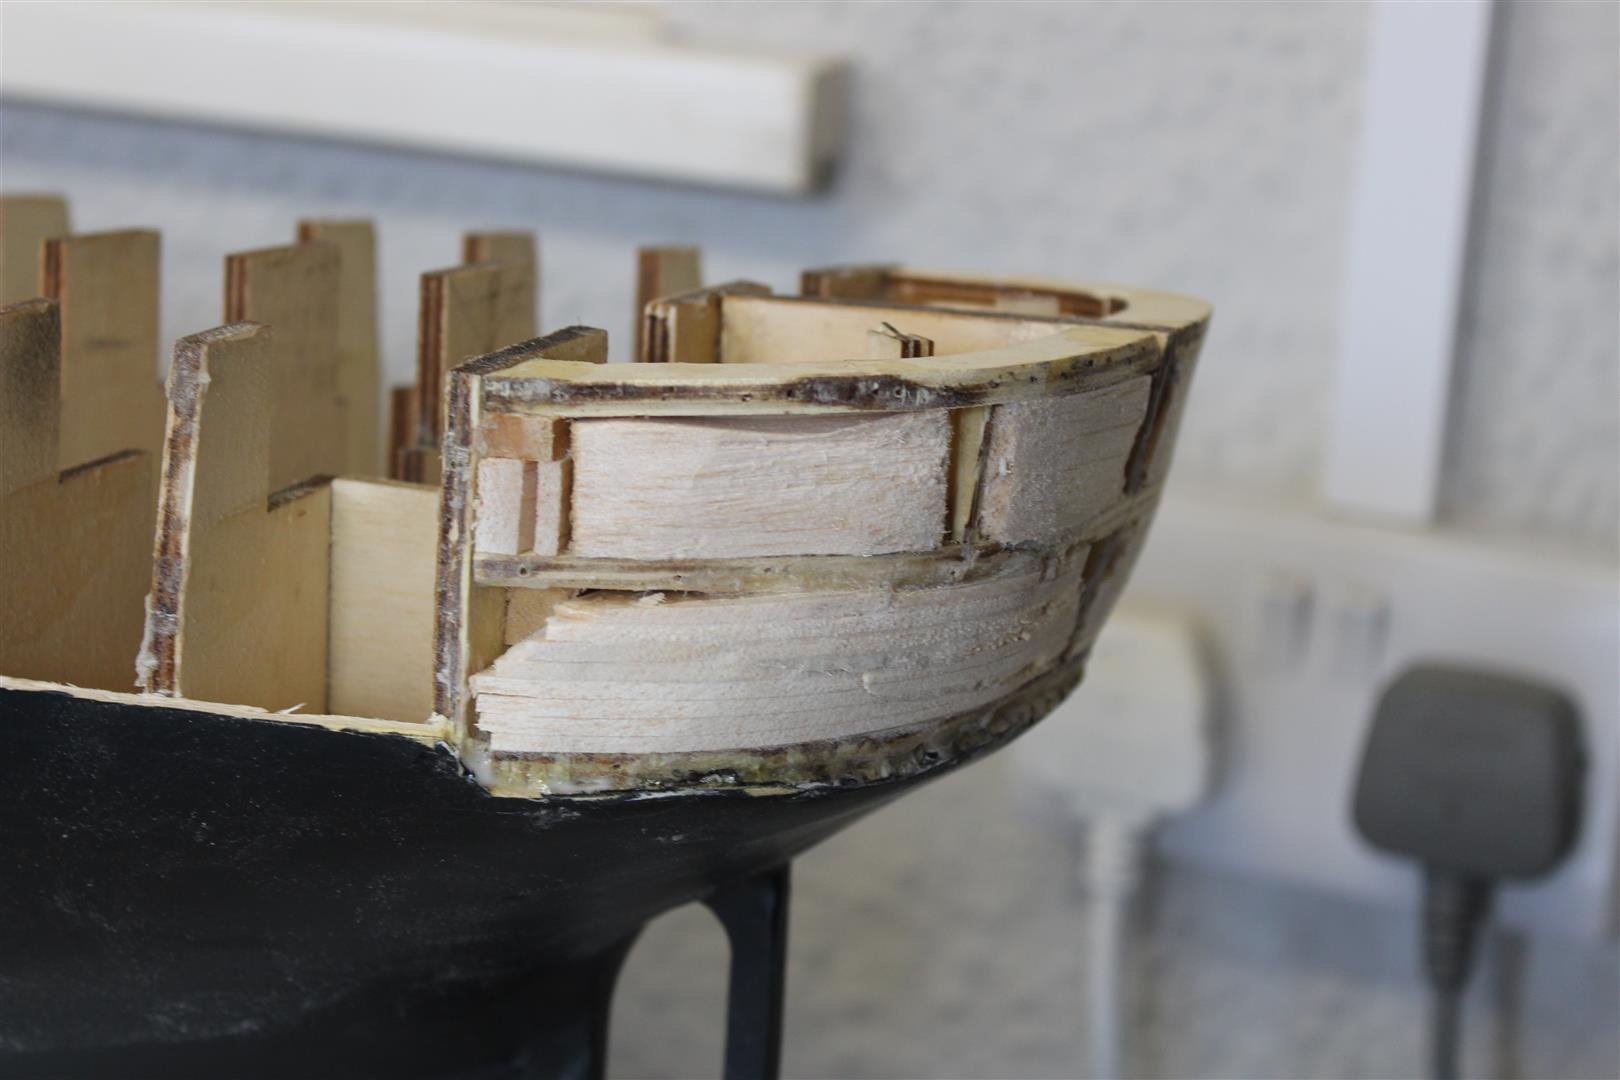
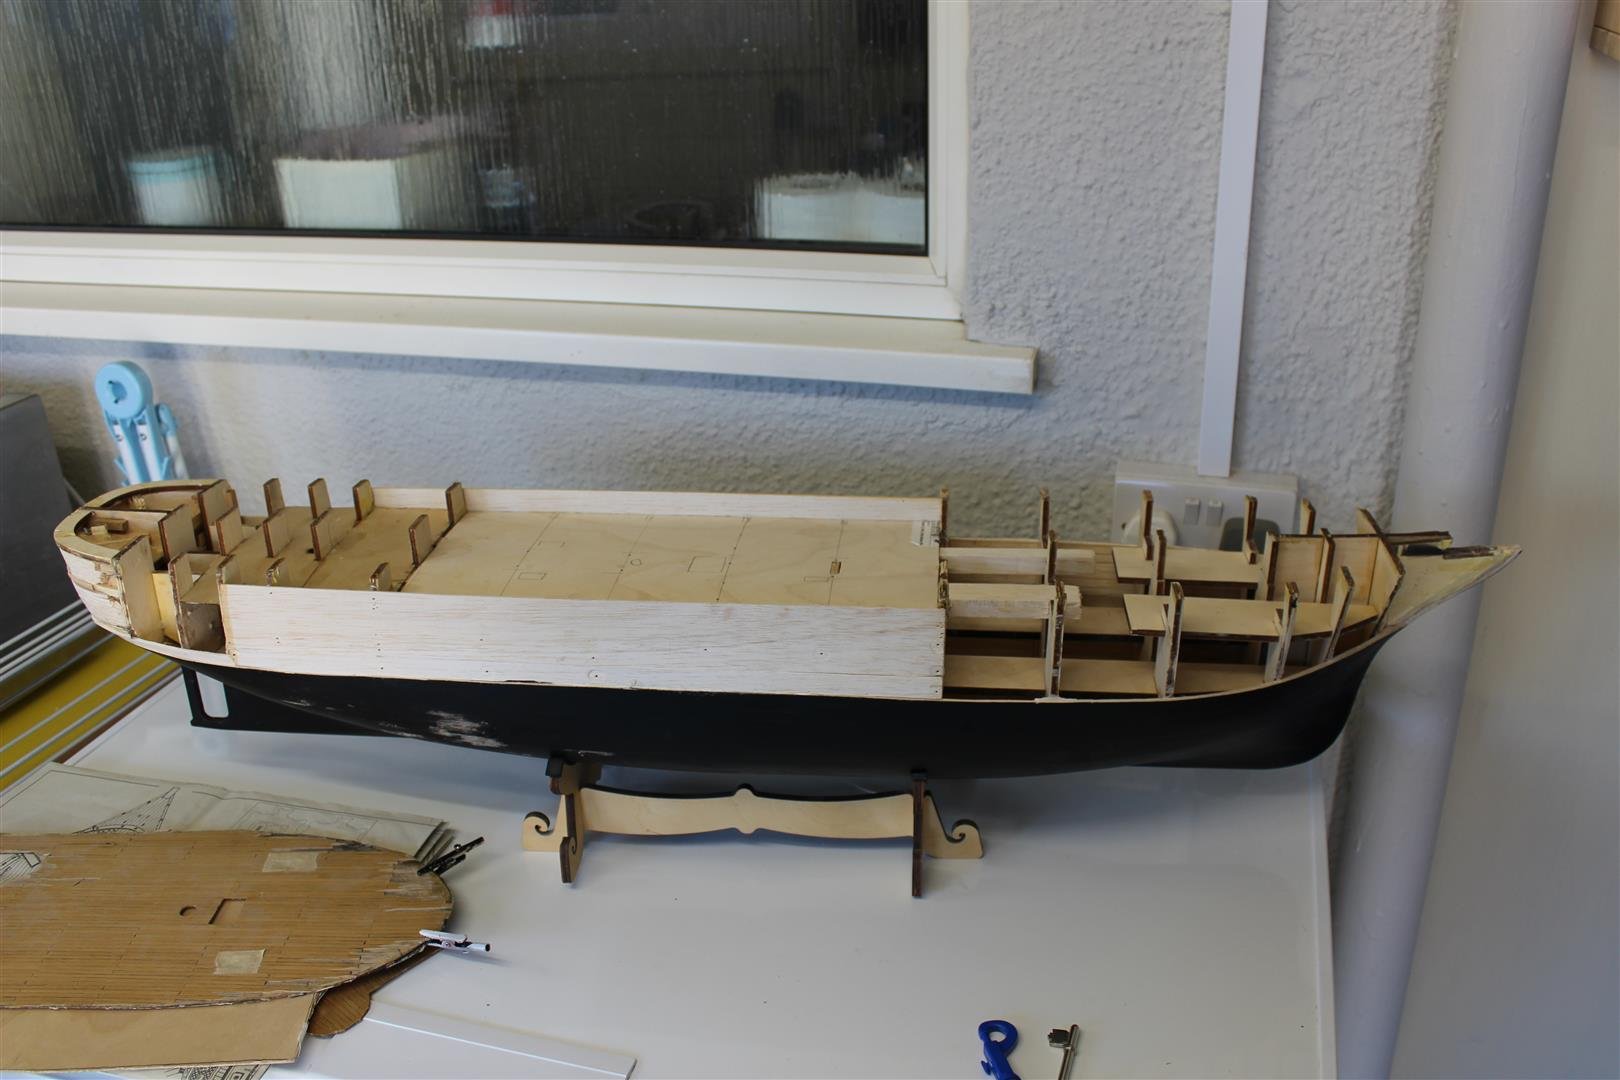
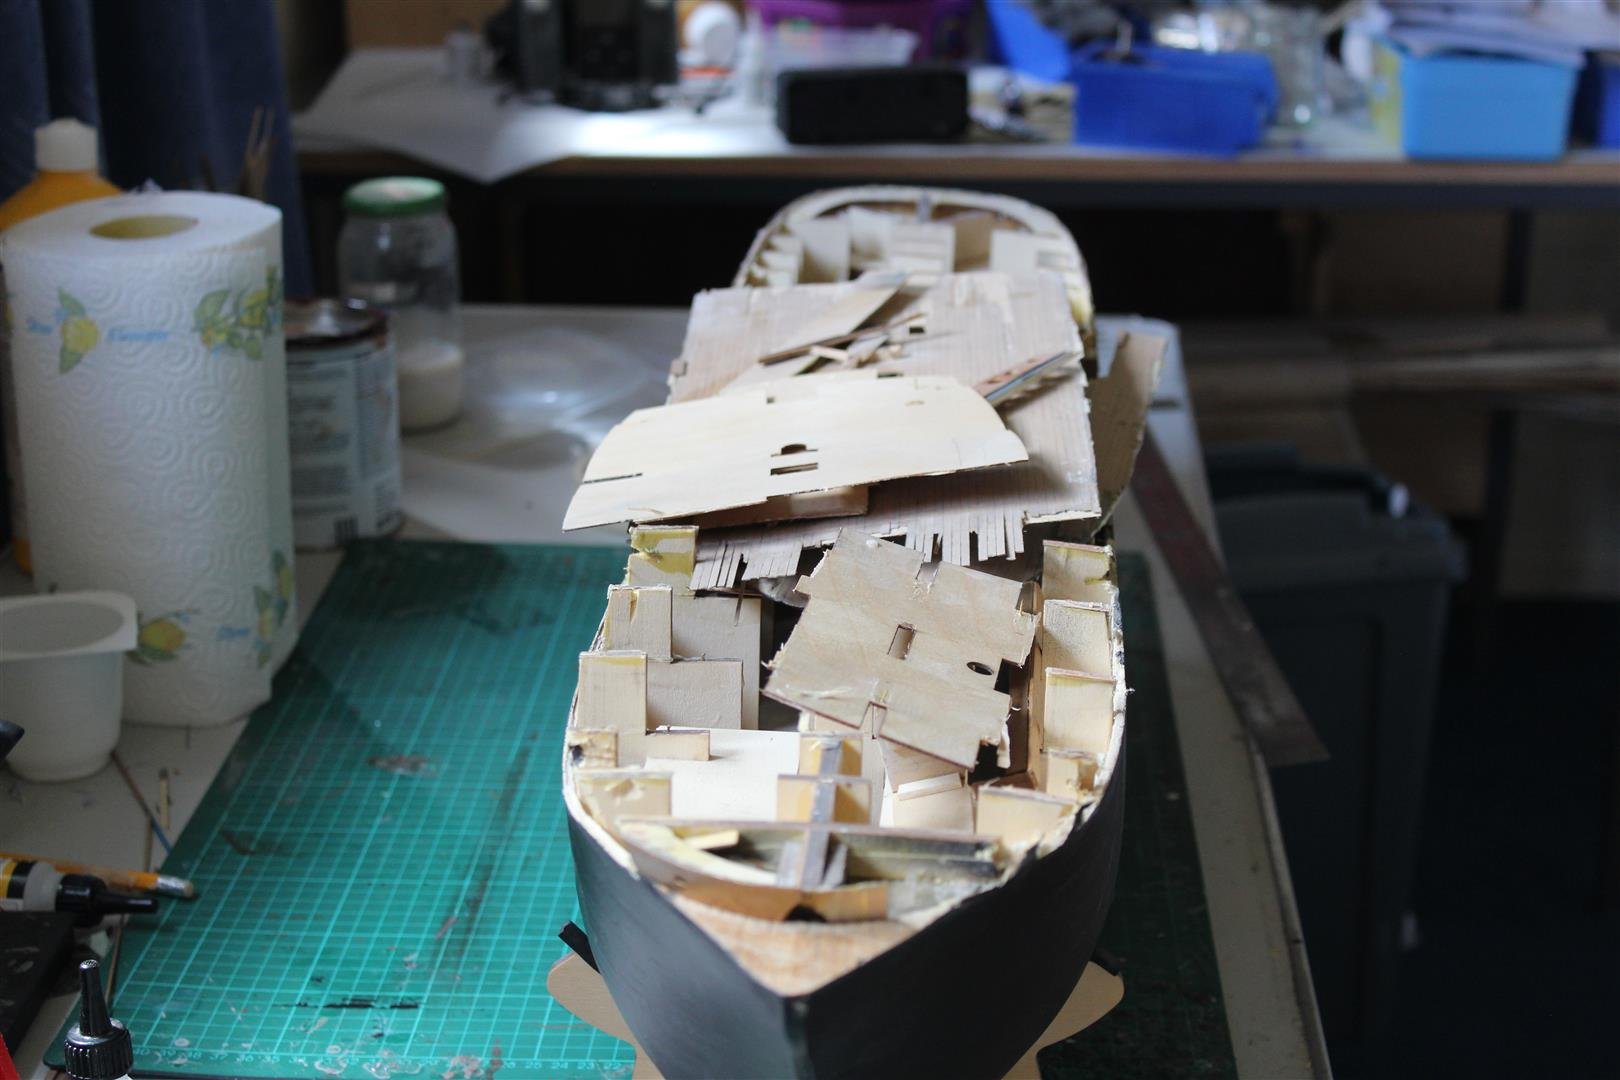
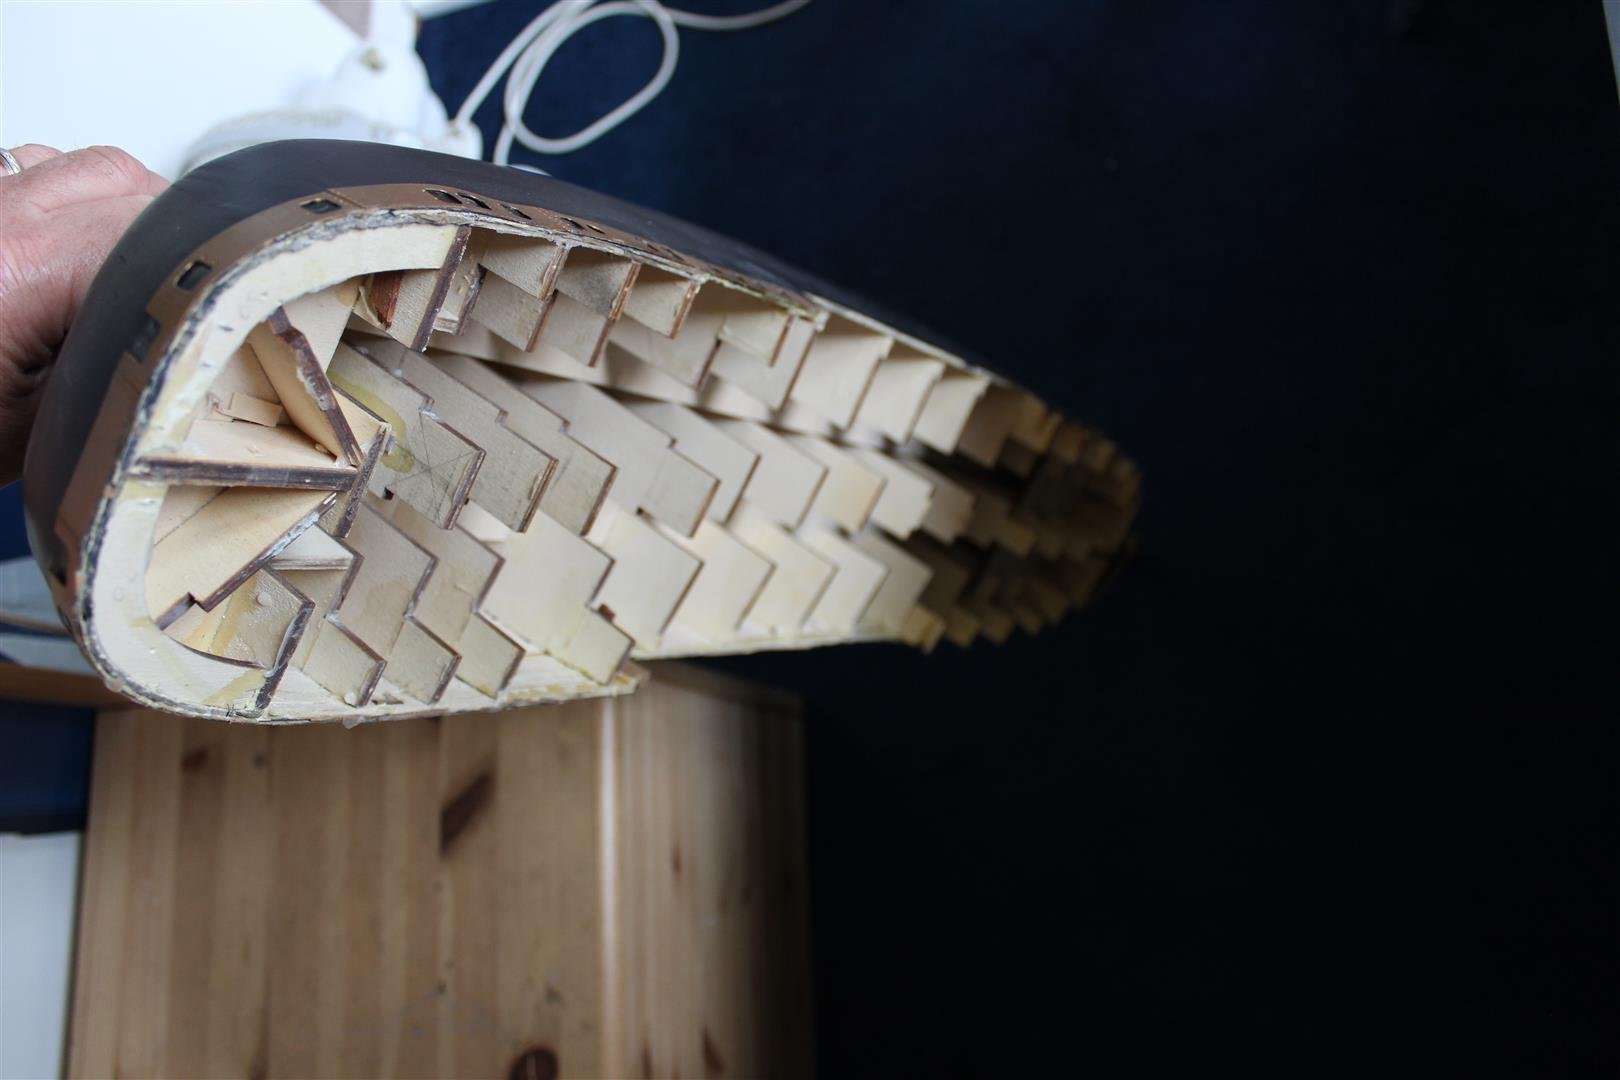
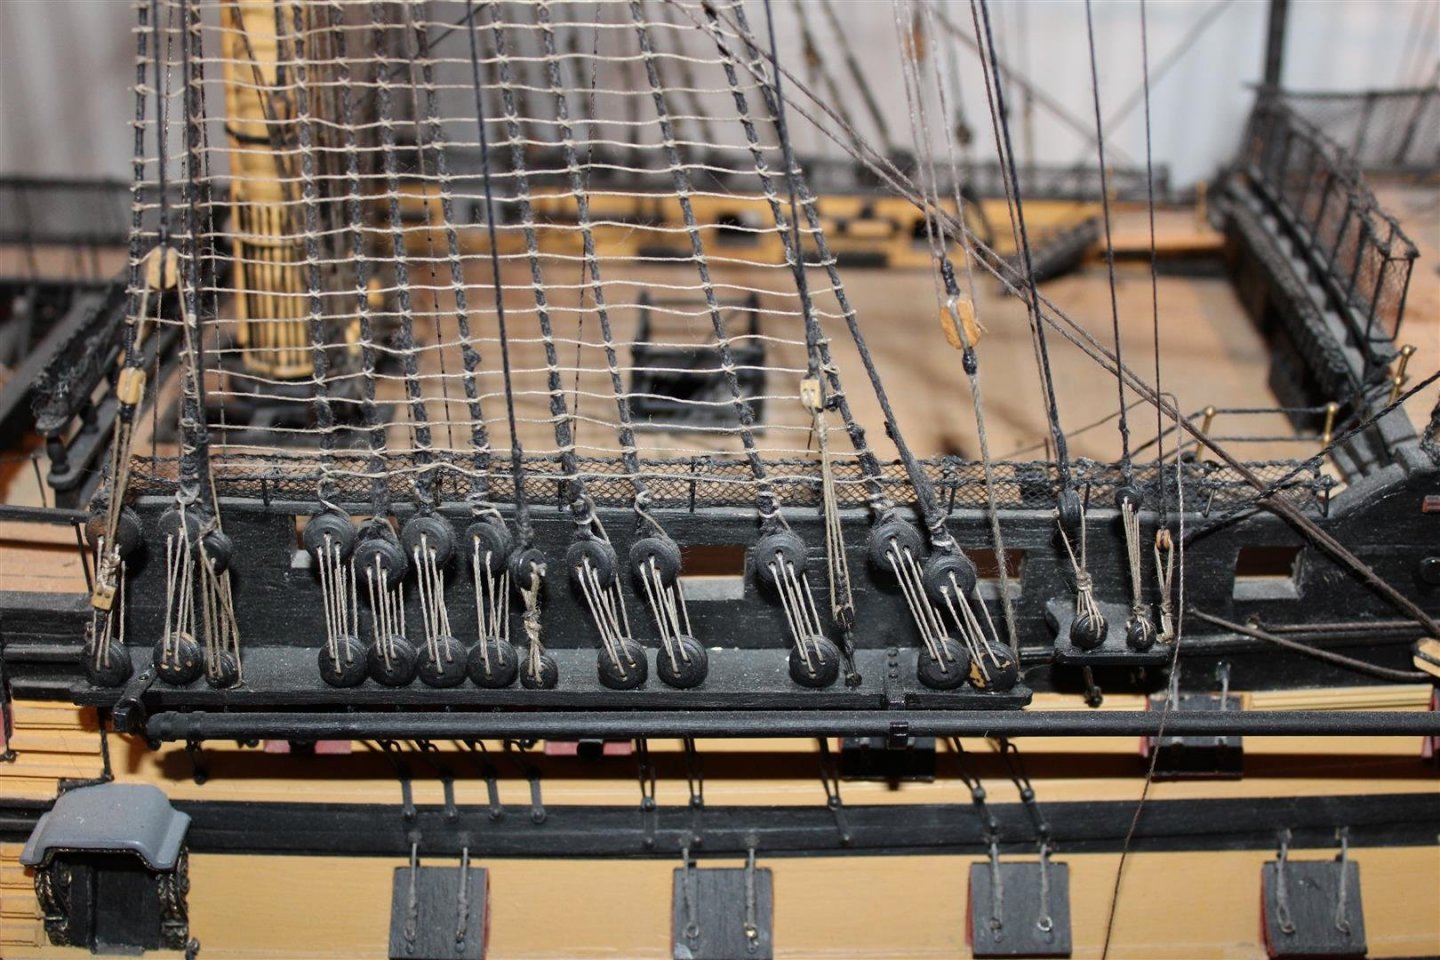
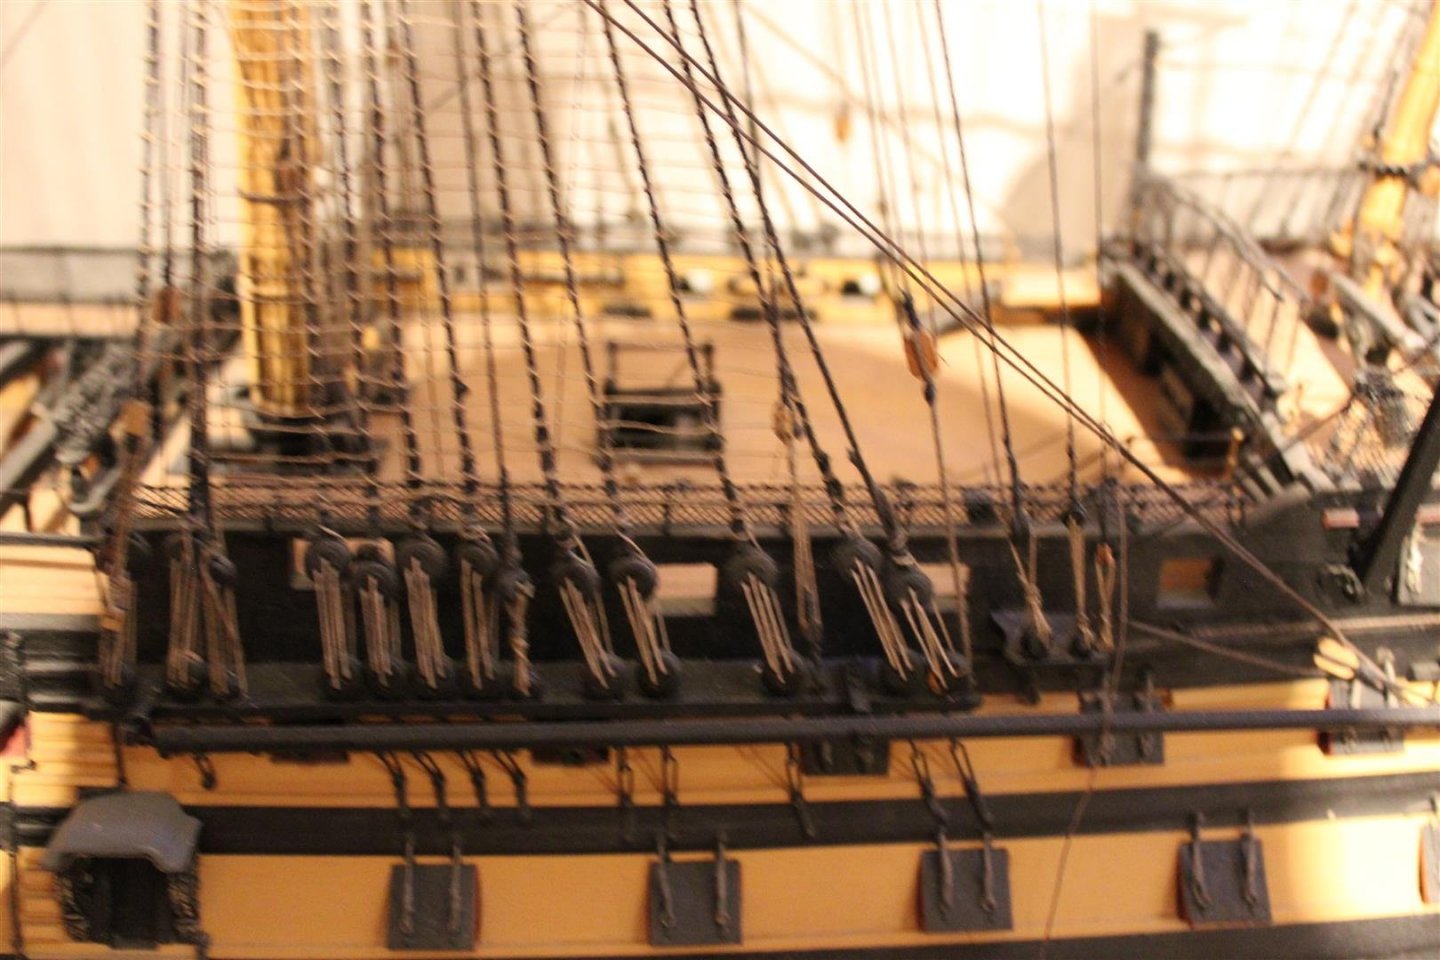
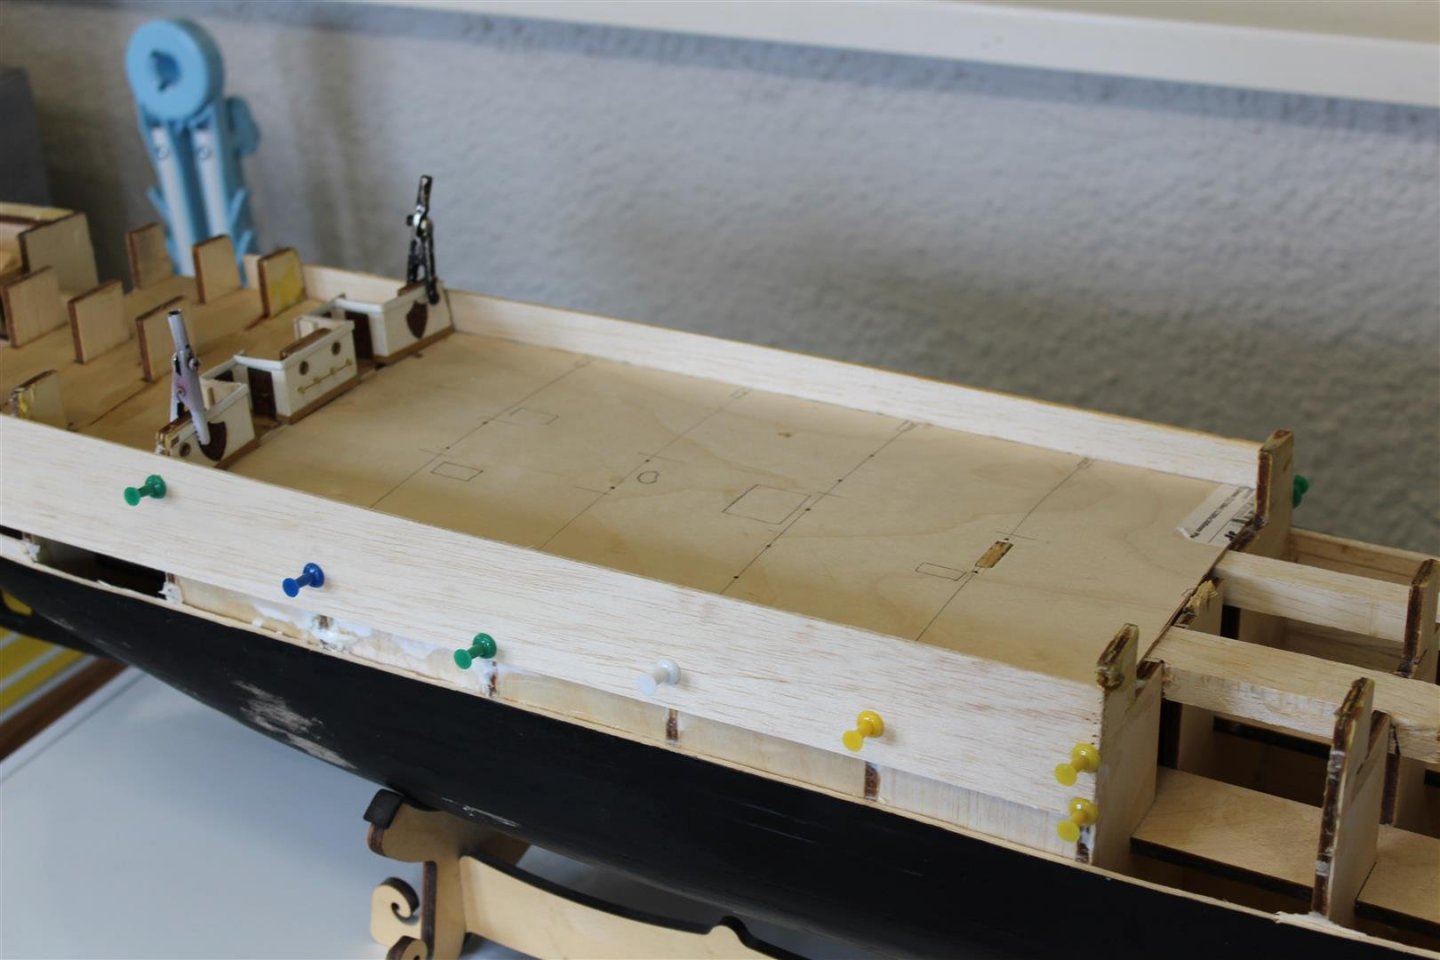
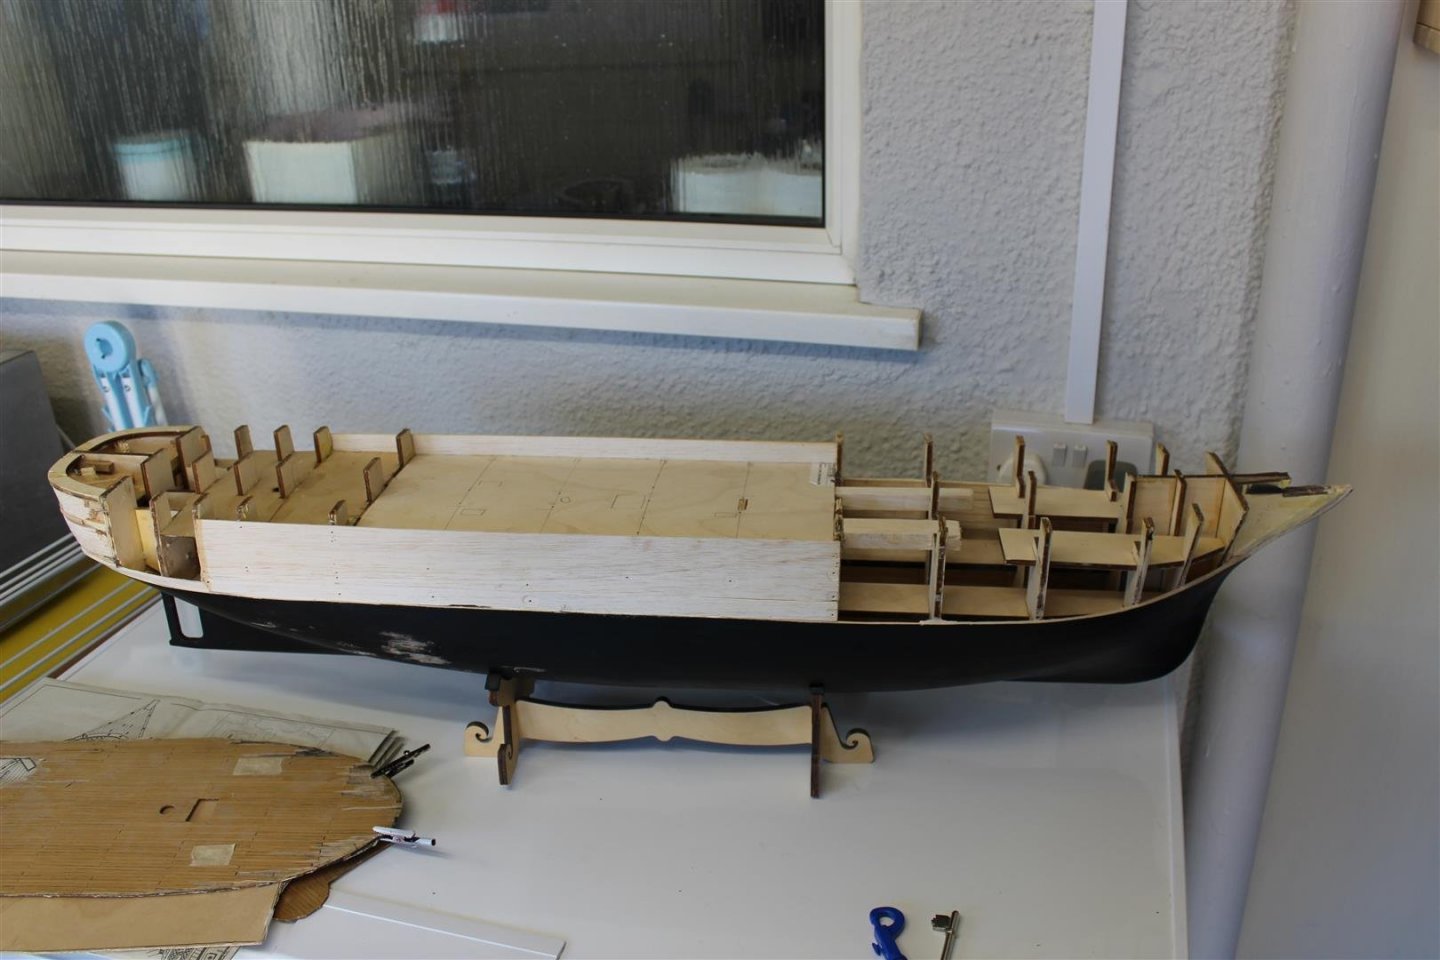
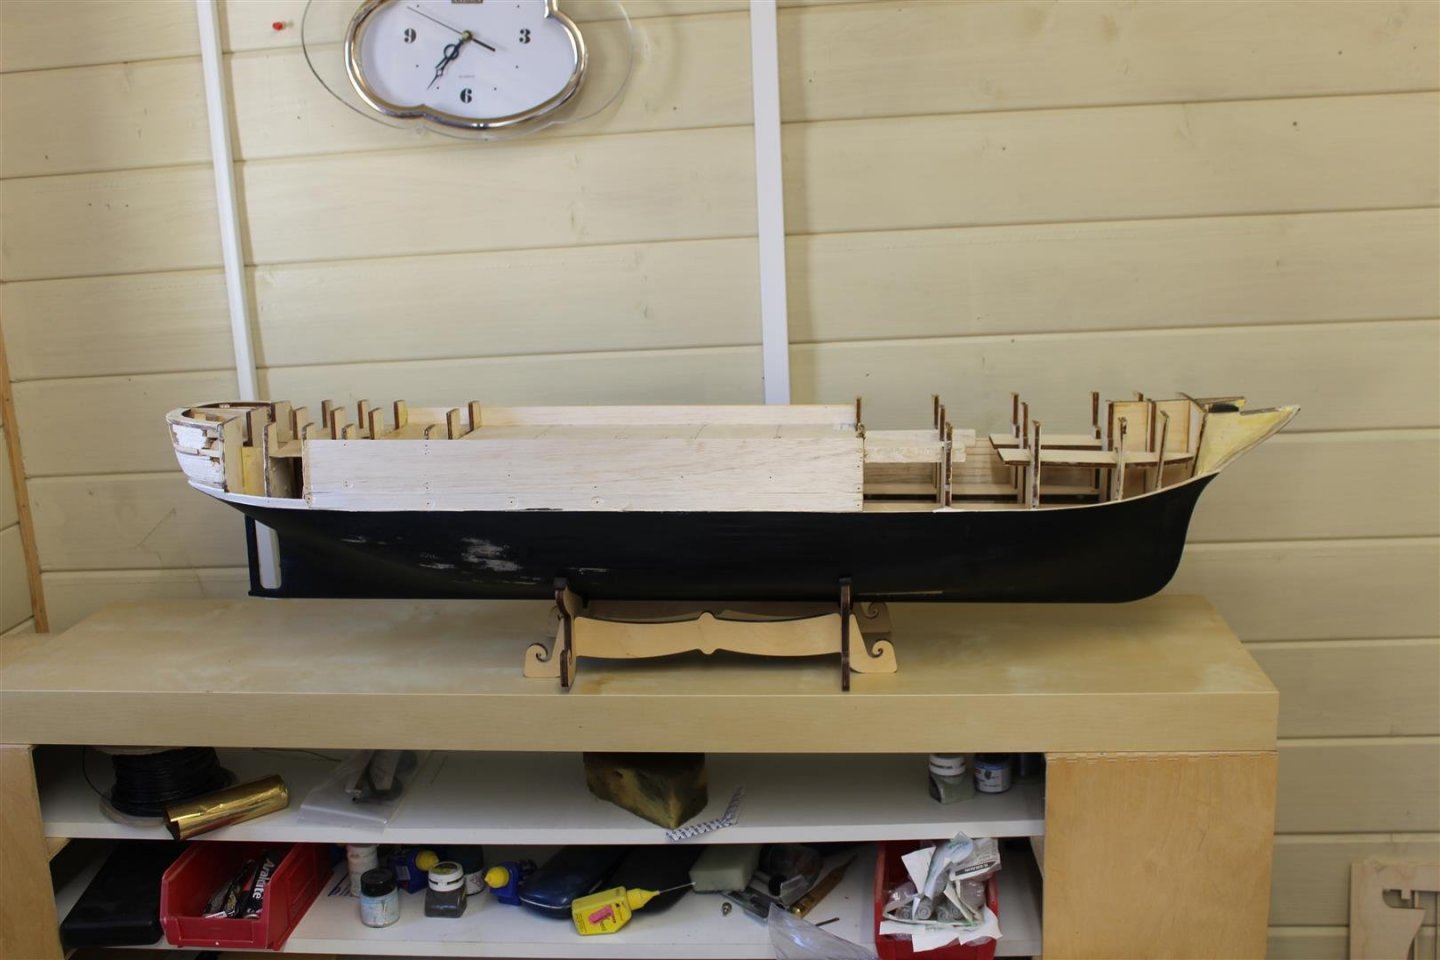
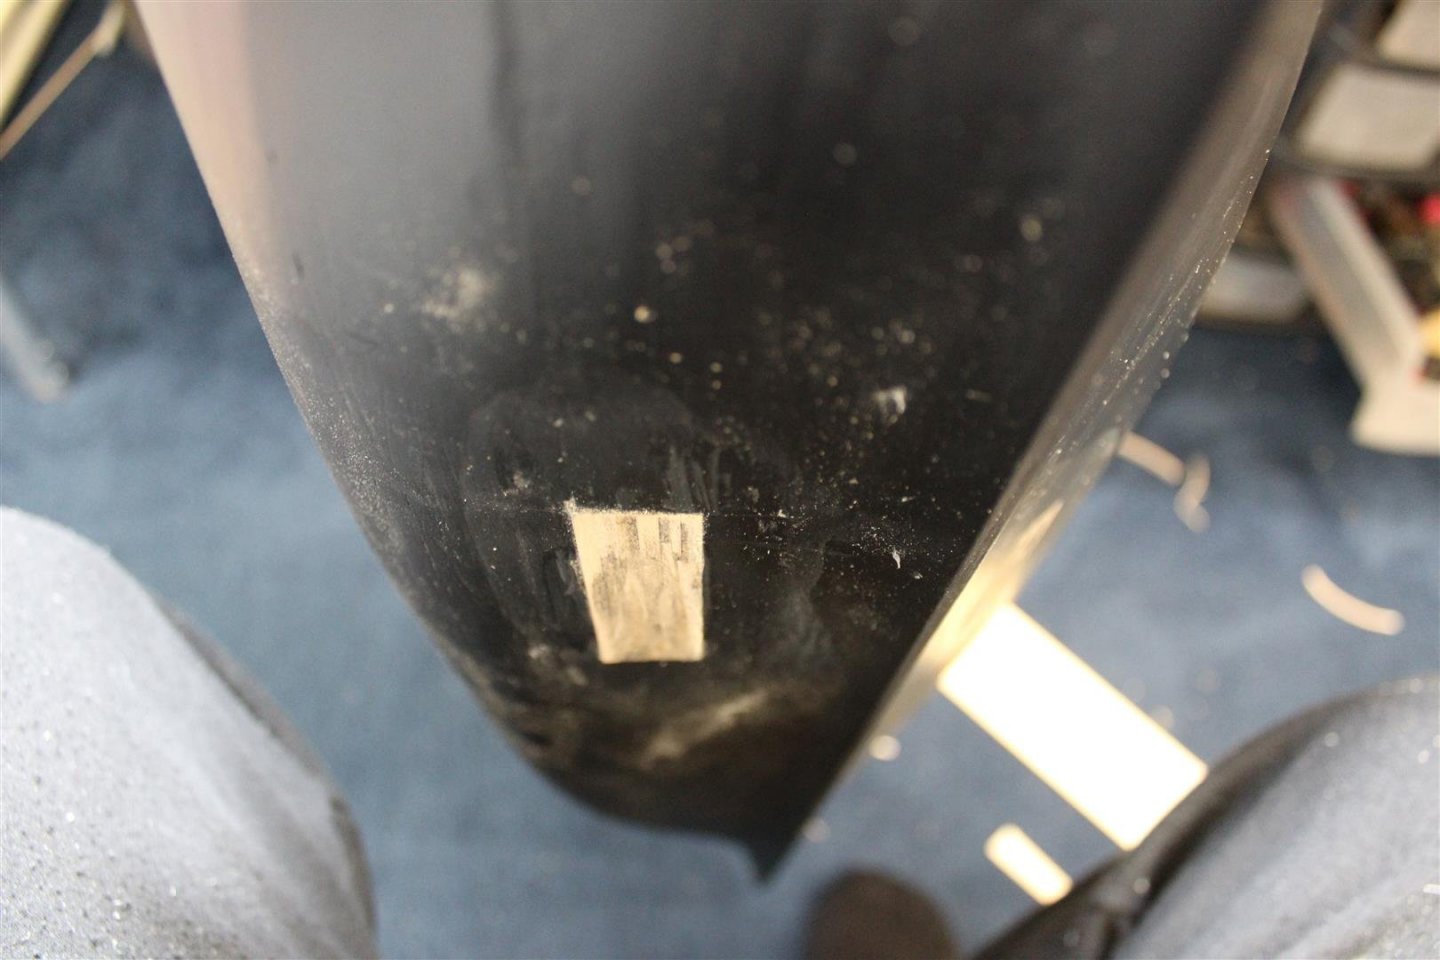
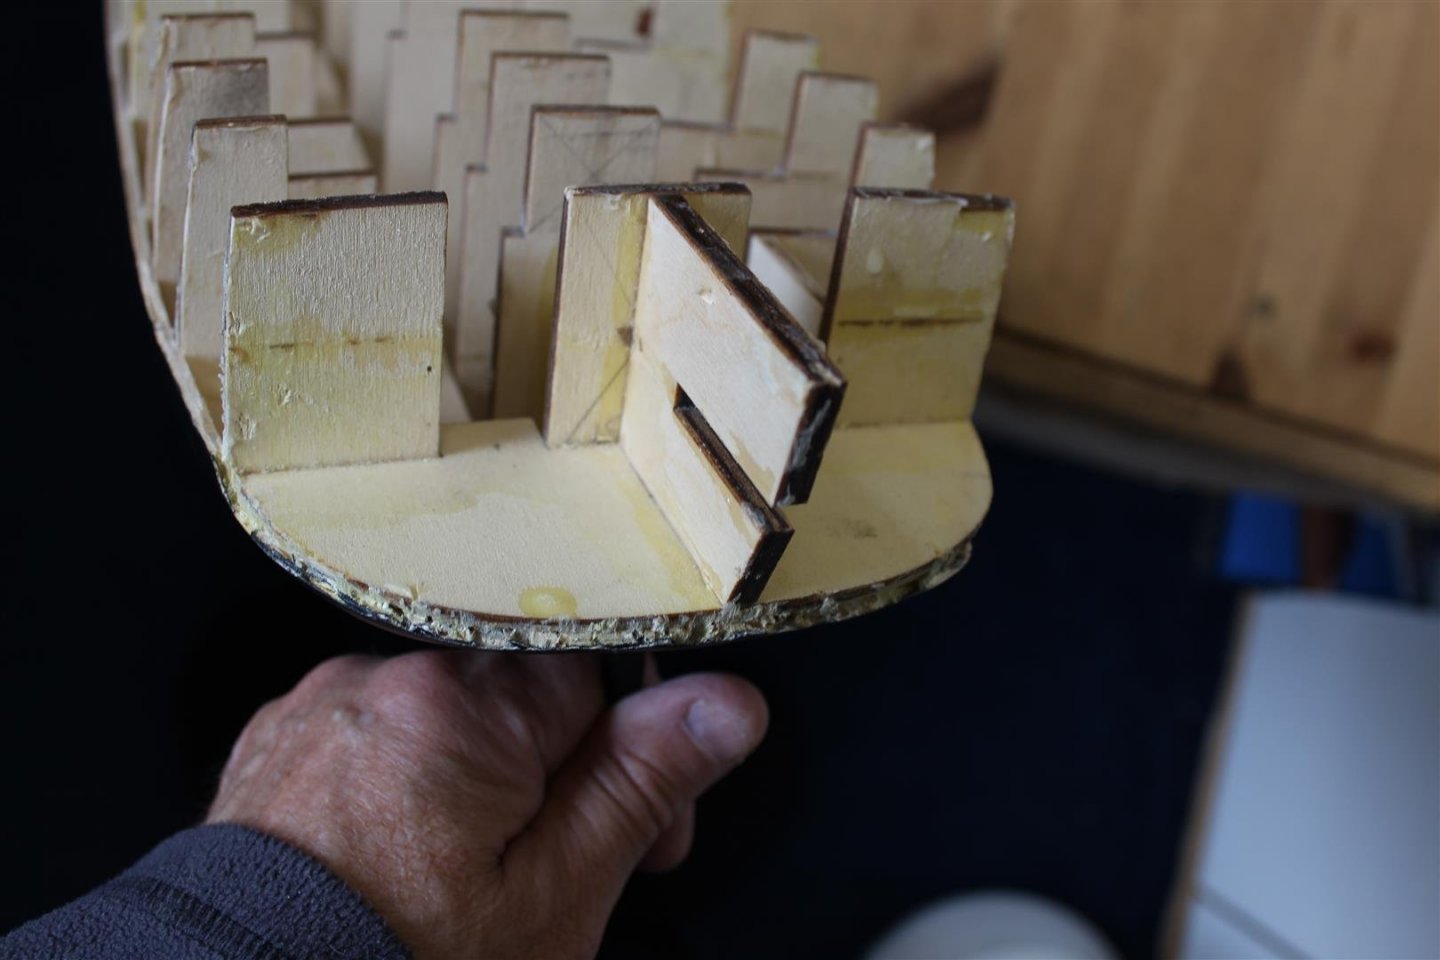
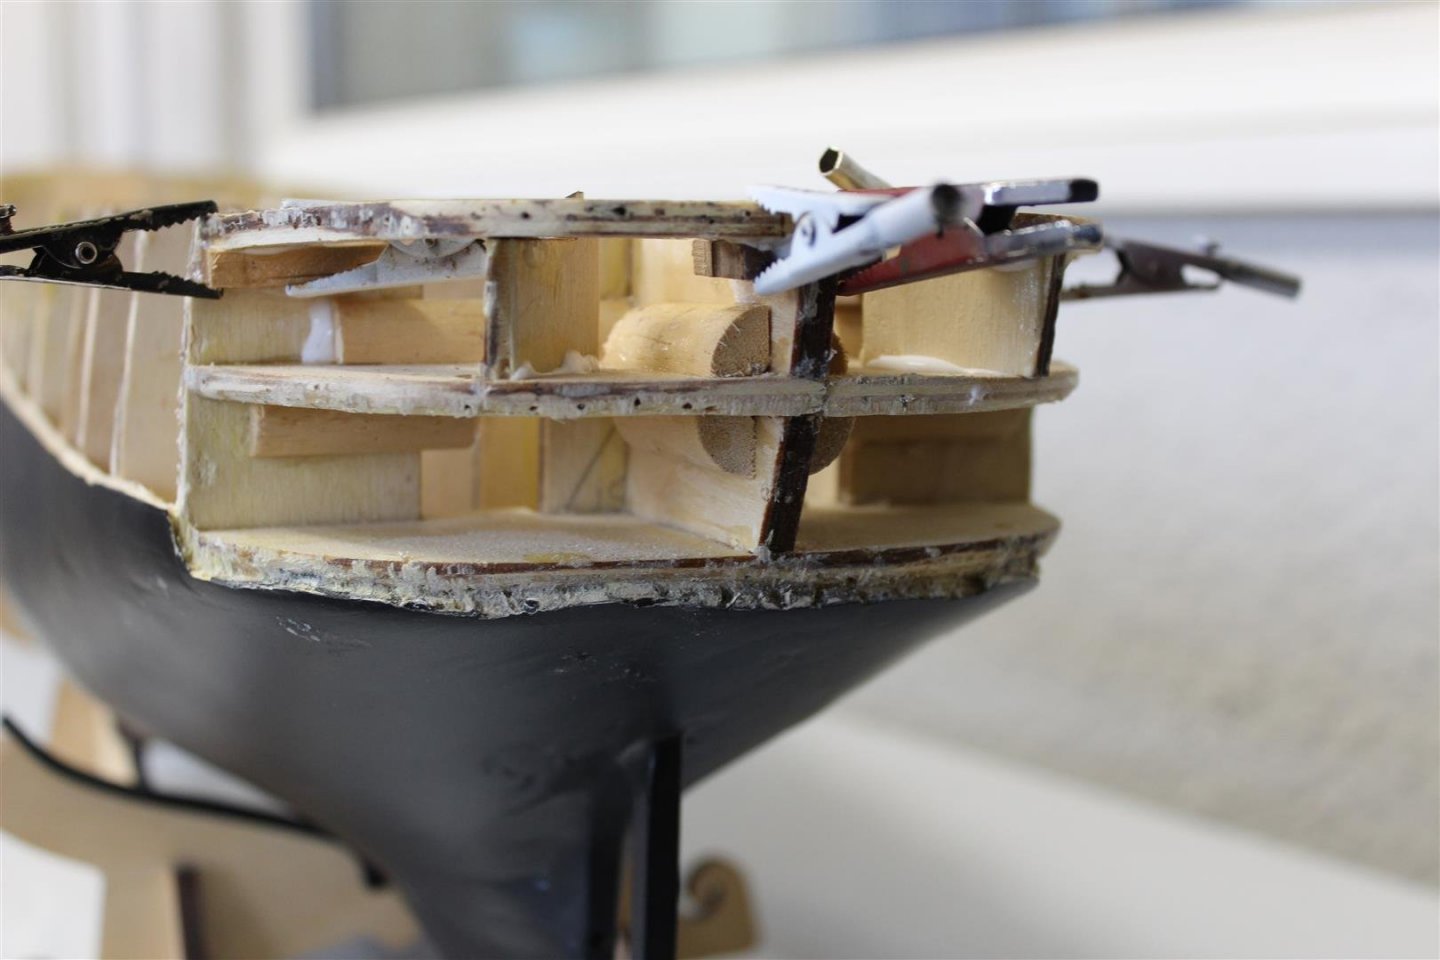
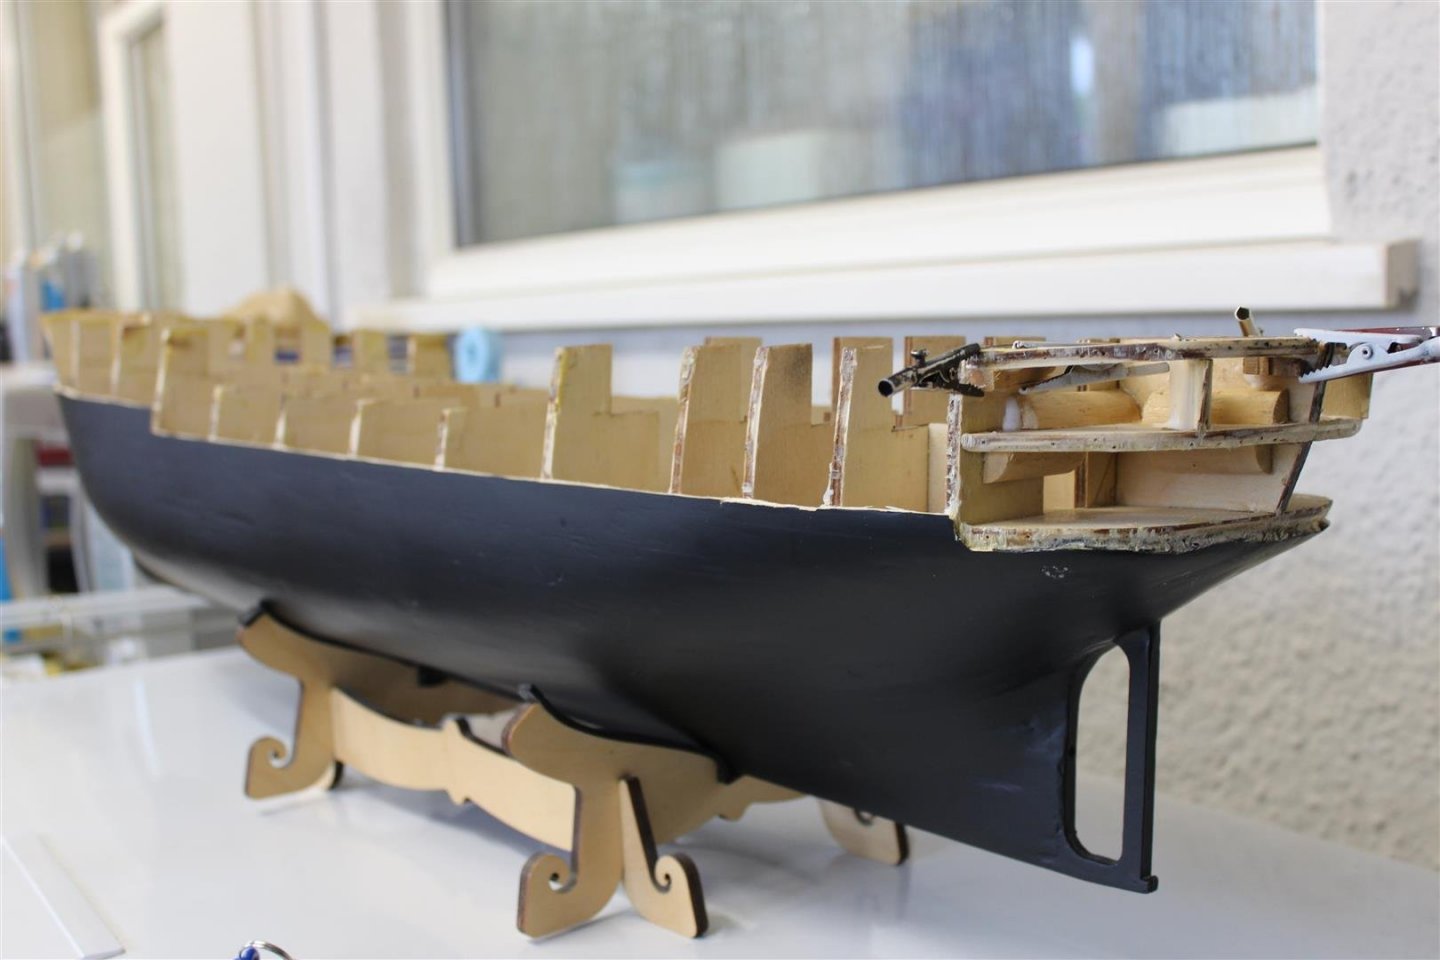
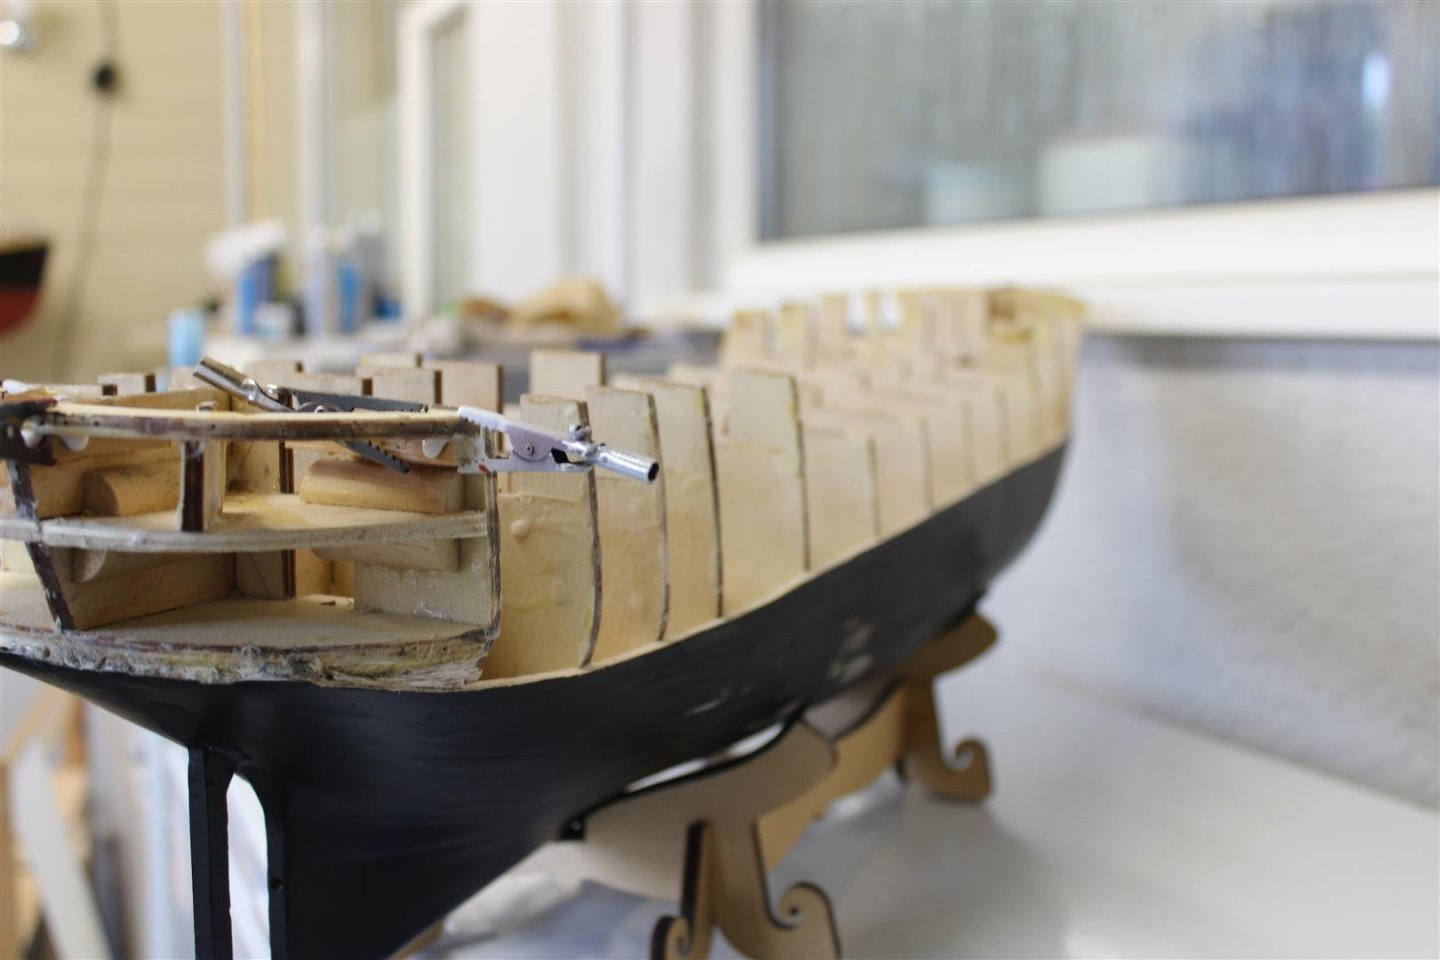
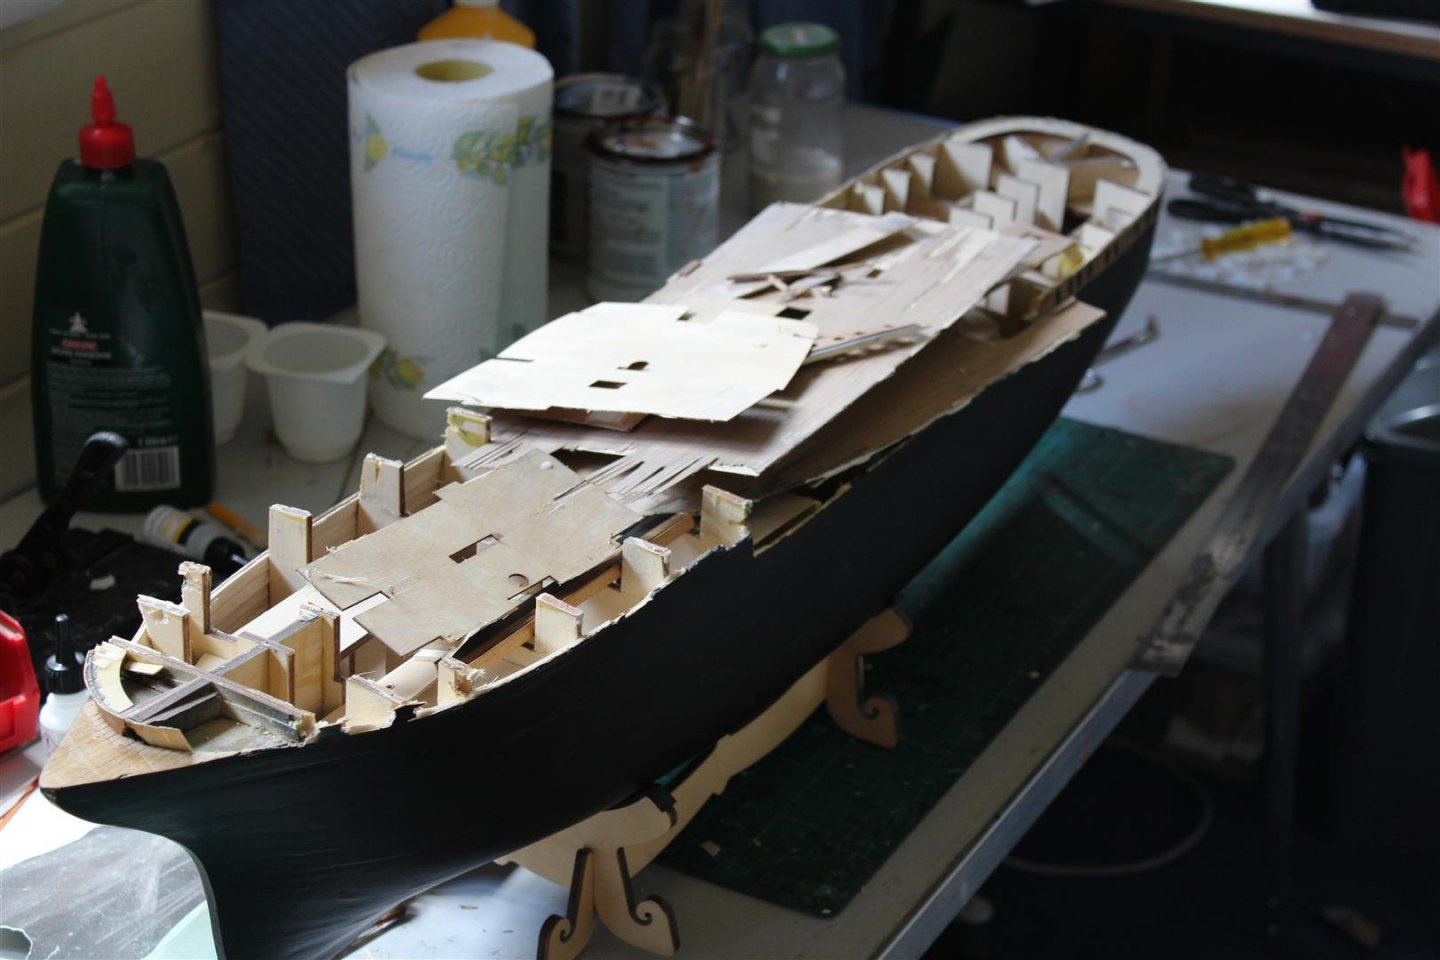
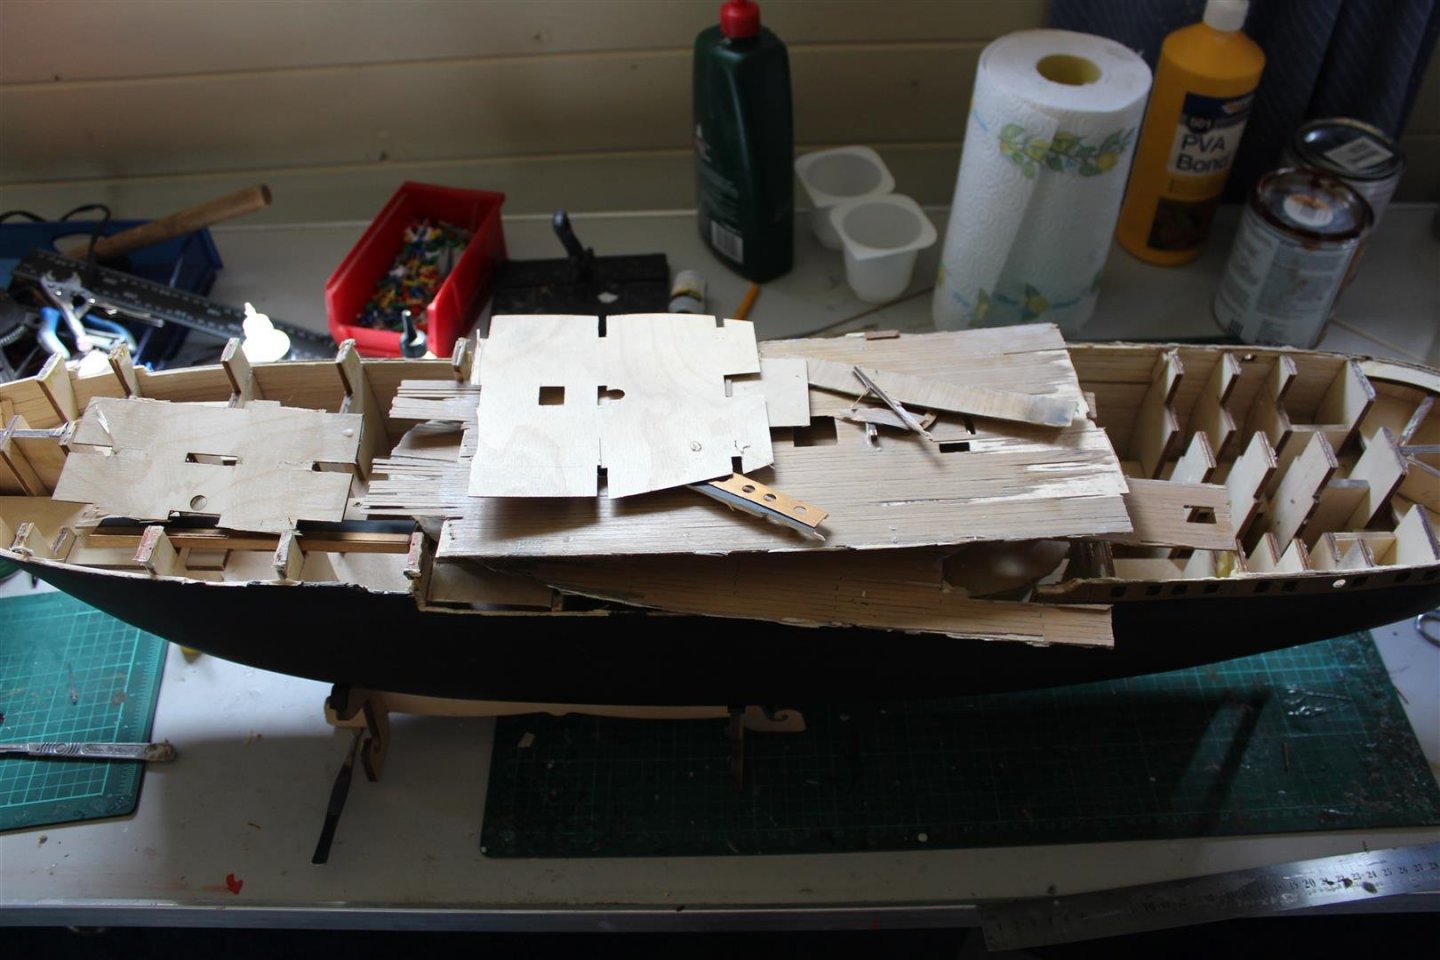
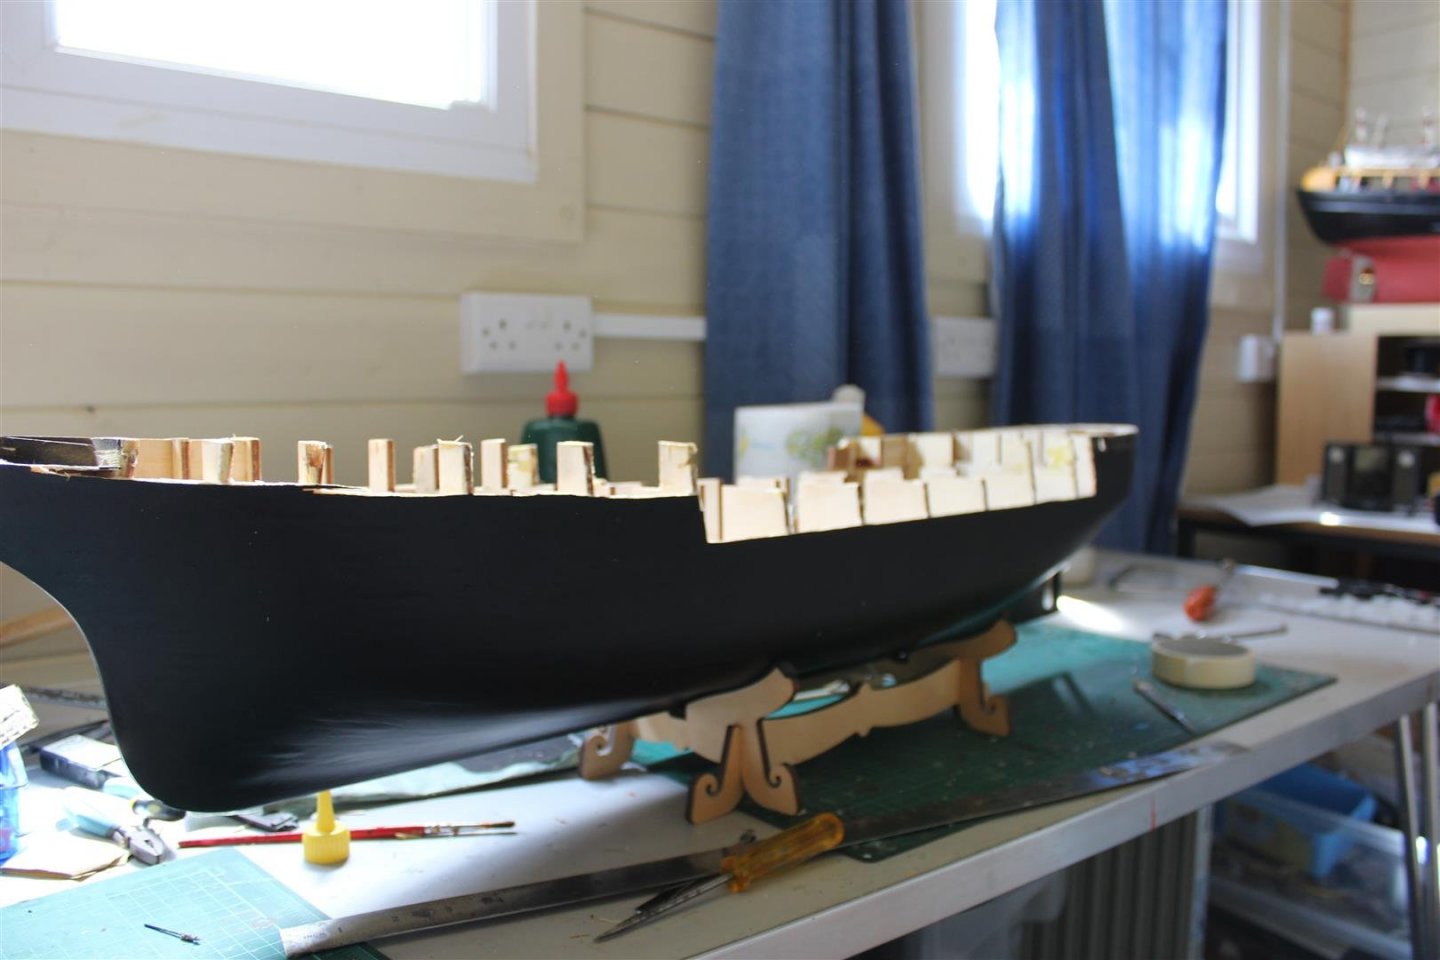
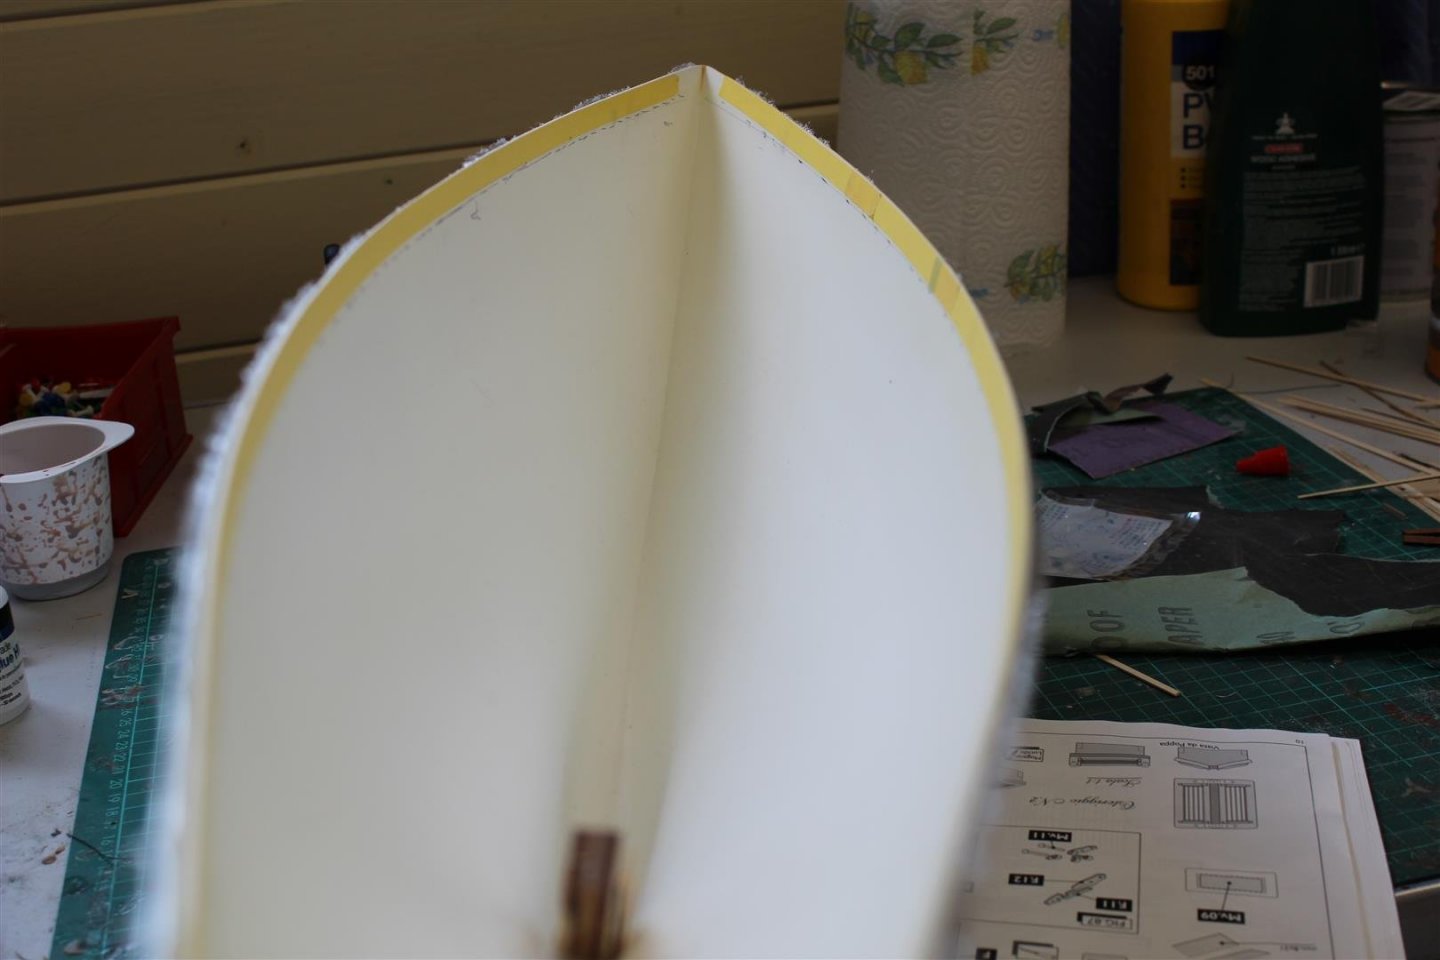
well this is going better than planned good evening everyone quite glad i have gone ahead to try and salvage this build, having planned a way ahead the stern and midships are now taking shape, I started on the bow tonight and that is the worst mess to sort out, god what the hell was i doing when i started this 12 odd years ago Stern i just used sheets of balsa to allow some reshaping of the sten to get the balcony to fit, having said that it is nearly there, as it is all fitting better, not pretty, but i am not either midships between the bulkheads i have put some balsa sheets it, to try and minimise any damage when drill the portholes, wether it works i will let you know the deck chamfer is not catered for, between the bulkhead, and as i have cut some of the false deck they also needed something to be secured to Bulwarks, this was worrying me, as the bulwark supports were cut out before deck planking last time so i never had a height, but i salvaged to two made last time and used the height from them


- 273 replies
-
- 12
-
-
- panart
- amerigo vespucci
- (and 1 more)
-
Welcome to MSW
-
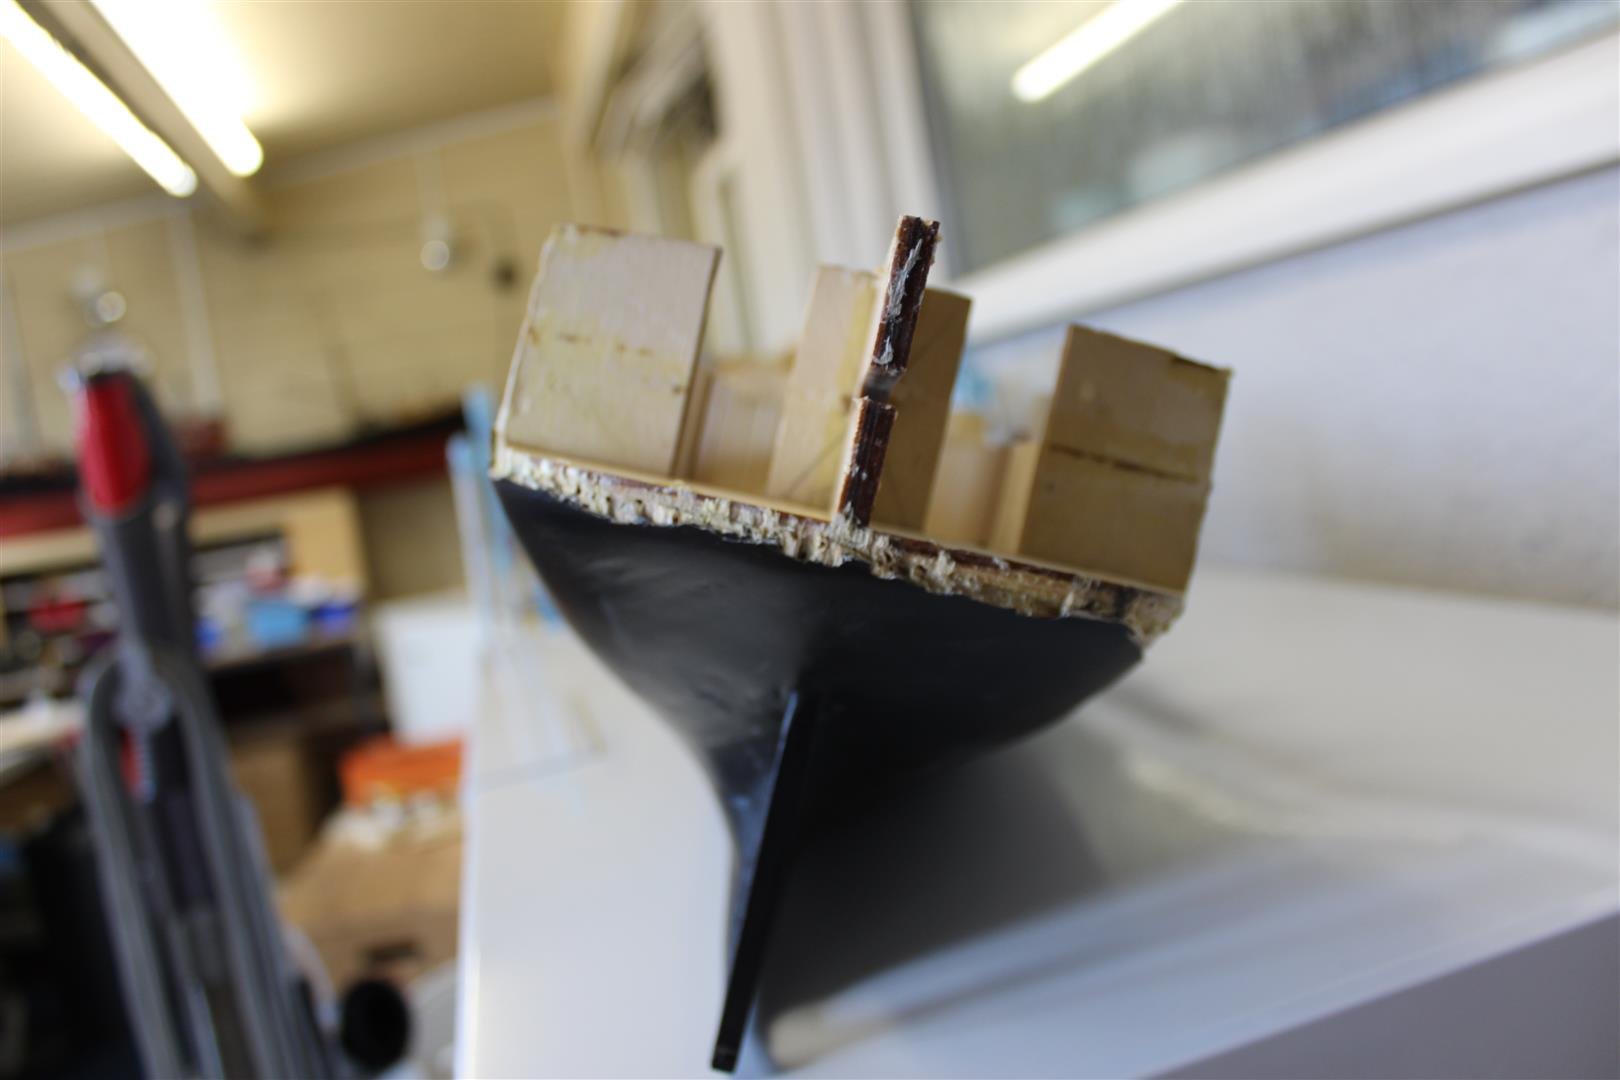
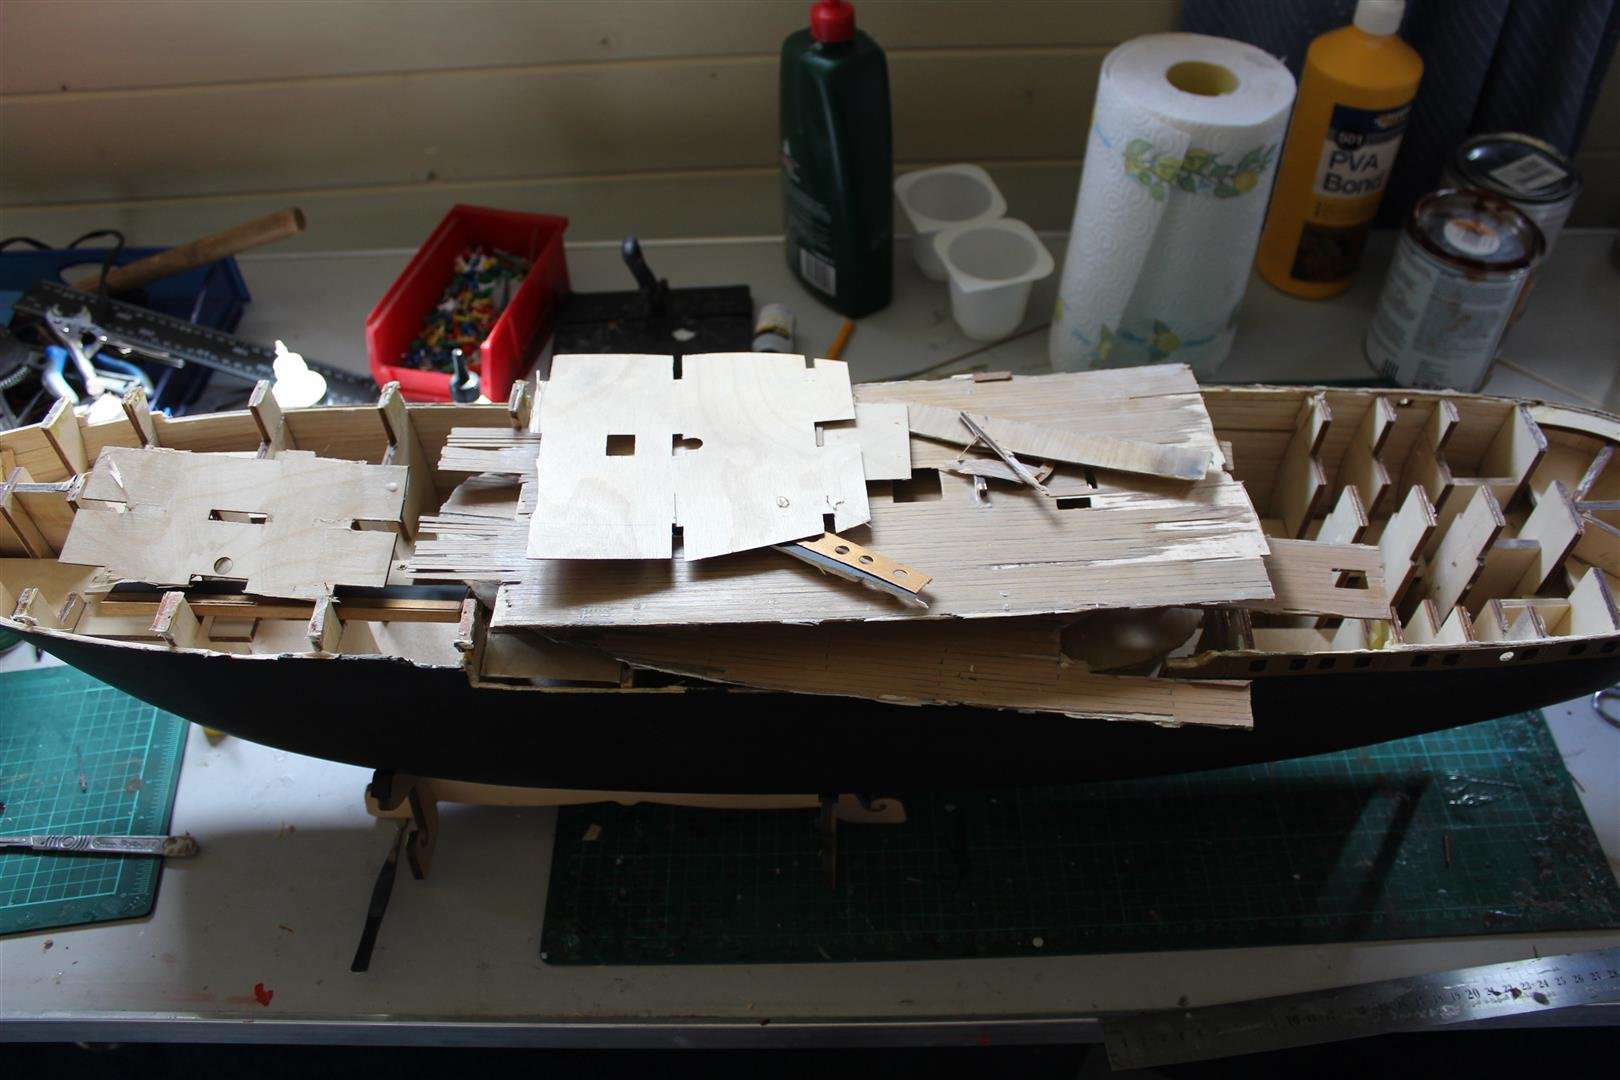
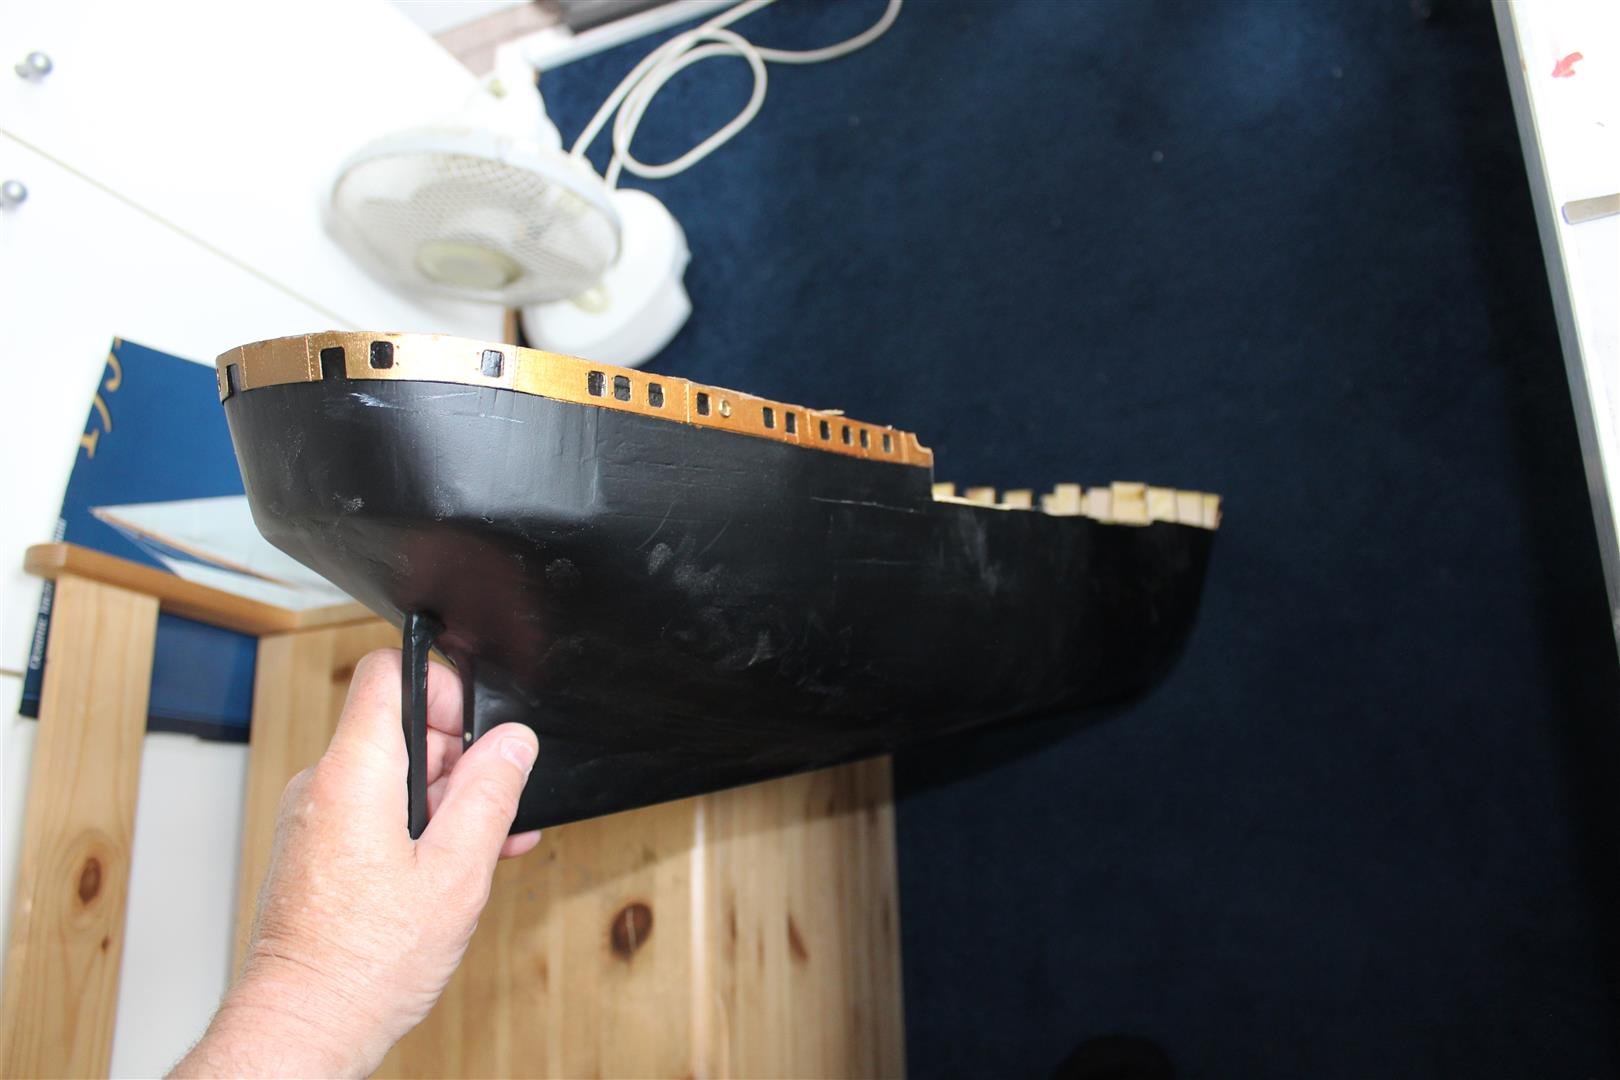
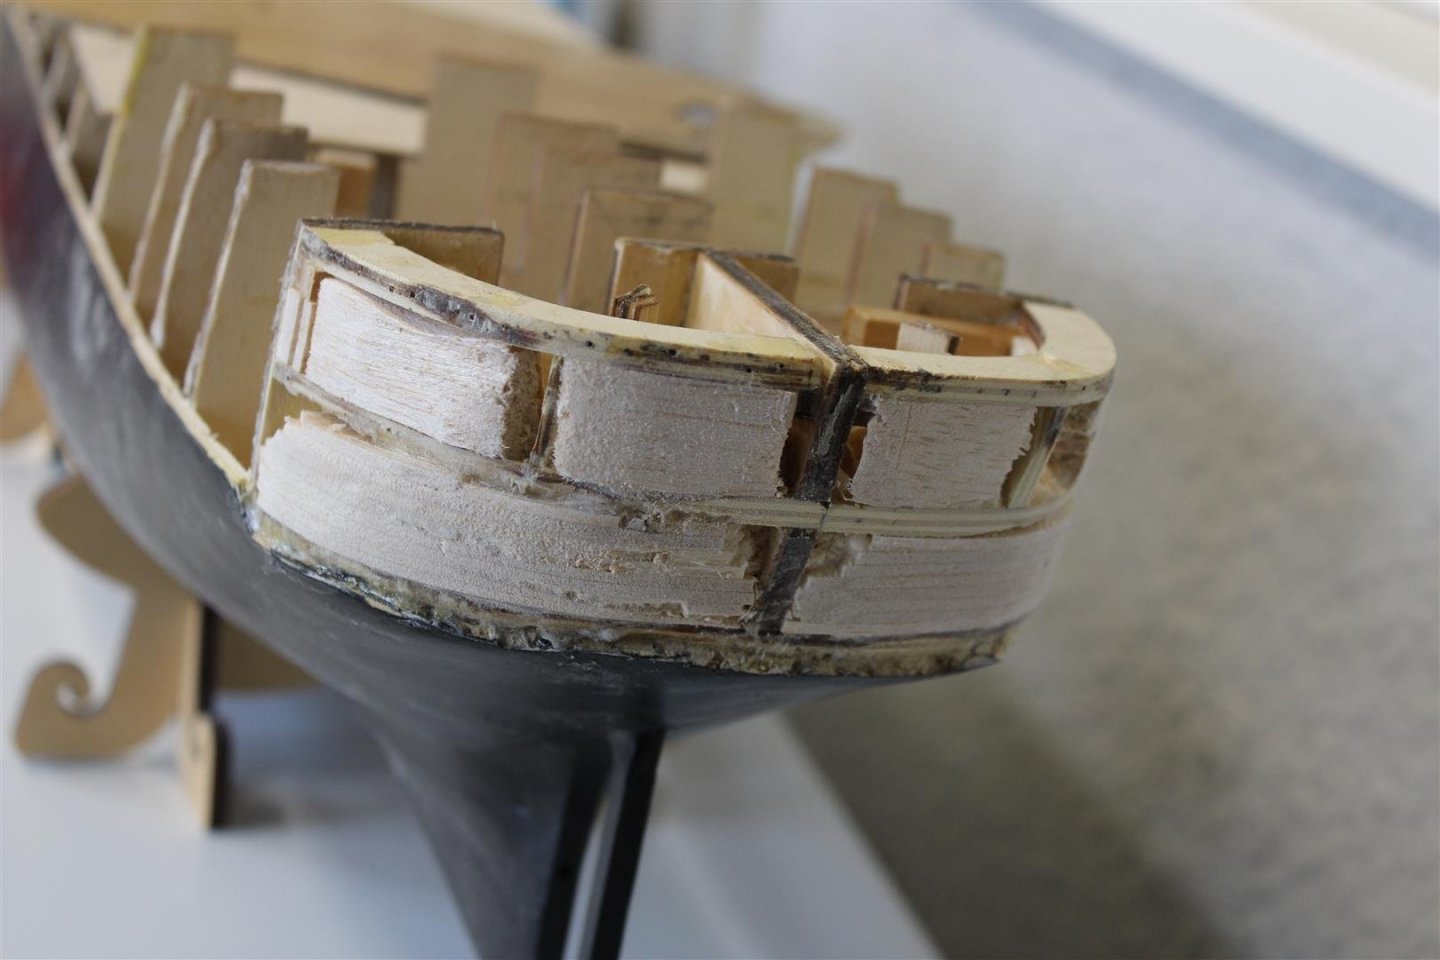
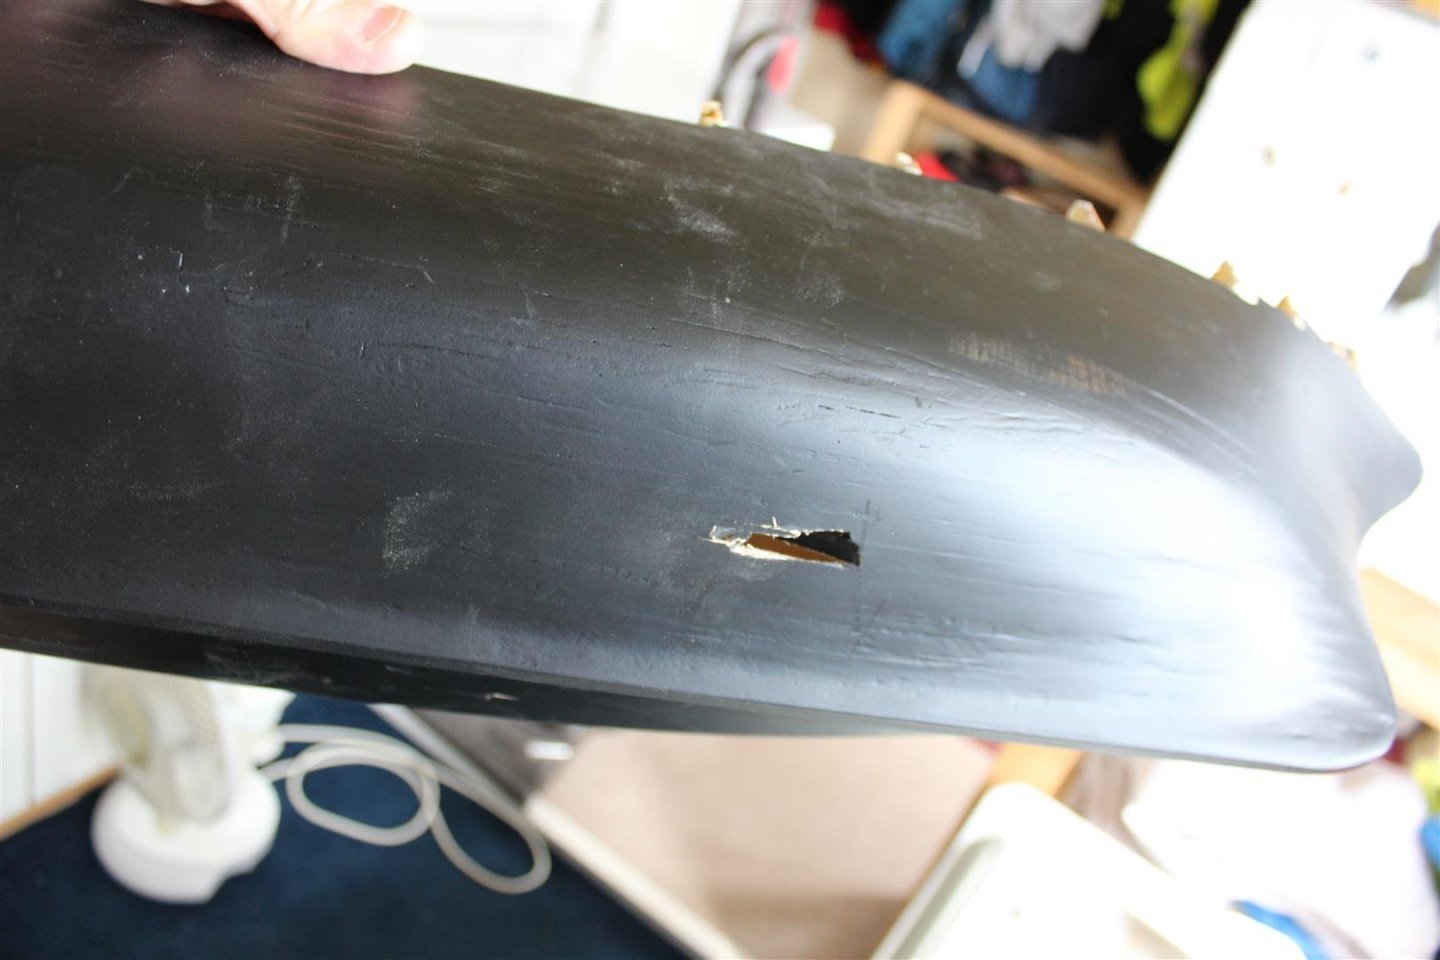
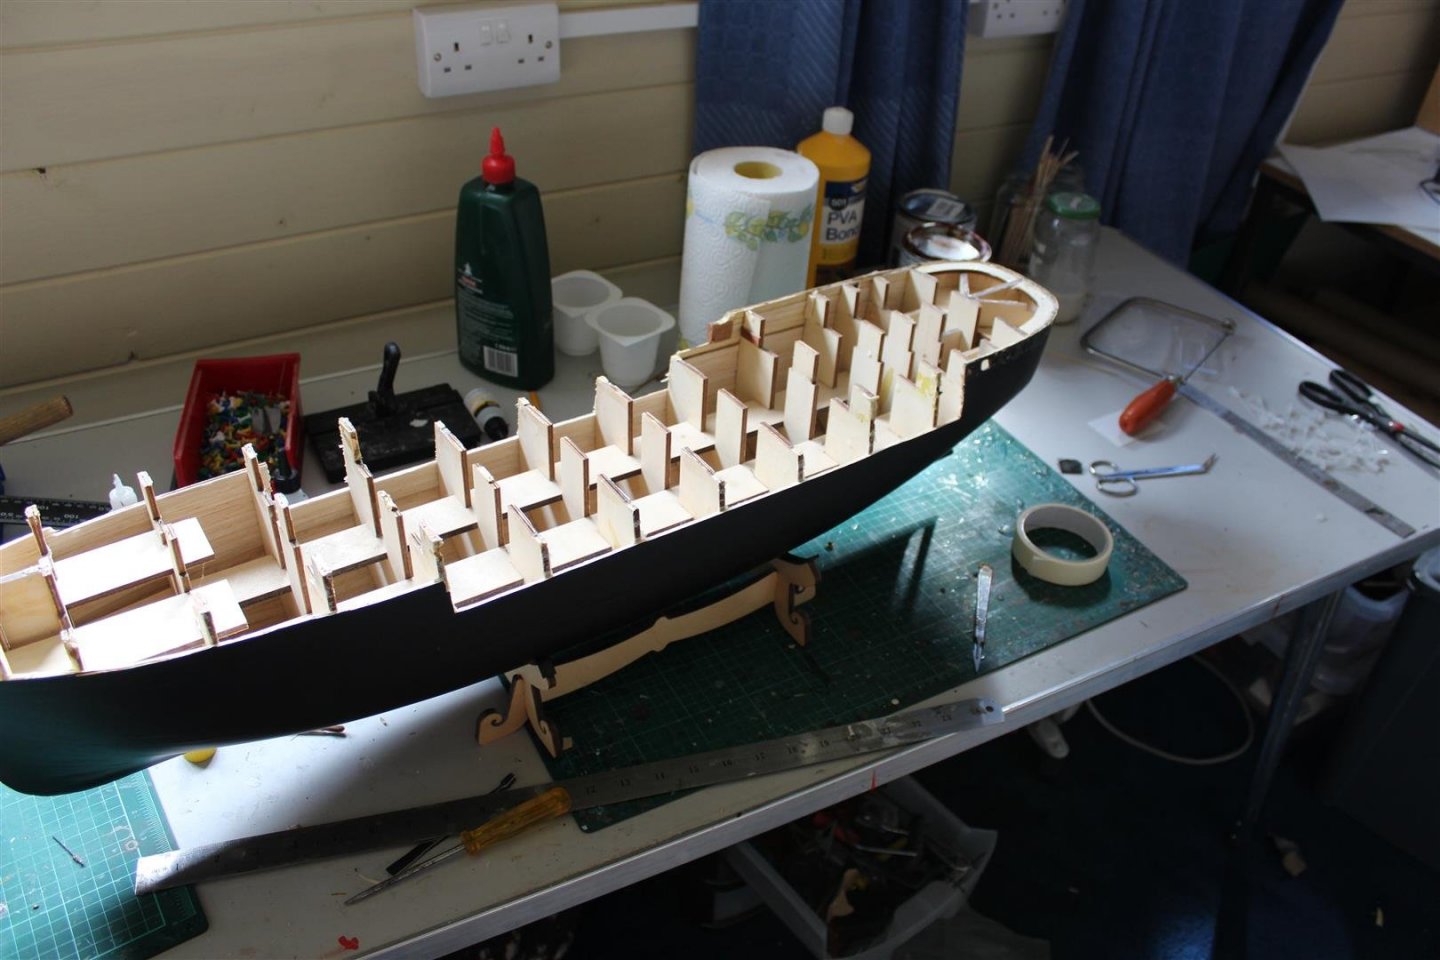
well the expensive Amerigo kit is well and truly back from the shelf of doom and on the build table, and actually going forwards again as i correct the damage and try to make some bits better the two holes have been repaired, just a bit more sanding required, i made the holes larger, frame to frame, put an extra ledge in to give me some support the stern above the water line was always my second biggest concern (the bow wins first place) but most of has been ripped out cleaned up and where possible replaced before the rip out
.JPG.7abec55c20966e69c7db3bd21e213cfa.JPG)


- 273 replies
-
- 9
-
-
- panart
- amerigo vespucci
- (and 1 more)
-
Thank you James
-
good afternoon Ken she looks great, the hull came out very nice i have just restarted mine after it being on the shelf of doom for 12 years, it has been in the rubbish bin more times than i can remember, but the initial cost stopped me from trashing it completly i have reordered a couple of the part kits, plus ply for the decks and 3mm lime strips for the decking planks , i also hated the kit produced wood, once the hull is back together, i will start to scratch a lot of the bits as they are pretty naff, as for the future i am looking forward to the rigging and hope to have a majority of sails set
-
thank you grant, my first issue is knowing how far to go back, the next one is that the 4 centre frames are cut to deck level on completion of hull planking,, but this a problem i generated, so lol i better sort it out, i have never had a build that has been put in the rubbish bin so many times,
- 273 replies
-
- 4
-
-
- panart
- amerigo vespucci
- (and 1 more)
-
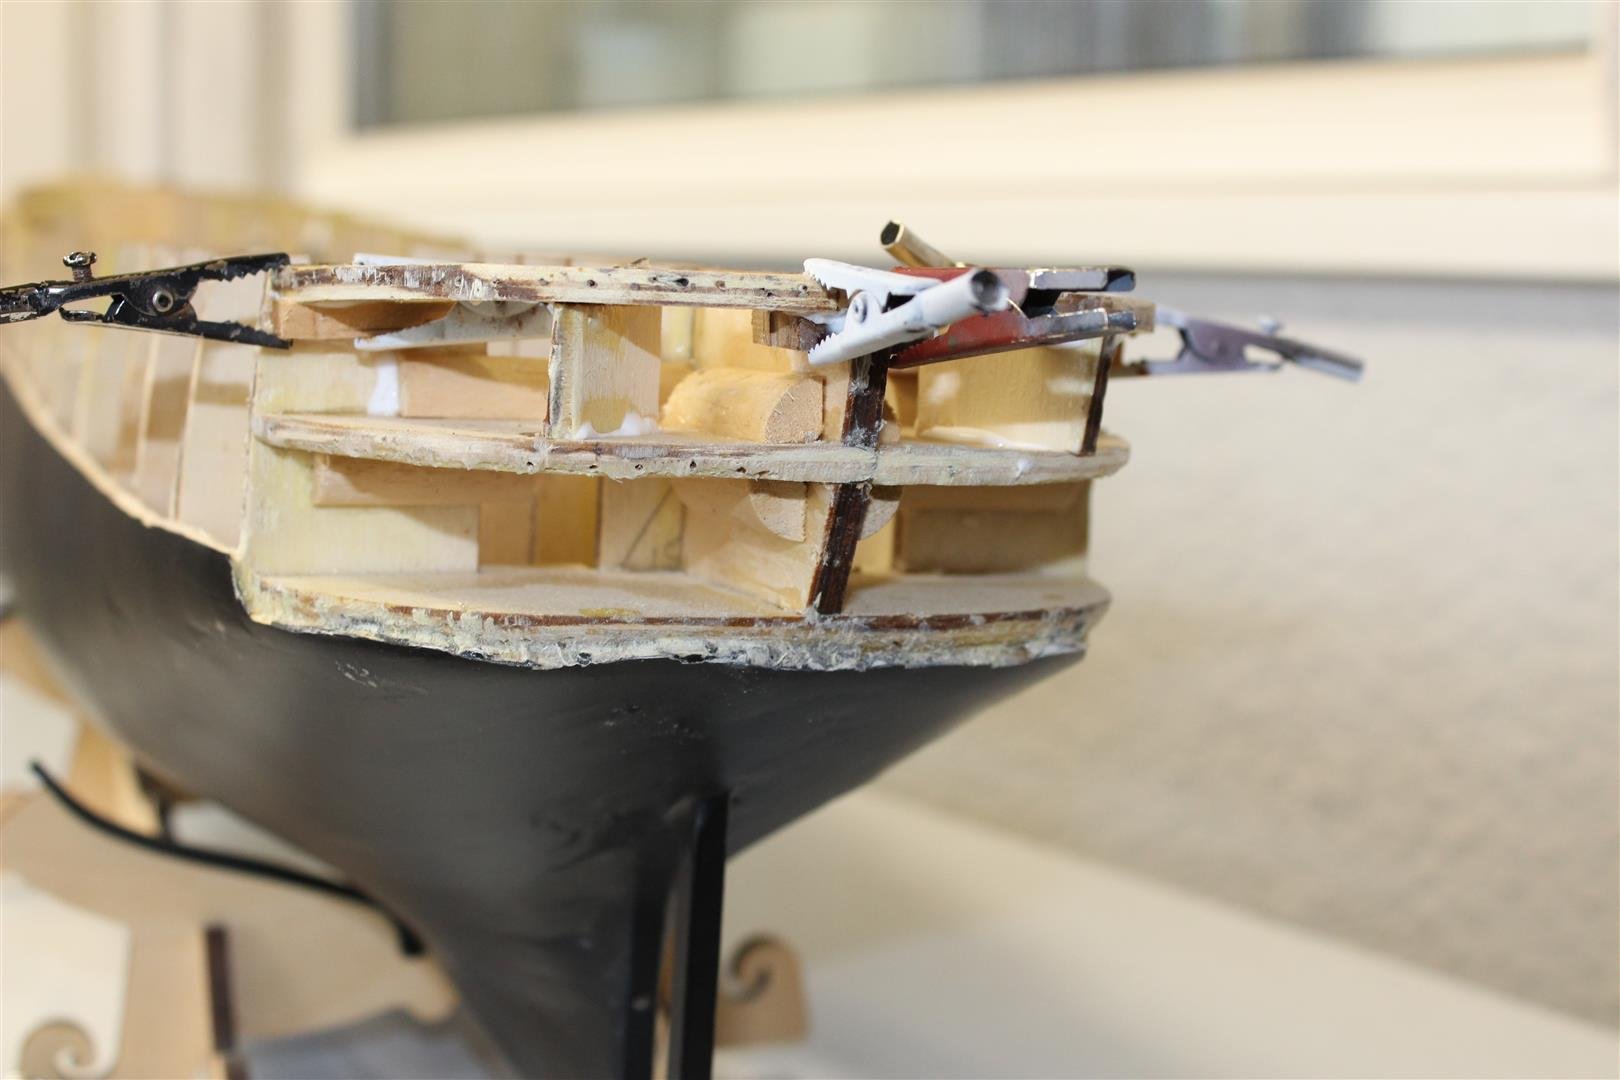
good evening everyone as well as the Dorade i have brought the Amerigo back to the table, i am in the right frame of mind to do this now, having had a few builds under the table at present i am taking the hull back so that i can do a few things that were not thought about first time around, like beefing up behind the port holes abd the stern as as to get the balcony on, please join me on my journey, its the rigging i want to get to


- 273 replies
-
- 7
-
-
- panart
- amerigo vespucci
- (and 1 more)
-
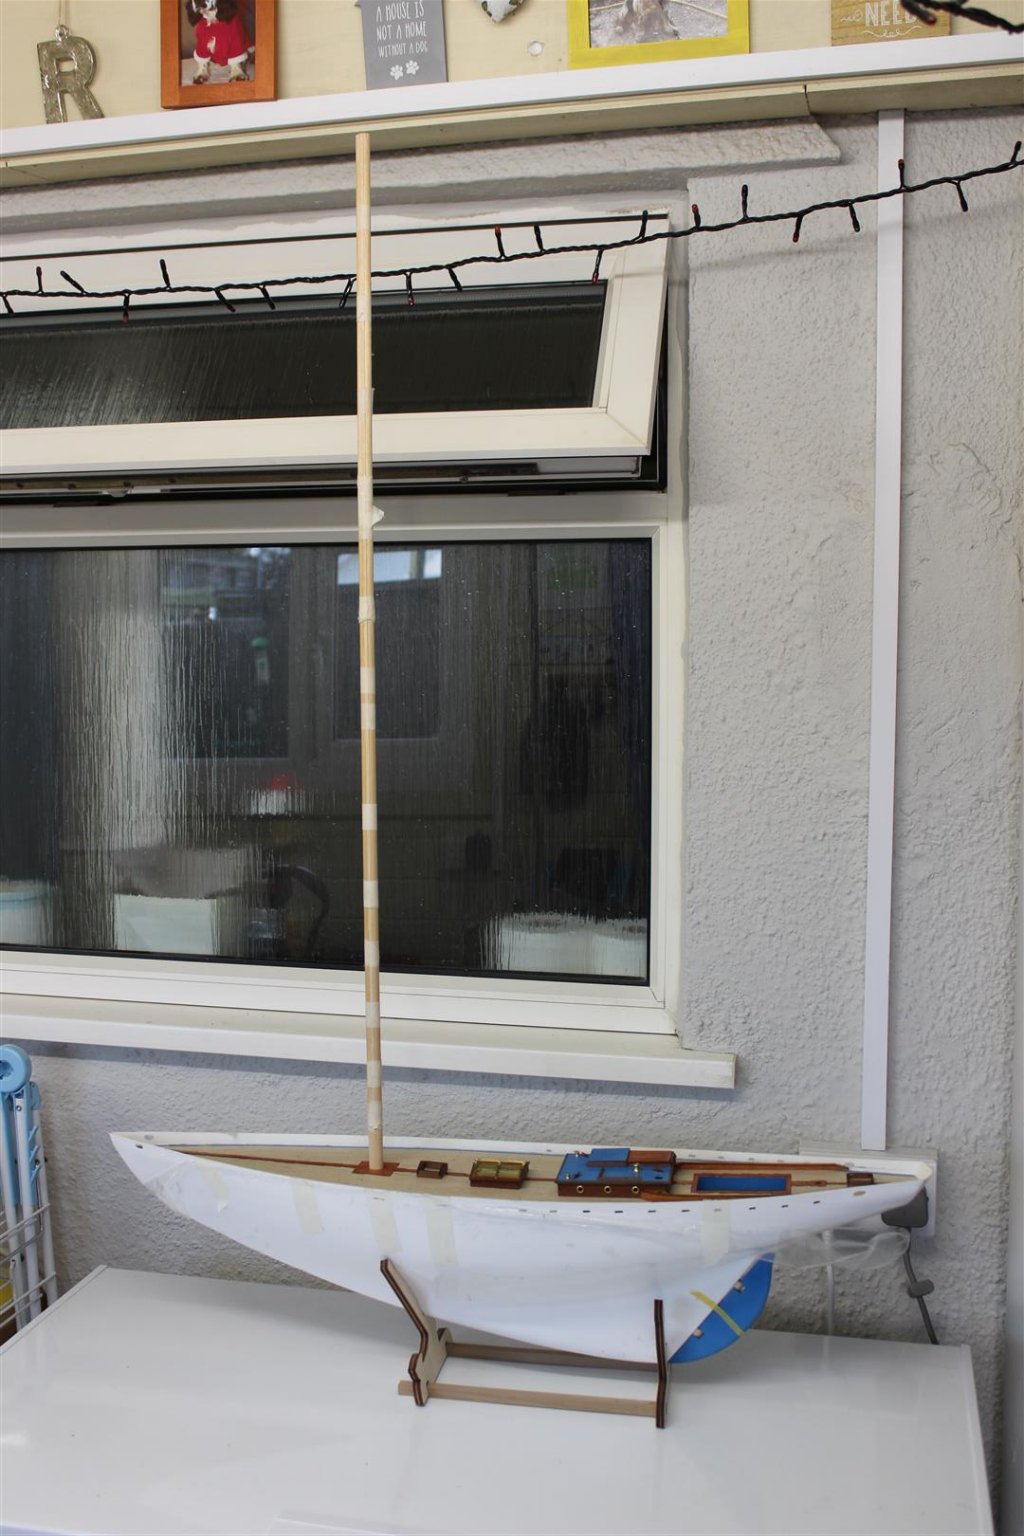
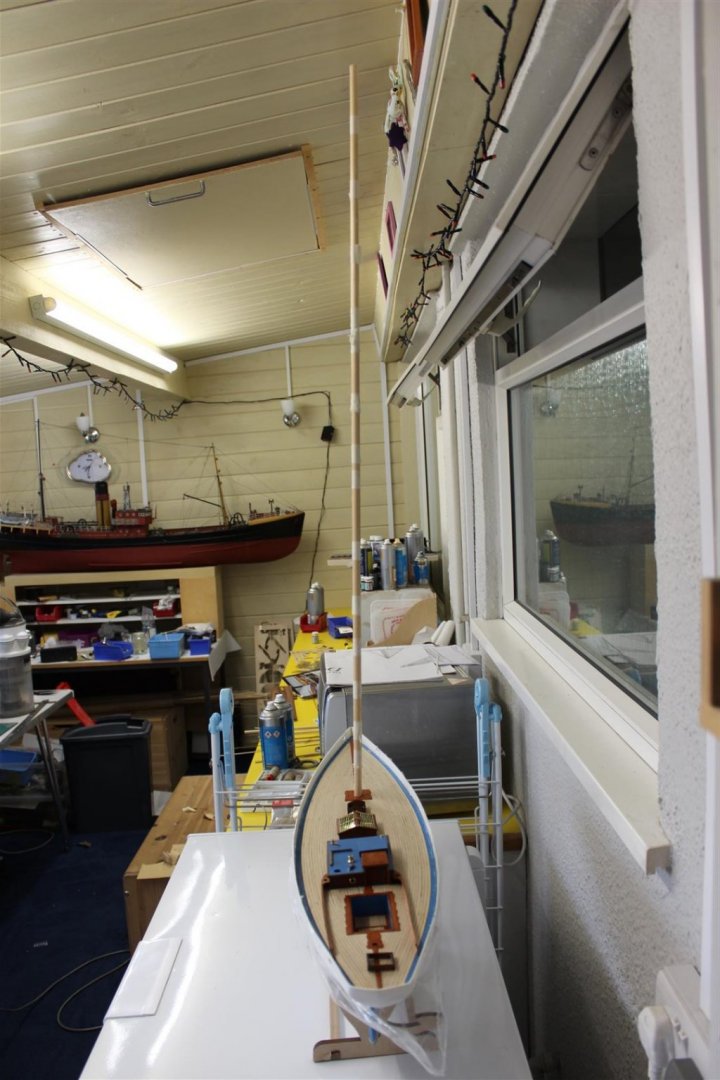
good evening everyone i in a position now to think about putting a primer on the hull, but been to wet and windy this weekend the mast is made up, by off centring different different strip wood to create an oval shape, it going to be tall at 97 cm long, still to be tapered off today i have brought another build back from the dead and will now also progress the Amerigo Vespucci


-
Buildlog is gone
Kevin replied to Kyak's topic in Using the MSW forum - **NO MODELING CONTENT IN THIS SUB-FORUM**
this is where a link to your build would have been so very handy -
1.6 metres long
-
only this time i think it might be to expensive,
-
was about 10 years ago i had a conversation with the wife over the Caldercraft Victory or Euromodel Royal William (victory won) is the same subject going to repeat its self again
-
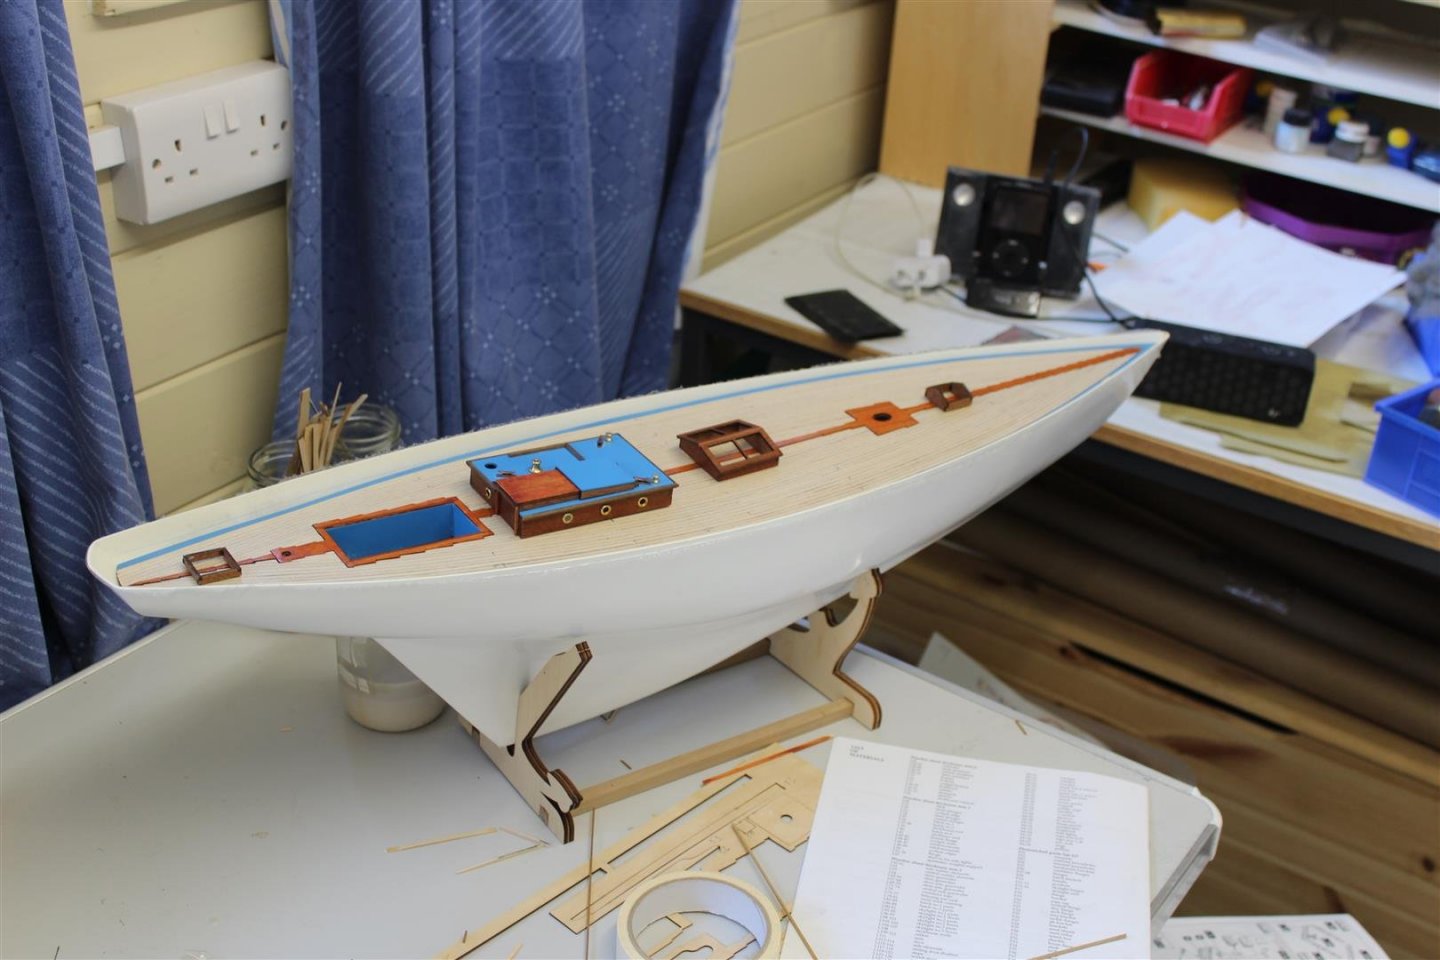
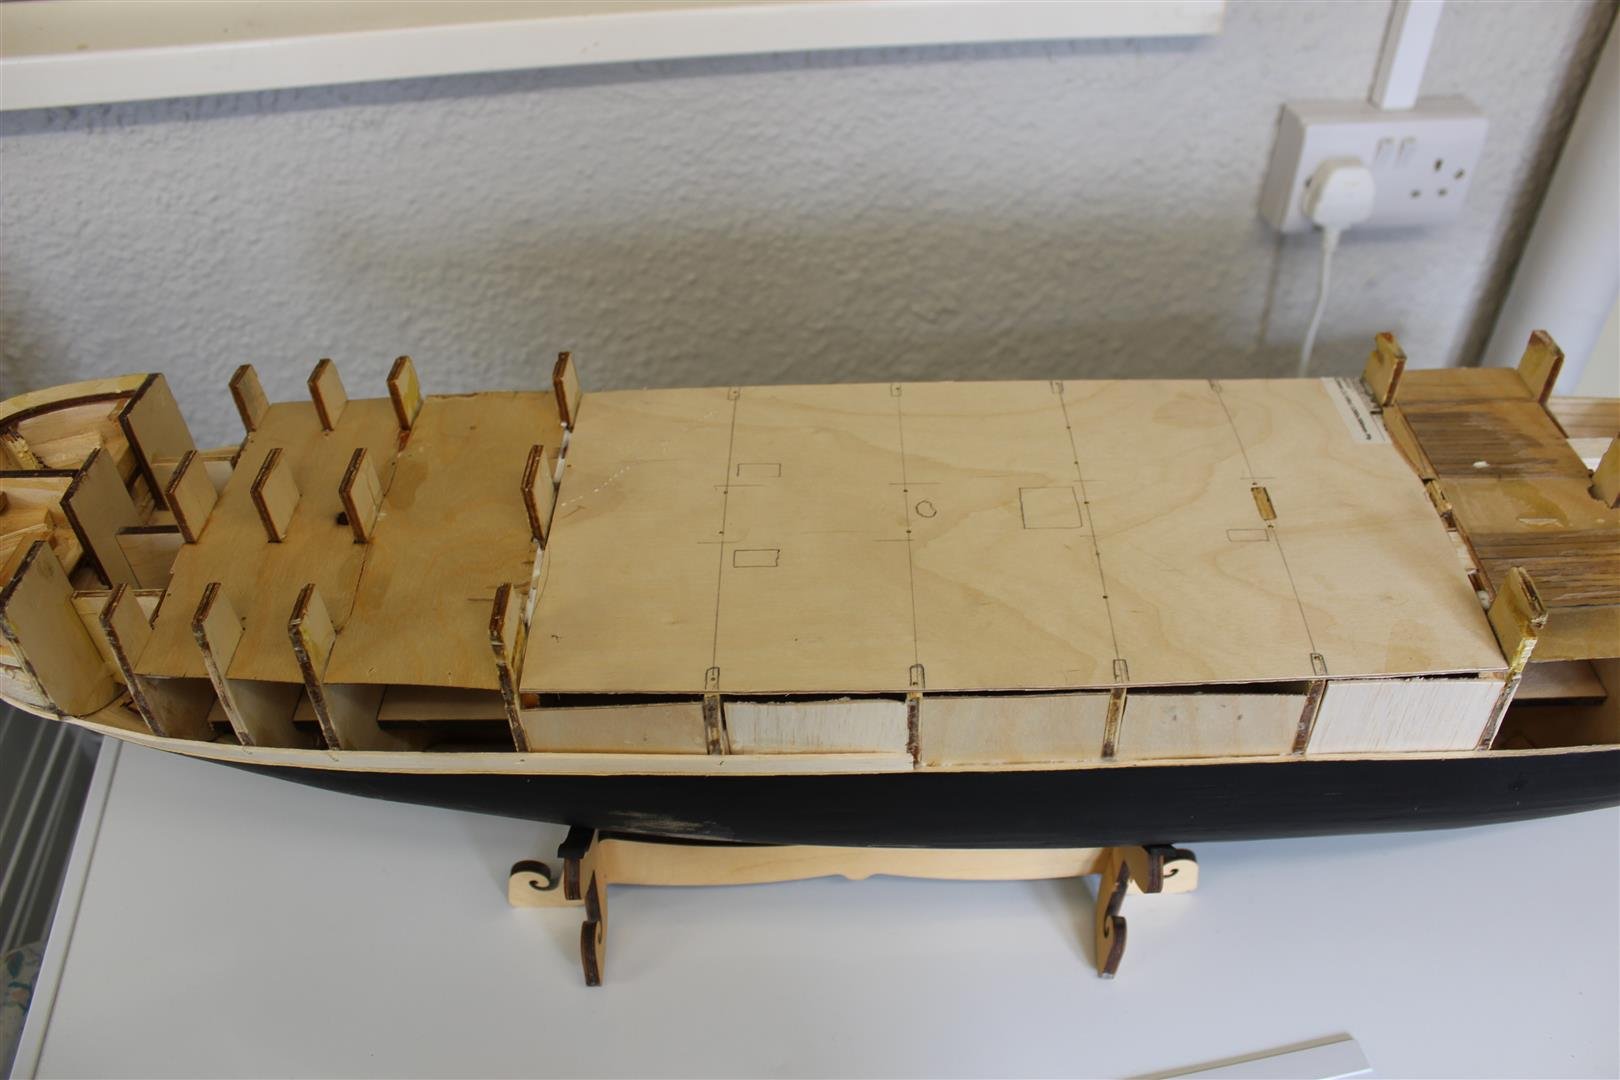
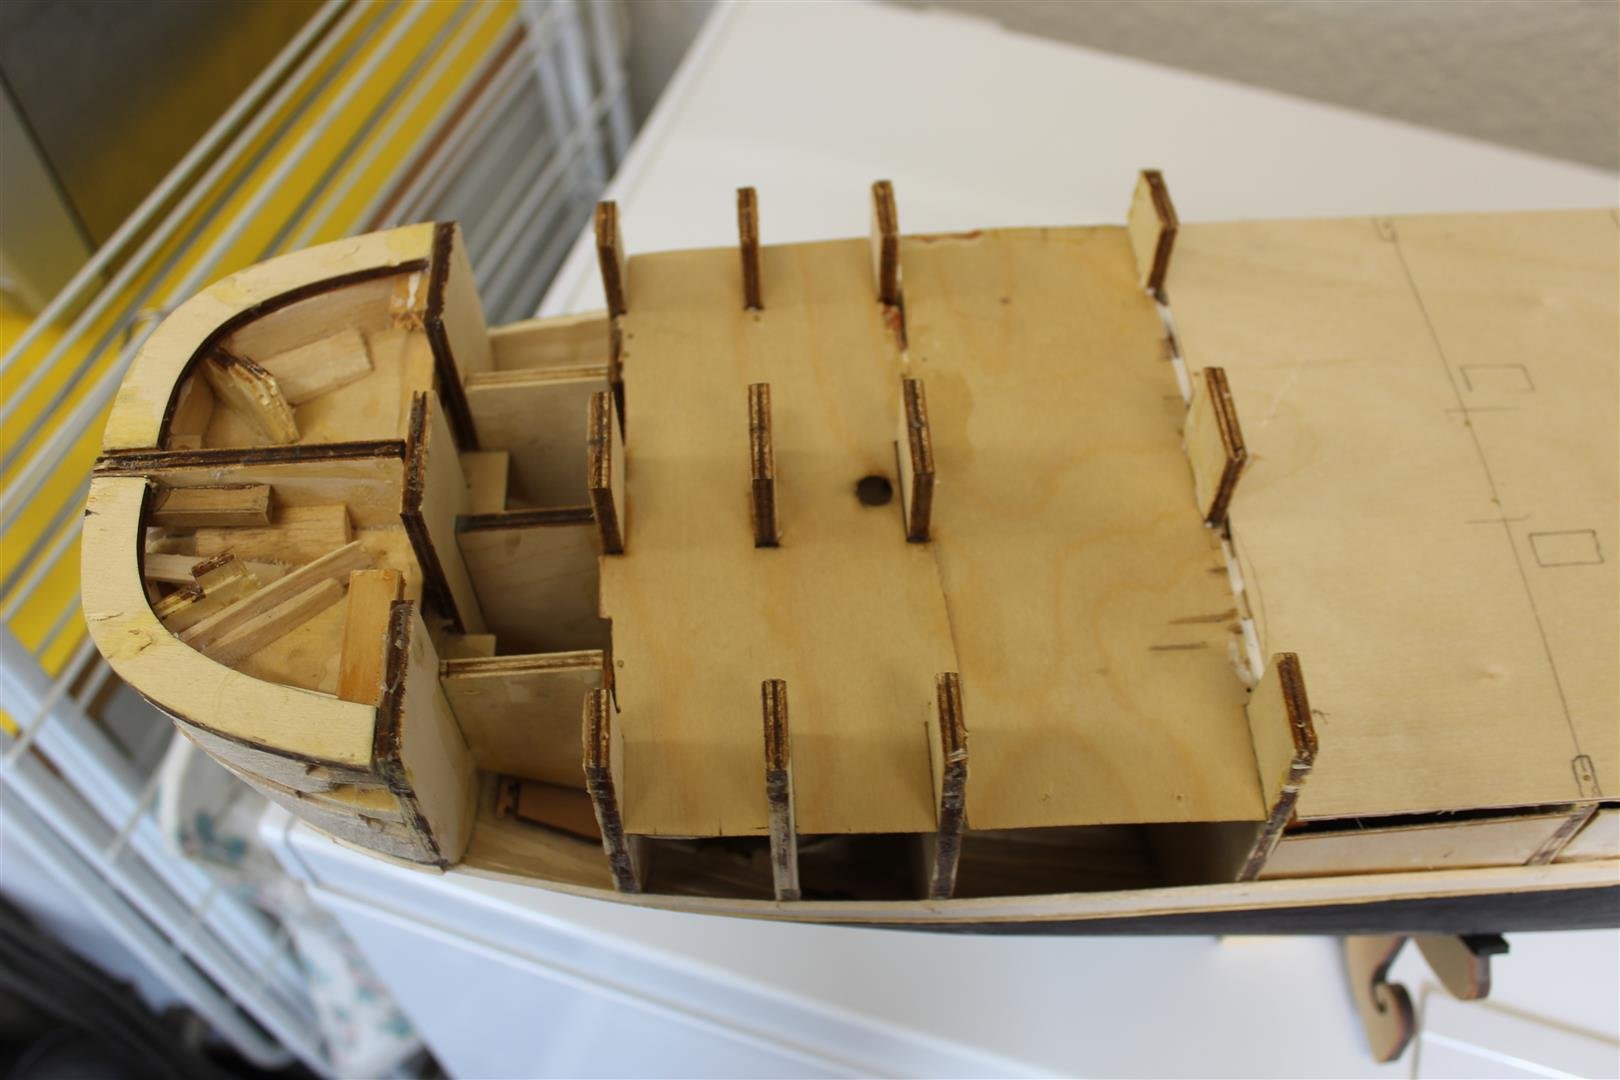
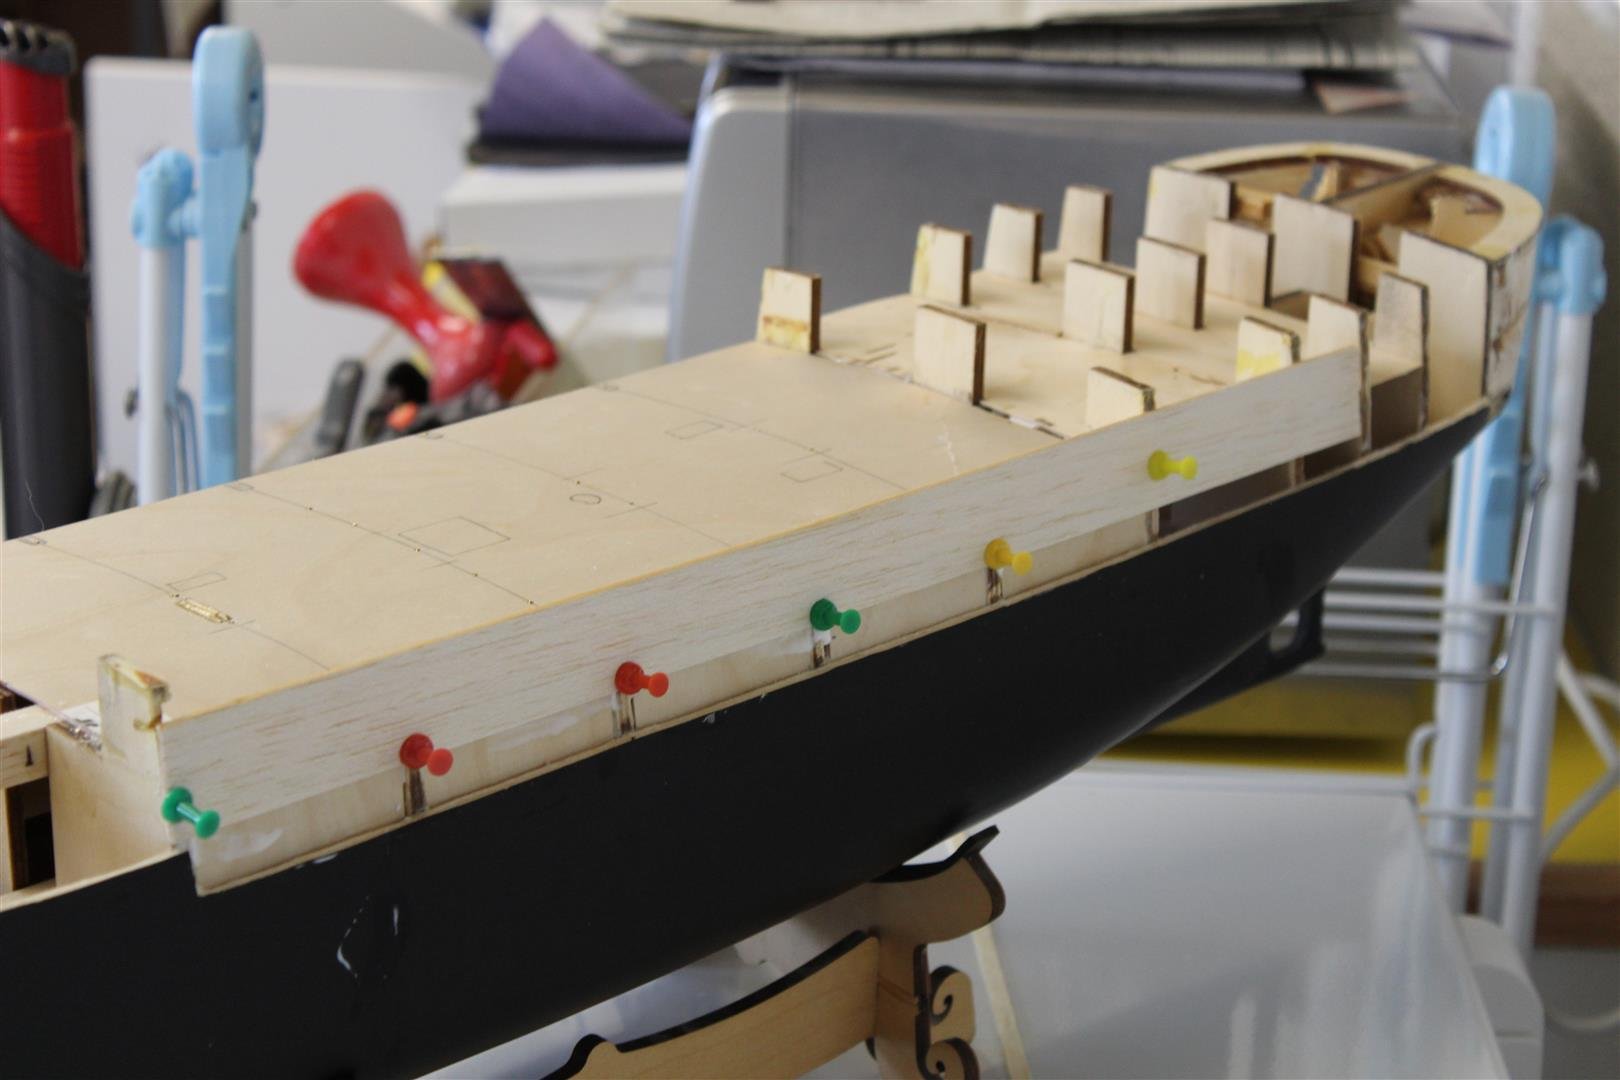
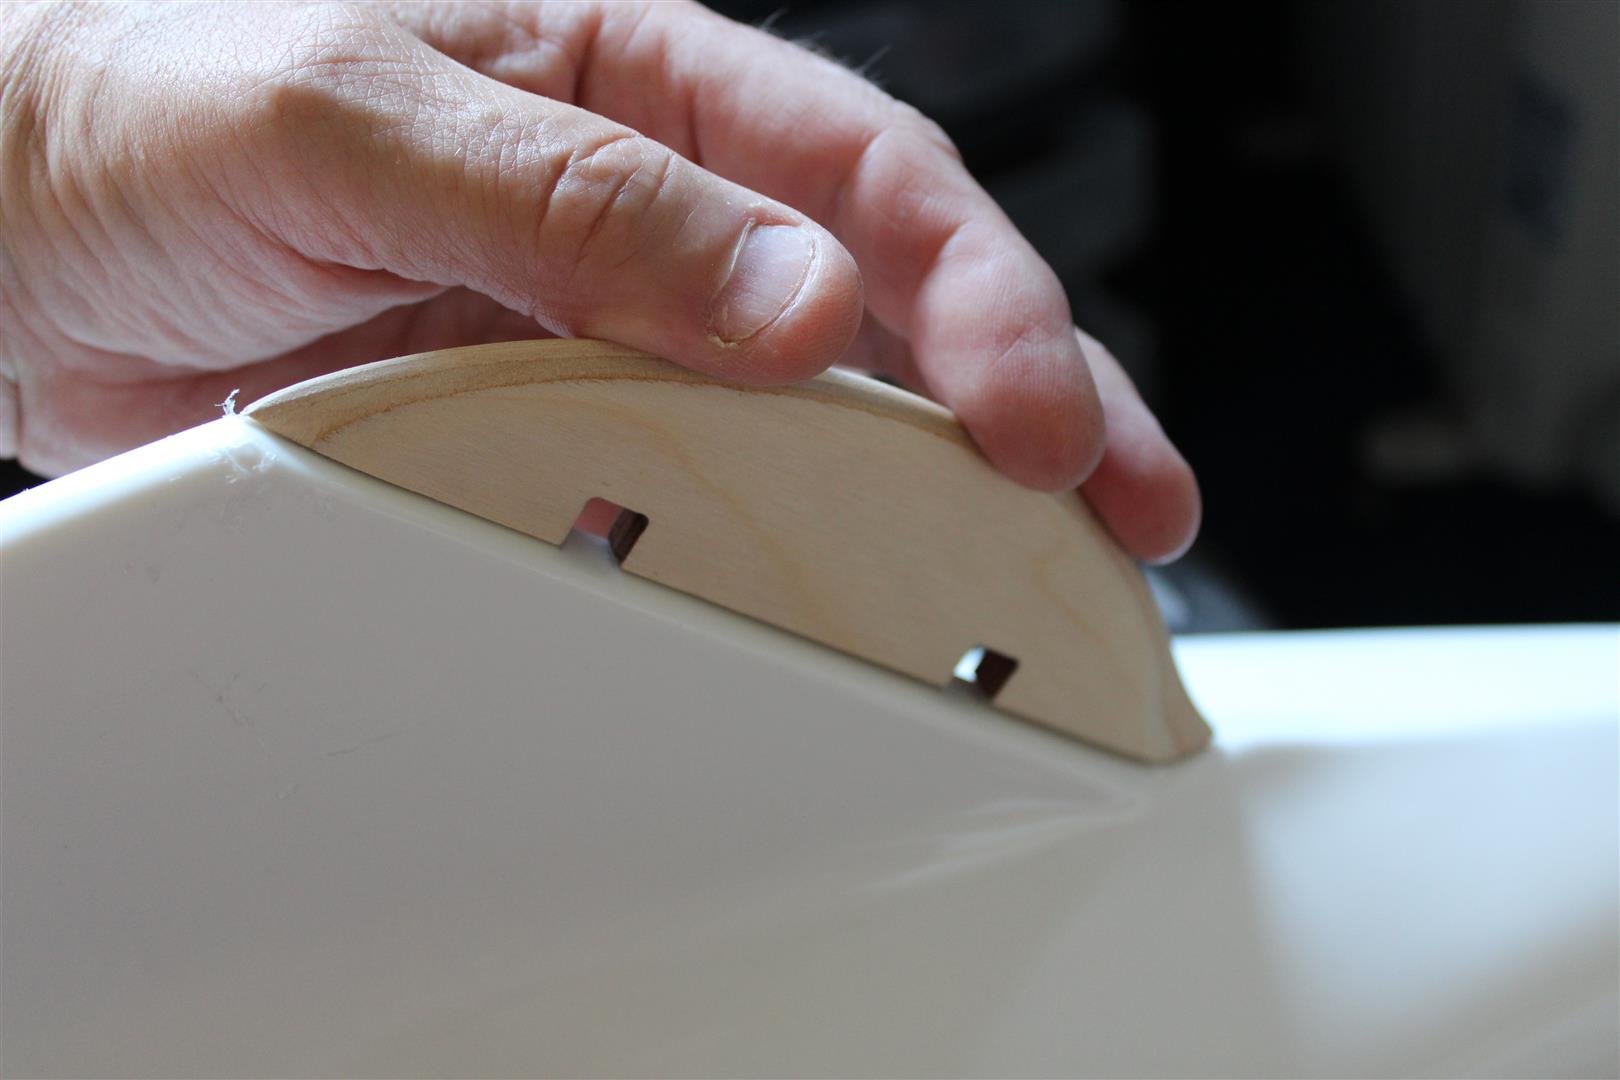
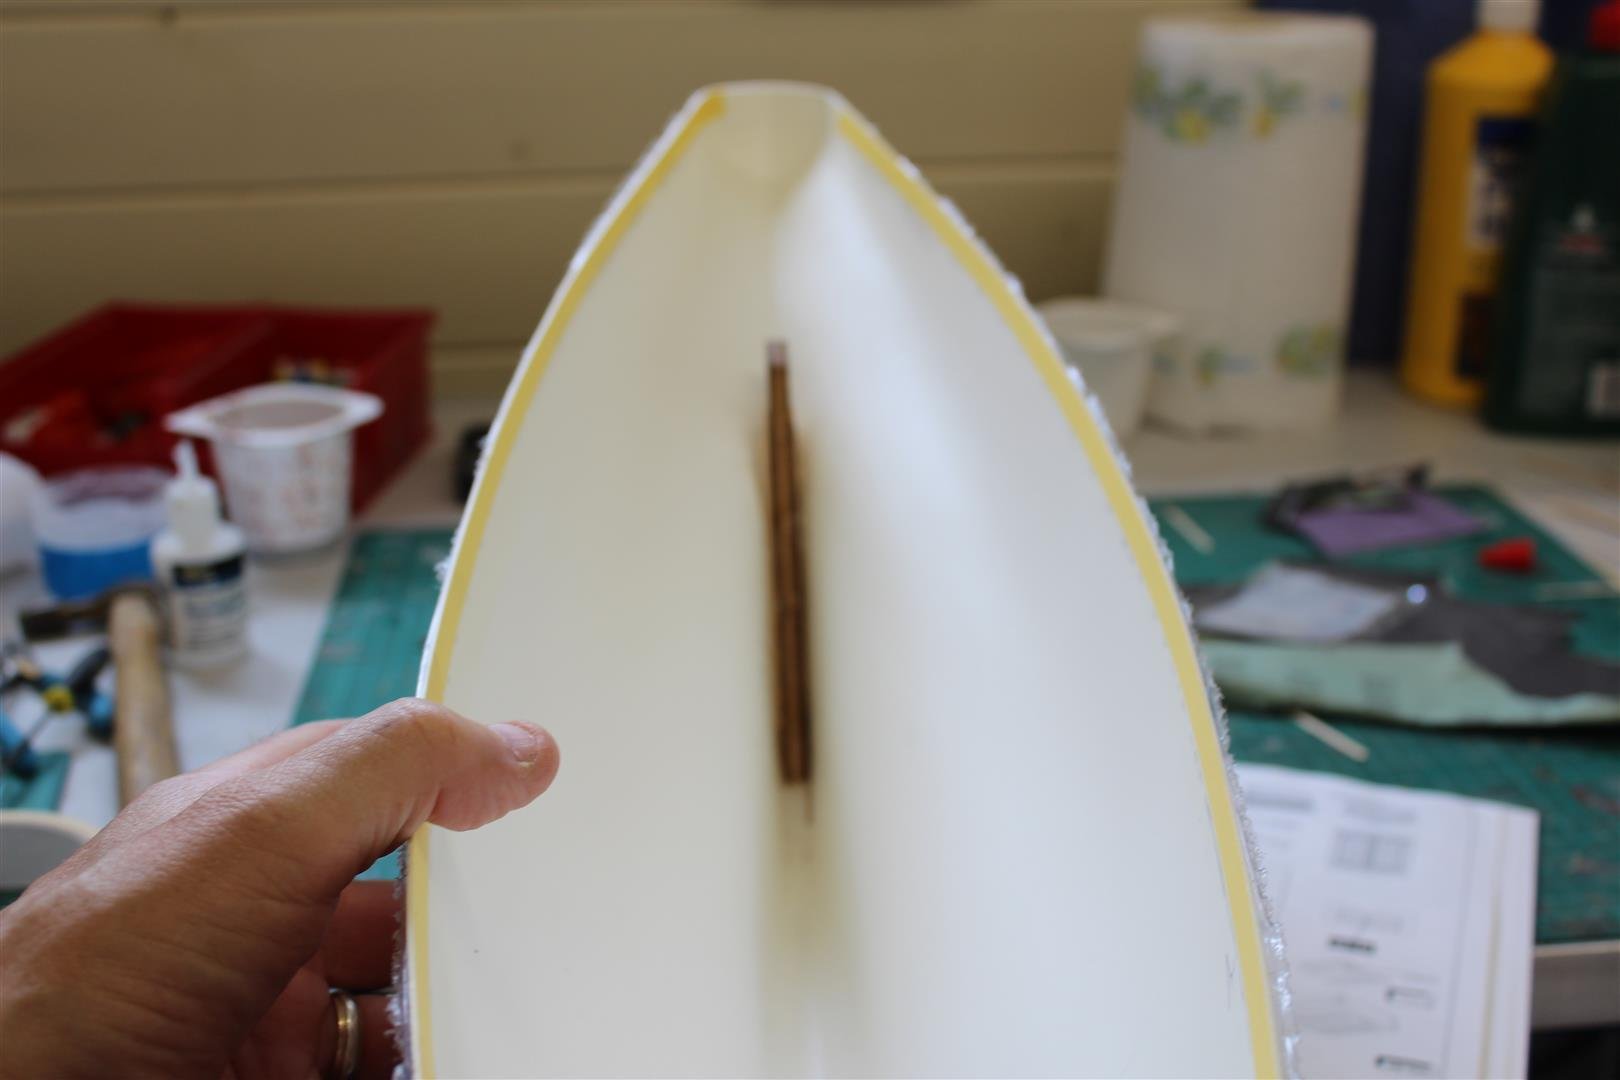
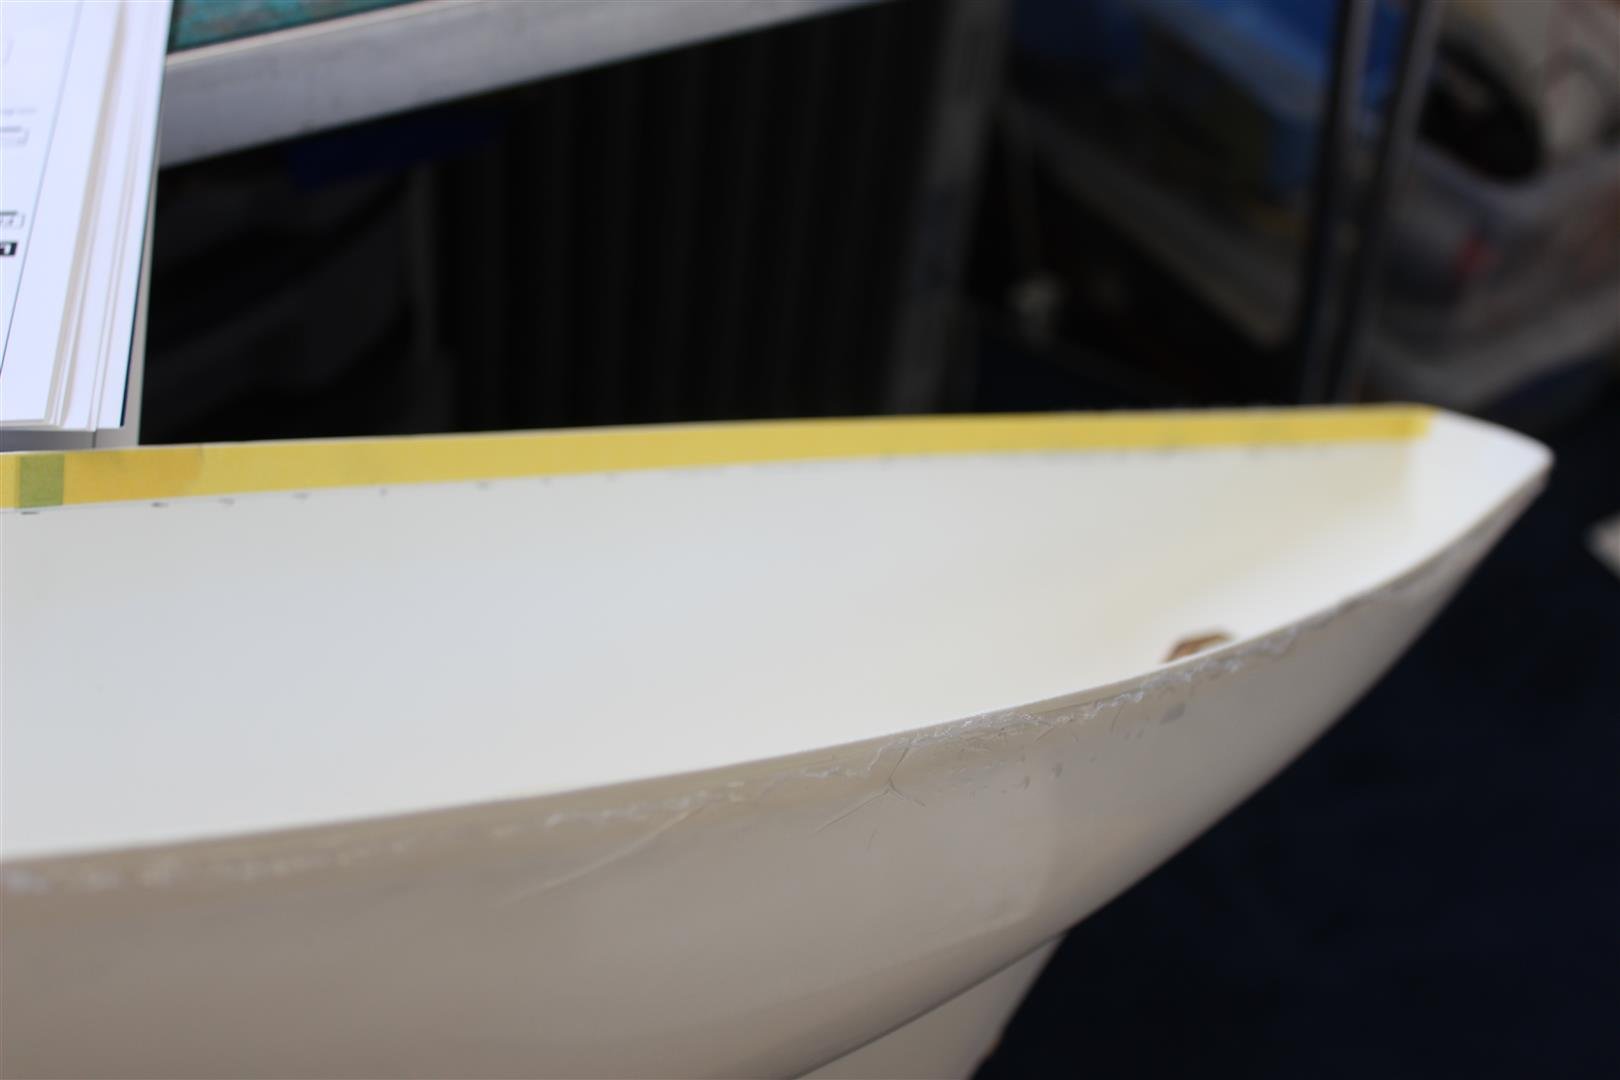
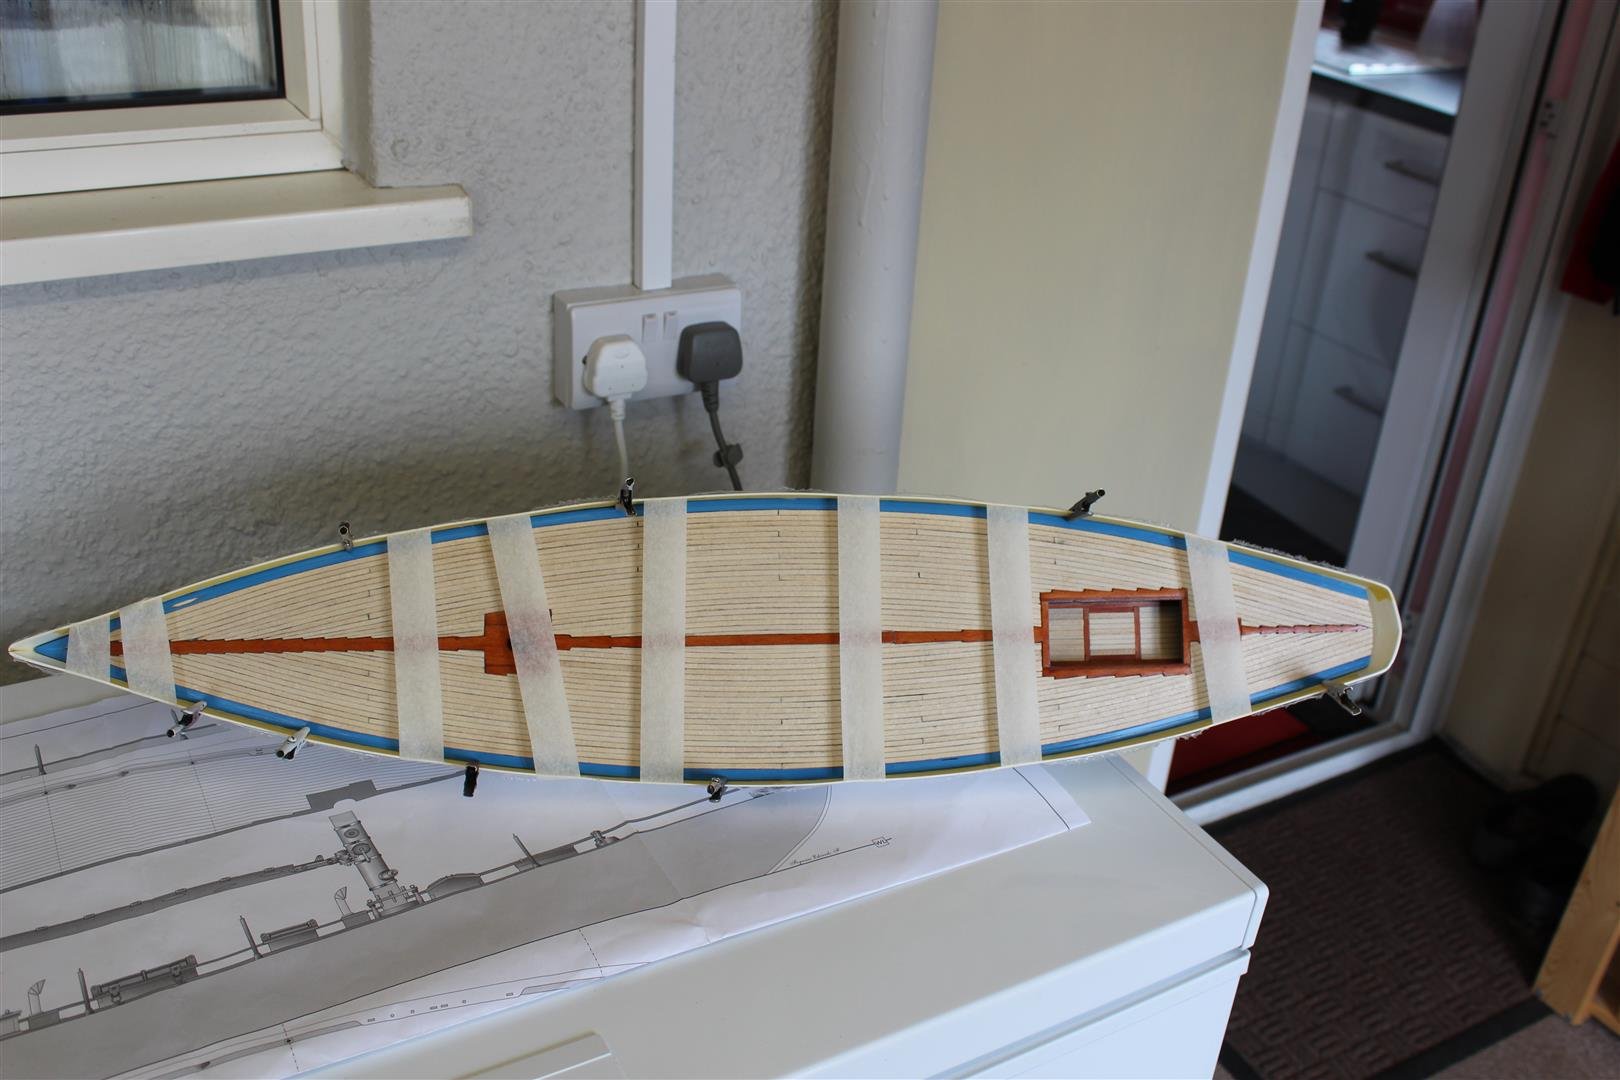
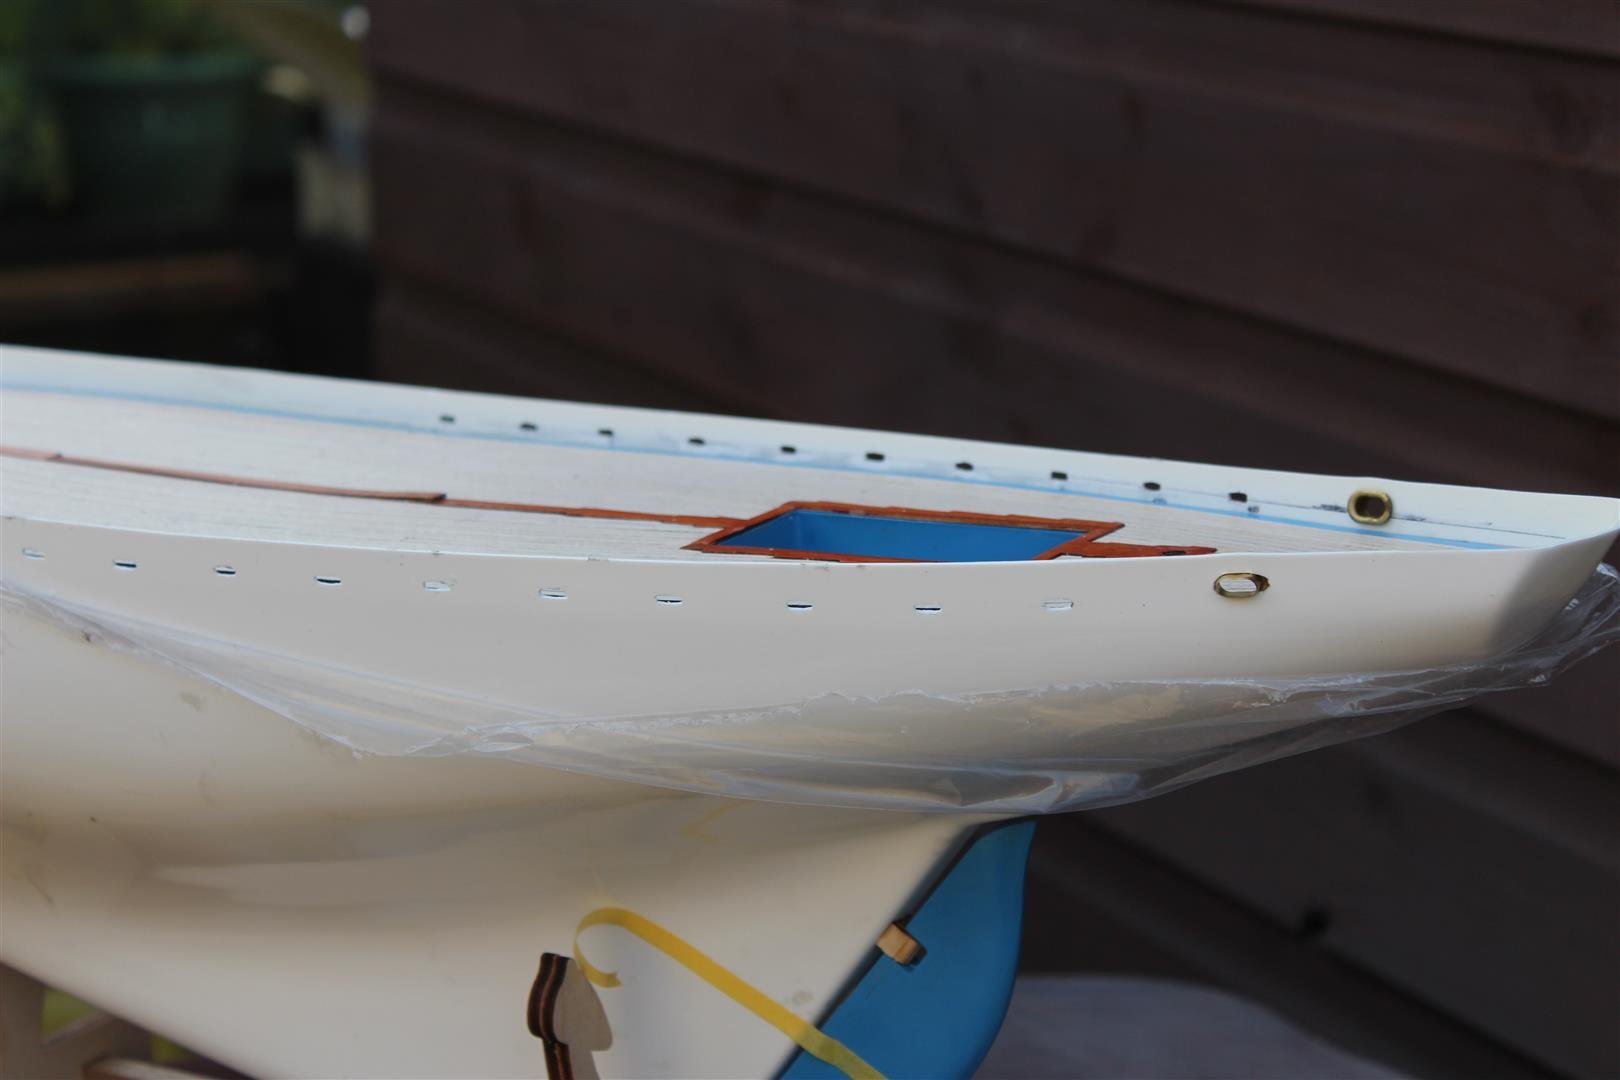
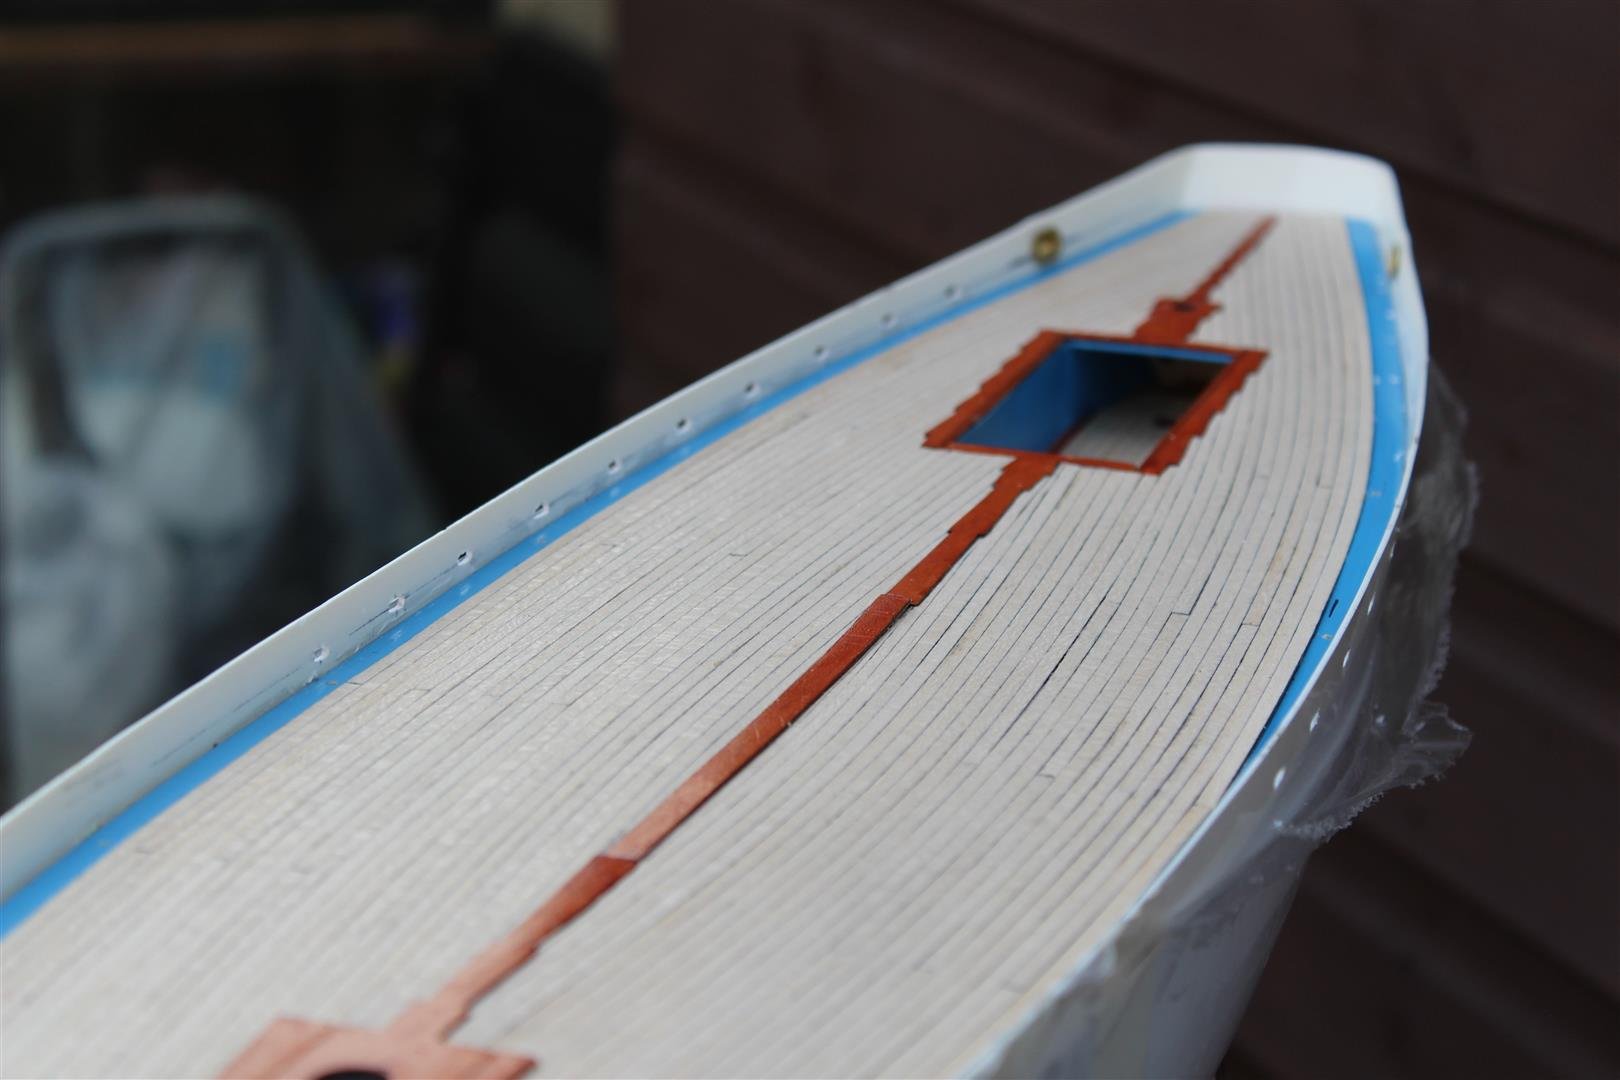
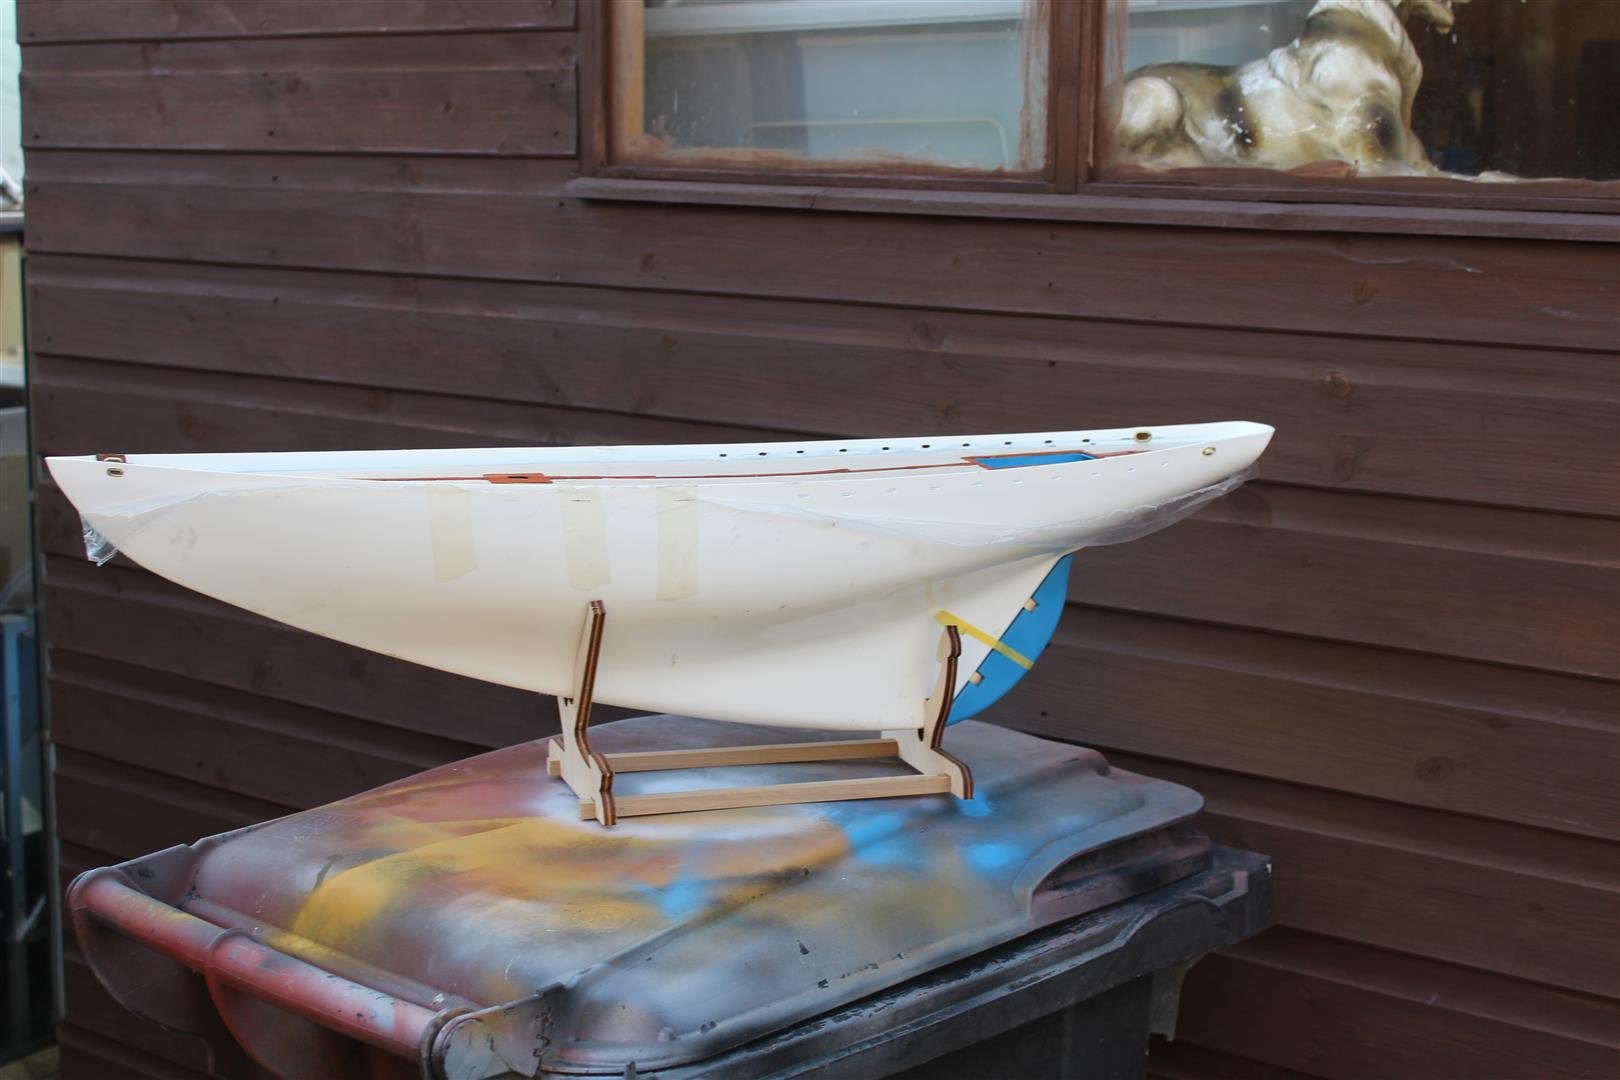
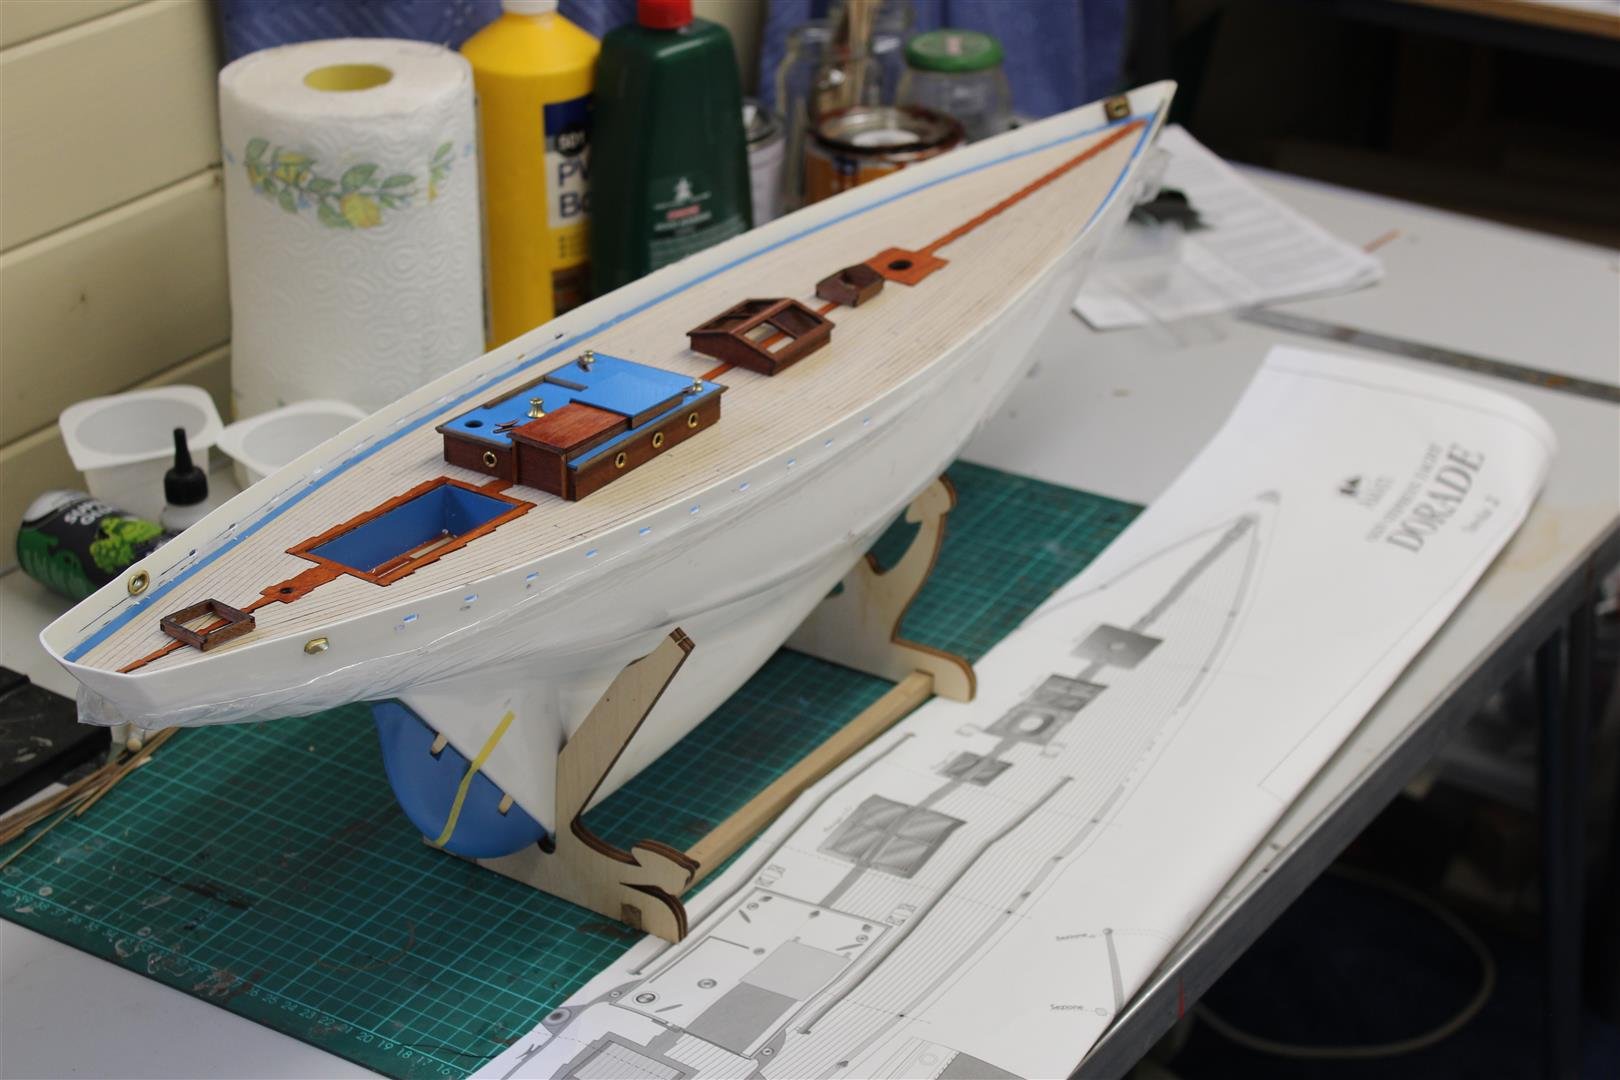
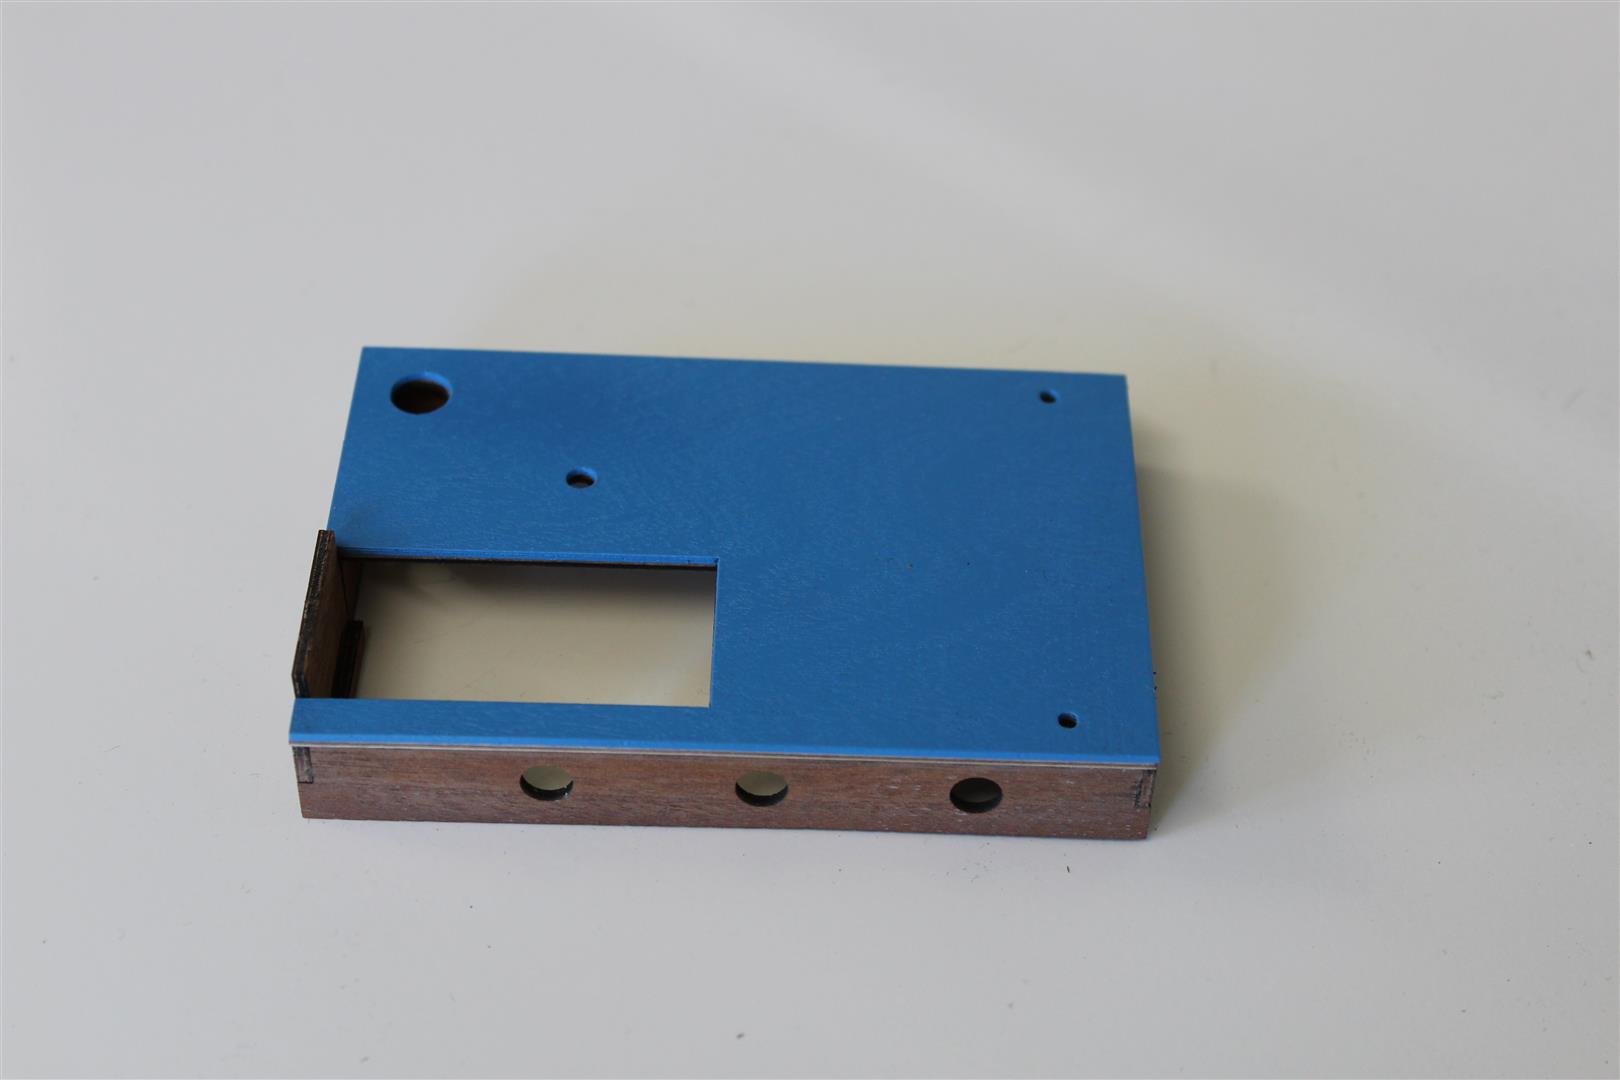
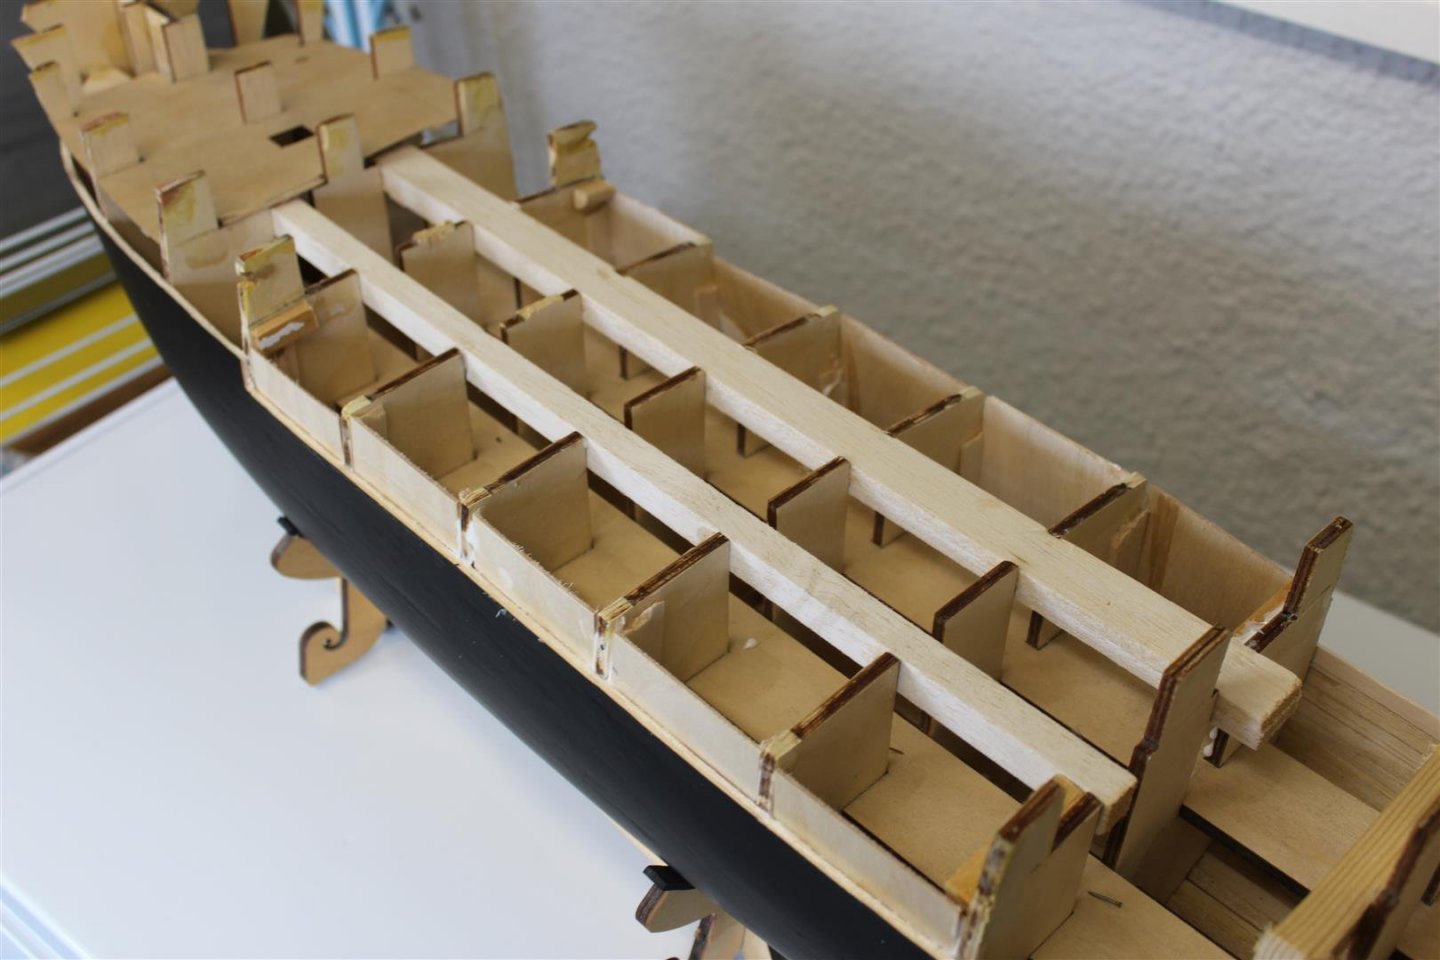
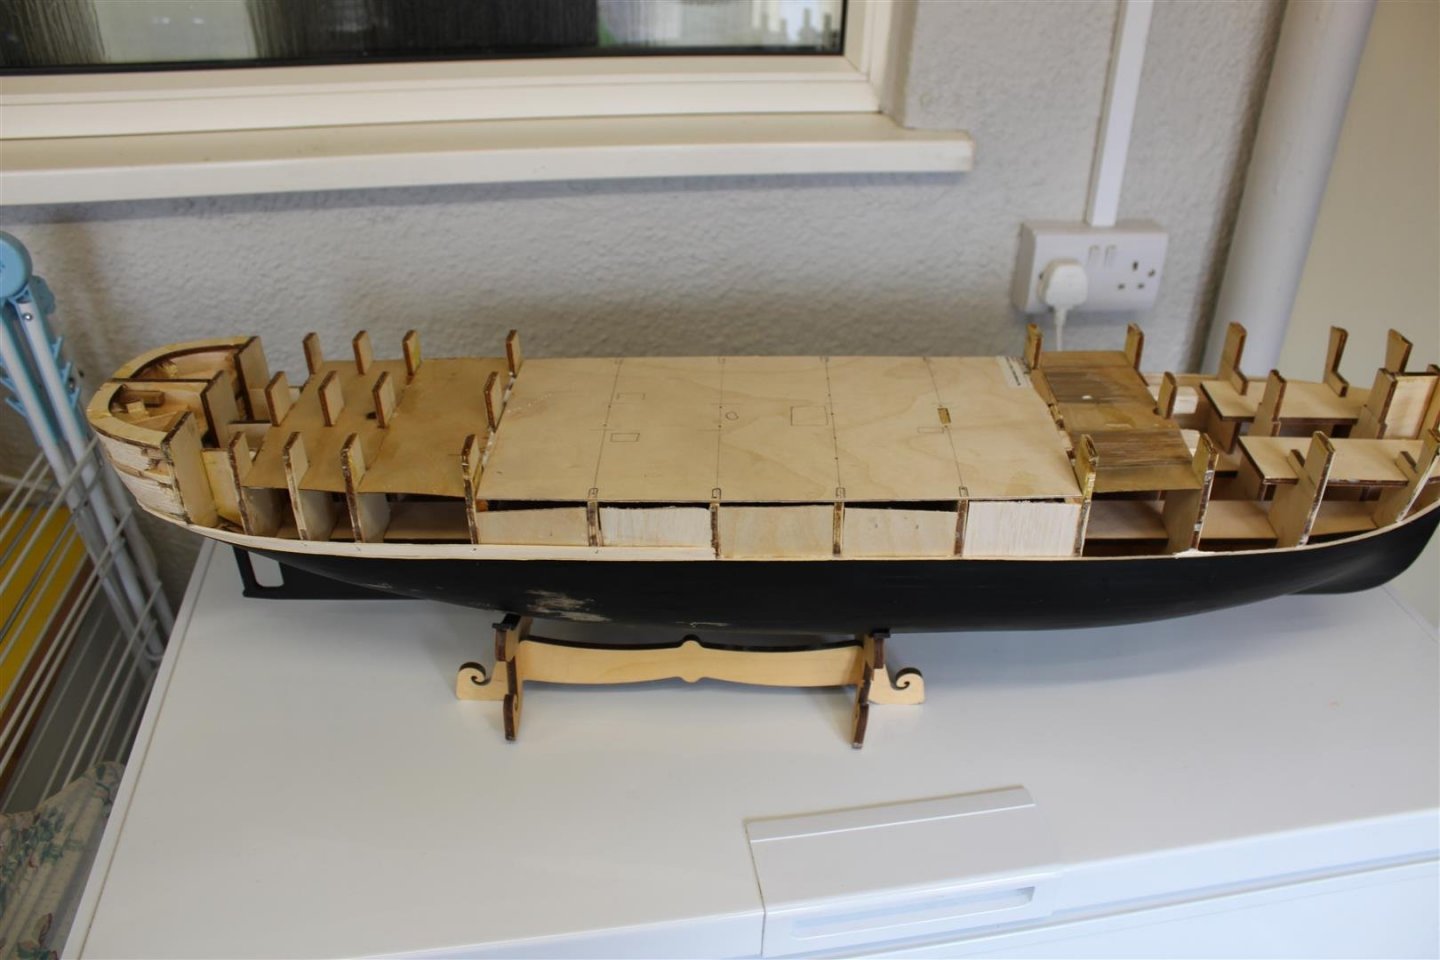
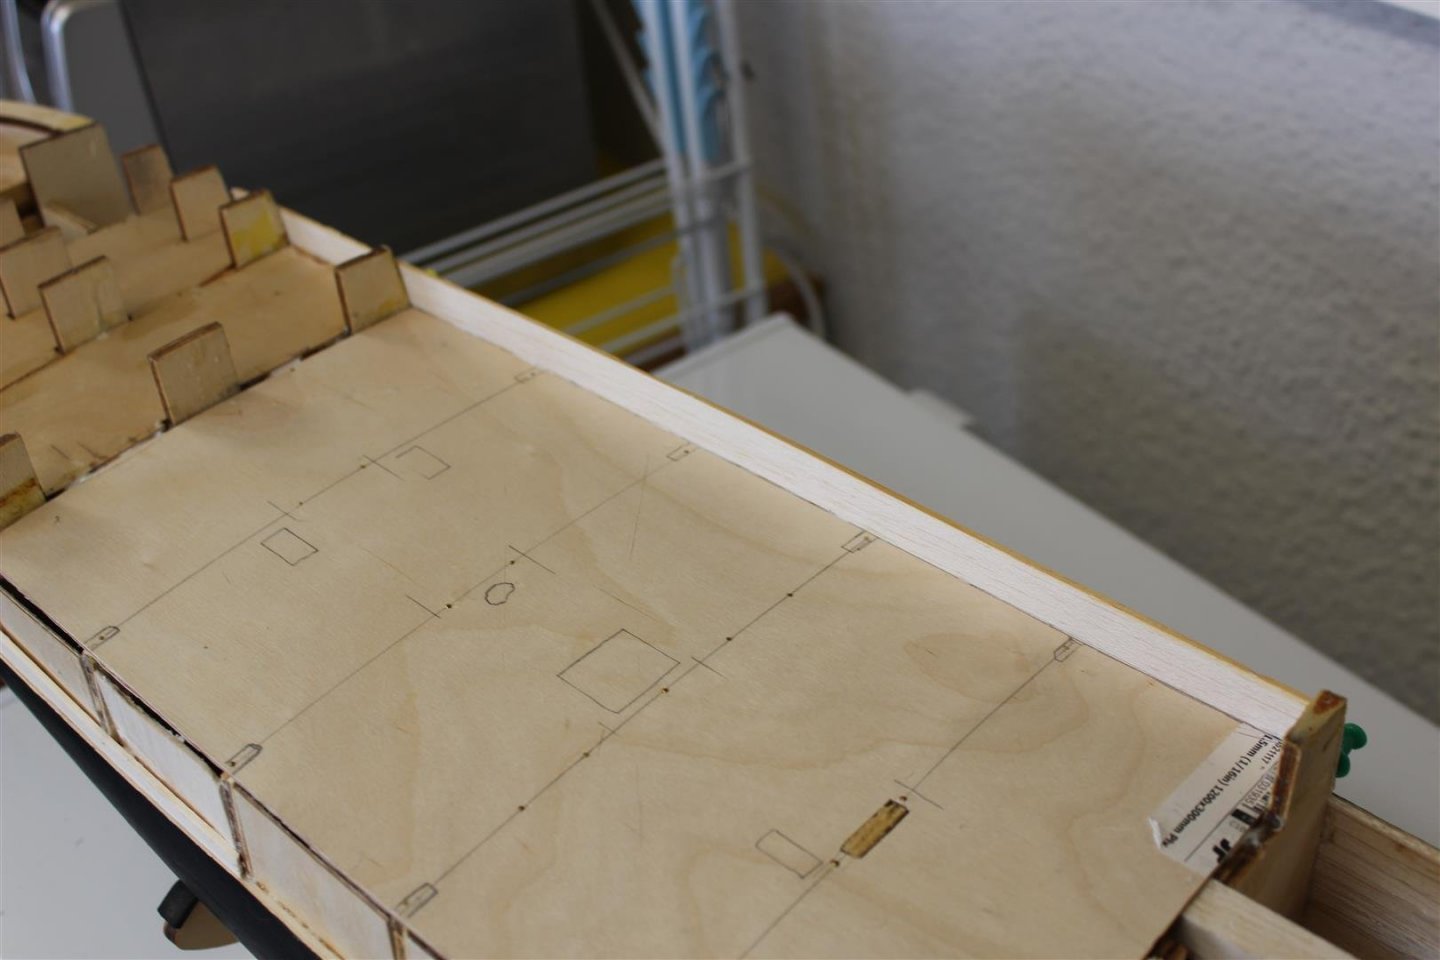
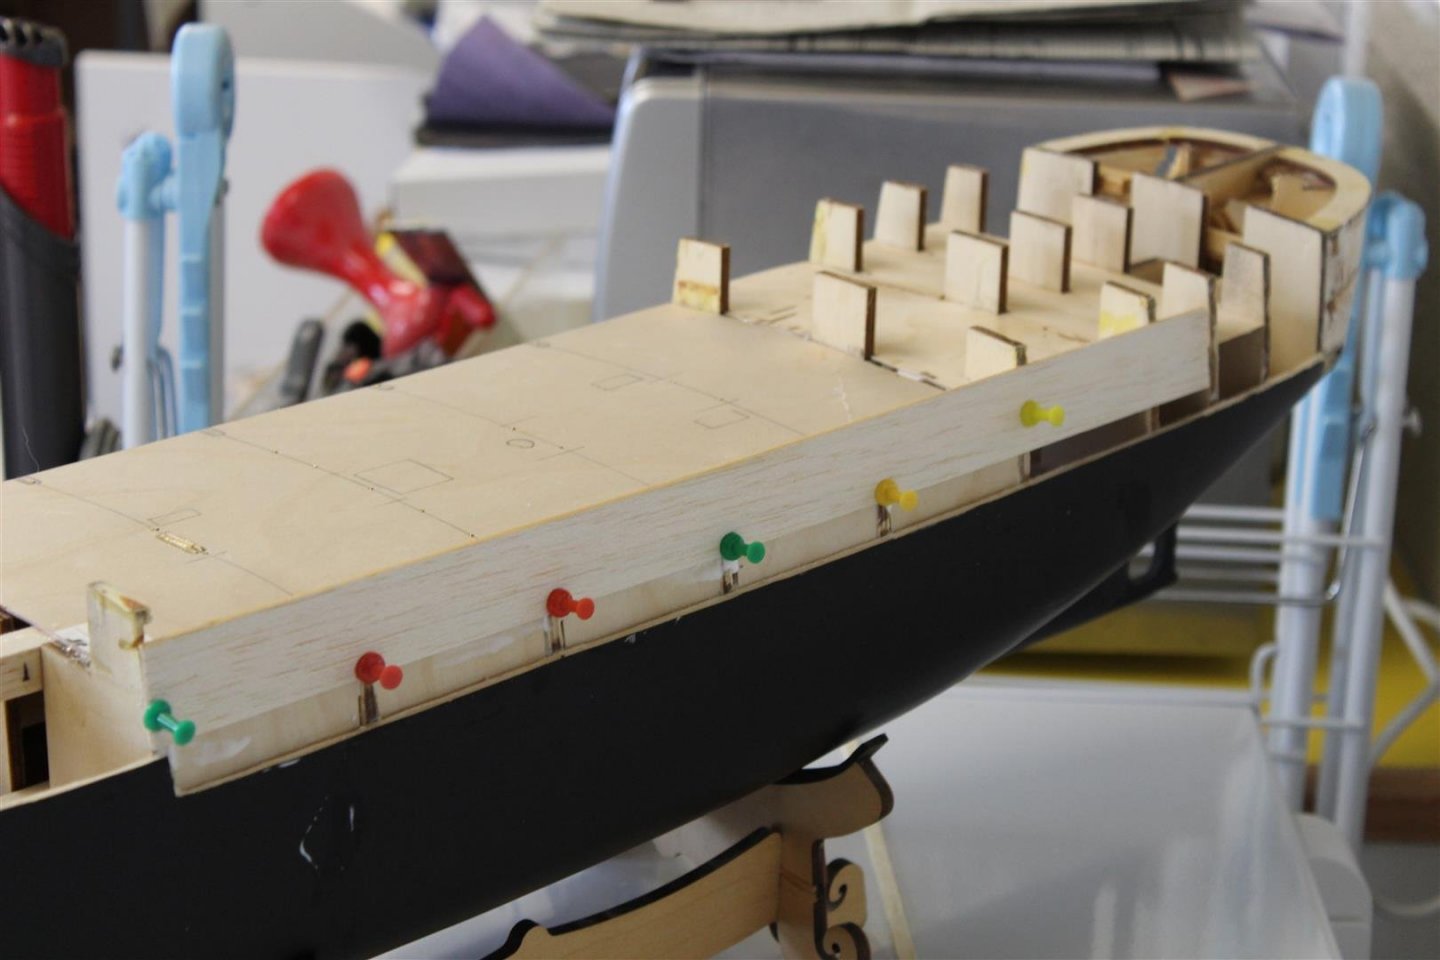
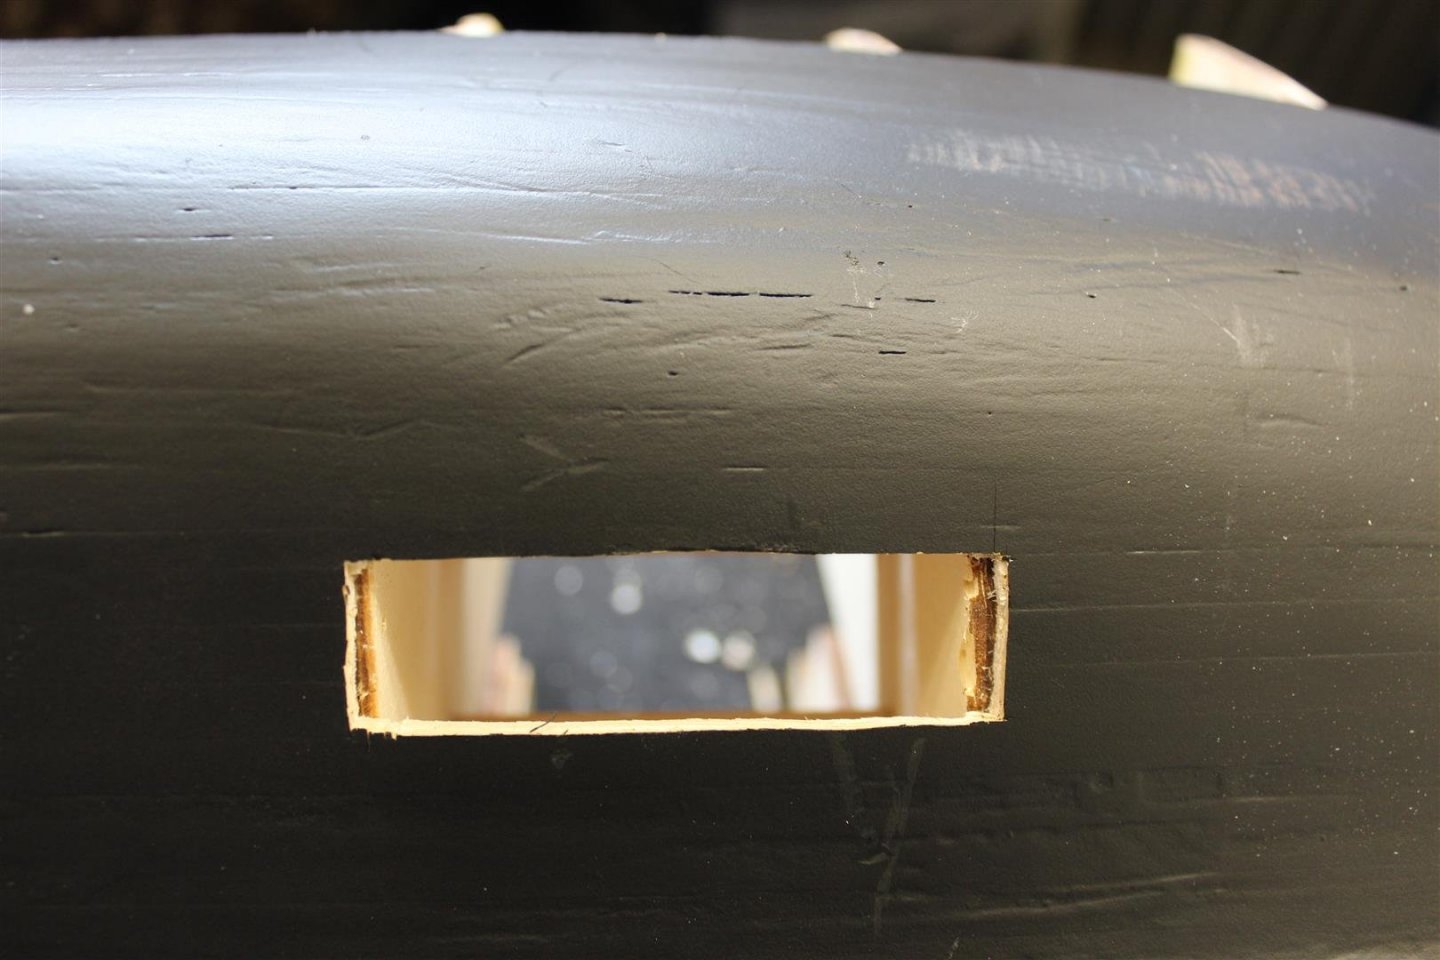
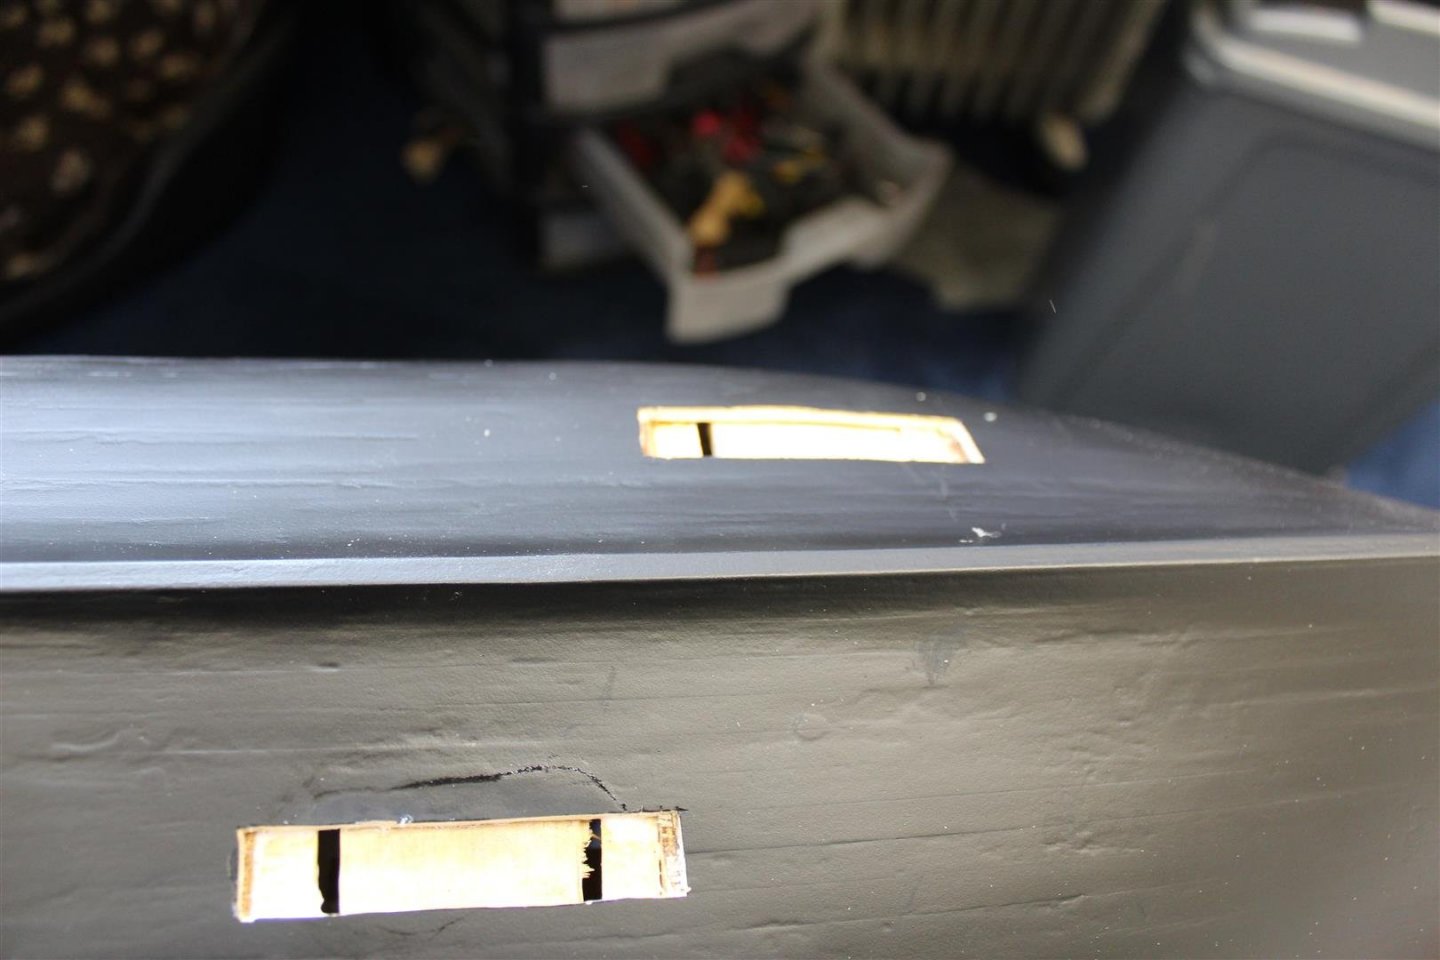
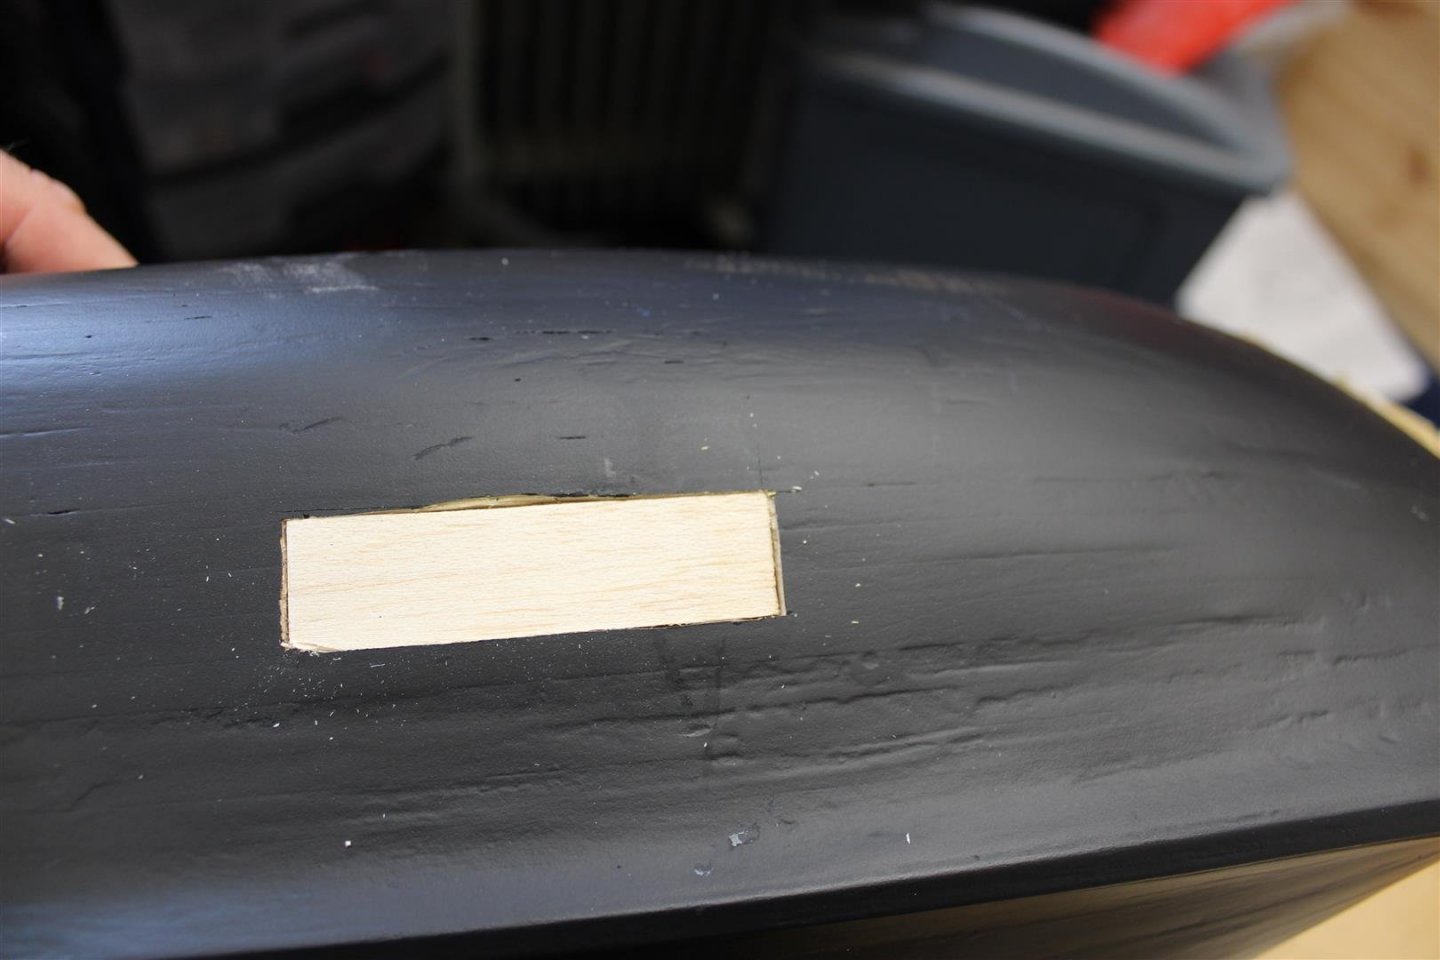
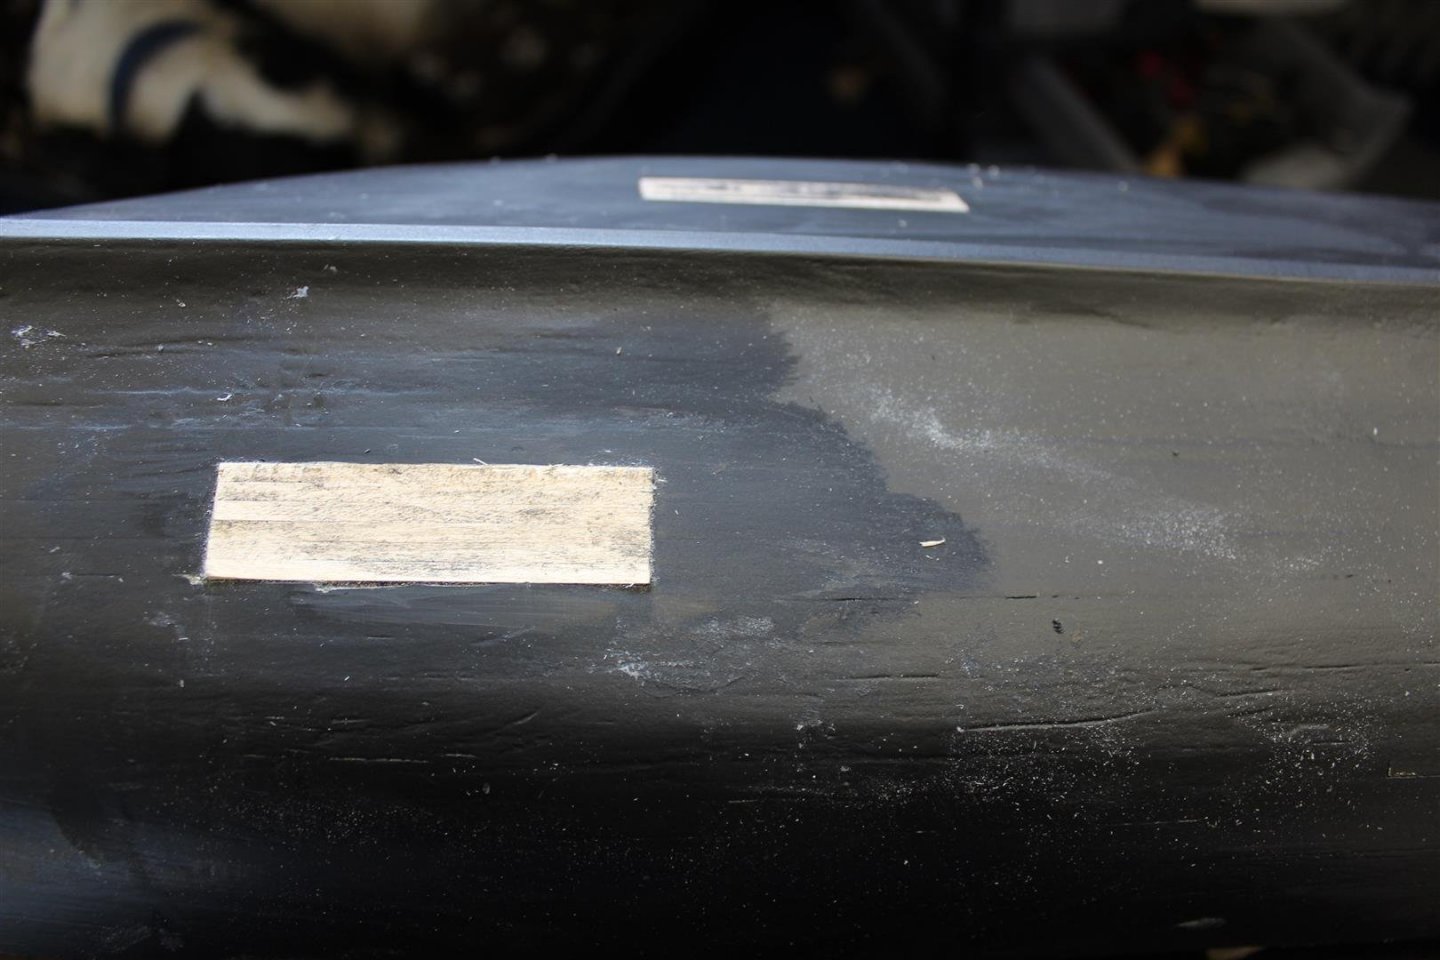
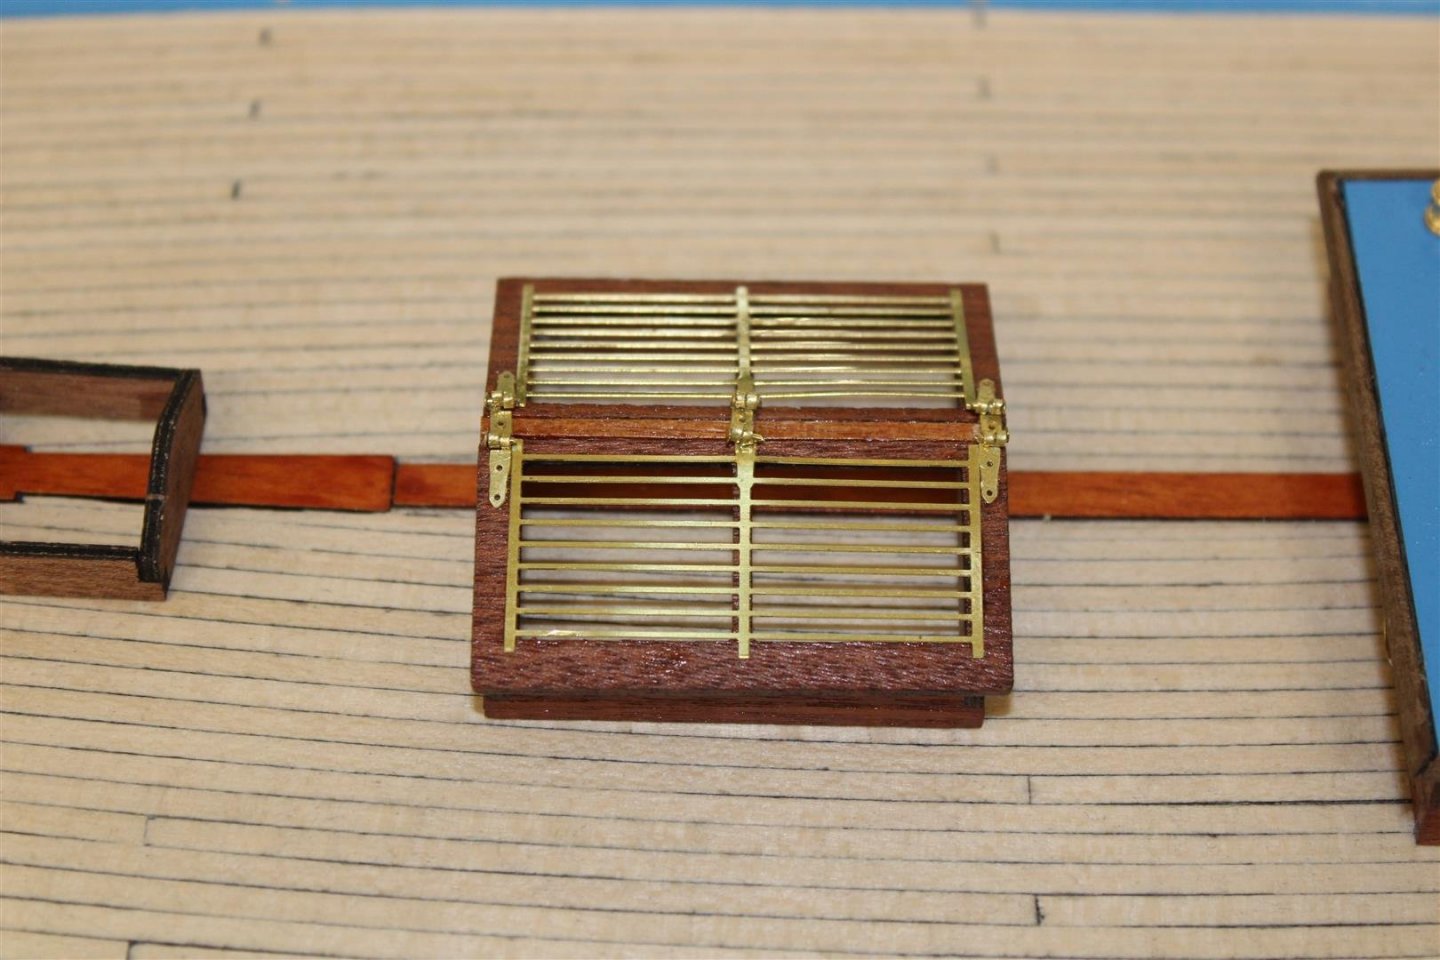
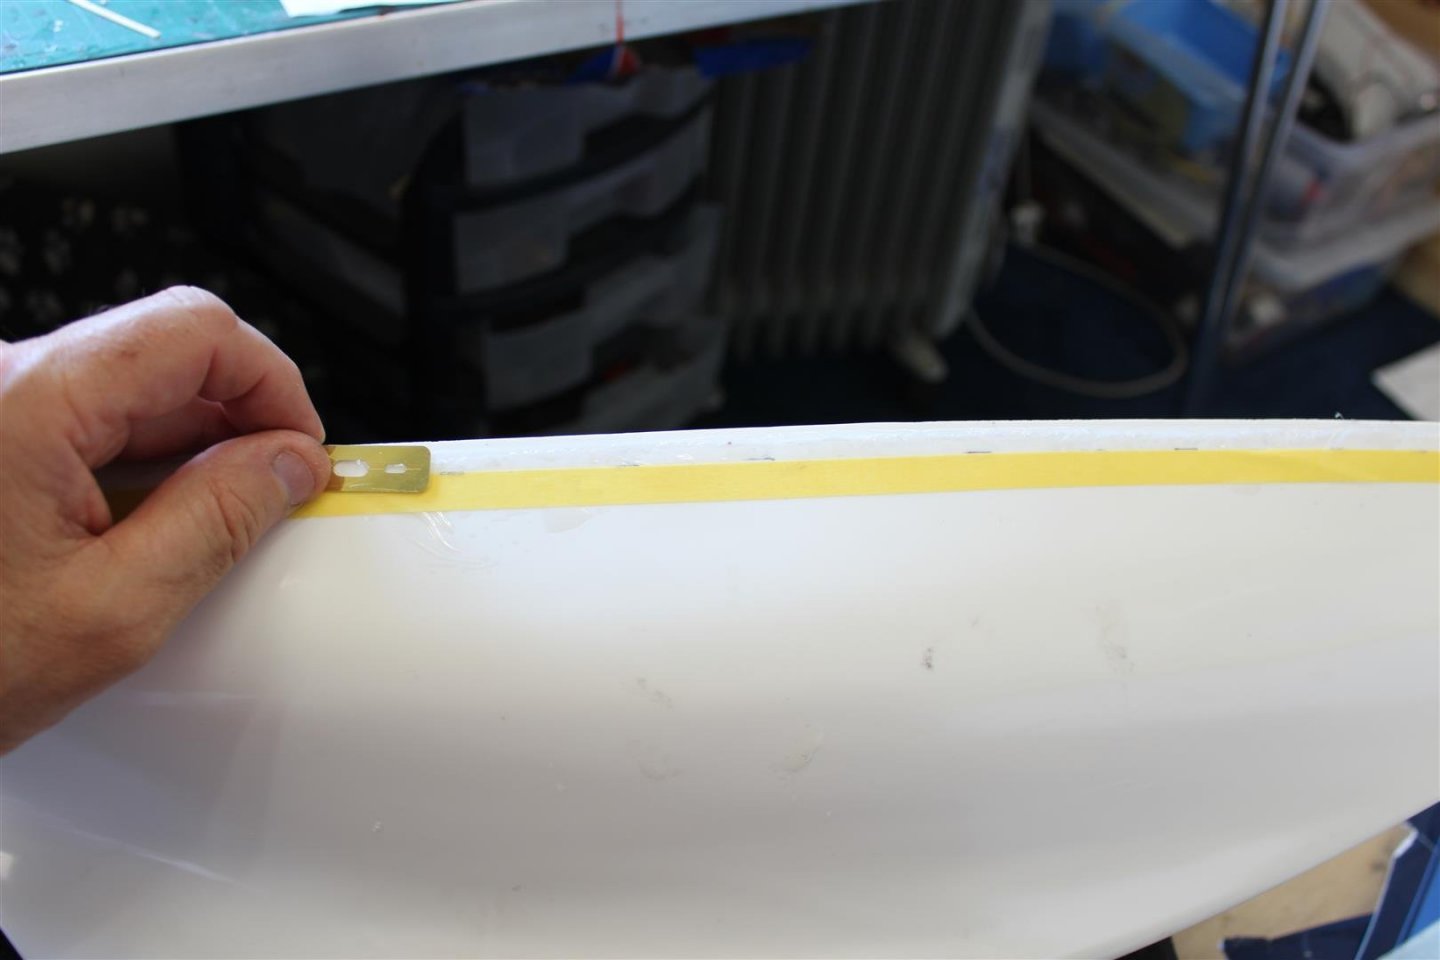
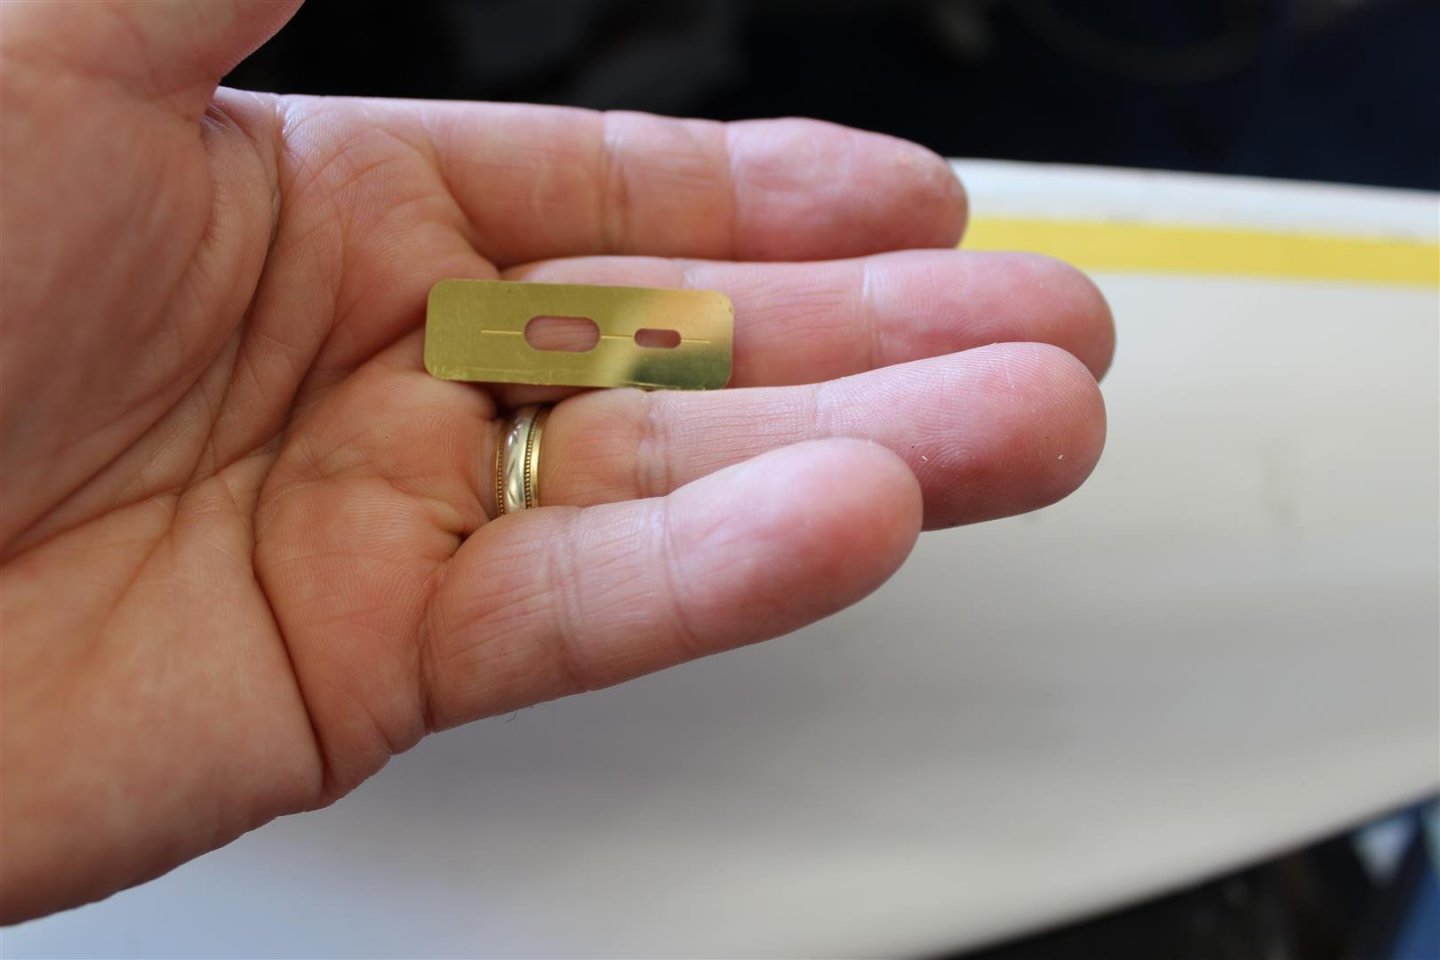
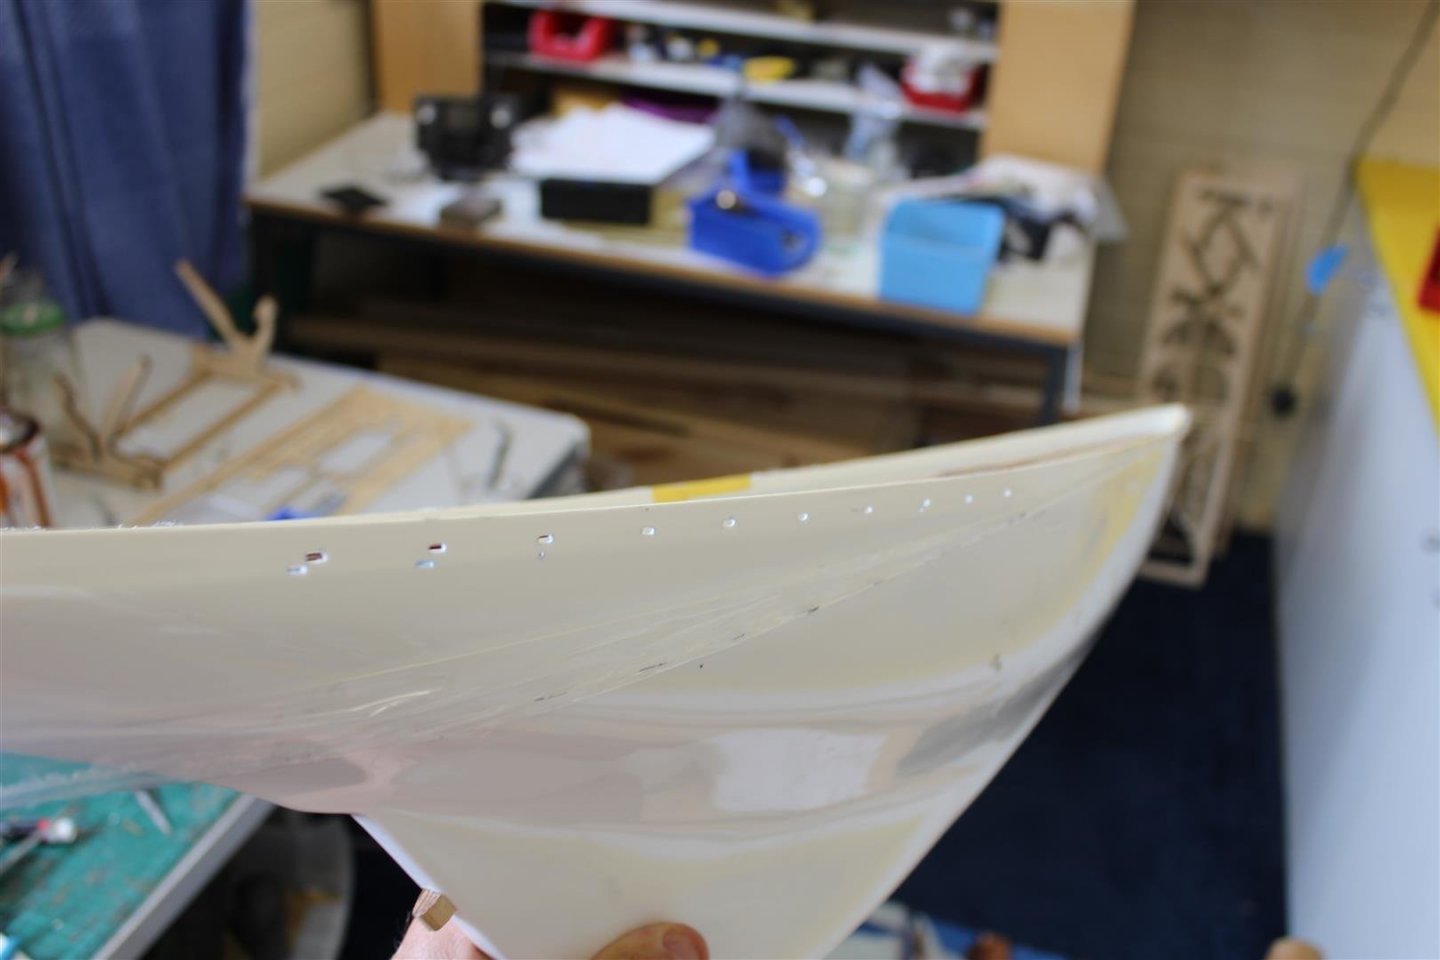
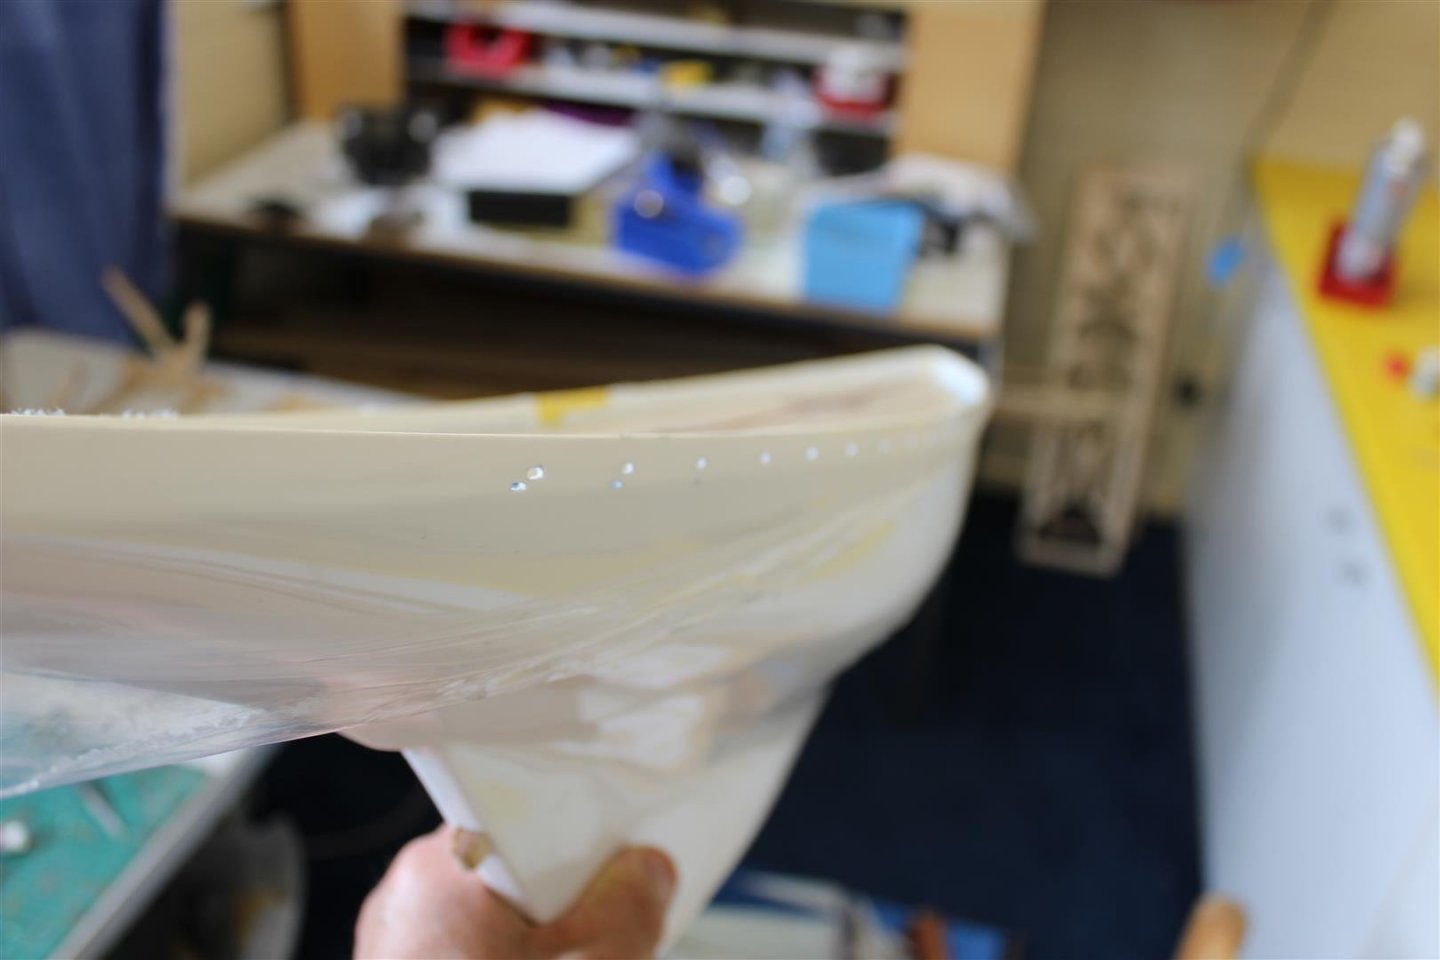
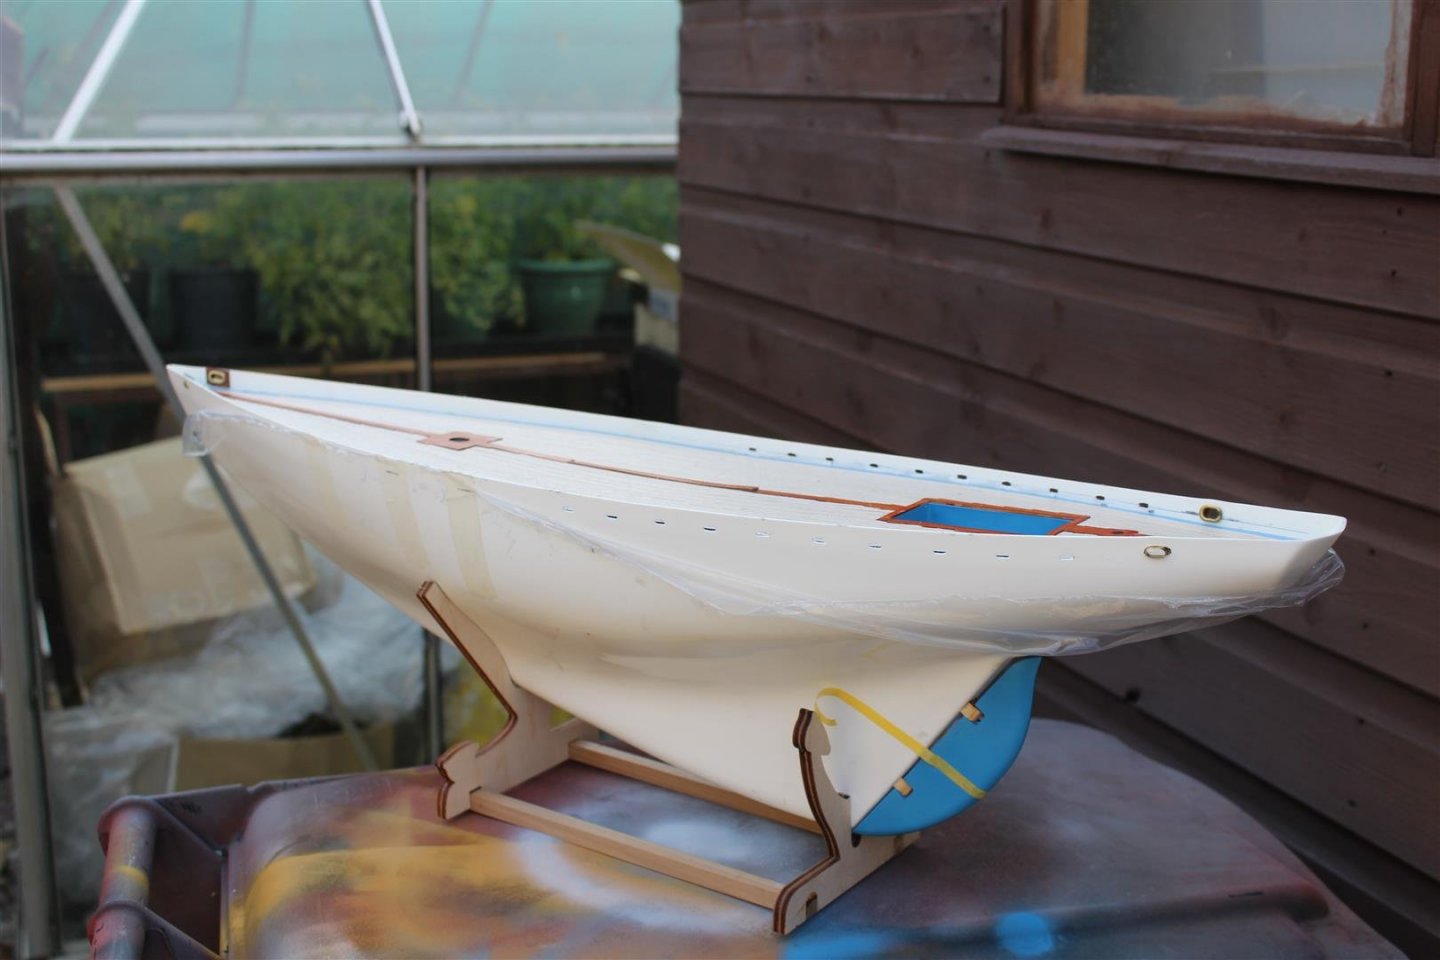
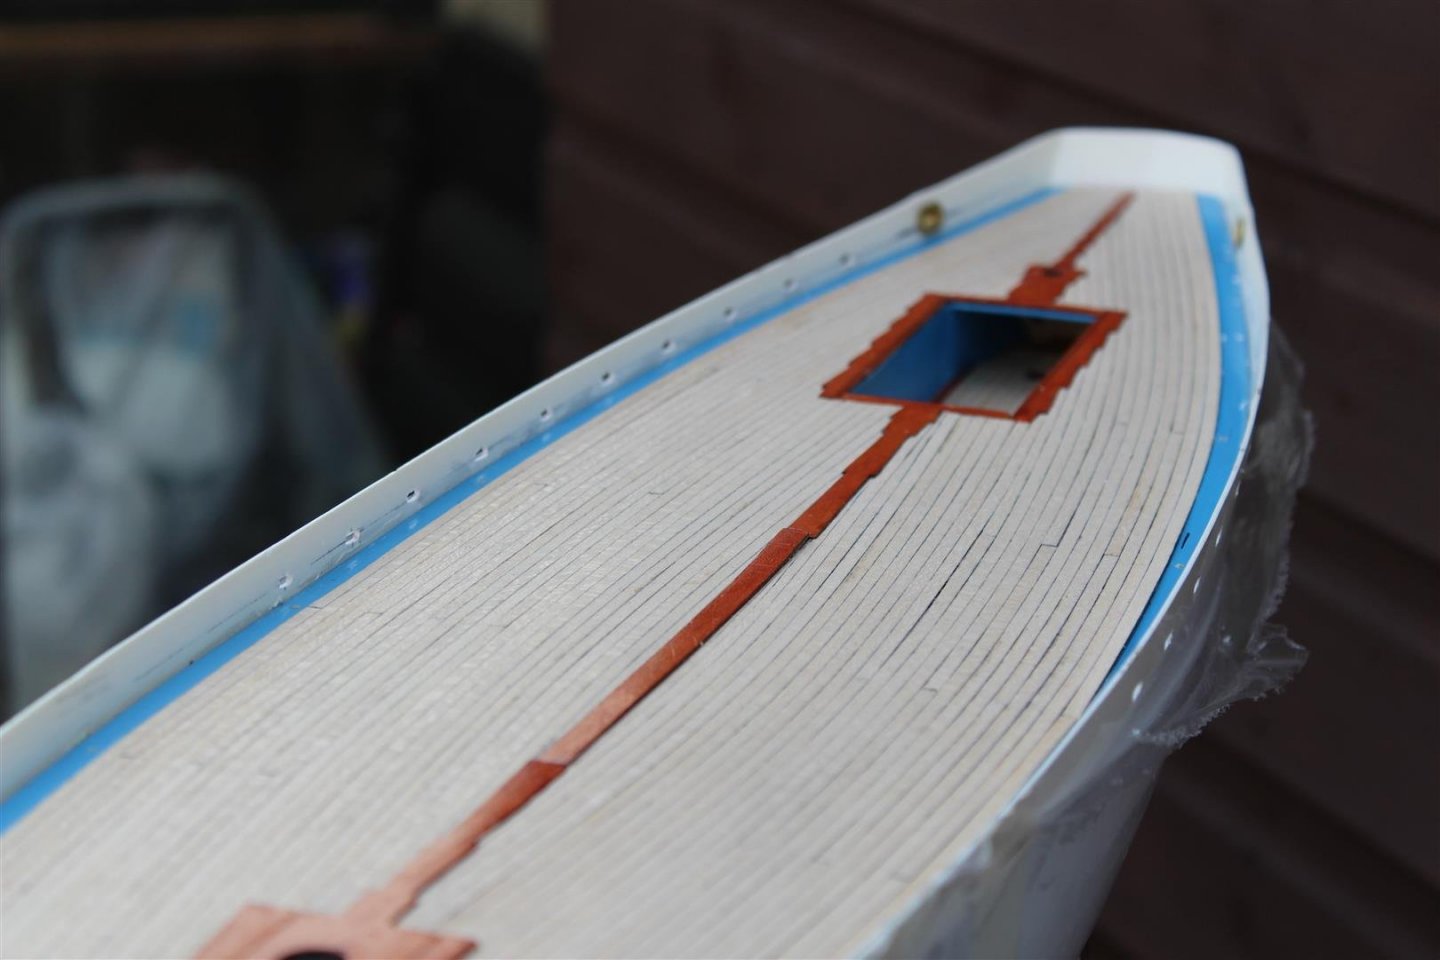
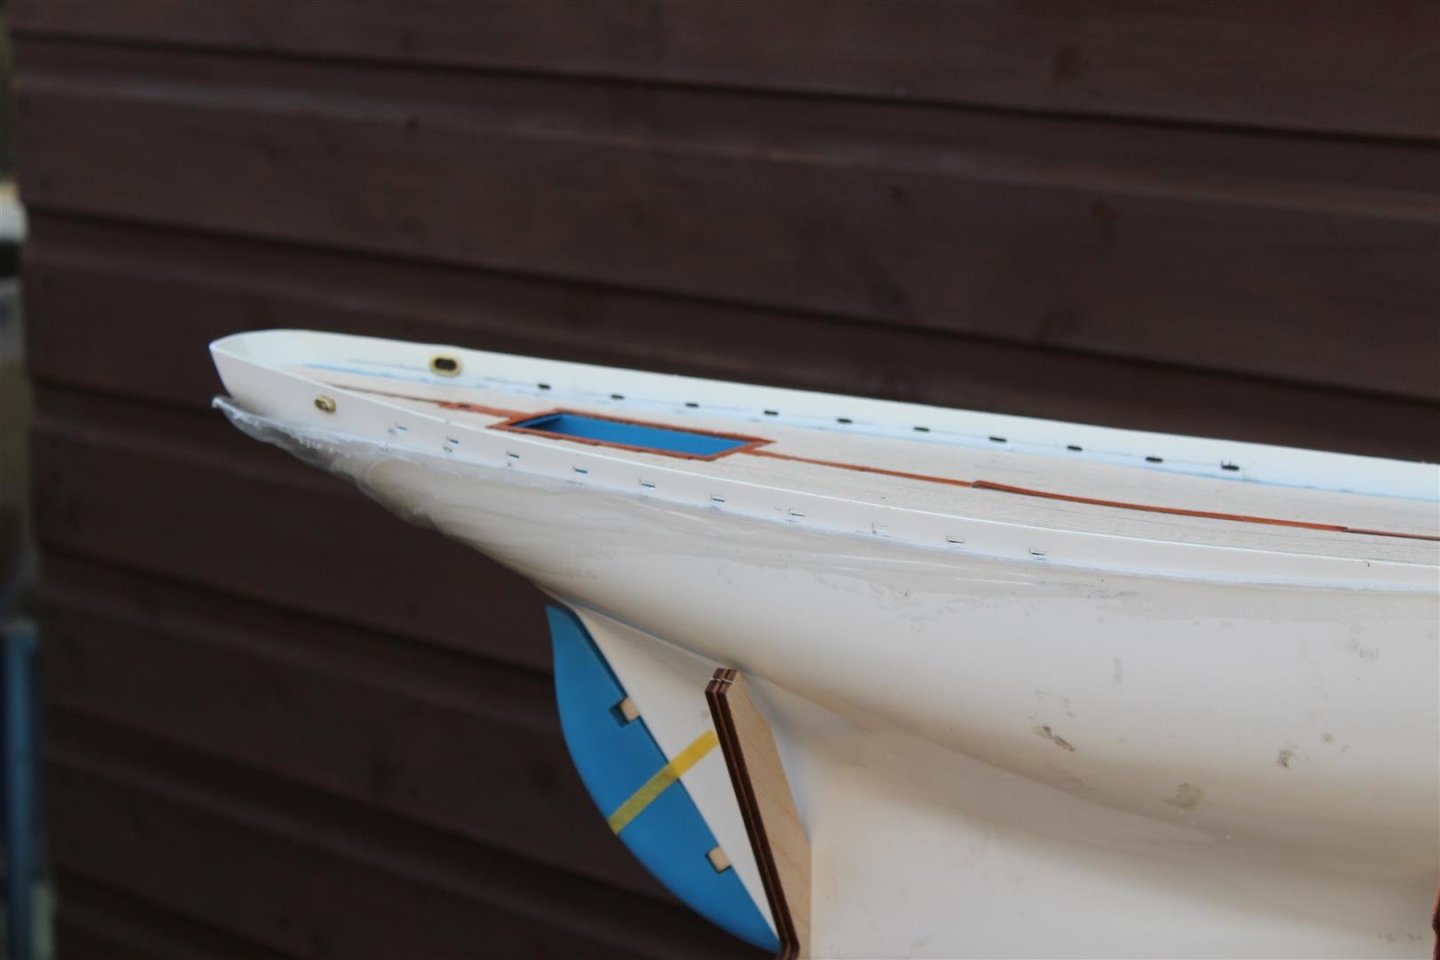
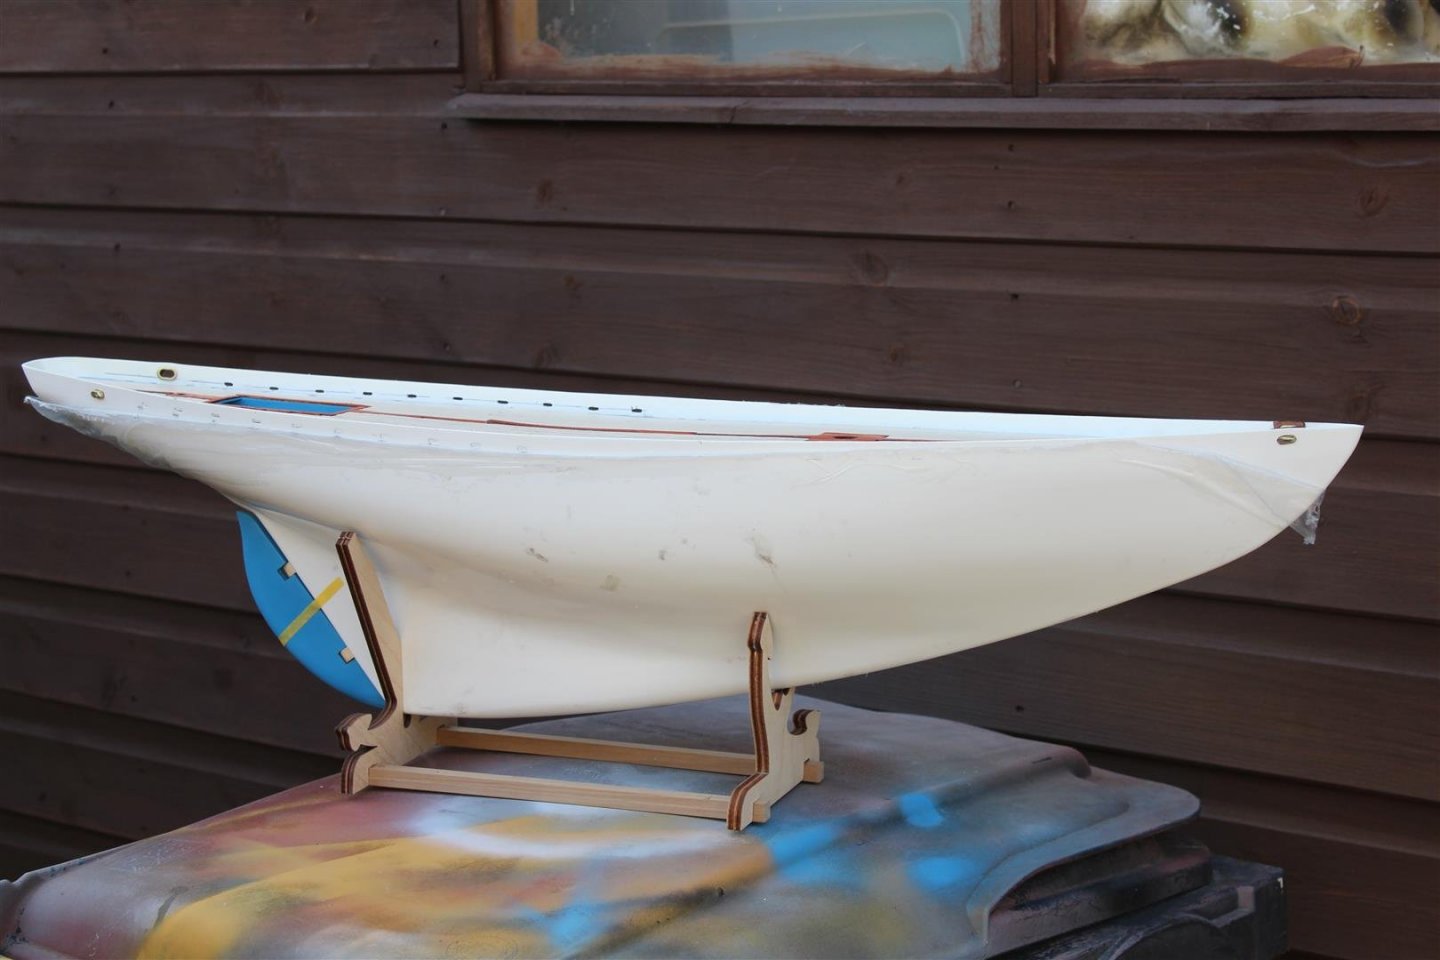
good evening everyone work on the yacht continues, the rudder post fitted, the rudder its self will be secured into position later, it will be fixed in a permanent way the structure has now been secured inside the hull, i now need to secure the deck to the sides, as i did not want to much 2 part epoxy dripping everywhere 26 holes have been put in, mainly for the scuppers and 4 hawse holes using the PE templete the scuppers were a real pain, and still need a lot of work to just get two looking the same


- 127 replies
-
- 13
-
-
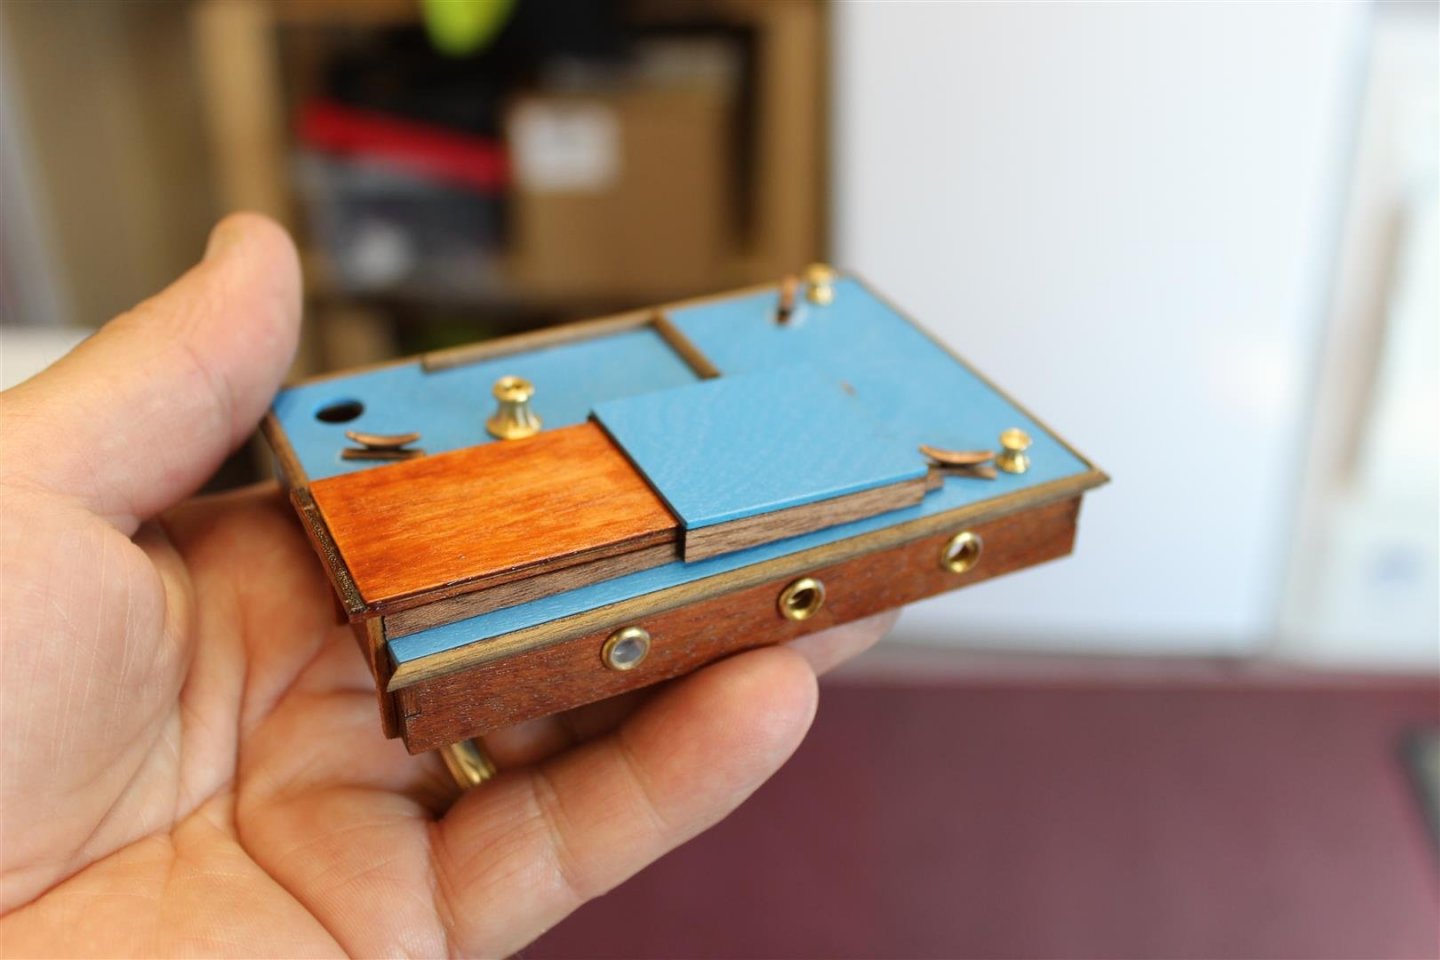
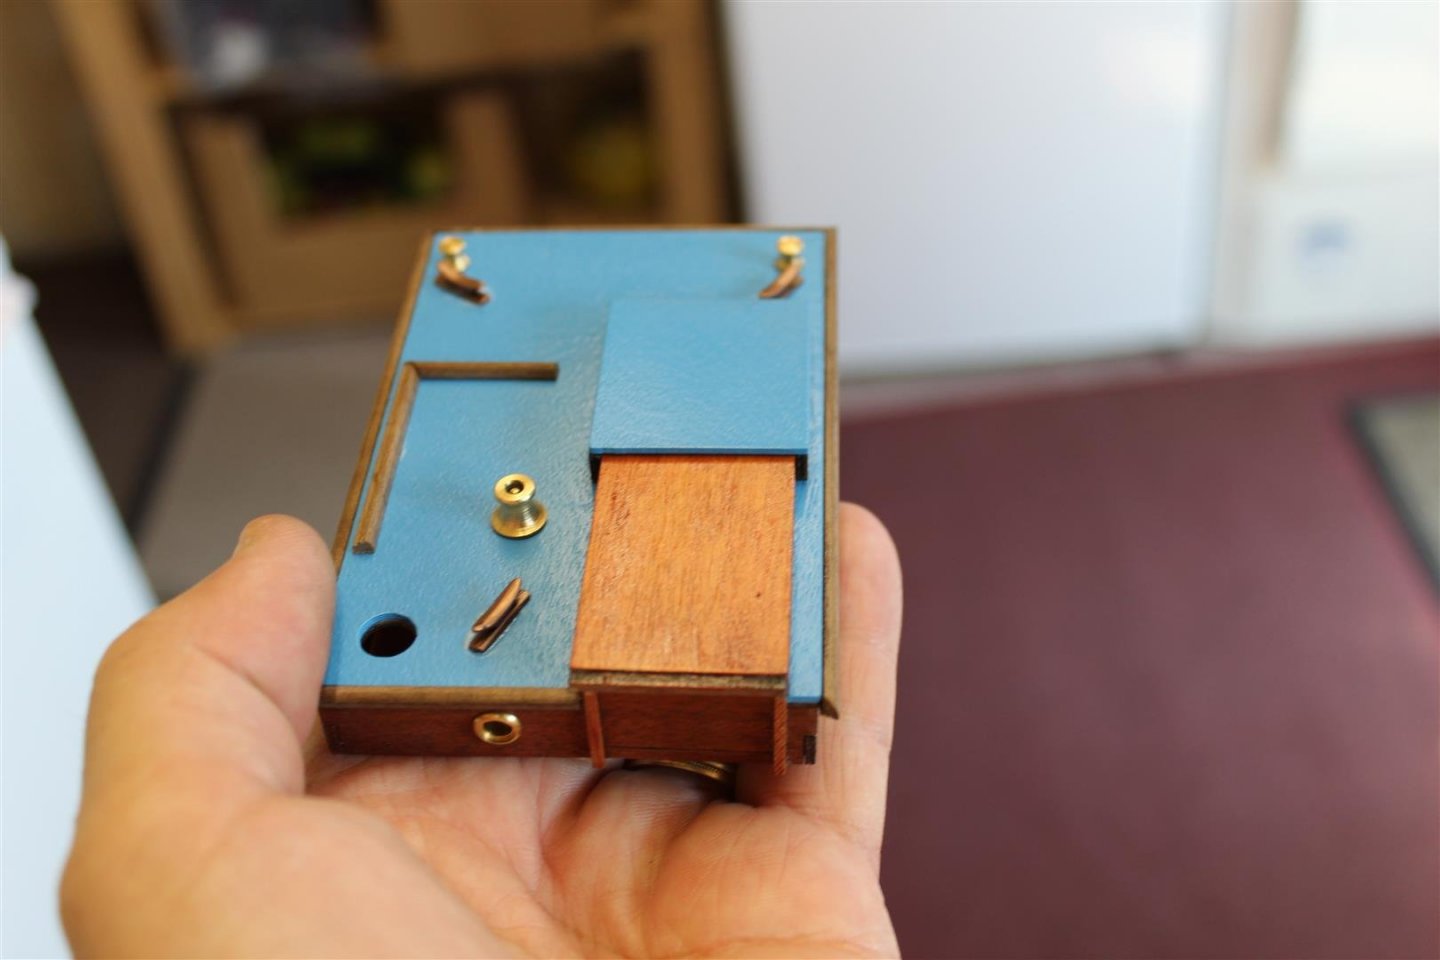
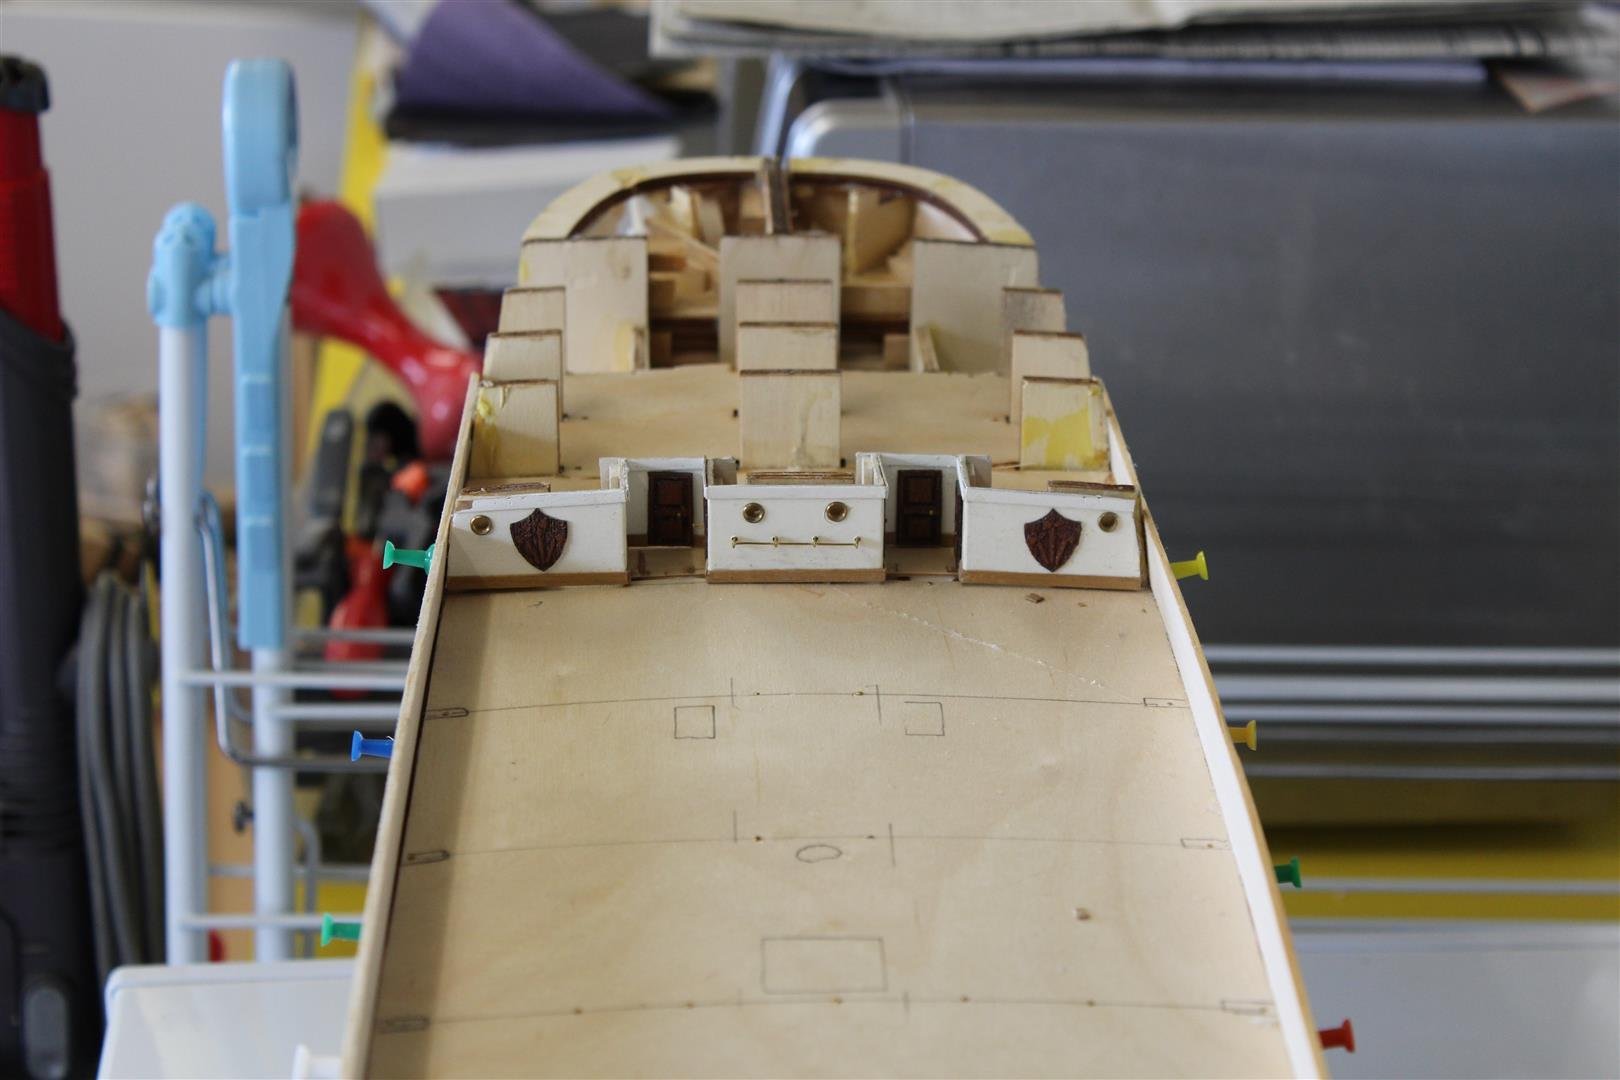
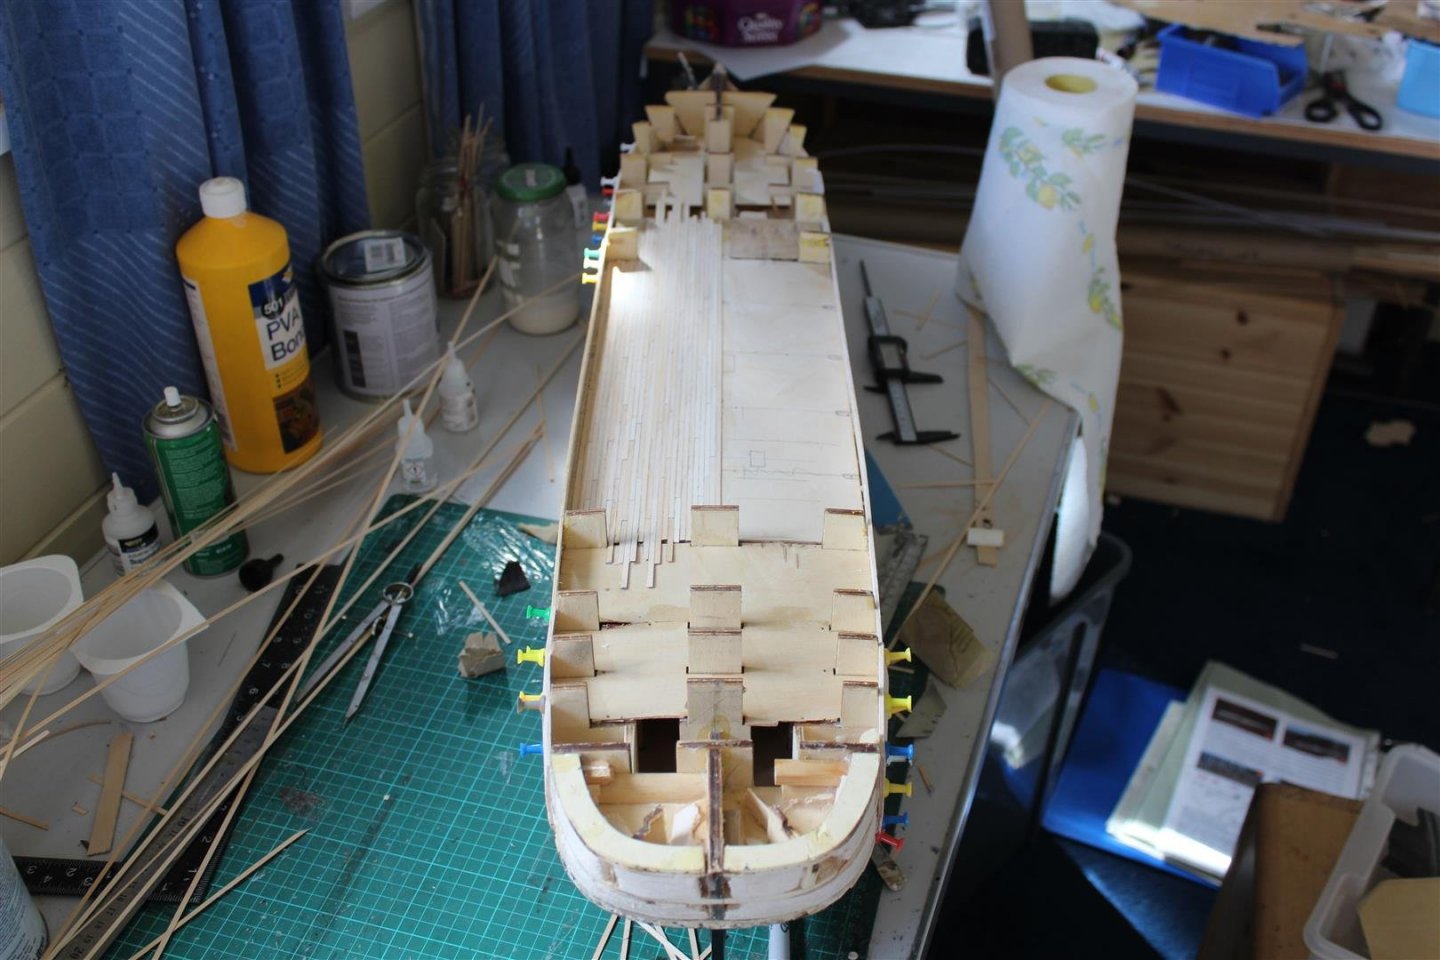
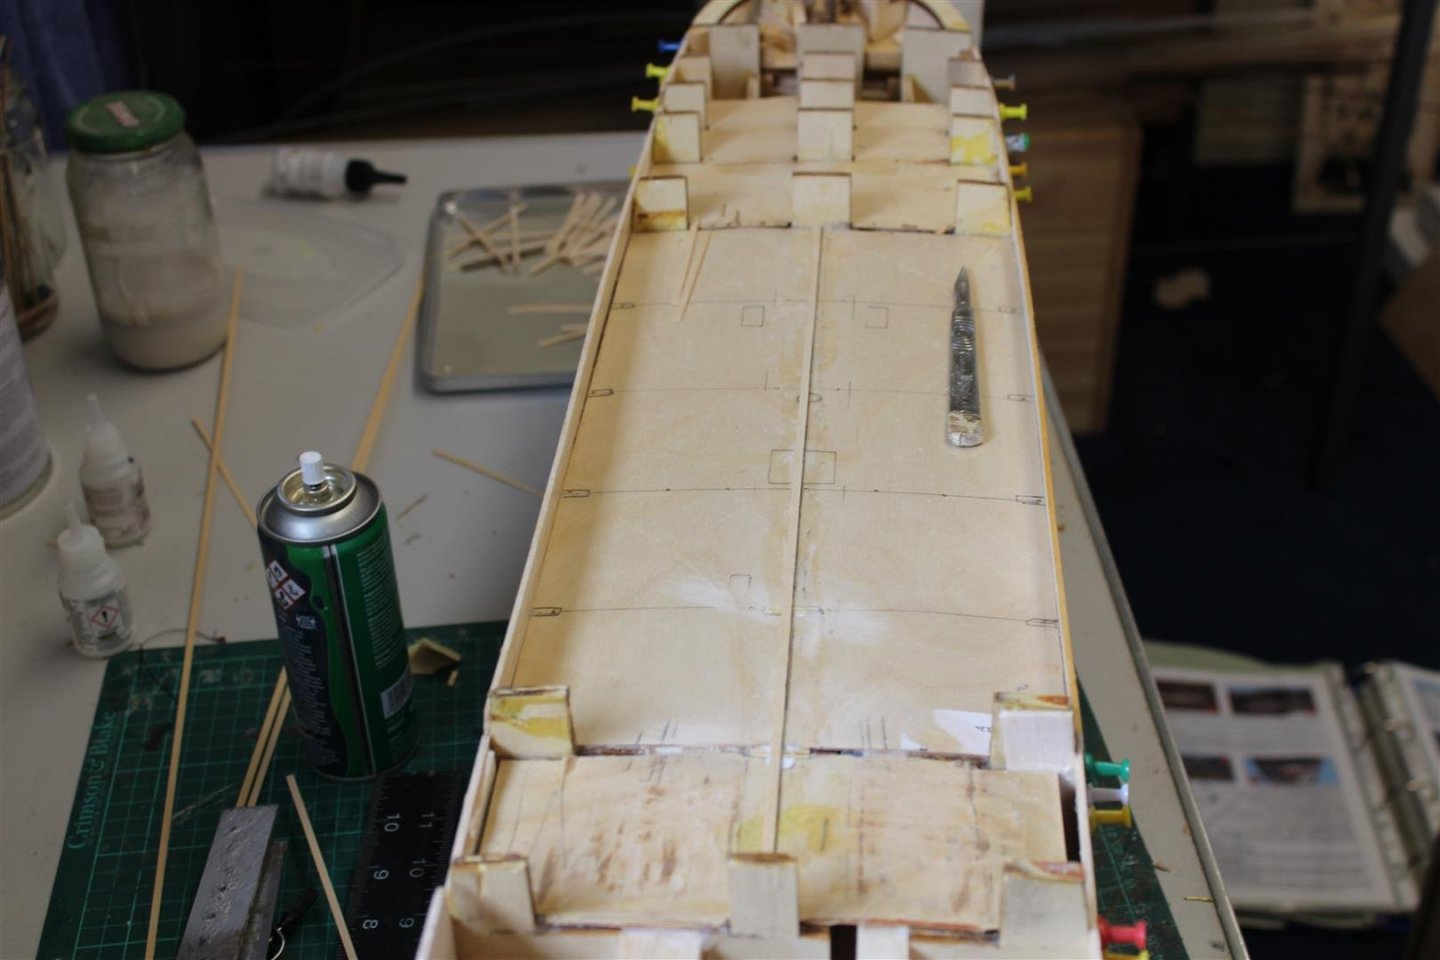
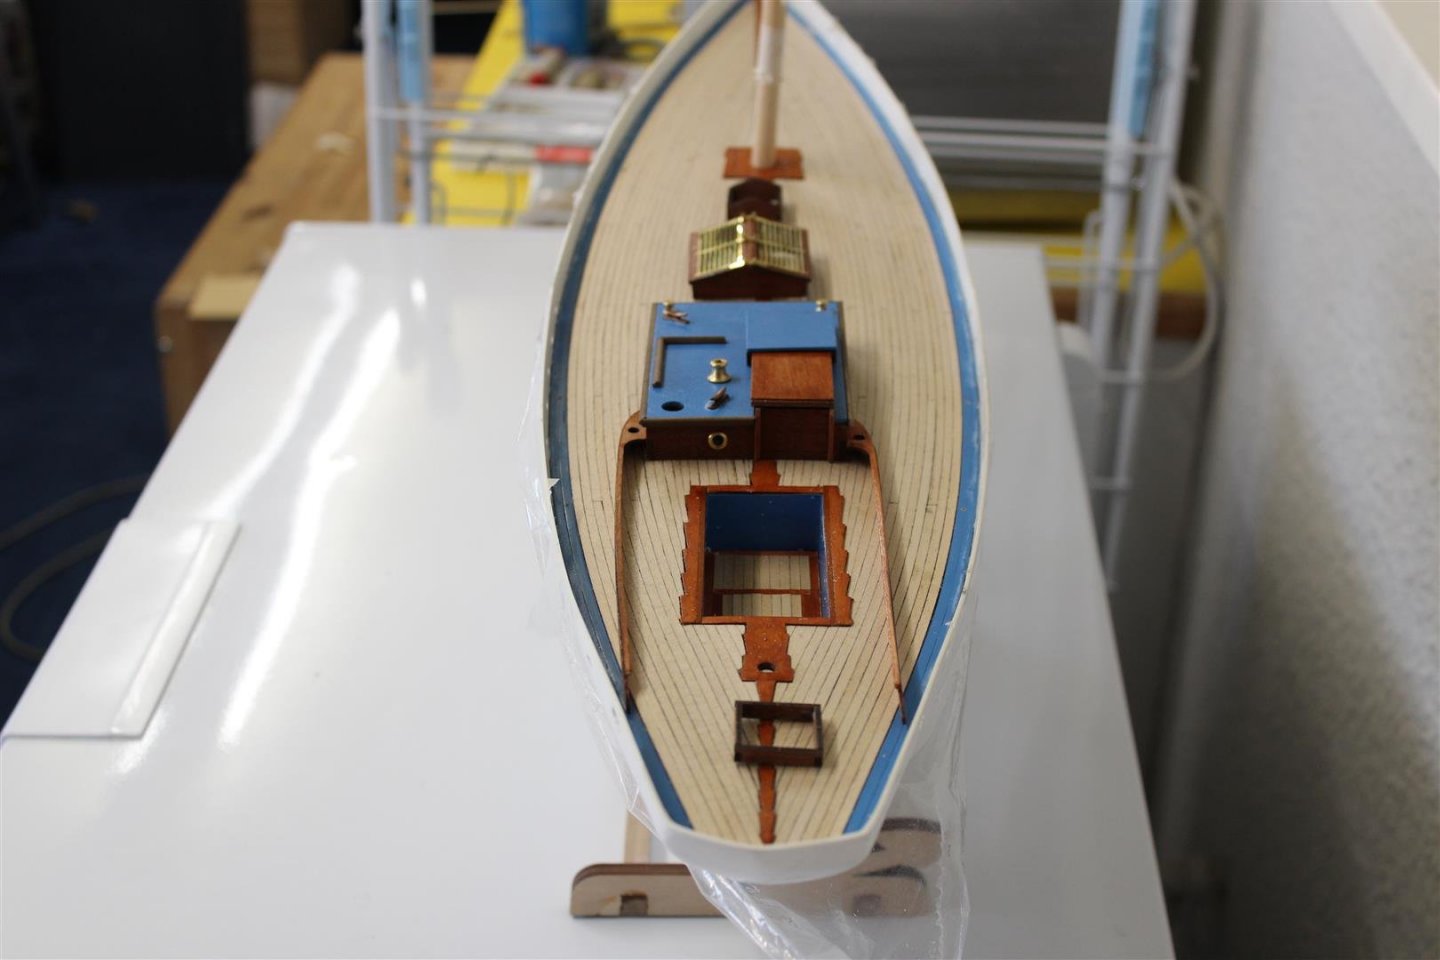
Good morning everyone well thats game of thrones watched, we thouroughly enjoyed it all 8 seasons, so now hope to spend a couple extra hours a day on the build until the next boxset, possibly "Killing Eve"https://en.wikipedia.org/wiki/Killing_Eve made some progress on the cabin top, i am finding it much harder than anticipated to keep everything clean and new looking, and trying to keep it OOB without extra, although i would like to get some white rigging line, and the box art shows brass rings on the sails, im not sure if thats correct, these are not included as part of the kit