


DmitriyMarkov
-
Posts
61 -
Joined
-
Last visited
Content Type
Profiles
Forums
Gallery
Events
Posts posted by DmitriyMarkov
-
-
Hello everyone !
I'm glad to be back - have some time to post pics of present status of the project - here we go:


-
My congratulations!
Great craftsmanship and a beautiful model as a result!
Best Regards,
Dmitry
-
On 6/21/2021 at 1:20 PM, Dimitris. said:
Wow! I'm impressed not only from your quality of work, but also the quality of your pictures!
Well done!
Thank you! That's mainly due to Tokina macro - lens which allows to get very close to the object part without much post-editing and also due to shooting in an aperture priority regime with an aperture closed as possible ( I use a tripod and always a timer).
P.S. I've noticed that there were some mistakes in this post so it can be misunderstood - I've made corrections and stressed them with red colour 🙂 I'm so sorry for my English...
- mtaylor, Dimitris., Old Collingwood and 1 other
-
 4
4
-
8 hours ago, Old Collingwood said:
Excellent work - so love the main guns with the weathering - really nice work.
OC.
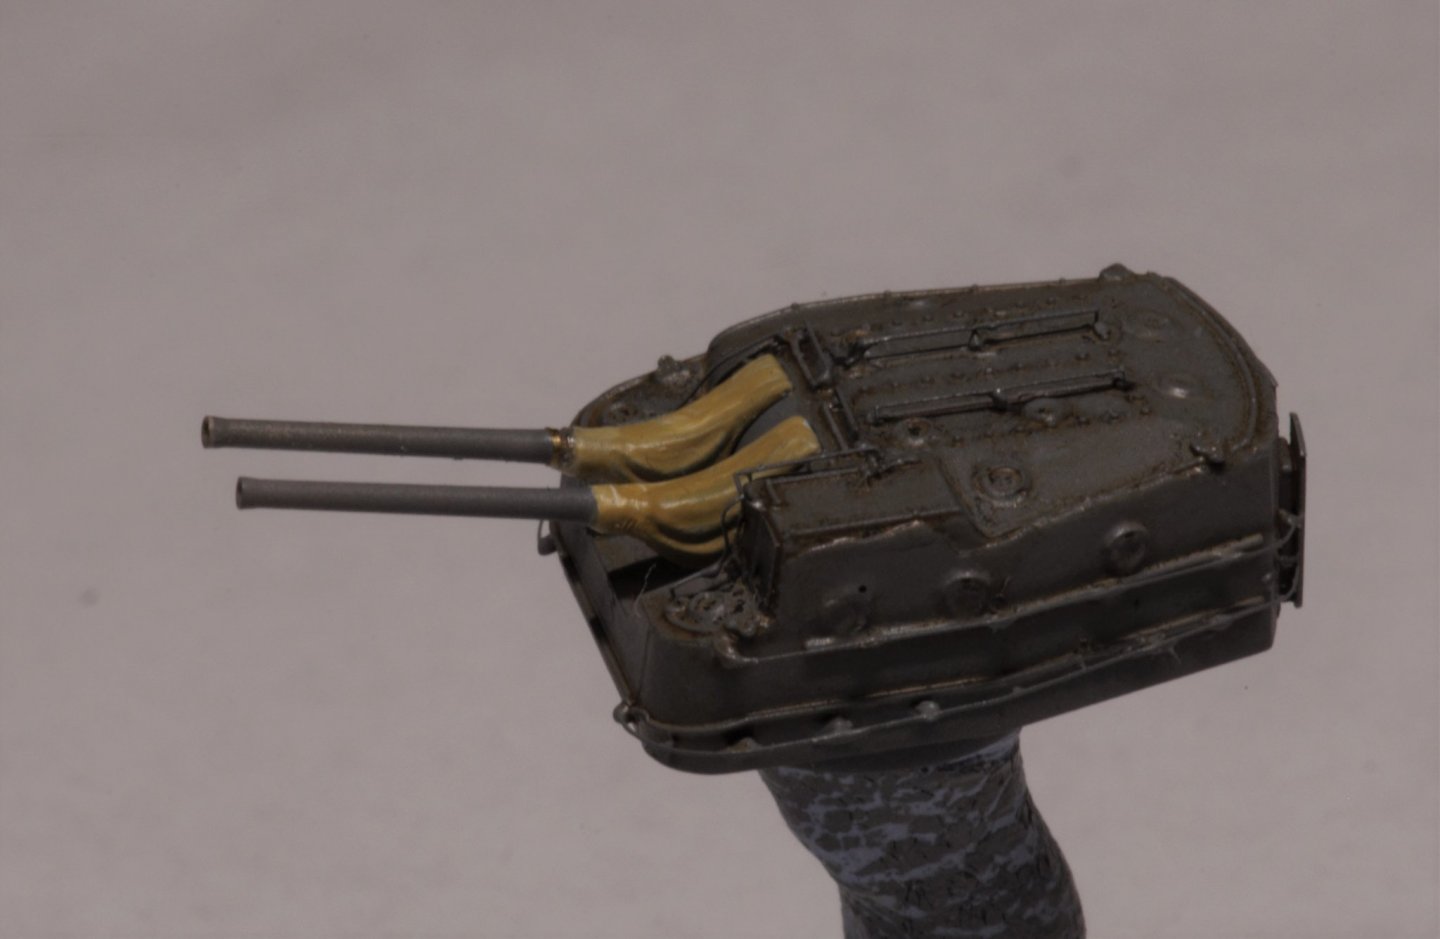
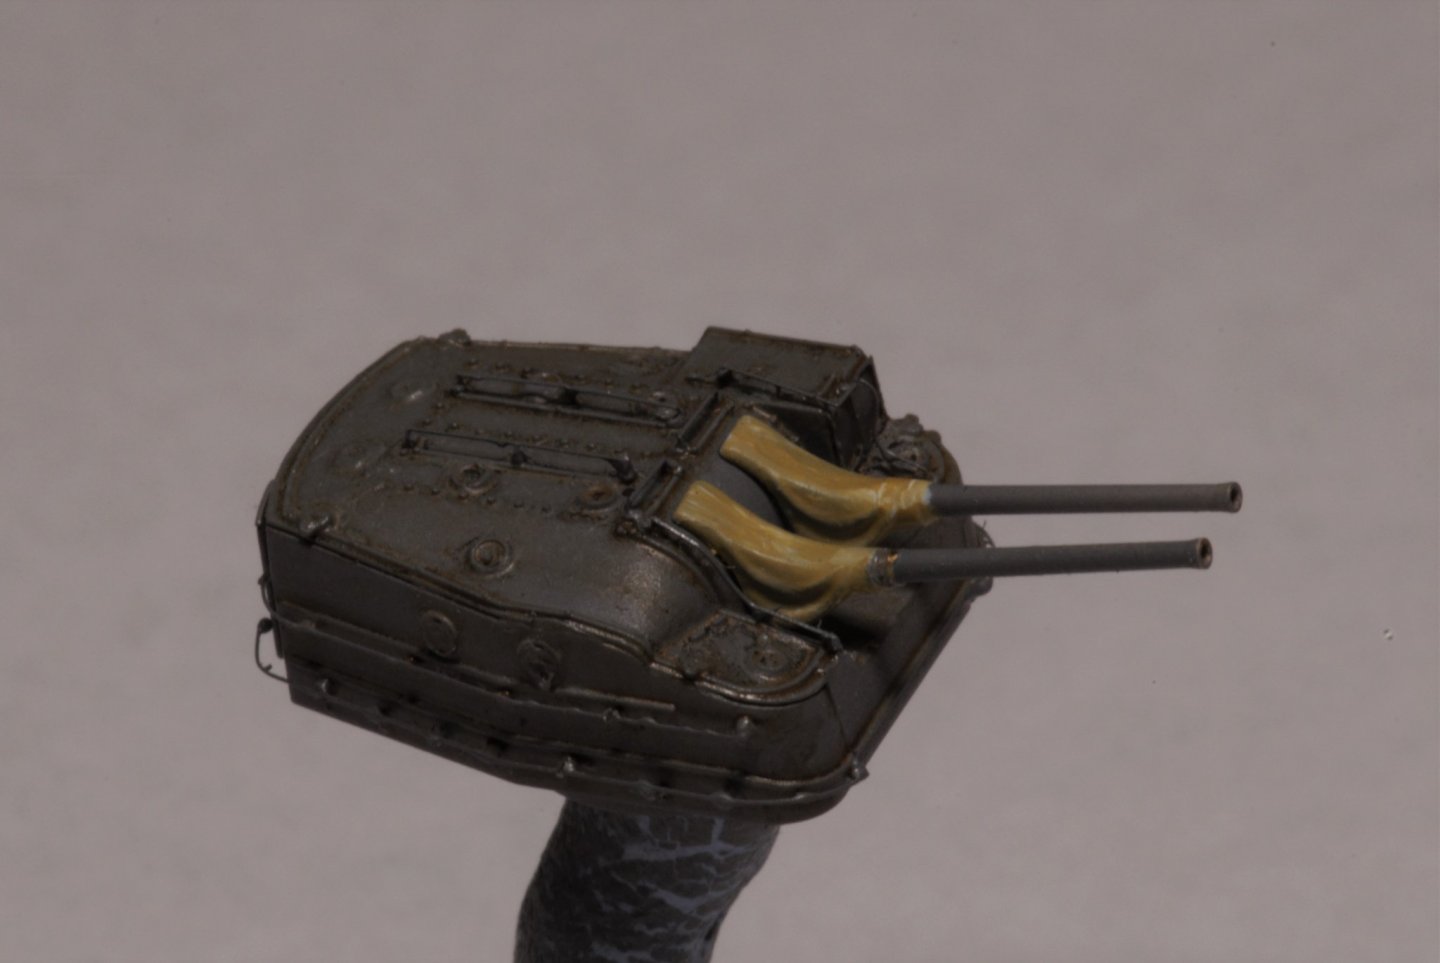
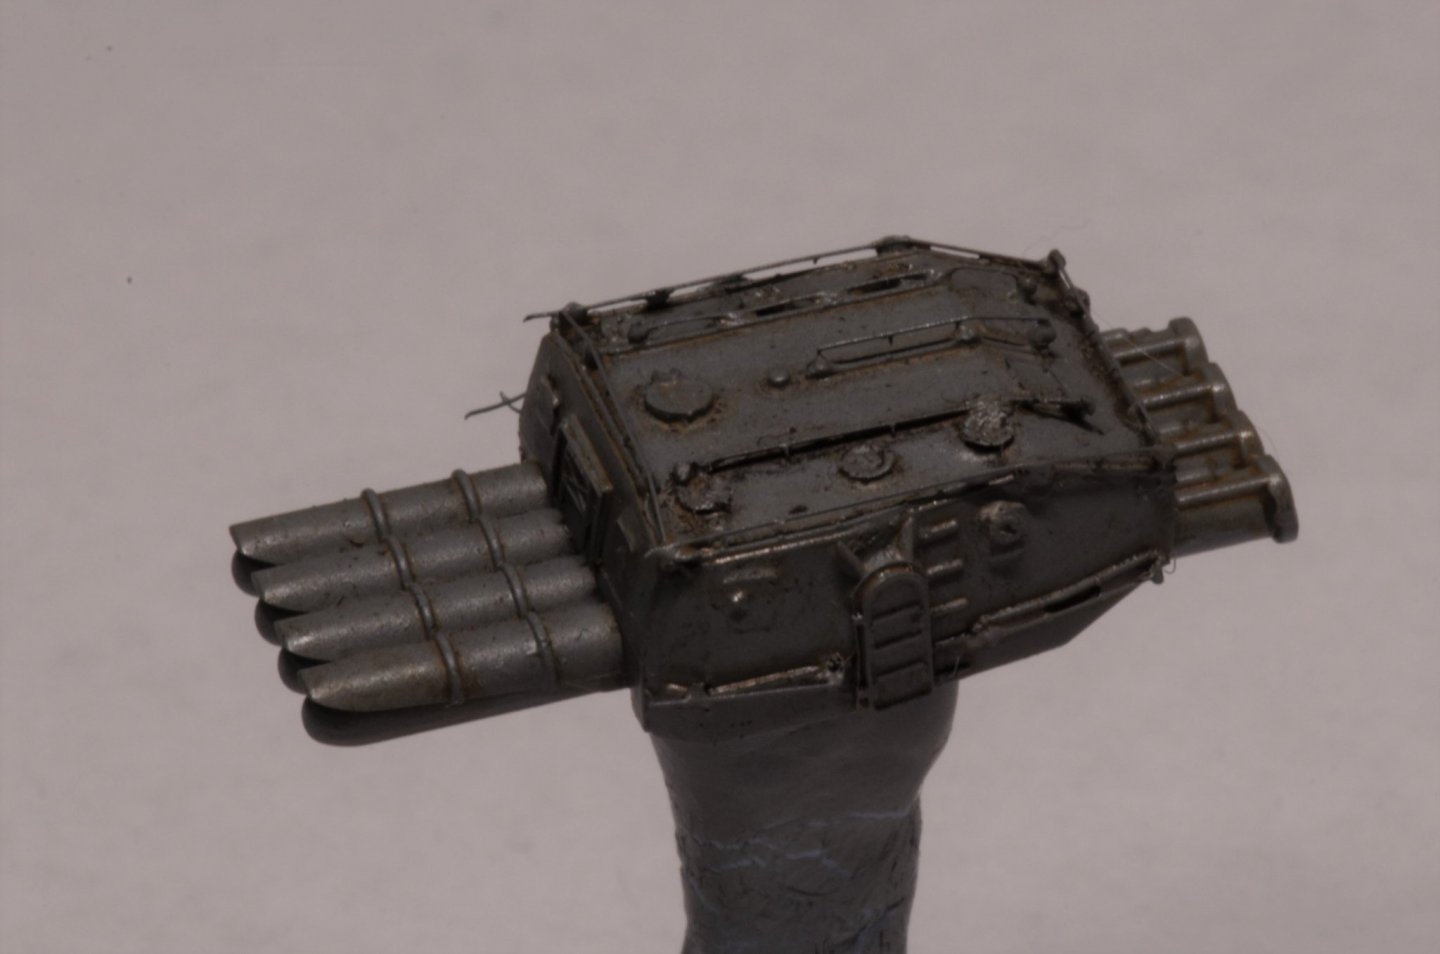
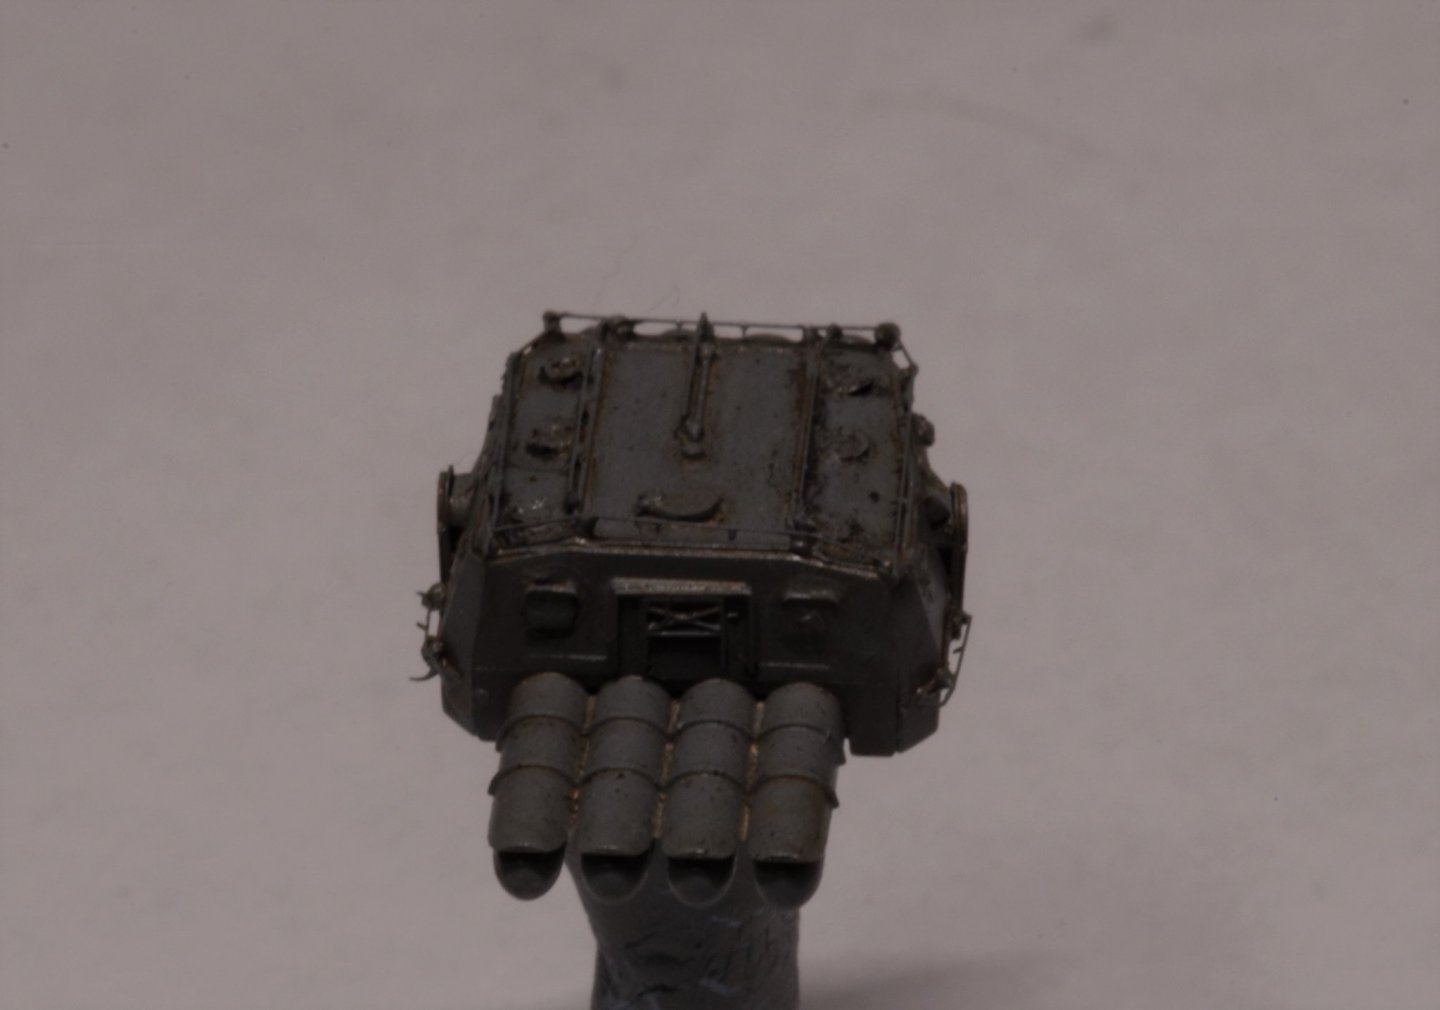
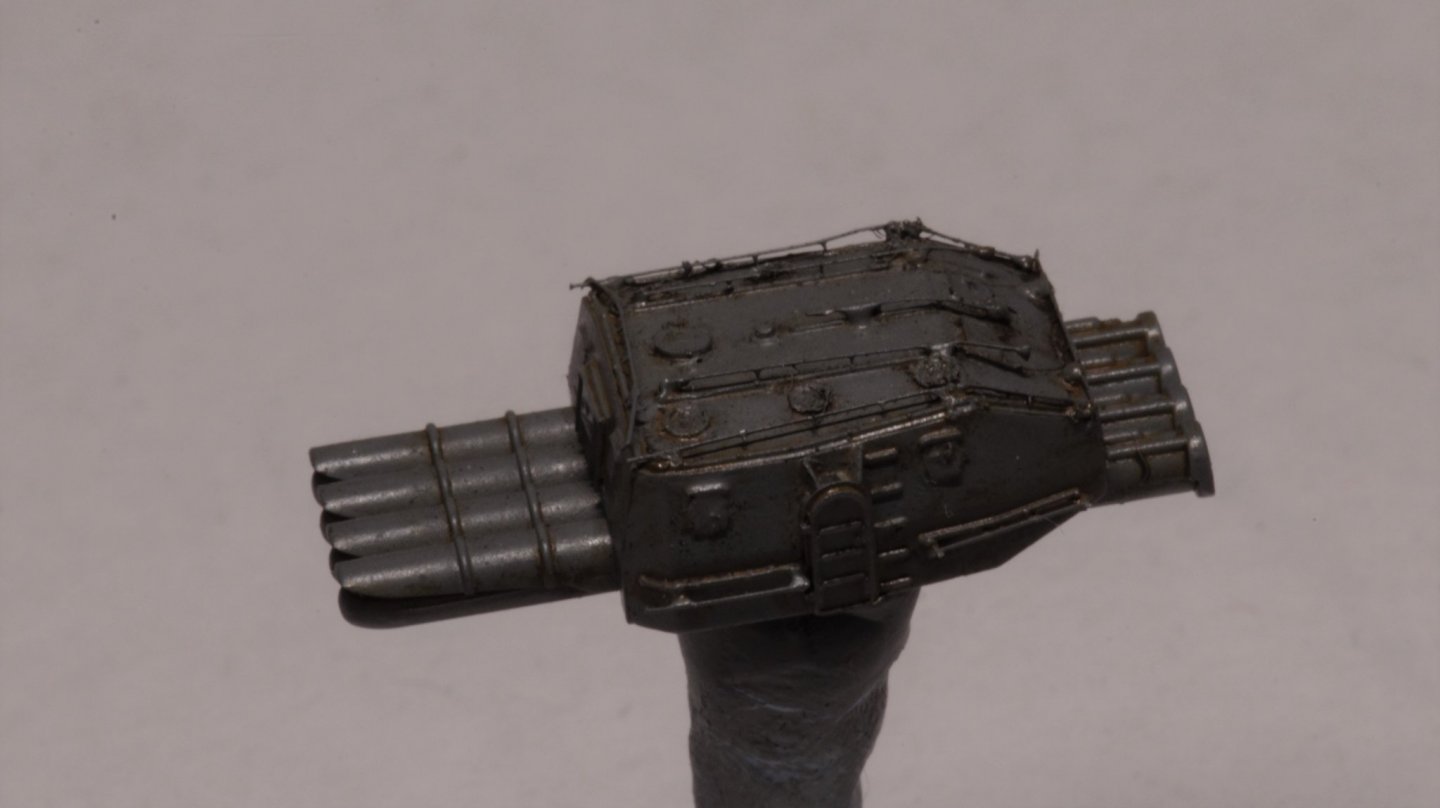
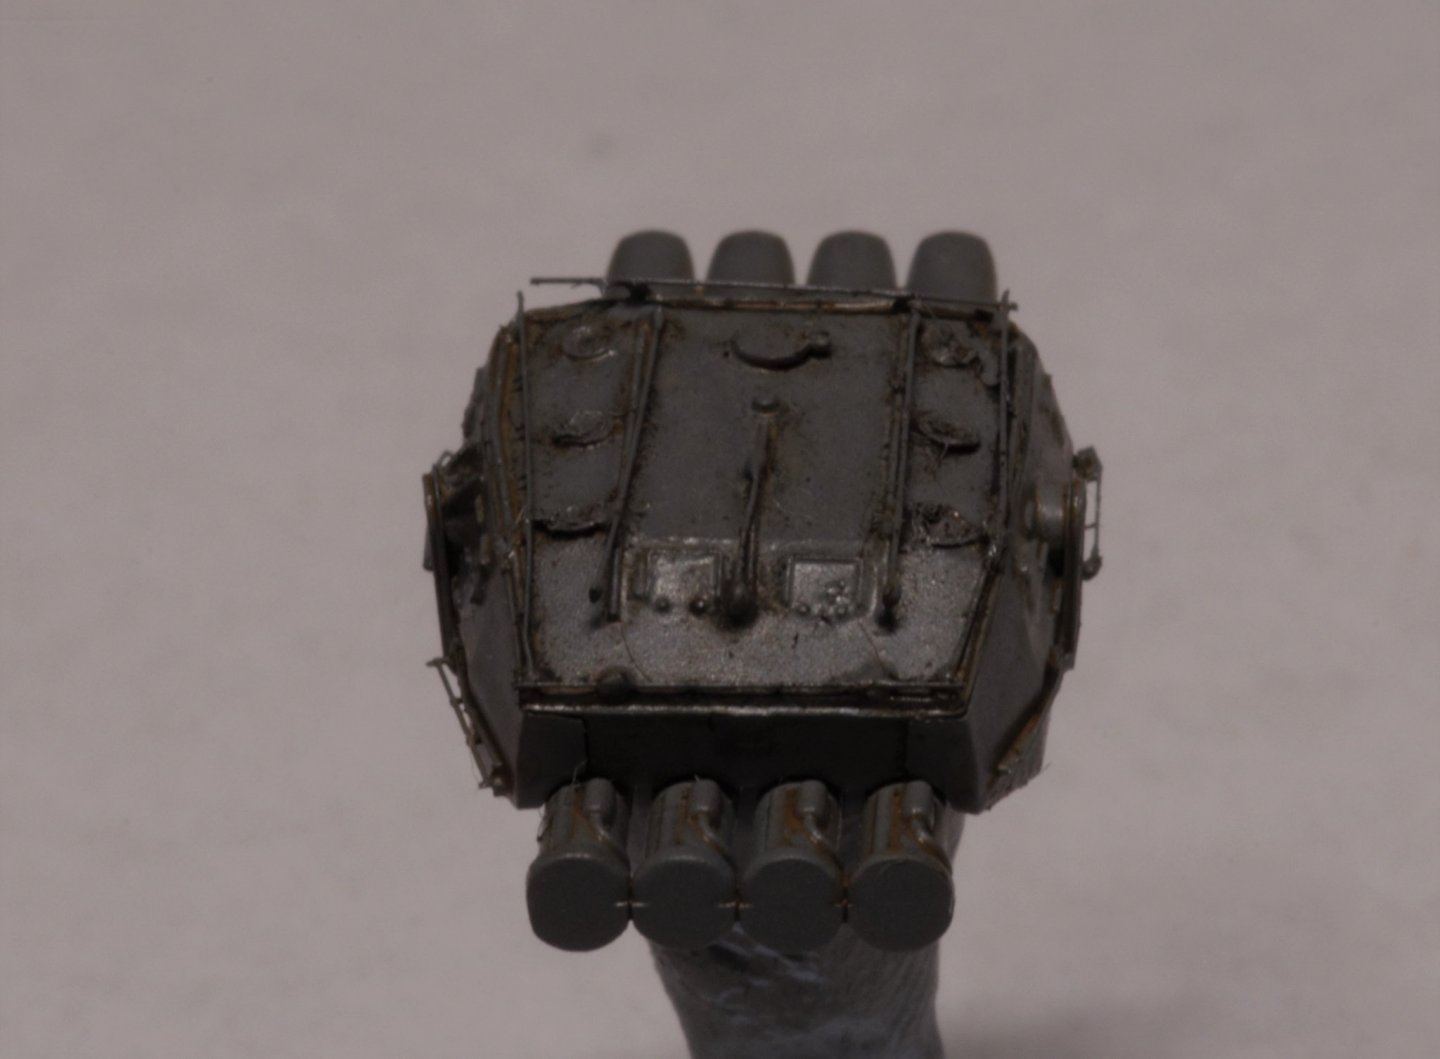
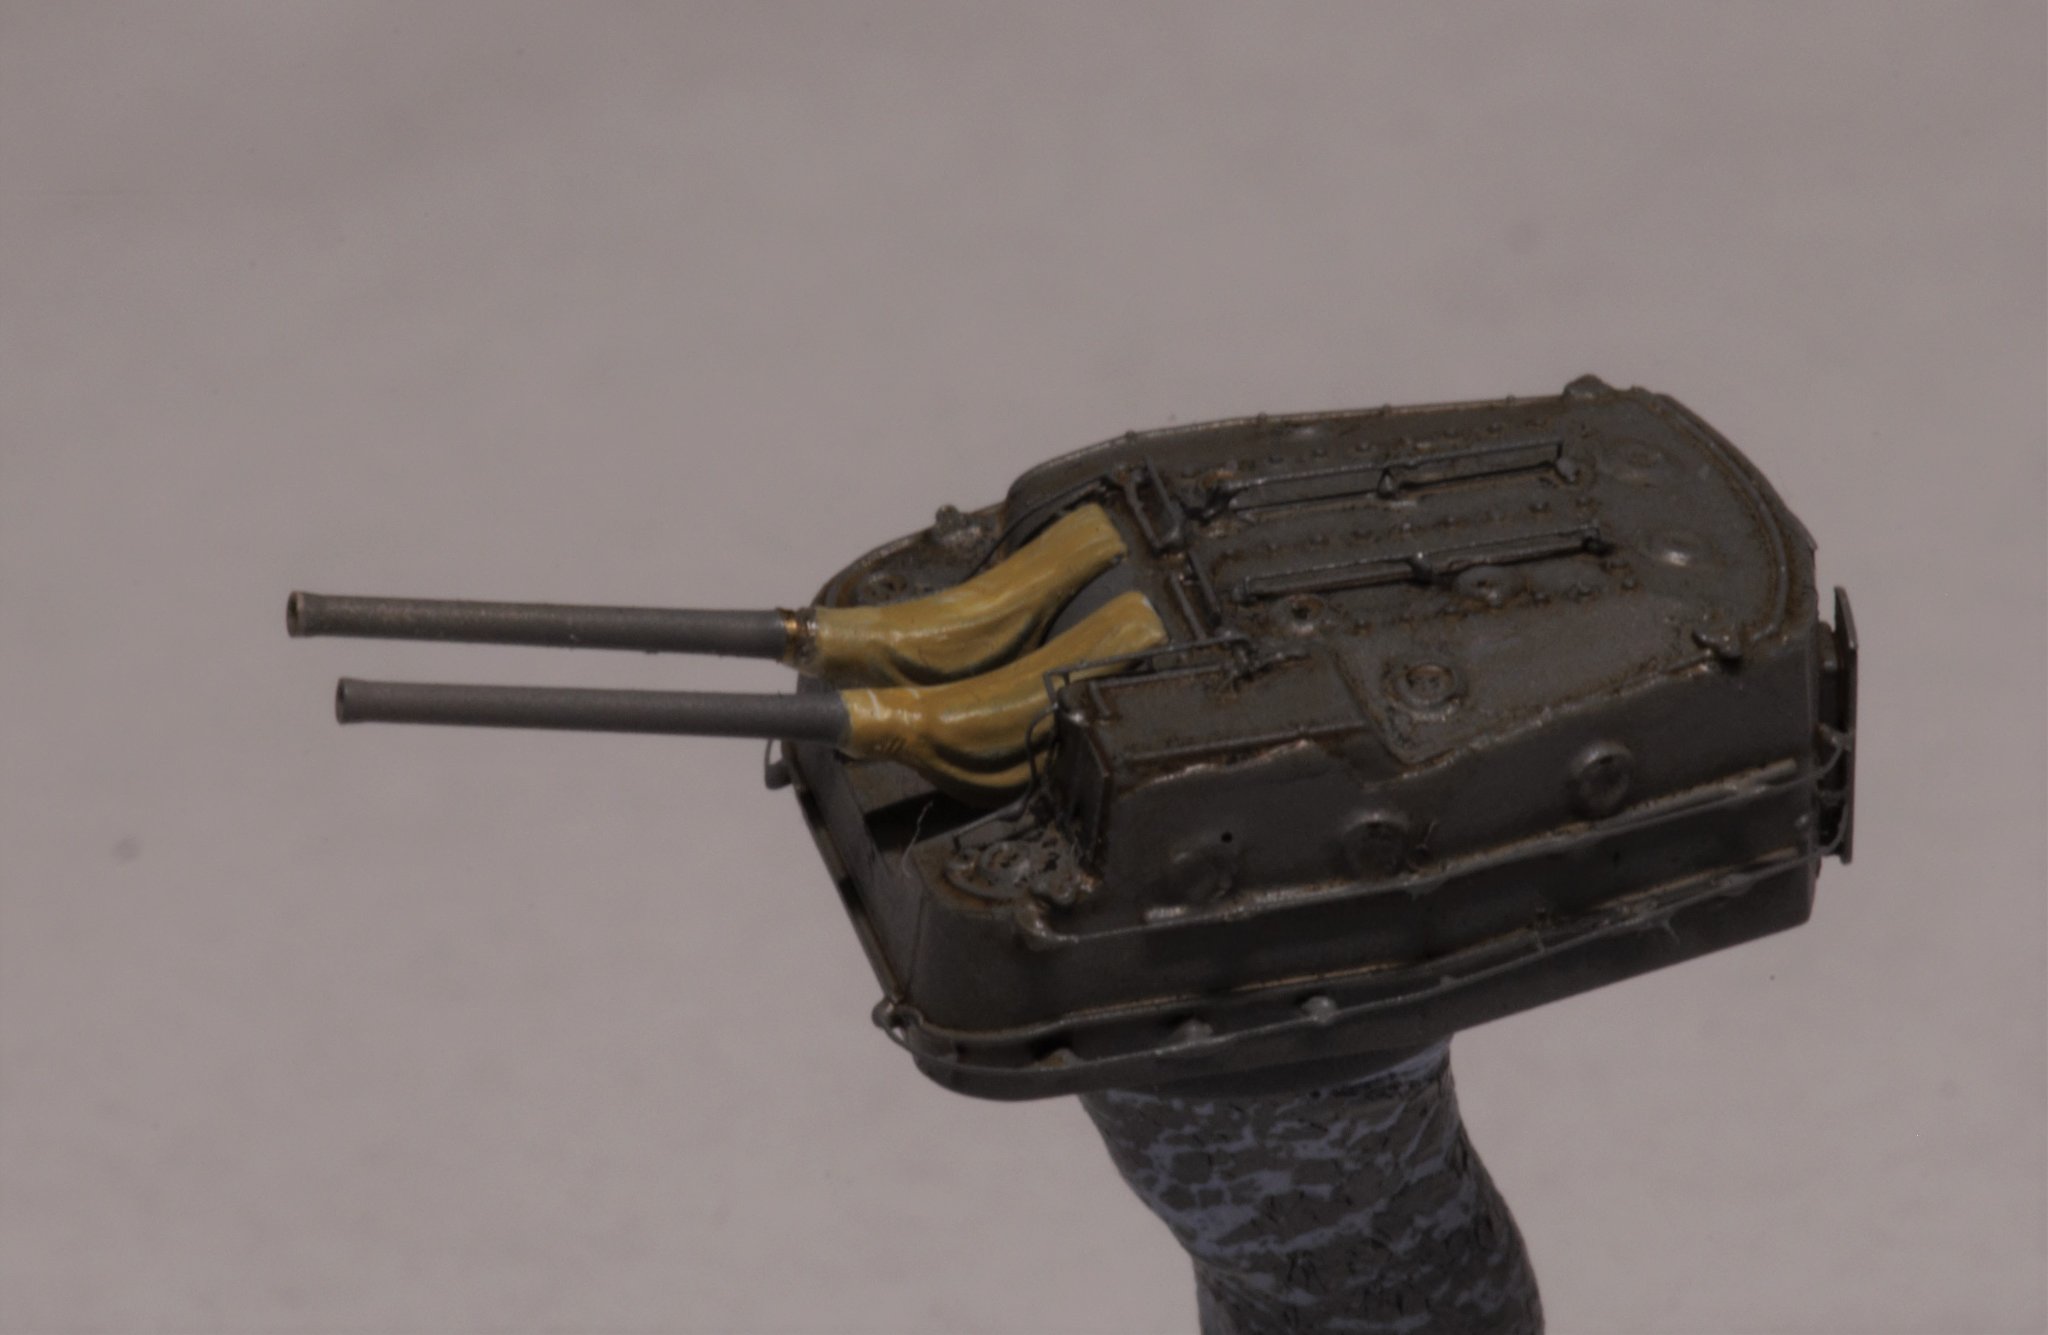
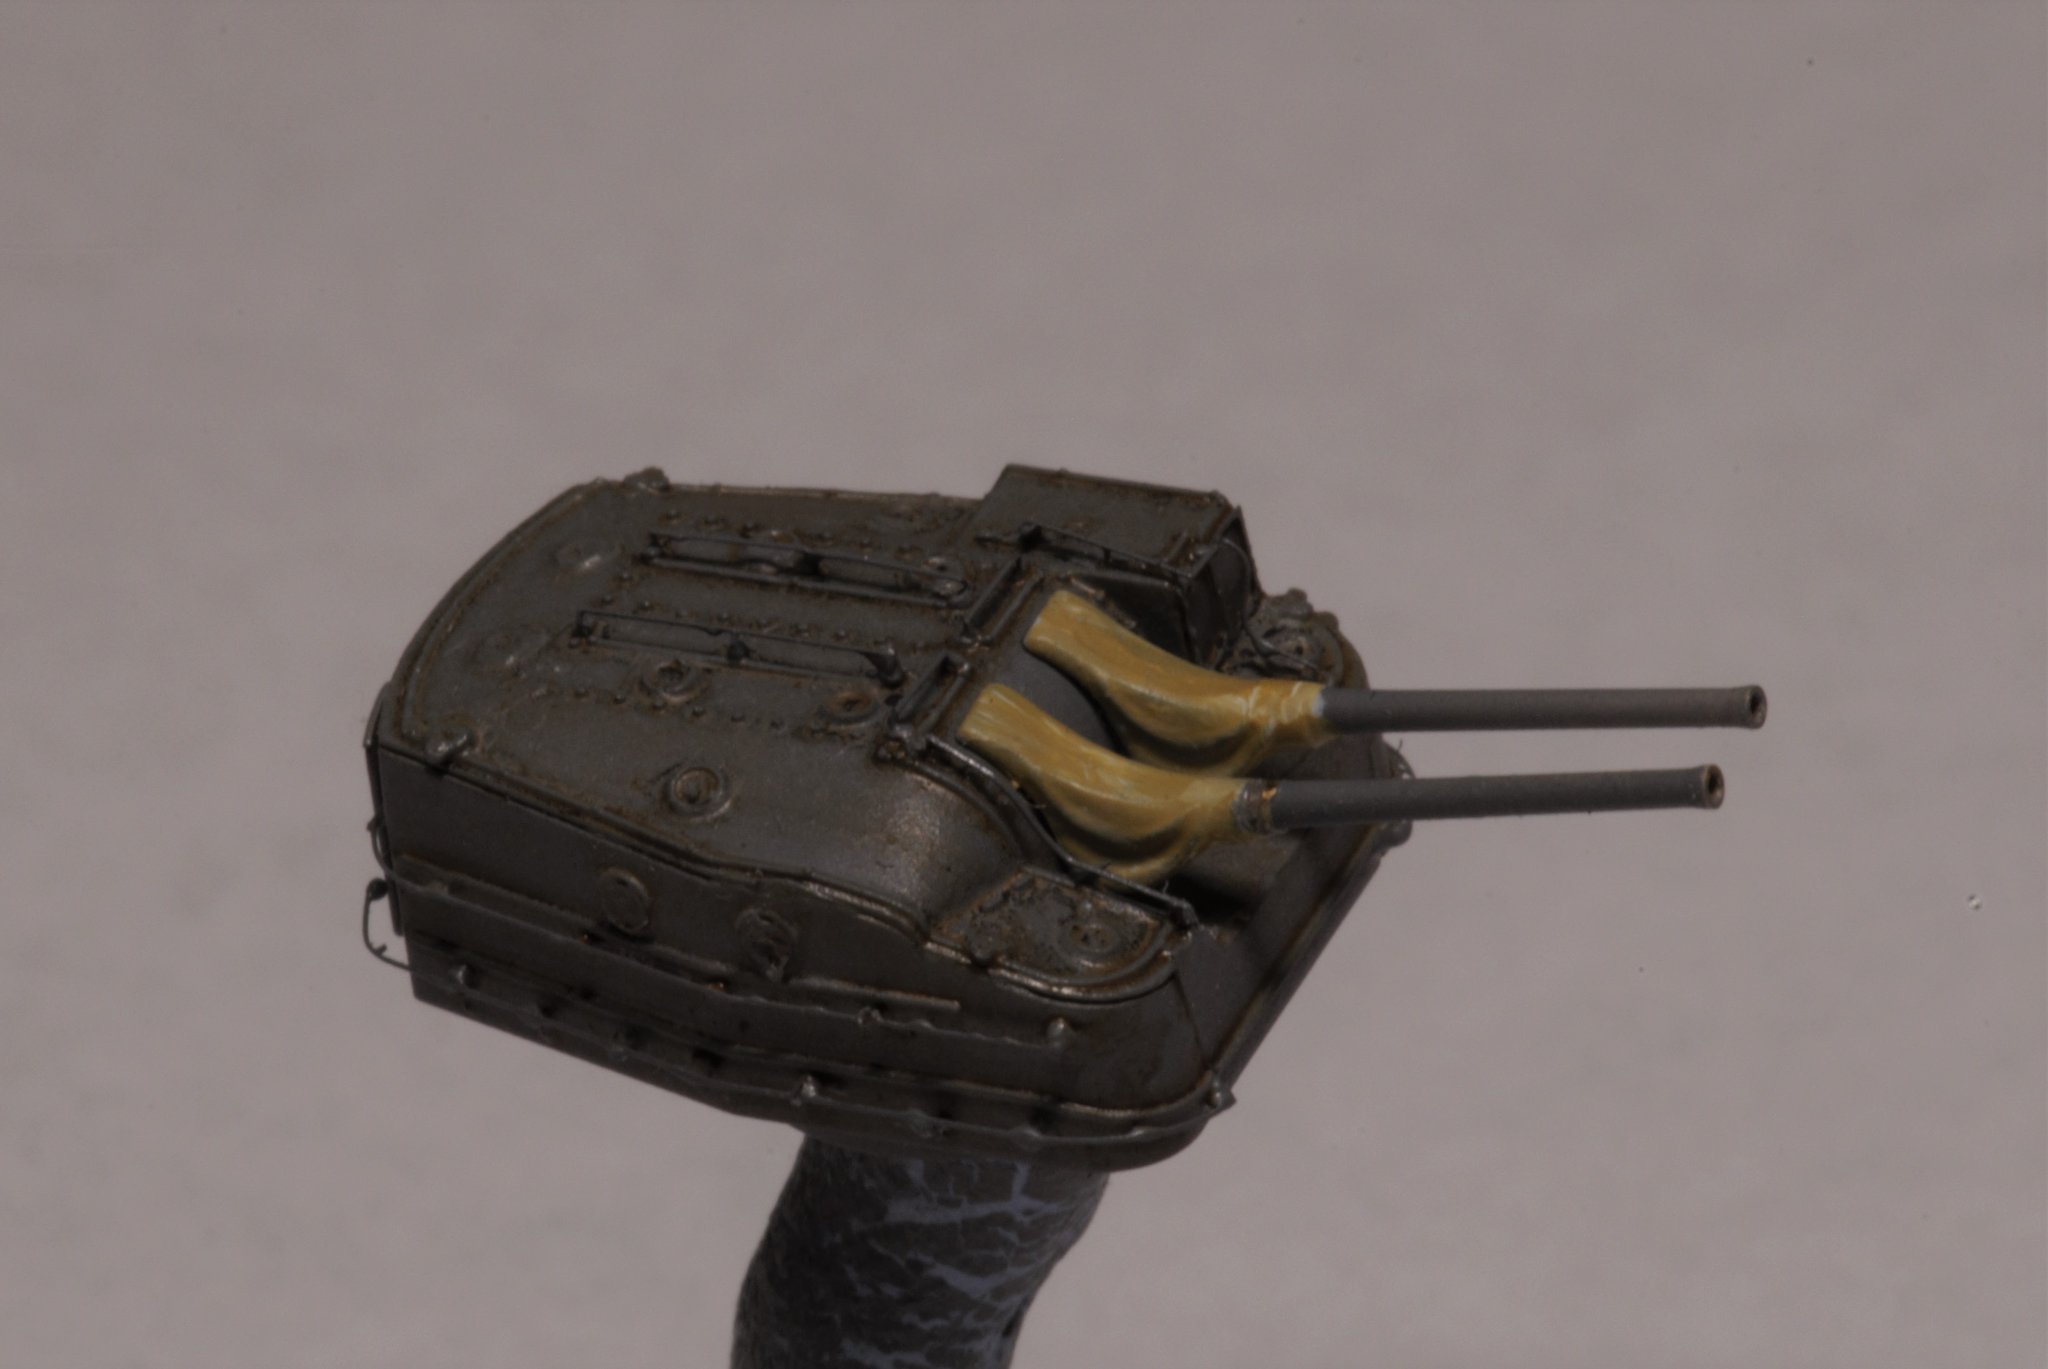
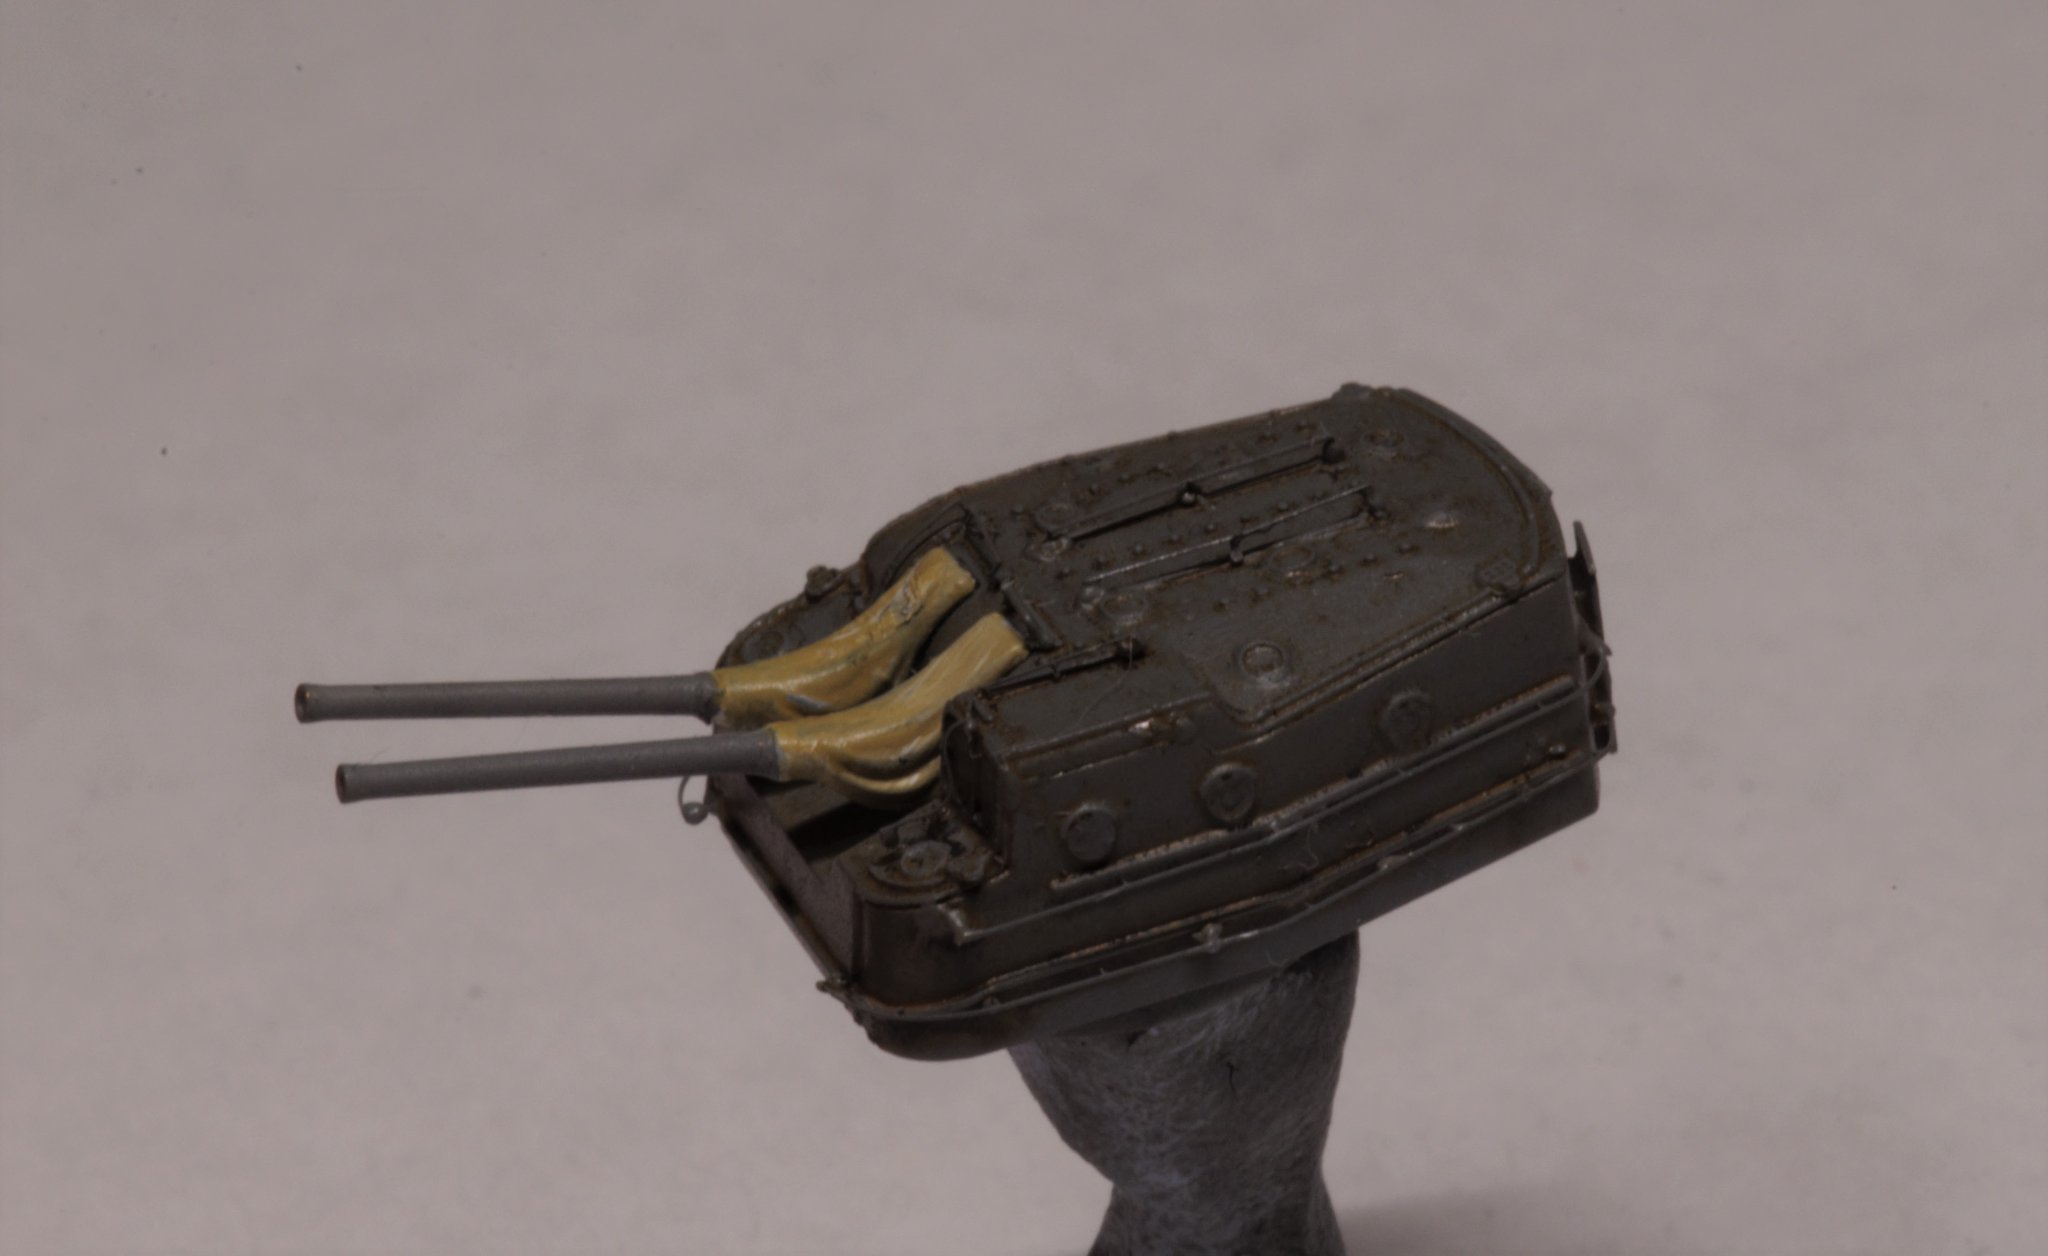
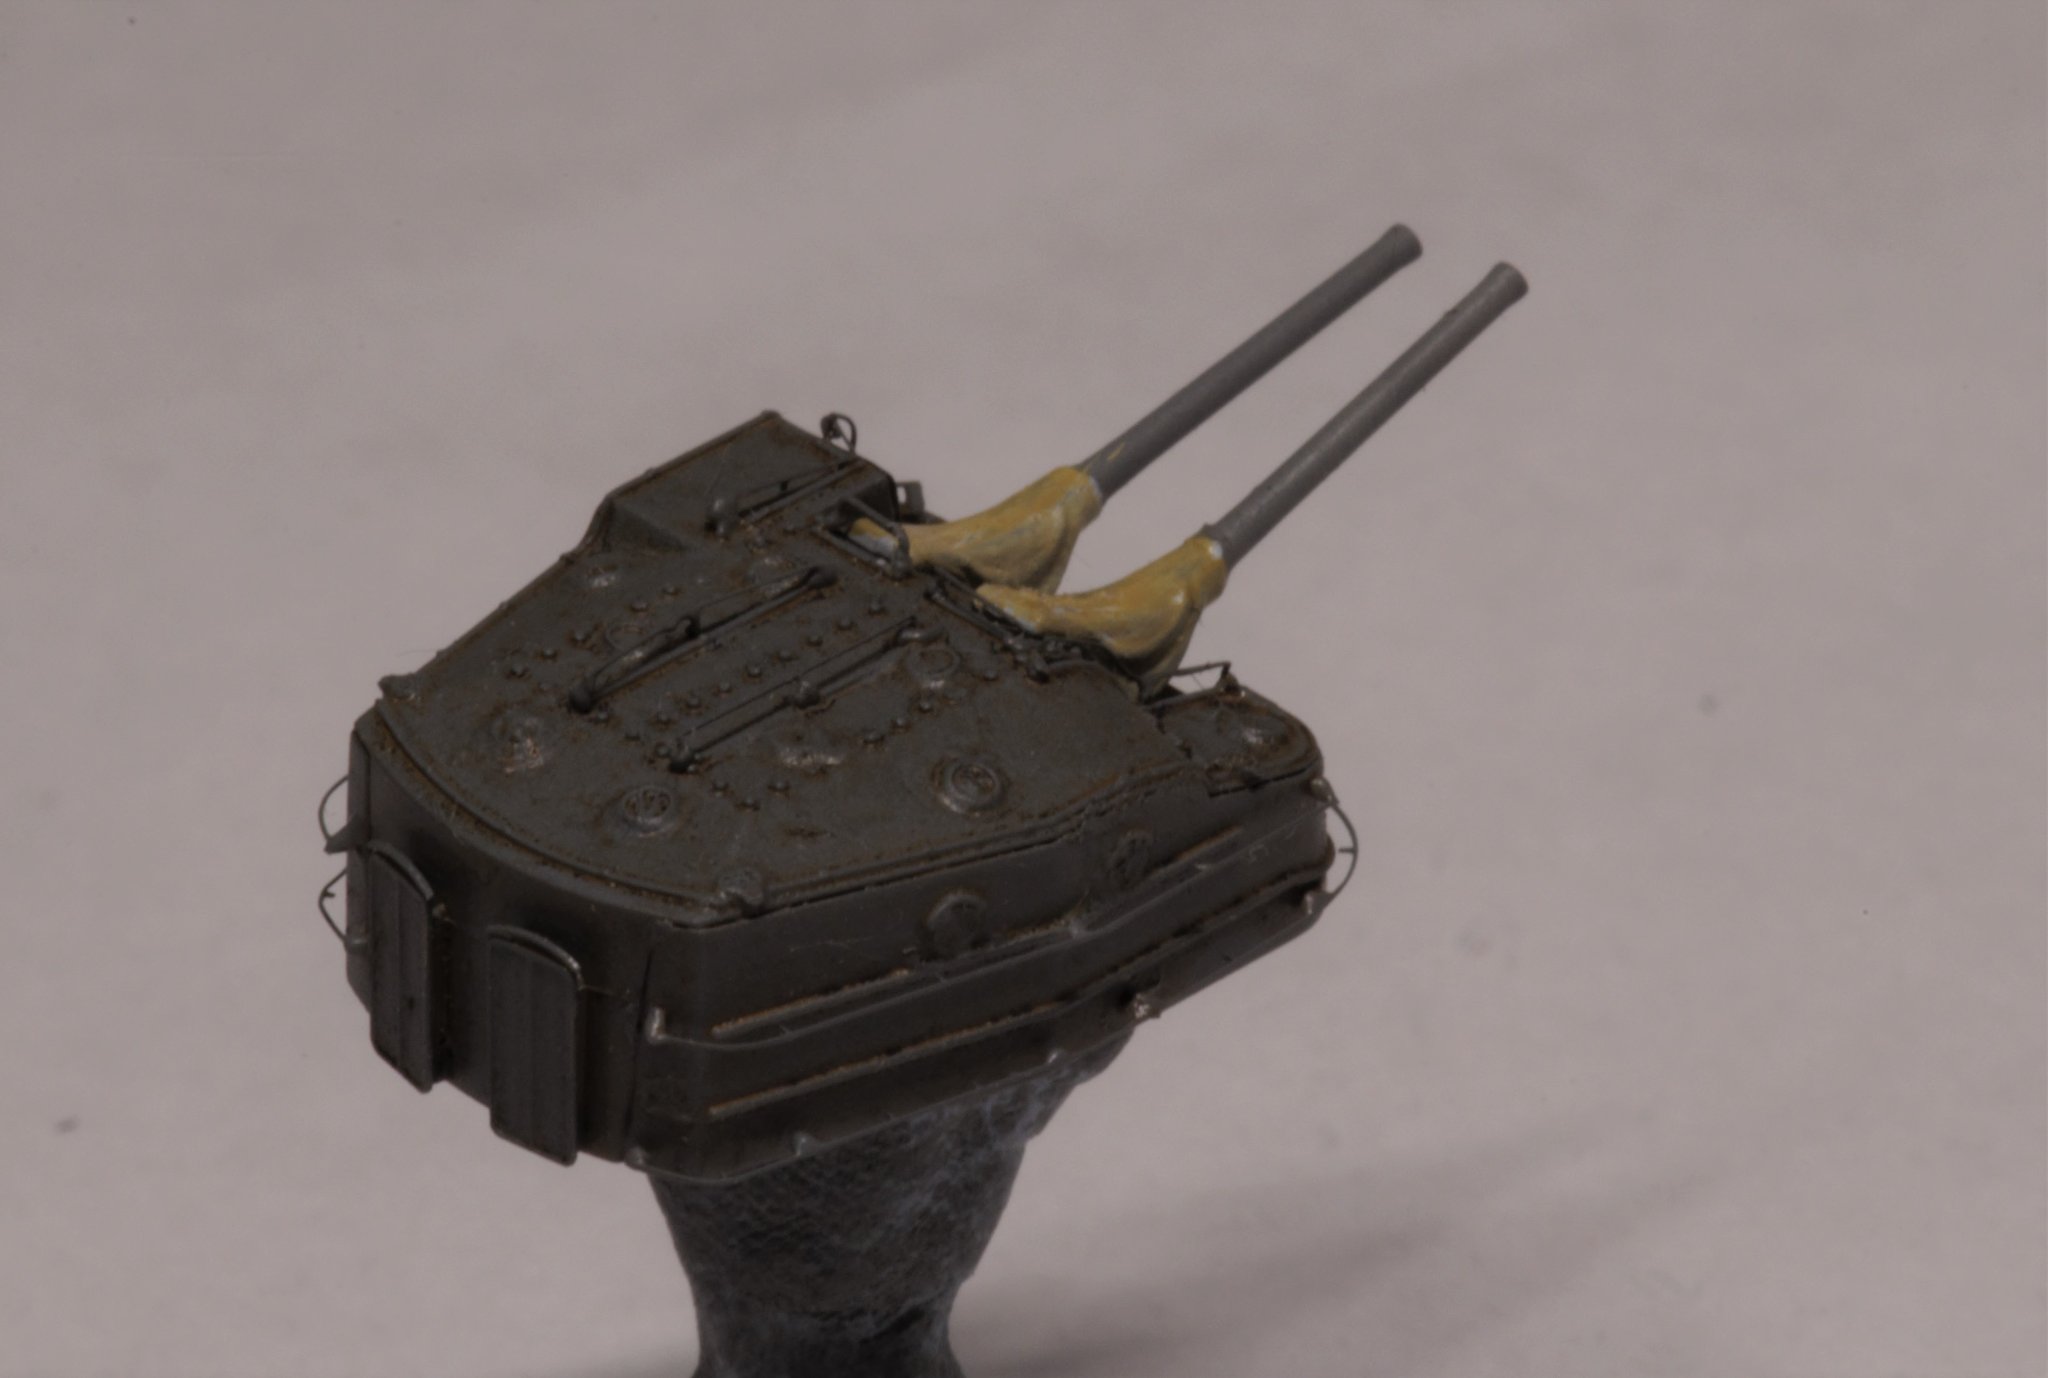
Thank you very much! Handling of those turrets and torpedo launchers became fiddly due to handrails everywhere (they've drunk a lot of my blood those handrails). Weathering is just a simple wash - I tried to remove as much as I could and at one moment when surface was still wet from solvent it seemed ok, but when surface has dried this wash fragmented into "brown" fraction which conducts like a filter and "black" fraction which condensed into shadowy places of structures and for my taste there's still too much of them both but I wouldn't dare to remove more 'cause solvent now can damage paint and laquer - their integrity is "balancing on a ledge" after wash and solvent.
- Old Collingwood, Canute, mtaylor and 1 other
-
4
-
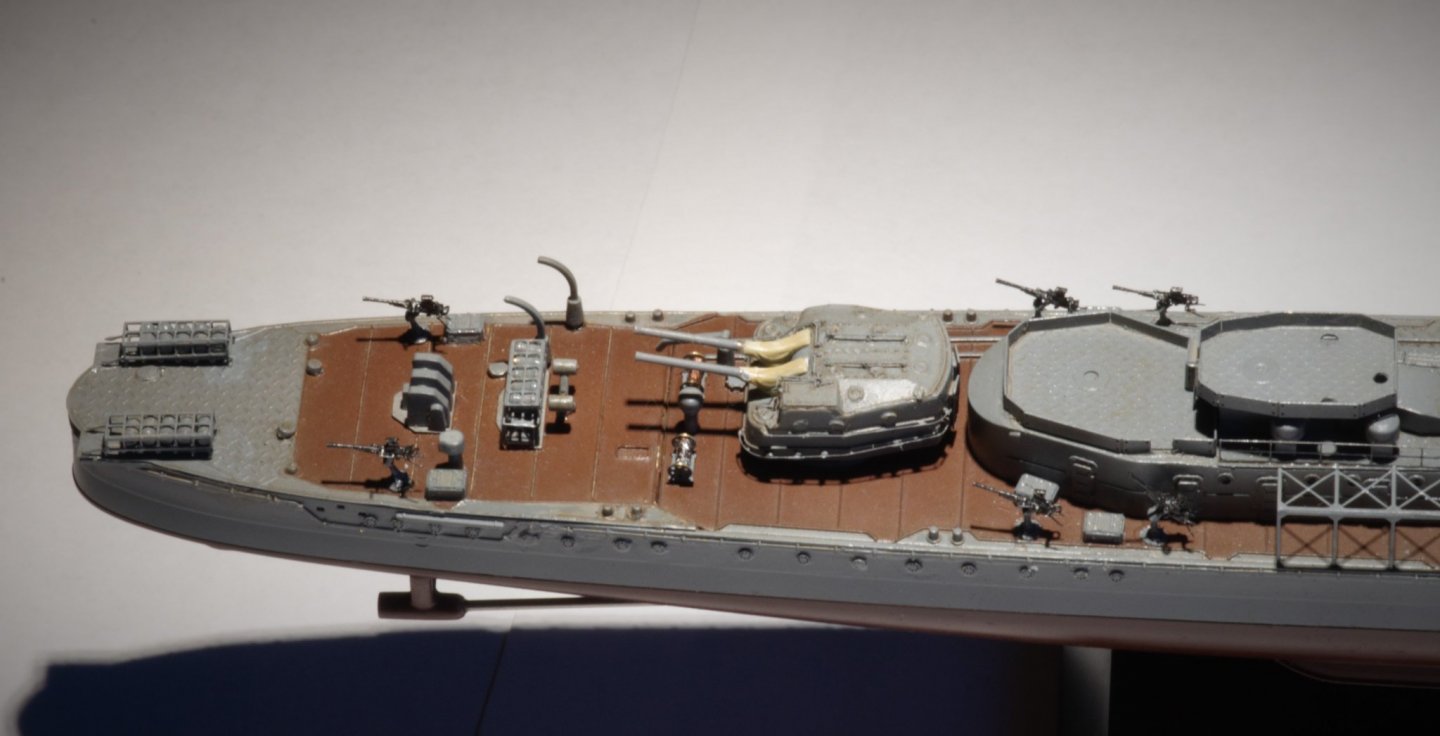
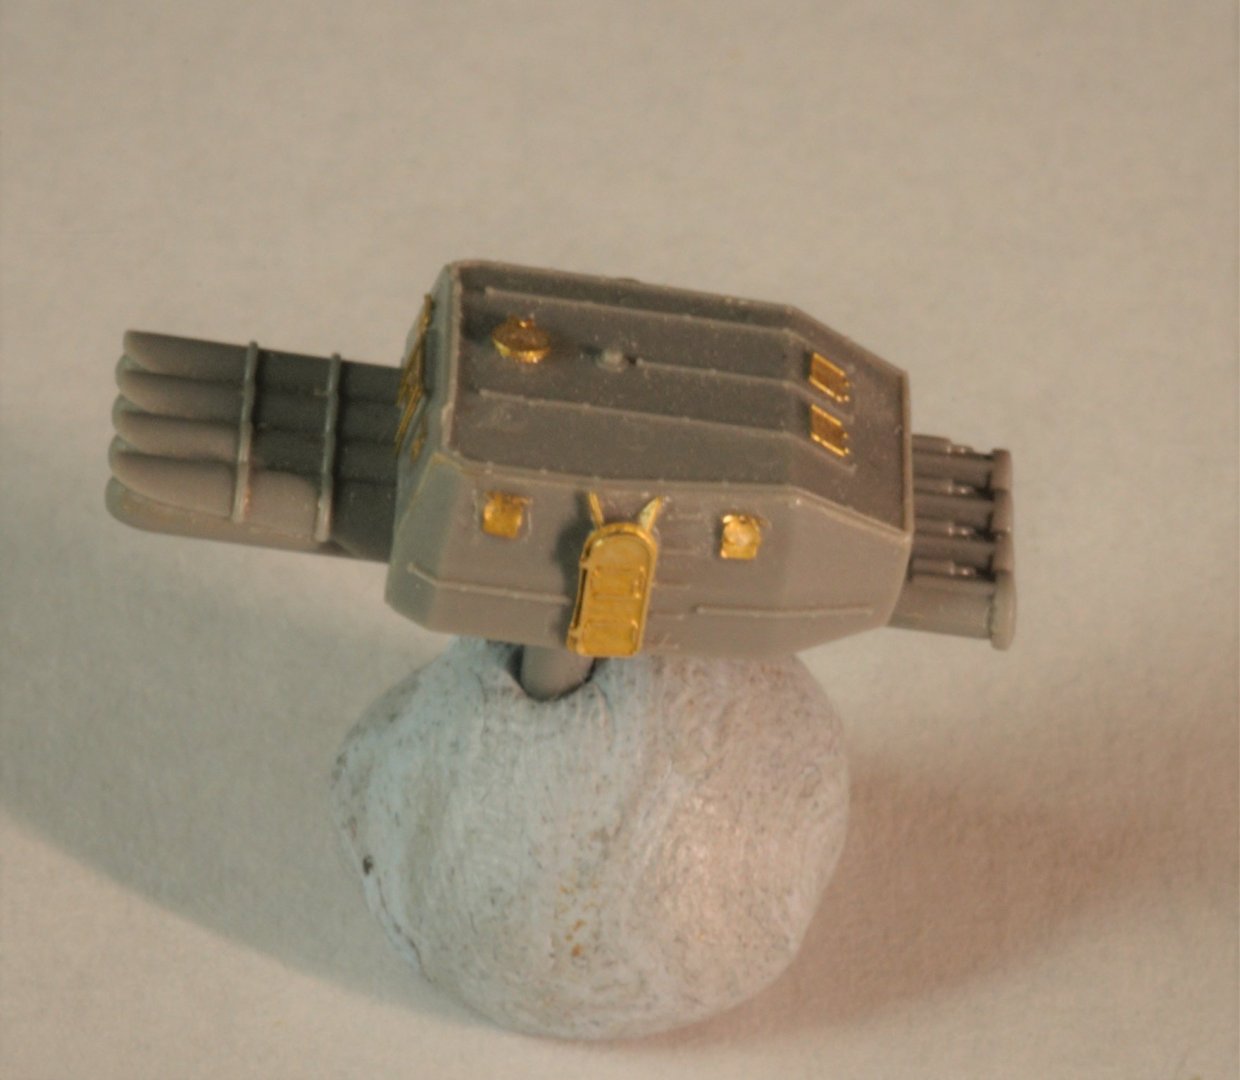
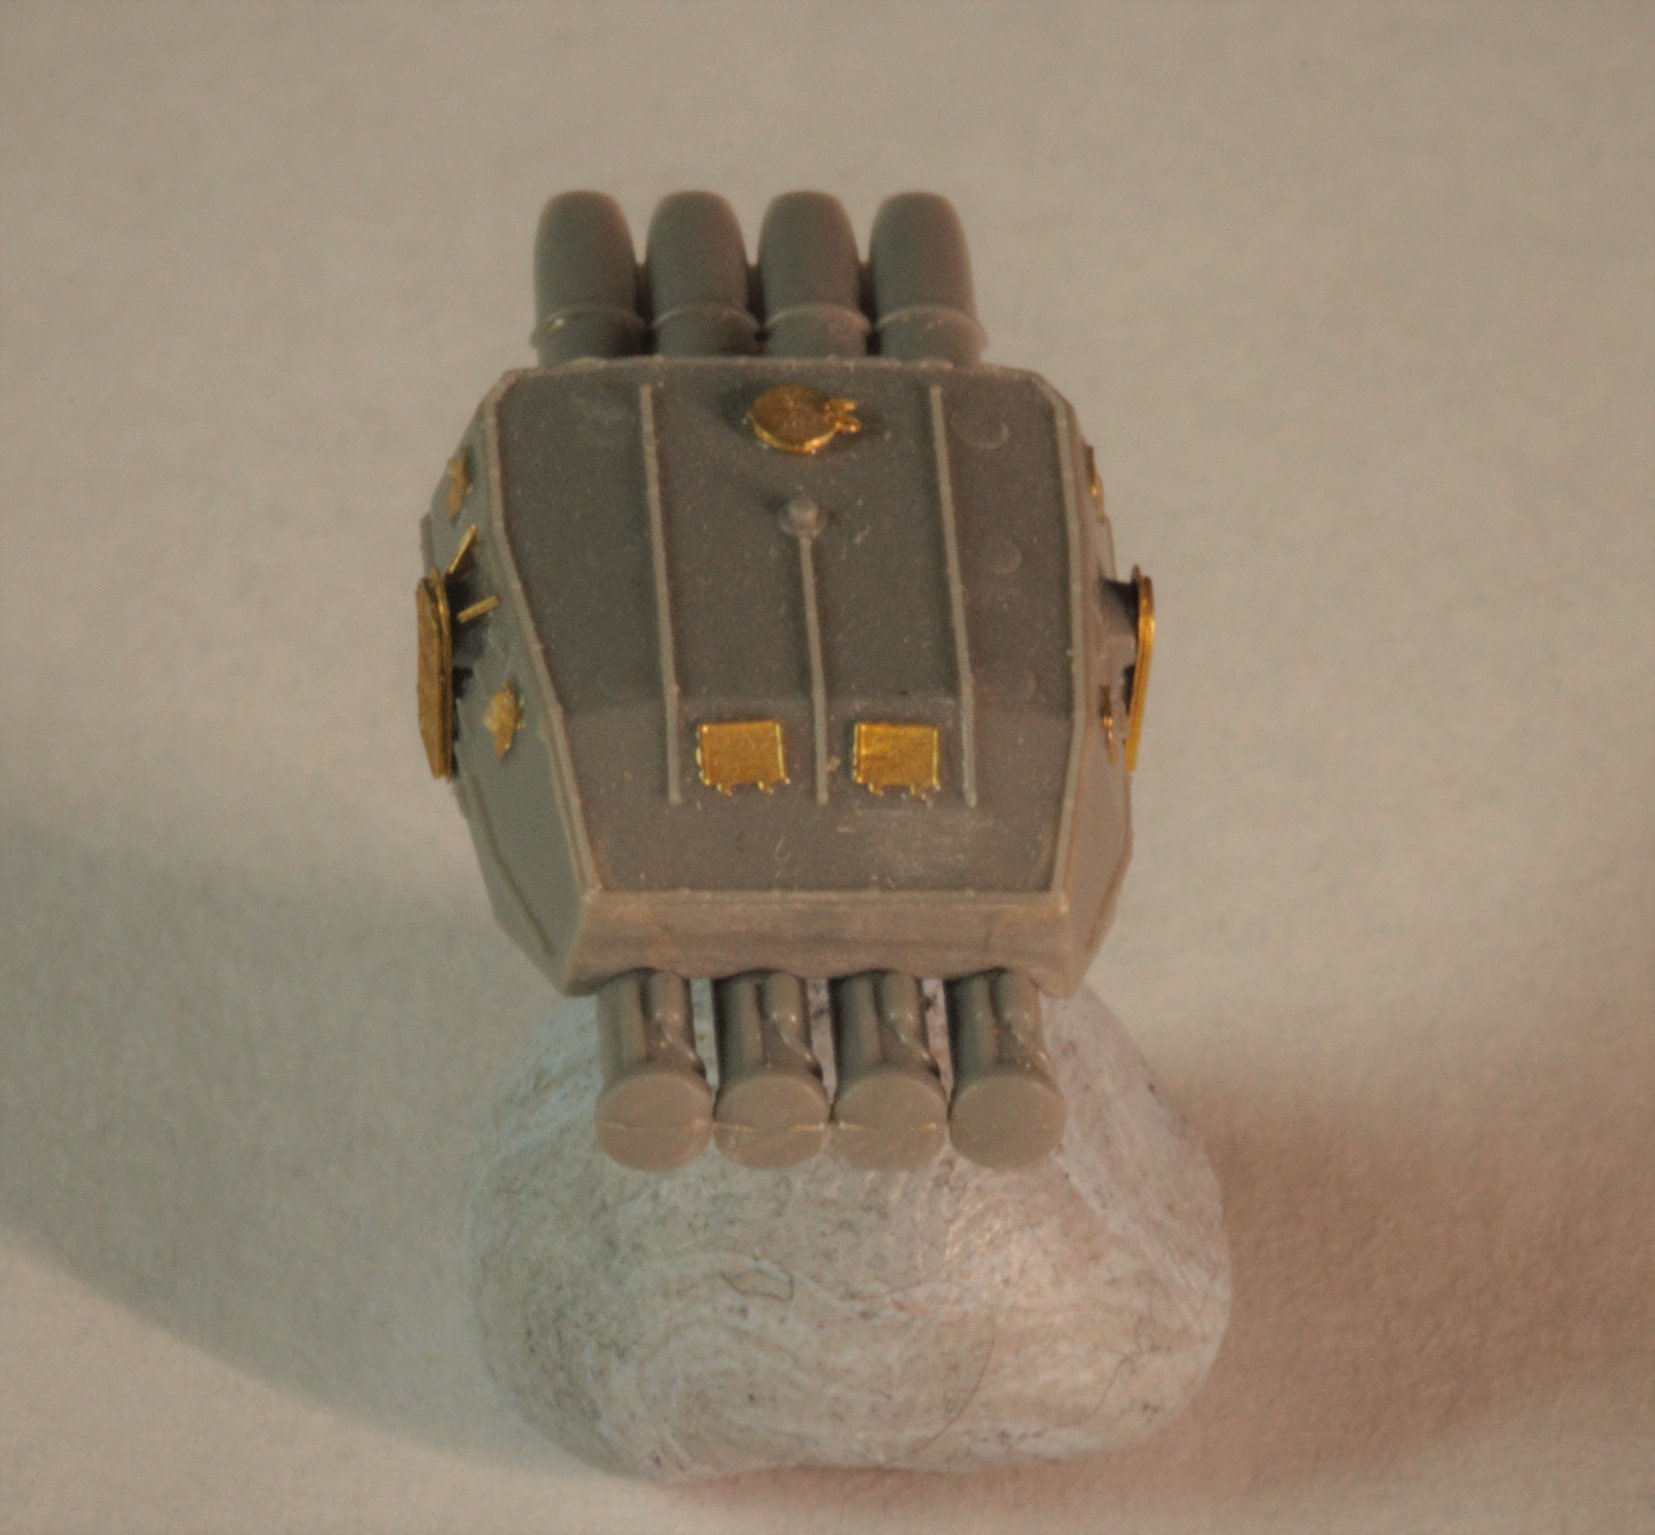
Hello everyone!
Well, here's aforementioned progress:
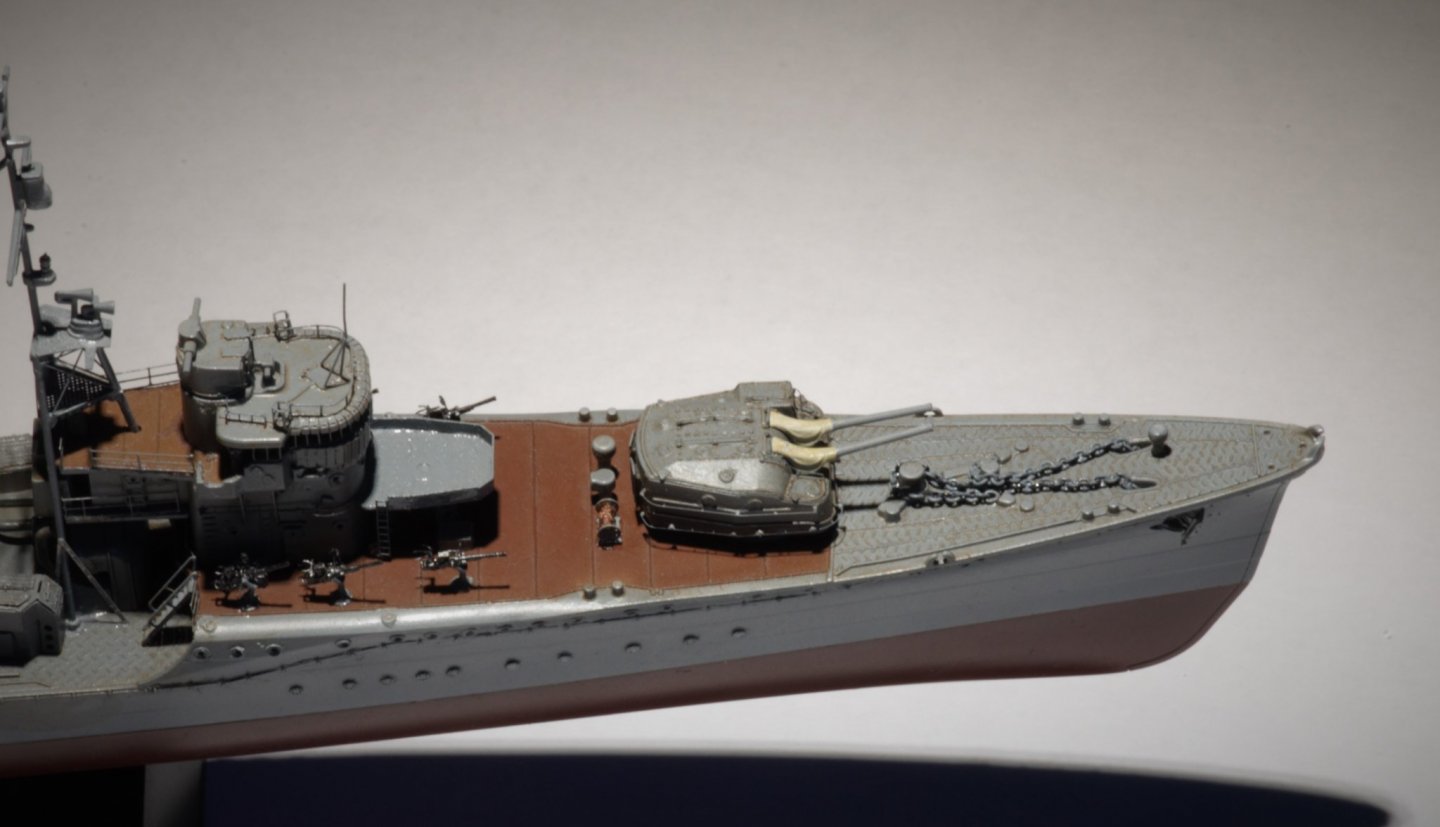
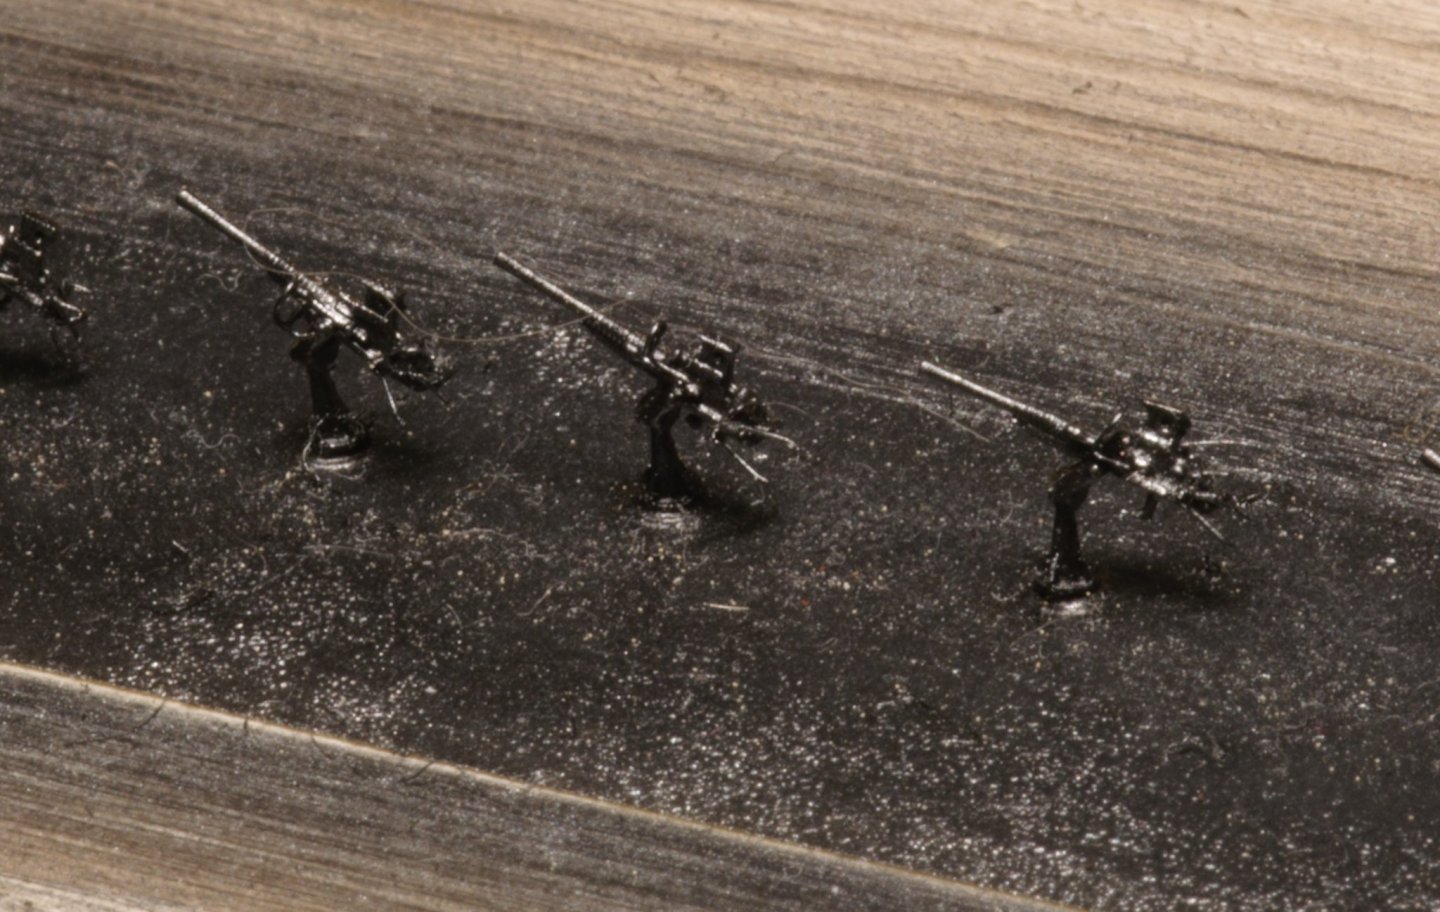
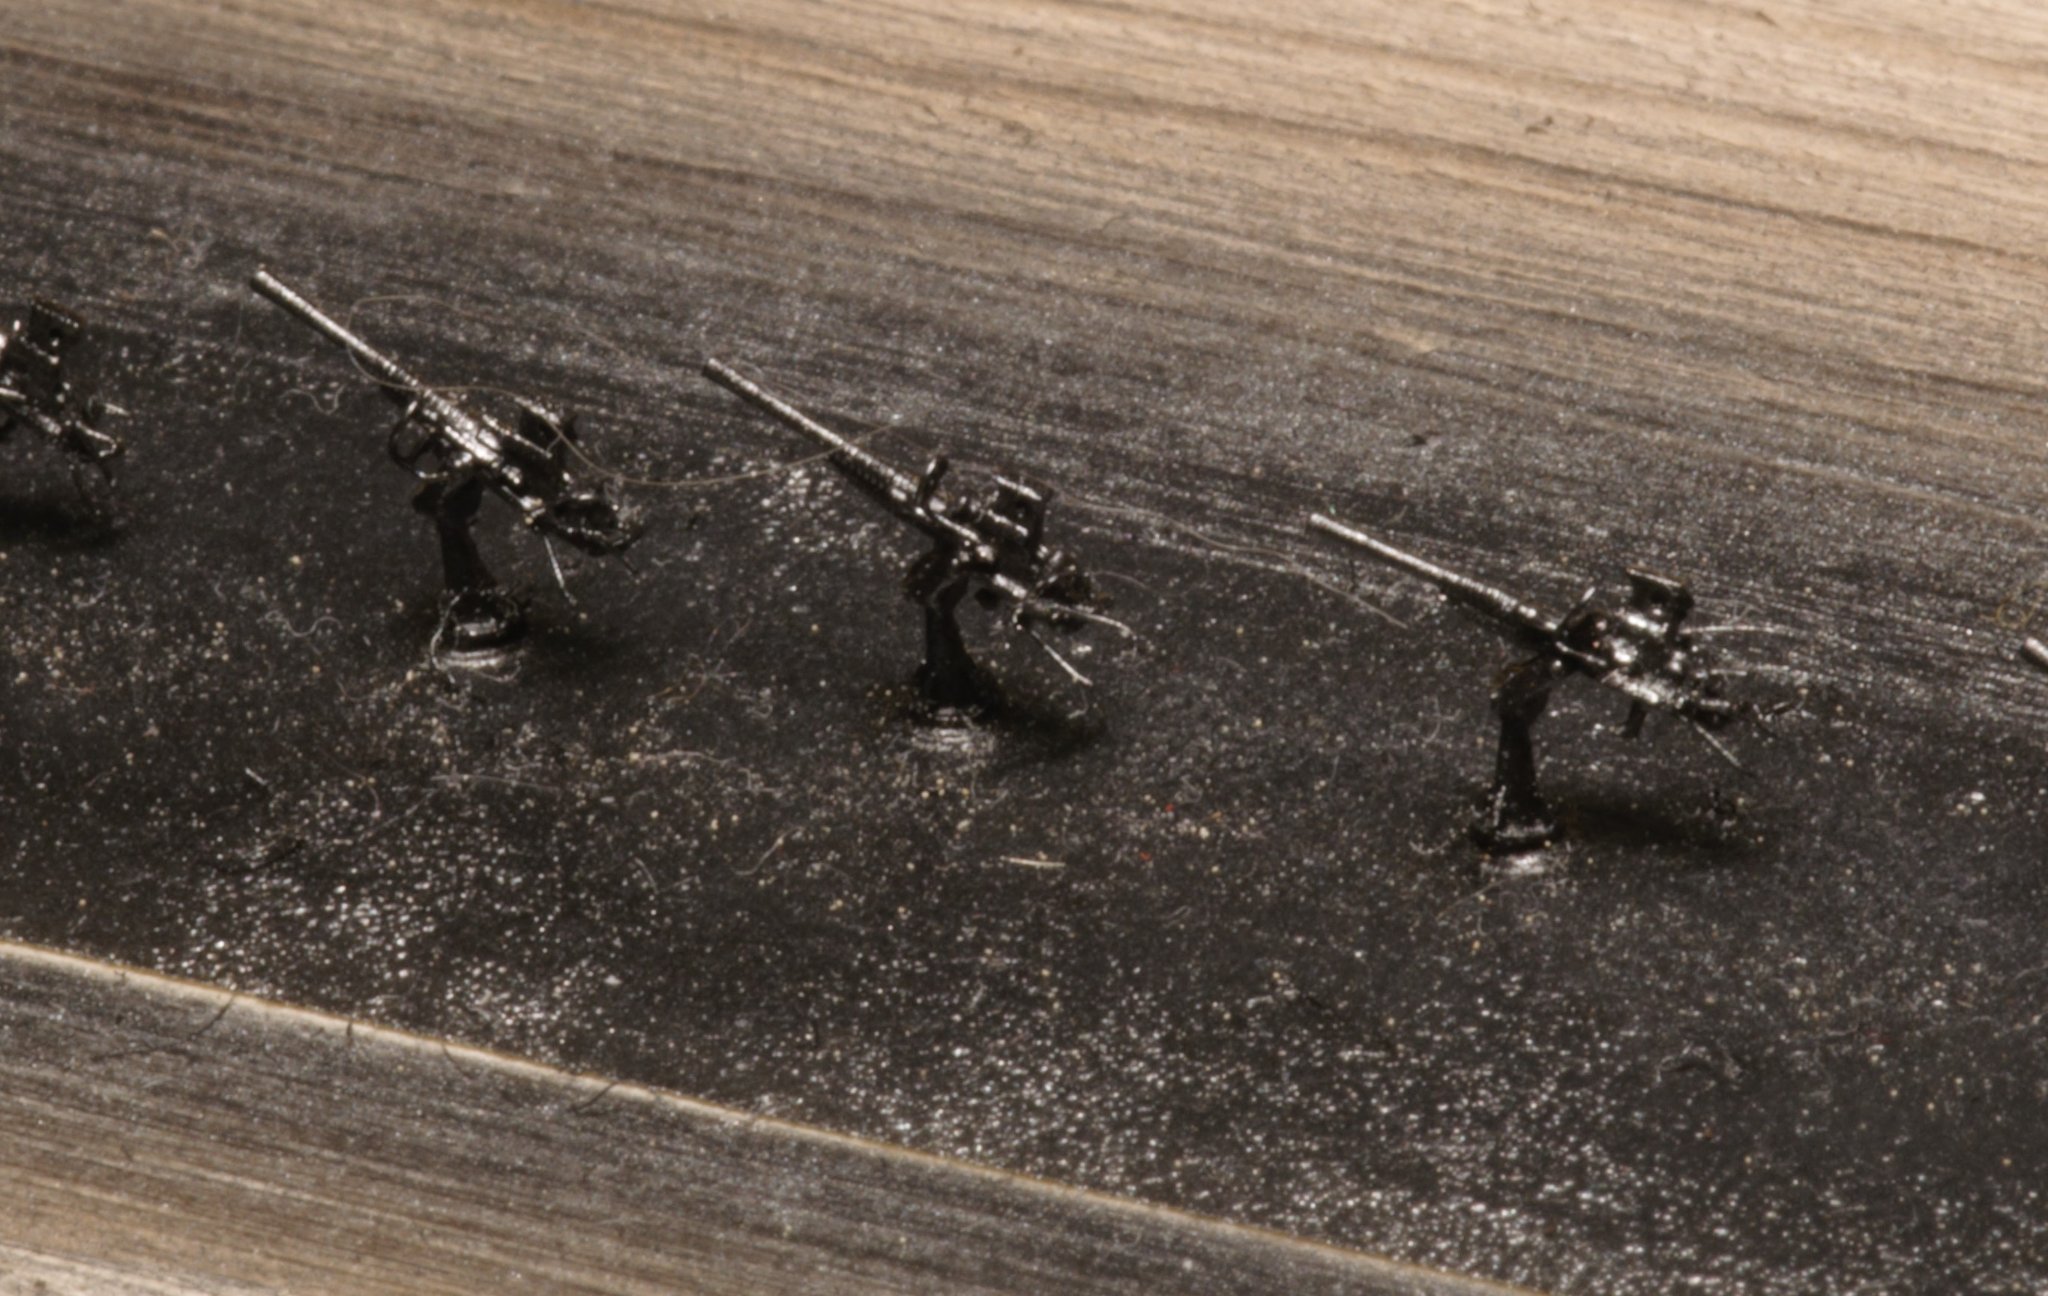
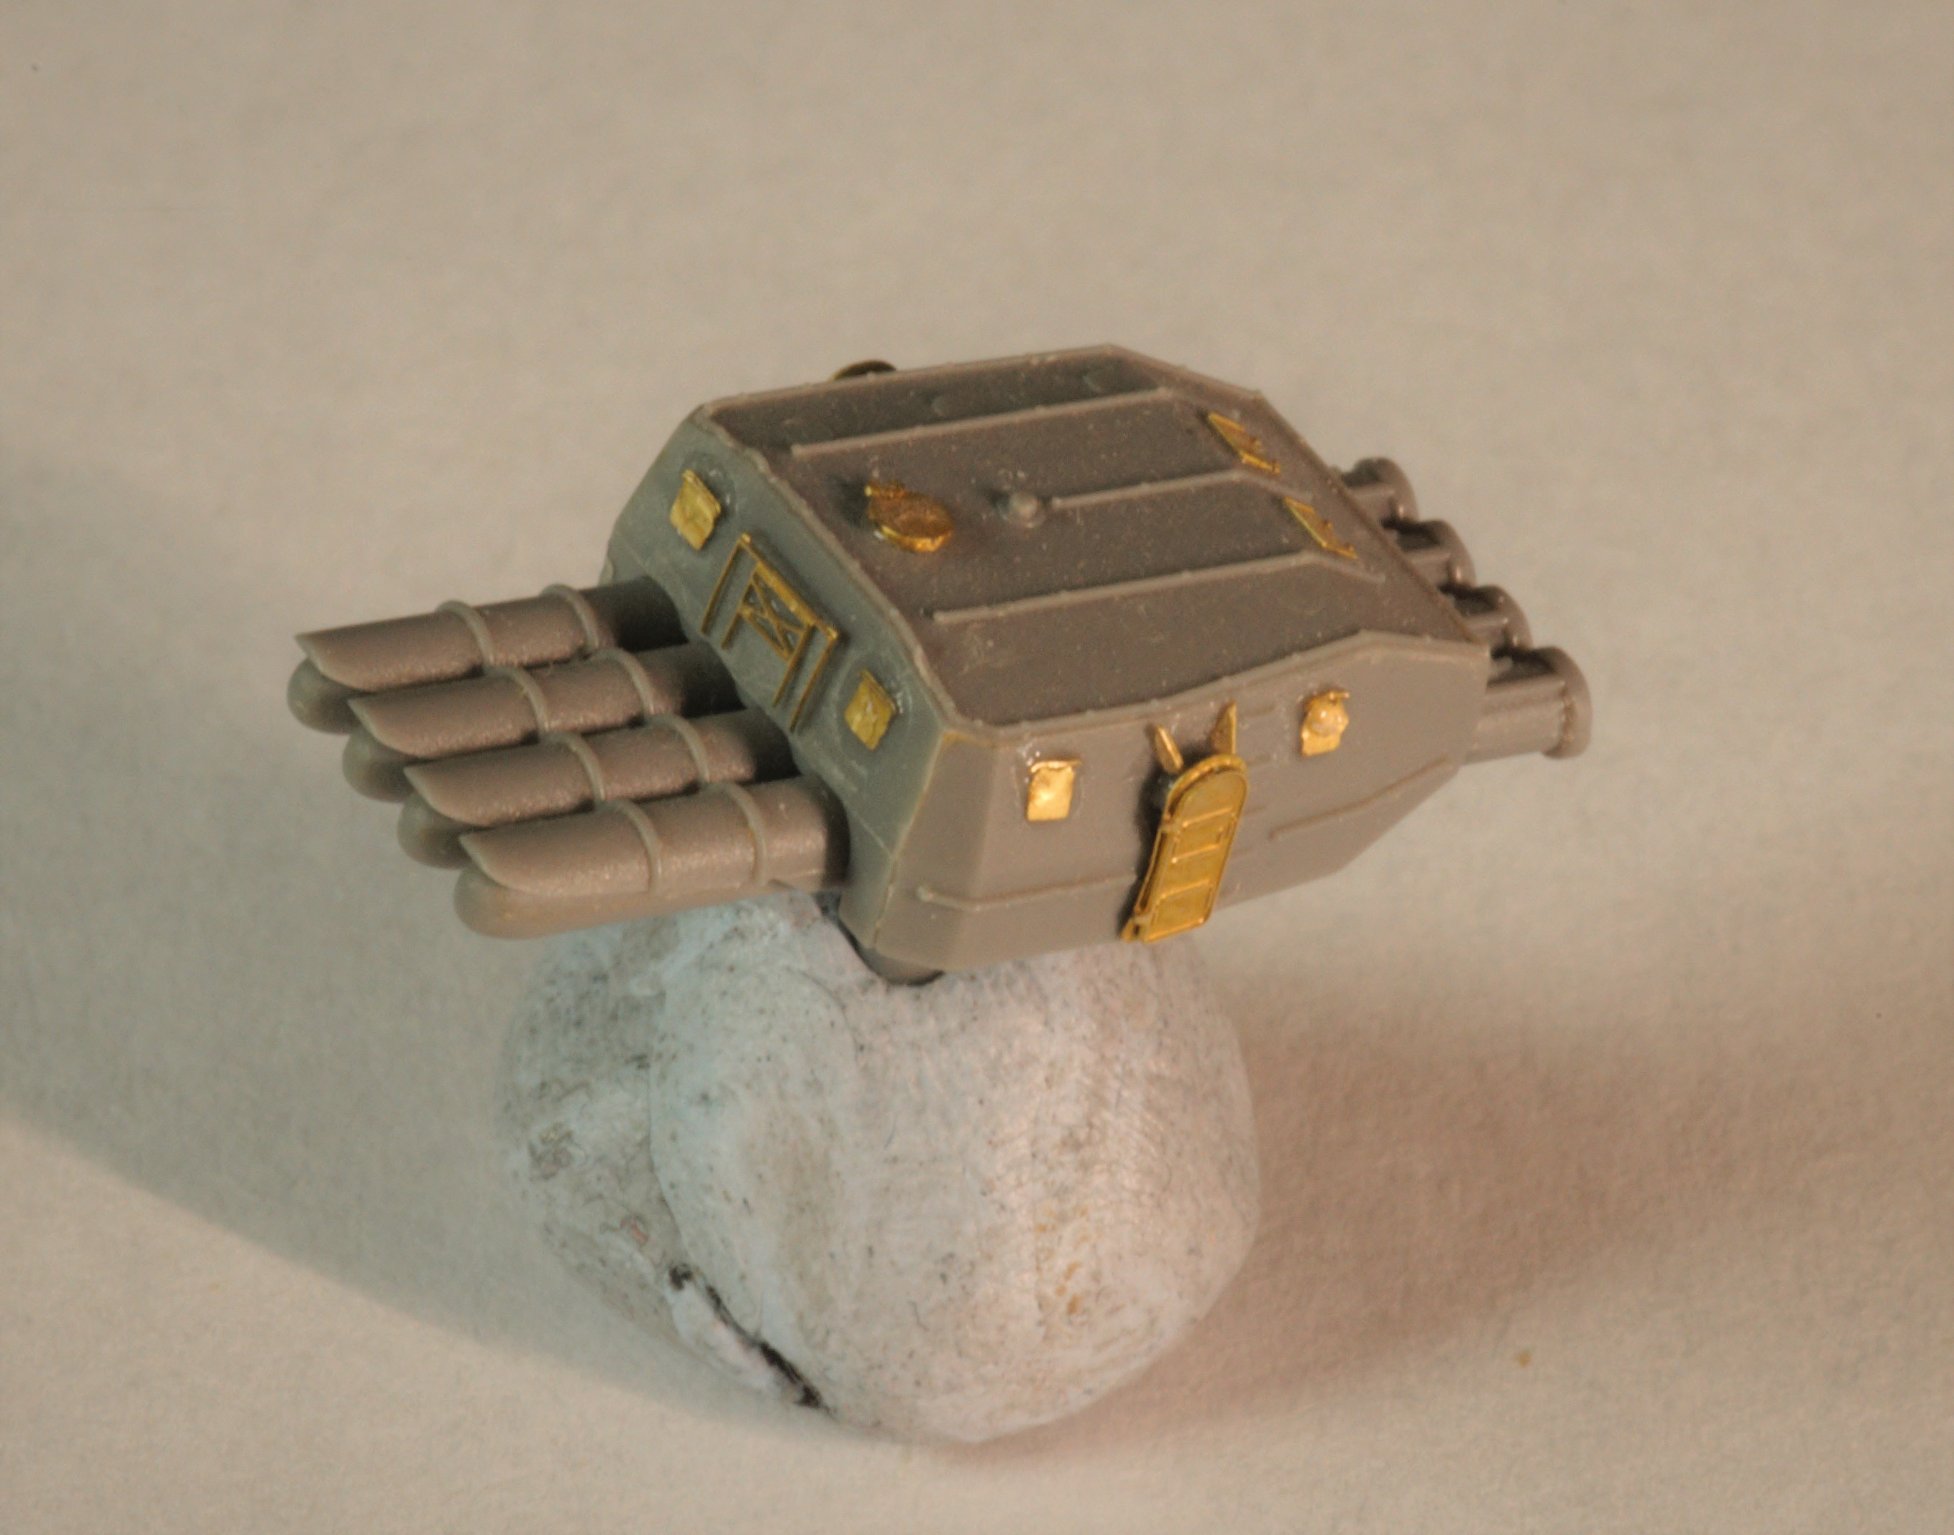
First, I've assembled and painted 25mm autocannons - there's circa 16 of them on the ship. Each Veteran's 25mm consists of 2 resin and 2 PE parts.
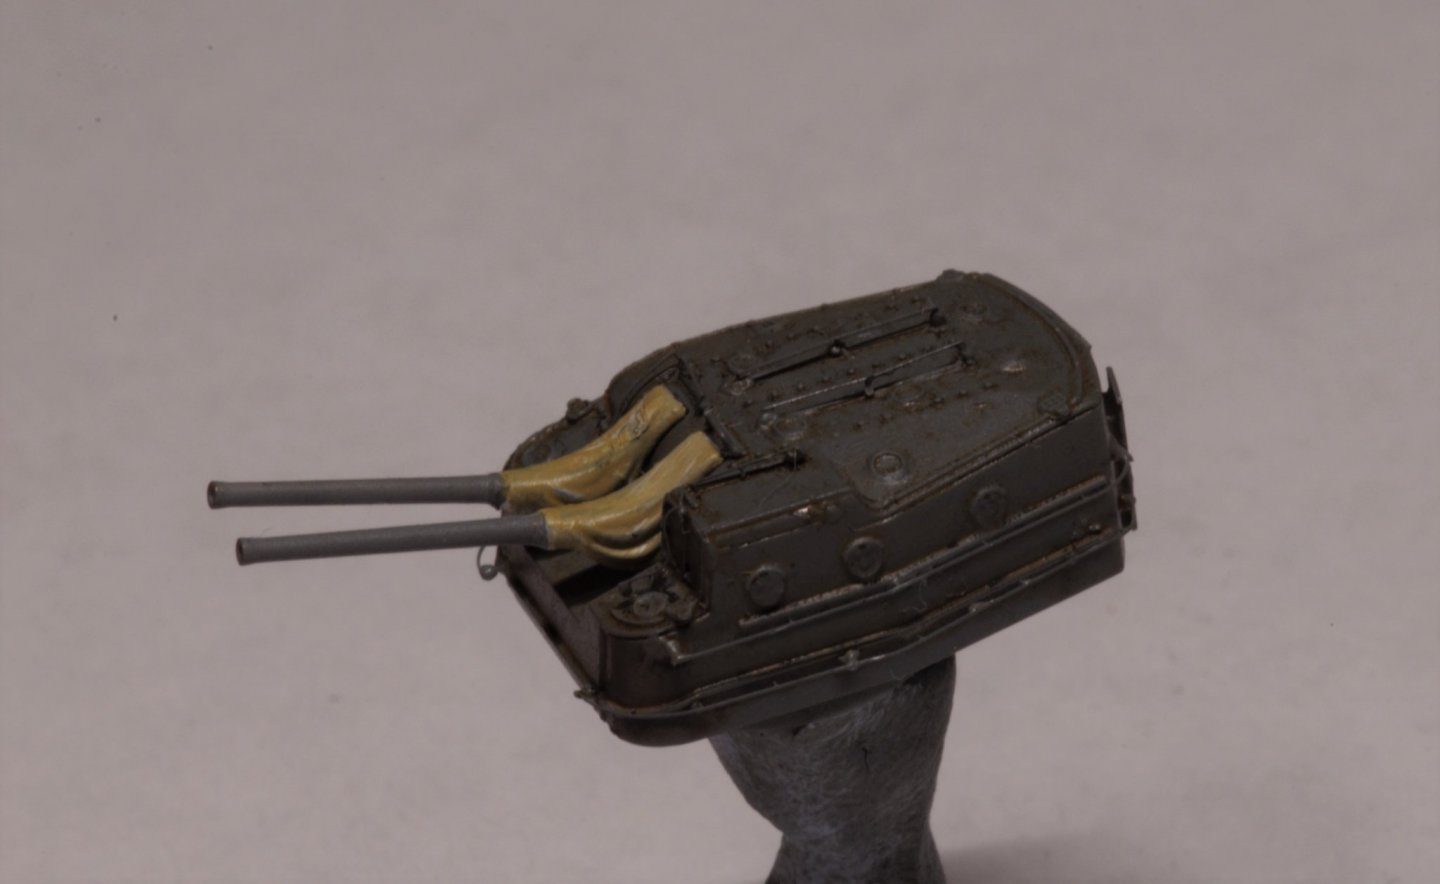
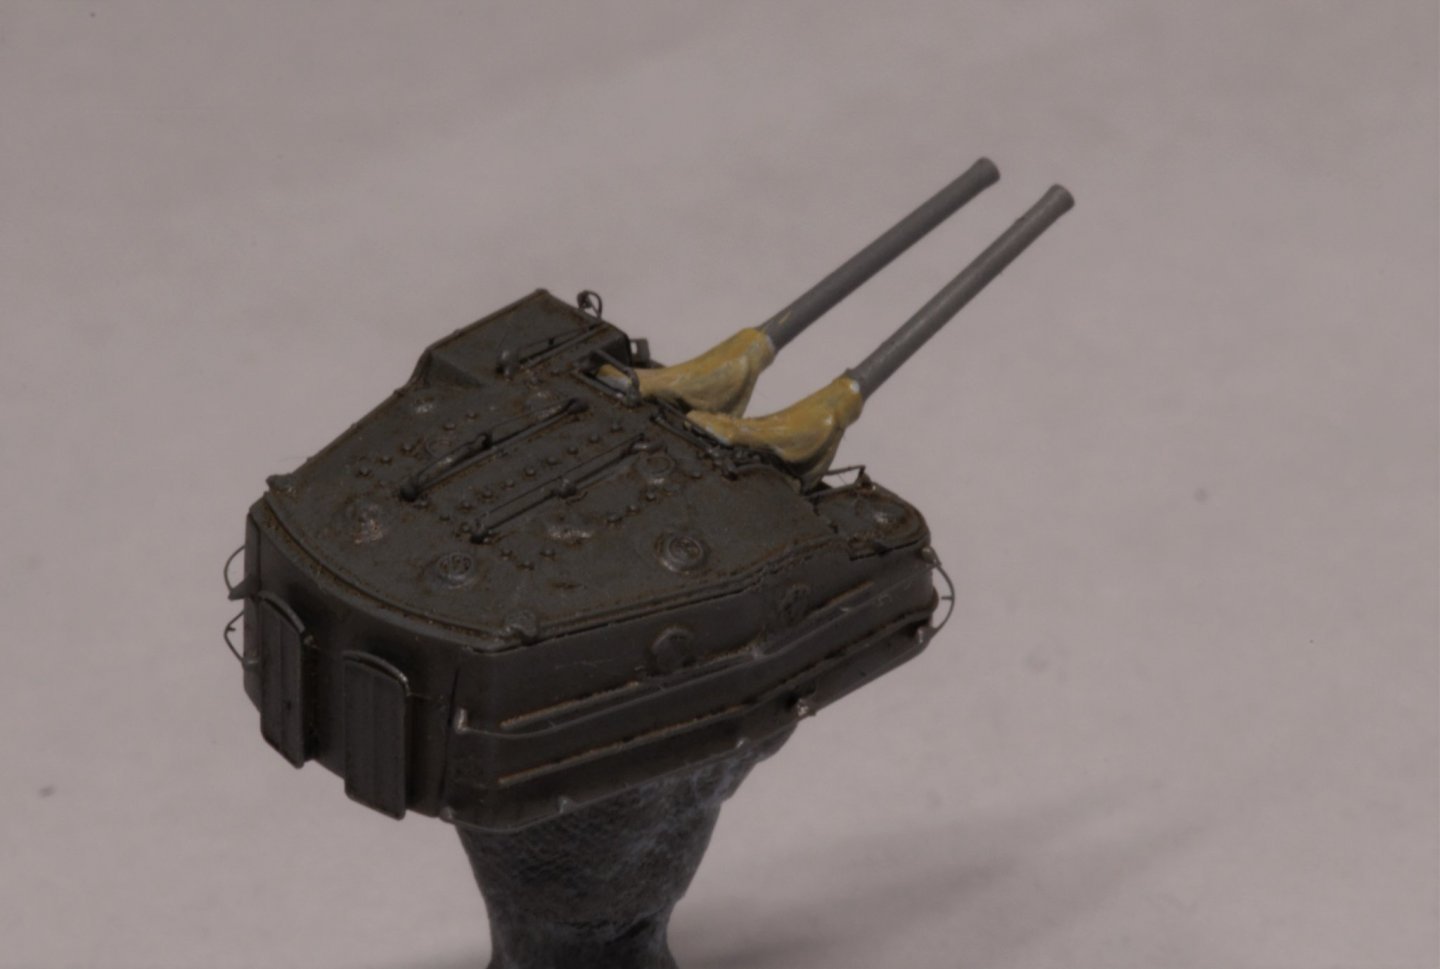
Next, I've equipped guns and torpedo launchers with handrails (tricky little devils they are ), then paint, clear layer and wash.
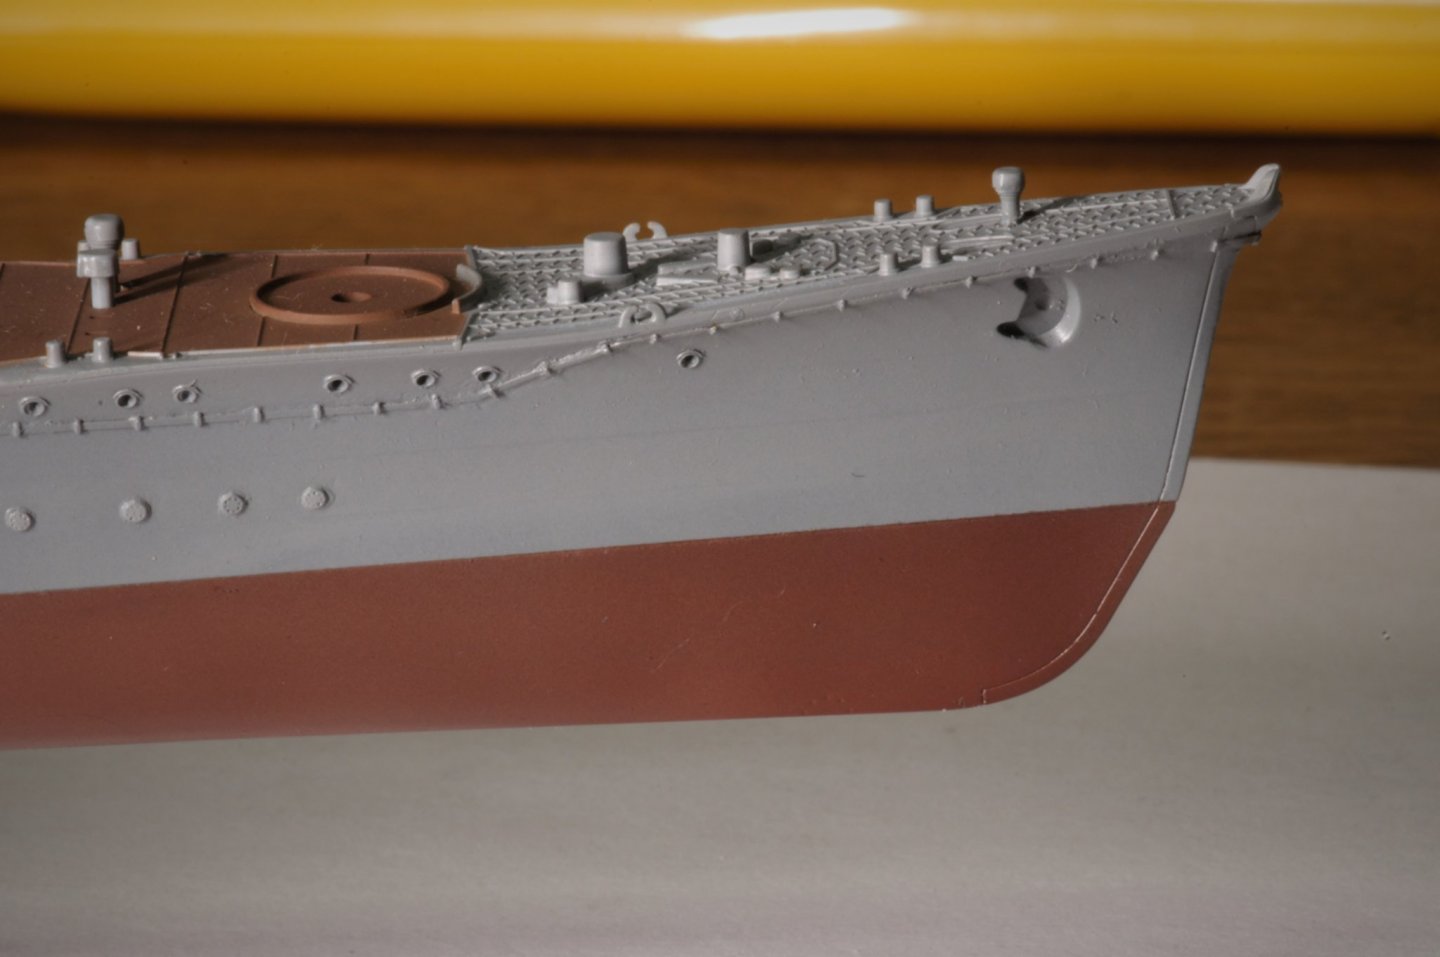
Hull was painted and given a layer of clear gloss.
I try to be honest - I show things I'm proud of and also things I'm not quite proud of 🙂


-
On 6/14/2021 at 4:06 PM, Javlin said:
If you never mentioned it Dmitri I wouldn't of known any better doing some Nice upgrades.I built this one a couple years ago but not as many upgrades still came out quite nice though.
")
Thanks, Javlin!
I've got some progress since my last post here - just don't have enough time to take pictures. Hope I'll be able to share this weekend.
- Old Collingwood, Canute, Javlin and 1 other
-
4
-
-
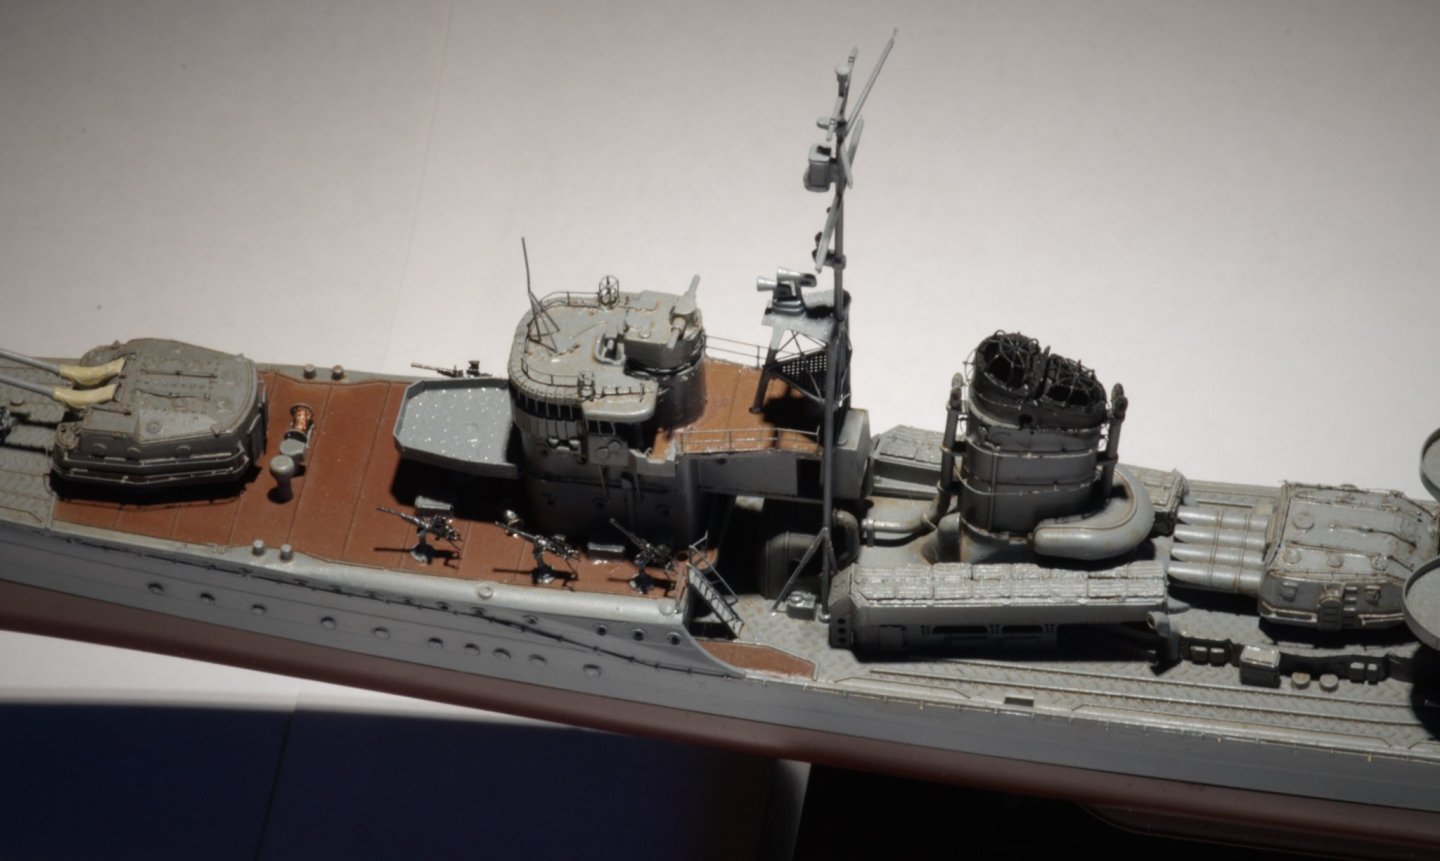
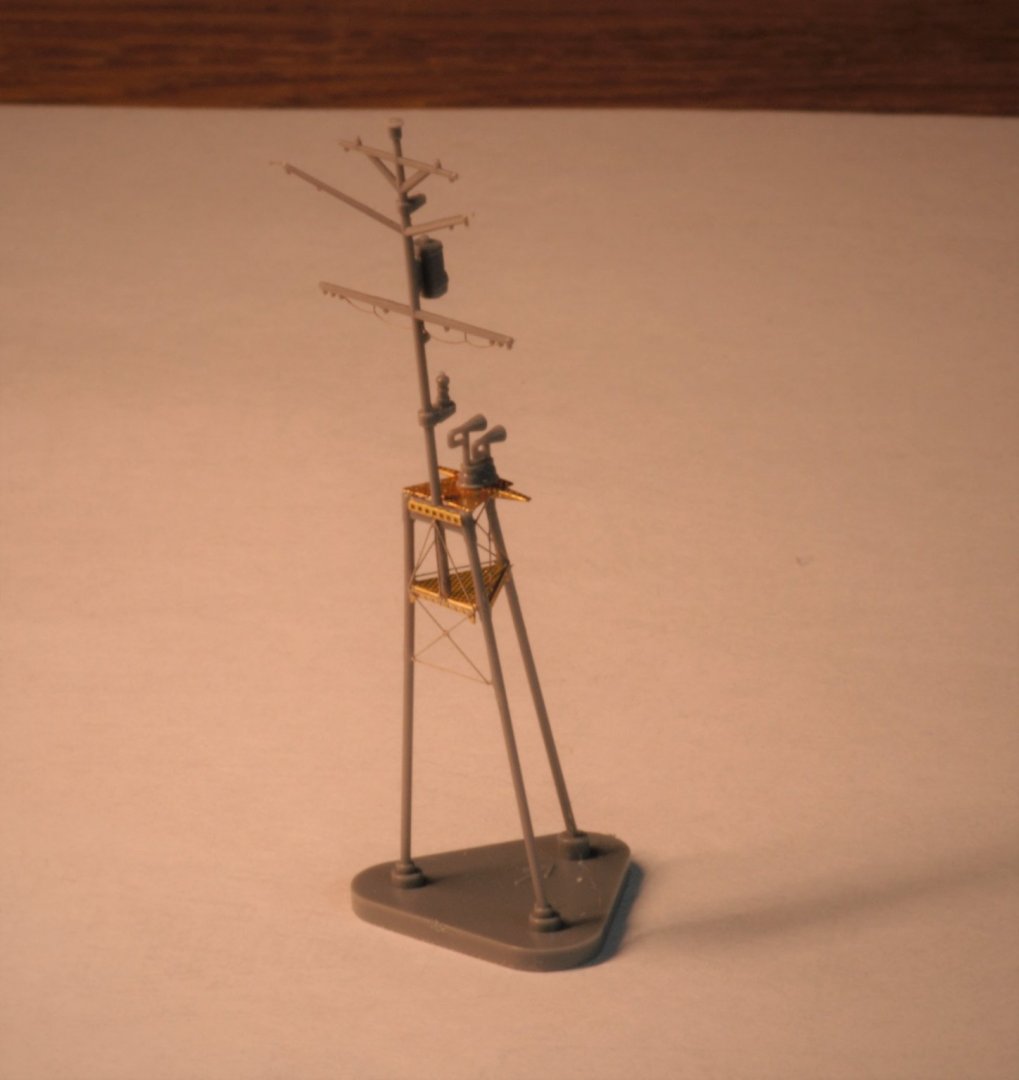
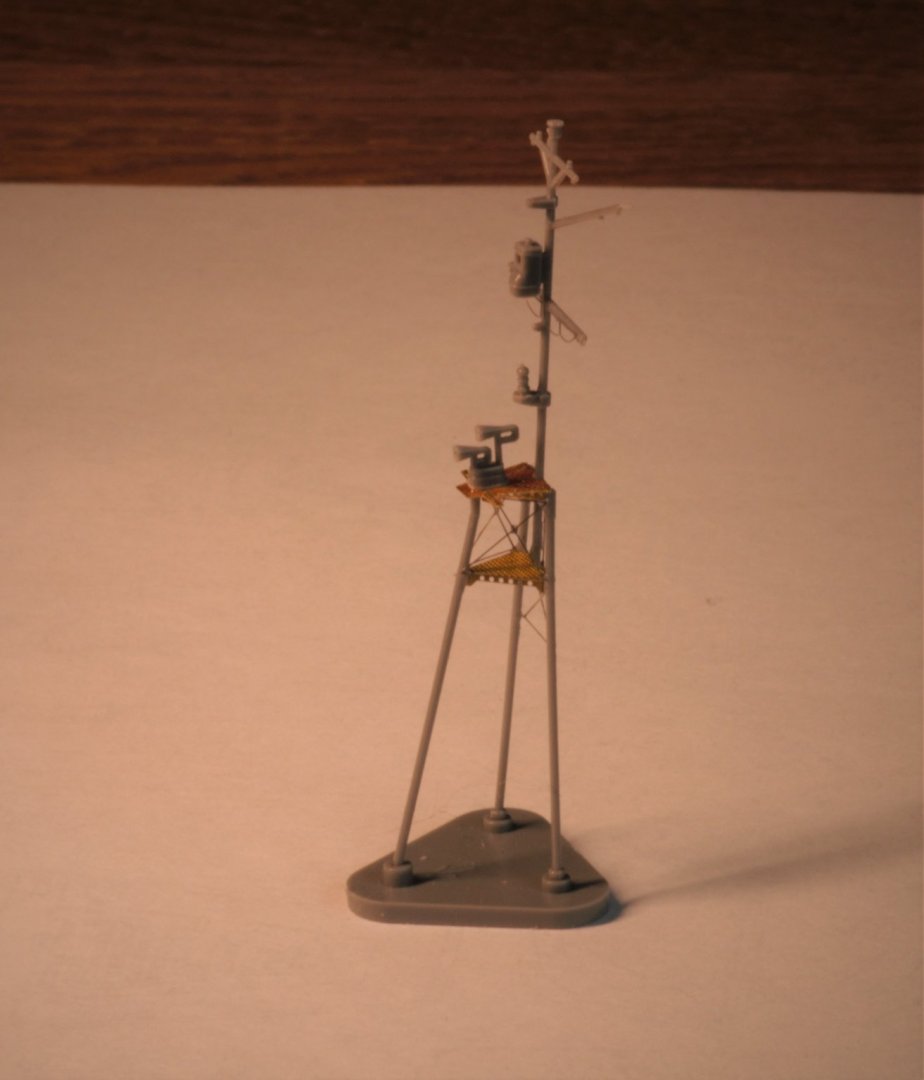
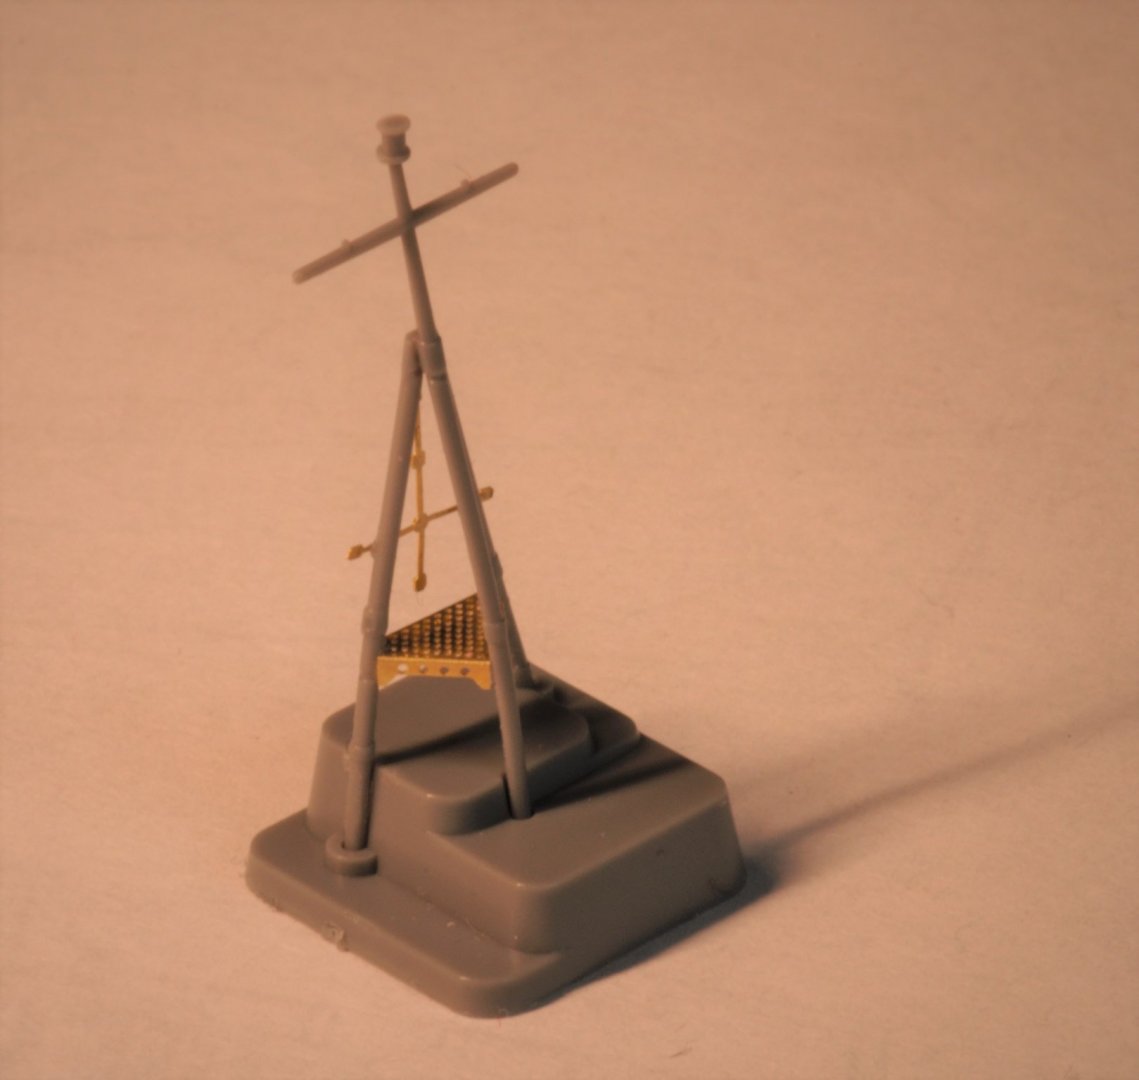
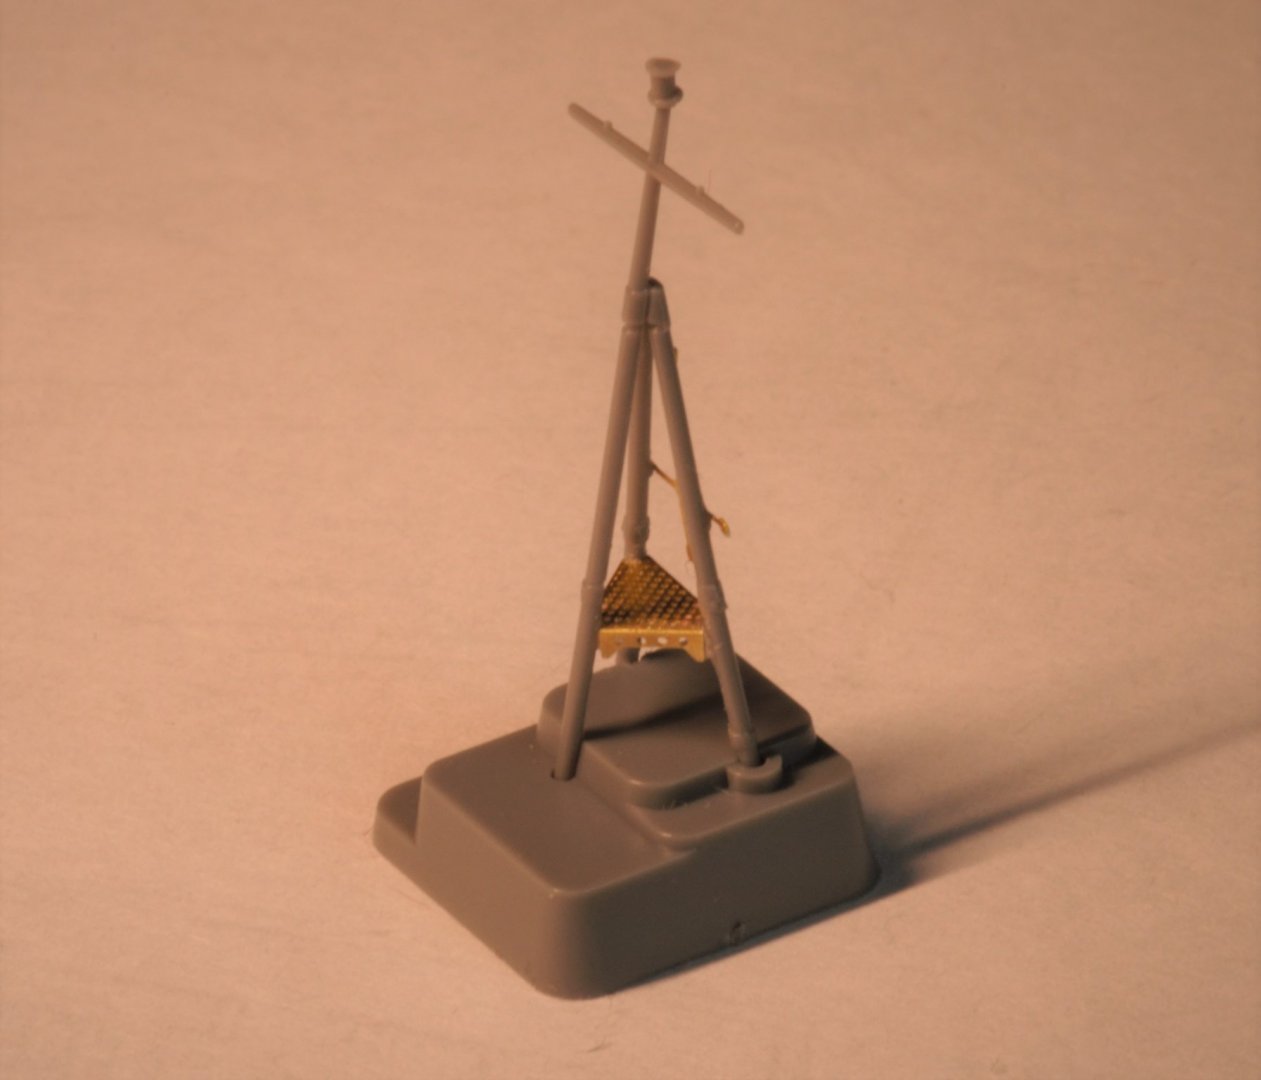
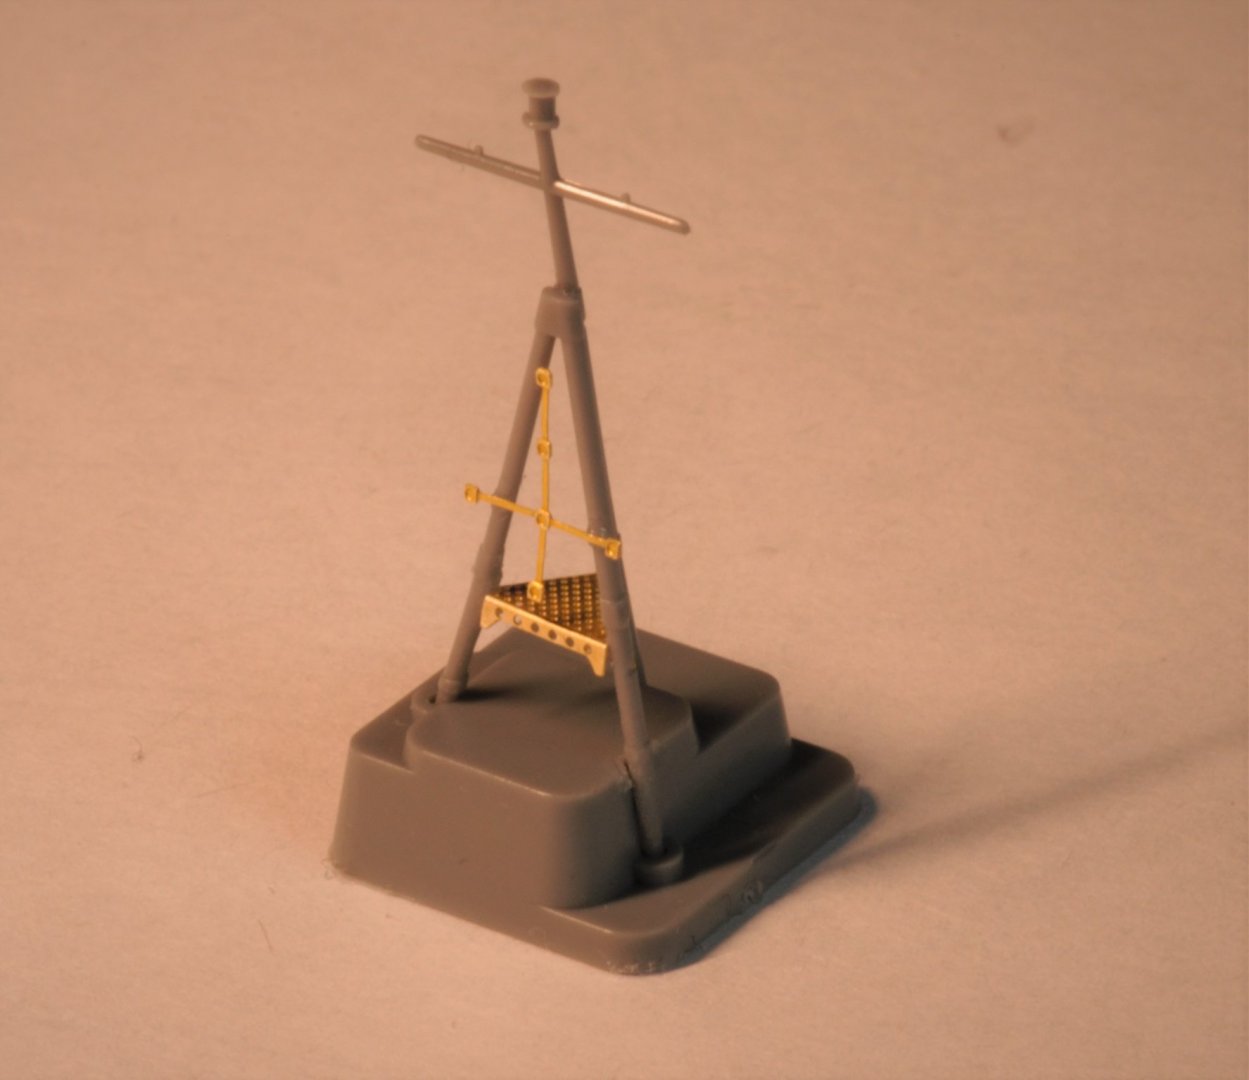
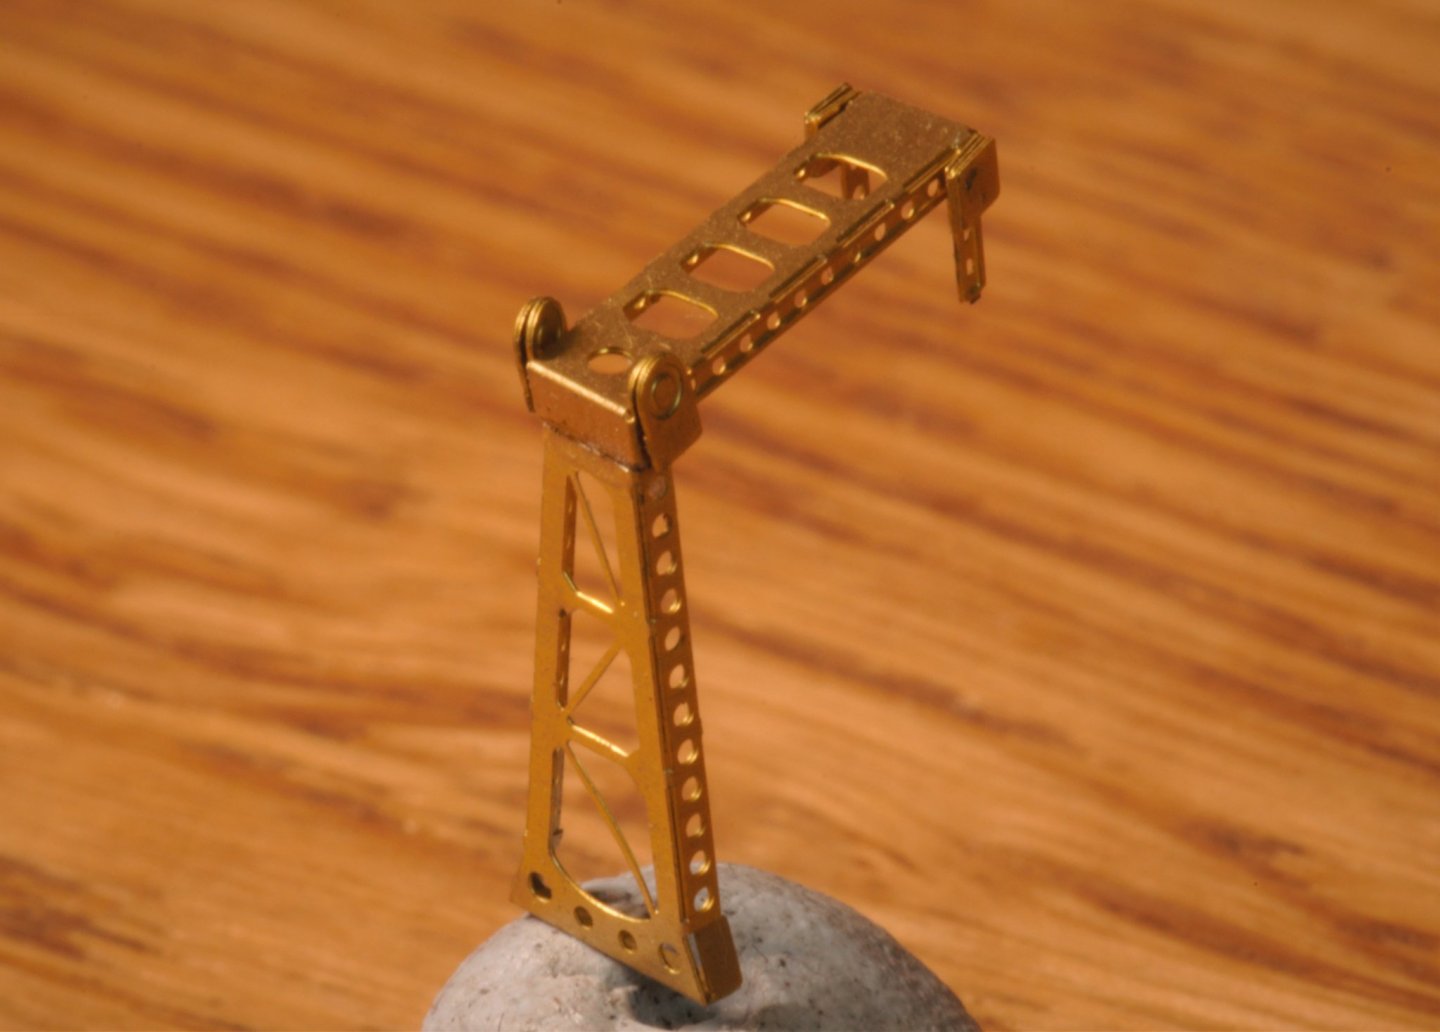
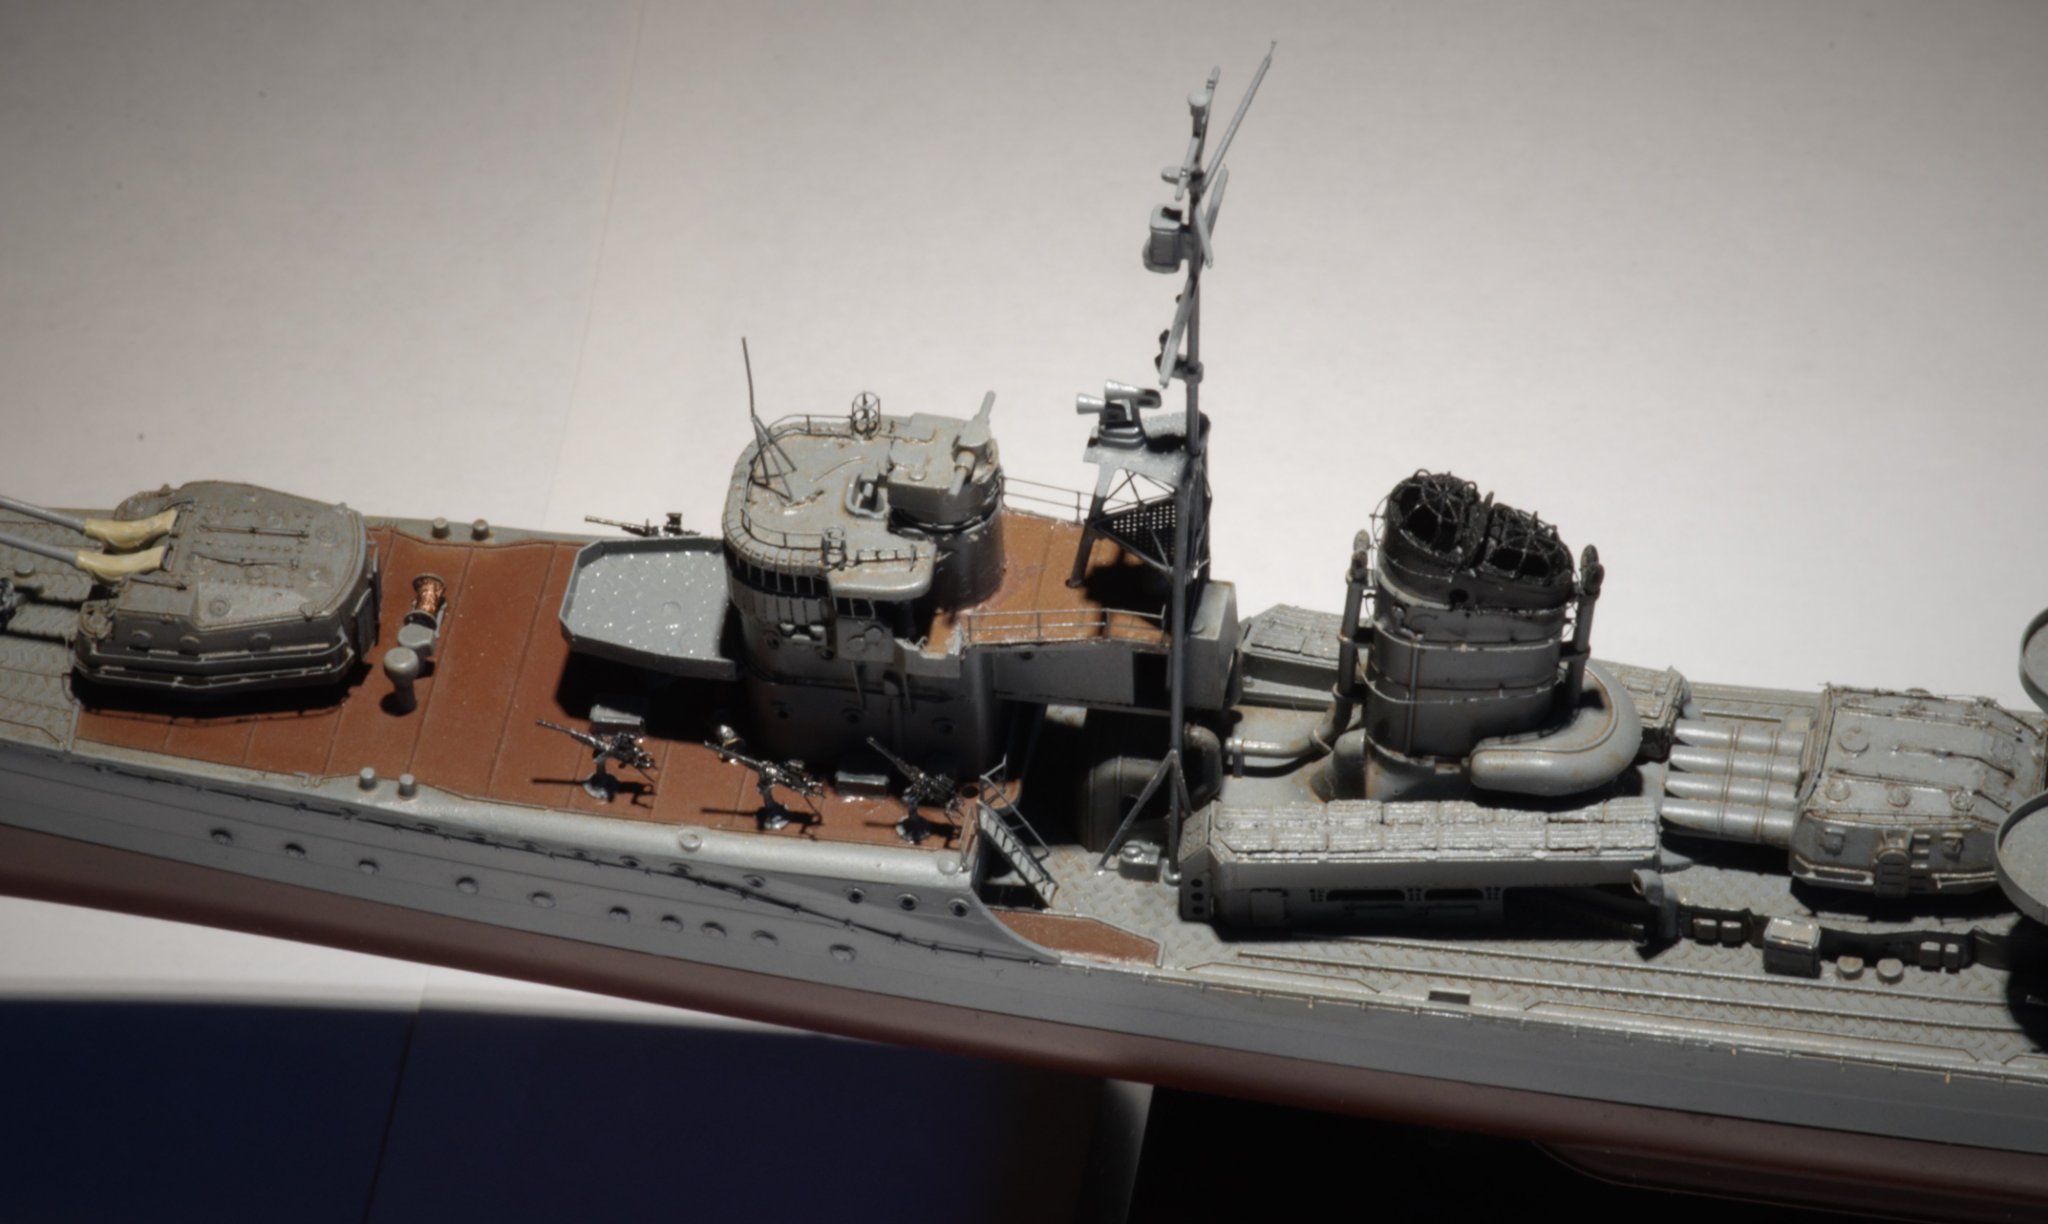
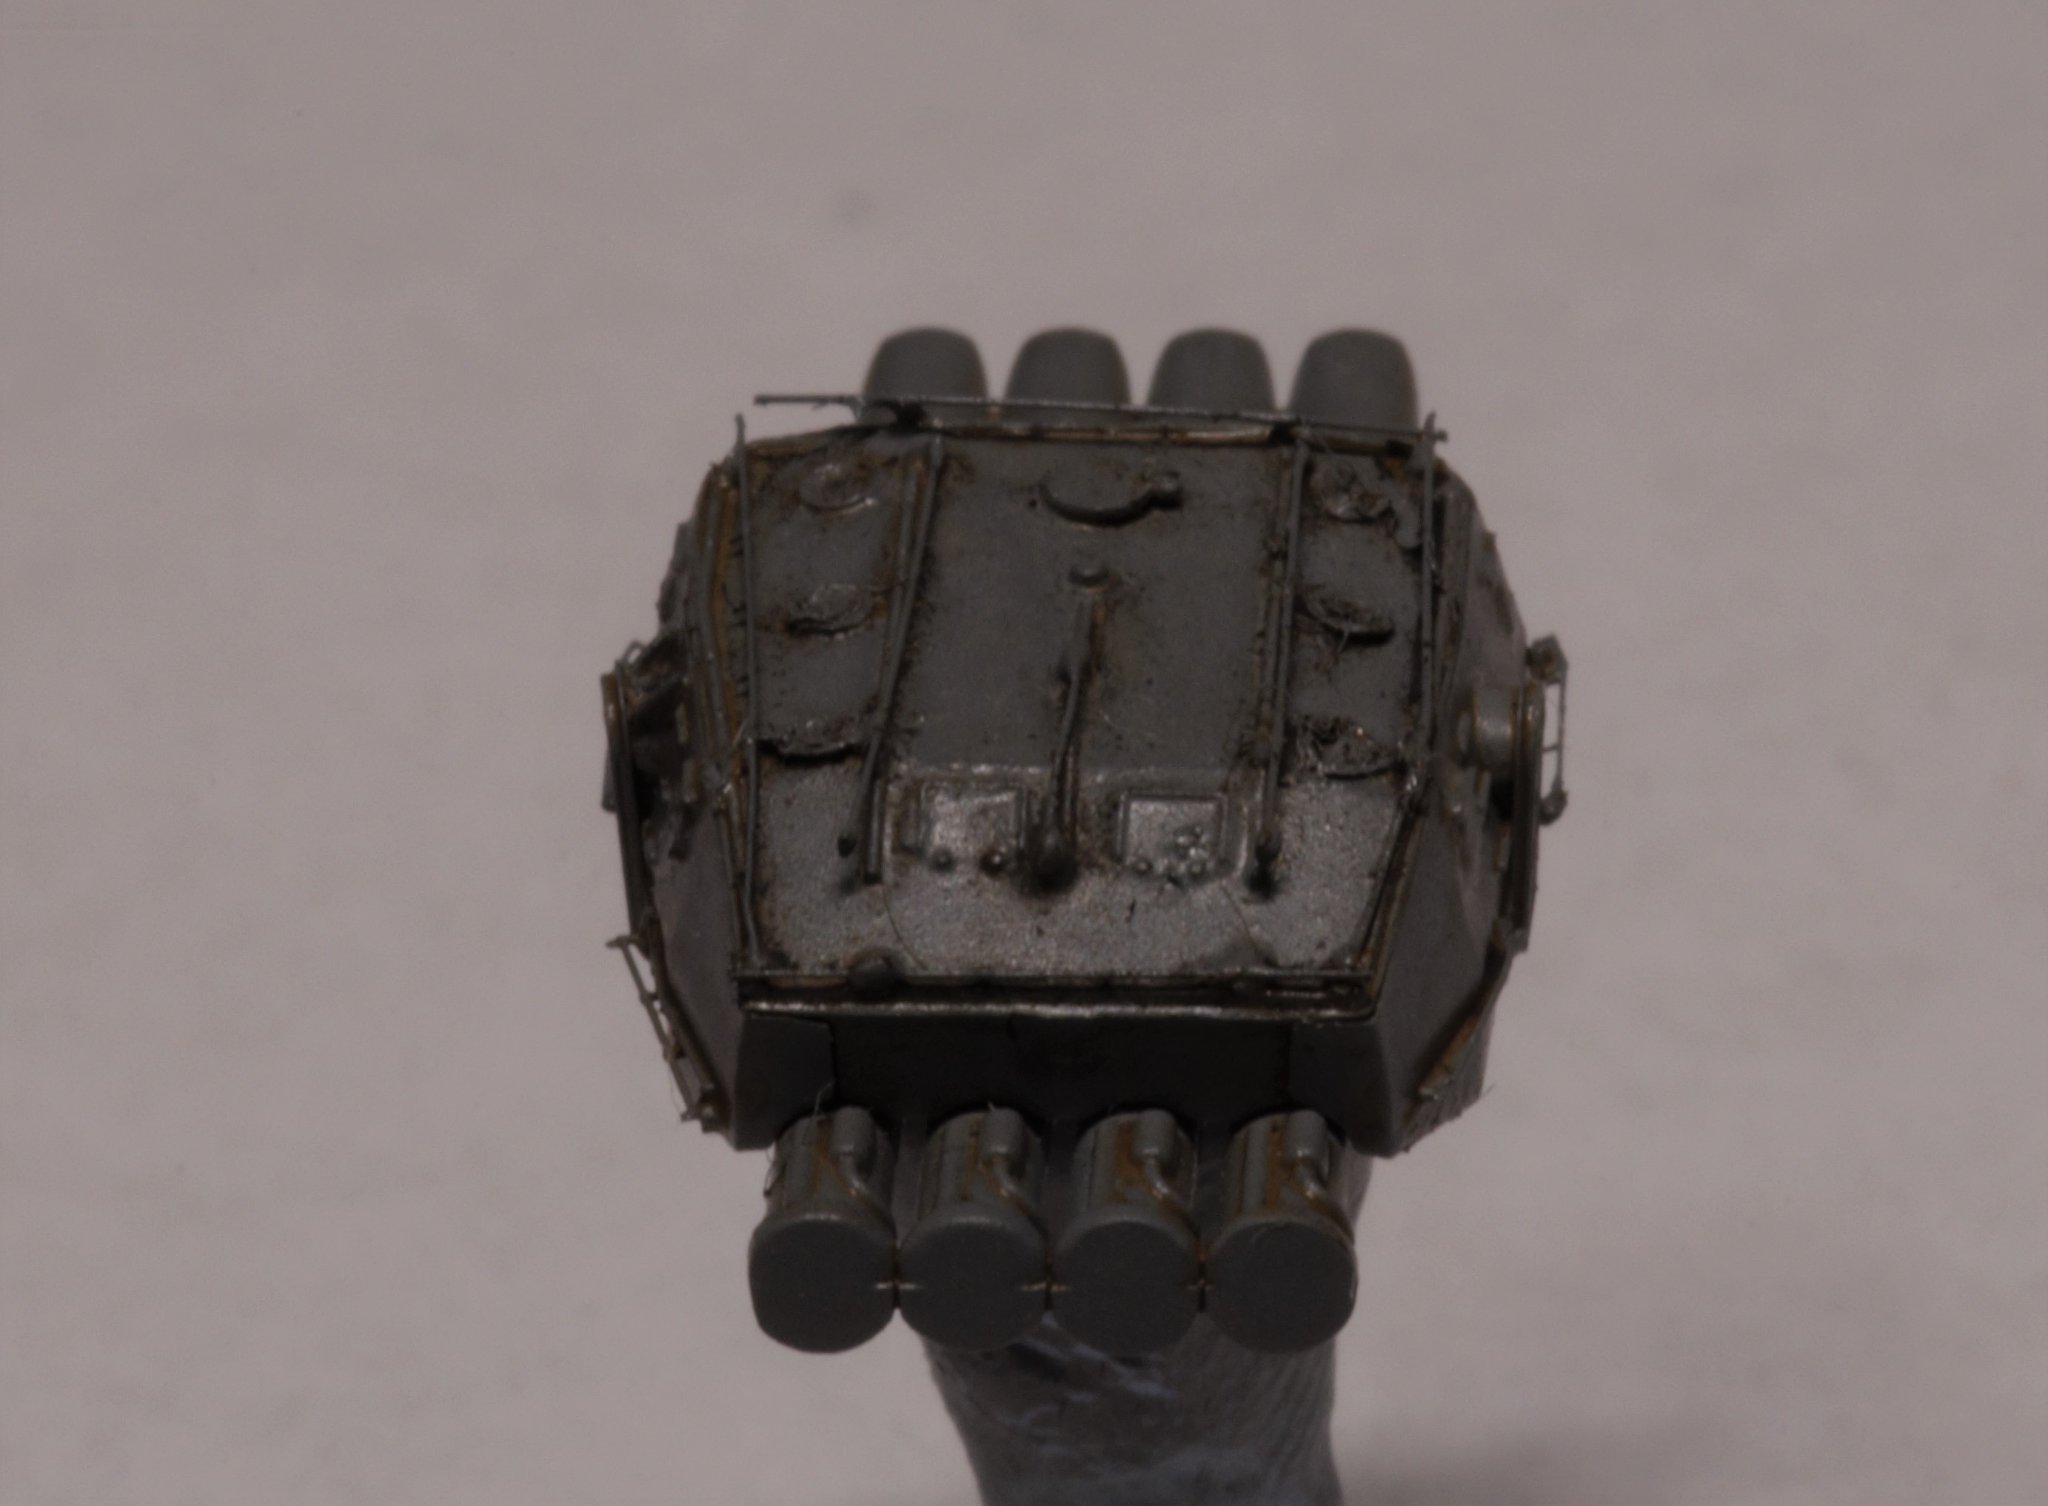
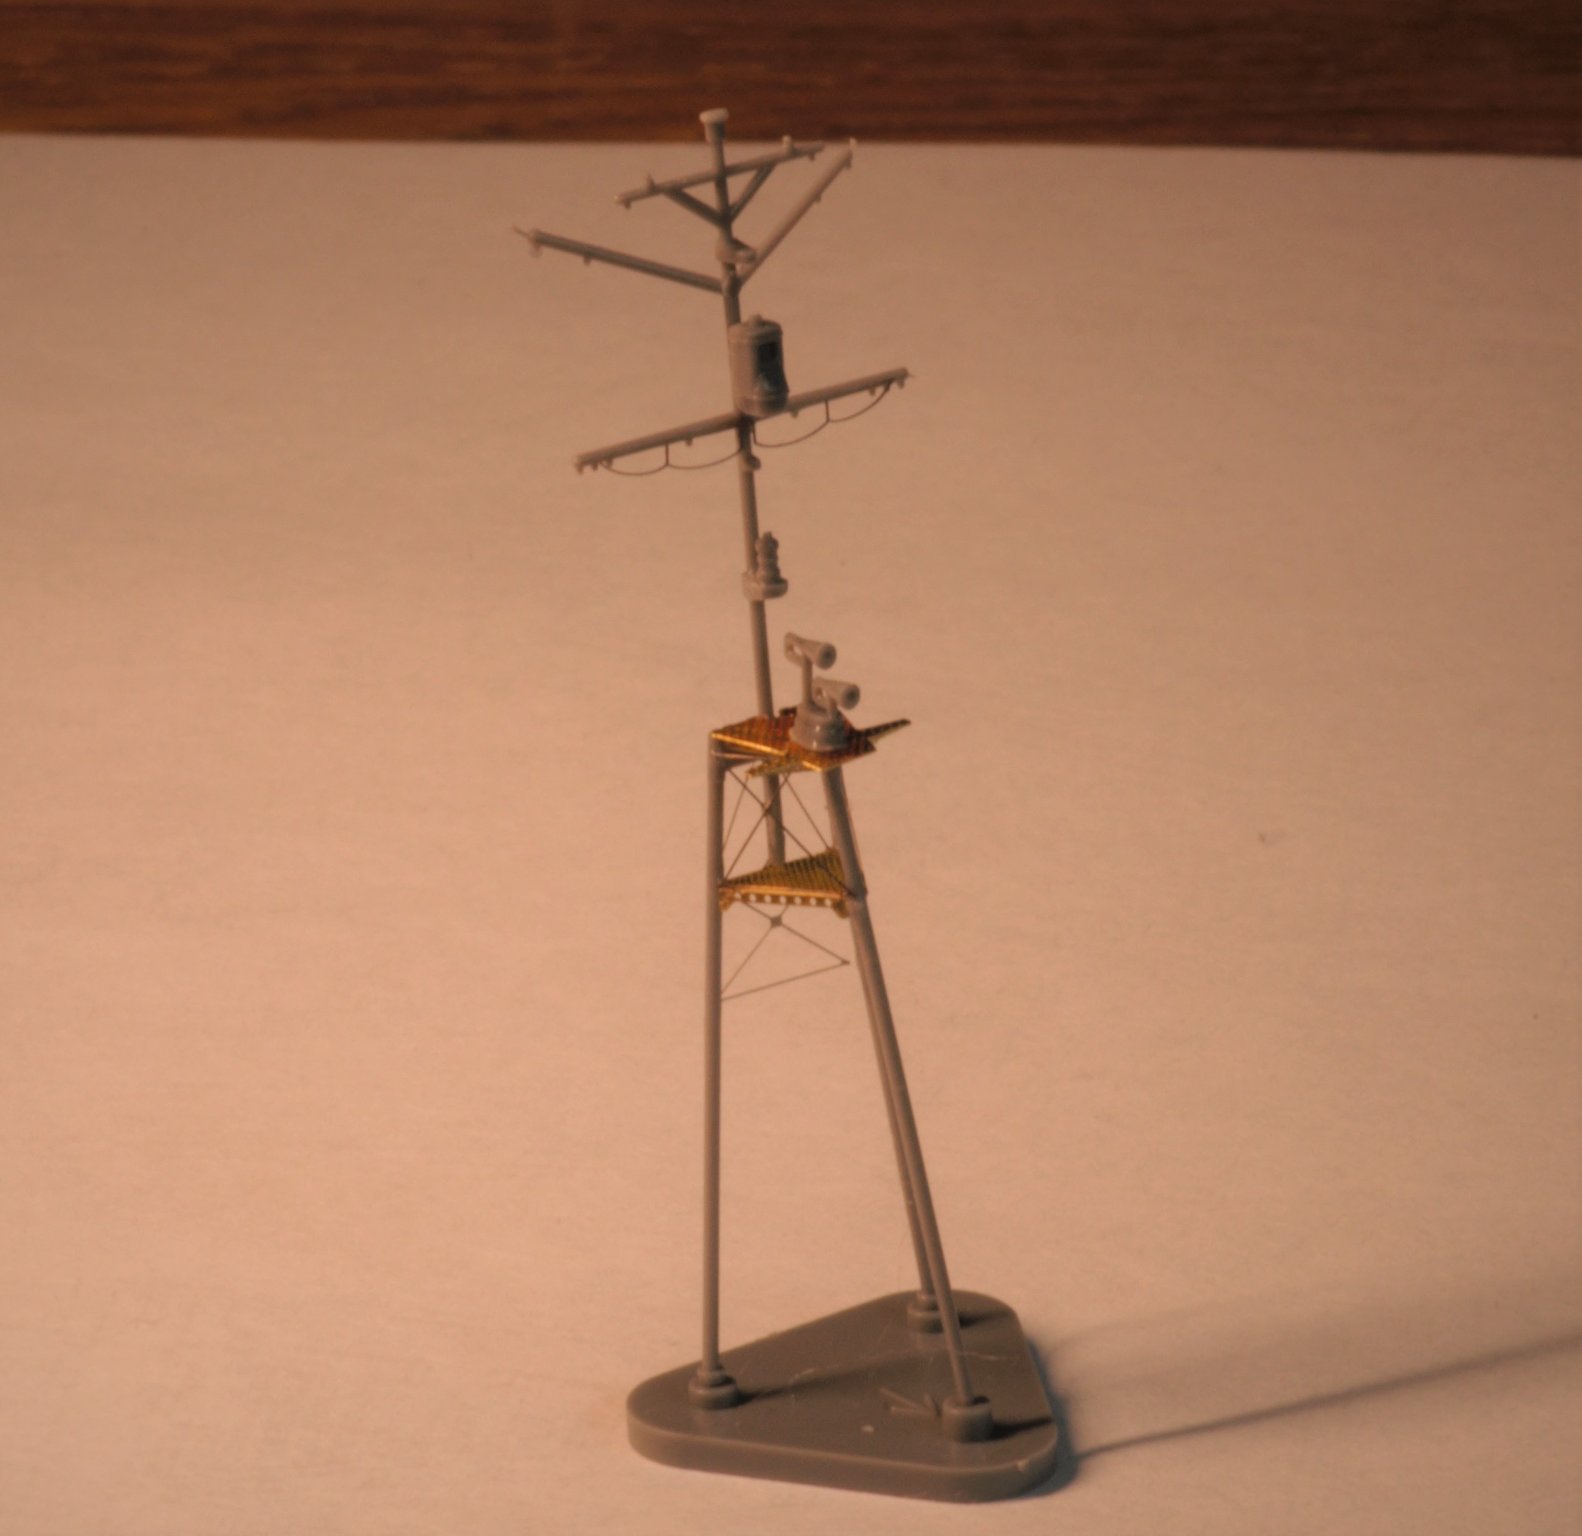
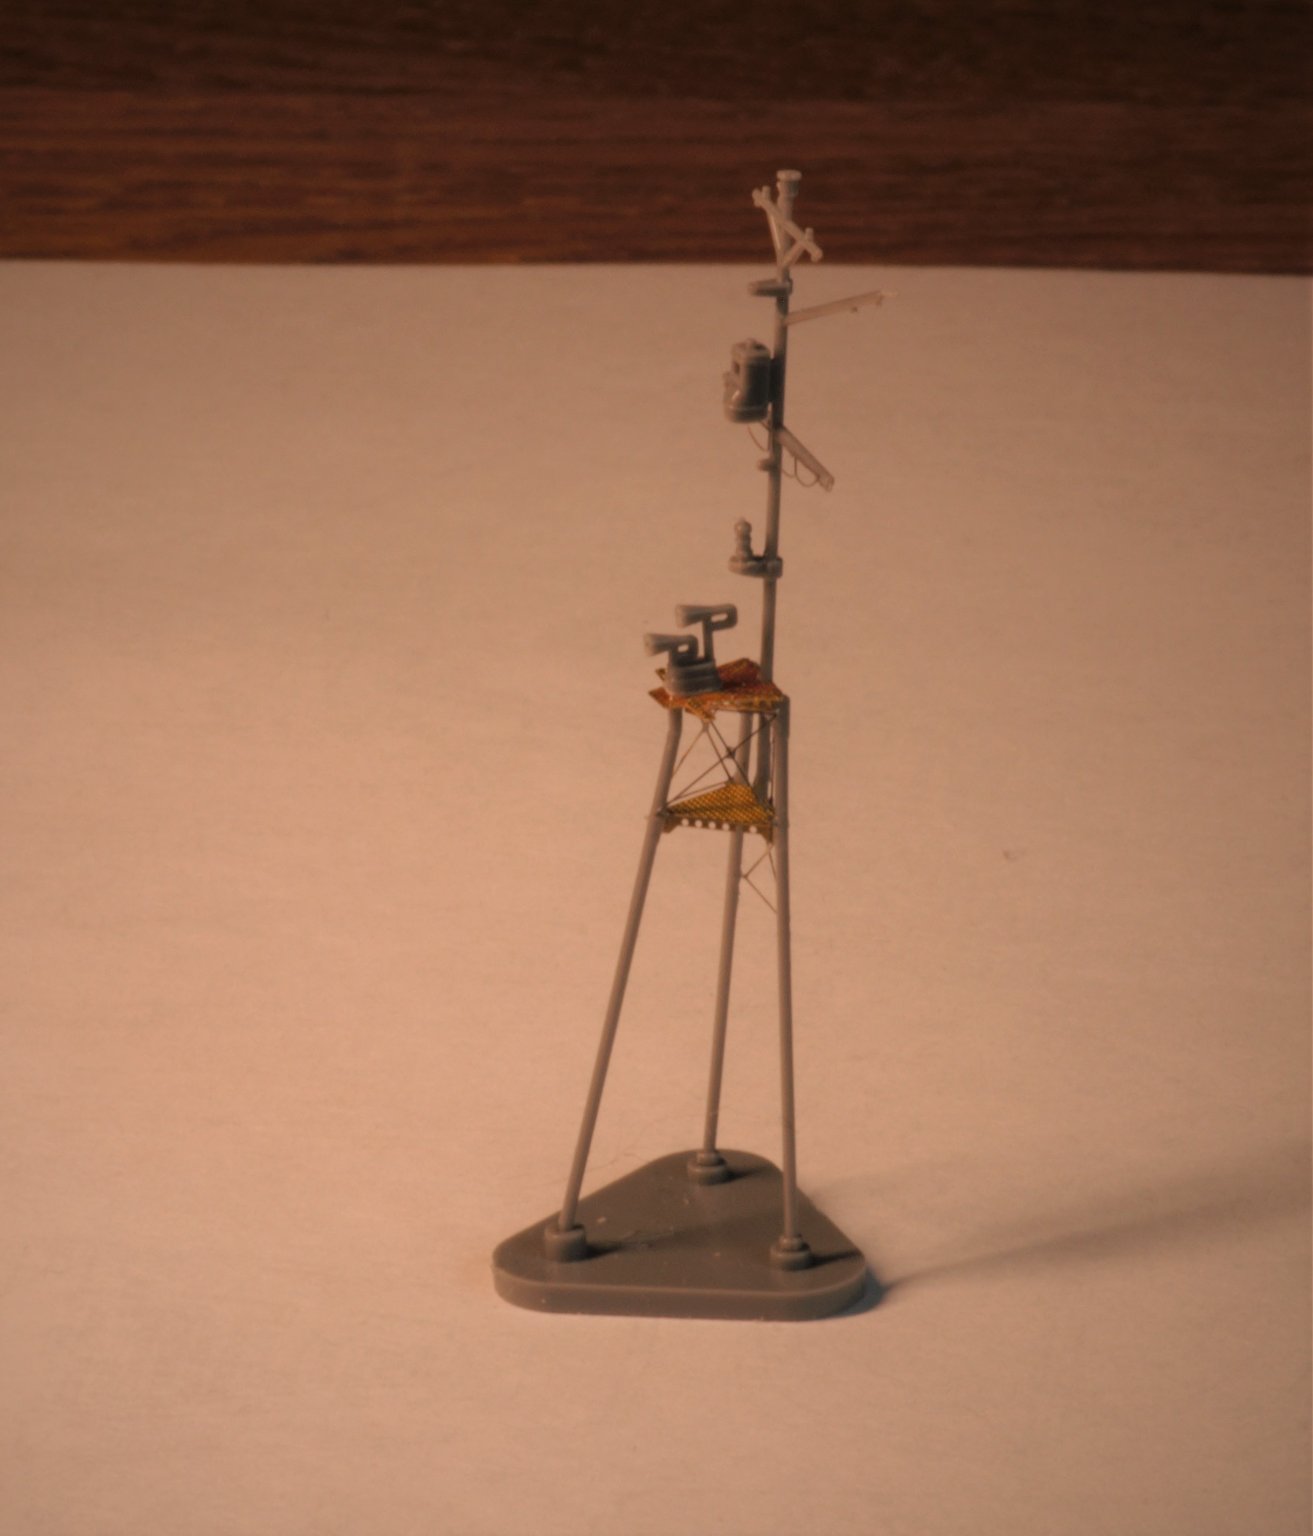
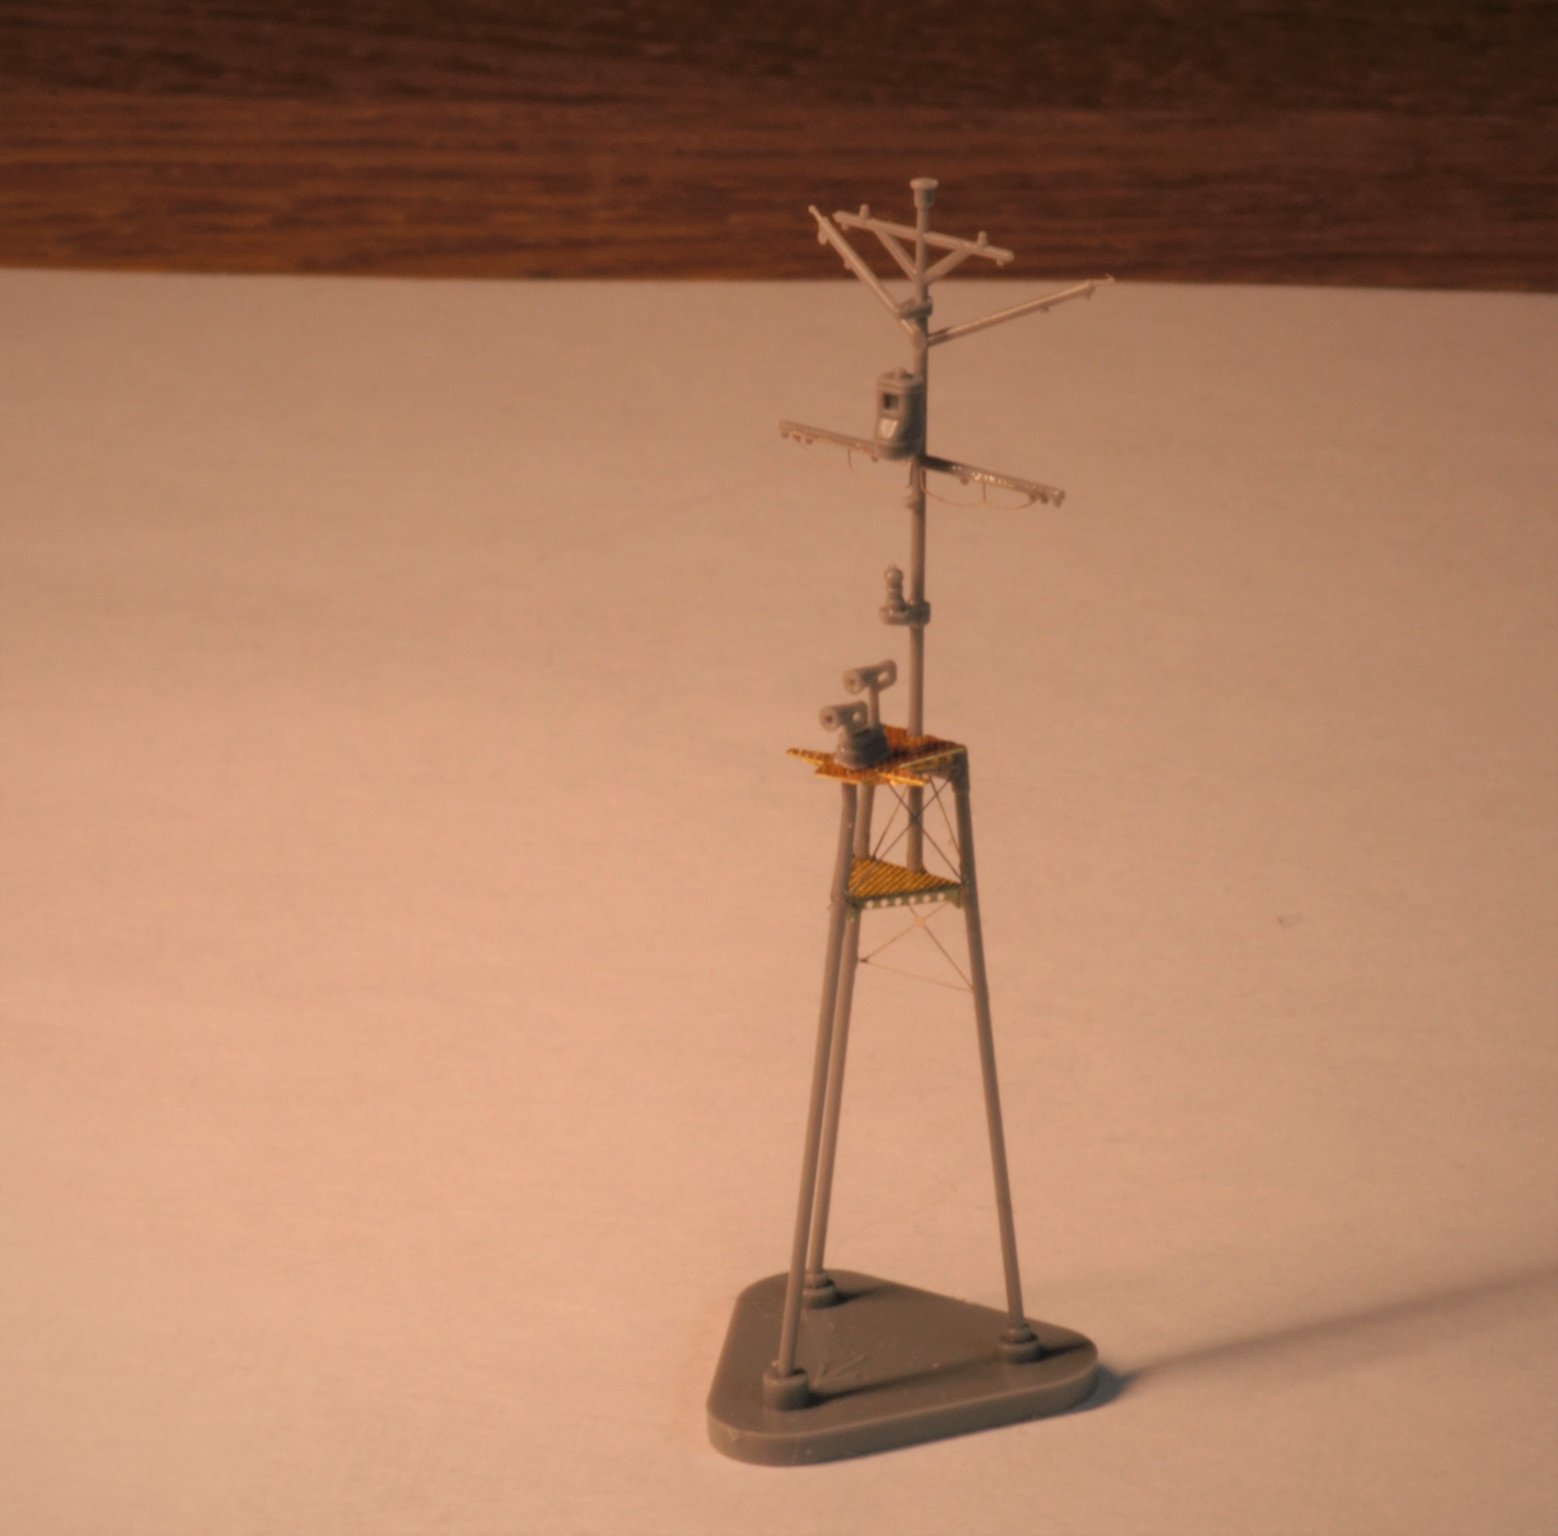
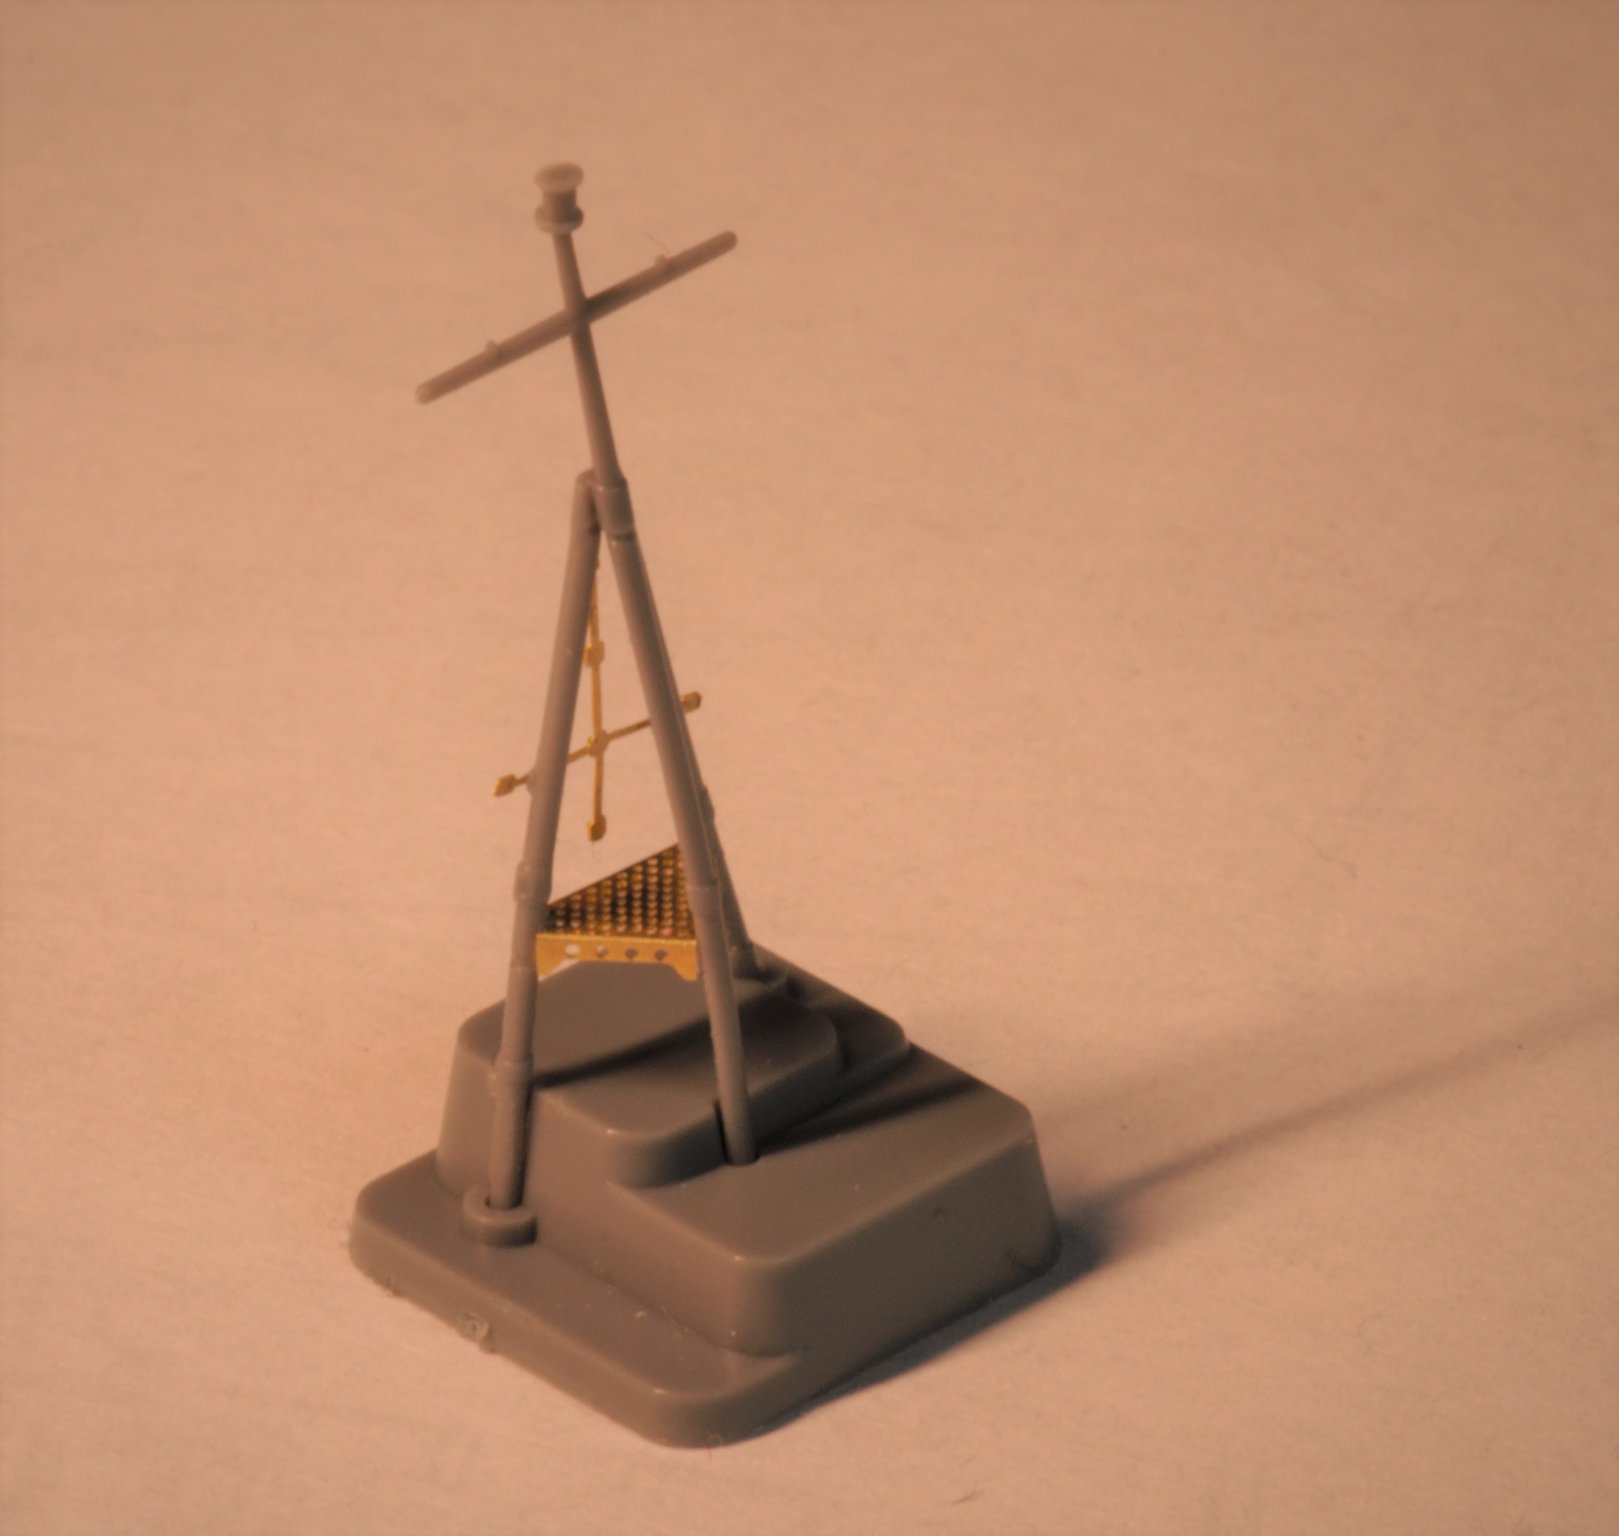
Hello everyone!
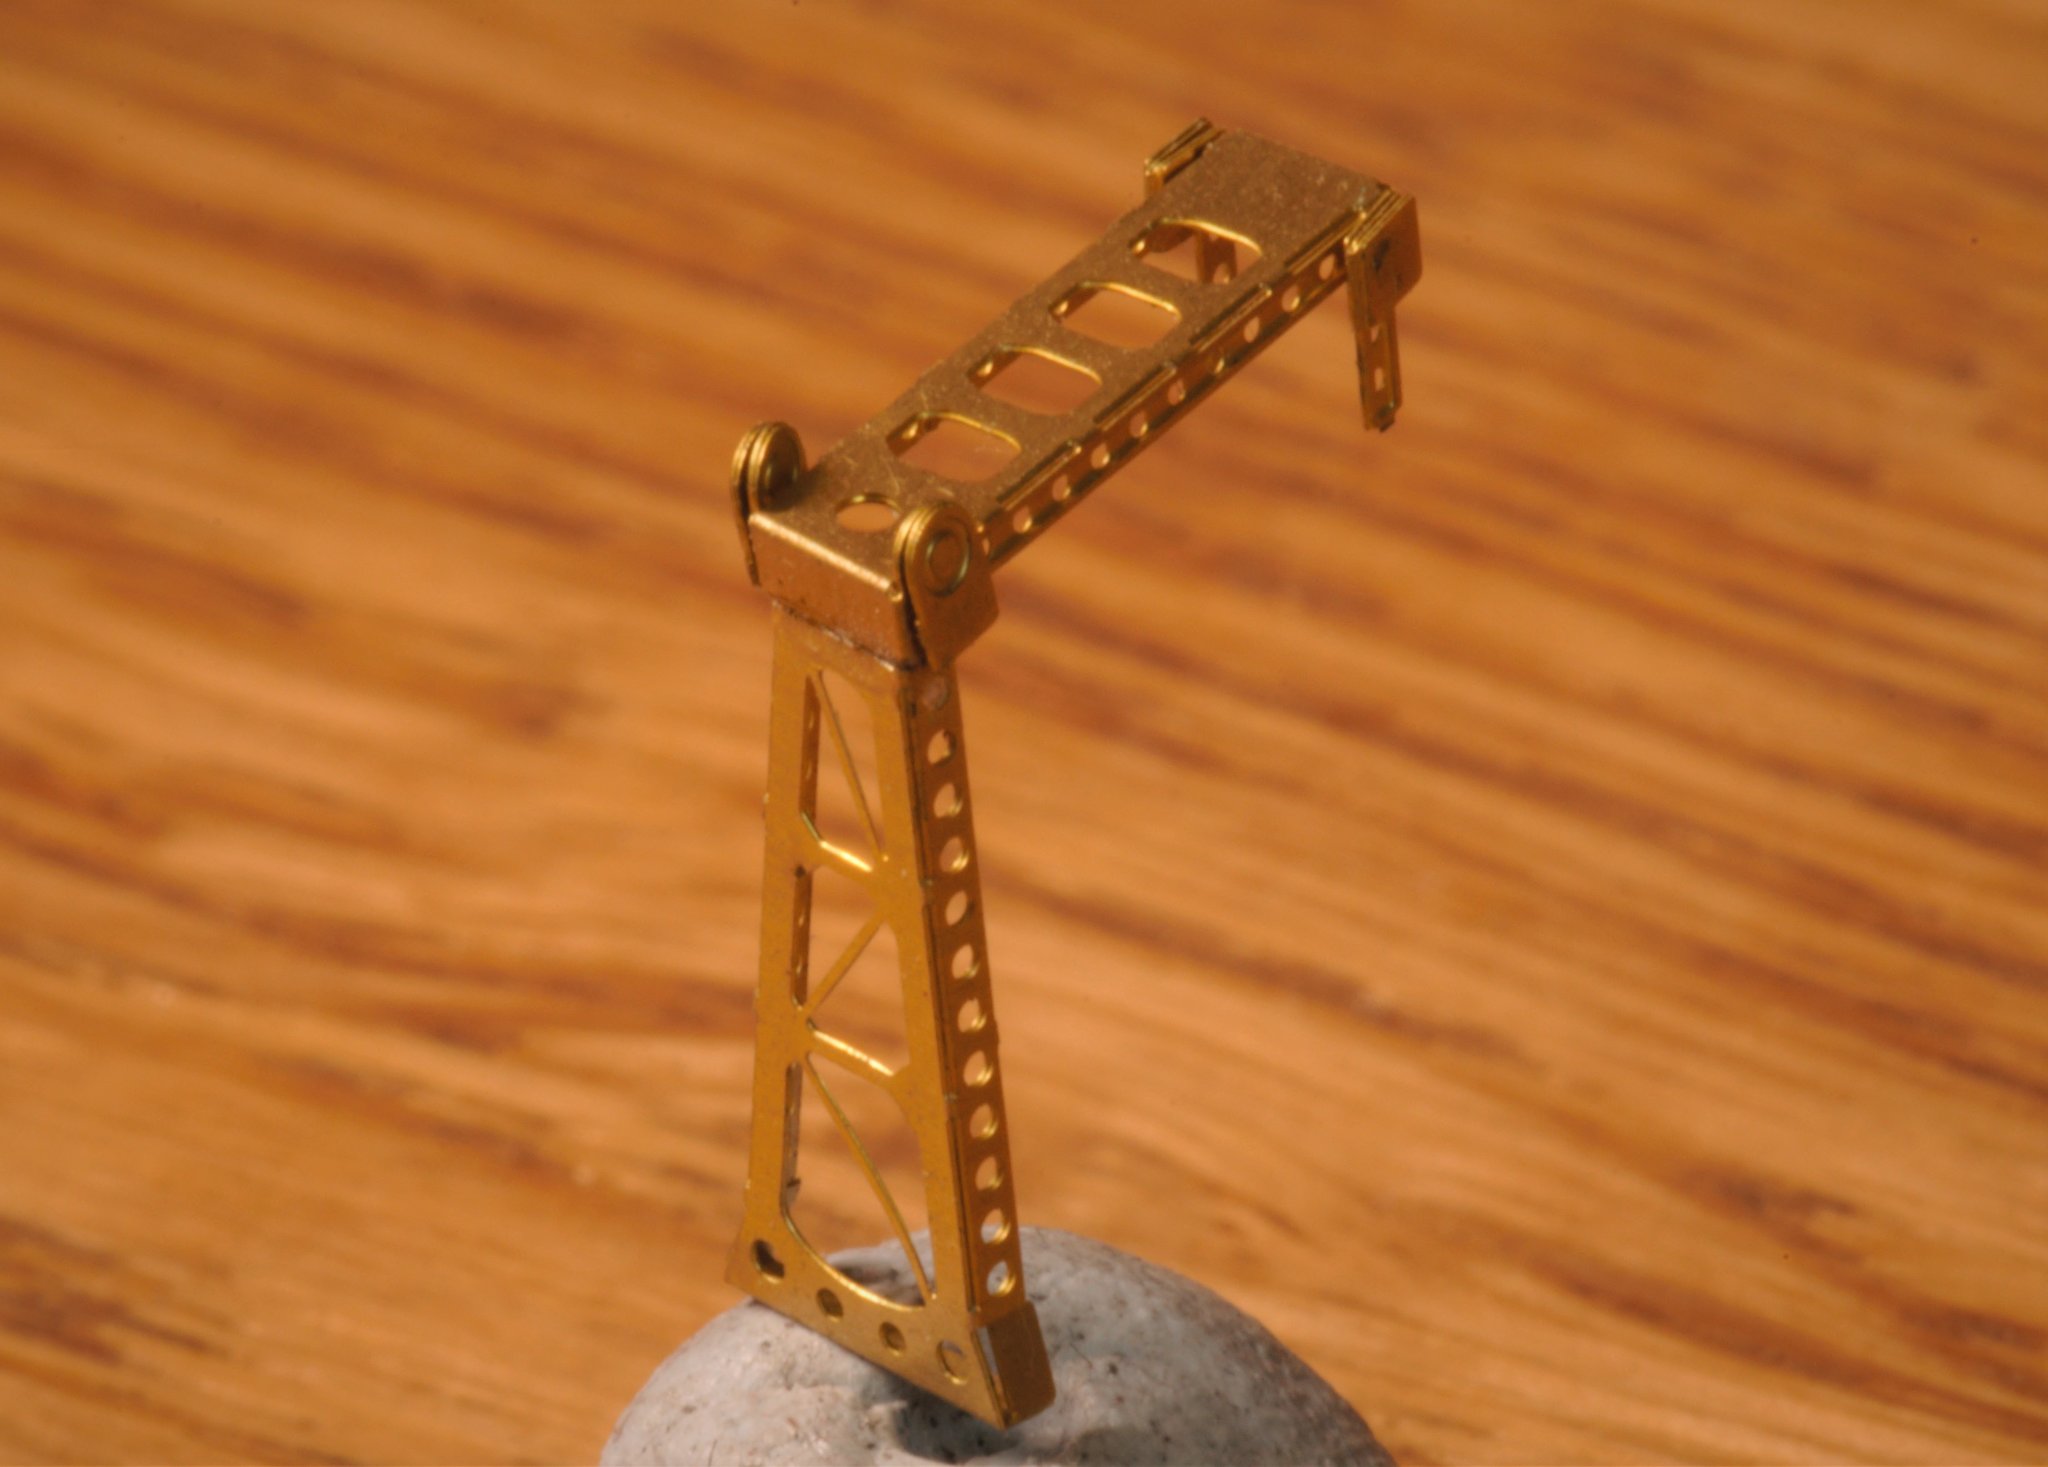
I've made masts )) Fore mast has more details but went much easier, mizzen mast is triky - I've tried my best, even re-made it couple times but still haven't managed to get it right.
Well, here we go:


-
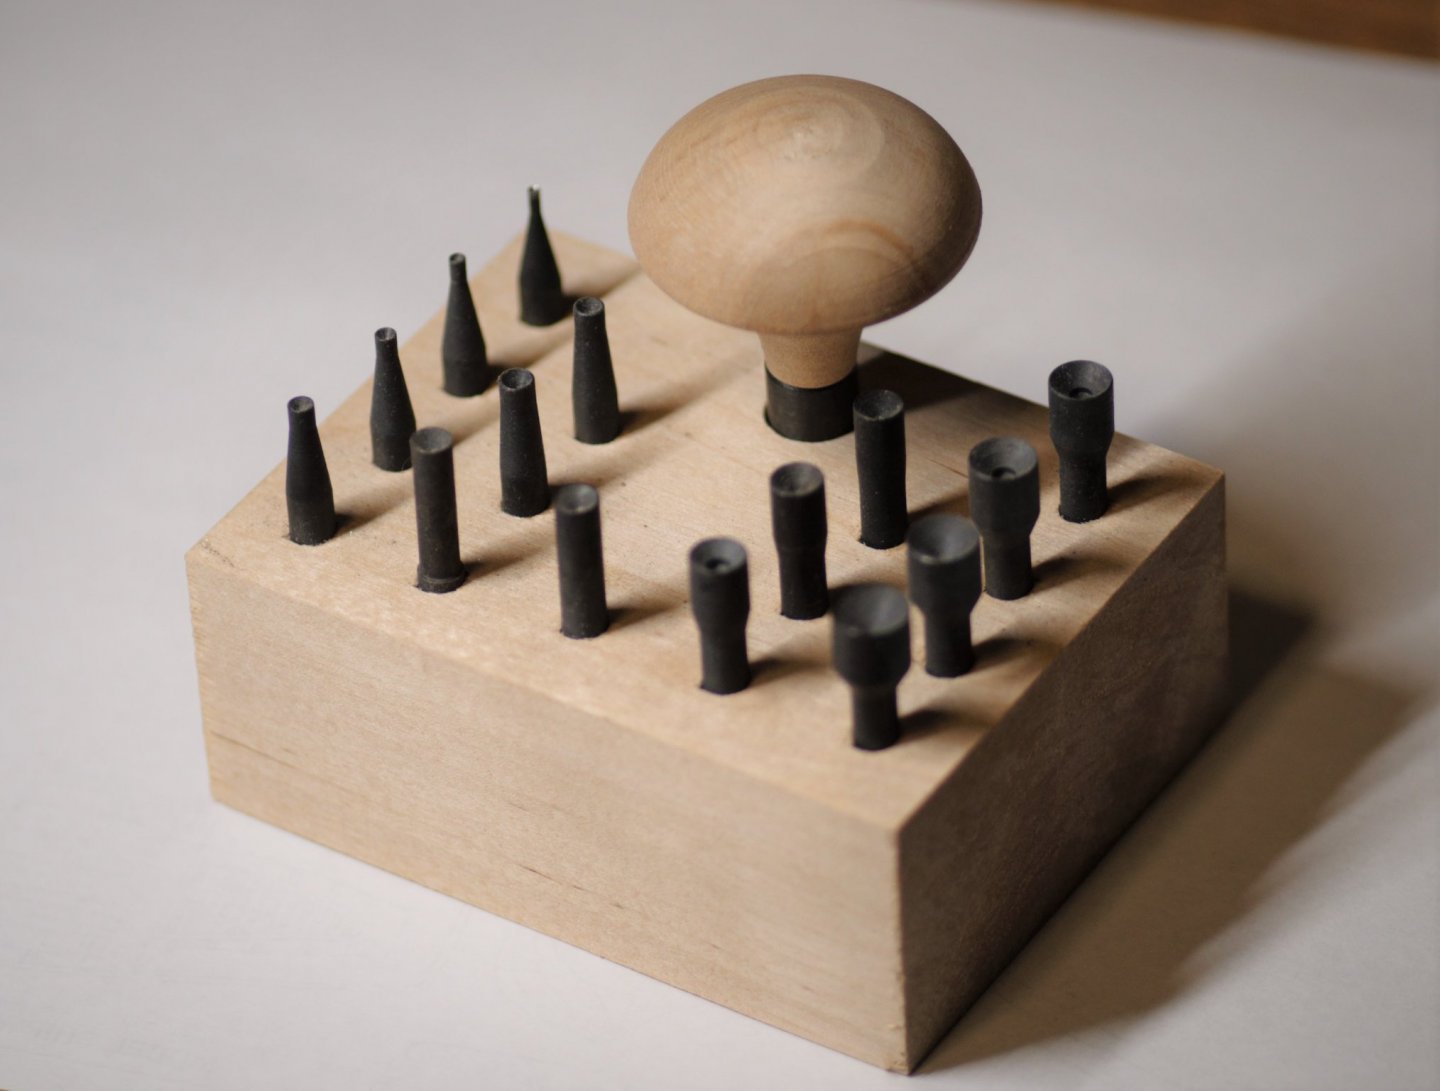
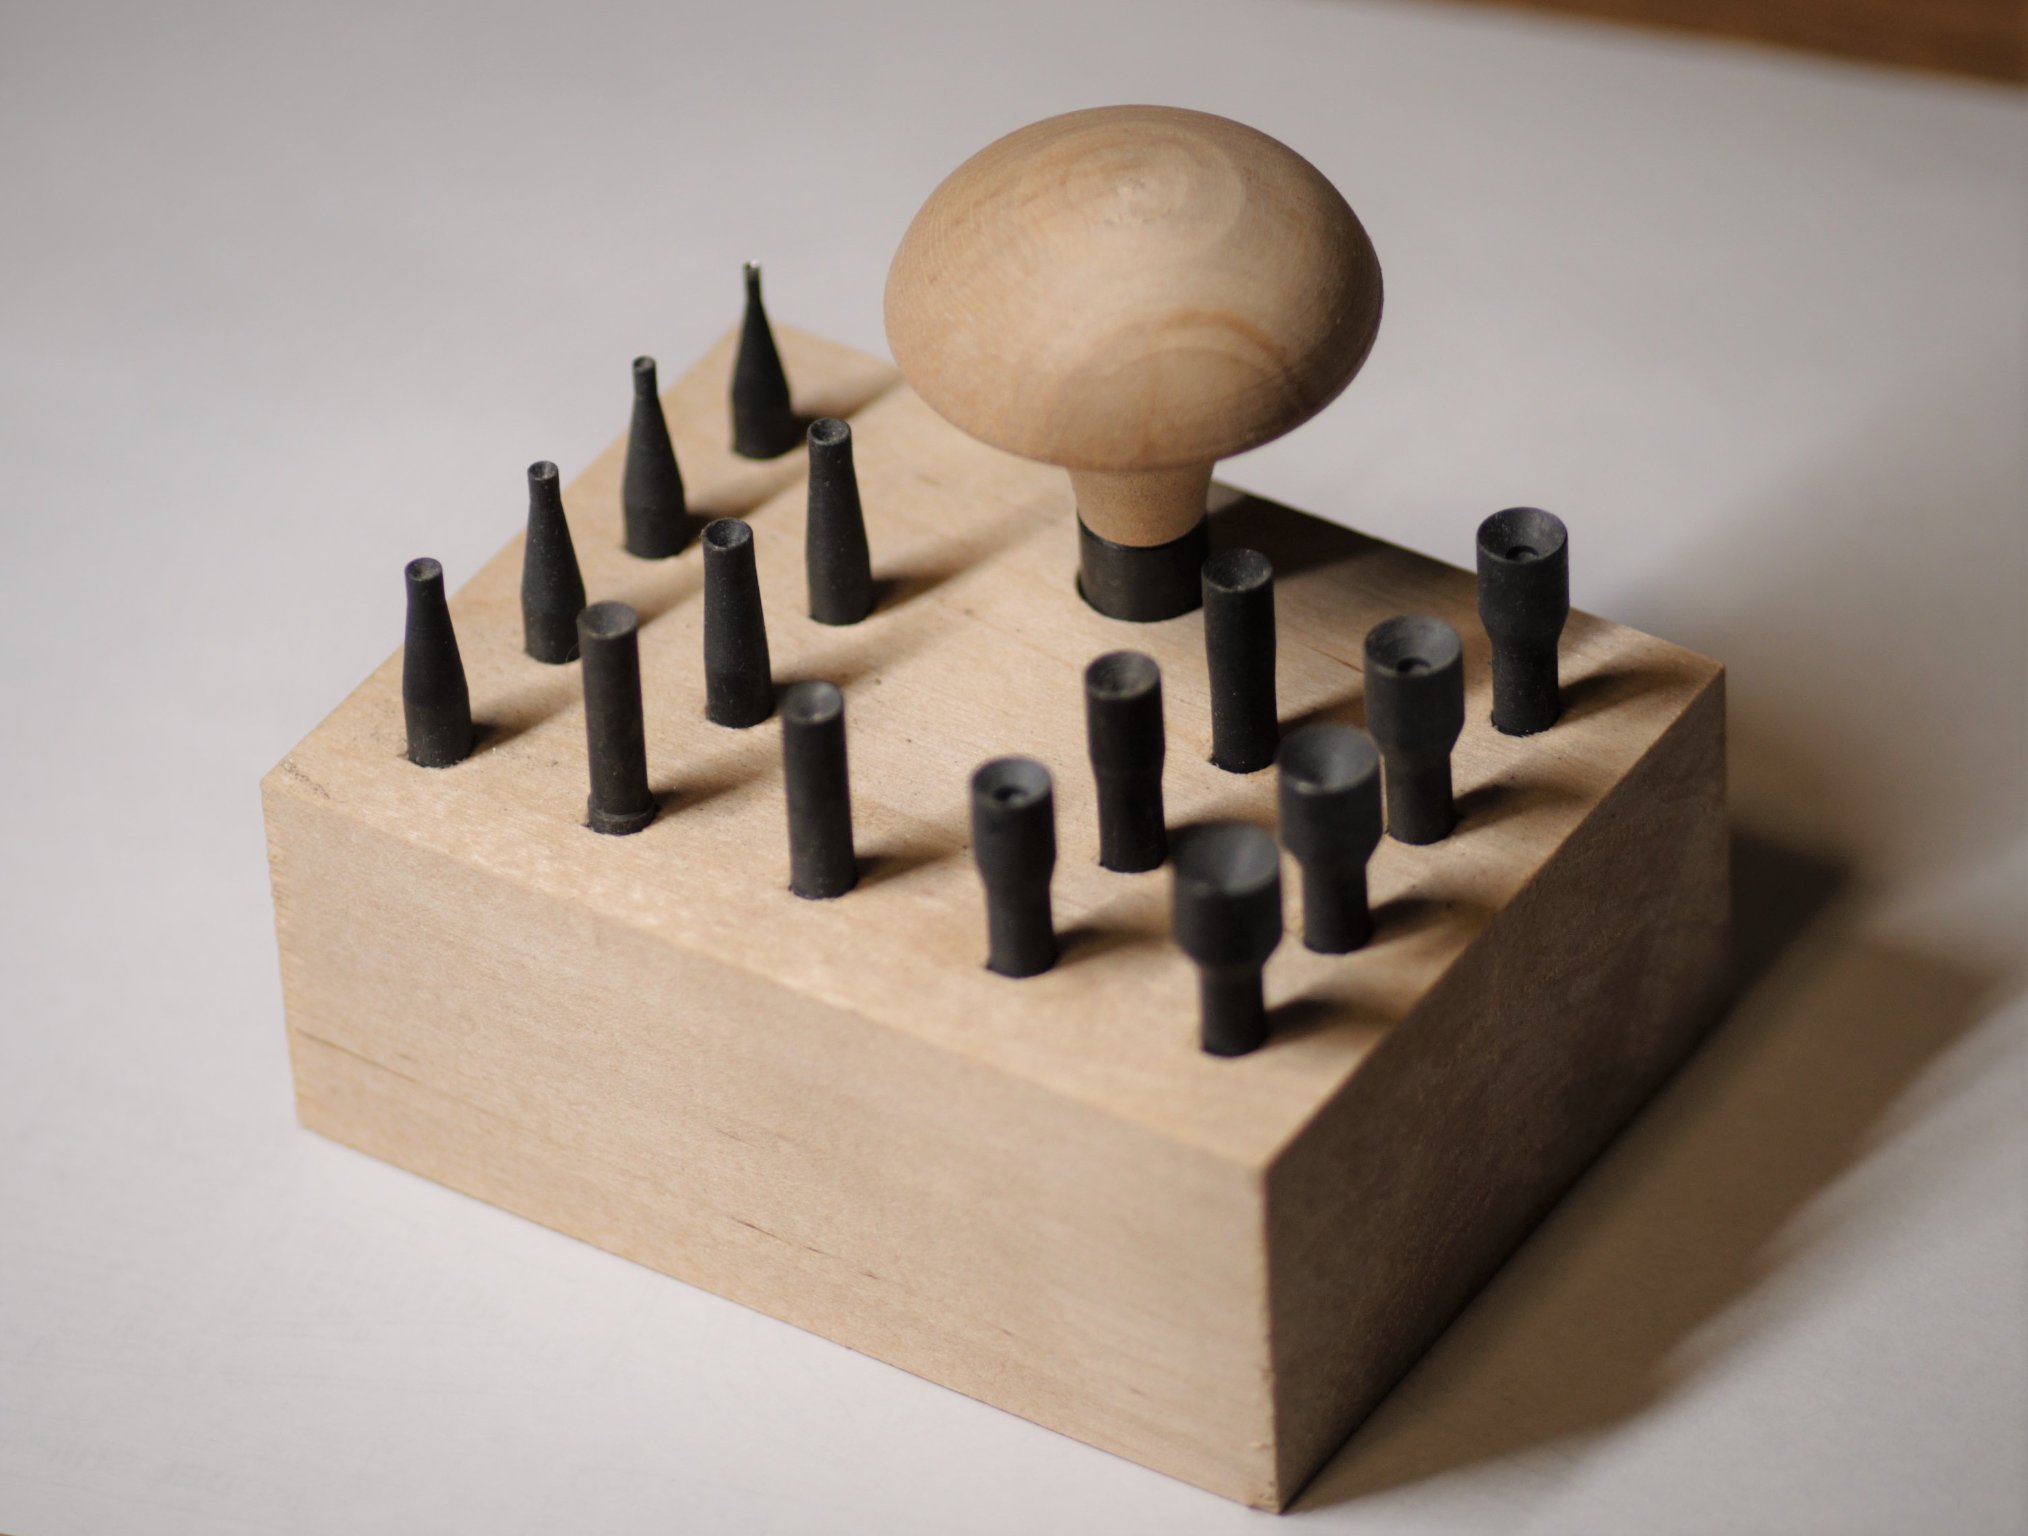
16 hours ago, cog said:
Nice punch set. Good to see you add some extra details
Thanks! I just try to somehow reach what other colleagues do on these forums 🙂
Actually it's not quite a punch set - these are my wife's tools for rolling-in of gems in decorations 🙂 We share each other's hobby tools from time to time. I can hardly tell a manufacturer's name - in our country they usually can be aquired via jewellery-tools stores. I think the same is right for most of other countries as well.
Best regards and happy modelling!
- Old Collingwood, Egilman, mtaylor and 3 others
-
6
-
-
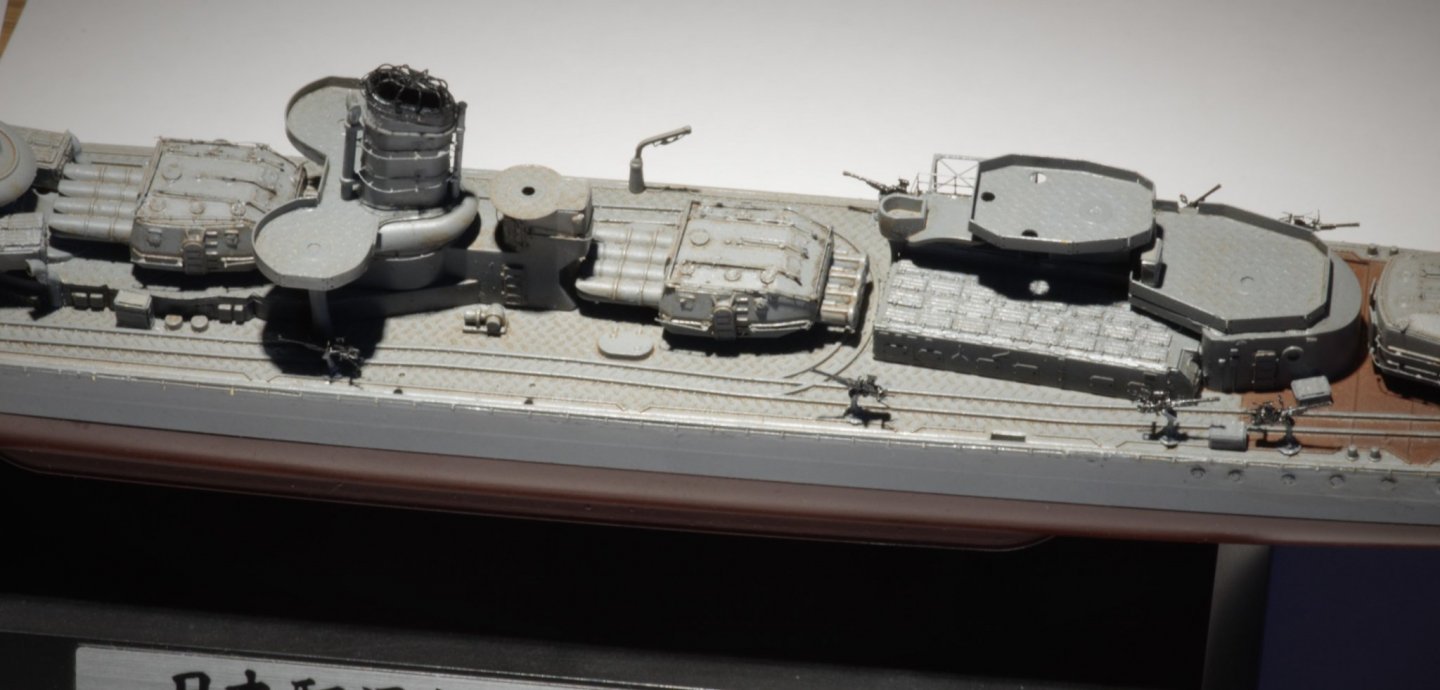
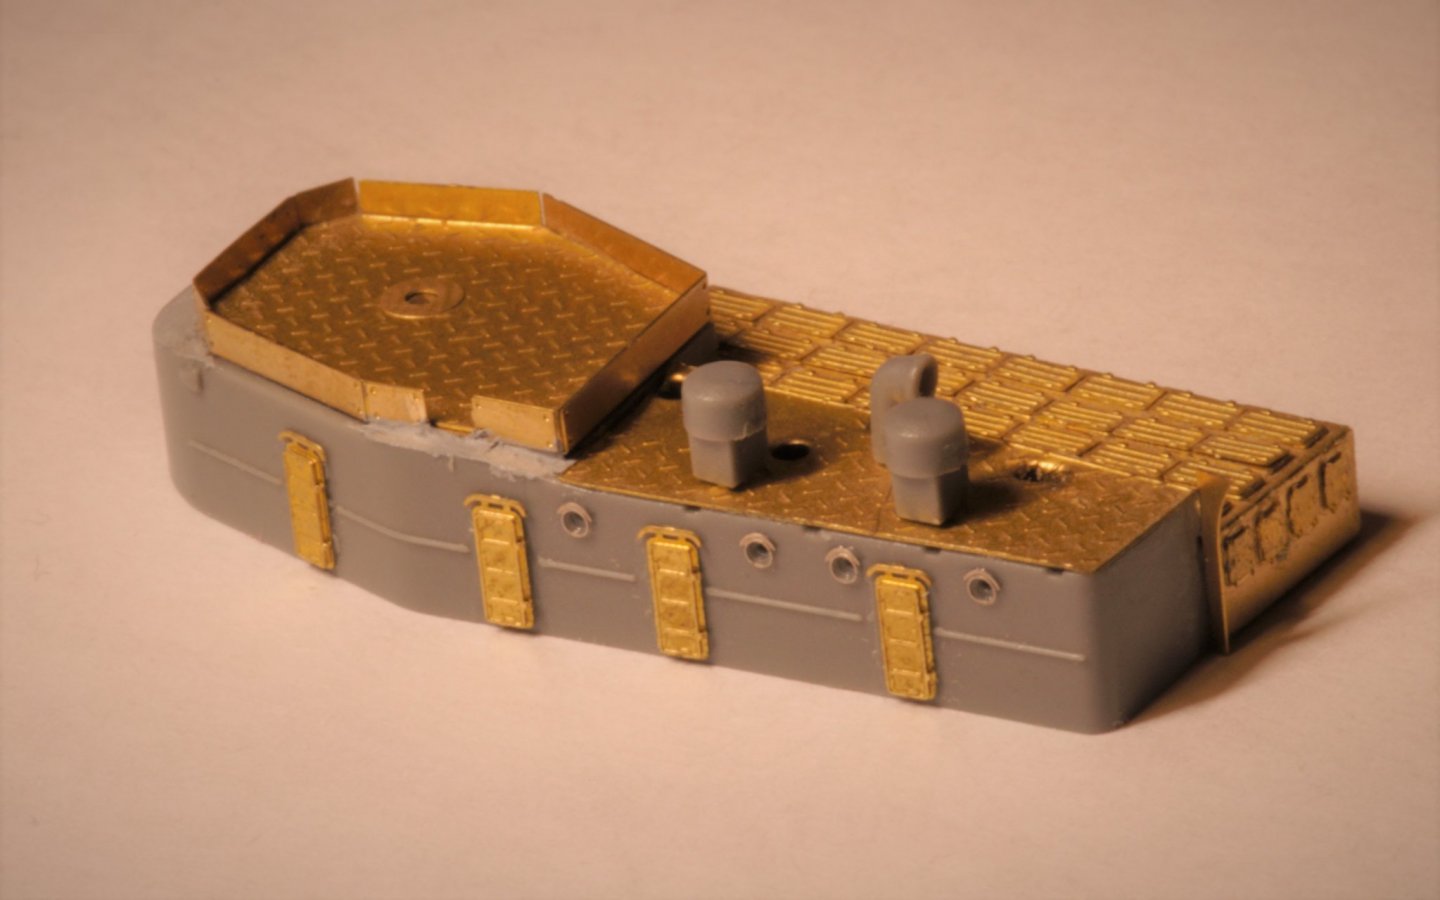
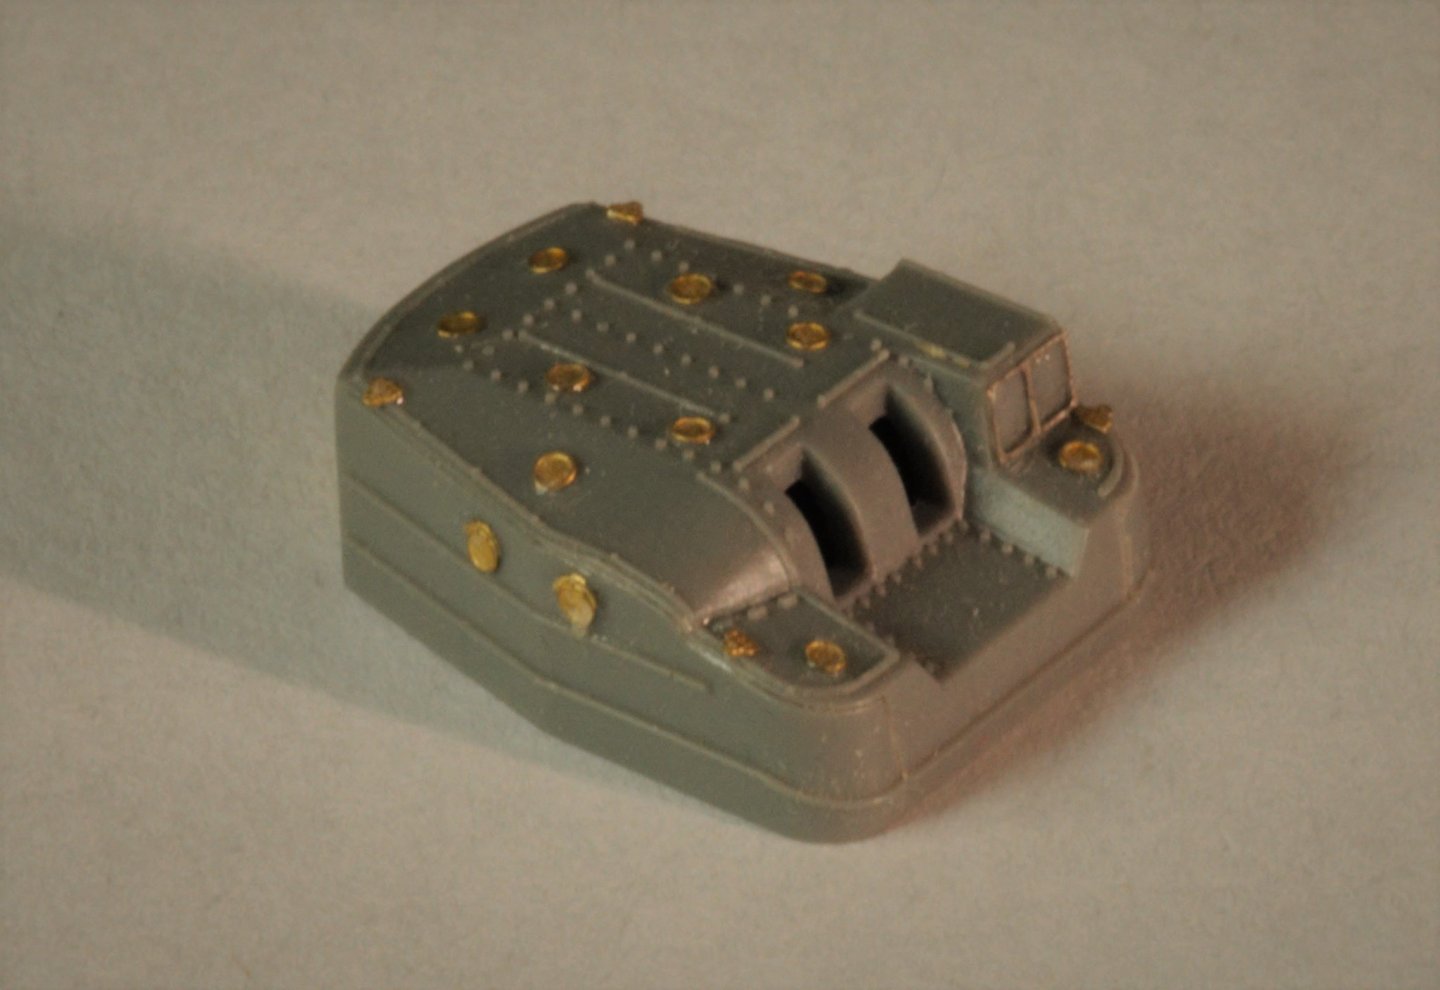
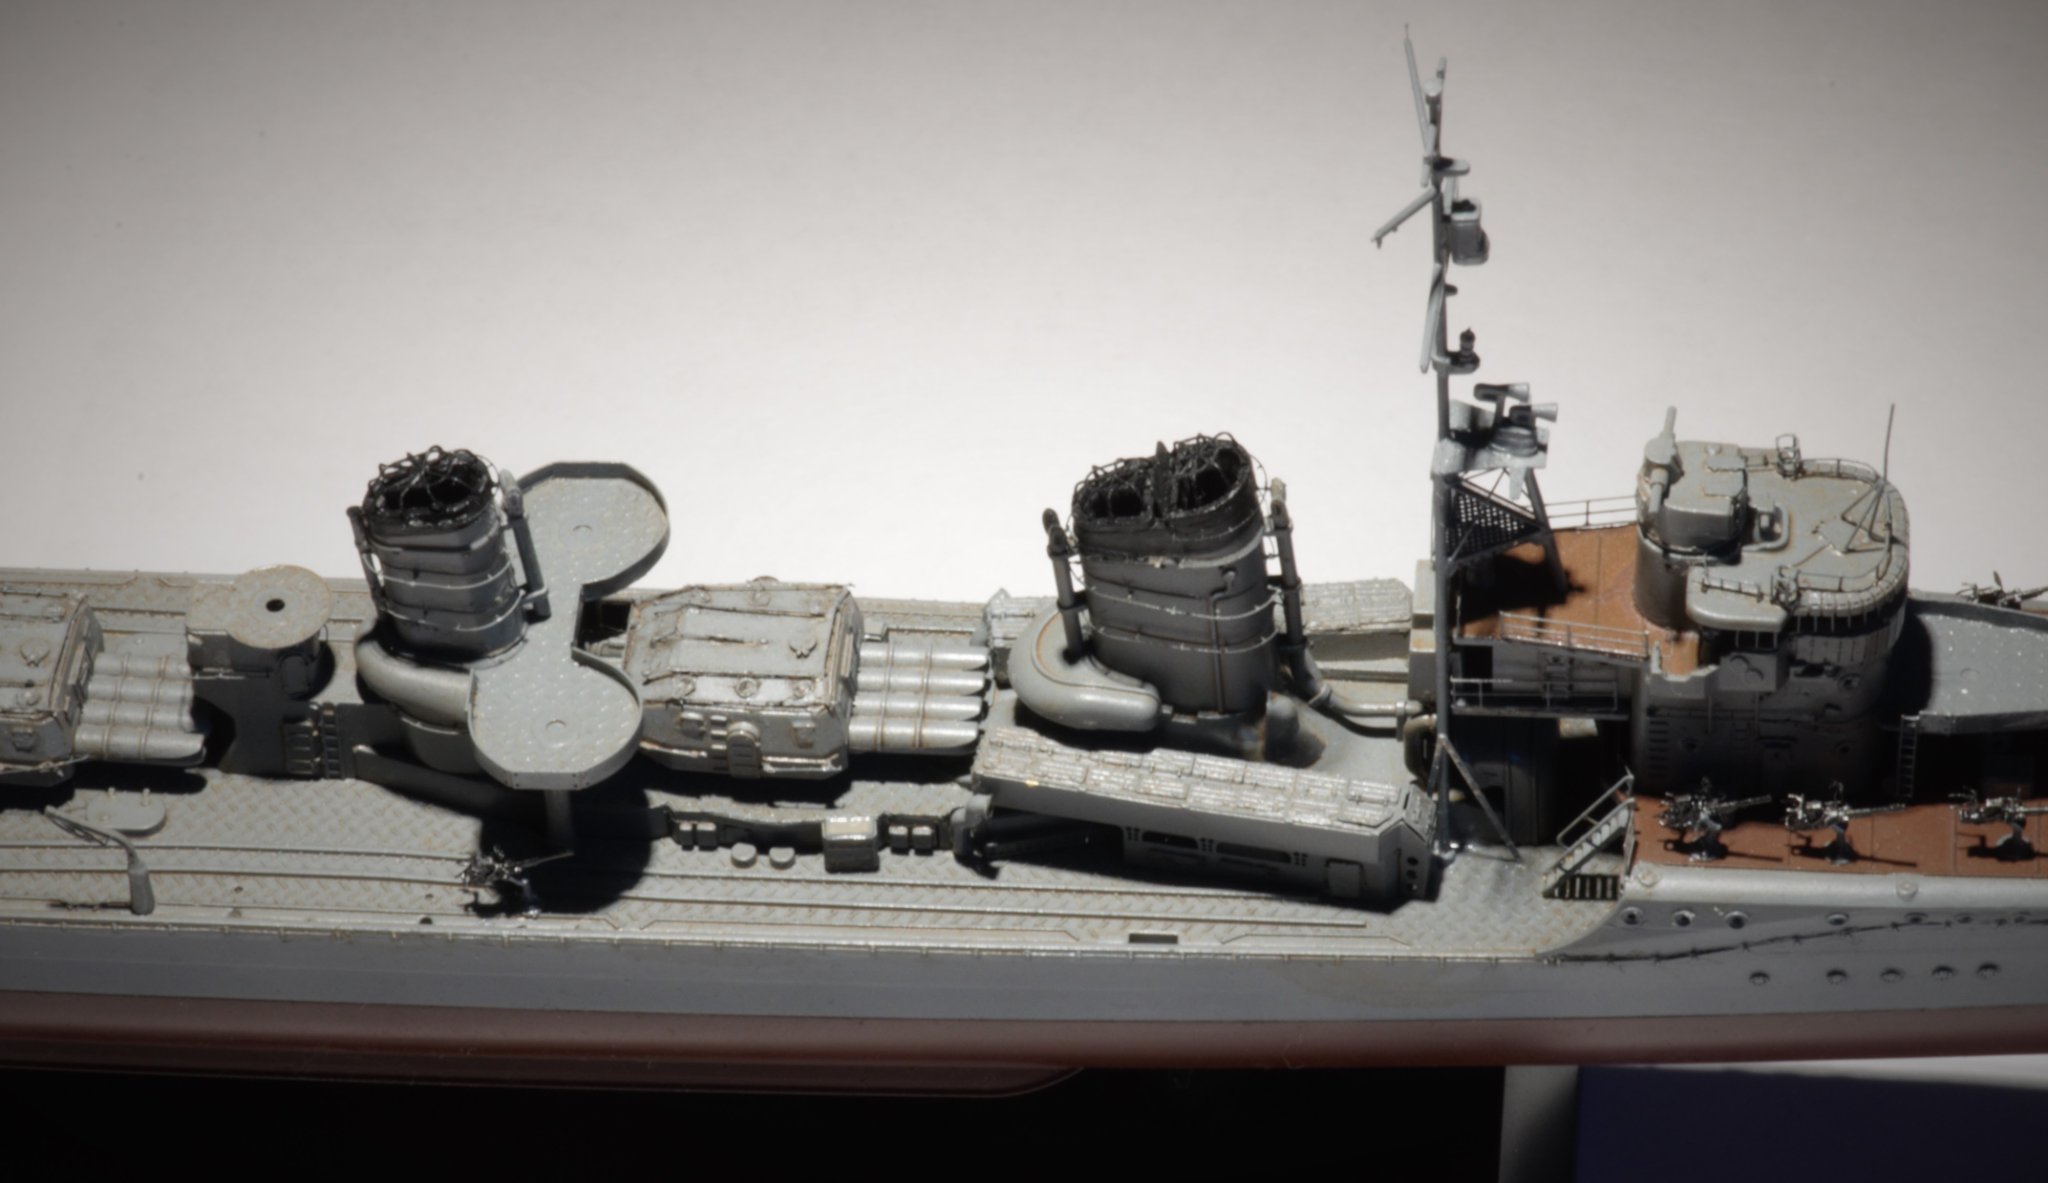
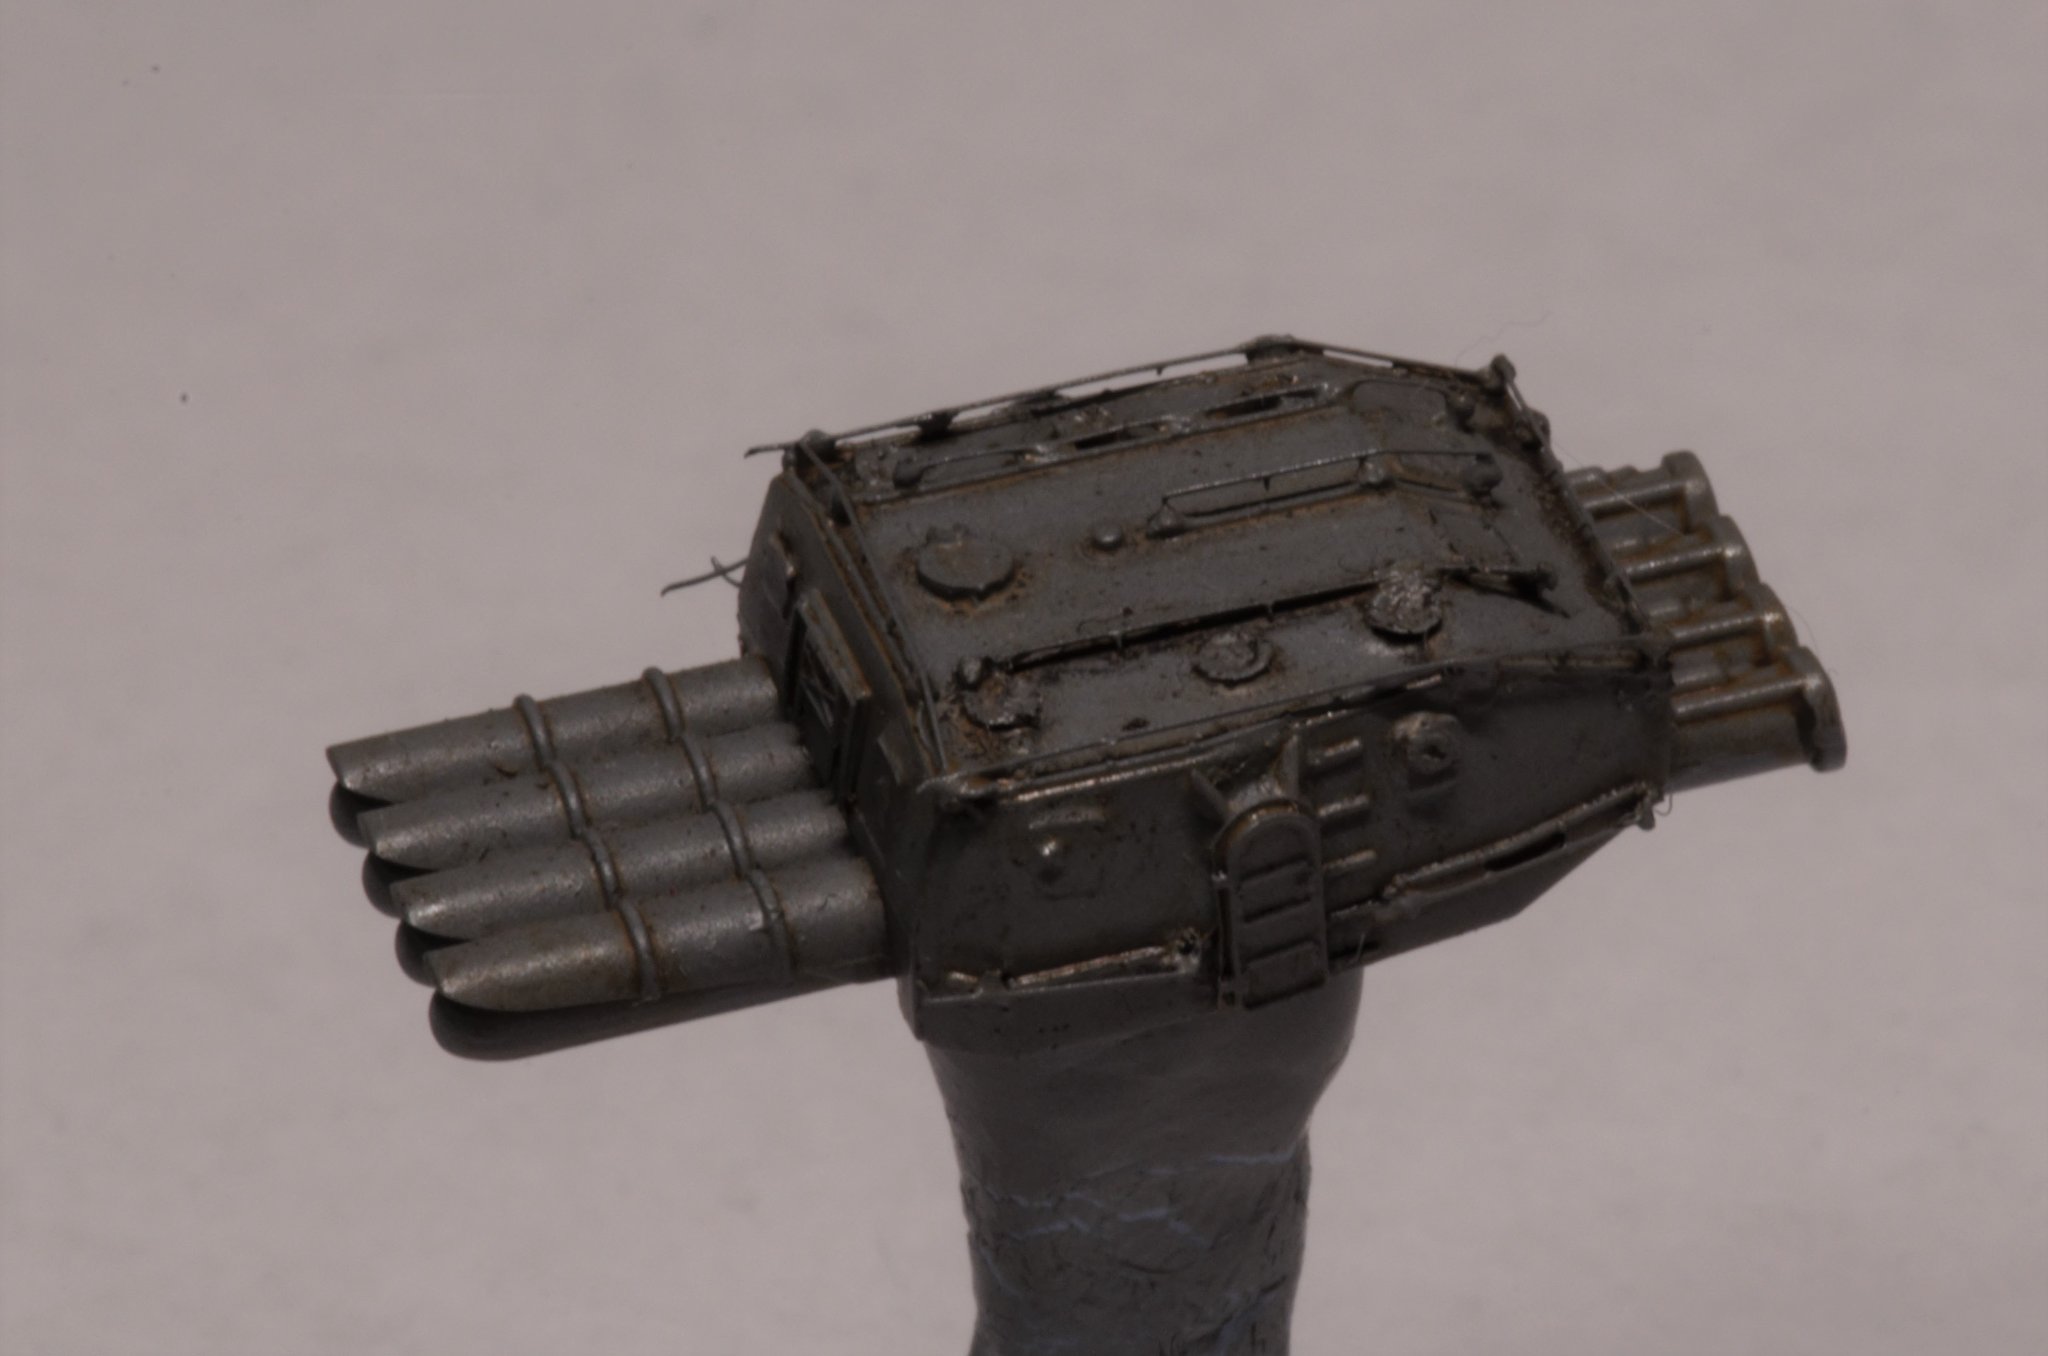
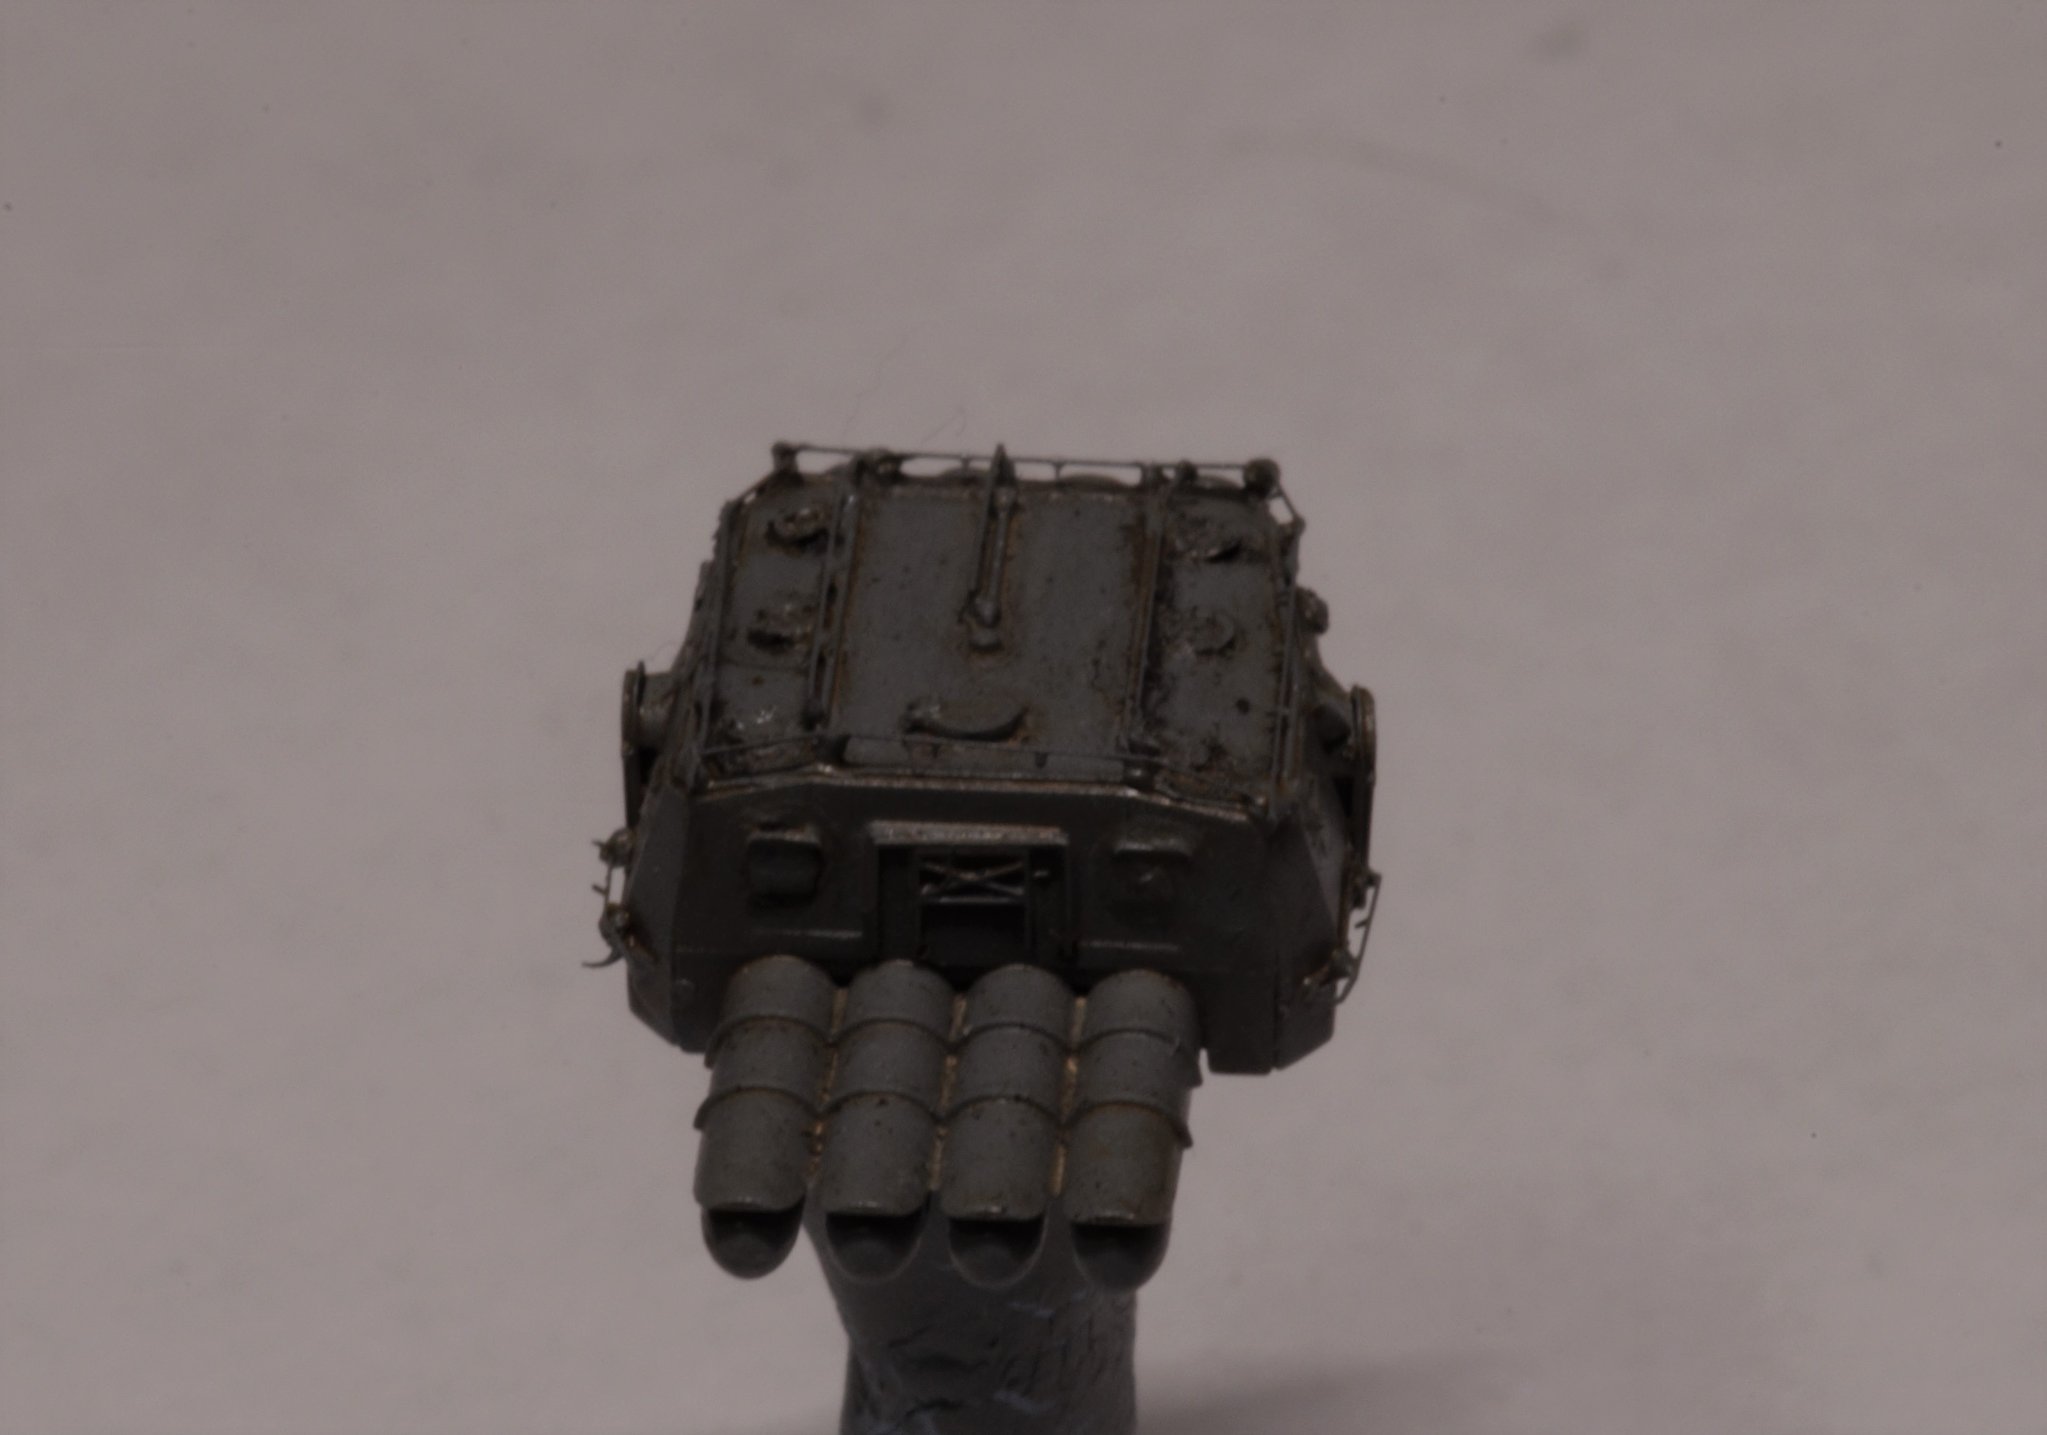
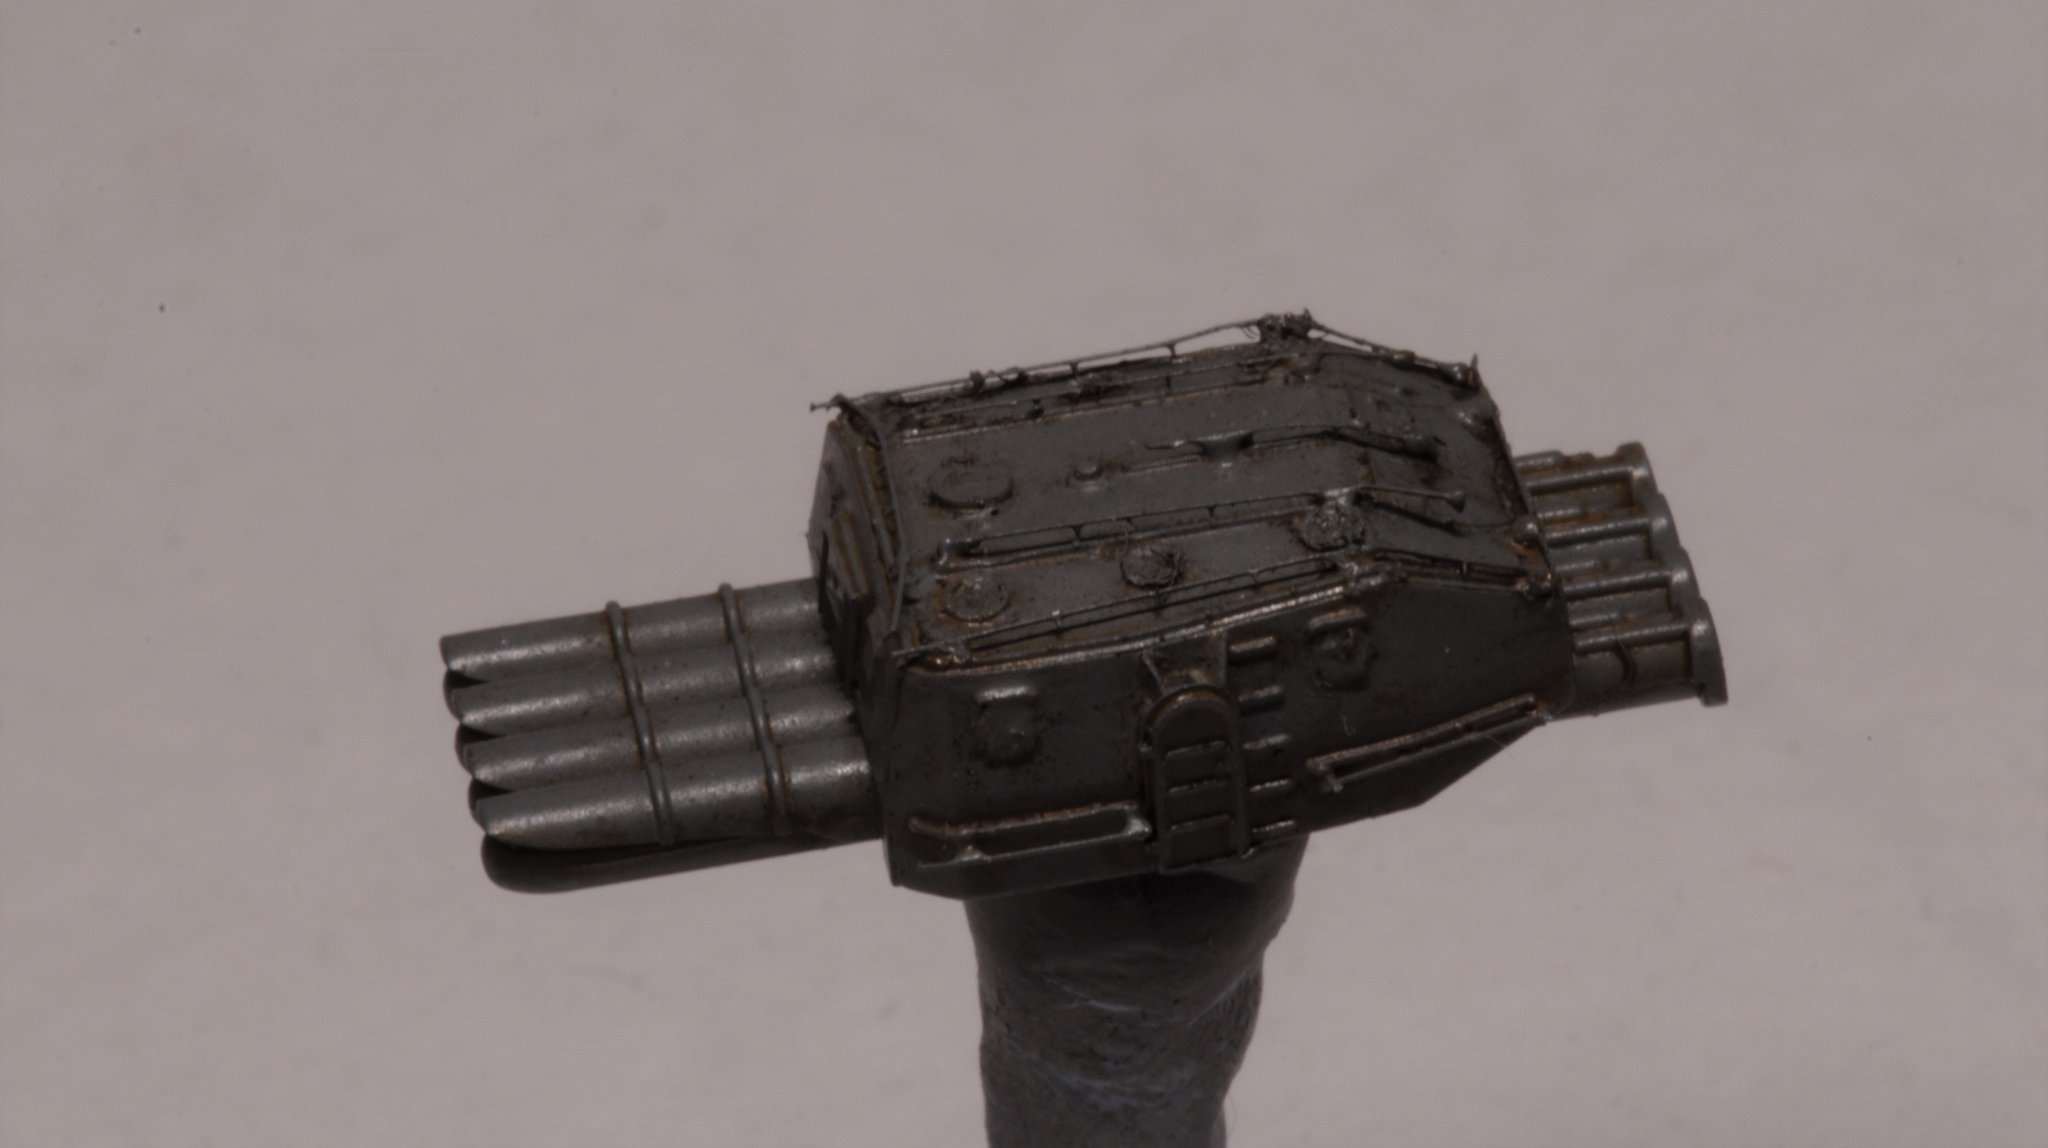
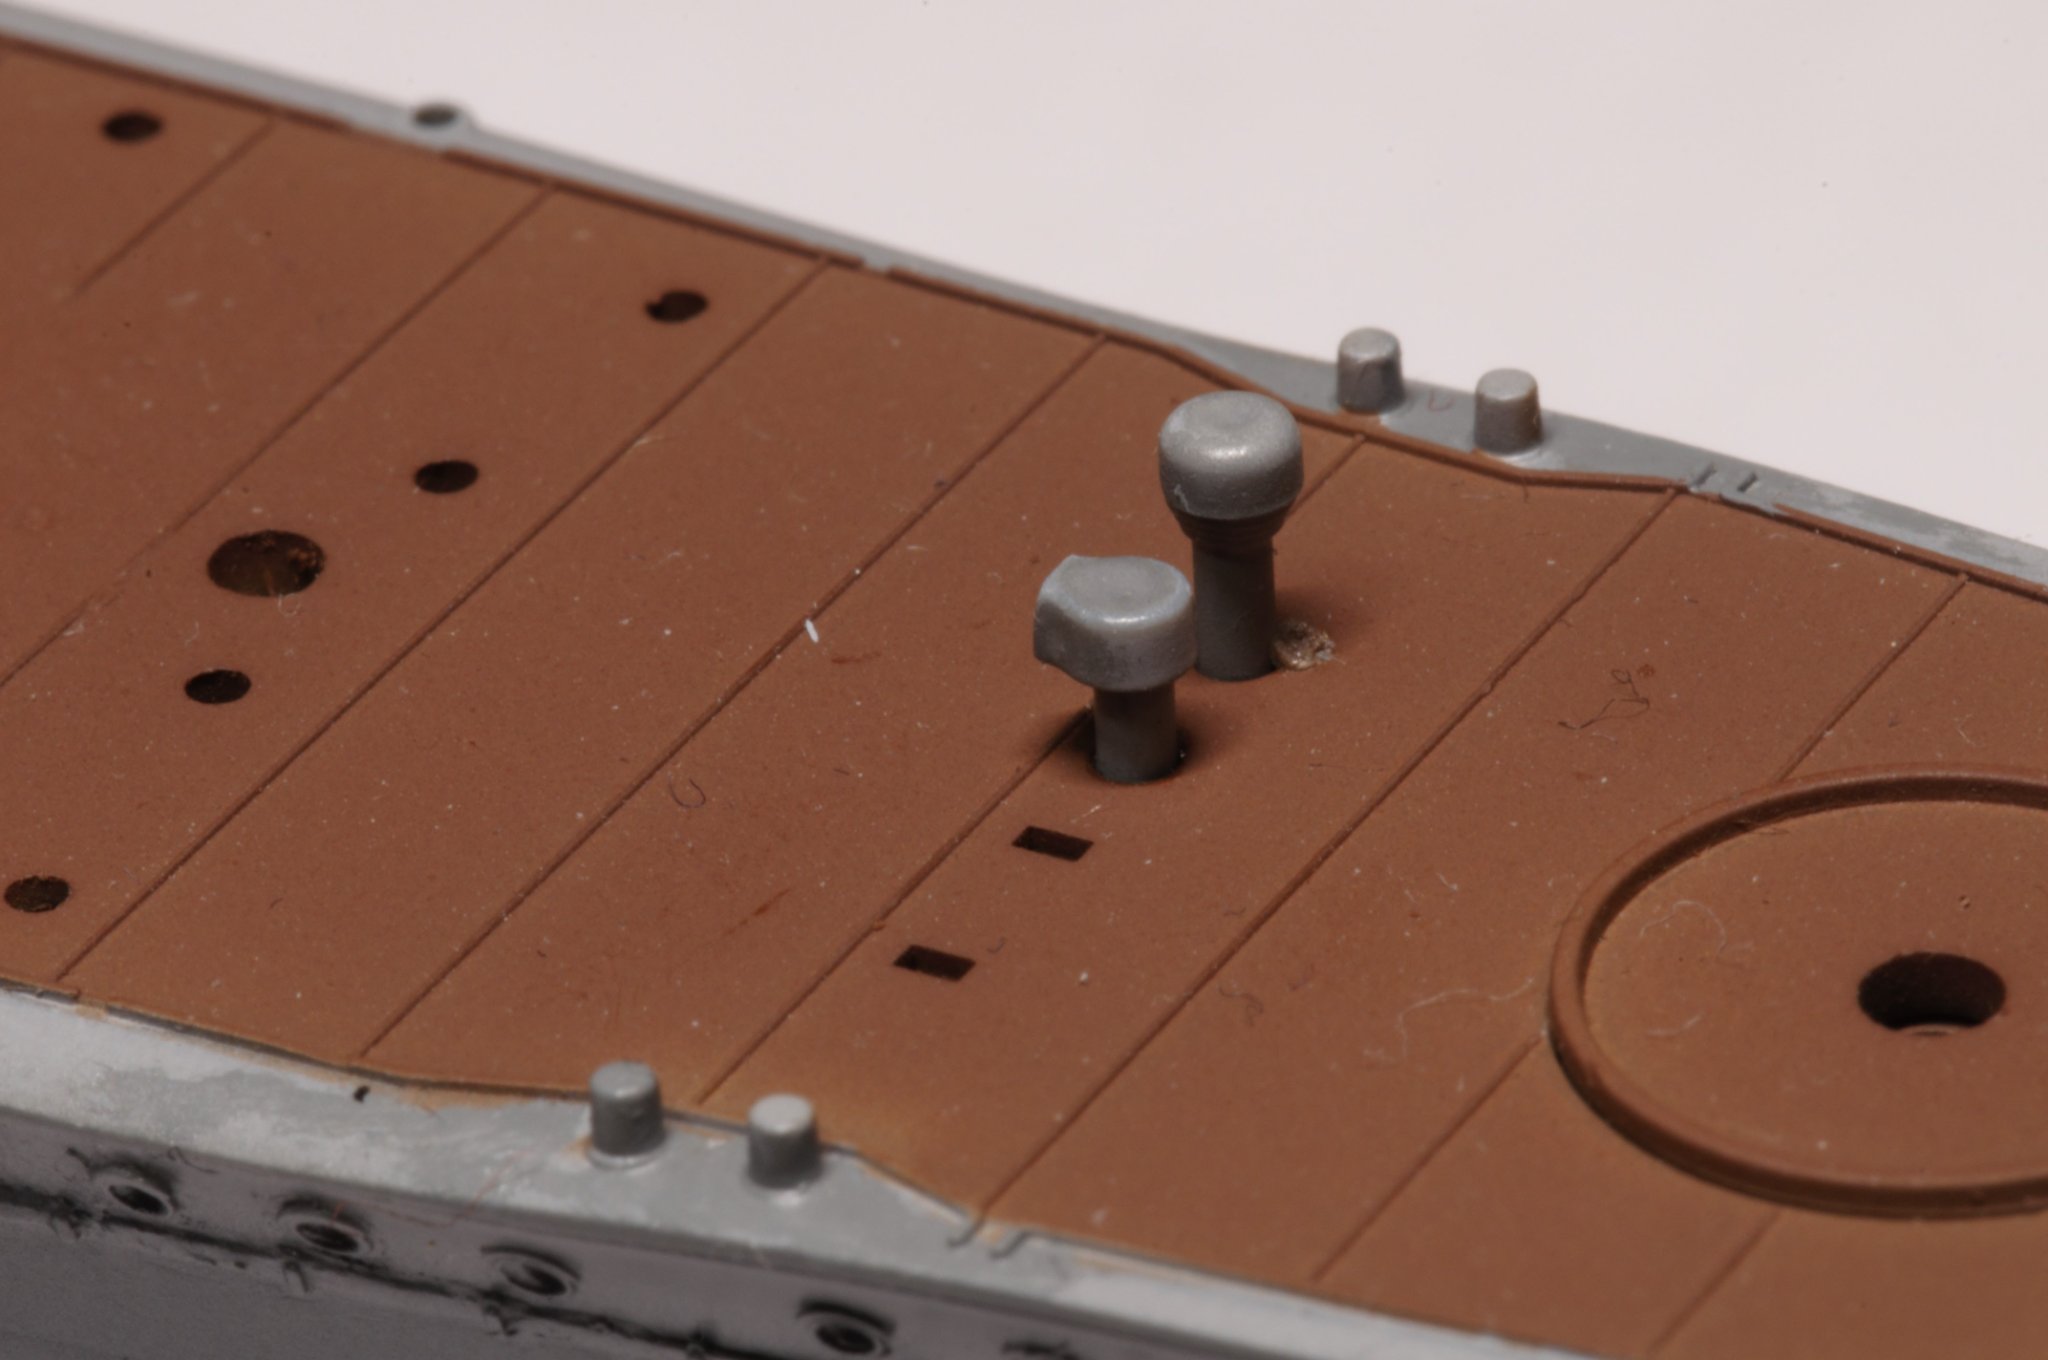
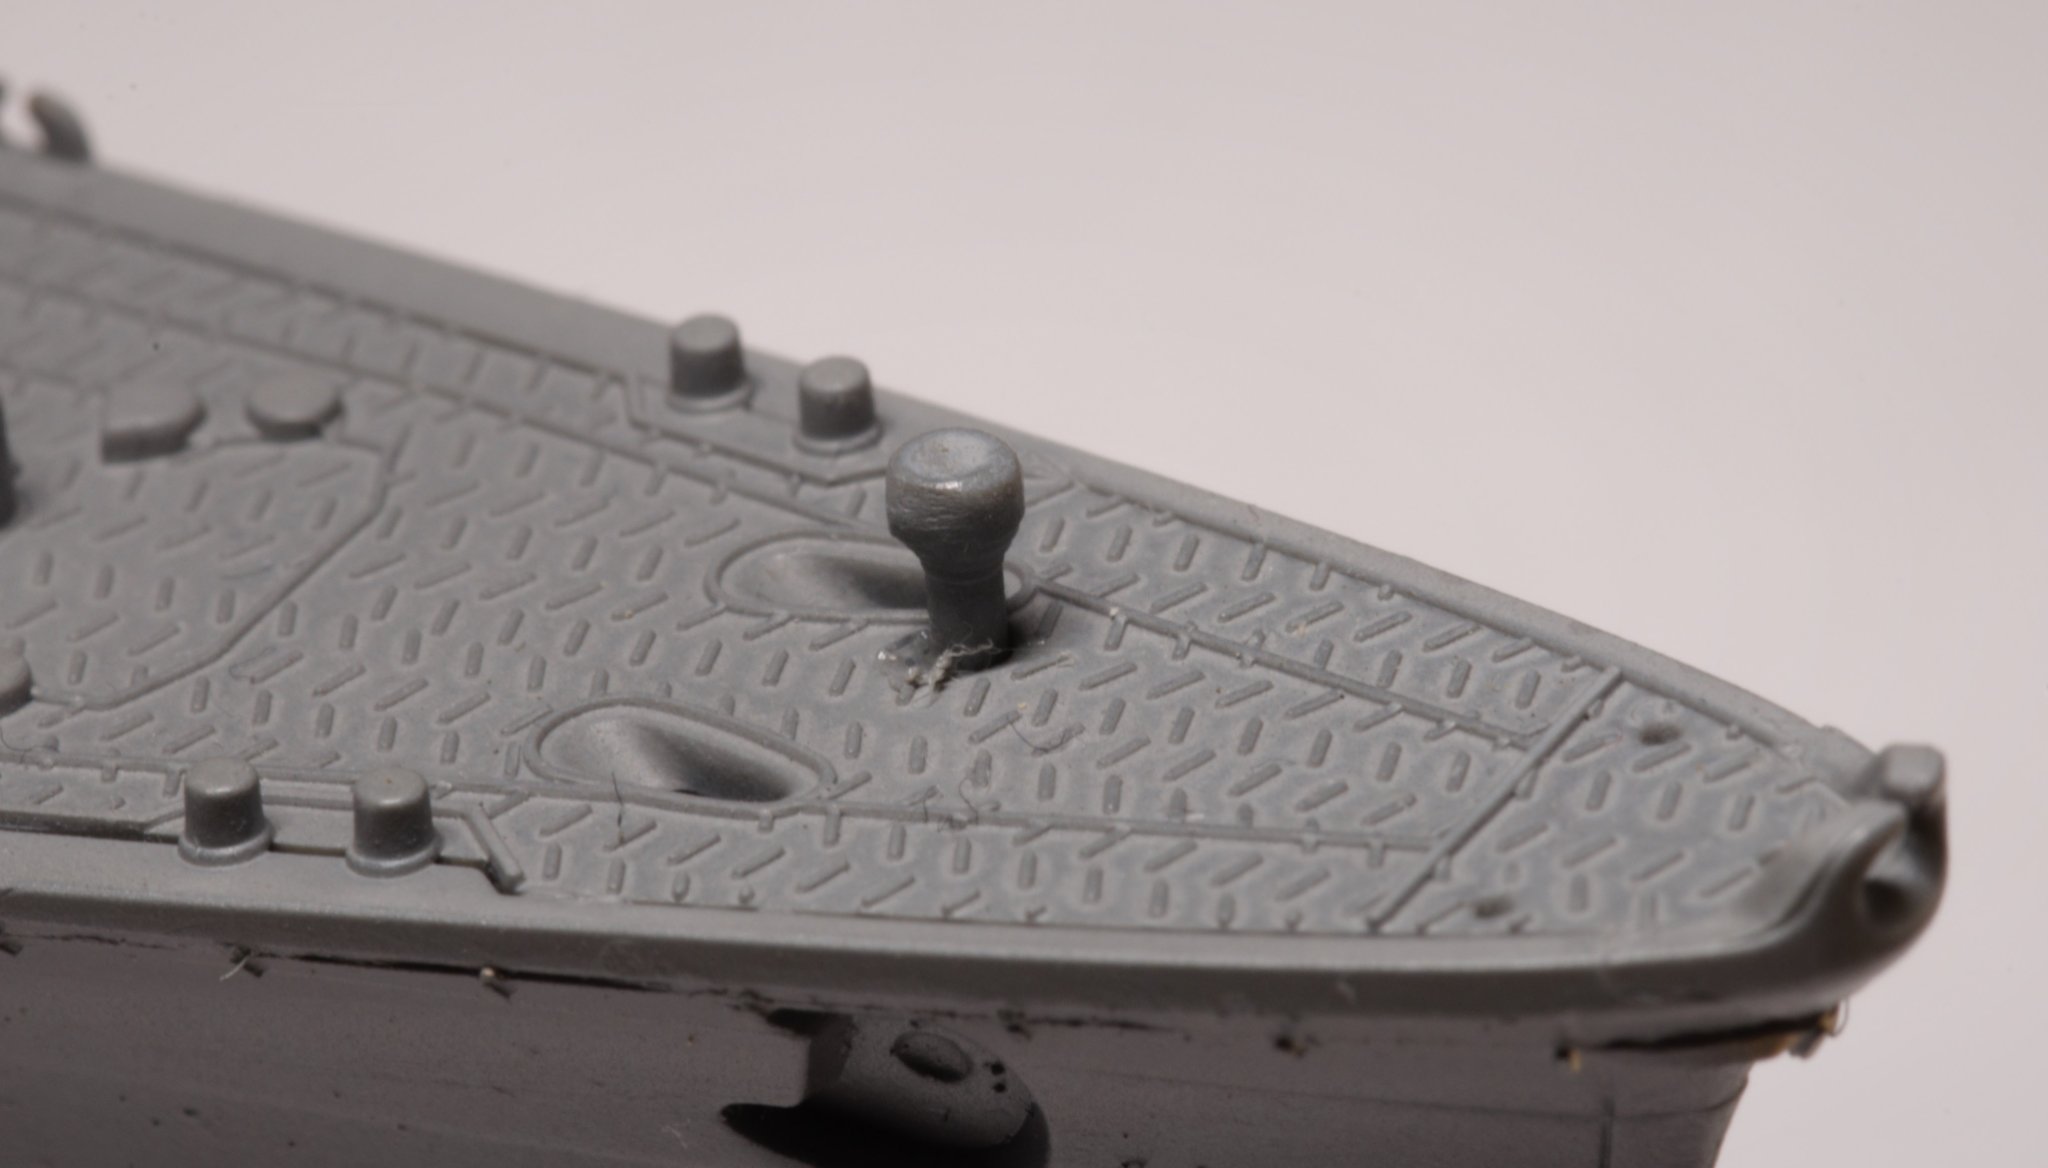
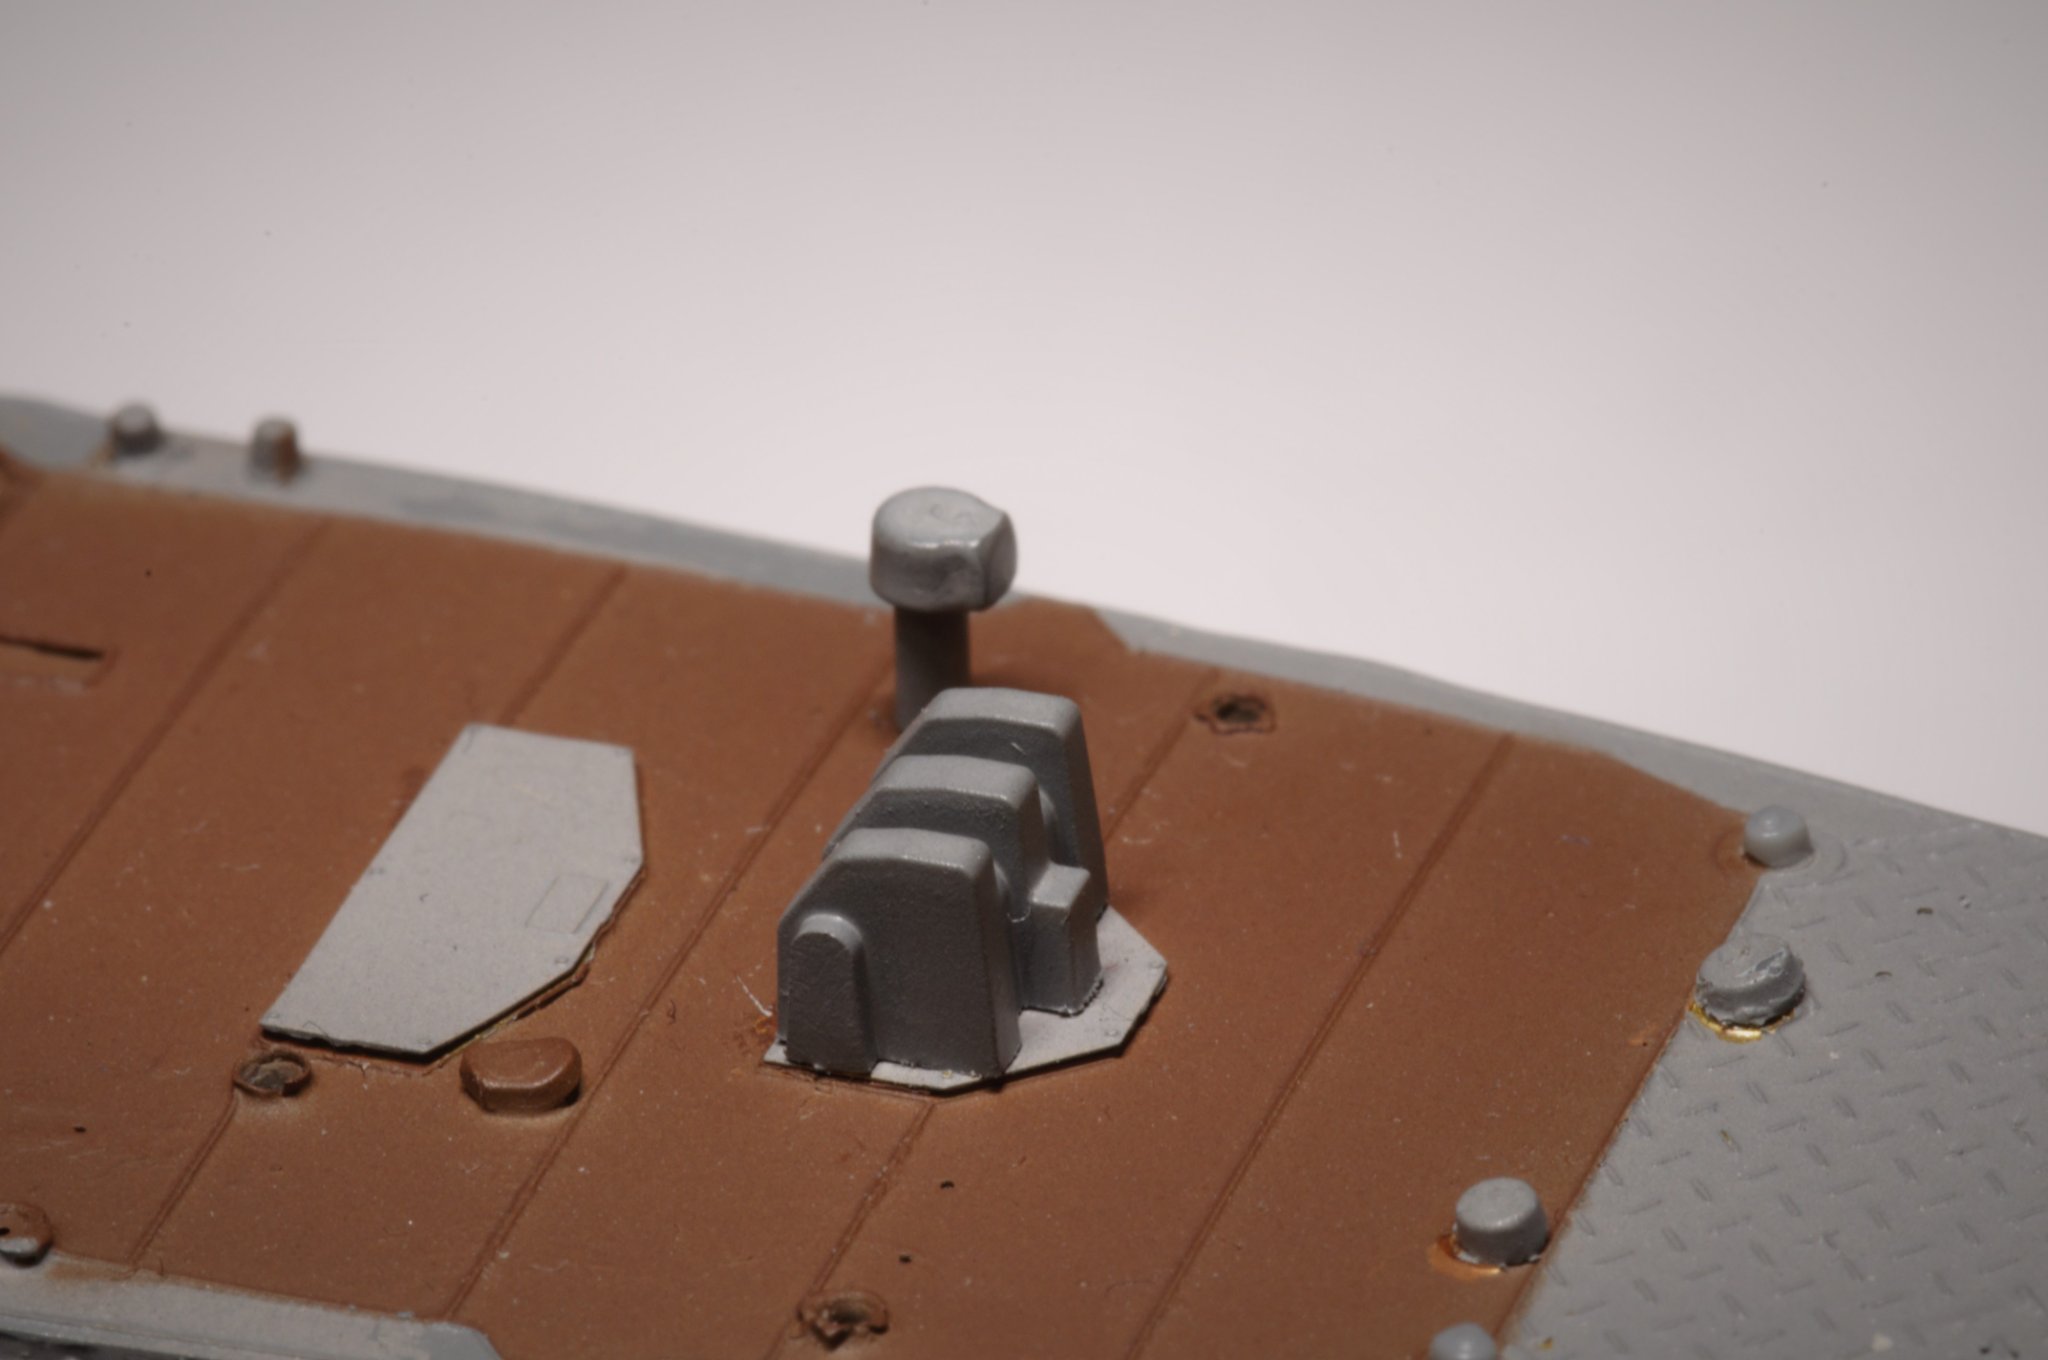
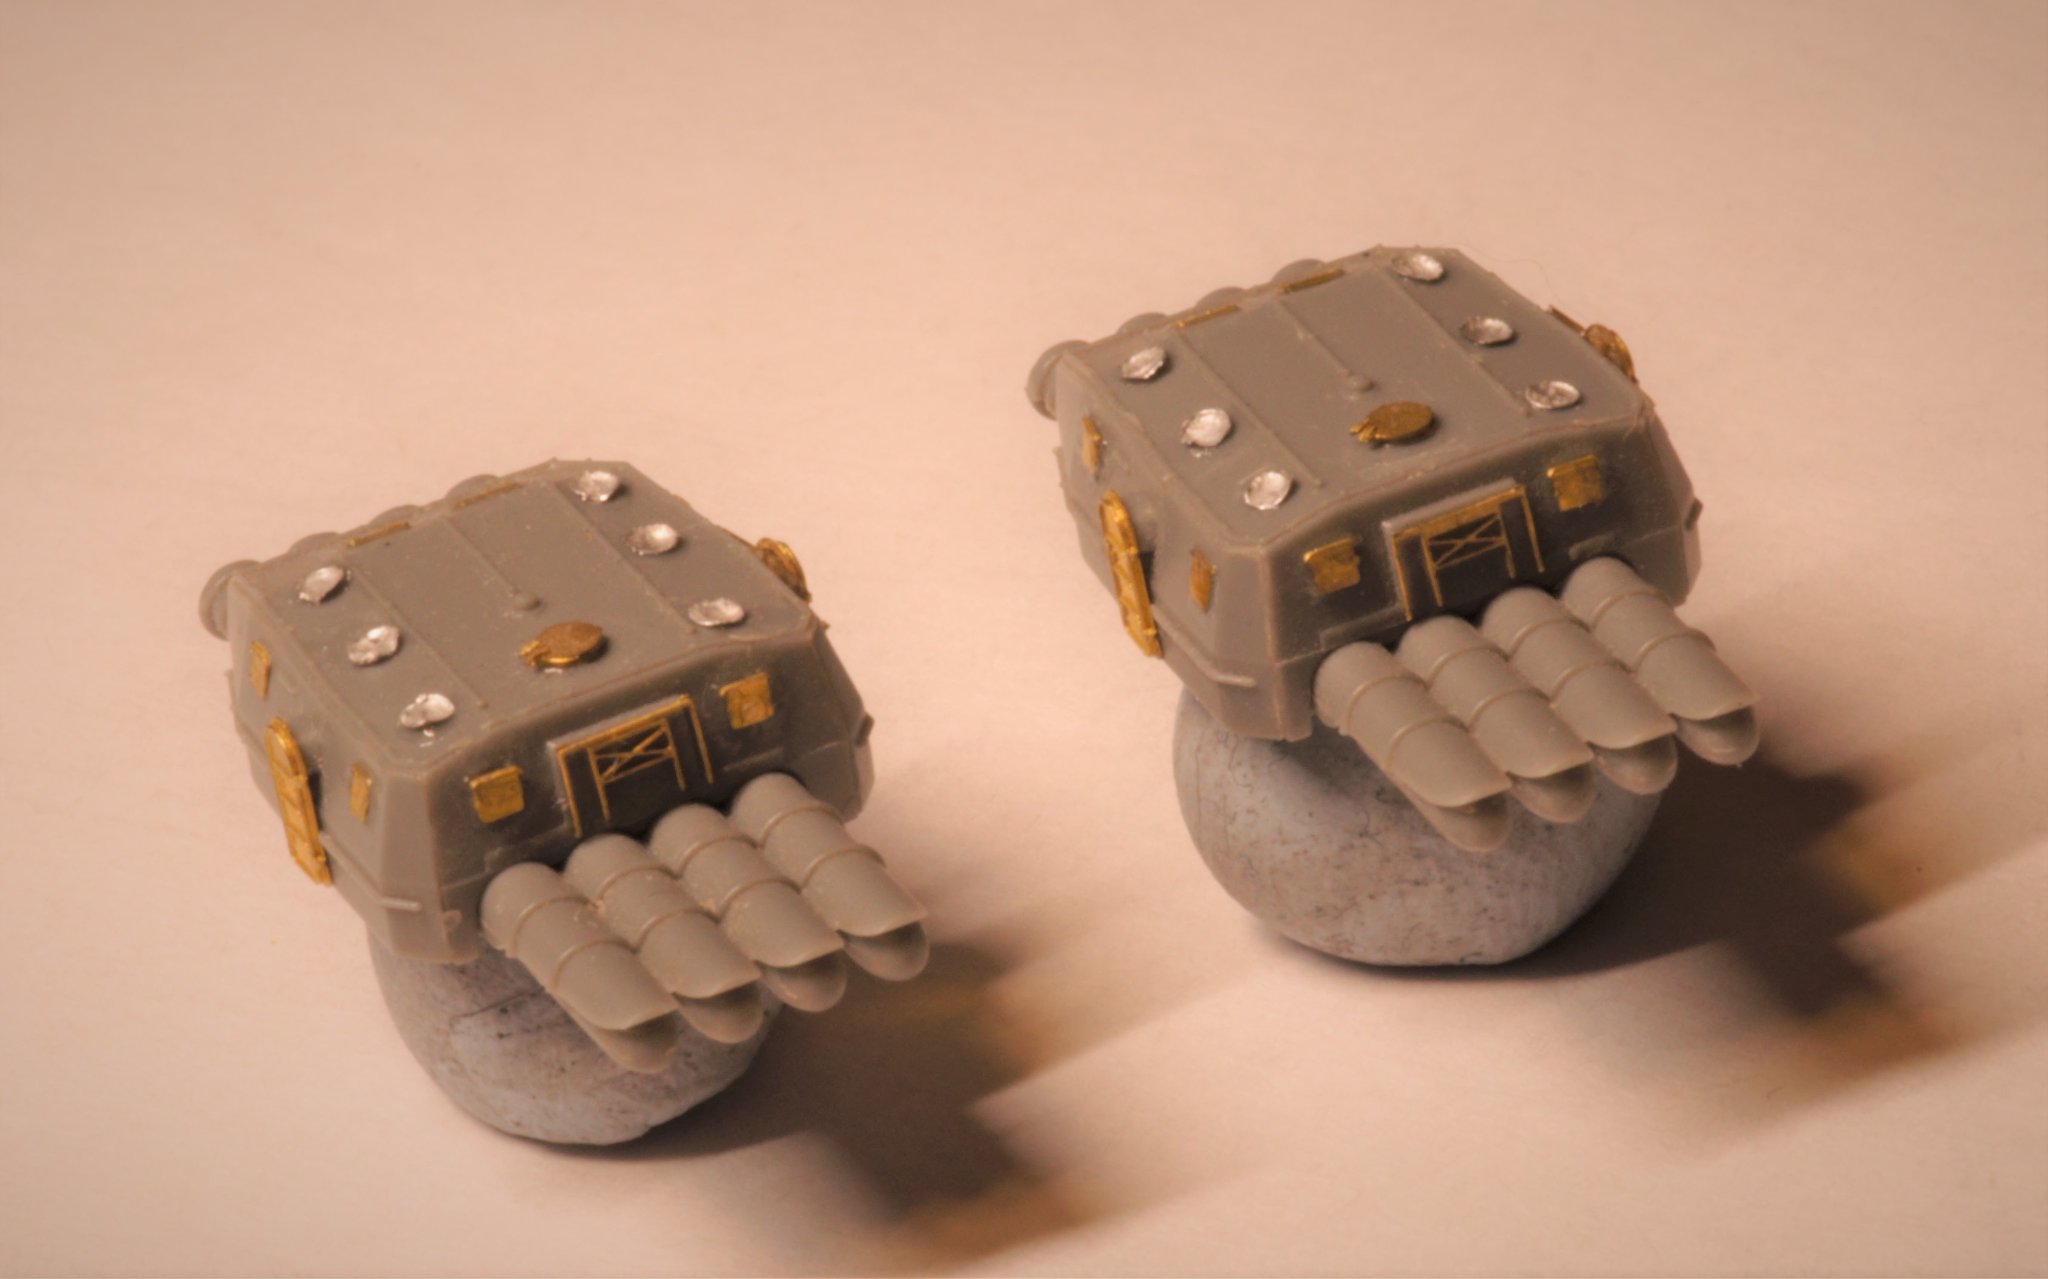
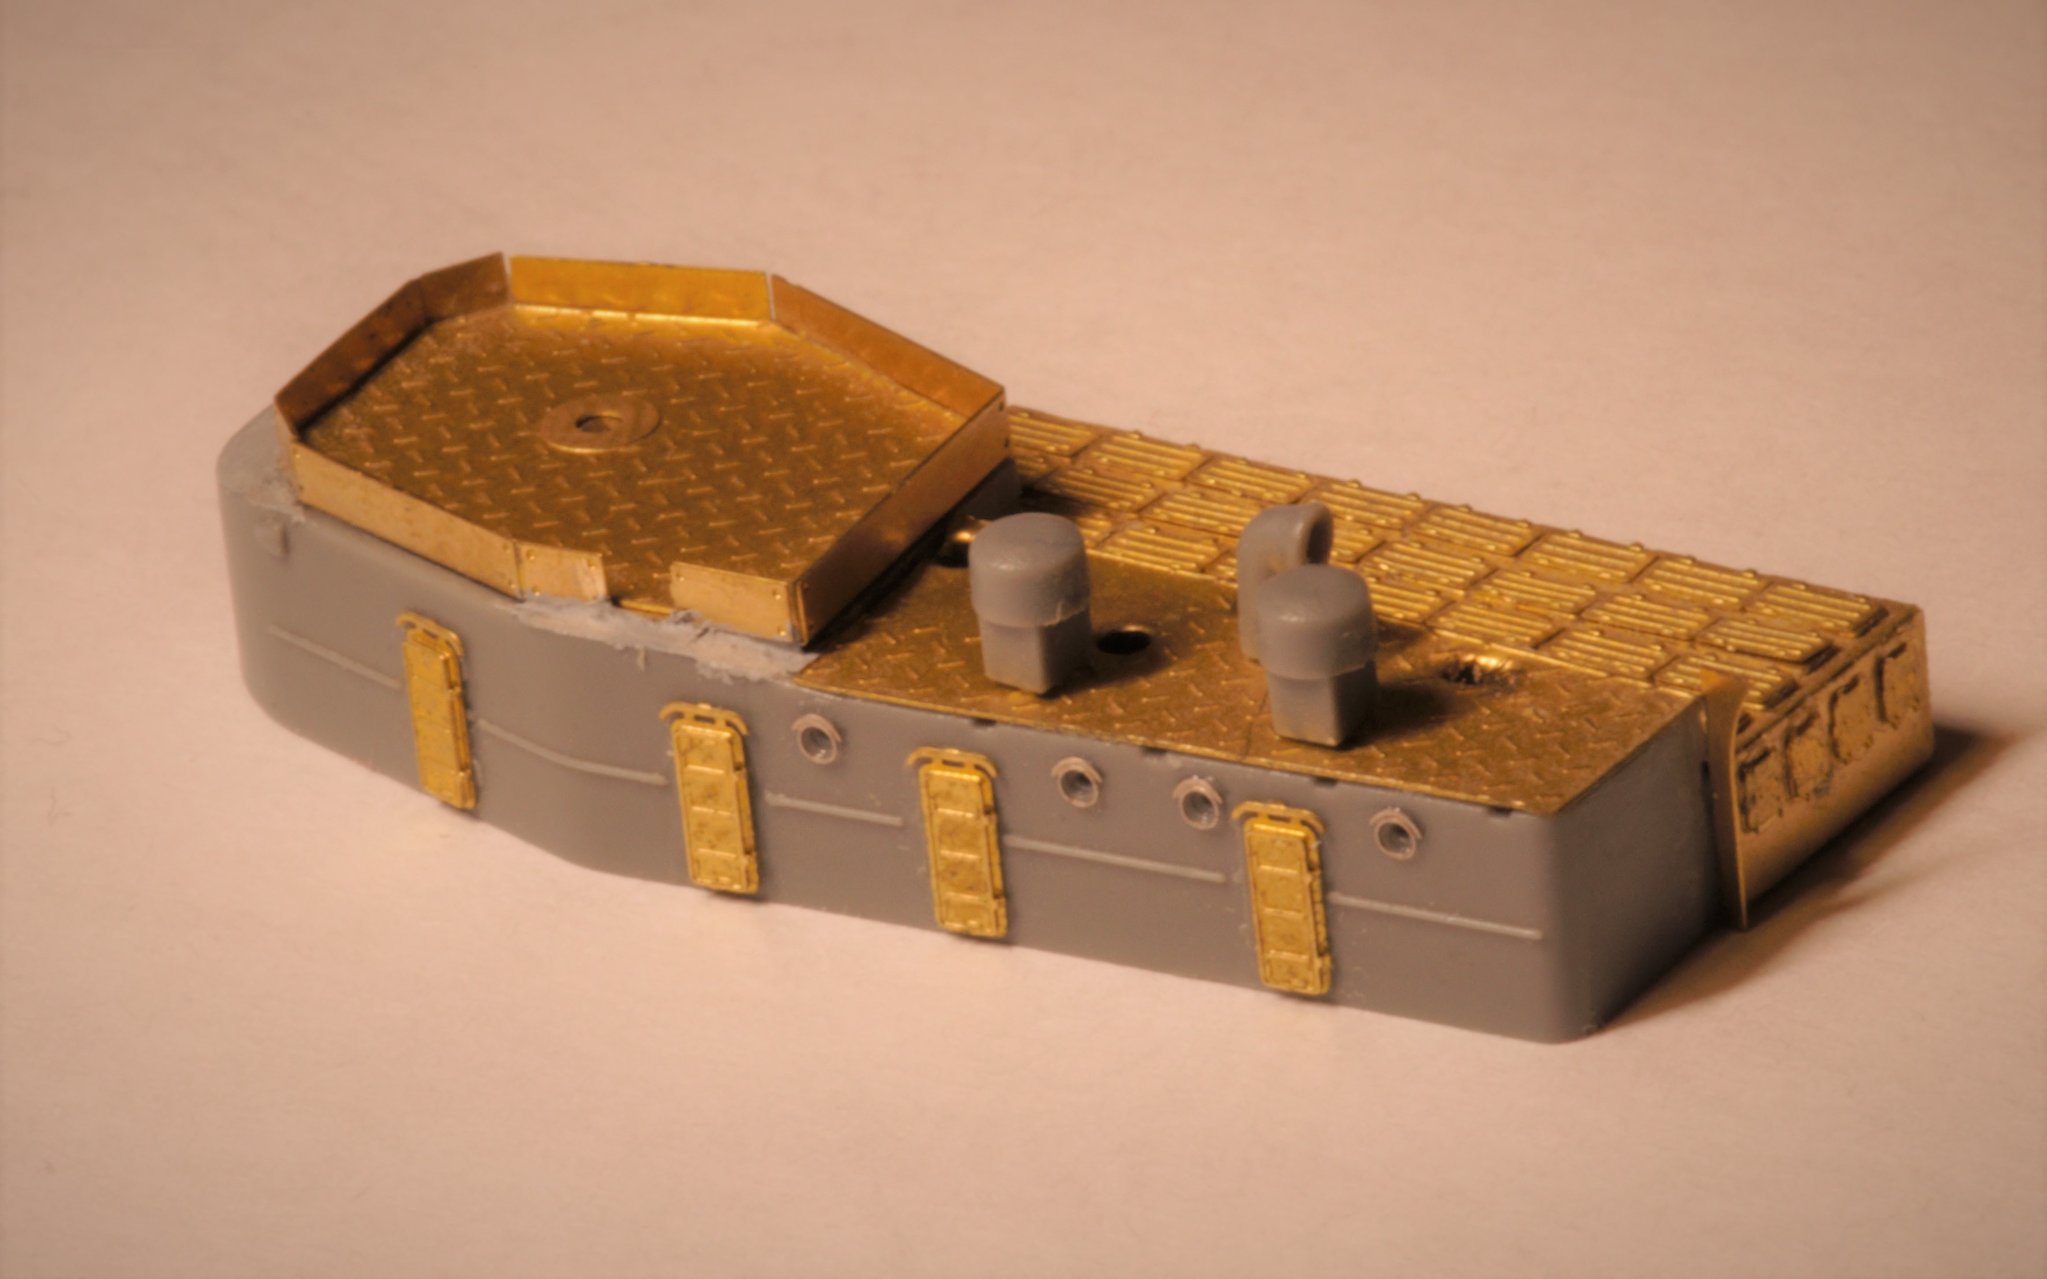
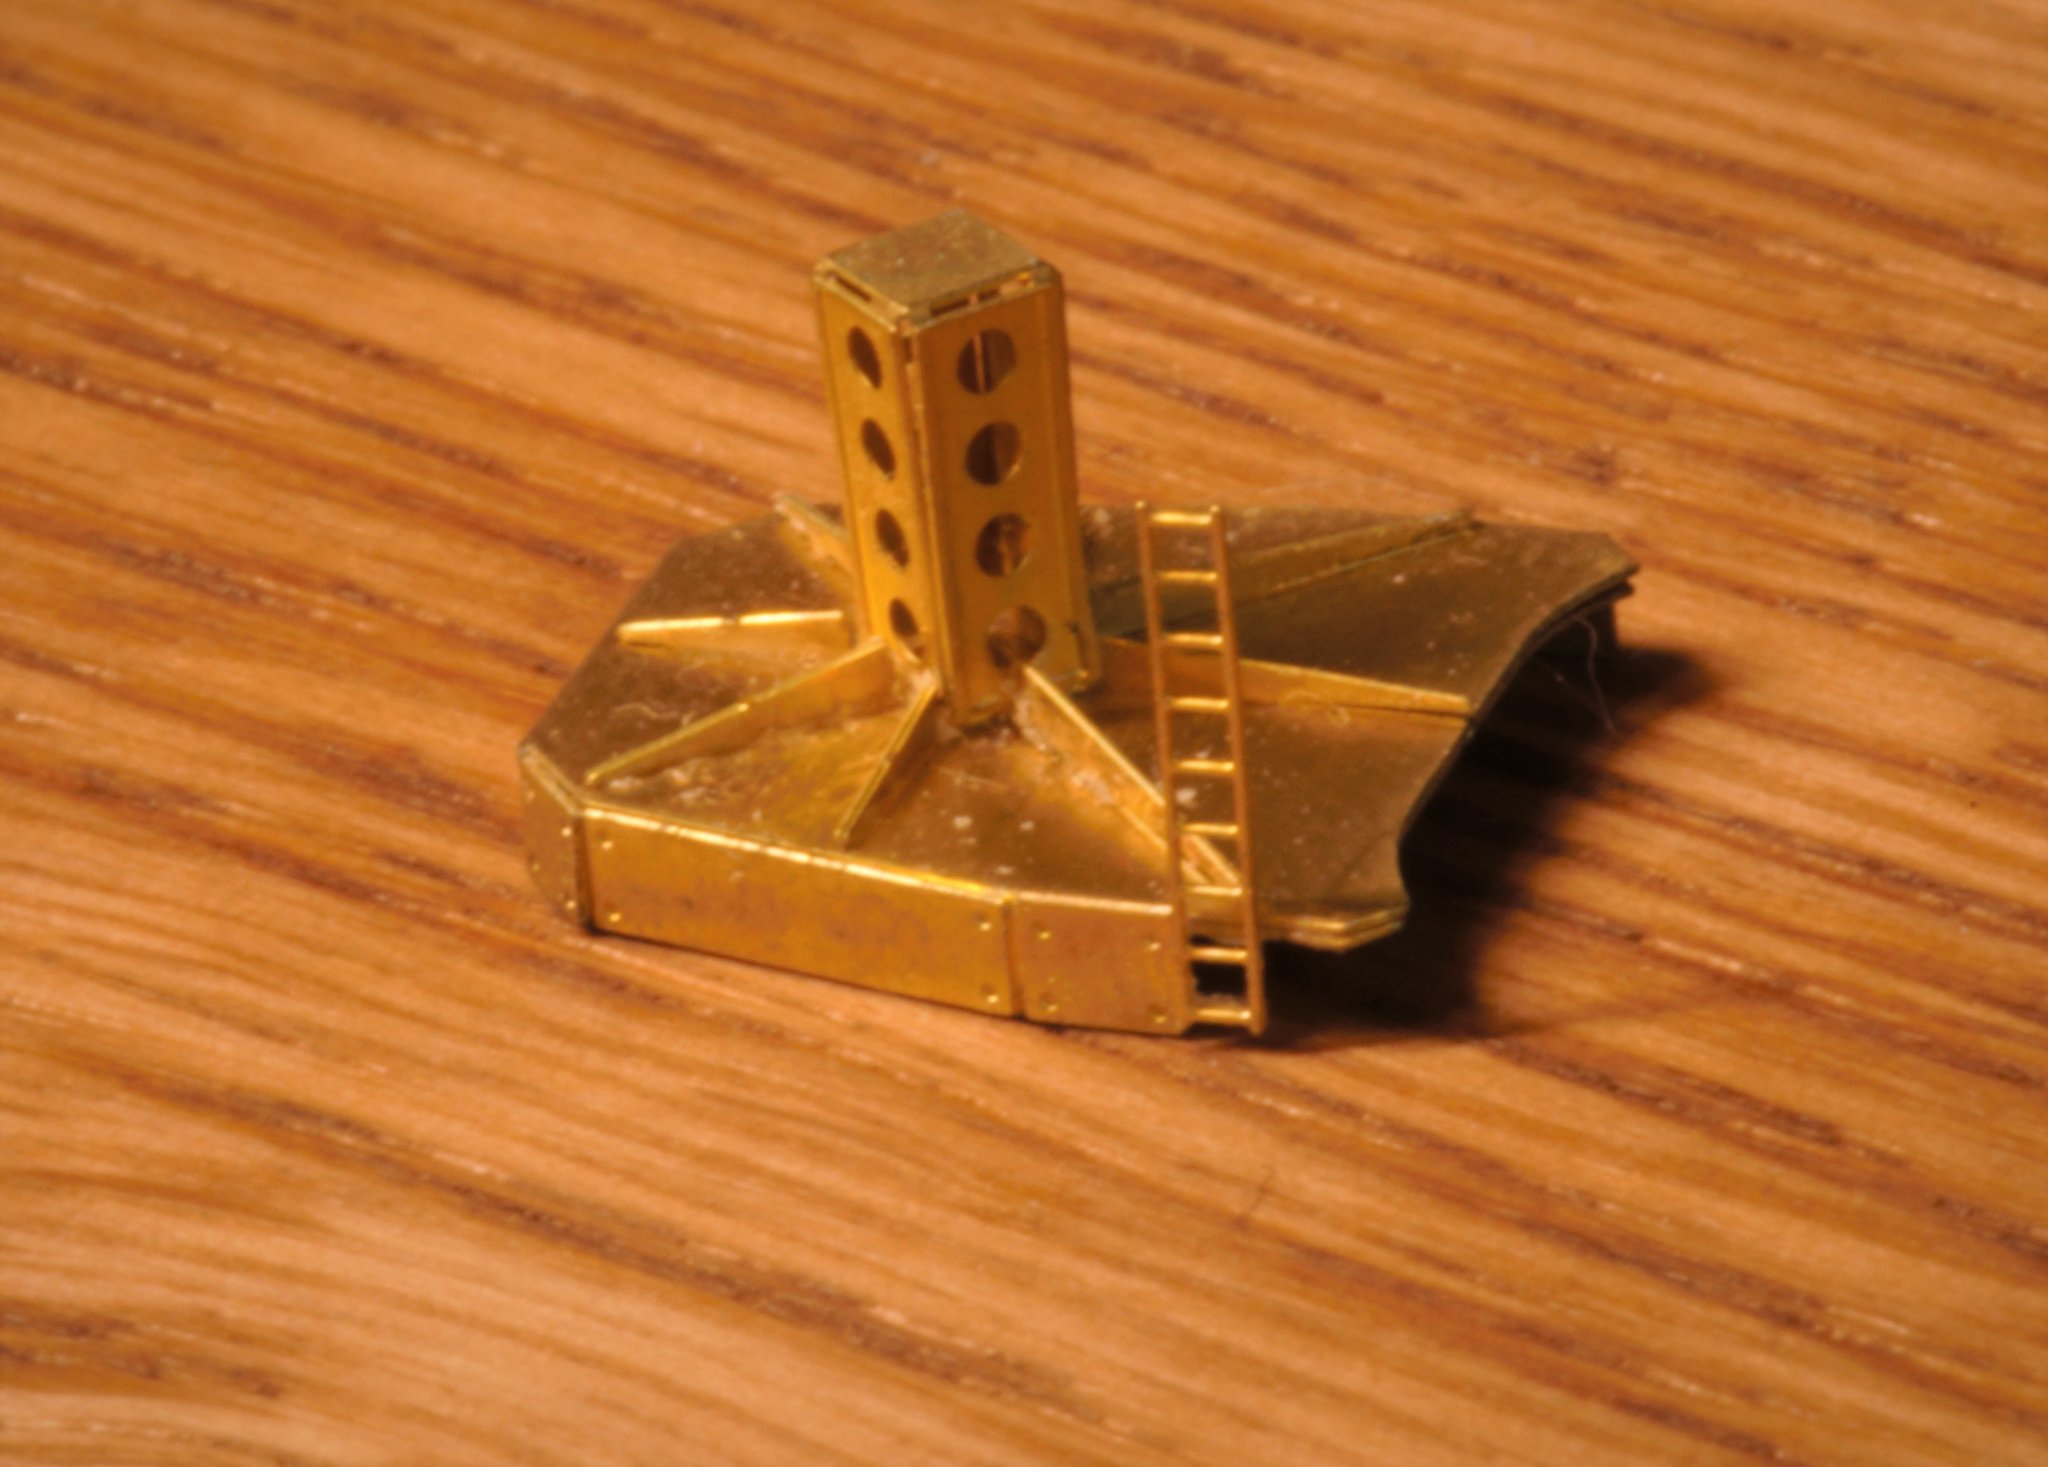
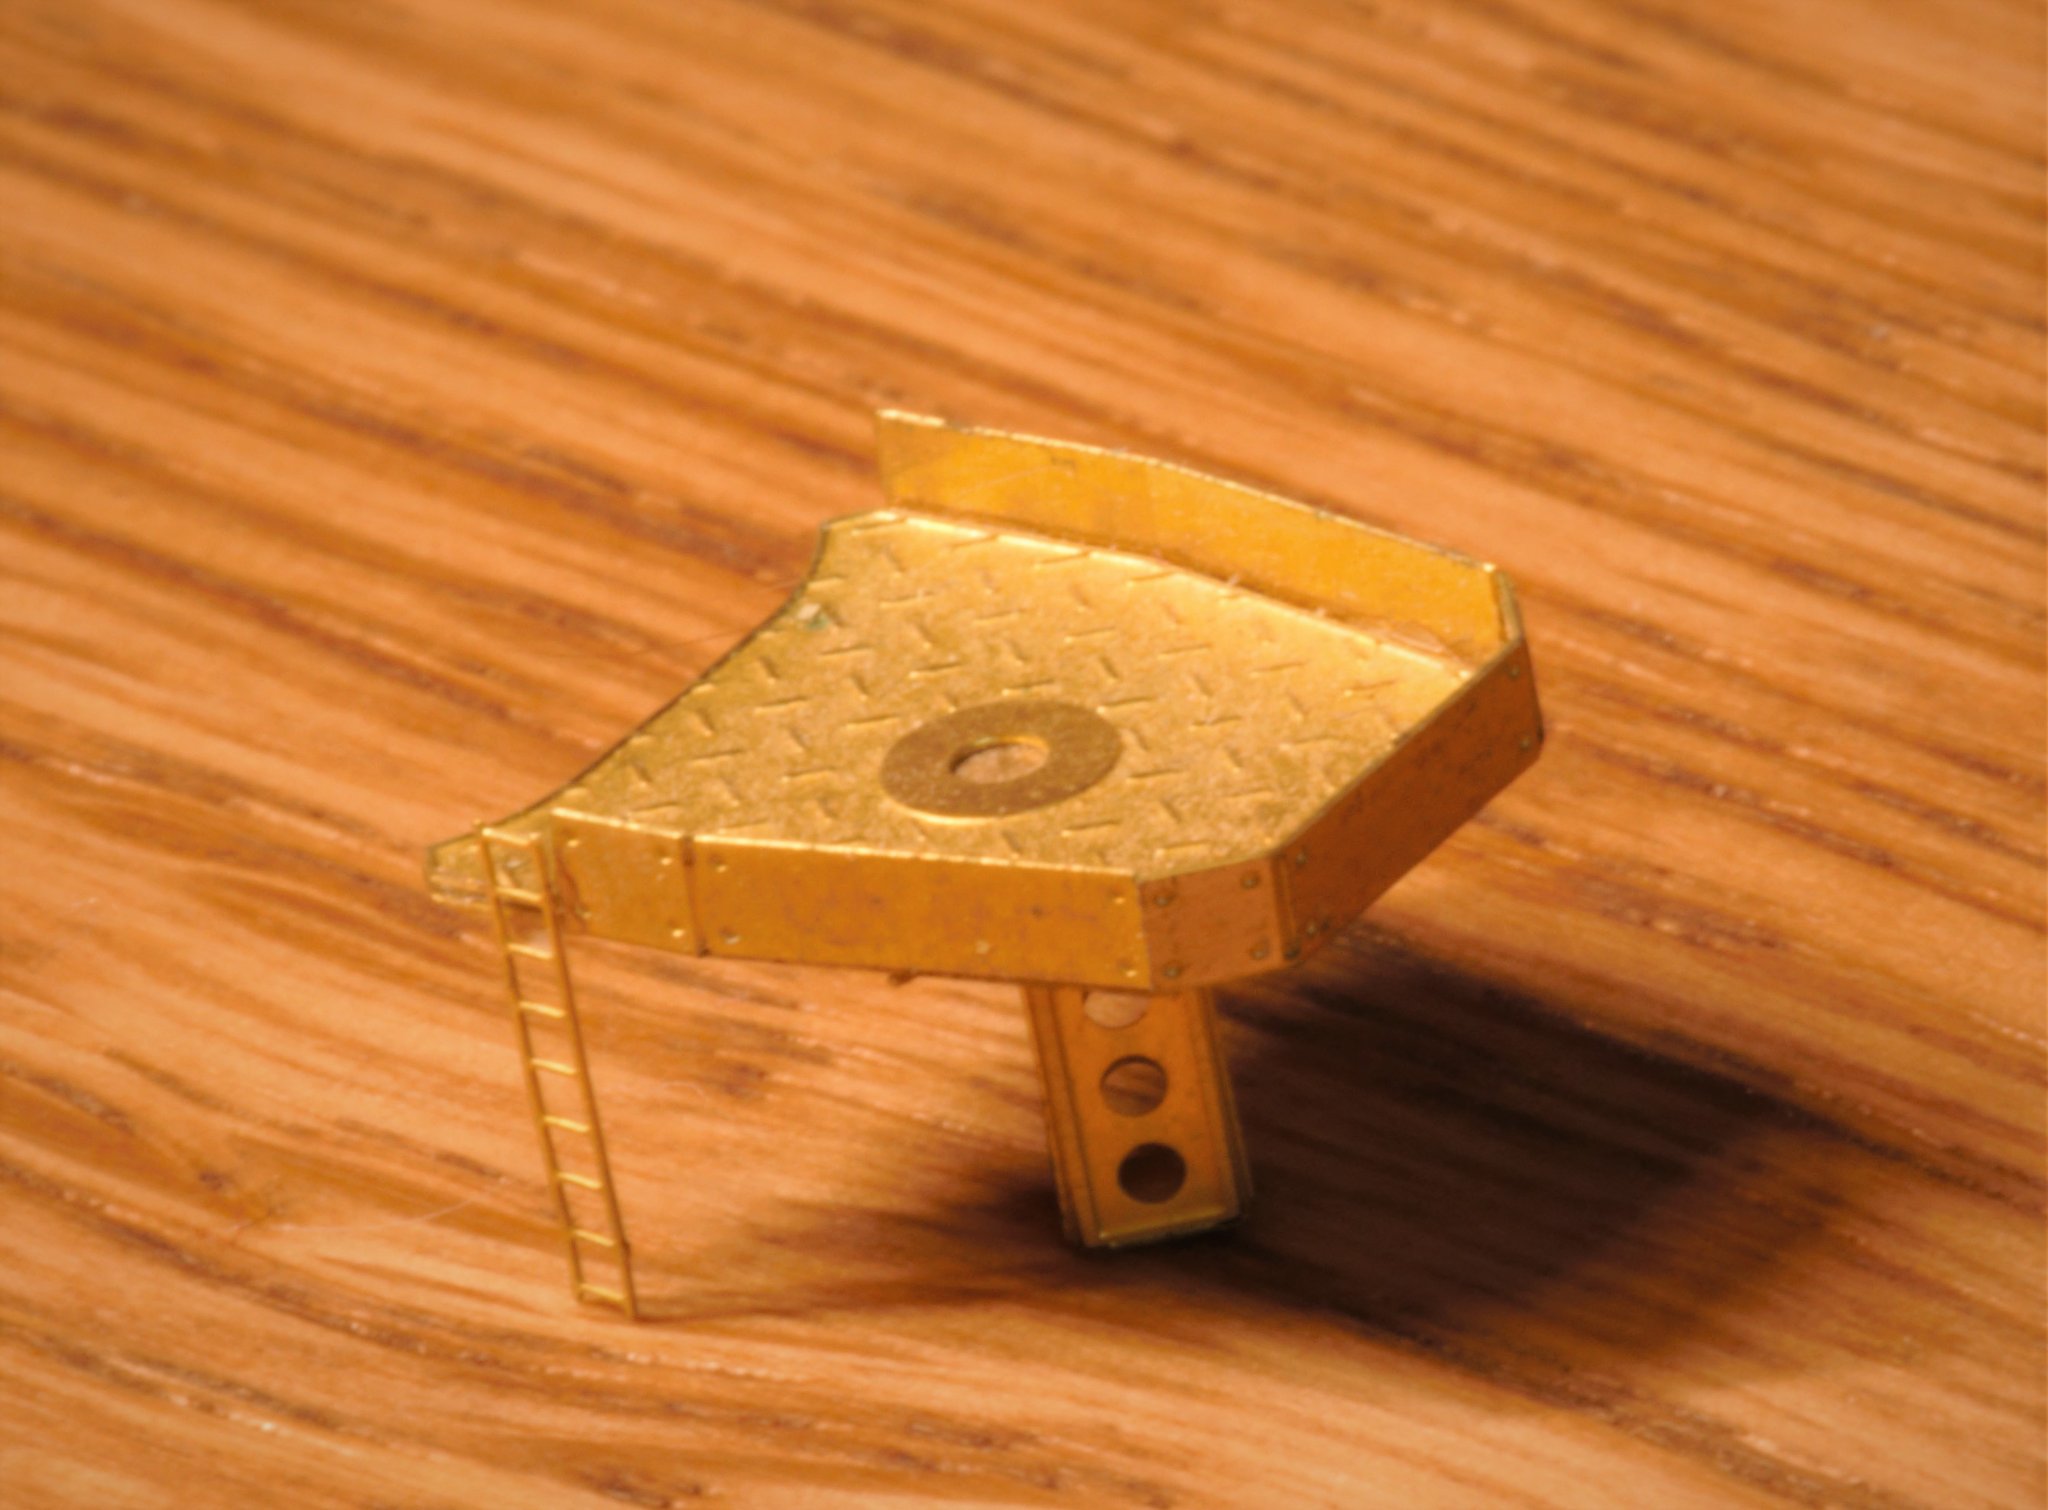
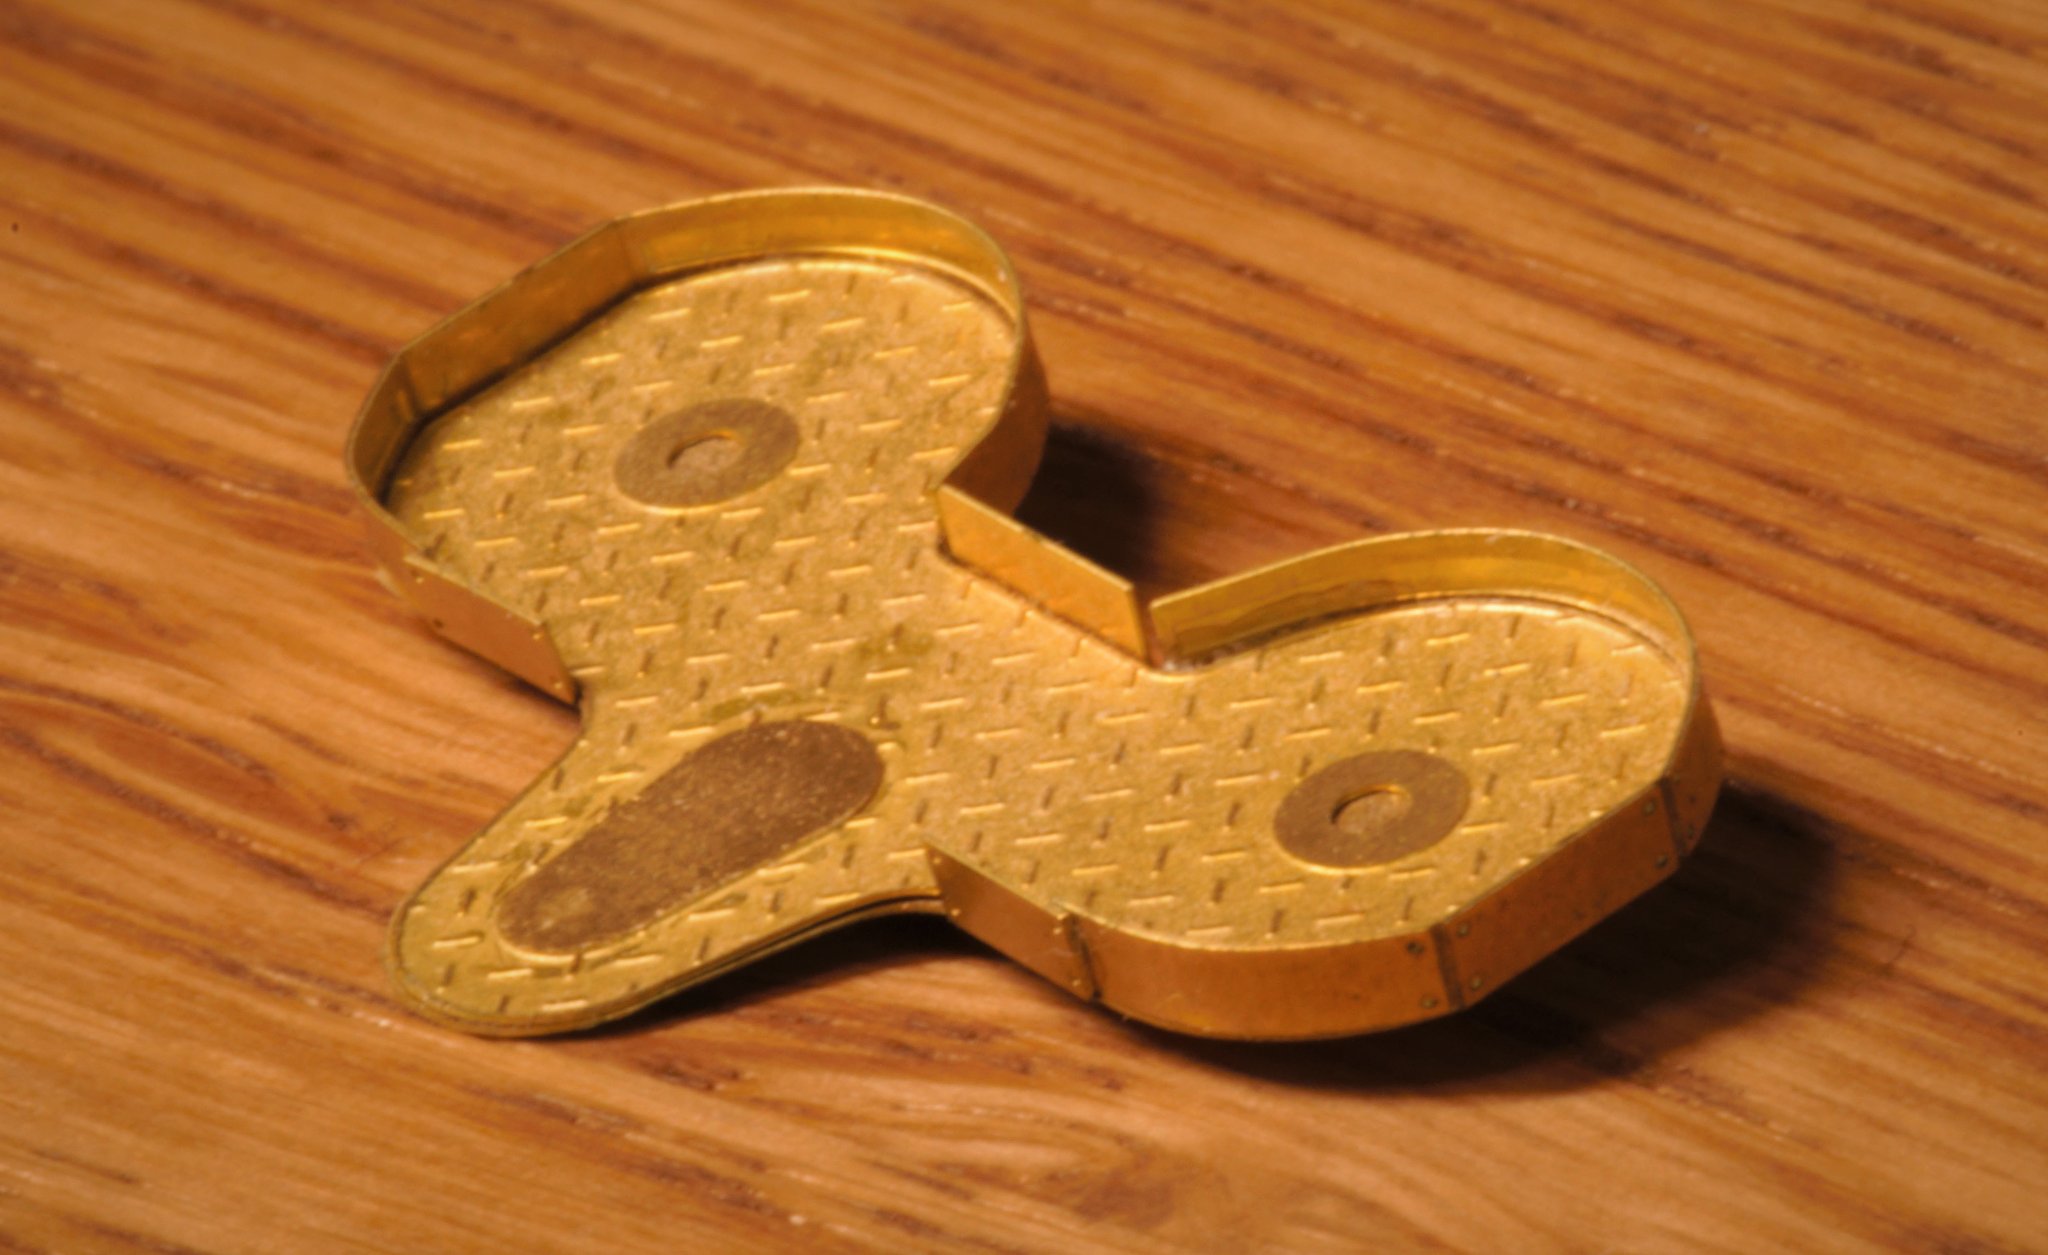
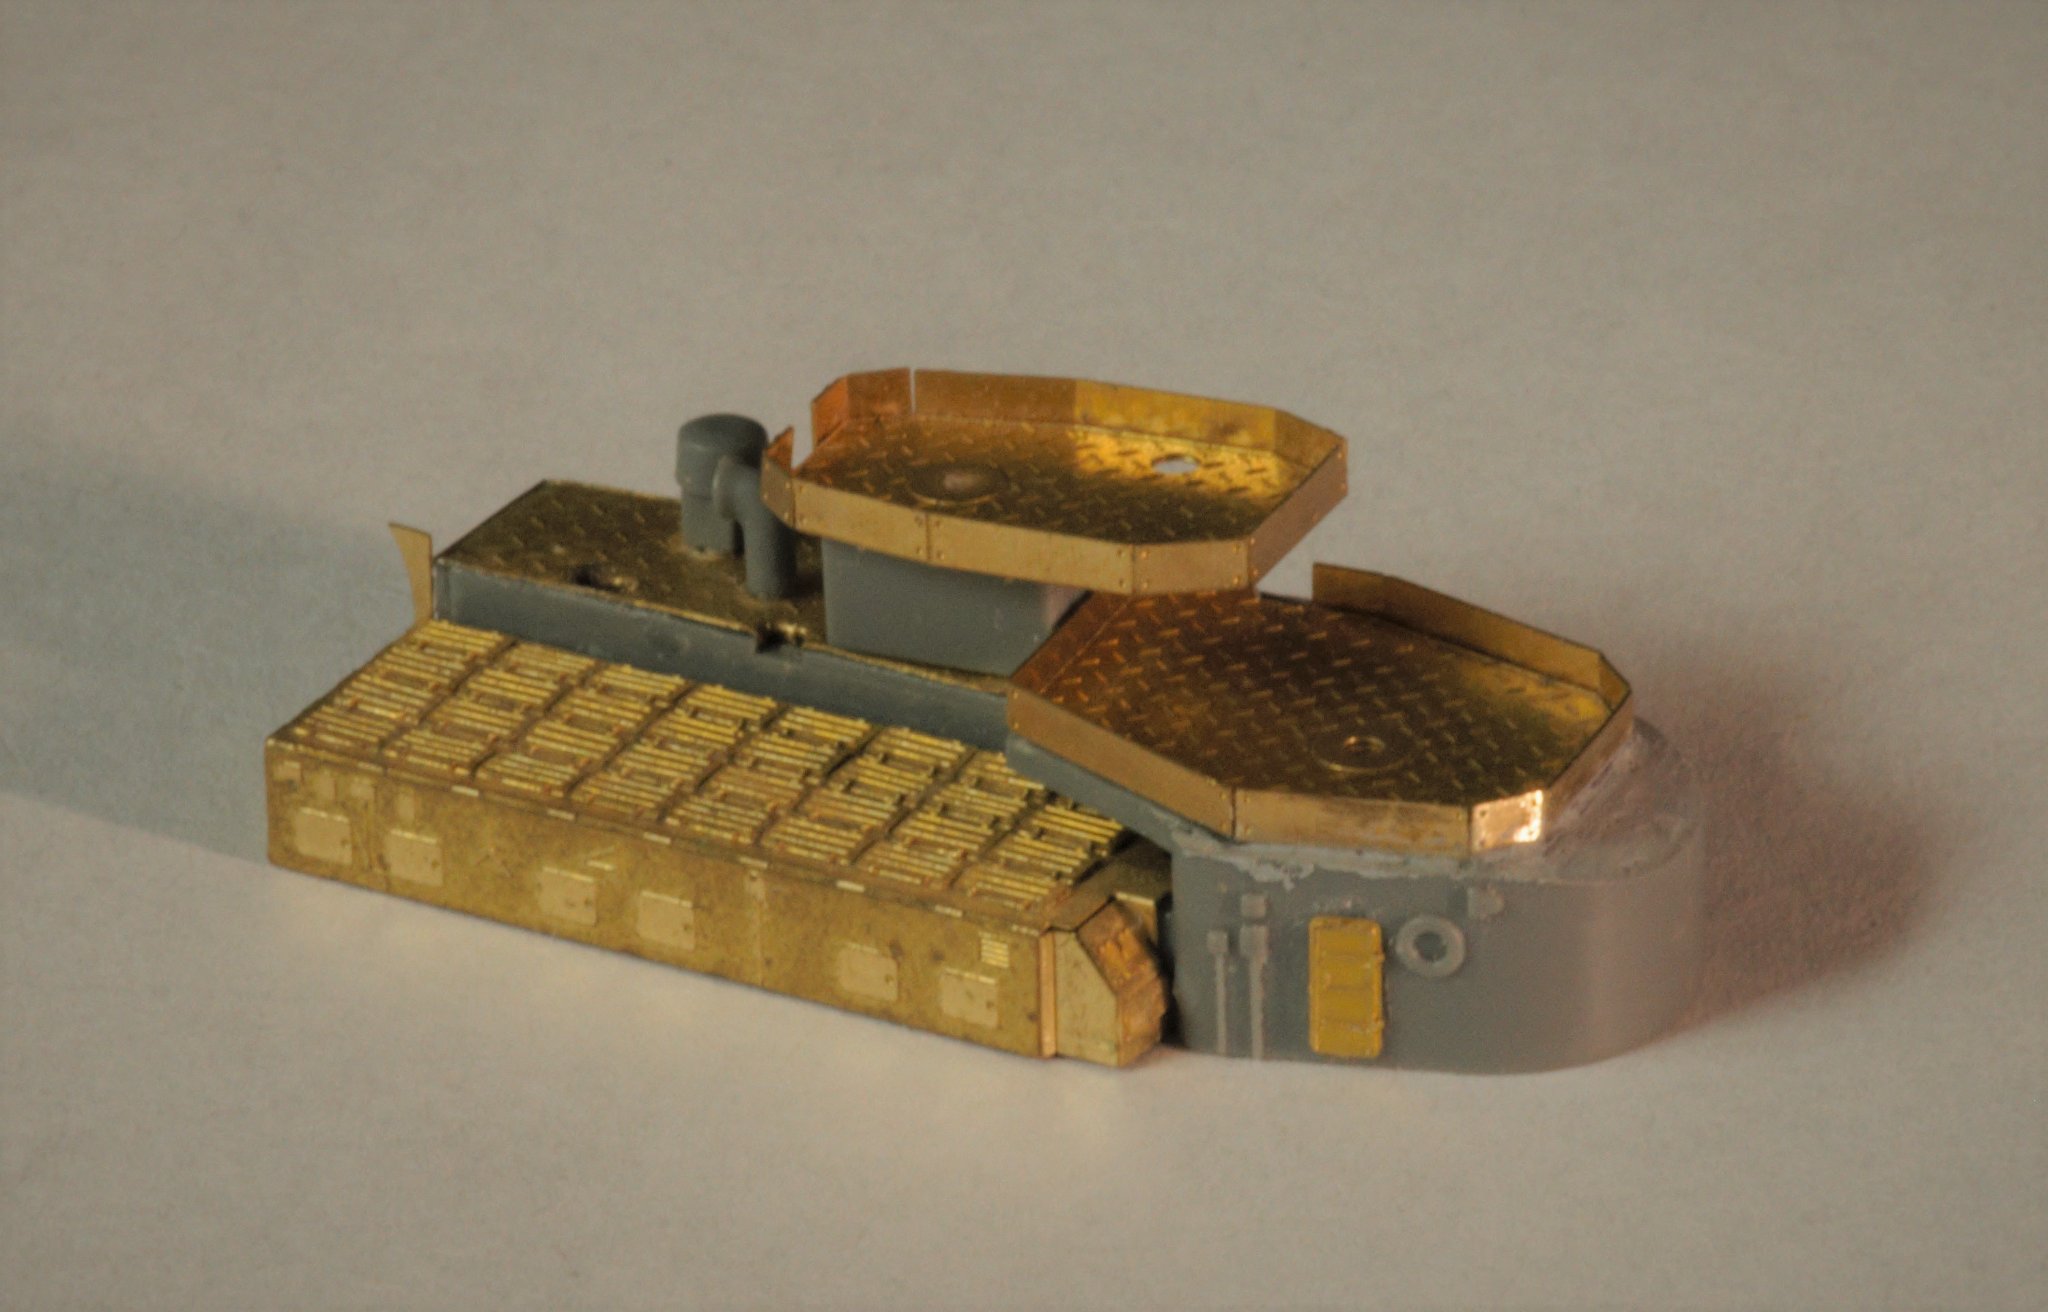
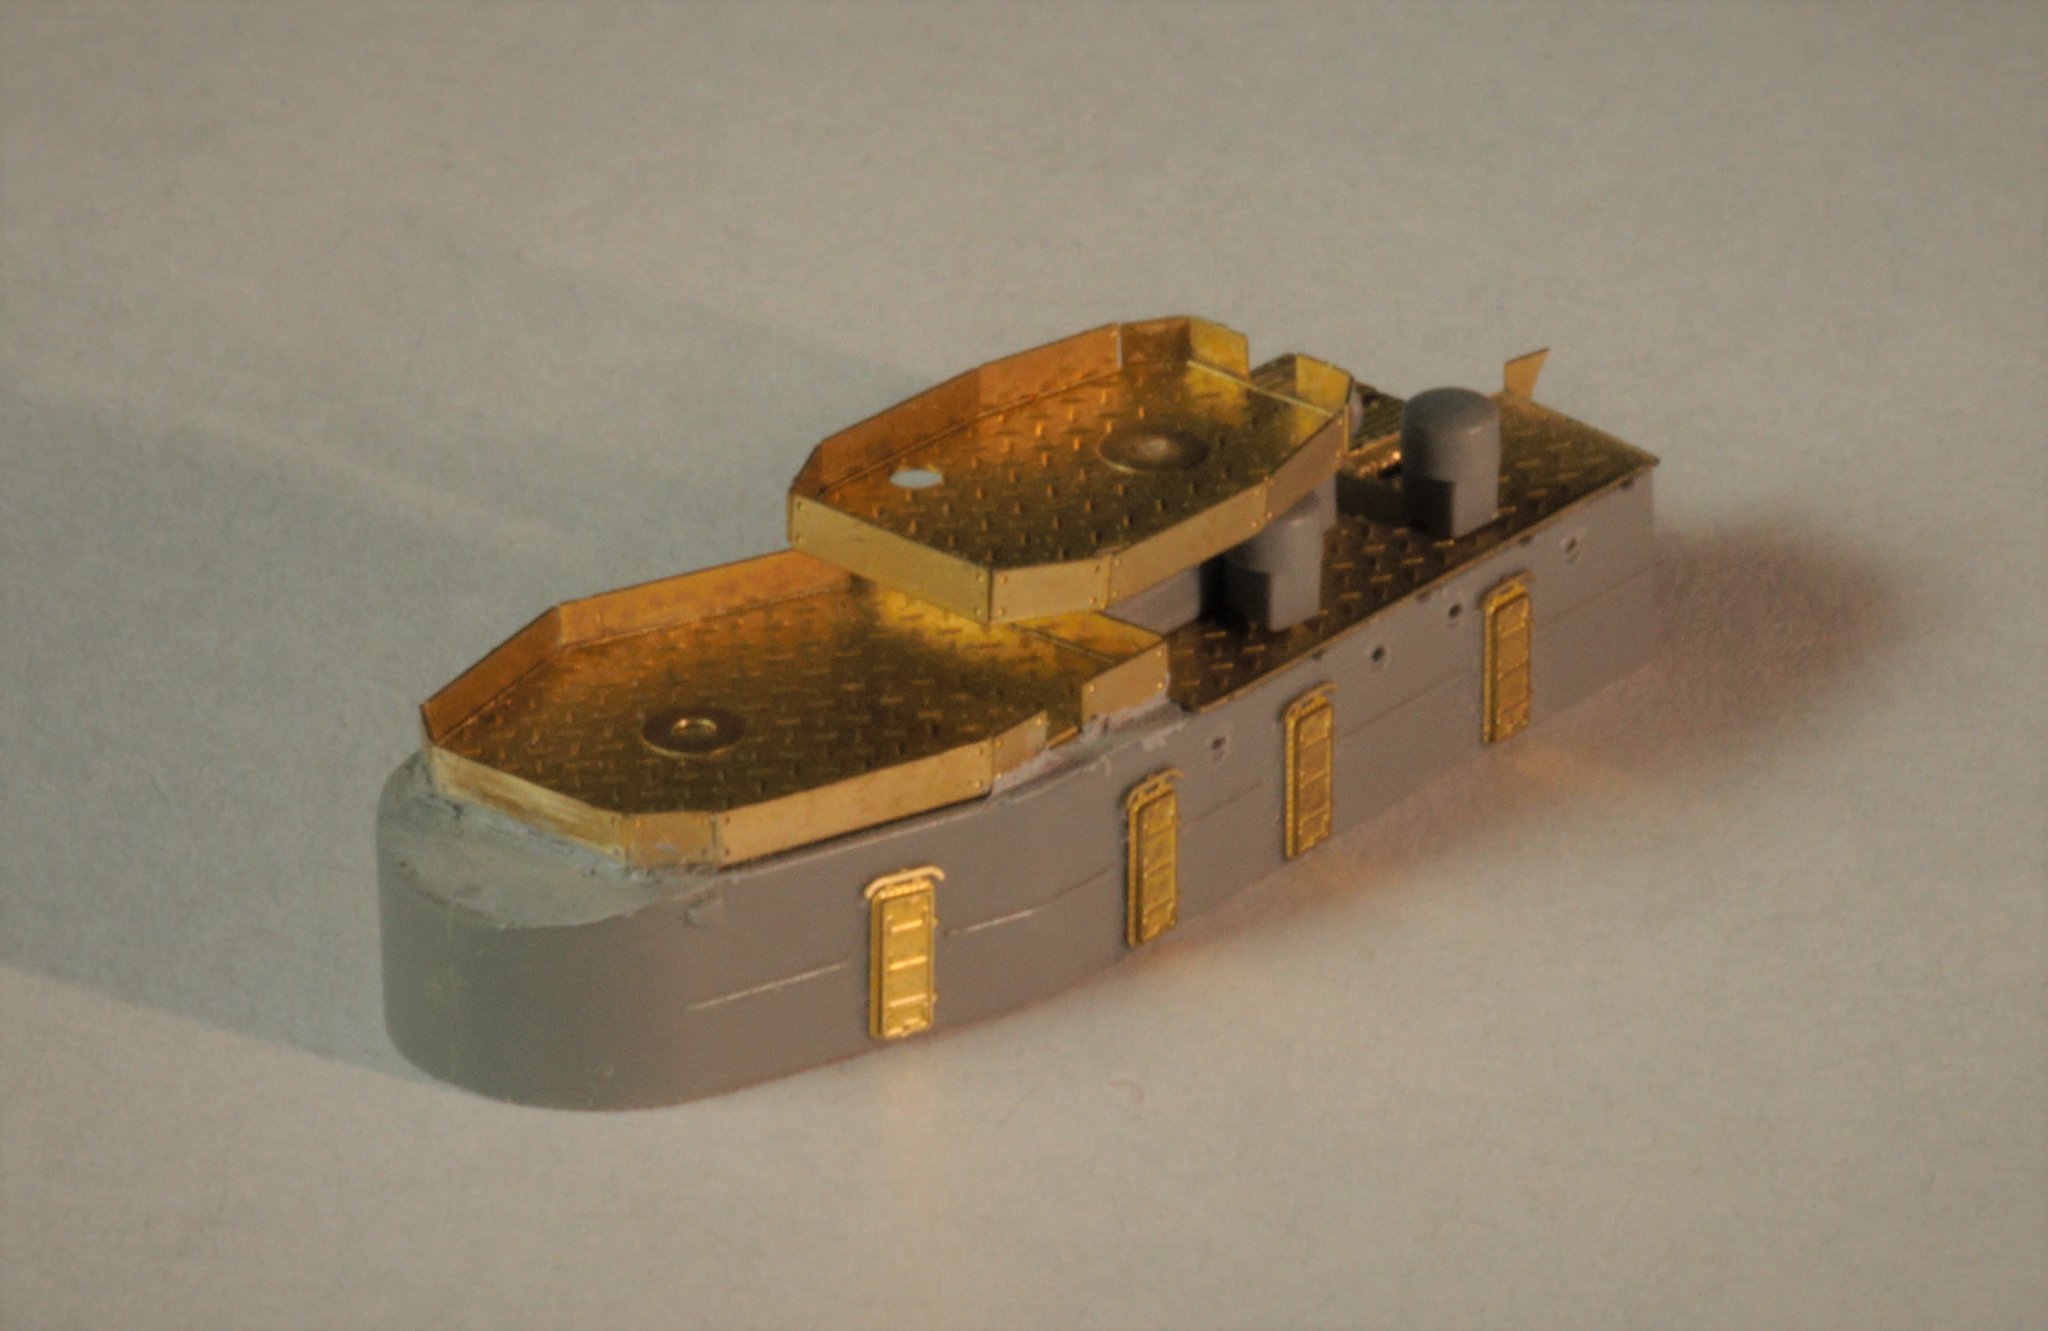
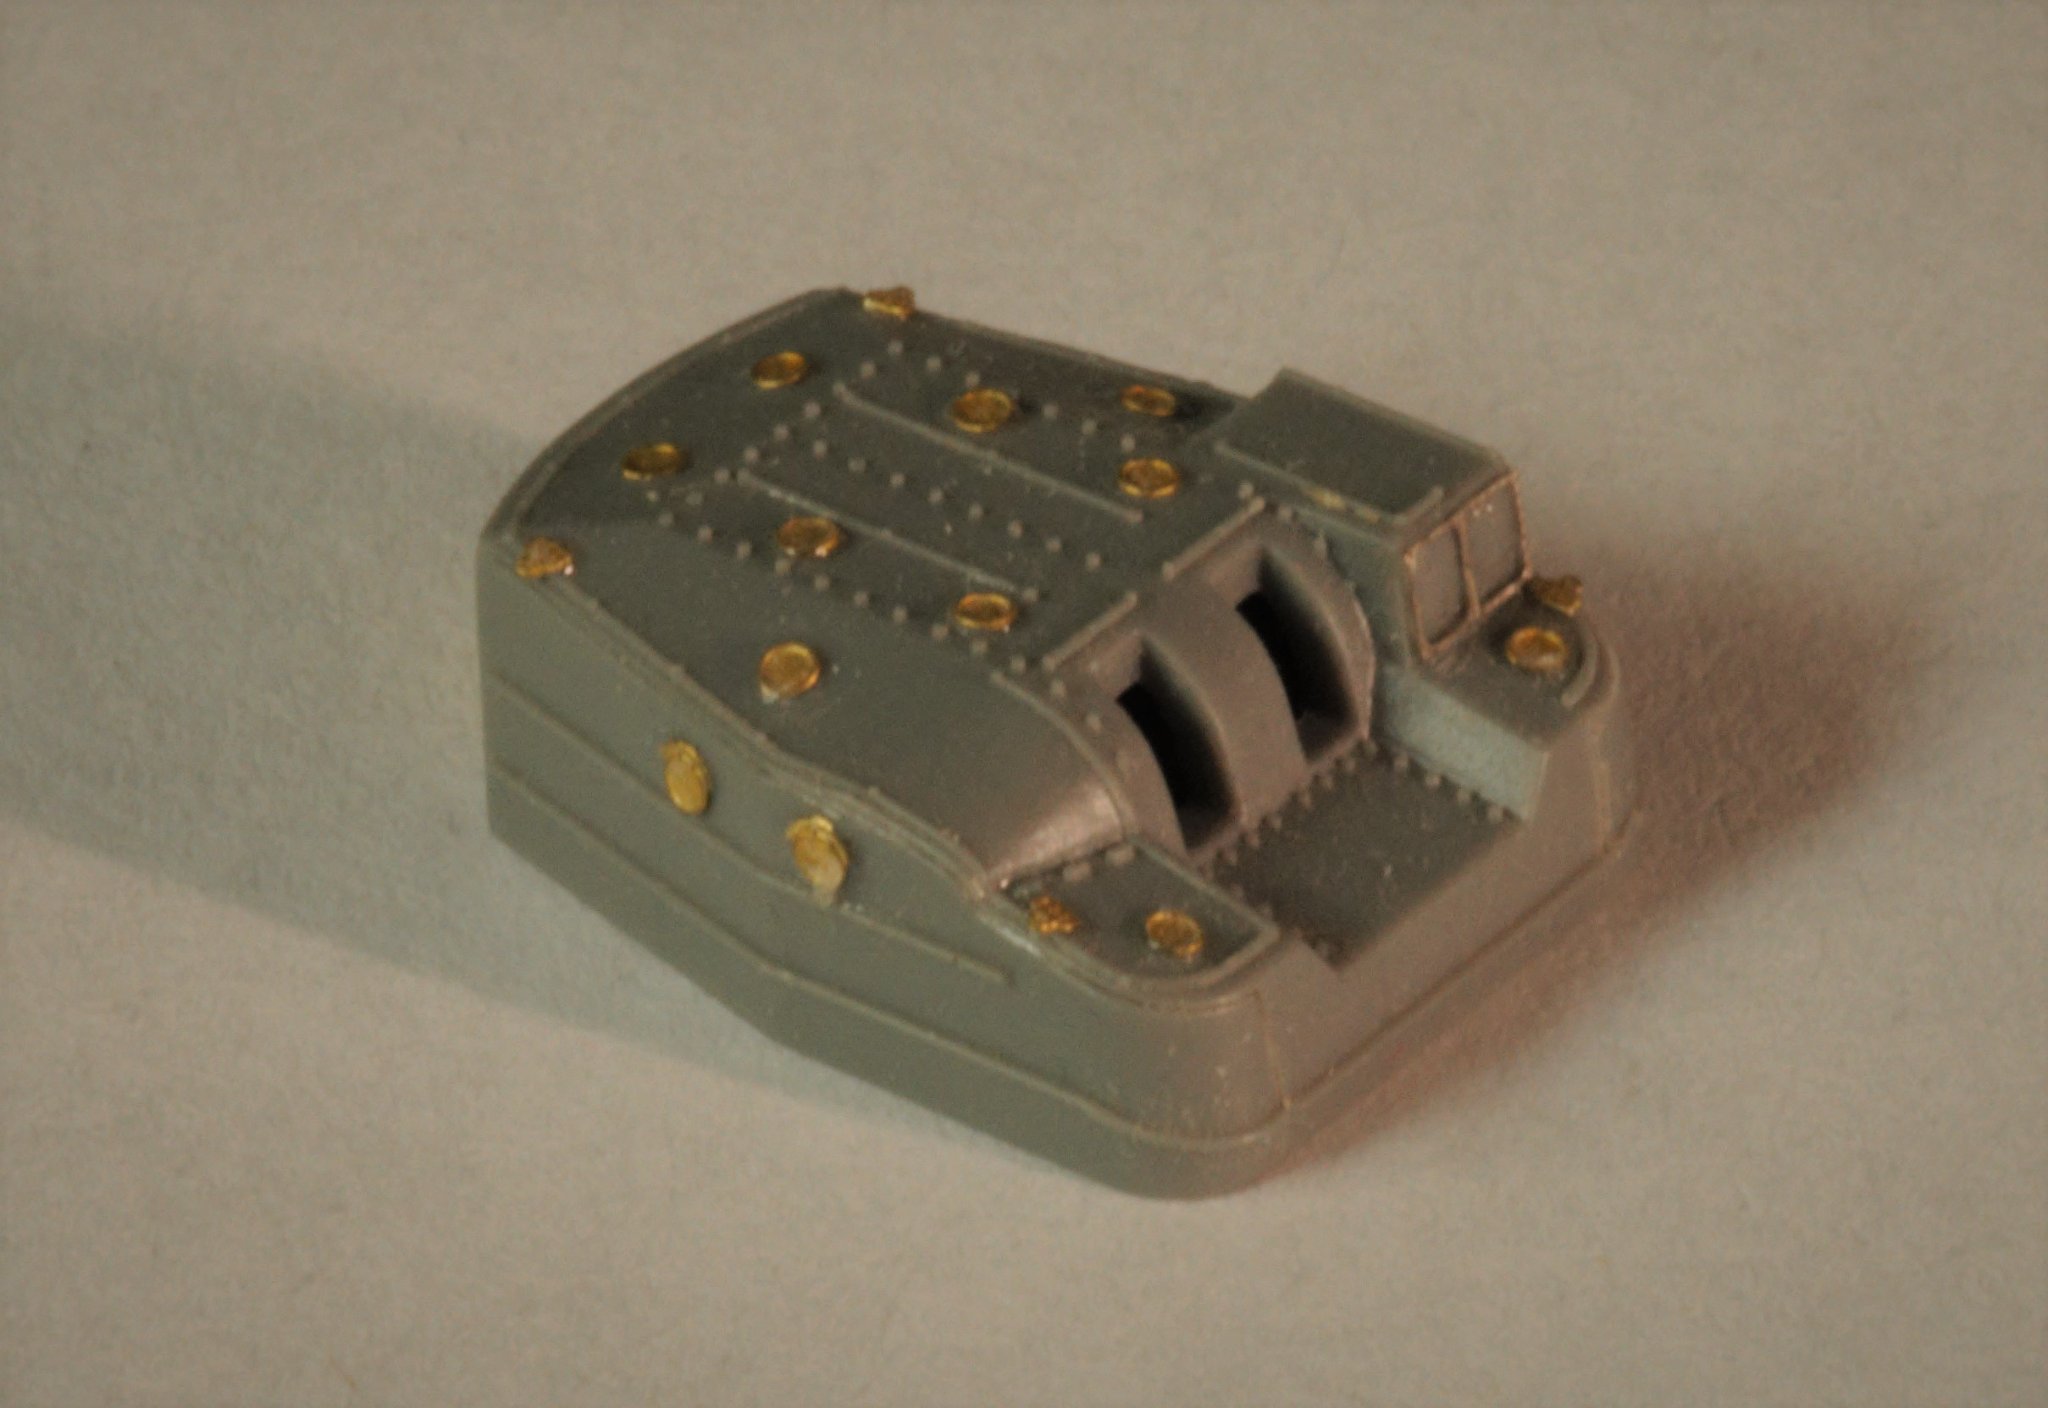
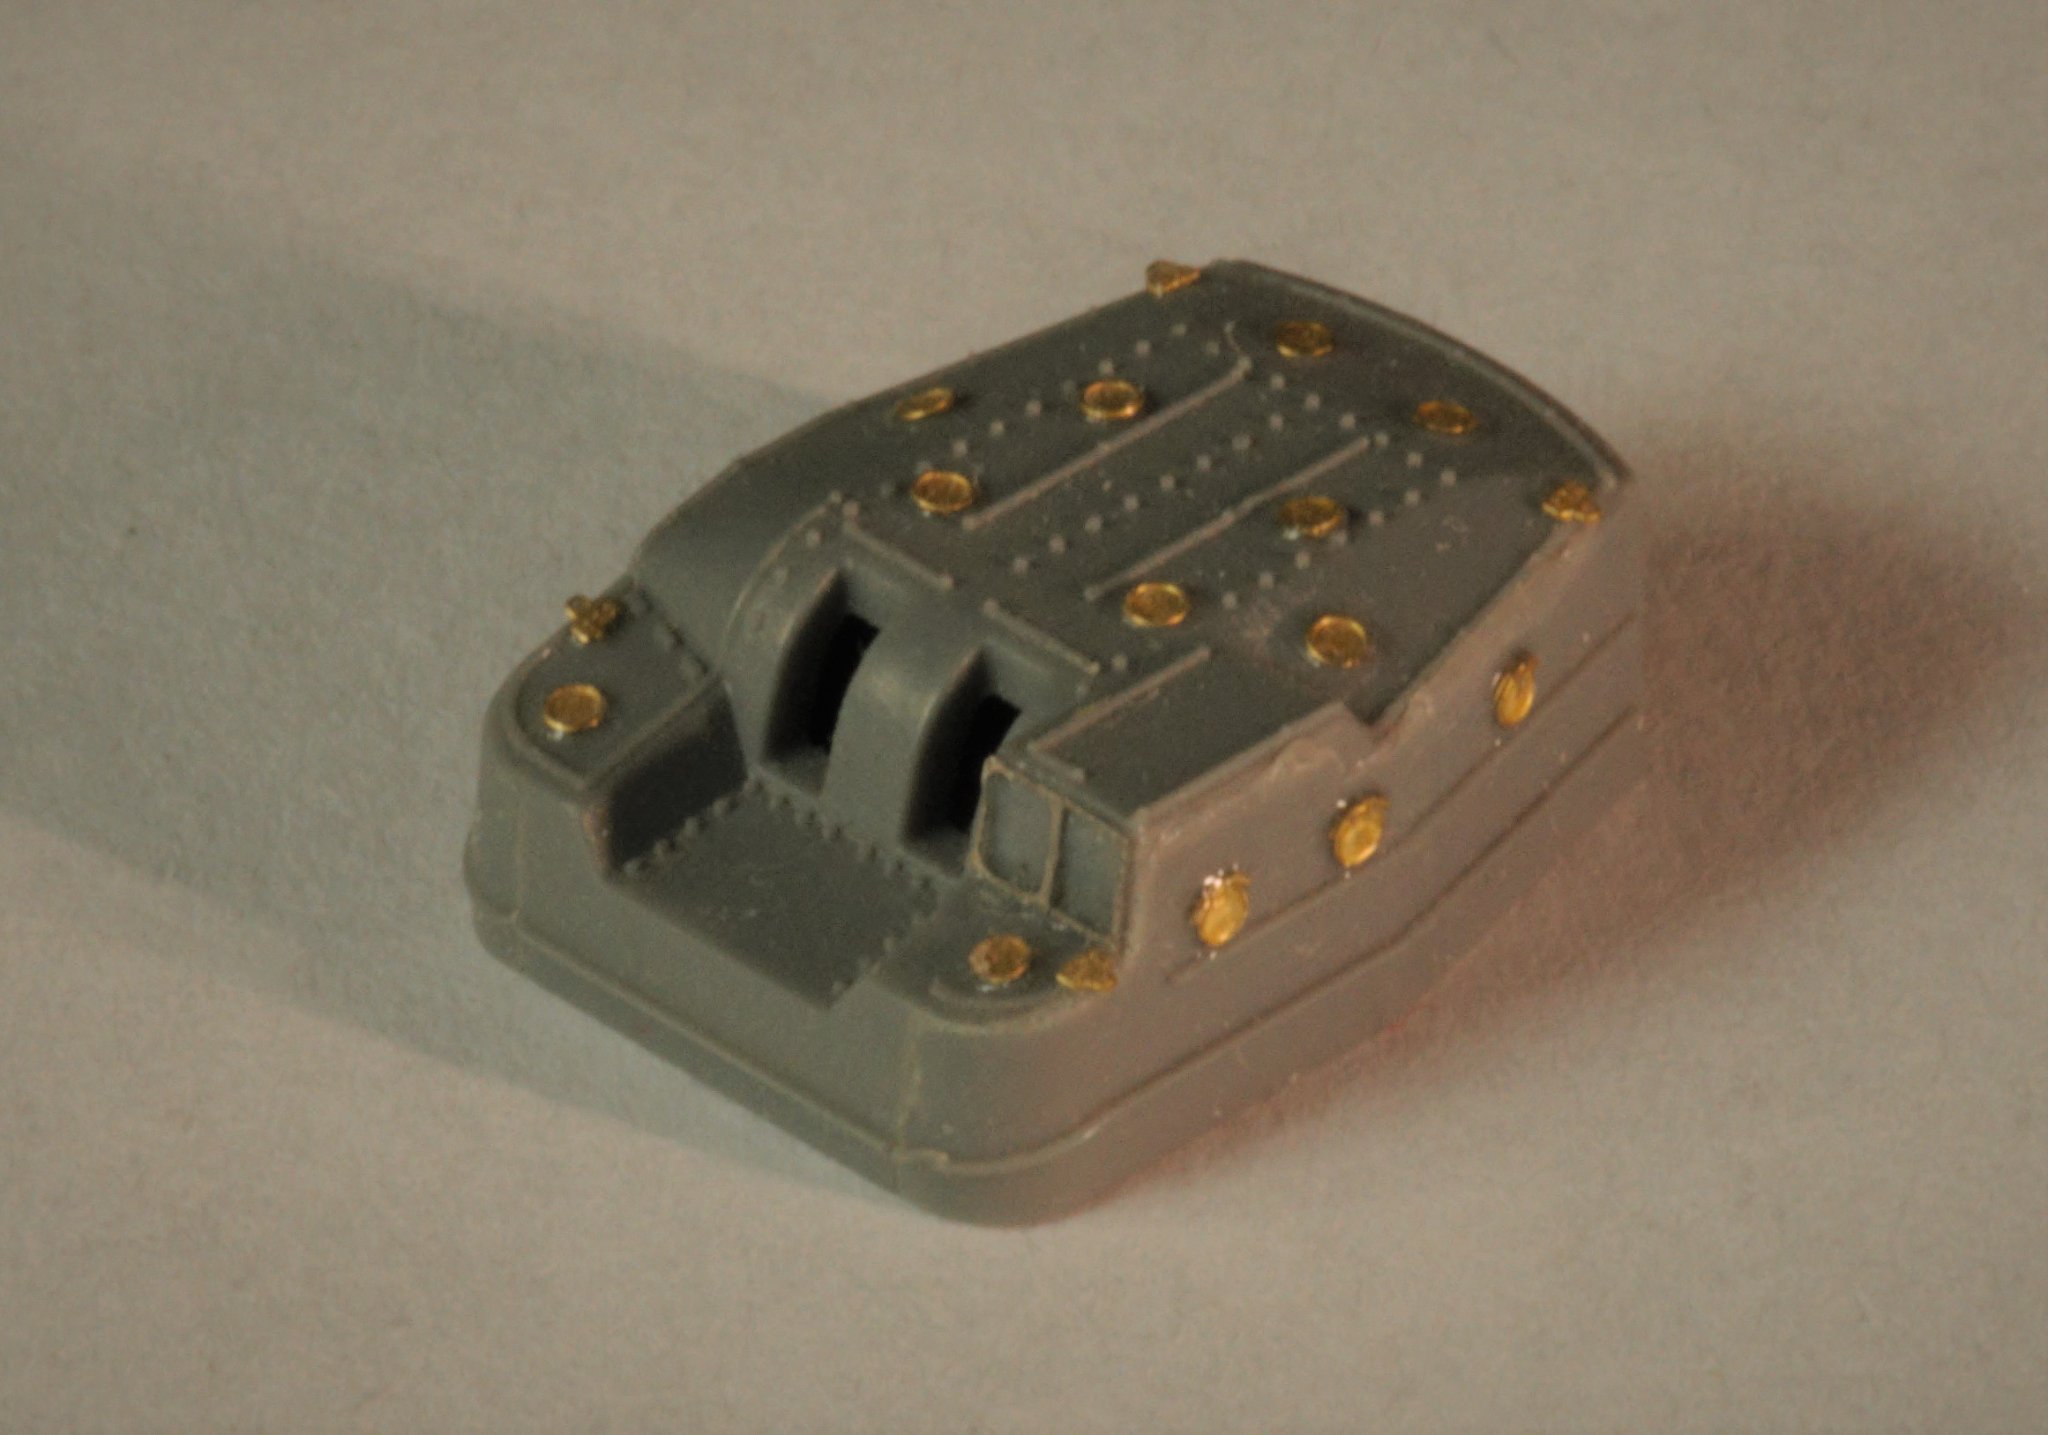
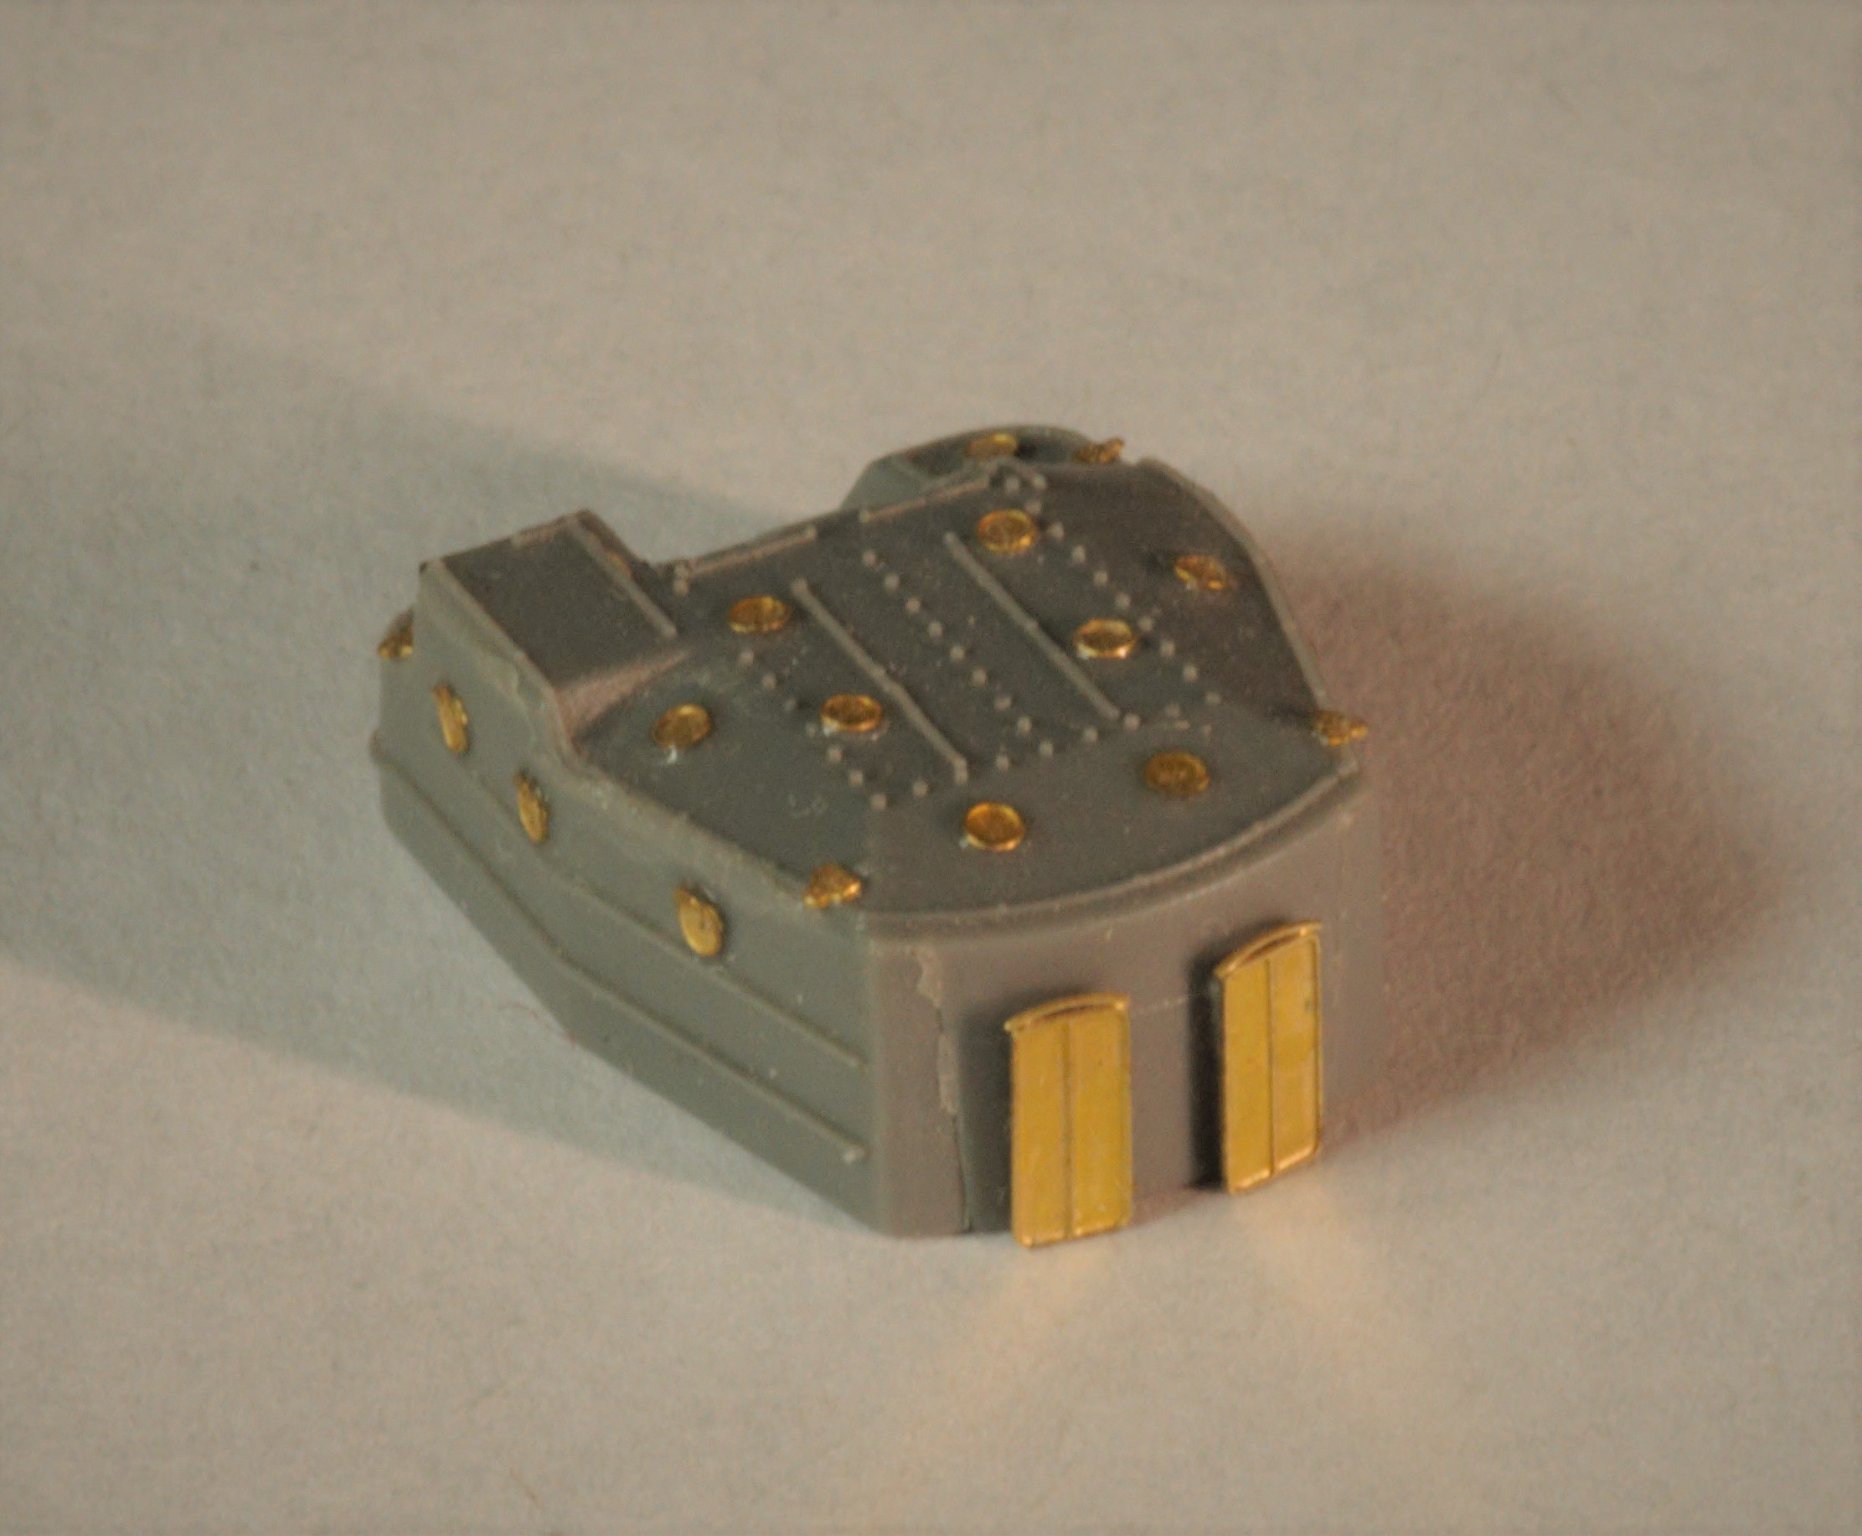
As I've said earlier I came across shortage of some details in Lion Roar kit - so I had to improvise and punch some round-shaped elements on roofs of torpedo launchers from self-adhesive aluminium foil. It turned out to be slightly bigger than needed - but that was the smallest available diameter in our punch set:

- mtaylor, cog, EricWilliamMarshall and 6 others
-
9
-
On 4/3/2021 at 6:24 PM, Landlubber Mike said:
Looking great!
On 4/4/2021 at 1:02 AM, cog said:That is some very crisp work, real sharp!
Thank you very much, gentlemen!
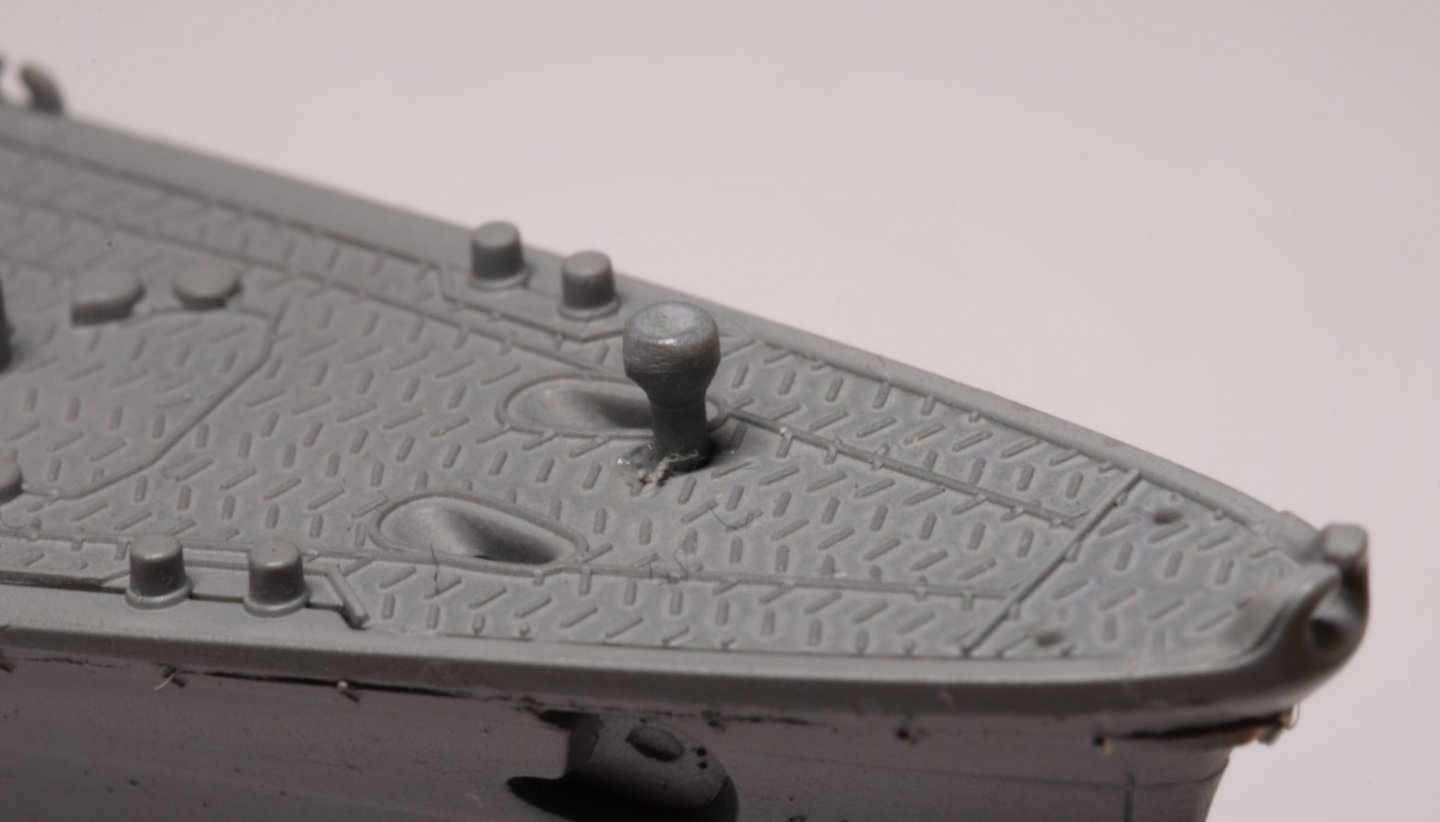
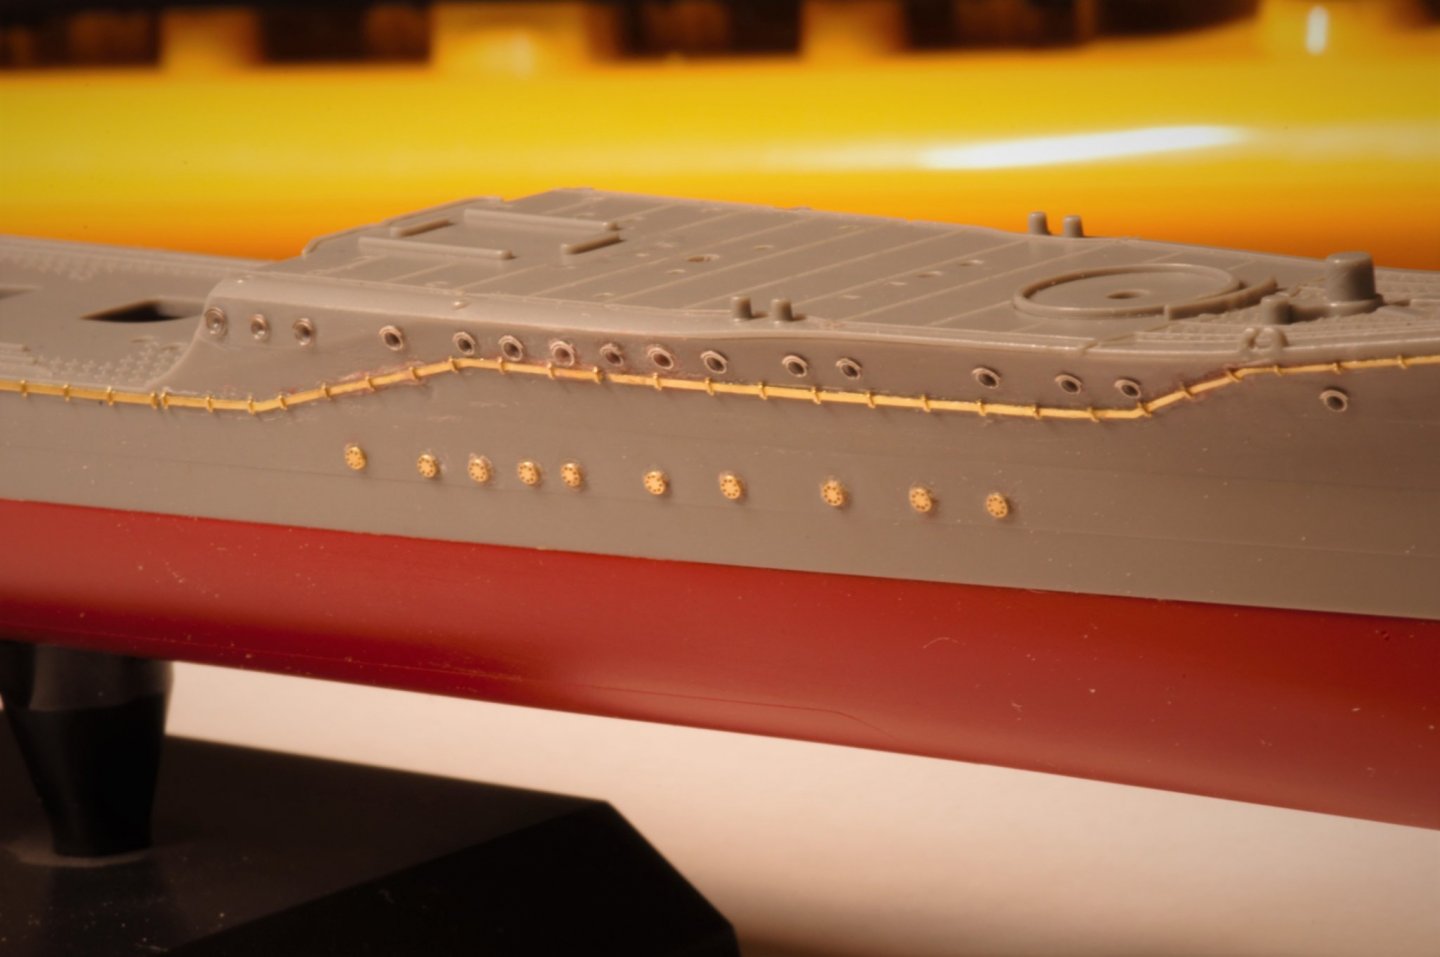
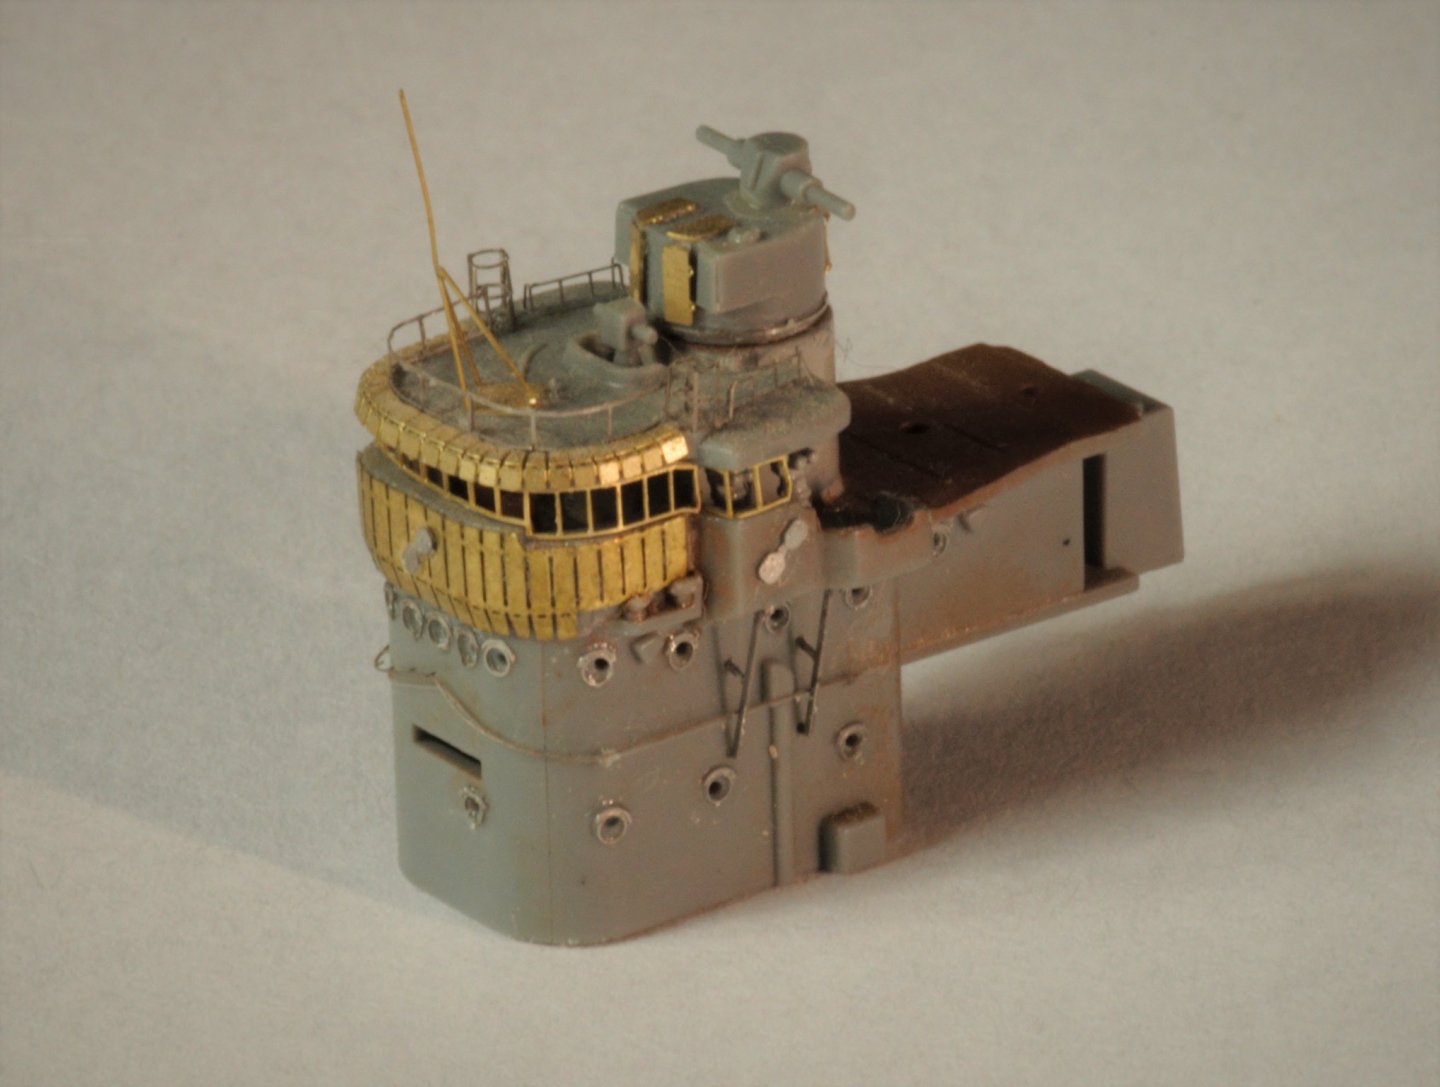
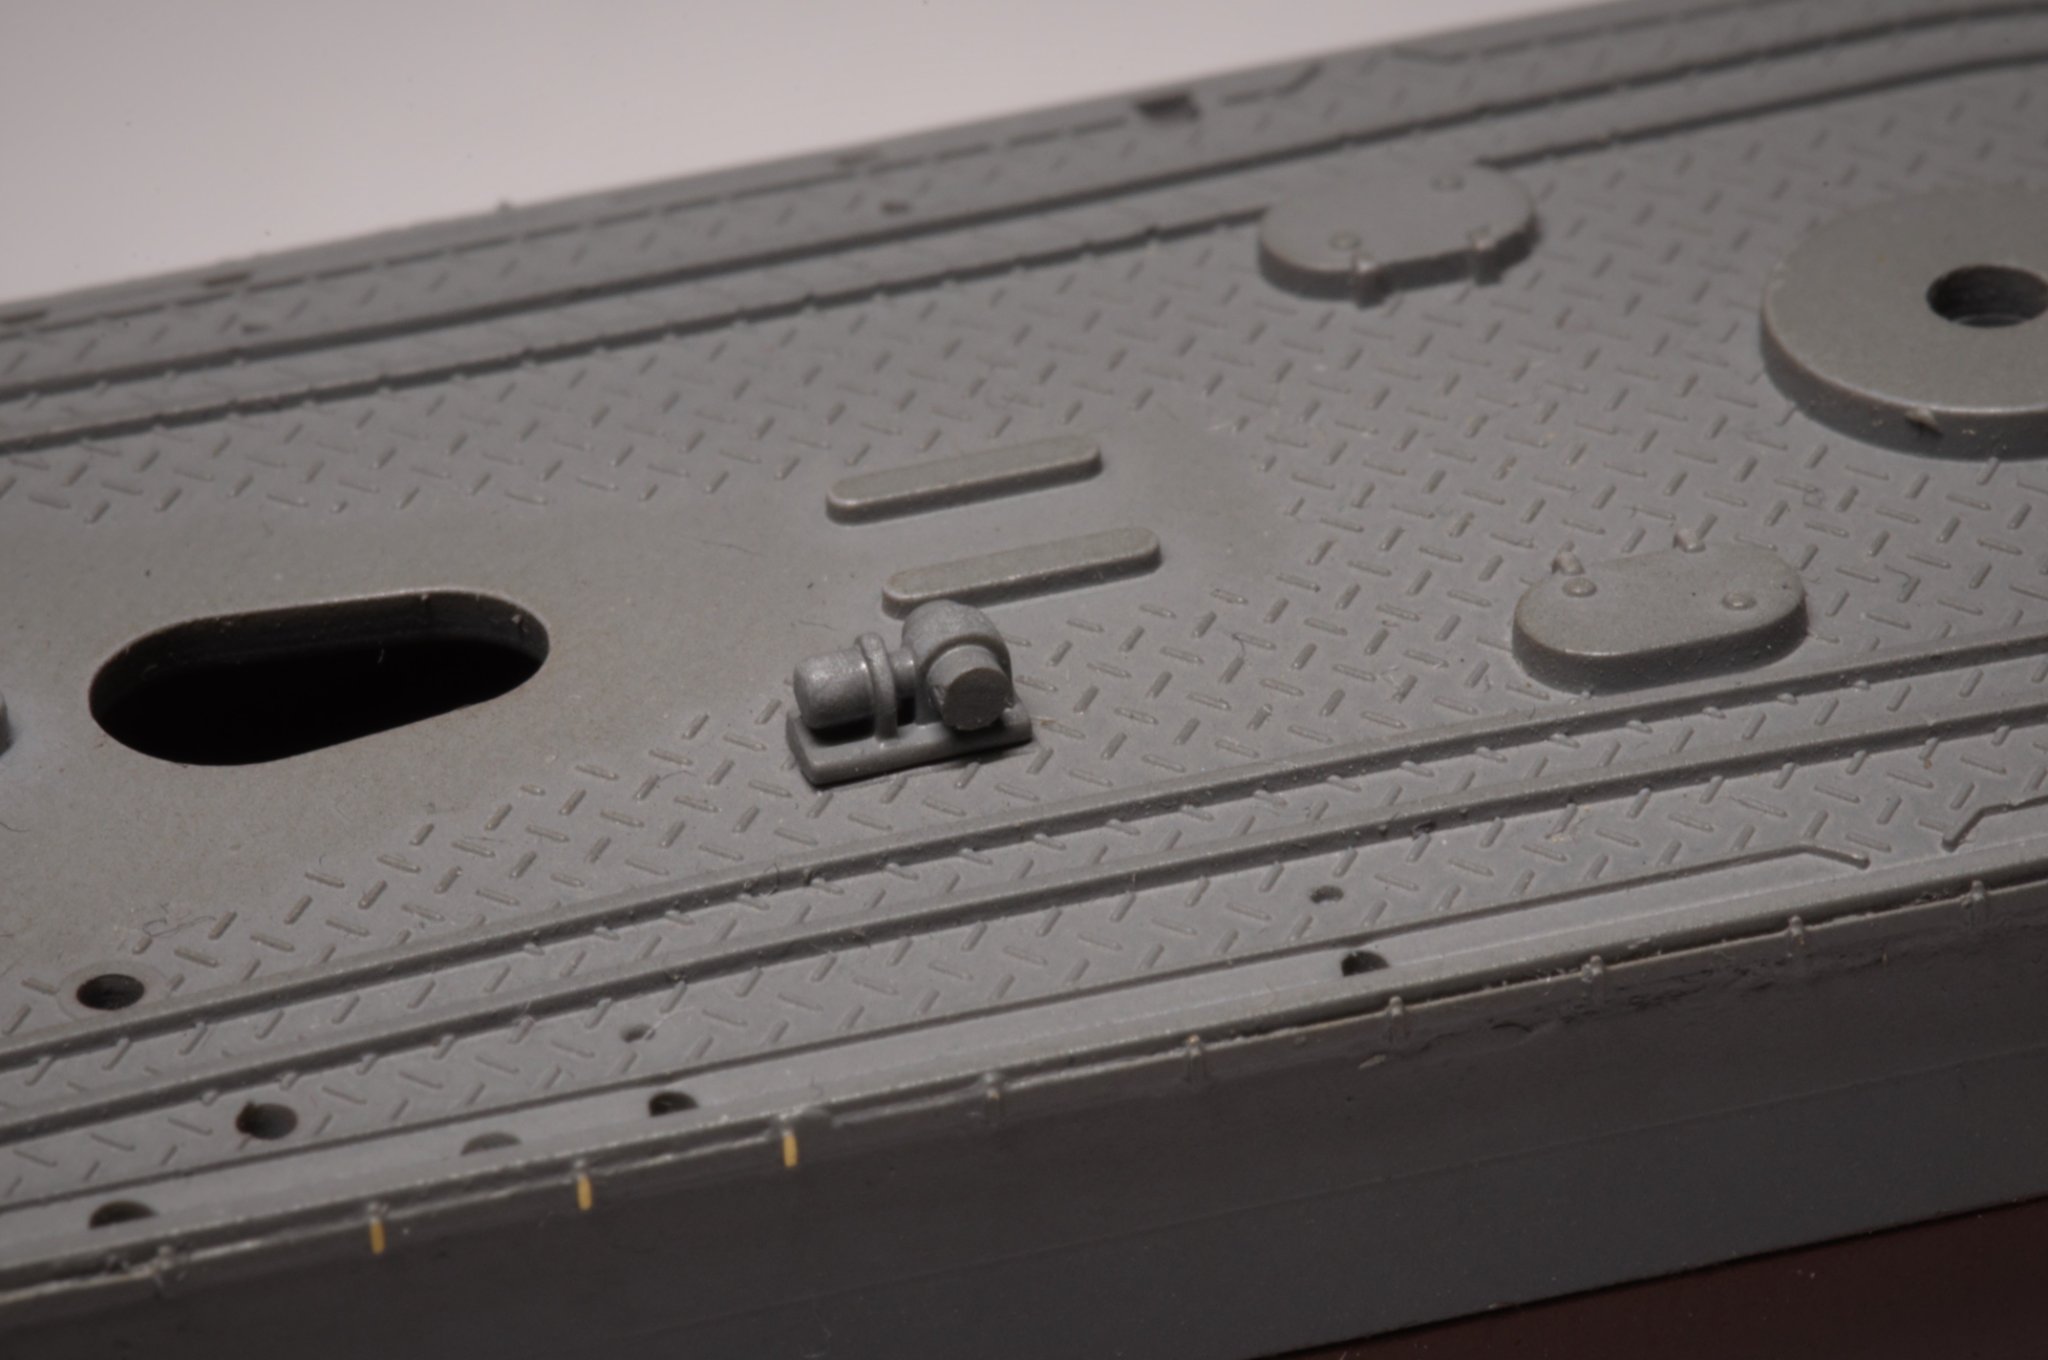
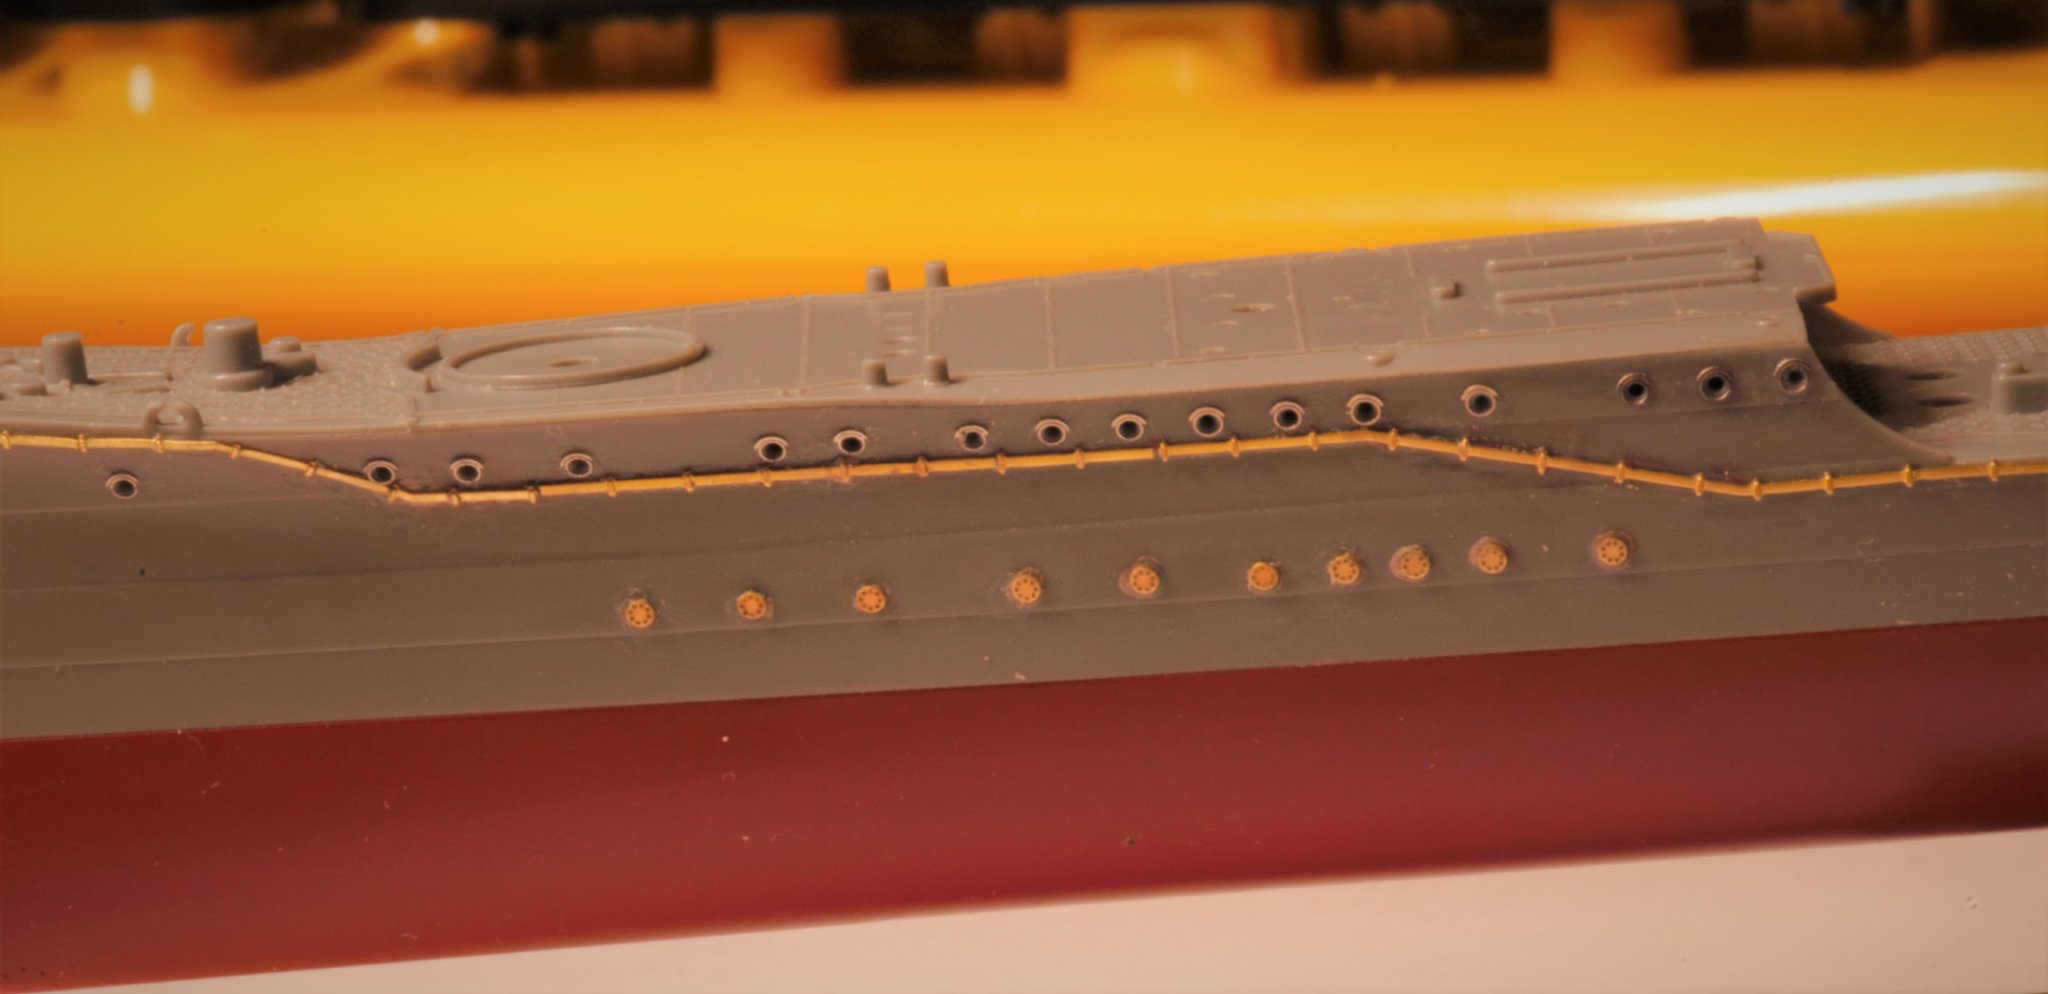
Meanwhile some portholes are finished ( actually those were all portholes that were left untouched until present moment):

-
Hello and welcome to MSW from Russia 🙂 I believe it's never too late to start a log - just show current status of your modelling project. It would be interesting for many of us to see pics of your build whatever stage it is on.
Best Regards and happy modelling.
-
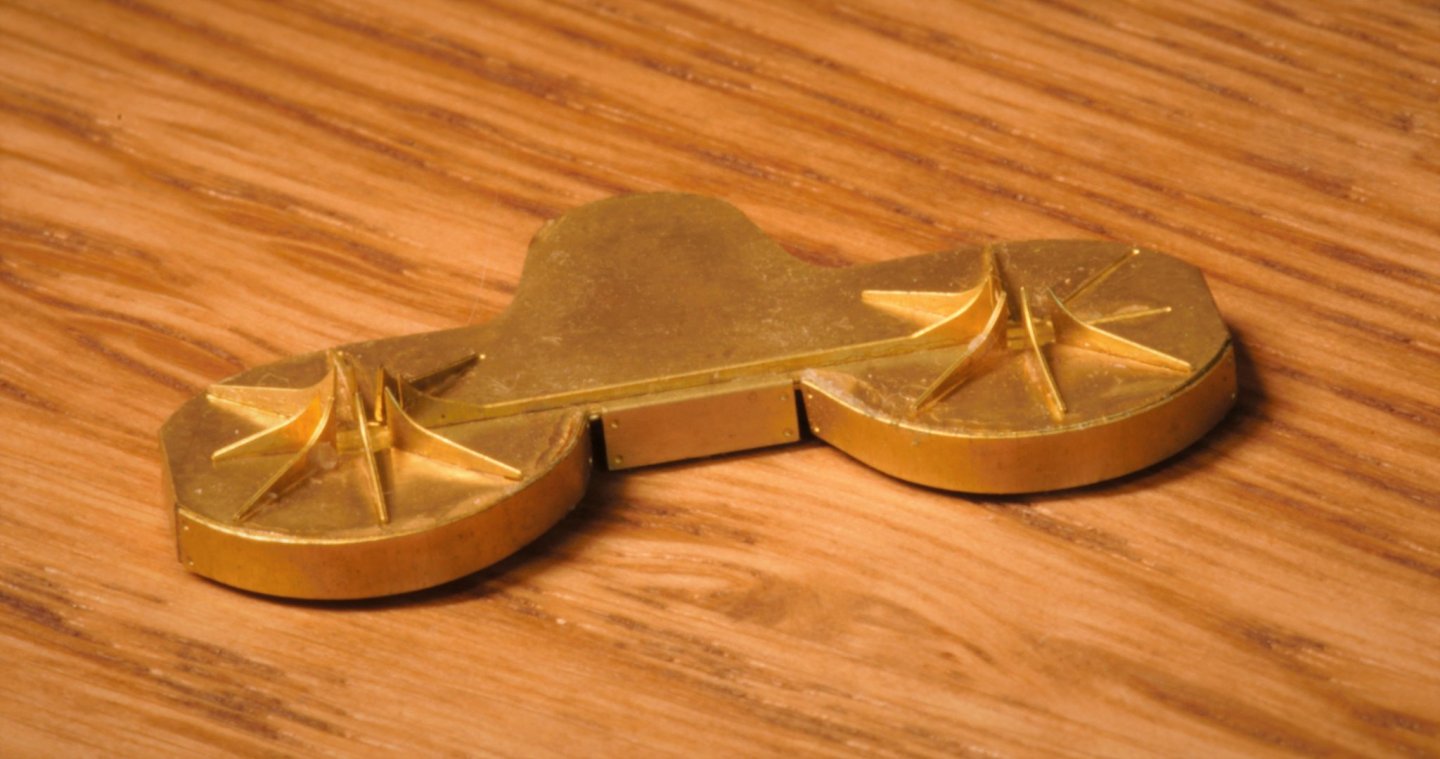
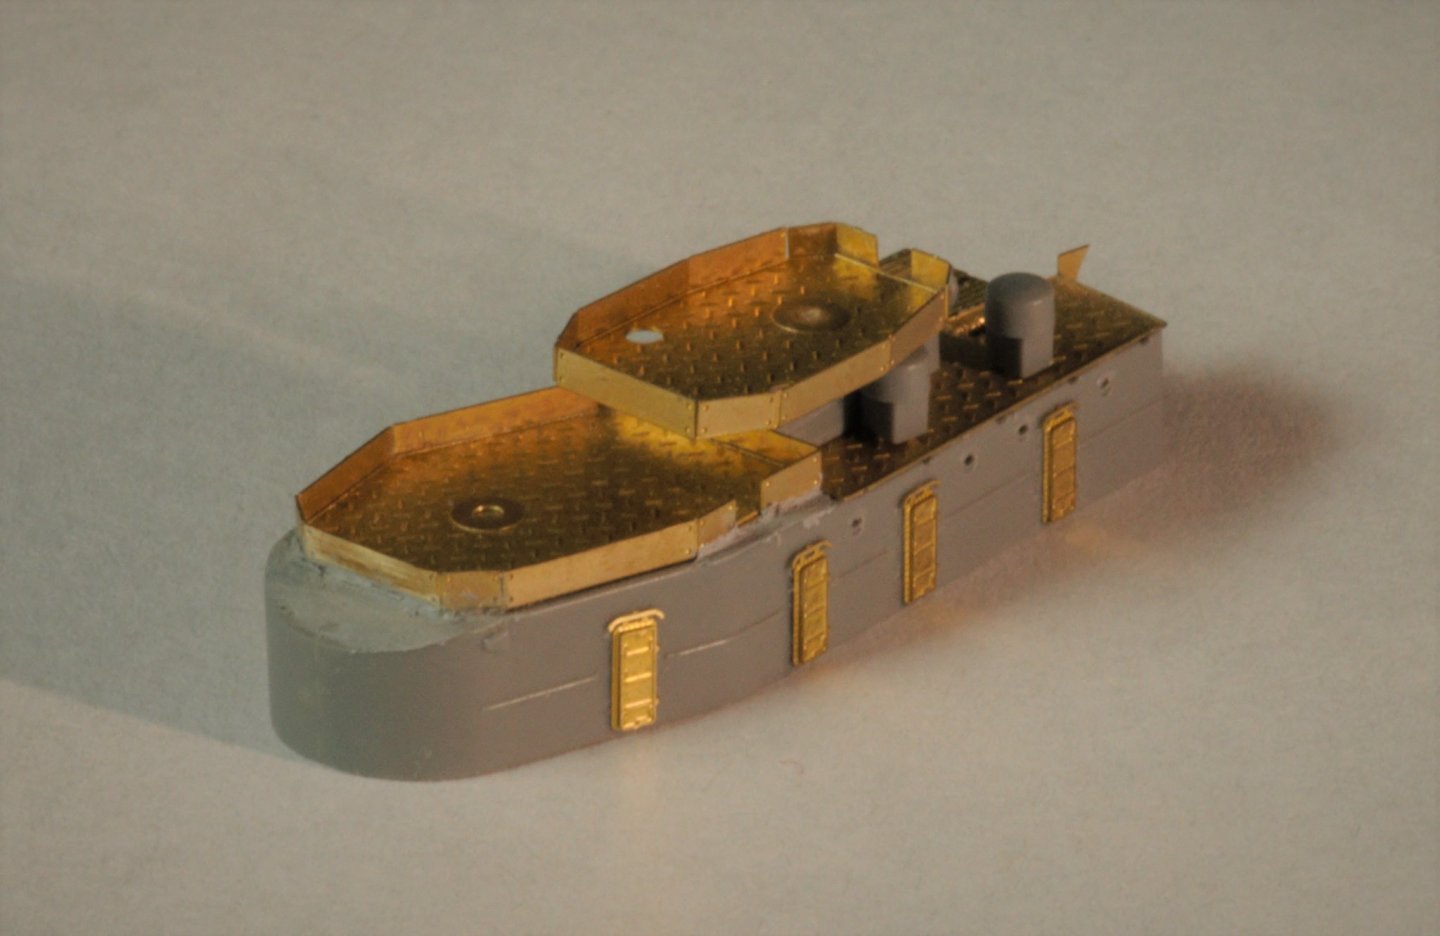
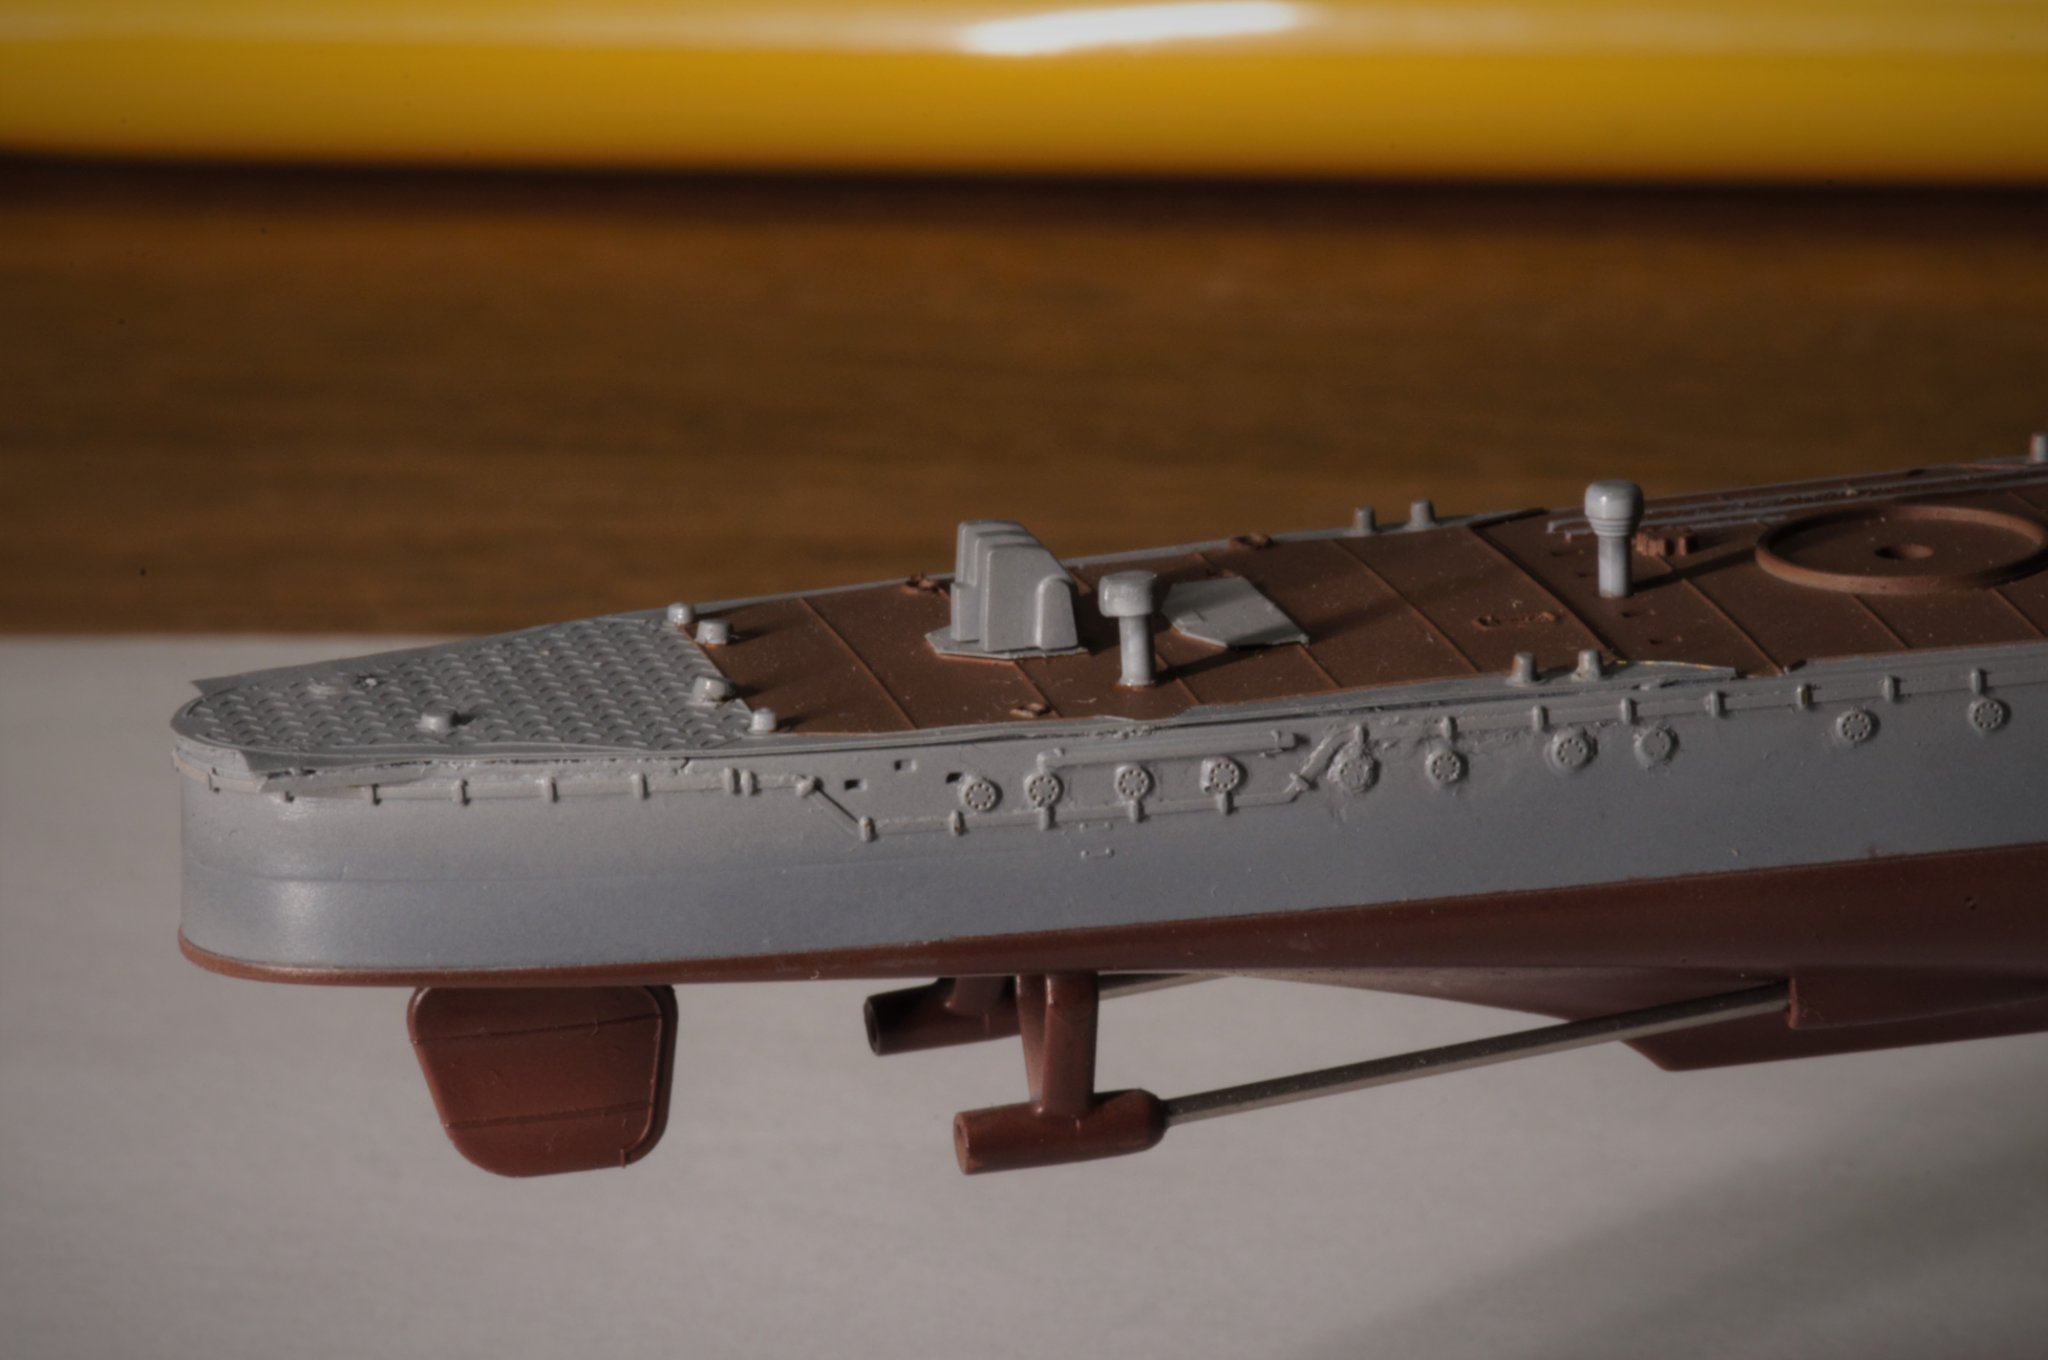
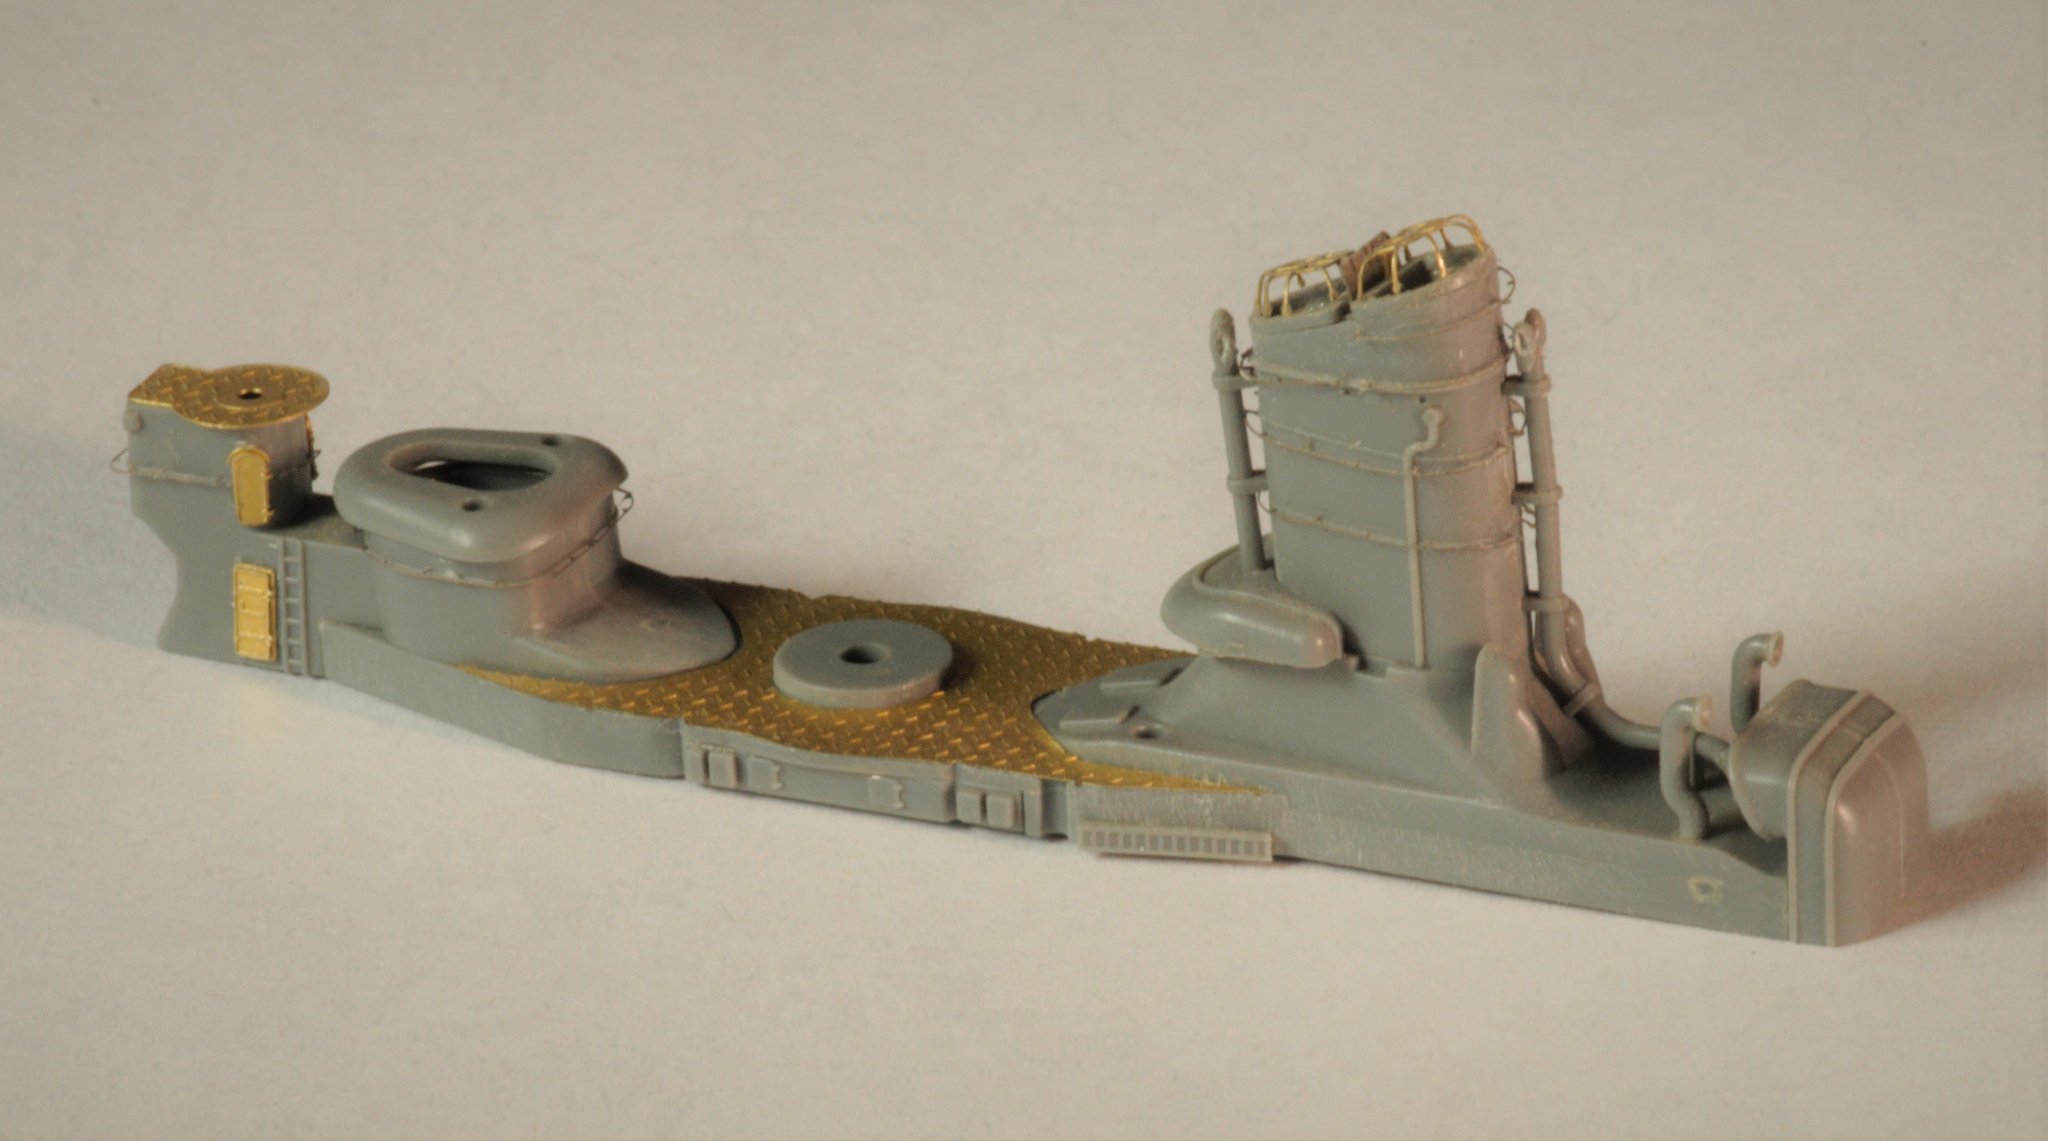
Some more pics with other sub-assemblies including hull:


- EricWilliamMarshall, cog, reklein and 12 others
-
15
-
Ladies and Gentlemen, to rescue please 😉
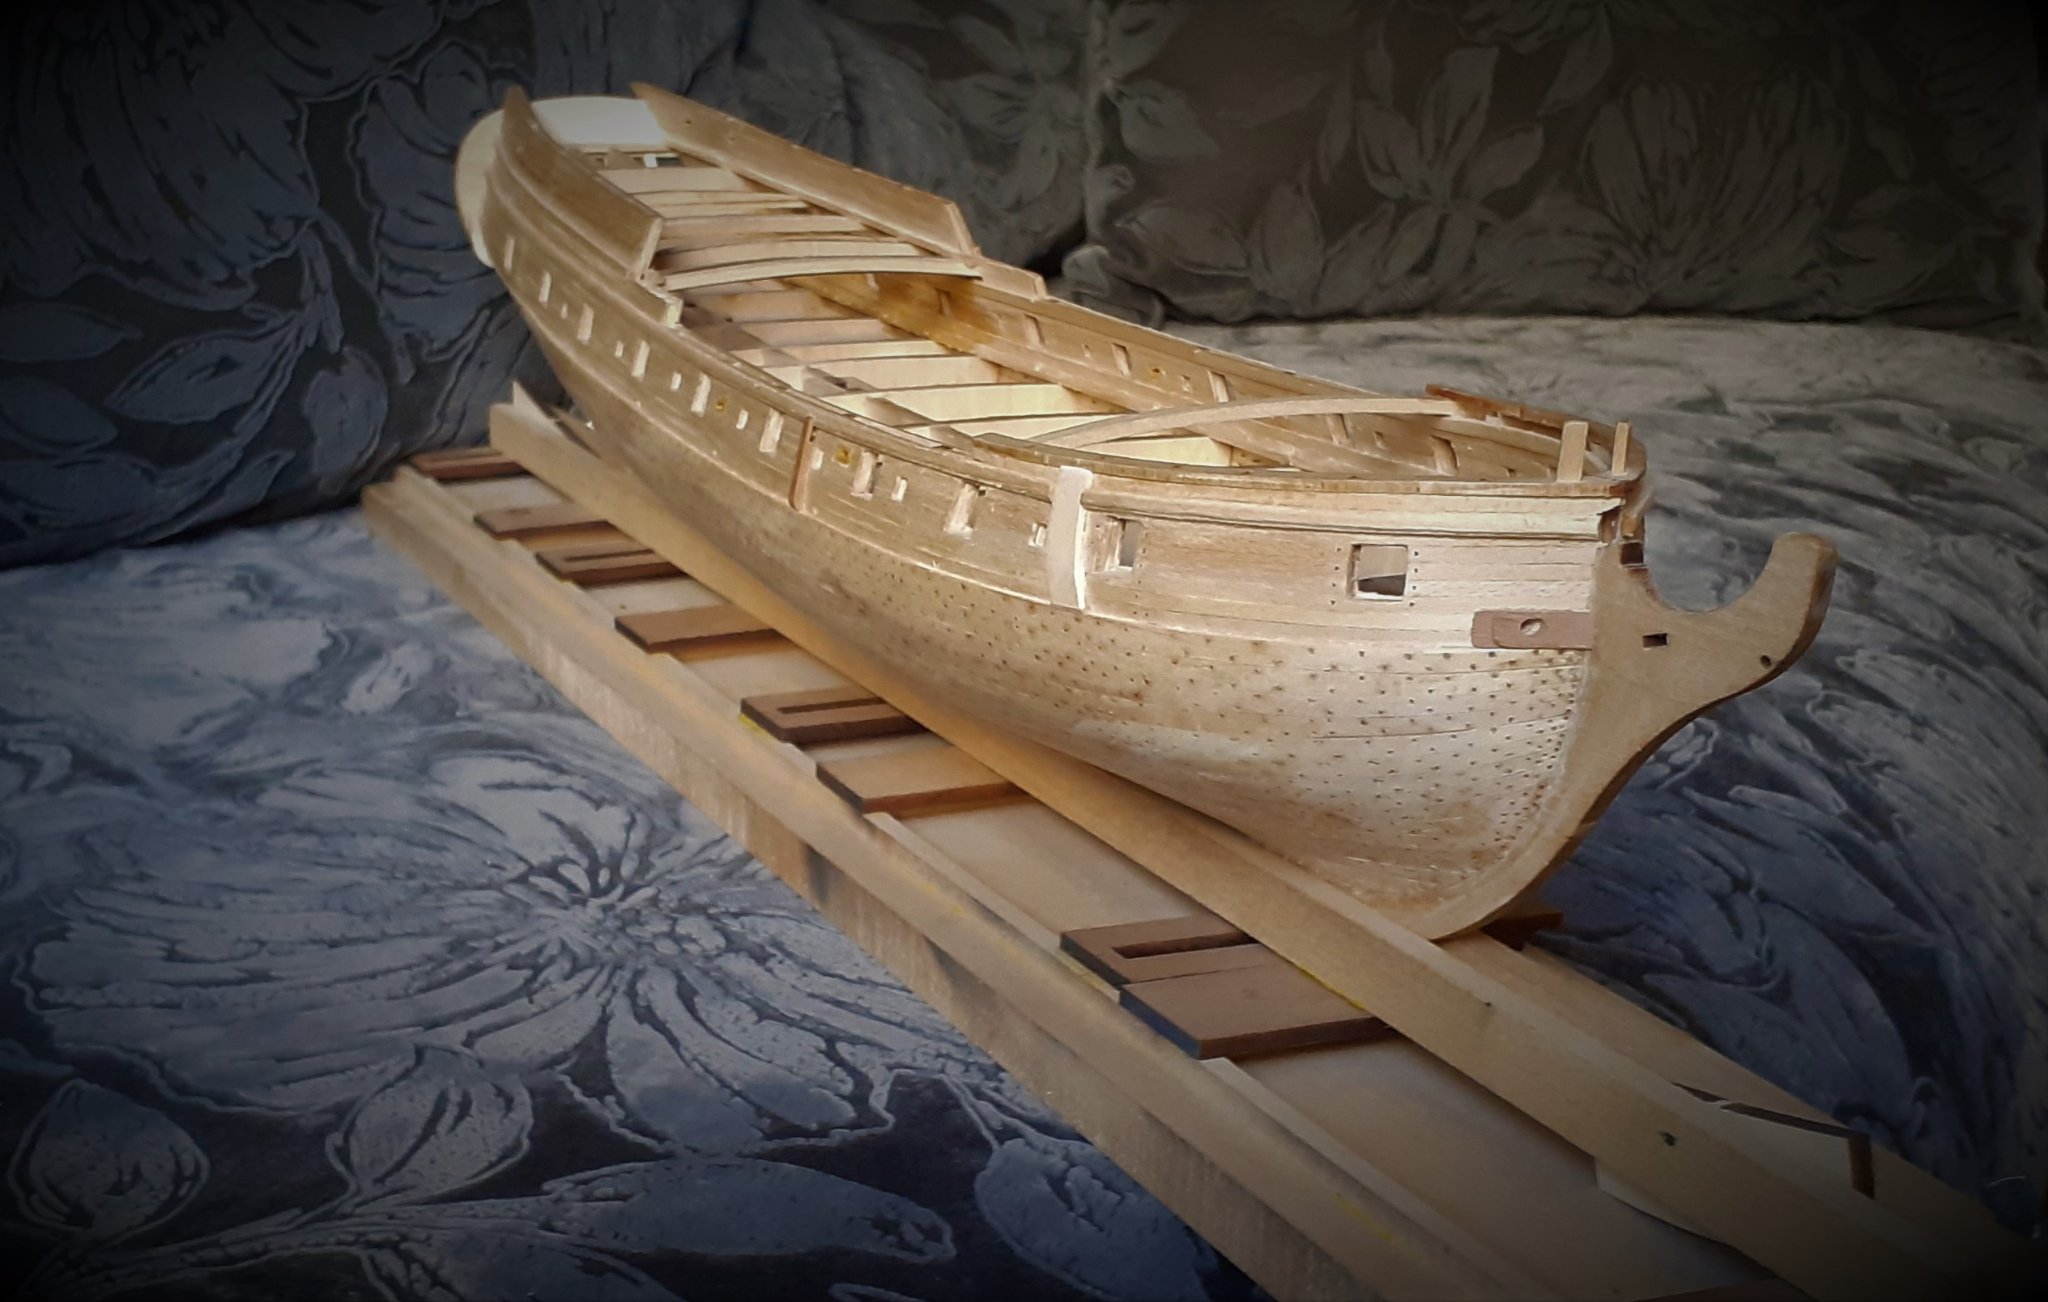
I beg you pardon my ignorance if I ask some obvious thing: Looking through period ships builds I've noticed that most of them have those fancy elements on keel area - horseshoe fore and swallow-tail at the aft. They are very attactive details I must admit and I'd like to introduce them on my model. However I've noticed that Model Shipways drawings lack either horseshoe and swallow-tail. What do you suggest - just do as I like, or would it be completely improper taking into account period and country ? (I've read somewhere that the shipbuilder who built original Rattlesnake was a self-taught man so he could introduce different approaches in his projects instead of following but one school either French or English )
Thank you
Best Regards and happy modelling
-
38 minutes ago, Landlubber Mike said:
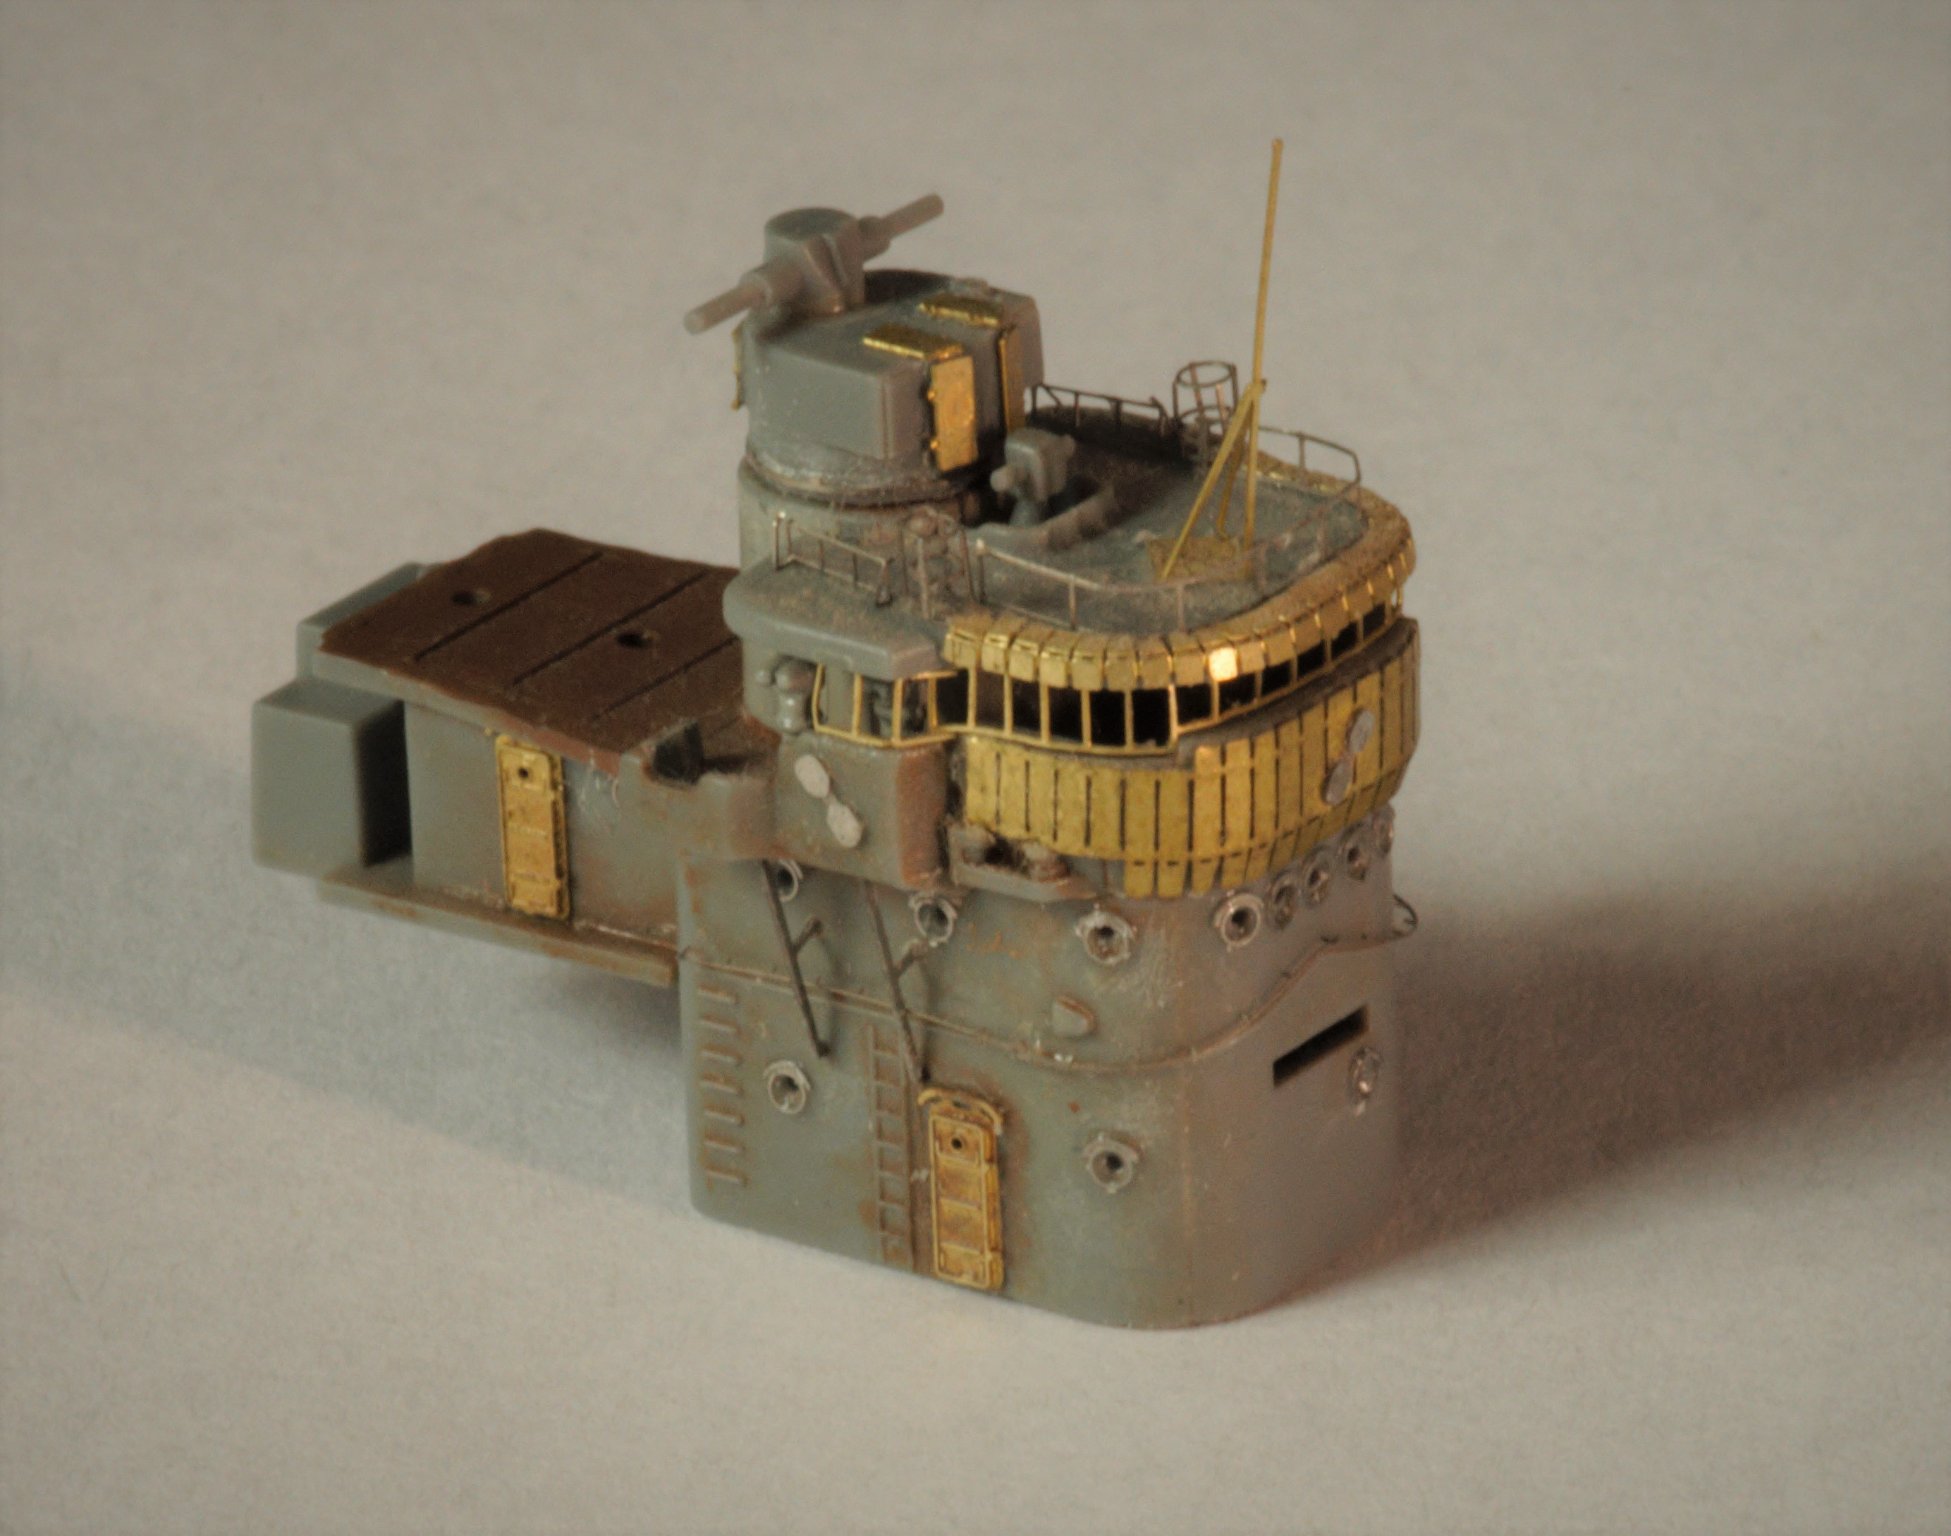
Looks really great! I have the same kit but with the Infini upgrade set. I really like the PE in your sets around the bridge windows though - the PE really brings out the detail! I just looked at the Infini set and it doesn't look like there is any PE that goes there.

Around the time I was buying the kit and extras there wasn't Infini set on the market if I remember correctly. I wonder if Lion Roar is still around ? By 2010-2011 it was the best complex add-on (except some parts in their set were short of supply and 25mm are flat PE parts) I haven't made any significant additions to my 1/350 stash since maybe 2015-2016 and while looking through bulids that are started around recent couple of years I see lot of brands that are totally unknown to me: Infini, Big Blue Boy to name some..
-
Thank you, Alan! Your Syren looks great too, well - looked until You've decided to re-plank her 🙂 That's quite a decision I dare say!
Have a pleasant reading with Hara-san's book!
Best Regards and happy modelling
- Old Collingwood, Canute, Egilman and 2 others
-
5
-
11 minutes ago, cog said:
Good to see another plastic & PE modeller. I love those Japanese ships
Thank you!
-
15 hours ago, Canute said:
Nice work with the PE.
Thank You very much - I try to do my best, however I'm no good at removing glue buildups )
1 hour ago, RGL said:Welcome!
Thanks, RGL - I find inspiration in your works!
1 hour ago, Mic.fr said:Already 10 years, how many more... ? 😉
Well, my pace is quite hasteless : good modelling projects are like wine - better when aged😉 Now I see things my quality control in 2011 considered as "passable" : some seams here and there, some molding joints, etc. If I was less patient and finished this little model then - it would suffer form those imperfections. Also by 2011 I haven't read Tameichi Hara's "Japanese Destroyer Commander" - which is motivating reading for a modeller I must admit 🙂
Best Regards and happy modelling
-
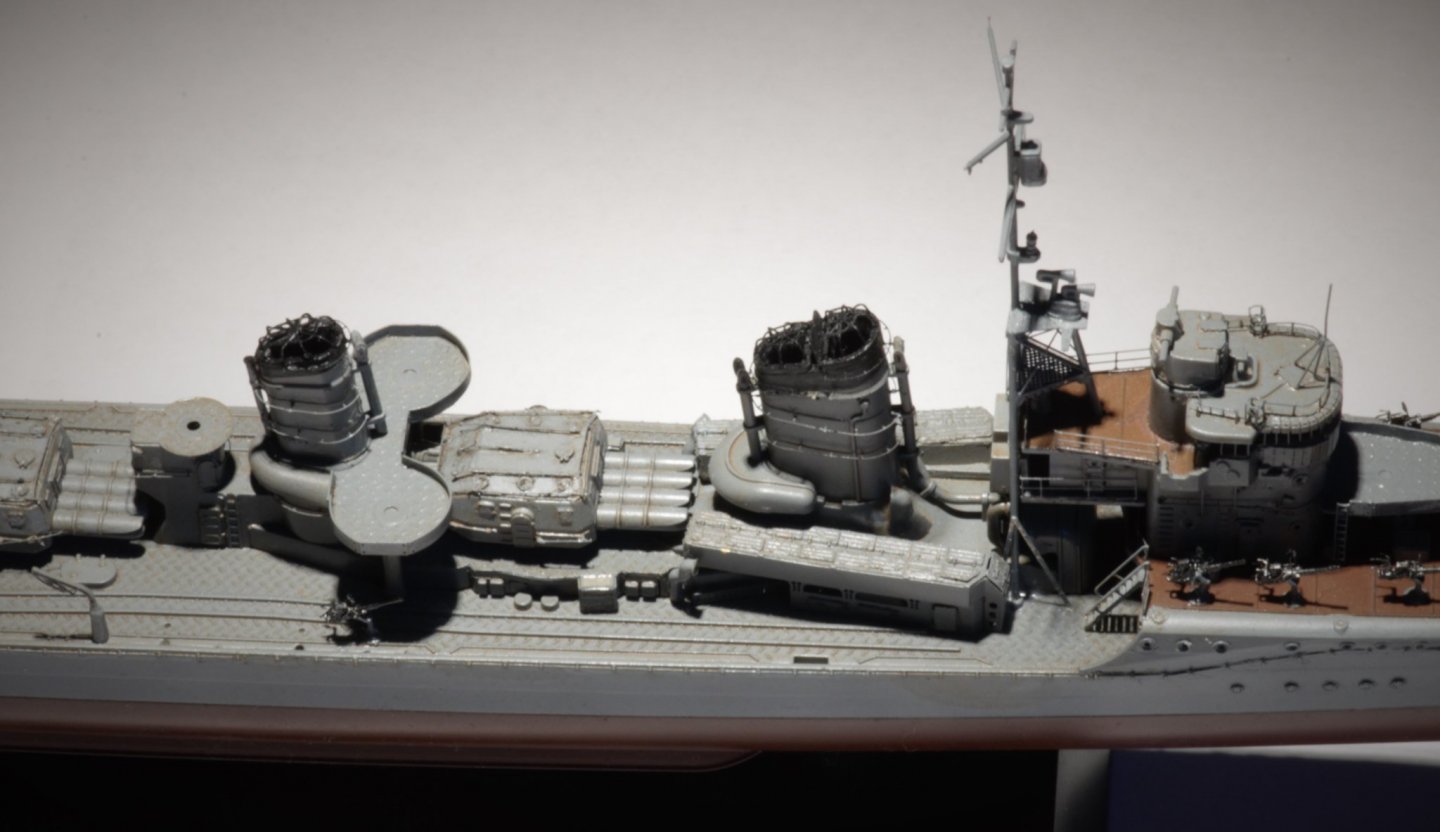
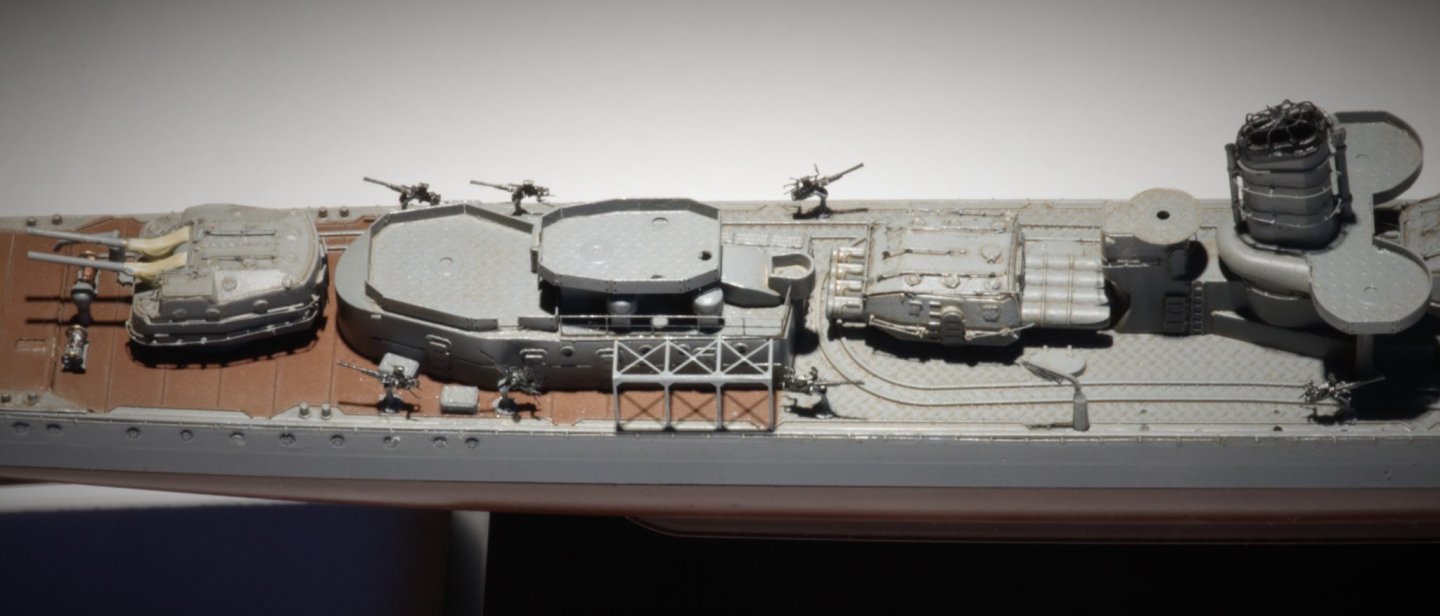
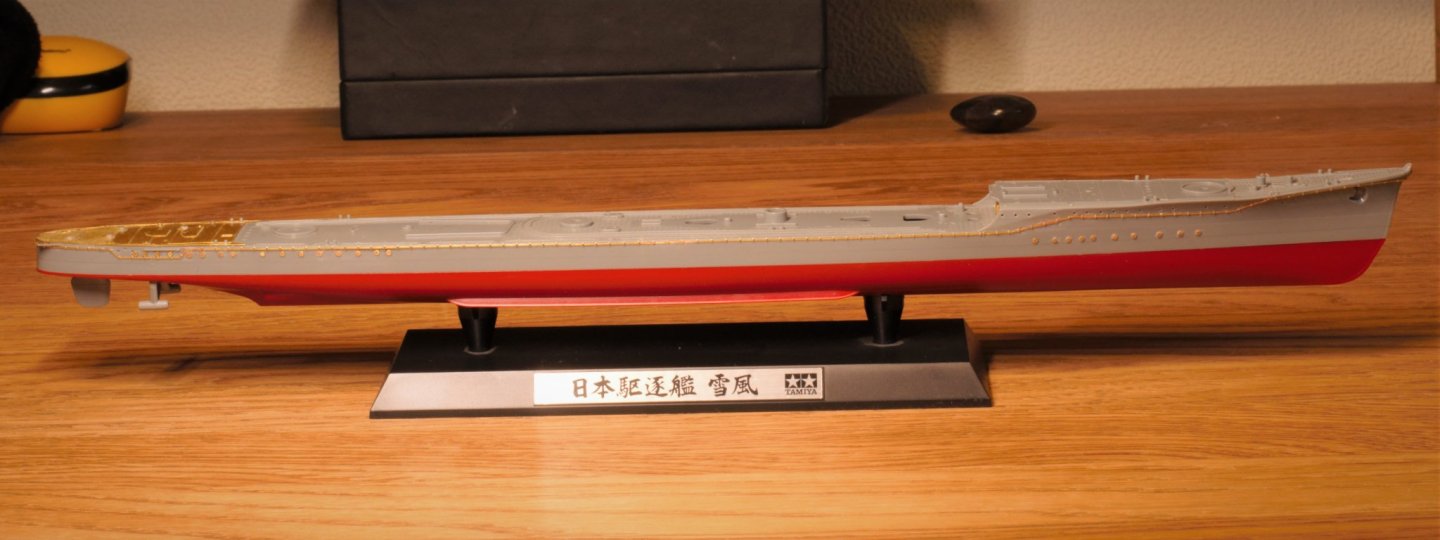
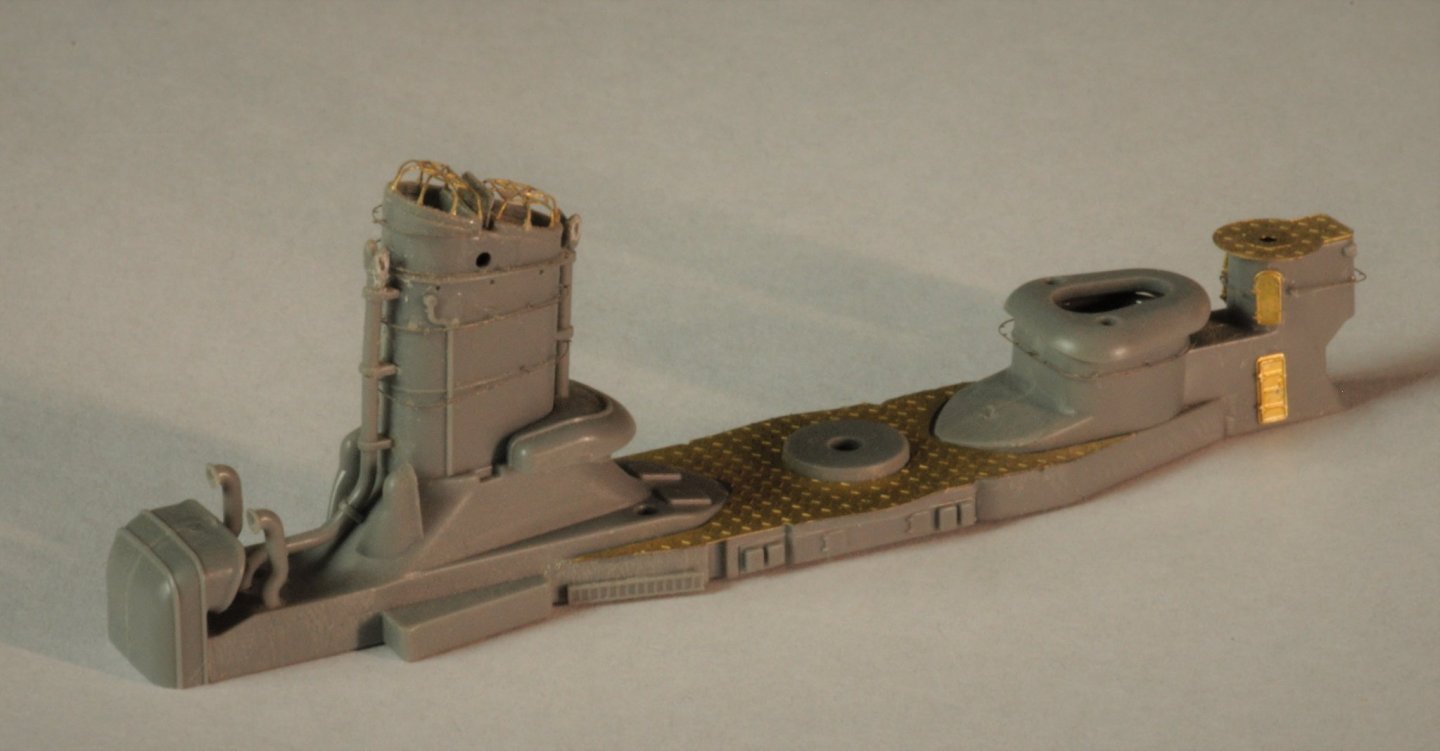
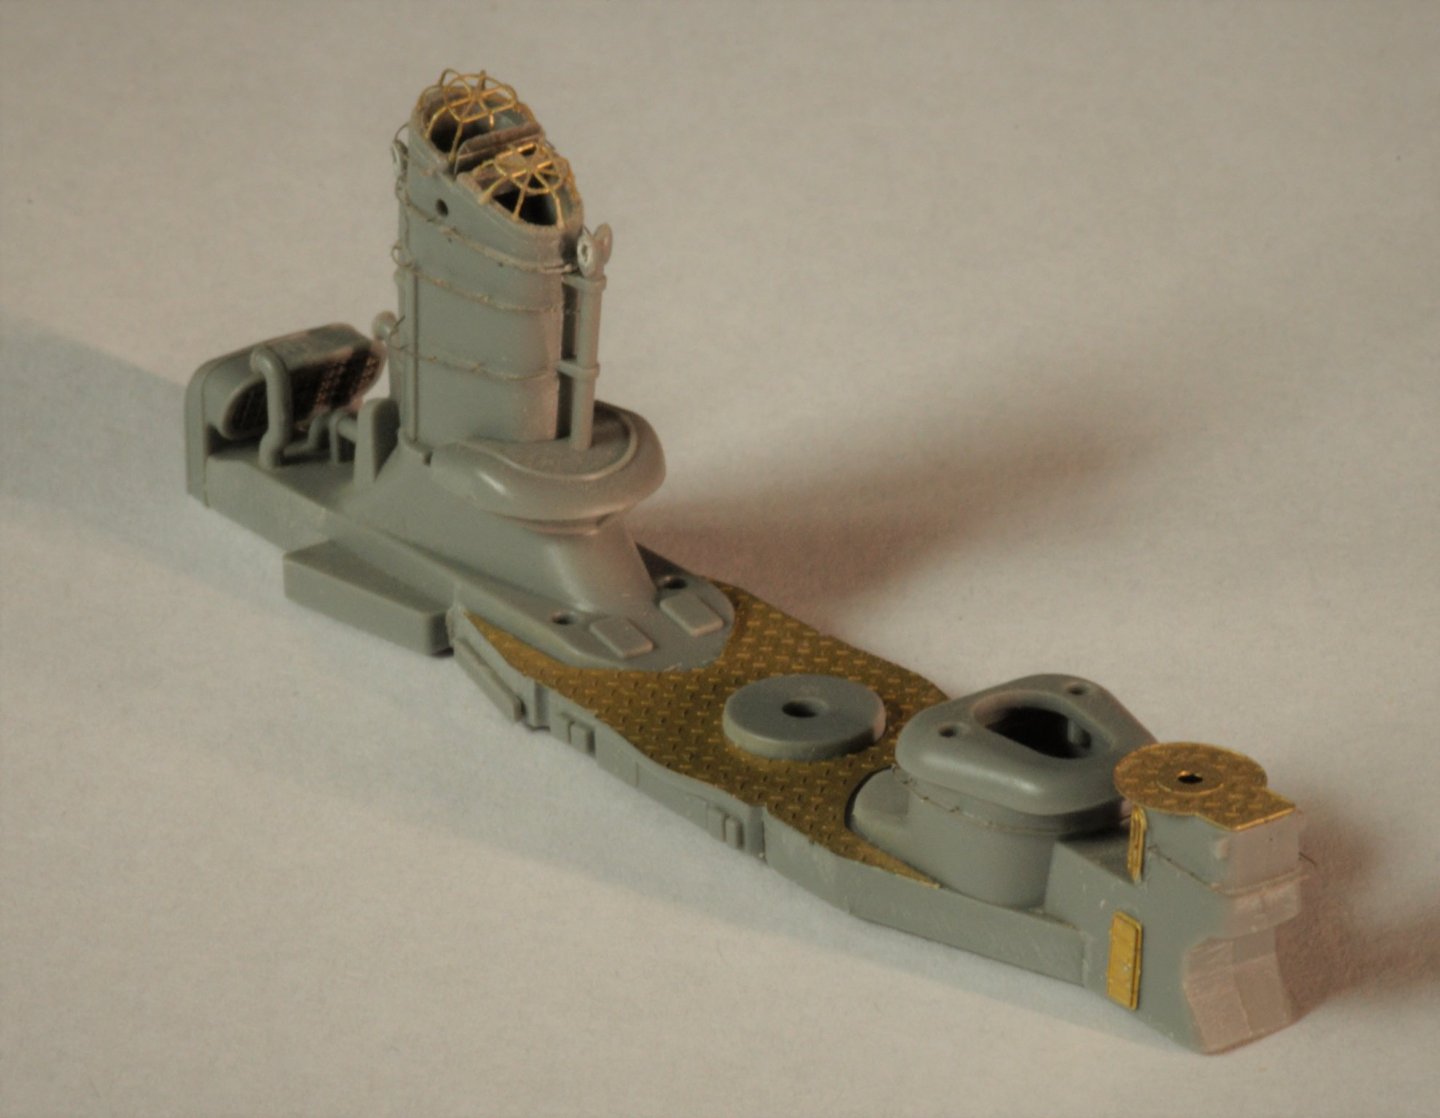
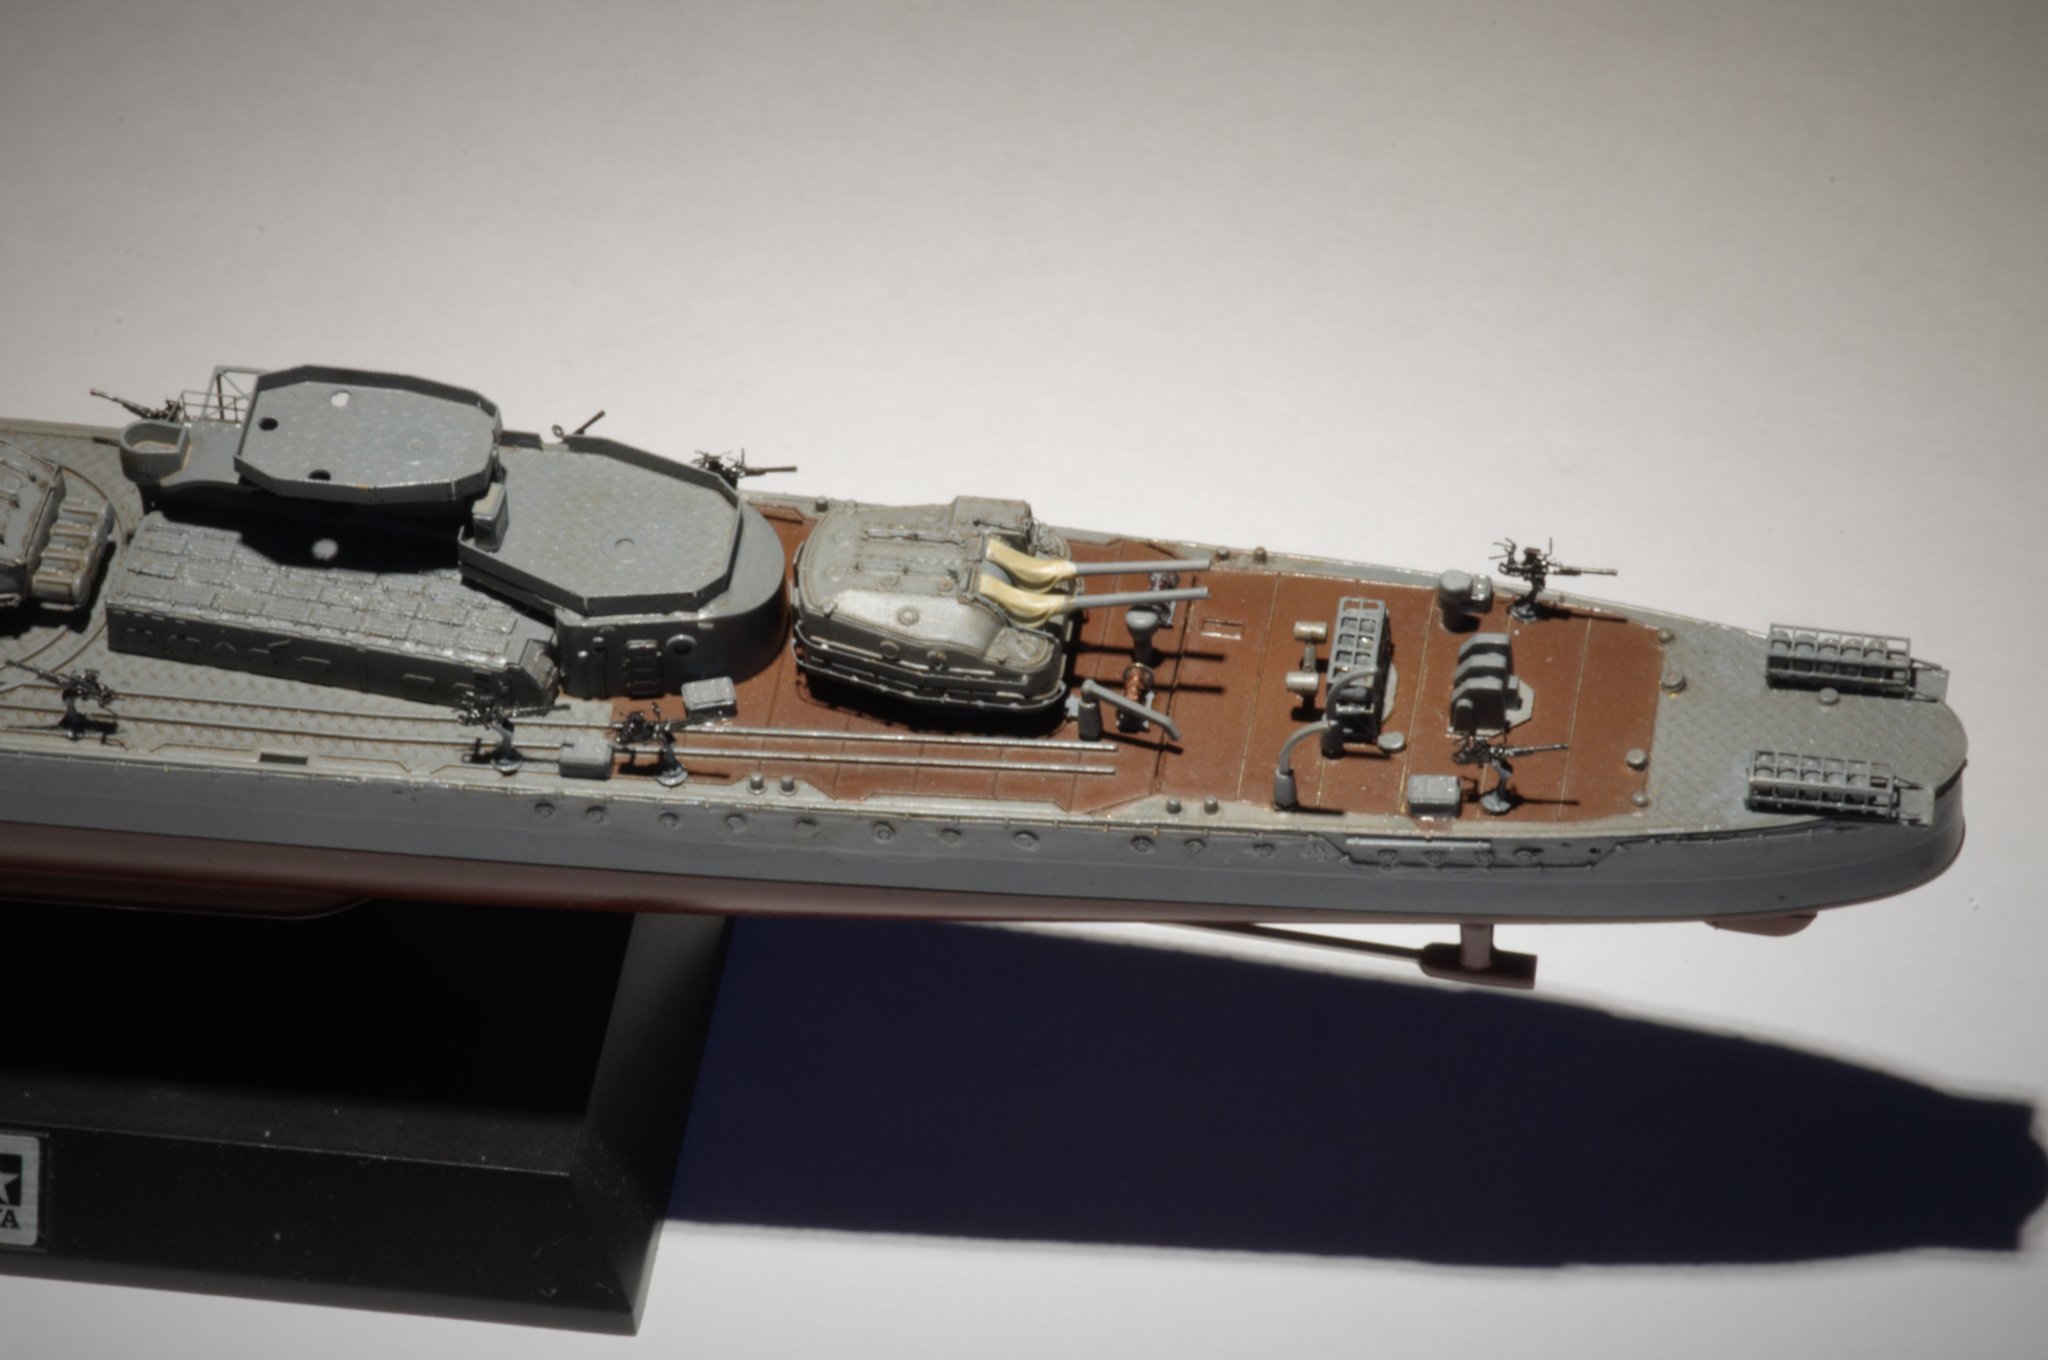
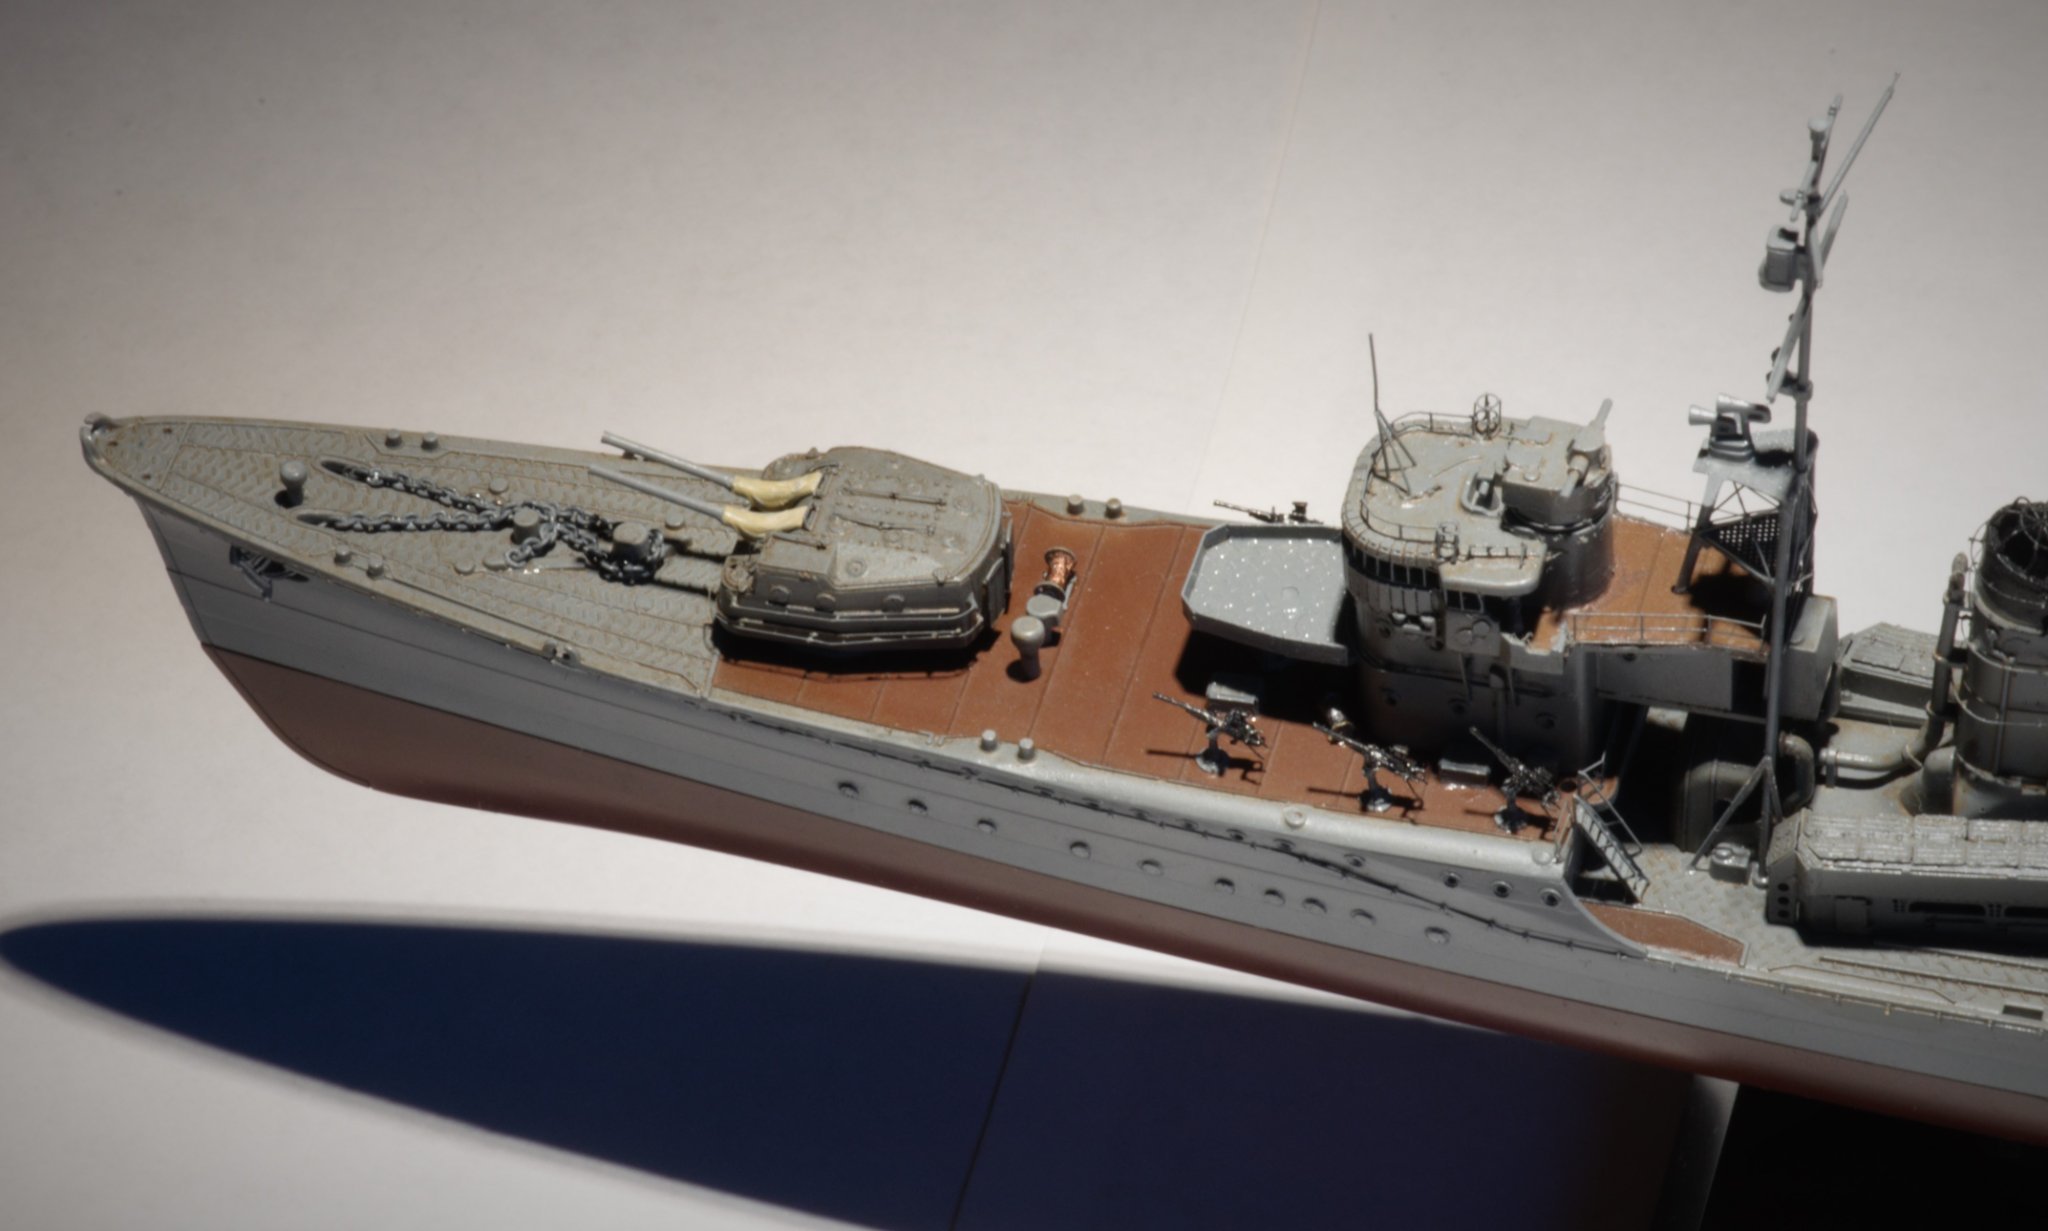
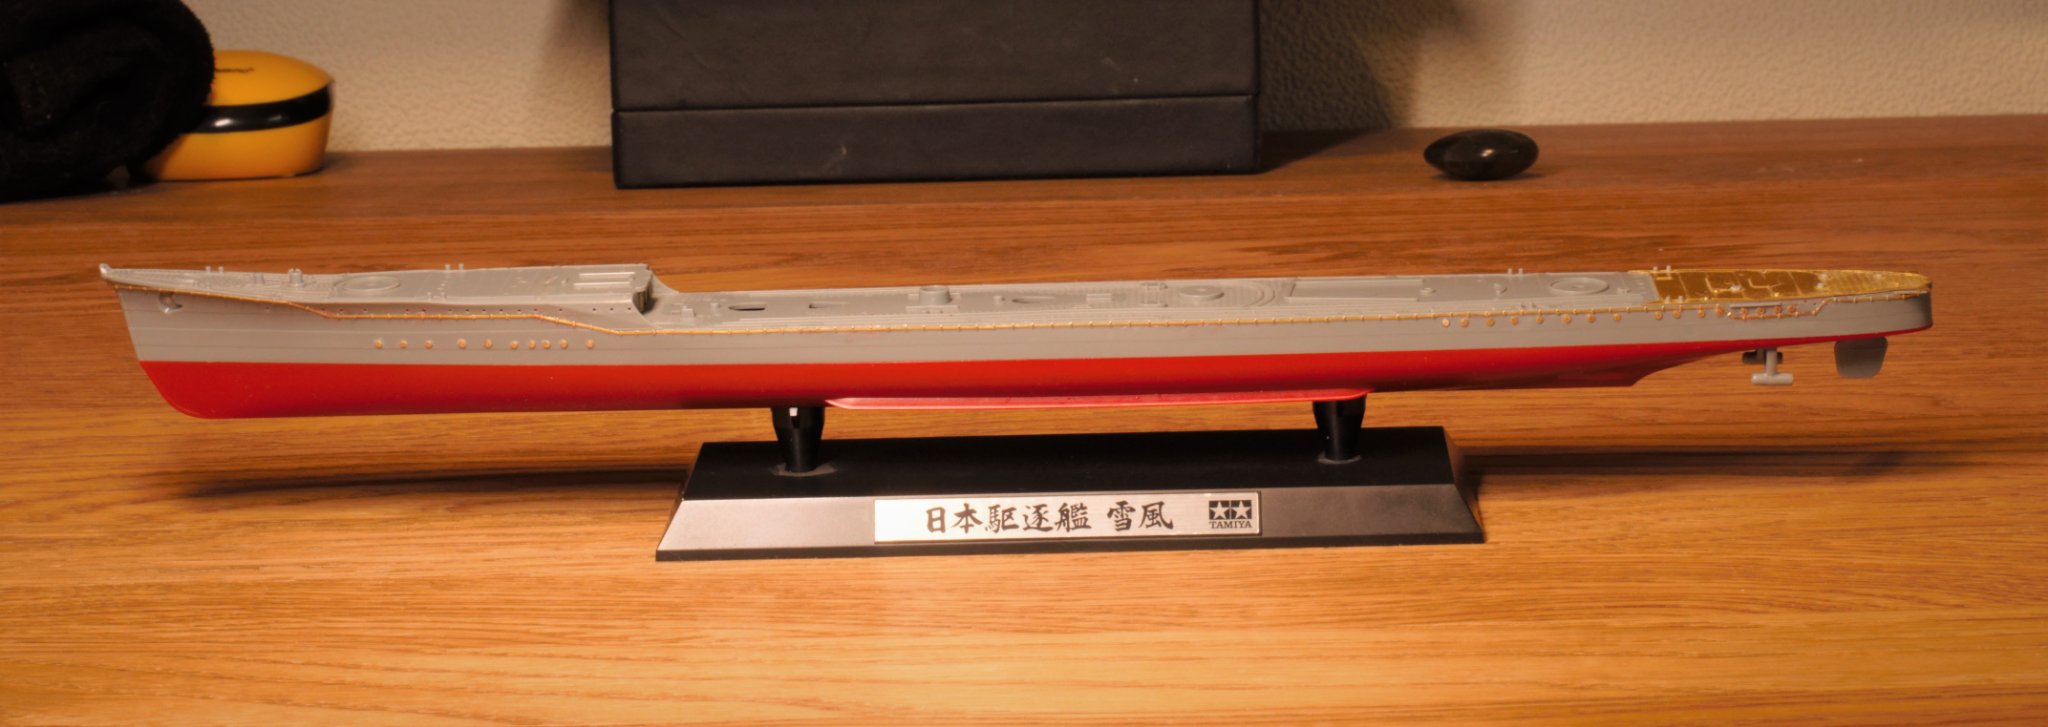
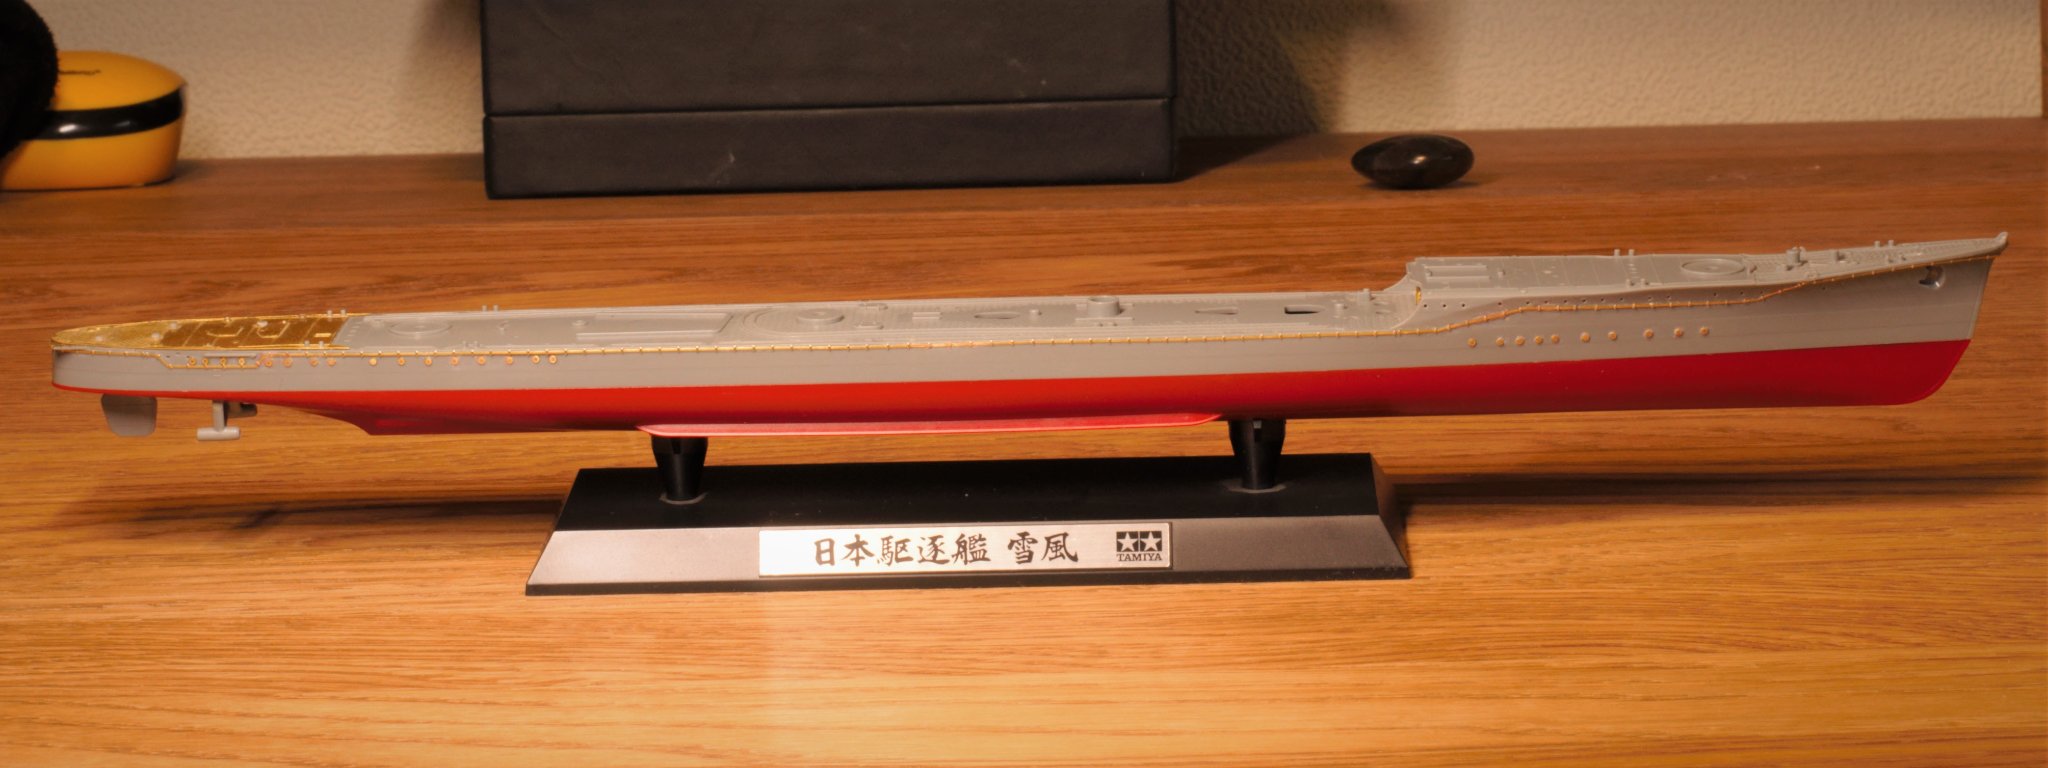
Hello everybody!
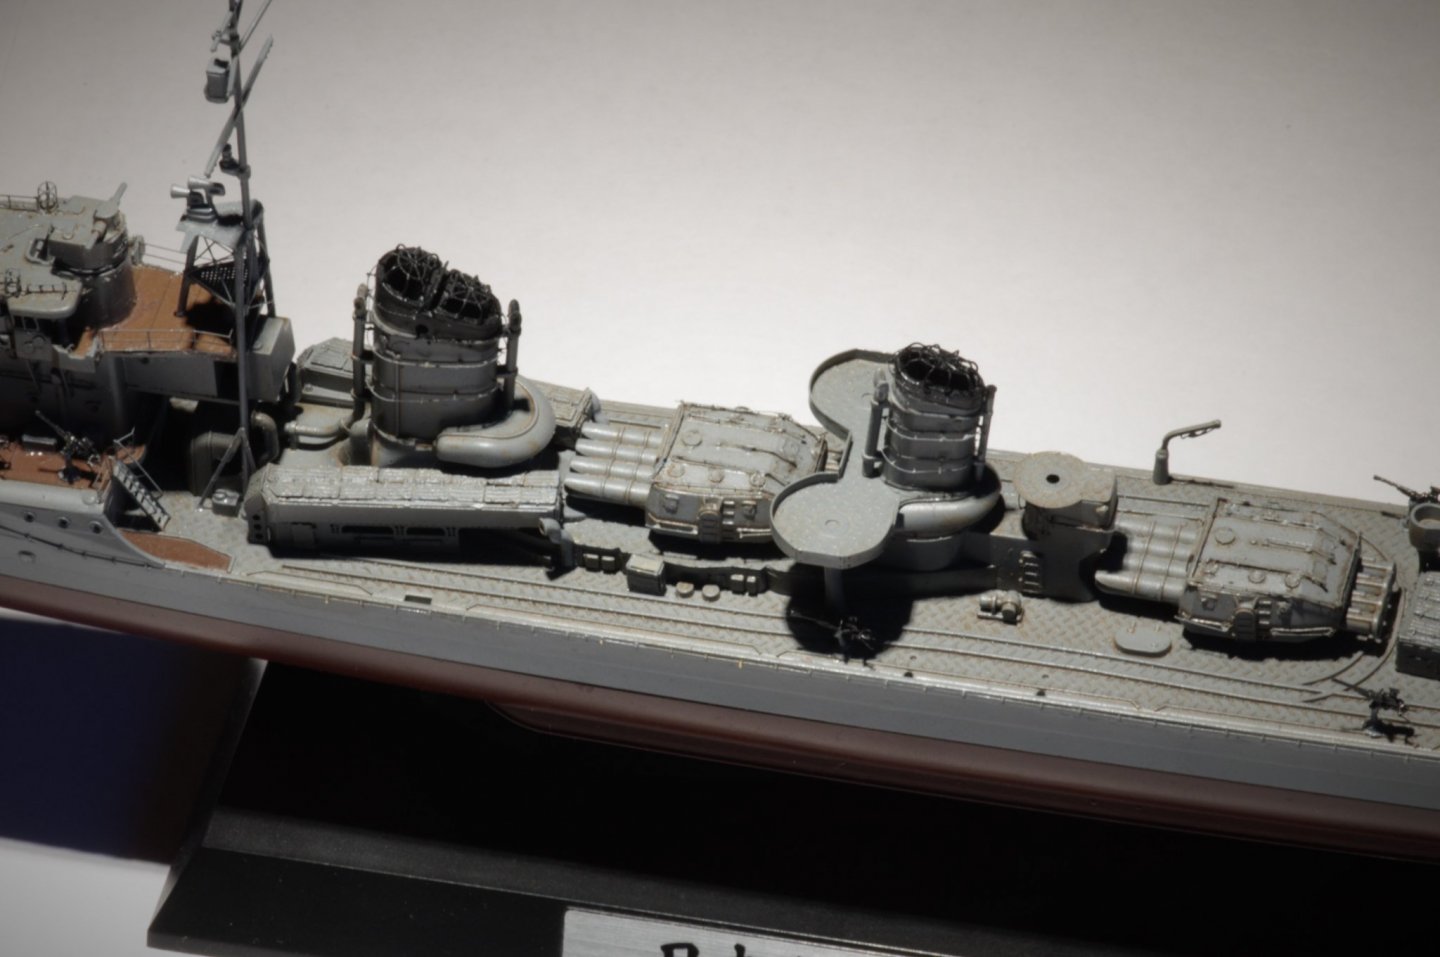
I've got an IJN mood - so I want to share some "progress" on a Yukikaze kit I've started nearly a decade ago. Base of the build is a very well known kit by Tamiya - a very high quality product I dare say. Add-on is a Lion Roar photo etch kit which also includes turned gun barrels and depth charges. Also there are couple Veteran sets - single- and triple-25mm auto cannons.
Most of sub-assemblies were built in 2011 🙂
Here we go:


- Reg, lmagna, EricWilliamMarshall and 12 others
-
15
-
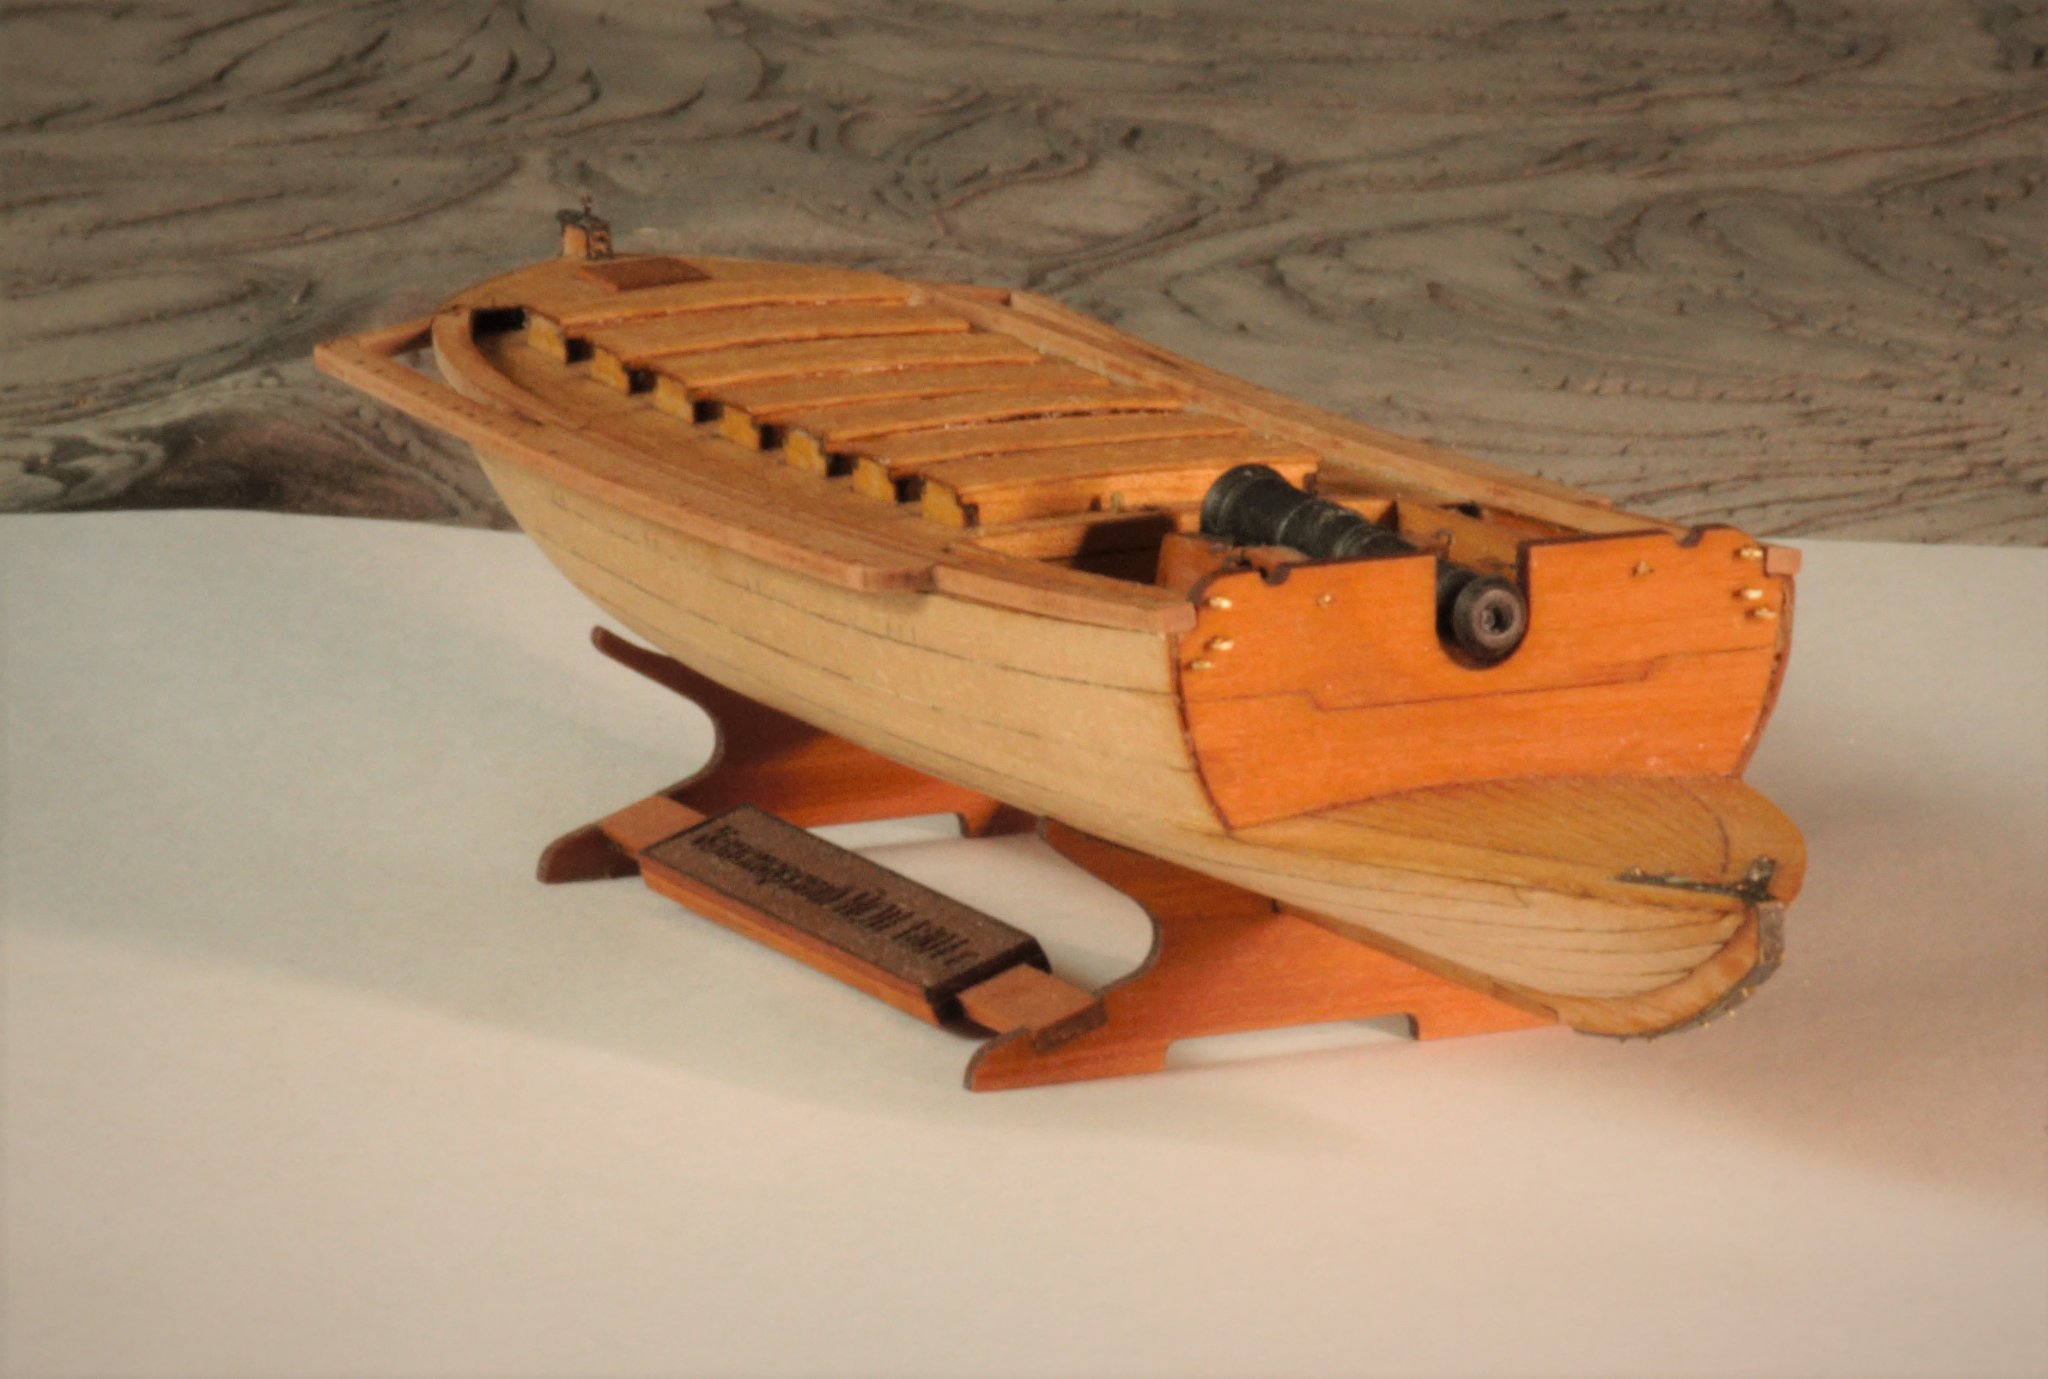
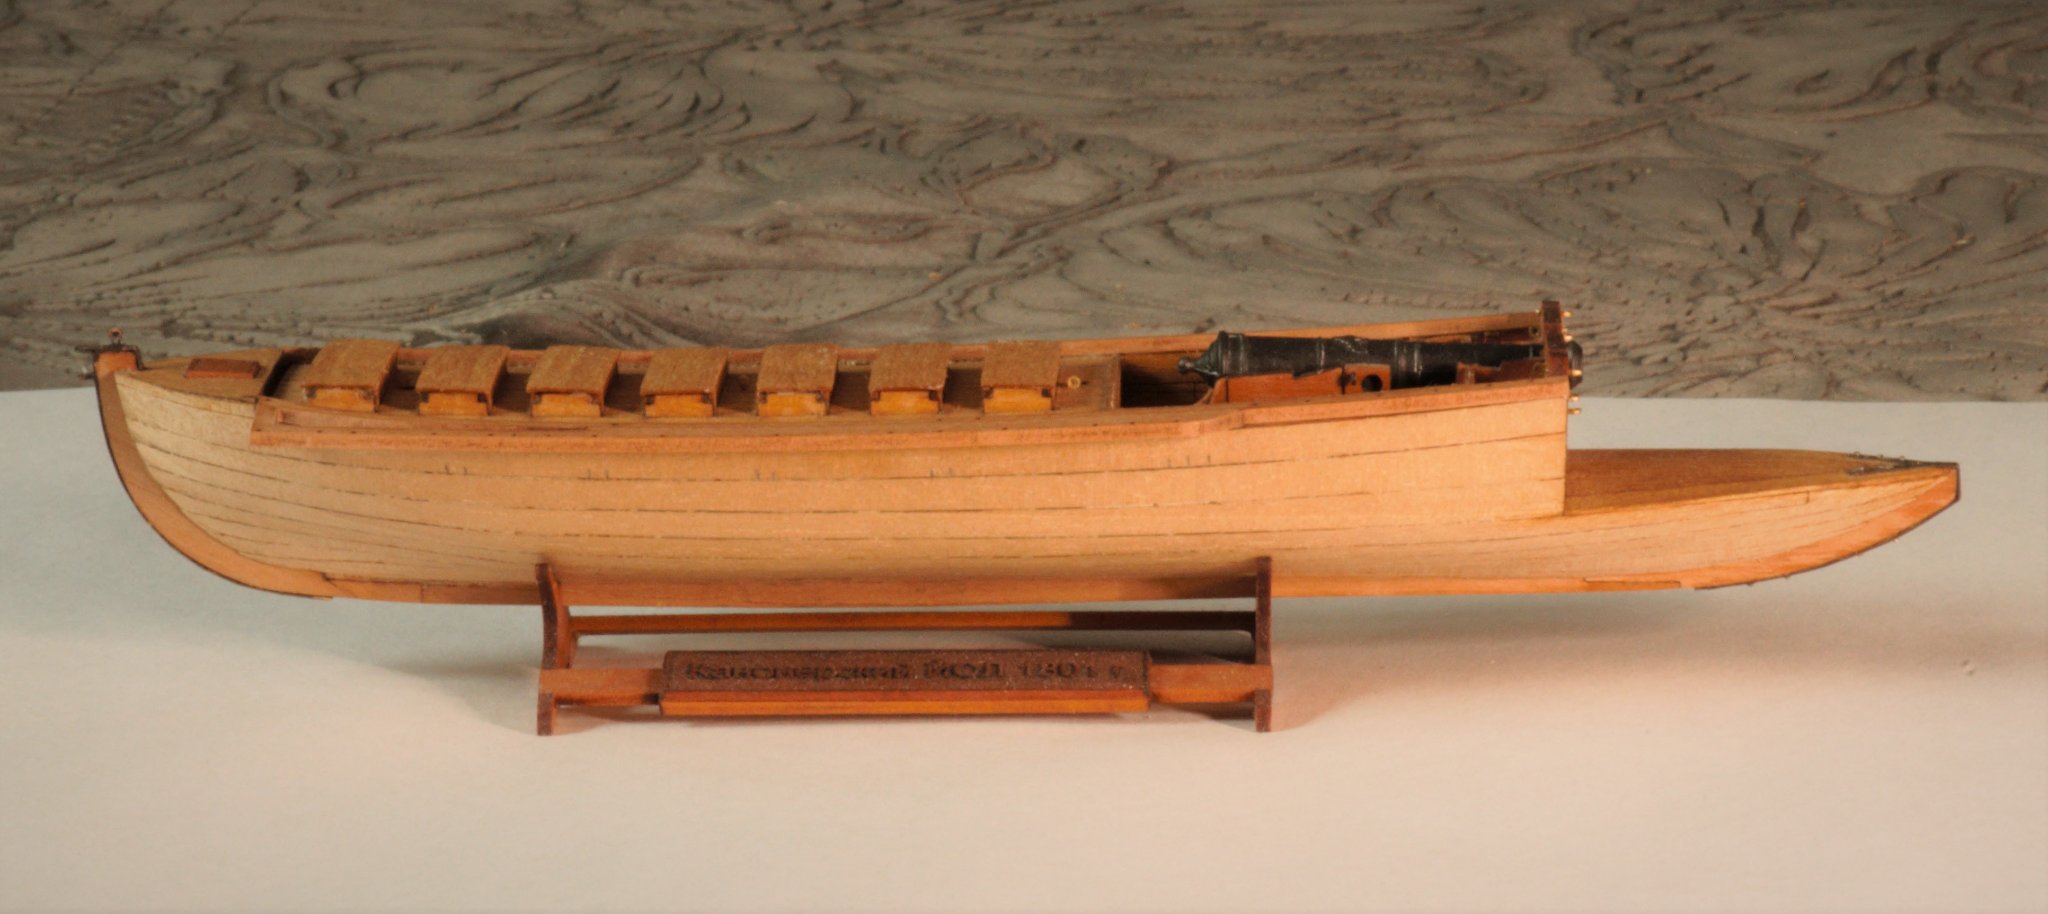
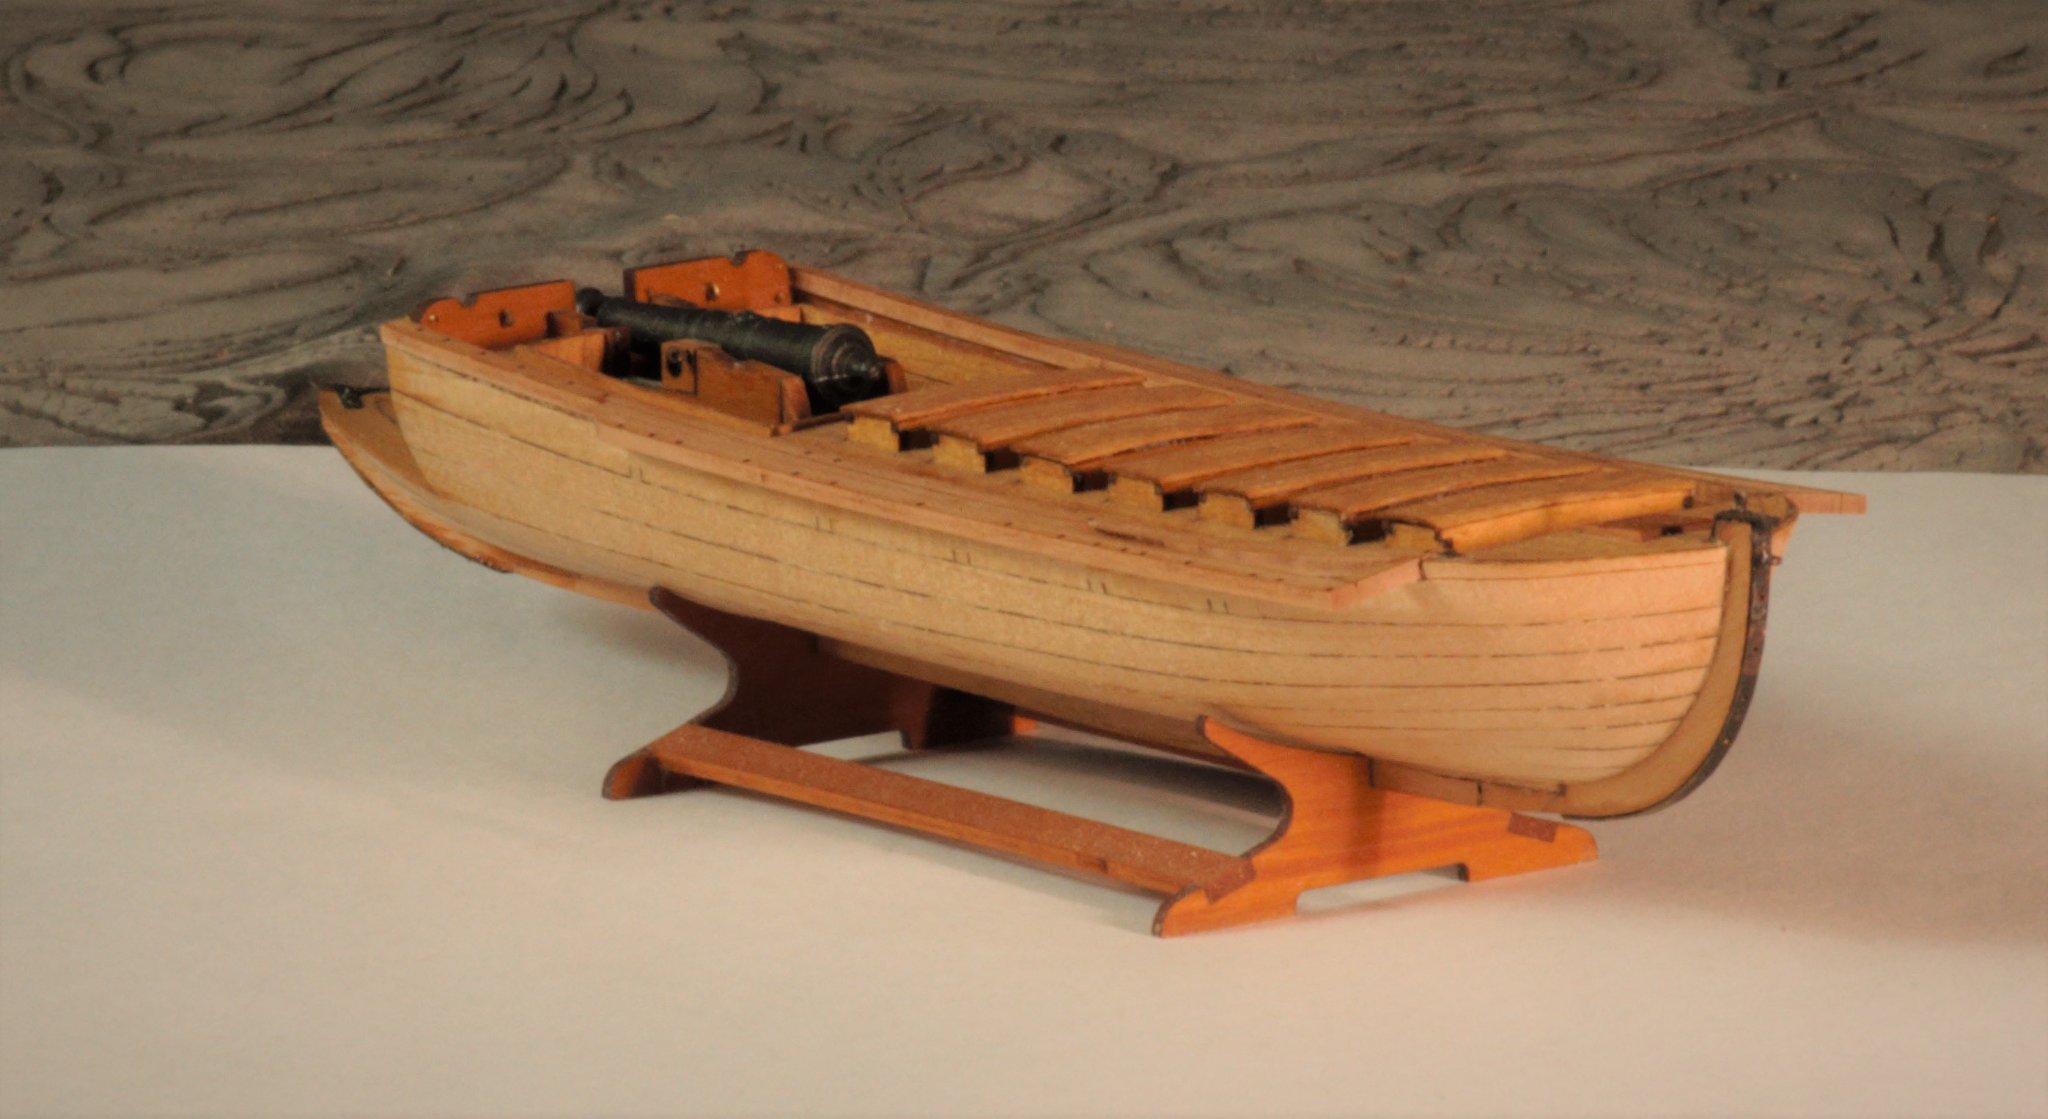
At the adjacent slipway we build a side-project with my son:


- CiscoH, GrandpaPhil, coxswain and 1 other
-
4
-
Hi, dear colleagues!
Thank you for your kind words and likes! Hope everyone is safe!
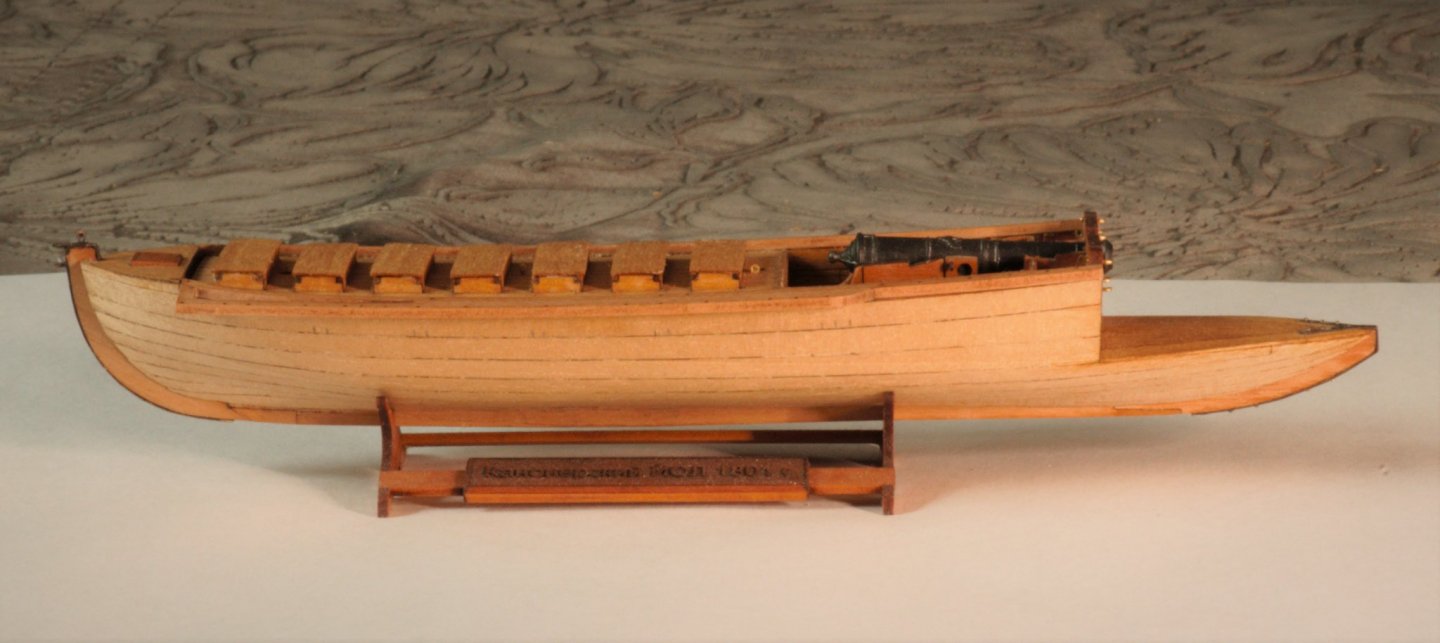
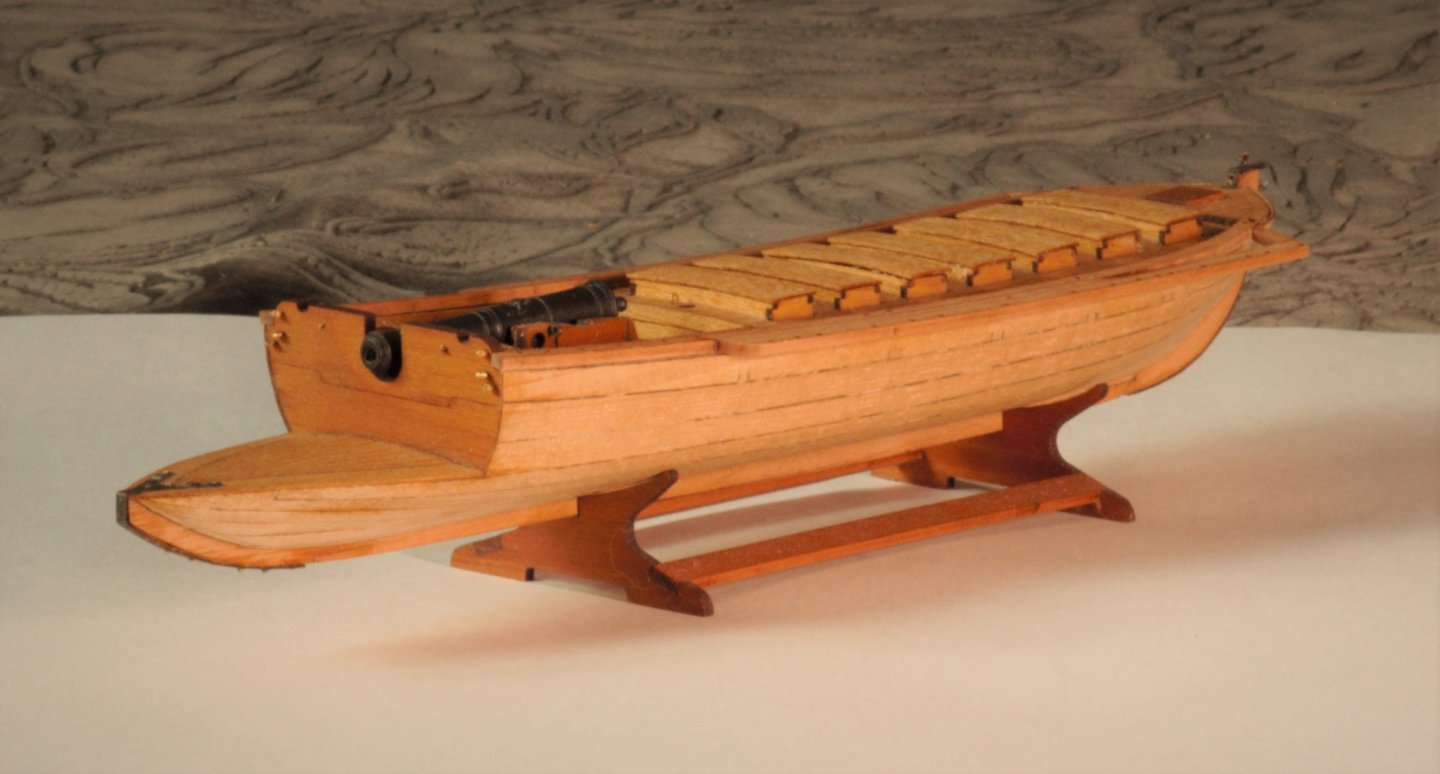
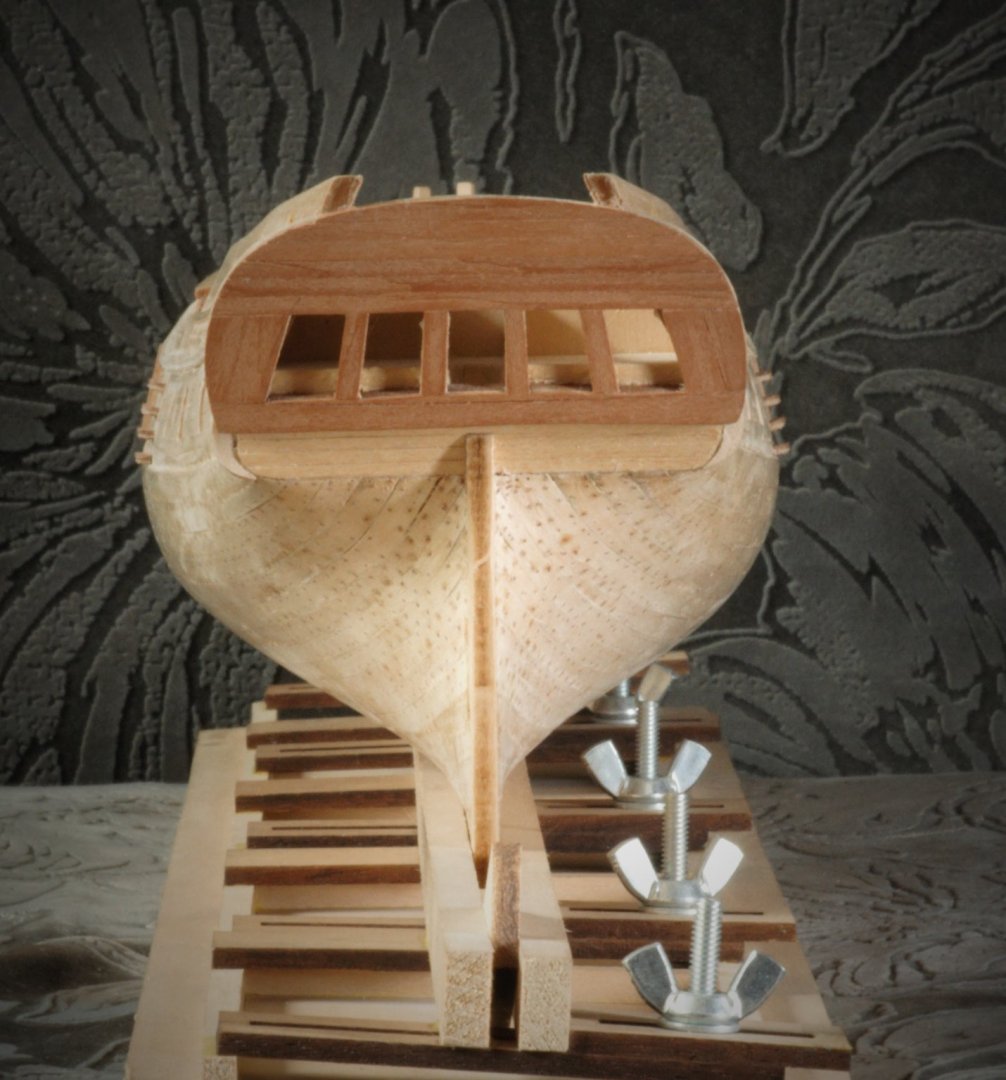
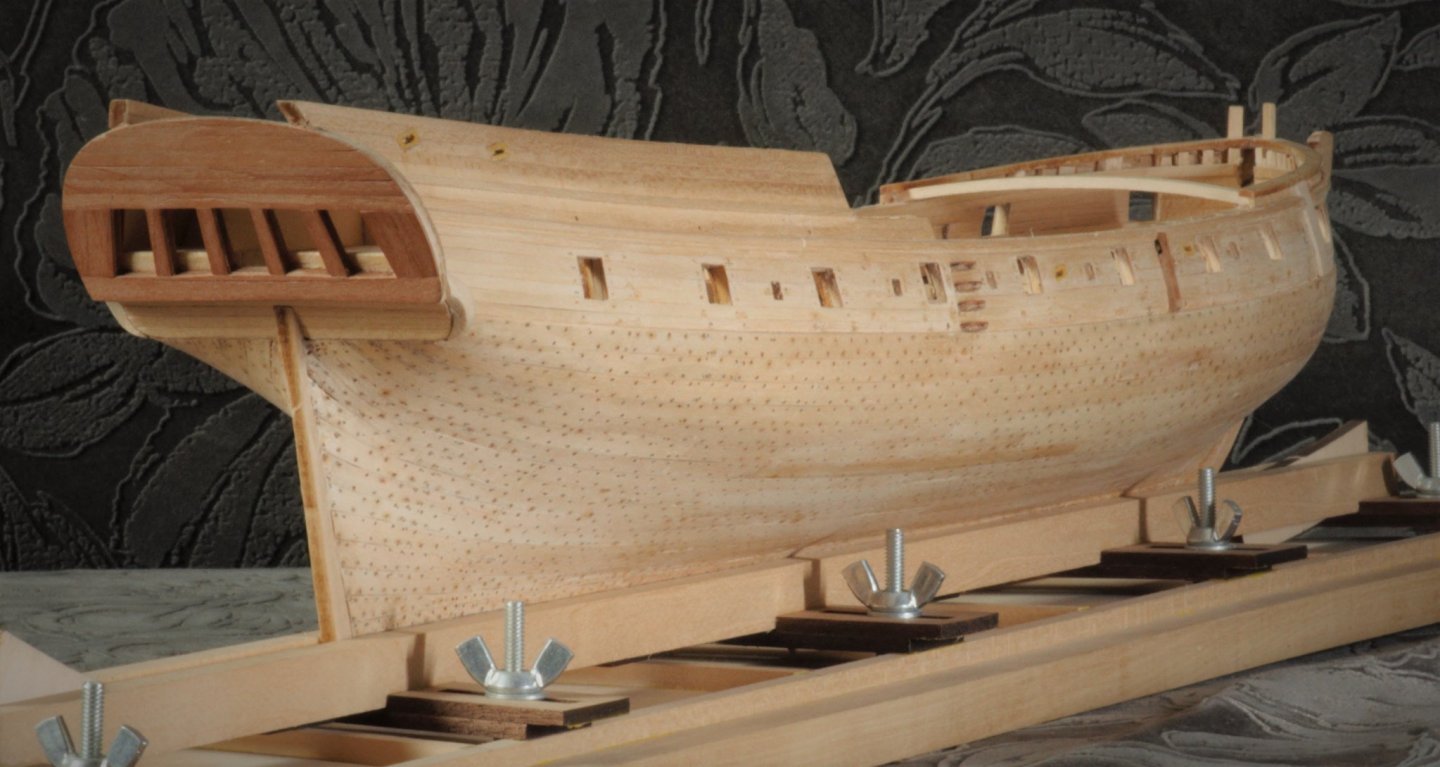
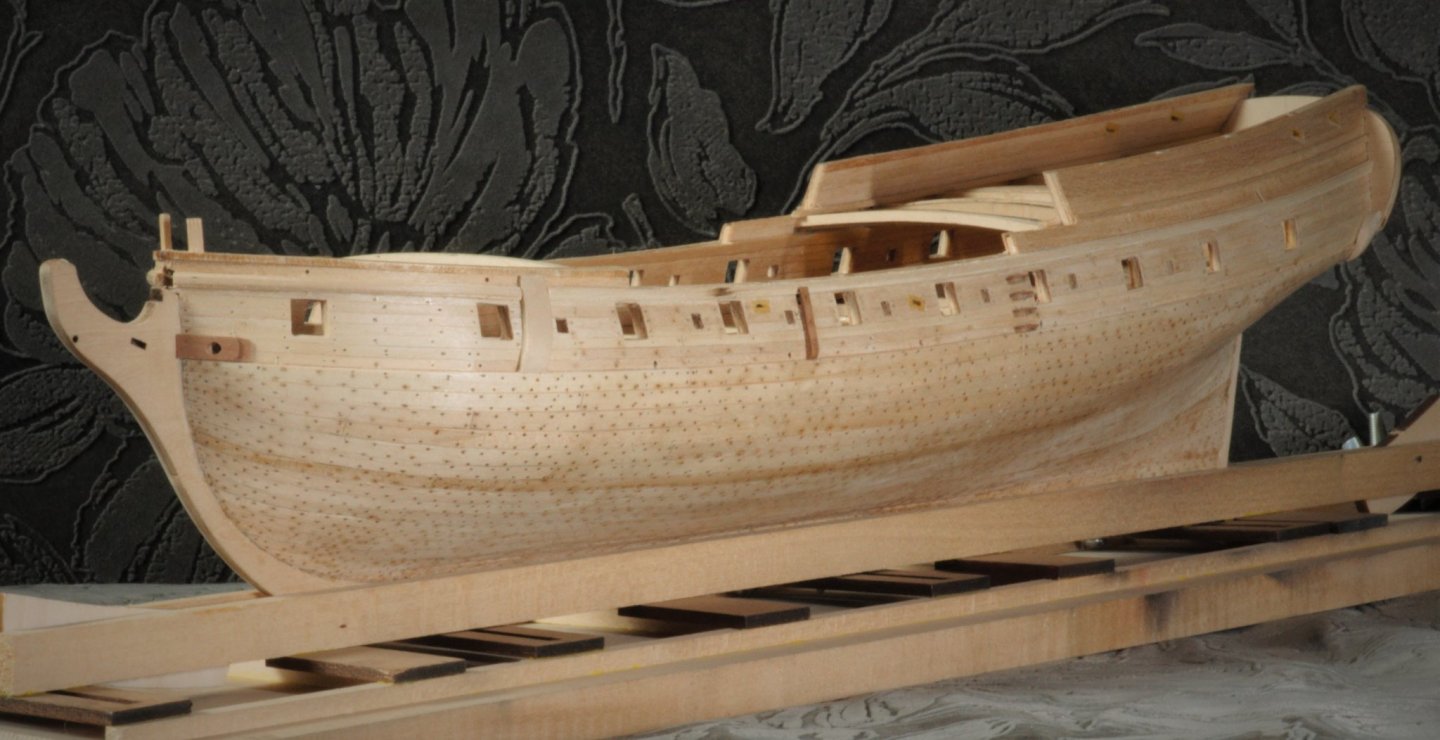
There's no progress at all with Rattlesnake, but I've managed to bring back to life my old trustworthy Nikon D90 so - here's a new "photo session" -now with better light conditions and less grain due to normal optics.
Here we go:


- GrandpaPhil, Edwardkenway, oneslim and 1 other
-
4
-
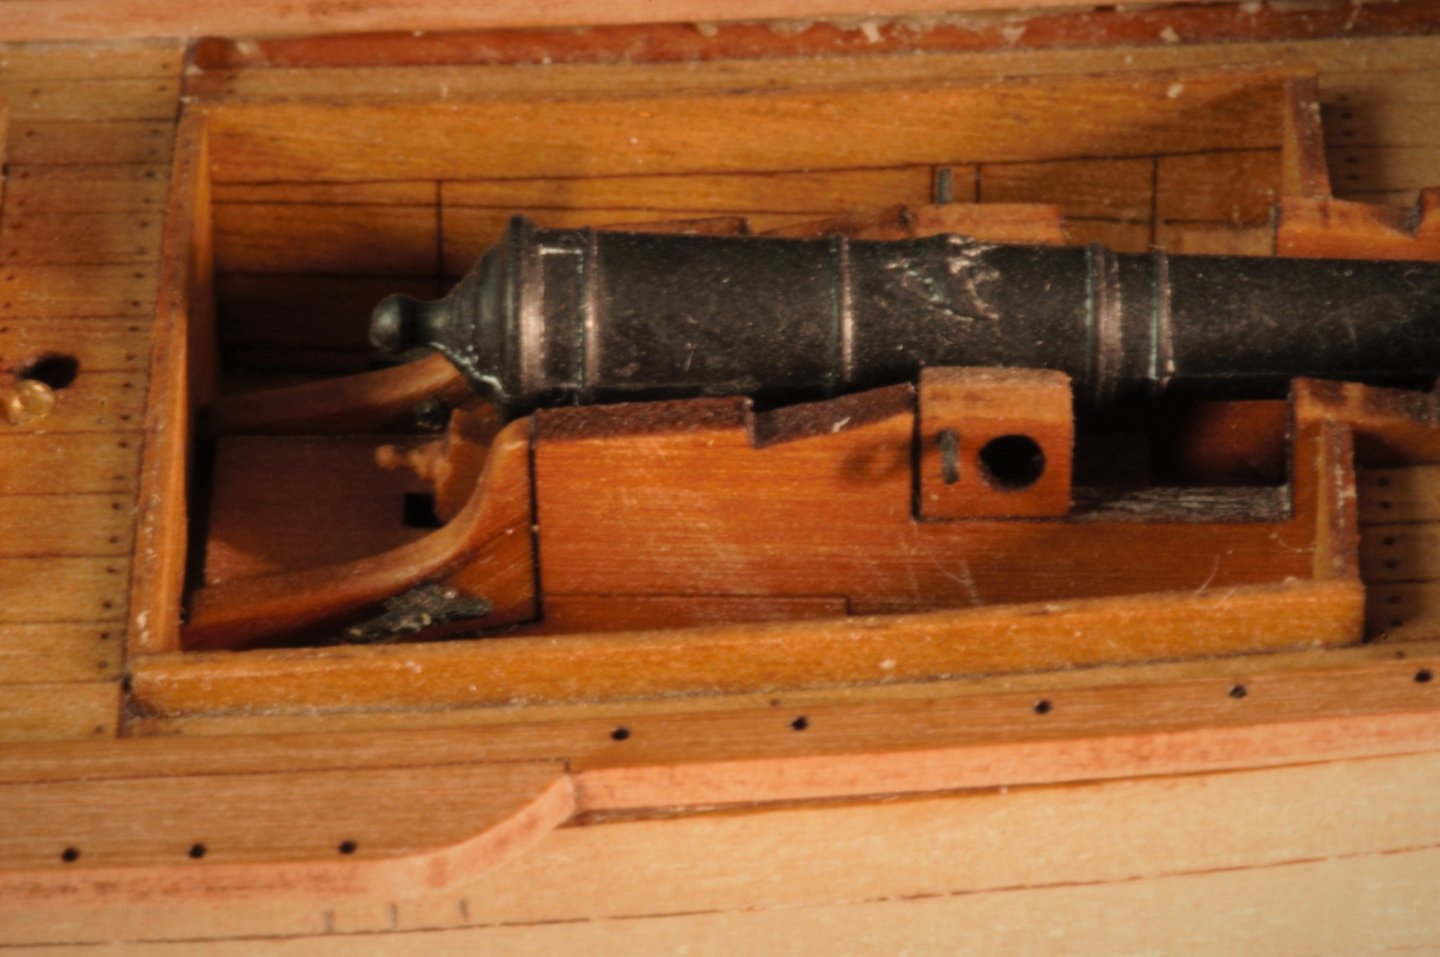
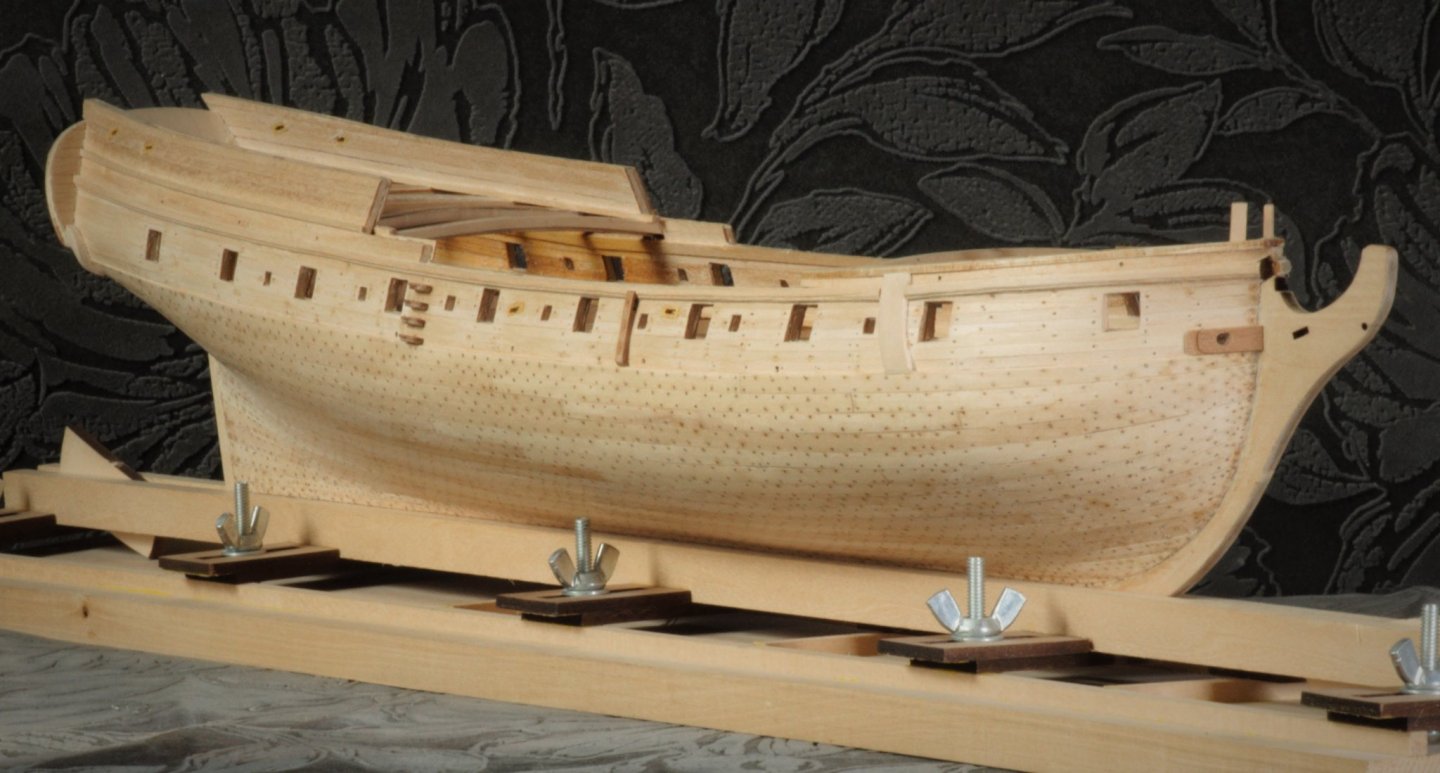
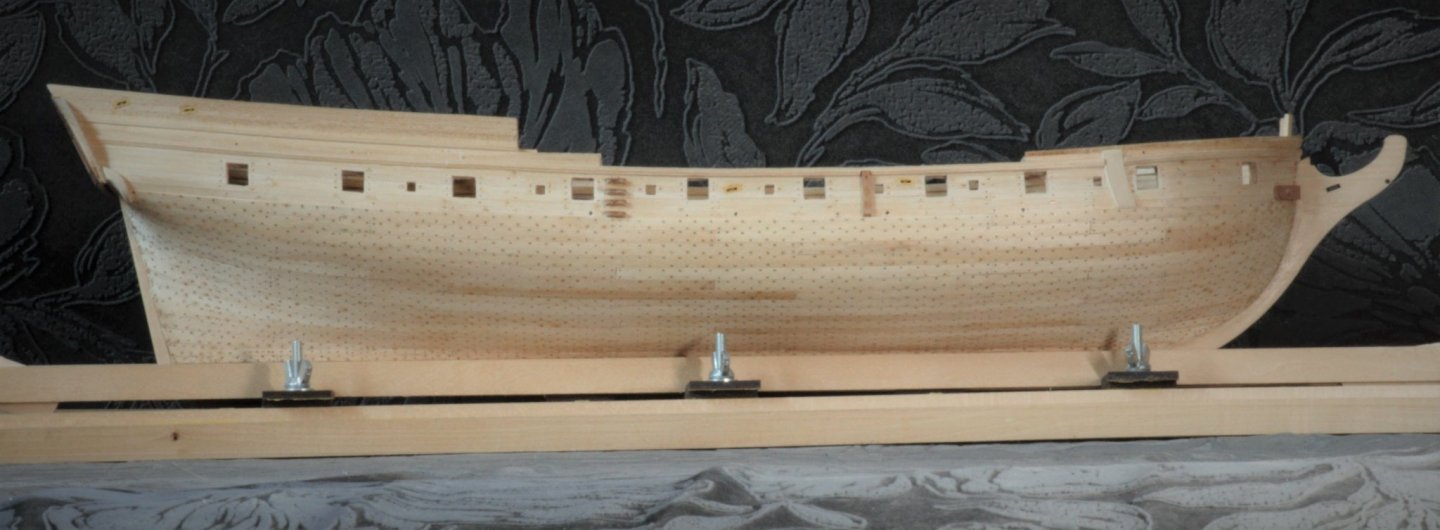
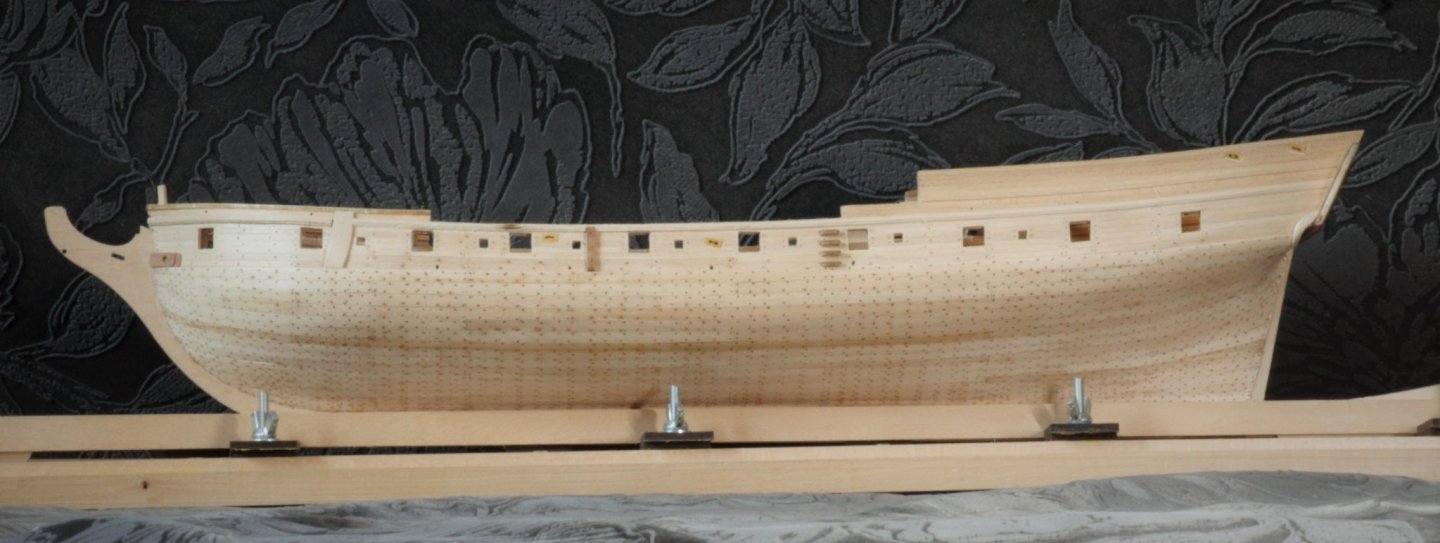
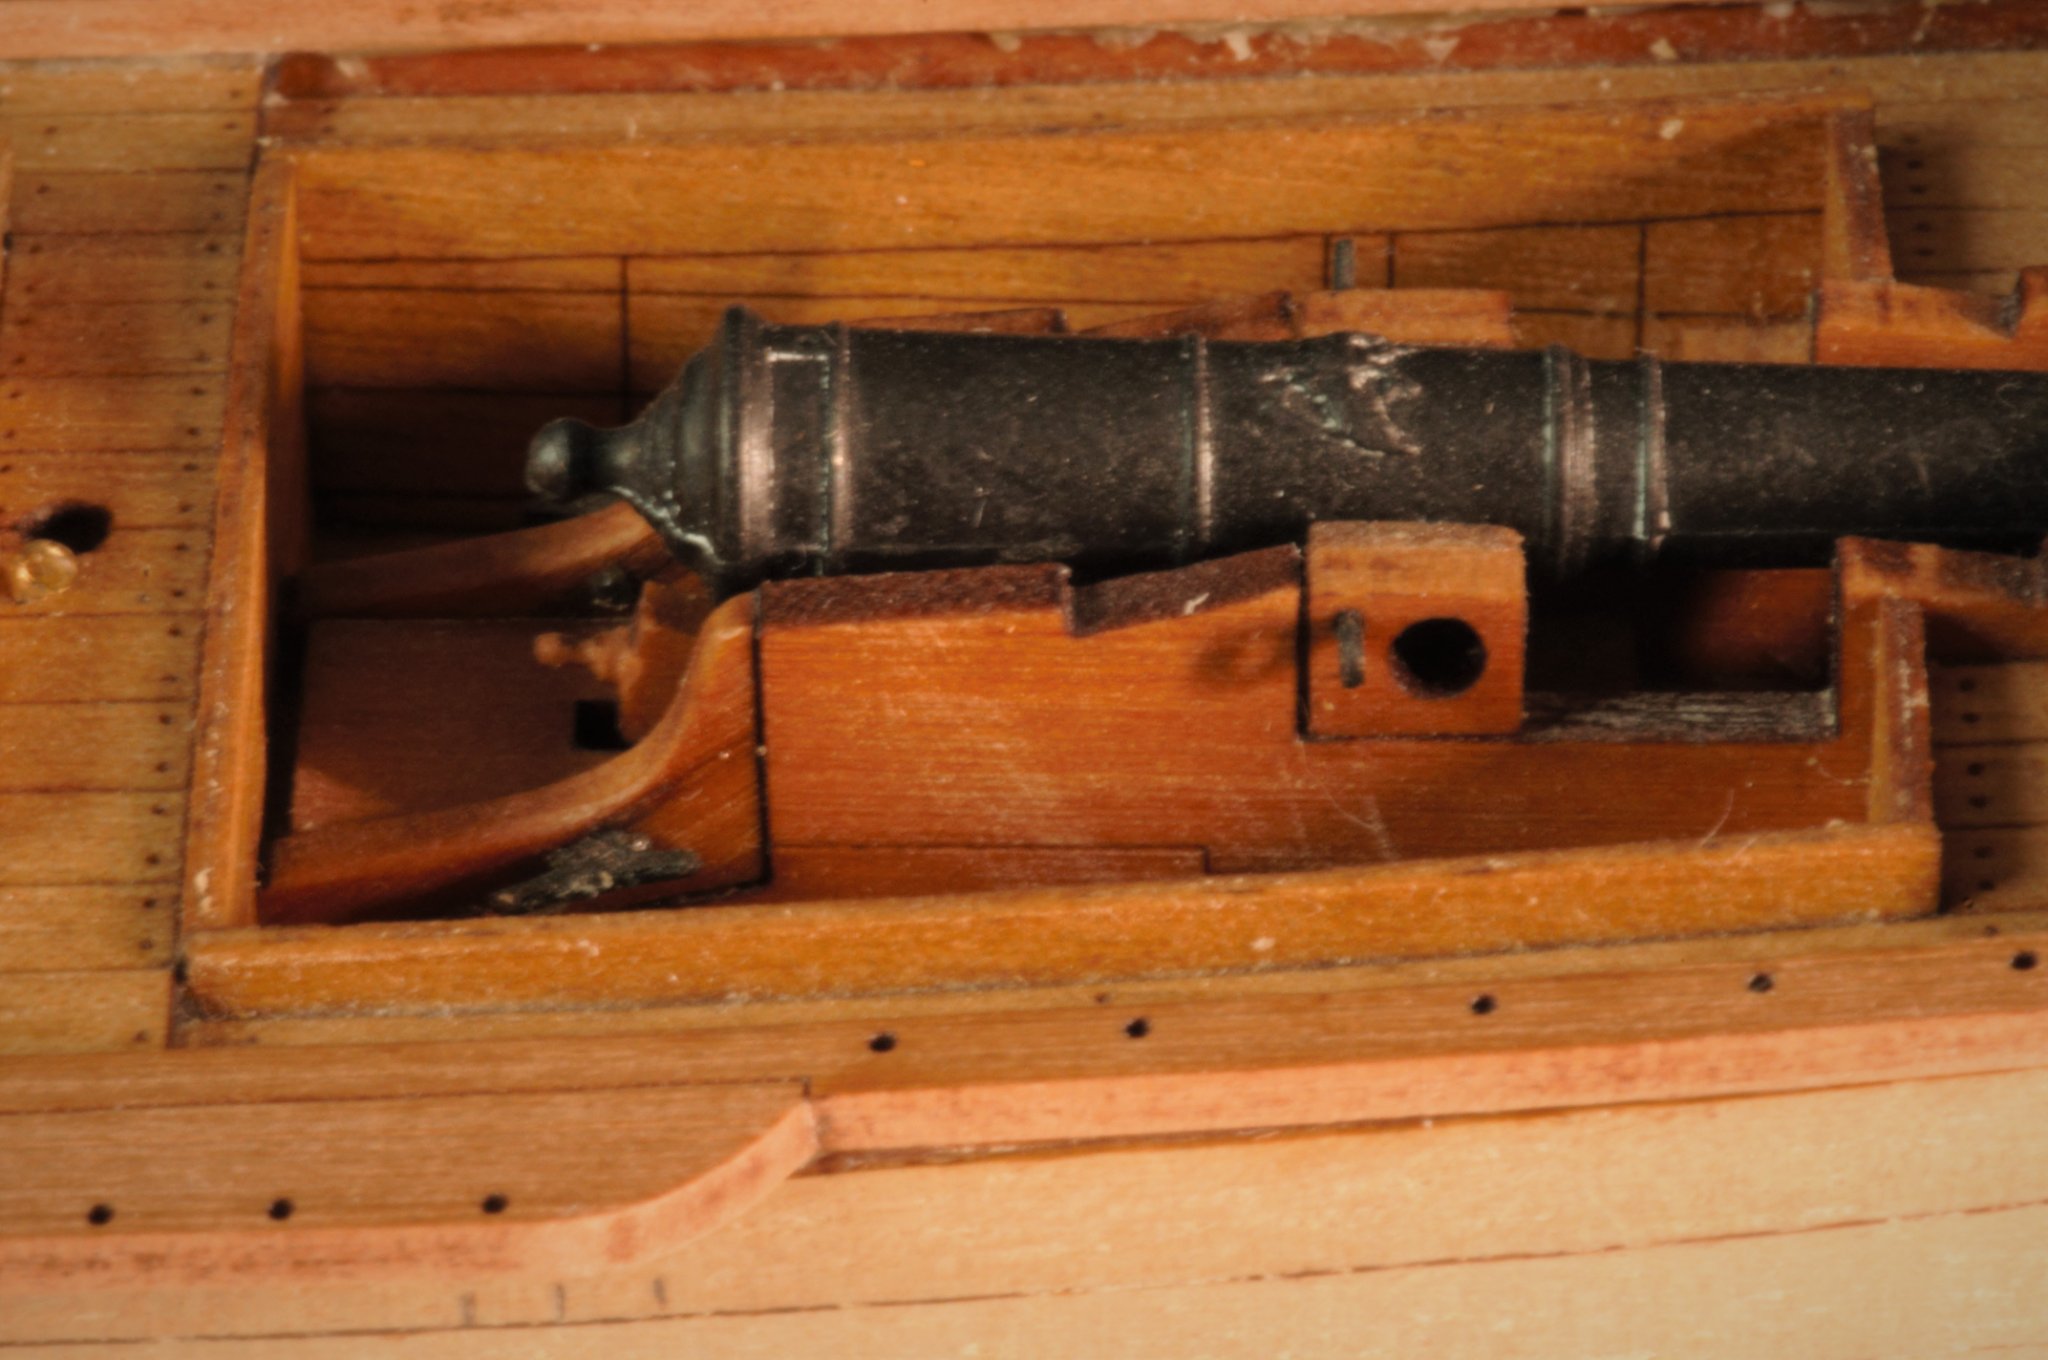
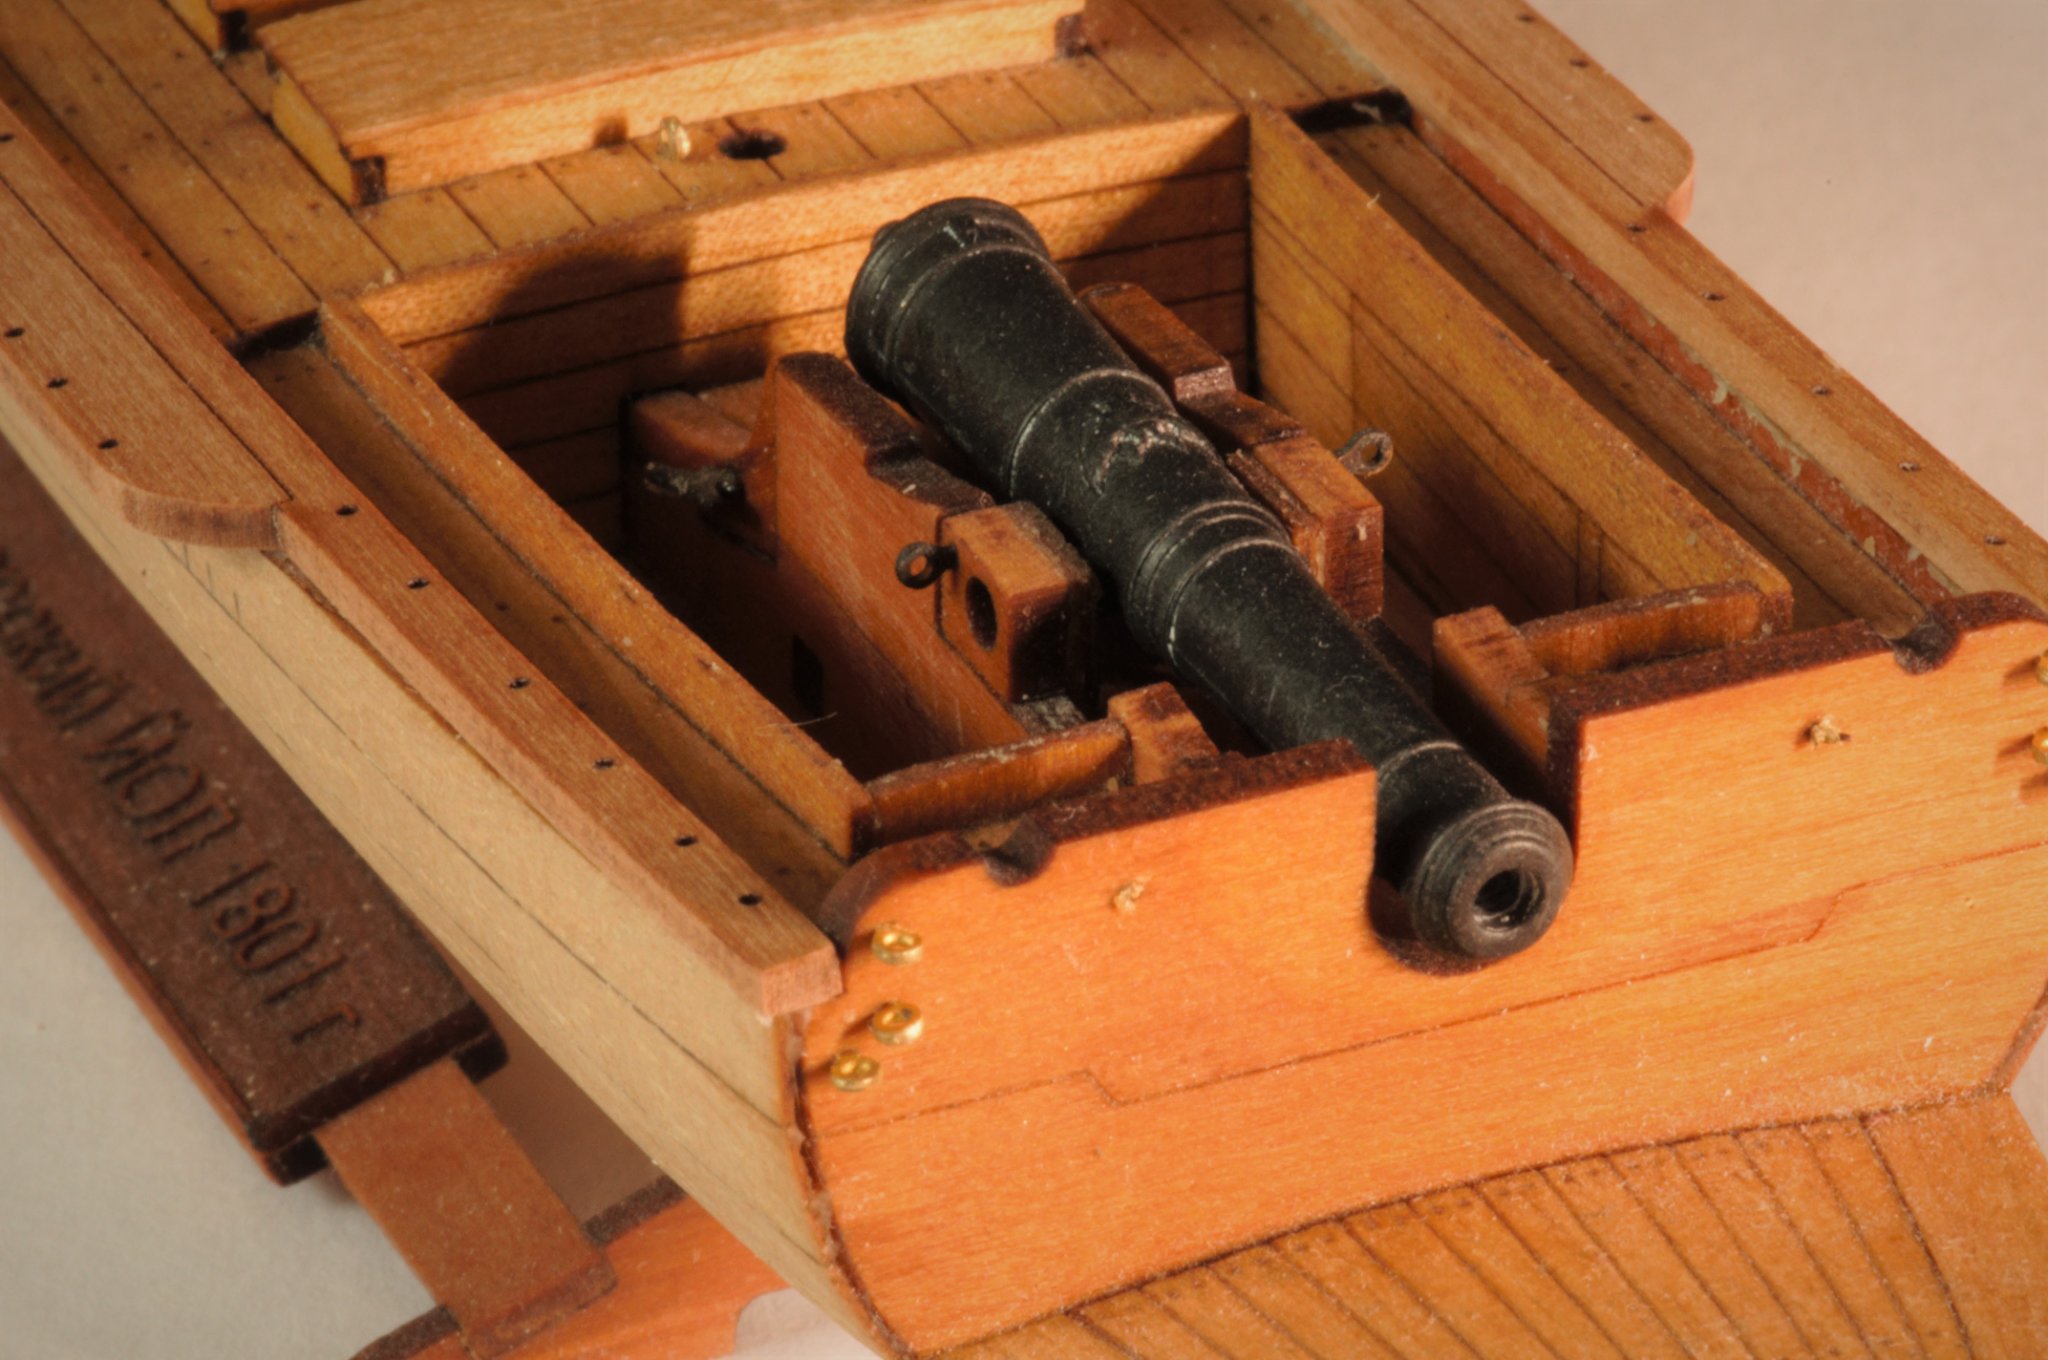
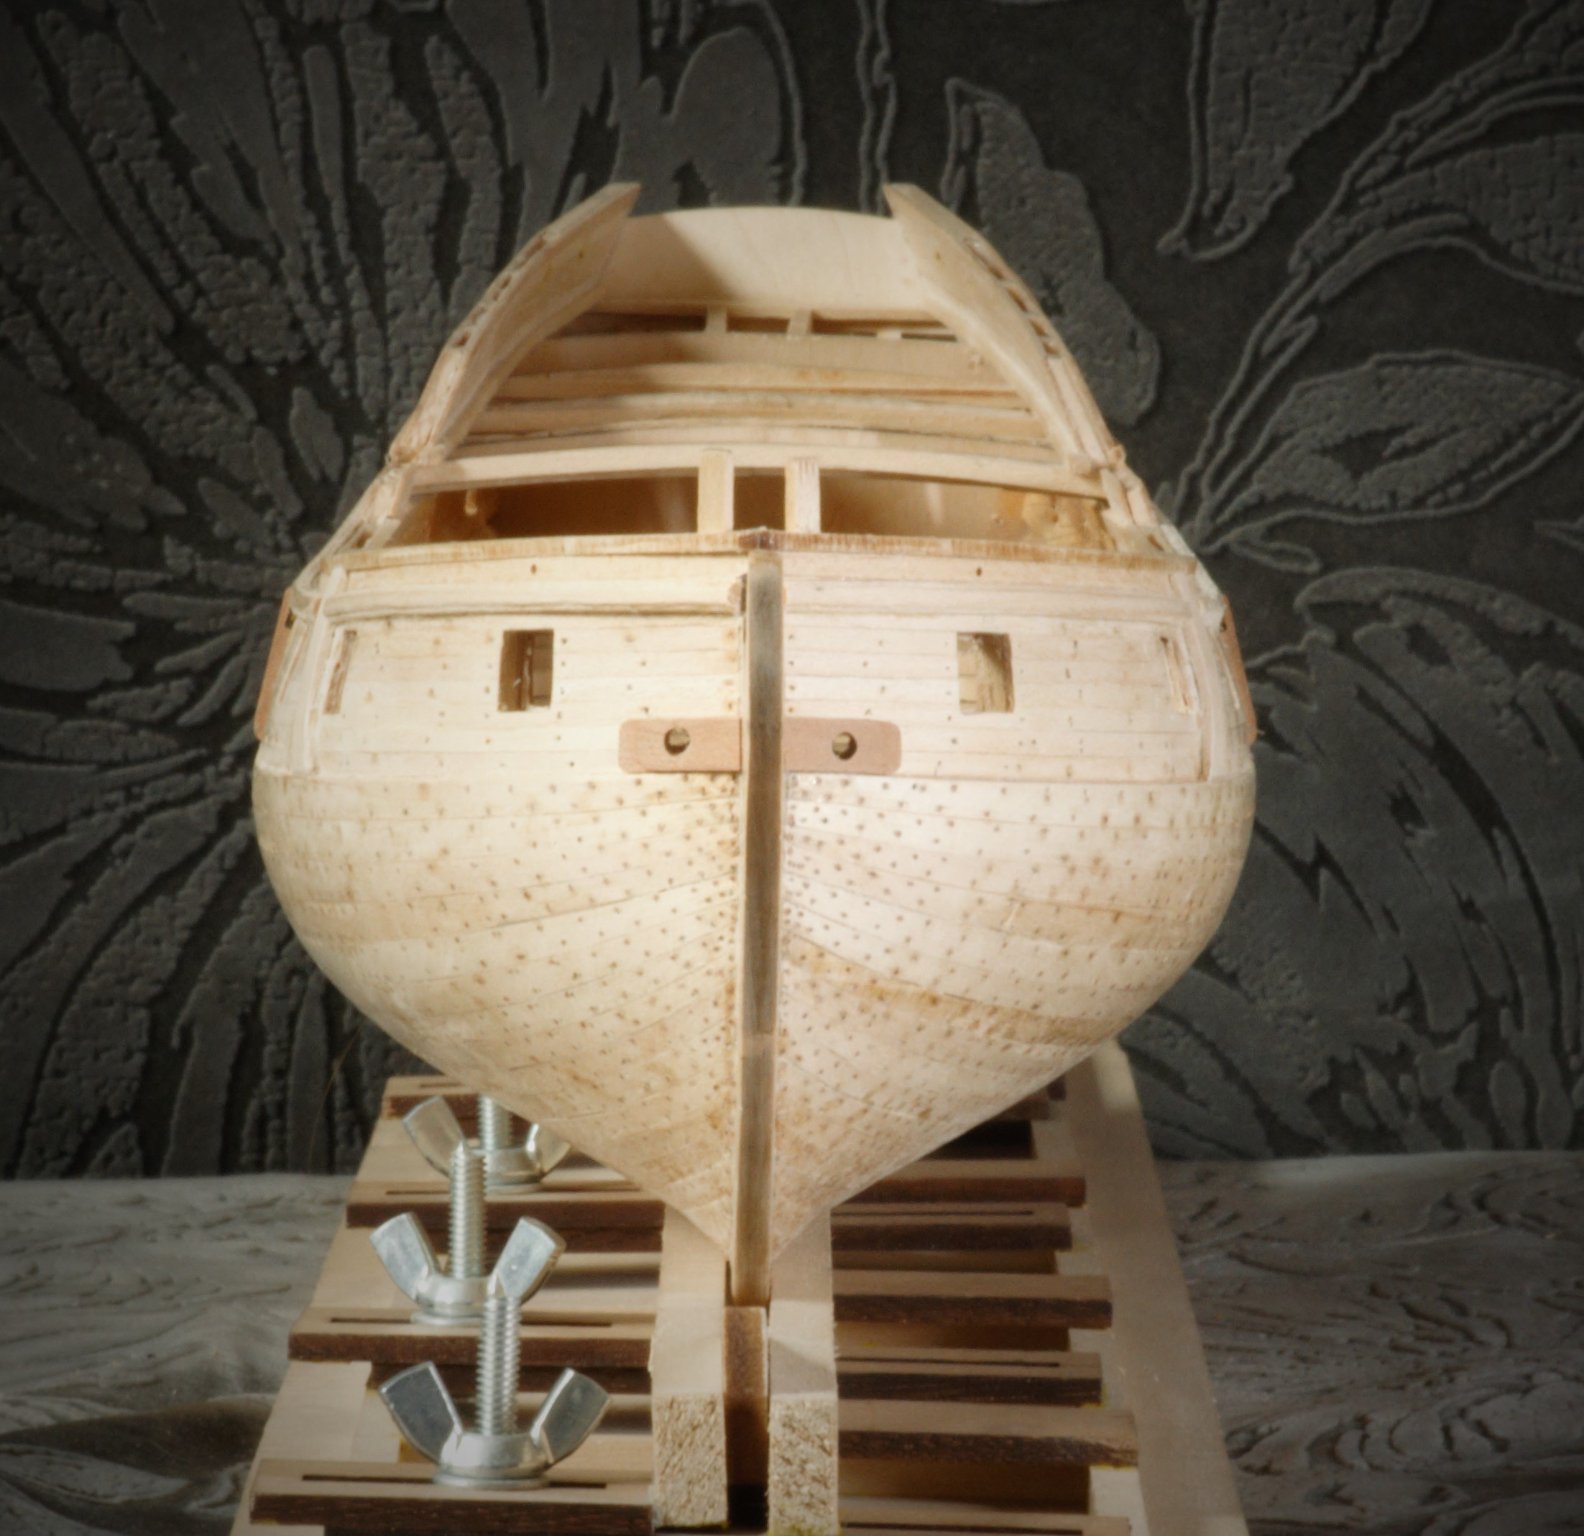
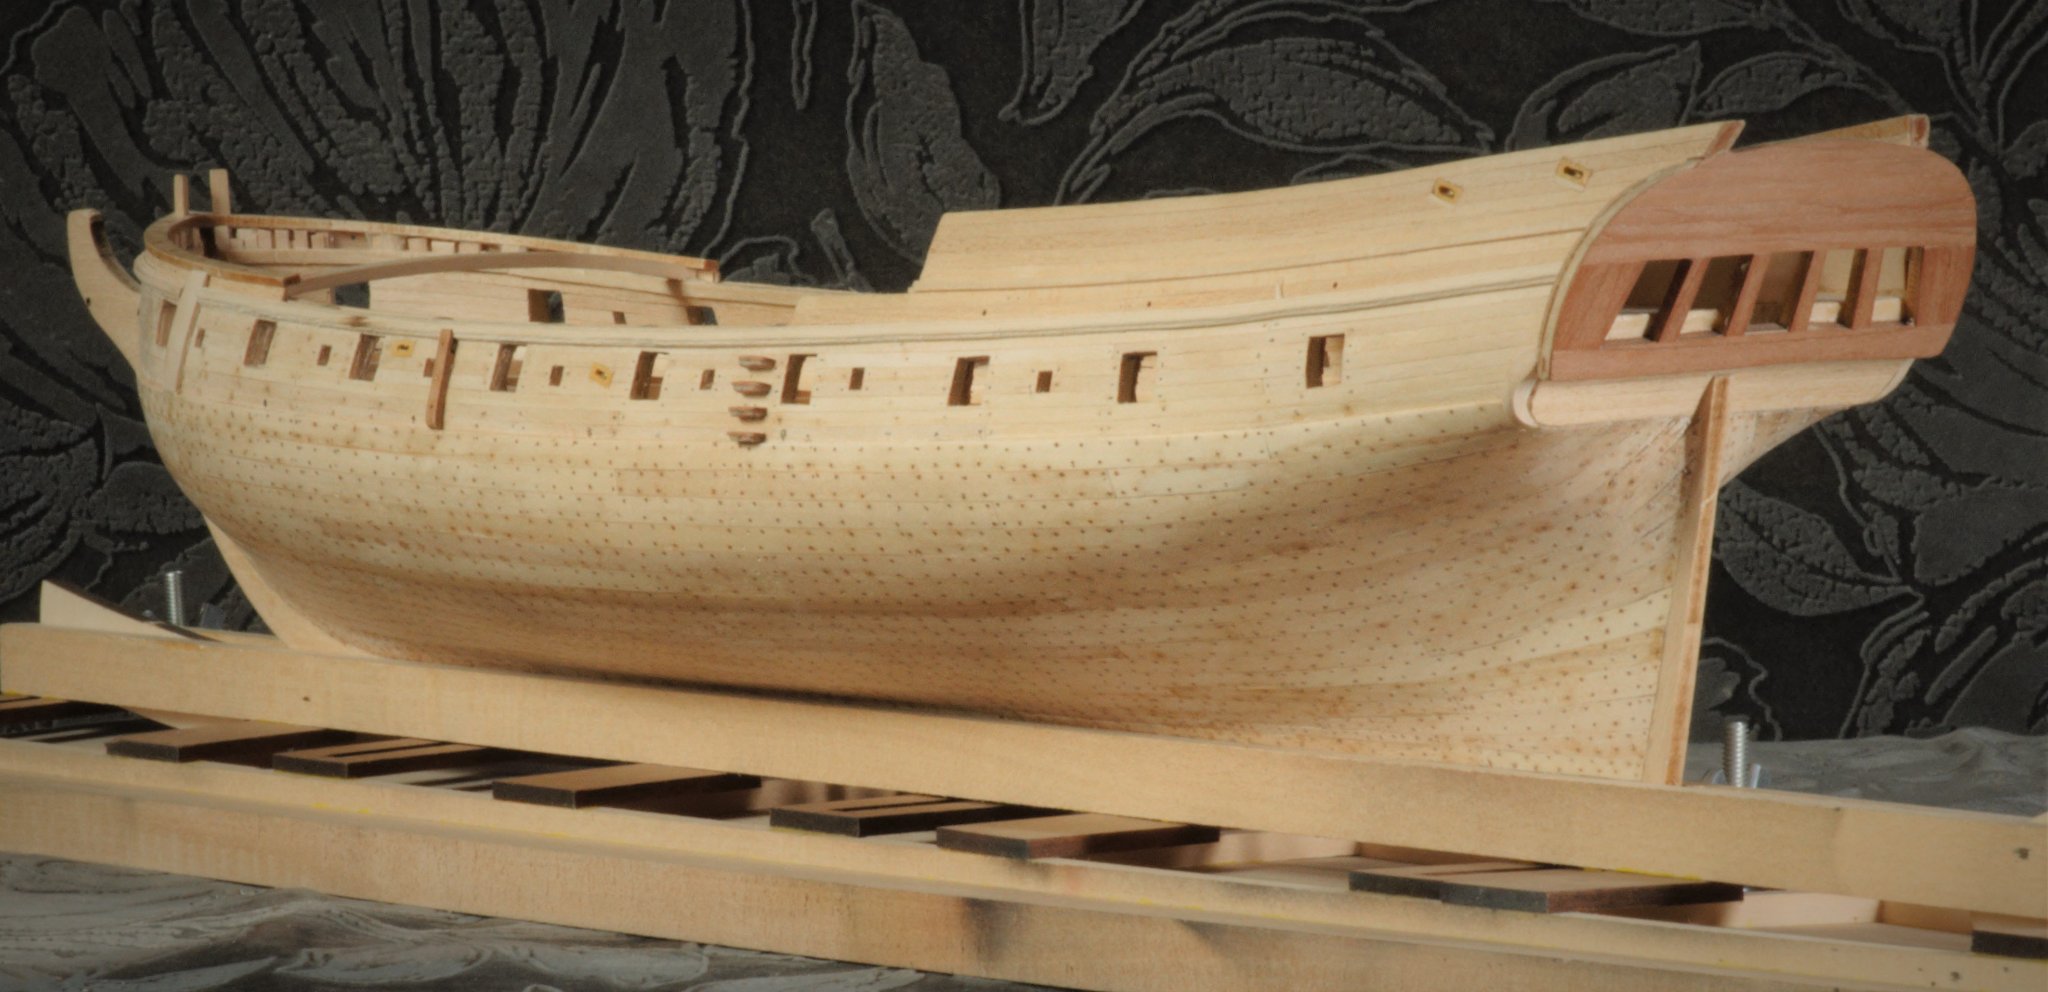
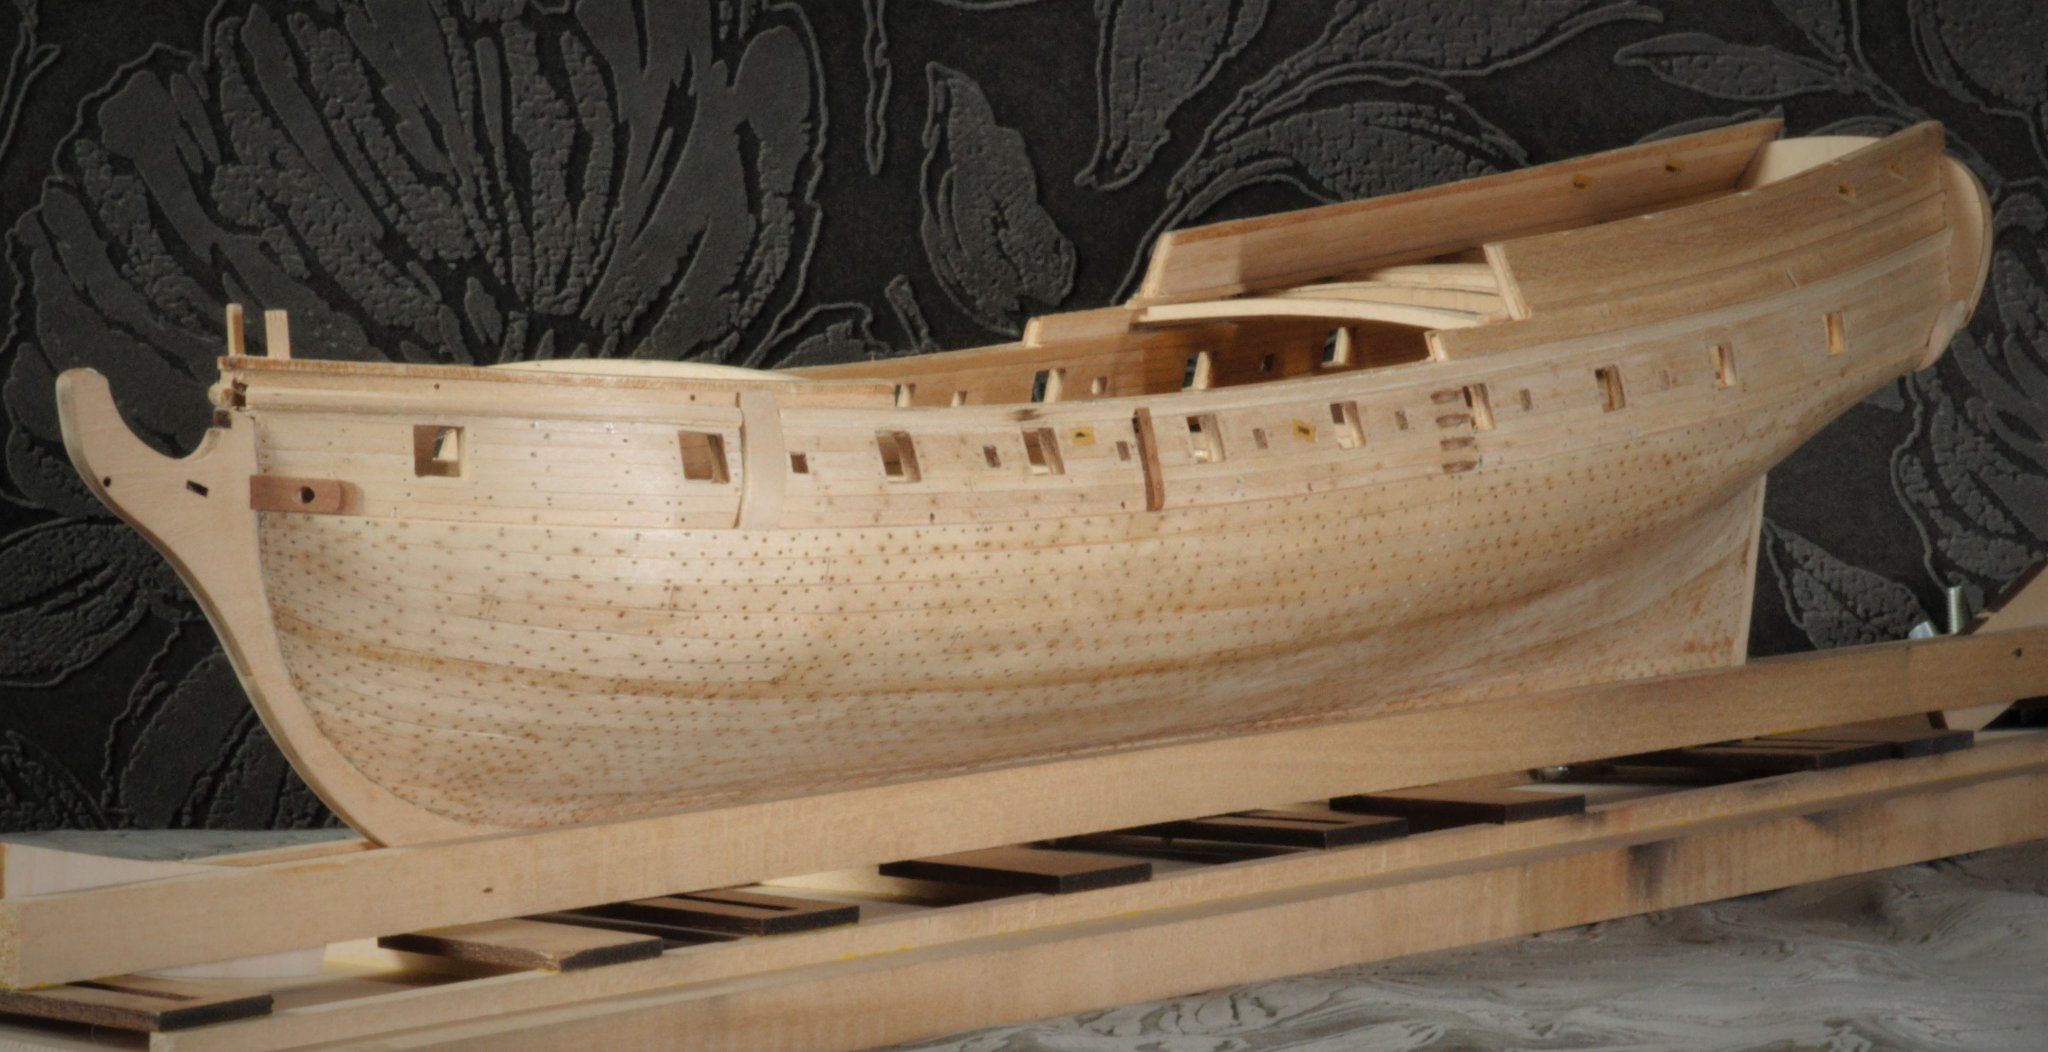
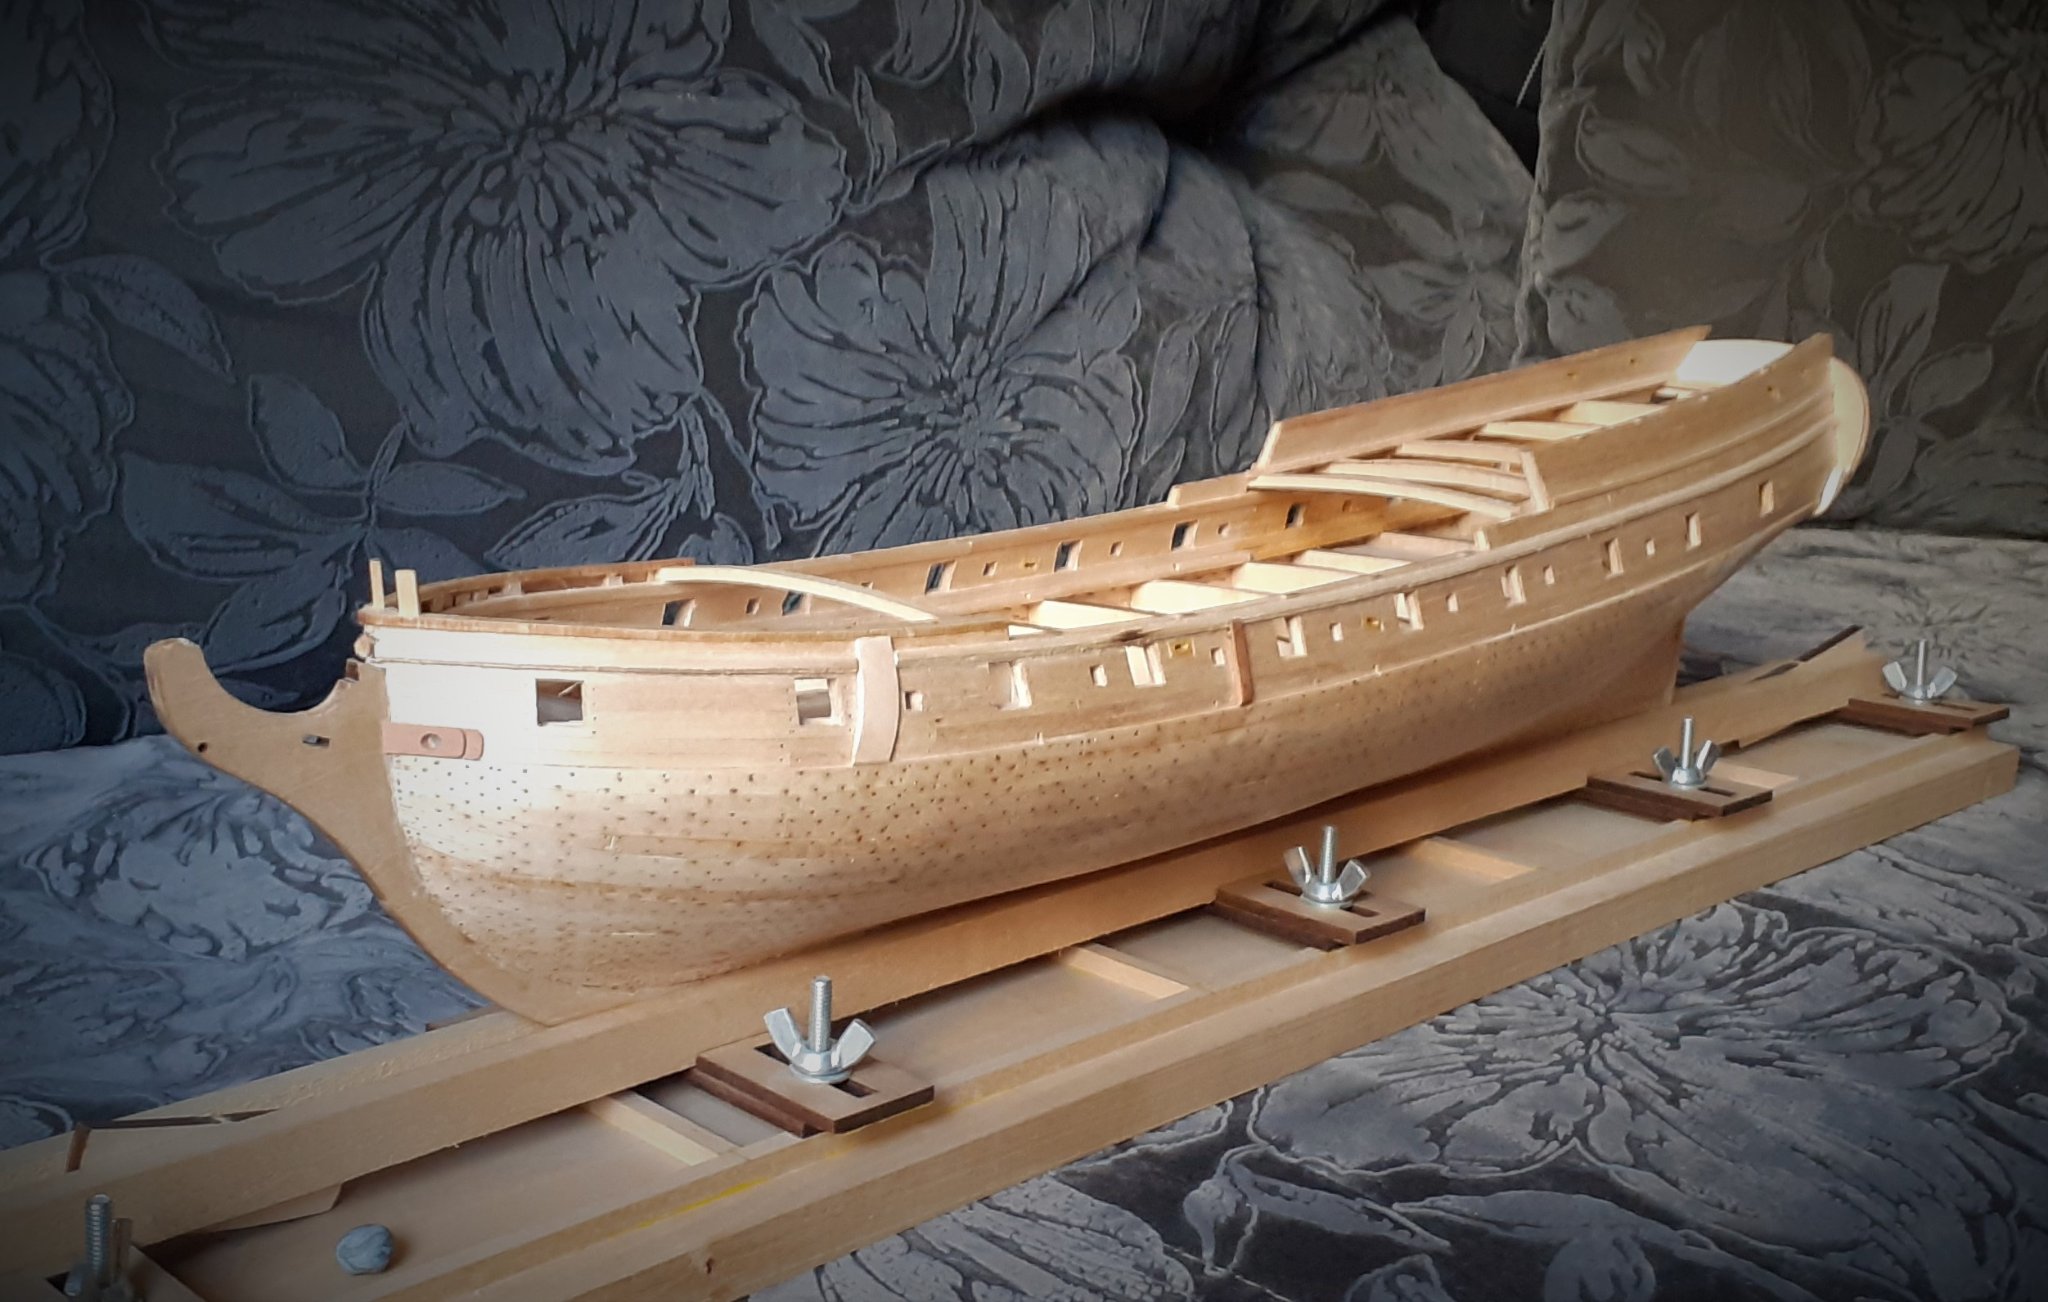
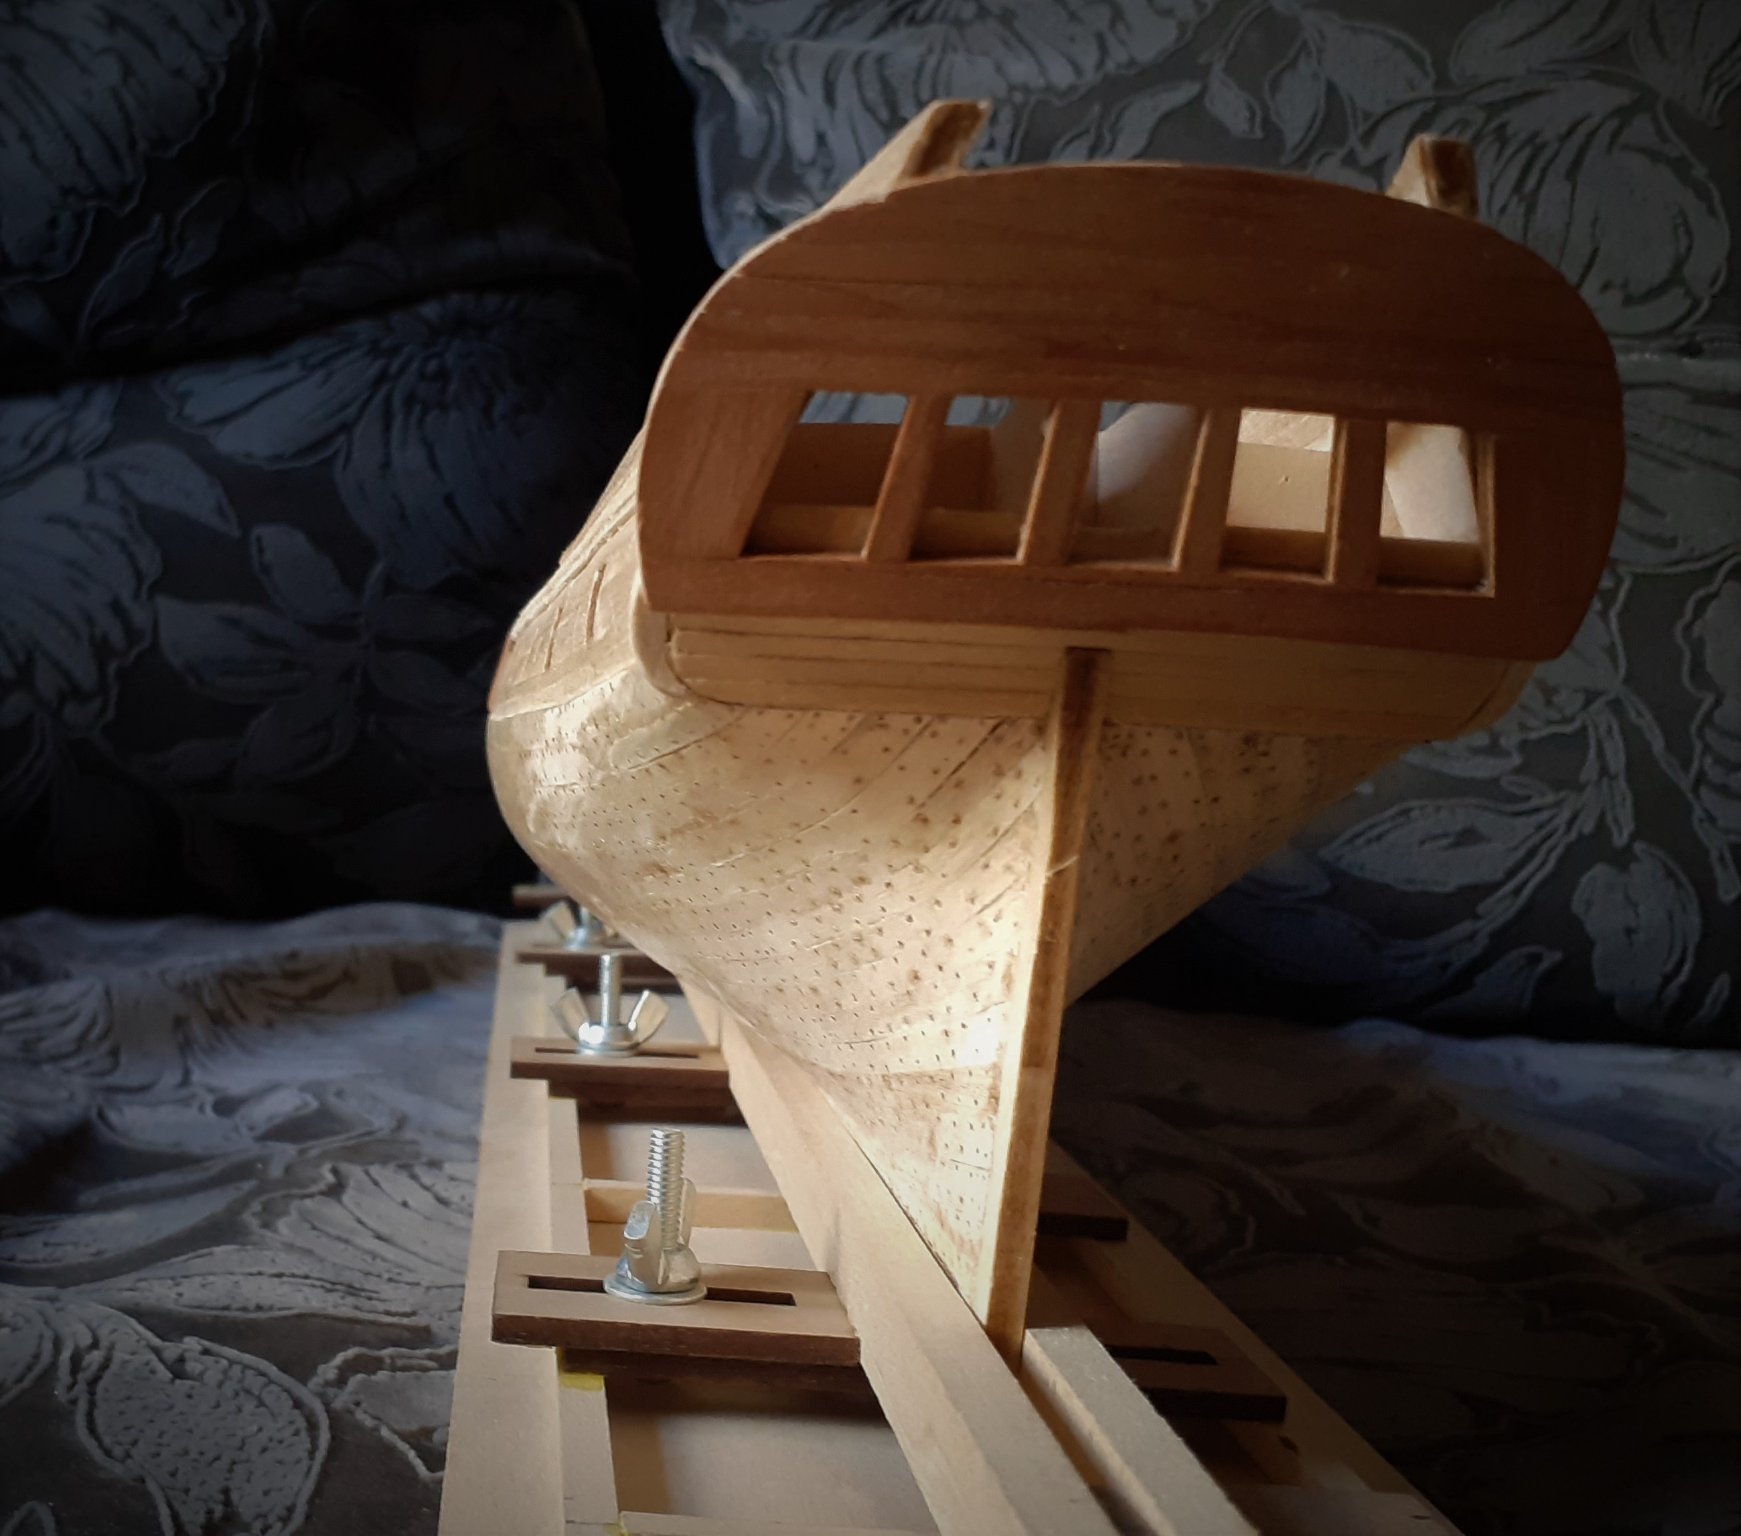
Greetings, everyone! How's the weather at your places? We are enjoying a very pleasant indian summer in Moscow these days - I cannot remember when the weather was this good at the beginning of october. Now I'm going to share a few pics - my main camera is malfunctioning so these were taken with a phone (sorry for quality). The progress is quite modest however - tree nailing below the wale - it took almost half a year to do, molding under rails (figured profile made with special scriber). Now marking places for smaller tree nails upwards from wale.

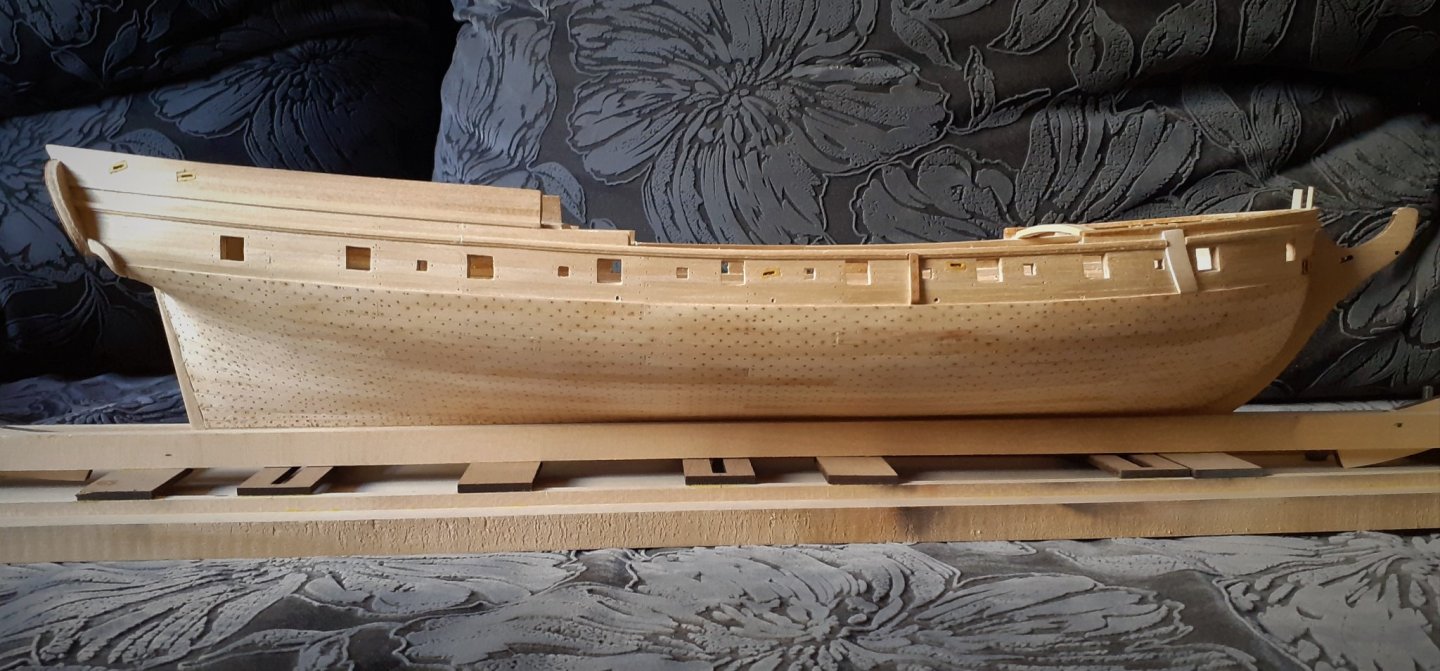


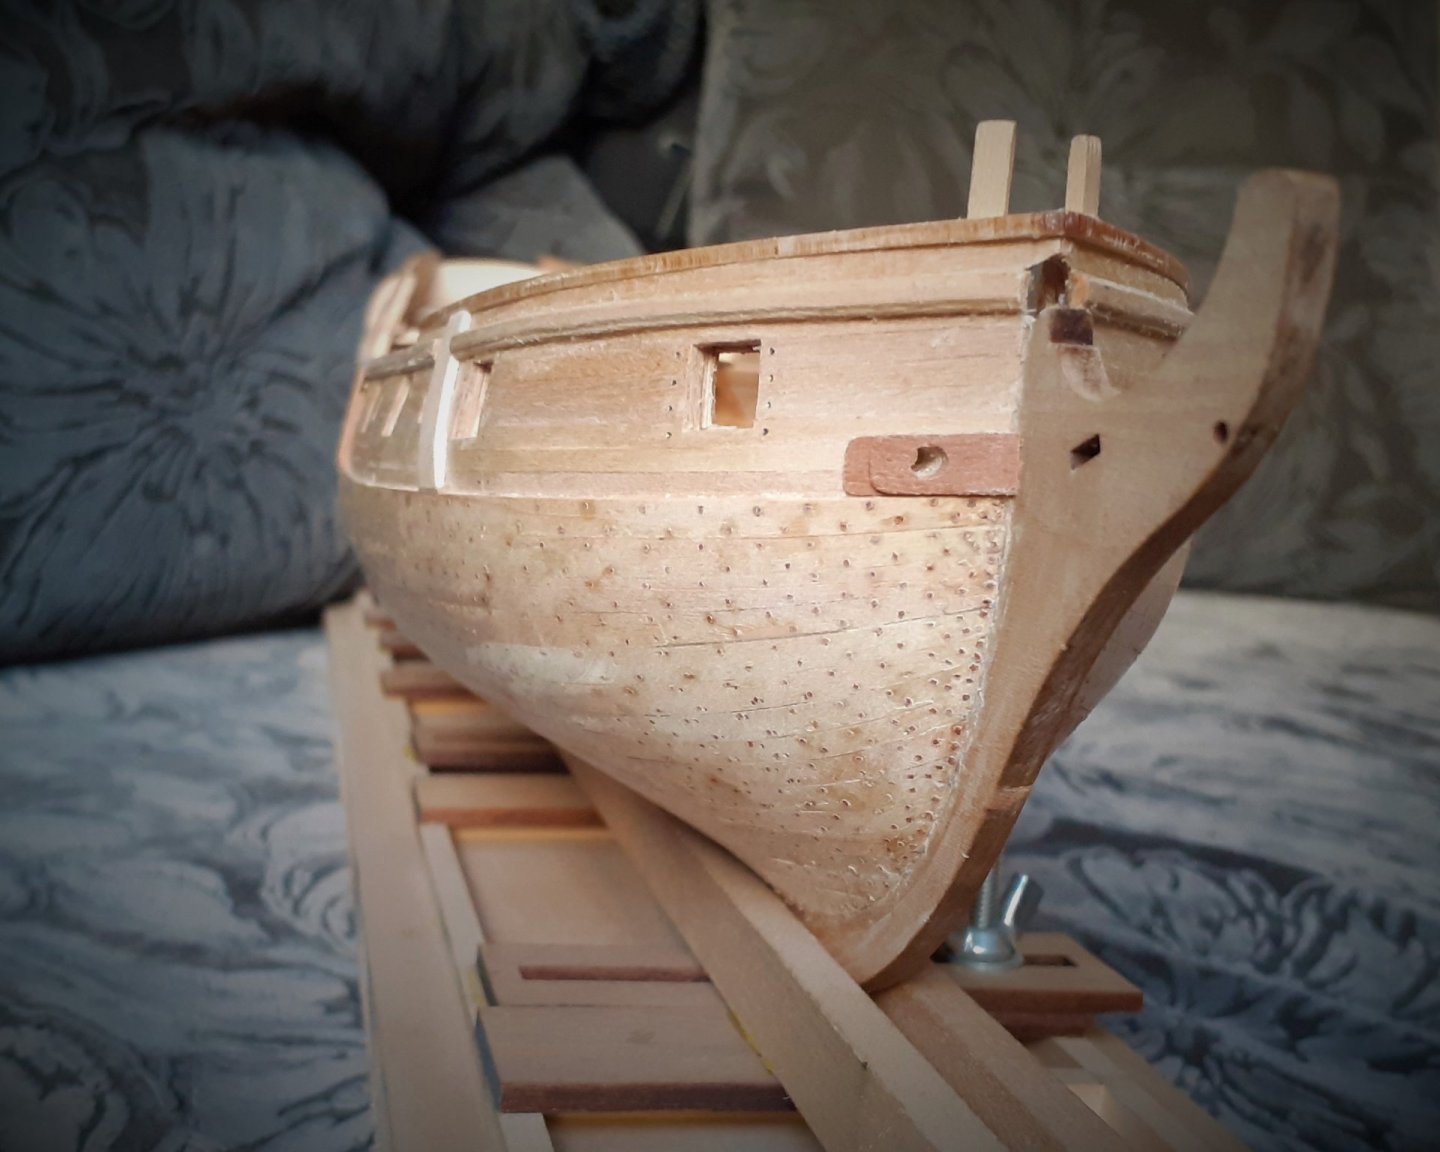

- Henke, KingDavid, GrandpaPhil and 1 other
-
4
-
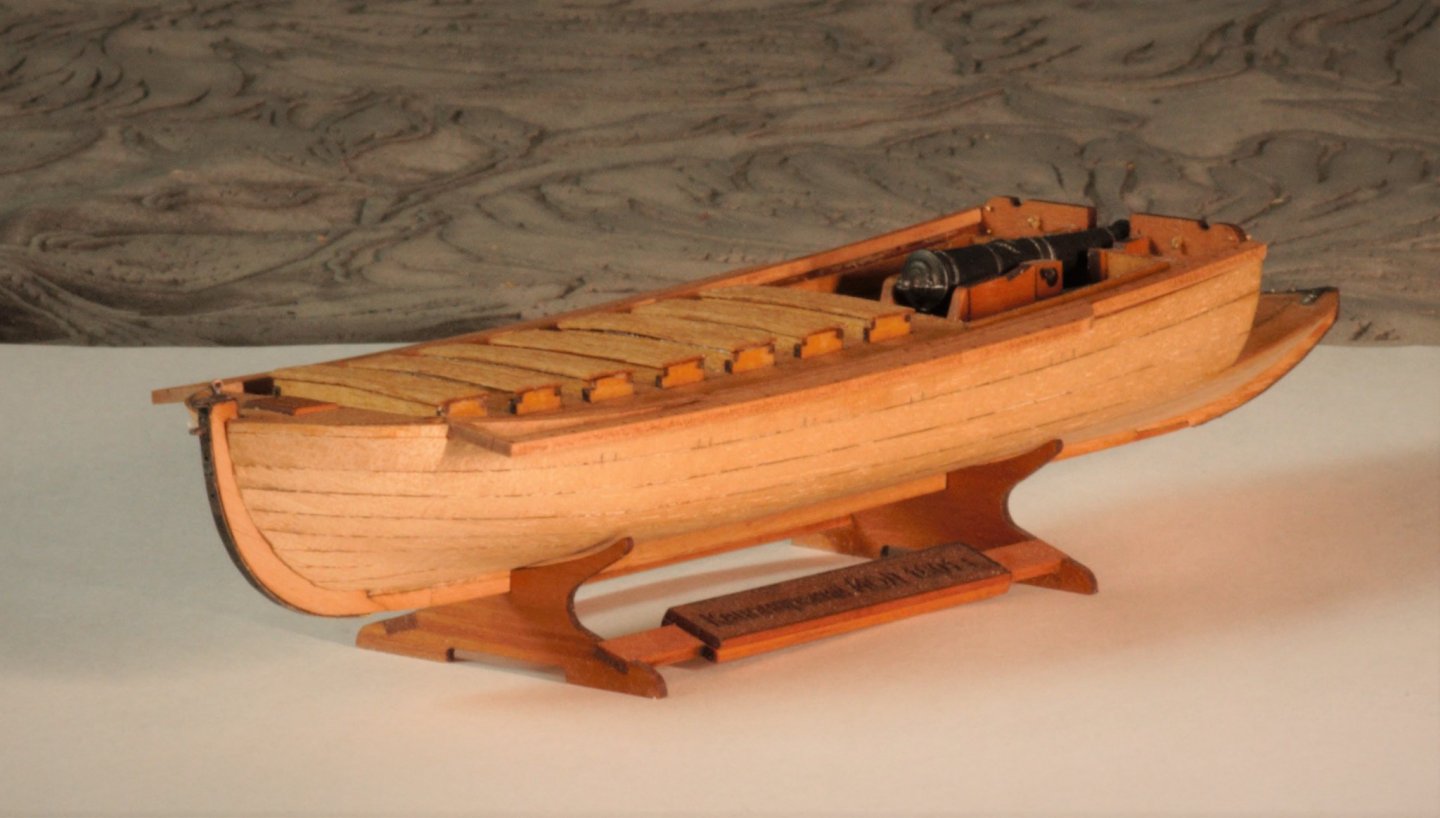
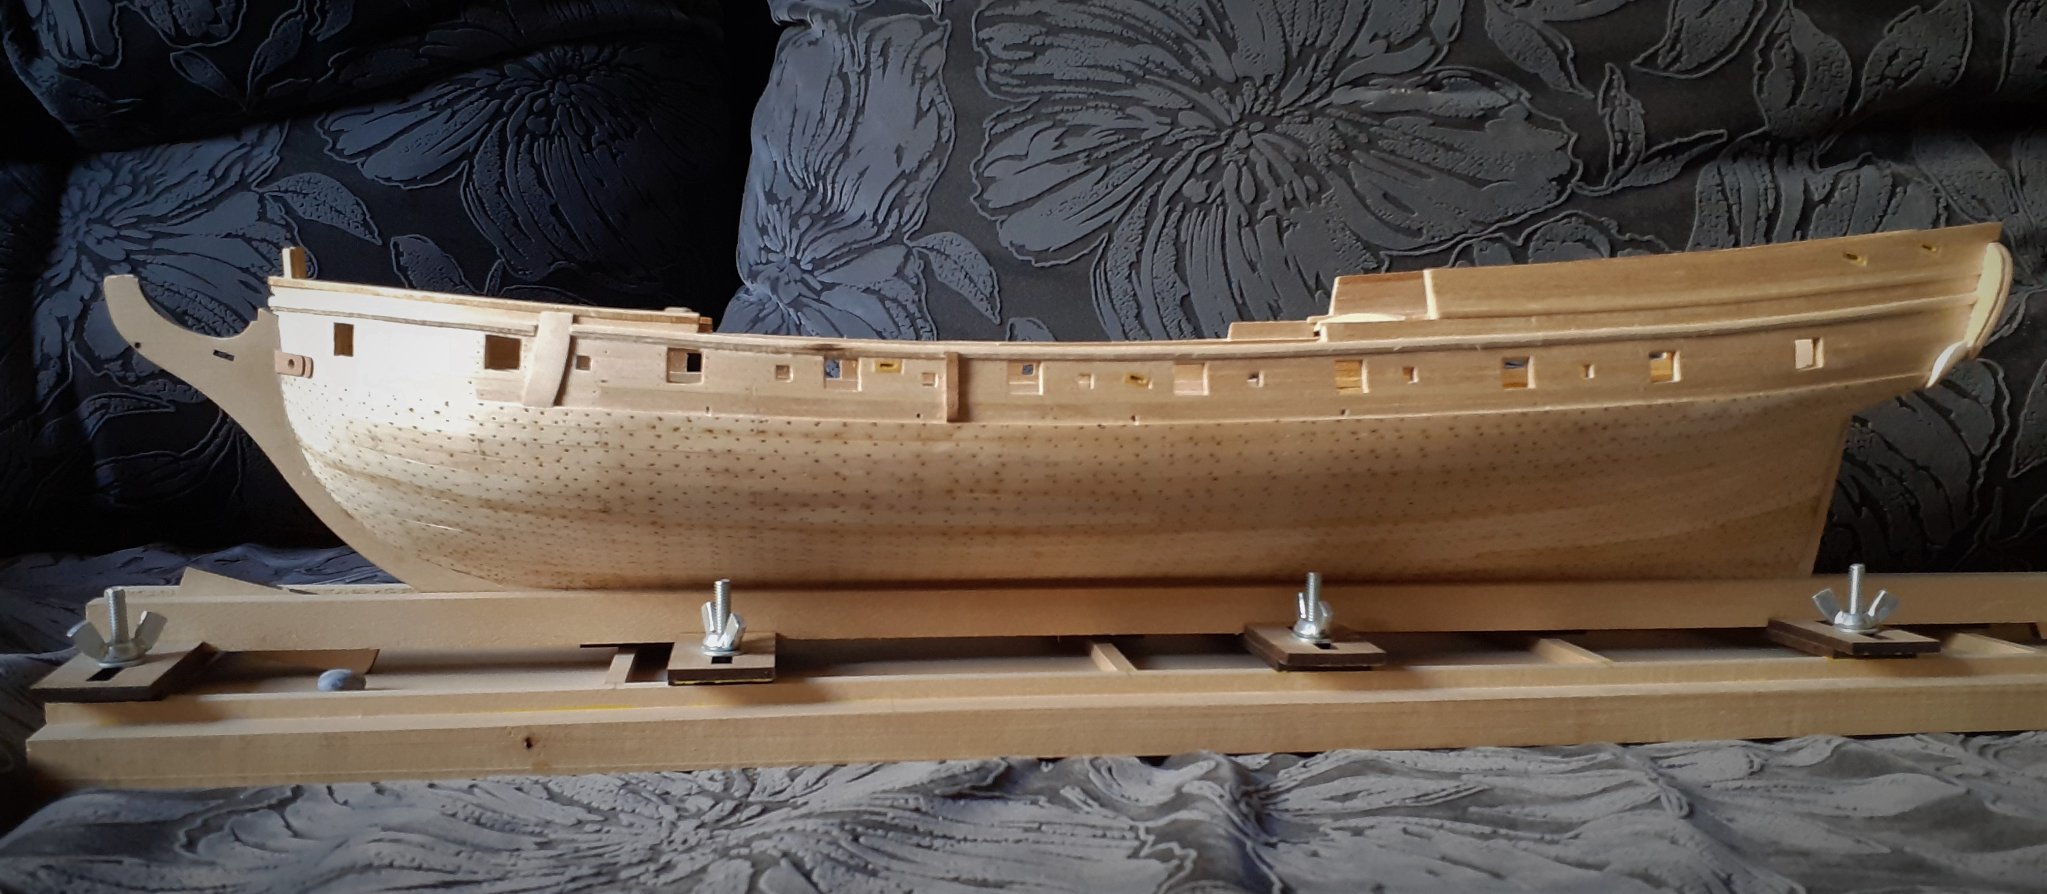
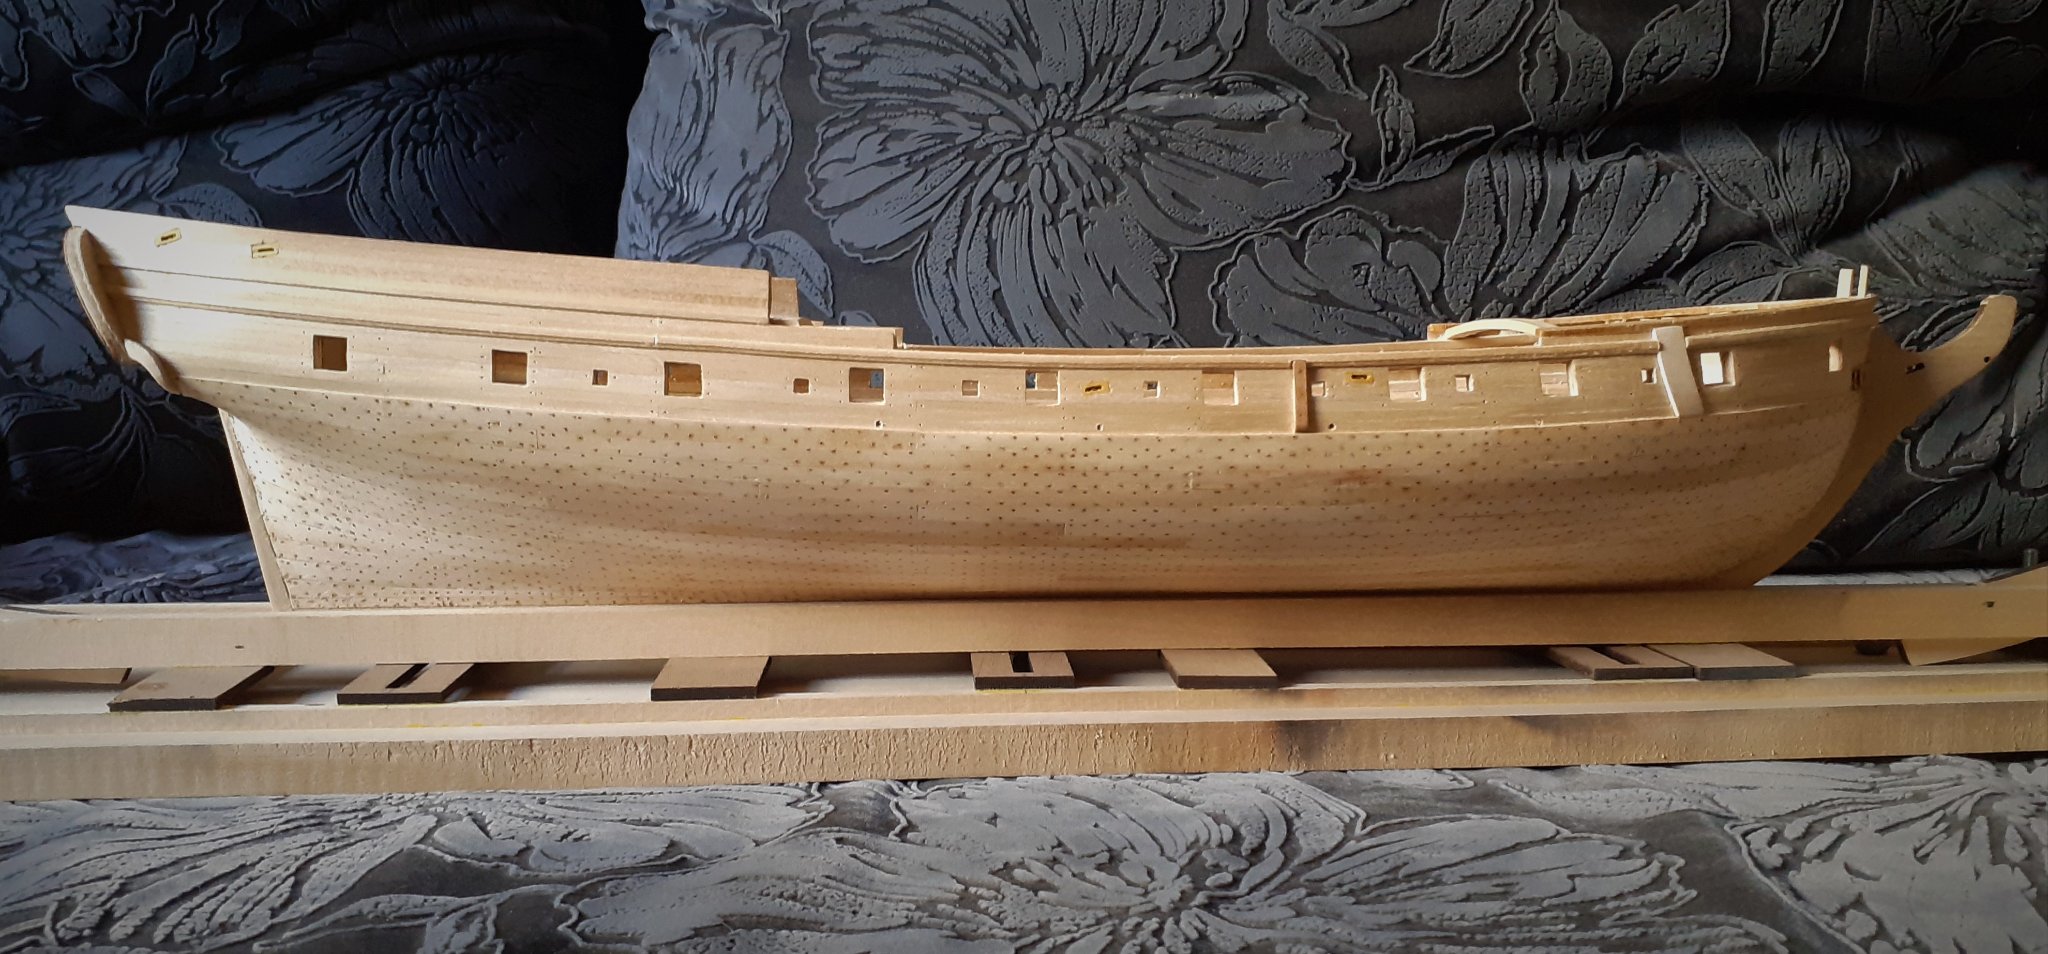
tewatson, thank you for you kind words!
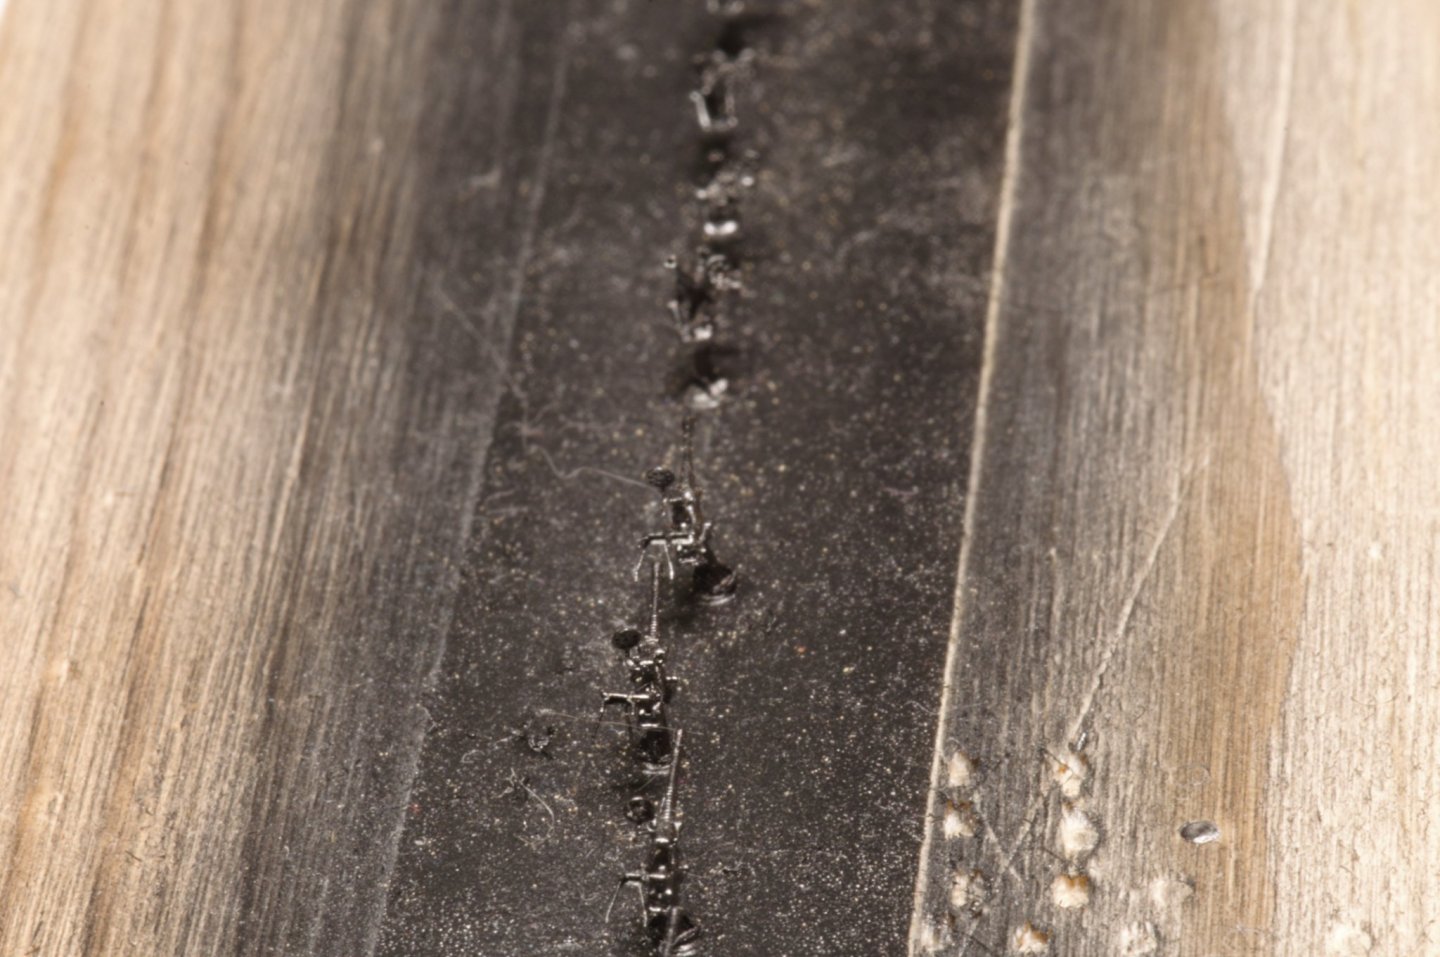
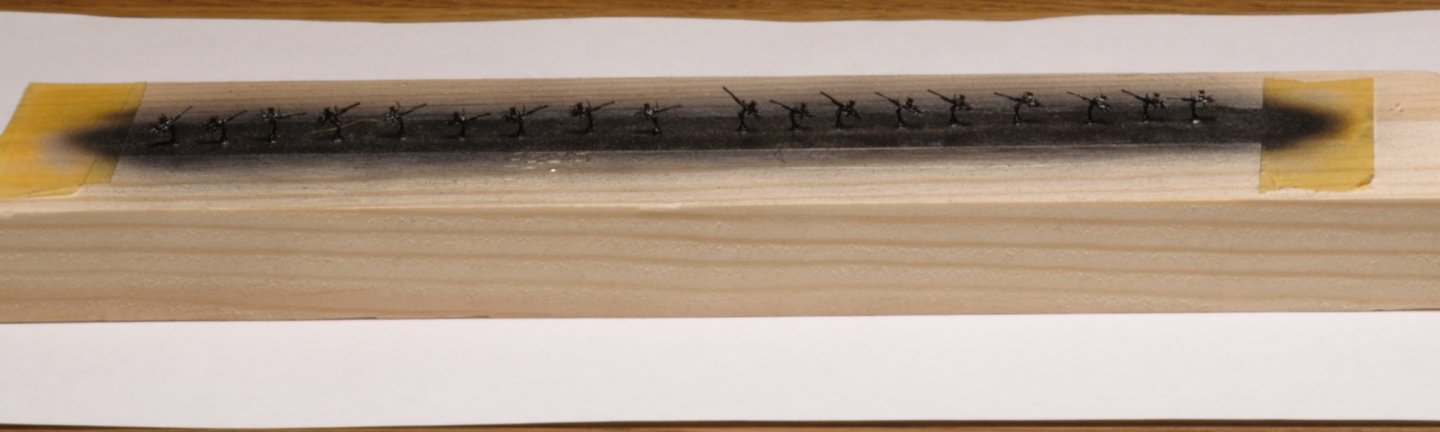
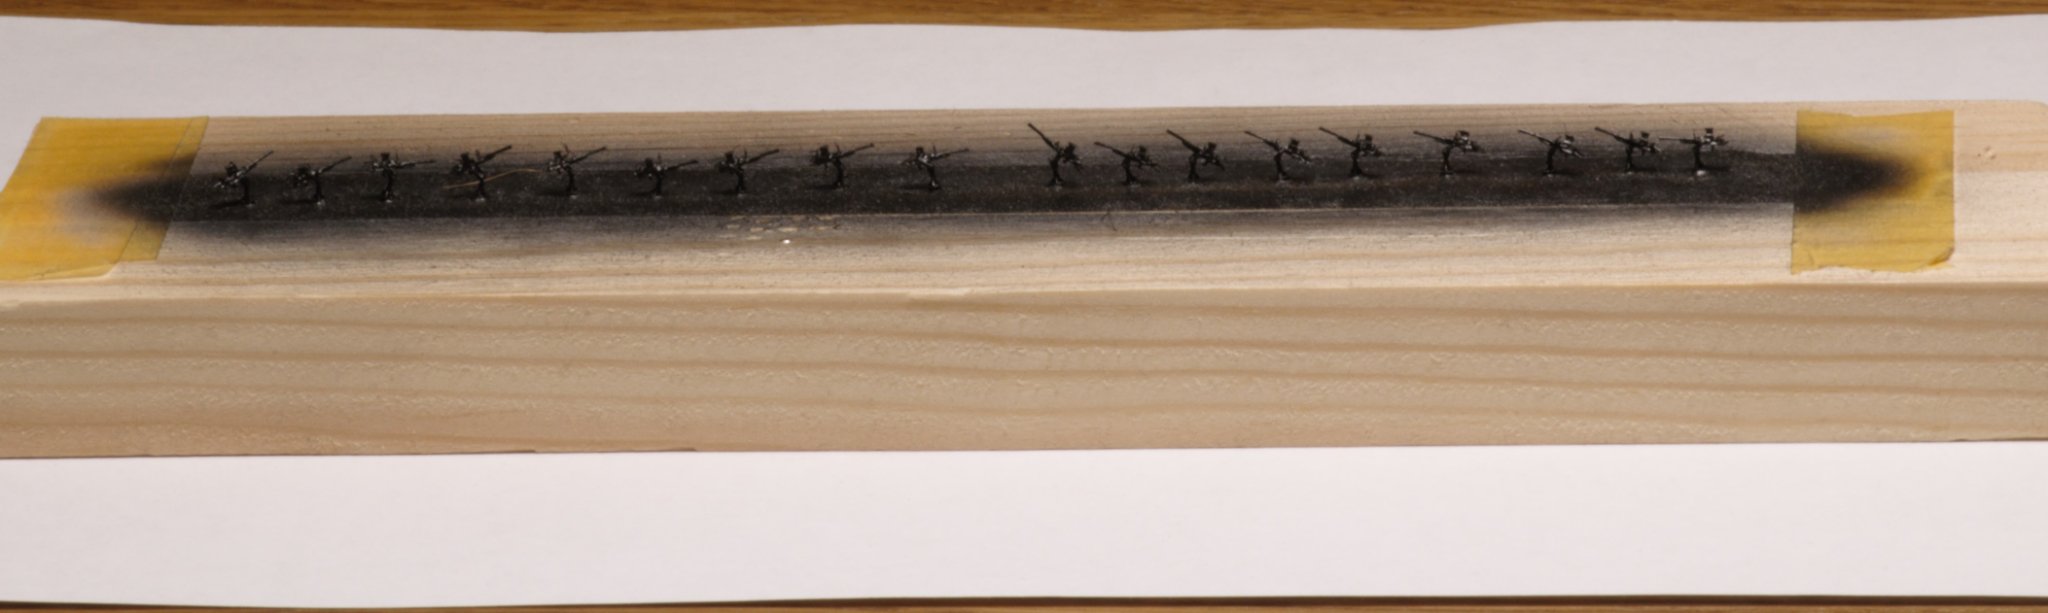
Meanwhile I've finished tree-nailing lower part of the hull (some pics to come of course). Now I'm trying to come closer to paintwork - main idea is to combine painted parts with oiled parts. I've made a "training cat" out of scrap wood strips, tree-nailed it a bit, then divided it in four stripes - one covered with tung oil, one painted with white Vallejo primer made by airbrush, one with couple layers of black Vallejo primer and one with more layers of black et voila:
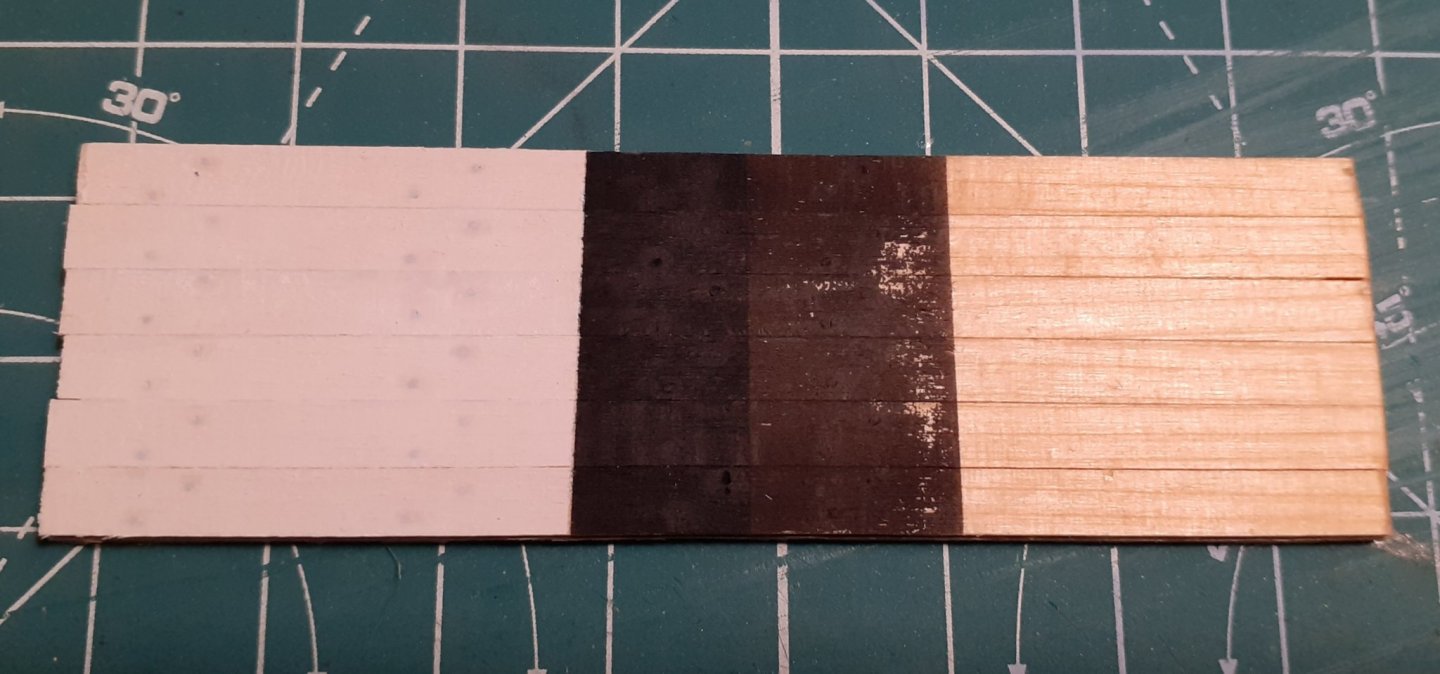
Next I tried to follow the technology mr. Dmitry Shevelev uses in his beautiful models - a bitumen lacquer - to make the things look older:
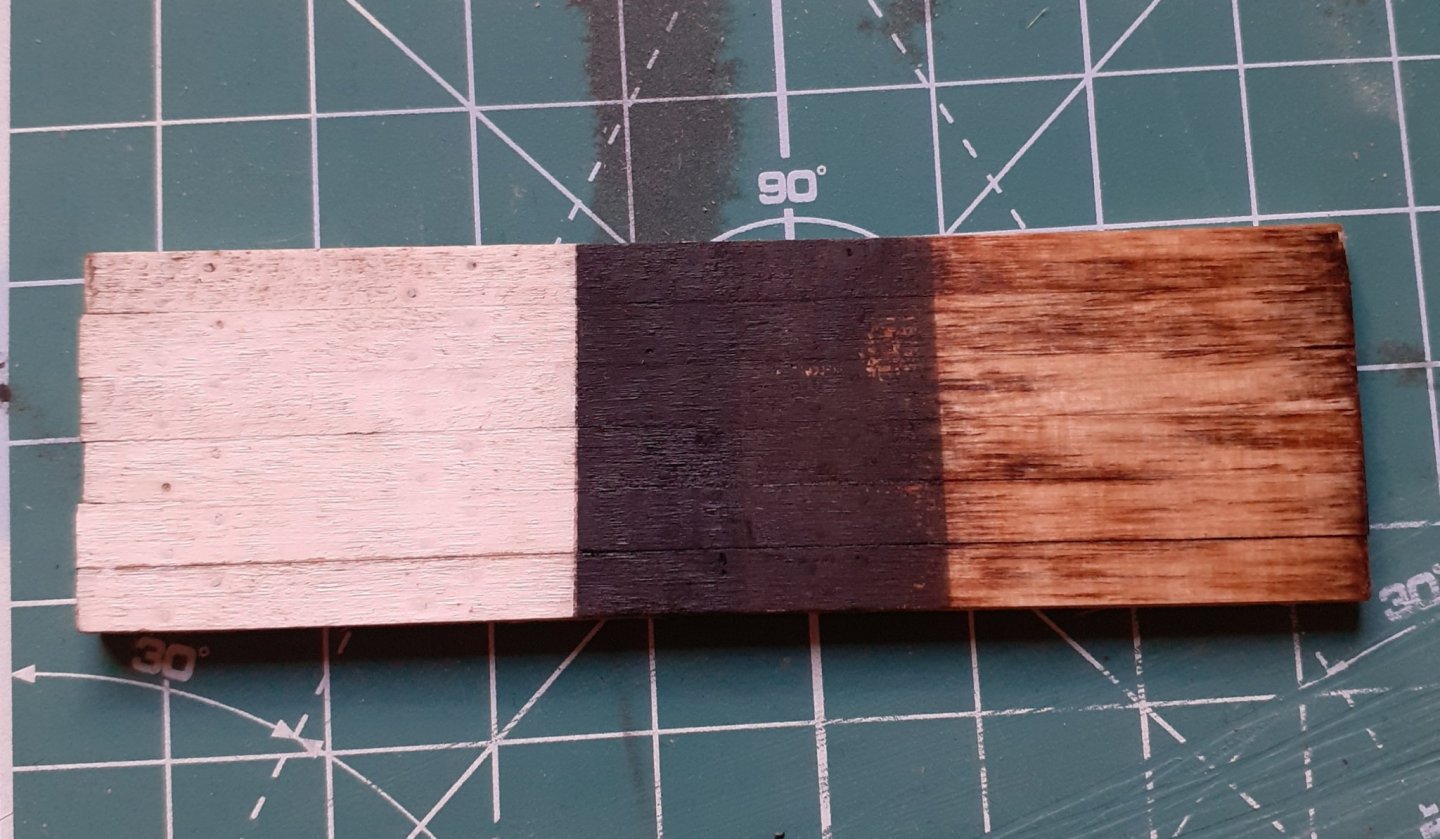
Well, a bit too old and dirty in my opinion - good, that I didn't try it right on a model
🙂
So a bit training still needed.
To be continued!
- Edwardkenway, Henke, CiscoH and 1 other
-
4


IJN Yukikaze by DmitriyMarkov - Tamiya - 1/350 - PLASTIC
in - Kit build logs for subjects built from 1901 - Present Day
Posted
Thanks, Mike !
As far as initial plastic is concerned - well, it's Tamiya: you can drop some glue into the box, shake it - et voila - You've got a model 🙂
Best regards, Dmitry