Beef Wellington
-
Posts
2,245 -
Joined
-
Last visited
Content Type
Profiles
Forums
Gallery
Events
Everything posted by Beef Wellington
-
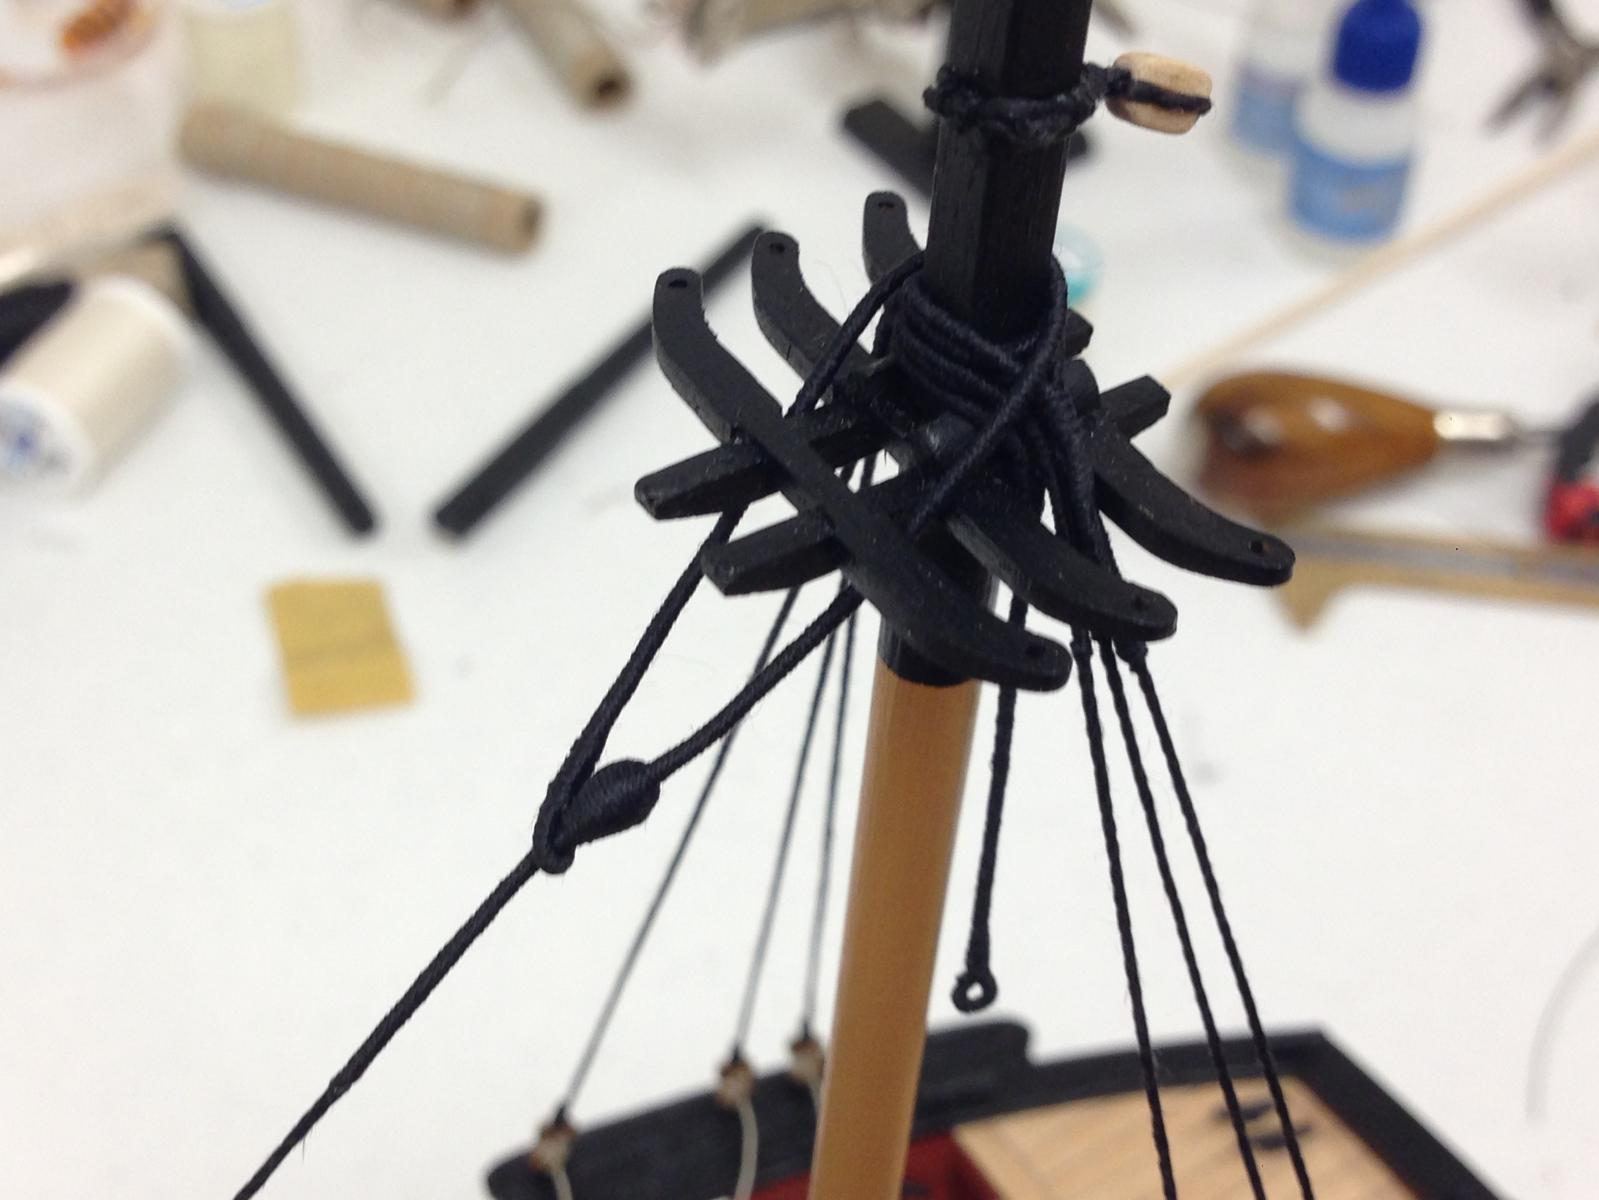
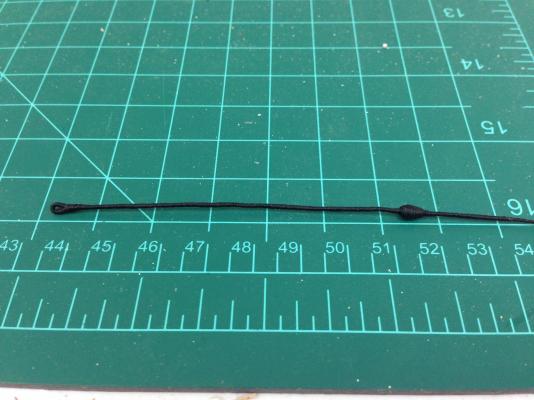
 Bug - nice to have you on board. I think I'm below the $1 mark Colin - thanks for kind words, I'm learning from your wonderful Pandora Mobbsie - it was Andy that put me onto that. Anyway, I owe you at least a couple for the 'mouse' help...speaking of.. First Mouse: I've been procrastinating over my first mouse on the mizzen stay. Size was estimated from various drawings. Followed Mobbsie's method and made the mouse out of wood dowel and glued onto the line which was then served. PVA glue was brushed onto the wood to keep the serving line in place (this photo is the second attempt and you can see the fuzz from attempt 1) Finished moused end...Lever identifies a pretty small eye vs the instructions which call for a much larger one against the mouse. The stay was served a little beyond the mouse which per Lever can be done "according to fancy". Mizzen stay in place...it looks OK to me but as always would welcome feedback if I'm off track before committing to this.
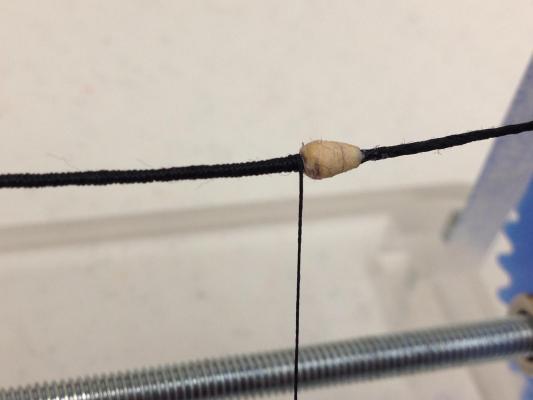

- 800 replies
-
- 11
-

-
- snake
- caldercraft
- (and 1 more)
-
Doubt this will prove to be too challenging...
-
Royal James?
-
Colin, those masts are just incredible, amazing detail and accuracy you've built into them.
-
Good for you Jim, those pieces look great, you should be pleased. My experience was that the walnut can vary greatly from piece to piece, some seem to split by just looking at them but you seem to be managing just fine.
- 412 replies
-
- 1
-
-
- snake
- caldercraft
- (and 1 more)
-
Ratlines - parallel to what?
Beef Wellington replied to mel_drew's topic in Masting, rigging and sails
Could I ask a related question on the use of stretchers - would these have been installed permanently? It seems that these are not typically installed on many ships and I'm curious why given the normal obsession with getting everything right. Any info would be appreciated. -
Here's some good news for all you Snake modelers out there looking to get rich . Check out the link below, seems the going rate for a completed model is around GBP 1,450 (~US$2,400) which includes the case. Its clear no one does this to get rich! http://www.rubylane.com/item/802481-3341/Fine-Cased-Model-1797-Sloop
- 800 replies
-
- 2
-
-
- snake
- caldercraft
- (and 1 more)
-
Sjors - understand you perfectly, thanks. Jim - appreciate the confirmation Full steam ahead it is...I suspect that the other shrouds and stays will take quite some time, but already I hear the very faint Syren's song of the ratlines.
- 800 replies
-
- 1
-
-
- snake
- caldercraft
- (and 1 more)
-
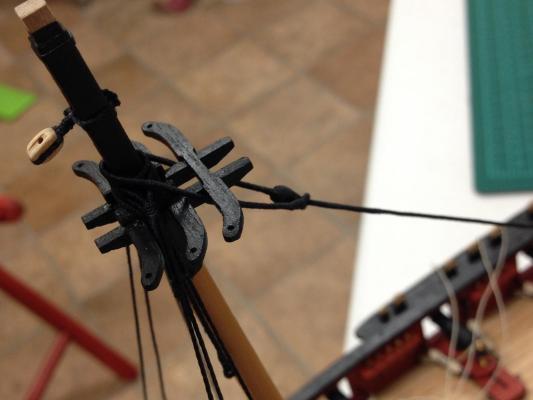
Hi Sjors - no, there is no platform on the mizzen mast, the mizzen mast seems quite 'stunted' compared to larger ship rigged vessels. The mizzen cross tree is about the same size as the crosstrees on the main and fore top masts. Here is a picture of the deadeyes but not yet tightened fully, please tell me if I've done something wrong. I first put the shrouds around the mast and then looped around the deadeyes before seizing them. As is the shrouds looks taught, but I'm not sure how taught these need to be - the .75mm line seems much stronger than the masts at this scale and I'm worried I'd break something if they needed to be much tighter.
- 800 replies
-
- 4
-
-
- snake
- caldercraft
- (and 1 more)
-
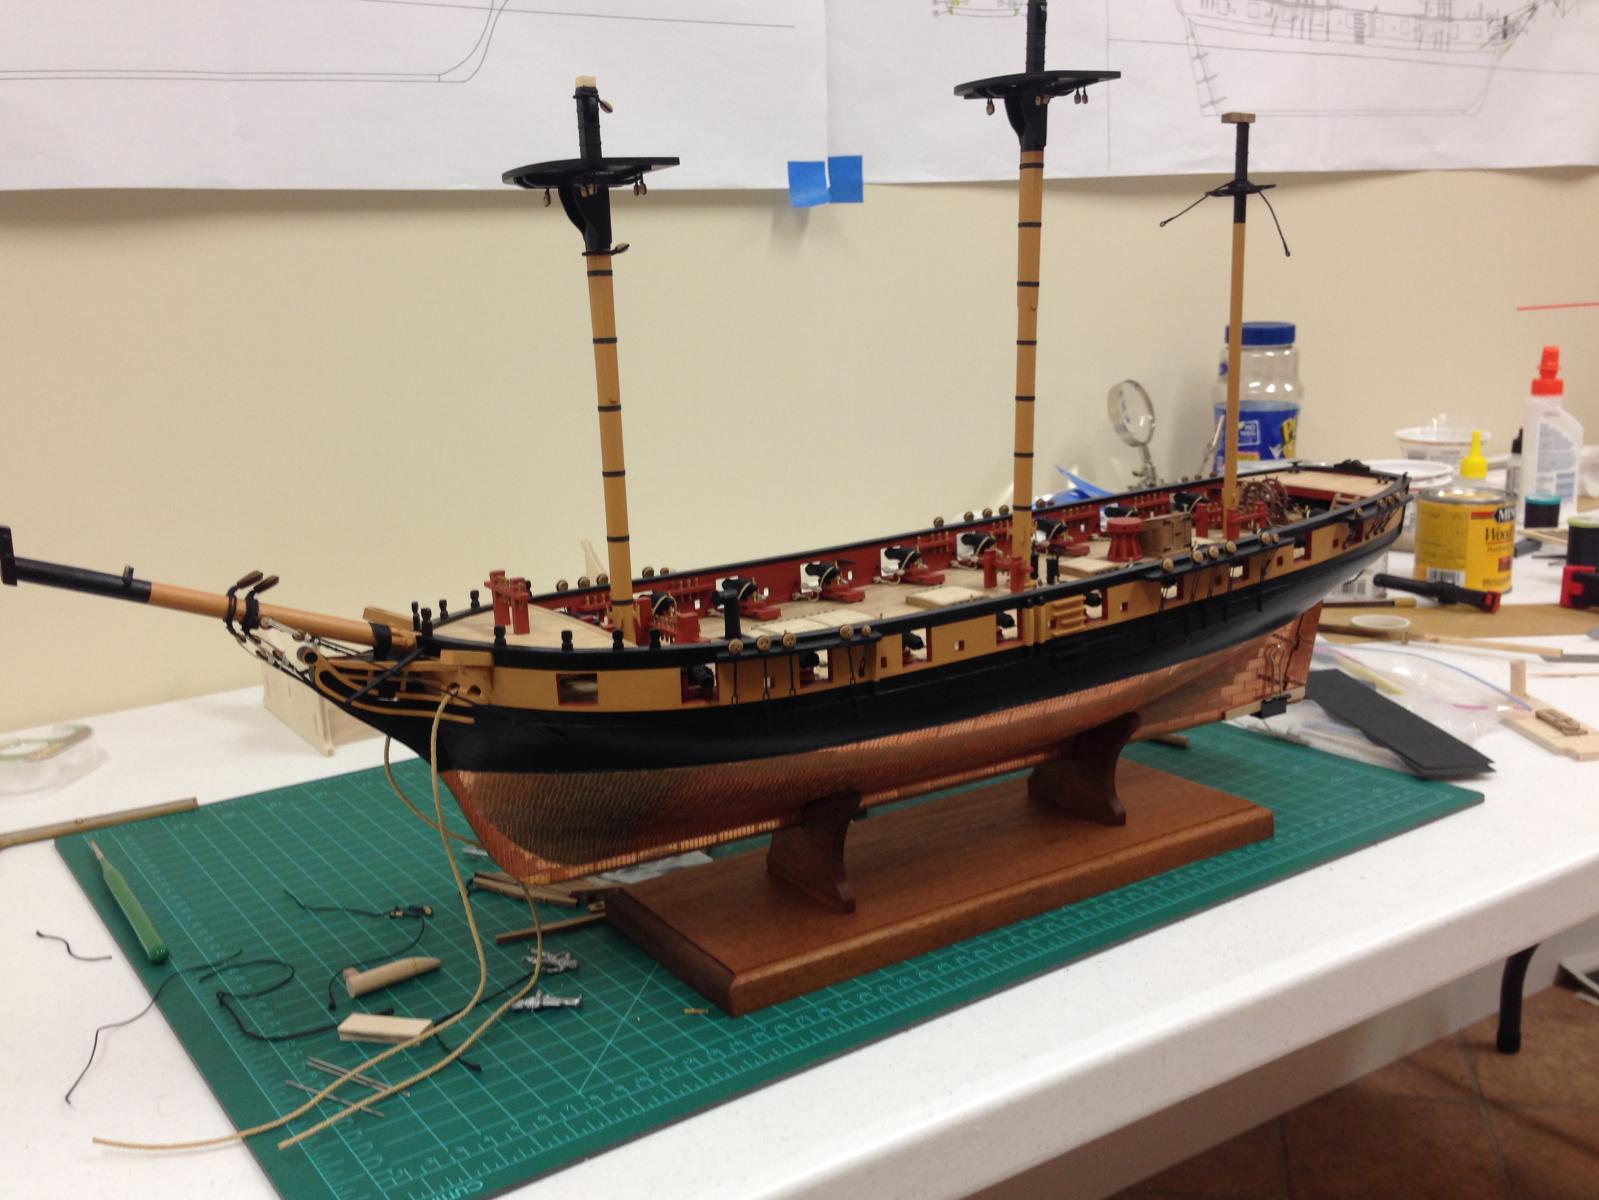
Cheers Mobbsie and all the 'likes'. Think I'm officially into the rigging stage. Mizzen mast stepped and the shrouds in installed. I'm going to wait to finish 'tightening' these until later. Found the method of getting the 3.5mm deadeyes into the shrouds at the correct height very fiddly, after many choice words found that using 2 pieces of wire in the holes worked better for me (rather than a single one as called out in the instructions) as this provided some more stability. Hopefully the 5mm deadeyes will be a little easier. Theres quite a stack of shrouds around the mast which is quite pleasing, glad that these were served. Following Andy's advice the Burton pendants were 'painted' with quite a bit of dilute PVA and then weighted so that they followed a more natural, less gravity defying line. A belated Happy New Year to everyone!!
- 800 replies
-
- 10
-
-
- snake
- caldercraft
- (and 1 more)
-
I take my hat off again to you Mike, looking very sharp indeed. I can only imagine the time and effort that goes into these, definitely is paying off.
- 153 replies
-
- 1
-
-
- badger
- caldercraft
- (and 1 more)
-
Making some great progress Kevin and great detail - I can imagine that the 'detail' must make you susceptible to obsession :-)
-
Nice start Sjors, as you know, I'll be following closely now you're underway.
- 1,616 replies
-
- 1
-
-
- caldercraft
- agamemnon
- (and 1 more)
-
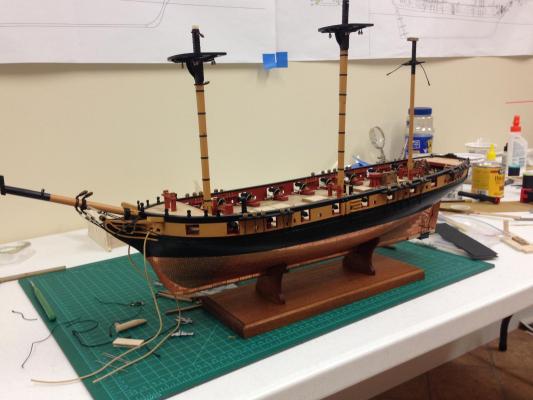
Stergios, this is where I found the base - www.historicships.com, I went with the mahogany. The wood for the cradle got from www.woodcraft.com. Shipping is pretty high from both. The cradle was made by using the contour gauge against the hull to get the shape and then cutting out with a fret saw - basic woodworking but I haven't had to do anything like this since school so was a bit trial and error
- 800 replies
-
- 2
-
-
- snake
- caldercraft
- (and 1 more)
-
Sailor - cheers. Robert - I was planning on just having her sit in the cradles, it seems pretty sturdy. I have thought about putting a few small rods in and drilling a couple of holes in the keel bottom to be doubly sure, but I think unless there's an earthquake should be solid, especially once in a case (that I have yet to figure out as well). Any recommendations on either point would be appreciated.
-
Jim - I think you're safe with the Nelson chequer. Even if it wasn't mandated, I'm sure any captain wanting to emulate 'the big man' would have gone with that scheme. It must be nice to build up your own little squadron
-
John, I know the grass is always greener, but it must be nice to be able to have so many 'different' things to make, I'm thinking armament especially! I know you still have a bunch of boats to make up but hope these aren't too monotonous. I love the detail that you are getting into, shes really looking very nice indeed, and all the 'small stuff' seems to really add to the overall impression.
-
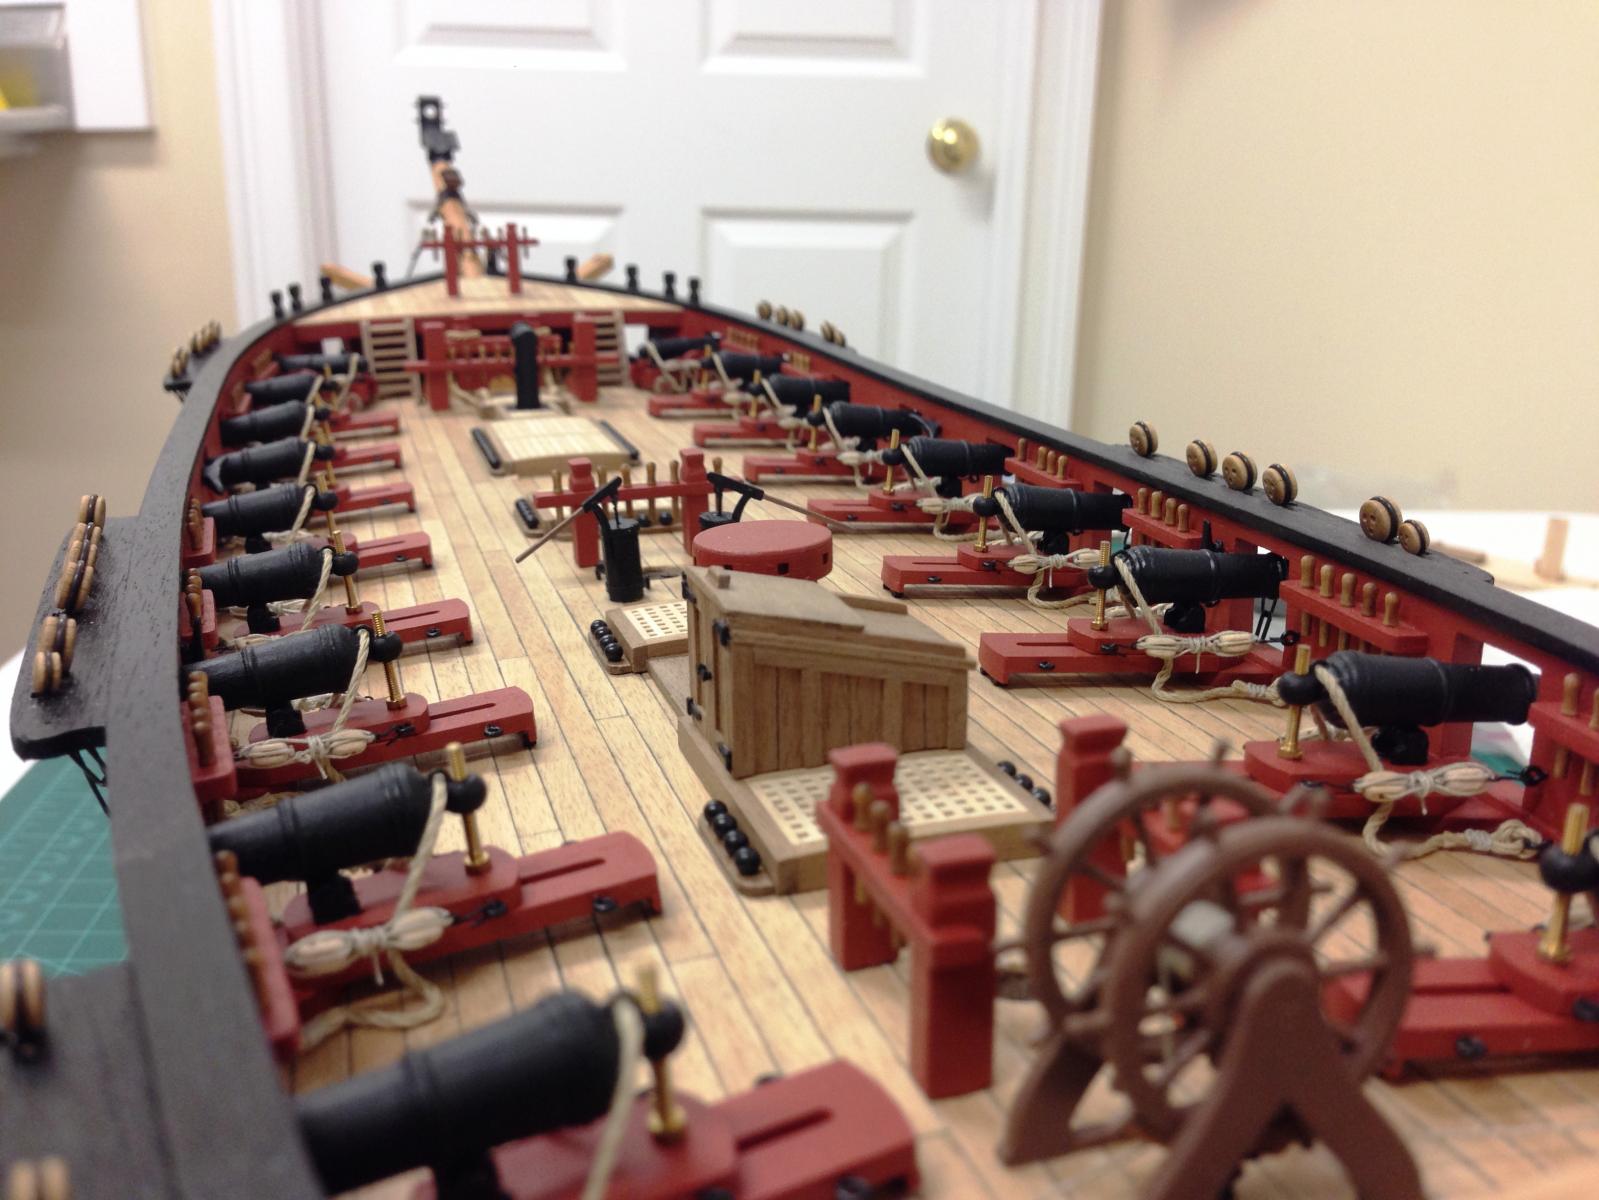
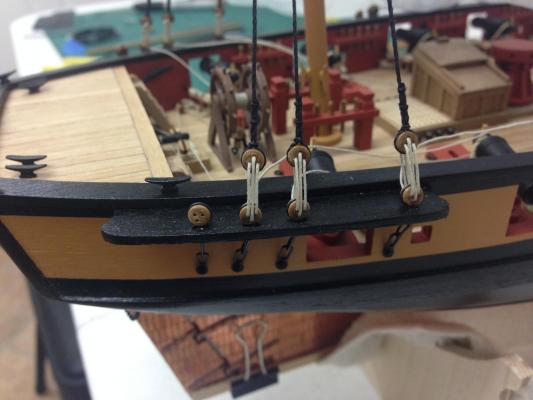
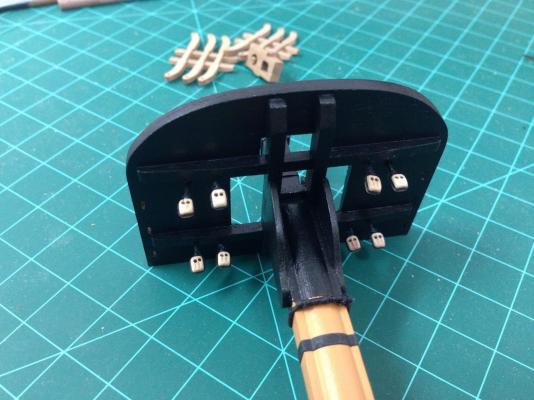
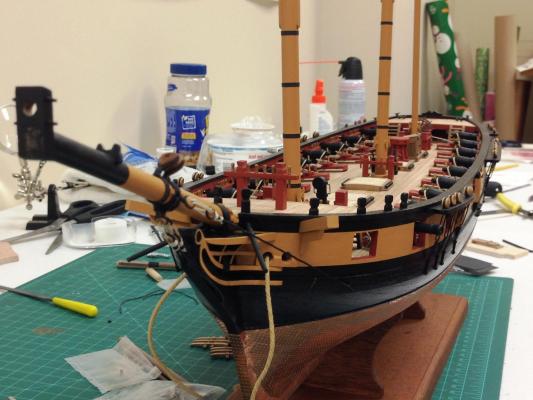
Doug, John, BE, Jim, Robert, Sjors - Thanks a bunch for kind words. Getting a lot of loose ends done and seems randomly capturing in my log. I've suddenly started having issues imbedding pictures in my posts, not sure if its some site incompatibility itself or my PC. Robert - your pictures are below. As I've said before I don't want to bore people but please let me know if you want to see more! The base is home made any still not finished but this was a good opportunity to see how it looks with the ship. Completed the blocks on the tops, as I've mentioned previously the instructions only call for single blocks on the fore top. However, even though I probably will not rig any buntlines, I did want this to be as authentic as possible. Research didn't seem to provide anything specific but in general it seems that a couple of double blocks on each 'corner' was somewhat typical so this is what I went with. Followed same method outlined earlier, these seemed to take forever to make, there were certainly rejects and structural failures during installation, as well as having to fill holes that I'd previously drilled. Luckily these proved to be not too noticeable.

- 800 replies
-
- 13
-
-
- snake
- caldercraft
- (and 1 more)
-
Exciting Jim, how are you going to balance her with your Snake? Also curious on you thoughts on the kit itself, think this is a more recent offering so wondering if the instructions and the supplied parts are better then the Snake. Sure you'll have fun!
- 226 replies
-
- 1
-
-
- ballahoo
- caldercraft
- (and 1 more)
-
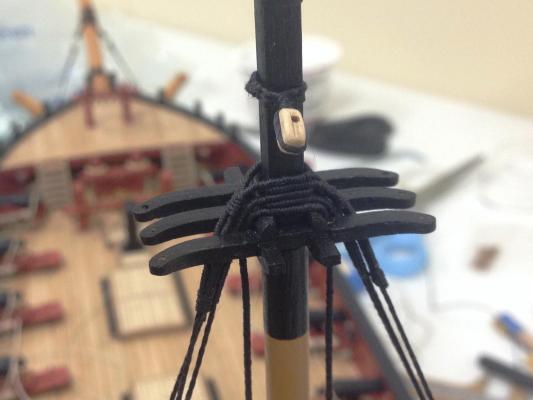
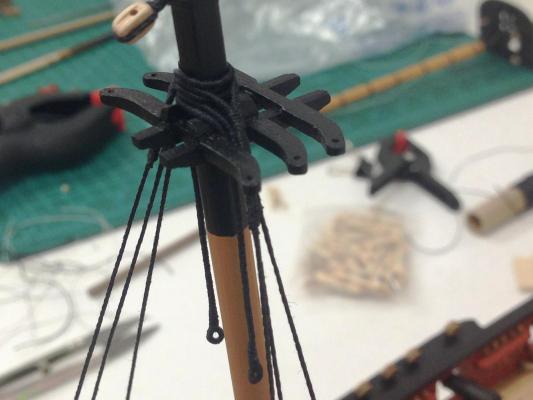
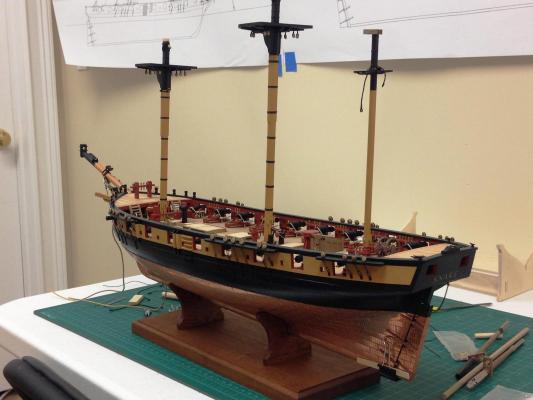
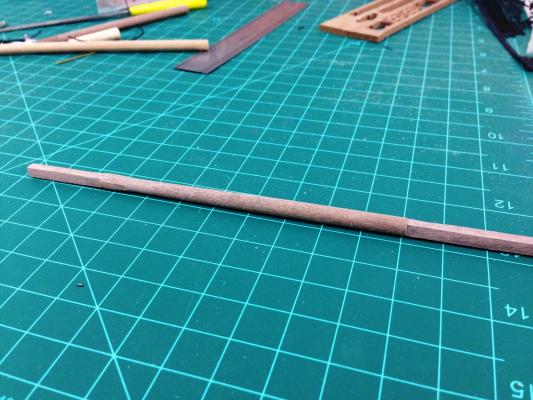
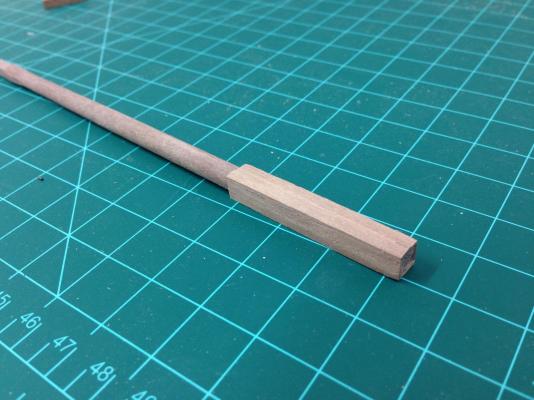
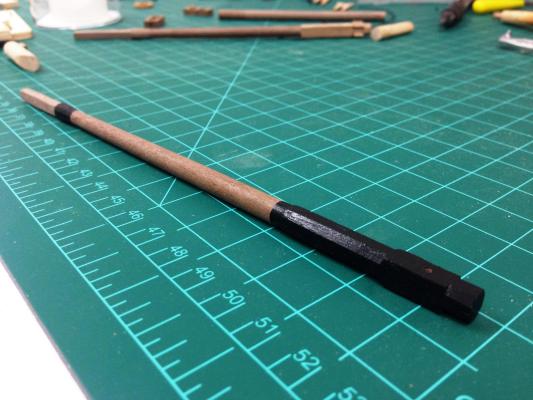
Top Masts These were made with walnut dowel rather than the supplied beech as I wanted to be able to leave these unpainted. The kit supplied dowel was also a little undersize (5.5mm vs the 6mm required). I found these to be tricky to make using only files as each end requires to be 'squared' and they need their faces to match otherwise the cross tree will not align correctly. The taper on the dowel was done on a mini proxxon lathe although I think using a regular drill and sandpaper would have worked just fine. I tried to make the section below the cross tree octagonal in cross section but it could definitely be better. The instructions call for the bottom of the top mast to be left squared of with smaller dimension than the rest of the mast. Didn't like that so built up this with some spare walnut planking. This was then shaped to be octagonal in line with what seemed common practice. Need to be careful going forward, as taking this approach means that if I want to install the top mast cross tree off the ship (my preference) I'll need to ensure the mast cap placed first as it won't fit afterwards due the above modifications. Overall, took a lot of time but was pretty happy. I know it wouldn't hold a candle to BEs beautiful top masts but seems a simple improvement to the kit as supplied.
- 800 replies
-
- 7
-
-
- snake
- caldercraft
- (and 1 more)
-
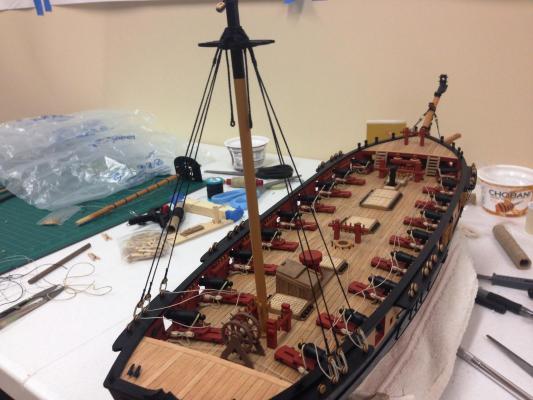
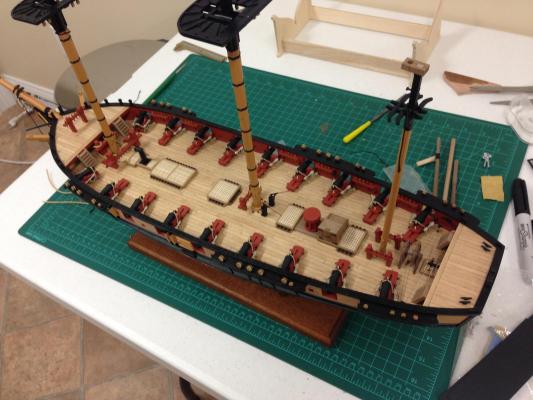
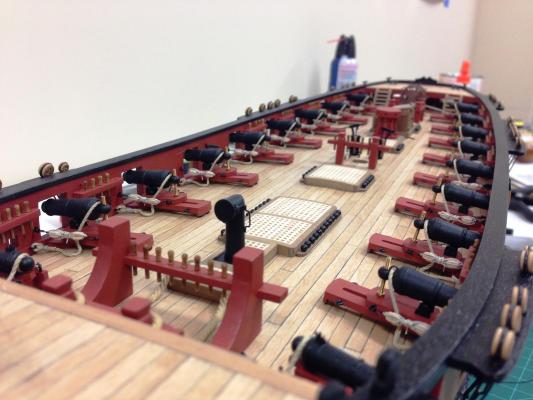
A few pictures to show the completed deck items before the masts go in. Definitely seems to be a little more crowed than kit supplied parts and layout but I'm pleased with how its turned out.

- 800 replies
-
- 11
-
-
- snake
- caldercraft
- (and 1 more)
-
Spyglass - you are of course correct, over to you. A Merry Christmas to all!
-
Stergios, I think you want the chesstree to extend between the wale and the capping rail to be authentic. There is a hole for a piece of rigging that goes through the top of it, and you should check to make sure that this hole is clear of the channel to avoid problems later. My initial quick thought would be to suggest filing down the end of the channel a little so you can accommodate the chesstree between the channel and the sweep port.
-
Ok, here's my next one...name has been obscured. Don't think this should be too tricky, but hey, its Christmas!

-
George W. Wells?