Beef Wellington
-
Posts
2,247 -
Joined
-
Last visited
Content Type
Profiles
Forums
Gallery
Events
Everything posted by Beef Wellington
-
 Those masts and tops look fantastic Mobbsie. I was about to put in some eyebolts on the underside of the top as well (although I only have 4 to do!) but may rethink my approach and copy you. I'm sure to be embarrassing myself here, but what are burton pendants for, and did all ships have them? I don't see any reference to them in my plans.
- 1,279 replies
-
- 1
-

-
- agamemnon
- caldercraft
- (and 1 more)
-
Love the BIG pictures Sjors, looks great. Looks like you are definitely getting your practice in serving!
- 1,873 replies
-
- 1
-
-
- occre
- san ildefonso
- (and 1 more)
-
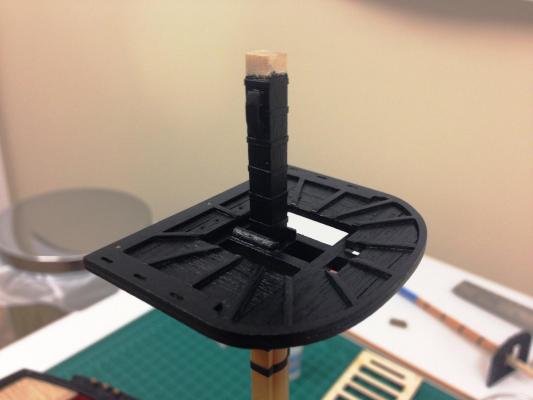
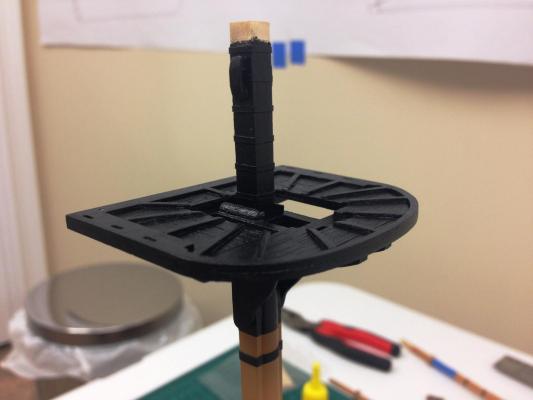
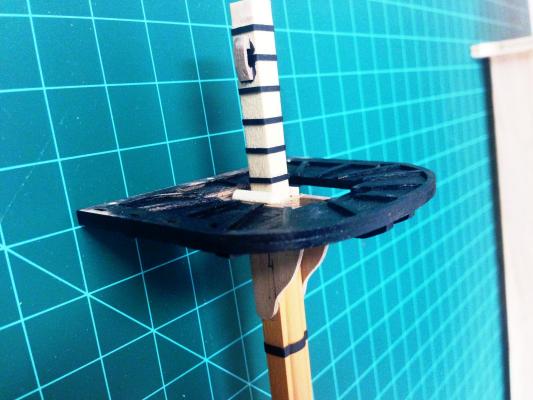
Haven't had much time to spare recently. Masts approaching completion, small strips of paper were used to simulate metal bands above the tops and also added some scratch jeer block strop cleats for bit more interest out of scrap. Painted up it seems to be coming together and I'm pretty happy. Rails and the eyebolts will be left off until later, but all holes have been drilled. Few more deck details to put finishing touches to and glue, and then onto the shrouds and ratlines.
- 800 replies
-
- 14
-
-
- snake
- caldercraft
- (and 1 more)
-
Your Mirage looks fantastic Sjors! I was about to say you can now move onto bigger and better things, but I know bigger isn't correct! Congratulations are well deserved, and I look forward to following progress 'elsewhere' :-)
-
Stergios, used thick CA glue (my favorite) and it worked just fine.
-
Candice, glad to see you have a build log, and welcome. Edward has some good advice. It is sometimes hard to see the exact problems from photos so please take my comments based on that! I'm also working on my first build so definitely understand where you are coming from. I'm not sure whether you have glued the various keel or sternpost pieces. If not, then I'd suggest that you want to sand down the false keel a bit as this will give you a better line to the planking, other planking will need to be tapered down so it is the same thickness as the sternpost. Otherwise, the you will have a 'step' at the sternpost which should not be there. There is lots of good info in the "Building, Framing, Planking and plating a ships hull and deck", especially the top 'pinned' articles. Hopefully looking at a few logs will also help you. The plans seem to show that the keel should be dead straight through its length, is the false keel the correct shape, or the keel piece warped? If it is correct, it may simply be that the bottom of the bow section is a little too thick The first planking is very forgiving. The most important things to get right at the bulkheads and you correctly identify that #6 needs some trimming. It will also be important to ensure that you fare the edge of the bulkheads so that the planks lie flat on them. Often it is recommended to cut a 'rabbet'. I did not do this and it worked out OK, you will just need to shape the edge of planks to try to get them as flush as possible to the keel. Woodfiller and sanding will really help get this looking OK if you get it structurally sound. Best of luck!
-
They look nice Stergios. The pricing seemed rather complex so difficult to know how expensive this would be. Why not give them a go?
-
Alistair, BE, Richard and JP - thanks as always for the interest, means a lot to have such skilled modelers looking over my shoulder. Continuing to work on the lower masts (not much to show right now) and would like to ask some advice from more experienced hands if I may... I'm debating whether to install the mast caps before installing the masts and I'm leaning towards leaving these off for now until after the shrouds are installed. Knowing that they fit just fine, is this liable to cause any issues? Same questions for the stanchions and the rail at the rear of the tops - seems that by installing these now they just seem to get in the way (i.e. be liable to knocked off/broken). These have been dryfitted, so this seems like a simple task to add later.
-
The axle pin detail says it all Robert, those look great! BTW, I'm glad you gave me to tip to glue items together to shape multiple items at the same time and then separate, I can see that coming in very handy for a few items! Looking forward to seeing the barrels installed.
-
Looking forward to your build Bill and the first progress pictures.
-
Embarrassed to say I just saw this log Richard, though thankfully haven't missed too much. This is a beautiful model and must be a nice change to the period ships. Just curious on the stern, will the second planking need to be handled in the same way as the first? Seems a really tricky surface to double plank but you've made a fantastic job of the first planking. Will be following closely now.
-
The colours and the finish look just wonderful. The technique to use diluted paint had never occurred to me and the results you've obtained are fantastic. Think I share your approach on trying new things in isolation, but try to force myself to alternate the sides so that I don't end up with a 'good' side a 'bad' side, just two different sides
-
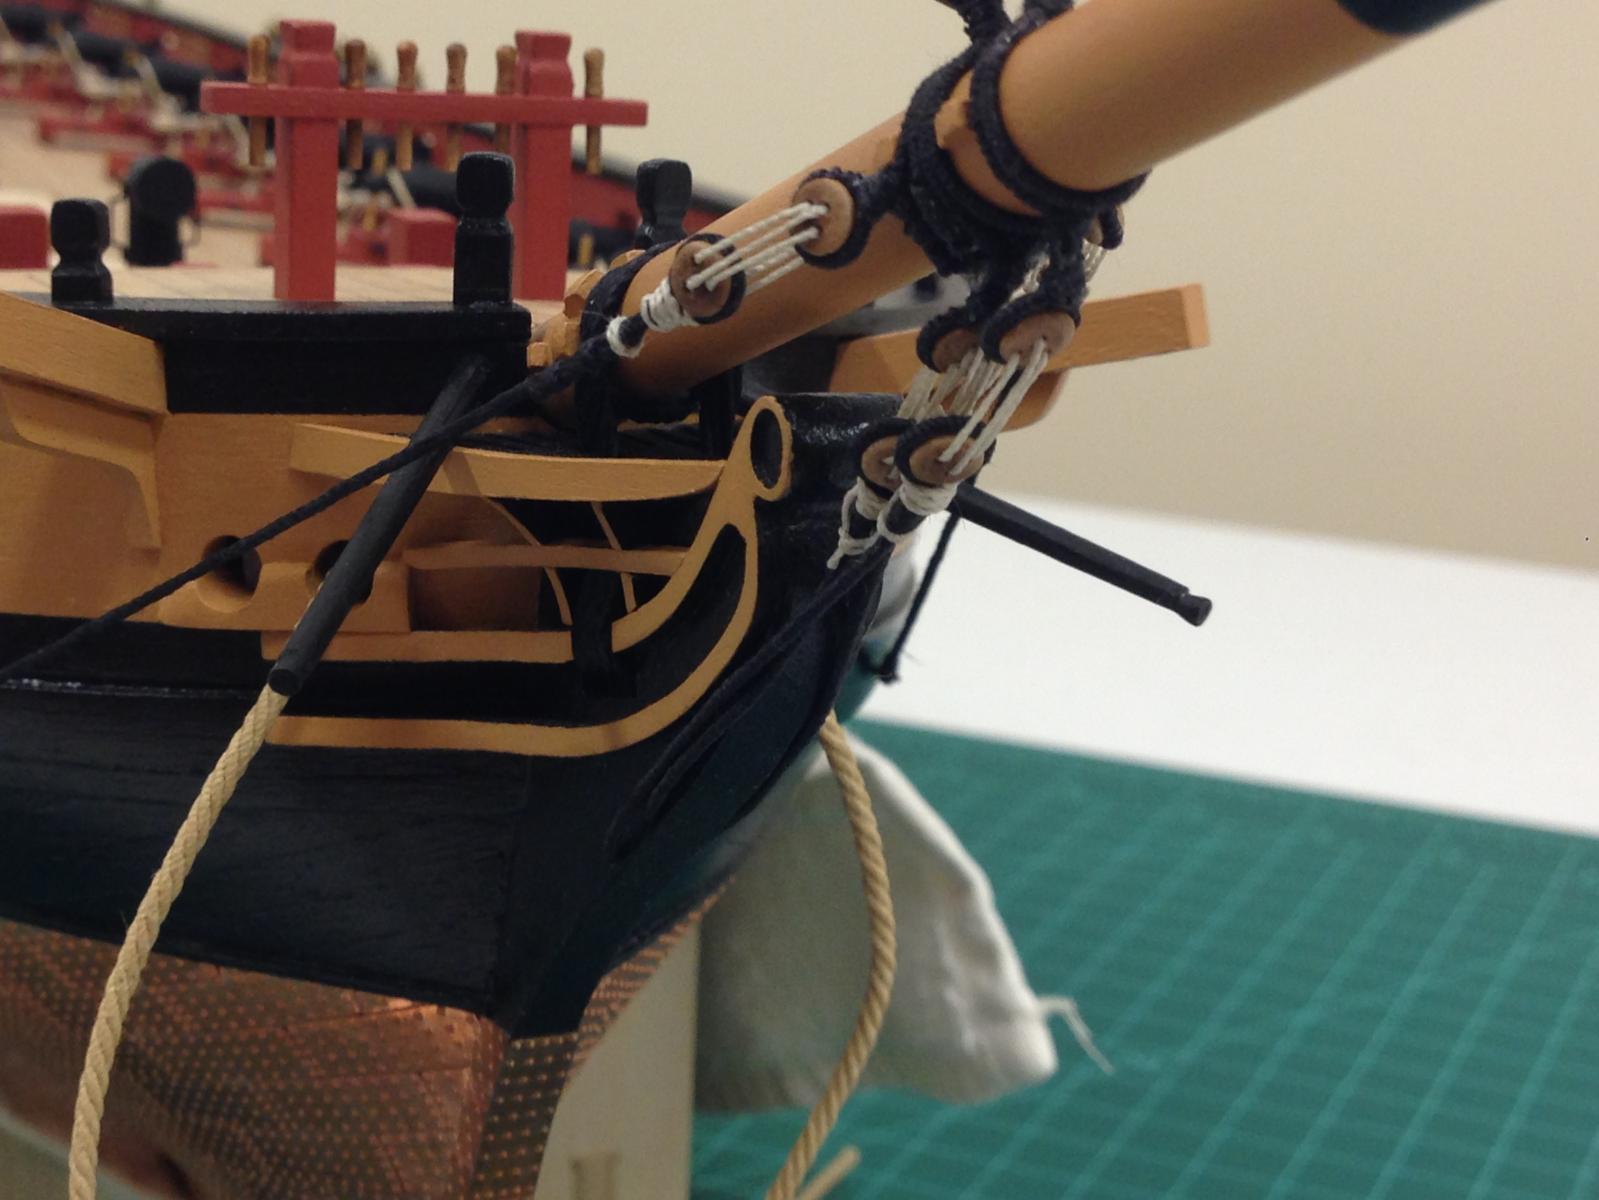
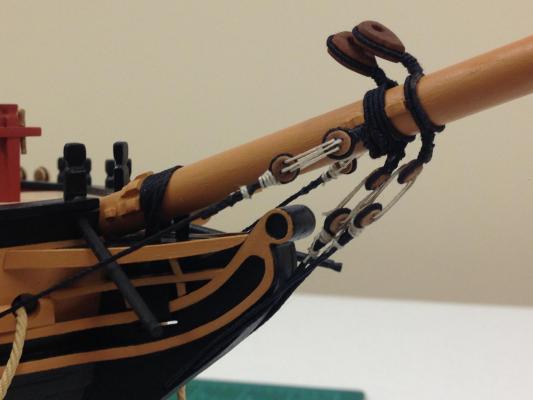
Sjors, Alistair and the 'likers' appreciate your continued interest and support. Small progress update, finished rigging the bobstays and the bowsprit shrouds. Boomkins made up but not glued yet as there was the potential to interfere with the bowsprit shroud. These will be left off until later as they just seem too much of an accident waiting to happen. Instructions indicate these should be made with 4mm dowel but even with tapering it looked far to thick so made up a set using 2mm dowel tapered slightly at the end which seems more consistent with pictures I've seen.

- 800 replies
-
- 16
-
-
- snake
- caldercraft
- (and 1 more)
-
Eamonn - I'm guessing the flags were painted to deter U-Boat attacks?
-
Alistair - if my rigging turns out half as good as yours I'll be ecstatic! Your AVS is really stunning - everytime I see your rope work it confirms my desire to have a go with upgraded line for my next build (if it happens ), you really made it look special. Sadly no Amati keel clamp, but muddling through so far (glad I didn't install the dolphin striker yet, guaranteed it wood be broken by now!)
-
Andy - cheers. Funny, the method you describe with the light thread was exactly what I found worked best for me. Its a good technique. Didn't get a chance to try the eye serving yet for reason outlined below but will keep that in the toolbox. Hamilton - your Blandford looks great regardless, doesn't detract in the slightest and you probably avoided a number of headaches. Couple of progress pictures, doesn't look anywhere near as bad in person, camera definitely has it out for me today. All collars made up and attached to the bowsprit, pretty crowded up there. After experimenting with the authentic eyes and lashing for the bowsprit shroud deadeyes, I used a simple loop for the remainder which were made up by splicing the thicker line to correct size. Don't think it makes much difference in look and its a bit tidier. Splices were attempted to be hidden where possible under and seizing. Sadly many more collars were hurt during this production but the practice was good, especially to get some practice serving. Also started on the first bob stay following Lever's lead in his 'Young Sea Officer's Sheet Anchor' The obligatory question - there are a couple of spots where some spots of GS Hypo glue had gone astray, I've noticed that it can get white/flaky/stringy in some cases. Is it advisable to 'paint' the line (with very dilute paint for example), or some other solution?


- 800 replies
-
- 7
-
-
- snake
- caldercraft
- (and 1 more)
-
I'm speechless Alexandru, absolutely stunning result! Have never seen this level of detail on a rudder before. Well done.
-
Good question Stergios! I'd suggest looking at the pump kit, its very cheap and offers a big improvement on the kit supplied items - C87160 Elm Tree Pumps, 1:64 Scale Can't remember whether you had decided to use the aftermarket belaying pins (they are a huge improvement in the kit supplied stuff) - C86001 Belaying Pin 9.75x1.5mm Walnut Also consider getting some of the small eyebolts, these are pretty useful (for making hooks if you want, handles on the carronade screw, etc). - C83505 Brass Etched Eyelet 0.3mm (250) Part references are from the CMB site. Just a few suggestions...
-
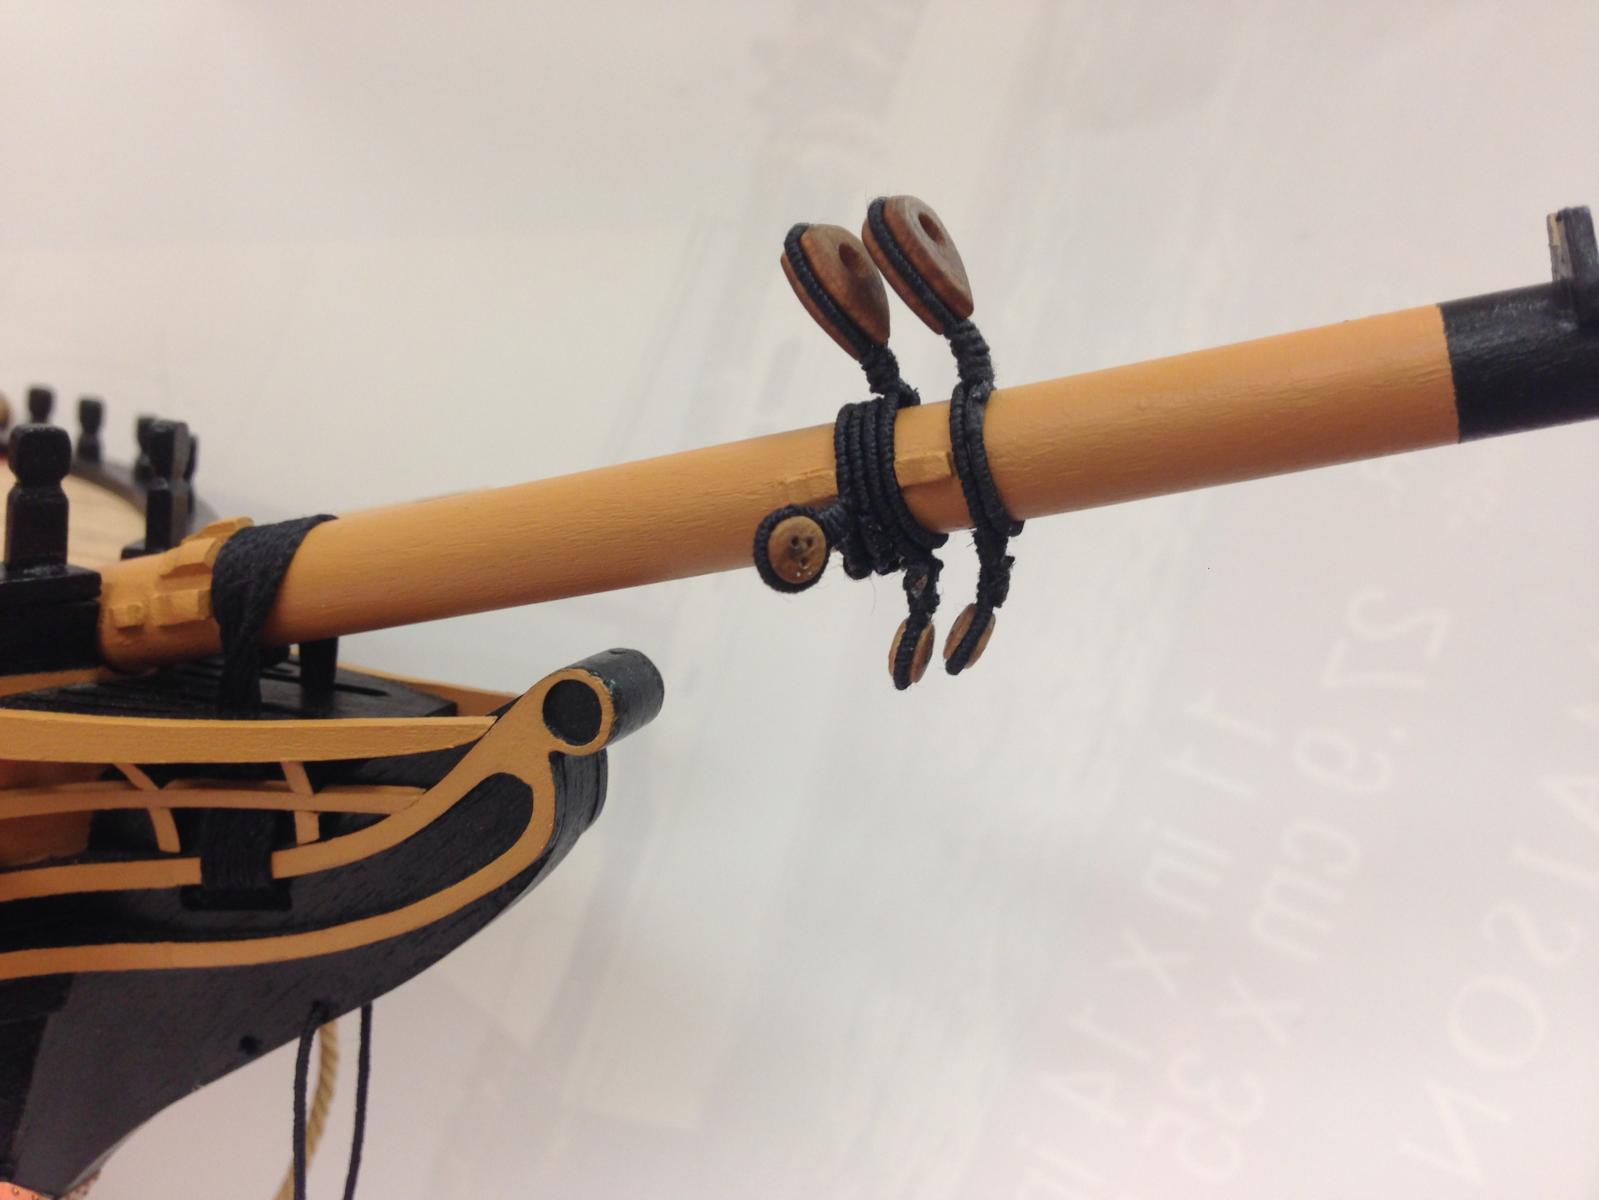
So this is my third attempt which may pass muster, thinking its probably well worth the effort to work through this although it does feel a little like jumping in at the deep end. Made the collar and the end loops with false splices, and then served the collar in between. Tried a few times to serve the eye but have not been successful yet! However, as Alistair notes above its really not that visible at all so this is a corner I'll cut for now until I get more proficient. GS Hypo glue worked really well as others have recommended. Second photo is trial installation and I'll hold off until I've made the second collar. Once these are installed I'll probably put some clear sealer in to help get rid of any fuzzies, but they're really only noticeable in the photos. Hopefully I'll get better with experience.
- 800 replies
-
- 6
-
-
- snake
- caldercraft
- (and 1 more)
-
Andy, Alistair - thanks a lot guys. I now have the objective defined, now need to figure out how to execute. I've been playing a bit and have a suspicion that these will take quite a bit of time to get right...
-
Thanks Andy, good to confirm. How did you do your lashings, do they just go through the collar eyes multiple times, or do they go round the bowsprit as well?
-
Looks great Kevin, especially after being painted. Did you try to start off with the 'easier' pieces of PE to get the hang of it, or did you just decide to focus on this area. Are you ready to go back the Victory yet?
-
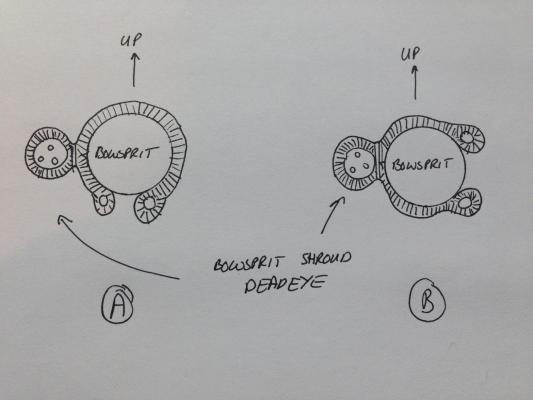
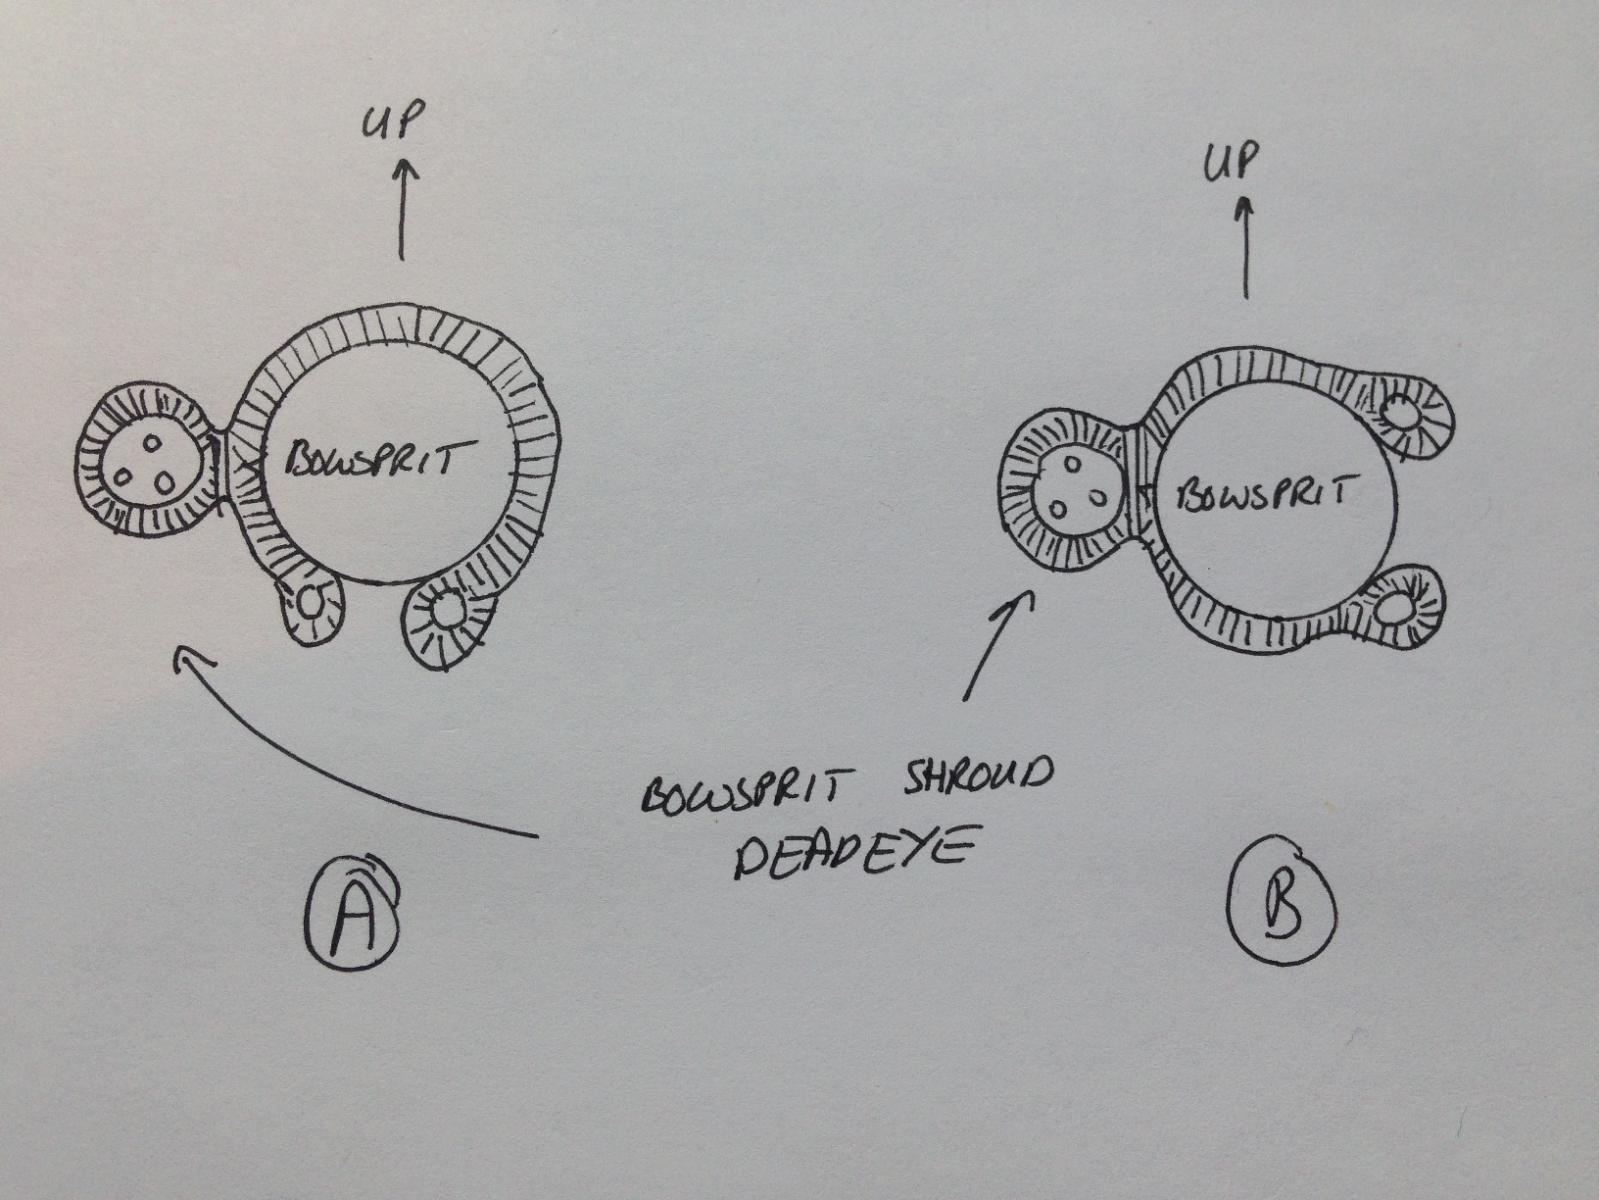
I cannot figure out how the bowsprit shroud deadeyes and collars should be installed. Various rigging book (Lever's 'Young sea officers sheet anchor' and Pederssons 'Rigging period ship models') all seem to provide tantalizing hints but not the complete picture. Per Lever, it states that there was one deadeye or heart per collar (implying that two collars would needed for starboard and port deadeyes), but in the merchant service it was common to have both deadeyes on one collar. I tried to draw below what I'm alluding to. Questions: Should the eyes be at the bottom of the bowsprit (option A) or the opposite side of the deadeye (option B ) Given the 'lashing is passed through the eyes and over the bowsprit' (per Lever) does this mean the lashing goes from one eye around the bowsprit to the other eye, if so, how many times? I'm not really clear how this works. Any help would be much appreciated! - I'll post this in the 'masting and rigging' section as well as so more people may see it.