HOLIDAY DONATION DRIVE - SUPPORT MSW - DO YOUR PART TO KEEP THIS GREAT FORUM GOING! (Only 20 donations so far - C'mon guys!)
×


Vivian Galad
-
Posts
596 -
Joined
-
Last visited
Content Type
Profiles
Forums
Gallery
Events
Everything posted by Vivian Galad
-
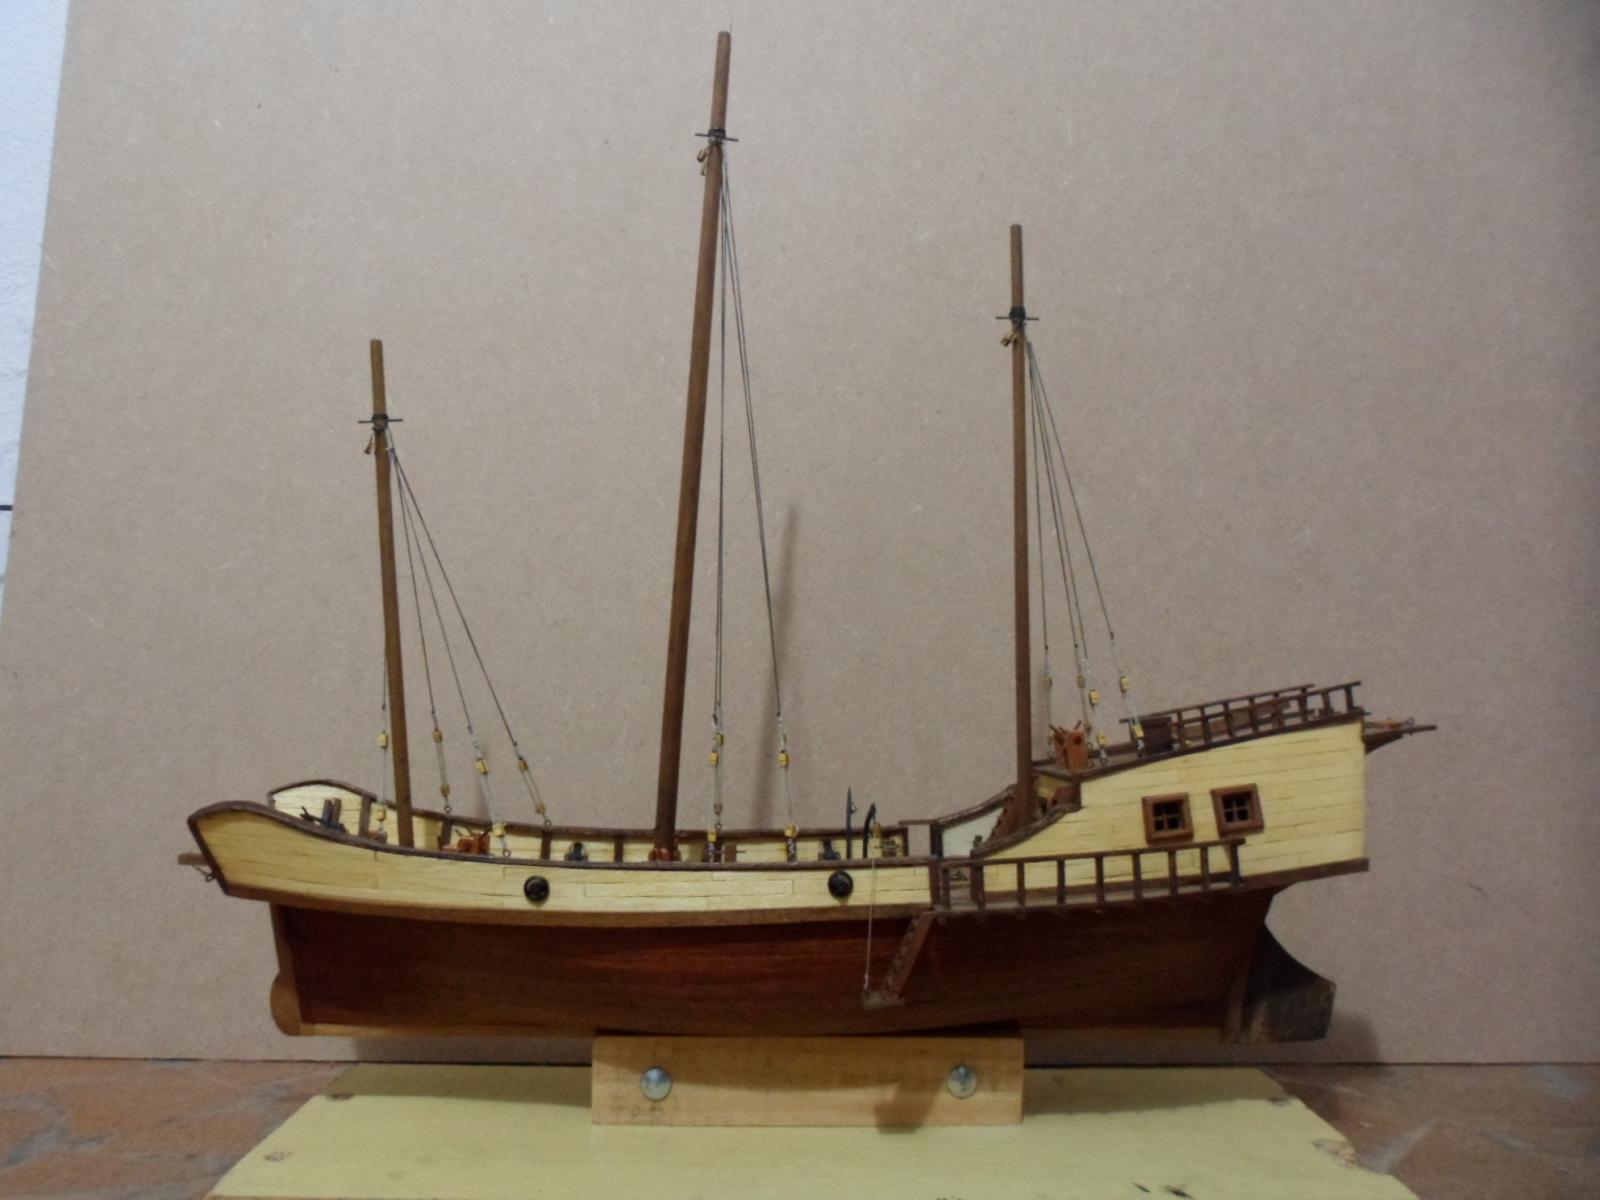
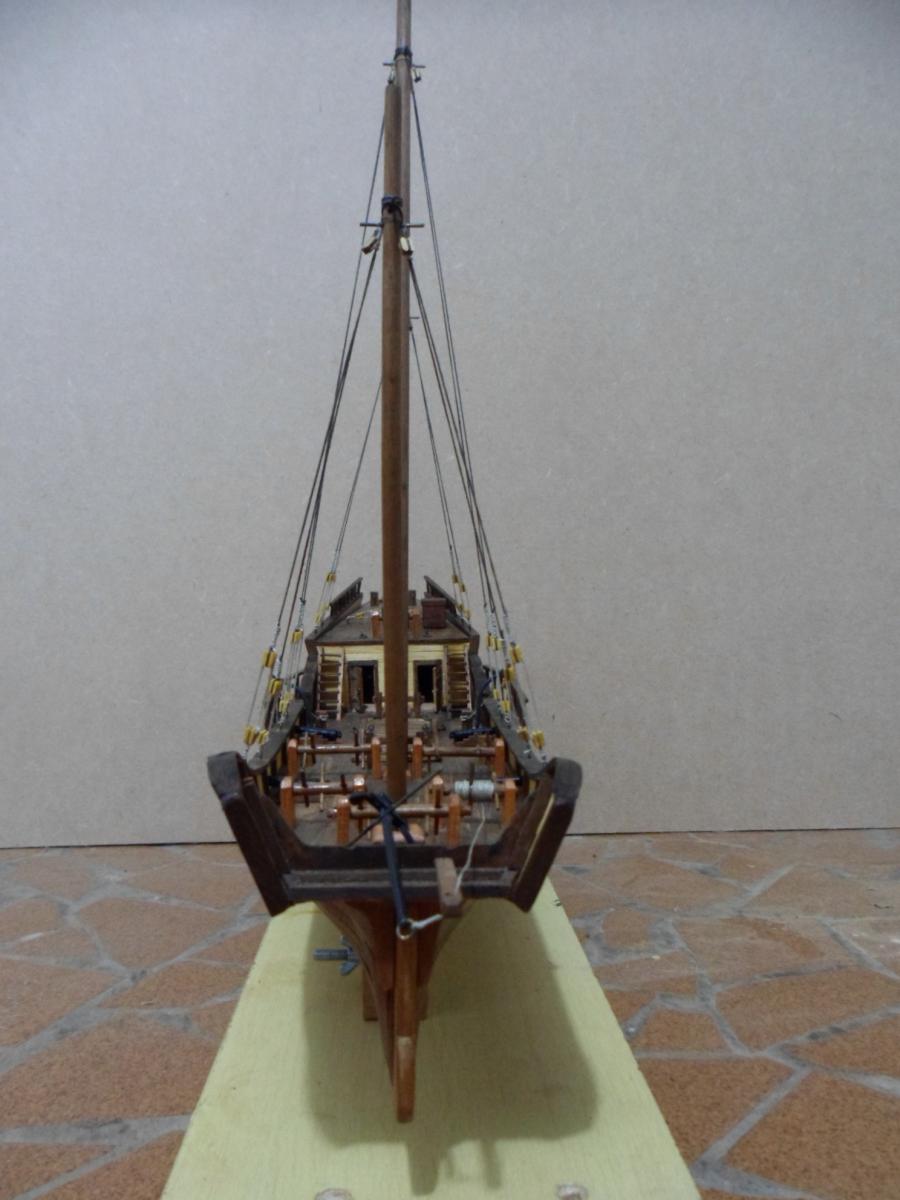
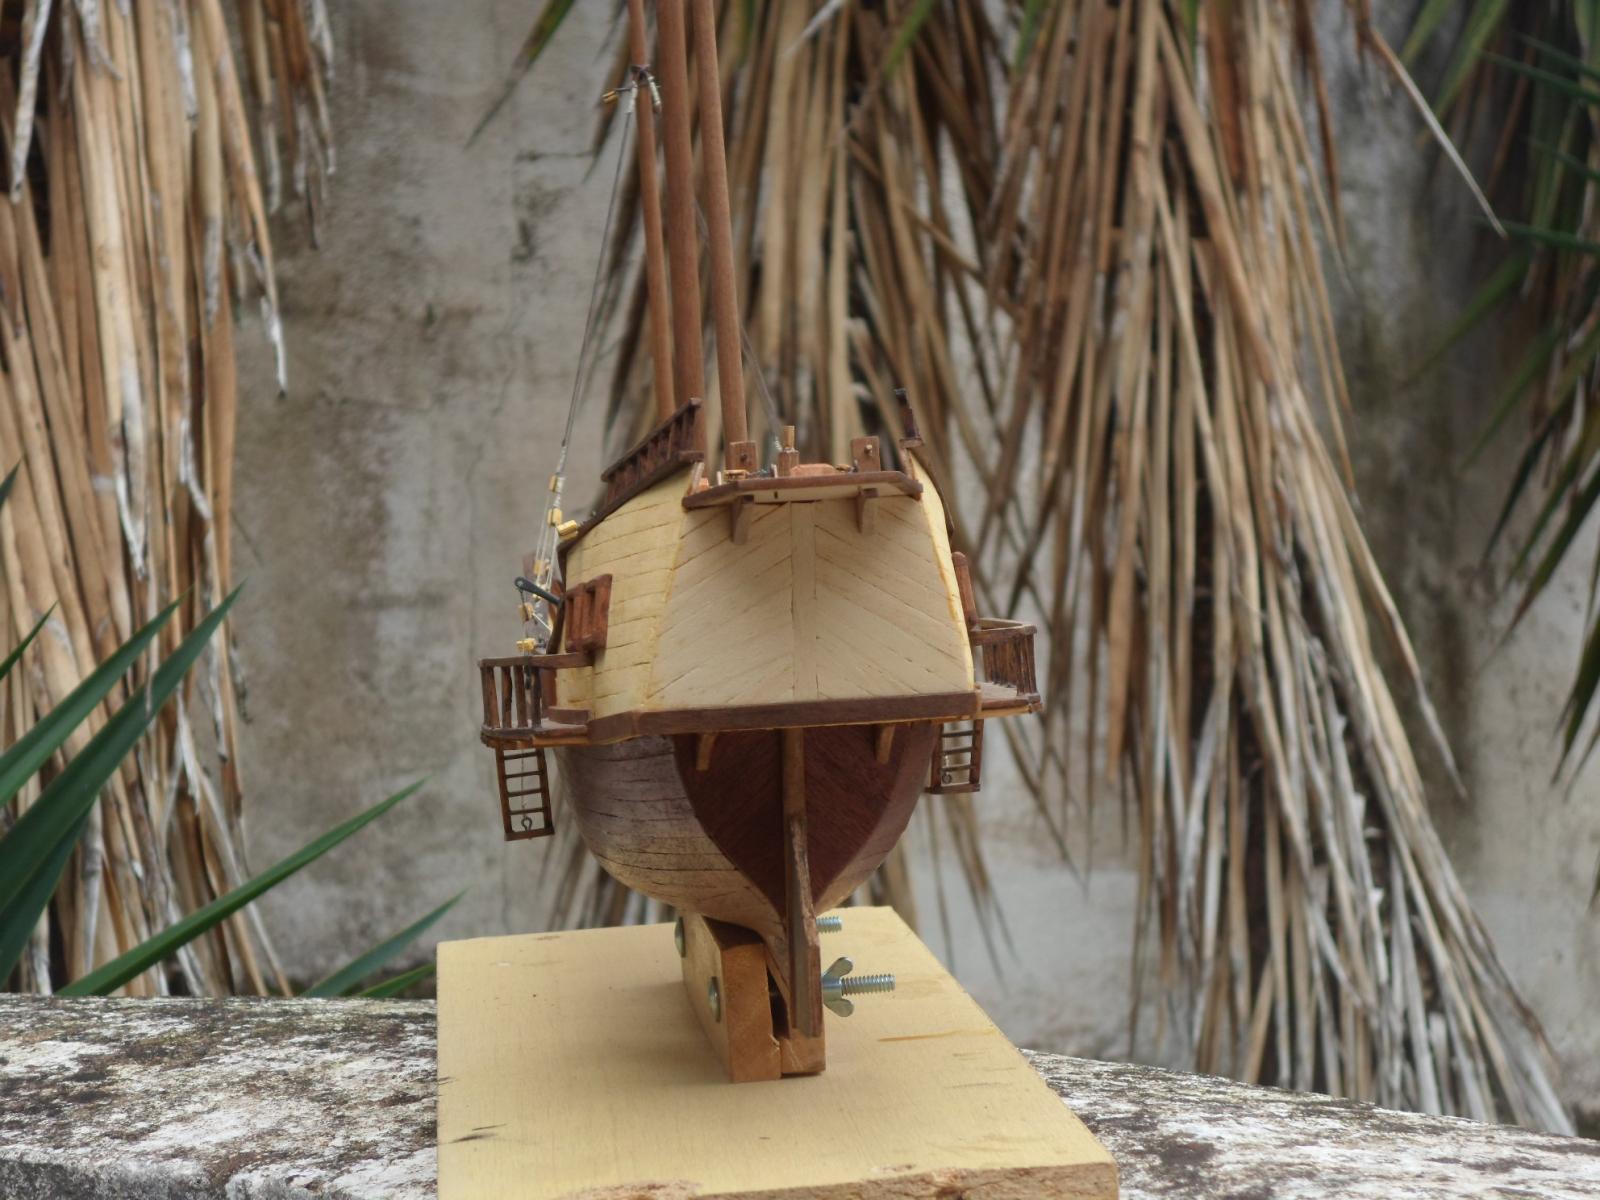
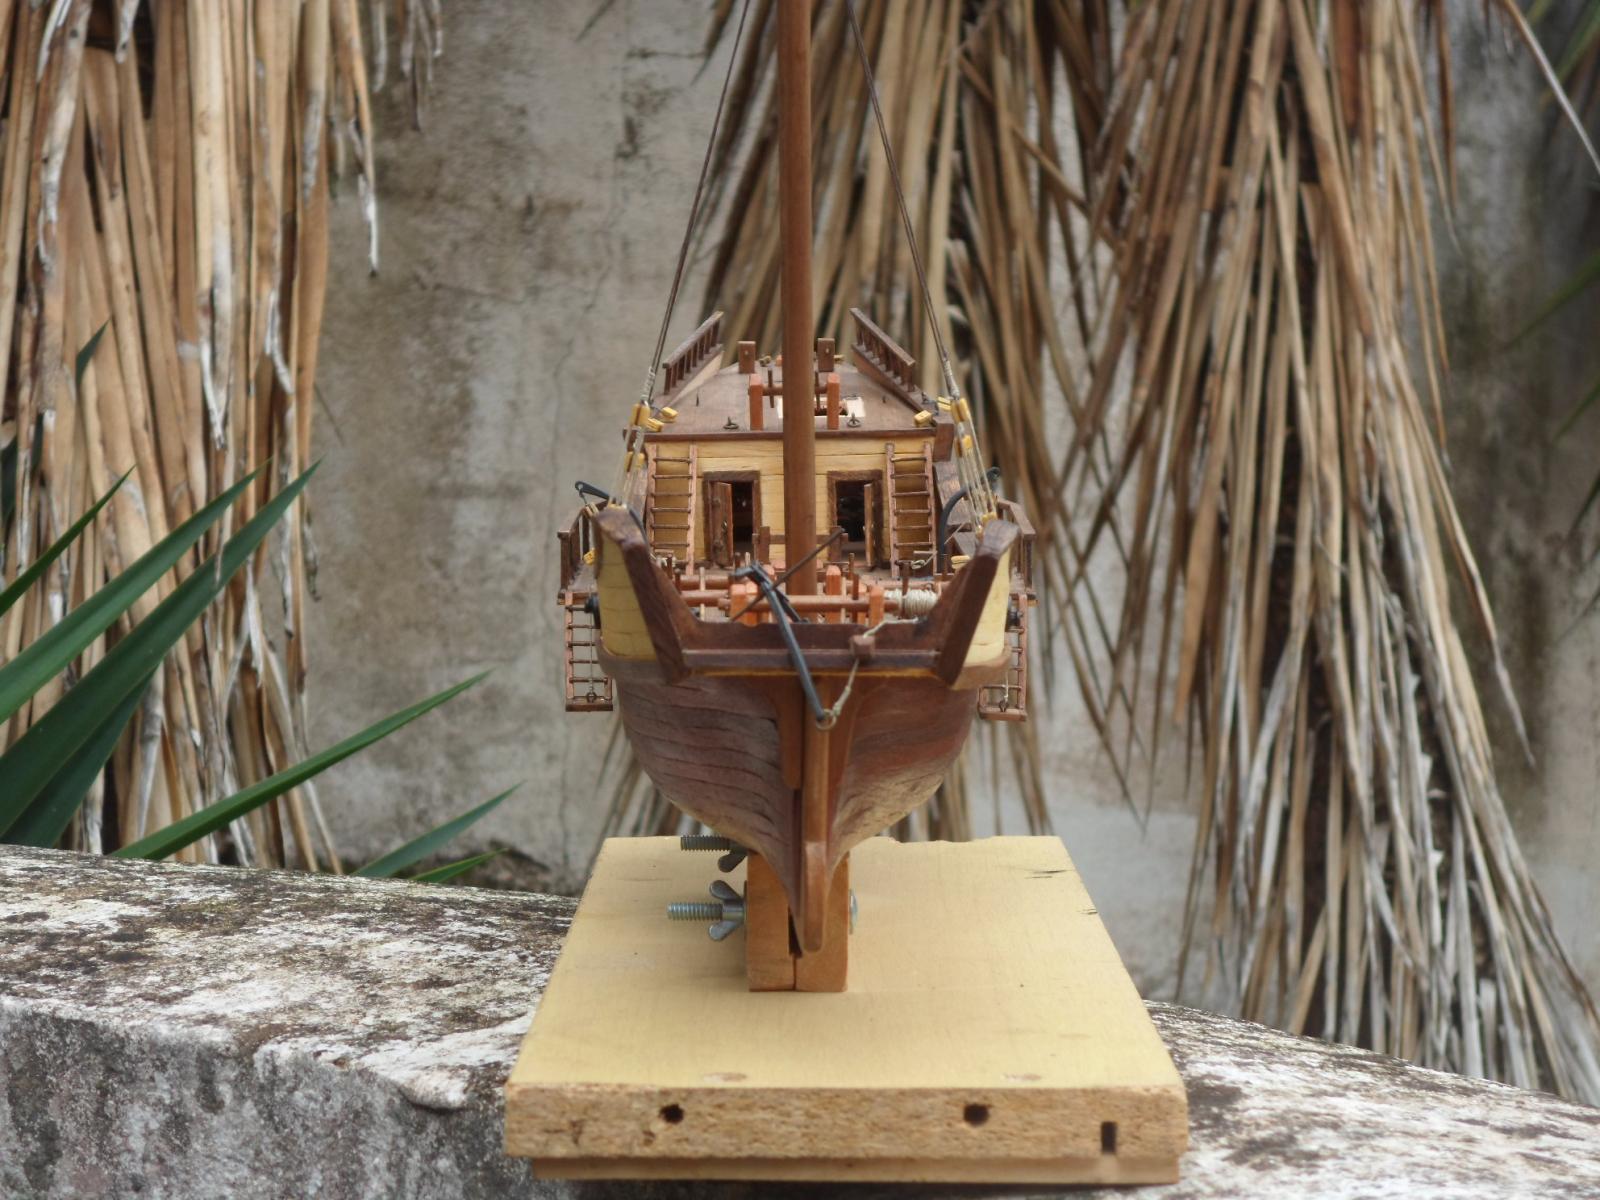
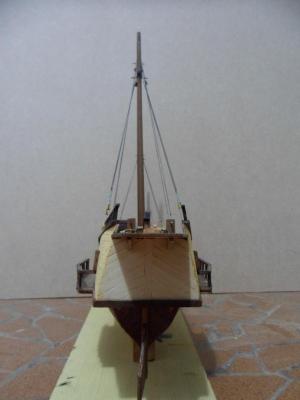
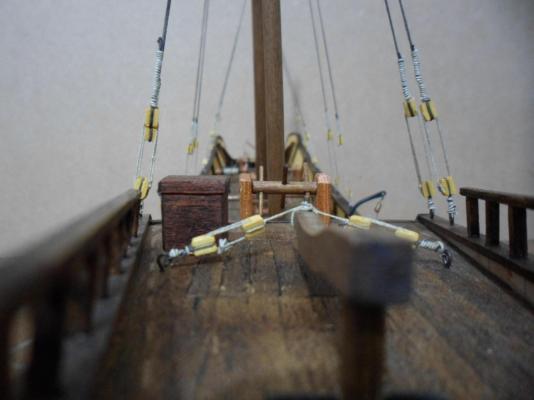
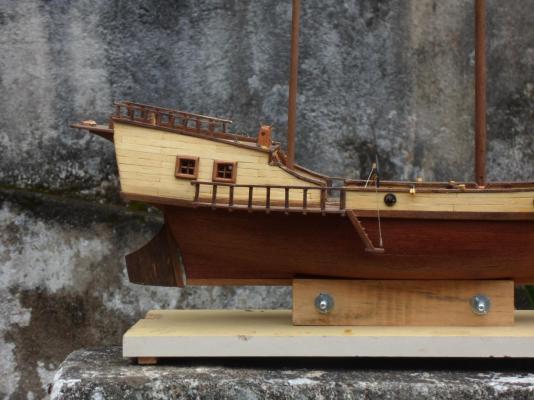
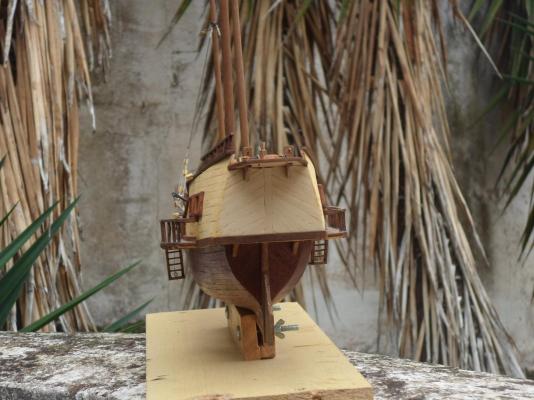
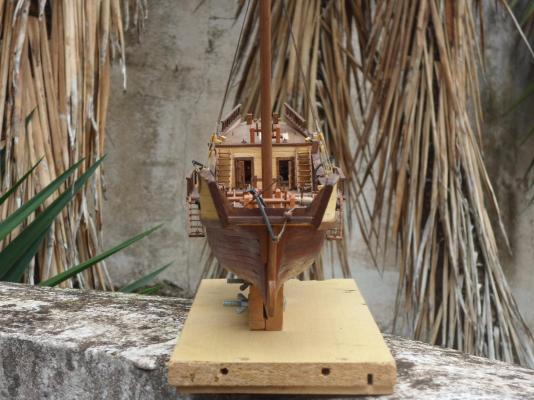
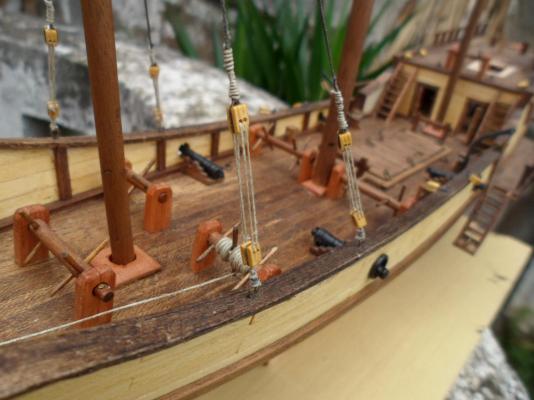
 So, I took some pictures from my latest efforts. Masts are rigged and waiting for sails. Main mast is a little bit too tensioned, as you can see. I don´t know if with sail on it will bring it to it´s rightful position or if I should release some tension before installing the sail - my fear is to let it go and have loose ropes on my model. Would be great to have some opinions in that. There are some few additions beyond sails, as the eyes on front rails and the painting on stern (I´ll make it as the kit´s decal don´t fit in my ship).
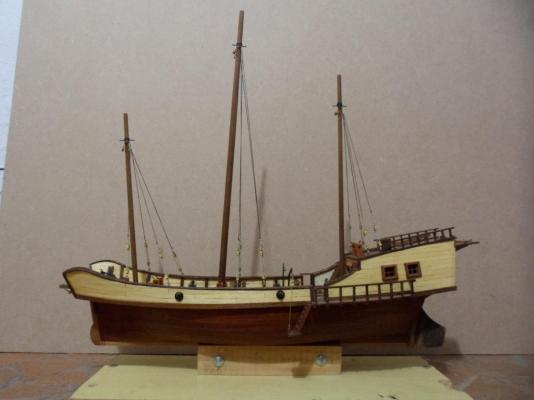
-
Ty, Popeye! Thanks for your words, Edwin. Yep, yep, yep, Jesse!! Thank you! Max, lighting is such an improvement to the ship that I think all of my next builds will have some (well, at least where cabins are present). Thank u and be visiting anytime u want.
-
Questions about Magellan era Portuguese Carrack
Vivian Galad replied to Salty Sea Dog's topic in Nautical/Naval History
Buck, Carracks are really great and I´m honored to be the spark to this idea. -
Thanks, Grant! Pops, right you are. That is something I learned from the Junk, while I darkened the deck in advance, against the after staining of the Caravel. It´s easier to work with the spots that way, cause the natural wood gets really marked by that spots - which we perceive only after staining, even when you had already sanded the wood. And welcome to my new build! Mark, thank you for the encouragement. Feel free as the room is large
-
Matti, the glues (be it CA or wood glue/white glue) usually stain the waxed wood. CA is worse, cause it can leave a white stain over the waxed wood - white/wood glue leaves a translucid spot. The wax weakens the CA bond, too, but other glues keep their properties. Usually I use a lot of CA, but not that much on waxed surfaces. tyvm for your visit.
-
Thanks, BrianC. Brian, I should´ve better explained that. The false keel will be apparent. As with my other ships, I like to age/darken them - before planking I darkened the false keel with 2 coats of bittumen wax, that way I won't risk damaging the thin planking with a latter waxing. The planks will receive a coat of bittumen wax too and all the hull will be later varnished to attain an even darker hue. I could use a stain, but till now the bittumen wax for darkening wood and giving that old look is the best I´ve tested. Jack, thank you. I´m already drawing the pattern for the scroll work. Scale is my main problem - it´ll push my skills to the limit.
-
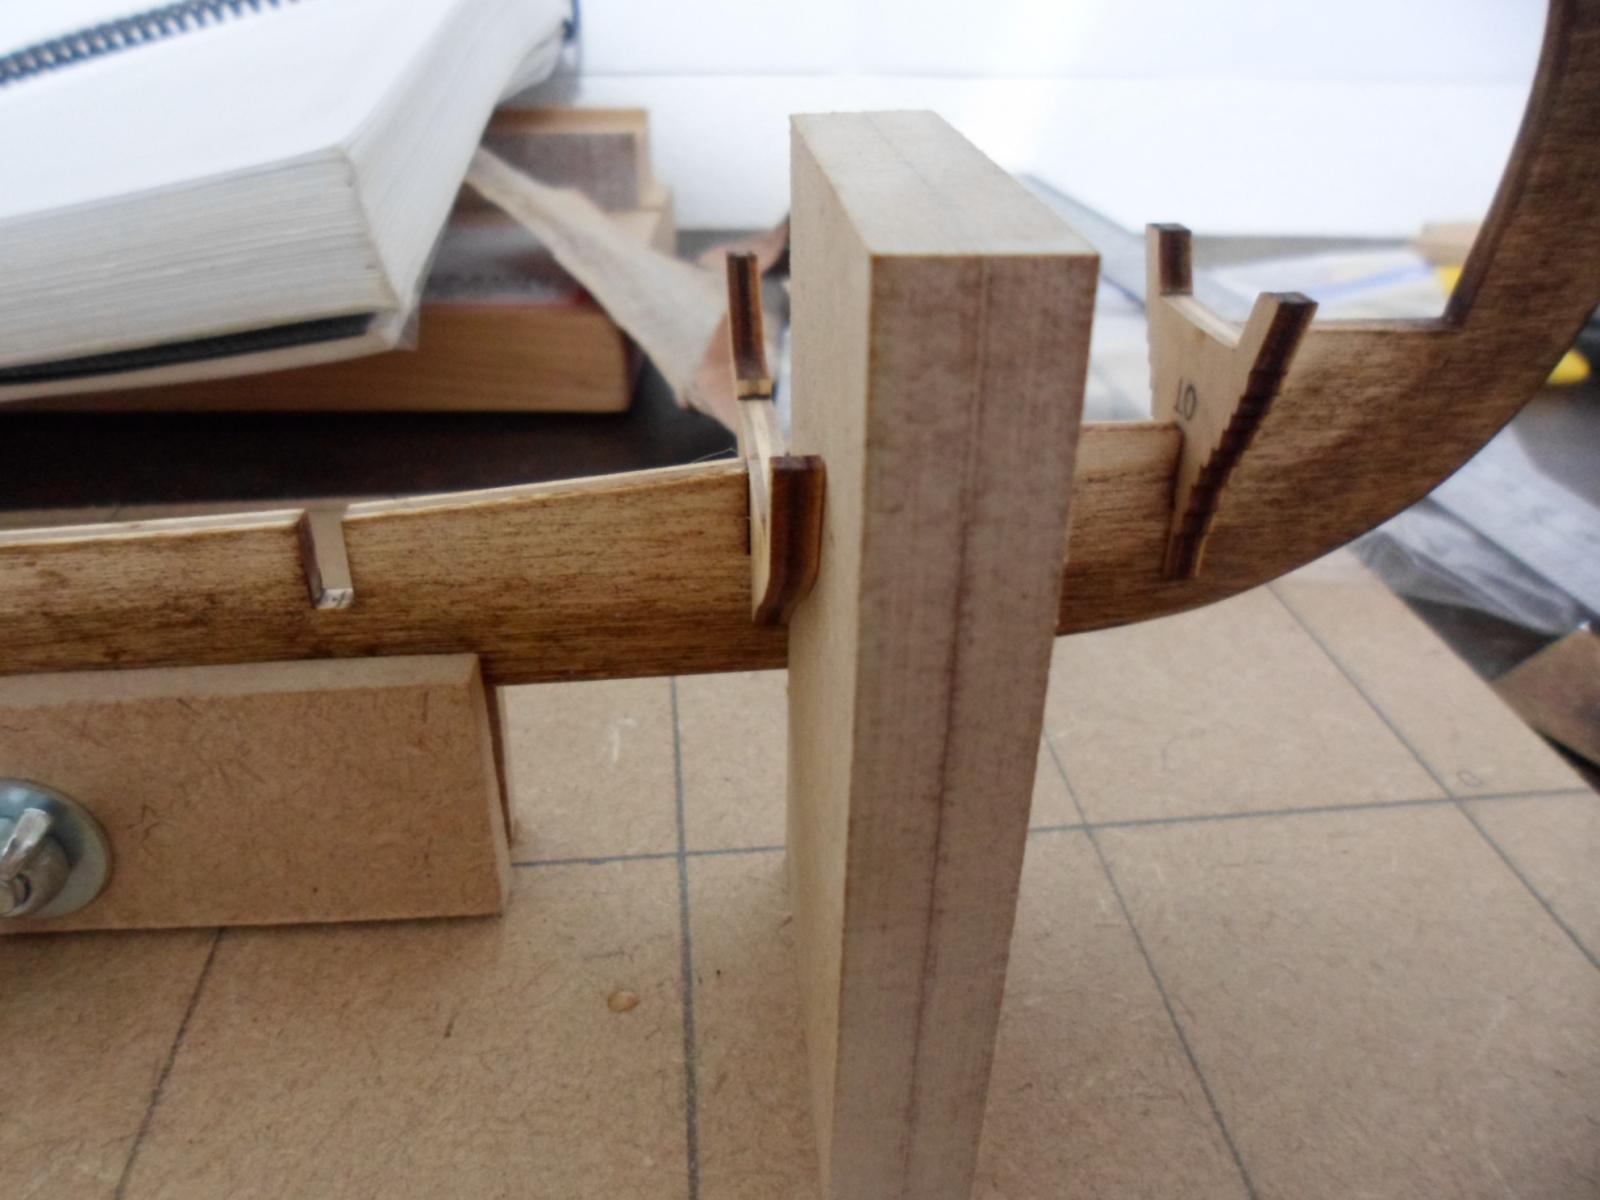
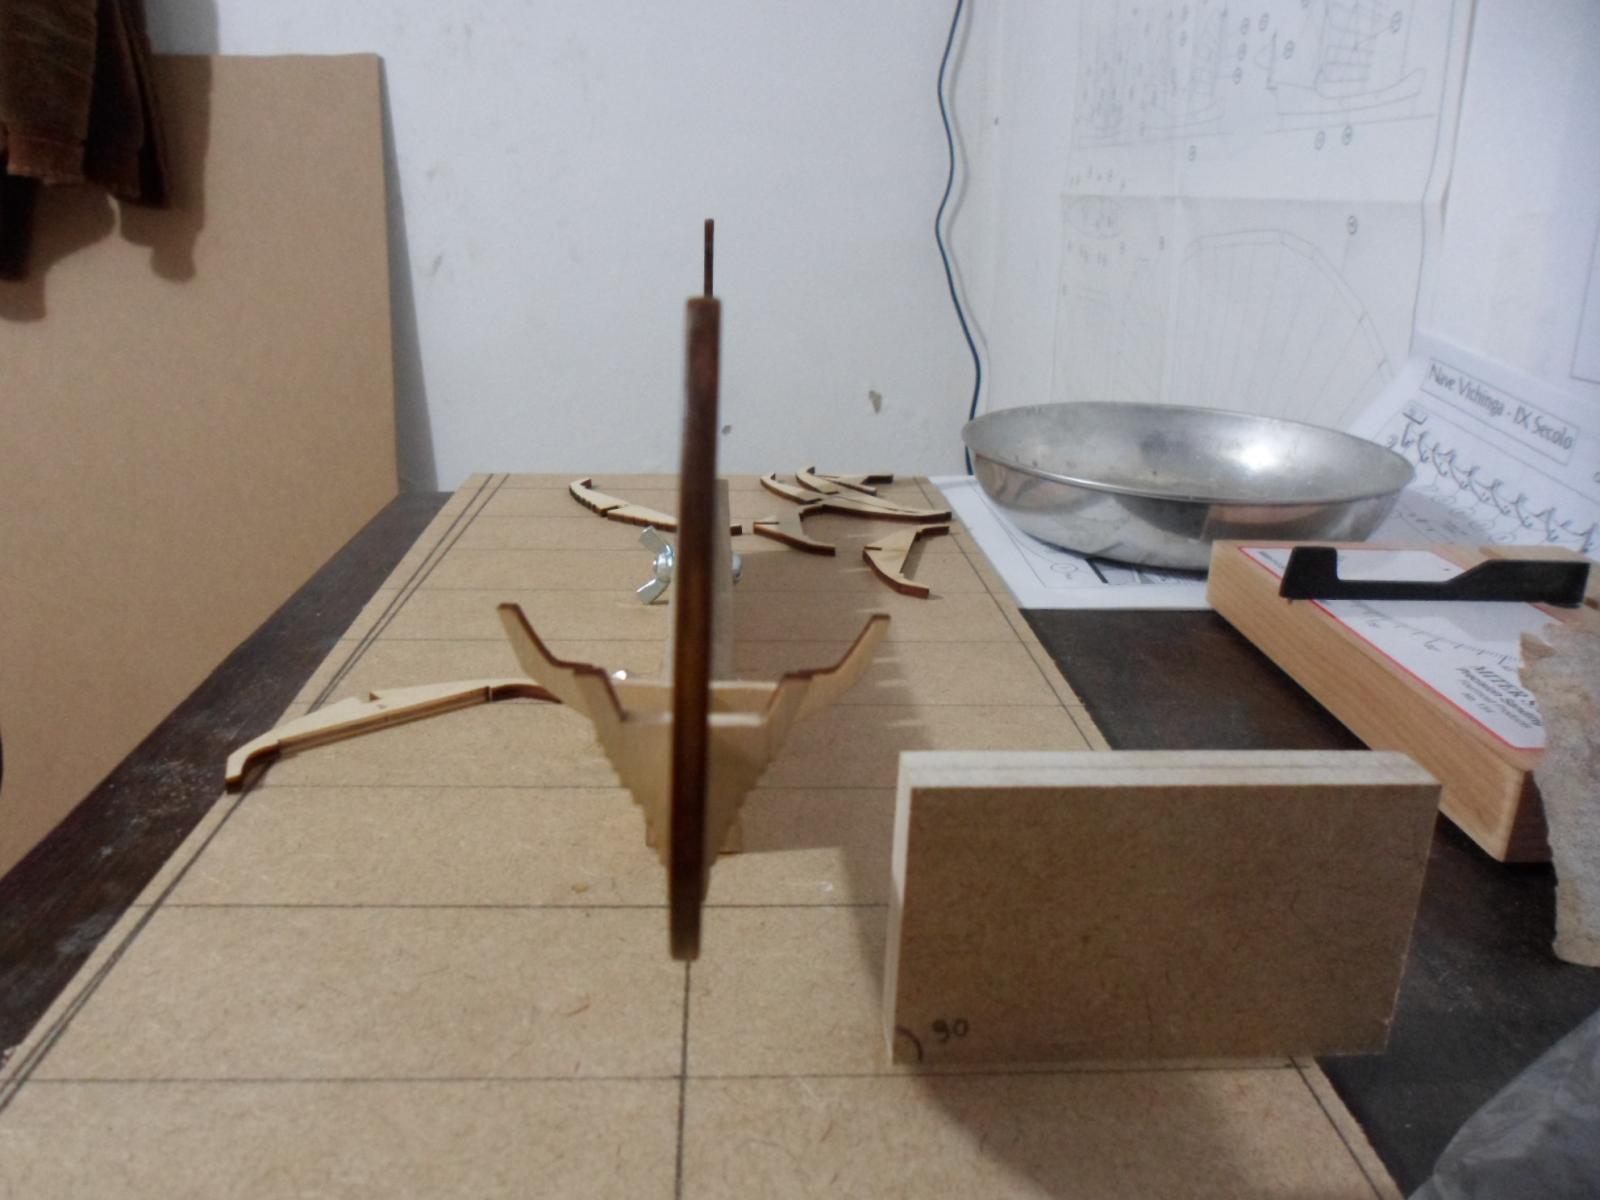
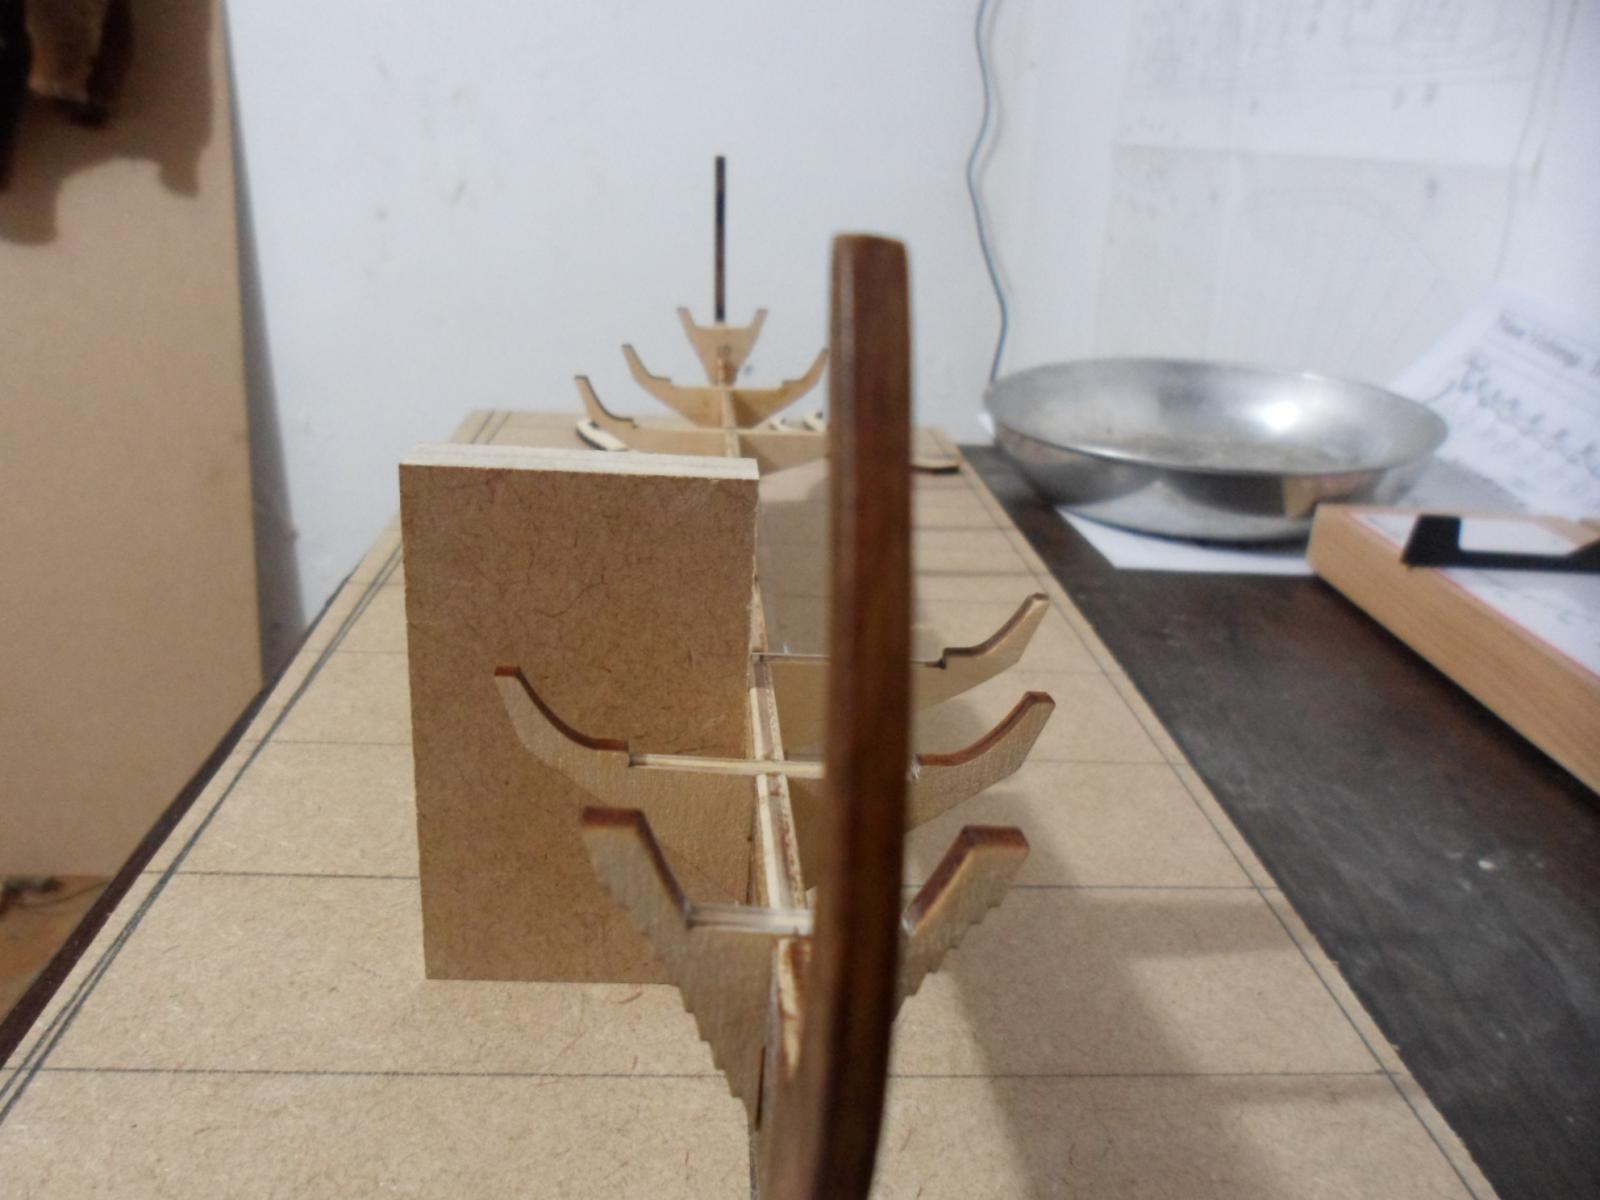
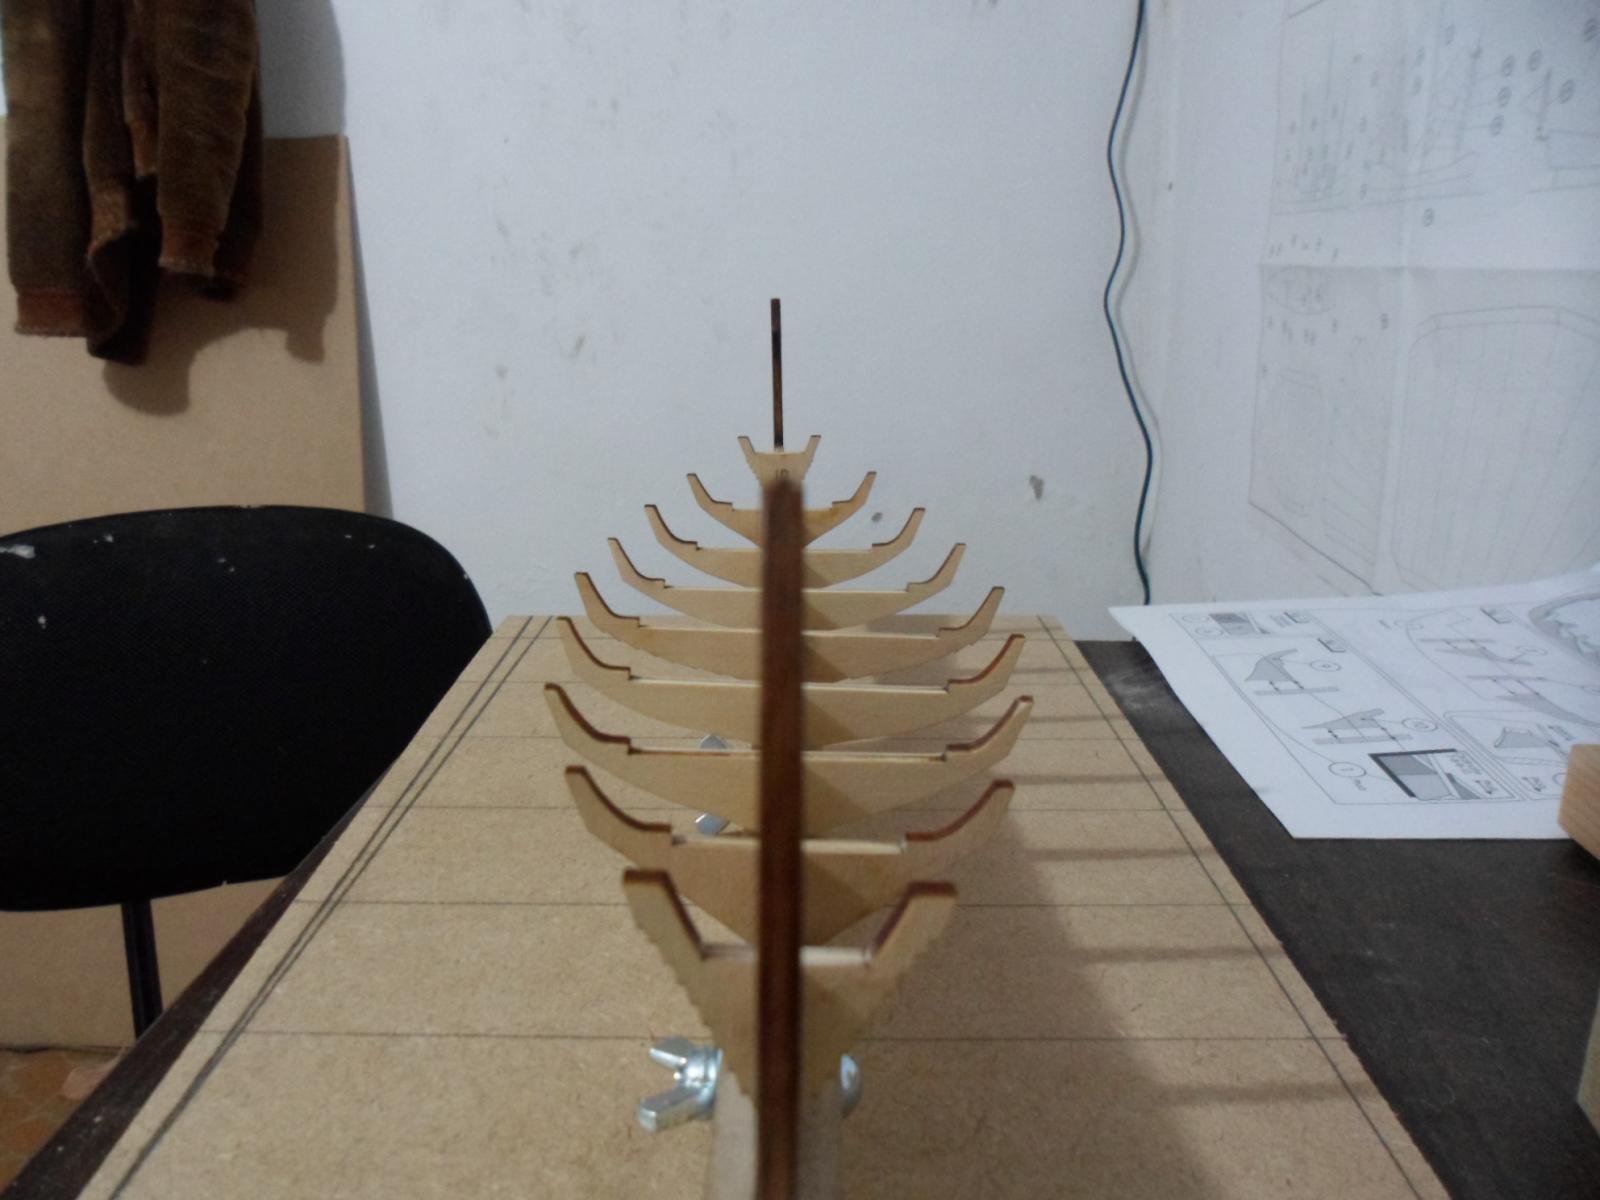
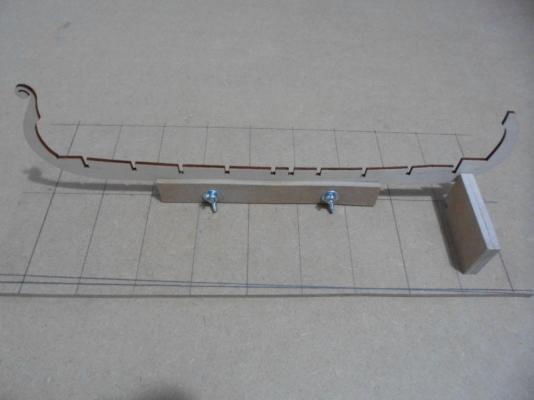
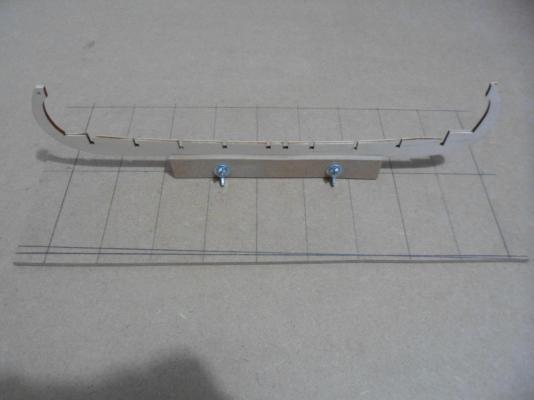
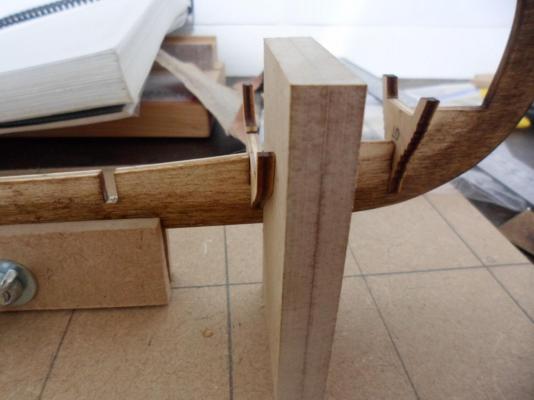
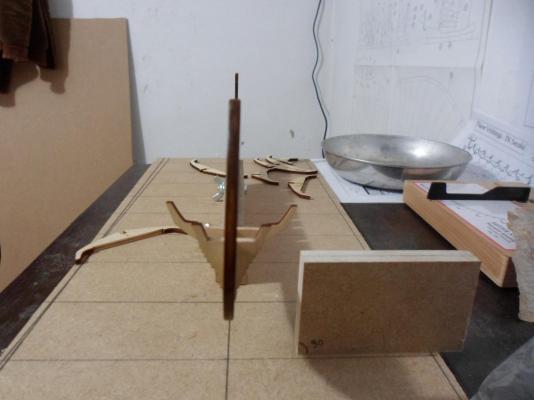
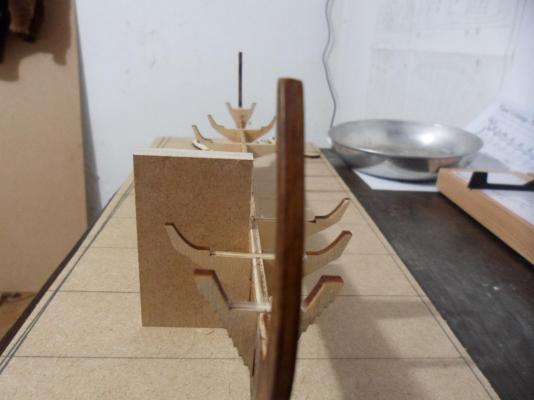
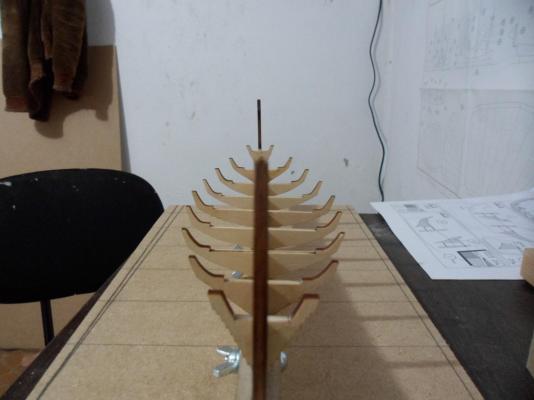
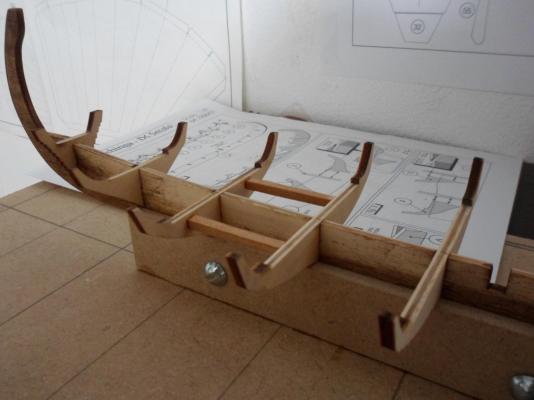
False keel was attached to the stand, first picture shows the before first modification: Second picture shows the after, as I cut the tail off. As I intend on building an engraved cover, that part had to get out of the way. I waxed the false keel, then and started placing the bulkheads. They were glued and fixed to the block I made for 90° aligning. I took pictures only after they were already glued and I could verify they were rightly fixed. As the ship seems too fragile at this point, I decided to place beams between the bulkeads to assure they wouldn´t bend while planking. And that´s it for now. Hope to be posting more pictures soon. :D
-
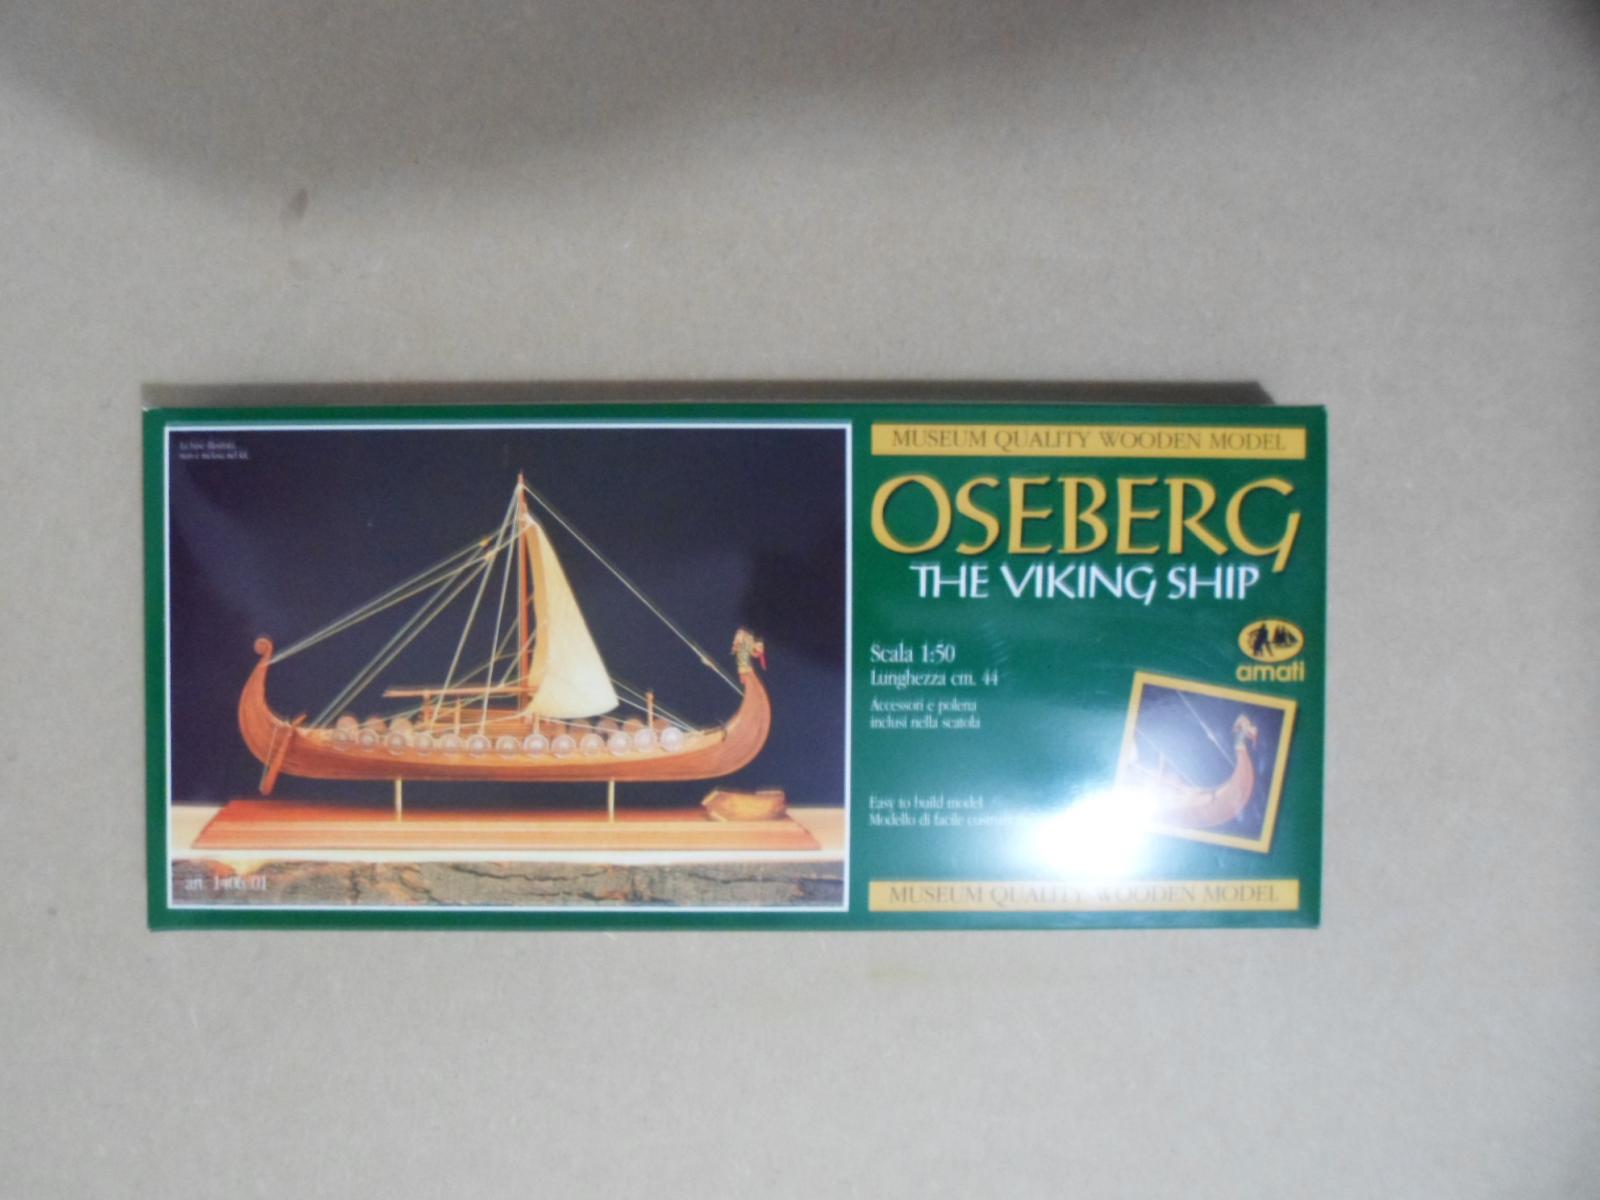
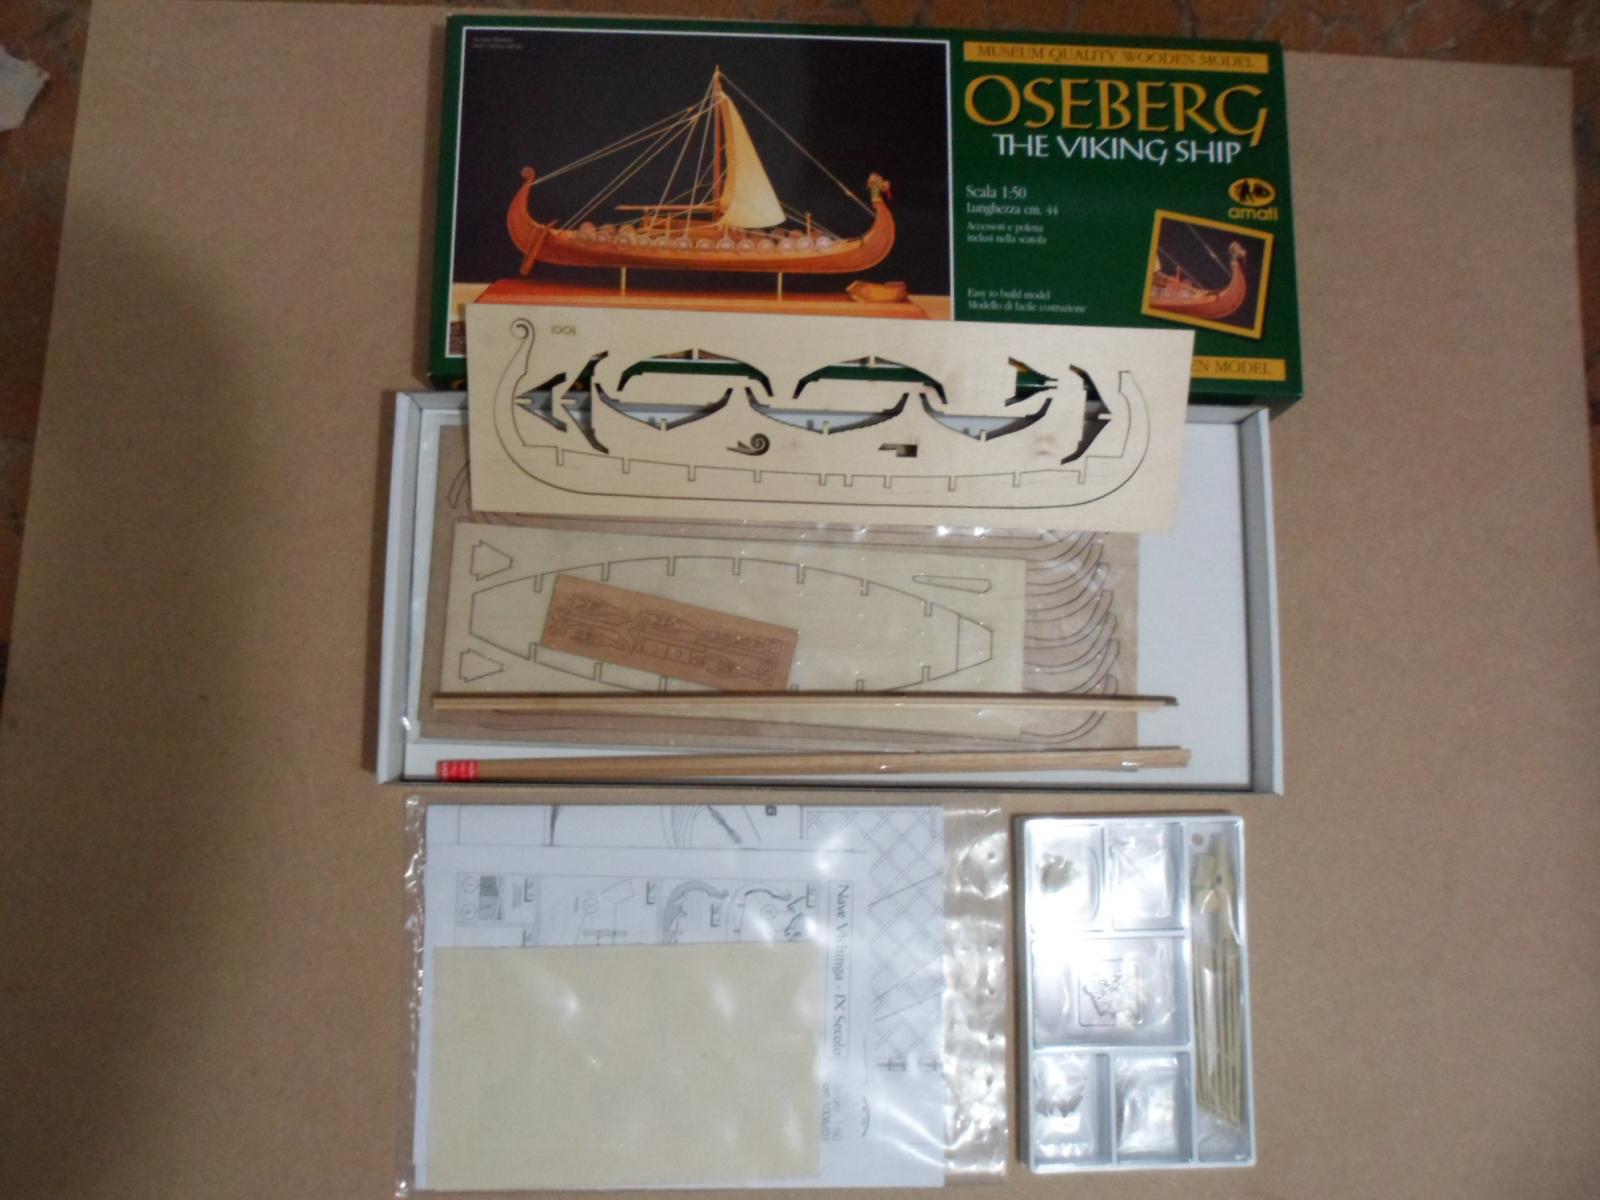
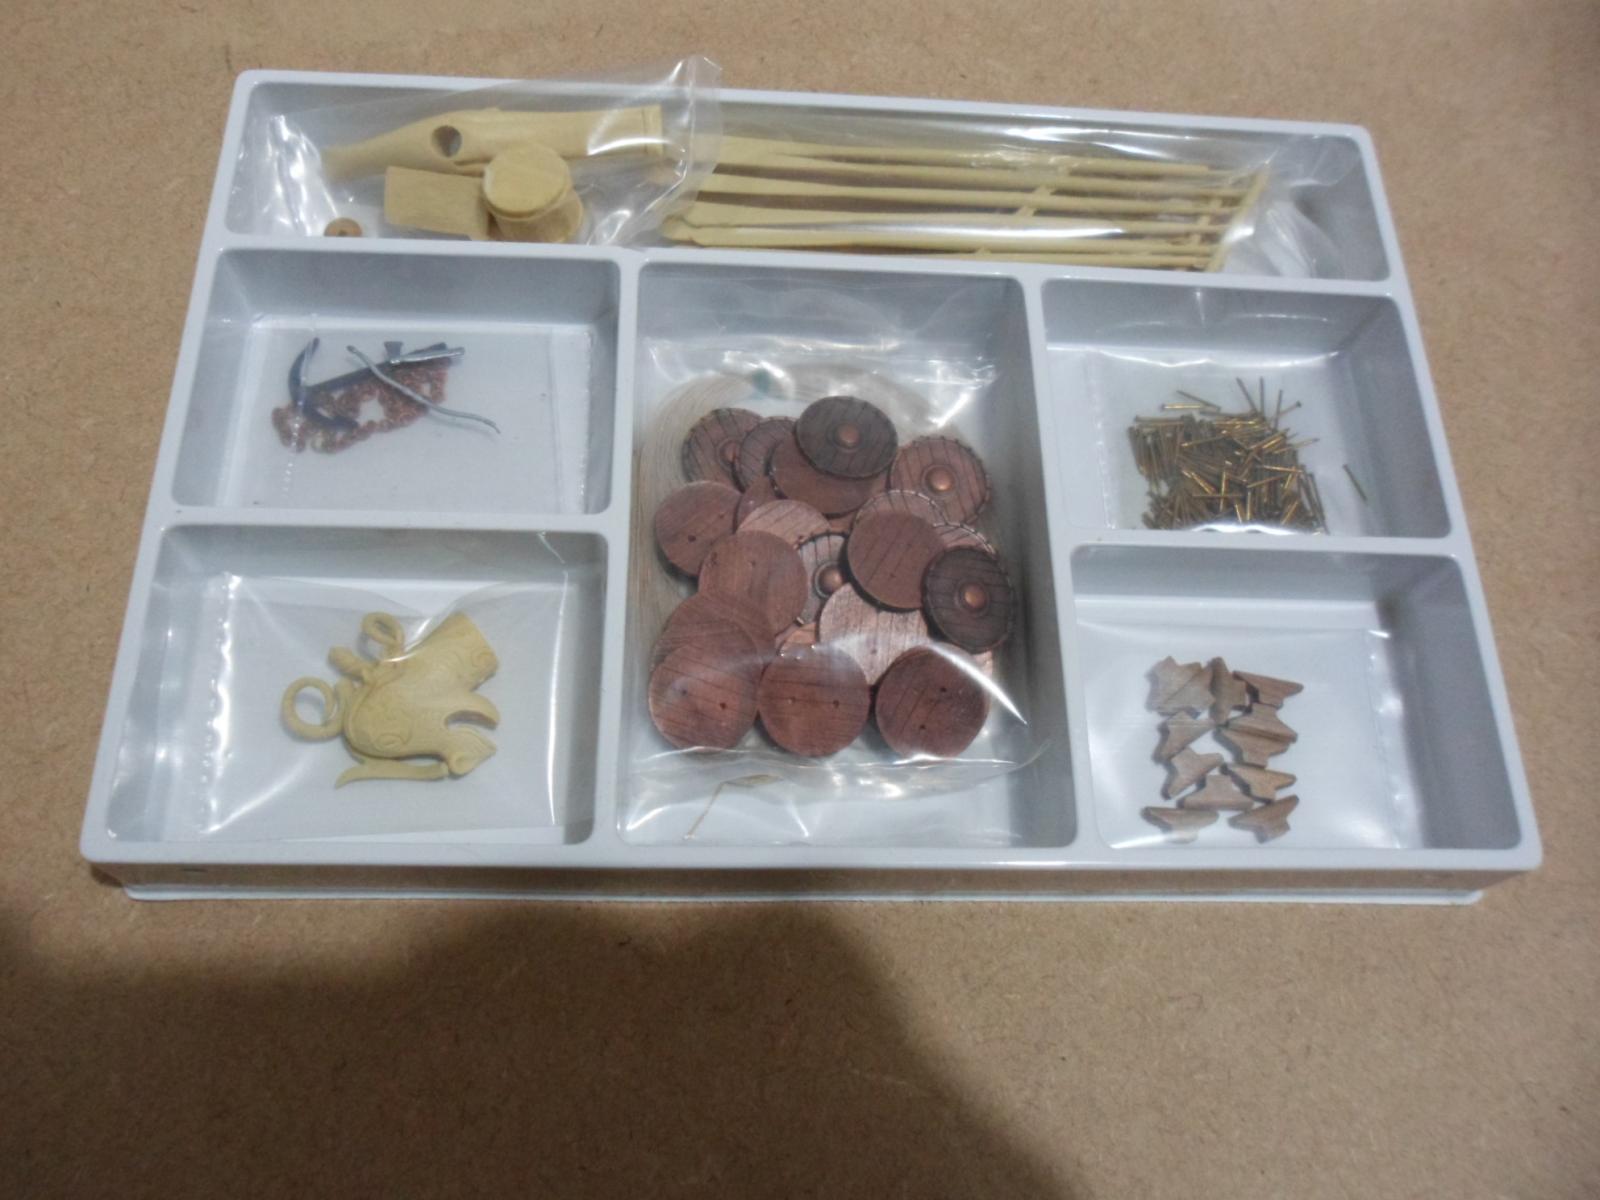
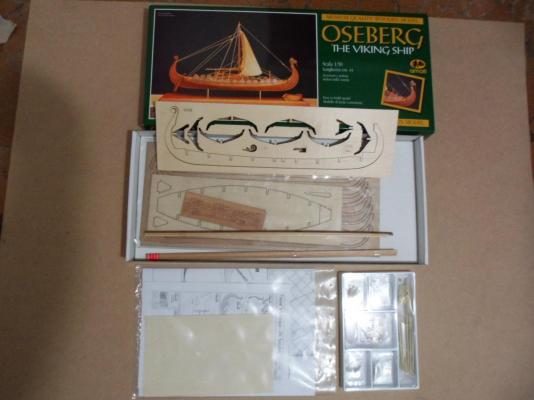
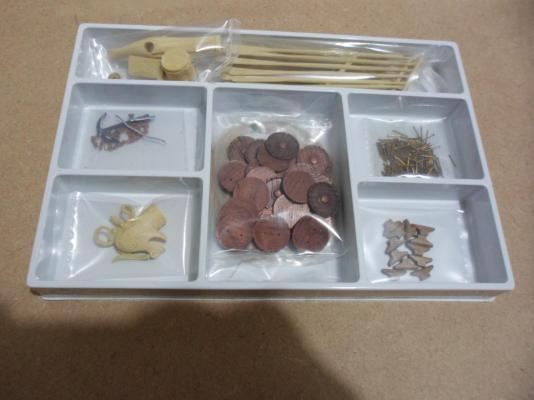
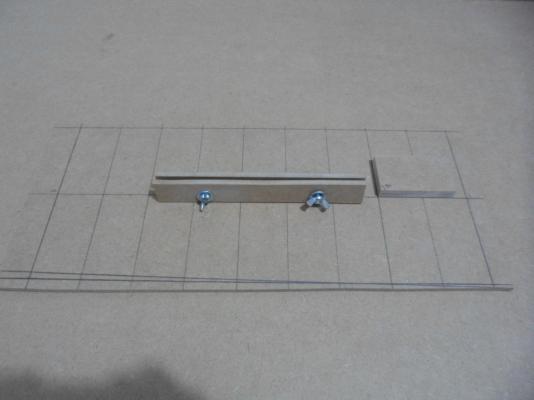
So, as I said, I´ll begin some new projects while still building the Chinese Junk. This is the first of two, the Osberg by Amati. Before any sawdust comes through, I have to thank my friend Jack Panzeca for his gift. Yep, he was a sweety and sent me this kit he wouldn´t build for he already was building the Billing´s Oseberg - As I was always telling how nice it was and let it clear I would build one if I had, Jack surprised me with offering this one. Jack, here I am, building the ship - Thank you. A review of the box - In comparison to the other 2 ships I built till now, the Amati Oseberg kit is a little sparse on material. Truth be told, that´s because the ship itself isn´t that material consumer - viking ships are fantastic ships considering the small use of wood and their sailing capabilities. The false keel and bulkheads are laser cut, as the wood for hull planking - at first I thought it strange for they´re strangely shaped, but that's explainable by the planking of a so characteristic hull. Some pictures follow: Fittings may be a problem to those who, as I do, like the wood everywhere. Shields are metal cast, oars are plastic as the mast step. All of those are already marked on my plans as scratchbuild fittings. I have to say, though, that Amati Oseberg isn´t really the Oseberg. I measured the ship´s keell and middle bulkead to find she doesn´t fit on the true Oseberg dimensions - False keel should have 43,16cm, and it has 43,9cm, width should be 5,20cm, it´s 5,7cm. Also, Amati´s bring a strange dragon head instead of the engraved details Oseberg has, as a central oar holder that shouldn´t be there. My plans on bashing/modifying goes for removing the central oar holder, engraving the stem/stern as the Oseberg (well, the closest I can get, at least), adding the big barrel the museum ship exposes and chests before the oar holes. I´ll scratch the oars, shields, mast step and rudder. I begun by building a stand. It´s a 6mm mdf board with two 6mm planks held together by butterfly bolts. I would install metal trails for a bulkead aligner, but changed my mind. Instead, I traced lines on the board and made a 90° angled piece gluing 2 mdf pieces (sanded and measured). (To be continued)

-
You keep doing great on scratchbuilding the fittings/metal cast parts supplied!
-
Hey, Edwin, in that case behind a modeller, there´s another modeller! Sjors got lucky, for sure. My admiral doesn´t even like to look to my ships. Sjors, great sail work!!
- 1,873 replies
-
- 3
-

-
- occre
- san ildefonso
- (and 1 more)
-
Great progress in there, Popeye. I´m following along ^_^
-
Thank u Pops, Mark, Matti and Grant. Thanks for every "like" everyone has clicked too ;) Hans, that remembers me when I was trying to build a medieval village on 1:50 scale with tavern/inn included - maybe that´s a call for some dioramas on my future. Makes me think on building a floating restaurant, too :P Joe, that´s something to wait from all of my buildings, more and more. Thank you. Carl, to answer properly, muito obrigada!!! Raymond. I´m getting ready for some challenges soon. Next kits I´ll try to do more than one at the same time as I already am hoarding some POF material (both for reading as for building) - I´m anxious for fully scratching a ship. Ty for your words, amigo. Piet, glad u liked !!
-
Wow! That´s a show room! Great work, Doris. All of your ships are great. Hope you can be modelling soon and get a better job (hope unemployment on your country decreases, too).
- 883 replies
-
- 1
-
-
- royal caroline
- ship of the line
- (and 1 more)
-
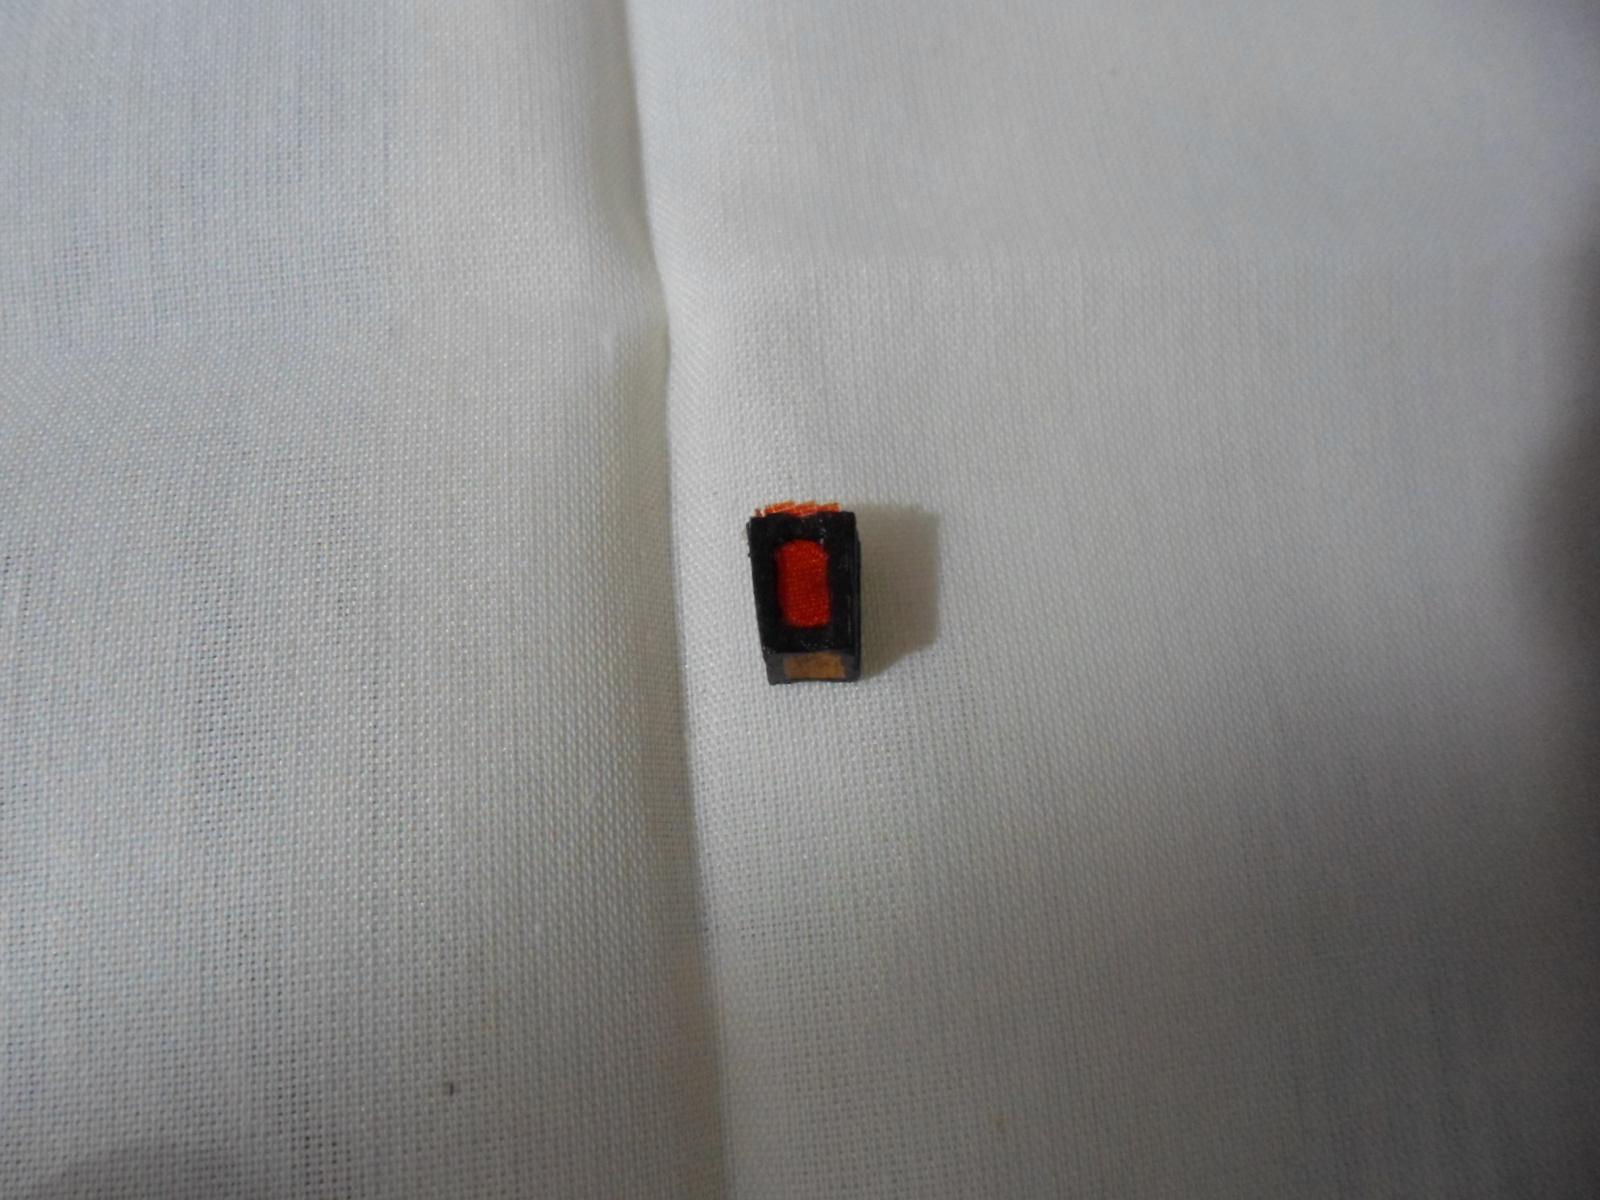
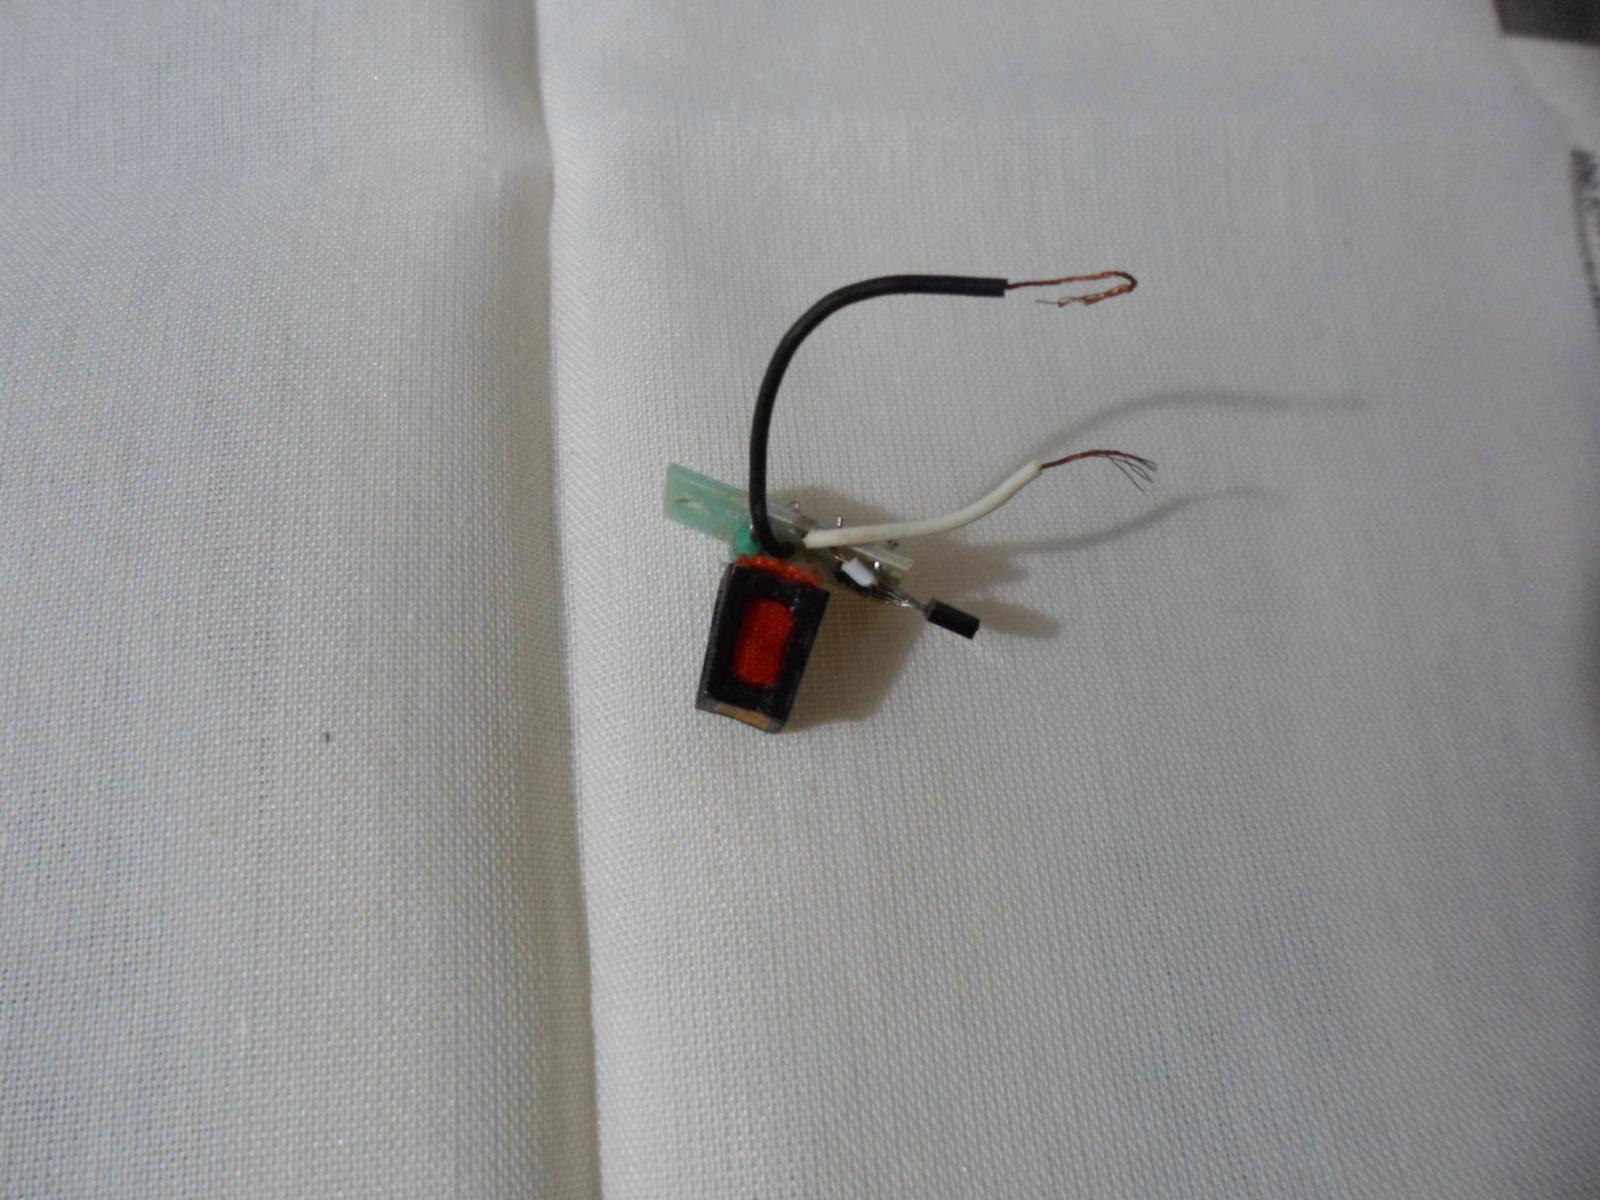
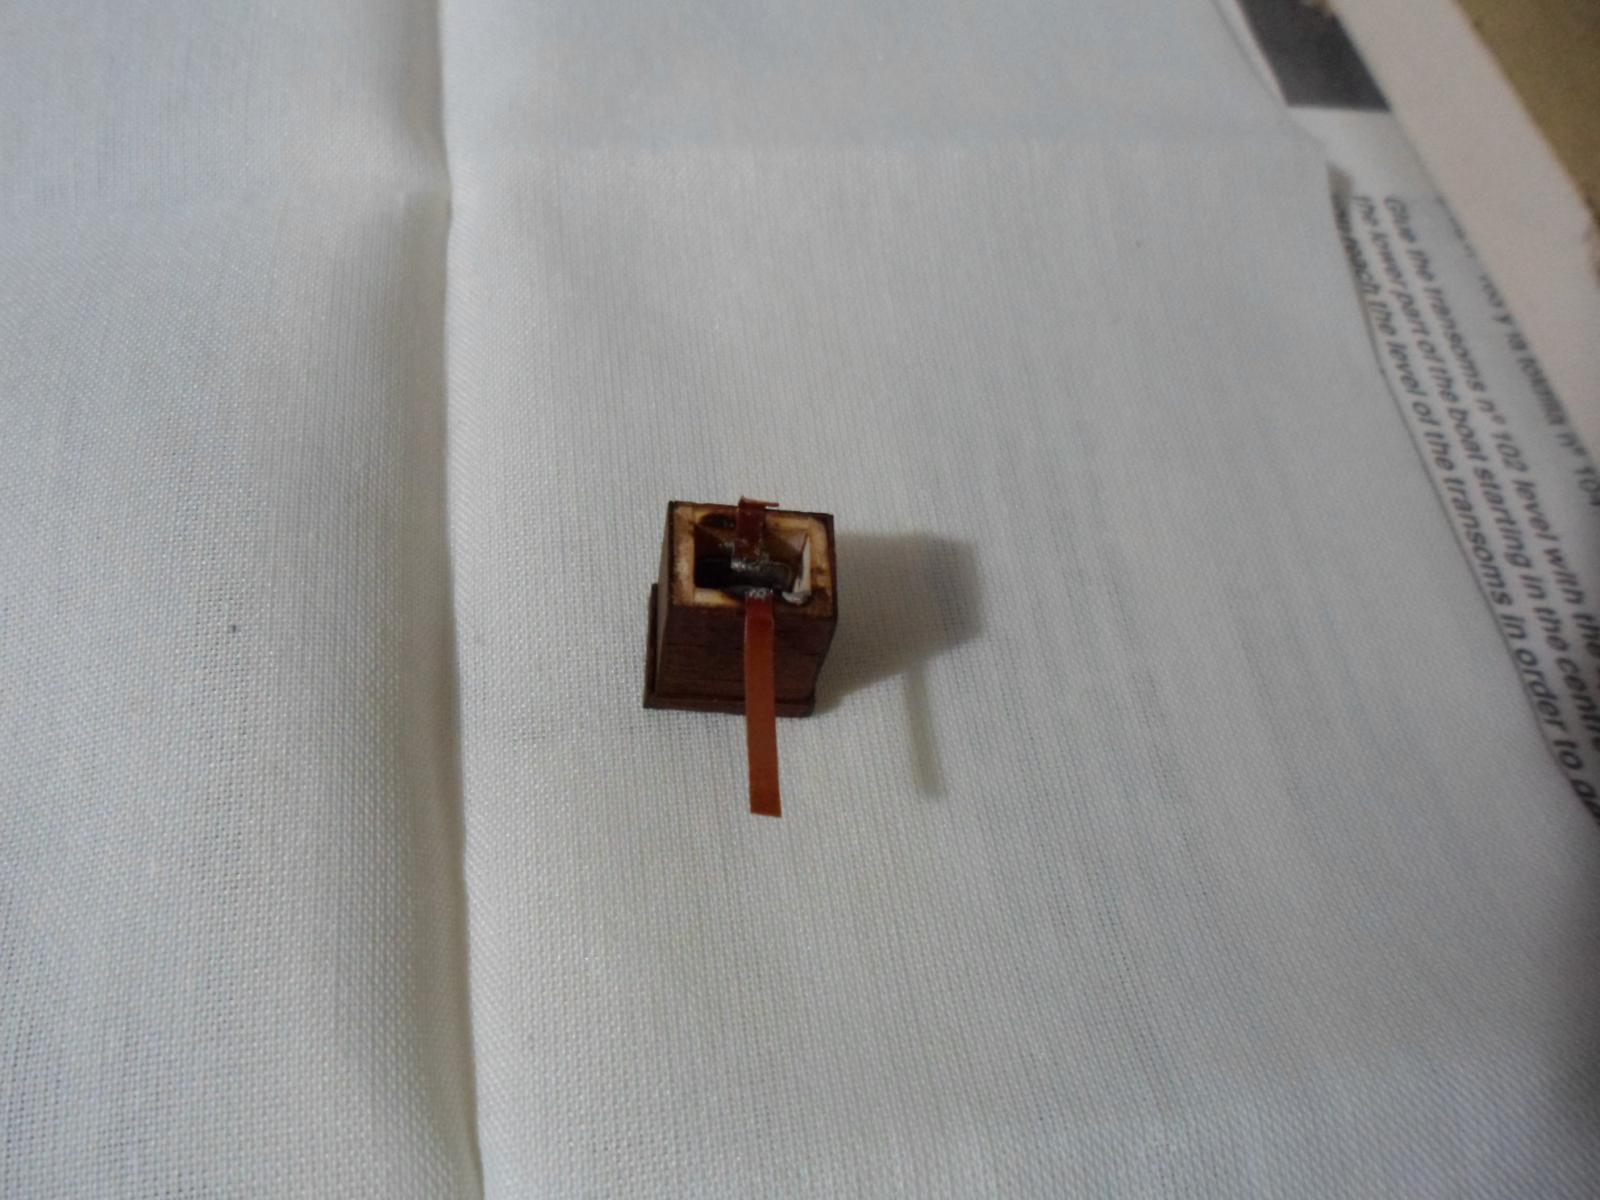
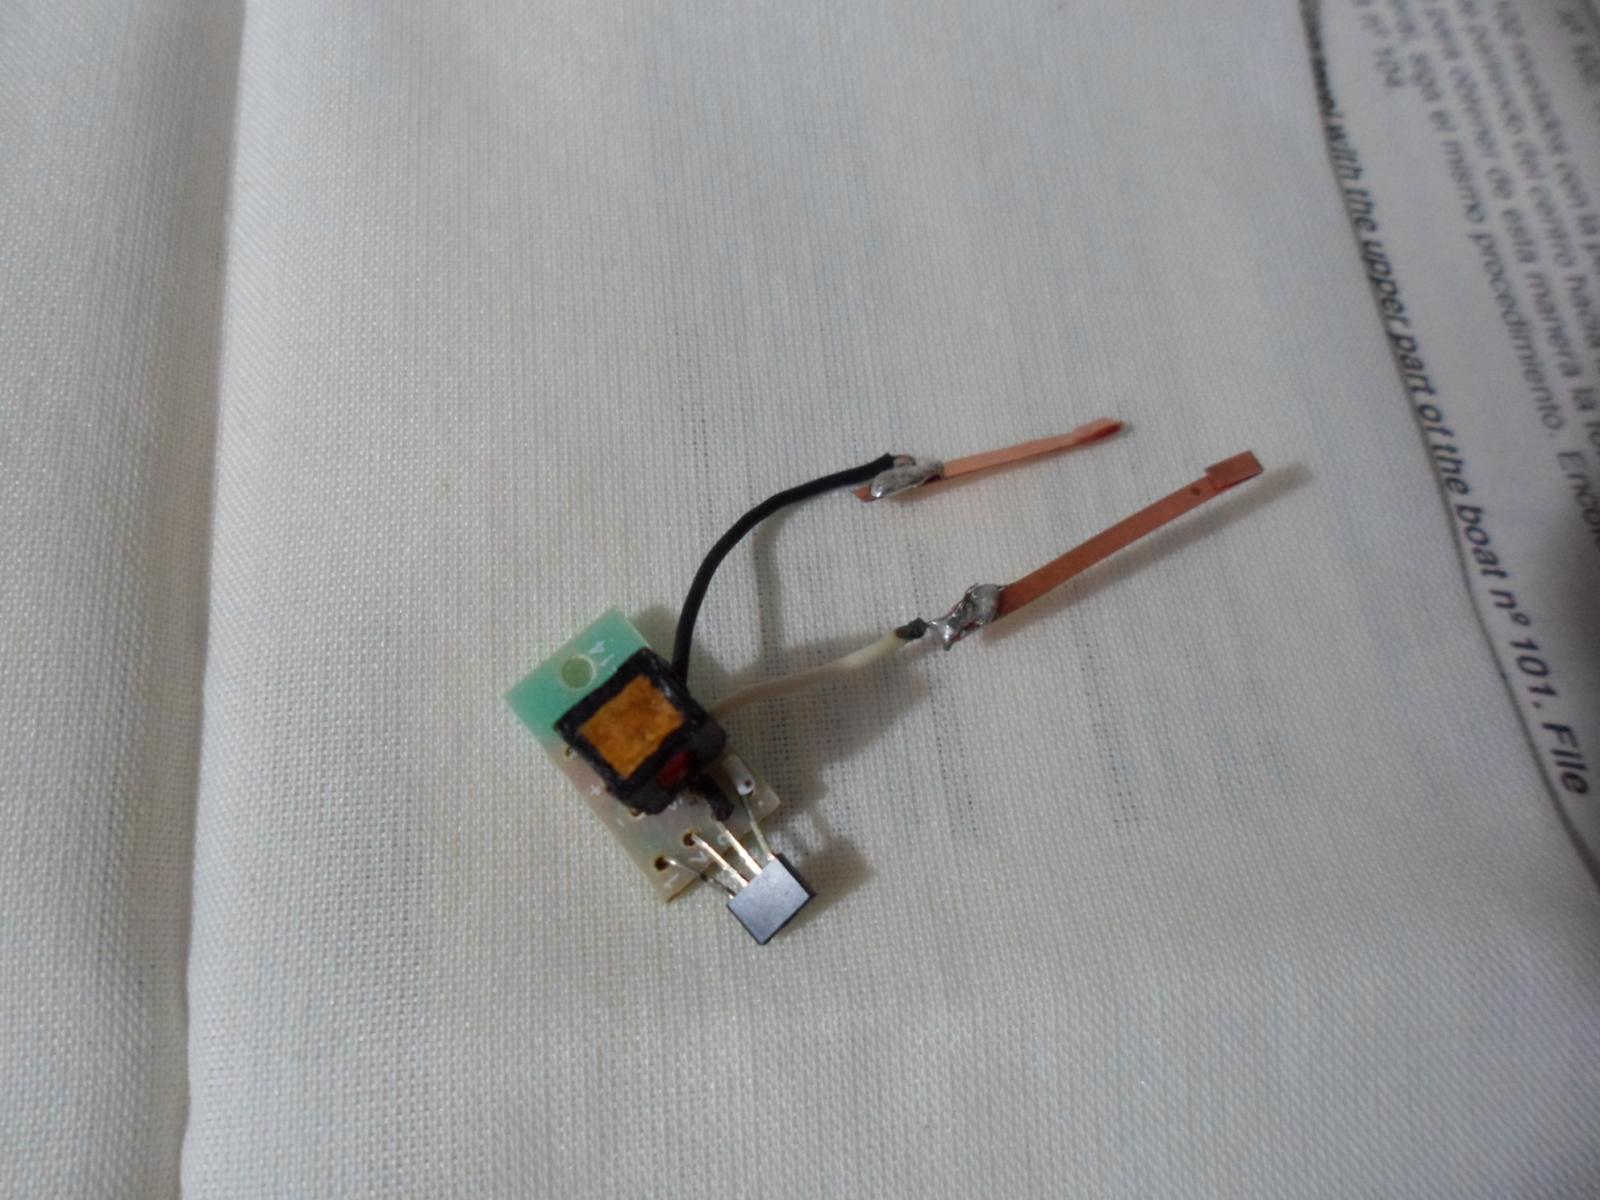
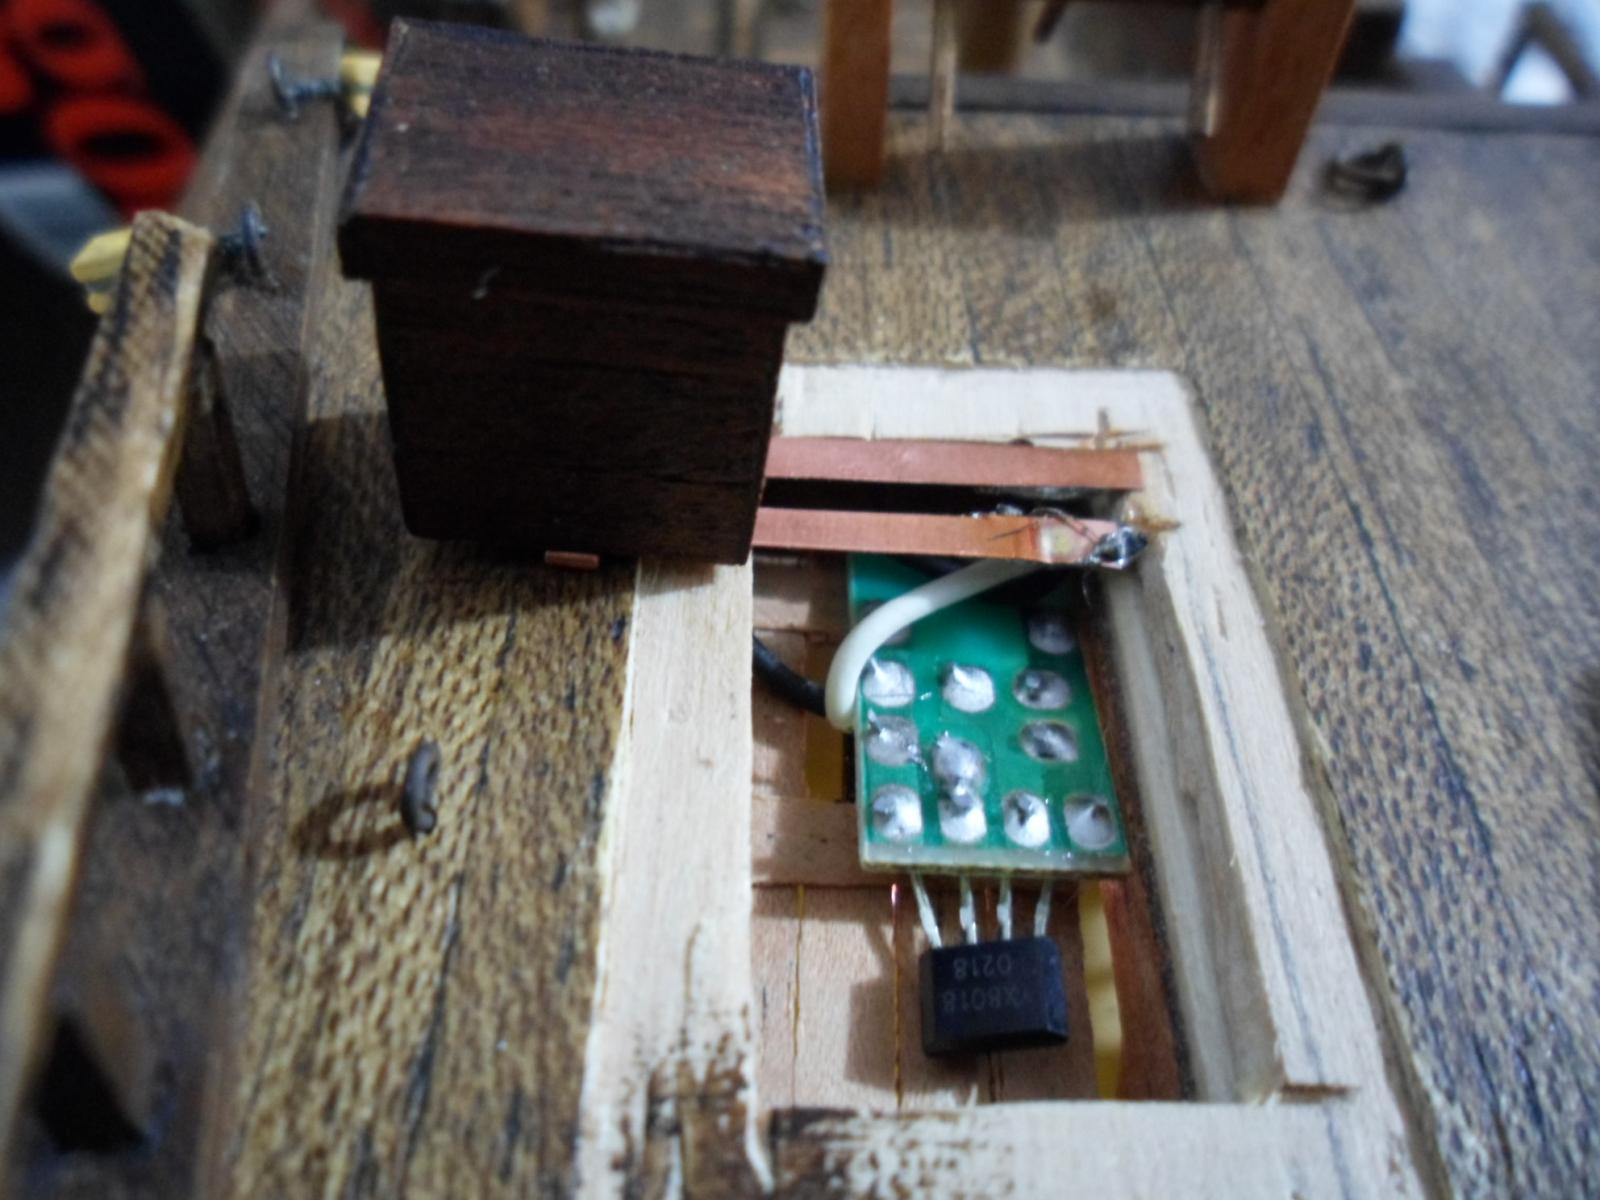
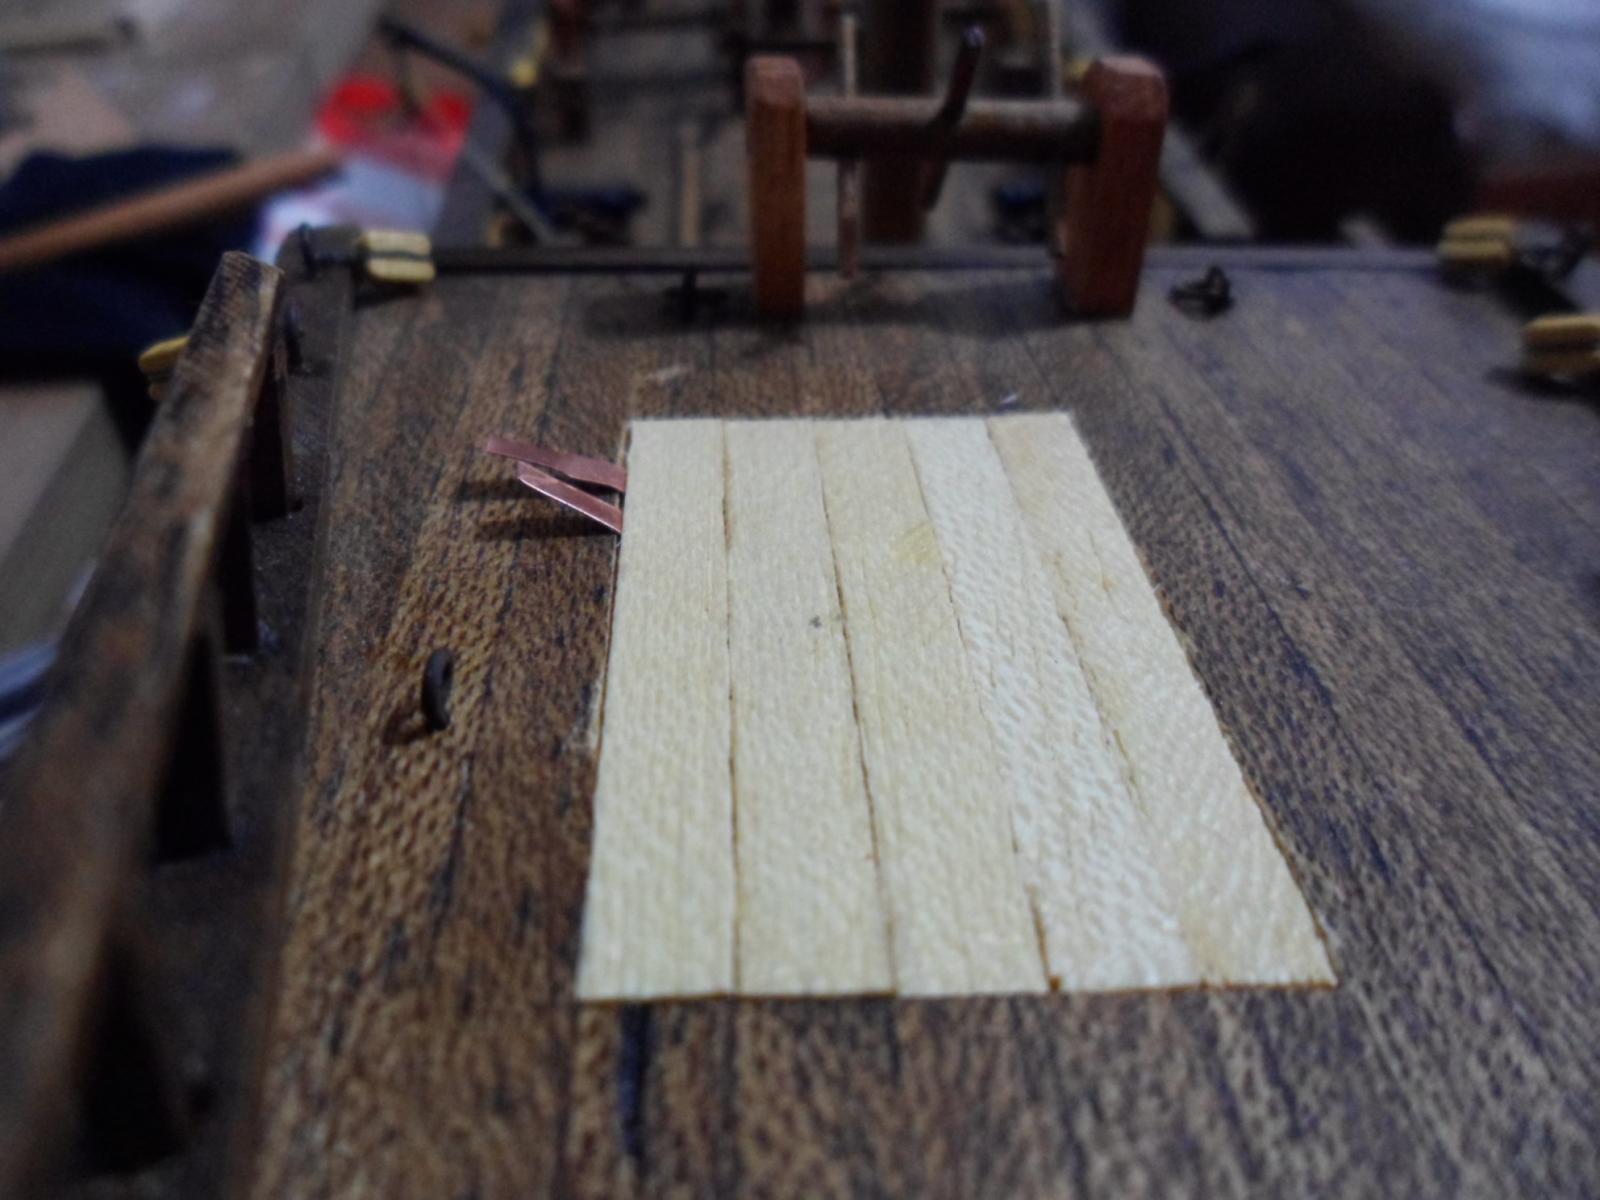
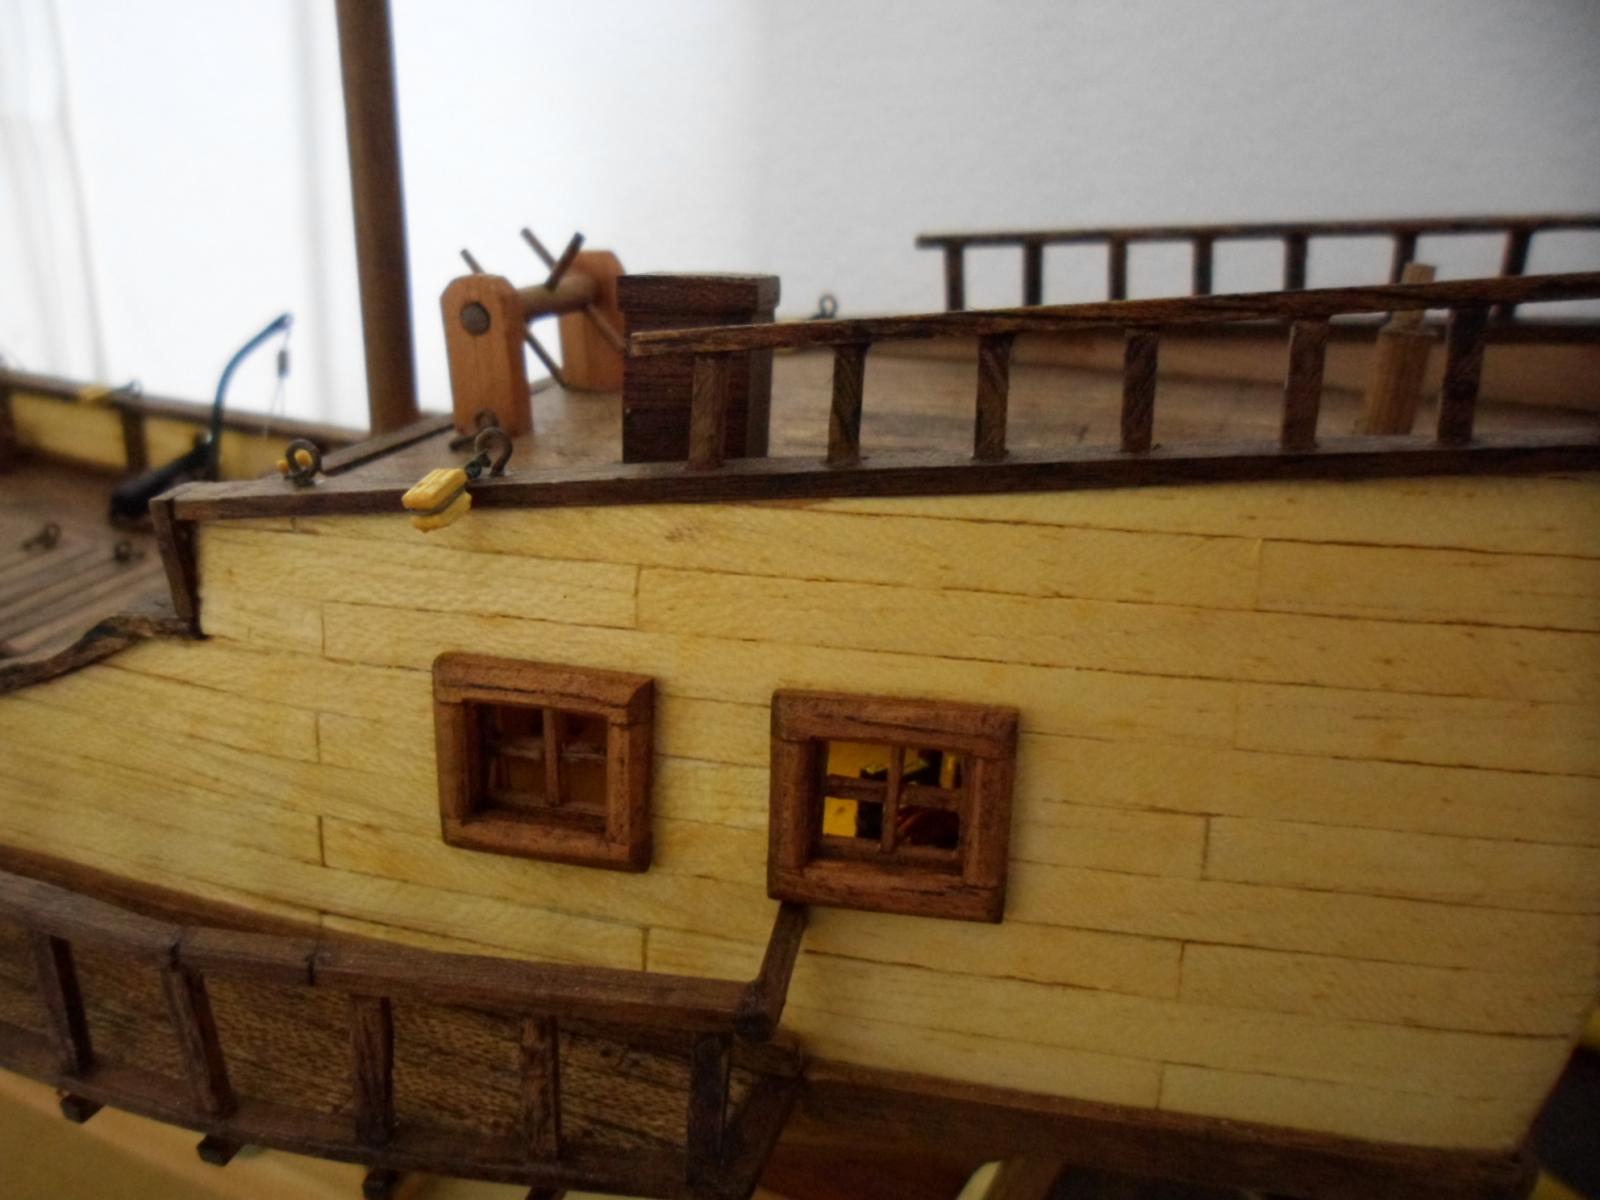
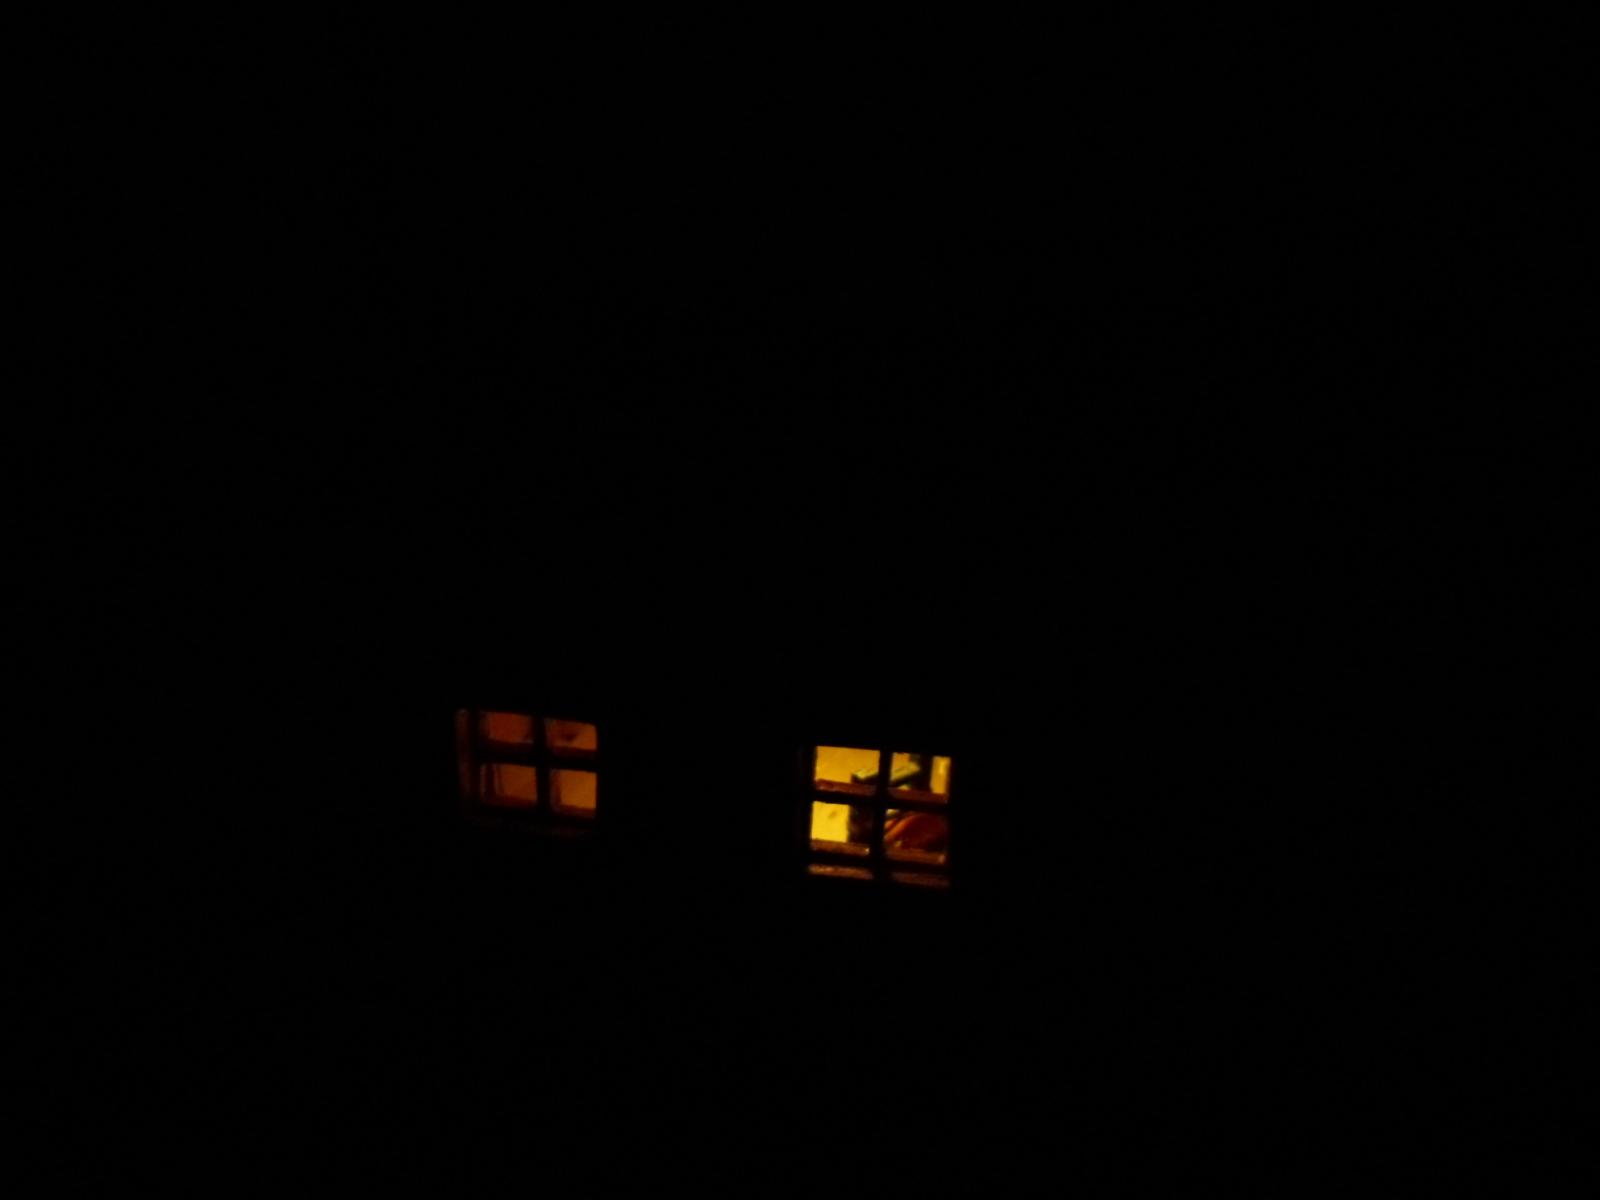
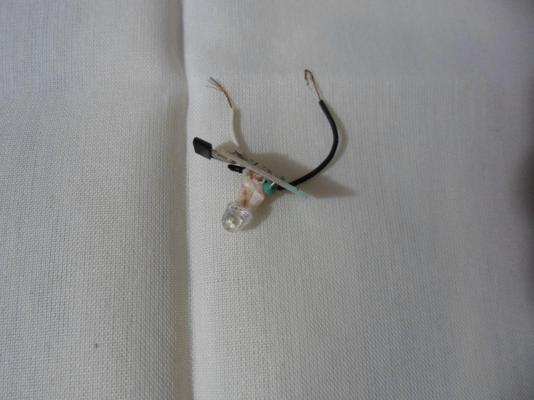
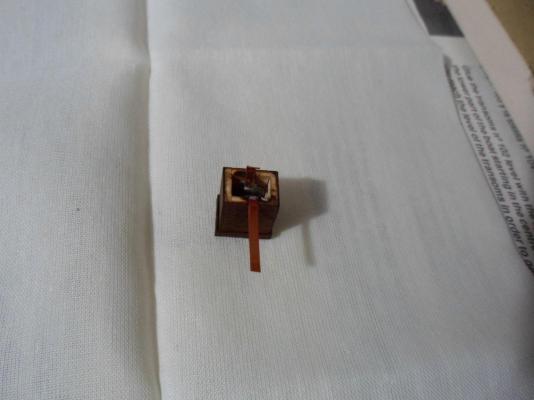
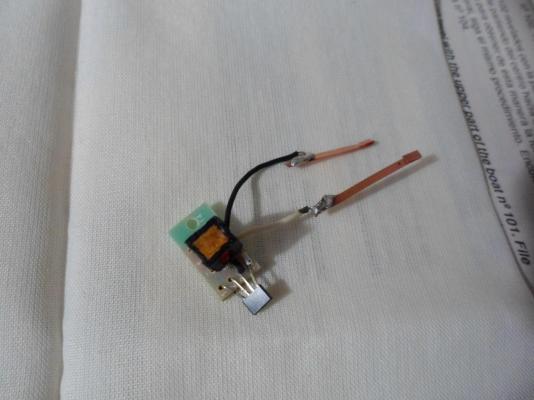
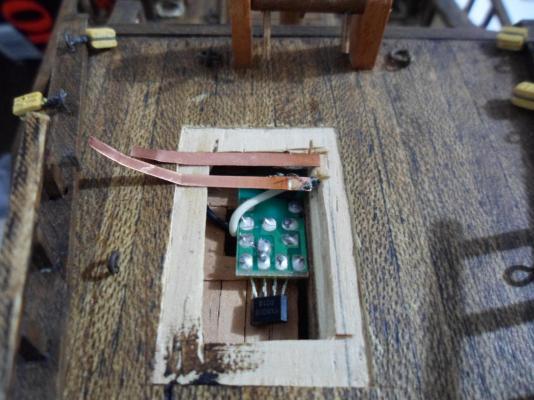
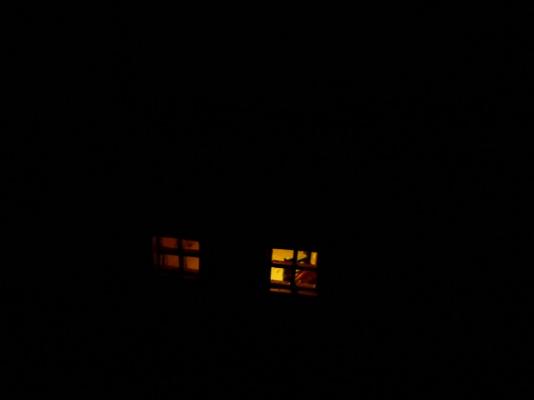
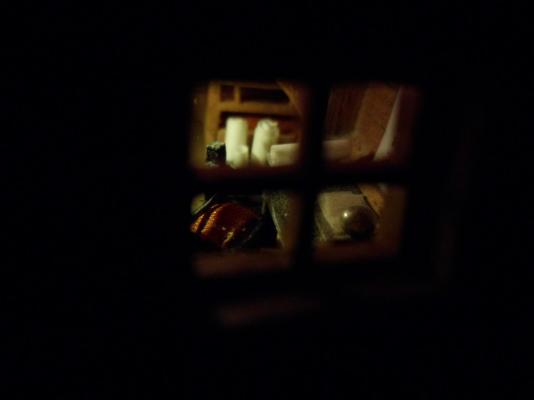
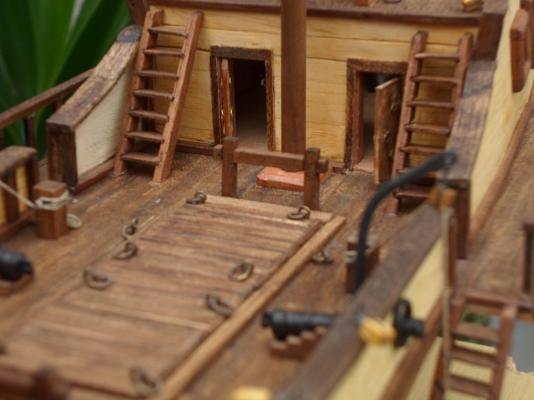
Hello again! Well, maybe I´ll get more updates as I enter the final laps. Here is the hole fix over the cabin and the switch for my cabin´s lighting. I made a step by step on the fixing/lighting as I´m proud to have done it. I know it´s not the greatest of executions or the best mechanism I could´ve used, but those hours spent on science fairs at school weren´t wasted. :D First picture shows the led with a circuit board - I used the led from a garden beacon with a timer, so the battery wouldn´t be consumed when I forgot to turn it off. This is my remade lantern - first version I used tin and painted paper. Replaced the painted paper for silk and better painted the tin frame. Attached the lantern to the circuit board. Cut two 2mm copper stripes from a copper foil and soldered them to the battery box. Cut another 2mm copper stripes and soldered them to the circuit board. Fixed the circuit board on its place (there was a hole for the lantern to be placed in the cabin) and glued the copper stripes parallel - that way the battery box could be placed and turned into the switch. After the eletronics were placed, used the same wood for deck planking to close the hole. Part of the stripes were left for the switch. Hole closed, planking aged and battery box/switch placed - ligths on. I thought on replacing all the planks so that trapdoor look wouldn´t be there, but kinda liked the idea. Maybe I´ll fix some holder for it. Next pictures shows the lighting effect. Now, all for the rigging!!!!!


-
Piet, some indonesian food recipes would be most apreciated - asian food is part of my everyday cooking. Don´t know if Indonesia would ship peppers as gifts for a bilateral commercial agreement on the early 1400´s, but who knows? It could be . Thank you for your kind words and concrete on these rainny, hot spots of our world tend to quickly gain that look - too much lichens and fungi. Hans, I could do that too, since the looks would be enough. I´ll do a test - thank you for the tip!! I´m not that master seamstress but can find myself well around needles, by the way .
-
Questions about Magellan era Portuguese Carrack
Vivian Galad replied to Salty Sea Dog's topic in Nautical/Naval History
There´s a lot of discussions on there. This type of ship seems to me a lot more spanish than portuguese on its looks. And, in portuguese we call it a Carraca Atlântica . When I was researching types of ships to build I found some words about the Carraca Atlântica discussing it as a Spain/Mexican "cruiser". -
Dick, that´s a great job interpreting the original illustration. I´ve tried to sort some things out from some old junk ilustrations and that´s really hard to understand some details. I´m reading Lazló/Woodman The Story of Sails and find it interesting how they depict the venetian ships - all beamed through the hulls, as yours, but not the genoese, as if they were an endemic venetian characteristic. PS. What´s that ribcage behind your Nave Tonda?
-
Casey, sails are next in line - don´t know yet if I´ll cut strips and sew them together or if I just cut them in their final look as the kit instructs. I´ll have to consider that after some more readings. Ty for your kind words. Sjors, u guys complain too much about rigging, well, maybe that´s because you choose bigger ships than I! But I´ll be getting some bigger ships on my way, no problem. Ratlines seem to be the Thing (I´ll have some on my next projects ). Jack, the cabin´s awaiting patiently for me - That hole needs it´s copper stripes instalation and soldering before being covered by planks and the switch/battery box already built. I just need a soldering Iron for that purpose (I lost mine on my last moving and always forget to buy a new one when I´m out). Rudder arm rigging will be over that part, too, and I´m still thinking if I´ll follow the kit´s instructions there. Today I´m finishing the masts rigging, by the way. TYVM!! Rick, I laughed and blushed a bit - thank you. Matti, you know I did that over your own pictures, right? When I saw your first pictures from the Vasa outside I considered taking some. Yours are my inspiration and you have a better landscape too! Thank you. Schnnu, I´m just sorting out how to finish my bulkhead aligner tool to begin my next project - as my two first wooden ships, next project will be heavilly bashed! Thank you for your words.
-
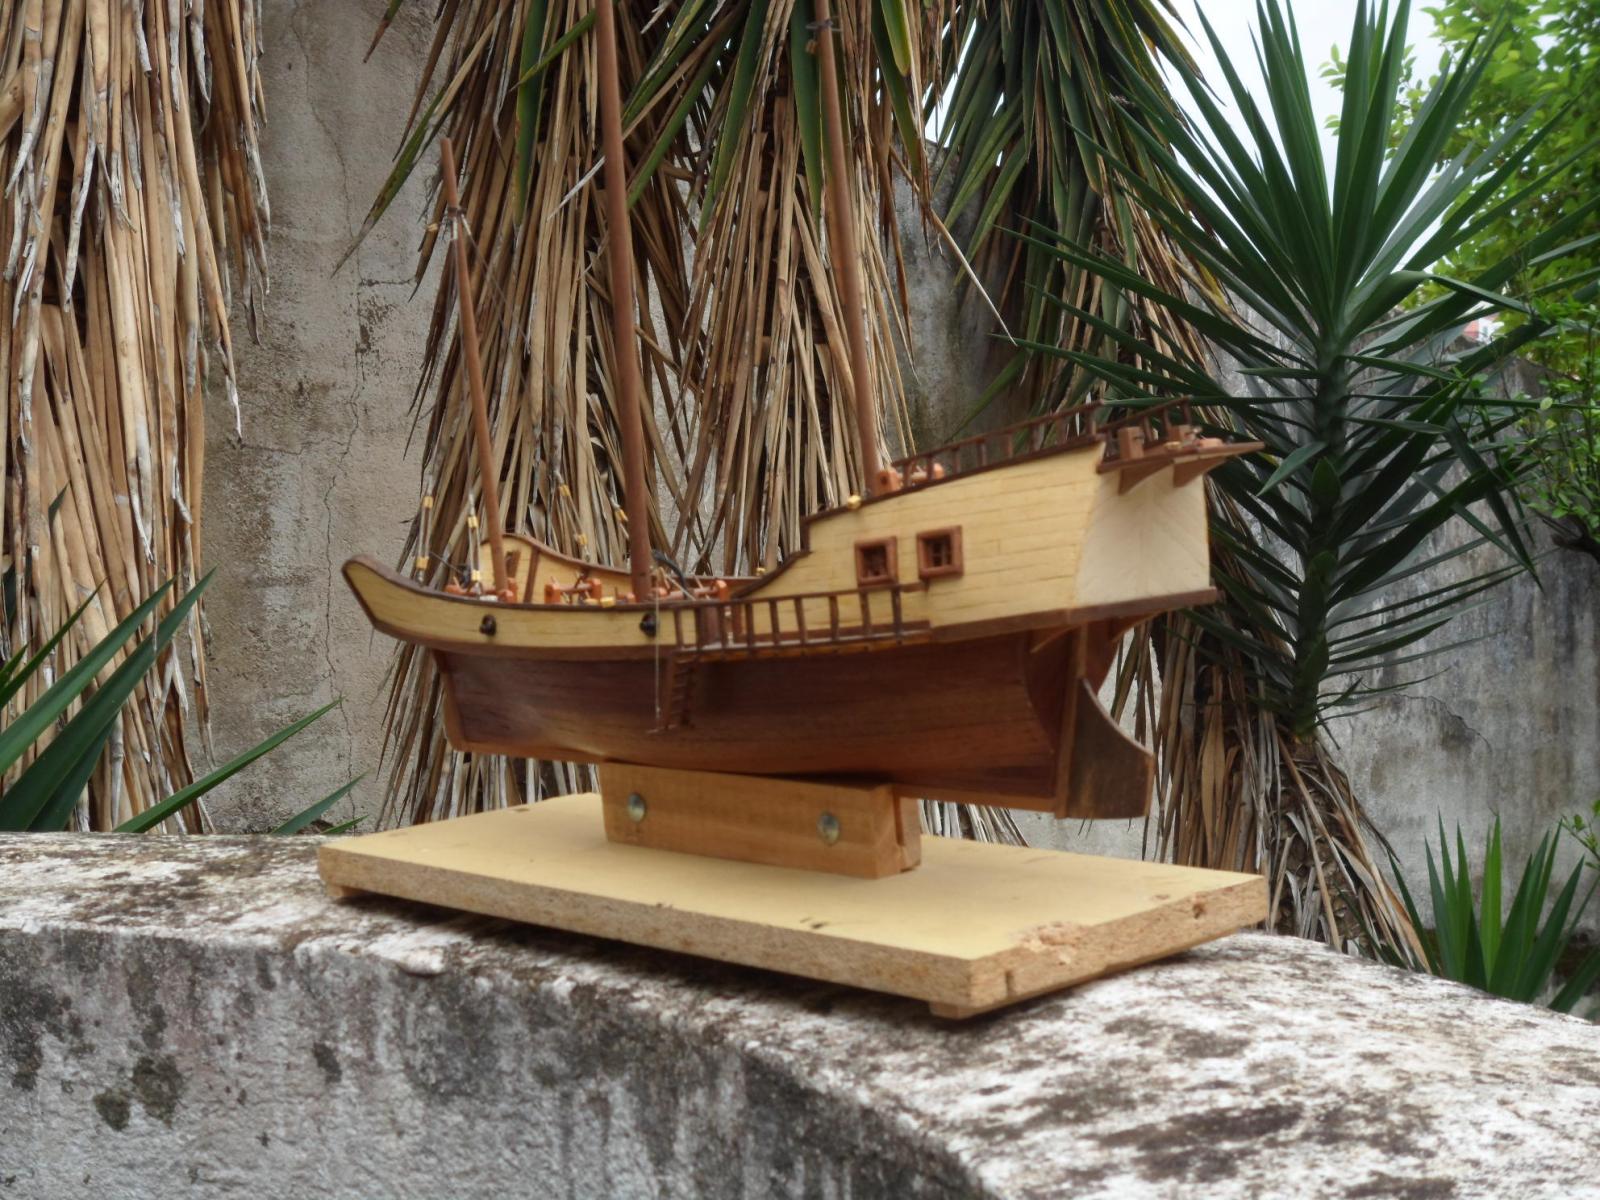
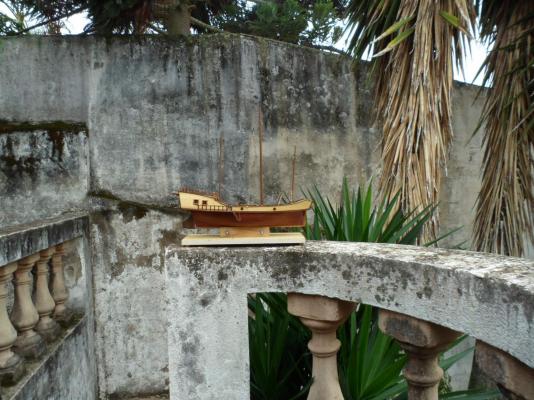
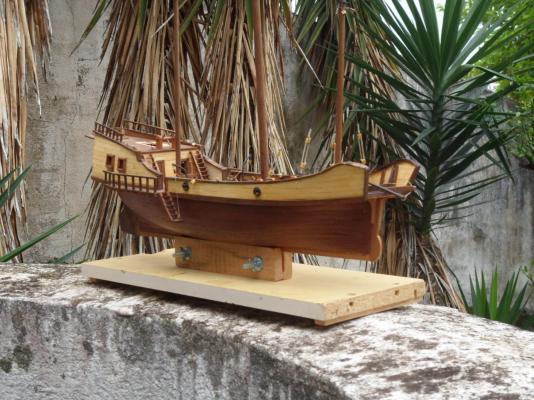
Frank, thank you! I was always thinking on put her outside and take some pictures, but let it pass. Daylight contributes a lot to details. Sam, that´s my backyard. Usually ppl paint it all from time to time (their houses, I mean) but I do like the green/aged concrete contrast - crude concrete with no plaster taunts me, too. Ty! Grant, thanks for visiting!! Pops, they look gorgeous even without sails, but when I finish rigging she´ll really show what junks are famous for. Thanks! Michael, that´s something I trying to reach, a natural oldish look, to hear (read) it from someone else is a great compliment. Thank you vm!
-
Really nice to see they growing
-
Cheers!!!
-
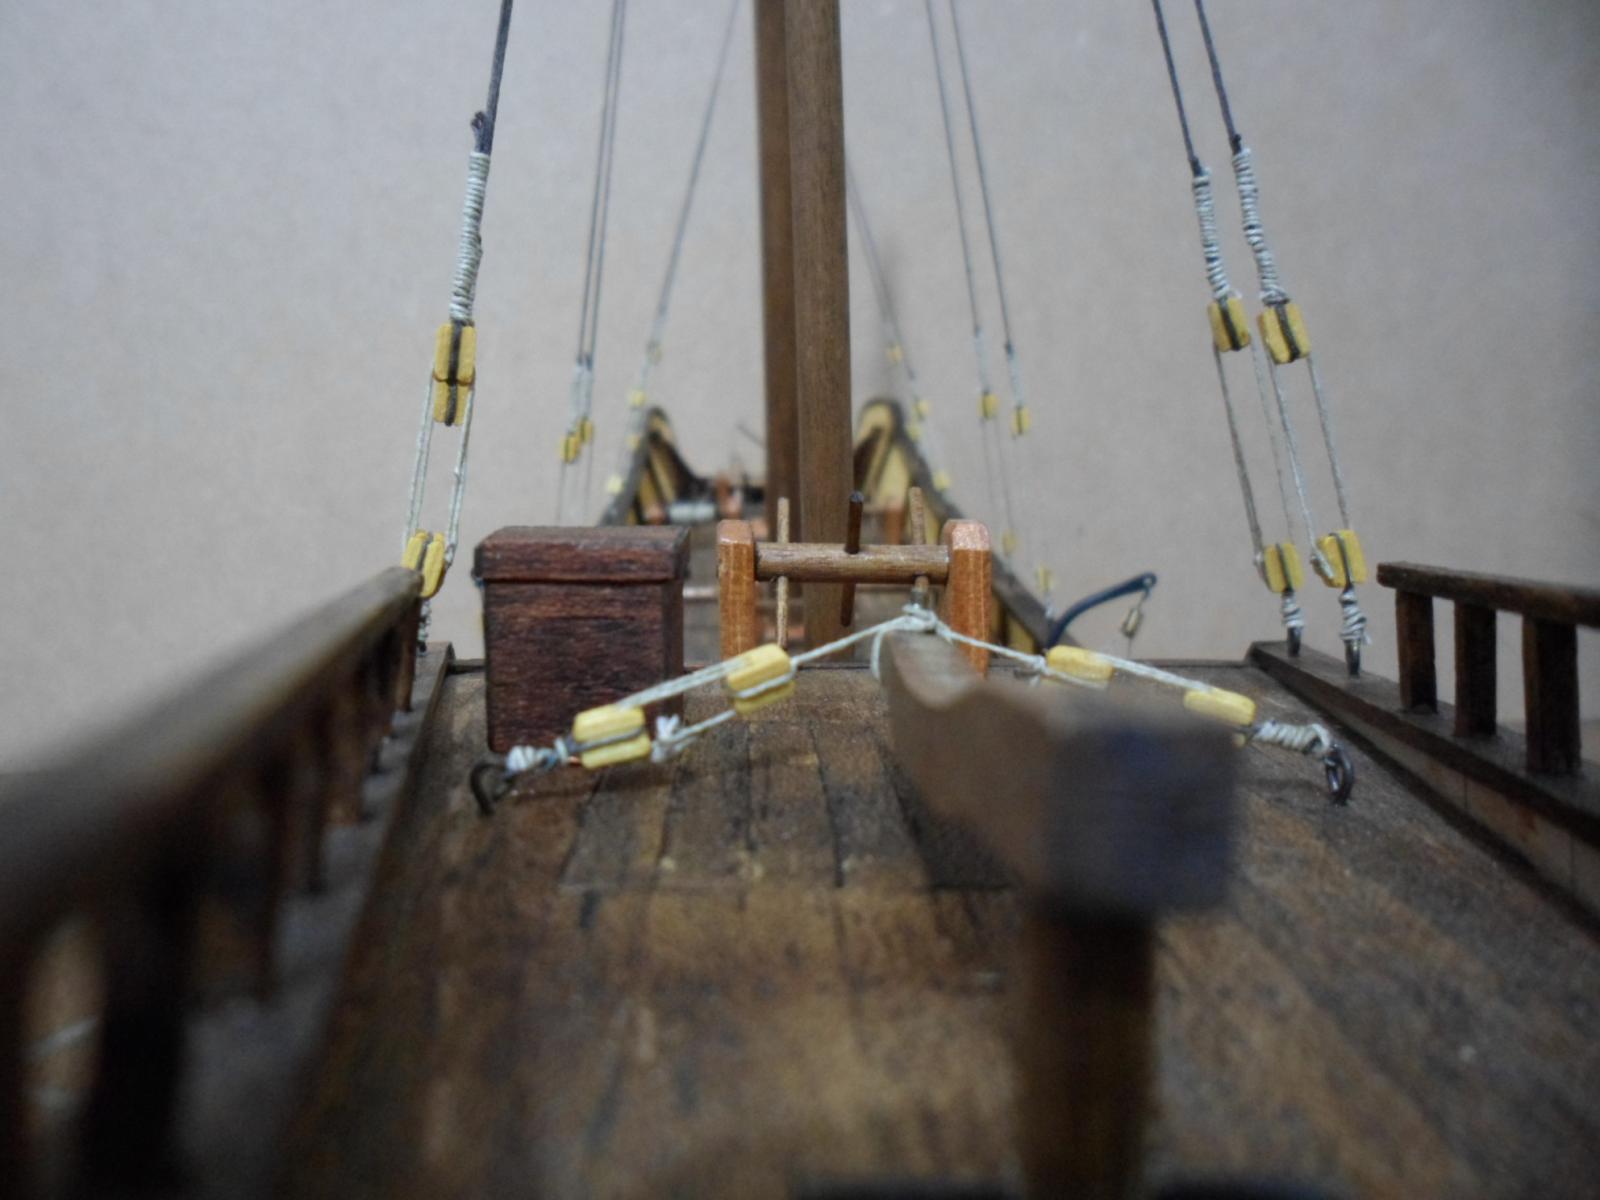
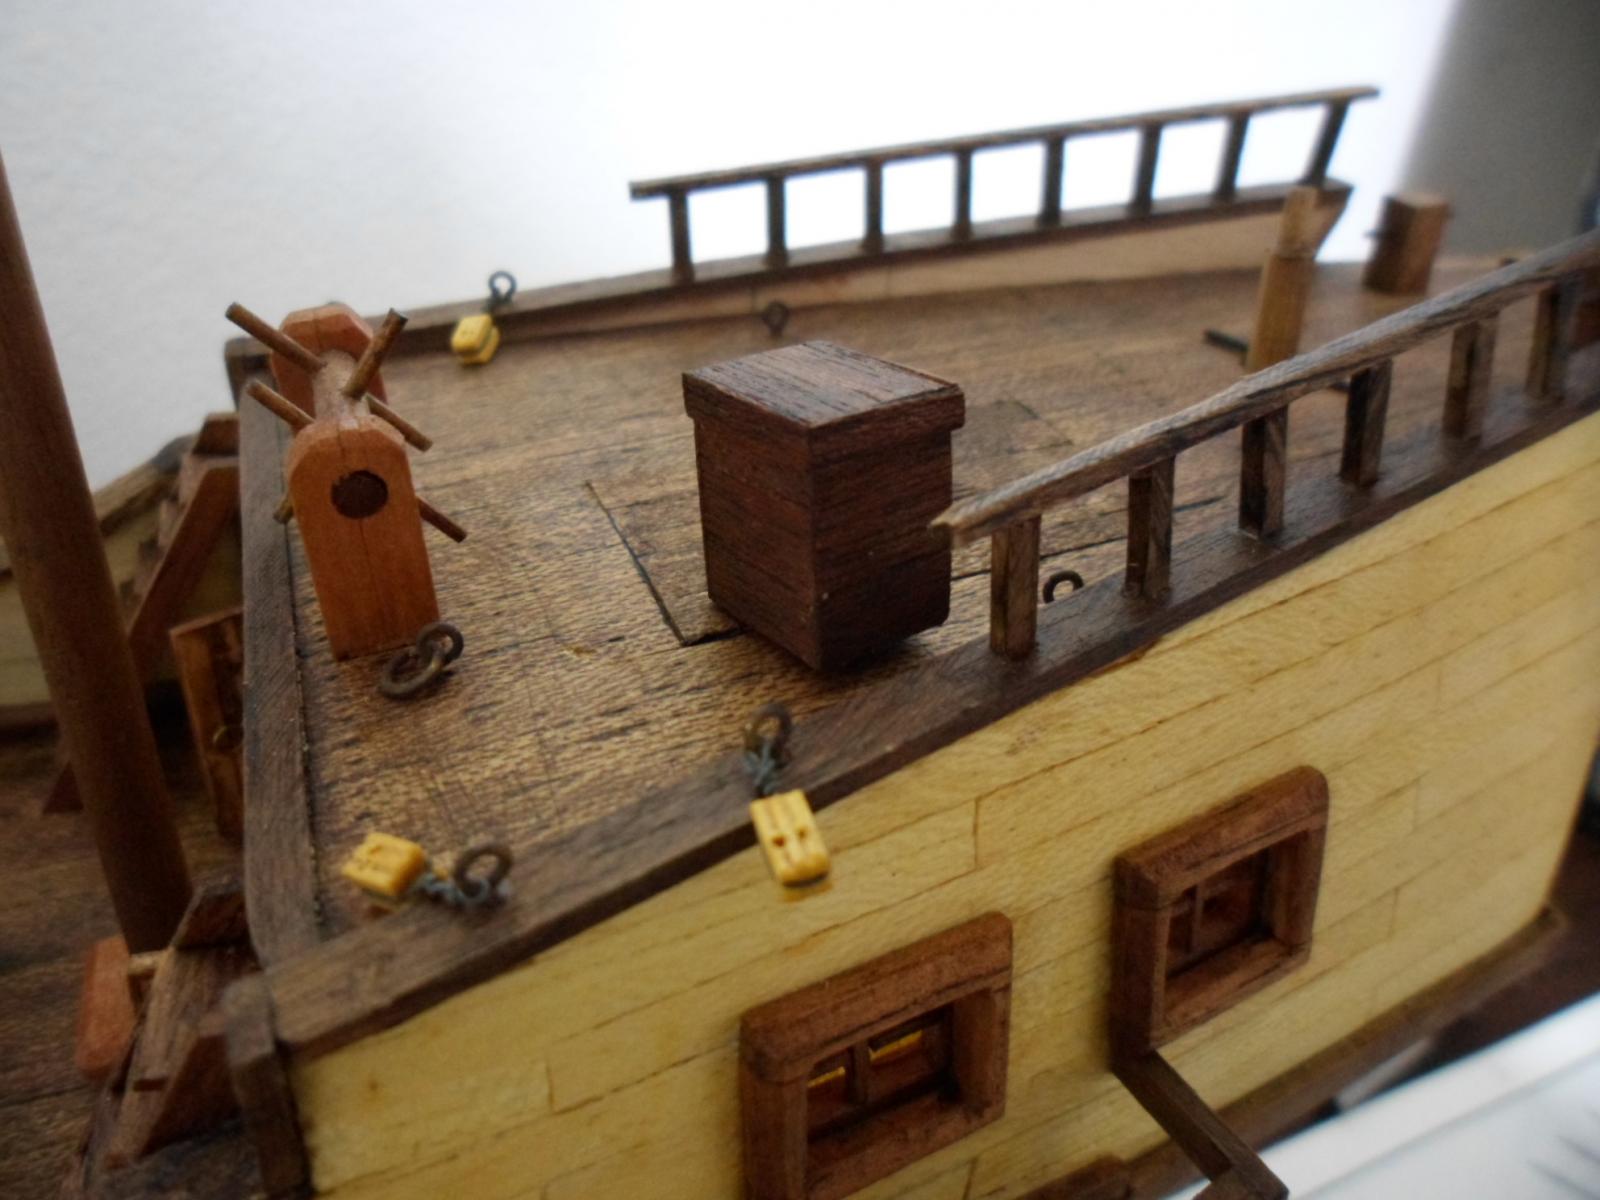
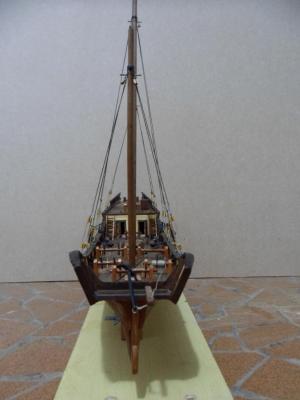
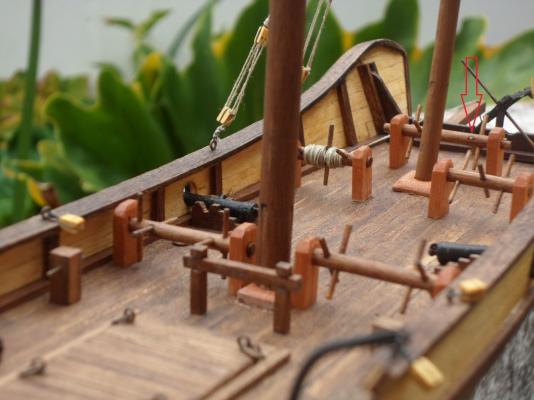
Well, here we are. After too much work and almost no time for ship modeling, I´m back for masting and rigging, at least to begin rigging. Still haven´t fixed the hole over the cabin as my soldering iron is missing and every single time I think to buy a new one, I forget to do it as my head is always in my work - hope I can forget the work justs a little bit on the next 2 or 3 days . I´ve made some daylight model shooting with her today, here are the pictures: The arrow is to show a little breaking on my windlass as I was rigging the first blocks. As the bars are wood, not the metal cast which the kit supplied, they are a lot more fragile. I´ll fix it after rigging the foremast completely. That´s it for now. I´ll be working on her next 2 days and begin a new project, soon to be brought to you. :D


-
Jesse, it´s a great ship to build. I´ll probably return to this type of ship sometime later. TY!
-
Piet, I love the story behind your build and the care you´ve been taking with all details. It´s not only a beautiful model to show, but a love demonstration. It´s an inspiration to us all, for sure. :wub:
-
Sharp work, lovely results. Railings look really, really great.