HOLIDAY DONATION DRIVE - SUPPORT MSW - DO YOUR PART TO KEEP THIS GREAT FORUM GOING! (Only 66 donations so far out of 49,000 members - Can we at least get100? C'mon guys!)
×


Vivian Galad
-
Posts
596 -
Joined
-
Last visited
Content Type
Profiles
Forums
Gallery
Events
Everything posted by Vivian Galad
-
Hey Dave. I´m building a chinese junk and decided to light on the cabin. That gave me some headeache for not planning it really on advance (I mean, to plan all the aspects, including the need to fix problems if they come to be). So, leds are great but you´ll have to think all aspects of it - I suggest using copper stripes to wires and a good soldering plan for them - bad soldering can bring all your plans down.
-

THE BLACKEN-IT TRIALS
Vivian Galad replied to Erebus and Terror's topic in Metal Work, Soldering and Metal Fittings
Well, so far, using blacken it didn´t give me a "black" metal. It got a dark brownish color that I liked - it seems aged metal, I would say. Something I did (maybe wrongly) was to put a lot of metal parts at the same time on the solution. This impatience of mine gave some parts a stained look - though I´ll keep it that way if I want a darker look, I´ll try to dump a few parts at a time. -
That will give u a lot of work!
-
THE BLACKEN-IT TRIALS
Vivian Galad replied to Erebus and Terror's topic in Metal Work, Soldering and Metal Fittings
Hey E&T. As everyone else is doing, I come to thank you for your work. I´ve used it for the first time, though changing muriatic acid by vinegar - I did it instinctively, only now I read other ppl do the same. So far, the results seem great. Your post is really one of the most usefull in MSW. -
Hey, Fishface, welcome to the marvelous, wondrous, just fantastic hobby of building model ships. As you´re struggling with the bulkhead alignment - I must confess that in my first ship I didn´t even gave too much thought to that and just maybe, maybe she´s a little bit pending to one side - lucky you to have everyone´s help on that and that you are willing to fix that. Don´t worry about the fix, though. Crebostar showed a great idea to strengthen your bulkead - after that, you can also glue a strip from one to another bulkhead. Try not to be bashed by this early mistake, too. As we build them ships we make lots of mistakes (I´m on my second, just on the start for the third) - and tools come as you need them. It´s a hobby, all about having fun! Enjoy
-
Major update. Loved, really loved the stain - got that aged look, but not too much, as a seasoned ship :im Not Worthy: . You´ve made a great job so far. I fell in love with this ship, by the way
-
Schnu, great you´re back and must have been a wonder to see the Vaasa. Good luck on planning the cabin and that´s difficult indeed - you have to read a lot just to learn the ship had something inside her cabin - it get´s harder as the years go back, by the way. Varnishing and staining are really personal matters. I like the wood to be there, to see it´s characteristics, so, I age my wood with bittumen wax and some stains (dark or oak) and varnish it with transparent varnishes - never those shining ones - opaque is what I want.
- 58 replies
-
- 2
-

-
- la candelaria
- occre
- (and 1 more)
-
Mark, I follow your progress (and other POF´s) with an increasing desire to jump on these waters. Your framing looks great from here. Keep those pictures coming! ^_^
-
Pawel, Gratz on your building. She´s really a great ship and your work was fantastic!!! Any new building on the schedule?
- 124 replies
-
- 1
-
-
- santa maria
- mantua
- (and 1 more)
-
Nice progress in there! And it´s really a great ship.
-
Doris, I´m always happy when u visit my post :wub: . I find it funny when you say you don´t work on wood, since you scratch so many parts of your ships on wood and know, from my heart, that when you get your hands over a fully wooden ship you´ll mesmerize us all the same. You´re some of the best ship modellers I know. Thank you.
-
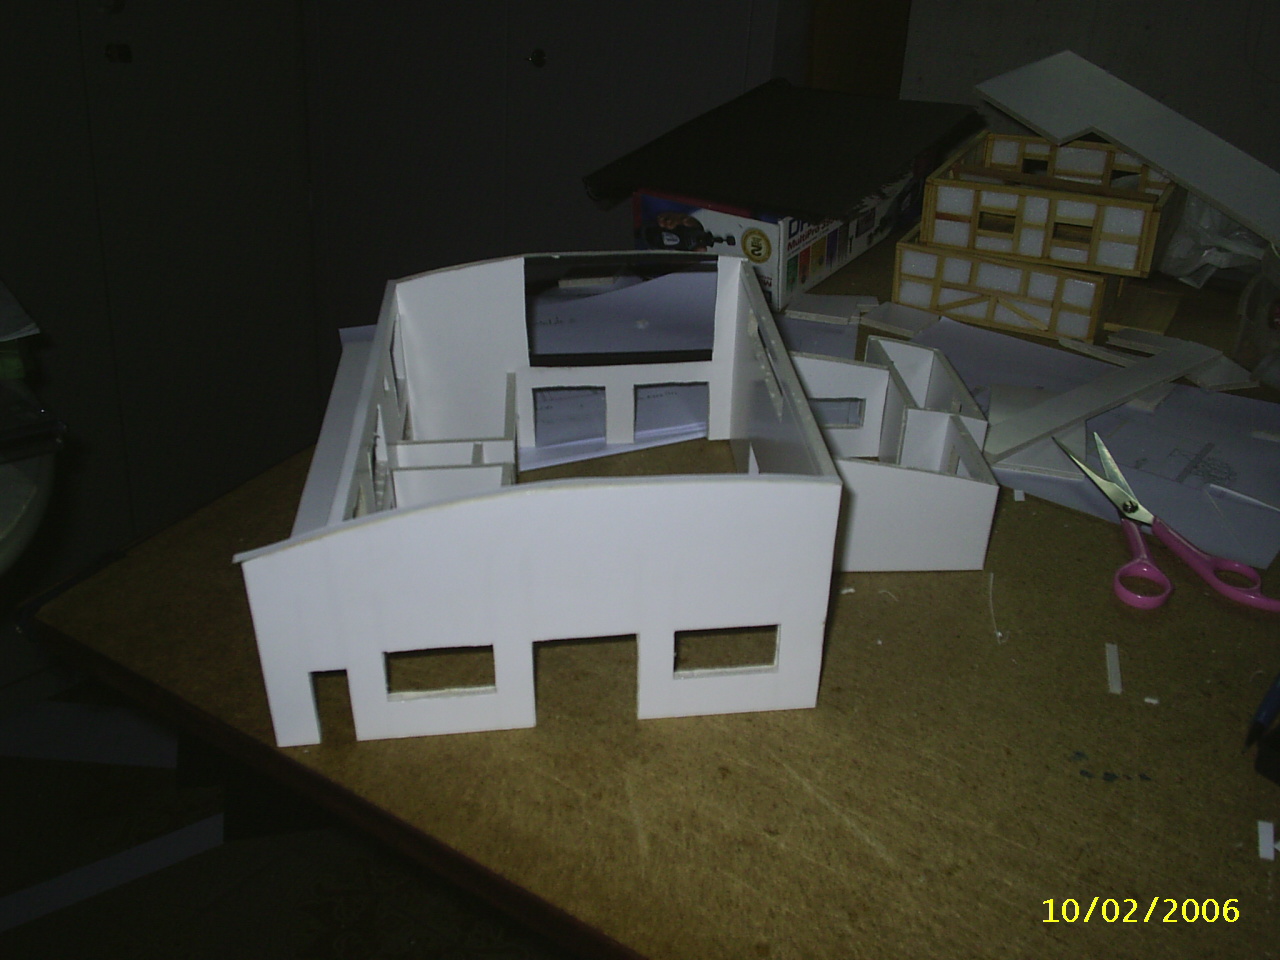
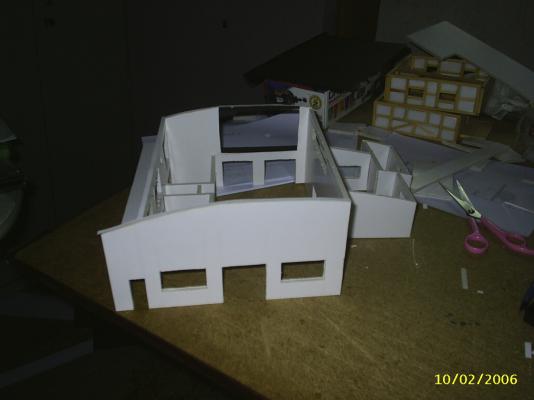
Jack, I´m like 85% now ! Might I grab your idea? Think that would be the best to do, to leave only the led inside I mean. A second one would bring too much light into my cabin. Regarding tools, I´m buying as I need them, but it seems it´s just the beginning, lol. And then, yes, I built models for my designs. That was something I loved to do and am really sorry almost all pictures for them are gone - in 2010 I lost almost a life on stored data (among other too much important things) and saved only one. It shows two models - on first plan a two stored home 1:50 model at it´s first stages. On second plan u can see another 1:50 model of a medieval tavern for a medieval town I was building at the time. It´s a pitty I don´t have any more pictures from it since the town had about 15 houses beyond the tavern and the beginning of a castle. The tavern and 3 houses were furnitured.
-
Pops, I researched some time and had the saw at my wishing list for some months before buying it. At first I thought buying a circular saw, but after seeing some videos regarding precision (and considering space, too), got this one. On my wishlist now remains the flex shaft tool and the work station . Now, for the hobby itself and some small wooden work like building racks and such the saw is amazing. I´m even planning in designing and building some wooden furniture with it (well, not that big furniture, lol), and as you can take it out from the table it becomes a rlly versatile tool. Till now, it seems all I needed from a saw.
-
Mark, thank u for your visit! The saw is amazing and I´ve been playing with it a bit. Have tested it to which width it gets and precision cut´s on small pieces - so far, so good. Everytime I overcome a difficulty I feel this imense pleasure and good-job-done sense and know the hobby is so much more than putting together some pieces. Sometimes I just sit before my ship to wonder myriad thoughts, since small details that would look great to how good would she sail. That´s too much fun, it´s all! :D
-
Wow, great building in there, Sjors. U guys are busy ppl, building more than one ship at a time!! Builtifull one, gratz!
-
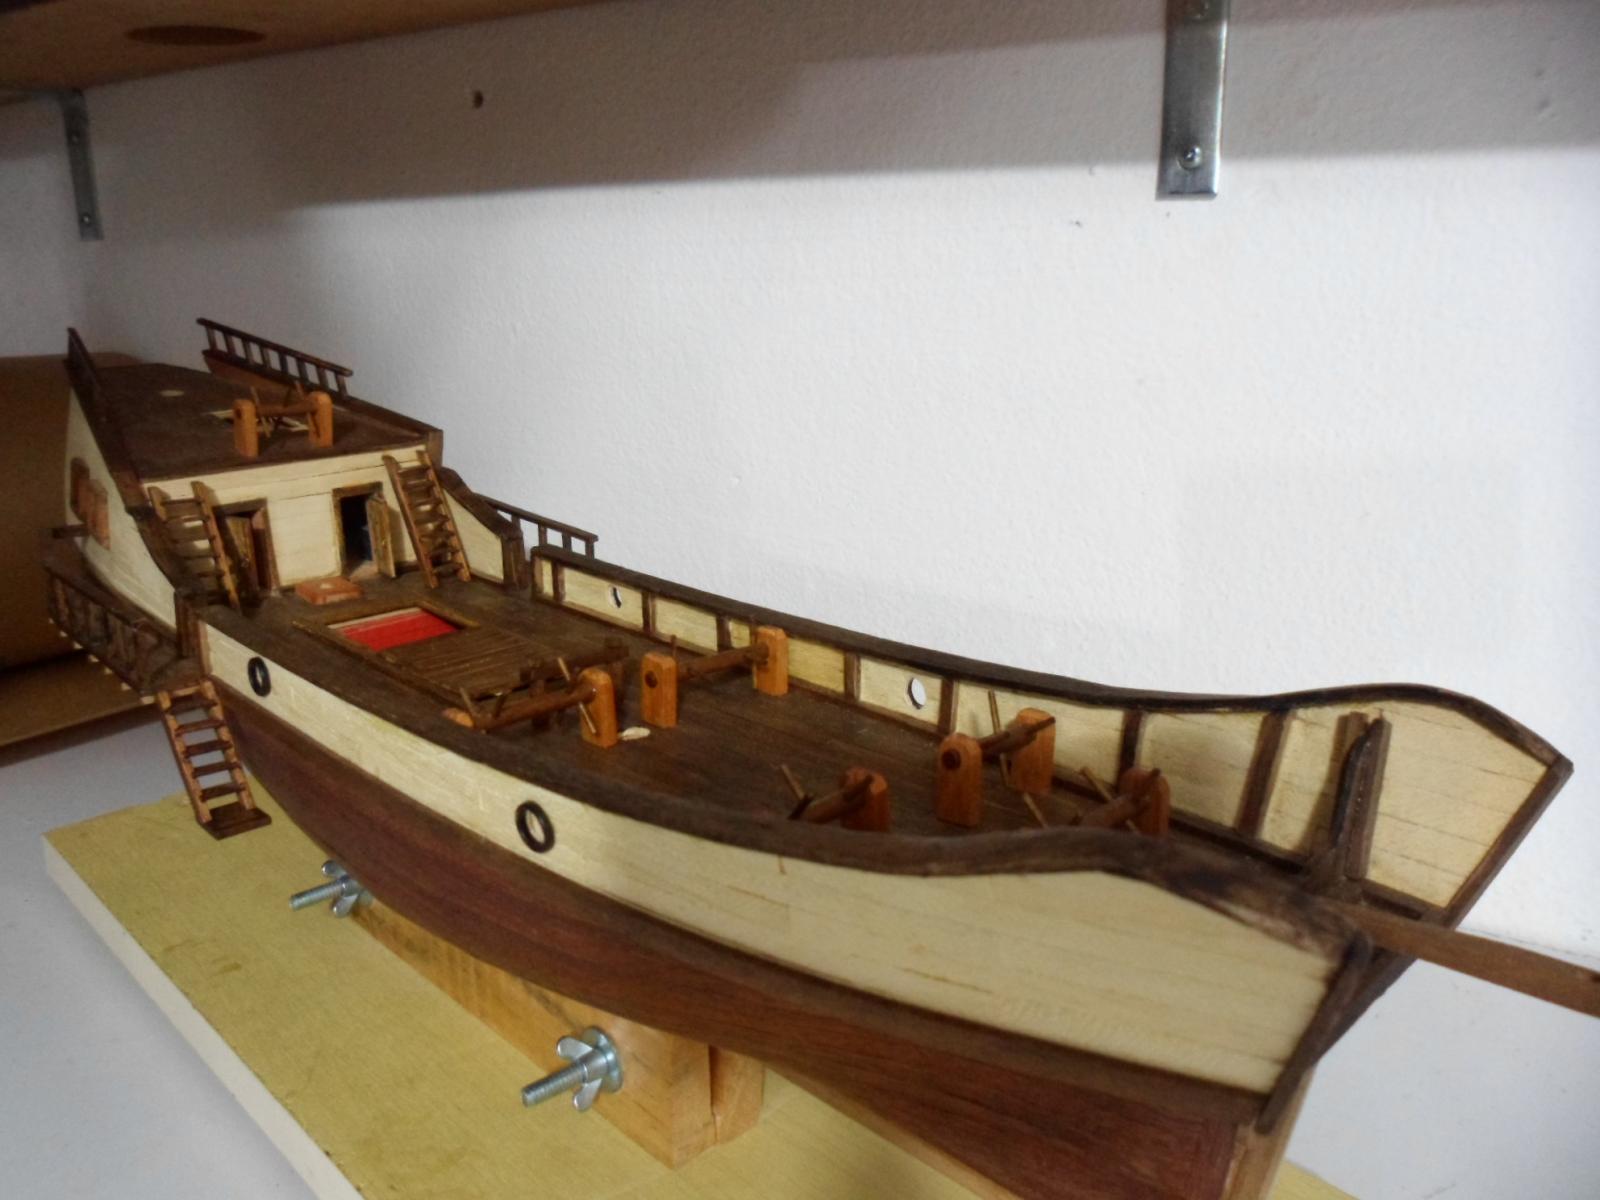
Schnu, she has 49cm / 14cm at it´s widest. I´ll hide the hole using the same strips I used for deck planking - maybe with a clinical eye there´ll be some small wear to indicate something, but all the aft will be under a kind of canvas, so, I think all will be fine . For the batteries and turning on/off the led I made two boxes - one of them will hold the battery, the other will be fixed to the on/off button - to turn on or off you just push or pull the second box - I´ll take some pictures to show it when it´s done.
-
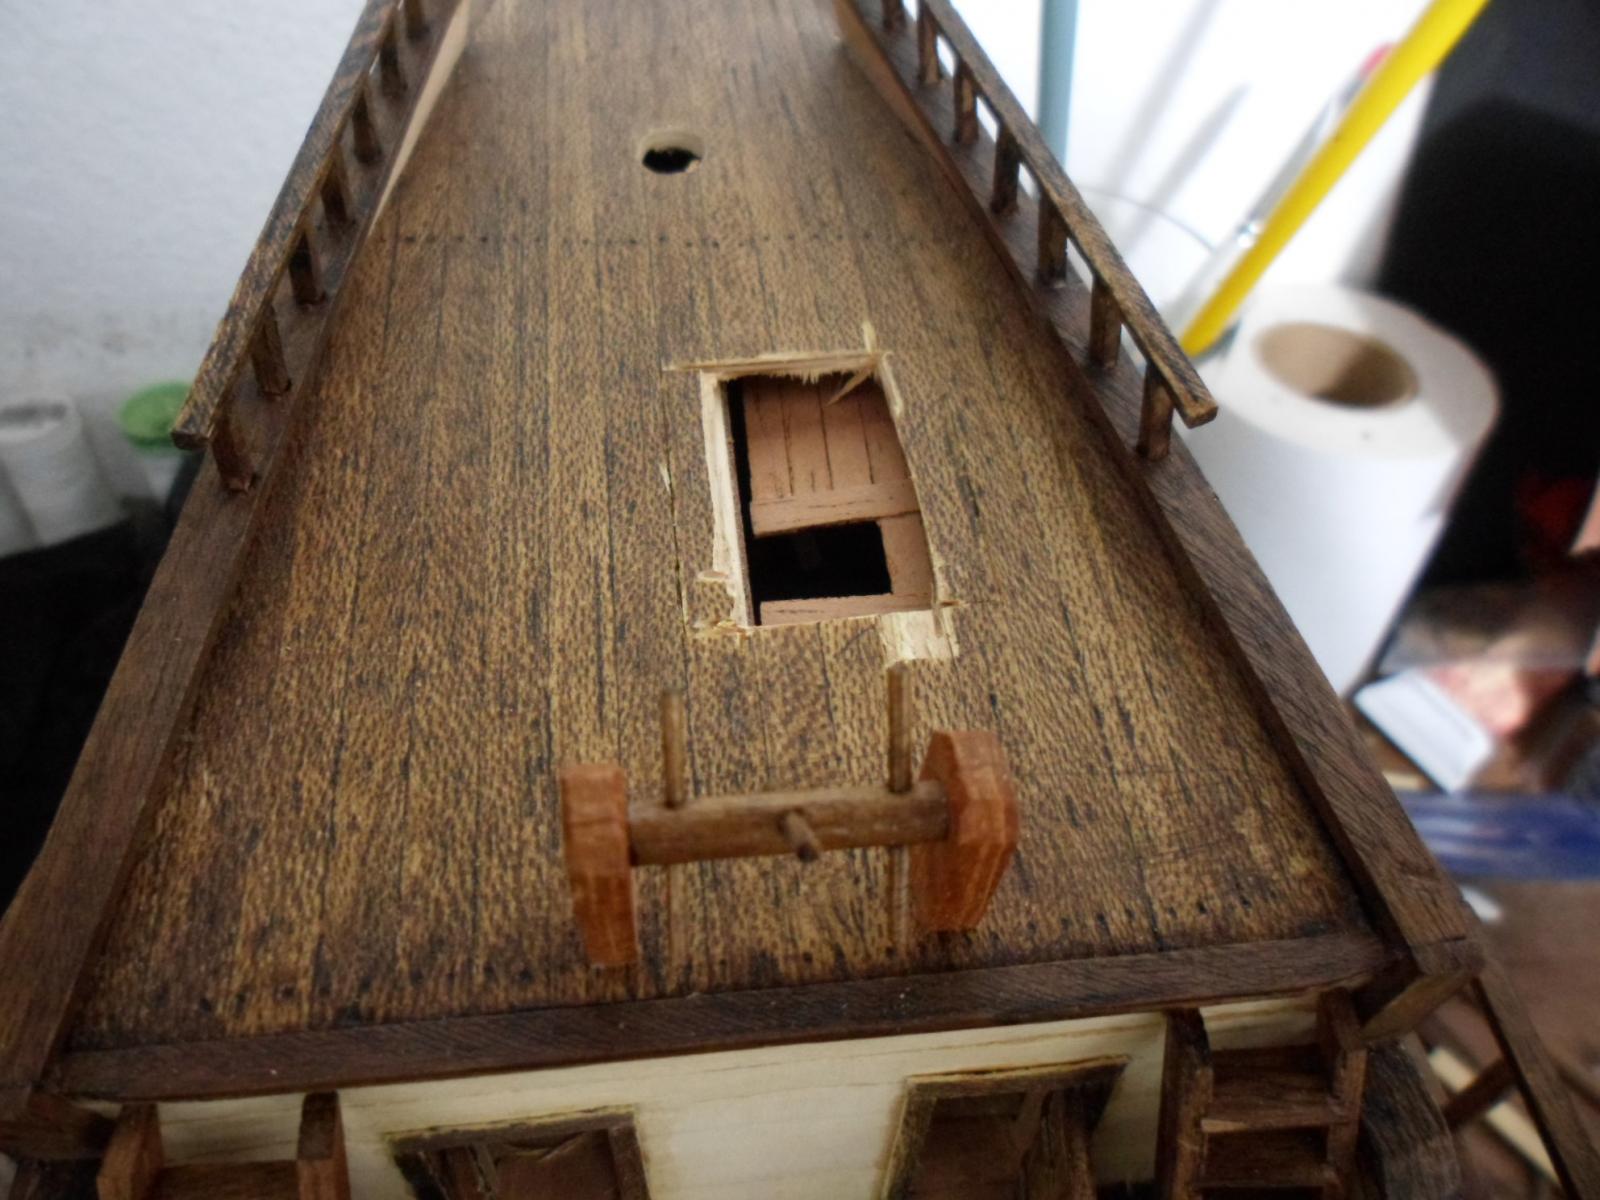
Pops, I had to make the hole to sort out why the led I had instaled wasn´t working. As I needed the light so the cabin could be seen, I took out the bad led and got a new one. The hole will be closed and won´t even appear to have existed (well, so I hope). I gave thought to gratings and coamings, but that would be rlly wrong for the type of ship - would look great, though, I must admit Sjors, I loved this saw. I used it in some ocasions already and it´ll soften my work (my hands are thankfull for that). The hole is just to fix the led, I´ll close it soon - for now I´m working on the rudder and part of it will be over that hole - using brass fittings I´ll have to darken - that´s why the hole is still open, by the way. Sam, bad soldering. I used a led from a sun powered beacon and had to take out some parts before soldering it. As I took out the led, I found it was loose on it´s place. I could just solder it again, but decided on using a new one with less interference from my hands. After doing this mess, it seemed right to reconsider the lantern (seemed too rough for my liking) and I´ll make a new one, too. It´s funny, cause on the beggining I found the lantern to be ok, but now I´ve raised up my standards - just in the course of this building. Popeye, think I already gave the answers .
-
Joe, my many thanks. Right now I´m almost myself again - just a little bit to get 100% Rick! Obrigada!!!! (thank you!) Wolf, really glad I can reach that. As I´m still a noob ship modeler, to have your words and everyone´s is great. Always looking to improve, though Hey, Nils, I´m getting there! Thank you. I have been absent cause after trying different methods to darken the metal fittings, I failed. So, as all roads seems to lead to Blacken It, I bought some on e-bay and got to wait it before continuing on my junk. On the meantime I´ve been busy reading ship modeling and ship history books. After some thought on which new tool to buy, I decided for this one: Till now I´ve found it to be a great power tool!! And then, I had a problem with the lighting. Don´t know what happened to the led, but it stopped working. As my cabin needs the light, I was made into oppening a hole on my ship. I know it looks ugly but, it´s for a greater good. As we learn with our mistakes, now I know I have to be very sure when installing eletronic components. The good part on it it´s that I´ve devised how to turn it on/off and where to put the batteries - must confess I failed in planning that before. So, the actual general view of my ship: Hope my Blacken It be here soon!


-
Doris, your work is really at the top. I hope one day I get close to you on your achievements. Always a pleasure to visit your log. Thanks for sharing. =****
- 883 replies
-
- 1
-
-
- royal caroline
- ship of the line
- (and 1 more)
-
Just lovely!!!!
-
Nails really gave her a presence. I love the stain - a ship always look amazing when aged.
-
Very great work. Loved the trick with the ropes.
-
Good progression in there.