

CaptMorgan
-
Posts
163 -
Joined
-
Last visited
Content Type
Profiles
Forums
Gallery
Events
Posts posted by CaptMorgan
-
-
Hello everyone:
Well I have finally got some time to get back to the shop and made a little progress in the last couple of days. Got my build board set up & ready to go.
I made the braces using left over plywood from the bulkheads. I got the base board from Menards, it was a bookshelf that was damaged on one end. Cost all of $2.49 and it works perfect for this job.
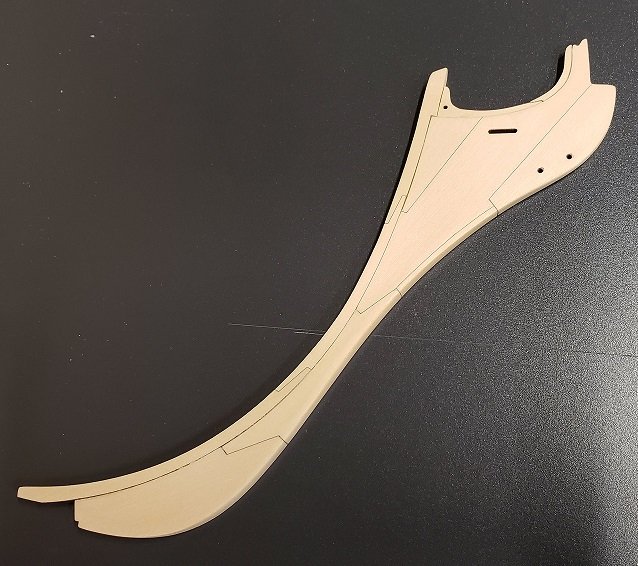
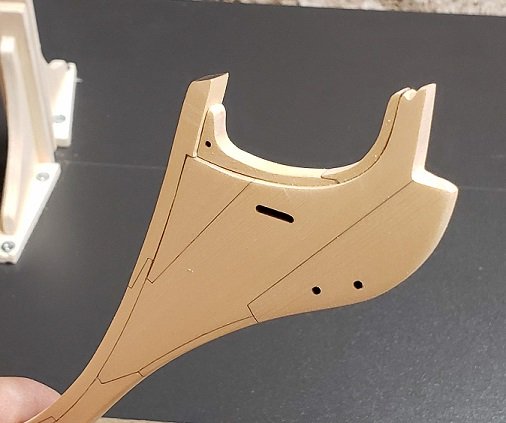
The rabbet strip has been installed on the bulkhead and I also got the stem assembled and about ready to go. I have yet to sand down the former to meet the rabbet strip. That is next on the list.
Then on to getting the rest of the keel assembly attached and finish up a few little details.
Then hopefully move on to all of those bulkheads in a few days. Looking forward to that....👍
- shihawk, Ryland Craze, JeffT and 12 others
-
 15
15
-
2 hours ago, Chuck said:
Is anyone going to order the resin set? If not I will just make around ten sets. Just in case.
This is my plan also... They are a long way off but I can order them anytime they are ready.... I just figured I would wait till Chapter 3 stuff comes out which is down the road a ways. It they are available when I order my wood for the planking I will add them then...
-
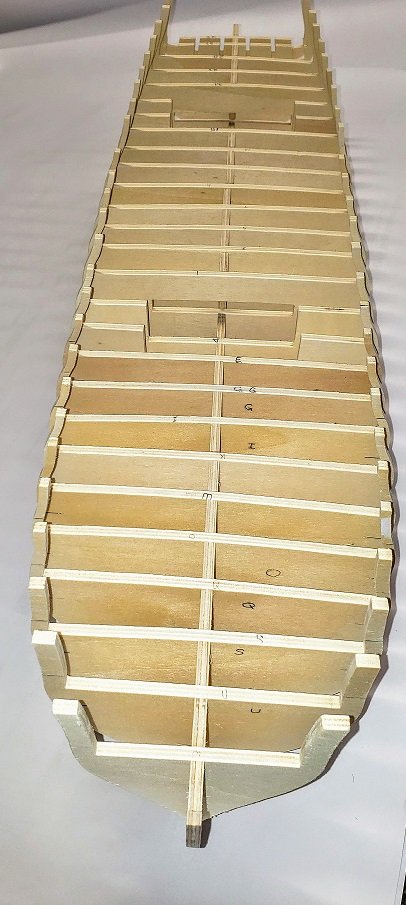
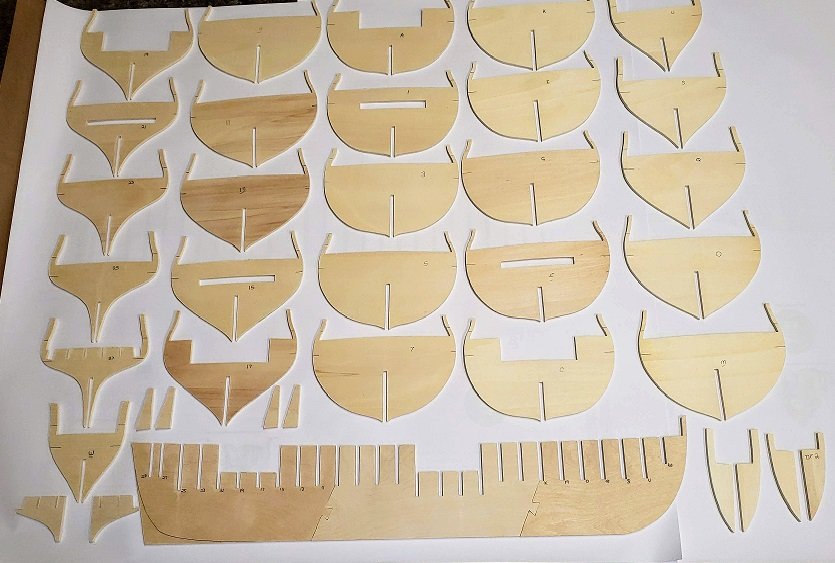
I found some time during the Labor Day weekend. I have all the parts cut out and done a dry fit with all of them. I cut all of the slots a touch on the small side and then sanded them down for a good fit.
Nothing is glued yet. Still have a little tweaking to do but almost ready to start assembly.....
Good luck to everyone in Florida and along the east coast... Thoughts & prayers to everyone in the Bahamas.....
- Jorge Diaz O, GrandpaPhil, rafine and 11 others
-
14
-
I'm not at home at the moment but I can verify that I have the same issue. And having the same internal debate.
I'll be watching - I wish I was at home so we could compare more notes....
Steve
-
Welcome aboard Bob. I've been following your builds since th Essex.
Glad to see you here. I look forward to furthering my education...
- FrankWouts and Elijah
-
2
-
I'm also going to join in the fun and have been looking forward to this build for a long time. This is going to be my first scratch build so I will have a LOT to learn. I'm going to depend on you all for some help and guidance along the way.
I have my order in the cart at National Balsa for some Birch Ply (false keel) and Lite Ply (bulkheads) and will be pulling the plug soon. I will be building it in Ceder & getting all the help I can from Syren (laser cut parts).
Plans are at the printers now. Unfortunately I will not be making any saw dust til mid October due to work but I will be getting things ready to go.
Looking forward to following along with everyone. 👍 😀
-
On 6/13/2019 at 10:00 AM, ccoyle said:
That's a wonderful idea. And I'm pleased to finally know your real name. 😉
I agree -- I think that's a great idea. I might have to do that on one of my future builds. It's add a lot to the ship and a great way to see the detail and time put into the model with out having to handle it or get out the magnifying glass...
Very nice build!!!!🙂👍
-
I have never replied to this thread but have been following along for quite a while.
Your work is just crazy perfection. A beautiful masterpiece. I really hope this will be placed somewhere that it will get the attention that it deserves.
I know this log is a real treat for me....
Thanks for letting us follow along..
Steve
- mtaylor, billocrates and KORTES
-
3
-
Looks like your back and working pretty quick on the Winnie - and it looks fantastic. It looks like your vacation worked like a charm 😉
- FrankWouts, mtaylor, Canute and 1 other
-
4
-
It's looking really good. Keep up the great work!!! 👍
-
Looks like you did a fantastic job with the planking. Look forward to seeing more as you continue. 👍
-
Hope you have a great vacation - you deserved it.....
- Canute, FrankWouts and mtaylor
-
3
-
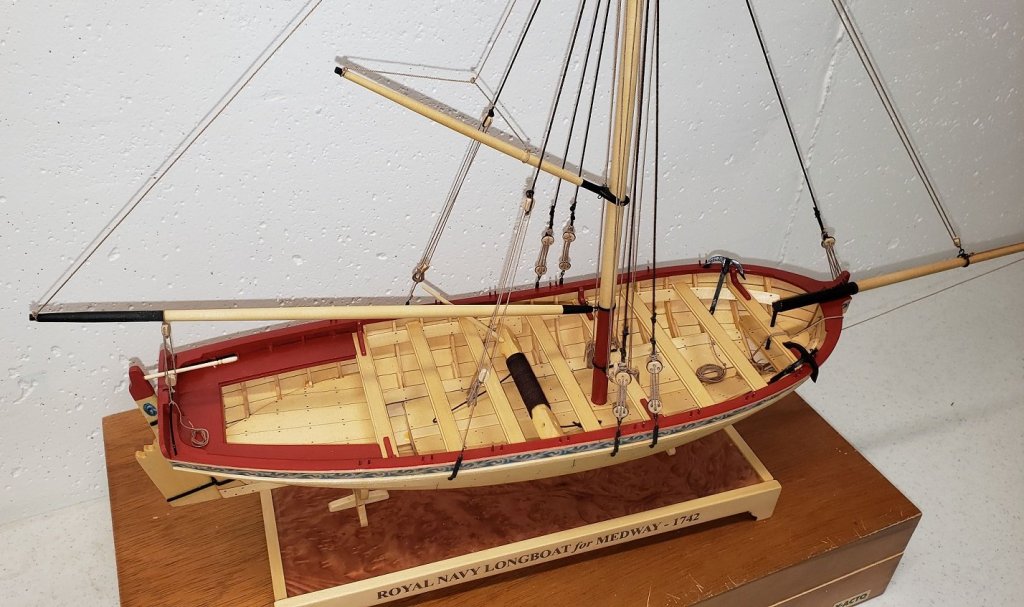
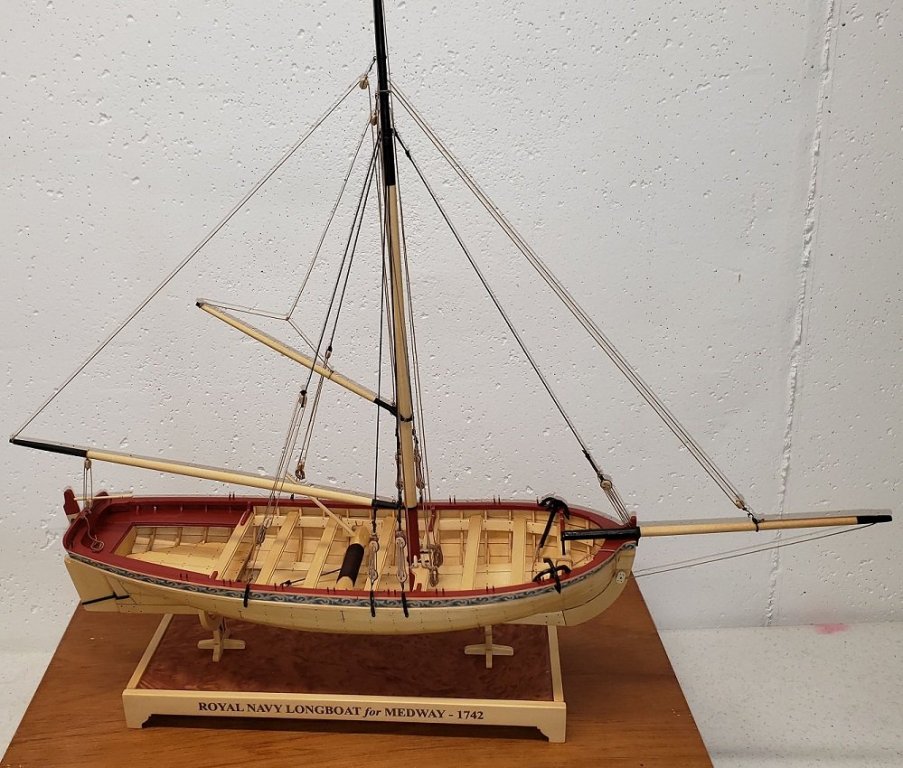
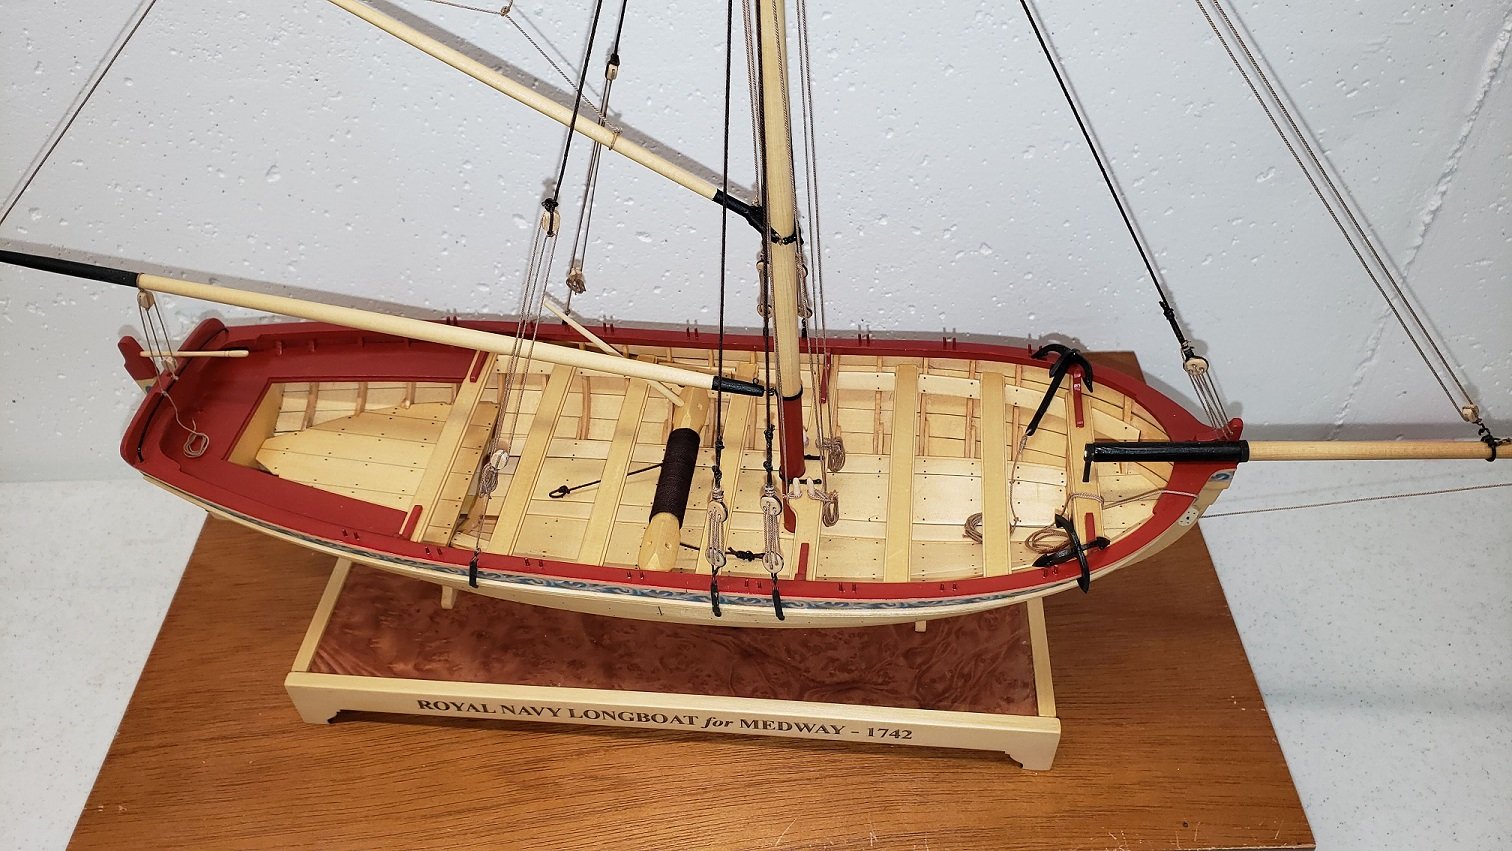
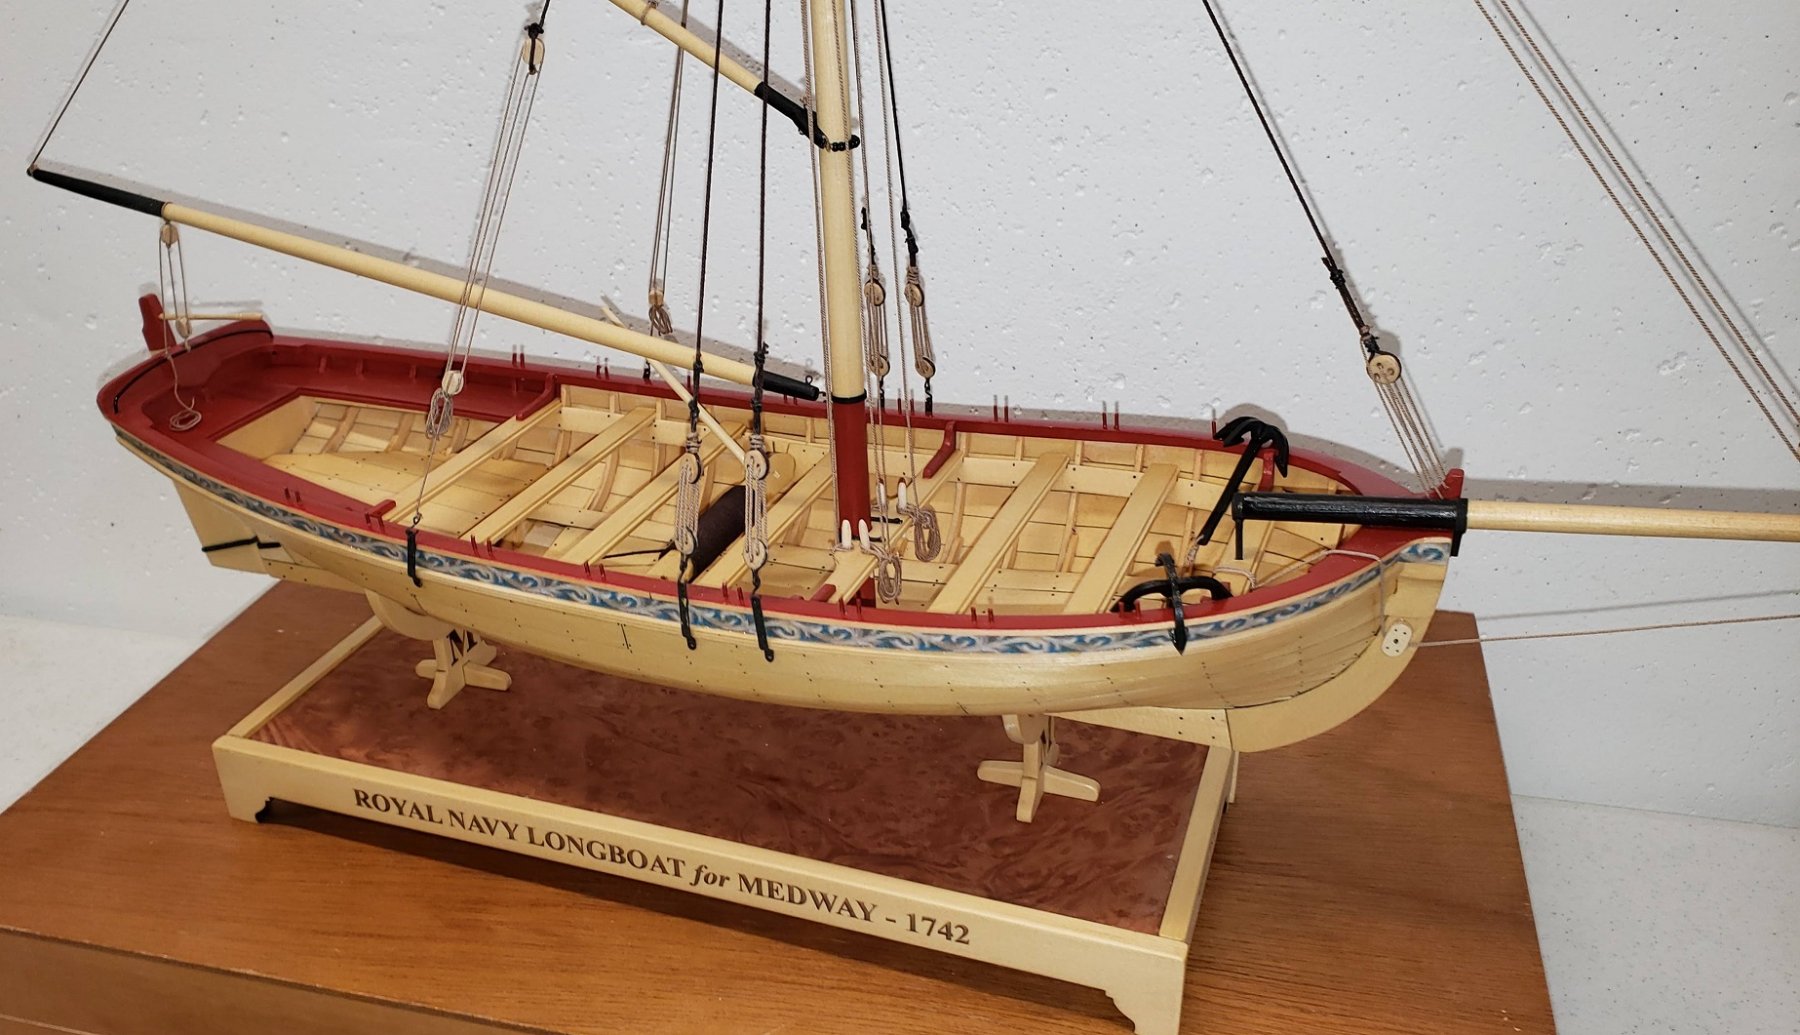
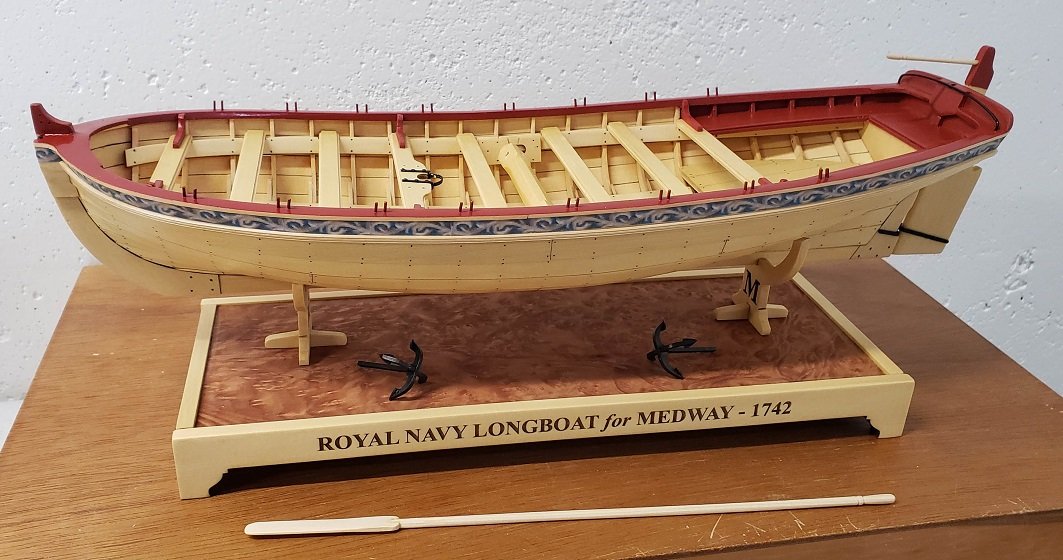
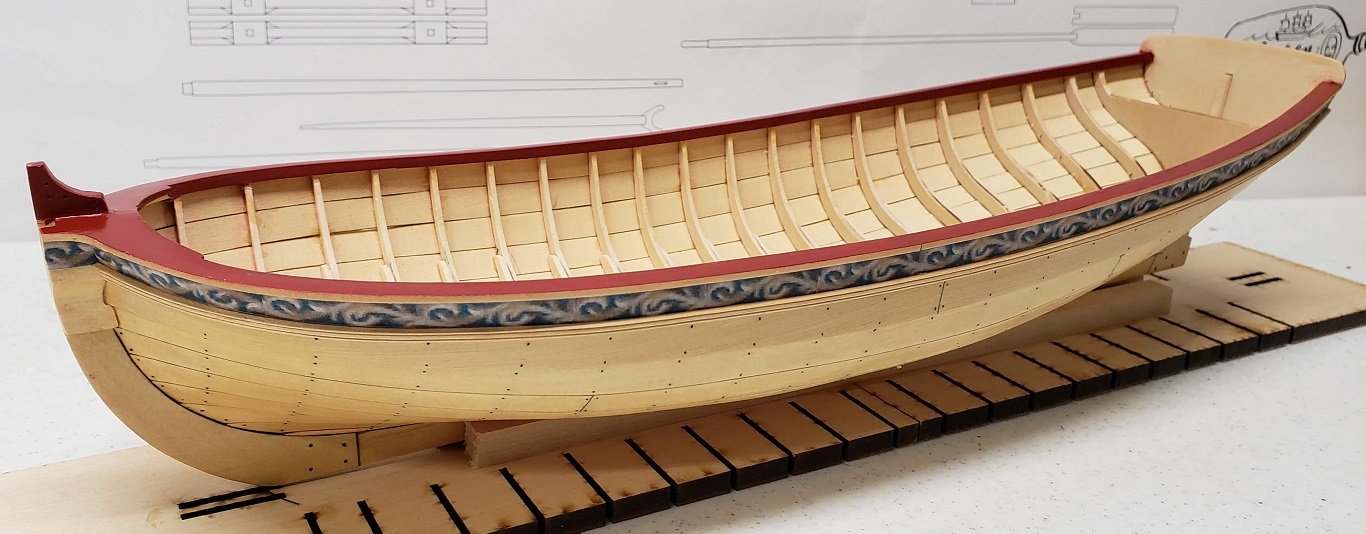
Well, the Medway is about finished 👍 About the only thing left to do are the flag (have to find the recommended spray) and the oars.
It has been a fun and entertaining journey. I learned a lot - and also figured out I have a lot more to learn. Especially when it comes to rigging and knots, etc, etc.
I would like to thank Chuck for this kit and everyone that has done the Medway before me - I learned a lot from your logs.
Below are a few pics of the finished product. I might post some more later after I get the flag flying.
Hope everyone enjoys the summer months (finally!!!)
Steve


- Ryland Craze, JeffT, Sea Hoss and 7 others
-
10
-
8 hours ago, Chuck said:
that looks absolutely wonderful. You have done a masterful job with the kit....I must thank you for terrific work, i just couldnt buy a better testimonial for the kit!!! Amazing work.
Thanks everyone --- and Chuck - that means a lot. Suffice to say, it is a much bigger testament to your sweet kits and the thought & quality you put in them. I sure could not do it with out you and your expertise.....

- Ryland Craze, Rustyj and Chuck
-
3
-
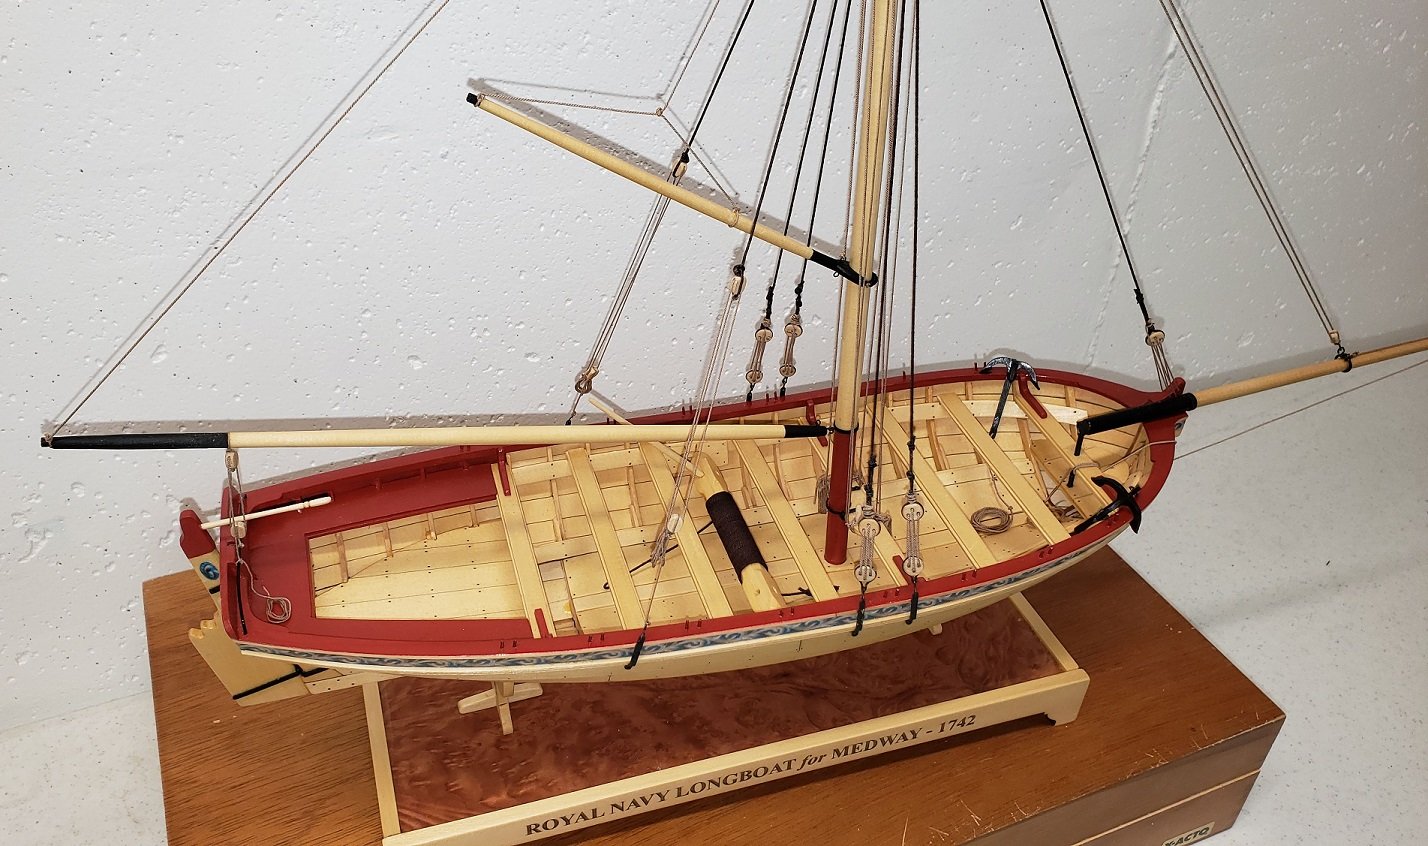
Hello everyone. Just a quick update. I got the rudder assembly finished and installed (temporary for now). Also got the thole pins, windlass bars, and fixed block made & installed.

Below is the first oar -- 4 or 5 more to go. This is where she stands for the time being....

Time for a break from the ship yard for a couple of weeks and go back to work. Bummer having to leave Michigan to go to Sebring.... Not!!
It gets a little crazy with all of the spring breakers though.
I'll be checking in and watching all the other builds.
- Tigersteve, JpR62, Ryland Craze and 4 others
-
7
-
Beautiful job Rusty. I like what you did with the windlass. I hope mine turns out something close to that. It looks very sweet....
So what is on your agenda now?? Anything special??
Thank you for your build log. It has been a source of both inspiration and learning.....
Steve
-
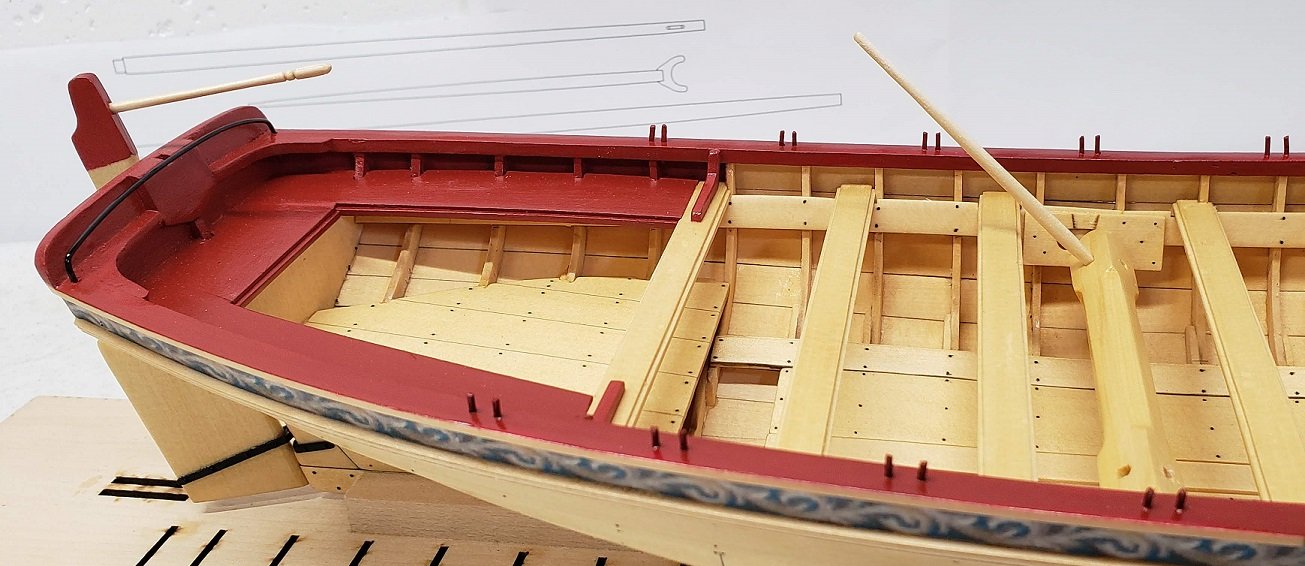
Thanks for the likes and comments, they continue to provide motivation. A little more progress has been made and I have a few pics to share to bring us up to date.
All of the thwarts and braces have been glued in place with the exception of the one with the 'ironwork', I left that one loose in case I needed to tweak it a little when I get ready to place the mast. I have completed the windlass and have the also have anchors made up and ready to go.
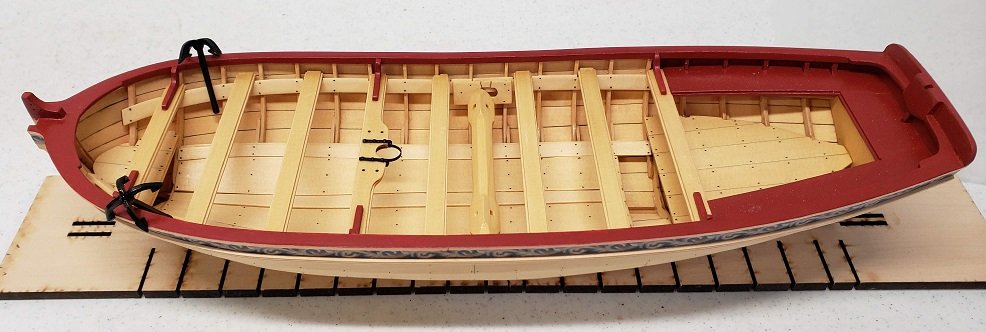
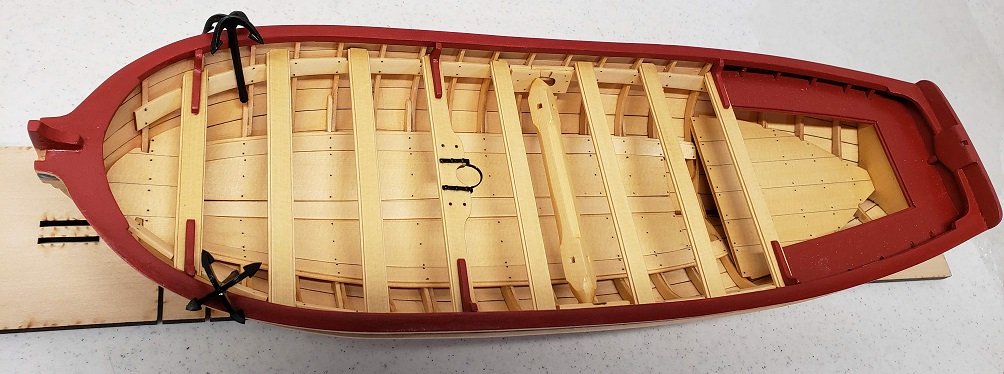
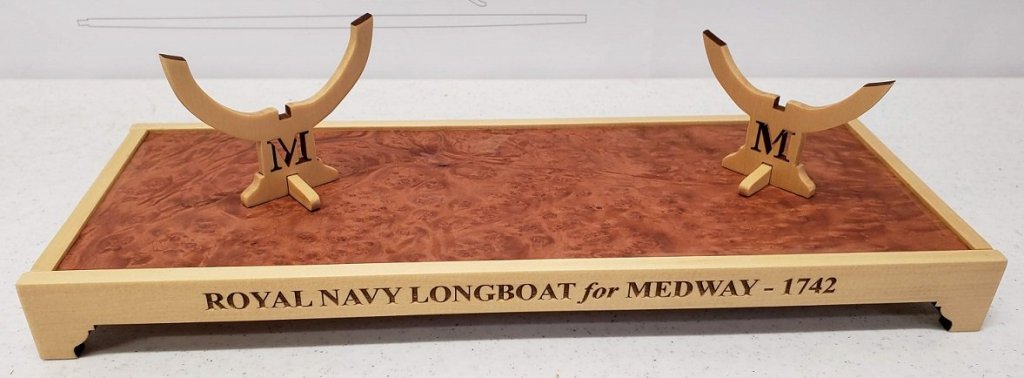
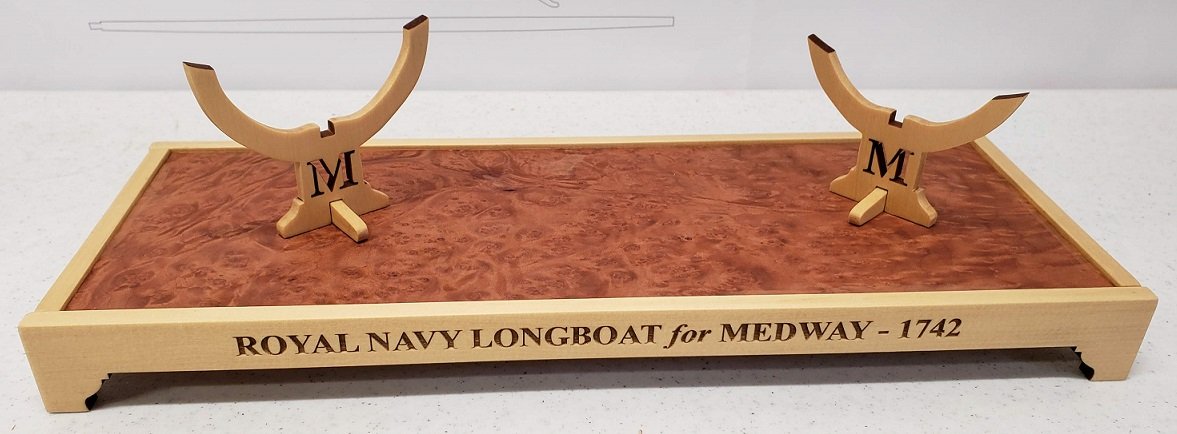
I also purchased the base stand from Chuck. I really like it and it adds some 'personality' to the kit. A couple of quick thoughts - the burl is thin and VERY brittle. When cutting it to size be very careful or you will end up with a lot of chips. I used a steel ruler and #11 blade but be very gentle. I made 7 or 8 passes with very light pressure. Also, try and not get any glue on it. I did and thought I had it all cleaned off but it came back to haunt me when I applied some Wipe On..... I also set the floor about an 1/8" below the frame. A personal thing I guess but I liked it better that making it flush. Anyway, the result is below.
All in all it turned out pretty good and will dress up the model quite a bit.....

Time to move on to the rudder, tiller, windlass bars, and the remaining little details that will help bring this to life. Hopefully I can catch one of the next rigging kits when they come available.
-
-
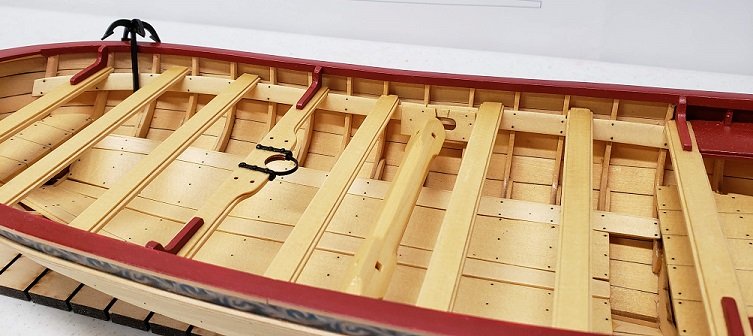
Hello everyone -- Just a quick post to let you all know about the progress that has been made up to today. Below are a couple of pictures of the floor boards installed. I used CA on the floorboards. Even with pre-bending them they were still tough to get correct and there was no good way to clamp them. I used templates for the front and rear to get them close to the correct shape then used sandpaper and files for the final fits. I was surprised how much material had to come off to get them low enough.


After that came the thwarts and rear seats. They were pretty straight forward. It was just slow going to get the right angles and fits on the seats...
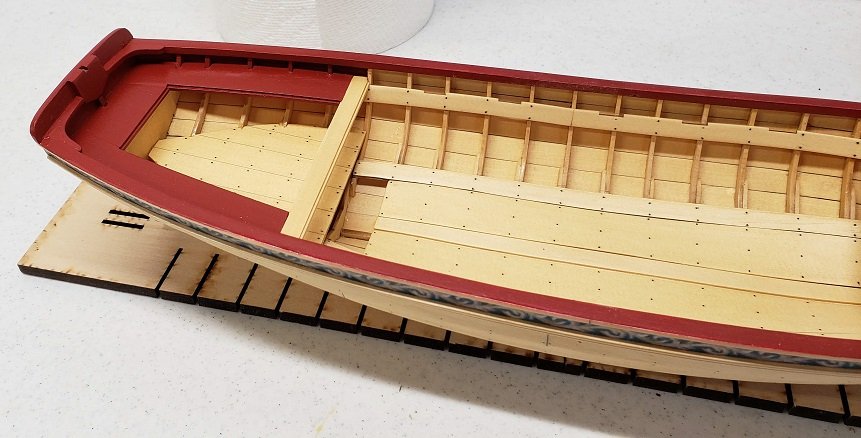
Time to move on to the windlass and its braces. Something to look forward to tomorrow.... 🙂
-
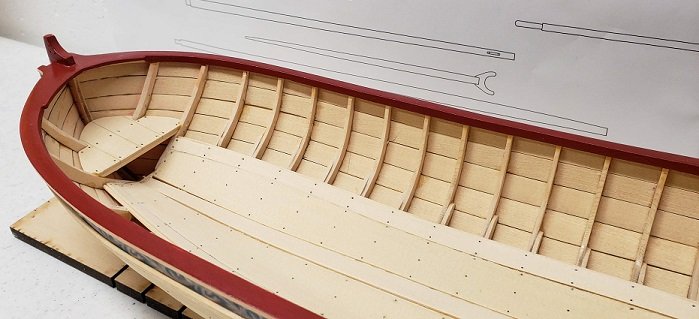
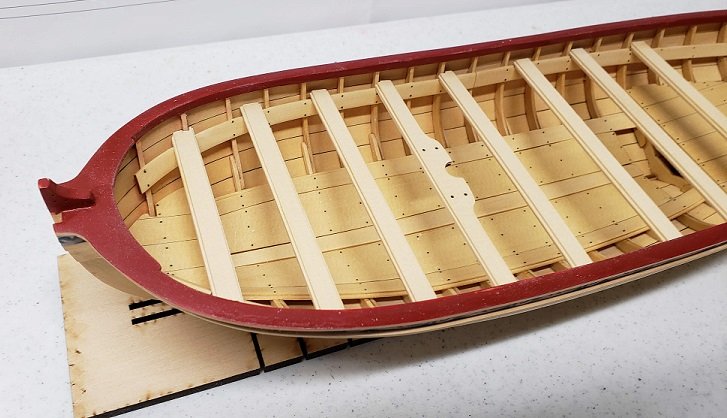
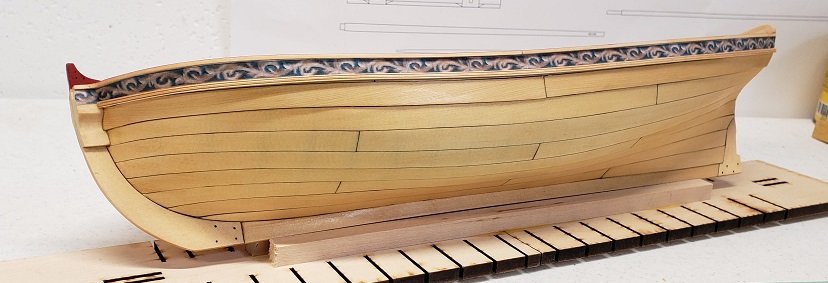
Hey guys -- I spent the weekend putting in all of the nails. I finished them up this morning and got the finish sanding done,
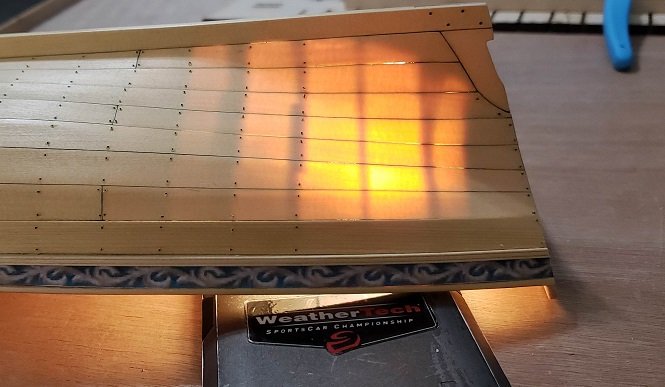
I used my phone with the flashlight turned on and put under the boat to show where the ribs were. That made it real easy to see exactly where the ribs were. Then used blue tape to mark the locations for the nails. Still managed to miss a quite a few.

After cleaning them up I put on another two coats of Wipe On Poly. All in all I'm pretty satisfied with the results.
Time to move on to Chapter 4 tomorrow. 😃
- Ryland Craze, Richvee, GuntherMT and 7 others
-
10
-
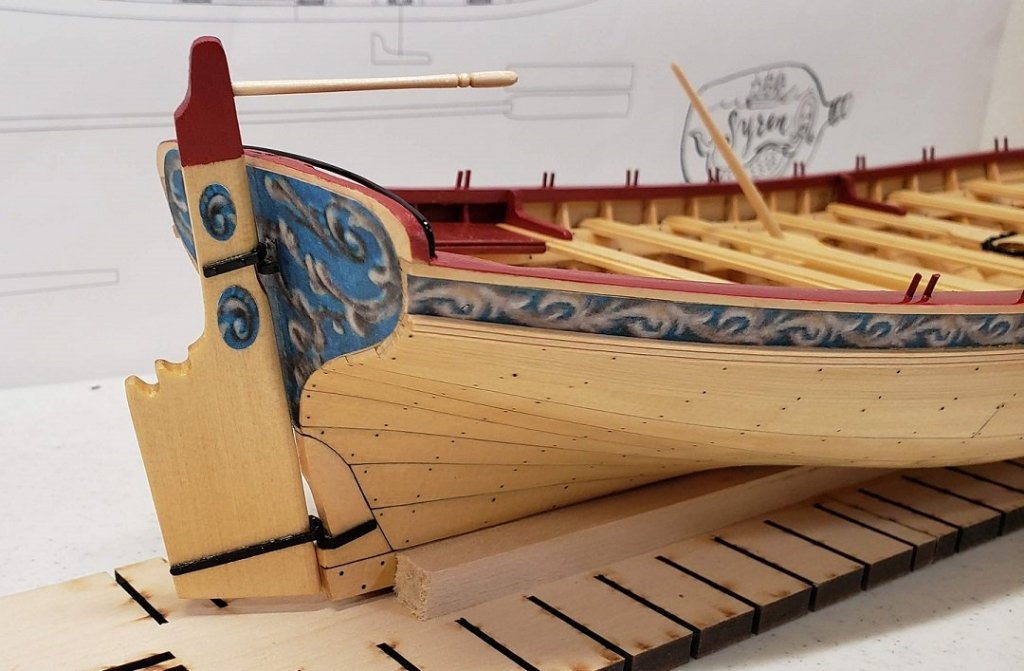
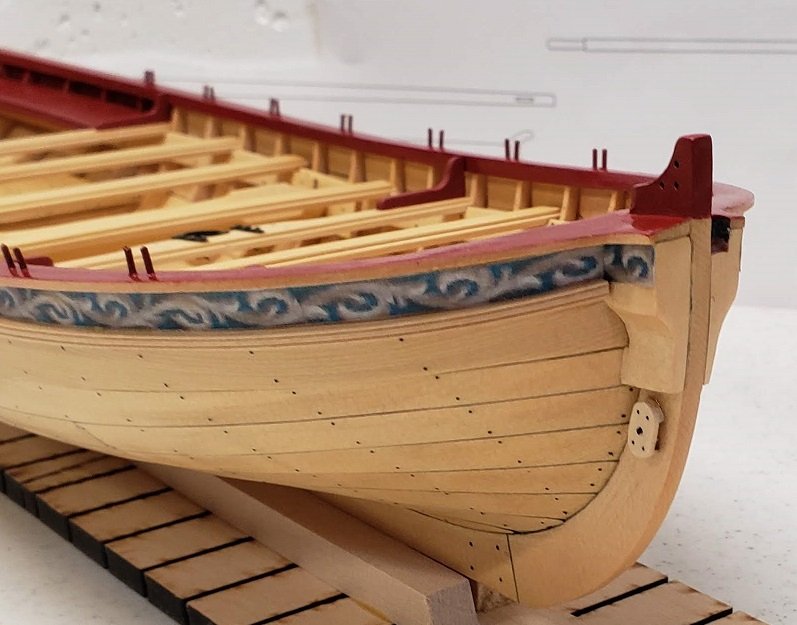
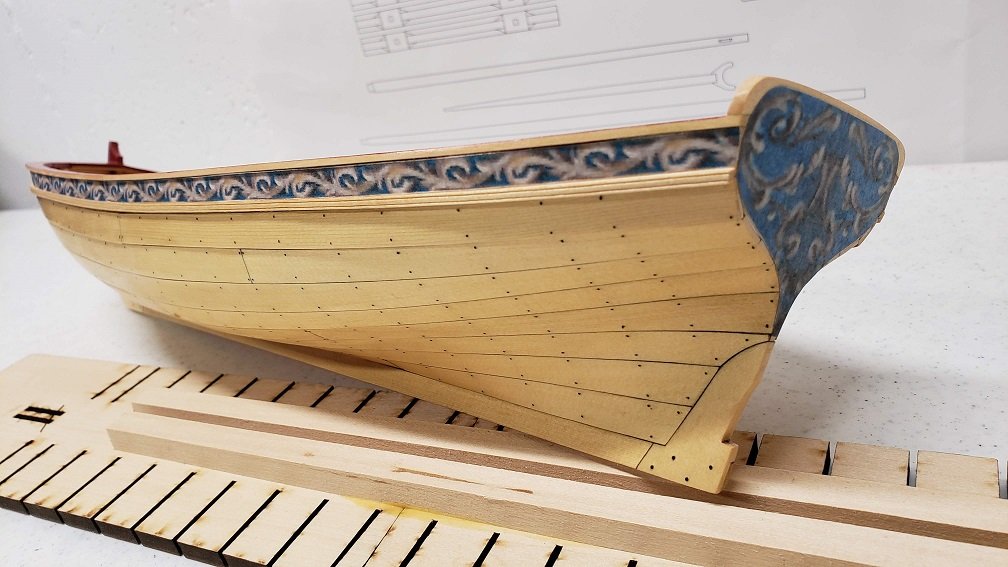
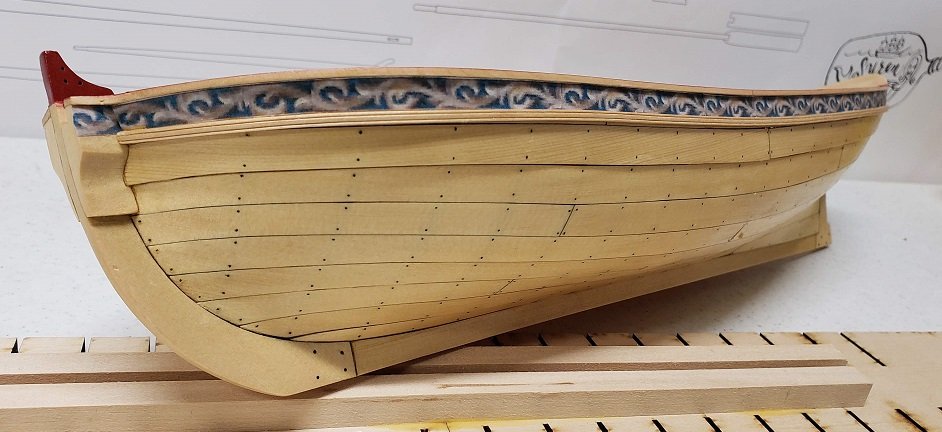
Hello everyone. I finally made it back from Daytona and got some quality shop time in. There has been quite a bit of progress since the last update but nothing unusual to report. Just trying to be patient and not rush things to much.
Below are a few pictures of where we stand now.
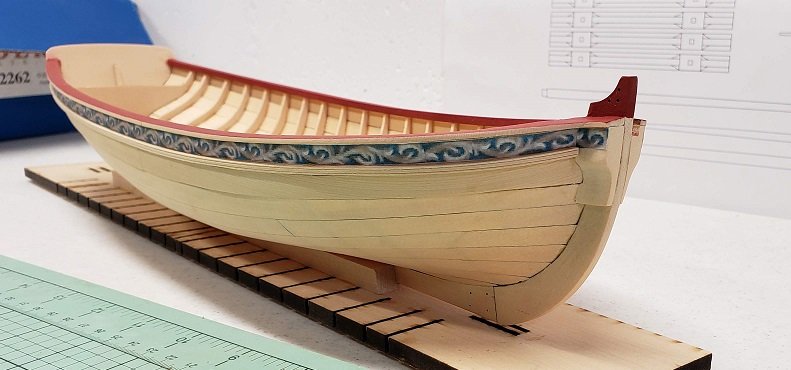
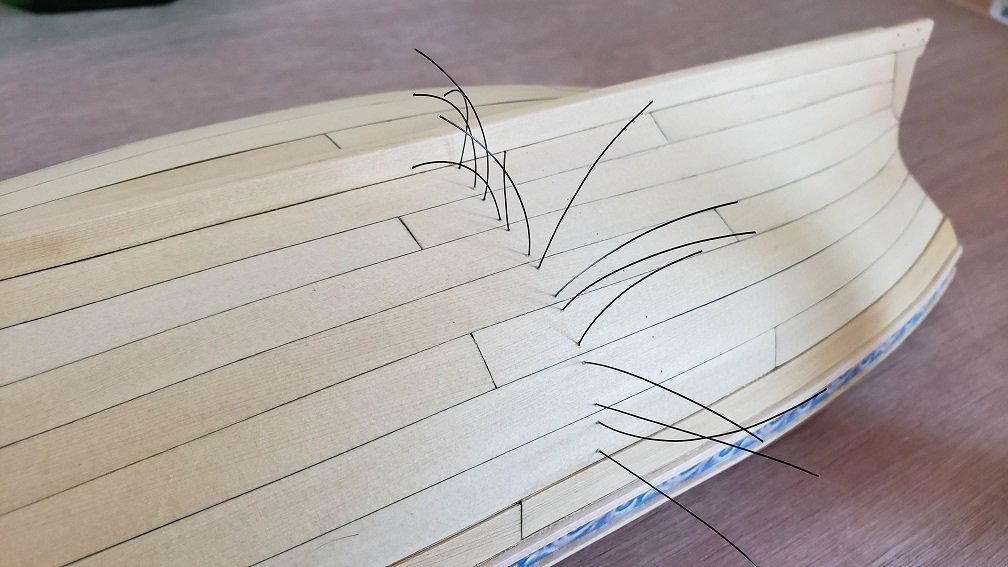
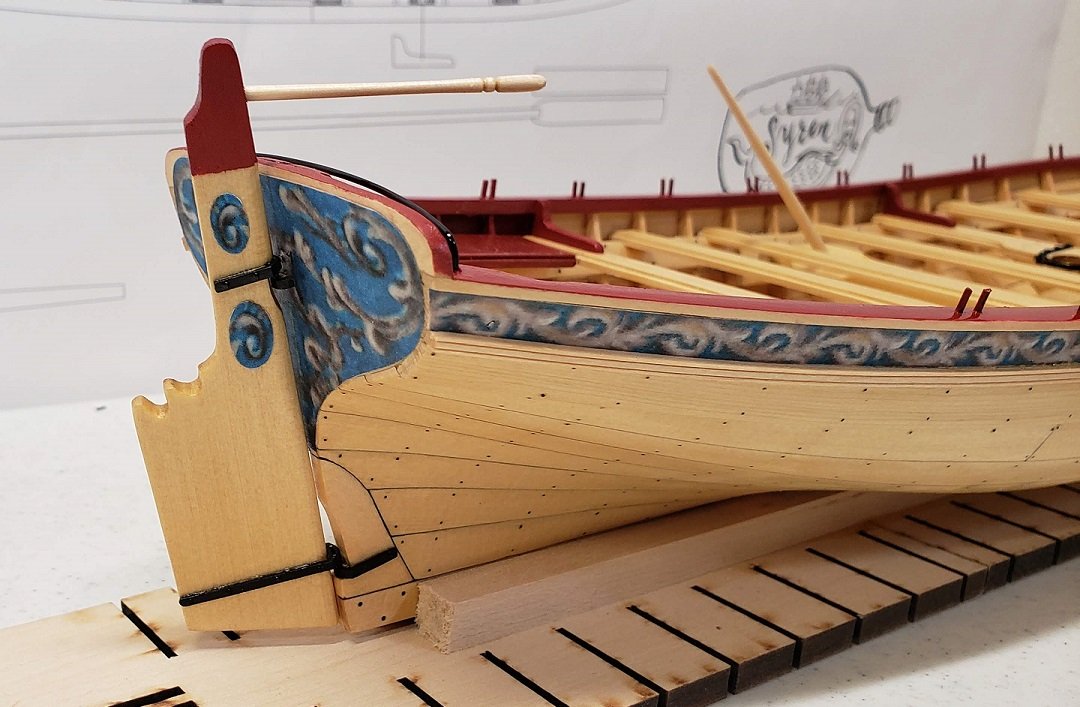
I got the cap rail installed with the inboard sheer strip. And also the frieze trim.
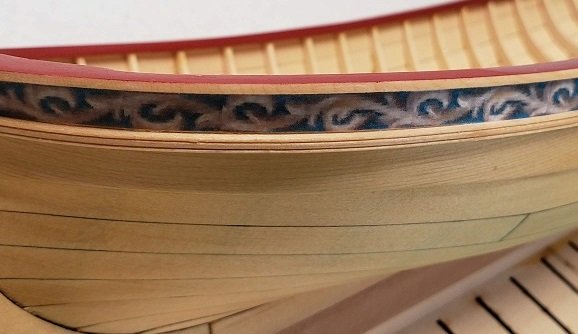
I used a brass scraper that I had from my Connie build for the shear strip. It seemed to work out pretty good and I like the result.
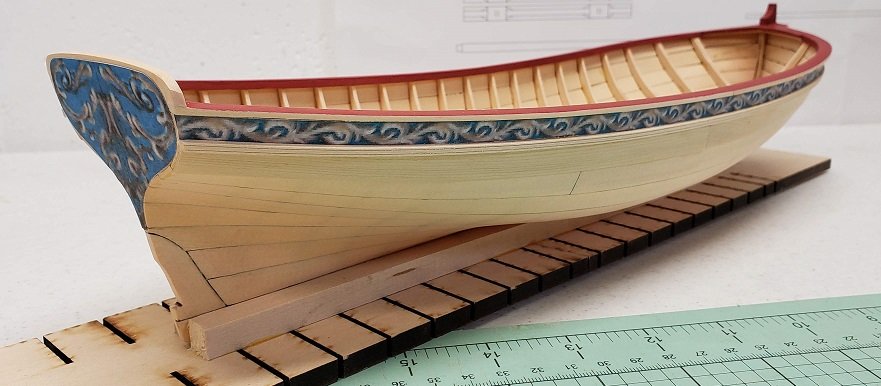
A rear view of the frieze and the shear strip.
The pic below are after one coat of Wipe-On Poly. It really brings out the color of the wood and the seams.
Almost time to turn my attention to the inside. I'm working up the courage to get started on the nails. I can never get those things to look as clean as I would like them to. Then a little cleaning up on the inside and moving on to Chapter 4.....
- Tigersteve, JeffT, Rustyj and 5 others
-
8
-
Great looking stuff Rusty. Definitely something to shoot for....
Good incentive for me to get back to the shop...
-
-
Wow ---- simply wow. You keep raising the bar Chuck !!! Awesome work...😉
- Obormotov, thibaultron and EJ_L
-
3

HMS Winchelsea 1764 by CaptMorgan (Steve) - FINISHED - 1:48
in Member Build logs for the HMS Winchelsea
Posted · Edited by CaptMorgan
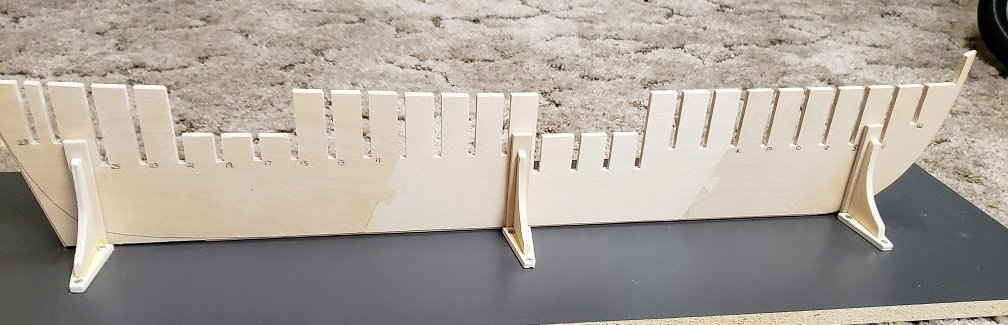
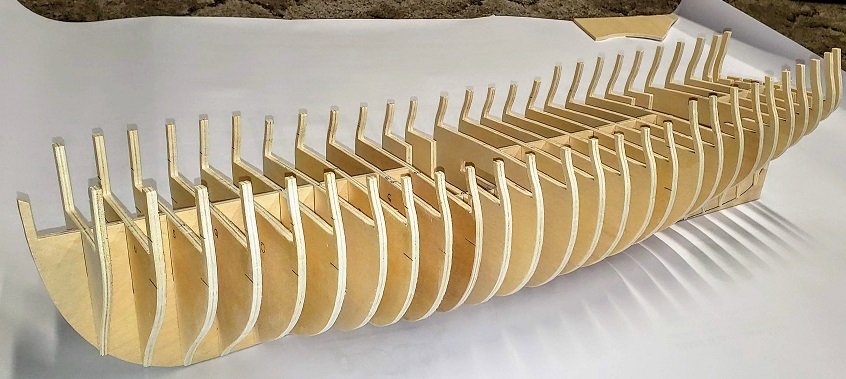
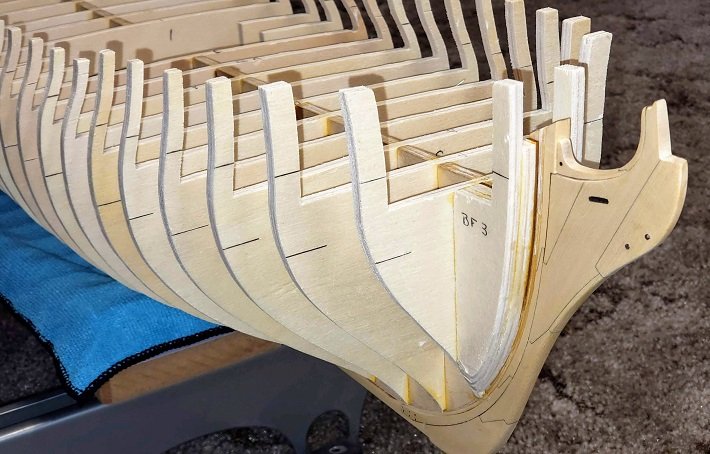
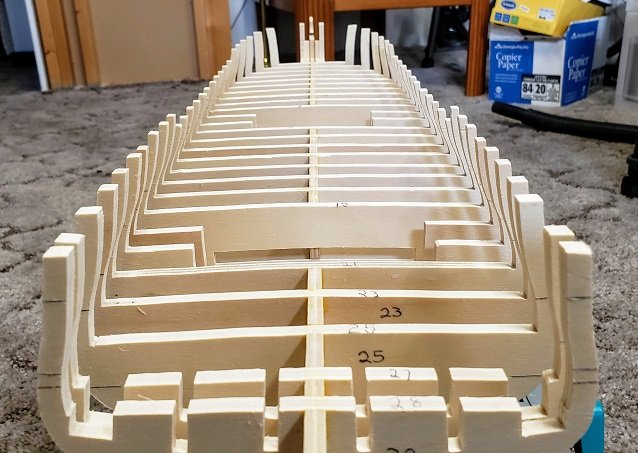
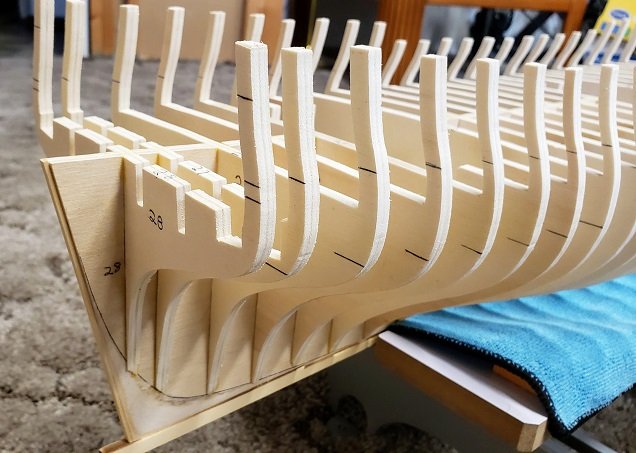
Made a little progress since the last update.
I got the keel assembly glued together and to the former along with all of the bulkheads attached. Also got the bolts put in the keel.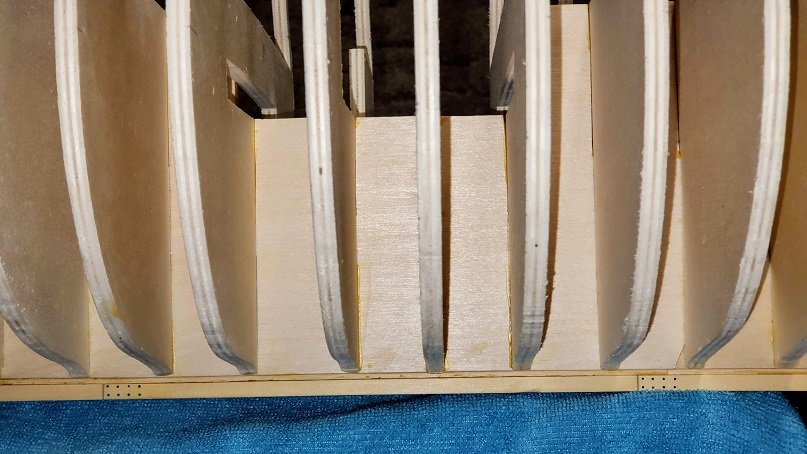
Do all you guys put WOP on the keel and head assembly at this point to help protect it during the faring process?? Seems like I read that a couple of people did that. Thoughts??
I know I will use a lot of blue painters tape to help protect it.
I also have a couple of bulkheads that are off a little and a couple of the guidelines for the batten seem a little off also. But for the most part I'm pleased with how everything lined up. Pretty good considering I cut them all out.
I'm going to print out a few patterns to see if it was just where I put the line or something more serious. I'm going to take my time with the paring process. I don't want to mess this up....
Next up - heading to the store for a mask -- I see a lot of sawdust in my future...👍