-
Posts
1,228 -
Joined
-
Last visited
Content Type
Profiles
Forums
Gallery
Events
Posts posted by KenW
-
-
After reviewing the height and placement of the gun ports, I finally decided to create the location of the keel. This keel is only for planking purposes. Once the hull is planked, this keel will be sanded down and the proper keel attached. It is not yet glued on to the hull. It’s amazing how a photo shows where more sanding is needed. Also one of the counters broke and needs to be fixed.
- mtaylor, KARAVOKIRIS, FriedClams and 6 others
-
 9
9
-
I have finally gotten the hull fully assembled and it’s almost ready for planking. I will still keep the sandpaper handy, but first I must add the keel.
This is a critical step that I’ve been avoiding. But it has to happen sometime.
The hull still isn’t pretty, but planking should help that as well as more sanding and adding shims.
-
Mike - Your work does look like it could've been computer generated.
- Ryland Craze and Stuntflyer
-
 2
2
-
I’ve glued the pieces to make the stern half of the galley. All the pieces had to be adjusted and sanded to make a smooth half-hull. I’m using a technique from an article by Richard Simon in the Nautical Research Journal, Summer 2023, Vol. 68, No.2. which simulates a POF scheme. I thought it would make the creation of the gun ports easier. For the stern, I’m using a POB technique. This model is using a lot of different techniques. It’s kind of a hodgepodge of different ideas from various sources. And the model requires lots of sanding. My shipyard is getting layers upon layers of sawdust; I’m going to have to spend days doing a complete cleaning up once the hull is finished. (I am doing some cleaning up each day, but not a major effort.) Included are the water boards at the rear of the deck. I made them without edge bending since the basswood wouldn’t hold the bend without breaking. I may make the board thinner towards the stern to match the plans. They aren’t glued yet.
- yvesvidal, JacquesCousteau, Chuck and 7 others
-
 10
10
-
I’ve spent the last two weeks creating and sanding the stern area. More sanding must be done. Also the stern is proving to be difficult. I don’t really like the way the plans construct the stern area. I still have a lot of work to do. I must make/design the counter and transom and continue the endless sanding.
- mtaylor, JacquesCousteau, Canute and 4 others
-
 7
7
-
Druxey: Thanks.
Unfortunately I got them created for me by "shapeways.com" which I now learn that they went out of business.
Chuck has a great source of models (from the UK, I think), but I don't know if they will create figures based on your personal requirements.
Cheers.
- FriedClams, druxey and mtaylor
-
 3
3
-
I haven’t been modeling for the last few months due to my recovery from surgery. But I have acquired some 1/48 scale sailors. I added three to the boat so the model looks like the photo from the book on Pilot Boats shown in my first posting. The little men seem very small and they will break if I’m not careful. I attached some photos below.
-
Thanks Greg.
I'll get in touch with Chuck.
- thibaultron, mtaylor and Canute
-
 3
3
-
Greg: I never heard of this site. Do they have a wide range of model guns at this site?
I need a collection of gun sizes for my current model. It's an American boat with guns sizes that depend on what they could 'acquire'.
Thanks.
- thibaultron and mtaylor
-
 2
2
-
Sorry - I can't fine the capsquares on the HMS Winchester page or the Ship Model Cannon page.
Cheers.
- mtaylor and FrankWouts
-
 2
2
-
I vote "yea" for 1:48 capsquares!
They look amazing.
- mtaylor, FrankWouts, JpR62 and 3 others
-
 6
6
-
Enjoy your vacation and rest up.
Cheers.
- FrankWouts, mtaylor and druxey
-
 3
3
-
Thanks Gary. All the sanding I'm doing, I probably should spent time learning to use power tools.
Cheers.
- FriedClams, Ryland Craze and mtaylor
-
 3
3
-
I want to do some preliminary sanding so everything looks a bit better. So, I glued several ‘bulkheads’ to form one of the center frames. First, I cut out the location of where the stairs leading below deck and painted it black. I also planked the floor since it will be seen if you look down the stairway.
Then I inserted blocks of wood between each bulkhead to strengthen the structure and started sanding. I had to add some shims in places and remove a lot of wood in other places. The result is not bad; nowhere near what will be the final fairing, but not bad. Still looks ugly.
-
Simply exquisite!
Excellent carving.
- mtaylor, Keith Black and HAIIAPHNK
-
 3
3
-
Well, I’m back with the Galley. The Pilot boat is done except the little figures I’ve ordered and have to paint.
So, I made a jig (similar to the one in the NRJ article) from basswood. I glued the side view of the plans to the jig and cut the gun ports so I can ‘mount’ the frames together.
Each frame with a gun port will have its sweep frame attached. When the frames are loaded It looks like this:
I also made a frame with most of the bow bulkheads. Lots of sanding needed to make the whole hull presentable.
-
Thanks Gary.
I see you've been busy. Just looked at your current build and find I have a lot of reading to do.
I know your build will be a masterpiece since I know your modeling abilities.
Cheers.
- mtaylor and FriedClams
-
 1
1
-
 1
1
-
Thanks Adam.
Another photo:

-
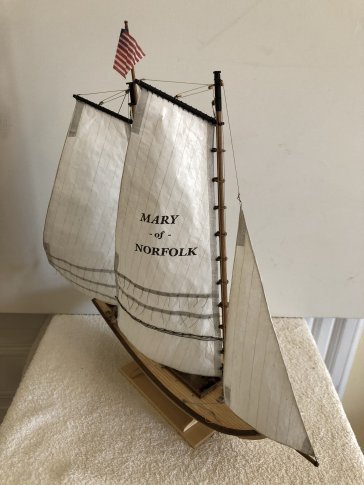
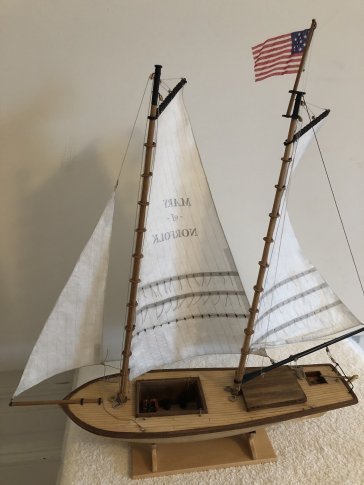
Well, everything is done except for the little sea men I created with the help of Amazing Models by Snapdragon. The guy whom I worked with was excellent. And although the price was high, I'm happy with an early birthday present.
Watch this space.

-
Great model. I like the use of rubber bands - kind of basic but good to keep in mind.
Cheers.
- mtaylor, scrubbyj427 and AJohnson
-
 2
2
-
 1
1
-
I’ve set the jib sail and completed all the rigging. There just remains tying off and gluing the lines at their cleats and adding some coils. I also need to raise the flag.
- whitejamest, catopower, GrandpaPhil and 3 others
-
 3
3
-
 3
3
-
The mainsail and foresail have been rigged to the boat. I’m having problems getting the sails to flare out from the hull so it looks like it's sailing in the wind. Of course, there is no wind. Therefore there is no force pushing the sails out and when I tighten the sheets, the lines keep pulling the sails closer to the boat. And the sheets never look tight, always loose. Not the look I want.
Also the stove and some jars have been added to the forward locker. There is a small jar heating water for tea.
- GrandpaPhil, FriedClams, CiscoH and 3 others
-
 6
6
-
December 20, 2023
I’m now working on the foresail. The unique feature here is the bonnet. It should be attached by a lacing, not the crazy sewing shown on the photo (see the first entry). I found the proper way in the book, “Historic Ship Models”, by Wolfram zu Mondfeld (see photo below on left). The method is shown in the photo on the right. My attempt is in the last picture. Still need some shaping of the sail.
-
Great job !
What thread do you use to make the rope?
I really don't like the polyester thread recommended by Chuck. It doesn't behave the way the old Syren rope behaved.
And white glue doesn't work on the polyester. That causes the rope changes color when you glue it. That nice brown rope turns to black.
I'm going to go to various yarn/sewing shops to see what I can find.
Cheers.


Pelican 1943 by FriedClams - 1:48 - Eastern-Rig Dragger
in - Build logs for subjects built 1901 - Present Day
Posted
Every time I look at your log, I am more impressed.
Amazing skill!