HOLIDAY DONATION DRIVE - SUPPORT MSW - DO YOUR PART TO KEEP THIS GREAT FORUM GOING! (Only 13 donations so far - C'mon guys!)
×


vossiewulf
-
Posts
1,477 -
Joined
-
Last visited
Content Type
Profiles
Forums
Gallery
Events
Everything posted by vossiewulf
-

Wood for decking
vossiewulf replied to JamesT1's topic in Building, Framing, Planking and plating a ships hull and deck
I used holly for my deck, but it's too white in my opinion. I wished I had very slightly stained it, as I can't see any of the common deck woods of the time looking this bone white despite holystoning and UV bleaching. Maybe it will be better after it yellows a bit.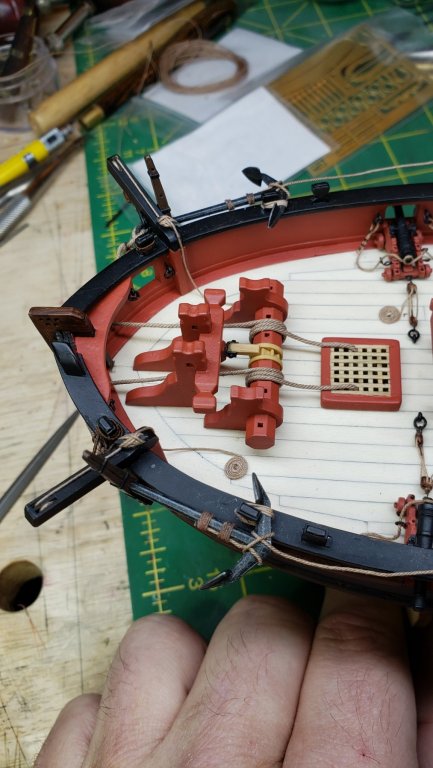
-
Best type of micro drill bits for metal
vossiewulf replied to BETAQDAVE's topic in Metal Work, Soldering and Metal Fittings
And using a tungsten center punch or awl is never a bad idea even using a stiff centering drill when drilling curved stock if you can't do Wefalk's trick for some reason. I also have a very spiffy laser center finder that properly calibrated will mark the center within a couple thousandths of an inch, which is fine for anything but the most precise work. Very useful if one can fit in the budget. -
Absolutely and one of my little planes was bought that way and it turned out to have a decent steel iron so it may work well as is. If it doesn't, take a look at the Mujingfang version, that will definitely work well. And I'm looking forward to this. I enjoyed the Kaiser Wilhelm in particular, must have missed your Xebec when I was away.
-
The cool thing about the Merlin is how much more efficient it was than its German contemporaries. It only displaced ~27 liters, whereas the DB 601 was ~34 liters, DB603 ~45 liters, the DB 605 ~38 and the Jumo 213 ~ 35 liters. All of them weighed considerably more than the Merlin and in most cases were still at a slight HP disadvantage at most points in the war. Good luck Danny, looks like you will need it
-
I have a version of that, it's called a bullnose plane and is exactly for the purpose you're using it. I used mine on my LN, cleaning up the joints between the bulkhead tops and the deck underlayment. You want to make light cuts with lots of pressure on the rear end of the plane to prevent it from nosediving into the wood, something every bullnose plane likes to do. The best small planes I've found are the Mujingfang planes, the steel is quite good. Although I like the coolness factor of the little Veritas copies of larger planes, they really aren't very ergonomic.
-
MONTAÑES by Amalio
vossiewulf replied to Amalio's topic in - Build logs for subjects built 1751 - 1800
-
Yeah, I keep running into those things, totally obvious in retrospect but look fine to the untrained eye up to that point. I have an S10, but I've always used Android. It's pretty consistent across all UIs so once you get the pattern you won't have any problems with anything. As for your new camera, for some reason the shots of you making the gaff have a very narrow depth of focus, almost like you have a tilt-shift filter turned on. However the longer shot of the ship itself doesn't seem to have that problem.
-
Best type of micro drill bits for metal
vossiewulf replied to BETAQDAVE's topic in Metal Work, Soldering and Metal Fittings
IMO Cobalt HSS drills made for professional jewelers are the best compromise as they offer long life for anything but drilling high carbon steel while not being nearly so fragile as carbide. -
(Tells the grumbling crowd of half'drunk woodworkers to go home and put out their torches and put up their pitchforks) I'm sure you'll like it in the end more this way, it's just not very common for someone to walk by beautiful wood that's beautifully finished and say to themselves gosh, I really wish I had hidden that with paint. And you know to keep a supply of boring non-figured planking wood around for the next time you're looking at a painted finish
-
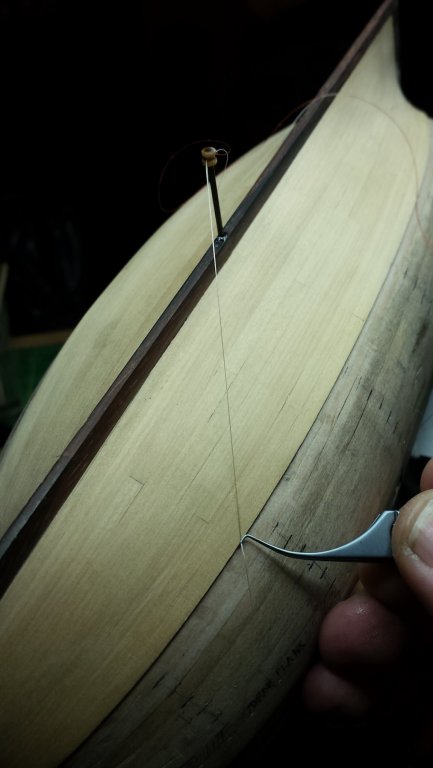
Here is a pic of me using the post and thread to check symmetry. Your boat is small enough to use any thread, it won't stretch enough to cause a problem. On bigger scales one should use fly-tying thread as it has considerably less stretch.
- 33 replies
-
- 3
-

-
- 18th century longboat
- model shipways
- (and 1 more)
-
And now you've run into another aspect of planking that must be watched very carefully, that is like many others totally obvious in retrospect, but not at all obvious before: the need to have the planking of both sides be exactly symmetric. I solved this problem by drilling a hole in the bottom center of the keel, exactly square. I mounted a piece of carbon fiber rod in that hole, sticking up a couple inches. I then attached two threads to that rod, one glued at the forward center and one in the rear center. With those threads, I could easily check any point on each side against the other, and it made it easy to maintain the required symmetricity. As to how to fix it, if it's half a plank width out you really can't fix it without removing at least one plank on each side and then splitting the difference between the two replacement planks.
- 33 replies
-
- 2
-
-
- 18th century longboat
- model shipways
- (and 1 more)
-
Naval Warfare in the Age of Sail: The Evolution of Fighting Tactics, 1650-1815
-
I'd think if they are trying to eradicate a pest, that burning might be a requirement and not optional.
-
I do it bit by bit, glue down a section an inch or two long and repeat. I don't edge glue, only putting glue on the bottom of the planks. Also the best method is to add glue in dots, don't try to smear it around, and the dots should be small enough that you never get squeezeout- if you do, you used too much.
-
The only answers are either to reduce clamp pressure, spread that pressure over a larger area, or use a harder wood for the strakes. Sometimes just gluing a small piece of 1/32" or 1/16" latex rubber on the clamp jaws evens out the pressure enough to prevent significant denting. If that isn't enough, you need some kind of small cauls to spread the pressure over a larger area. A fancy-dancy caul will be slightly concave so when a single center clamp bears down, it ends up very evenly spreading the pressure. But this problem is also why I use CA instead, I've never had any fun figuring out clamping solutions for complex multiple curved pieces. With CA the only clamps in use are fingers 1-10.
-
Mark was referring to this. No it's not bad
-
If you wish Keith, you can go to a considerably higher level of gloss if you shift at this point to automotive finish buffing compounds. You don't need an electric buffer, they work fine with some elbow grease. There are many different "cuts" however from pretty rough to final polish, if you want to try this ask your local auto supply place which to use for final buffing. I've done some very high gloss finishes this way, they look great with beautiful natural woods like you have here.
-
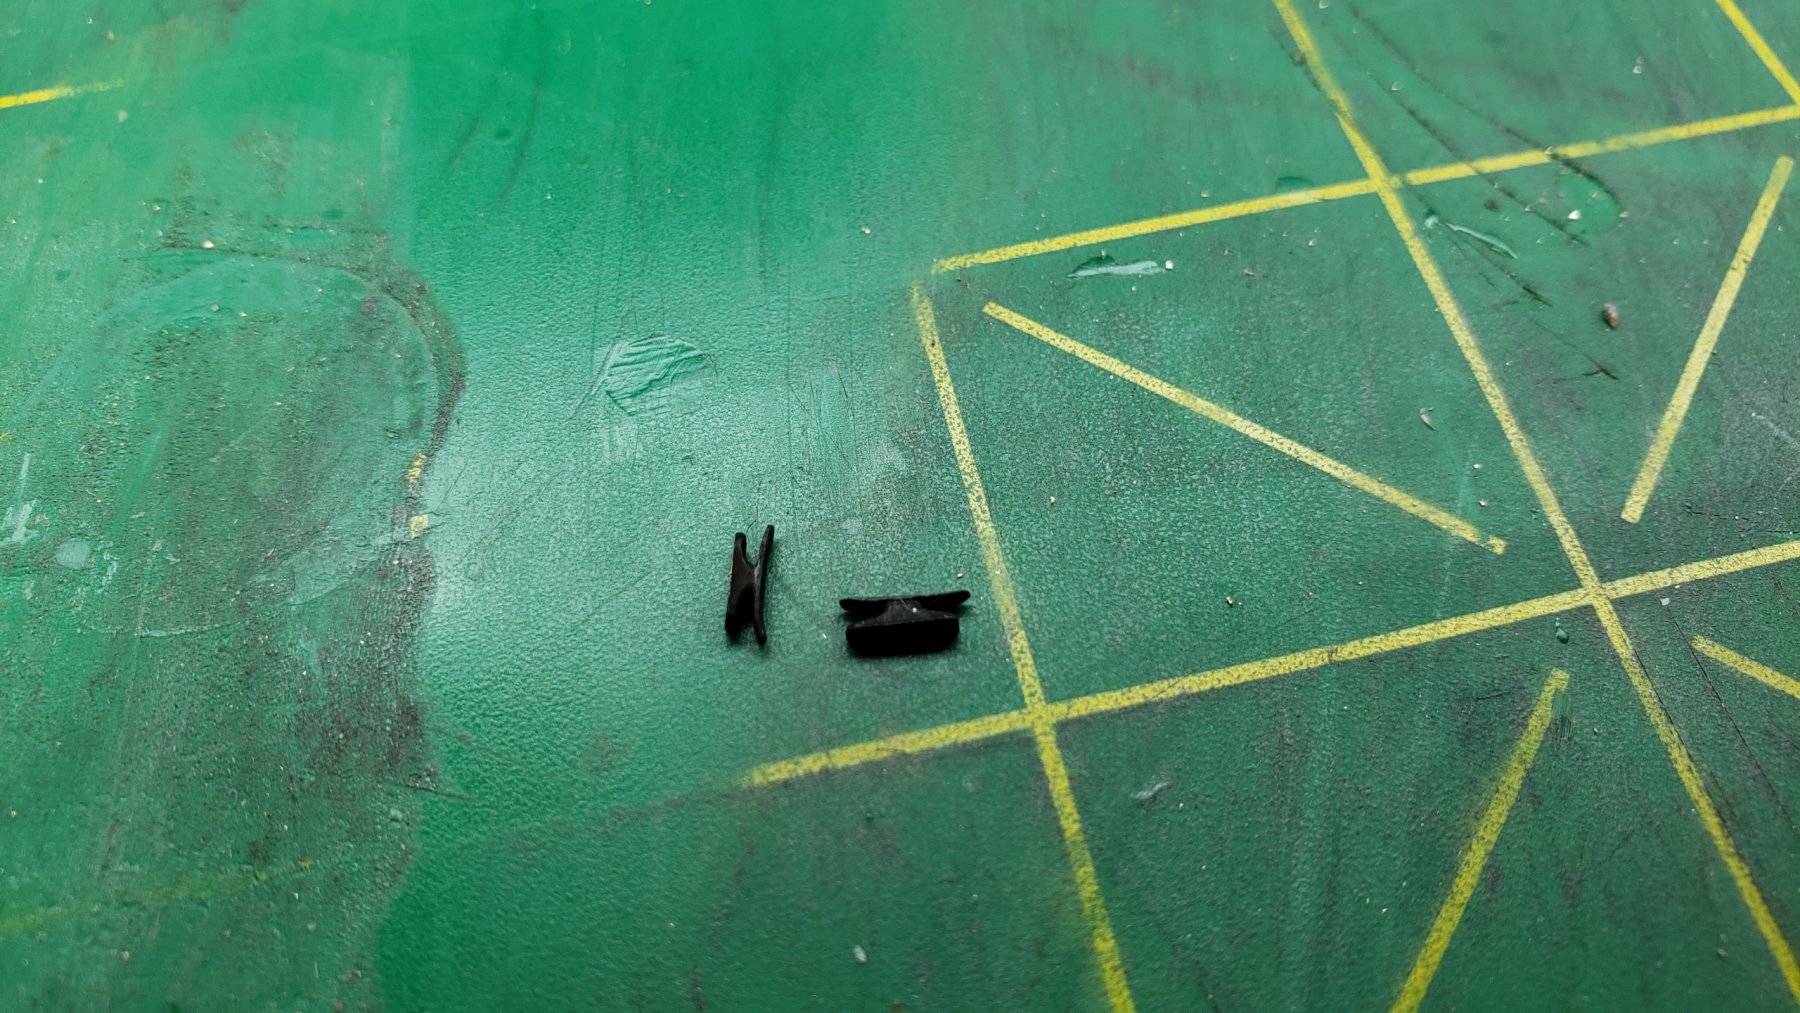
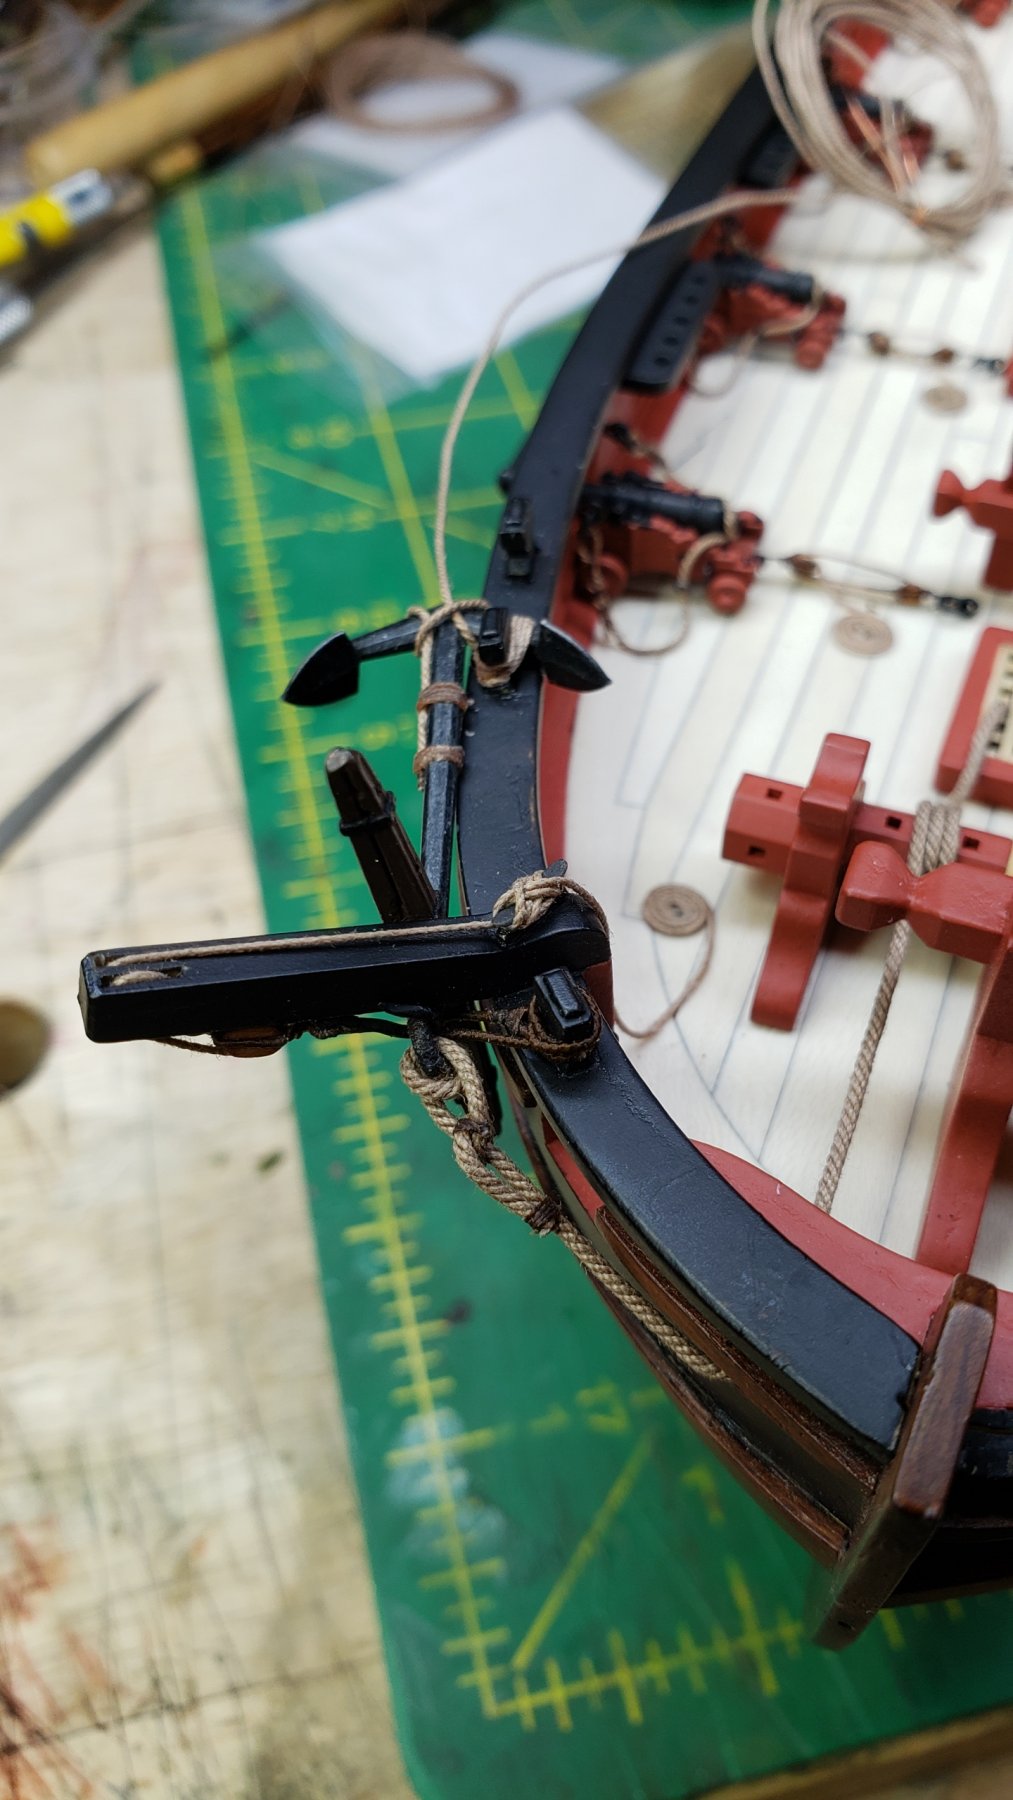
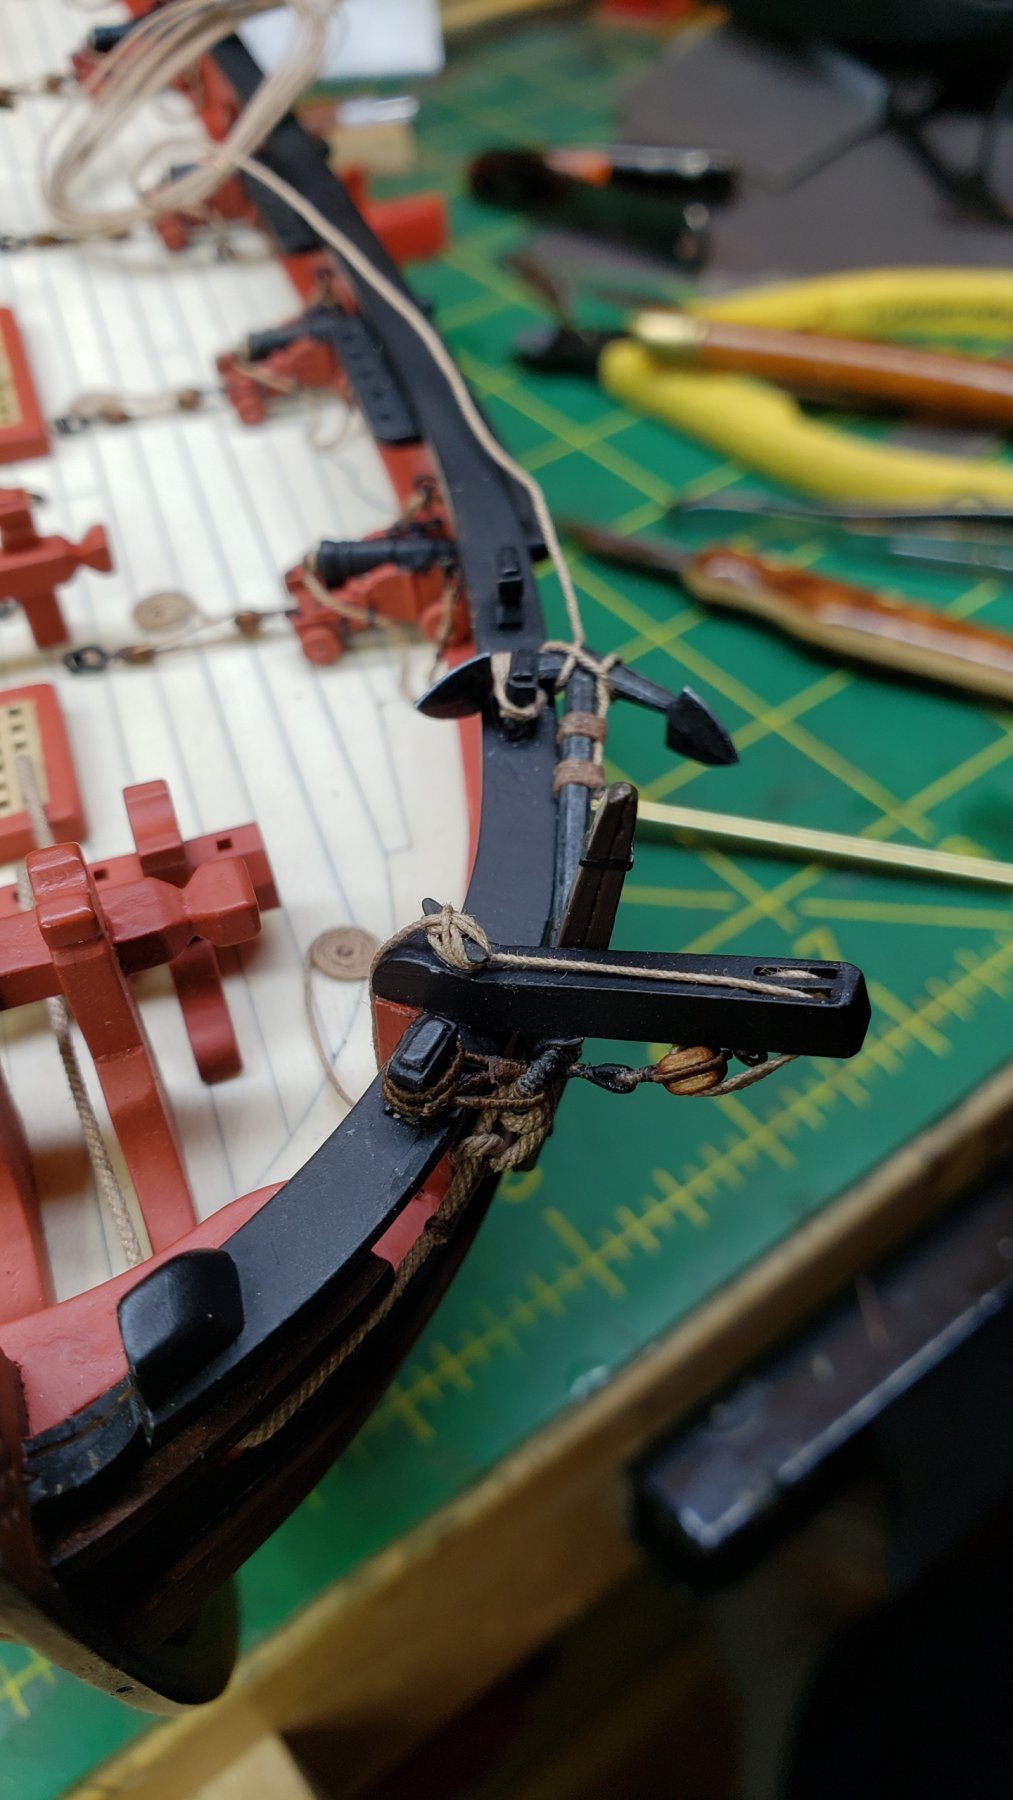
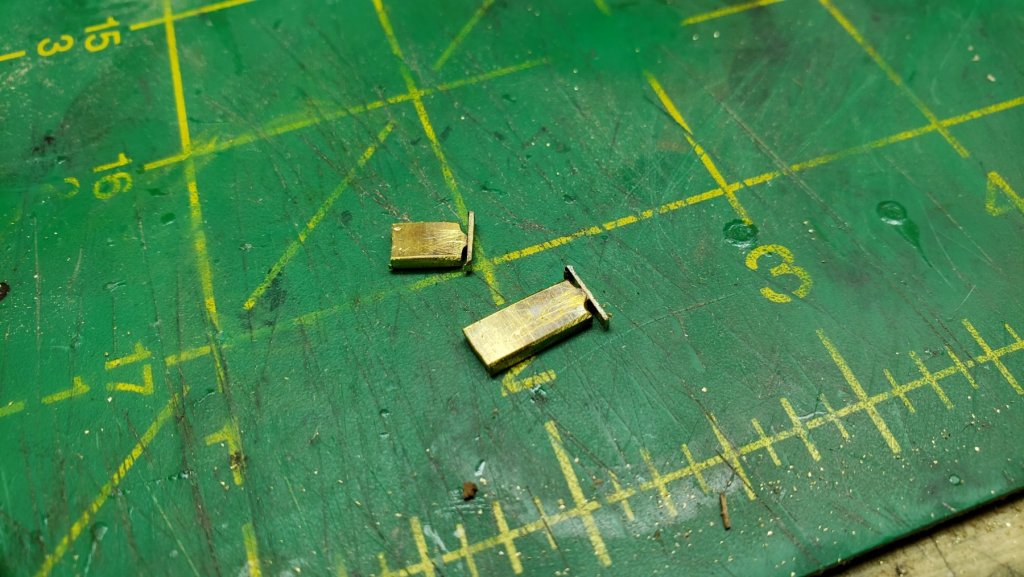
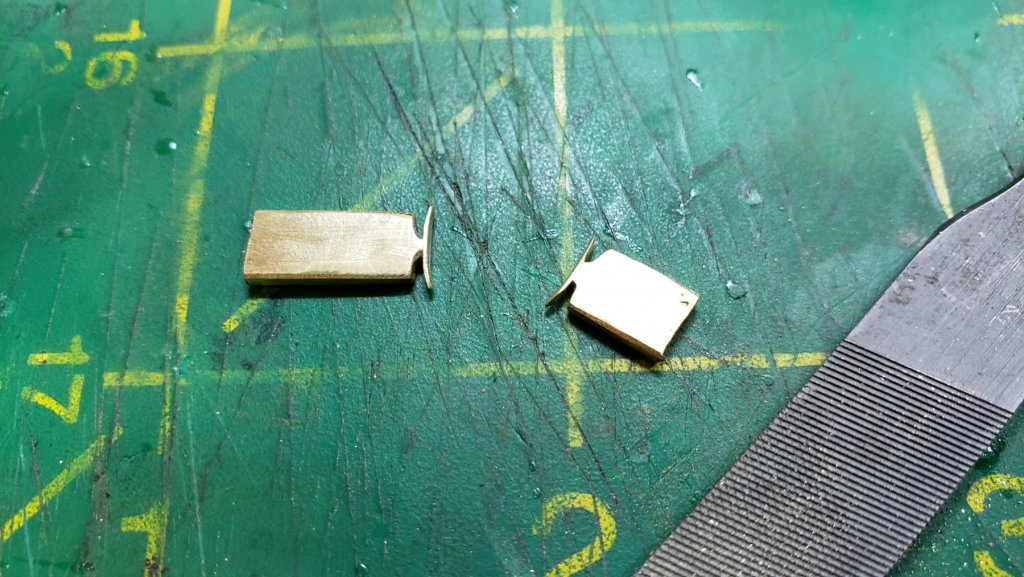
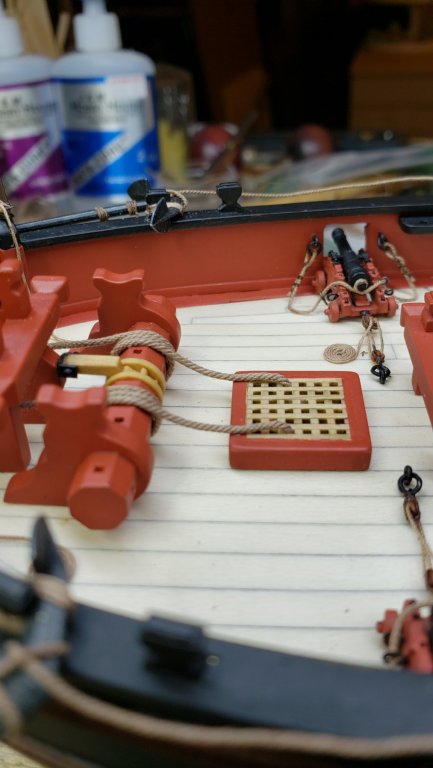
Have had company in town for the last week, little time to do anything, I just finished the two anchors. I ended up rigging both of them up, although I liked the idea of hanging one from a cathead I keep having to remind myself that I'm doing this for the first time and I don't need a lose anchor floating around waiting to be ripped off while I thrash with full rigging for the first time. I made two brass cleats for the cathead hauls, I think that's what they're called, and set them at an angle as seen below because one in line with the cathead would have been rendered too small. So I went once again with the what would I do if it was my boat method, and made reasonably big cleats and set them at an angle. I made them out of two pieces as that seemed the simplest method with a cleat this small. I'm also spending time fiddling with the lines to get them to drape correctly as if they had real weight/stiffness ratios.


- 714 replies
-
- 15
-
-
- lady nelson
- victory models
- (and 1 more)
-
One thing to consider with handles Gaetan is how well it locates the point of the blade and its rotation for you. A curved and fully rounded handle can be quite comfortable, but it's hard to know exactly where the point is just by the grip. That's why I always make the back edge of the handle straight, and perfectly in line with the point of the blade, and also with slight flats on the side, these help you intuitively feel where the edge is pointed. With a fully rounded handle, you can be holding the knife slightly twisted in your hand without noticing. But in the end, handles are very personal things, make what feels right for you.
-
MONTAÑES by Amalio
vossiewulf replied to Amalio's topic in - Build logs for subjects built 1751 - 1800
You can't fool me! He's just hiding the other six arms behind him! -
Tying hooks to blocks - Tips??
vossiewulf replied to daddytotwo's topic in Masting, rigging and sails
Looking at your pic, one more suggestion since your hooks aren't like mine, where I'm making them out of wire and can slide the loop onto the hook after the loop is made. In your case it looks like you have premade hooks. In that case, go ahead and make the loops as I've described, but once the loop is made and seized, add thin super glue to the top of the loop so it will soak in, and after it dries, cut it with a sharp knife right at the top of the loop. Pry it open a bit to add the hook, then use CA to glue the cut ends back together. -
Tying hooks to blocks - Tips??
vossiewulf replied to daddytotwo's topic in Masting, rigging and sails
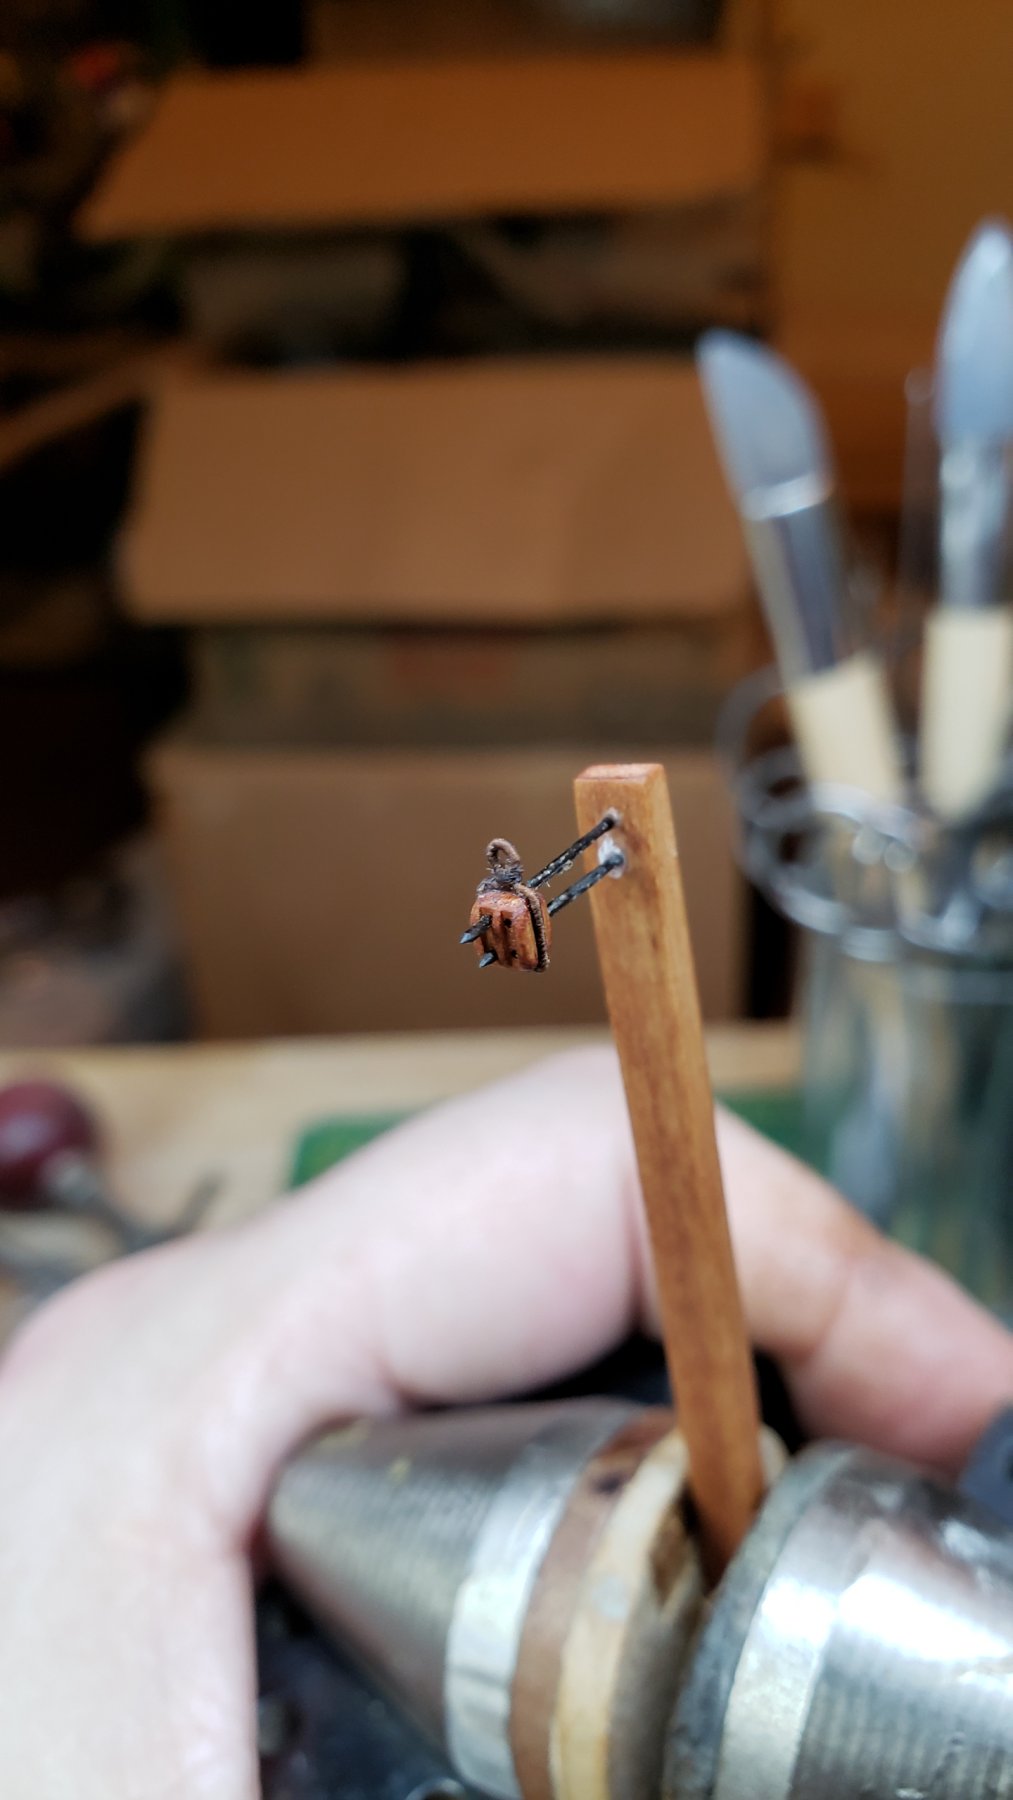
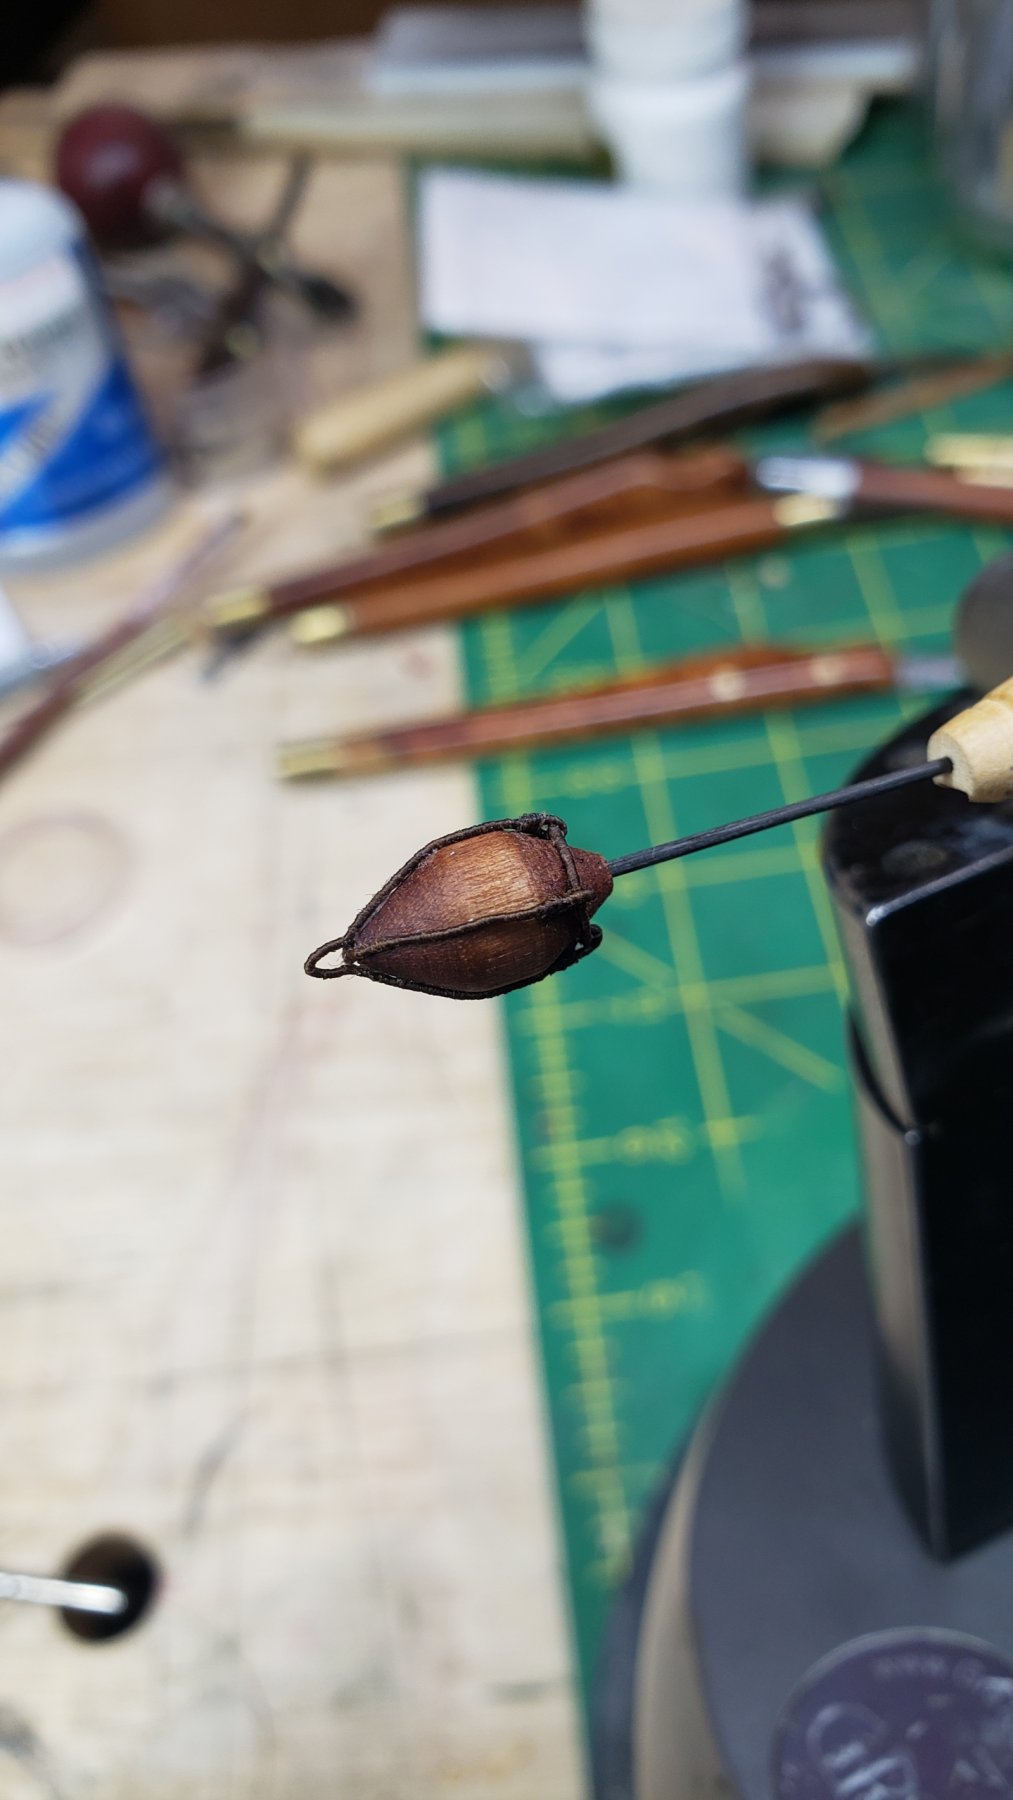
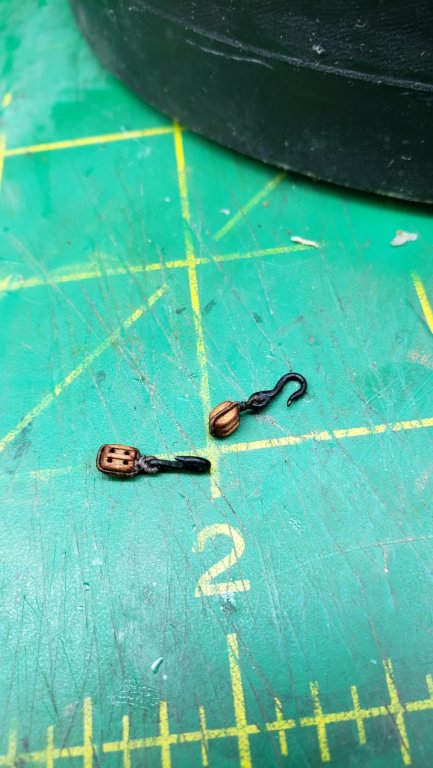
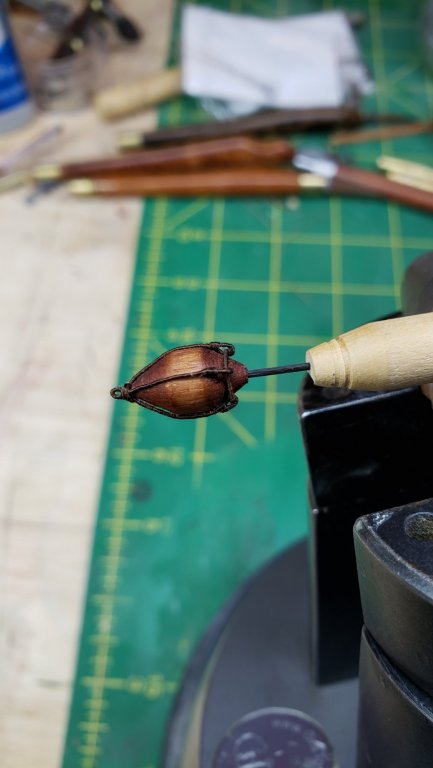
This is the little jig I have been using, it works well enough. The little prongs that are holding the block are carbon fiber rod, I don't know of anything else stiff enough at this scale. Also I use fly-tying thread that is very thin for the seizing. Add the hook after the loops are made. In this case the hooks were pretty large as these are the catfall blocks. First step is putting a tiny drop of CA on one side of the loop, and using that to attach the fly-tying thread about in the middle of the length of the thread. Once that sets up, wrap both ends of the thread around the loop a couple times, and pull tight to bring the stropping together at the bottom, this forms the loop. Glue it again with CA. Cut off one end of the thread at that point, and continue wrapping with the remaining thread until it looks correctly seized. Glue one last time and then cut off the excess. I'm putting another example below, of one of the anchor buoys I made that shows what the loop should look like before you start seizing.

-
For all those who use yellow glue, I suggest you try Luthier Mercantile International's glue. It is excellent wood glue, but has an additional feature needed by instrument makers who can't afford a single spot of glue anywhere: it contains a fluorescent dye that reacts to a UV light. So all you need to do is buy a small black light, and shine it over surfaces and any glue spots will be immediately visible, and in a case like Dr. PS has there'd be no guessing, you could see exactly whether you have glue present or not.