Nirvana
-
Posts
5,457 -
Joined
-
Last visited
Content Type
Profiles
Forums
Gallery
Events
Everything posted by Nirvana
-
 Aydin, I would suggest to get reduction gearbox for a more scale like performance. However, it is looking sweet.
- 414 replies
-
- 4
-

-
- riva aquarama
- amati
- (and 2 more)
-
Can i live without a BYRNES TABLE SAW
Nirvana replied to shihawk's topic in Modeling tools and Workshop Equipment
Keith, that didn't helped me at all.... -
Can i live without a BYRNES TABLE SAW
Nirvana replied to shihawk's topic in Modeling tools and Workshop Equipment
I think Howie are refering to a used one.And so am I. -
Can i live without a BYRNES TABLE SAW
Nirvana replied to shihawk's topic in Modeling tools and Workshop Equipment
Gunther a new one but of course.... lol Every once in a while I am on Jims page and putting an order together. Related question, which accessories should be the first essentials? -
Looking good Aydin, regarding the front light, does the kit come with any sort of inserts for the woodframe? Then another question, and I think it's only the camera angle, but the longitudinal of the light frames are to be parallell with the deck. You are building a speedster in speeding time....
- 414 replies
-
- 2
-
-
- riva aquarama
- amati
- (and 2 more)
-
Can i live without a BYRNES TABLE SAW
Nirvana replied to shihawk's topic in Modeling tools and Workshop Equipment
Now wait Howie..... I am first on that list! lol -
Aydin Wow you really are rocking building the Riva. It's interesting and fun to follow along.
- 414 replies
-
- 4
-
-
- riva aquarama
- amati
- (and 2 more)
-
Aydin, Wow, you took off quickly and nicely. It's nice to see something more modern being built too. The build slip looks really to be a good investment. Sorry for not making the final at Eurovision Song Contest. I watch it over here in the USA.
- 414 replies
-
- 4
-
-
- riva aquarama
- amati
- (and 2 more)
-
Hobbyzone building slip for wooden ship models
Nirvana replied to aydingocer's topic in Modeling tools and Workshop Equipment
That is a build slip I would go for.... -
Hobbyzone building slip for wooden ship models
Nirvana replied to aydingocer's topic in Modeling tools and Workshop Equipment
Chris, And probably much better than any previous building slips we have seen being available. -
Mikeymo, Edit: Oh I forgot one thing. A warm welcome to MSW! Thank you for the introduction of your journey with Endeavour. I am looking forward to this build. No I am not building her. Have to many waiting anyway. But now I am pulling up the first chair, getting a good cup of java and enjoy this.
-
As all the parts are laser cut, so there will some sanding to get rid of the burn marks. This picture will show the burns to the left with their starting points, the other side is worse.

-
Papegojan 1627 by mati - FINISHED - 1/48
Nirvana replied to mati's topic in - Build logs for subjects built 1501 - 1750
Mati, Those picture you uploaded are crispy clean! Extremely nice photo job along with the parts! -
John, For this build I have arranged ten really comfy chairs and you are the second. Make yourself comfortable and the coffee is fresh!
-
Mark, You are very welcome to something different, please help yourself at the self service area where various items are at your disposal. I even sat up a "help your-self" bar for those that are into such. Maybe a nice smooth Scotch. There will always be fresh brewed Swedish coffee.
-
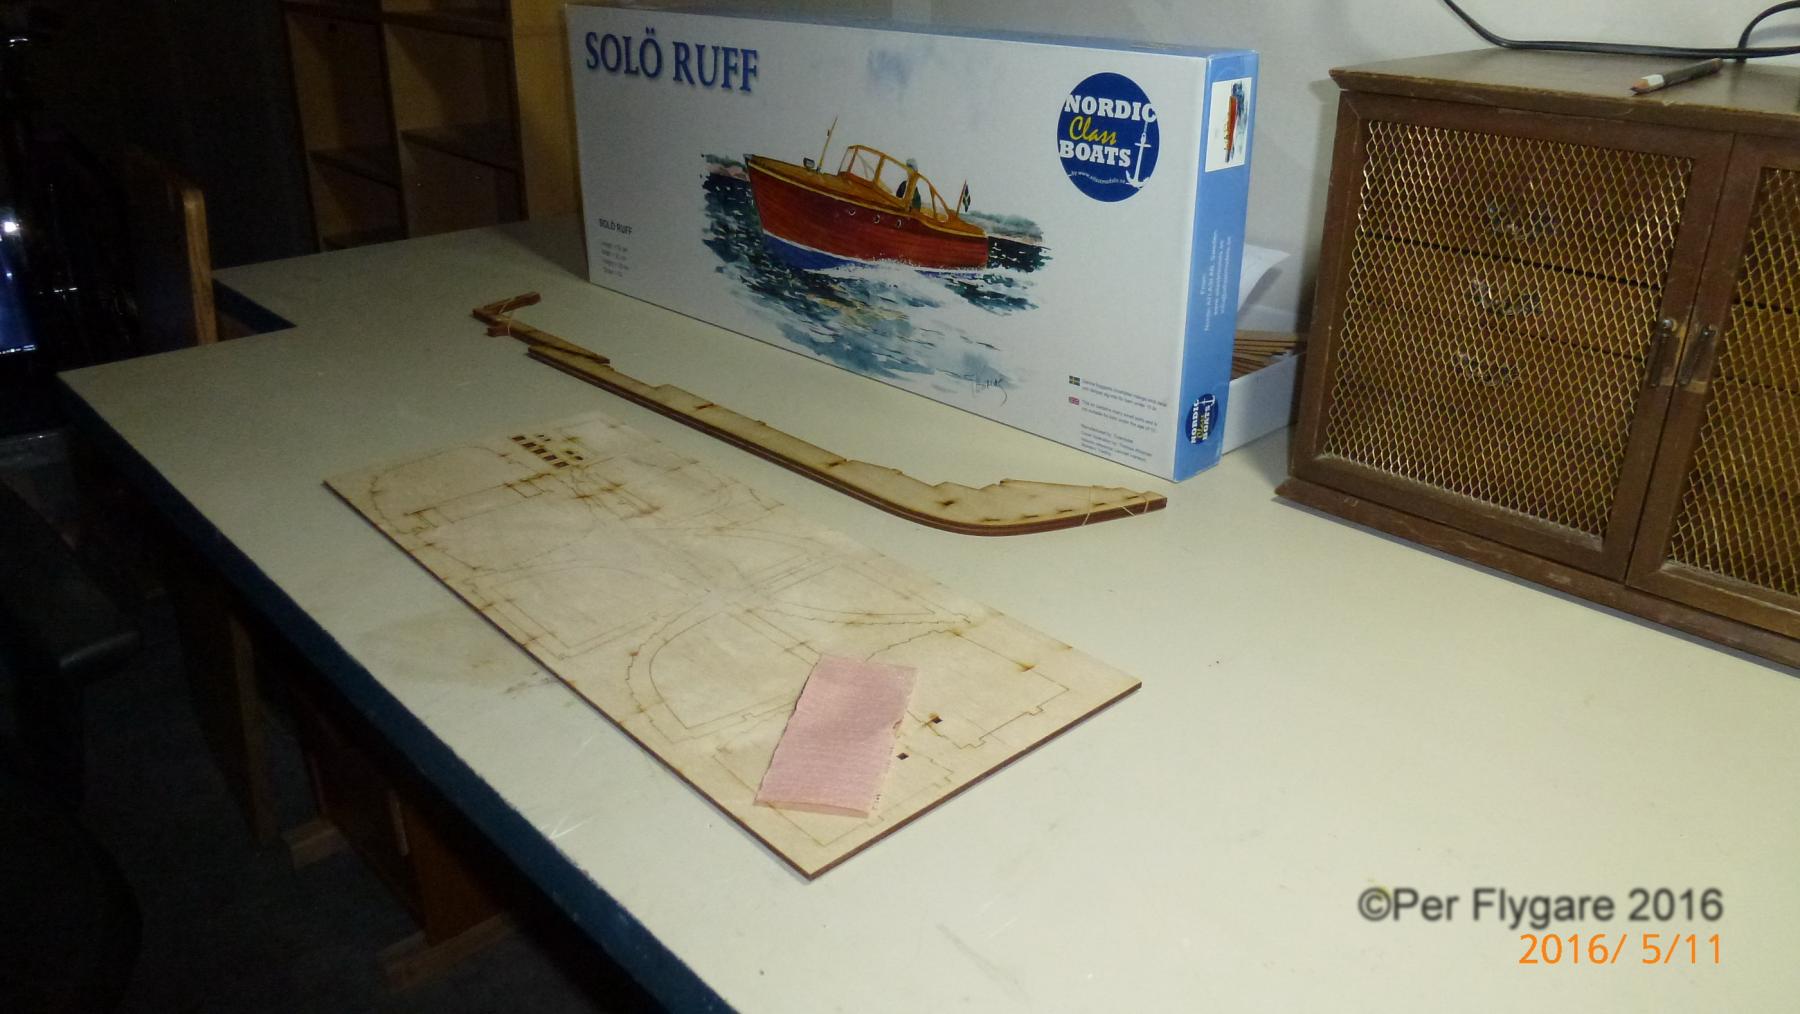
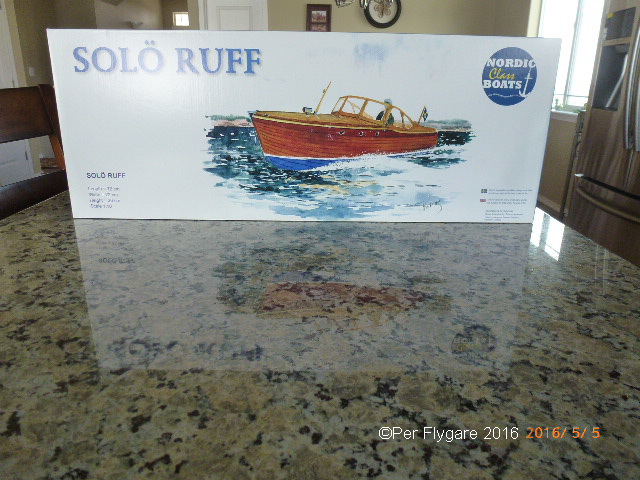
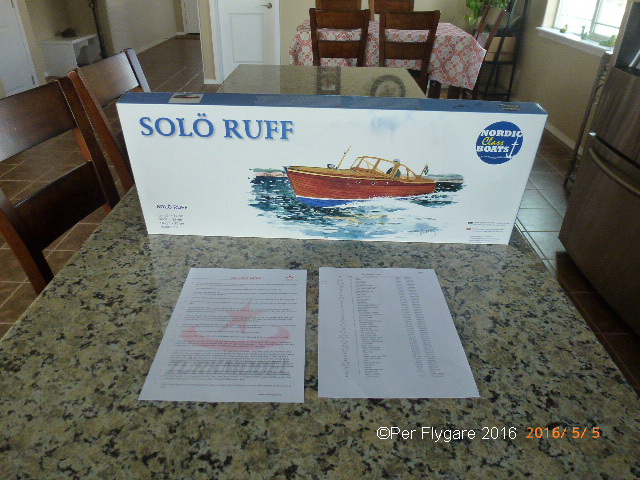
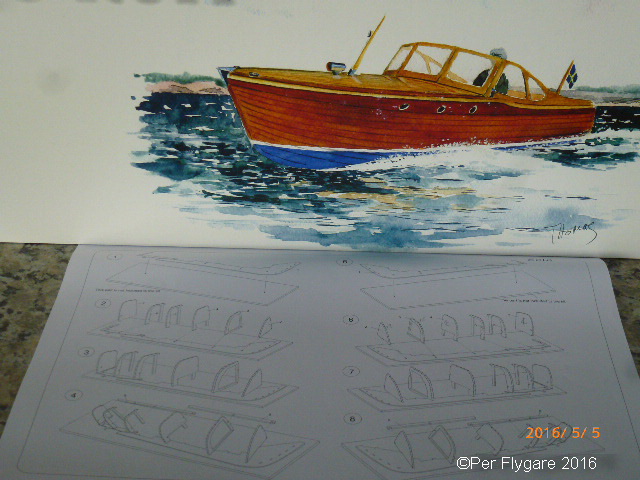
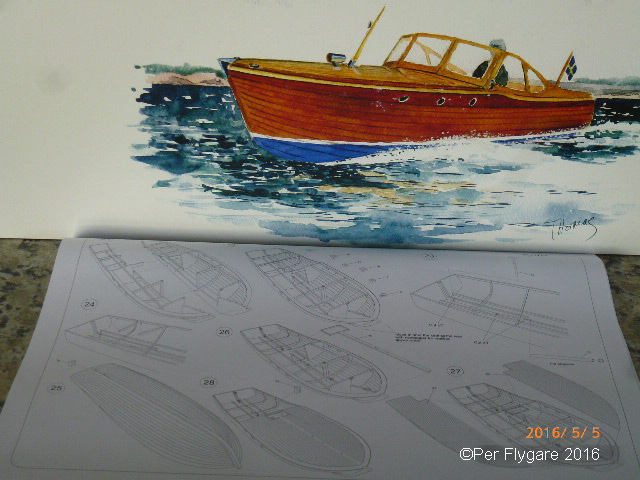
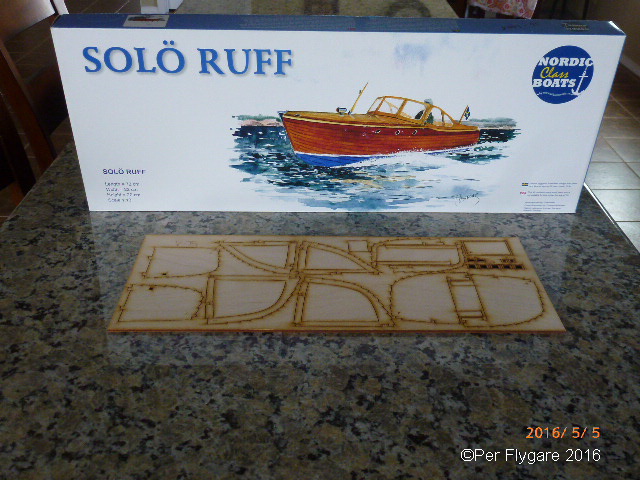
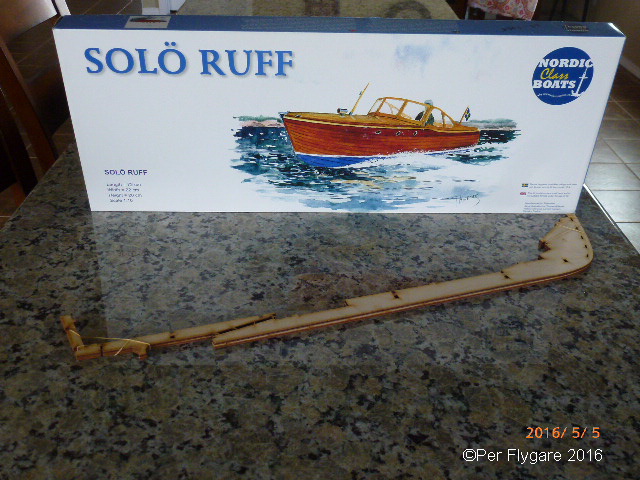
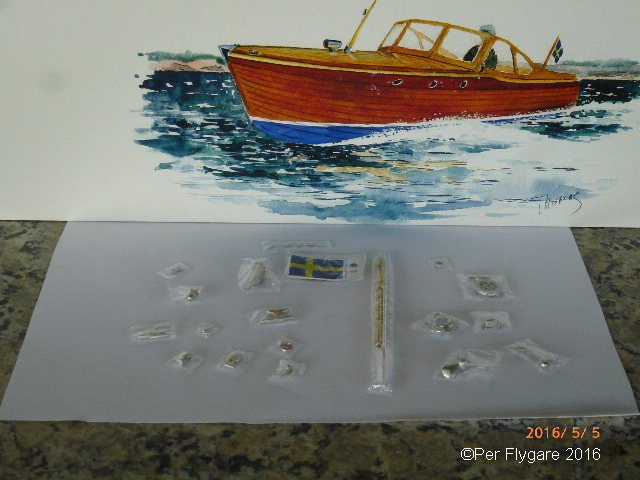
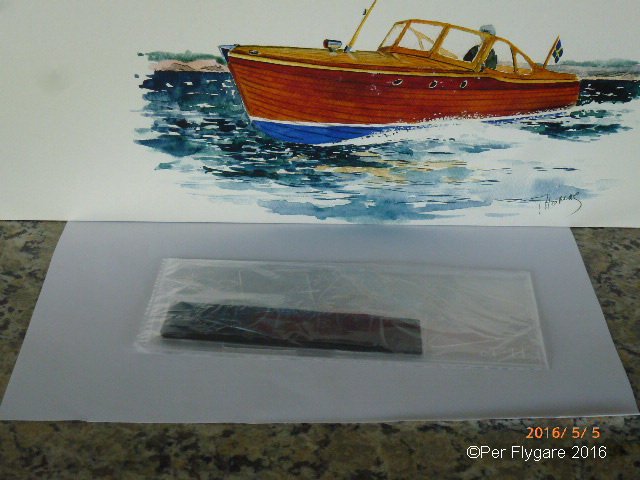
Solö Ruff This is my build log of Solö Ruff, first an introduction of the boat itself. This boat was built by Storebro from a design by Einar Runius (1897-1967), a famous Swedish boat designer. It´s a truly elegant, cabin-boat combining elegance with ruggedness, roominess and comfort with the maximum in cockpit and deck utility. In all the Solö series, a total of 2800 models were built beetween 1951 and 1964: Solö Ruff I (1951-53) •Length: 6,85 meters •Breadth: 2,00 meters •Displ: 1,1 ton •Engine: Penta BB41 Solö Ruff II (1953-57) •Length: 7,00/7,15 meter •Breadth: 2,10 meter •Displ: 1,25 ton •Engine: Penta BB50 Solö Ruff III (1957-1959) •Length: 7,35 meter •Breadth: 2,44 meter •Displ: 1,30 ton •Engine: 1 or 2x Penta BB70 Solö Ruff IV (1959-64) •Length: 7,25 meter •Breadth: 2,20 meter •Displ: 1,25 ton Solö does not have any brass detailing but instead high polished steel. This is something I will try to highlight. She was built clinker style, either oak or mahogany. Mostly mahogany. This model is based on the 1960 boat which became the most popular one. Solö was intended for the international market and likewise it had a huge success. Still today many of the boats can be found at various Vintage Boat Shows. The most common engine was now Volvo Penta BB115. A very reliable and strong engine. Still Solo was capable of speeds up to 24 knots, but cruised best around 15 knots I hope you will enjoy this adventure with me. So let’s start with intro of the model kit. It’s a Nordic Class Boats by atlastmodels.se, manufactured by TurkModel. Historic reference is Lennart Ivarsson, Storebro Trading Credit should also go to Thomas Ahlander for the cover illustration. Upon opening the box I was greeted by a color paint schematic. This to help with painting the boat. The build process is not provided by any means in words as we normally have an instruction booklet of some kind. There is one sheet covering the parts and one sheet with a little recommendations, no instructions. The building process is very much like Billing Boats with sketches instead. But everything is easy to understand and straight forward. The hull is built in two halves to be glued together. Totally there is 8 sheets A3 format as for instructions. Solo can be built either as a static model or as a RC. She will be built as a static. All pieces except for the planking is laser cut to high quality. Edit: planking is laser cut as well due to profile and port/starboard separation. Some of the parts almost falls out by gravity. I am extremely happy and surprised by the keel piece. Even though the box itself is on the edge of being too small. The keel is straight as an arrow. So there is nothing to worry about in that matter. The kit is a plank on frame. I haven’t decided yet how to approach the engine as it would be great to have a 1:10 scale engine inside of her. How and where I would find such I don’t know. I will probably leave it out or make a coarse dummy. All the metal pieces are made out of Britannia metal. There is a flag that is accurate color wise. Included in the kit there is actually soft material for cushions. Now before starting anything: Here is some stats about the kit. Length: 72 cm, 2’ 4 11/32 “ Width: 22 cm, 8 21/32 “ Height: 20 cm, 7 7/8 “ Weight finished: ? Kg and ? Lbs The first thing is now to get a build foundation for the two halves. For that I am using shelf parts from the old office. It will work for now. I will also start working on varnish test as I like to get as close to the dark mahogany finish as possible for the hull. The deck will have a light finish. For the varnish I will start with Min-Wax products. Any questions and input is as usual very welcome.

-
Erik, That is very nice displaying your work, Even though the Cheerful is not on my list I am following this one of yours to the bone. Very nice!
-
Papegojan 1627 by mati - FINISHED - 1/48
Nirvana replied to mati's topic in - Build logs for subjects built 1501 - 1750
Now that is a new way! And I like it very much! -
DELFT SHIP
Nirvana replied to NavalArchAngel's topic in CAD and 3D Modelling/Drafting Plans with Software
I would also suggest SketchUp for your projects! It's very accurate too. This program has become very powerful and is also being used in the movie industry.- 15 replies
-
- 3
-
-
- delft ship
- 3dmodelling
- (and 1 more)
-
I were on my way to bed when my outlook inbox chimed for a new message. So I got a reply from the Swedish side related to the kit of the VASA. As it is for now; There are no options for shipping to USA. Well at least I got a reply, which is helpful. But to bad I can't get the kit, unless I use my fathers address in Sweden.....and have it forward. Besides the dollar is getting cheaper vs. the Swedish kronor for the moment hehe
-
Cannonfodder, you lucky B****** "Editing"; I am sorry for the language. You are already getting your workshop together. Funny part though is that we have the same idea of setting up the work area. Now I am looking forward to the build of Emma.
-
Hamilton, That looks great. I have the Bluenose kit from MS that I intend to get going with someday.
-
This may not be a problem, as you will have time to build an amazing ship not having all the parts in front of you taunting you to a "bad" job. I think this is helpful if you want to go slow but still get great result. As for Vasa considering it is a 36 part built, that means 3 years.
-
Well, the news regarding Endeavour surfaced on CNN as well today. This is what Rhode Island Marine Archaeology Project has on their website. I will believe it once we have true confirmation about it.
-
The link for the Model of Wasa from EditionAtlas, partner of the DeAgustini company, is something I will consider. This model has been created together with staff of the Swedish Museum to provide the most accurate kit ever. The kit is in subscription format of a total of 36 "issues", each running at SEK 49.00 plus SEK 49.00 for shipping, this only applies for Sweden. I will make an attempt to get in contact with them for information regarding international shipping, if possible.