
HOLIDAY DONATION DRIVE - SUPPORT MSW - DO YOUR PART TO KEEP THIS GREAT FORUM GOING! (89 donations so far out of 49,000 members - C'mon guys!)
×


AON
-
Posts
2,867 -
Joined
-
Last visited
Content Type
Profiles
Forums
Gallery
Events
Everything posted by AON
-
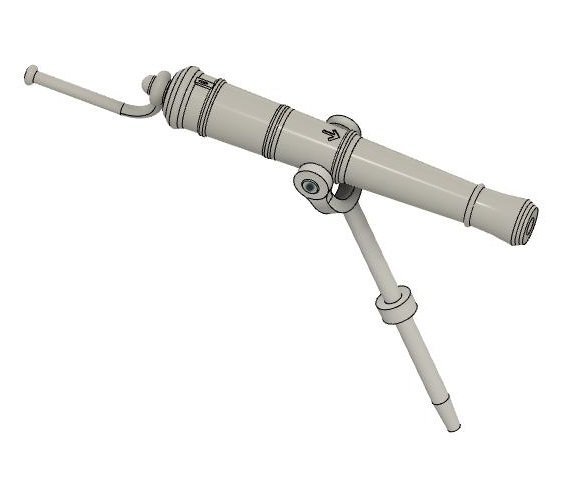
 I completed my mast calculations and came to the conclusion that, once again, Mr. Steel and his rules do not agree with his plates of tables and scaled diagrams. Knowing no one will be taking a measuring rule to my build the yard will likely be applying the "good enough" rule. PDFs of my calculations and a summary spreadsheet are attached for those interested. My mast, trees and tops drawings are in progress and will be posted later. AND... one of our local club members agreed to 3D Resin print my swivel guns from my model! (fingers crossed that they turn out wonderfully) Hope everyone had a safe Christmas holiday.... and have a safe New Years celebration. mast dims summary - spreadsheet.pdf Lower Mast Calculation.pdf
 -
As I am staining the leaves for the Library display I cannot afford to stir up any sawdust from my shop so I decided to go back to my computer and work on my made fore and mizzen masts.... but before I start that I modelled my 1/2 pound (1-1/2" bore) swivel gun for my fore and main tops (platform). Originally I saw these as 16 inches long but that was from one reference, a Battlefield 18th century swivel gun manual printed in 2016. Lewis and Clark had a 1-3/4" bore 22" long barrel swivel gun in 1804. It's just that everyone I talk to suggests naval guns we scaled down in size so my 1/2 pdr would be 27 to 30 inches long following that train of thought. At 1:64 scale that makes it just under a 1/2" long! Now to see if they can be resin printed as my other cannons were done.
-
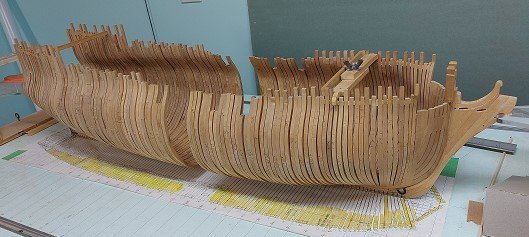
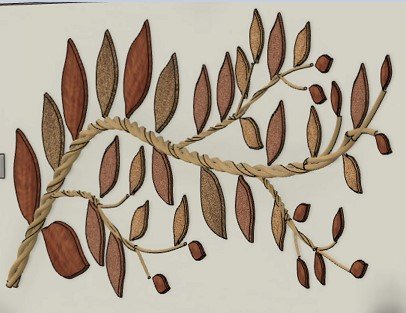
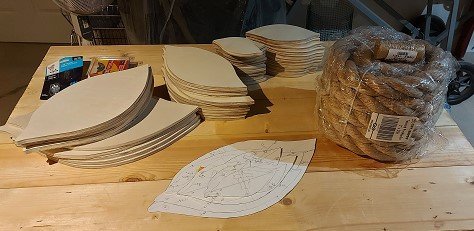
Year end update? My build progress to date: Only a few frames to go. If you've been following you know I've also worked on the figurehead, bowsprit, jib boom and associated yards, the rudder and the main mast and tree. But I am again distracted. I volunteered my time to make a donor wall display for our local library. They wanted something like this. But I proposed this. And I am presently sanding the leaves (yuk). The edges have been bevelled (45°). They will be stained (3 different stains for variety) and sealed. I made card stock templates to locate the hangers so they each dangle at their proper angle. 2" synthetic manila rope for the main branch, 1" for the off shoots to be spliced in. 2 ounce waxed whipping will be used for the sailmaker's whipping to finish the one base end and common whipping for everything else to keep things tiddly!

-
Really enjoyed watching you win that battle! Jazz... I couldn't help but focus on the birds in the background. It is -3°C here in the Niagara Falls area (-35°C a bit northwest of us - Thunderbay, Ontario, Canada) All our birds are hunkered down waiting for the sun to pop out.
-
It's like building an igloo (with dirty snow)!
-
Good afternoon "Flyer". I am very interested in following and understanding your rigging of this ship. I appreciate your comment about the Preventer Stay rigging changing in 1793. This will be very helpful to me. I presently have one question: what do you mean by the statement of "The futtock shrouds have a strength of 1 mm"? Did you mean diameter?
- 366 replies
-
- 1
-

-
- bellerophon
- victory models
- (and 2 more)
-
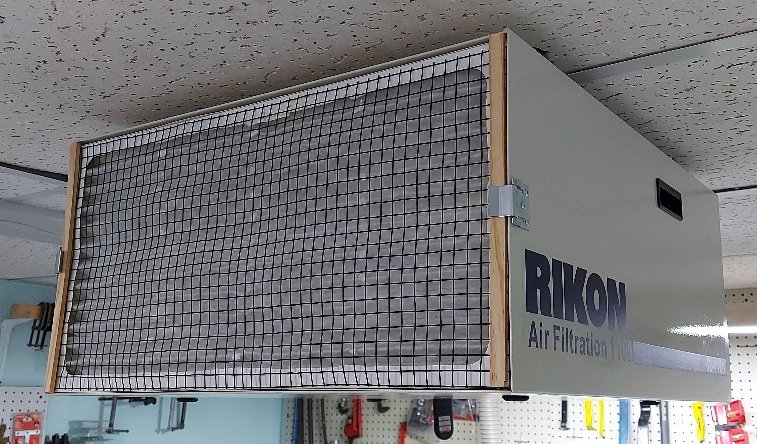
I don't like to waste money replacing perfectly good filters. But the design of these pleated filters with crossing cardboard retainers makes it difficult to vacuum the filter clean even with a crevice tool. So I modified it. Removing the cardboard cross pieces and replacing with a removable thin wire screen (to assure the pleated filter doesn't fall out) increased the open area by 19% (increasing filter efficiency) and makes access for cleaning much easier. Quite an improvement if I do say so myself.
-
Mark, I have been faithfully following since 2019. It will be a shame to not see her completed but that does not compare to the news of your health. It is indeed terrible news, and I pray you continue find the strength to stare that bastard down and fight on. Alan
-
McMaster-Carr https://www.mcmaster.com/number-drill-bits/
-
תודה על המילים החמות. אני מוצא את הפורום הזה מאוד מועיל. כל החברים מאוד נותנים! .Thank you for the kind words! I find this forum to be very helpful. All members are very giving!
-
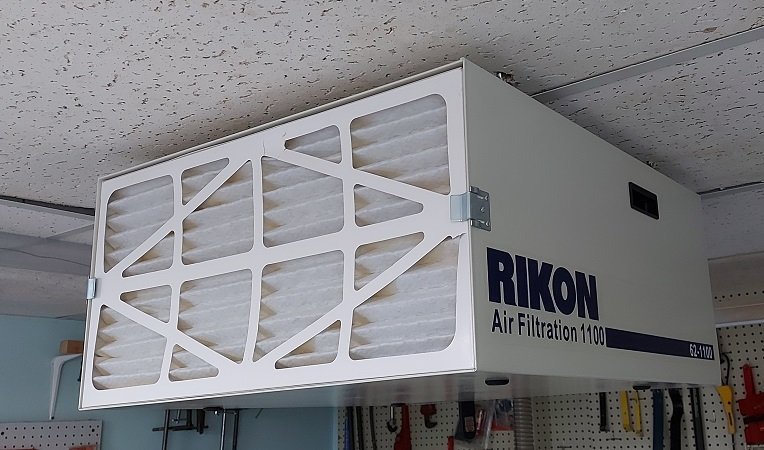
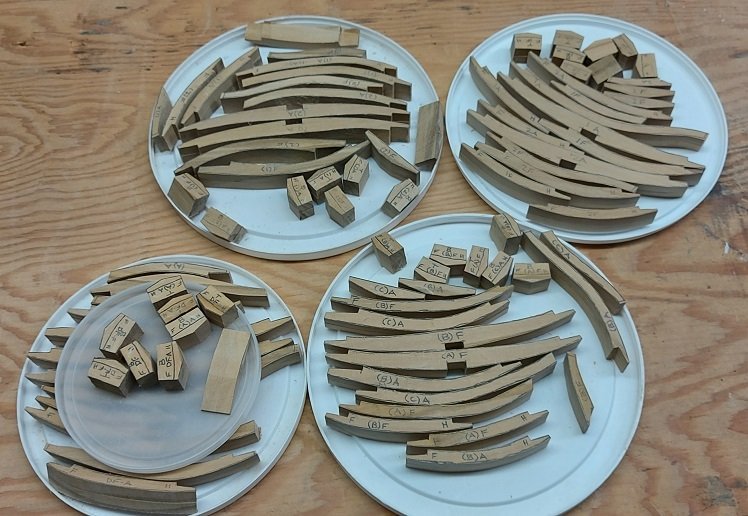
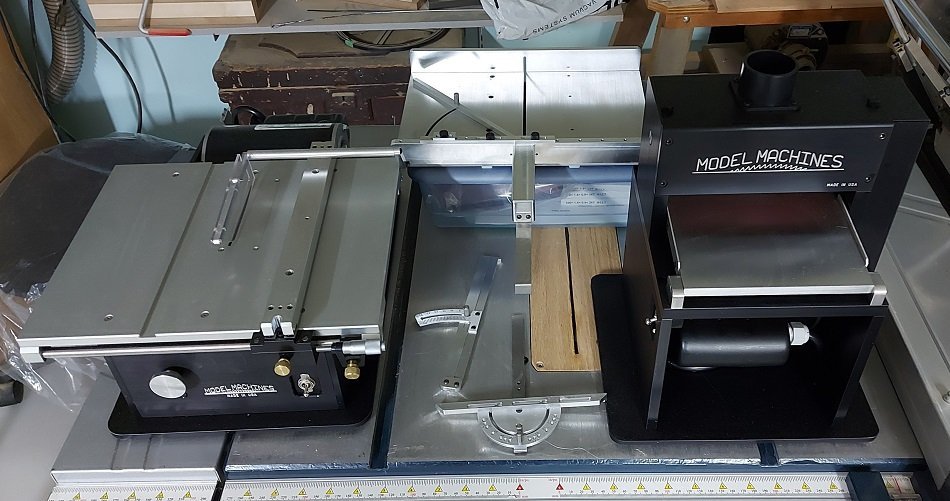
Just finished cutting the last of the square frame pieces moments ago. Now to fit, and assemble, and install, and move on to .... sanding. Also got a few new items for the shop. The ceiling mounted air filtration unit has be up for a couple days and it has caught quite a bit of the mess that use to migrated throughout my basement (and probably the whole darned house). The thickness sander, table saw and accessories came in early last week. They haven't been used yet, but very soon! The fees getting them across the boarder were outrageous... more than half the costs were Canadian taxes!
-
Archaeology of a 19th century Great Lakes shipyard
AON replied to JKC27's topic in Nautical/Naval History
Practically in my back yard. The site is next to the fire fighters training centre and the old sea cadet hall. -
Cheers from Port Hope, Ontario, Canada
AON replied to Peter Rumgay's topic in New member Introductions
Welcome to MSW Peter. If you're looking for a monthly live connection with other modellers there is the Model Shipwrights of Niagara (Niagara Region) presently conducting Zoom meetings. Next one is being held on Nov 21, at 1:30 PM. -
Welcome to MSW Paul. I understand there is a great modelling club in the Hamilton area (Confederation Marine Modellers) and then ours down in the Niagara Region (Model Shipwrights of Niagara) if your looking for a monthly connection!
-
Welcome to MSW from near Niagara Falls, Ontario, Canada. We were all new once.... and some of us still don't know what we are doing! (that would be me more than half the time)
-
Derek Let me know how the clean up goes on the PLA as my experience was it was difficult to sand or file. A flat blade on the soldering iron helped a bit but your supposed to use wet sand paper on it... and a good dose of elbow grease. 😉
-
What material is this?
-
Try a black permanent marker. Check that it doesn't rub off with your finger.
-
I've found that LOS does not seem to react with brass. Bill wrote that it takes a long time. If so it takes much longer than I am willing to wait. It works extremely well with copper.
-
Taper p/s means port and starboard to me but if it were tapered wouldn't it be symetrical?
-
Very impressive work Derek. Can't wait for the day I can come over and see it, or we get back to club face to face meetings and your bring it in to show! The one schooner I rigged (my first and only involved rigging to date) was quite relaxing work.... although I found the ratlines to become a bit tedious after a short while.
-
Sorry to read your tragic story. I am assuming you didn't get hurt... or the shock of the damage to your saw has hidden any aches or pains you'll be feeling in the morning. Check for bruises.
-
I make a scrapper and scrape the rabbet groove in. I was told to use an old metal saw blade. Heat it cherry red with a torch to soften (anneal) it (quench in cold water), and then file the desired shape into it.

