Jump to content

Recommended Posts

Posted

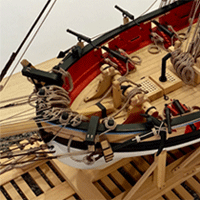
This is my first semi-scratch build and it is more like an experiment, which may possibly end in an epic fail. I bought a Caldercraft Badger and Granado kit from eBay (from a guy who probably gave up this hobby) some years ago for a reasonable price and the Badger had been already started but with some mistakes. I kept both kits in storage and did some easier builds instead. A friend of me had recently bought a simple CNC laser engraving machine (to cut ribs for RC-Planes) and I had the idea to build a bigger version of the Badger instead of fixing the already started kit. I also would like to add some extra details and make some changes to the hull and structure according to the NMM plans. There has been a discussion about this before to prepare that build.


I decided to enlarge the plans to 1/48 scale, redraw the bulkheads with Corel Draw to add a rabbit, redesigned the center plywood piece as two parts instead of one (because the machine’s working area is restricted to 30cm x 40cm) and create dxf-files to let him cut the parts. After some trial parts he was able to cut all the bulkheads, the false keel, plywood deck and gun pattern for me. Although the engraving machine was not designed to cut 5mm plywood, the parts are usable. So I started to build a 1:48 version of the Badger, which will be approximately 80 cm long and 70 cm high. I will mainly use the supplied Caldercraft plans but enhance the build with the NMM plans that I will also use for reference. 


The Badger is a small brig (former US merchant vessel Defence) that allows me to do some custom work and will be a nice addition to the AVS as both ships have a lot of similarities and are build in same scale. Also it allows me to stay with 1/48 scale some more time. I made a start already, building a rack to put the model on during construction, gluing all bulkheads together and adding some balsa fillers to give the first planking more gluing surface. Bevelled all bulkheads,  sanded the filler blocks to shape and already prepared the 1,5mm x 5mm basswood strips for the first planking. 
 

6EC64856-6B9D-4432-92AC-7383E6F8EF43.jpeg


4A8169CF-370C-4B45-9867-29A2F54C51EF.jpeg
097825A4-0F88-43FE-B2D6-AC51E950146D.jpeg

07C1CC1F-7D5E-4CE2-8174-444FF6AAB541.jpeg

3A0D0E99-F821-496E-9A4C-5551BDE2CE4F.jpeg


Current Build:

HM Brig Badger 1/48 from Caldercraft plans

Le Coureur 1/48 by CAF


Completed Build:

Armed Virginia Sloop 1/48 by Model Shipways / Gallery
HM Cutter Sherbourne 1/64 by Caldercraft / Gallery

Posted

I built the Caldercraft kit a few years ago and enjoyed it.  It's a nice subject, good luck!

Mike


Current Wooden builds:  Amati/Victory Pegasus  MS Charles W. Morgan  Euromodel La Renommèe  


Plastic builds:    Hs129B-2 1/48  SB2U-1 Vindicator 1/48  Five Star Yaeyama 1/700  Pit Road Asashio and Akashi 1/700 diorama  Walrus 1/48 and Albatross 1/700  Special Hobby Buffalo 1/32   IJN Notoro 1/700  Akitsu Maru 1/700


Completed builds :  Caldercraft Brig Badger   Amati Hannah - Ship in Bottle  Pit Road Hatsuzakura 1/700   Hasegawa Shimakaze 1:350

F4B-4 and P-6E 1/72  Accurate Miniatures F3F-1/F3F-2 1/48  Tamiya F4F-4 Wildcat built as FM-1 1/48  Special Hobby Buffalo 1/48  Eduard Sikorsky JRS-1 1/72

Citroen 2CV 1/24 - Airfix and Tamiya  Entex Morgan 3-wheeler 1/16


Terminated build:  HMS Lyme (based on Corel Unicorn)  


On the shelf:  Euromodel Friedrich Wilhelm zu Pferde; Caldercraft Victory; too many plastic ship, plane and car kits


Future potential scratch builds:  HMS Lyme (from NMM plans); Le Gros Ventre (from Ancre monographs), Dutch ship from Ab Hoving book, HMS Sussex from McCardle book, Philadelphia gunboat (Smithsonian plans)

Posted

I'm pulling up my chair now Captain, this will be interesting and fun.

Current builds;

 Henry Ramey Upcher 1:25 - on hold

 HMS Winchelsea 1764 1:48 

Completed:

HM Cutter Sherbourne- 1:64 - FINISHED   Triton cross section scratch- 1:60 - FINISHED

Providence whaleboat- 1:25 - FINISHED


Non ship:  SBD-3 Dauntless 1:48 Hasegawa -FINISHED


Posted

Thank you guys. The gunport-pattern has been installed, it is slightly smaller that the one on the plan. Now I‘m ready for first planking which will be done with 1,5 mm x 5 mm basswood strips. Now the shape of the hull can already be imagined...

4A0E660F-E6E1-4FD1-8838-9FE1A18B4256.jpeg

0C224831-F8B5-4E68-9C20-9FC6B46E49FB.jpeg

1F250EAA-3C01-489B-8F34-F4D6D1A9AAB5.jpeg

8699B66E-F4AB-4C52-842C-3B584C33A5CE.jpeg

DB7381BA-970F-46C3-9DE6-B6F4C5C90475.jpeg

Current Build:

HM Brig Badger 1/48 from Caldercraft plans

Le Coureur 1/48 by CAF


Completed Build:

Armed Virginia Sloop 1/48 by Model Shipways / Gallery
HM Cutter Sherbourne 1/64 by Caldercraft / Gallery

Posted

Do you mind if I ask, did you have the gunport pattern made or did you cut it yourself?

It is taking shape, looking good

Current builds;

 Henry Ramey Upcher 1:25 - on hold

 HMS Winchelsea 1764 1:48 

Completed:

HM Cutter Sherbourne- 1:64 - FINISHED   Triton cross section scratch- 1:60 - FINISHED

Providence whaleboat- 1:25 - FINISHED


Non ship:  SBD-3 Dauntless 1:48 Hasegawa -FINISHED


Posted

The bulkheads, false keel, deck and gunport pattern are all laser-cut to build the basic structure and to avoid as many errors as possible, which can't be corrected later. From that on it will be mostly scratch-building.  

Current Build:

HM Brig Badger 1/48 from Caldercraft plans

Le Coureur 1/48 by CAF


Completed Build:

Armed Virginia Sloop 1/48 by Model Shipways / Gallery
HM Cutter Sherbourne 1/64 by Caldercraft / Gallery

Posted

Only small progress. First planking has begun. But I have holiday for the next three weeks so next days I will be busy in my workshop..

332DA857-379B-4AAD-A187-FEBC0CFDFBC6.jpeg

DE6EE0FE-55D4-45CA-B5D9-955BCDB9FC7F.jpeg

D85FE7F9-FDA4-4471-AA62-2192282DA5C3.jpeg

856FB663-CB74-4938-9AEE-7E880A642525.jpeg

Current Build:

HM Brig Badger 1/48 from Caldercraft plans

Le Coureur 1/48 by CAF


Completed Build:

Armed Virginia Sloop 1/48 by Model Shipways / Gallery
HM Cutter Sherbourne 1/64 by Caldercraft / Gallery

Posted

Installed the subdeck, not glued yet. It is planked with 3/16‘‘ boxwood stripes. I think about adding some fake walls to cover the sides of the bulkhead and the filler blocks but they won‘t probably be visible through the hatch. Maybe I will just paint that black before the false deck is attached. I will also skip the treenails on the subdeck because they won‘t be seen there too.

0B584A18-51F3-4E9E-BE95-3ECB65CDC18F.jpeg

9304B725-726E-4C5B-B51E-0A9065F7D929.jpeg

Current Build:

HM Brig Badger 1/48 from Caldercraft plans

Le Coureur 1/48 by CAF


Completed Build:

Armed Virginia Sloop 1/48 by Model Shipways / Gallery
HM Cutter Sherbourne 1/64 by Caldercraft / Gallery

Posted

Finished the first planking today. As my stock of basswood stripes depleted during the planking process I had to improvise a little, so the planks vary in colour and size. Already sanded the hull with 80 grit sandpaper. The 1,5mm basswood is thick enough to be sanded to shape without the need of using wood filler and I can glue the second planking directly onto the sanded hull with white glue. Will give it another sanding with finer paper and some tuning of the basswood later and add the rabbit.

4E7E5B78-E50C-43F9-84B8-968EDDE01177.jpeg

00415DC0-D67B-4DBC-8944-89A4C0FFD809.jpeg

E555F41A-5E55-4006-8064-E20F39EF5F3C.jpeg


EF847390-1584-4702-A1CC-A6A3BE129980.jpeg

5DE285FA-496B-4AC6-BF15-1203CDD76D89.jpeg

Current Build:

HM Brig Badger 1/48 from Caldercraft plans

Le Coureur 1/48 by CAF


Completed Build:

Armed Virginia Sloop 1/48 by Model Shipways / Gallery
HM Cutter Sherbourne 1/64 by Caldercraft / Gallery

Posted

Looking good. The Badger is an interesting vessel both historically and physically. I like your choice of 1/48 as it lets you add detail. Good luck with your build and I look forward to following your bujild.

Completed scratch build: The armed brig "Badger" 1777

Current scratch build: The 36 gun frigate "Unite" 1796

Completed kits: Mamoli "Alert", Caldercraft "Sherbourne"

Posted

Thank you mugje. After some final sanding the first planking is now complete. I glued some pre-bend basswood stripes inside the hull to strengthen the planking (although the basswood stripes are still solid) and to fix the gunport pattern in place as I’m going to remove the bulkhead extensions next to test fit the false deck. I will plank the inside before the outside to secure both bulkwards are of equal height and the guns will later center the gunports. But first I have to build all keel parts next. As the weather gets better every day - some outside shots this time.

96F59164-F899-4D45-A201-0A0CBAD1573F.jpeg

E3C2E661-59BA-4724-B6B8-E1AD639E9B06.jpeg

626F131A-44AE-479E-9860-8BE42E4D2ACD.jpeg

Current Build:

HM Brig Badger 1/48 from Caldercraft plans

Le Coureur 1/48 by CAF


Completed Build:

Armed Virginia Sloop 1/48 by Model Shipways / Gallery
HM Cutter Sherbourne 1/64 by Caldercraft / Gallery

  • 2 weeks later...
Posted

The use of gunport pattern might not have been the best idea. Should have planked that area with basswood stripes instead. As the plywood gunport pattern is more than 2 cm wide and 1,2mm thick it is not very flexible and the upper edge has the tendency to warp towards the outside at the bow when bend around the first two bulkheads. So I had to fill that area with small basswood stripes to compensate. These fillers are beveled so they are 1,5 mm at the top and almost as thin as a hair at the bottom. They are glued inside the plywood to strengthen the plywood and to form a new first planking so I can sand down the plywood without the risk of weakening the structure too much. So the bulkwards at the bow are now almost orthogonal to the deck. The bulkhead extensions have been removed and I reinforced the plywood with 1,2mm basswood stripes so it will hold its shape and to make the bulkwards a little stronger. Sanded them down to 0,8mm. Still have to sand down the outside bow areas.

05F0A823-1156-4309-9234-5D131AA9DA12.jpeg

B2289616-E110-4223-9729-36956DF3B99E.jpeg

2218C02B-BA58-40A0-A1C7-4ADEC0A4063C.jpeg

Current Build:

HM Brig Badger 1/48 from Caldercraft plans

Le Coureur 1/48 by CAF


Completed Build:

Armed Virginia Sloop 1/48 by Model Shipways / Gallery
HM Cutter Sherbourne 1/64 by Caldercraft / Gallery

Posted

Nice solution on bow and bulwarks. Looks good.


Completed scratch build: The armed brig "Badger" 1777

Current scratch build: The 36 gun frigate "Unite" 1796

Completed kits: Mamoli "Alert", Caldercraft "Sherbourne"

Posted

Thank you barkeater. I have sanded the bulkwards to shape at the bow. This project will be a challenge. The gunports are way off compared to the NMM plans so I will ignore the cutouts and cut new ones by hand. Have added the rabbit and drawn the keel parts with Corel Draw. Printed them on adhesive paper to cut them out of boxwood sheet later.

B68B90AB-BFF7-4FCB-9258-46ED0B27D96C.jpeg

E7B2C309-E91A-4B9D-90FE-25B89C97B4A6.jpeg

F862E593-ED26-4423-B72A-F36F306E20C6.jpeg

Current Build:

HM Brig Badger 1/48 from Caldercraft plans

Le Coureur 1/48 by CAF


Completed Build:

Armed Virginia Sloop 1/48 by Model Shipways / Gallery
HM Cutter Sherbourne 1/64 by Caldercraft / Gallery

Posted

Thank you for the nice comments and the likes. The original kit supplied a simple 2-part keel for the Badger as it is supposed to be painted later. The NMM-plan shows a more complex multi-piece keel and I’m going to prepare both options to choose the final one later and gain more experience for future builds. For the multi-piece solution I first printed all parts on adhesive paper and glued them on 7/32“ boxwood sheets. Then roughly cut the parts with a scroll-saw and sanded them to shape with a Proxxon disc sander.


DD3076DD-64A3-45CC-8155-65D614D0CF01.jpeg


The final sanding to snug fit was done with sanding blocks I made of different wooden blocks. The sanding paper is attached to the blocks with double-adhesive tape and the bottom of the blocks is sanded with the disc-sander so the attached sanding paper is orthogonal to the bottom of the blocks to secure no sloping will occur during sanding the keel parts.


70A22328-10BC-4DB5-A646-1F1AE652D3AA.jpeg


43034EF5-65F7-42B6-9EEE-C2737CBFE89B.jpeg


As the paper templates are still on I have to use some needles for a test fit. 


05D12021-F223-411A-B55E-5E07DE8E3373.jpeg


For the tarred joints I might try the paper method dvm27 explained pretty well in his Speedwell log. But before gluing all parts together I still have to find out how to taper the keel correctly. As this is my last day at home working in my workshop might slow down a bit during the next weeks.

Current Build:

HM Brig Badger 1/48 from Caldercraft plans

Le Coureur 1/48 by CAF


Completed Build:

Armed Virginia Sloop 1/48 by Model Shipways / Gallery
HM Cutter Sherbourne 1/64 by Caldercraft / Gallery

Posted

Thank you barkeater, I agree to that. I have finished all eight keel pieces and dry-fitted them. Got some 80 gsm and 120 gsm black acid free paper and I will try the simulated tarred joints on some scrap parts first.
 

Anyone has a suggestion how to taper the „knee of the head“? I have only seen that on some bigger ships before but these ships’s had a different shape. The Speedwell and the Fair American seem to have a similar KOTH, maybe I should use them for reference.

B8AB76D5-9D5B-46B8-B11F-D6C5ADE06E38.jpeg

F13A71EB-1BF3-4BF6-B406-169100AF89F7.jpeg

B77B708D-A25E-460E-A4A5-C36631FCB879.jpeg


Current Build:

HM Brig Badger 1/48 from Caldercraft plans

Le Coureur 1/48 by CAF


Completed Build:

Armed Virginia Sloop 1/48 by Model Shipways / Gallery
HM Cutter Sherbourne 1/64 by Caldercraft / Gallery

Posted

Sorry, I have no great suggestions on keel tapering other than sanding. On tarred joints I lightly run a black indelible marker along edges. You may want to try that on scrap. It is quick and I like the look. You do not have to cover the surfaces completelly if you do both of the two adjacent planks.

Completed scratch build: The armed brig "Badger" 1777

Current scratch build: The 36 gun frigate "Unite" 1796

Completed kits: Mamoli "Alert", Caldercraft "Sherbourne"

Posted

I made two test-joints with scrap. The one in the back is made with black paper (80 gsm), the one in the front is made with black single-sheet cellulose (maybe 30 gsm) I „borrought“ from my daughters desk. Both look very similar but the one in the front looks more discrete. Nitrocellulose-lacquer was used as varnish.


FBD06ADB-C23C-4BE6-B9C2-4E8F88407185.jpeg

Current Build:

HM Brig Badger 1/48 from Caldercraft plans

Le Coureur 1/48 by CAF


Completed Build:

Armed Virginia Sloop 1/48 by Model Shipways / Gallery
HM Cutter Sherbourne 1/64 by Caldercraft / Gallery

Posted

I find the version with the single-sheet cellulose more subtle ...

Always a real pleasure to follow the progress of this log !

Jean-Paul


'You are not carving a bear with a chain saw here folks',

Chuck Passaro, ´Queen Anne Style Barge´ manual of instructions


Current builds :


Finished build :


Next on list :

  • HMS Winchelsea 1764 - Syren Ship Model - 1:48
Posted

Thank you Jean-Paul. A lot of preparation, so there is not much to see yet. I will use the cellulose as it looks more subtile. I have to sand a little more and then glue all parts together and taper the assembly.

Current Build:

HM Brig Badger 1/48 from Caldercraft plans

Le Coureur 1/48 by CAF


Completed Build:

Armed Virginia Sloop 1/48 by Model Shipways / Gallery
HM Cutter Sherbourne 1/64 by Caldercraft / Gallery

  • 1 month later...
Posted

Some weeks have passed and I finally was able to spend more time in the workshop. For simulating tarred joints I first glued the paper on one of the two parts that are joined later. I use two different paper weights (80 gsm and 20 gsm) to simulate different strength of joints. As I haven’t found enough information about all keel parts and how it was build I finally decided to paint the hull white below the waterline so I only have to build the knee. It is exactly shown on the NMM plan. For the keel I will use a single part.


2DCB6F08-F3F7-4861-B2B2-98EB32AE5BA4.jpeg


Holes were drilled into the paper so the glue can penetrate the wood on the opposite parts.


95095C38-26B6-4B1F-84C6-5CC6011EE0B6.jpeg
 

Both parts were then glued together to form a joint.


1C246F5C-8839-4189-BAE5-7AFC73C96734.jpeg


Both sections were then glued together to form the knee. Another layer of paper was used to separate both sections.


945E0049-7040-4A97-8F79-4EE2BD6D47F4.jpeg


The keel was added at last.


F6DE6C3C-6773-42C9-8738-B4FA510959E0.jpeg


Dry-fit on the model. I still have to taper the knee and cut the gunports before the keel will be glued on. 
 

9BF97D8C-7BB7-4458-A34A-4F075A7D3F59.jpeg


Current Build:

HM Brig Badger 1/48 from Caldercraft plans

Le Coureur 1/48 by CAF


Completed Build:

Armed Virginia Sloop 1/48 by Model Shipways / Gallery
HM Cutter Sherbourne 1/64 by Caldercraft / Gallery

  • 2 weeks later...
Posted

Building time is limited these days so before I start more work on the hull I wanted to do a little side project, the ship‘s oven. As a reference I used a picture I found on MSW in another thread. It was rescaled to match the scale of the build.


00AB913E-045A-4A22-B404-ED625DE60EB6.png


The original kit supplied one is just a box made of britannia casting and the chimney is attached to it. I started with building the basic structure made of wood. The assembly is basically made of boxwood sheets with some brass parts attached to it with epoxy. 


CC52D367-D522-451D-8164-F6E561ED927F.jpeg
 

Then the brass parts were attached. Put the whole assembly in my electrical stove after attaching the parts to each side and heated it for 10 min. (100 C Celsius) to reduce the cure time of epoxy.


F8D2E296-25B1-4C24-A882-24038F1B957B.jpeg


Instead of an angular chimney I decided to use a rounded one to match the one in my plans.

23DD939D-F274-4263-8C74-63741FC6A890.jpeg


The whole assembly with all parts attached to it but without paint.


B68DAEA0-E905-40F4-8176-9E3AD0C8626E.jpeg


... and after painting it with oxid black acrylic. Will add some clear vanish just before final installation.


9F70B922-31E7-4E42-8FF6-5C0F01D3D8B1.jpeg


40C8B40E-CD30-4D46-8EBA-110D0AE0CEBC.jpeg


D70C3D92-E60E-4D44-A205-454445959731.jpeg


B539A401-07AF-449D-90A2-F66507DCCE88.jpeg


Current Build:

HM Brig Badger 1/48 from Caldercraft plans

Le Coureur 1/48 by CAF


Completed Build:

Armed Virginia Sloop 1/48 by Model Shipways / Gallery
HM Cutter Sherbourne 1/64 by Caldercraft / Gallery

Posted

Prepairing all fittings slowed me down during my last build but this time I have already prepaired them all. Now back to the hull. I glued all subdecks in place and then the false deck. 


021FF794-0934-4150-ACED-990CB42B50AB.jpeg


08D9DC09-9046-4C8C-AC9F-D0BEB1264D30.jpeg


FD55F493-D626-4C2C-8813-64D87727F1CA.jpeg


Current Build:

HM Brig Badger 1/48 from Caldercraft plans

Le Coureur 1/48 by CAF


Completed Build:

Armed Virginia Sloop 1/48 by Model Shipways / Gallery
HM Cutter Sherbourne 1/64 by Caldercraft / Gallery

Create an account or sign in to comment

You need to be a member in order to leave a comment

Create an account

Sign up for a new account in our community. It's easy!

Register a new account

Sign in

Already have an account? Sign in here.

Sign In Now
  • Recently Browsing   0 members

    • No registered users viewing this page.
×
×
  • Create New...