Search the Community
Showing results for tags 'model shipways'.
-
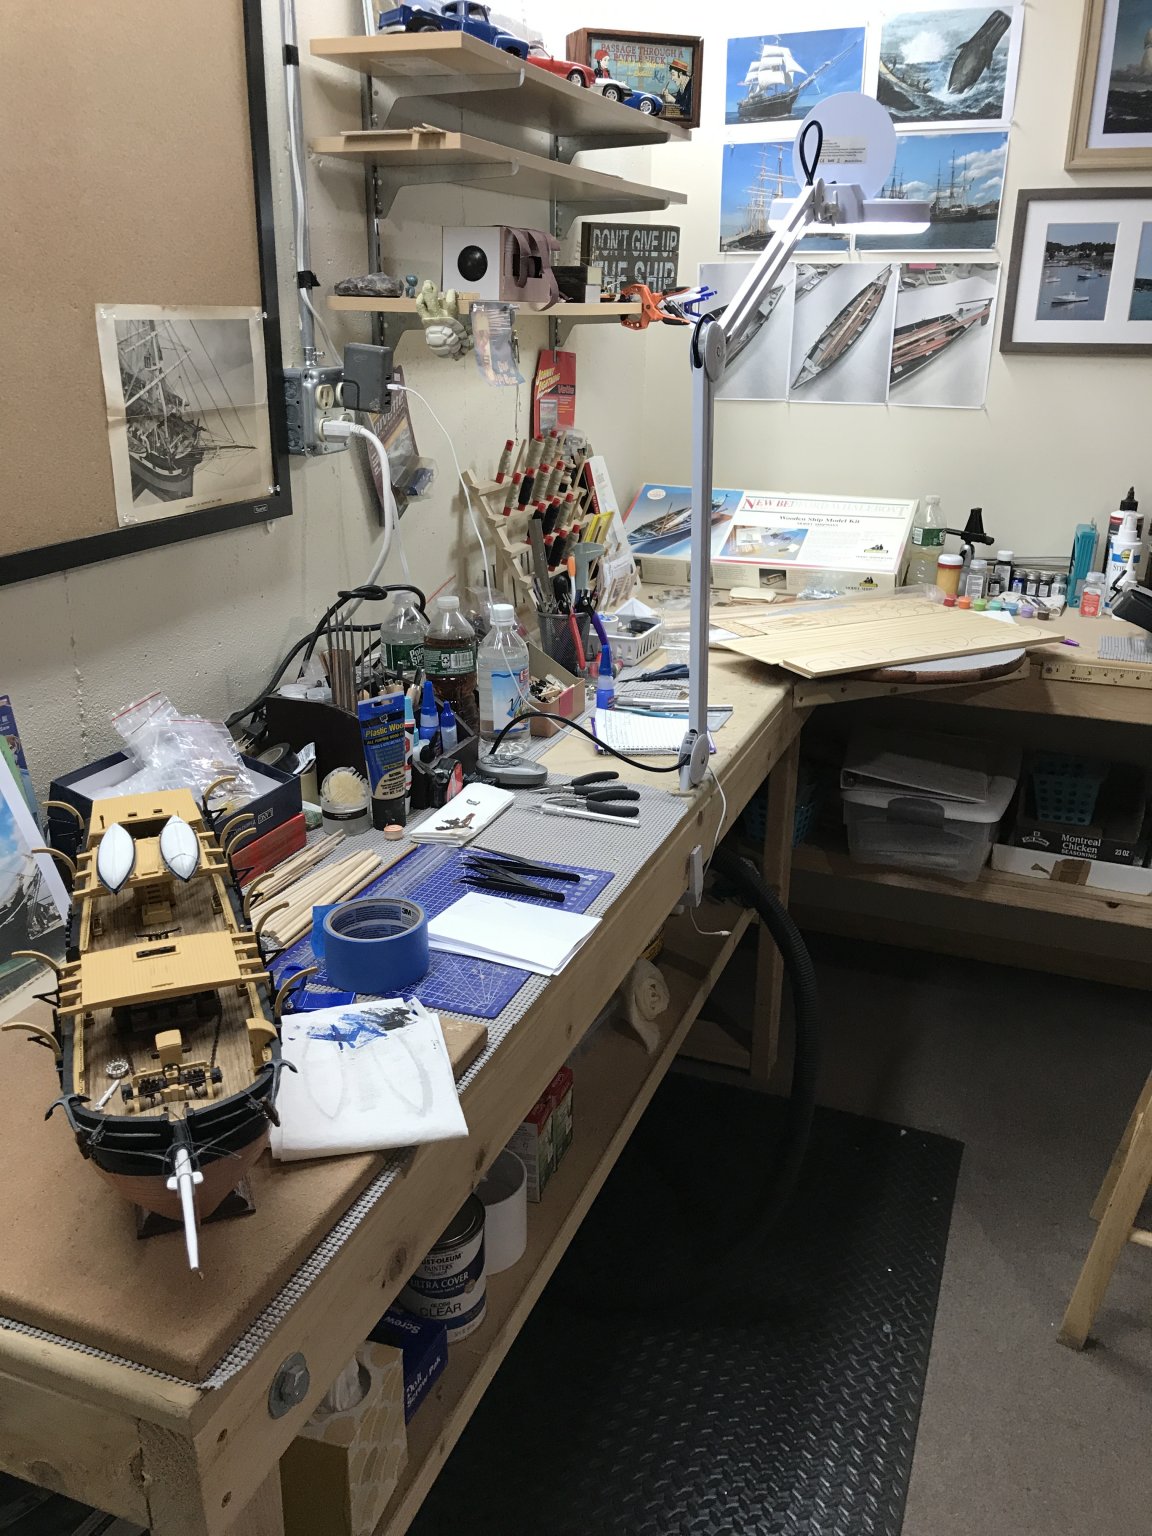
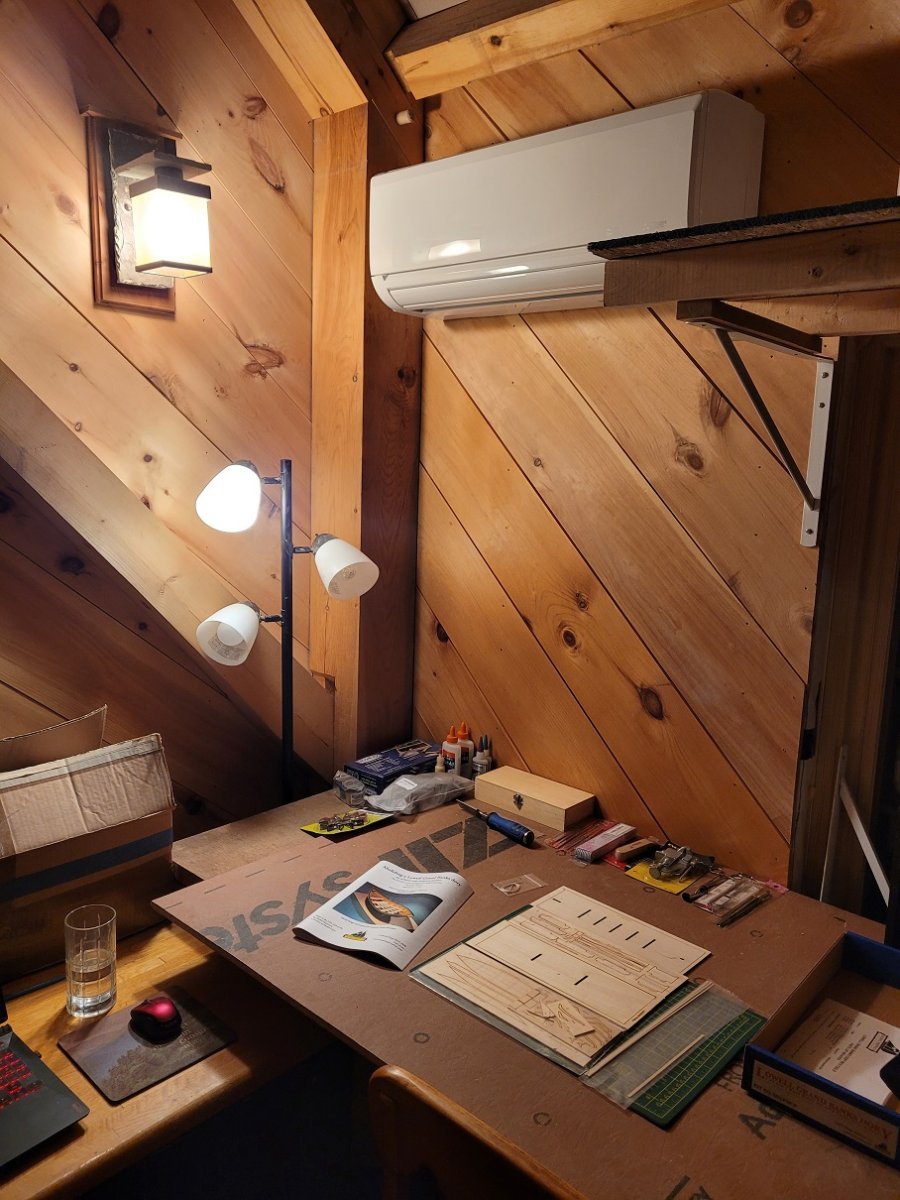
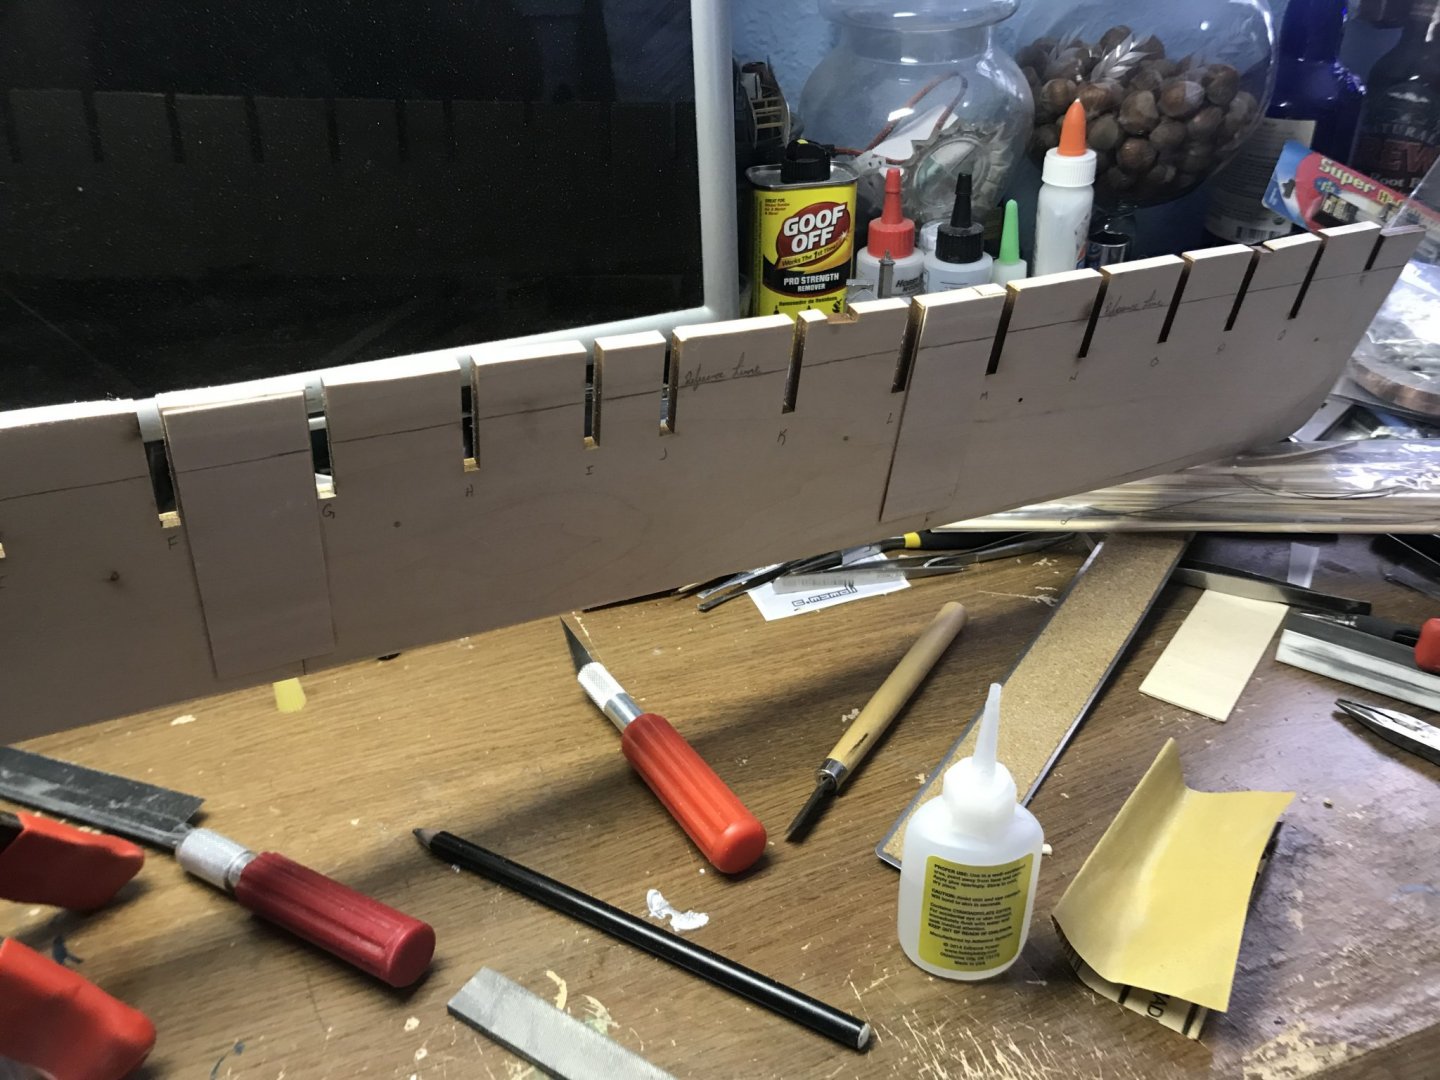
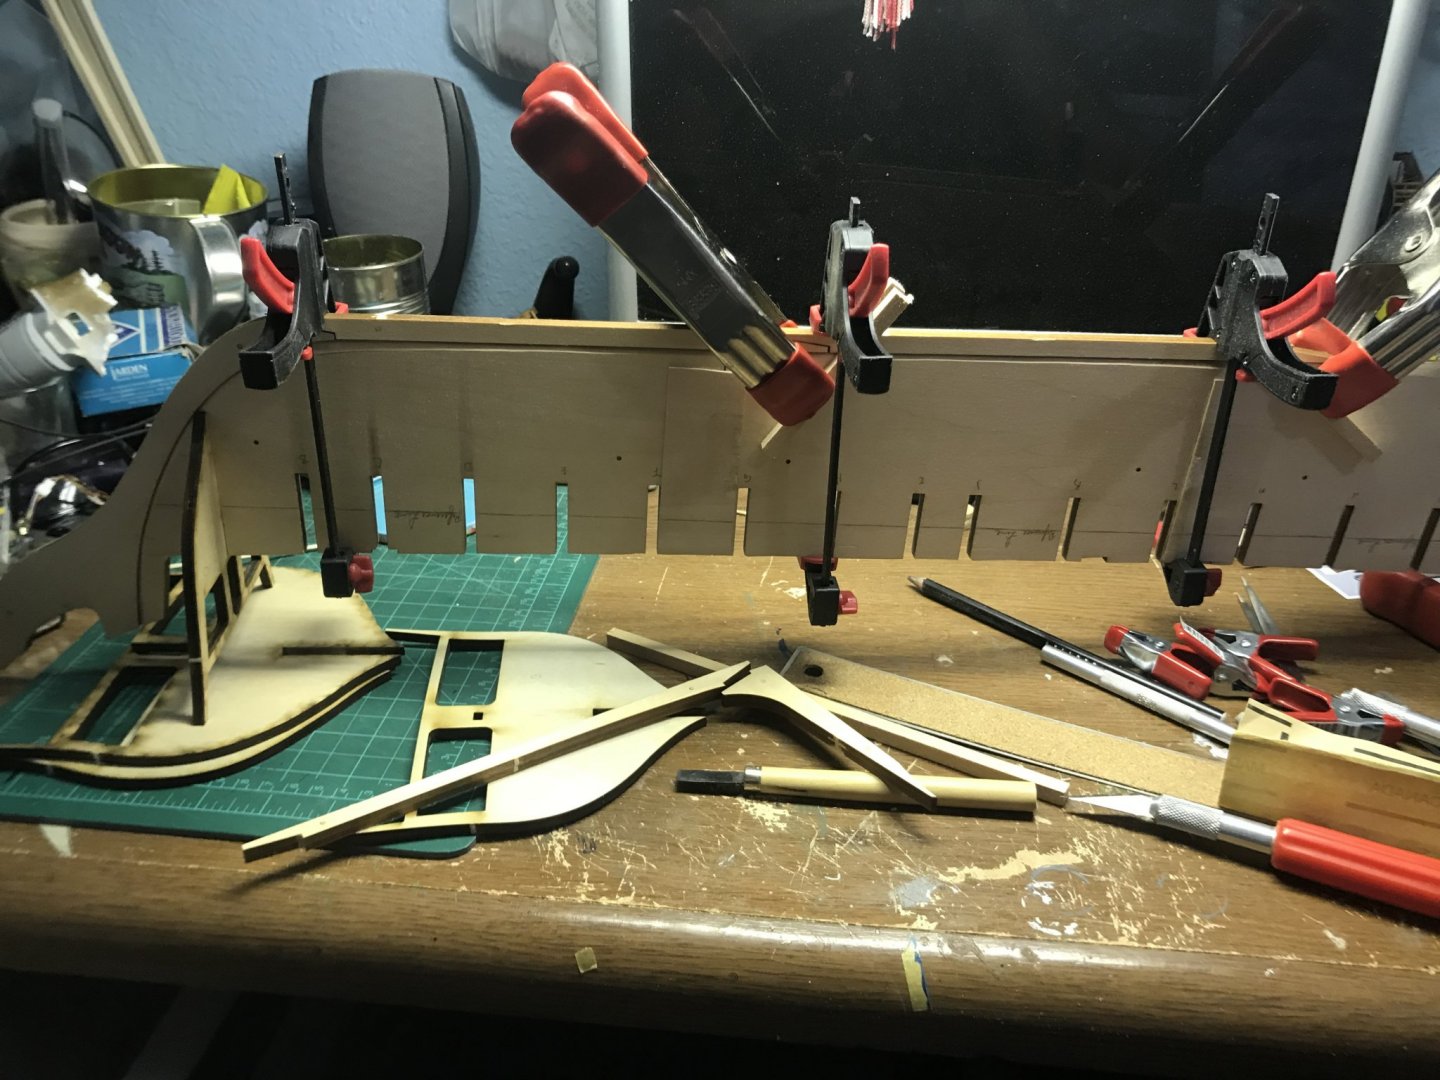
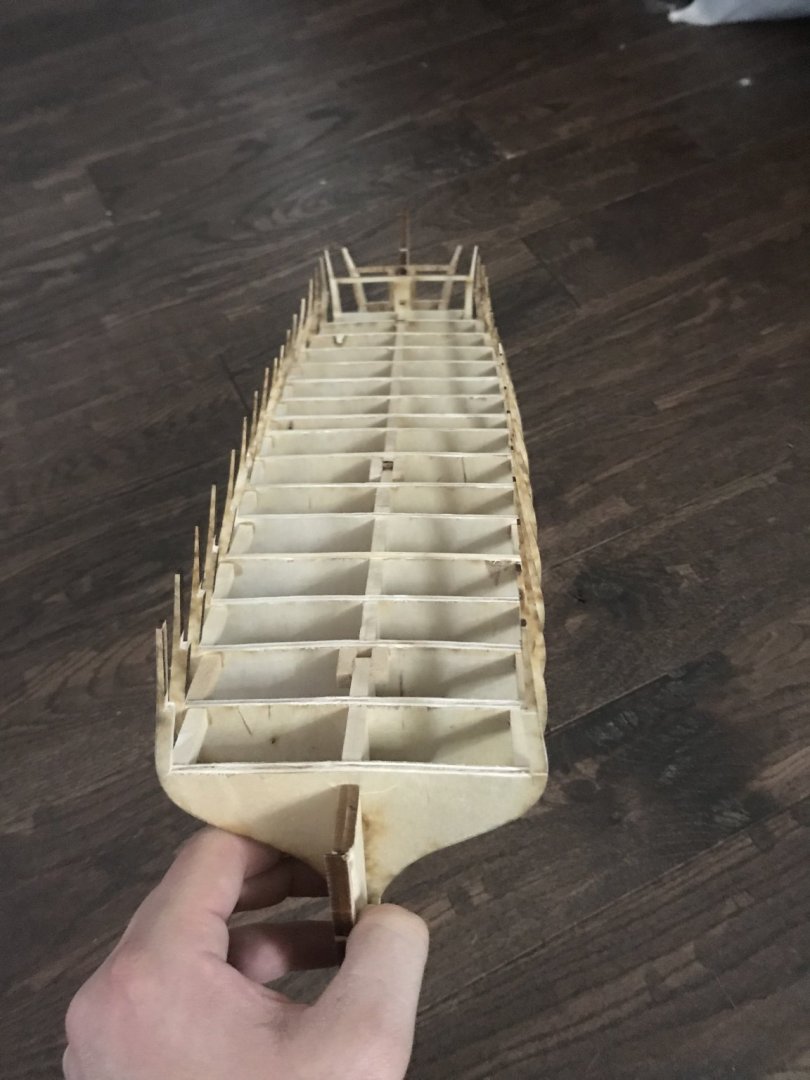
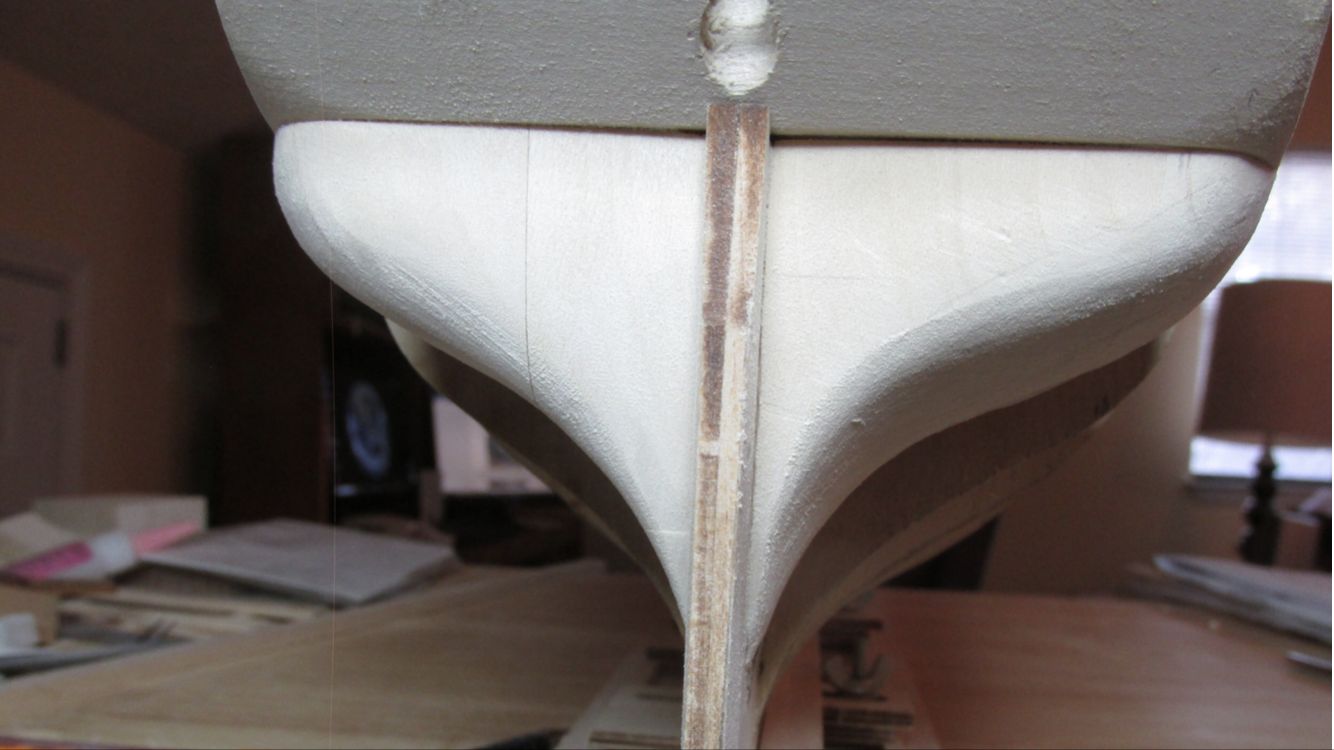
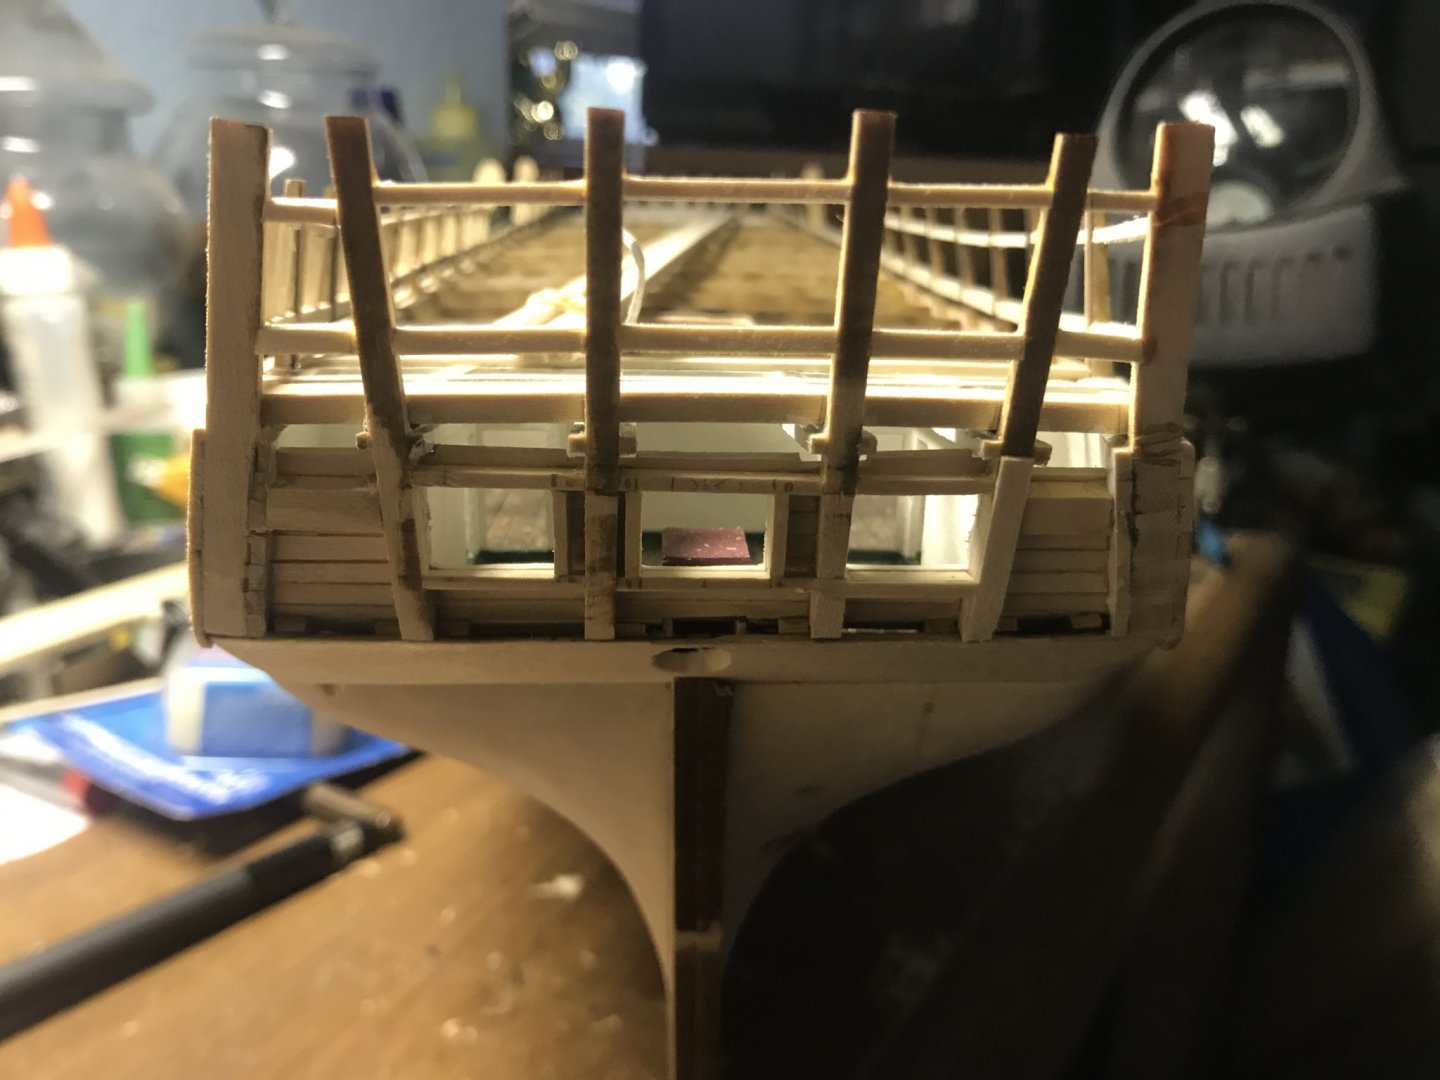
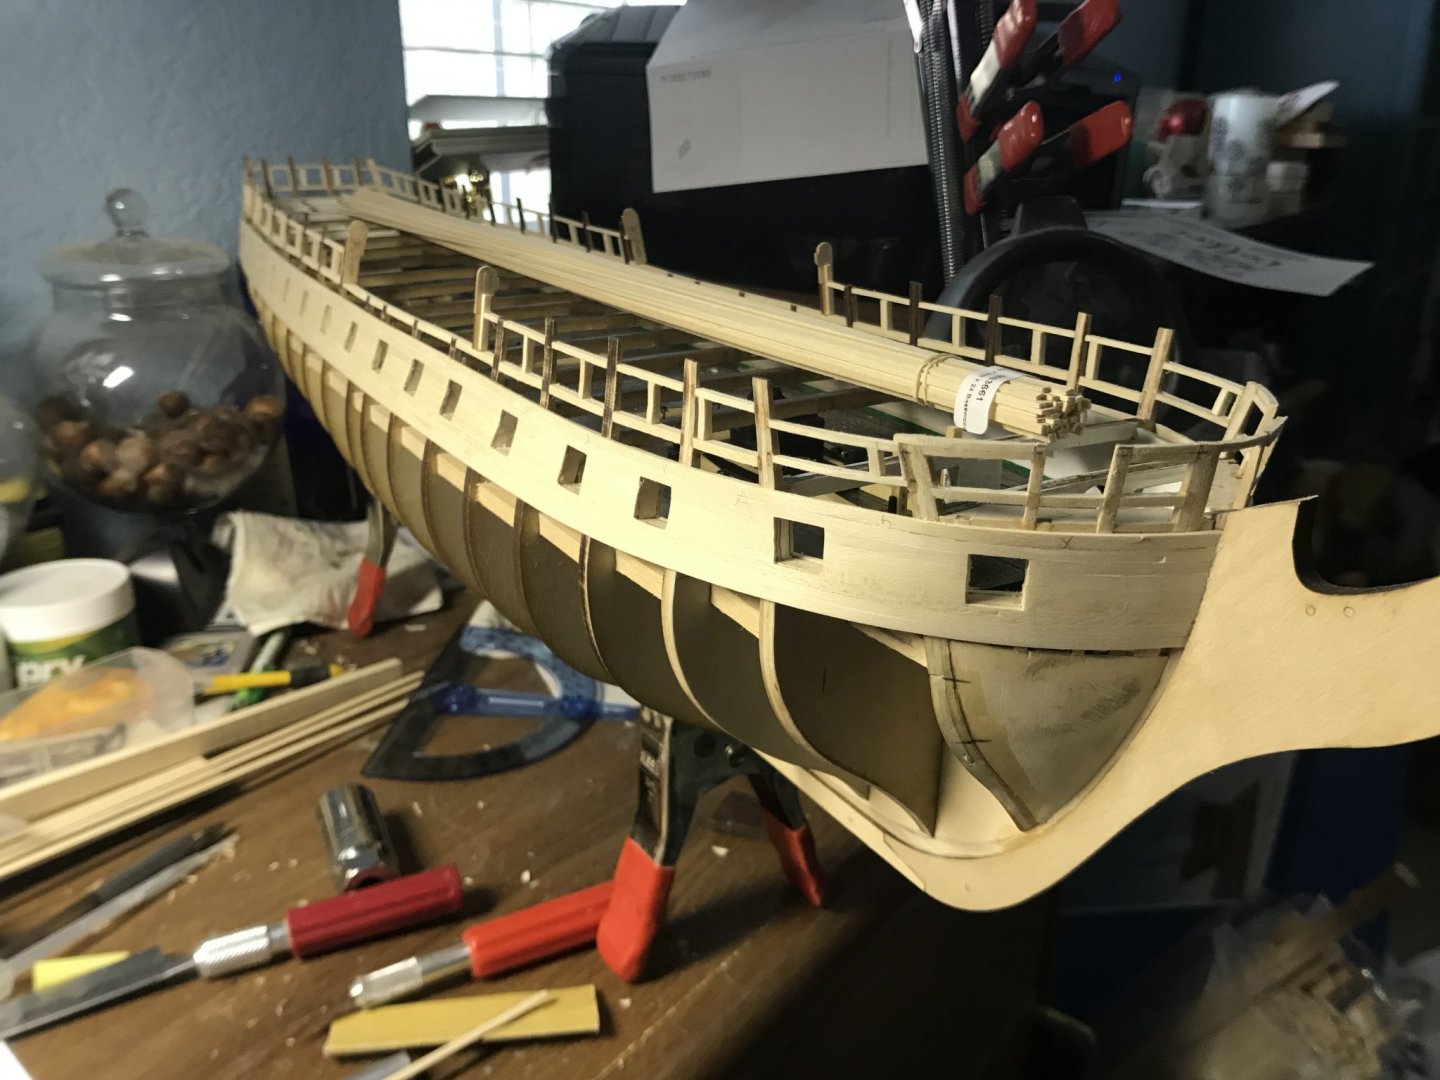
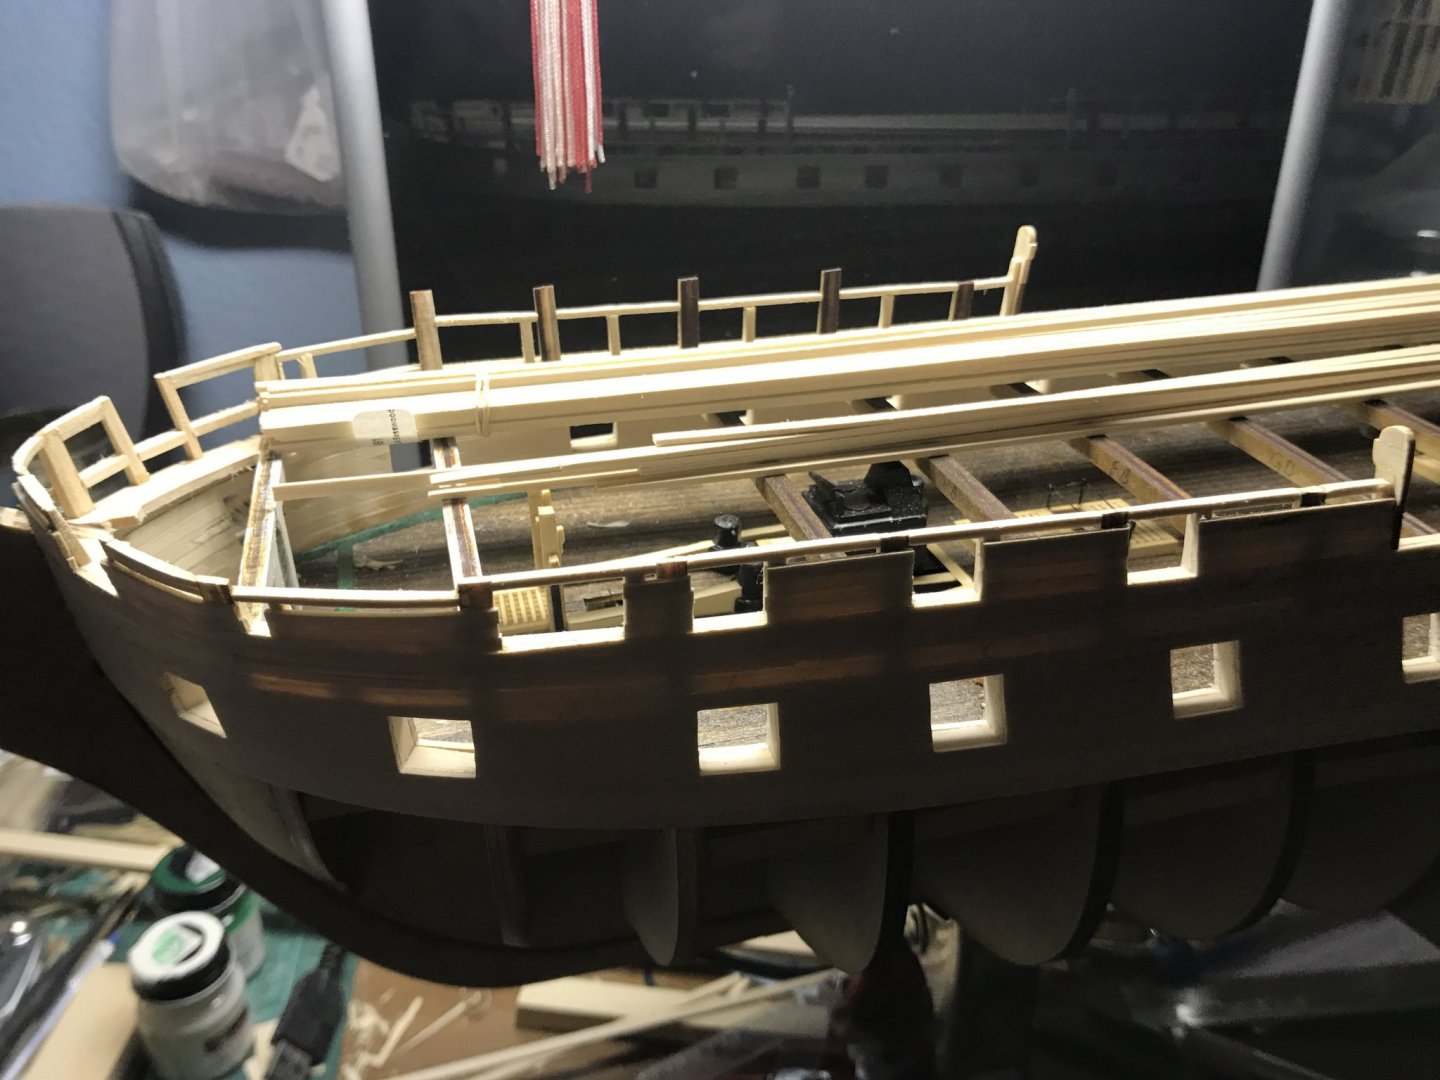
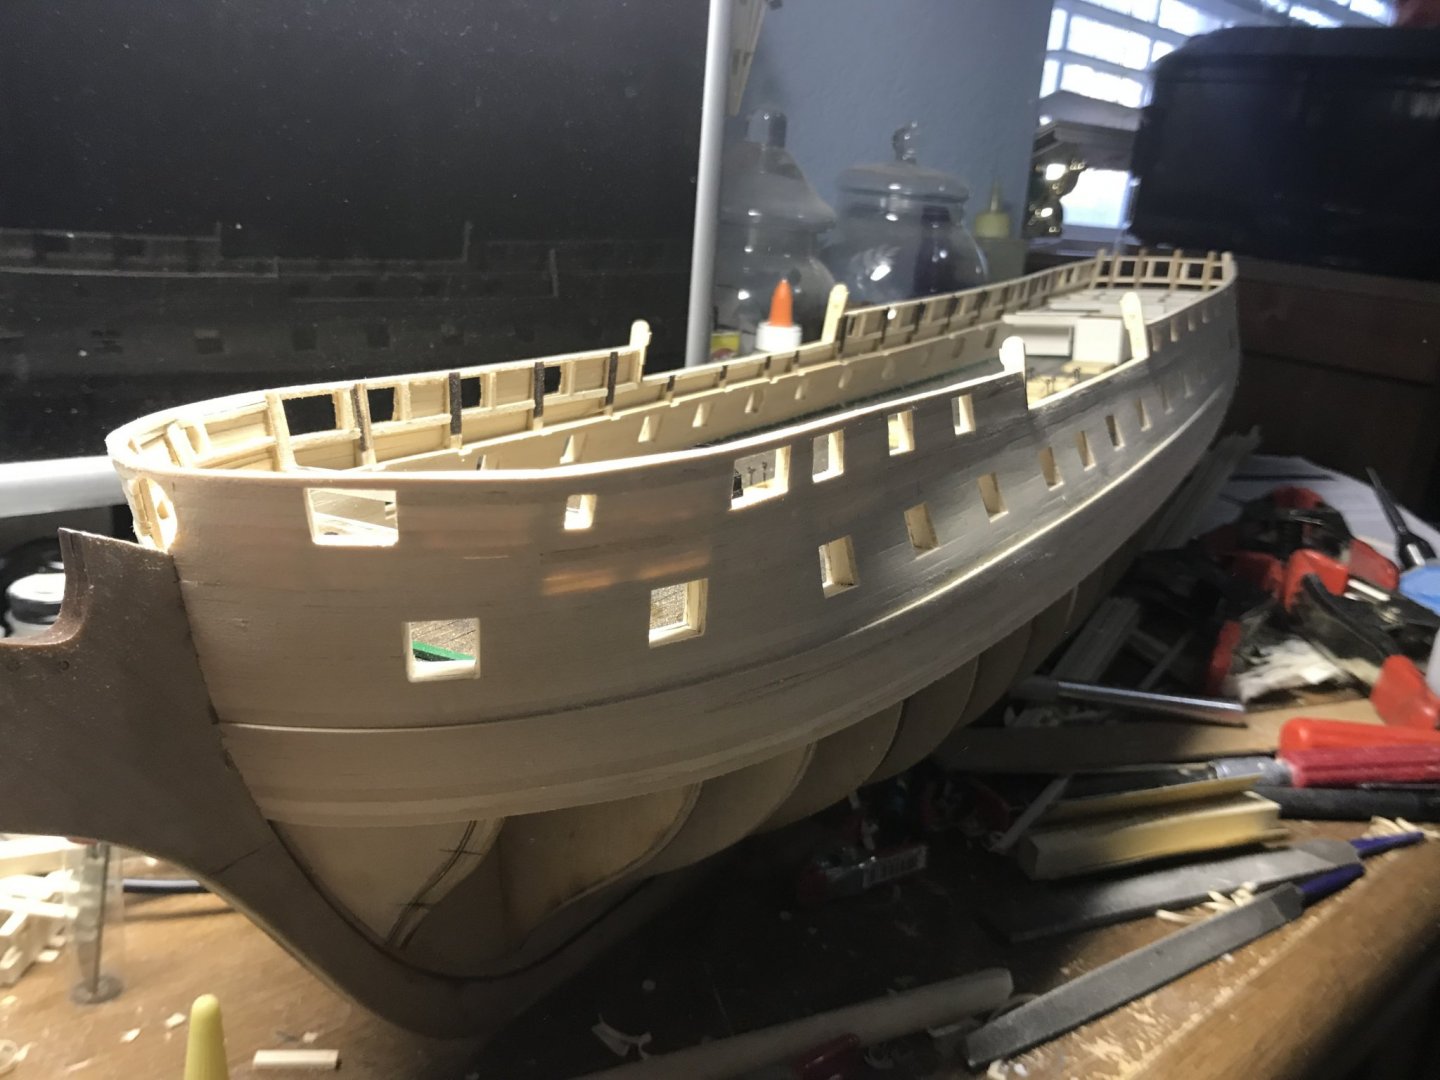
 Log entry No. 1 Well, I'm going to take the plunge and start a build log. I could probably name this build log after one of my favorite Dr. Suess books I had as a child; One fish, Two fish, Red fish, Blue fish. There are several Flying Fish builds on MSW, so why not one more. I started this Model Shipways build in 1998 when my kids were small and had grand ideas of building the Fish as a grand piece for my office. Despite working as carefully as I could, I got frustrated with all of the mistakes I was making and put it aside in 2000. This was not the first ship model I've built. I just made a lot of careless mistakes rushing the build. Reading through the Fixing Mistakes thread on MSW gave me the motivation to take on the Fish again. The first order of business will be to fix all of the mistakes I've made. Here's some of the mistakes I will need to fix: 1. Did not fair bulkheads 5 and 6 enough resulting in a kink in the planking rather than a smooth run. I will need to remove the planking I've done and fair the bulkheads properly. 2. Sanded the planks as I went before I attached the stem. This resulted in a misshapen bow and too thin planks. Need to repair and bow and properly fit the stem. 3. Broke bulkheads 1 through 3 in the forecastle. Need to properly trim the replacement bulkheads I made from scrap basswood. 4. Did not properly taper the planks and installed stealers when I didn't need to. I will be removing the incorrect planks and re-installing them. 5. Need to replace the stern part of the planksheer that I ineptly carved. 6. Cut the stern part of the keel off too short so that it doesn't extend below where the rudder will be installed. I work exclusively with hand tools. I do not use so much as a dremel or air brush. One of the reasons is that I like to work at night when it is quiet. I don't want to disturb the admiral with the noise of machinery. The second reason is that I love working with hand tools. Surprisingly, despite sitting in an unheated garage for 20+ years, the hull is still true with no twist. I'll be working slowly and methodically and will post progress periodically. Please wish me luck. Wawona59 (John)
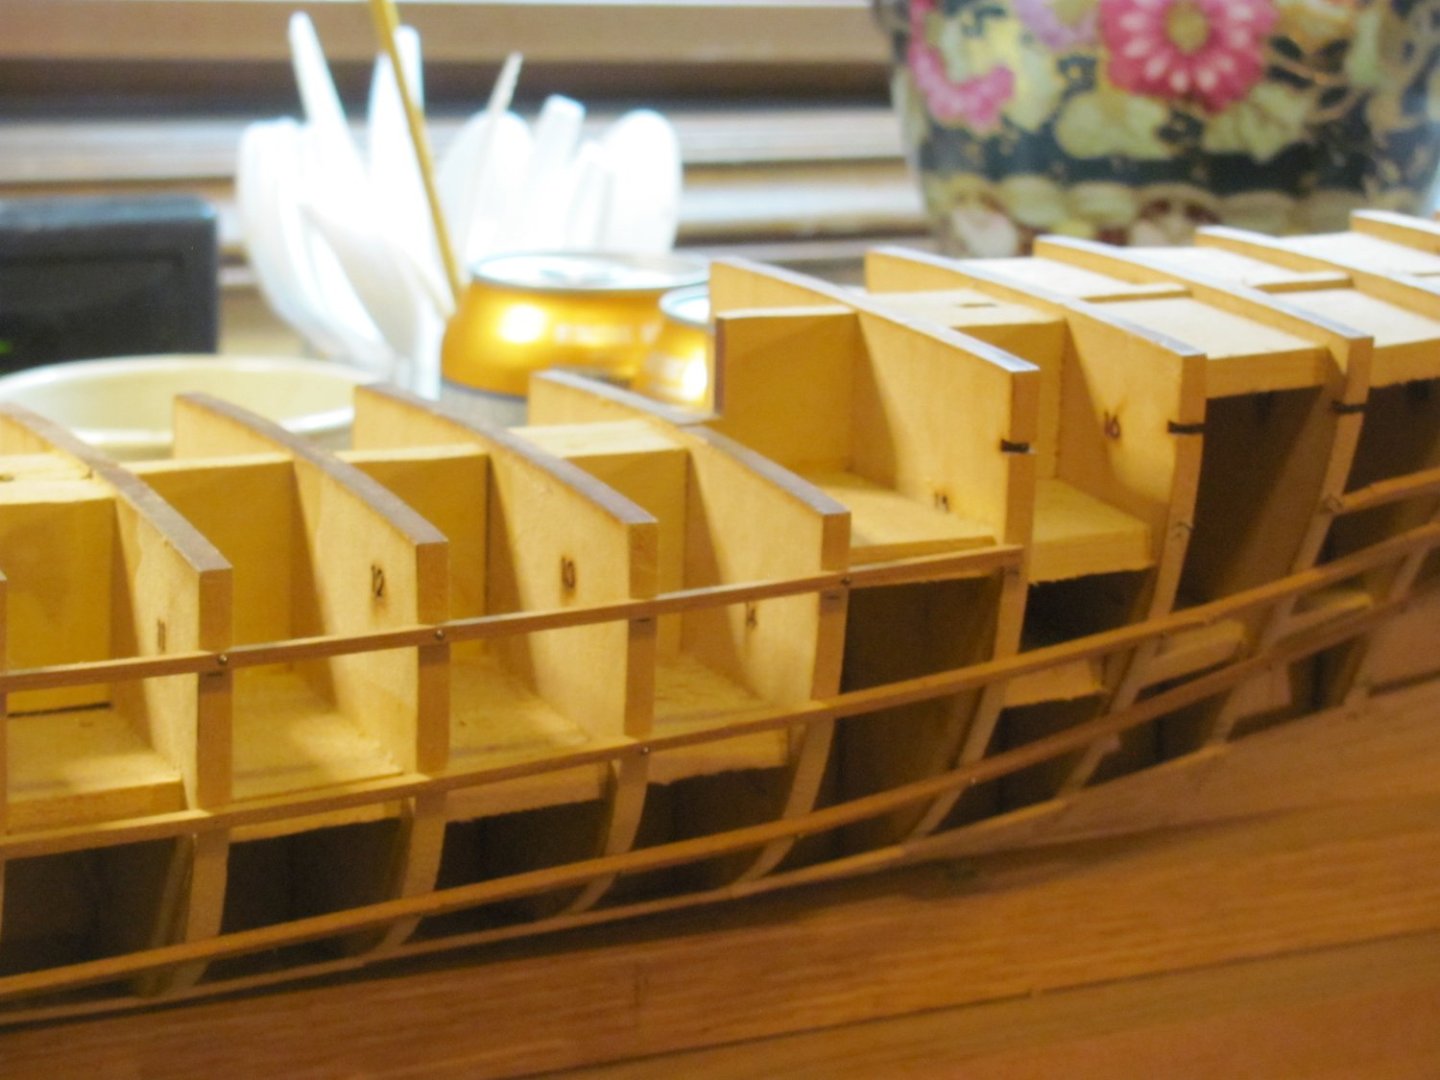


- 34 replies
-
- 3
-

-
- Flying Fish
- Model Shipways
- (and 1 more)
-
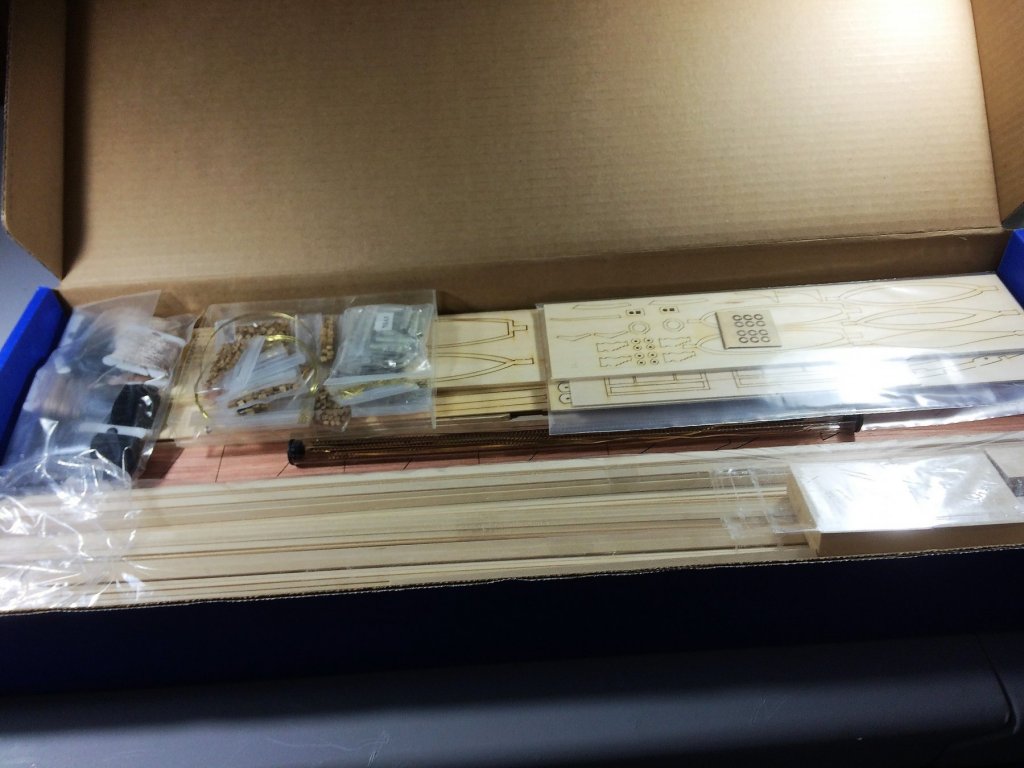
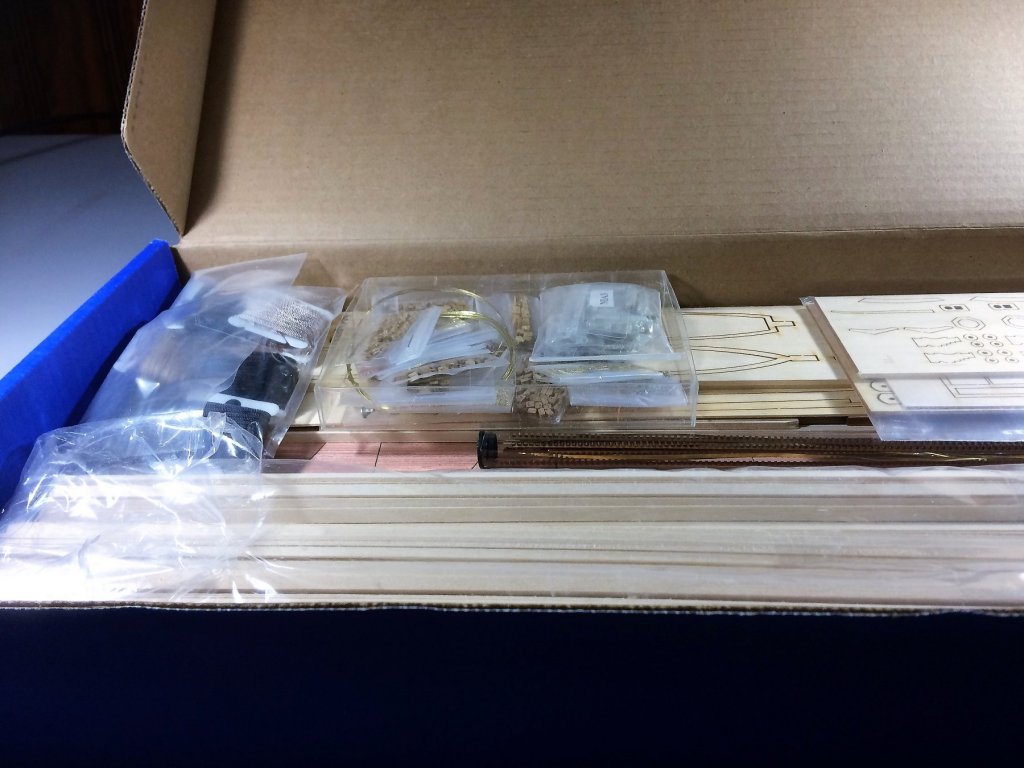
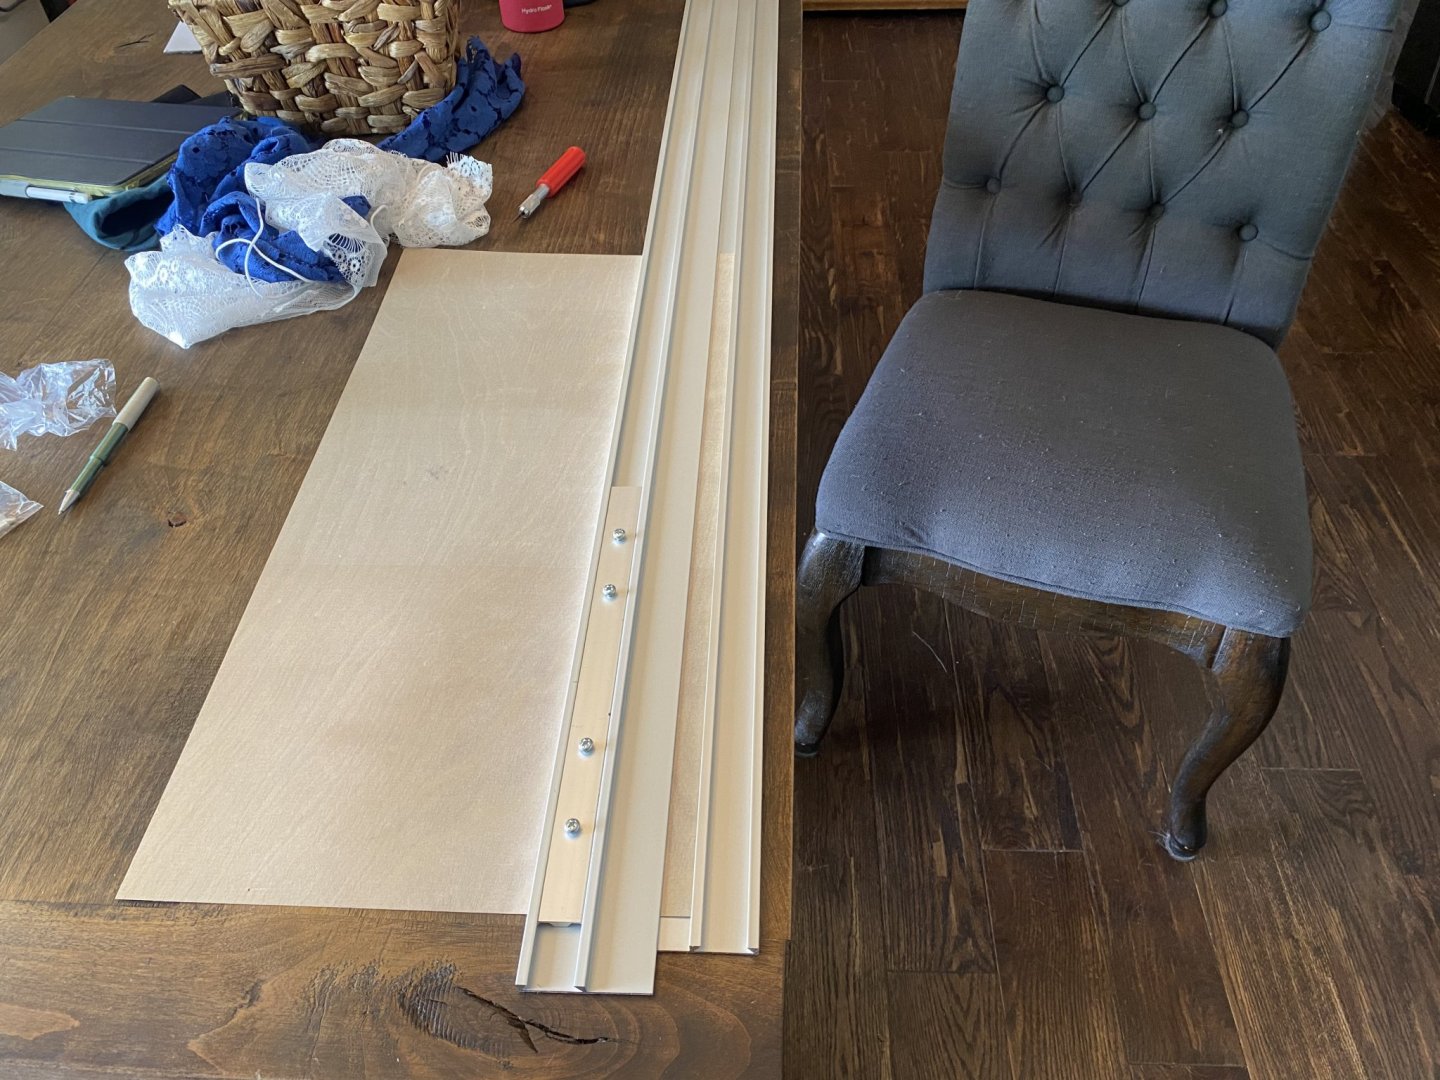
 Hello Model Ship World! I am starting my build log for the Model Shipways Niagara. Although not new to model ship building, this will be my 2nd foray into wood. I recently finished the 18th Century Long Boat and learned so much, that I feel confident in moving to a larger ship. I am very slow and methodical when it comes to building. I'll let stuff dry for a week before touching it! I'm including the shots of the box and contents as it will probably be the last time it looks so neat and organized I cant thank other folks from the "Niagara Club" such as 6ohiocav and Mikiek (among others) for their build logs, your logs have been a wealth of information. Time to start counting sticks and get a keel laid down! Updates to follow! Tom E
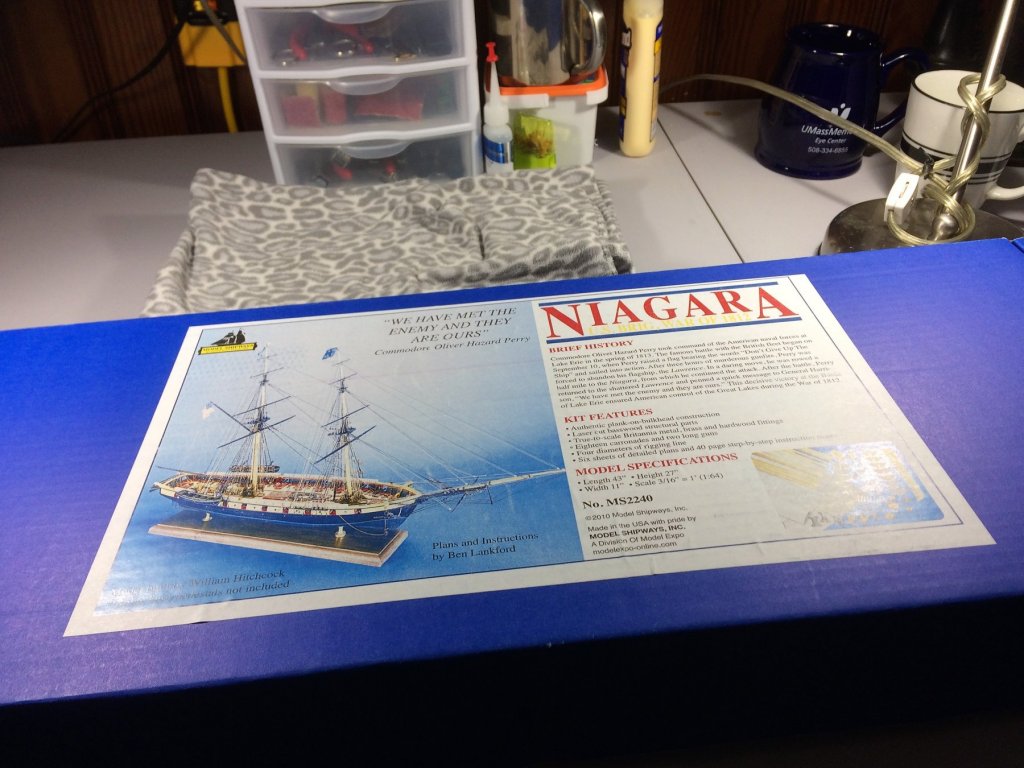
-
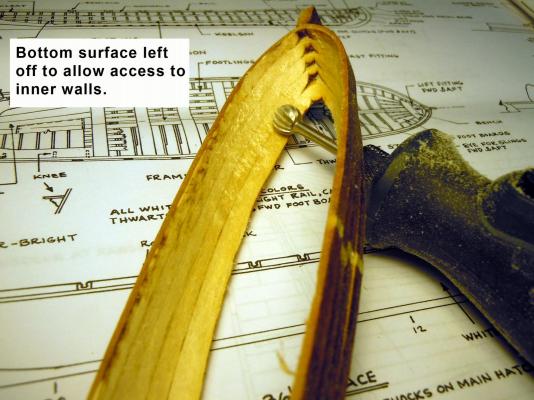
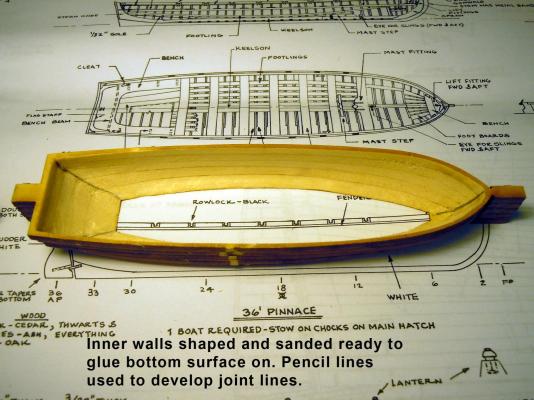
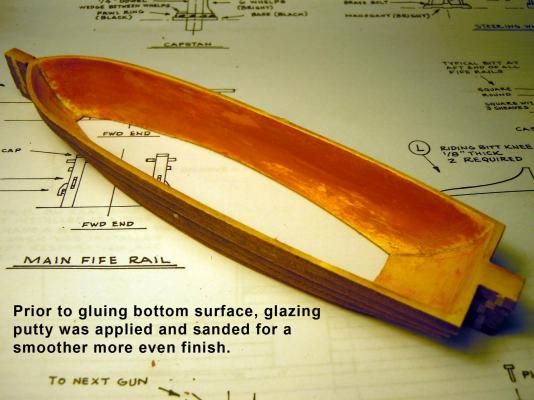
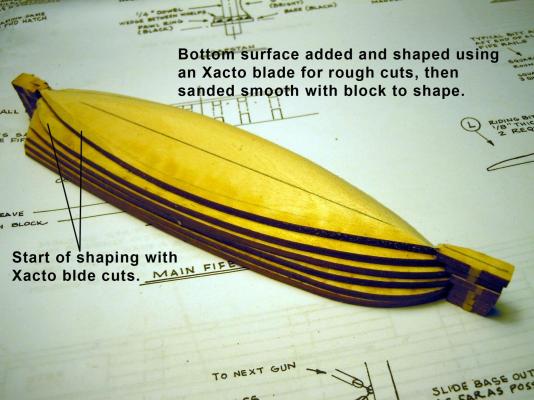
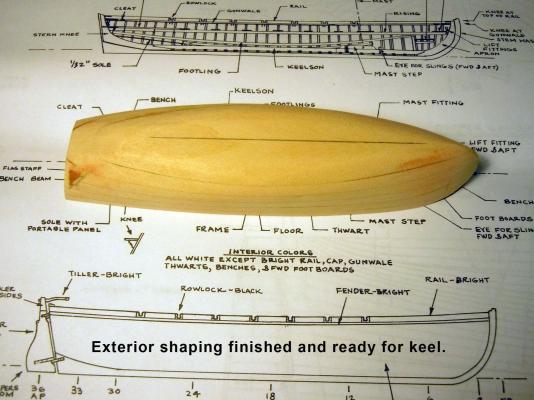
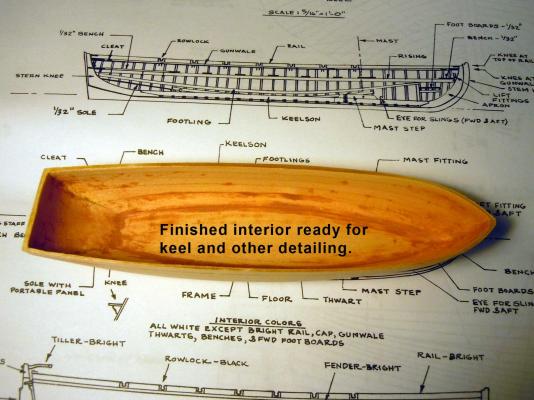
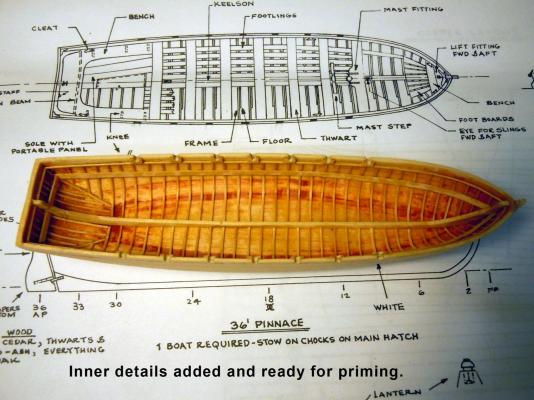
 I am off and running to continue my education of model ship building and hopefully on this one I will add sails. Like my Niagara build I will start with the small boats which are mini model kits in themselves and that my two young granddaughters like looking at the "baby boats". They are 2 and 4 years old. I will skip the presentation of the box and contents since others have done it so well. I am starting with the pinnace the larger of the four. I started by marking the top surfaces of the laser cut parts before removing them from their parent sheet. The reason is that the laser cutting process burns a slight angle in the wood and when layering and gluing together you can use this angle to your advantage and avoid super thin areas. I glued all the layers of all the boats together minus the bottom layer. I used the scrap center as a clamp surface to provide even compression. Here is the reason to leave the bottom layer off and allow clearance to work on the inner walls. Here is the finished up inner walls rough cut and then sanded. Next I added sparingly automotive glazing putty to the inner walls for additional smoothness. This glaze dries quickly and is very easy to sand. Think of it as a thick layer of primer filler. Here is the finished exterior Here the bottom layer was added and shaping started by rough cutting with an Xacto blade, sanding block and sanding sticks. Here is the finished exterior ready for the keel. Here is the finished sanded interior ready for keel and other details. First I had to address the bow to stern sidewall curve which I developed using 1/4" masking tape, then marked the upper edge with a pencil and removed the tape and trimmed to the pencil line. Here is the interior with all the details added that will be painted while the rest will be bright stained finish. The exterior keel has also been added. The ribs are .0208" square Basswood Midwest Scale Lumber item number 8000. I have used their micro cut lumber for years on airplane builds. Next the pinnace will be primed and sanded and readied for paint per the plan scheme.
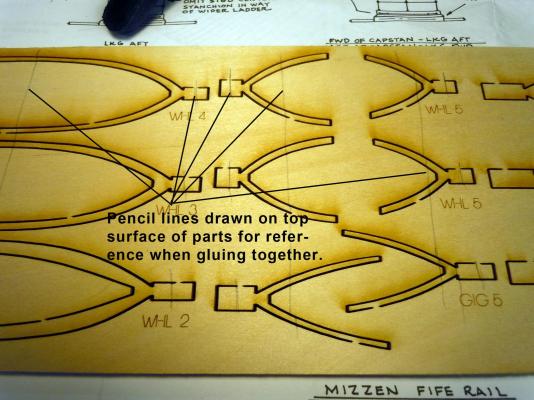


-
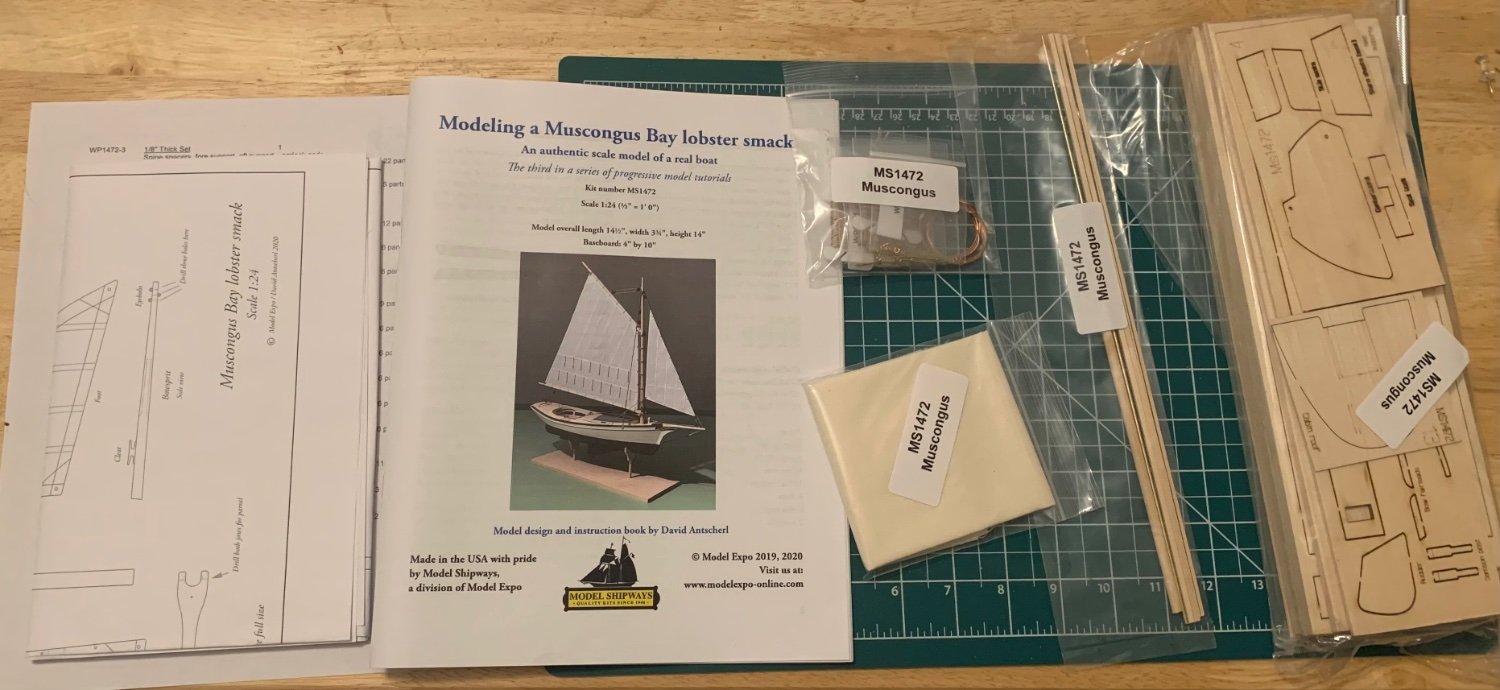
 Muscongus Bay Lobster Smack by MajorChaos - Model Shipways - 1:24 Third in a series of progressive model tutorials. The Dory is complete, model 1. The Pram, model 2, is almost done as of this writing. The Dory build Finished The Pram build Finished The Dory and the Pram have their short nick names we all seem to use, not sure what to short name this one yet. Started April 8th 2023.
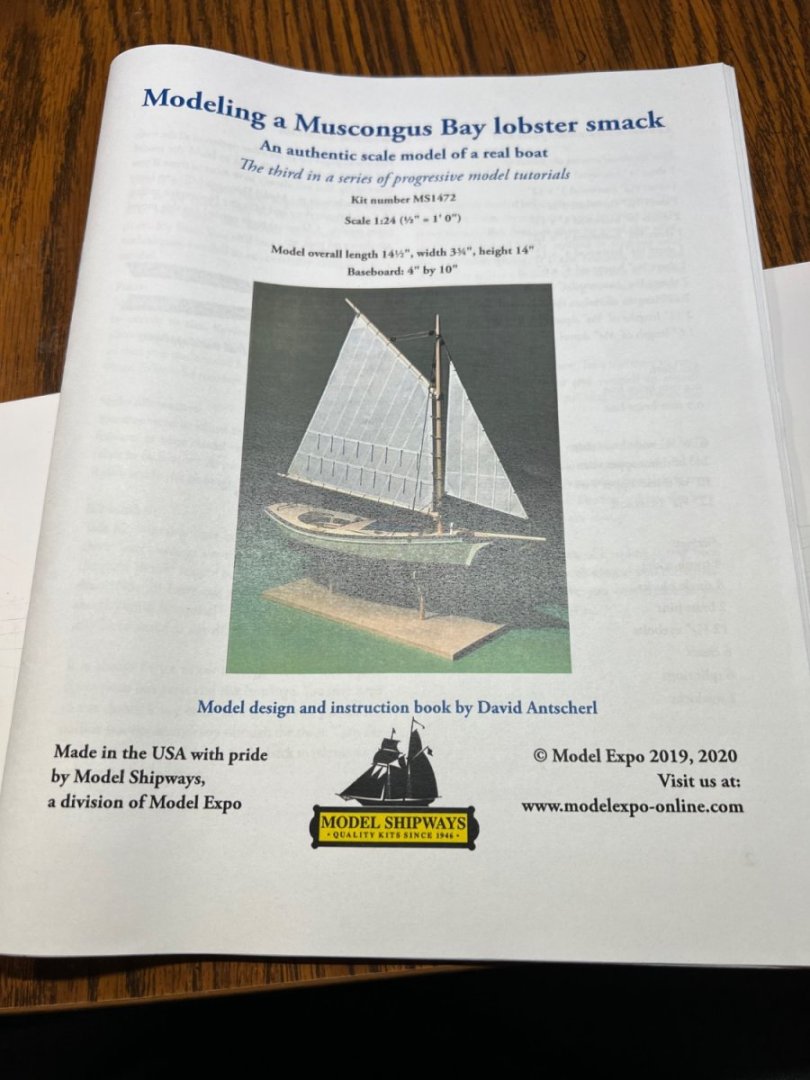
- 39 replies
-
- 4
-
-
- Model Shipways
- Muscongus Bay Lobster Smack
- (and 1 more)
-
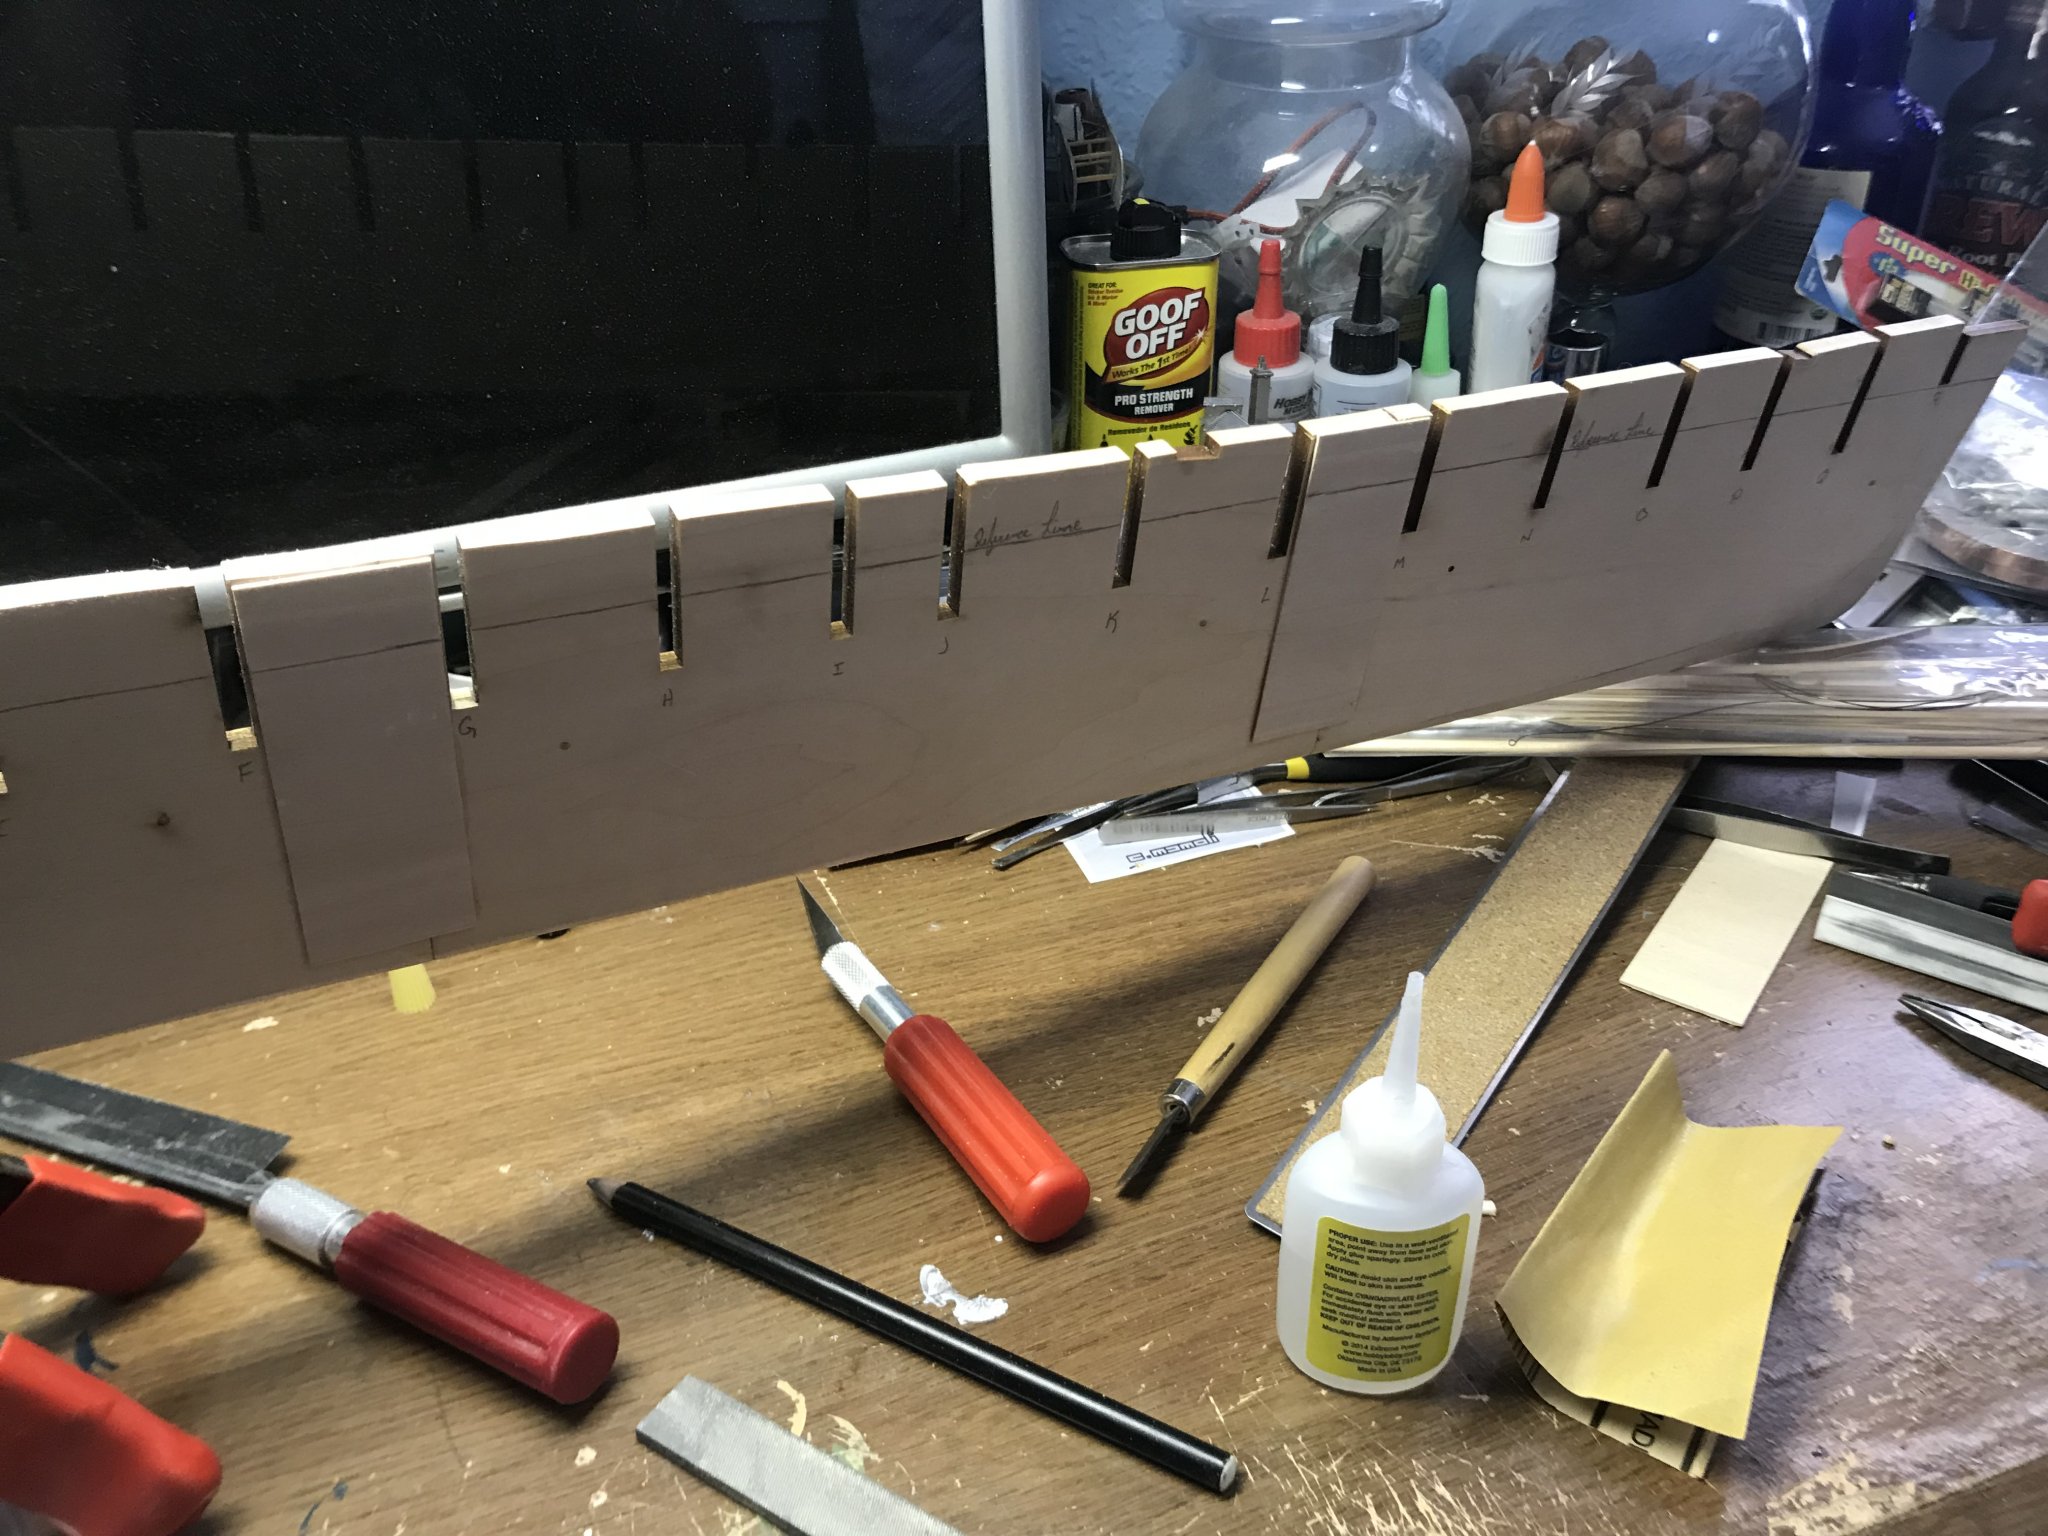
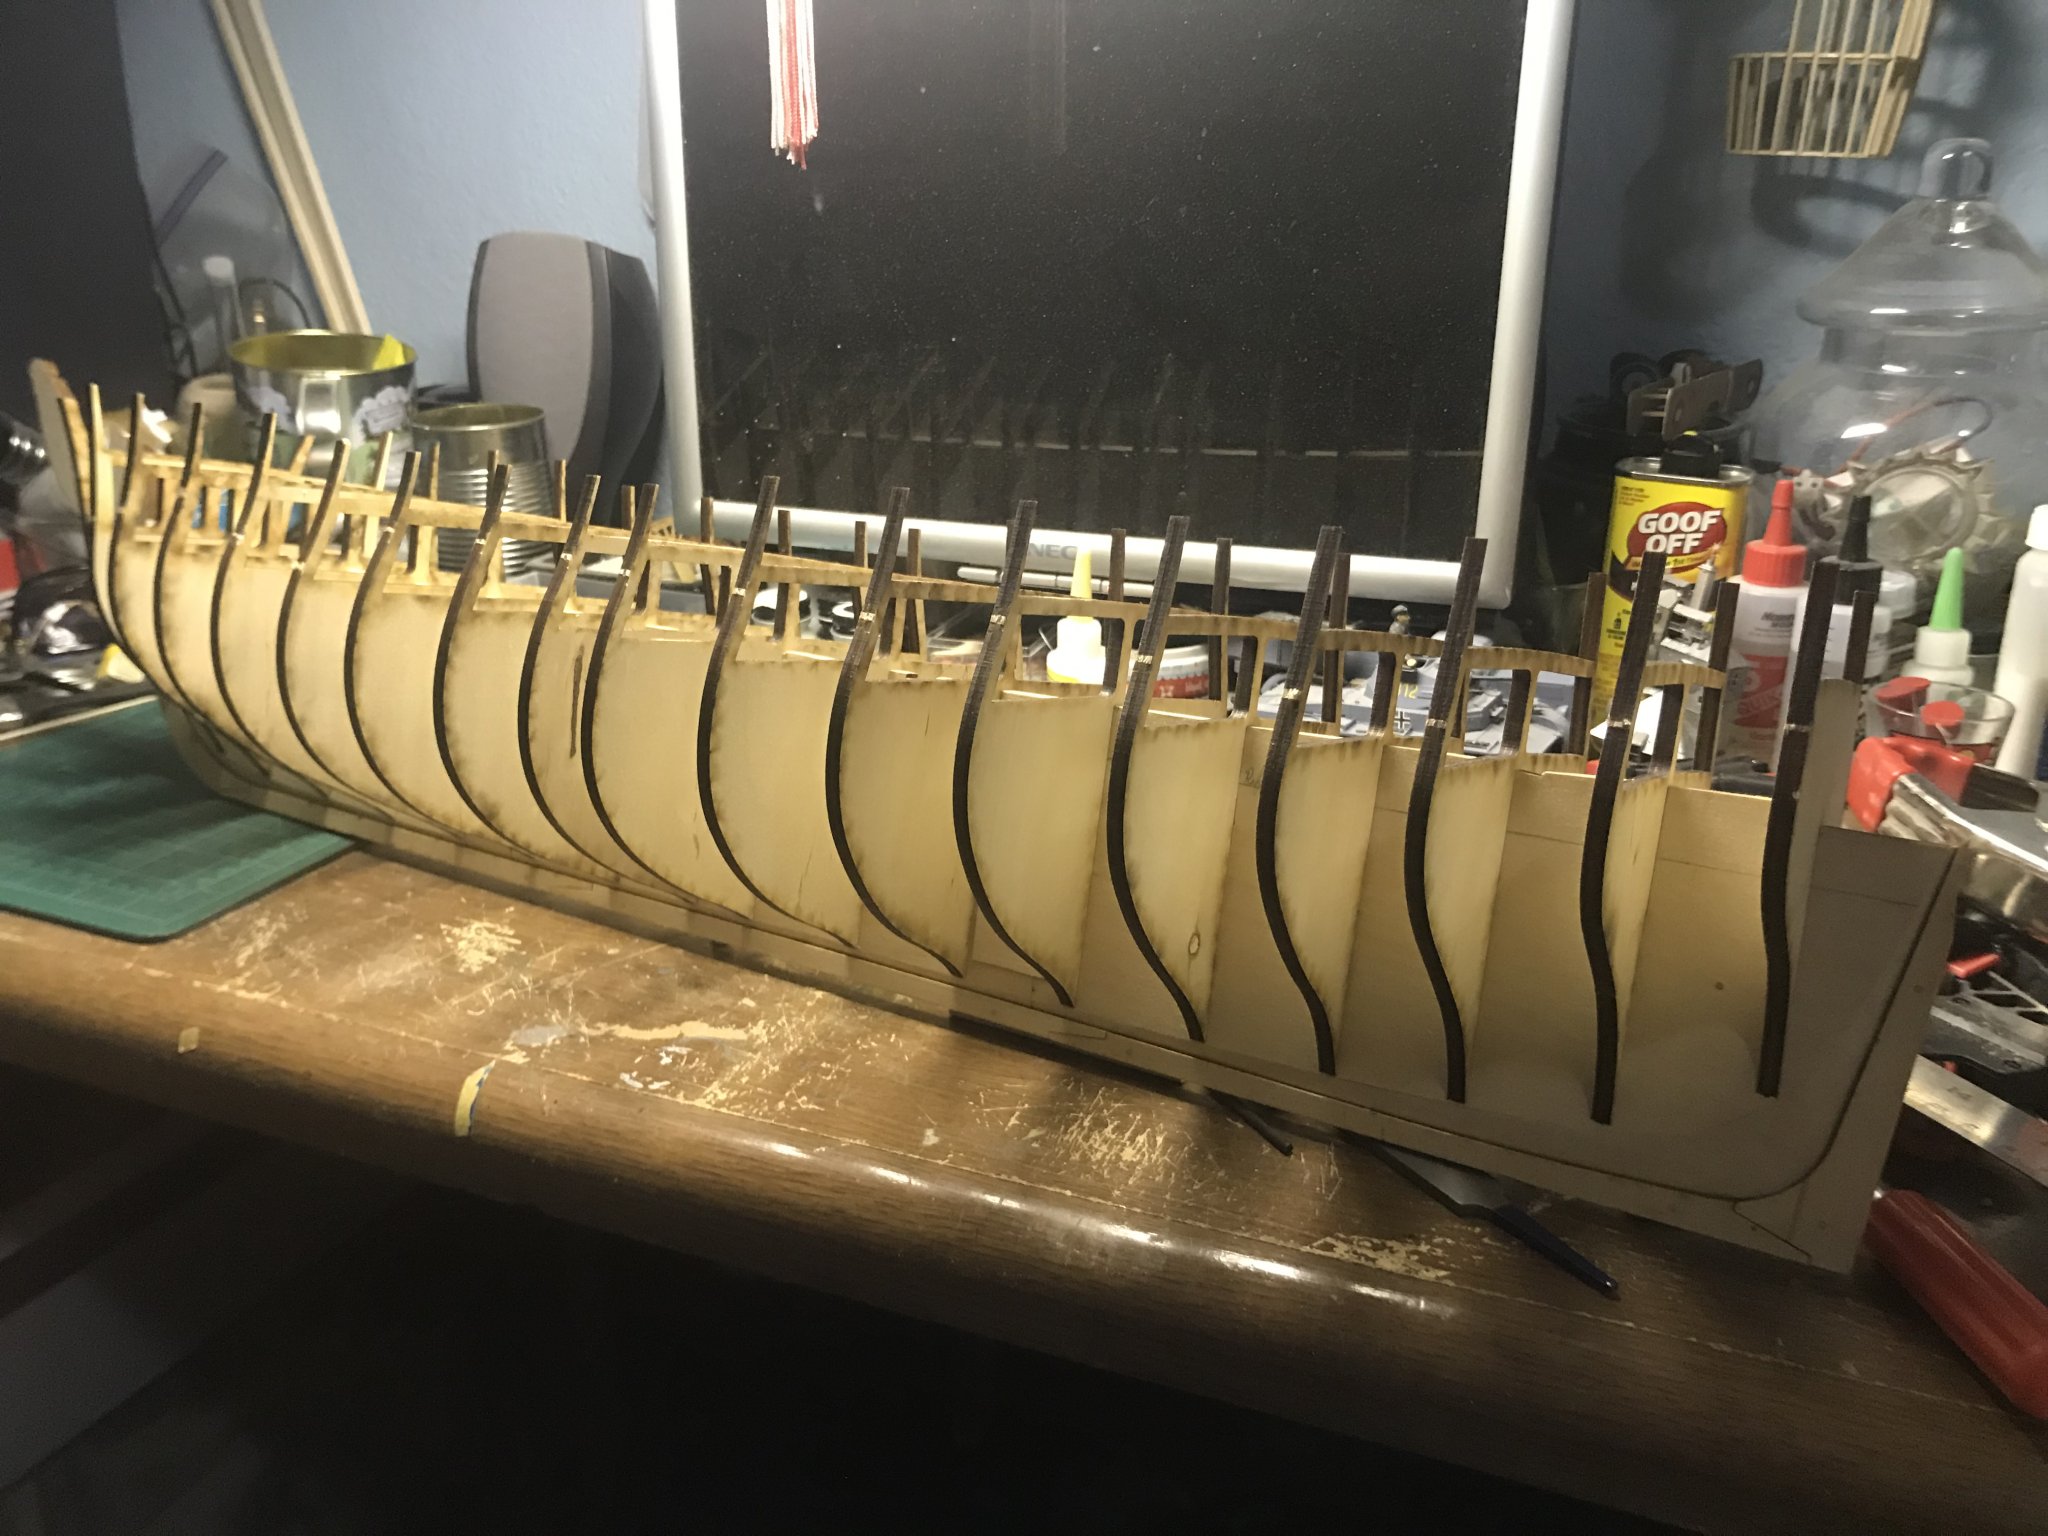
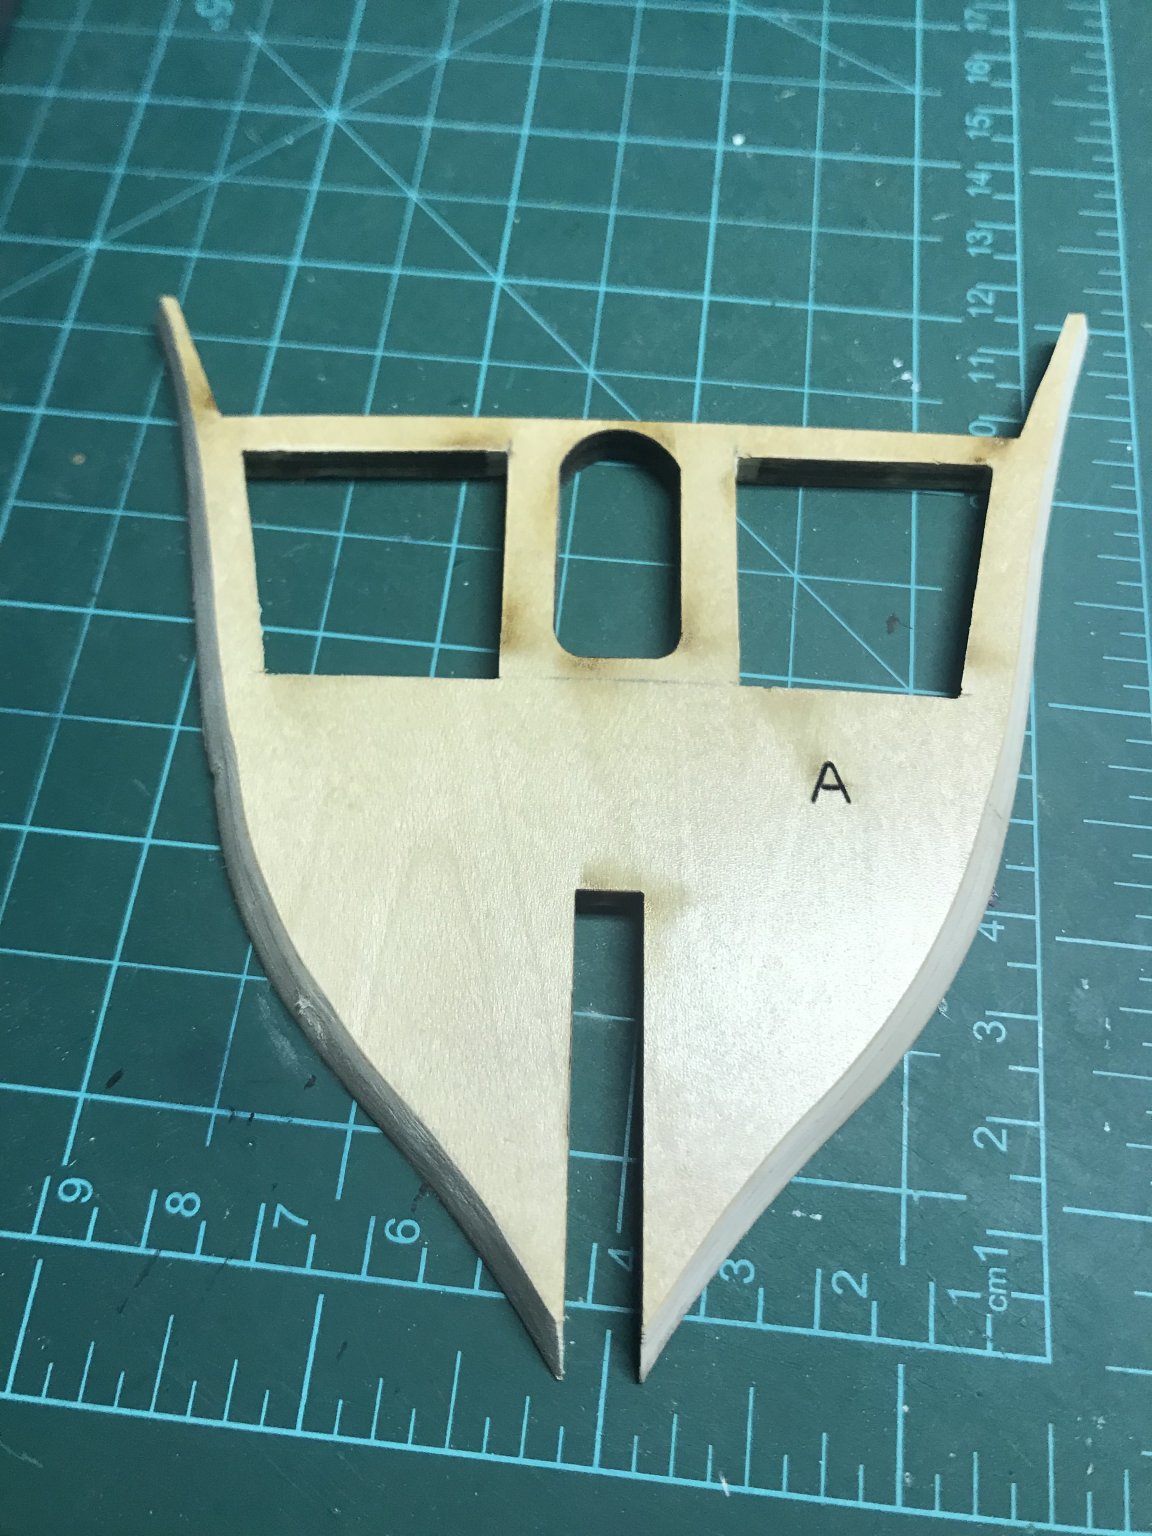
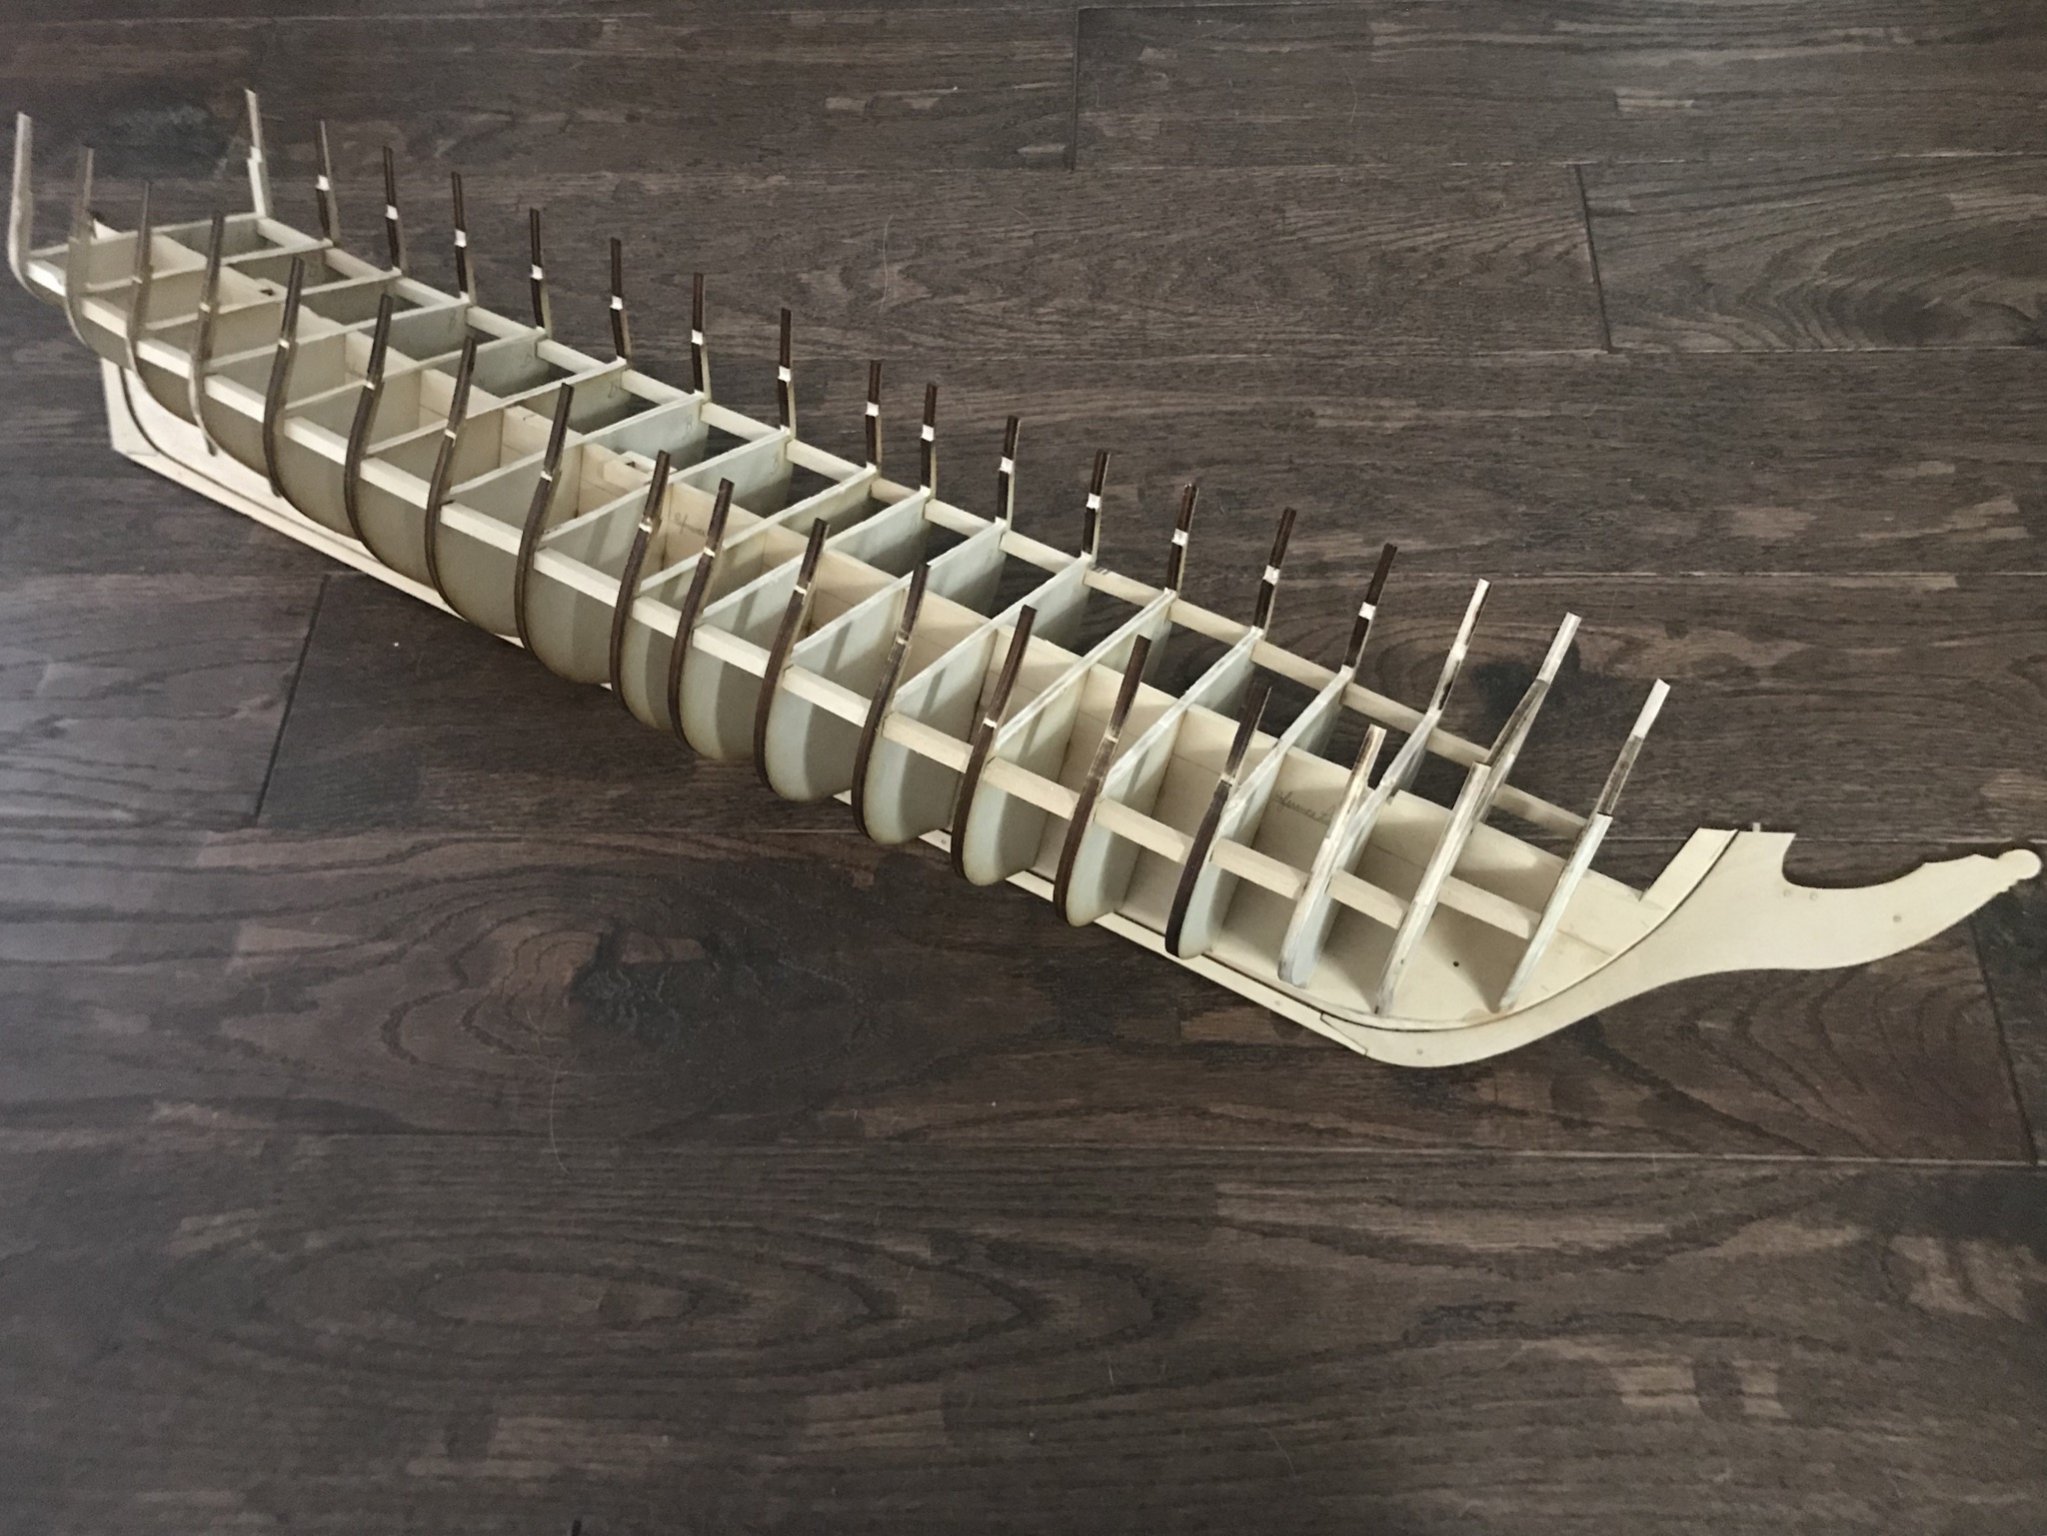
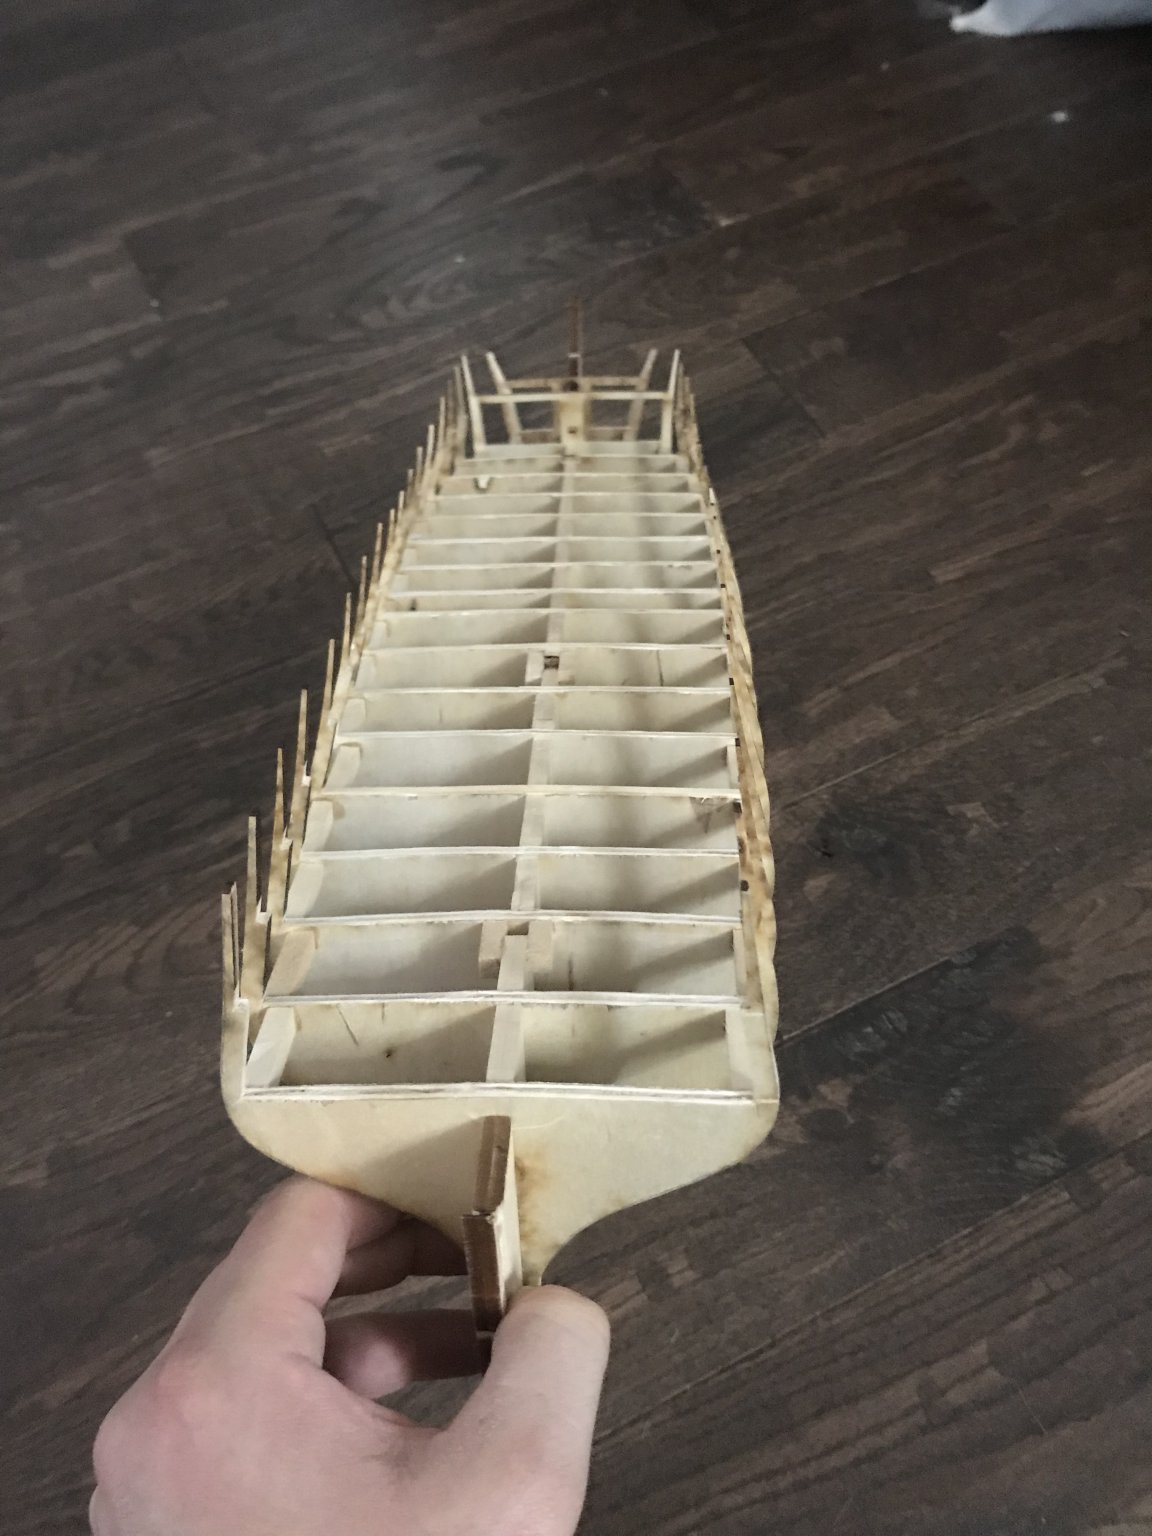
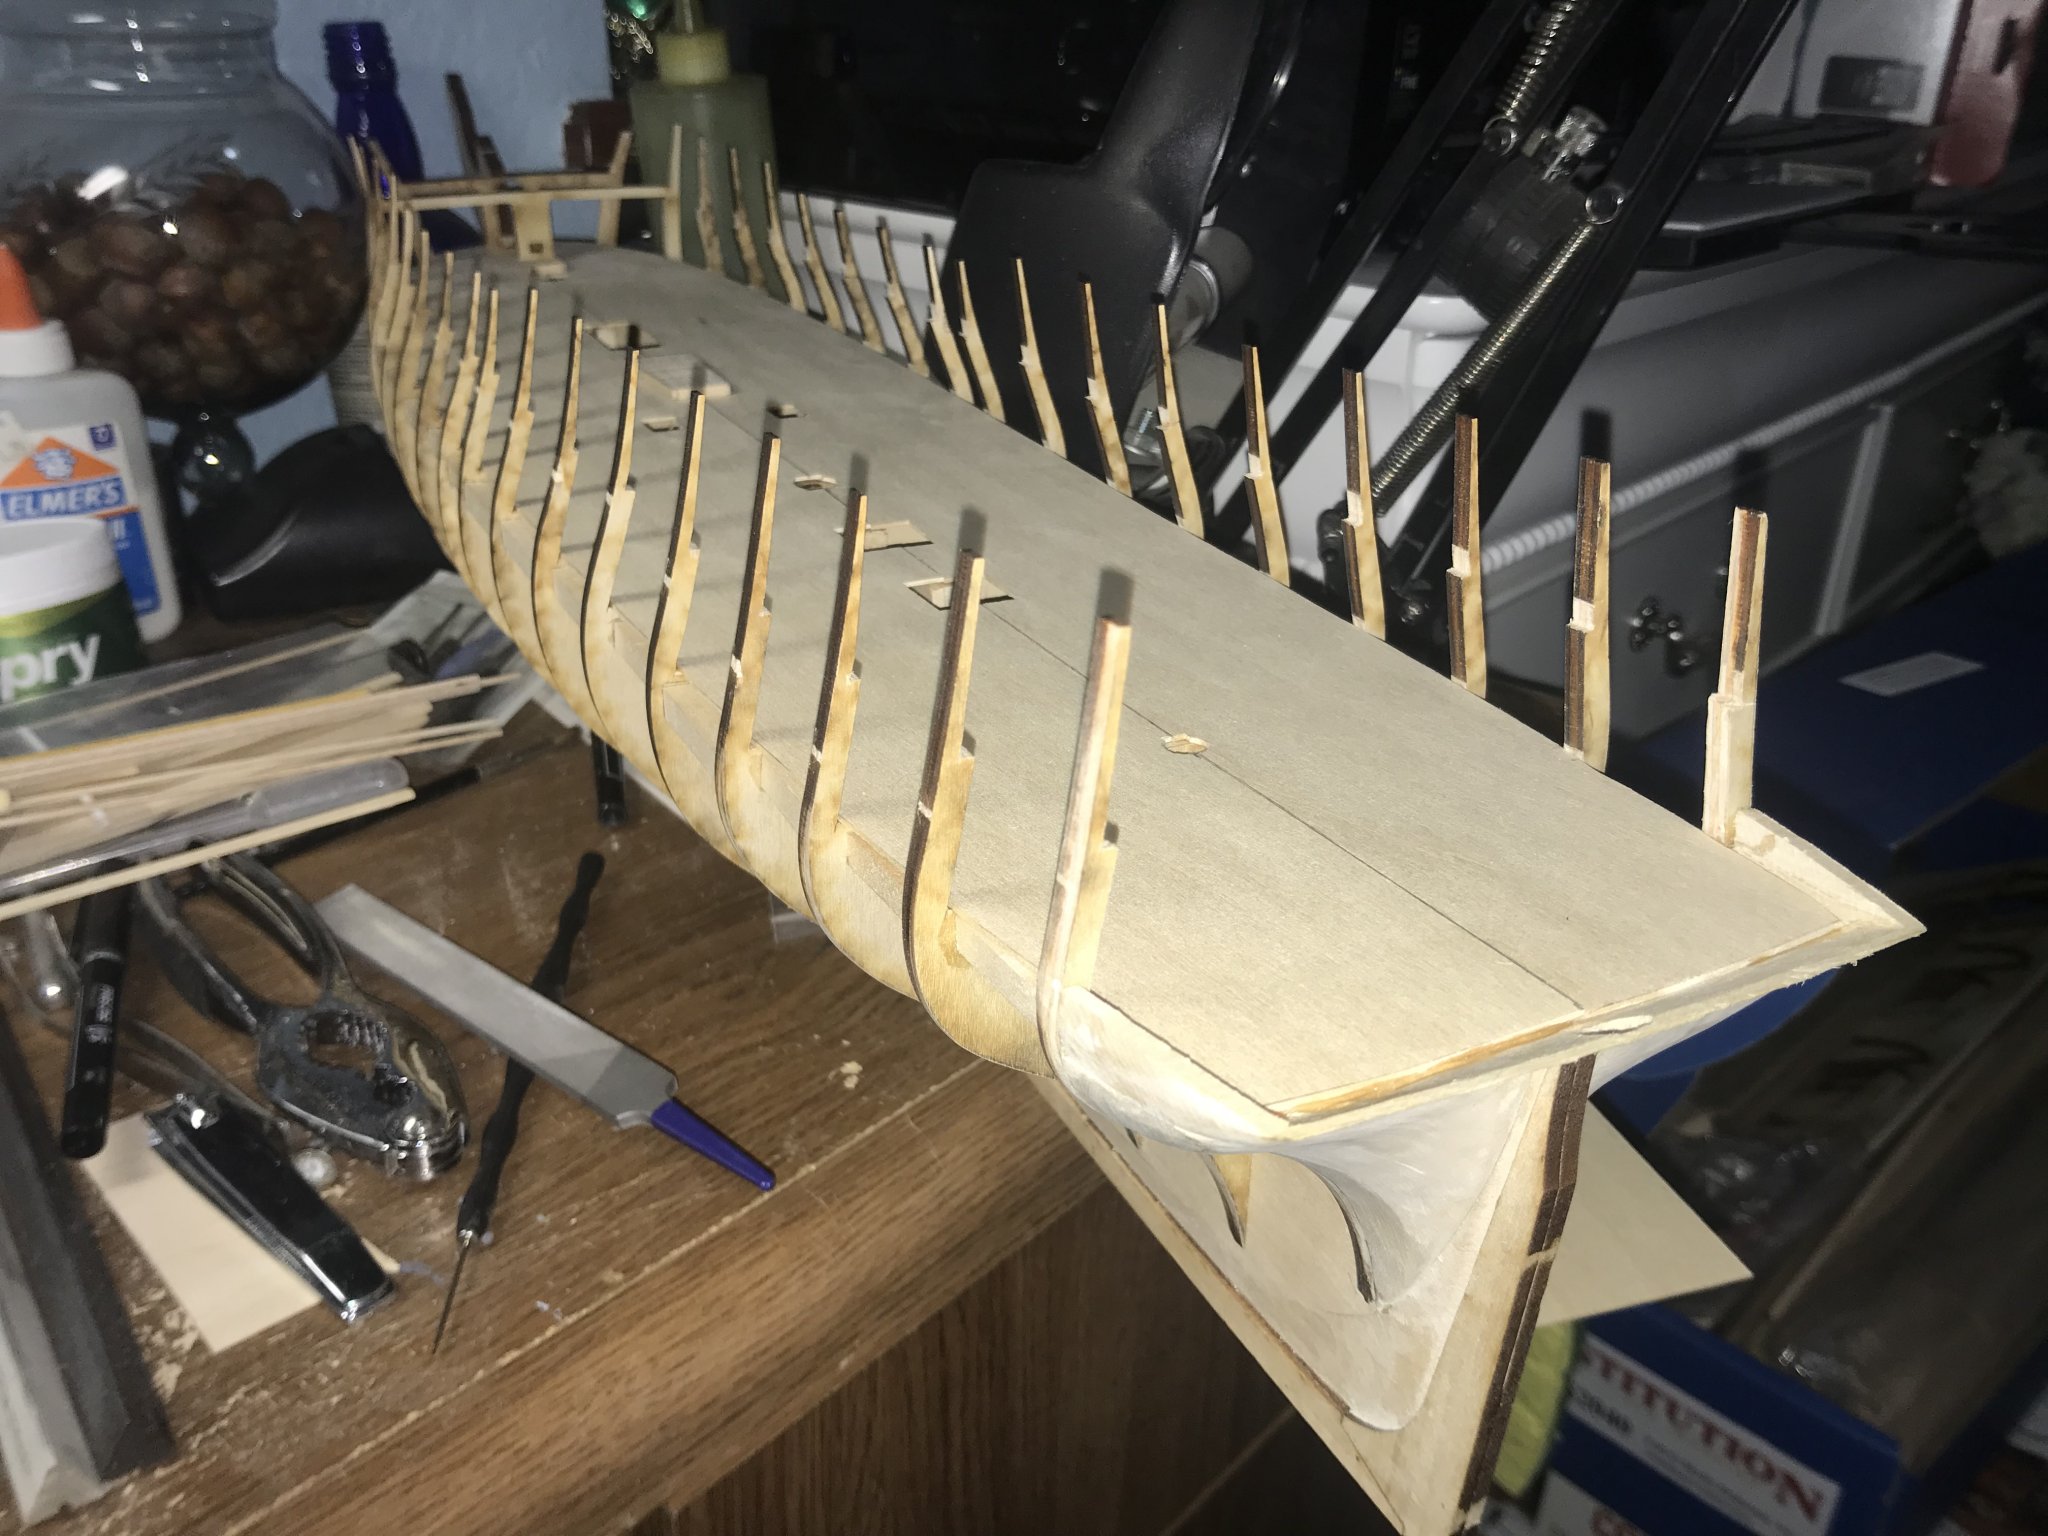
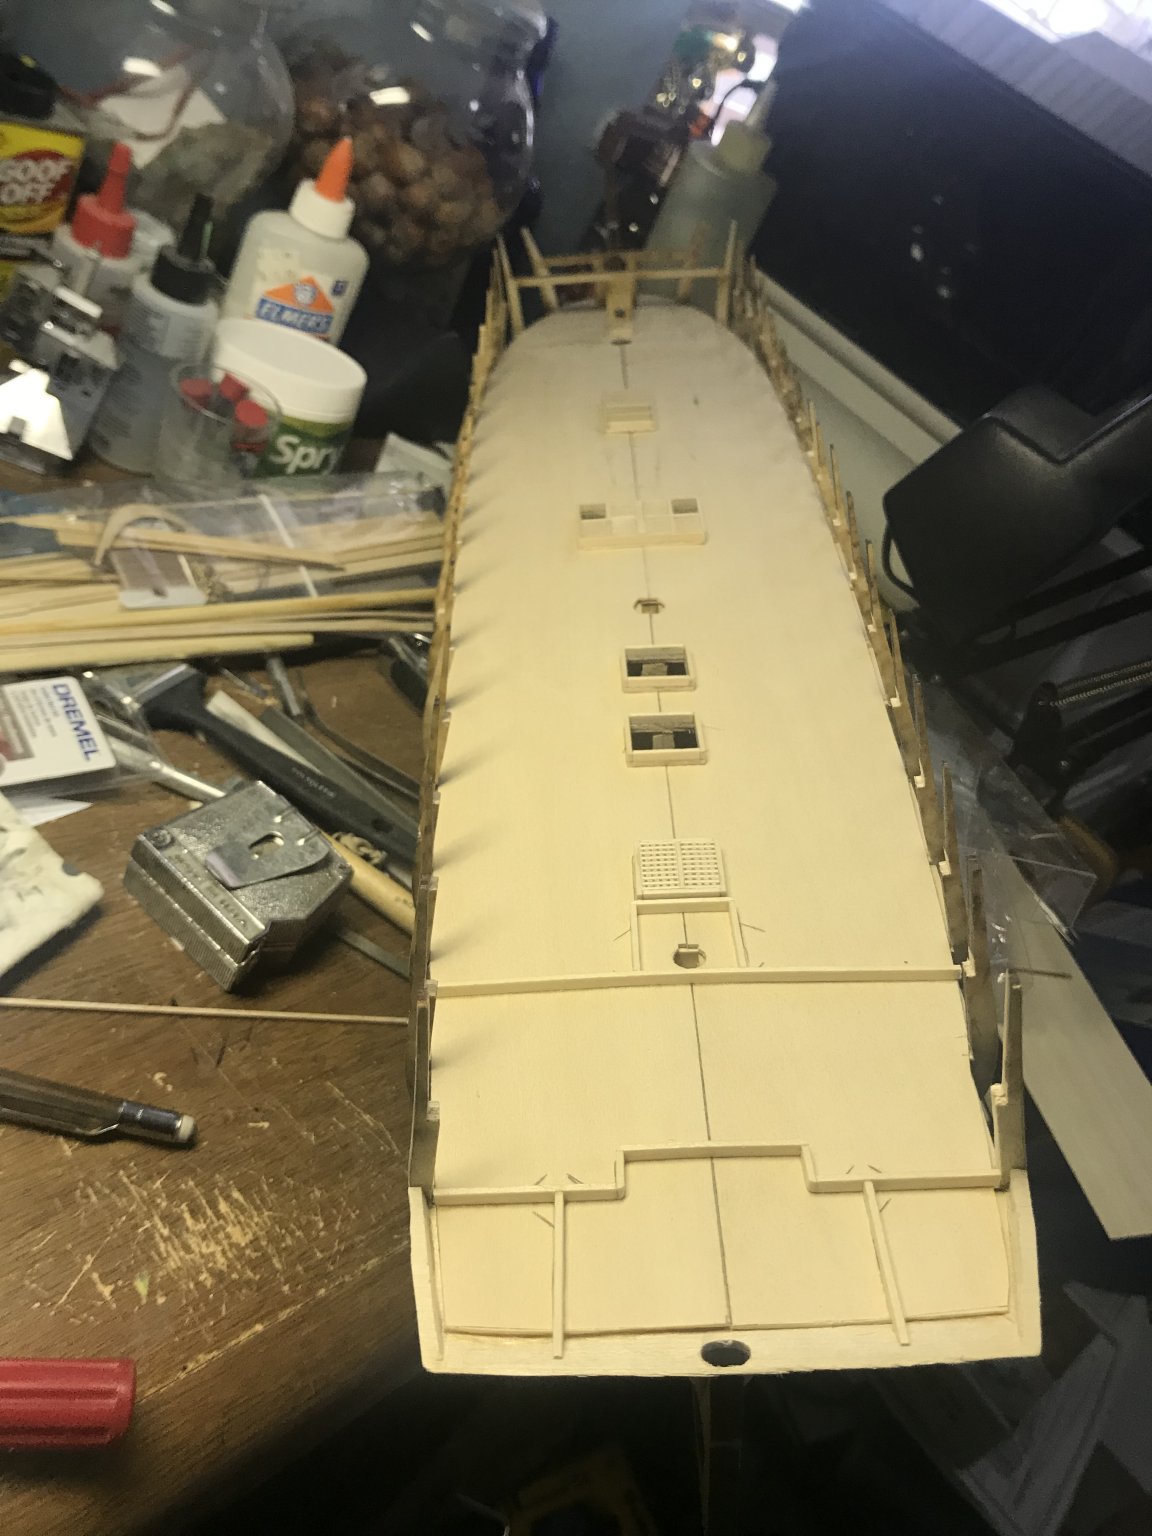
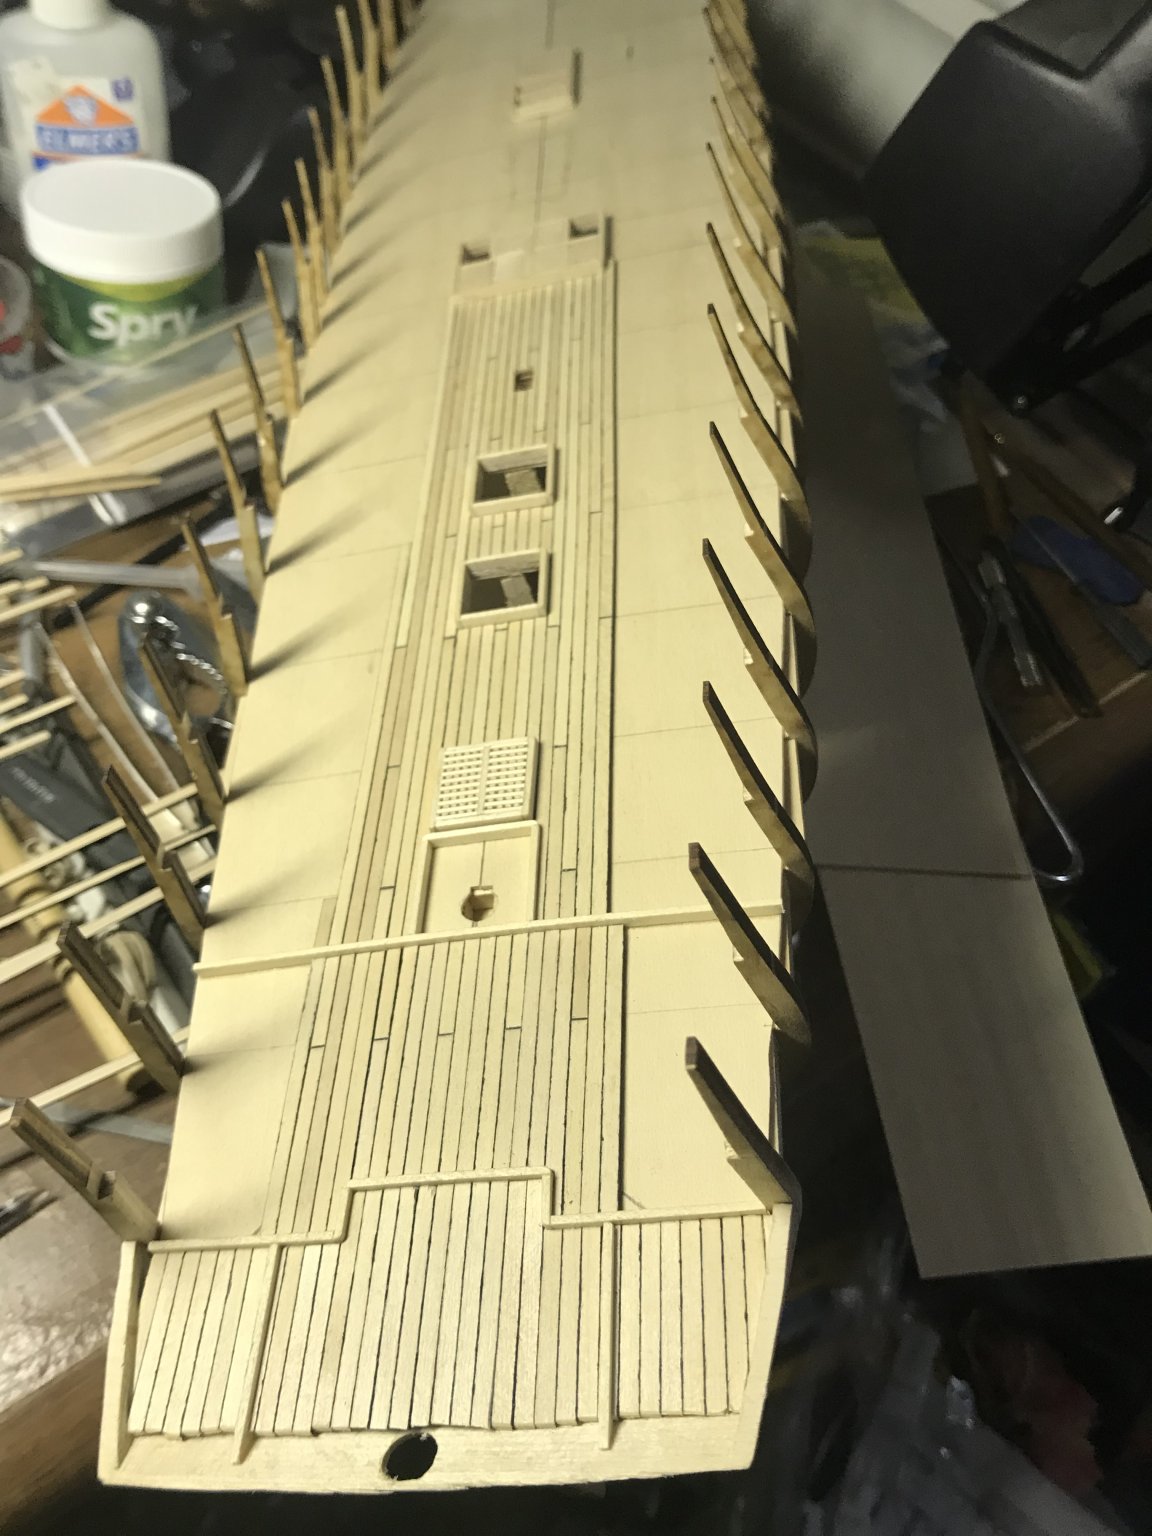
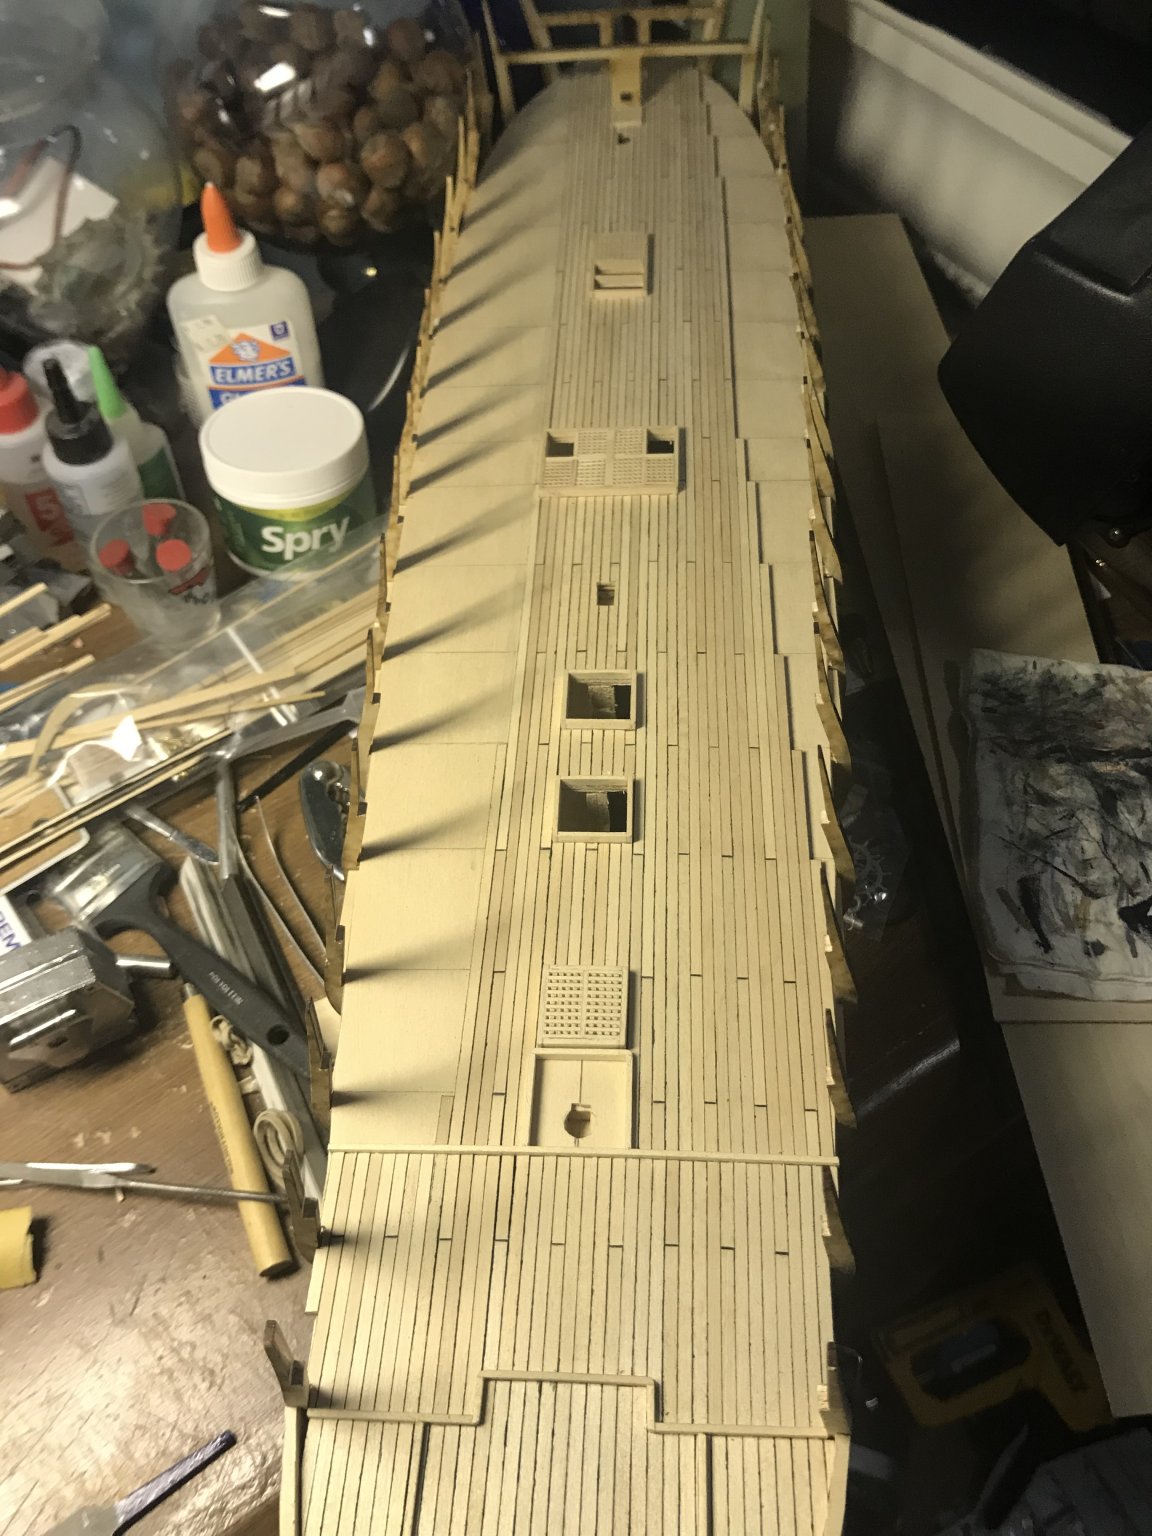
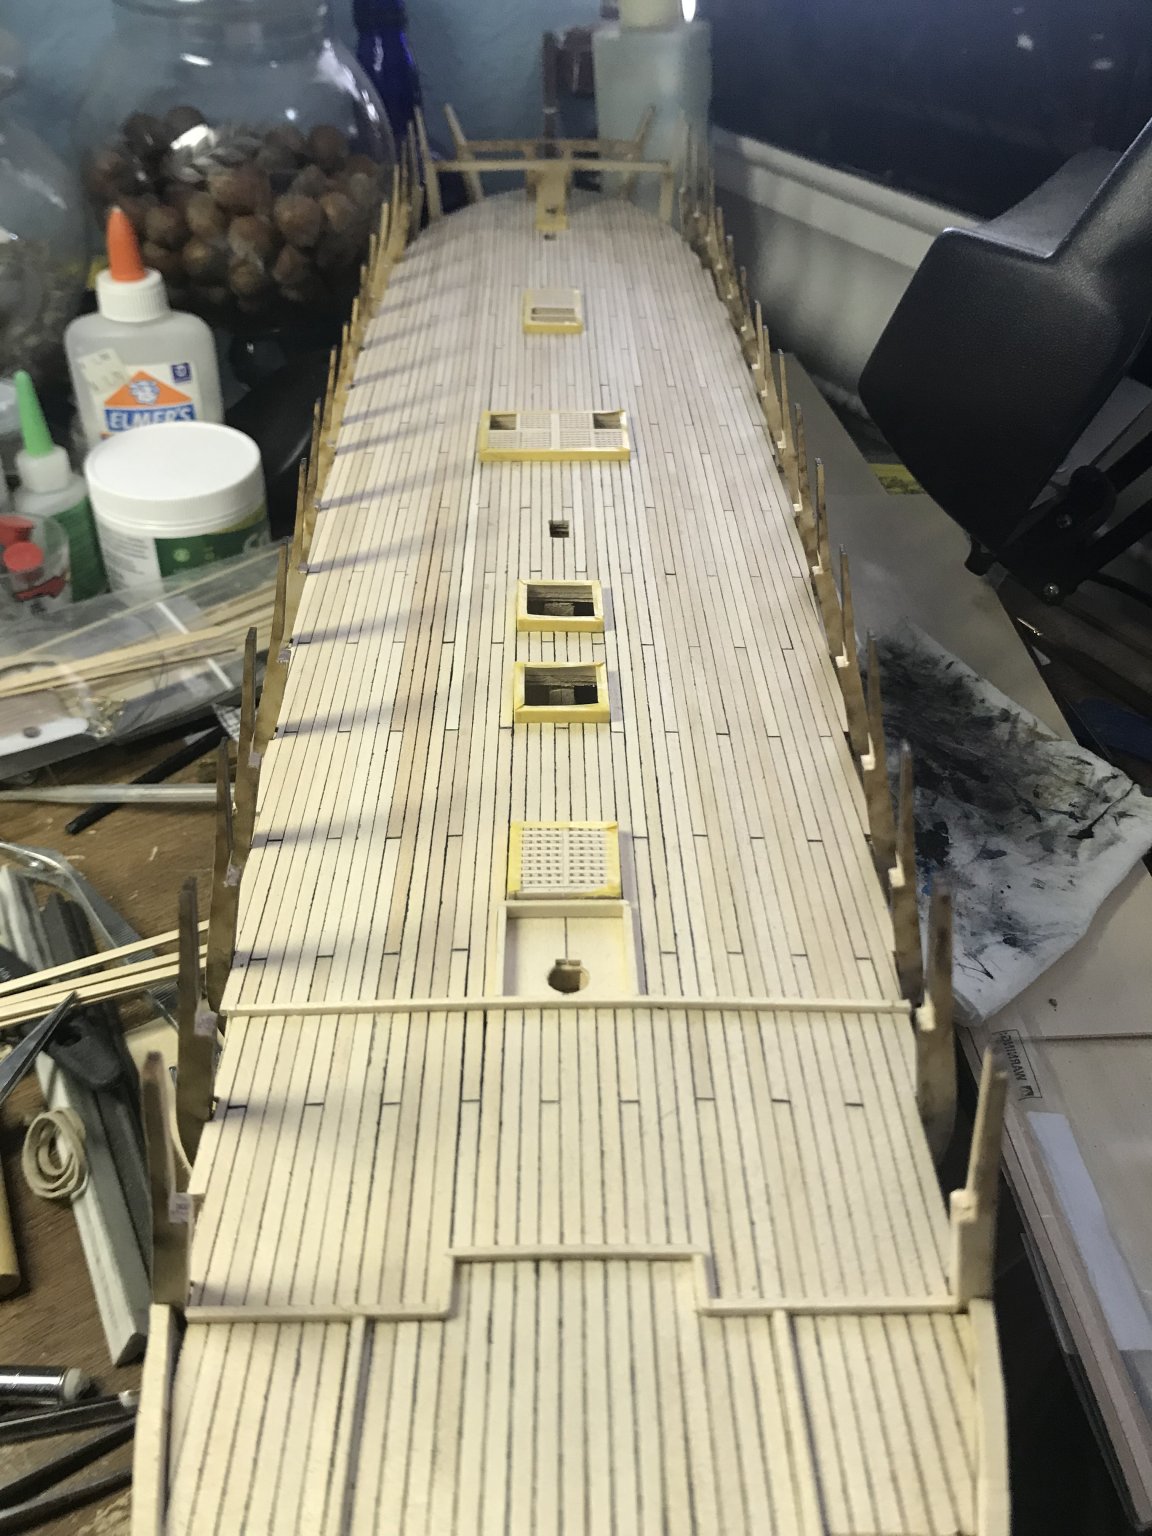
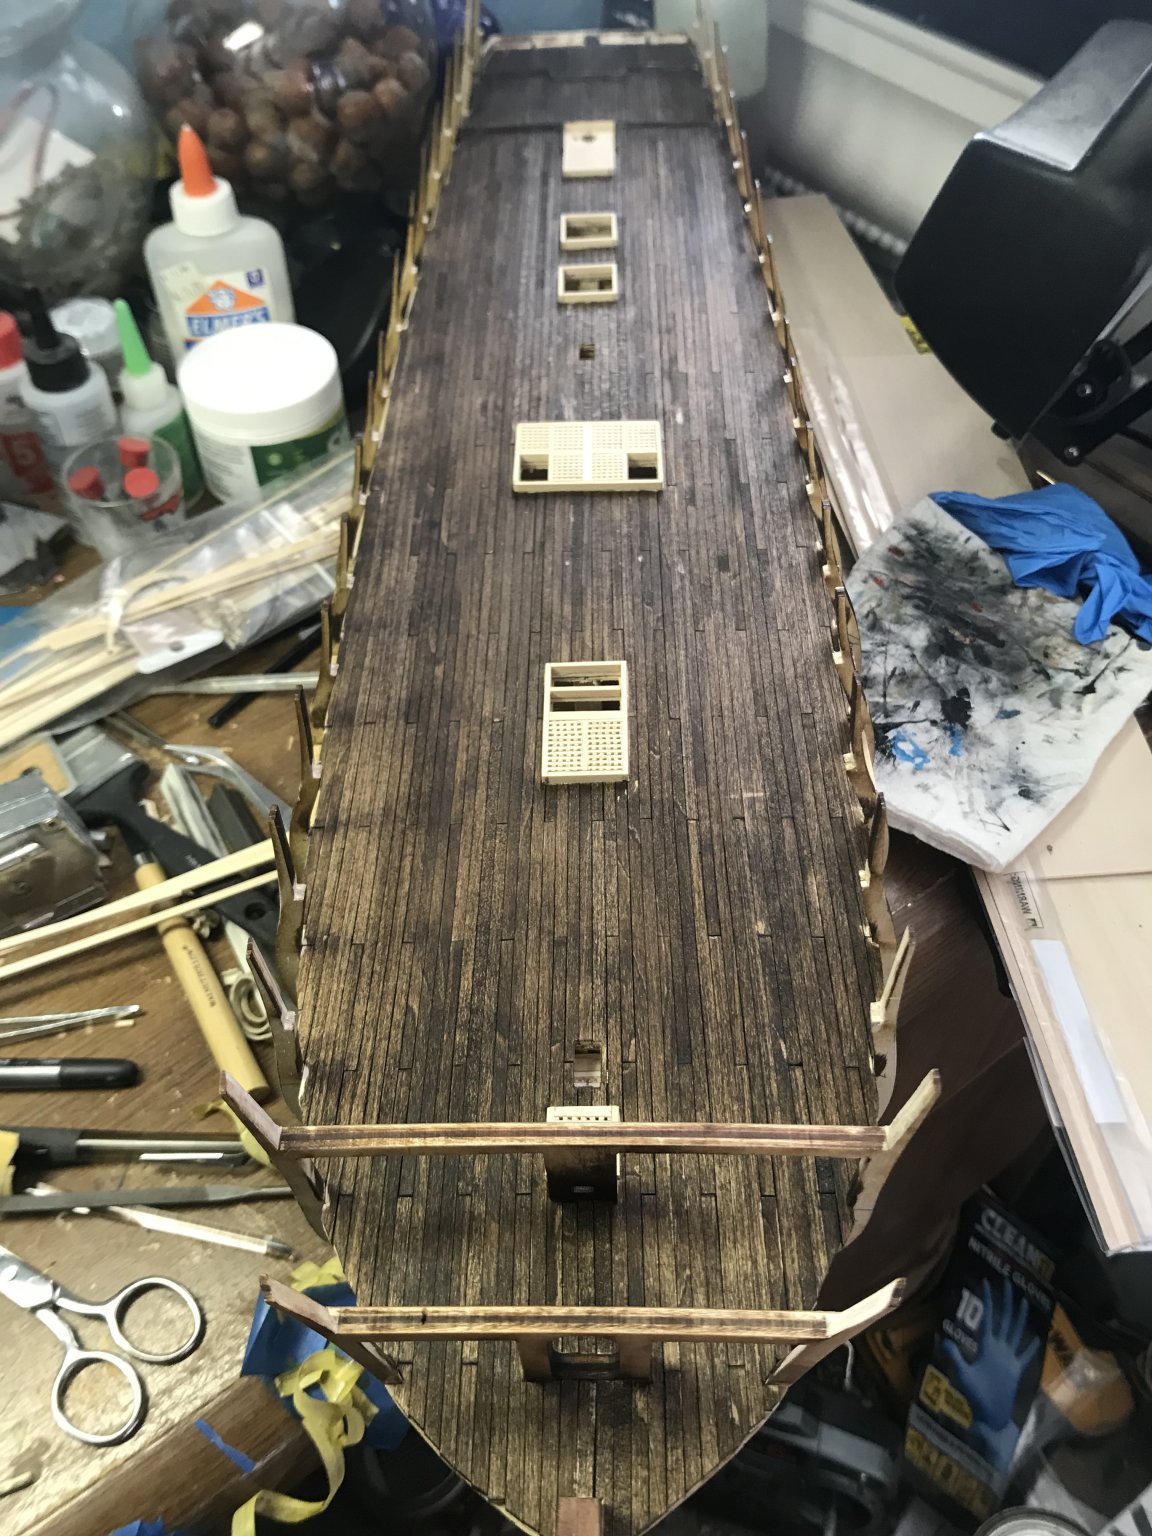
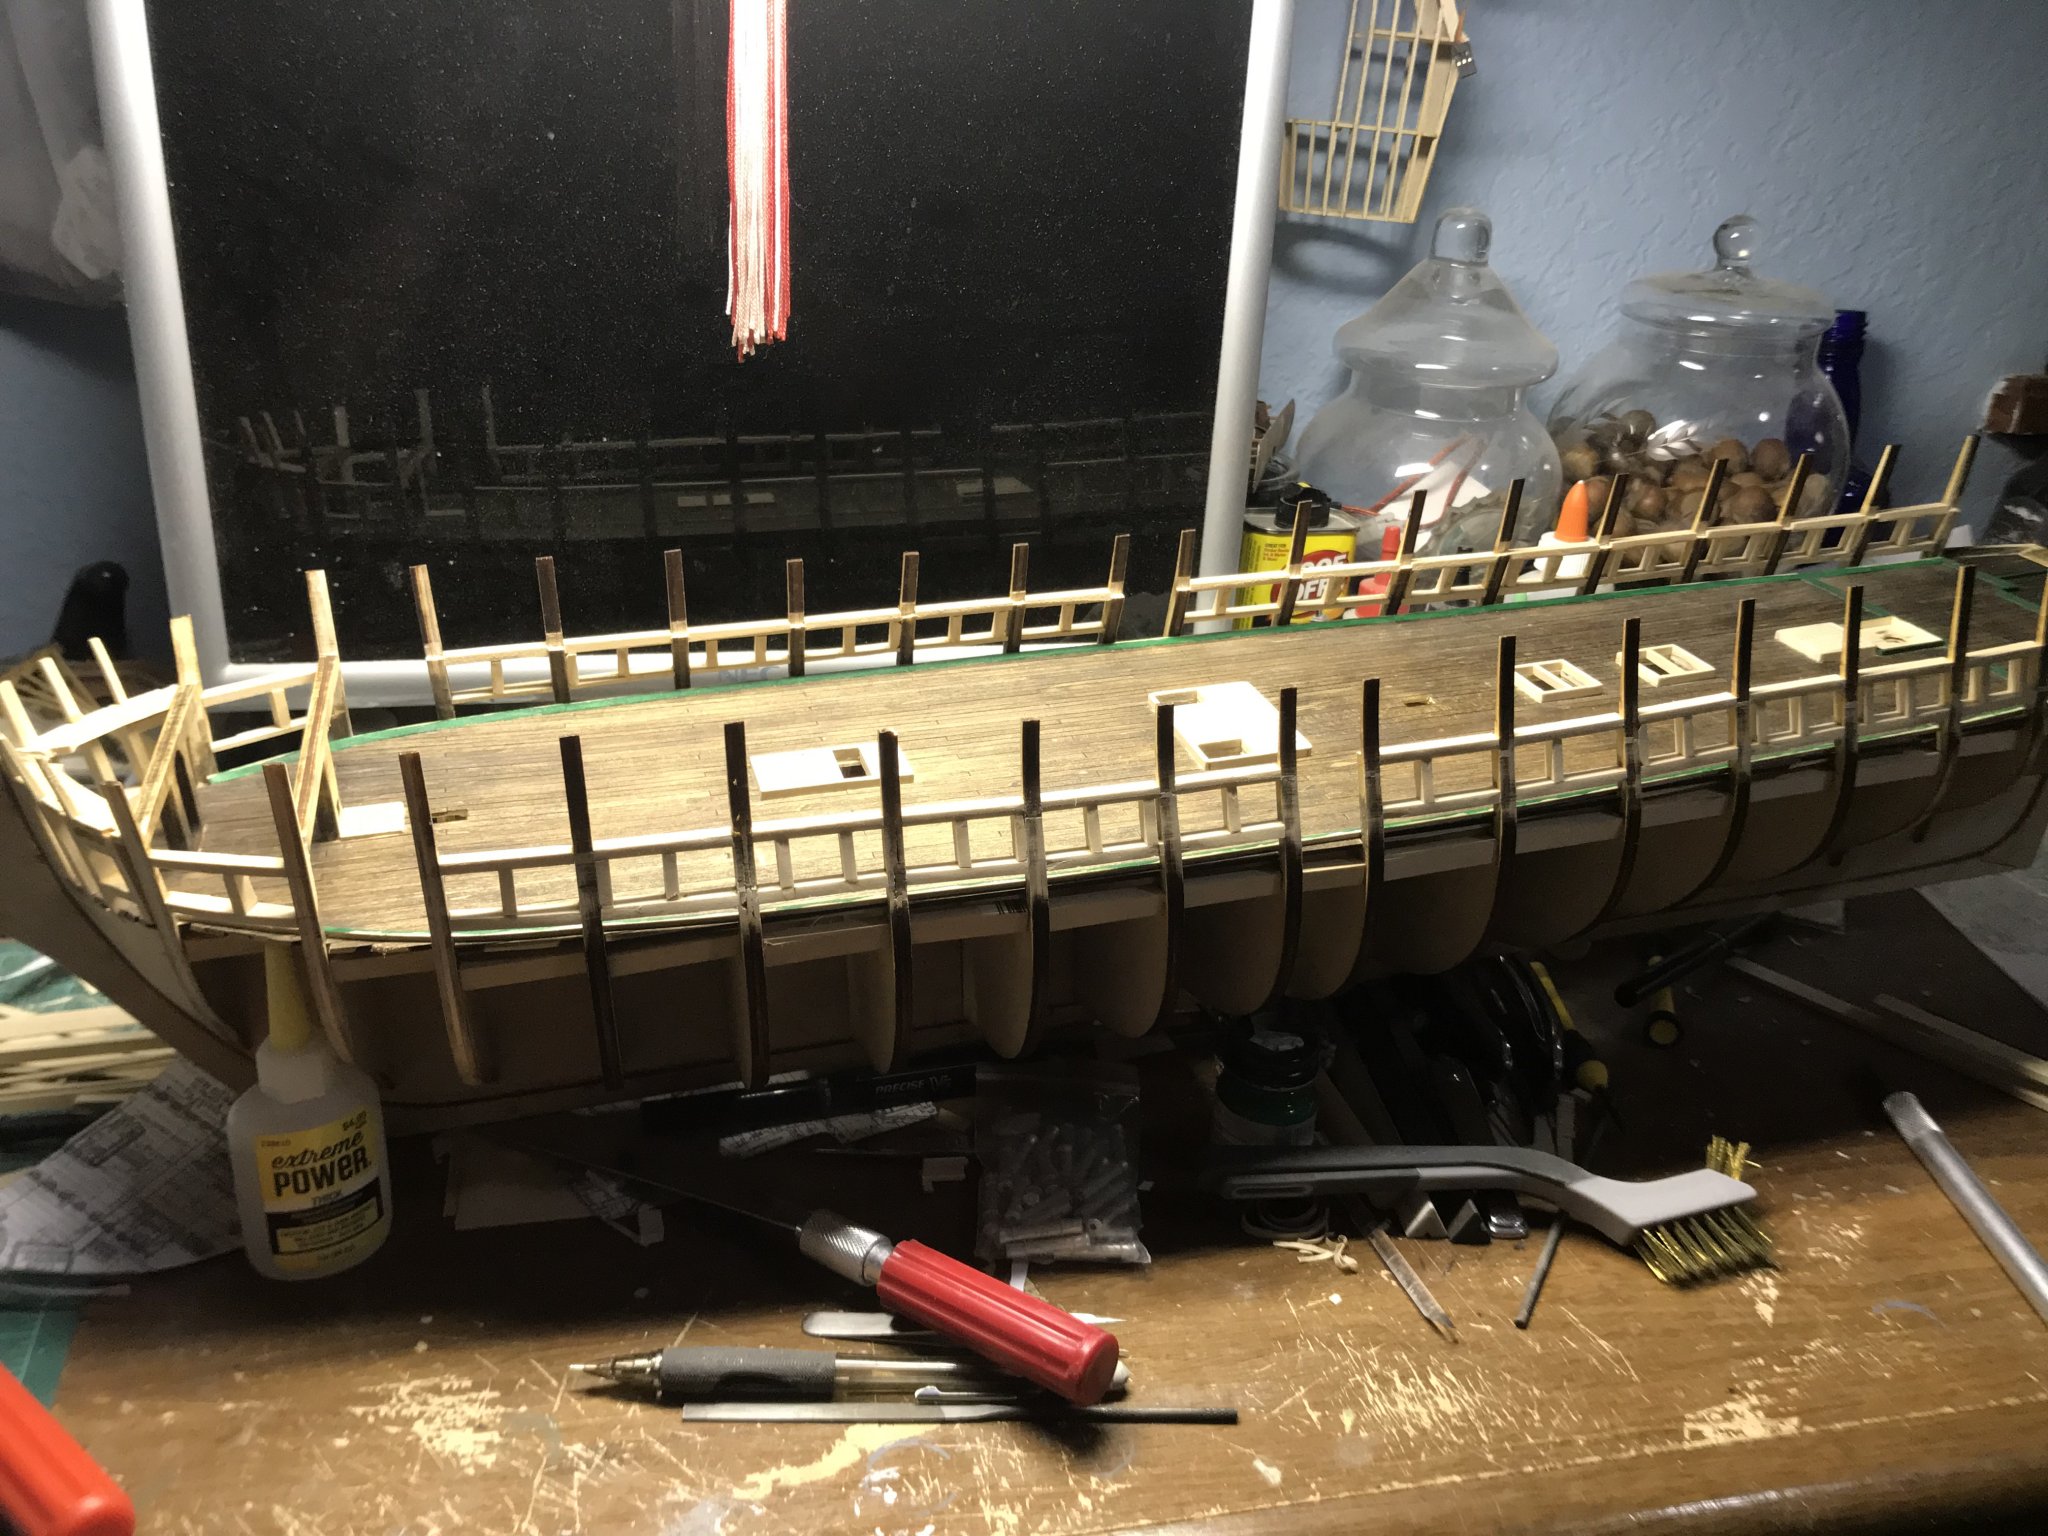
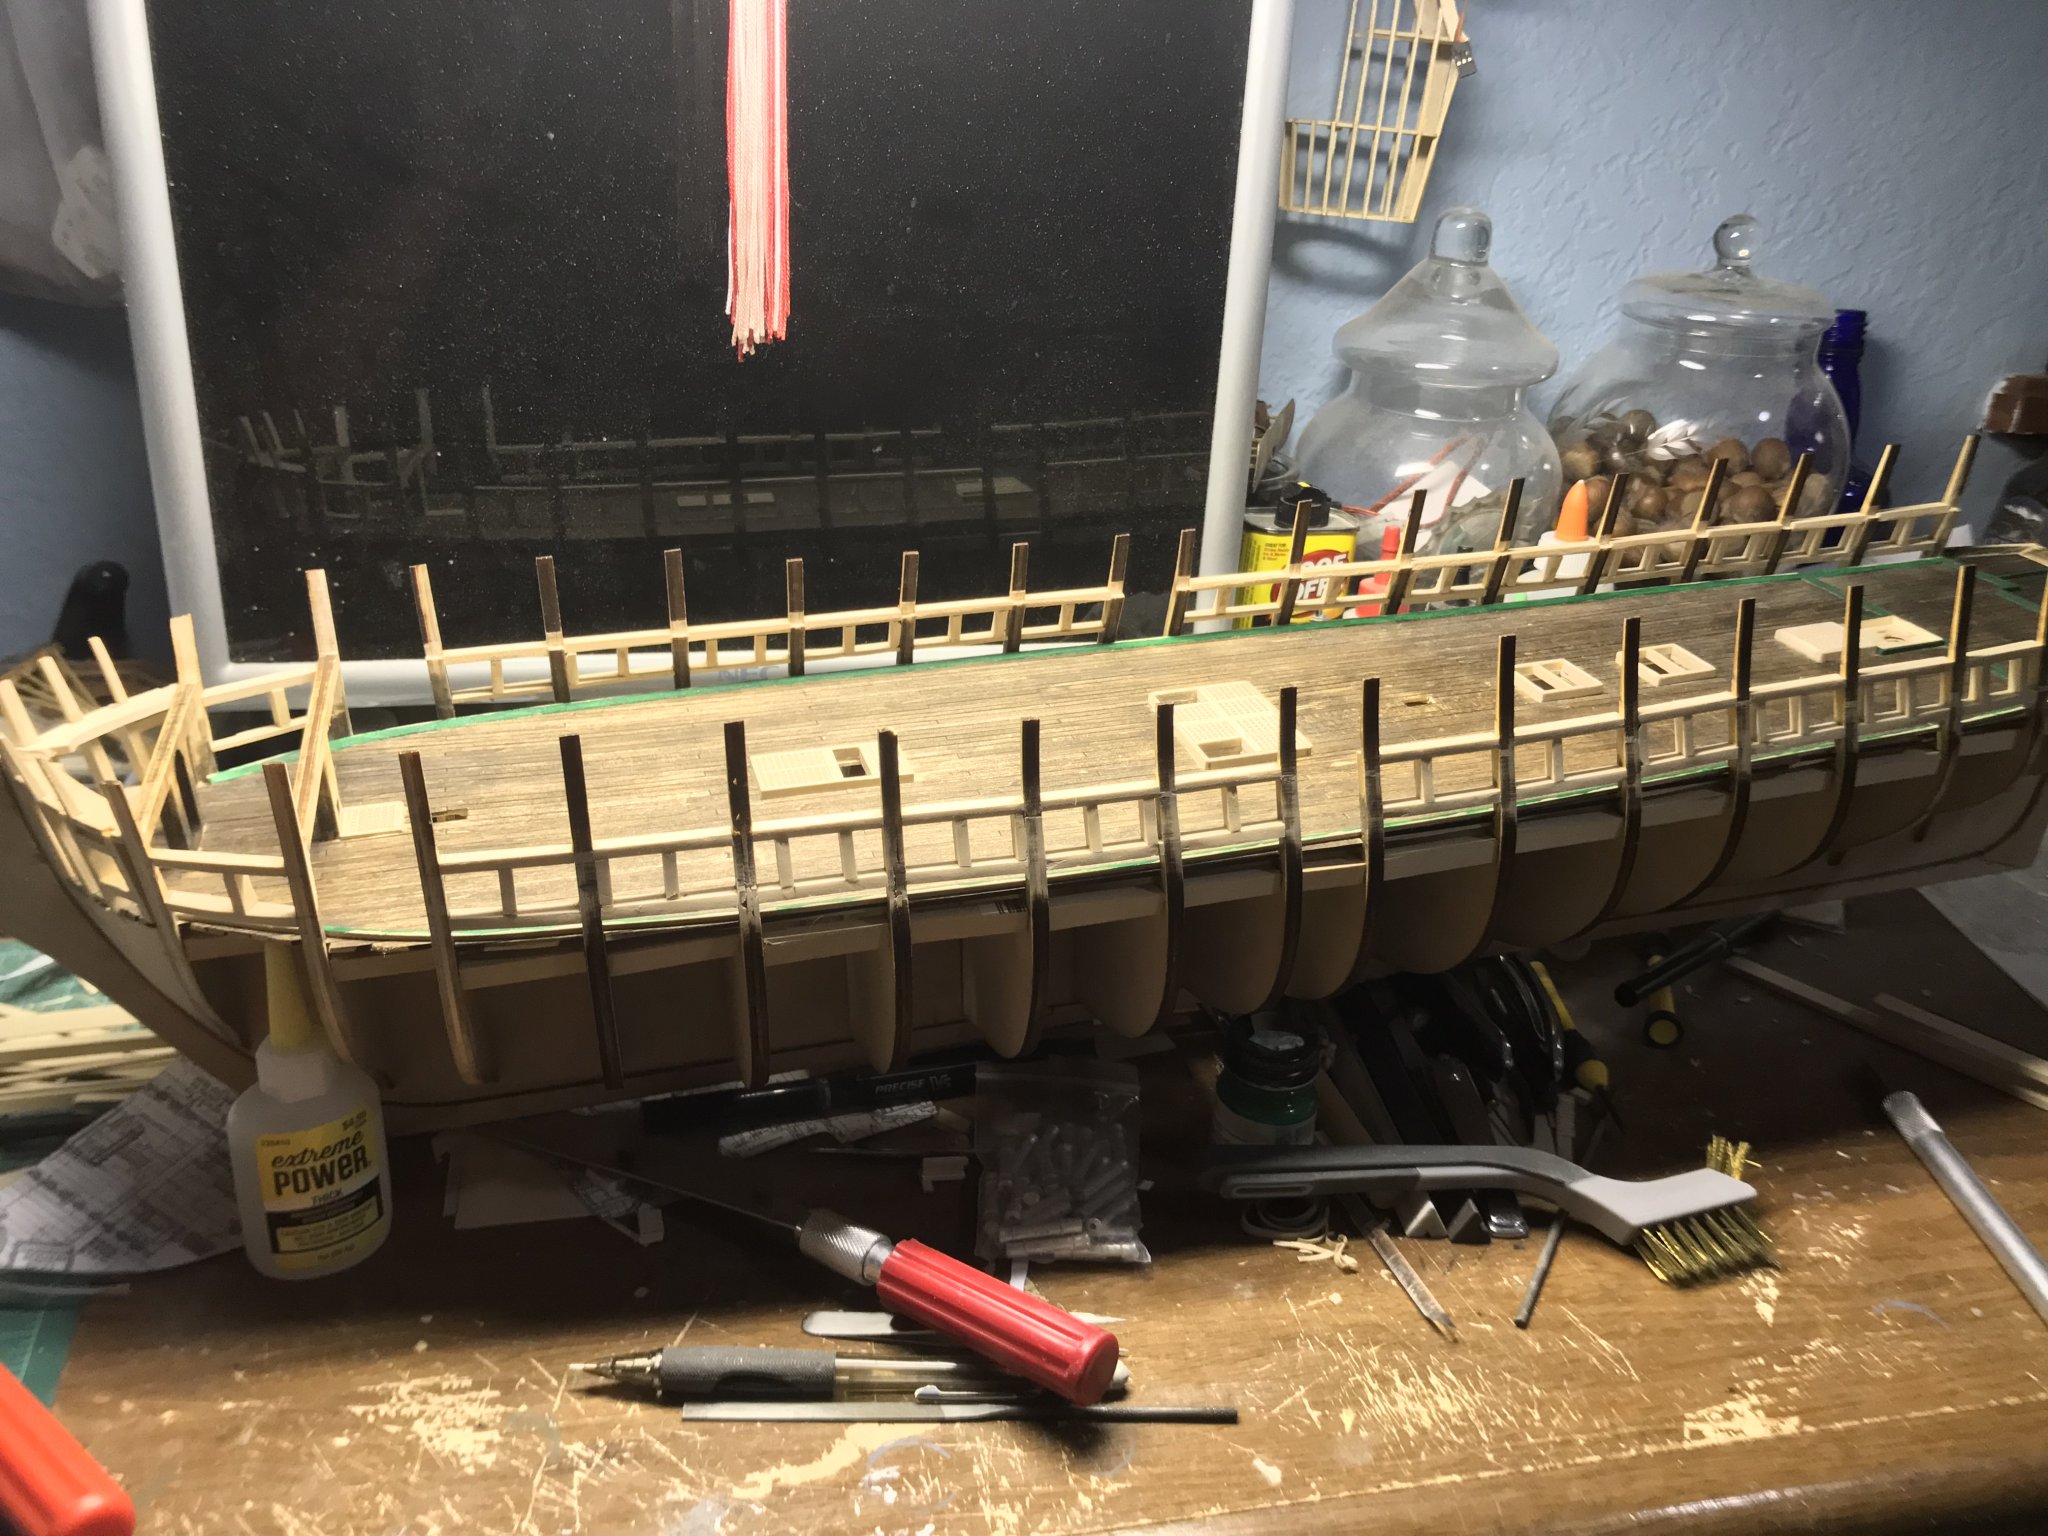
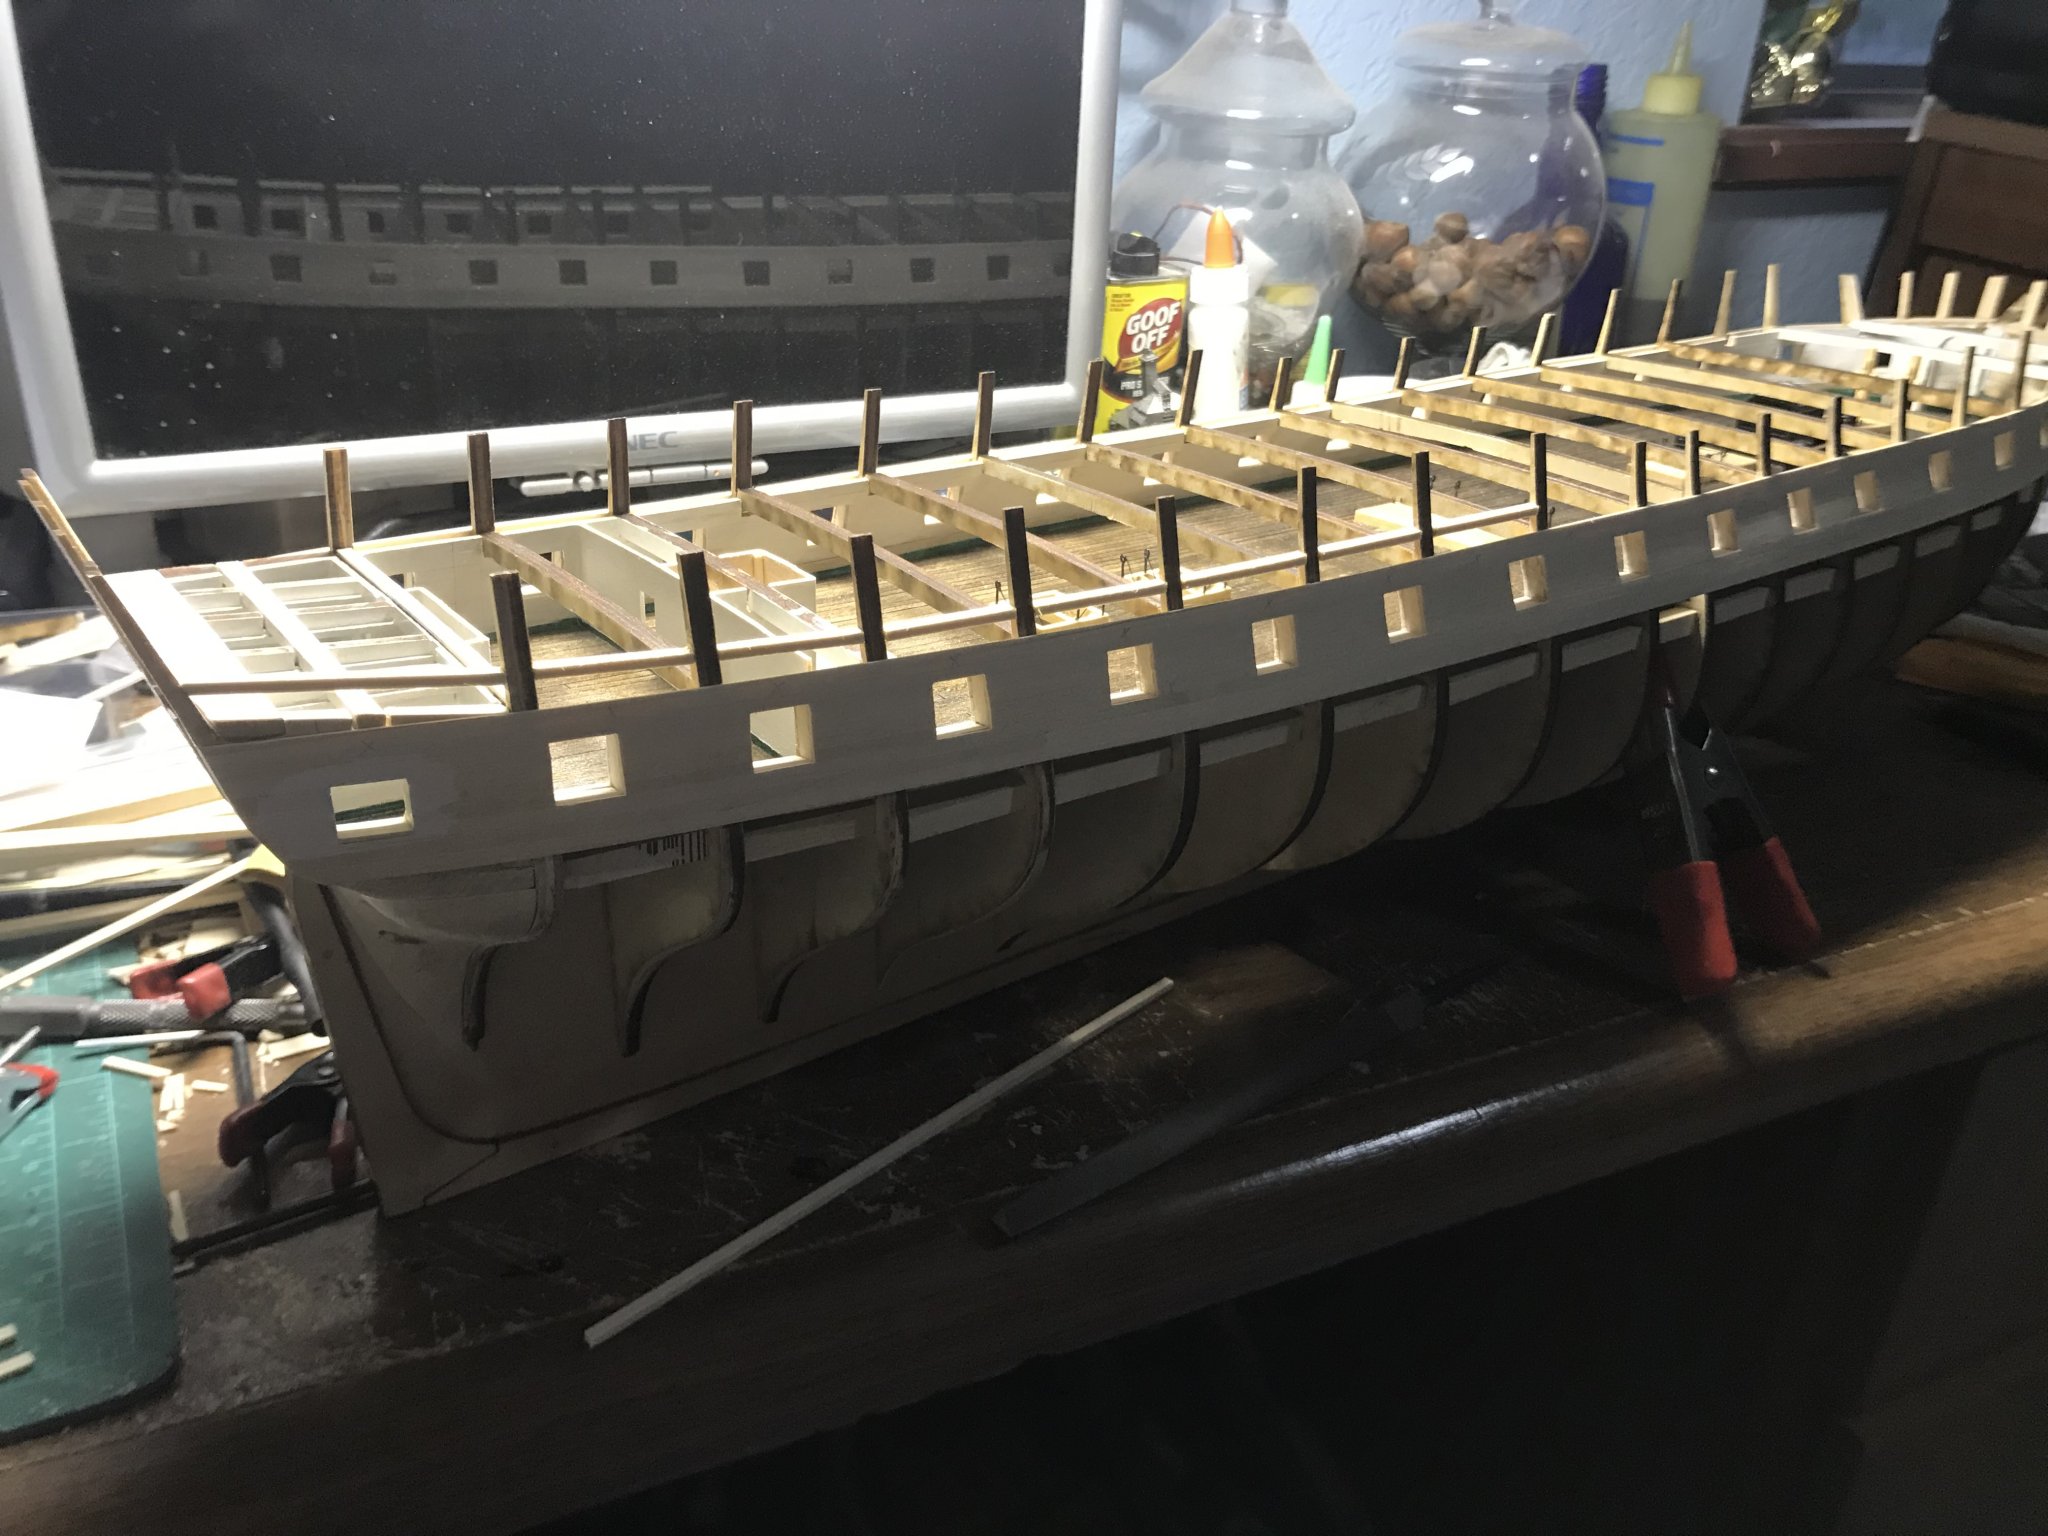
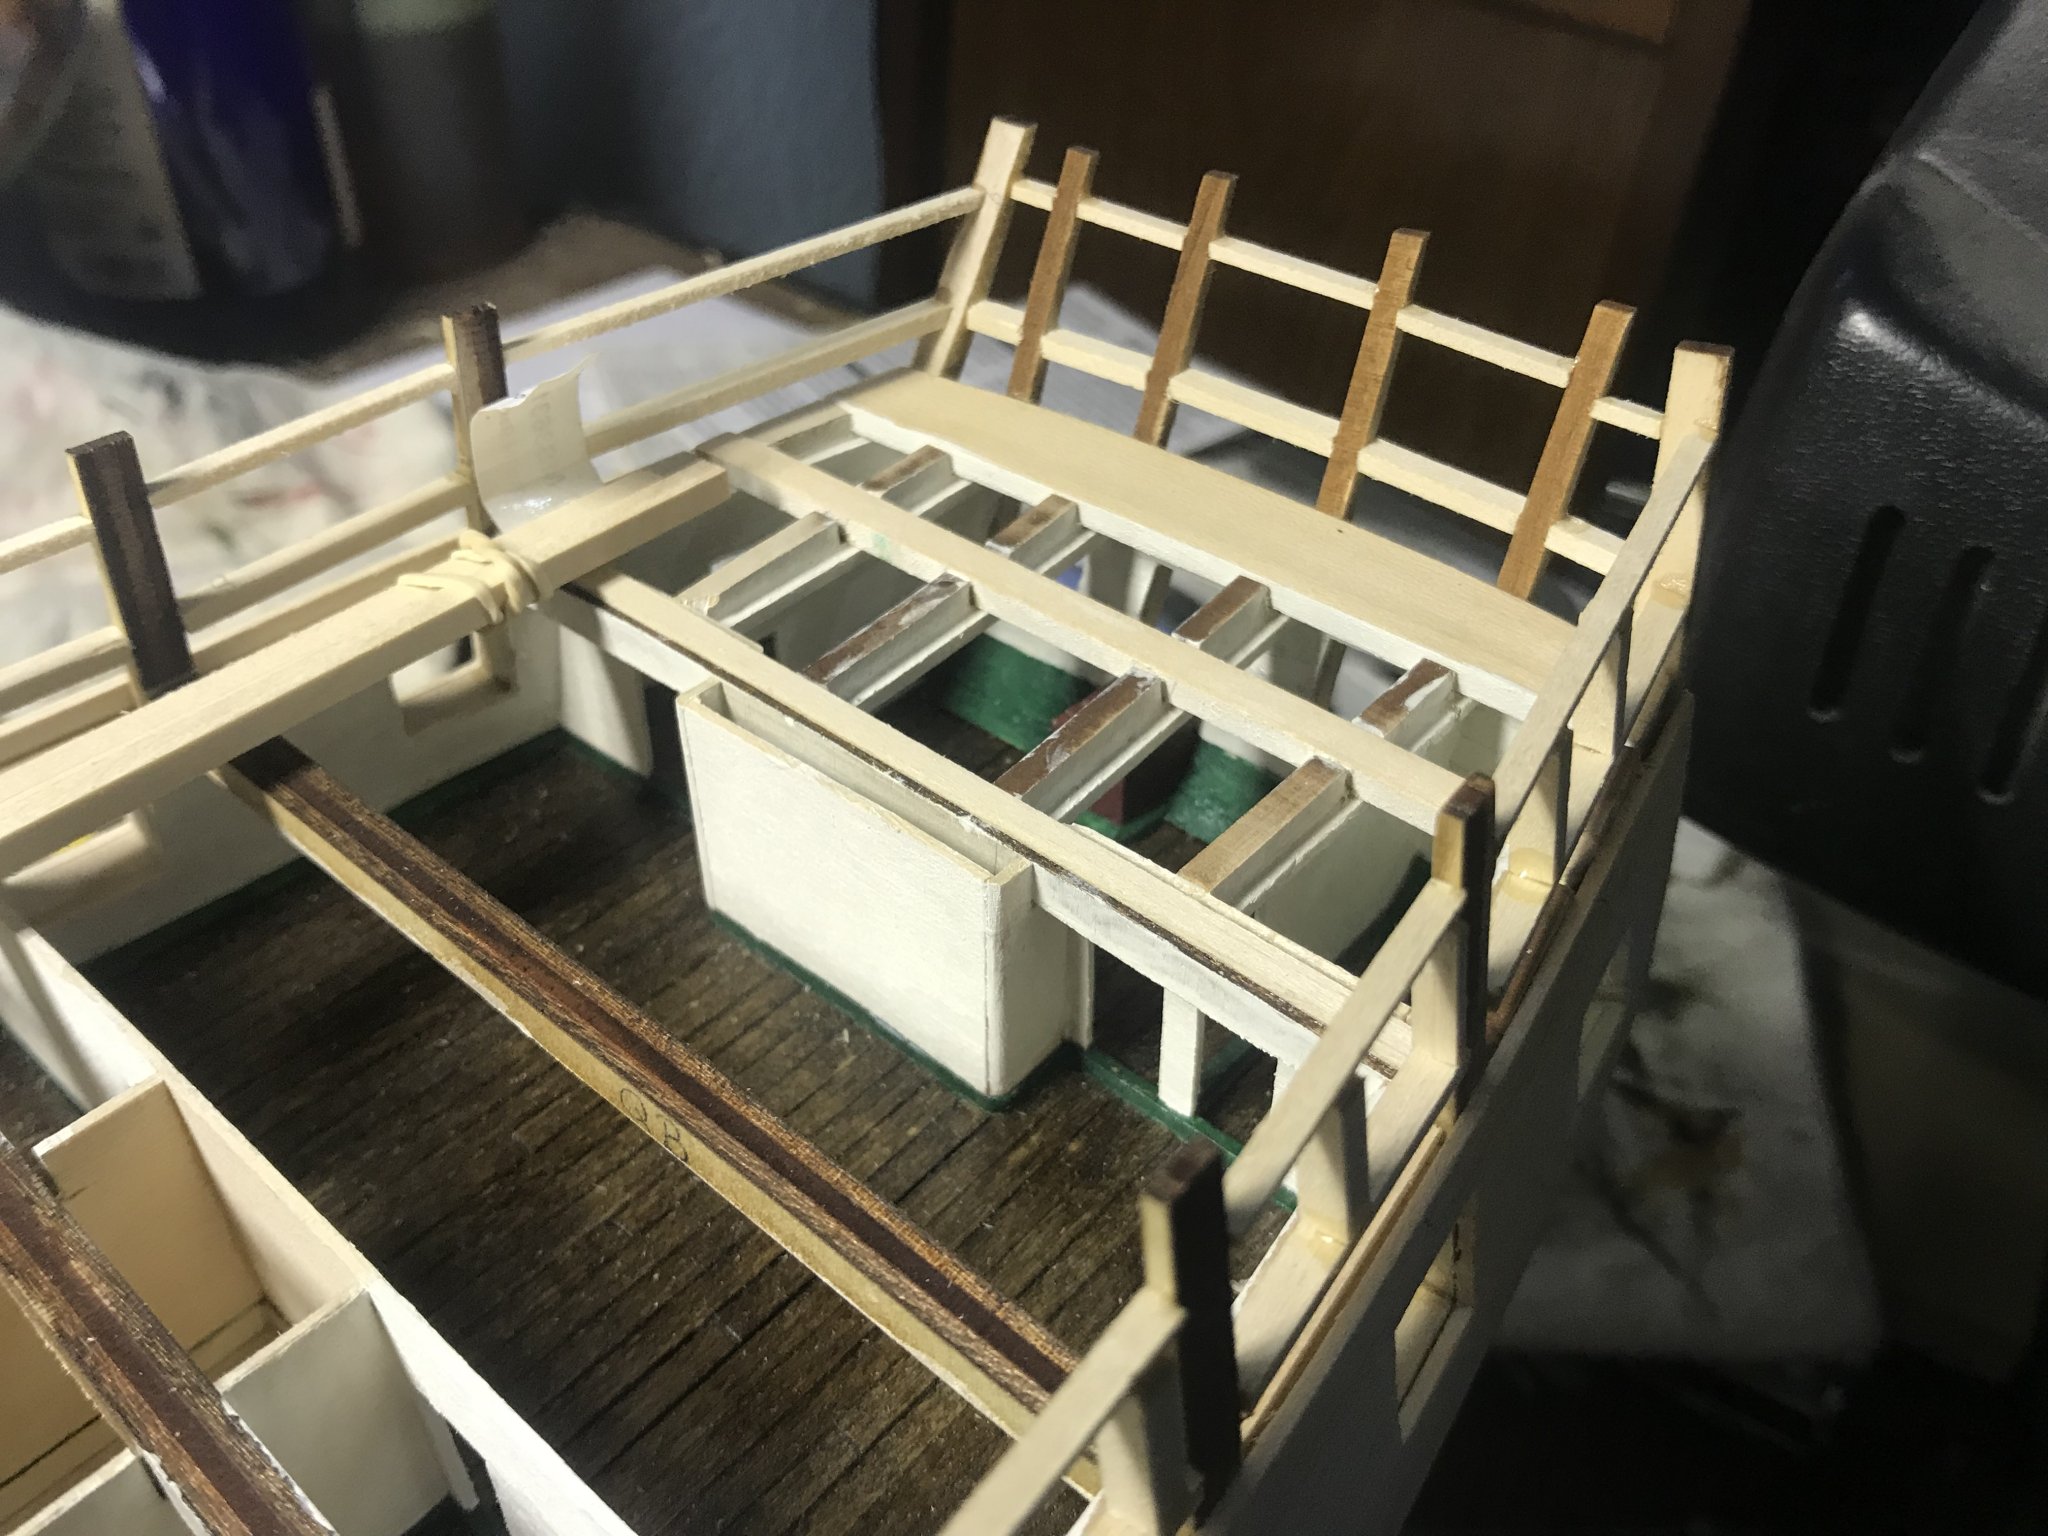
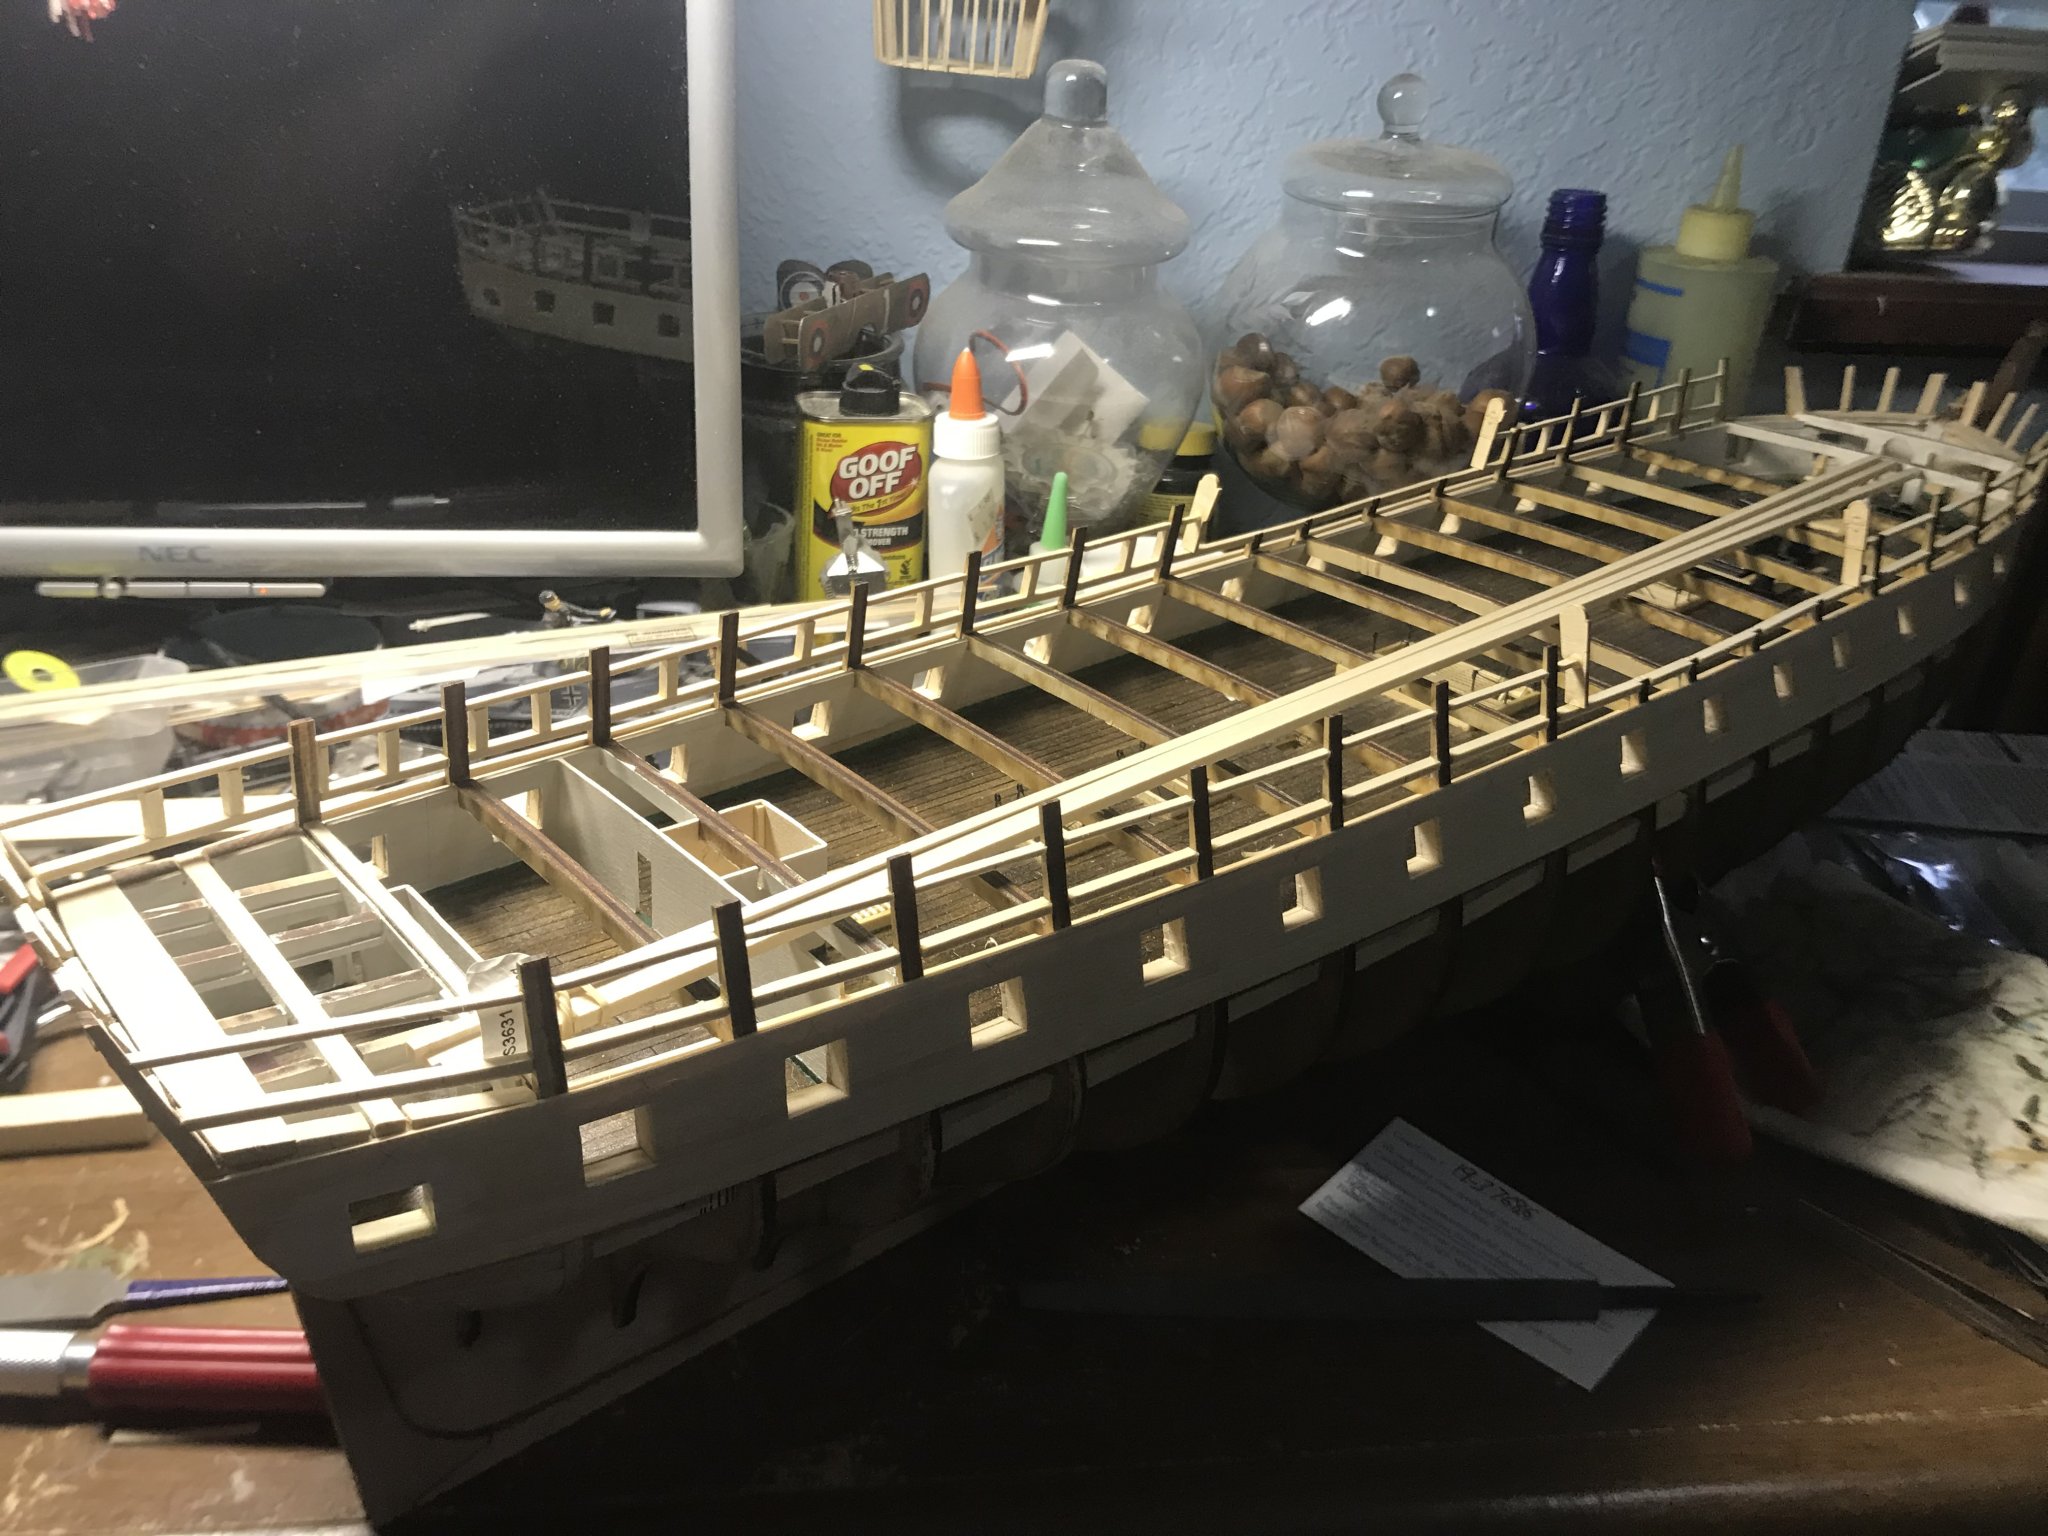
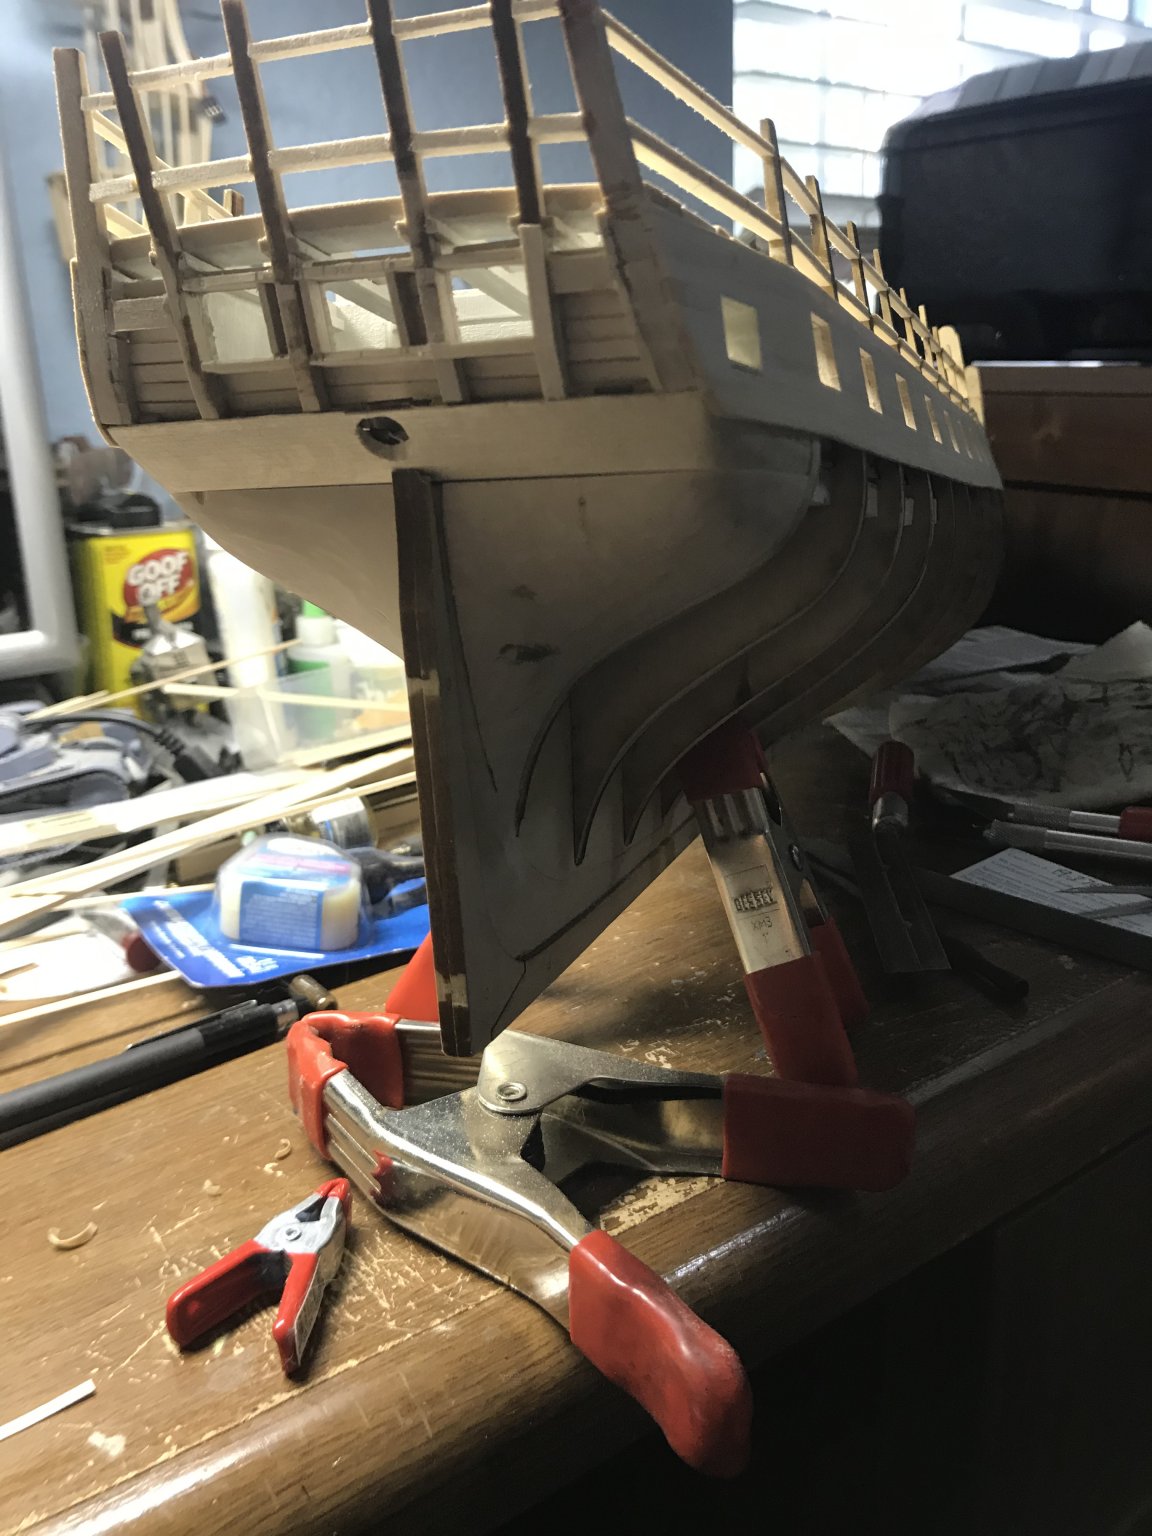
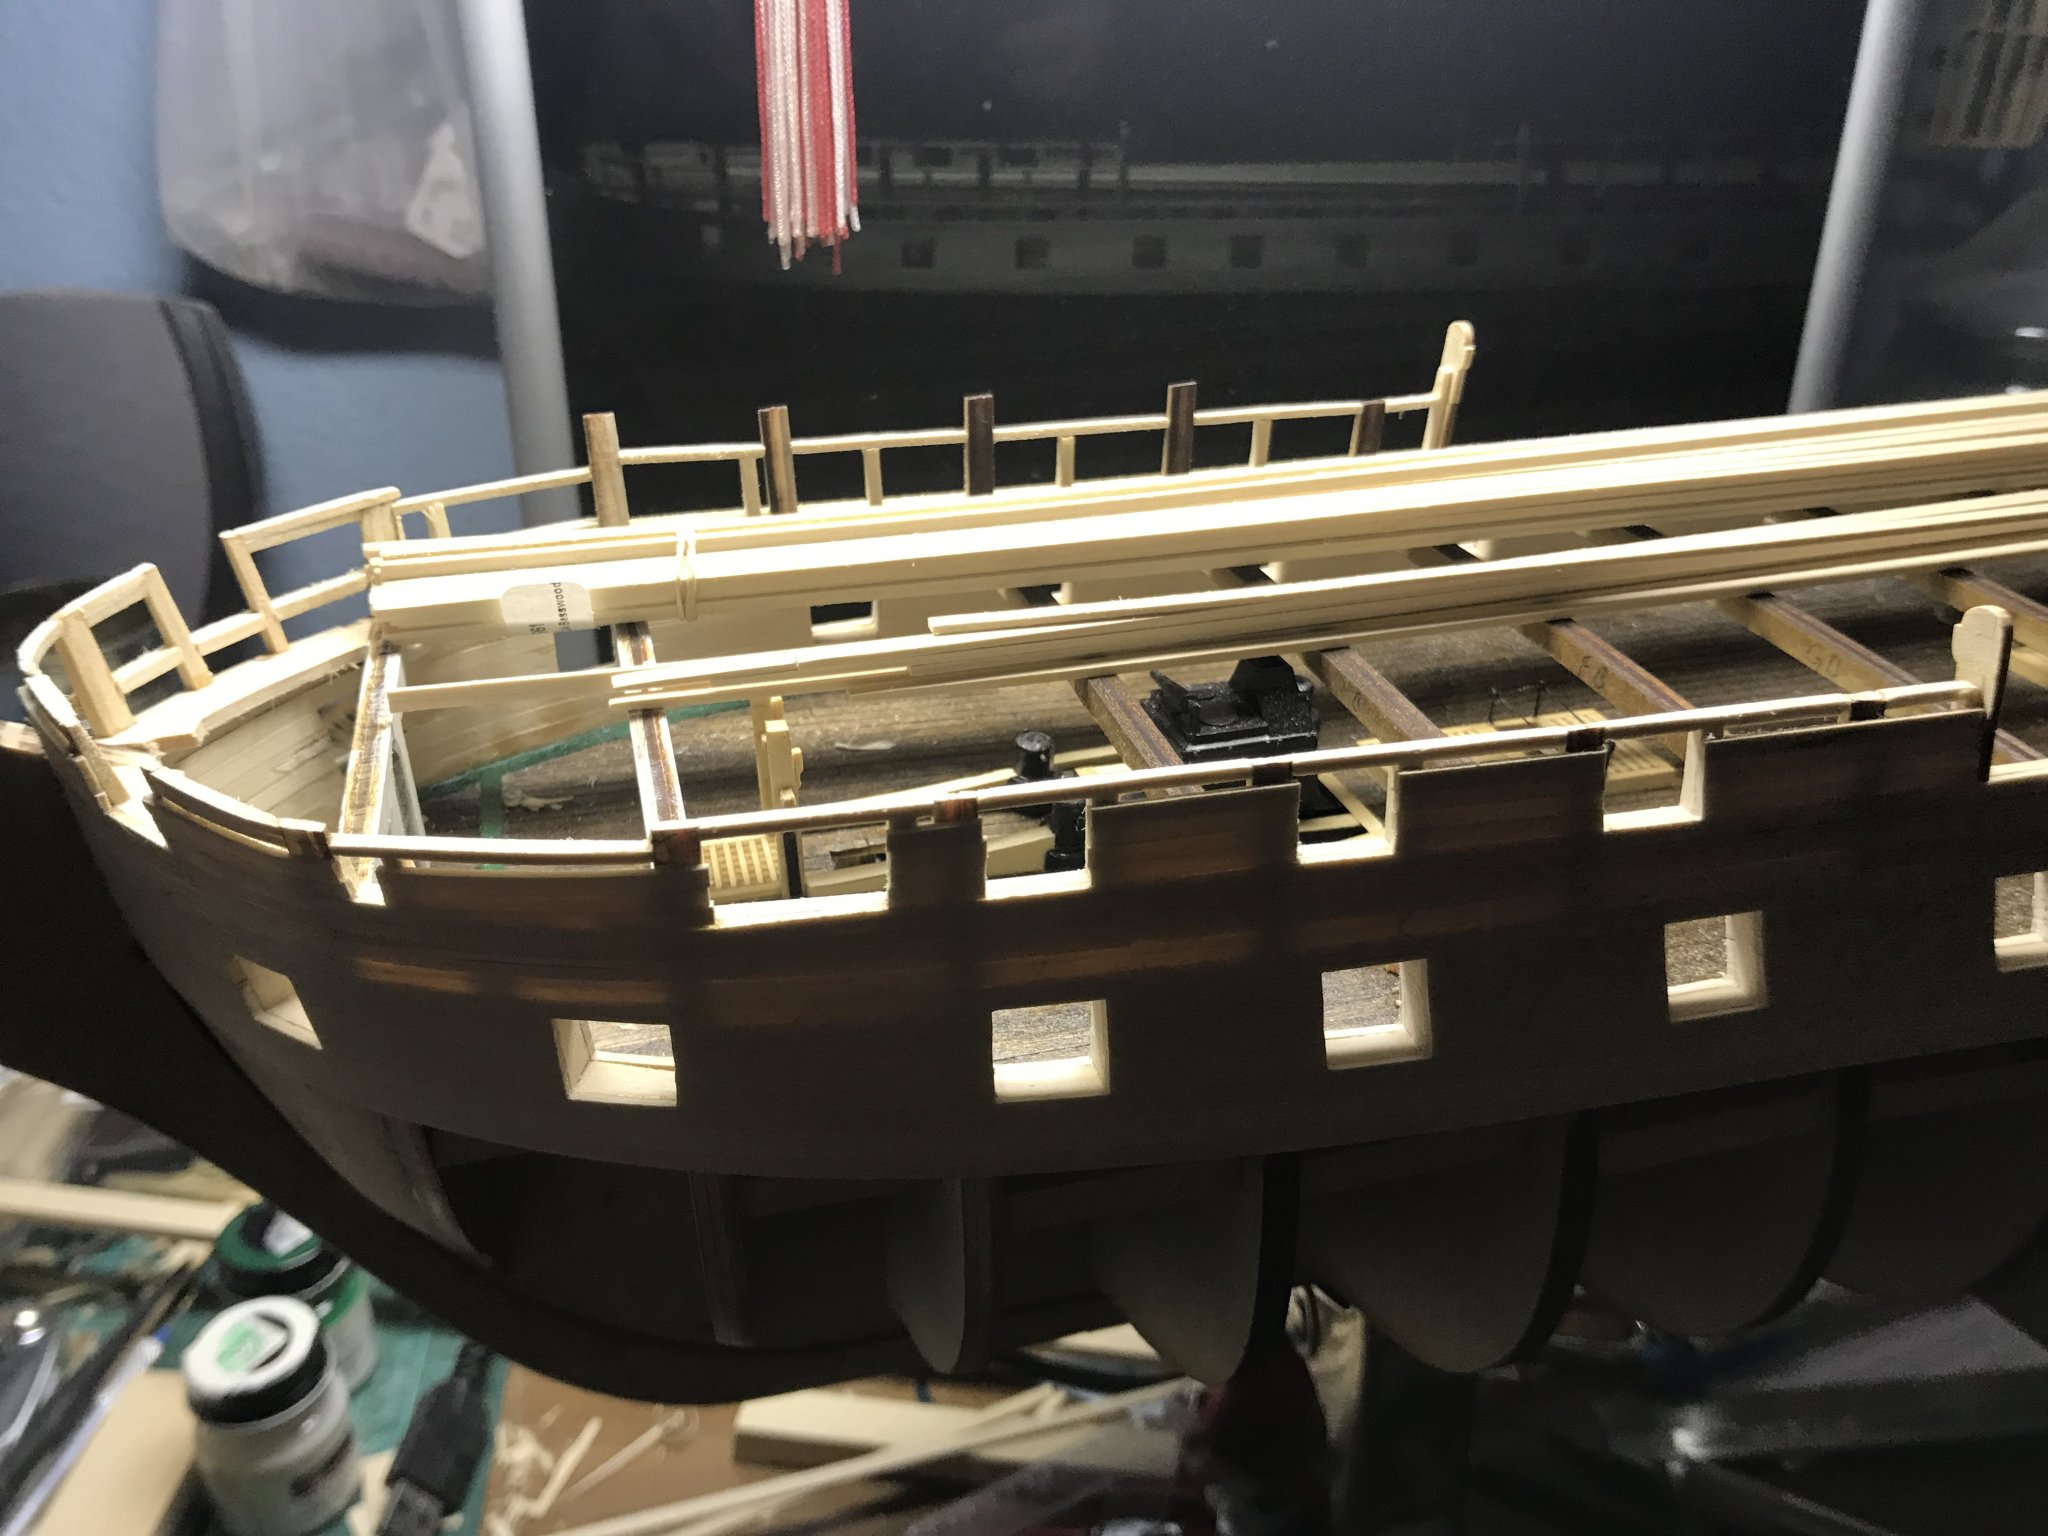
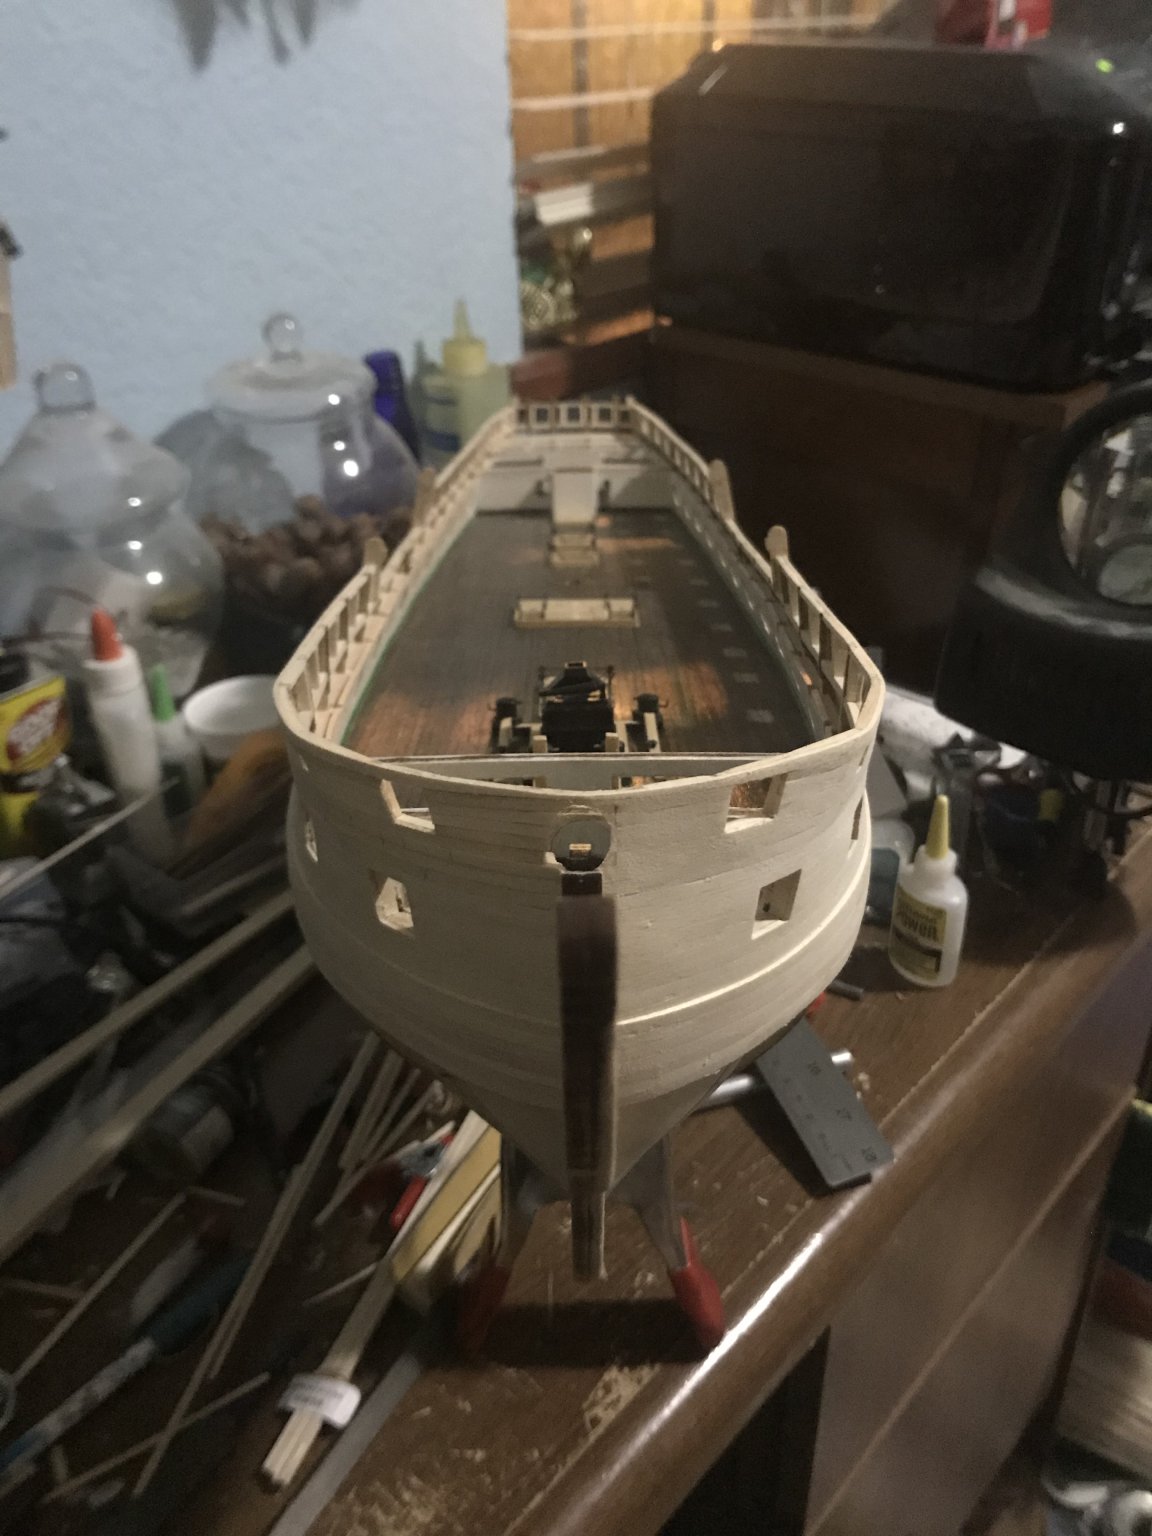
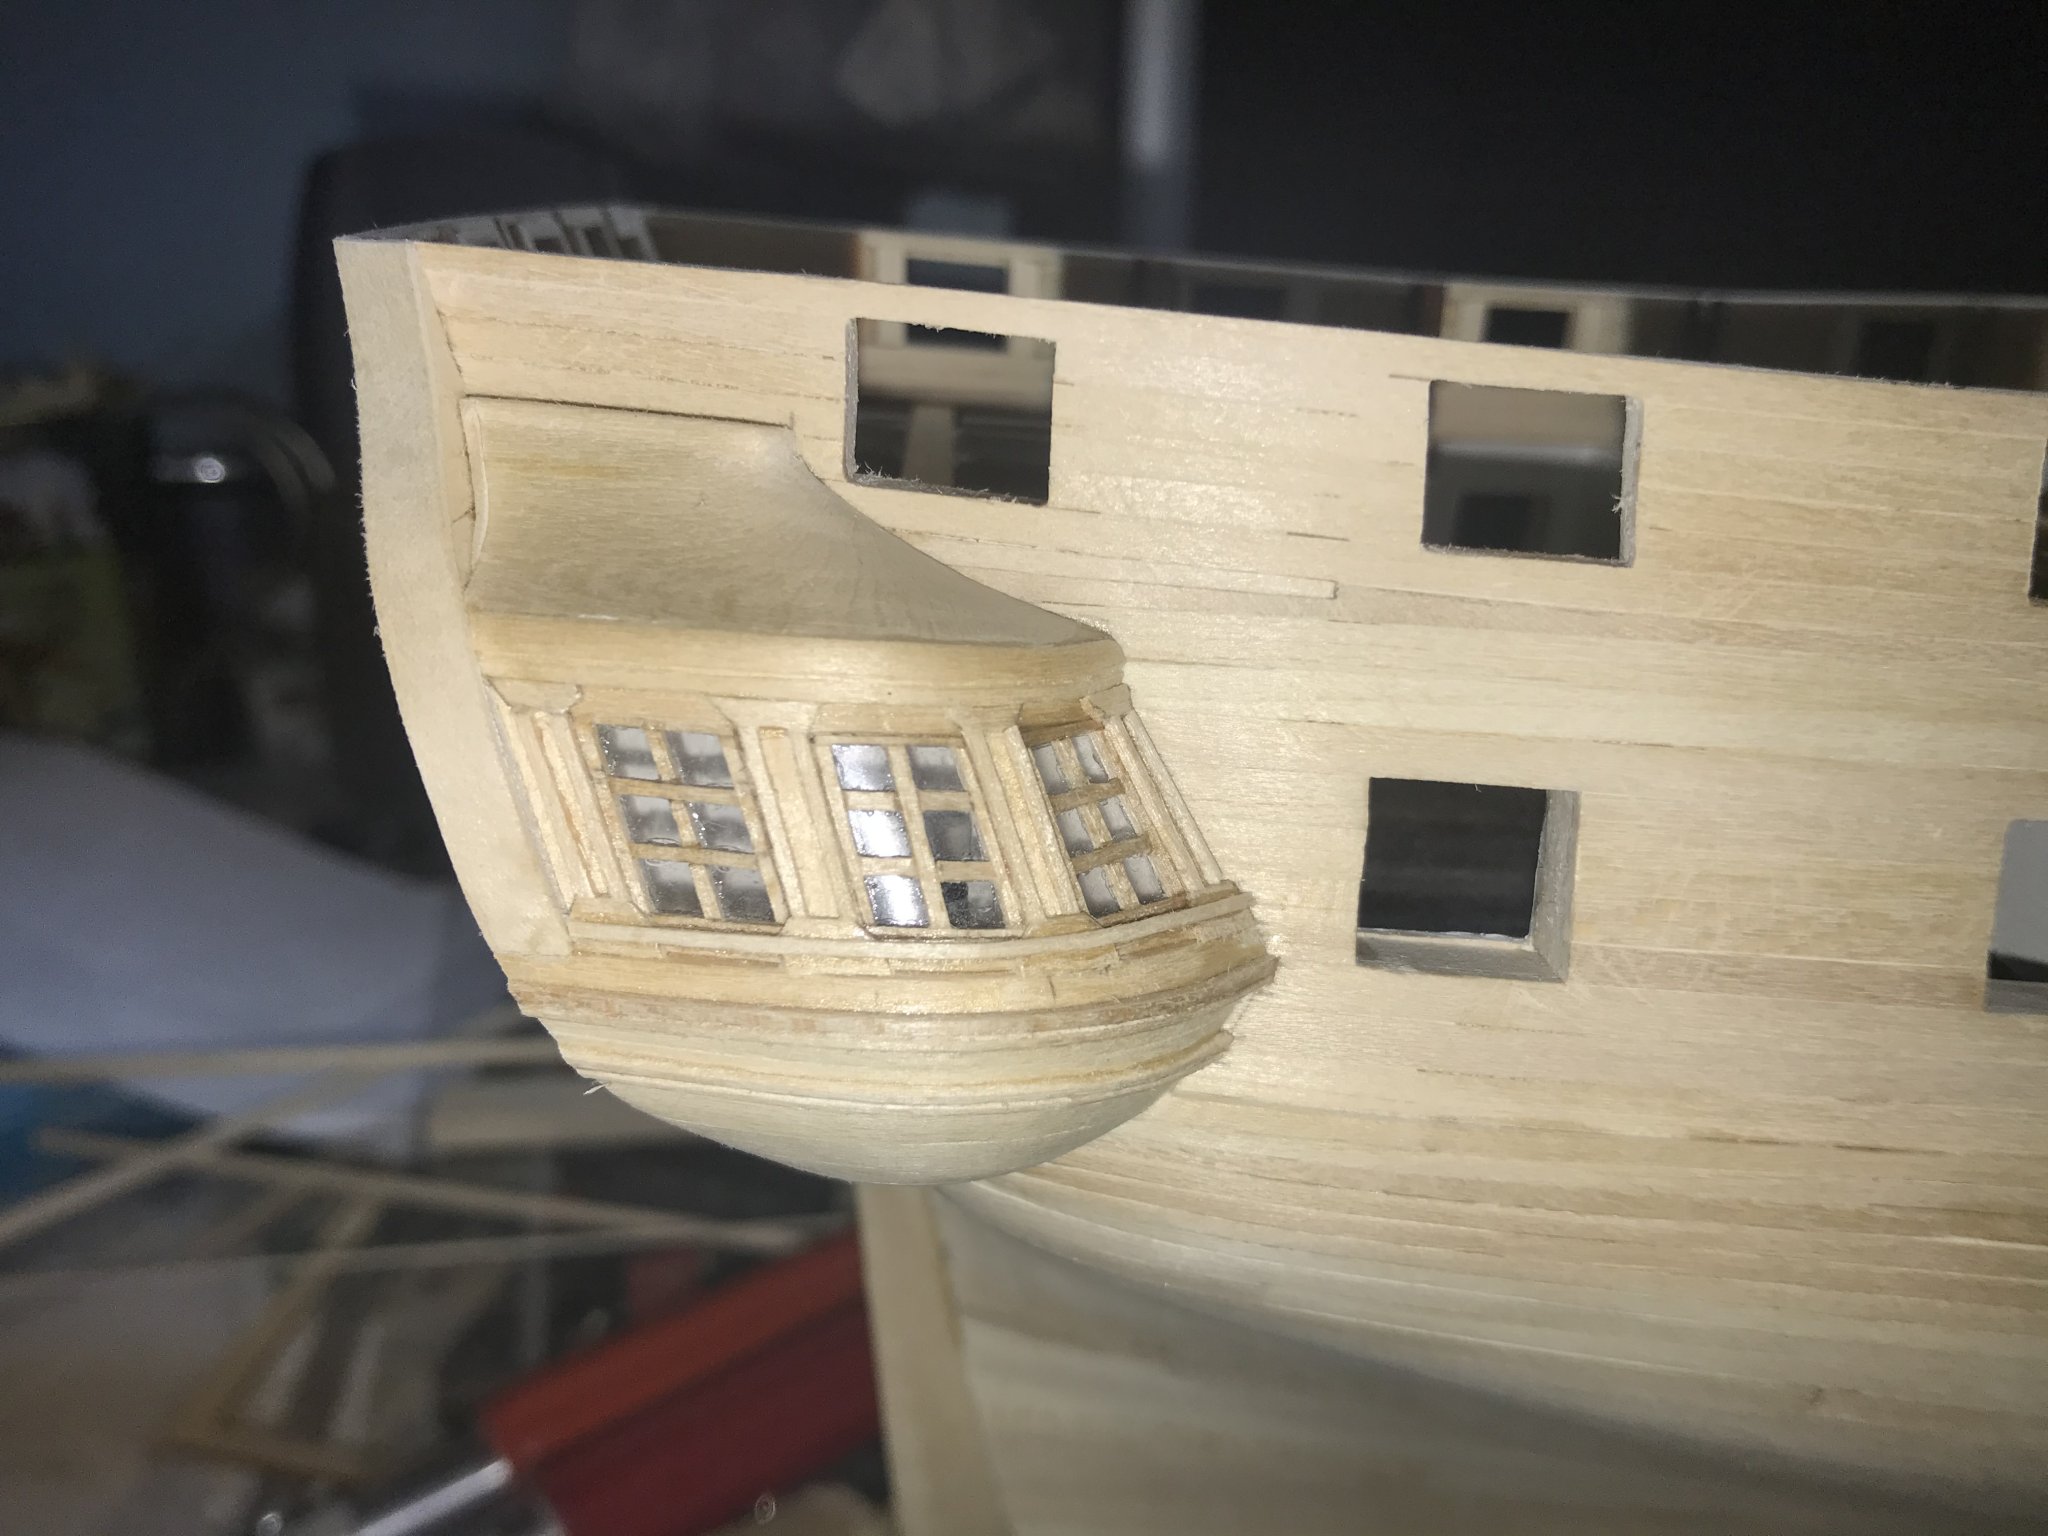
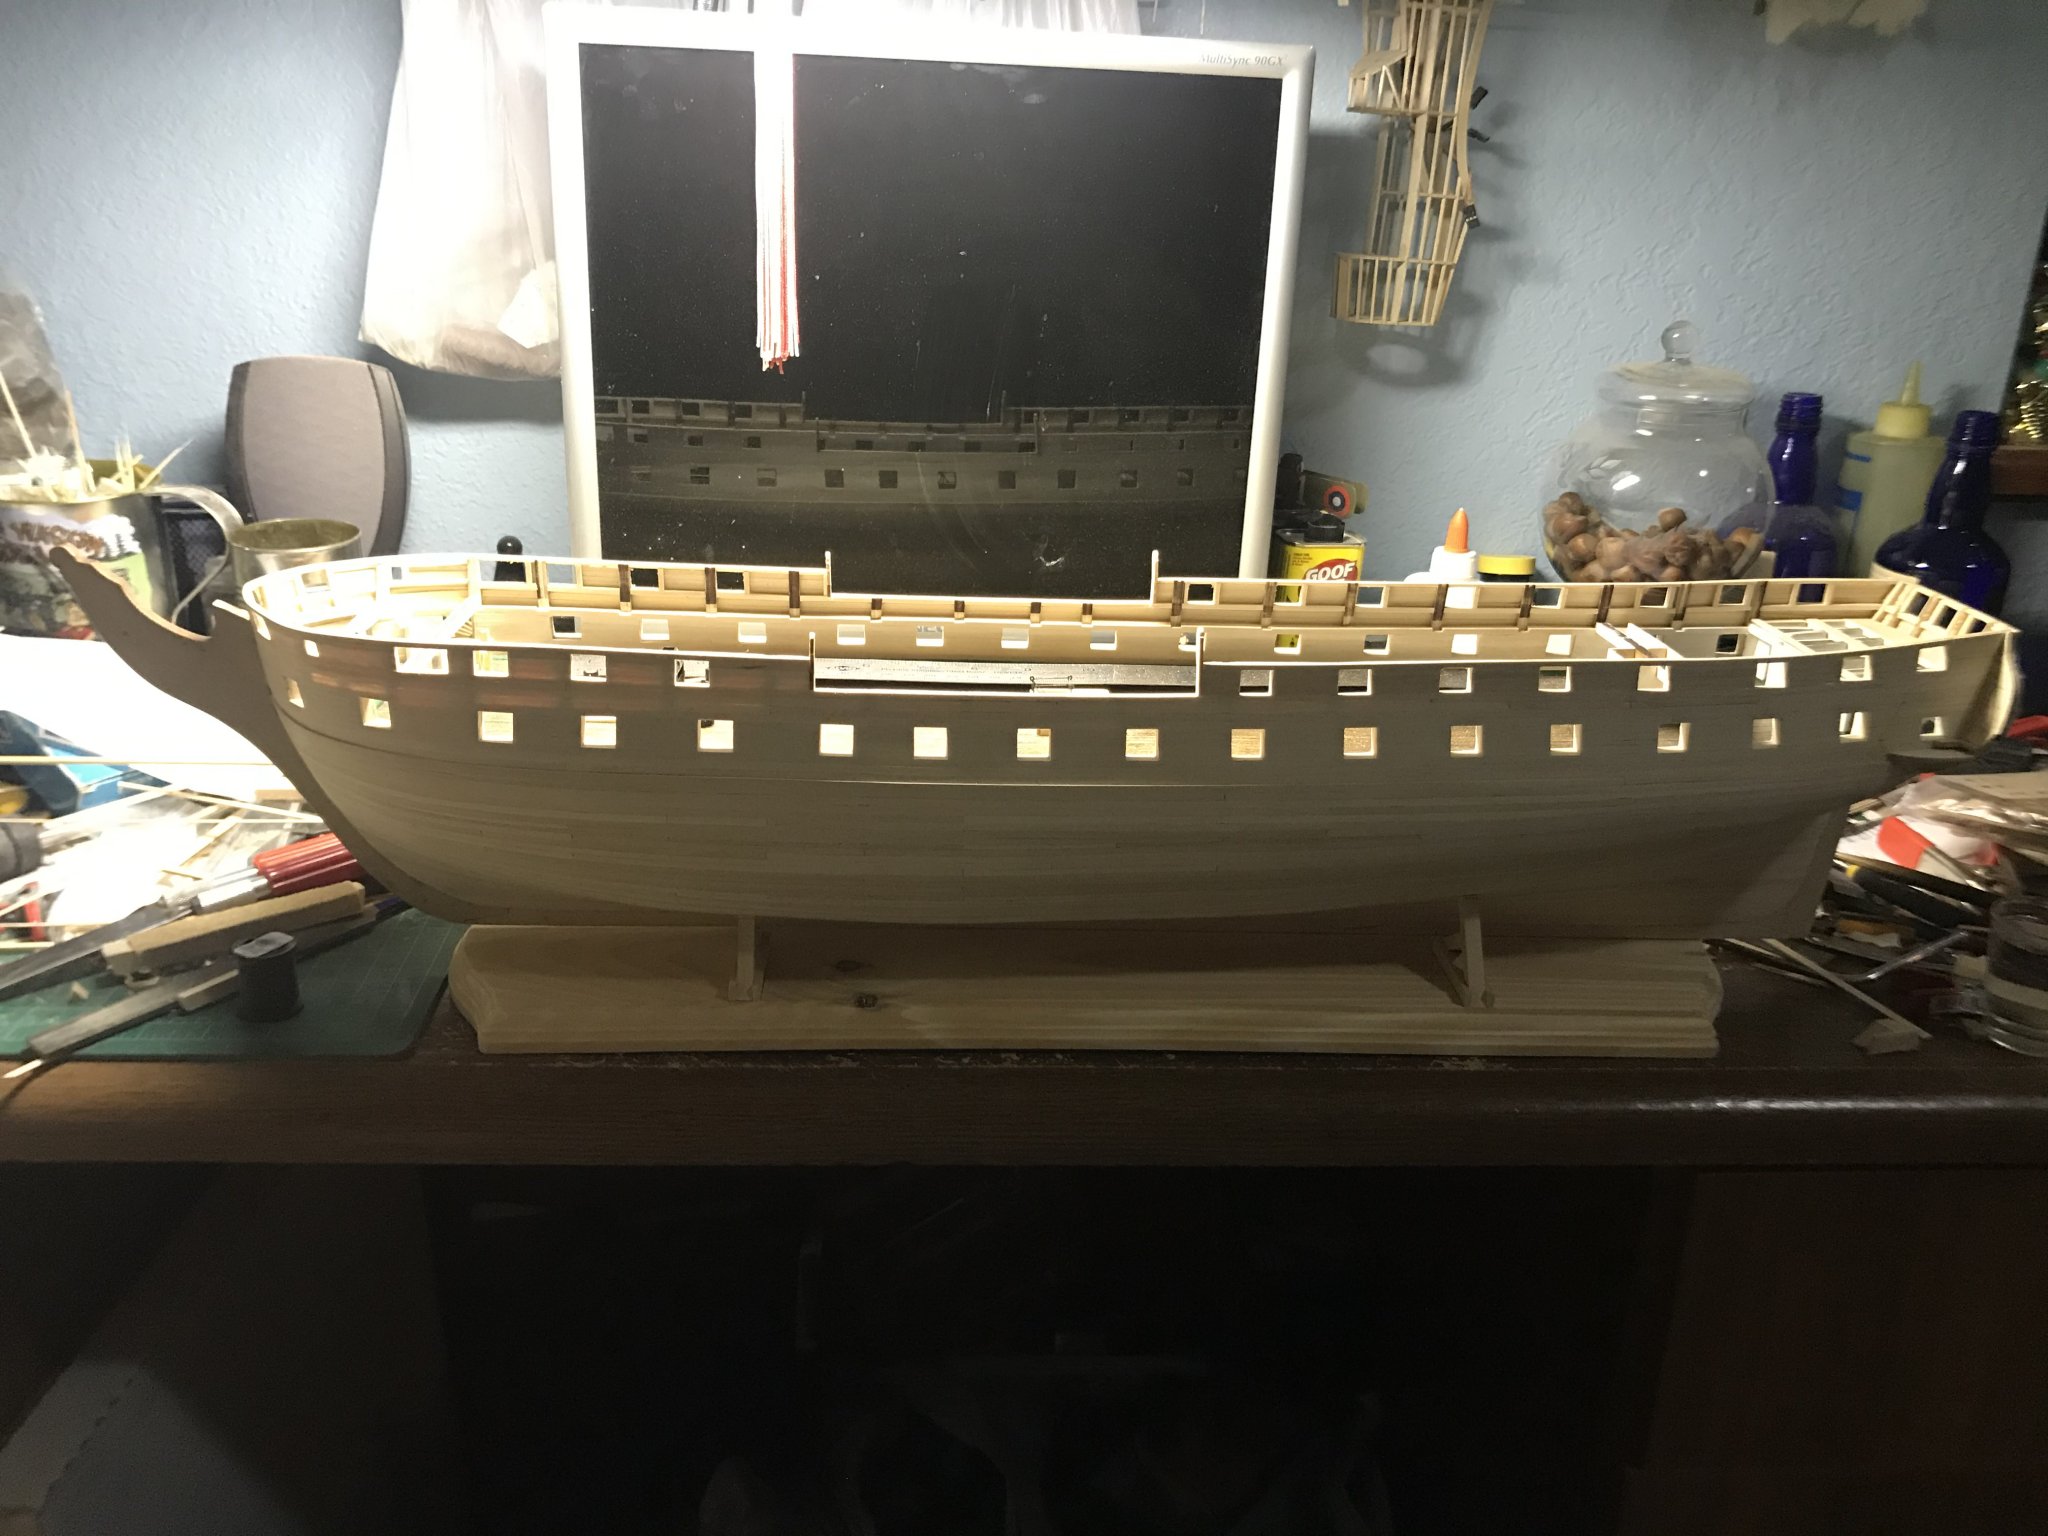
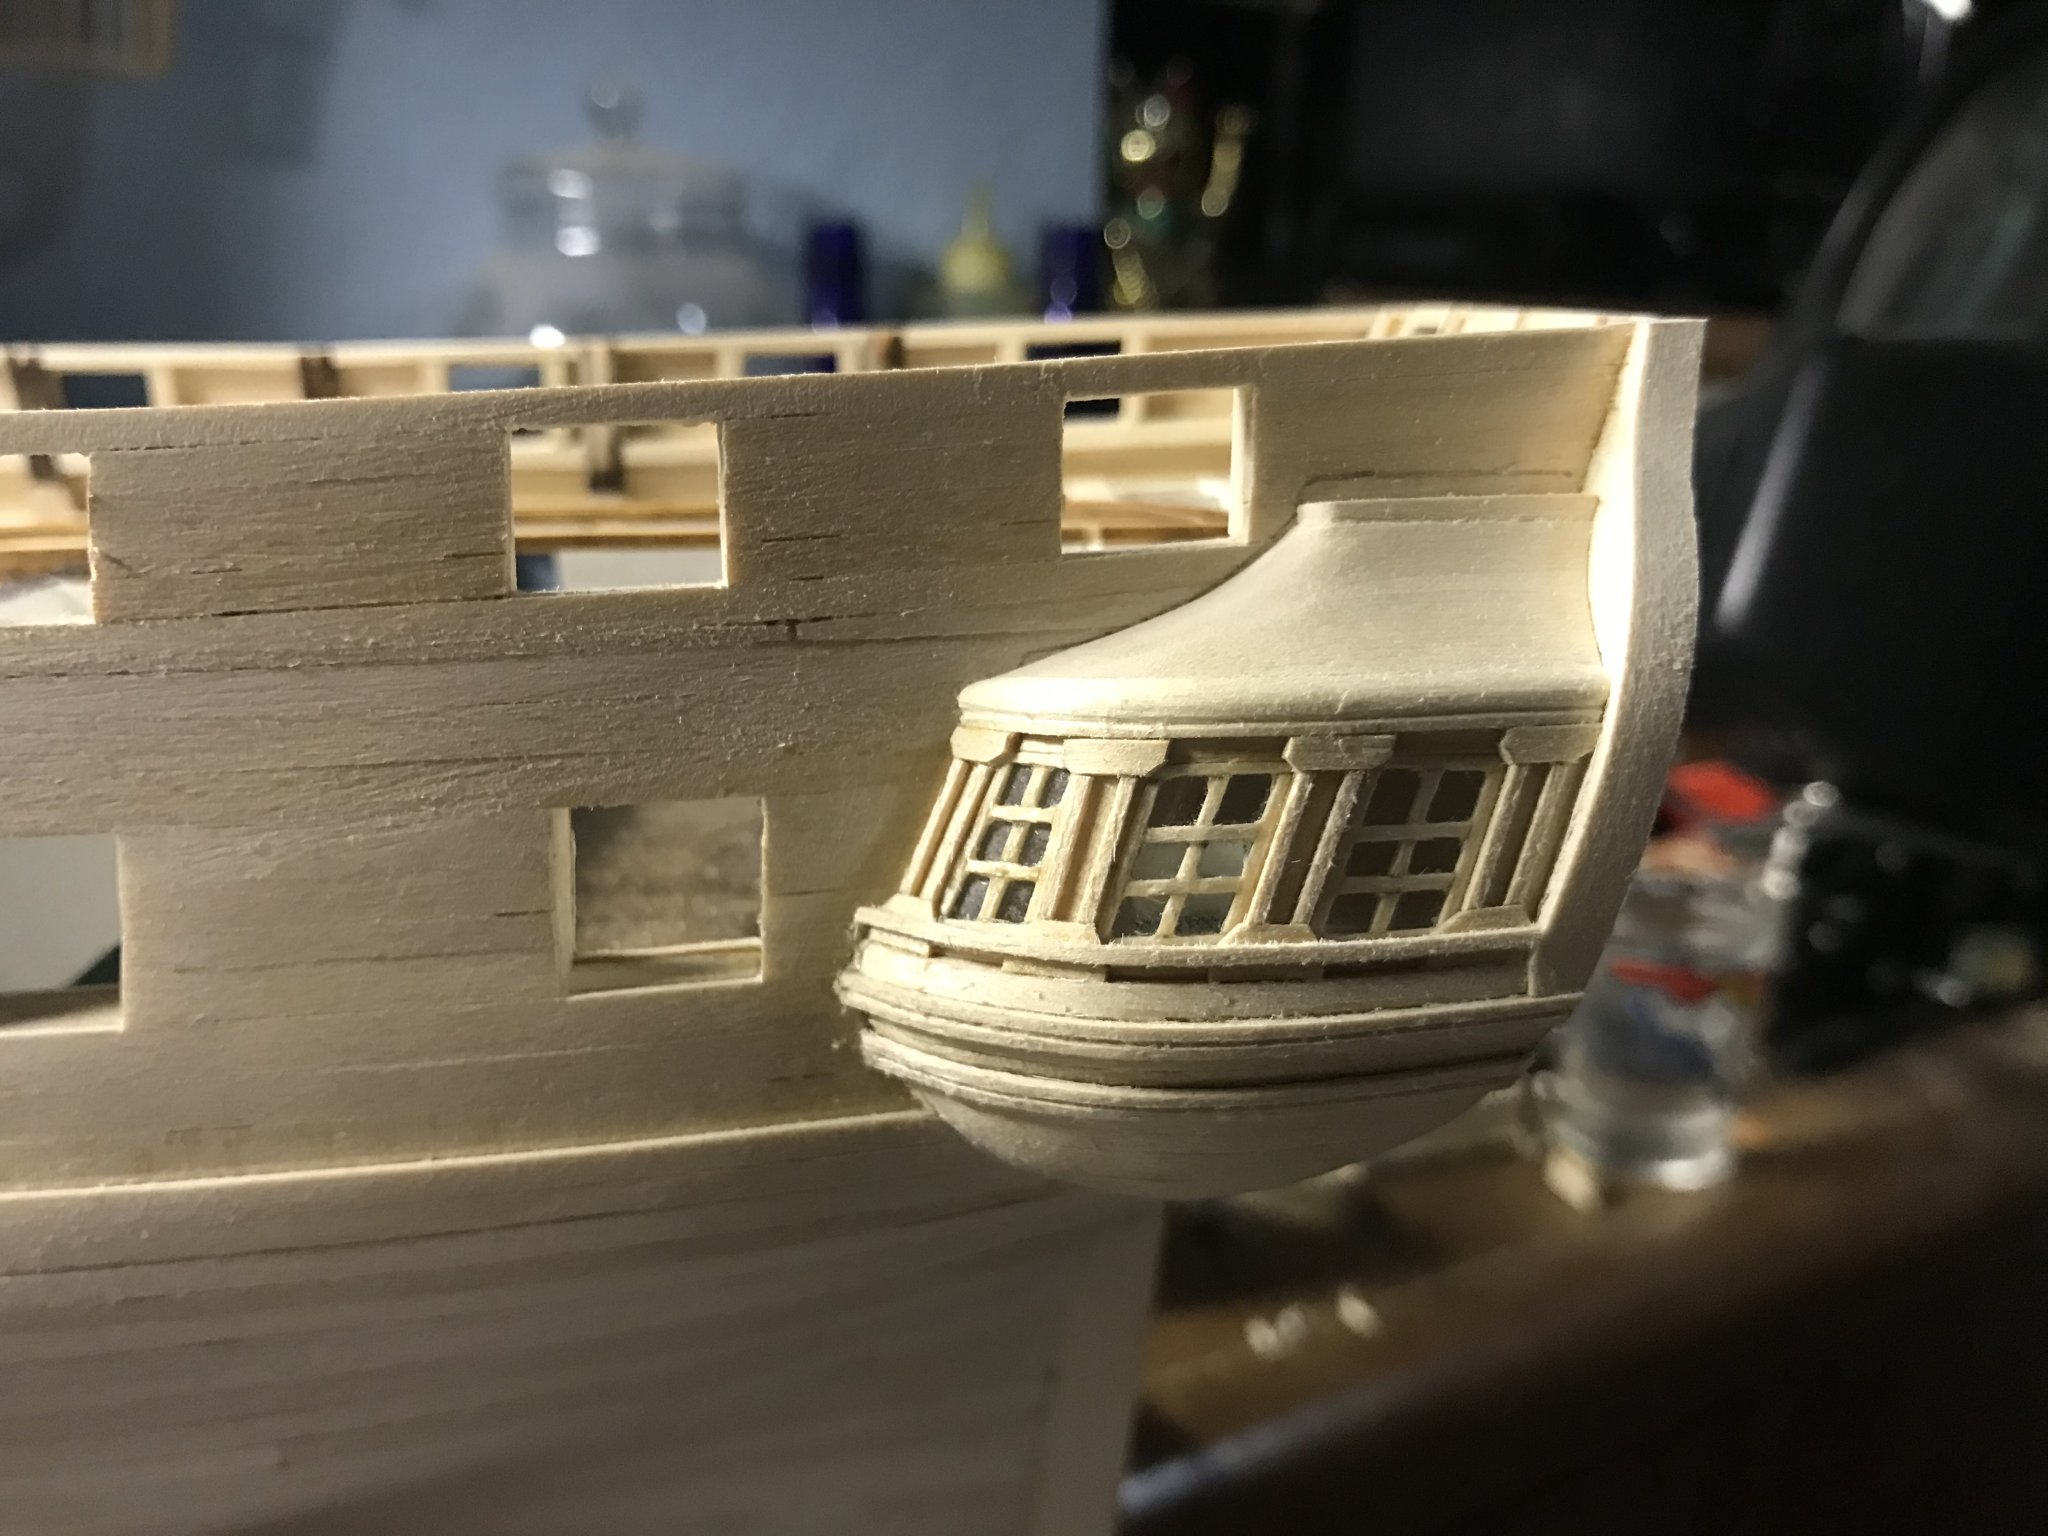
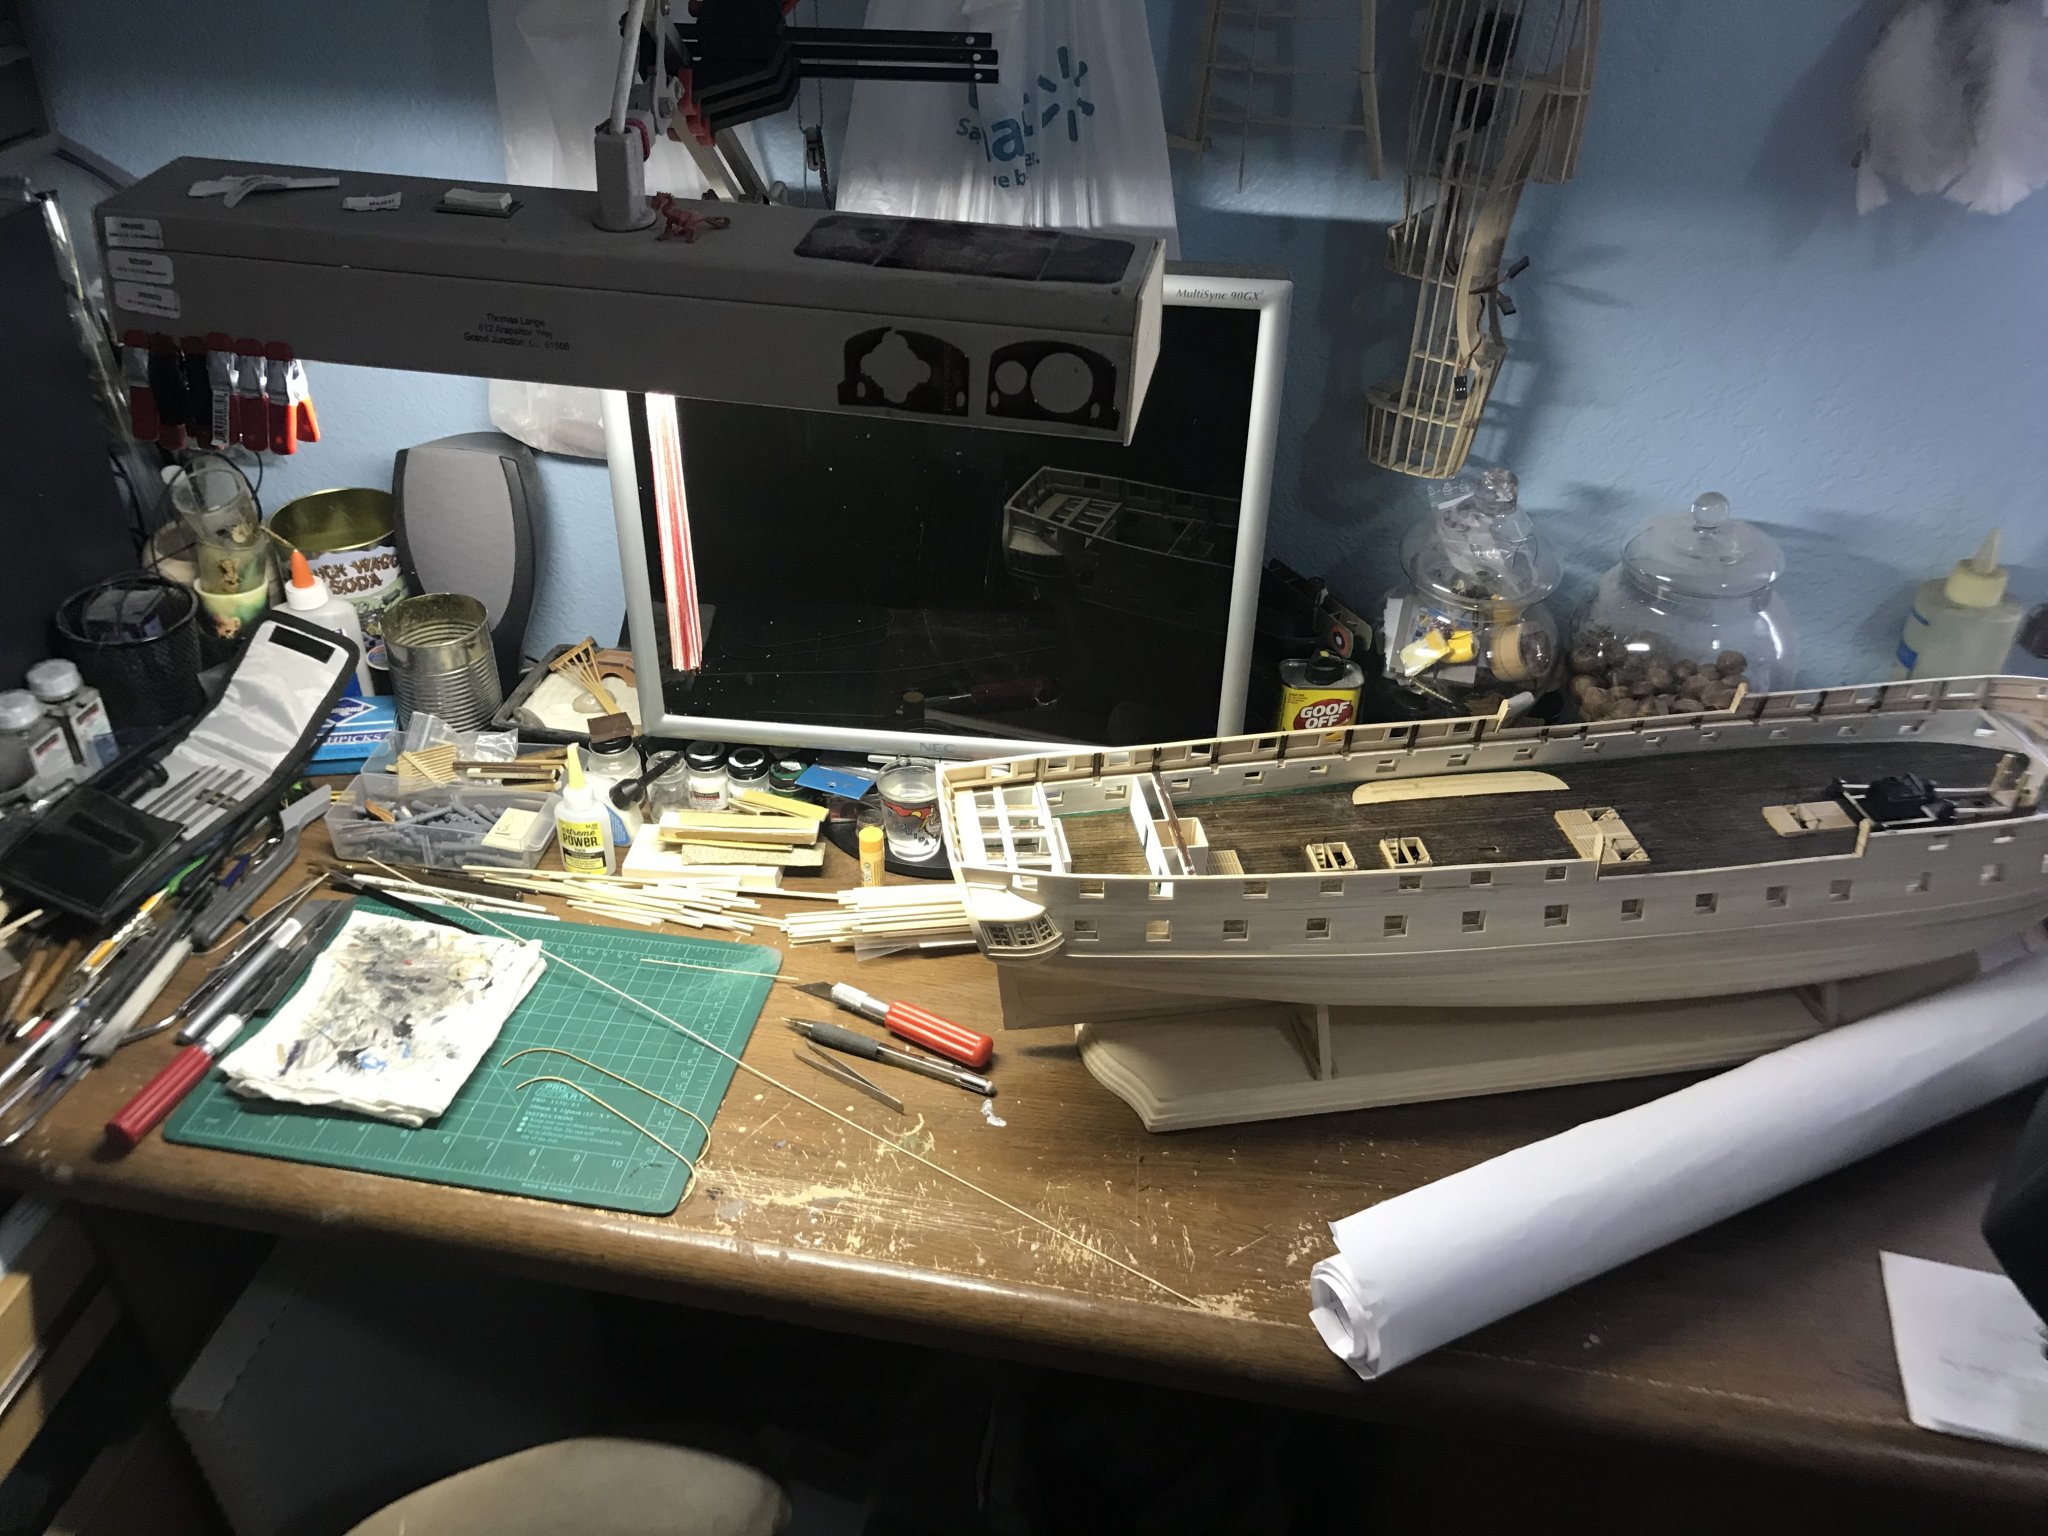
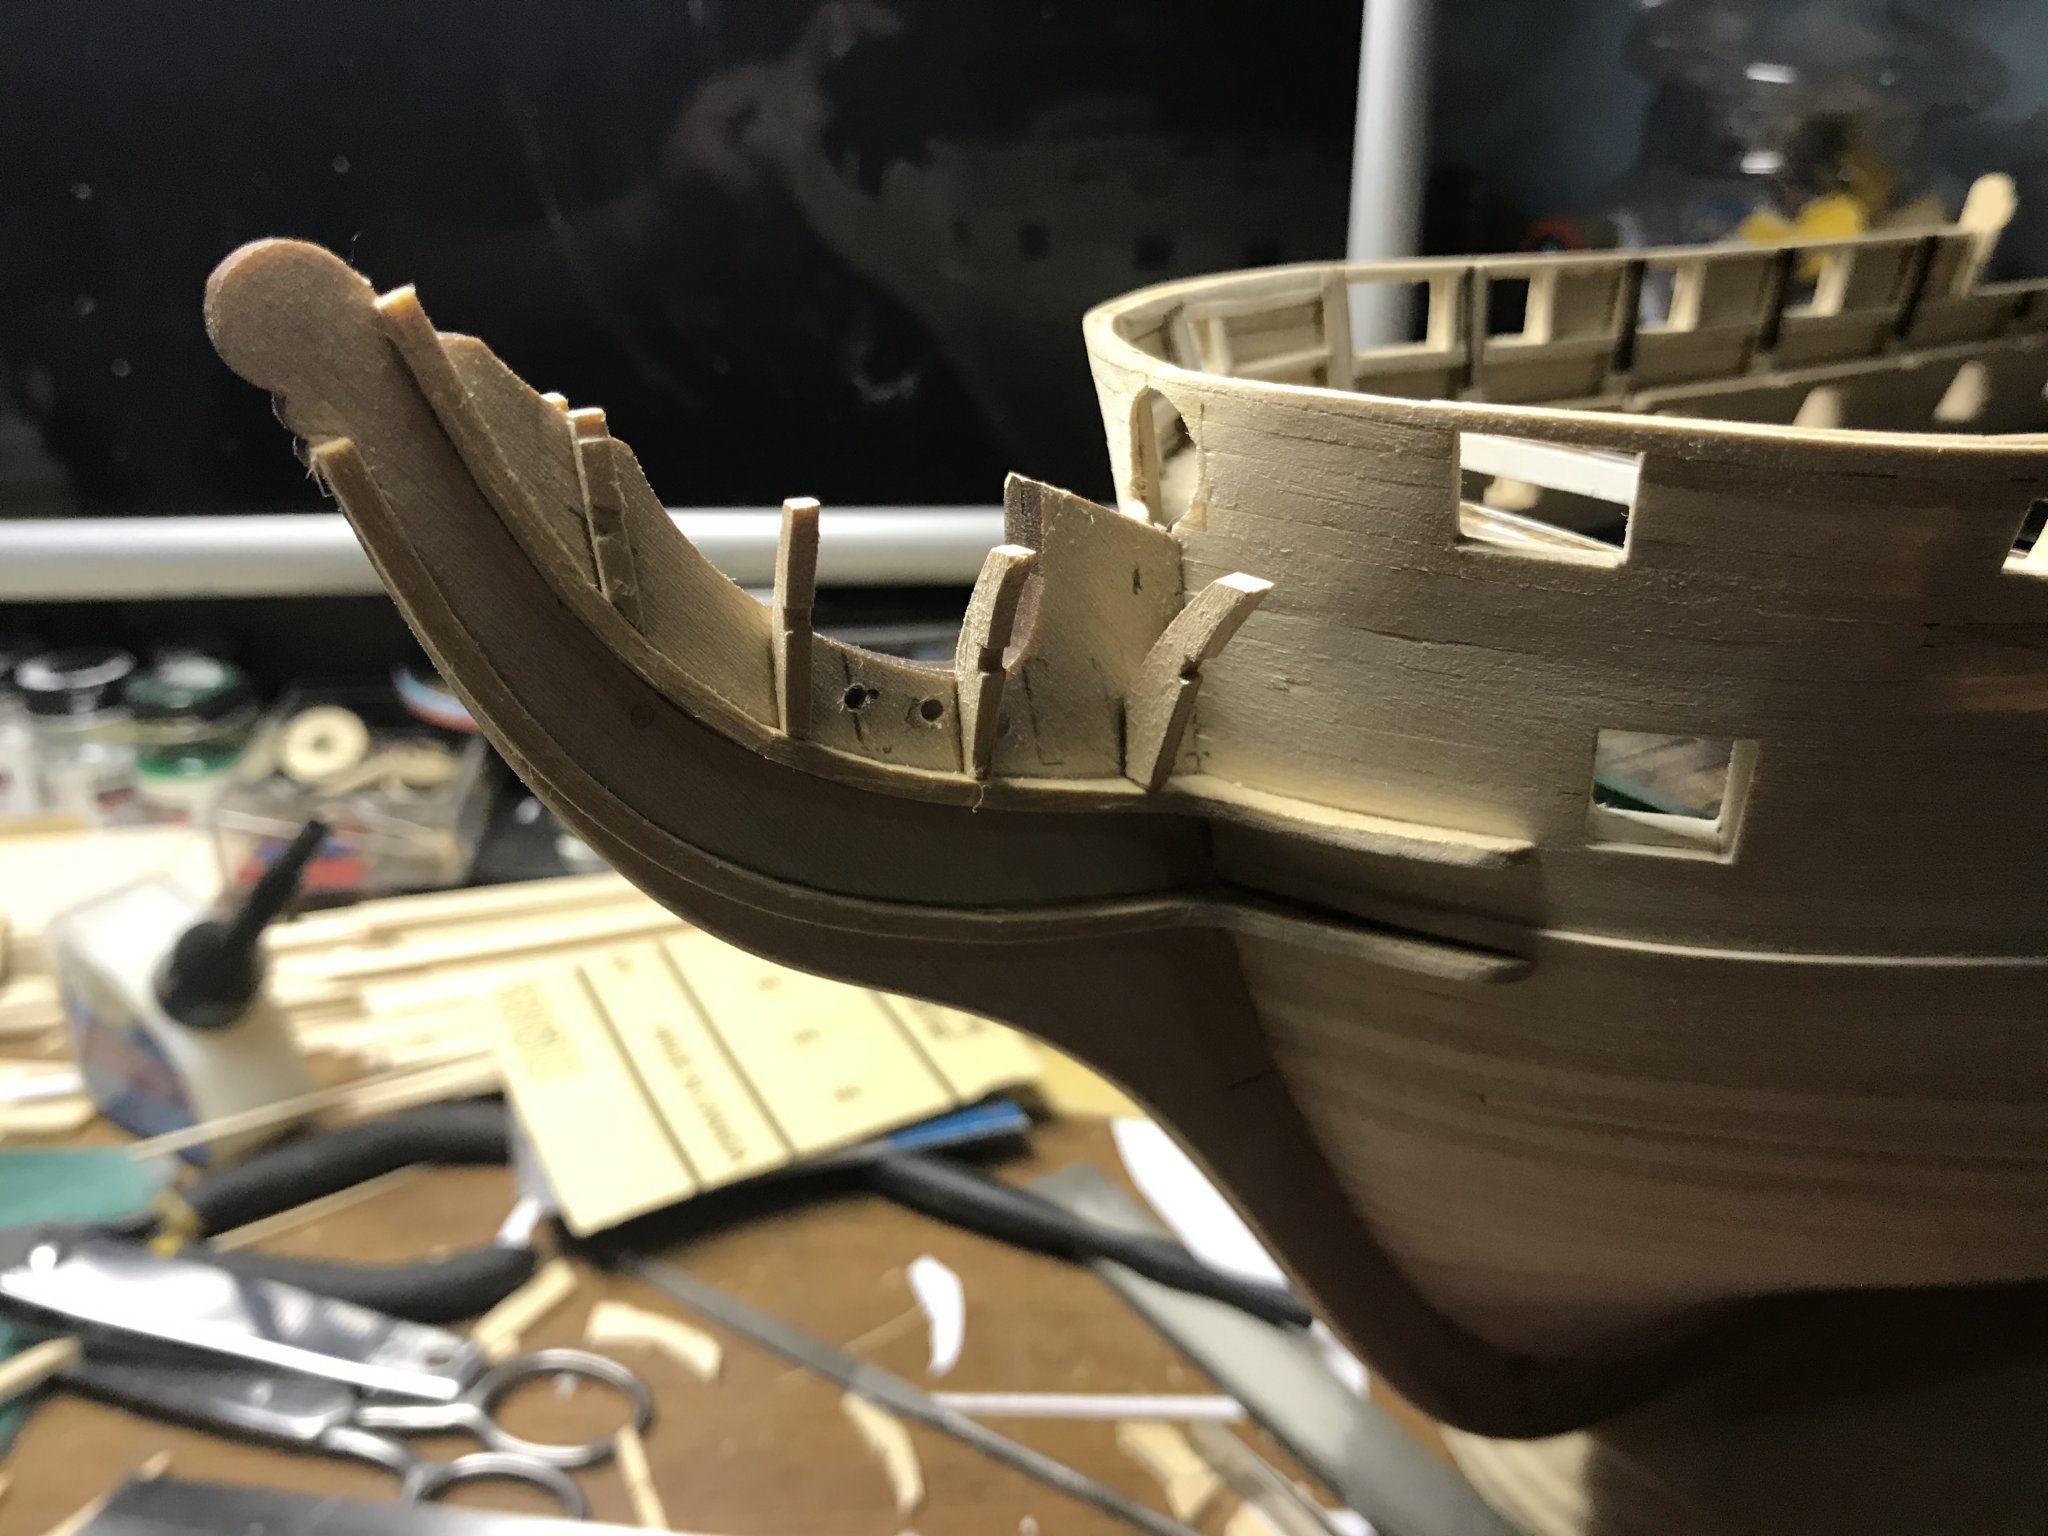
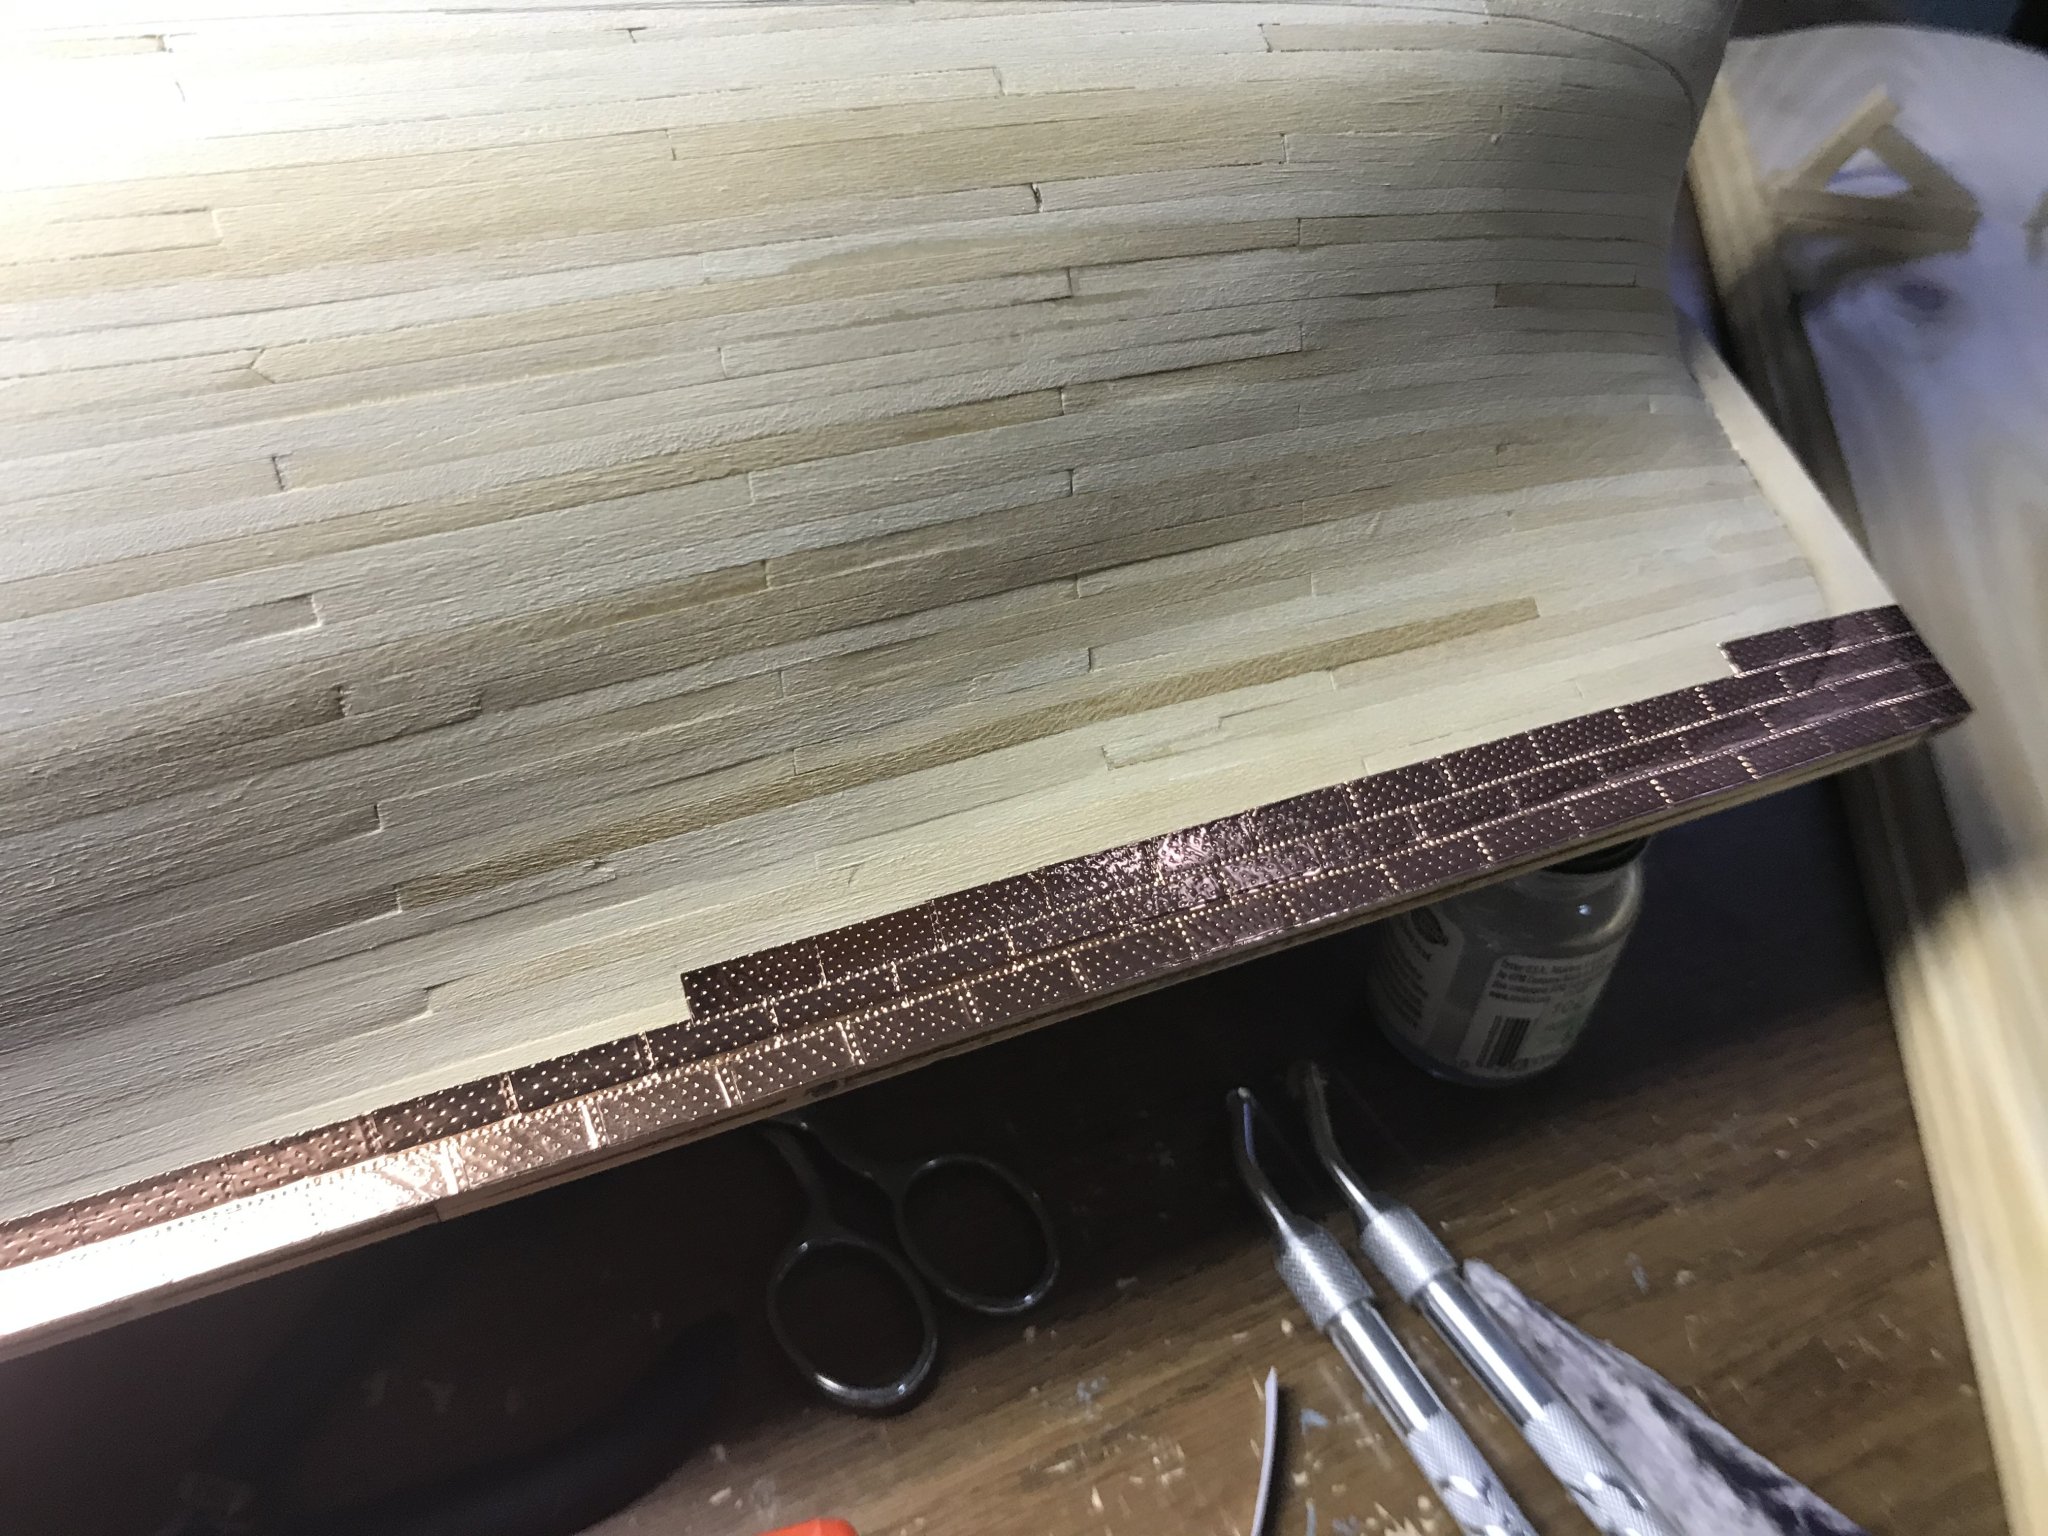
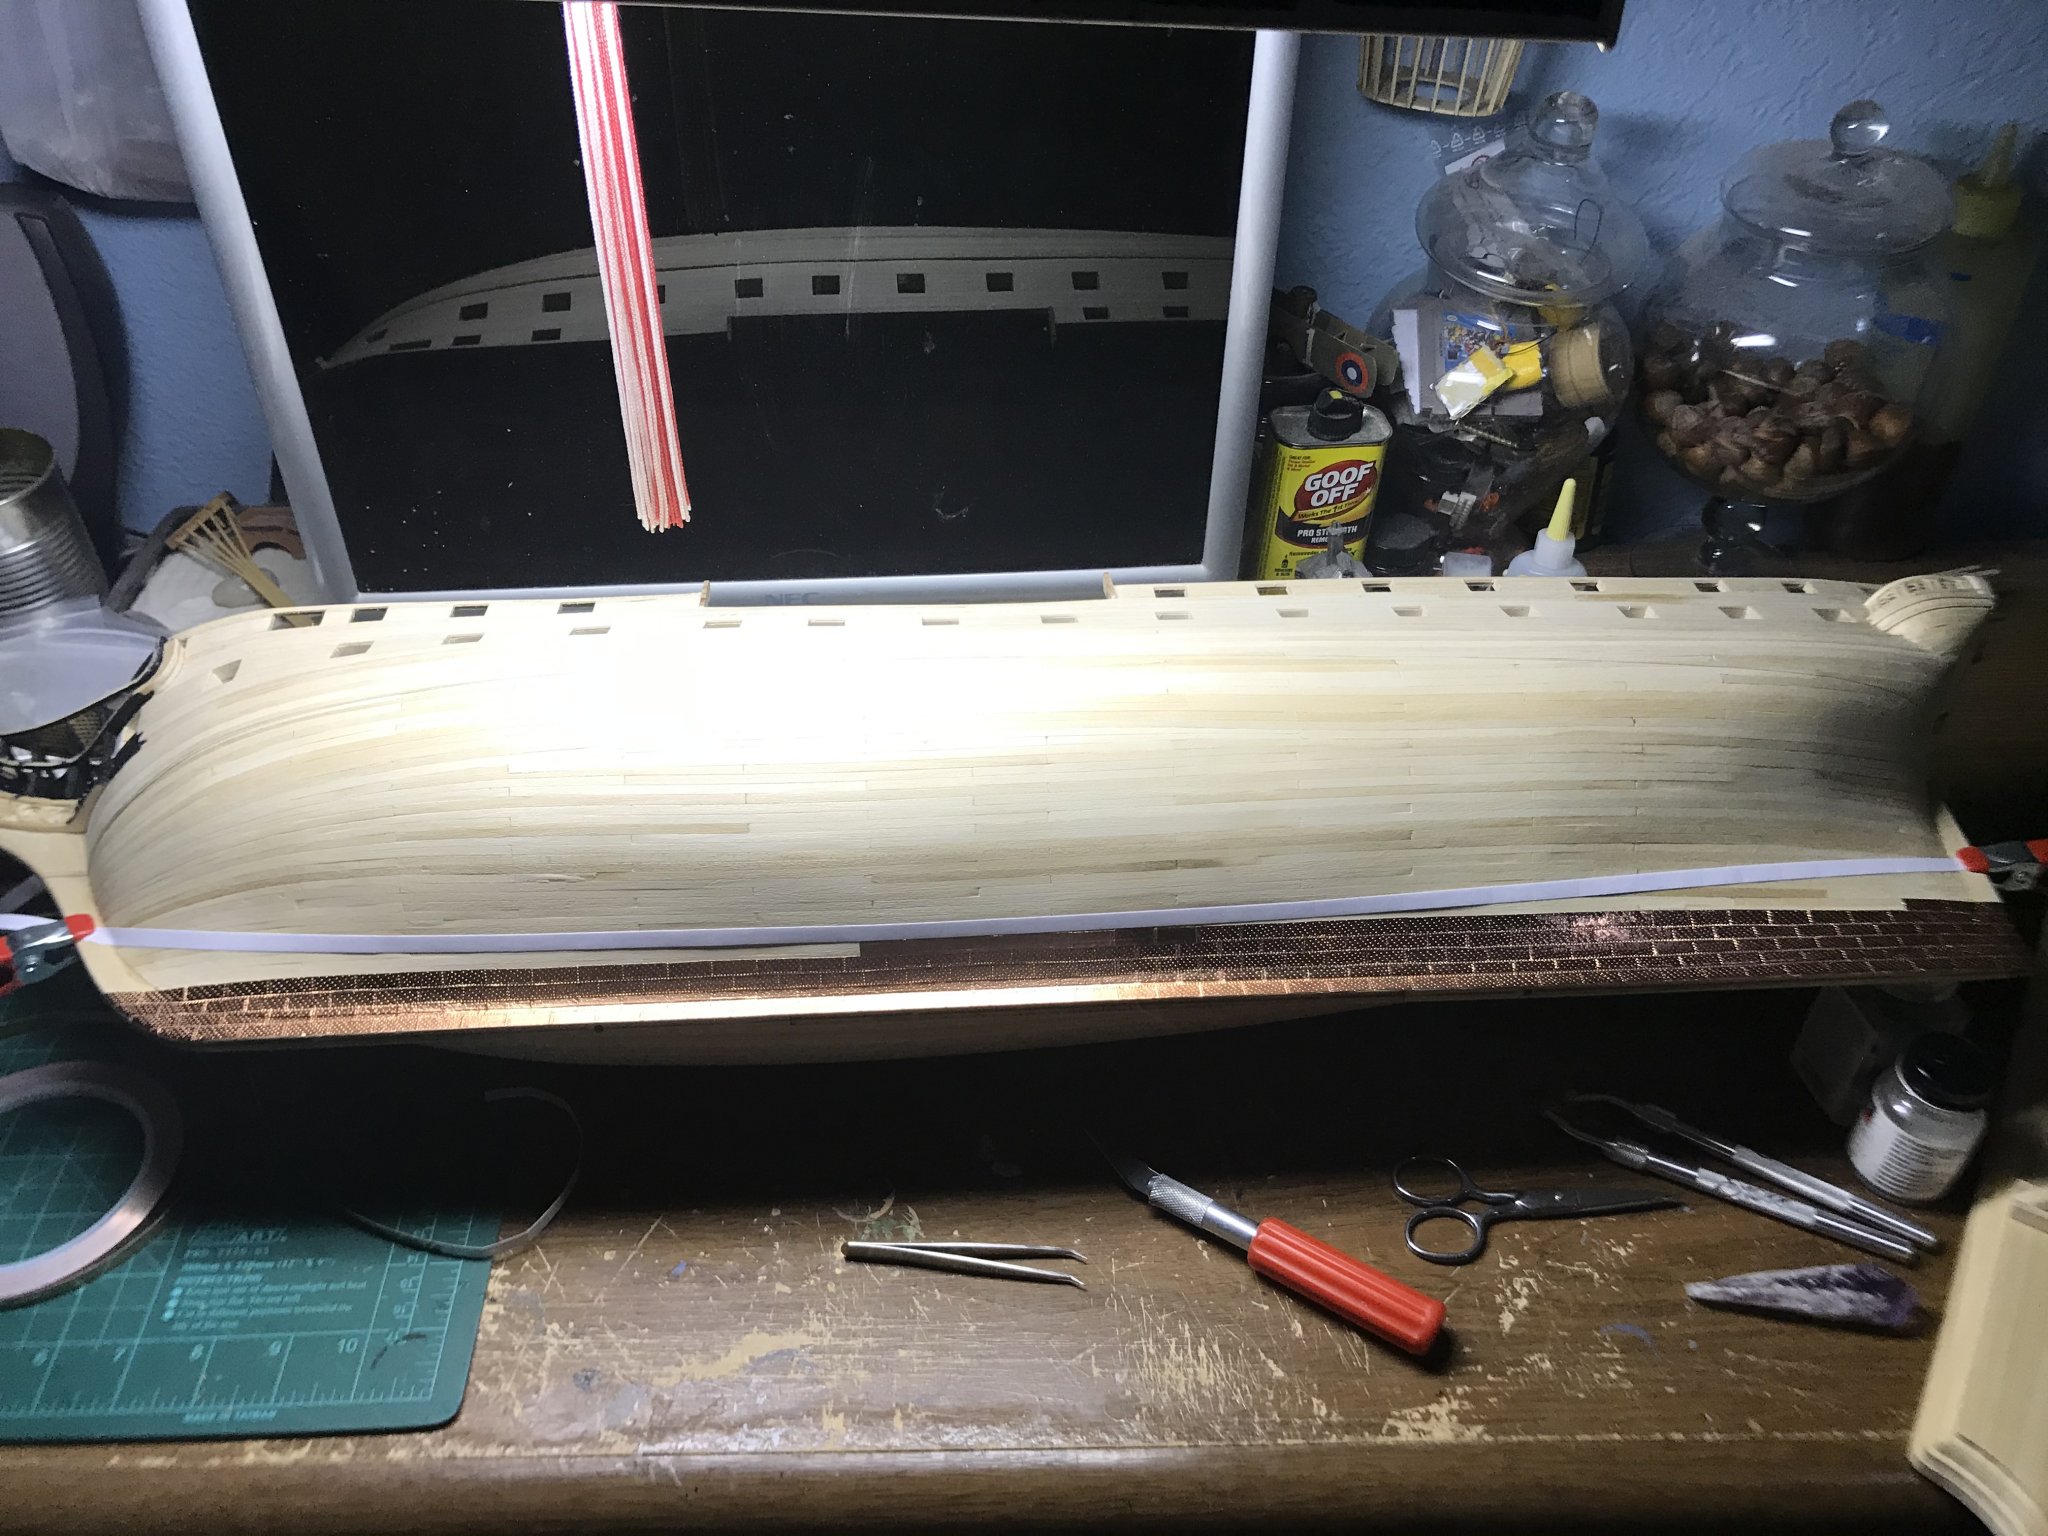
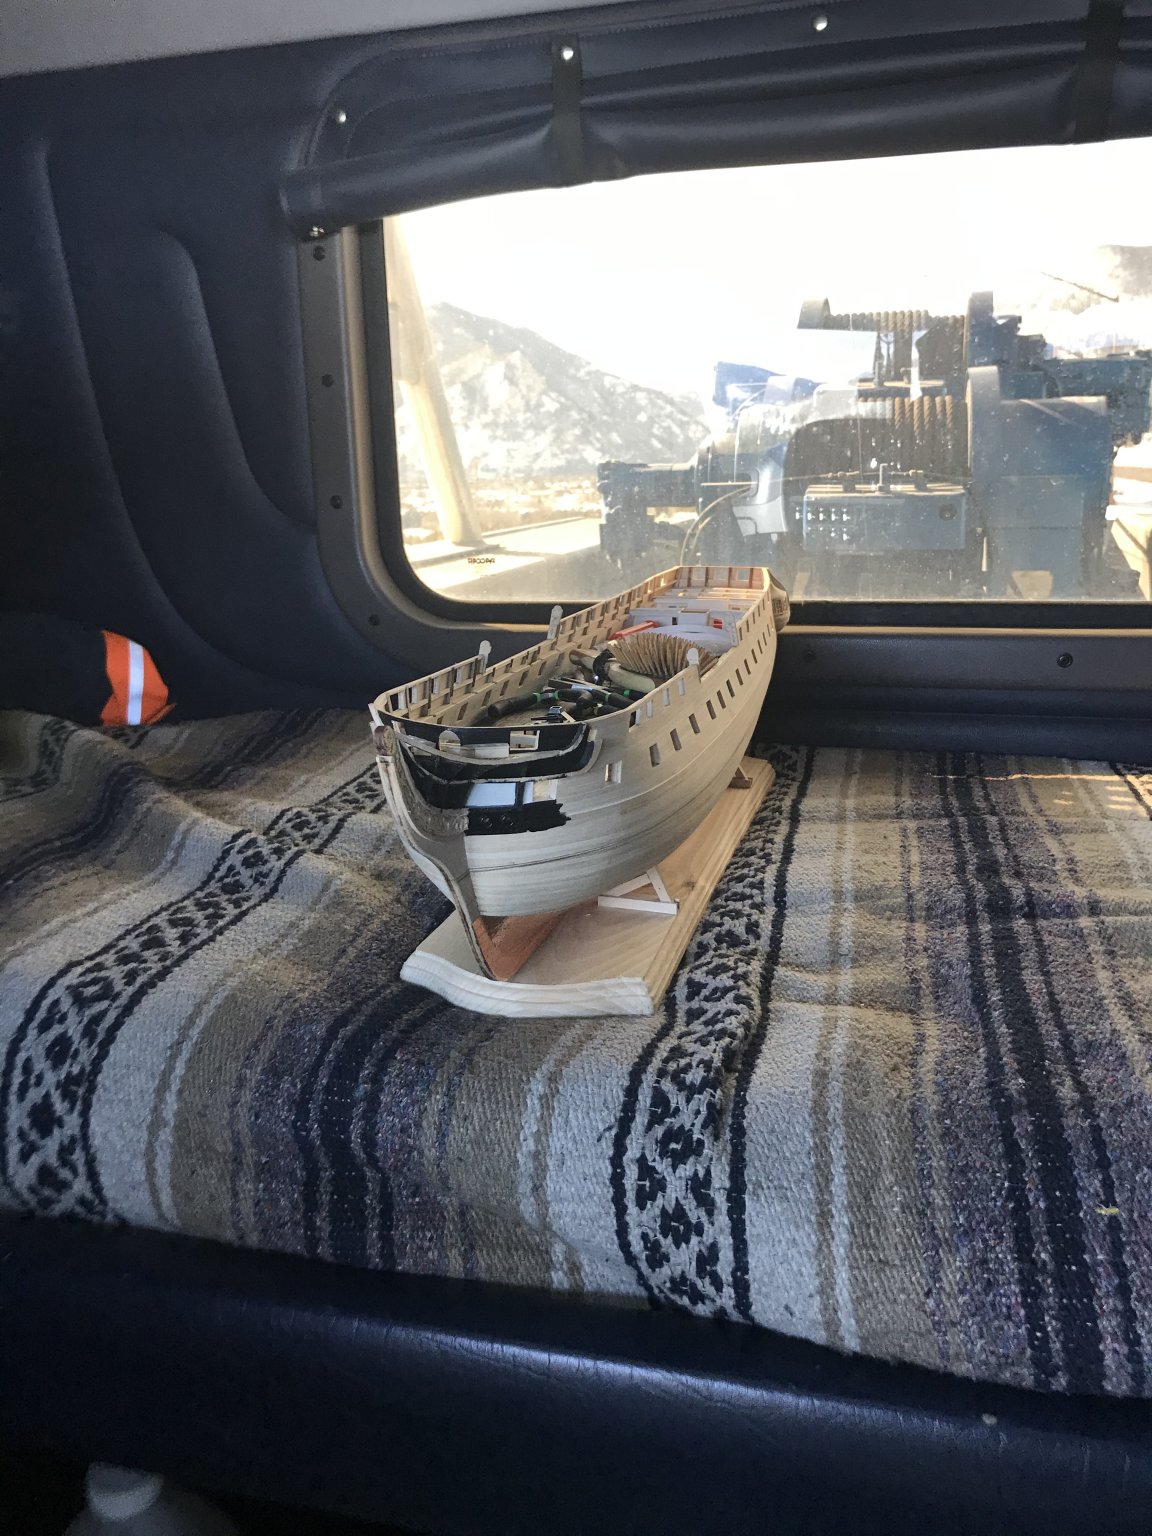
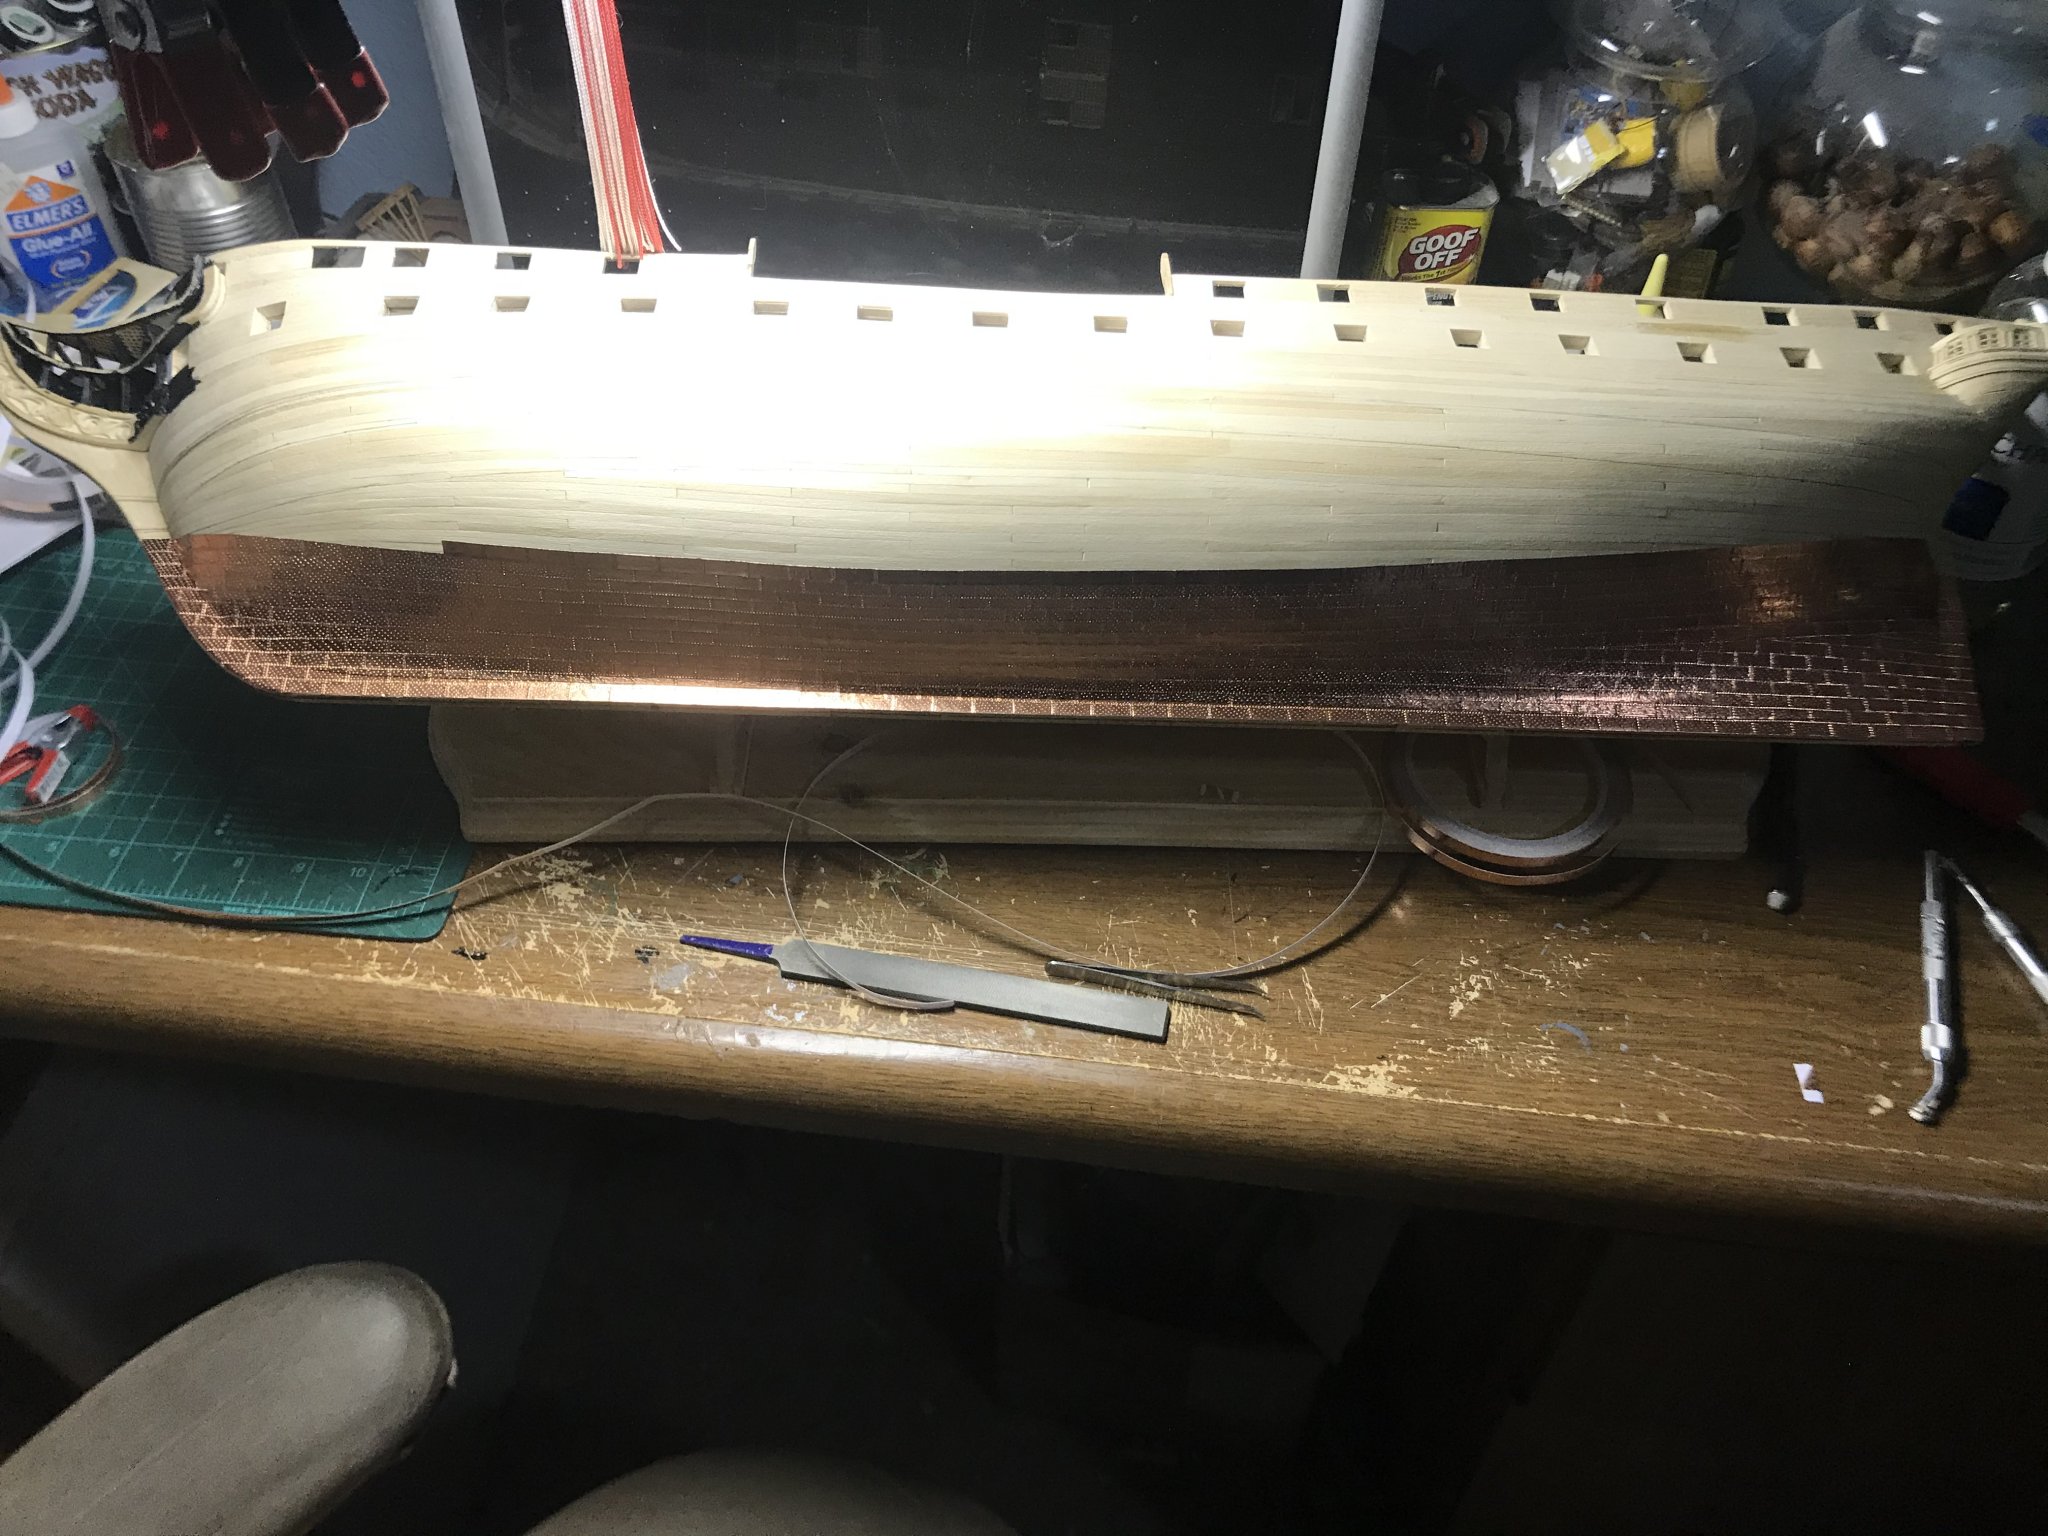
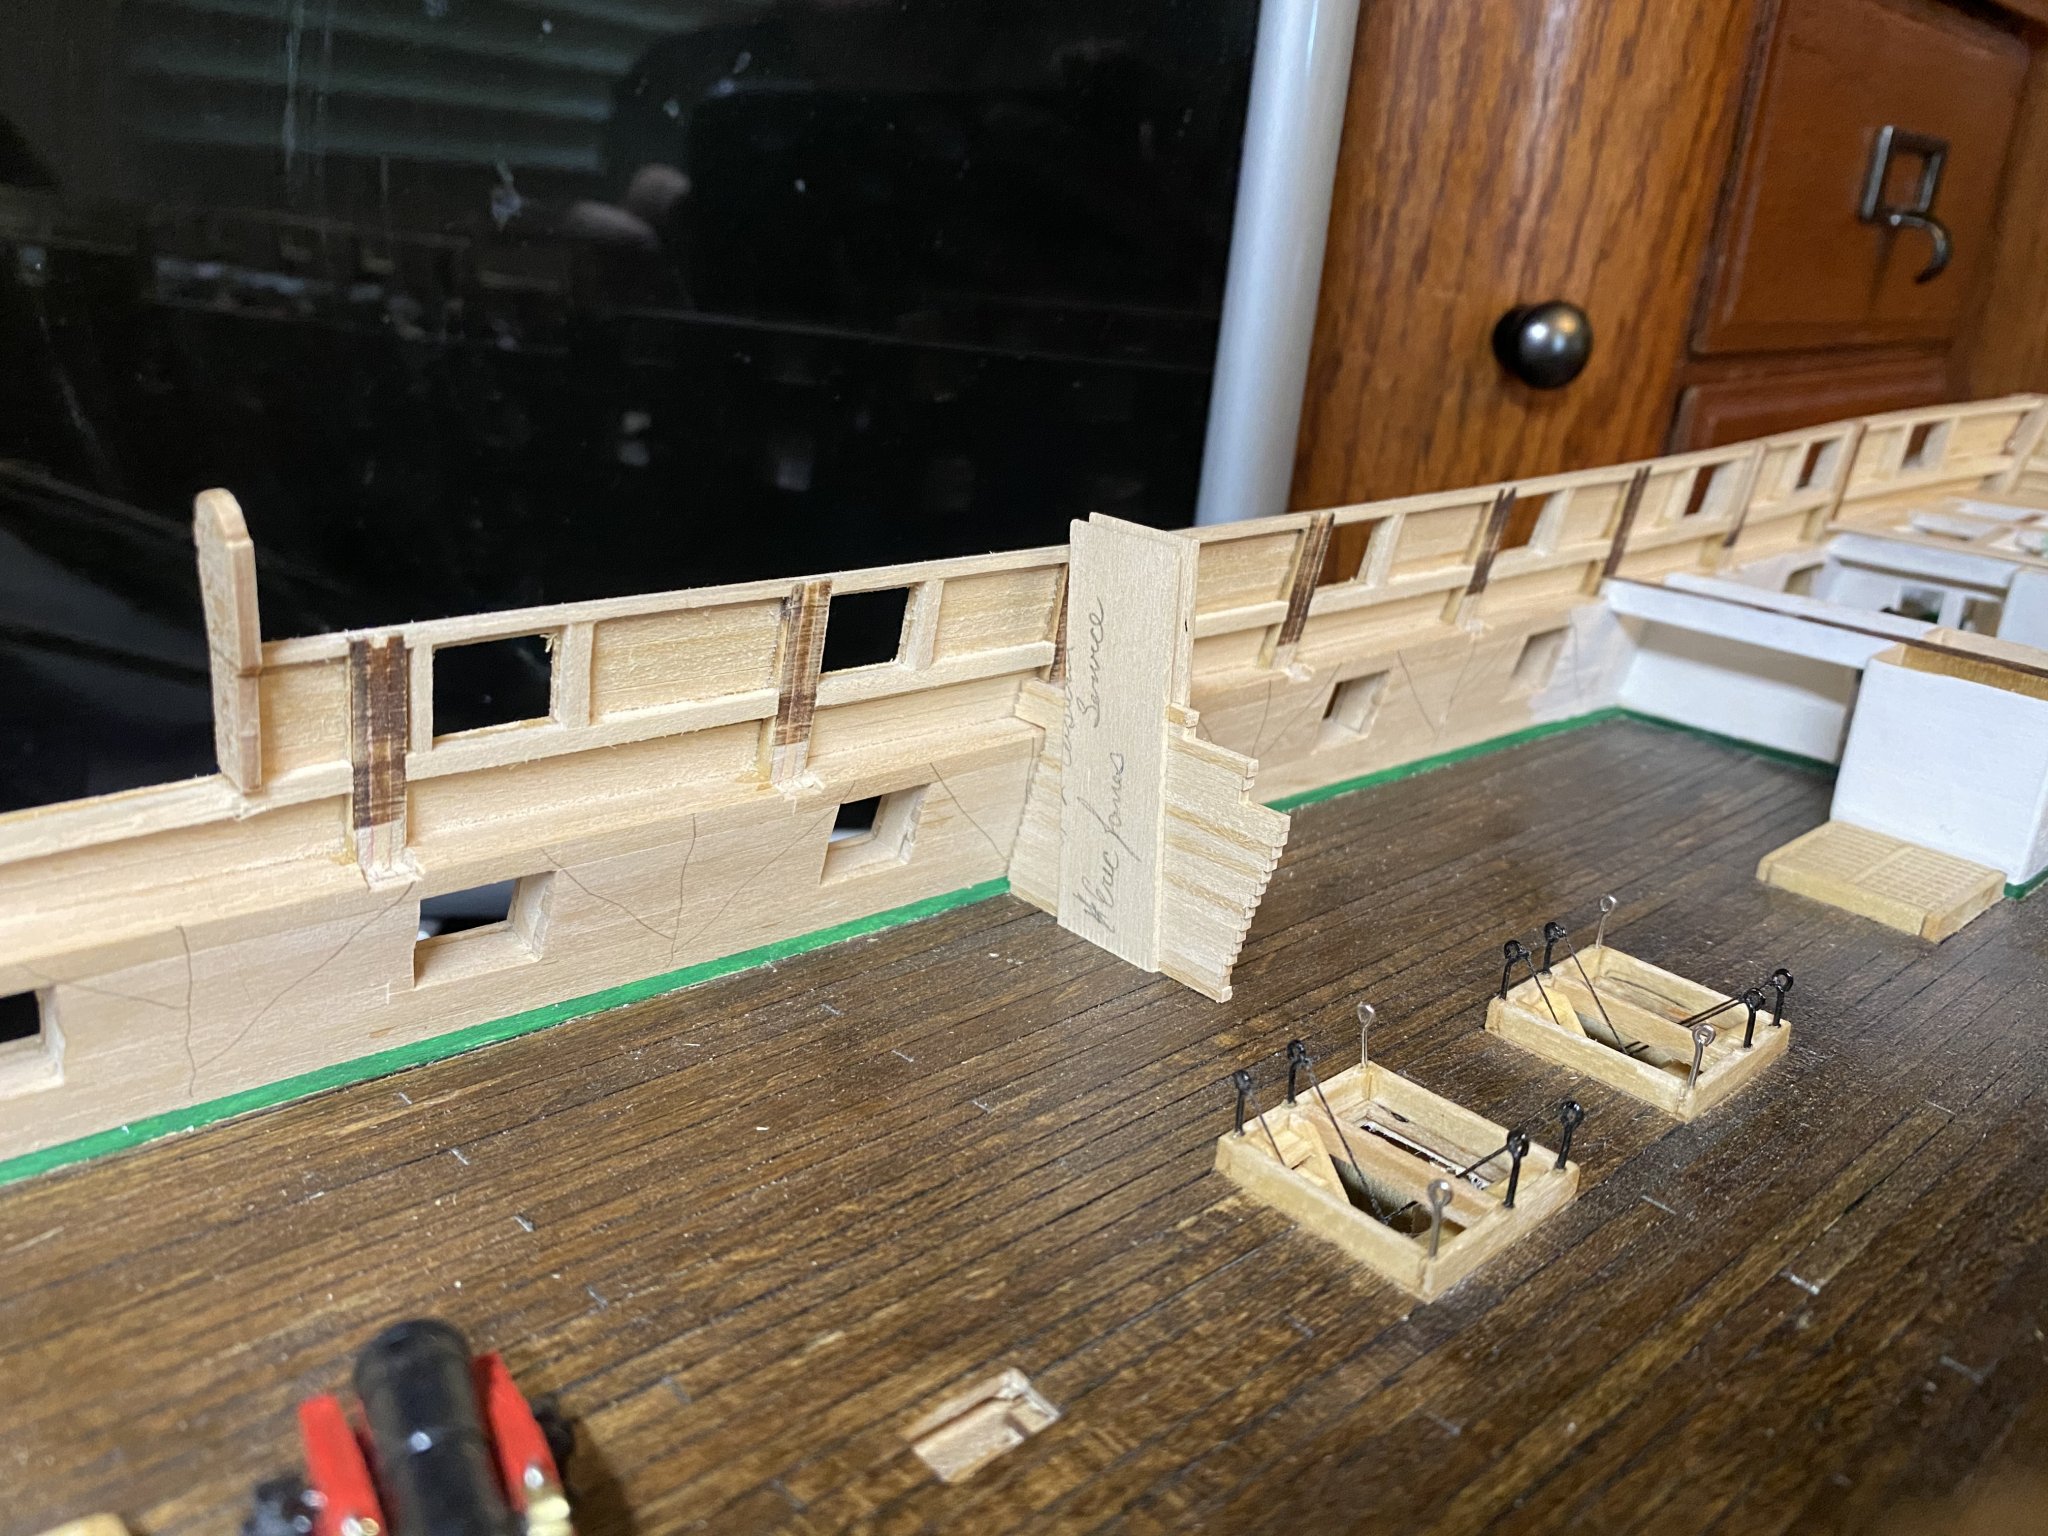
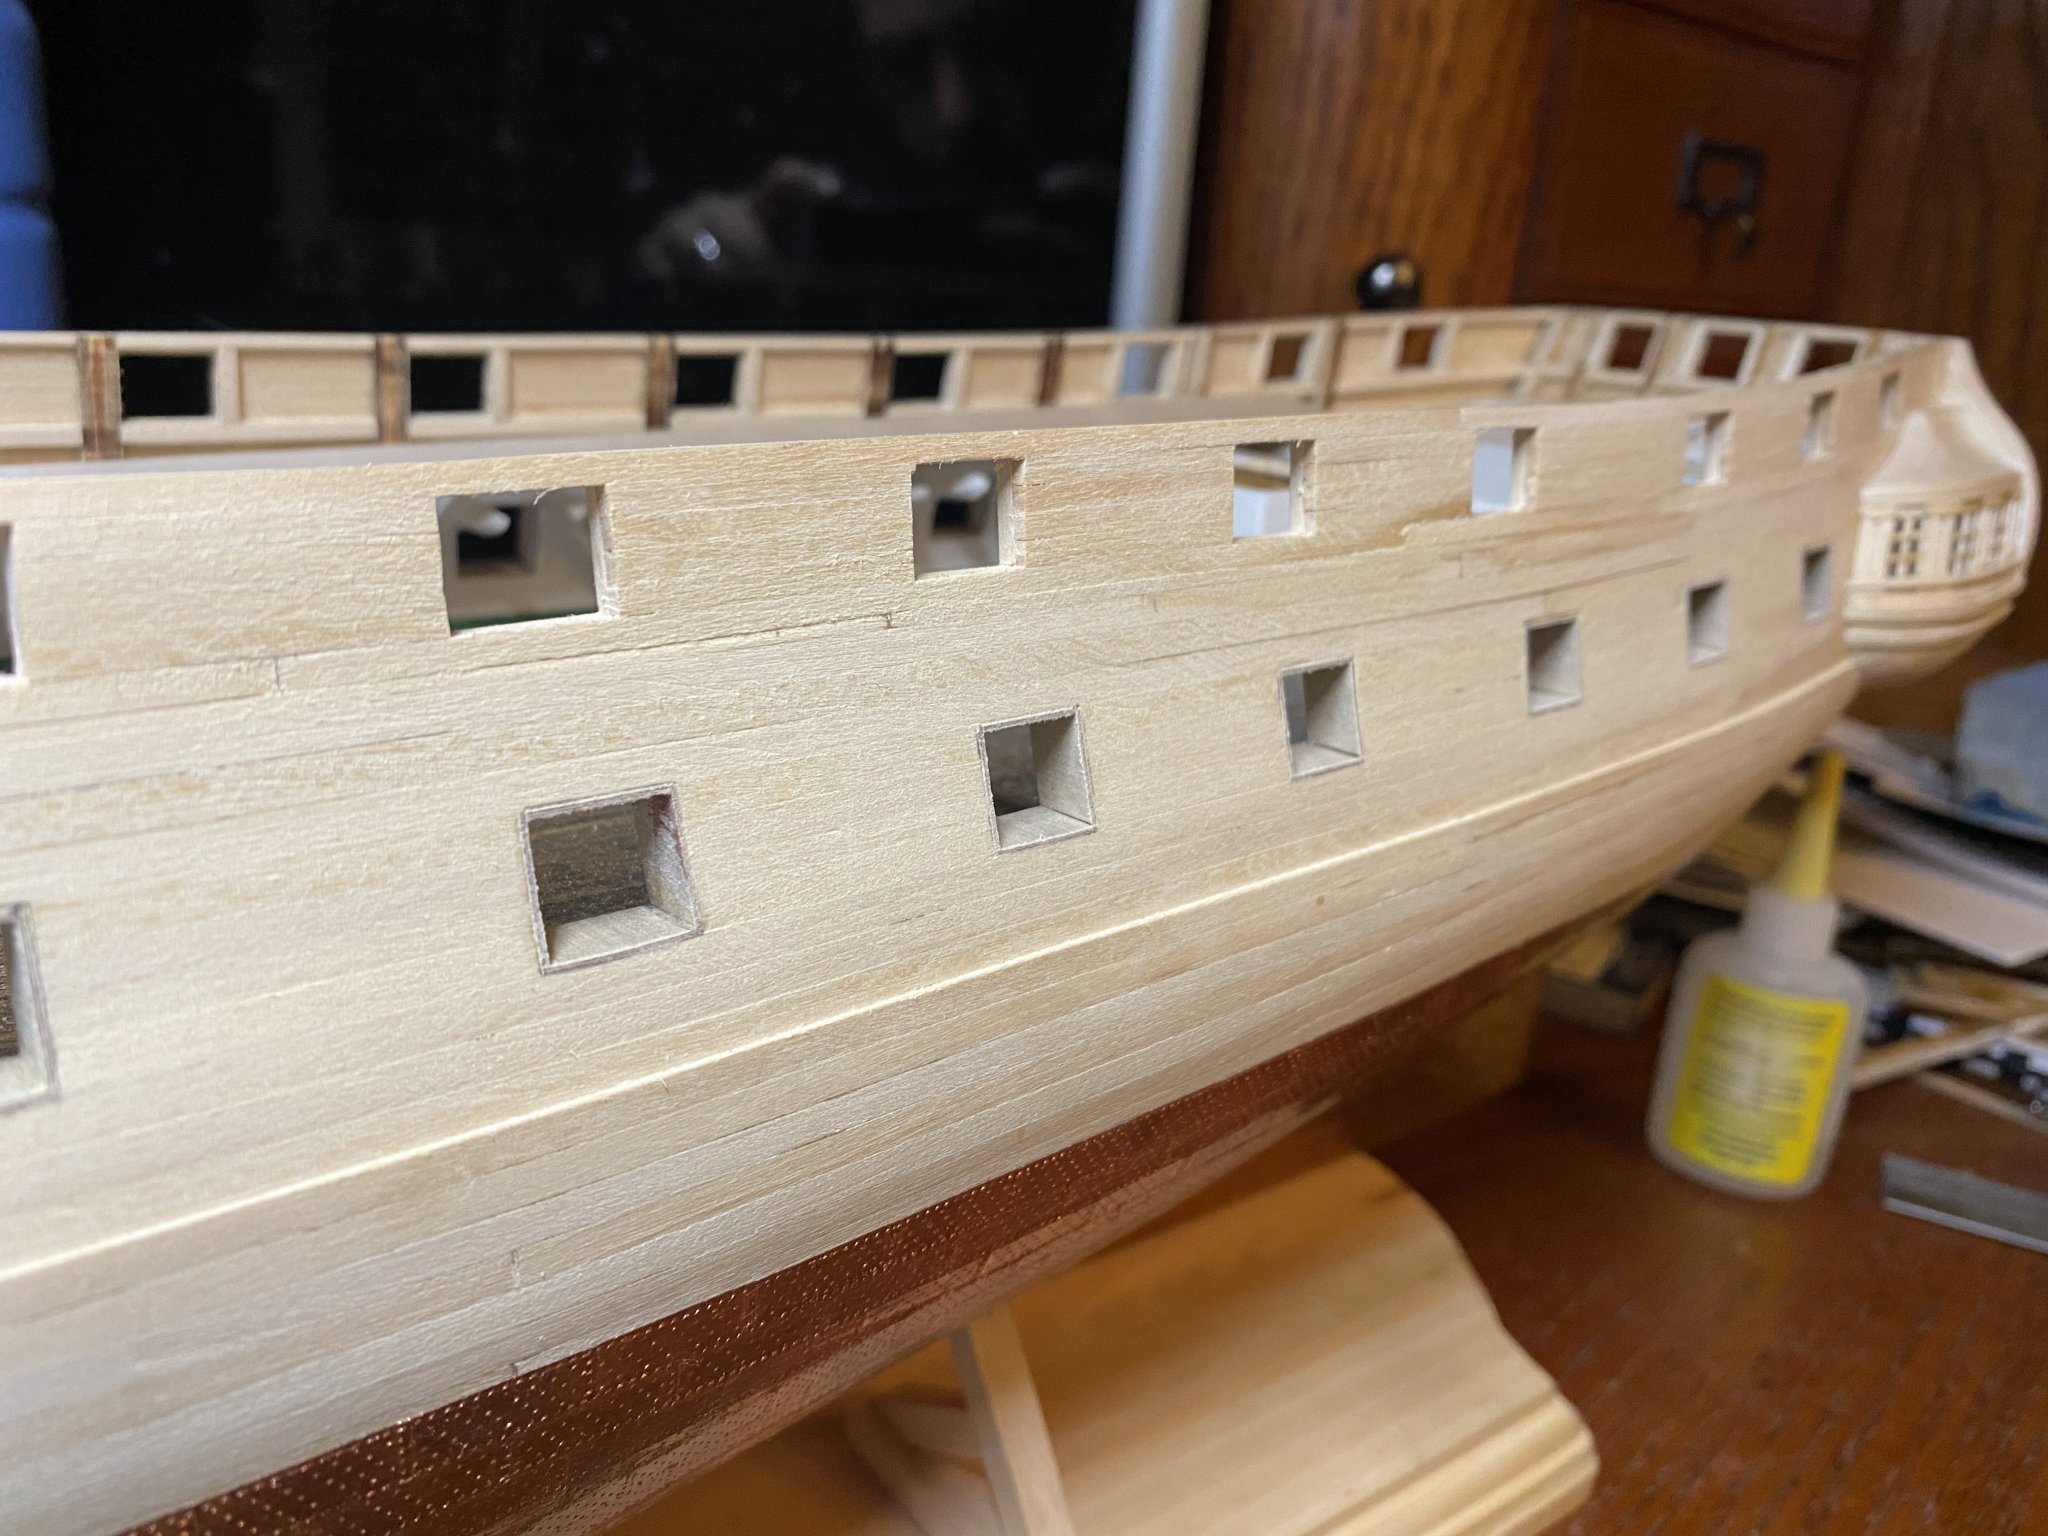
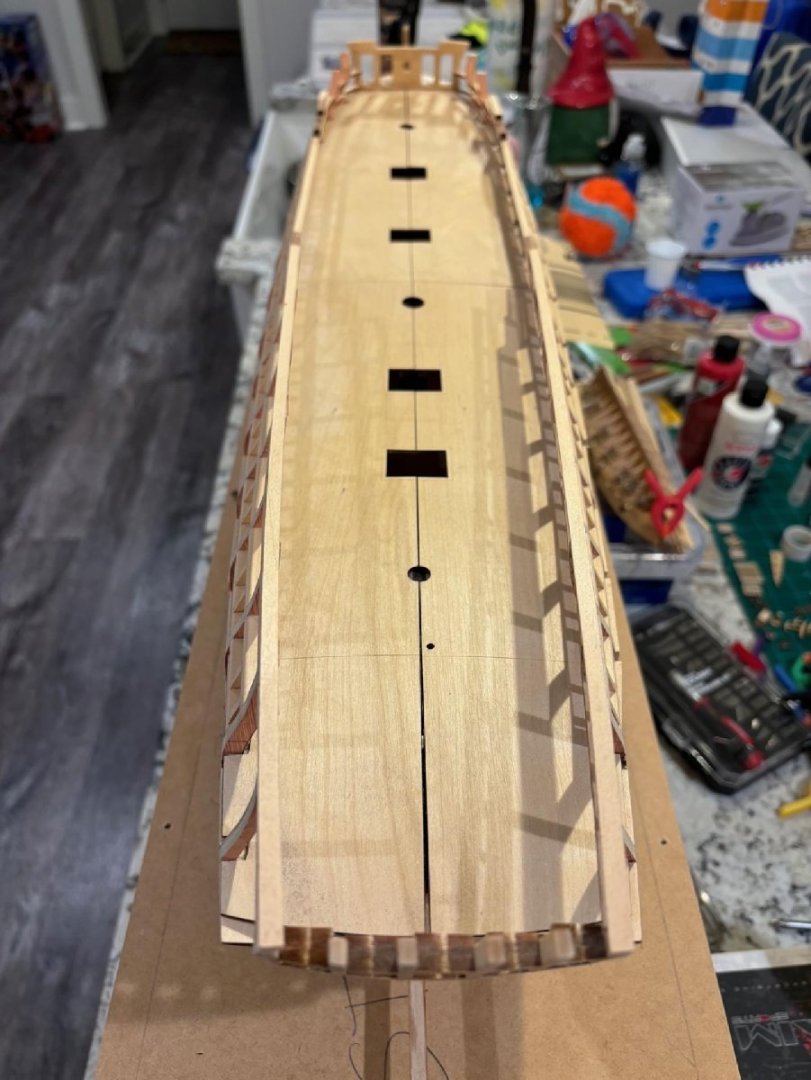
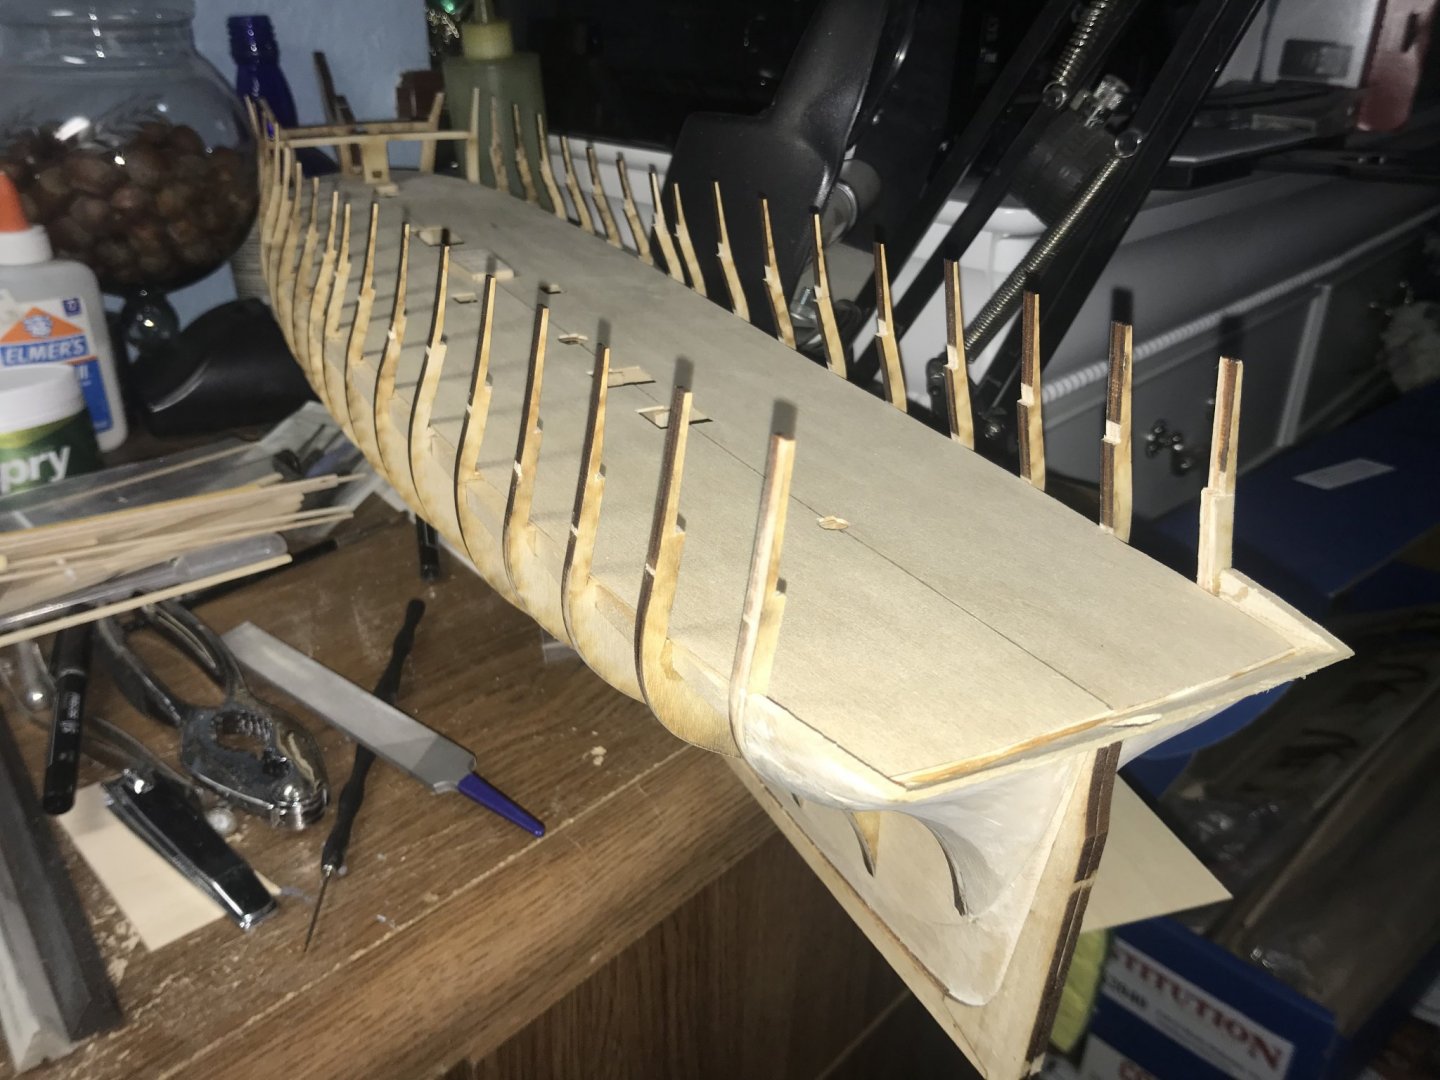
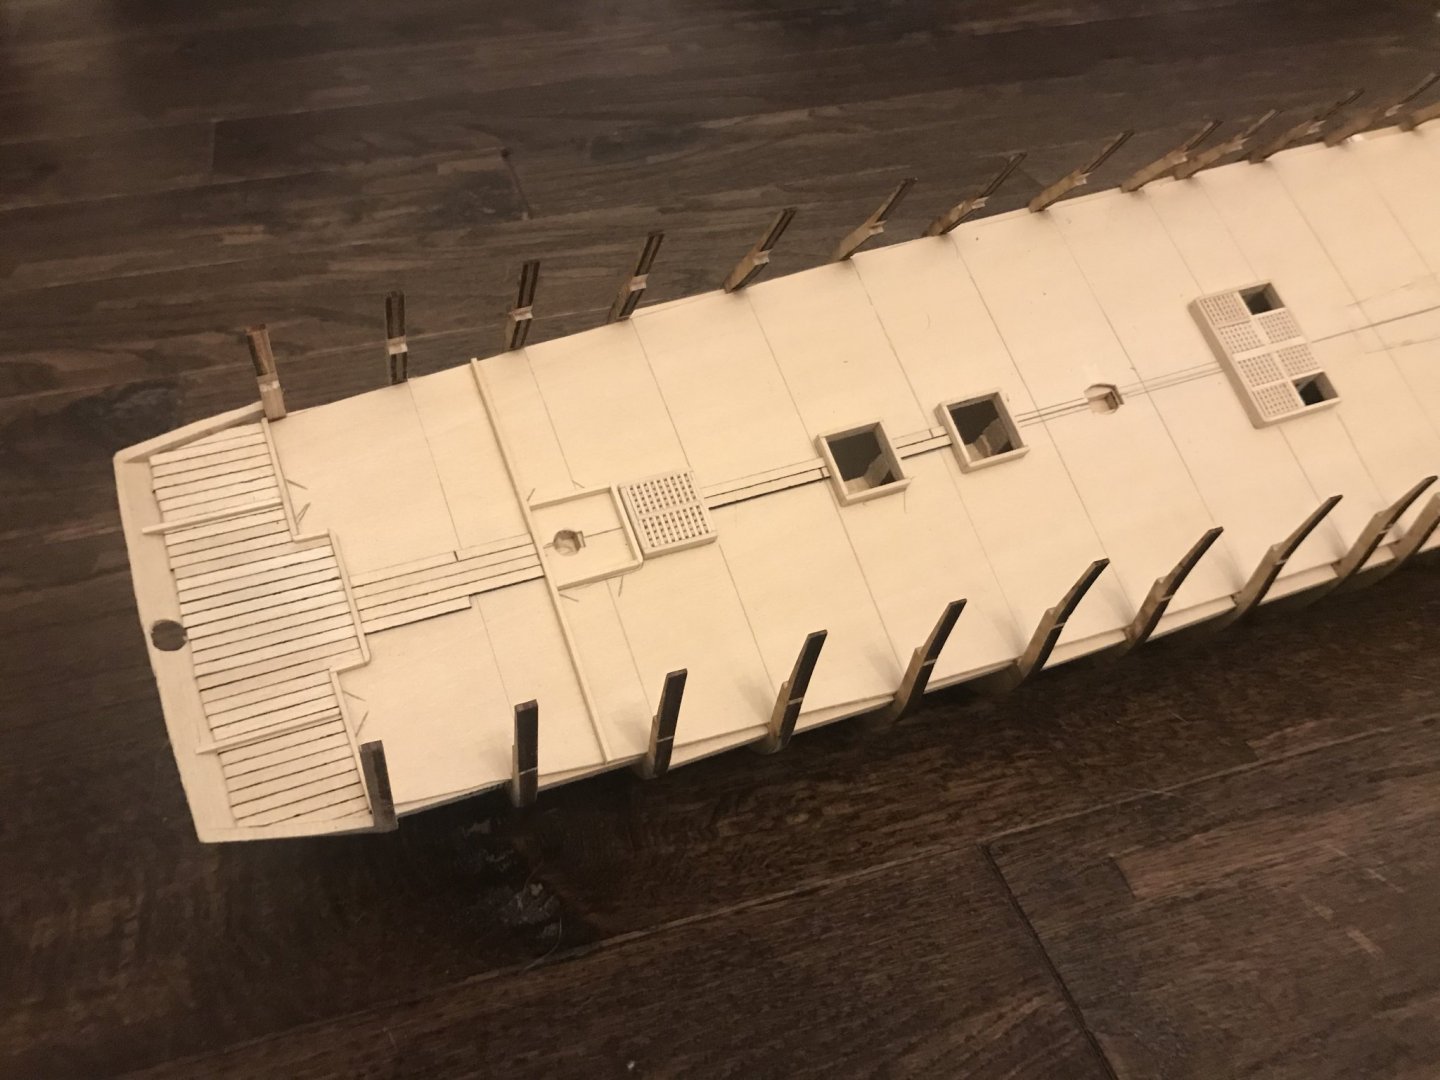
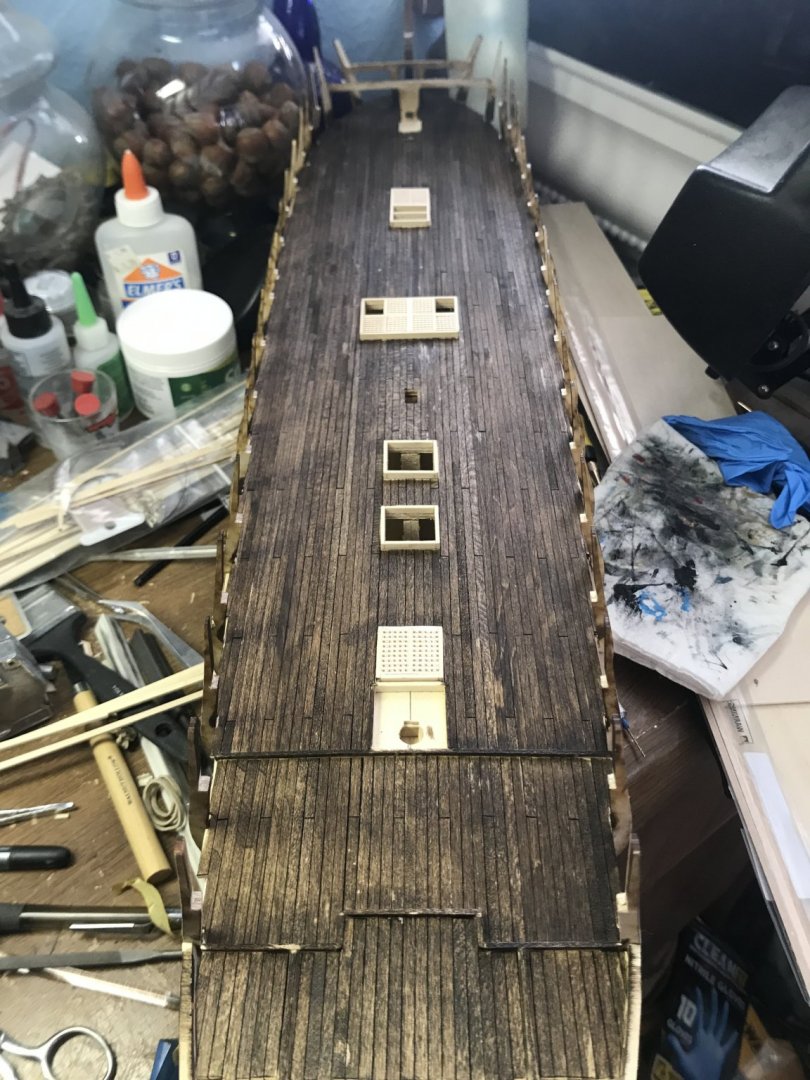
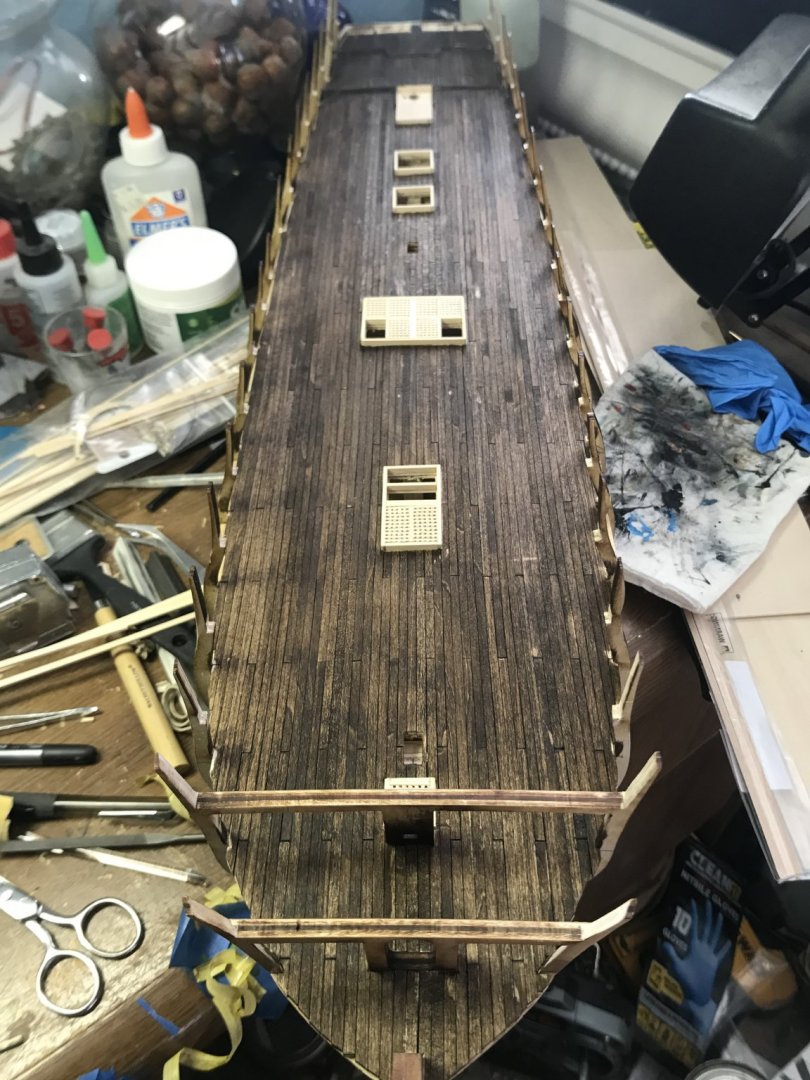
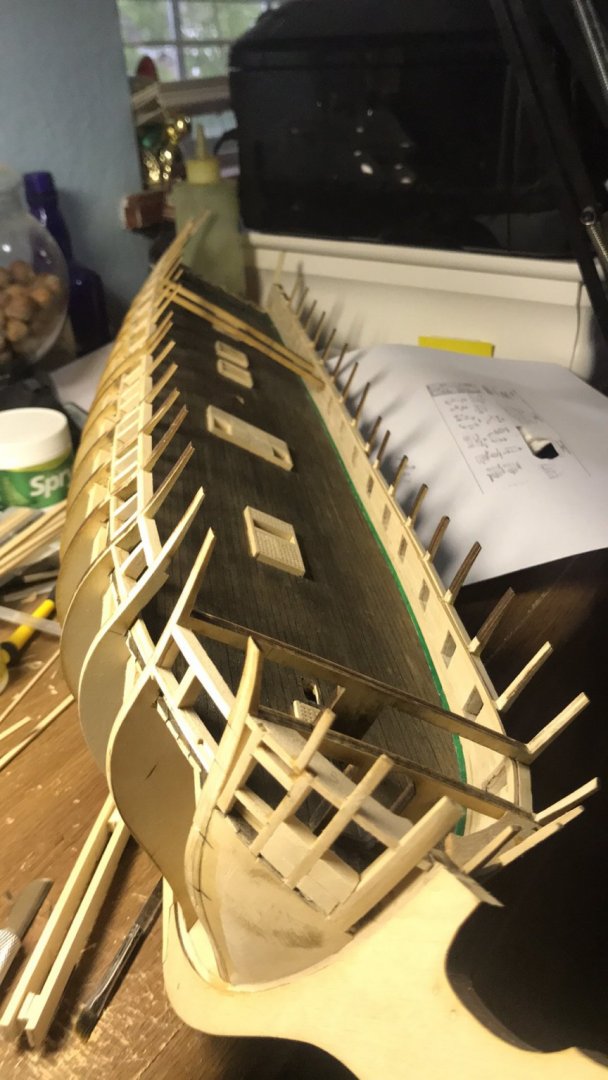
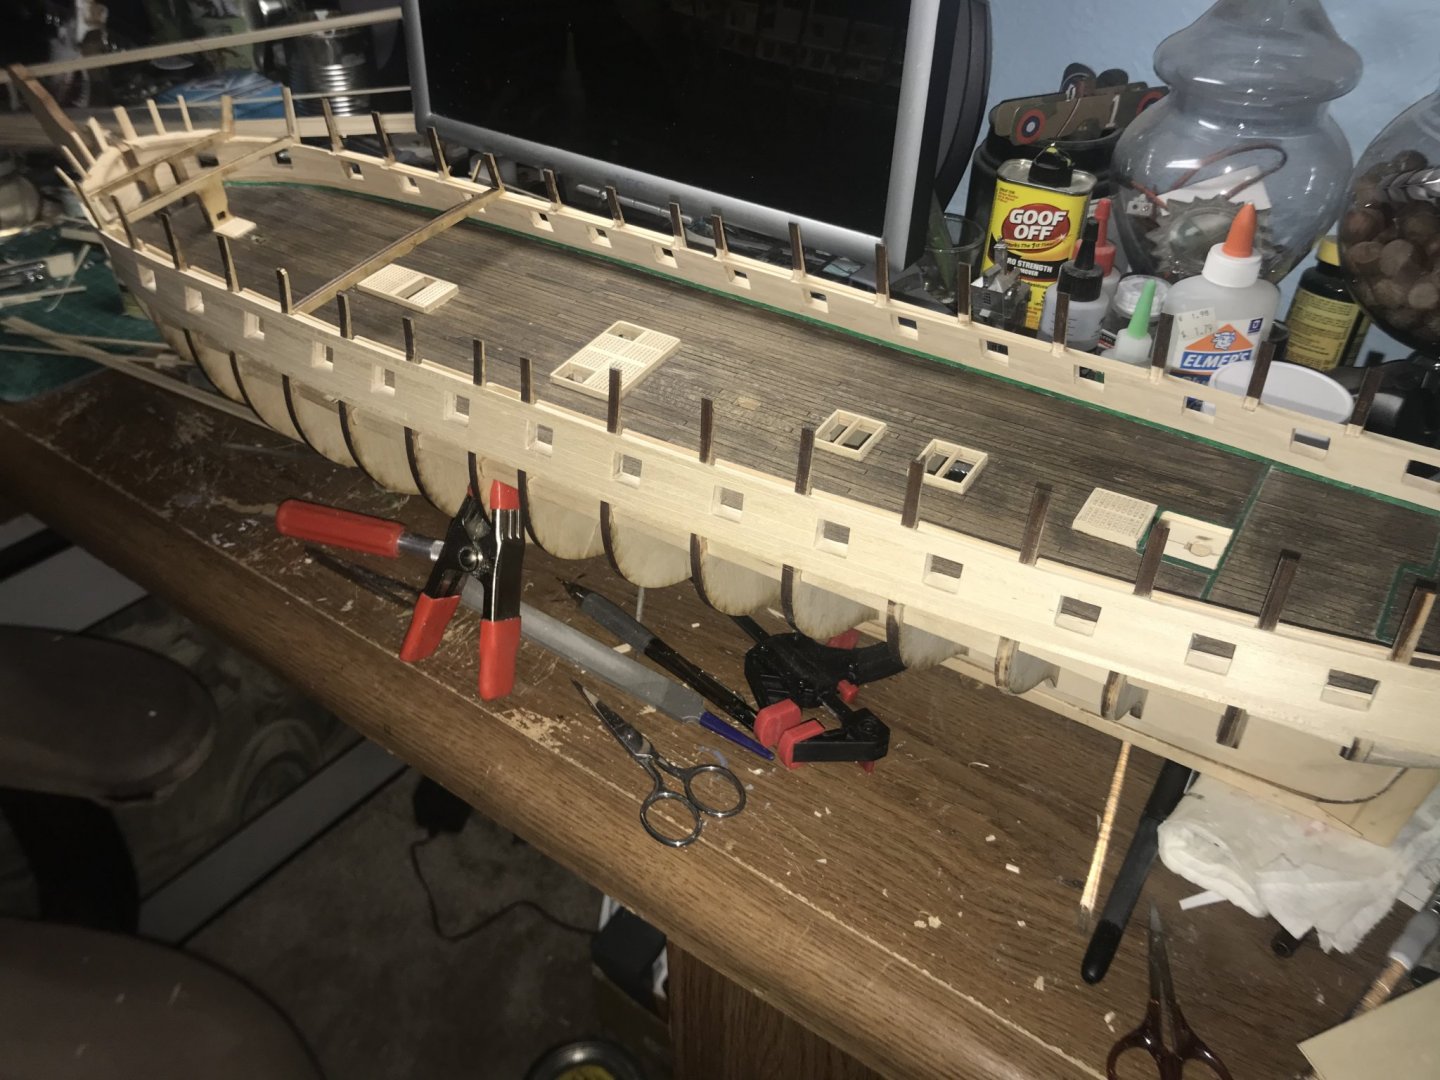
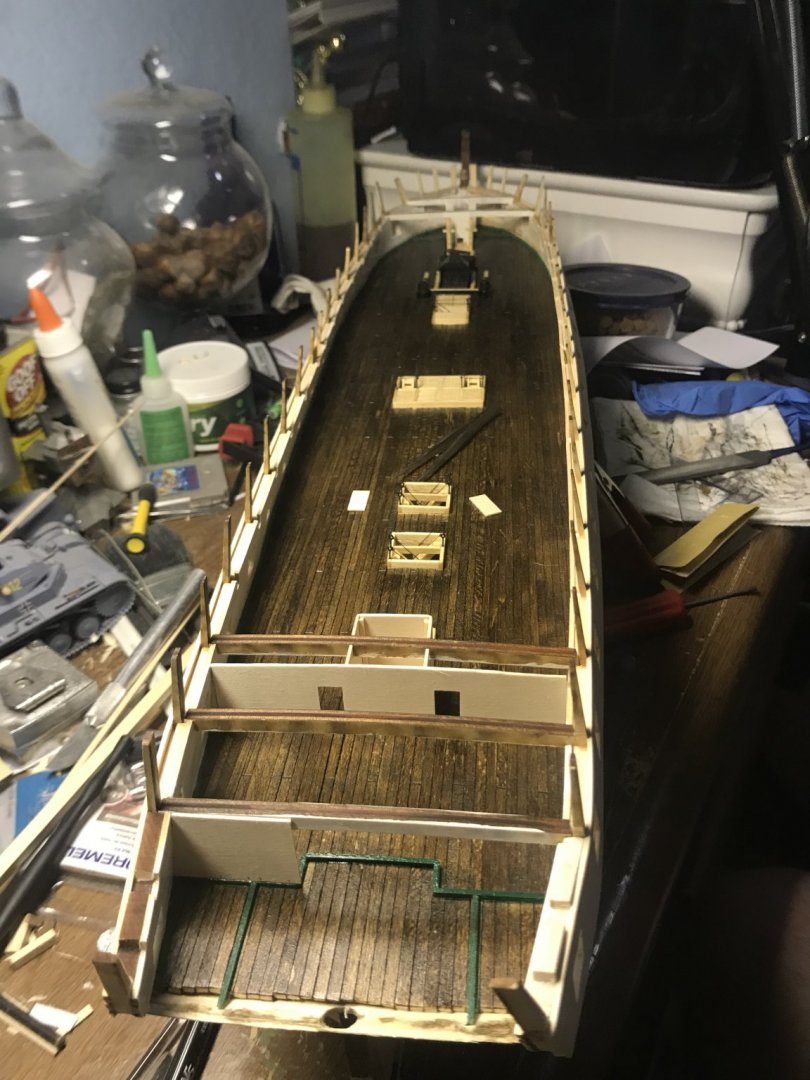
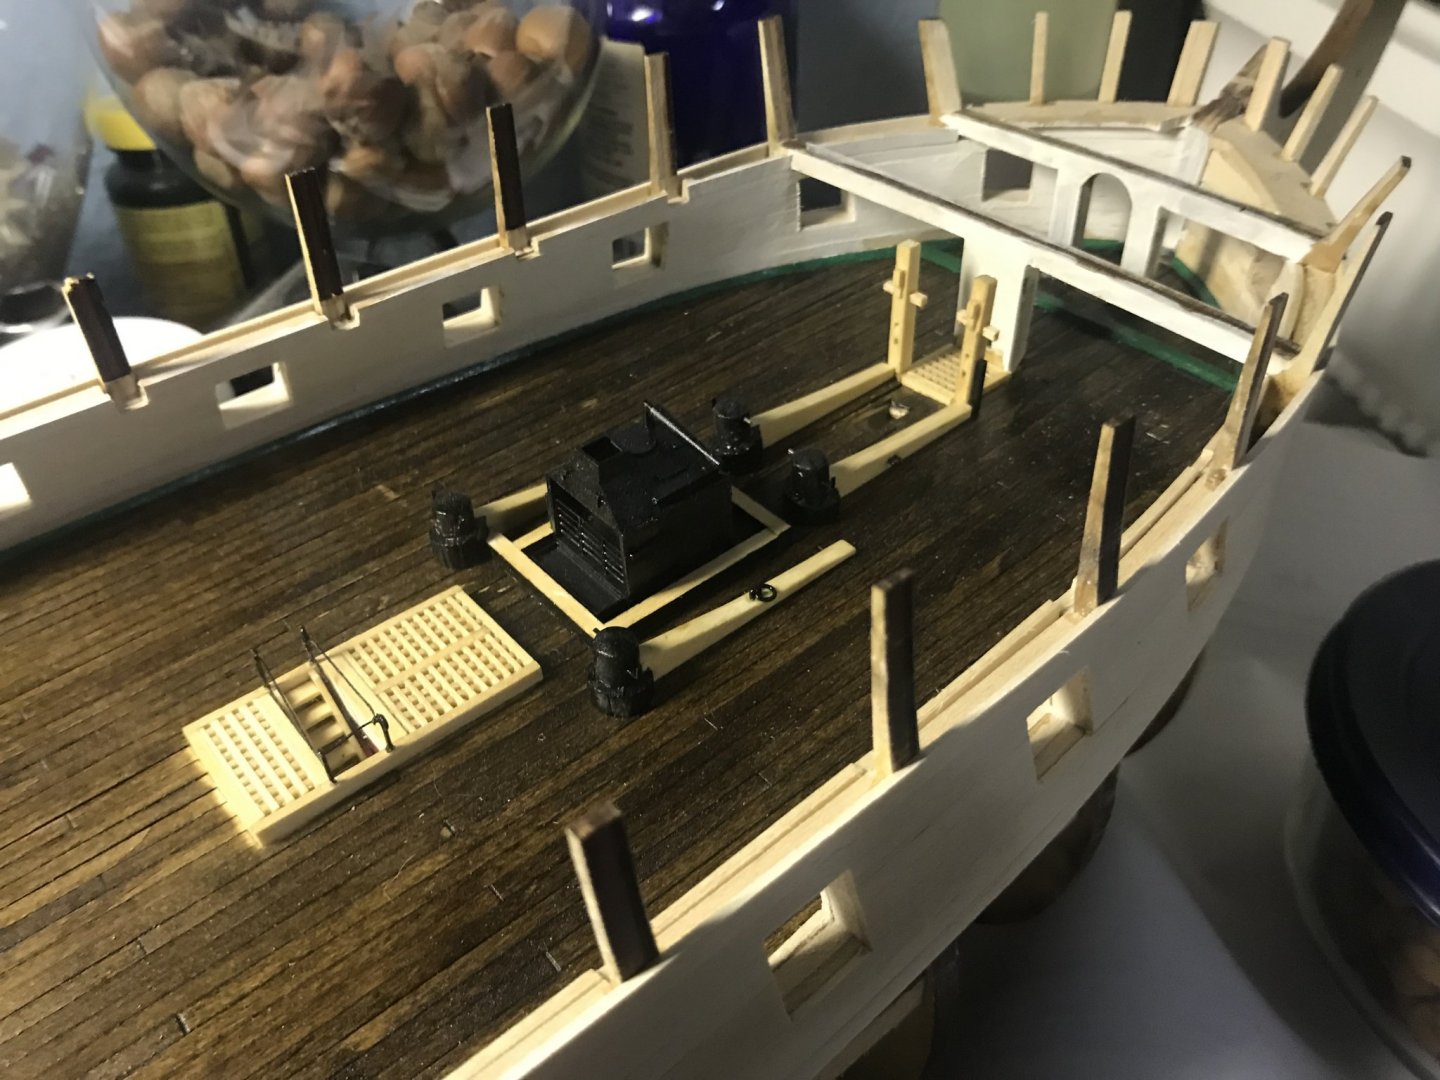
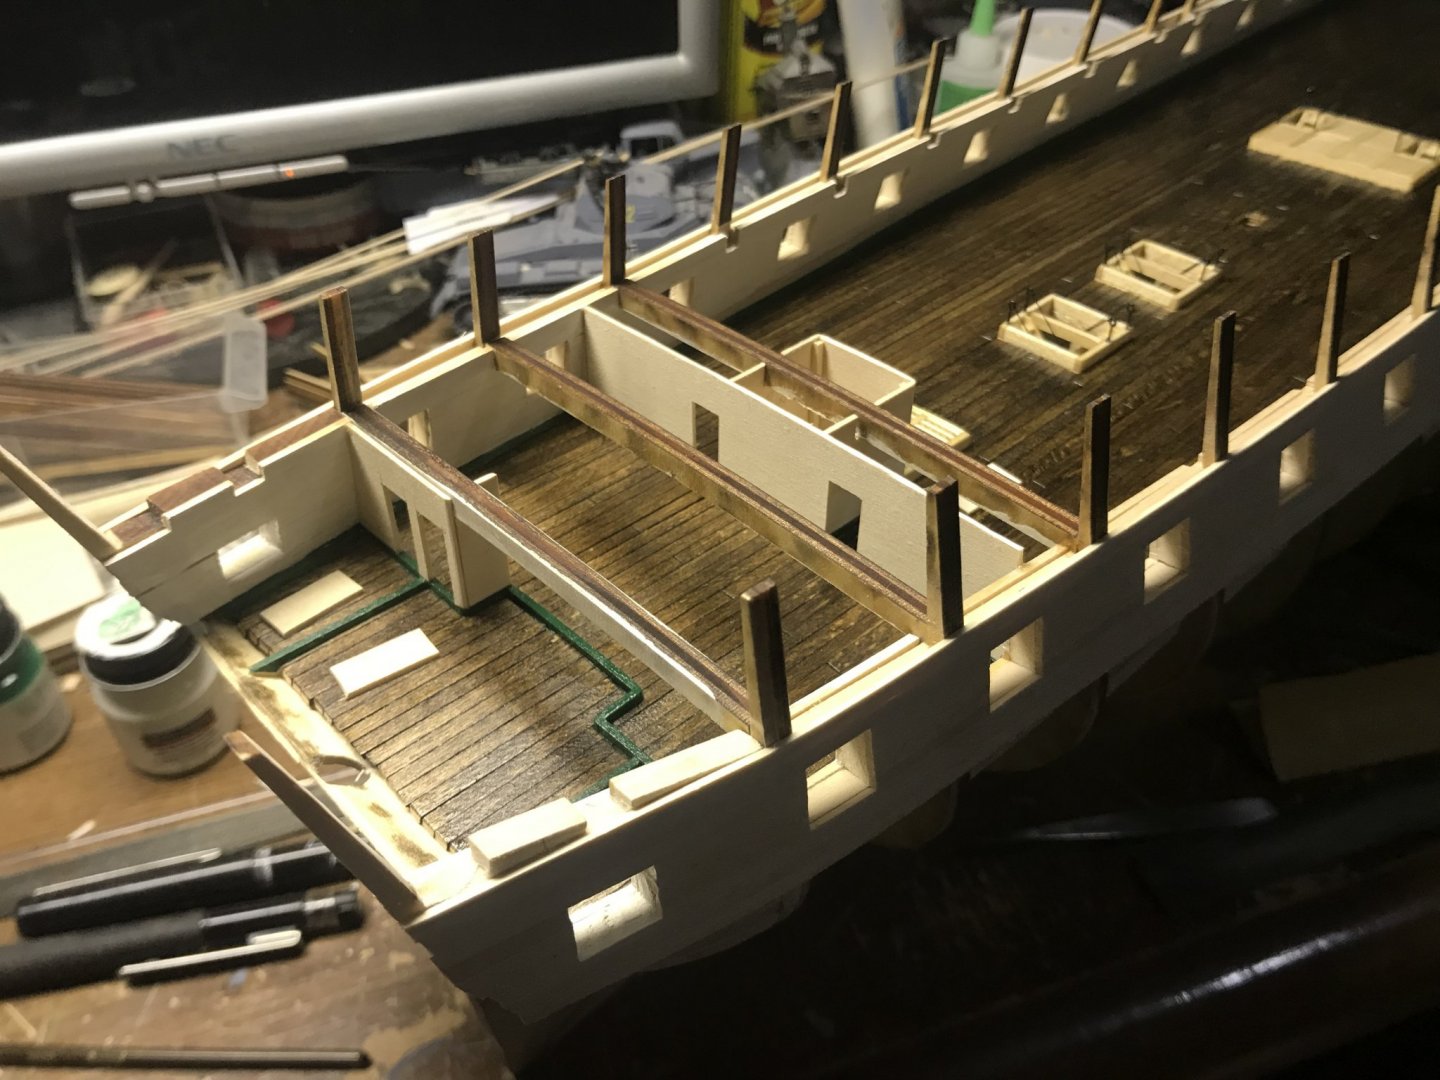
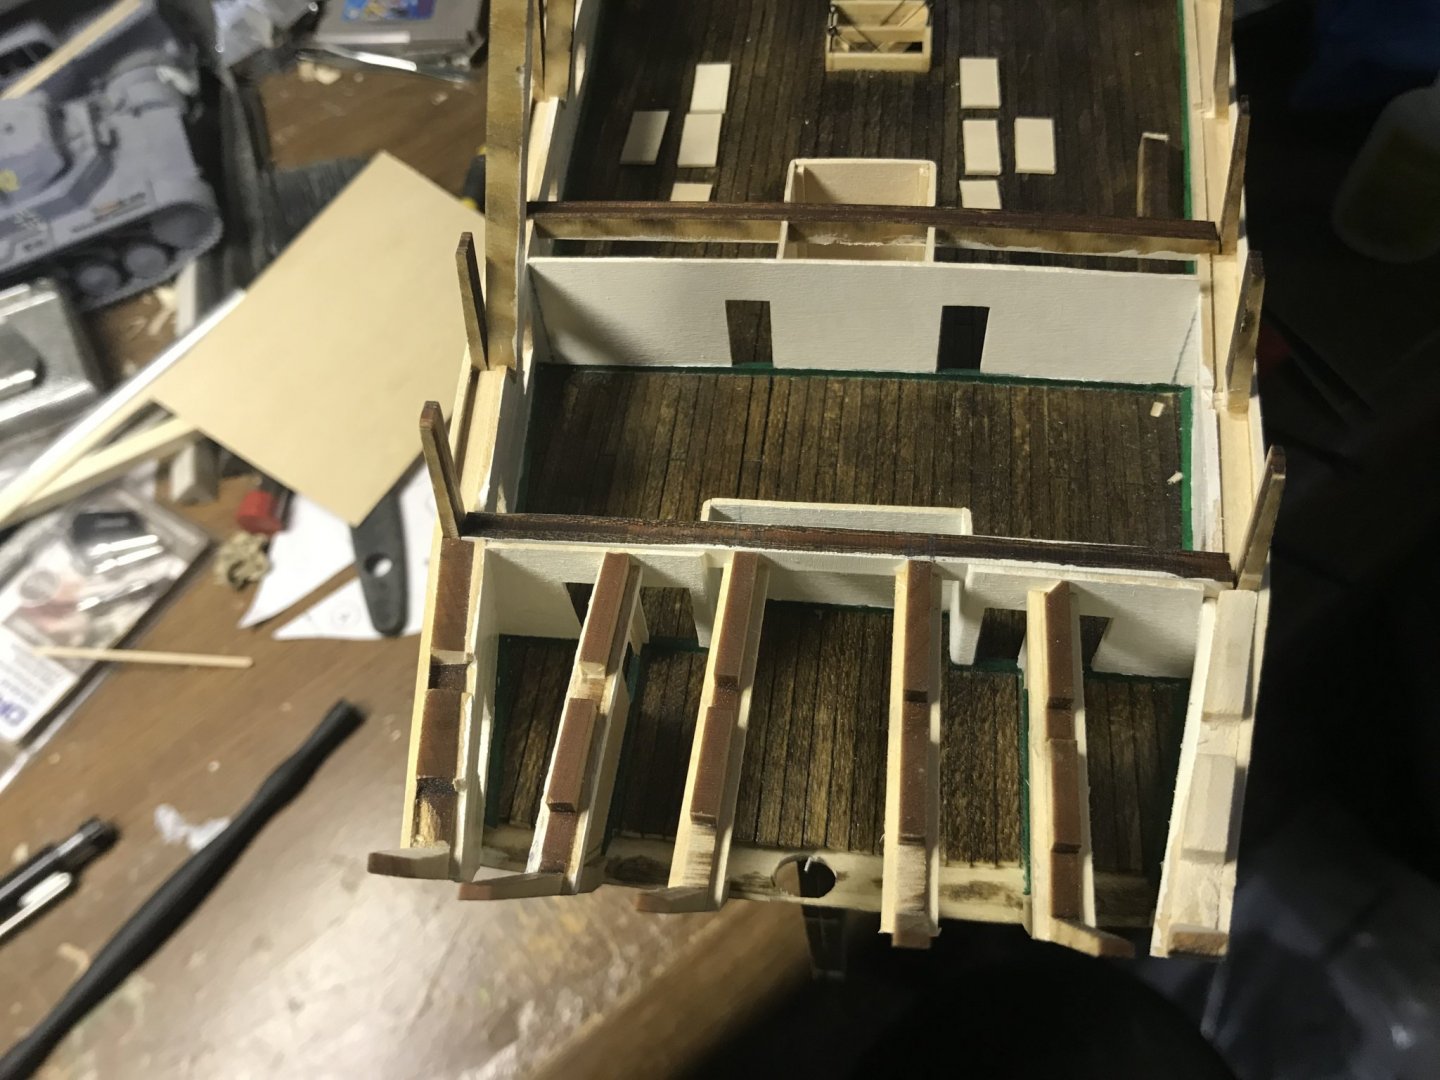
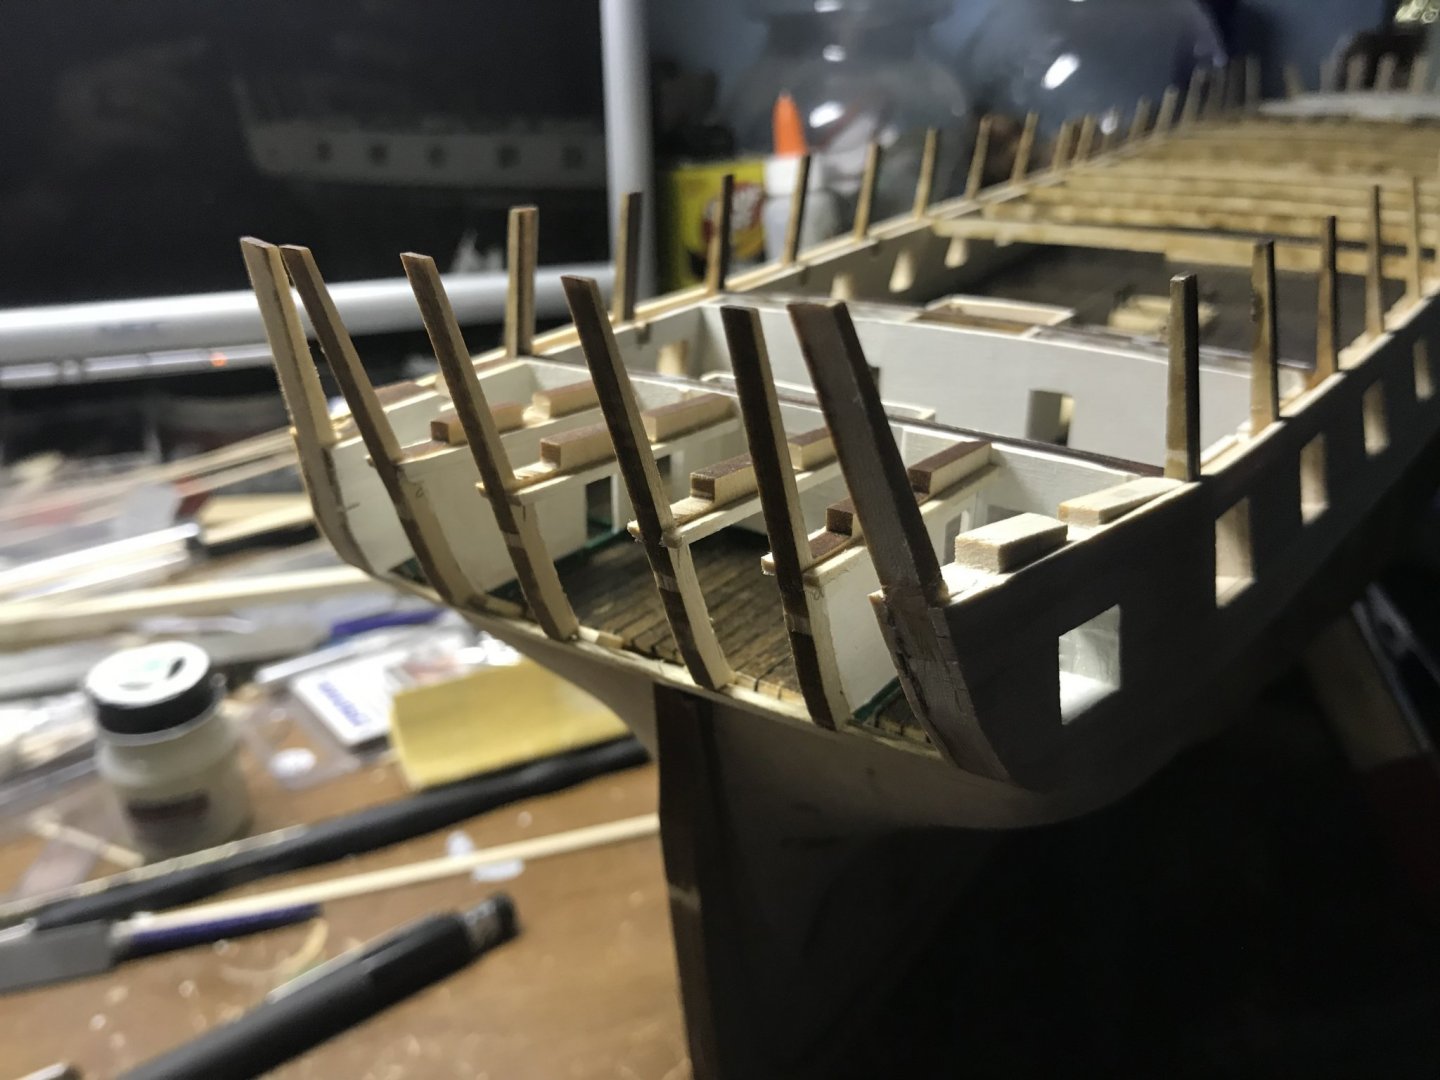
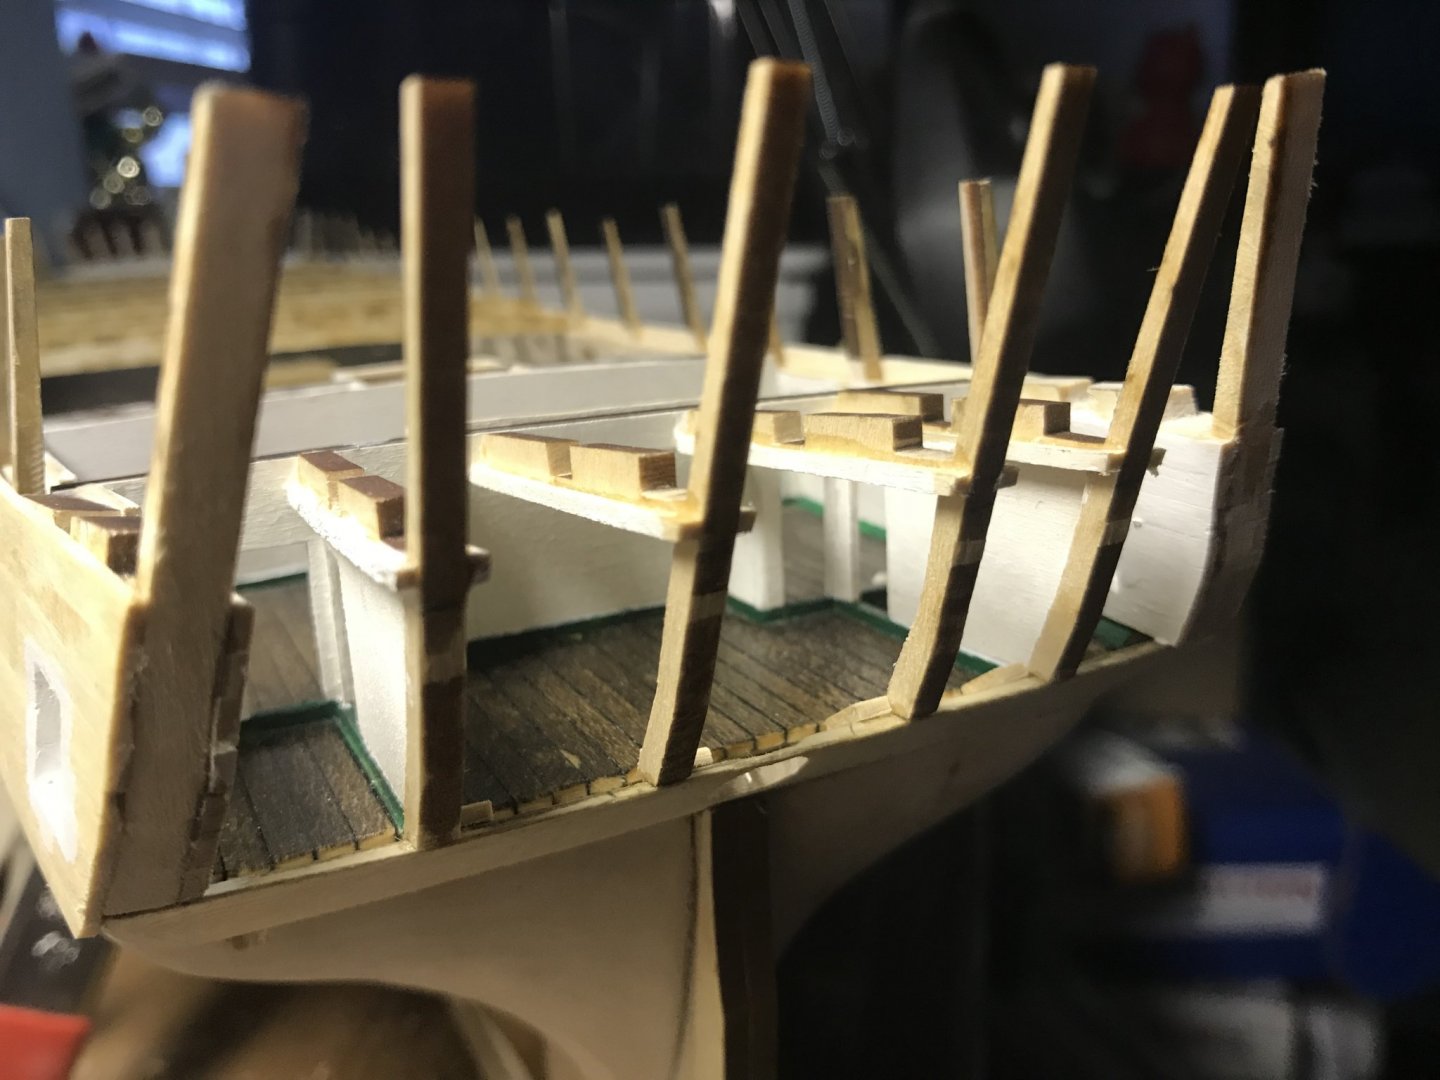
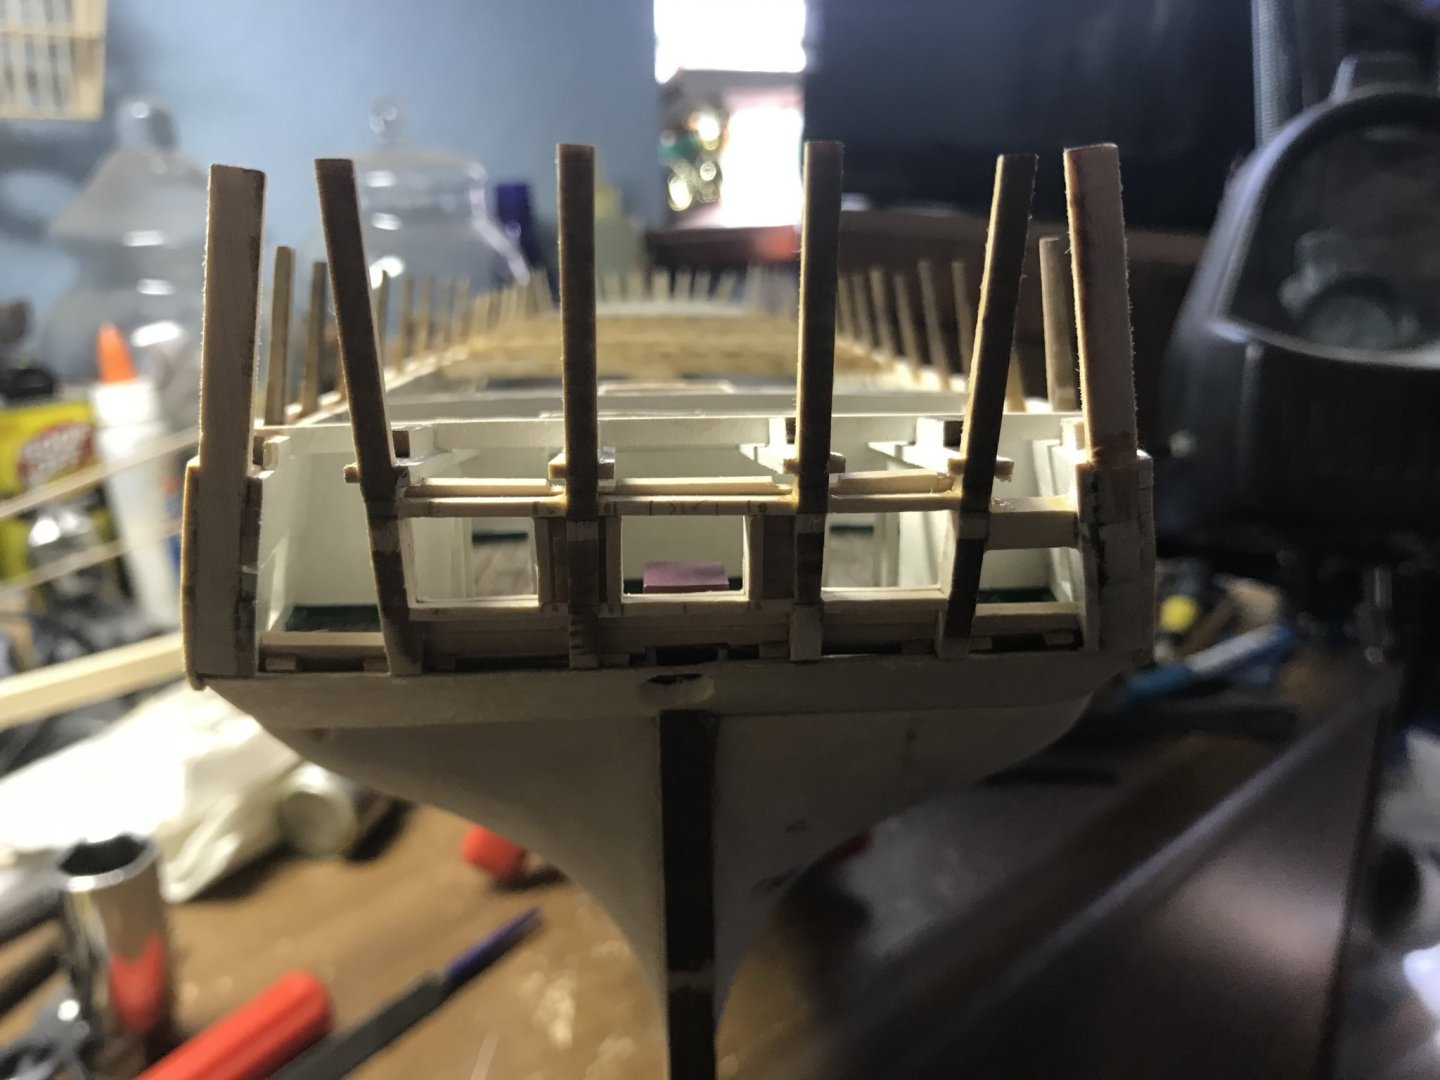
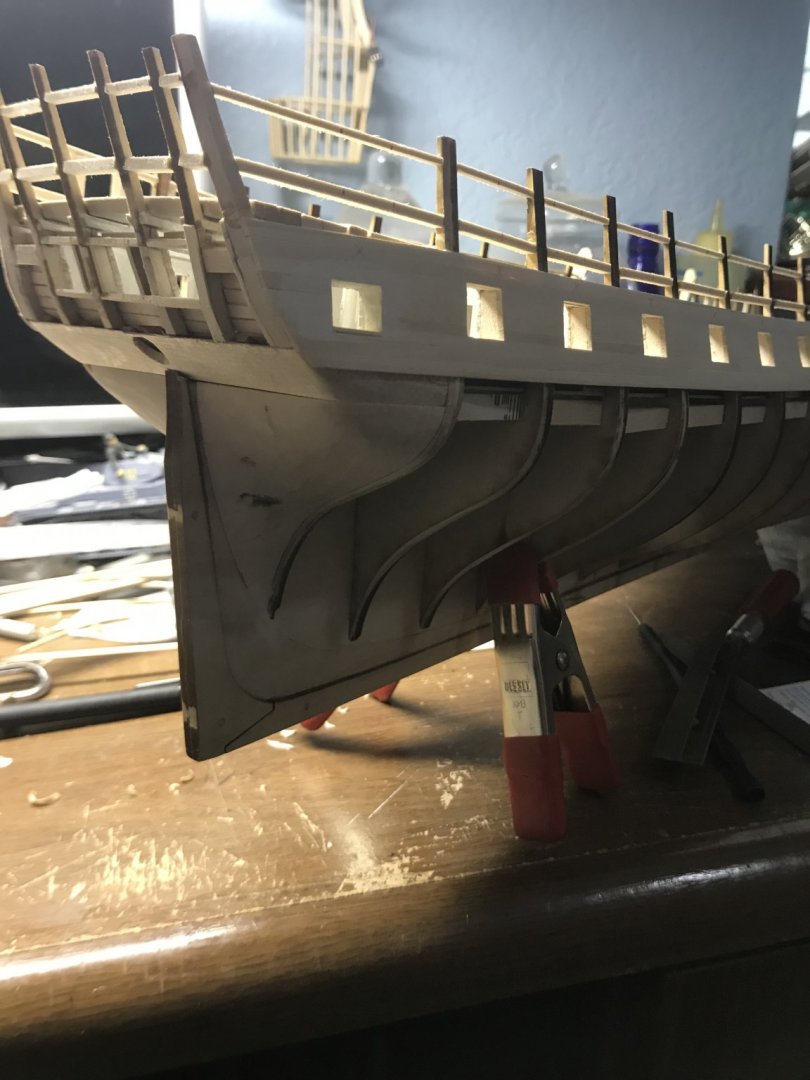
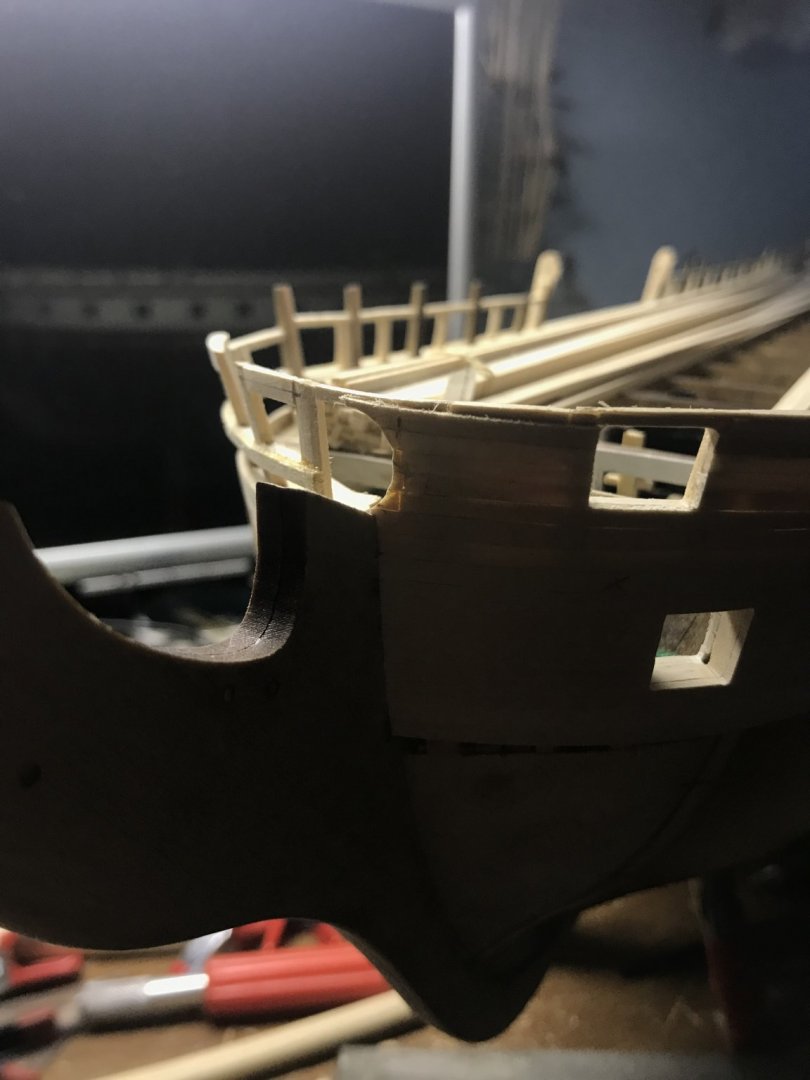
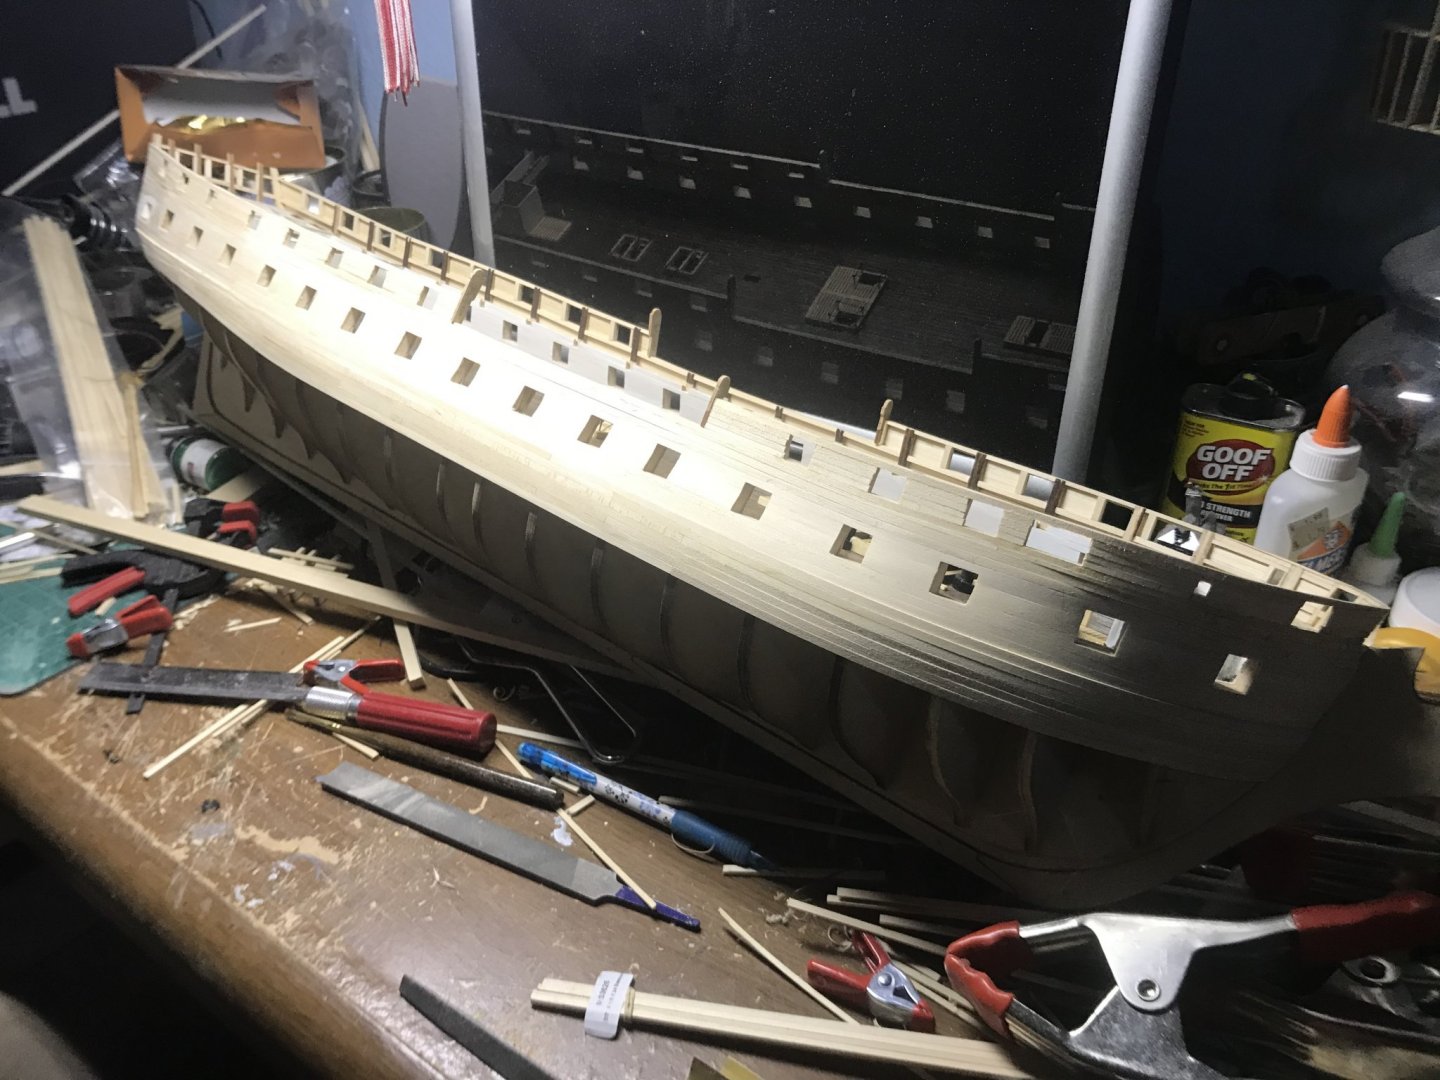
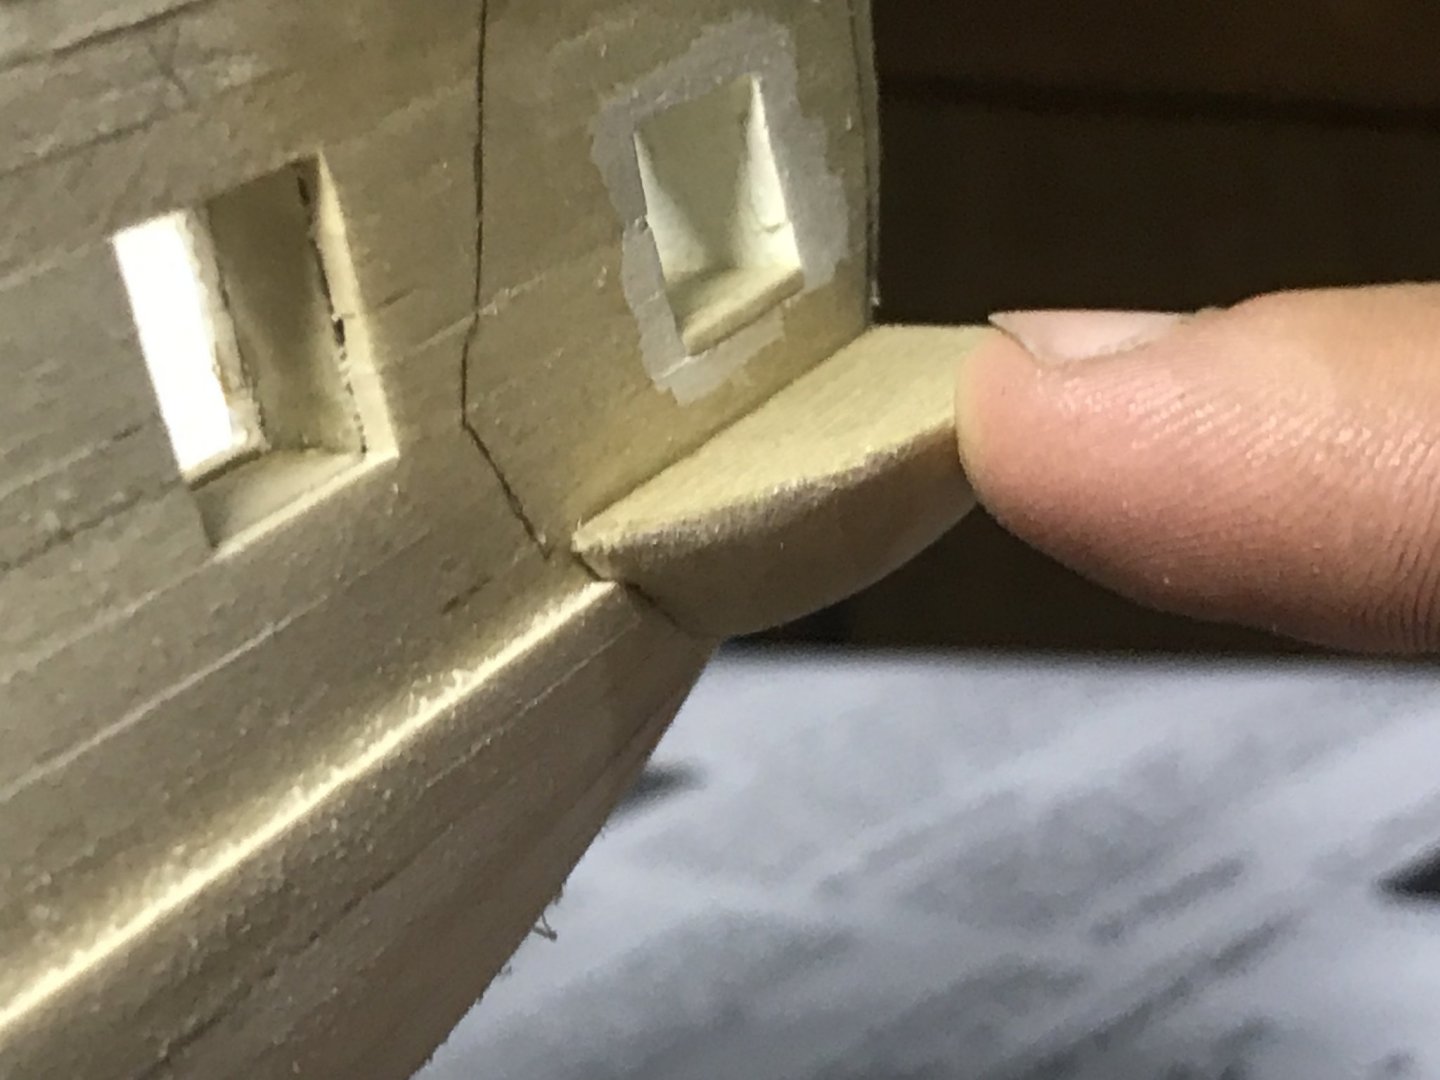
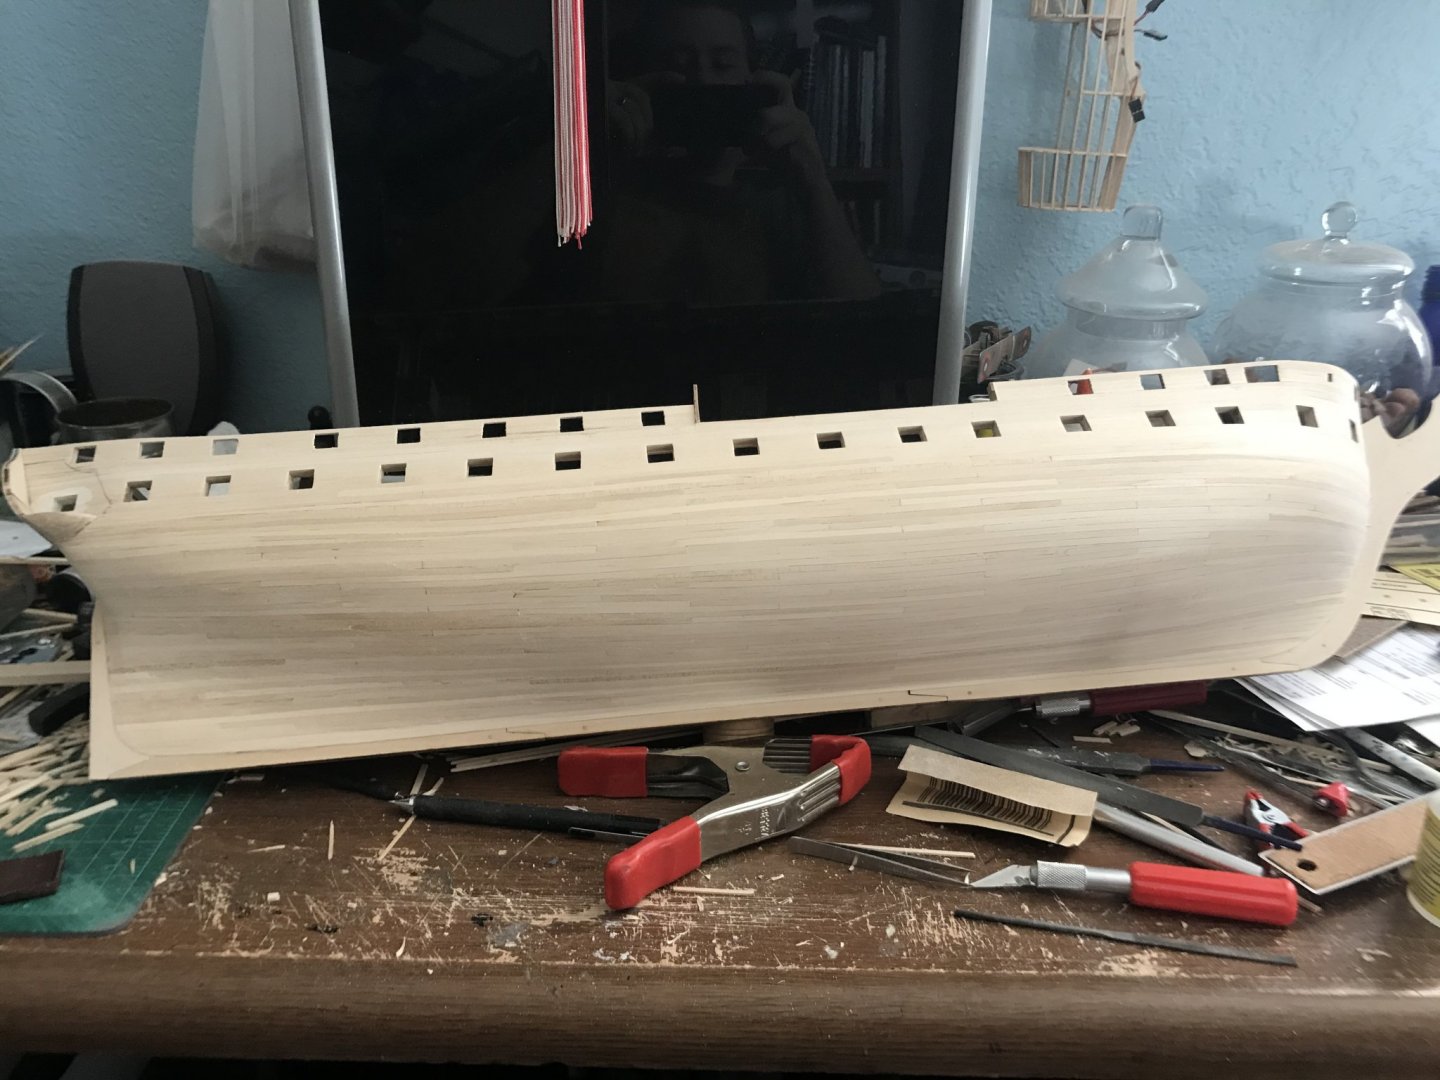
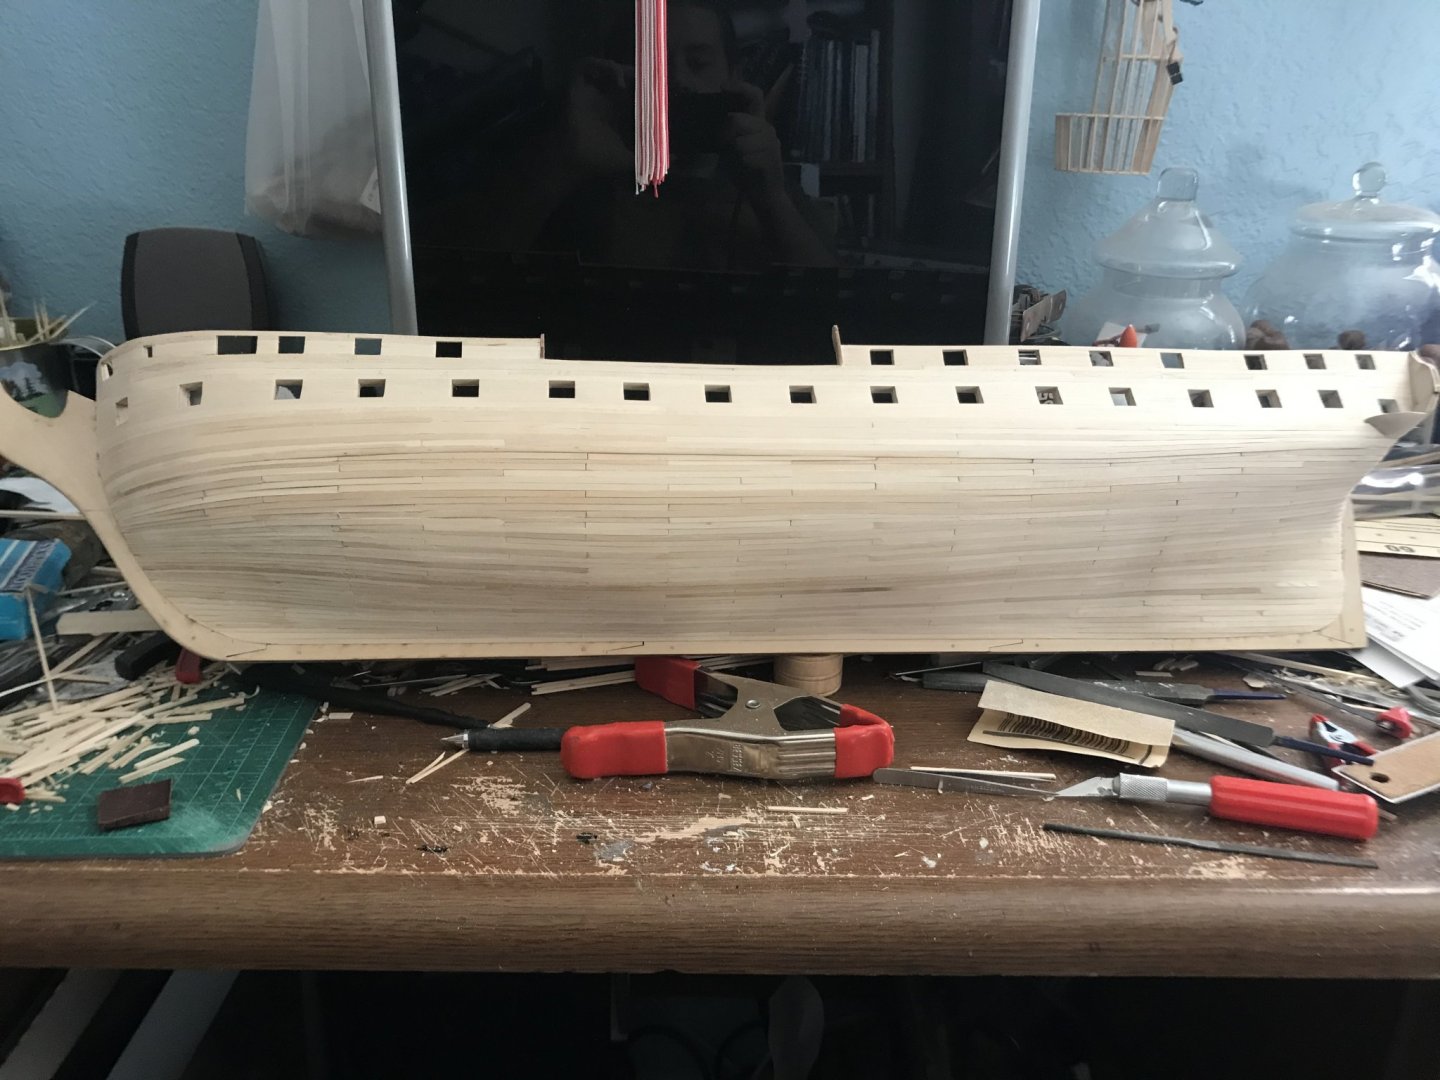
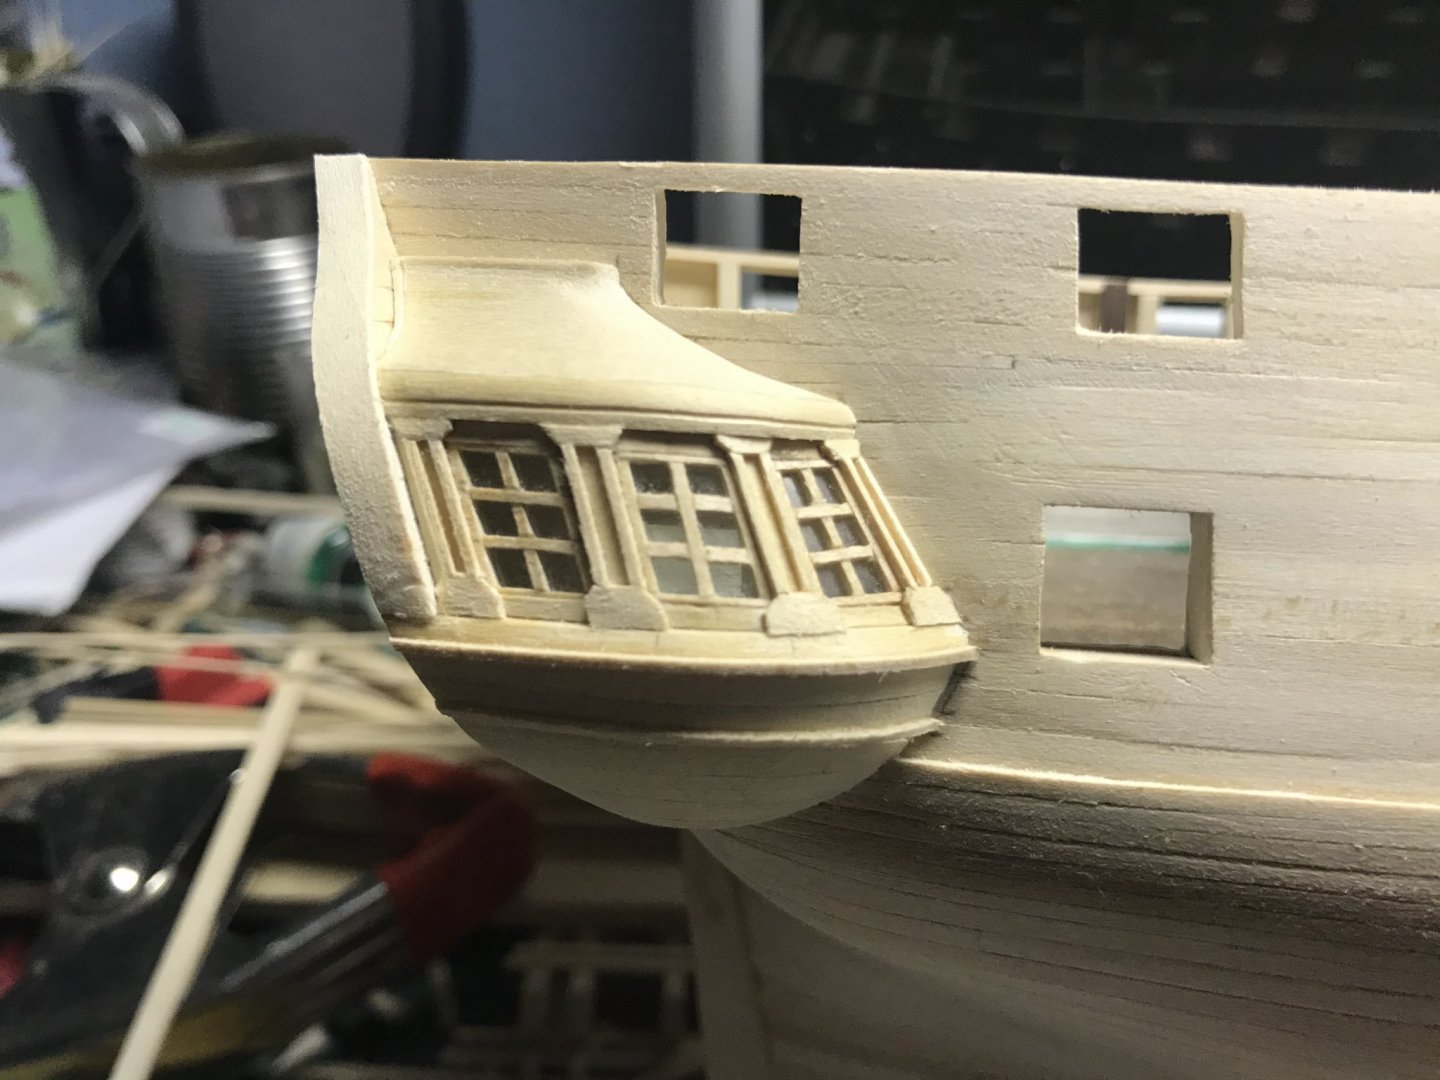
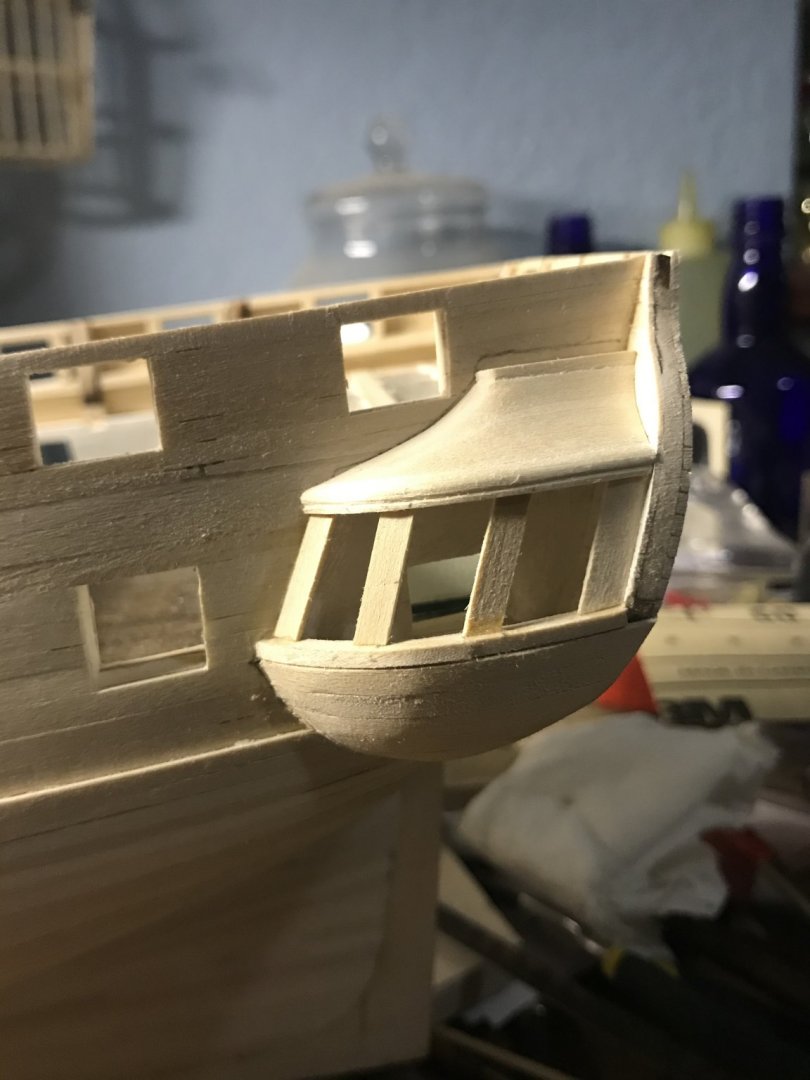
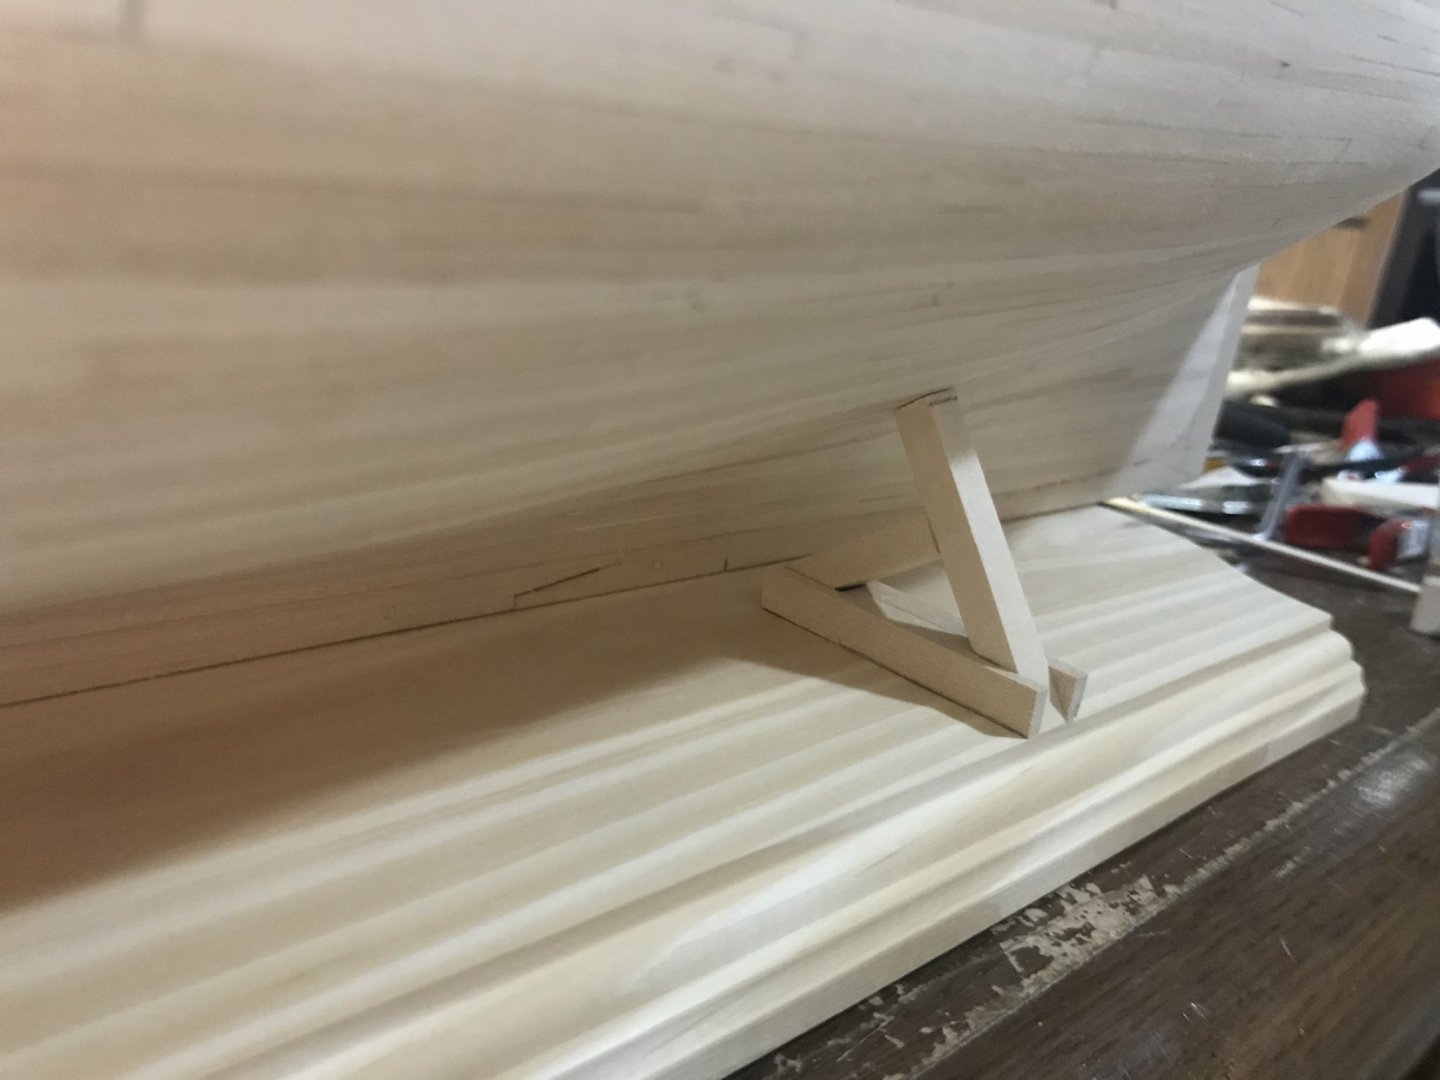
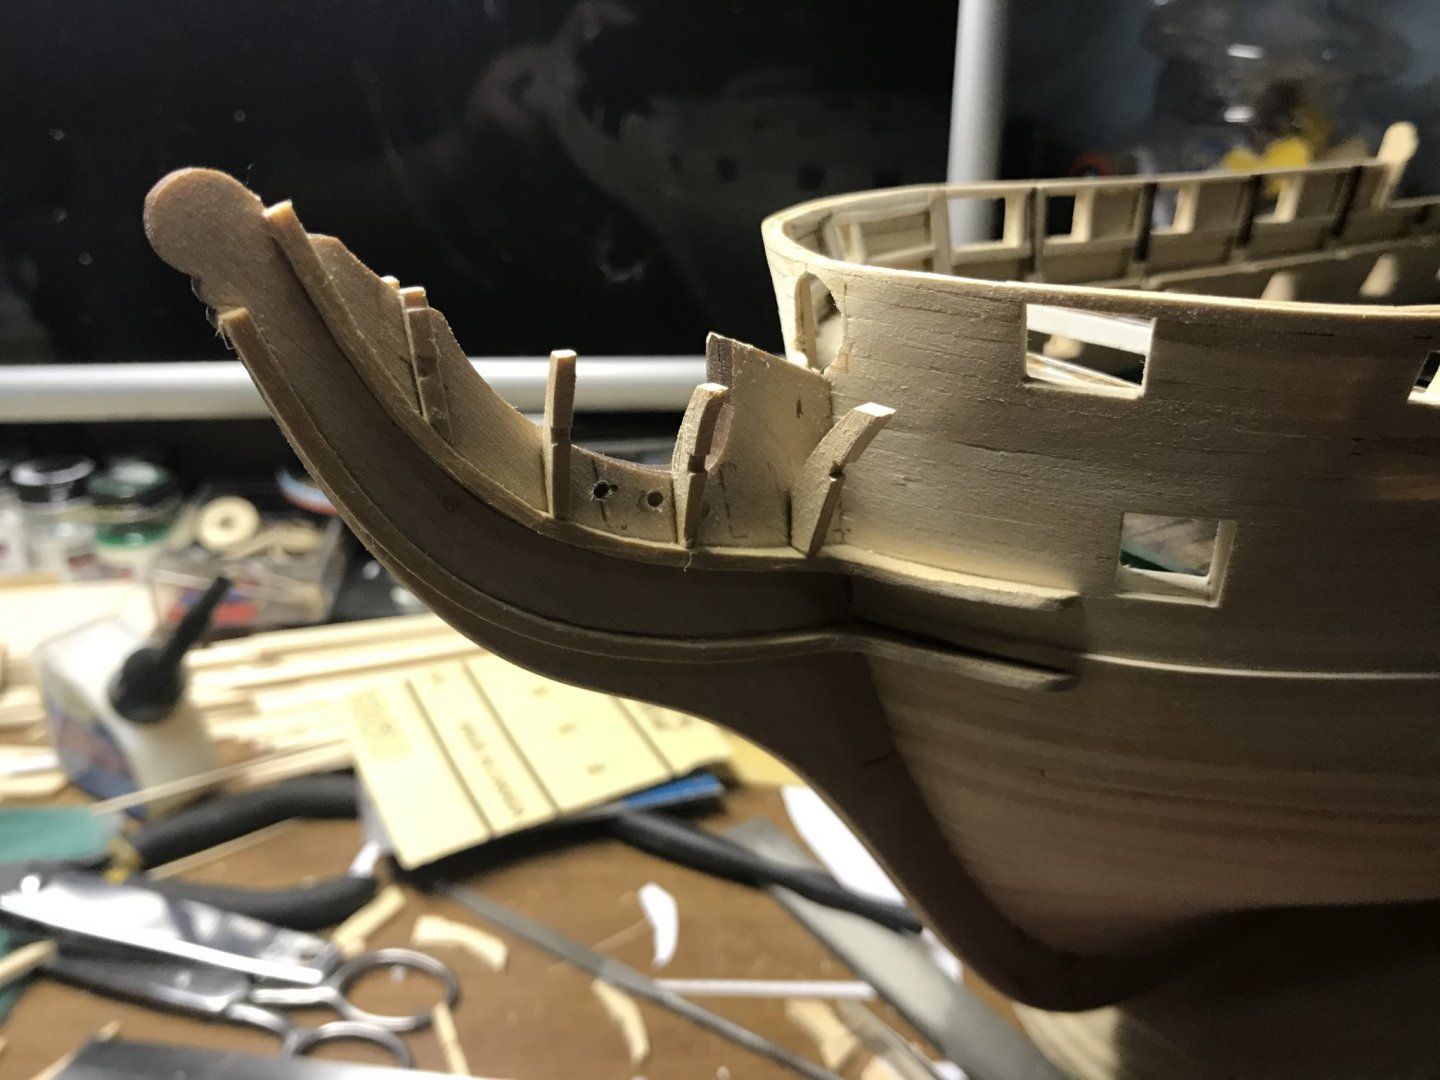
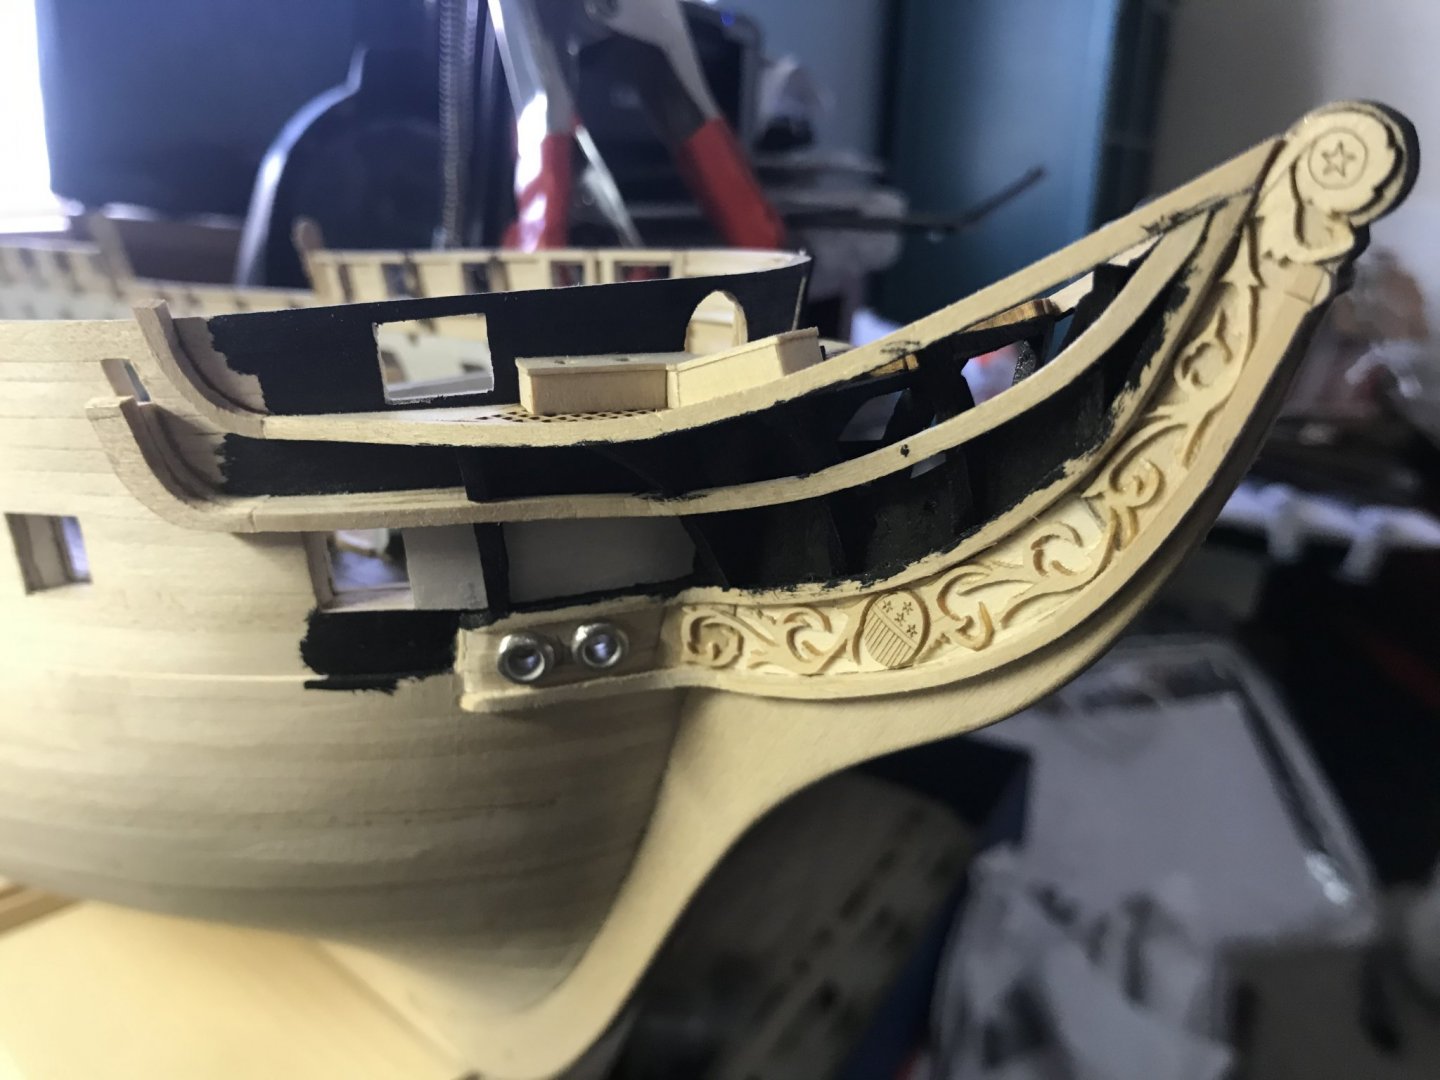
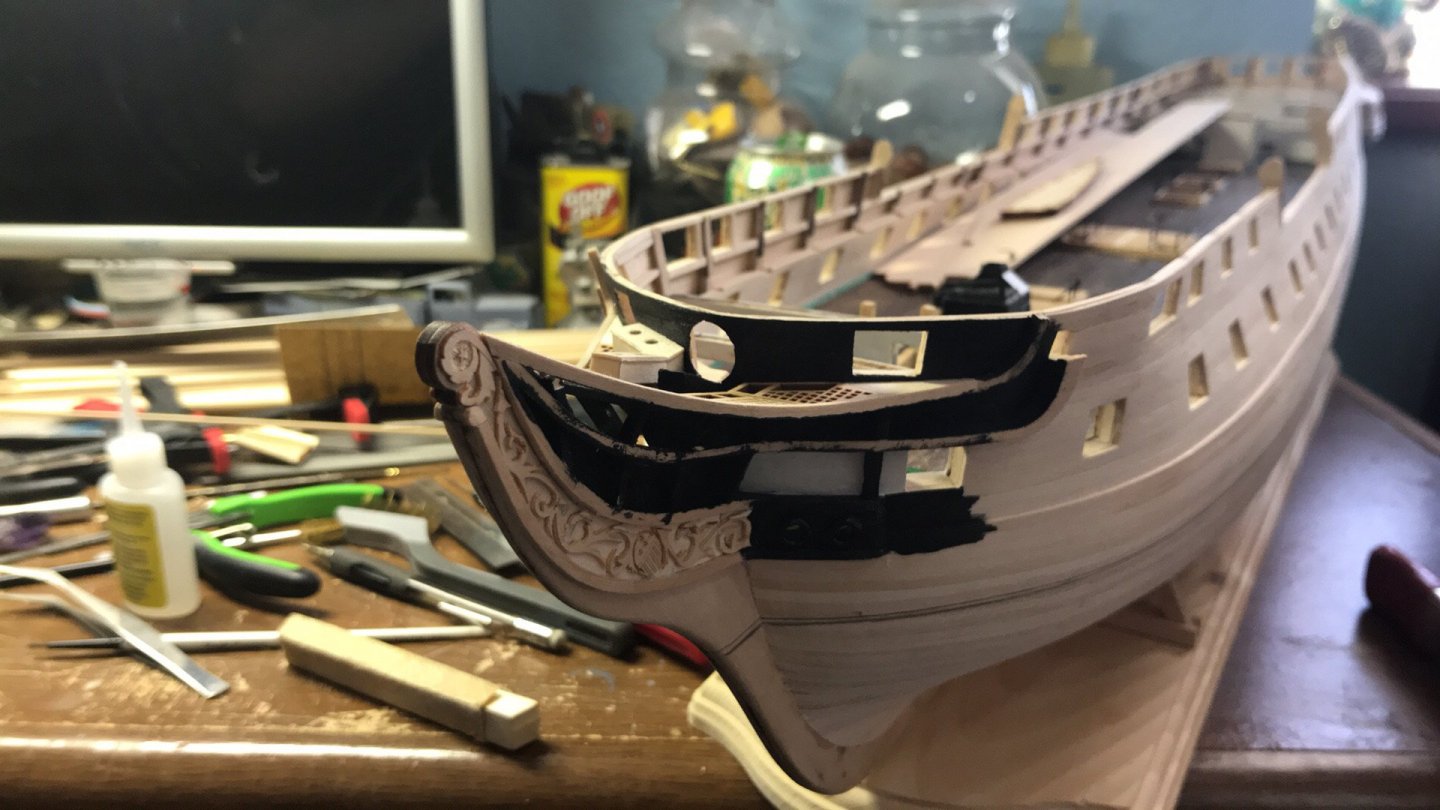
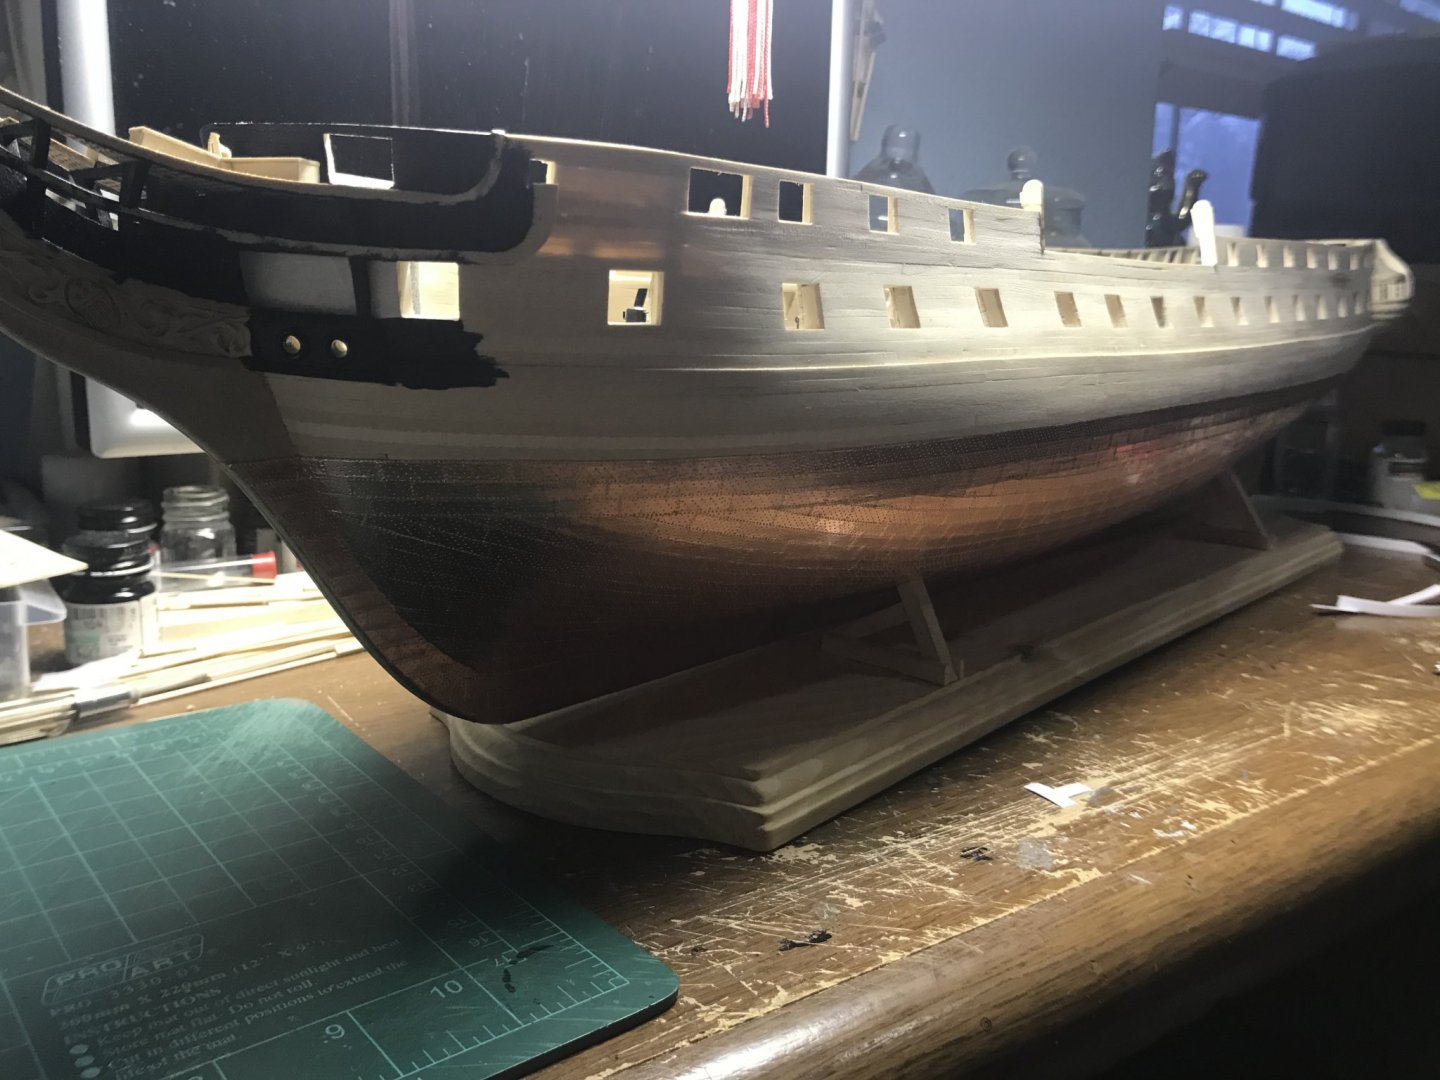
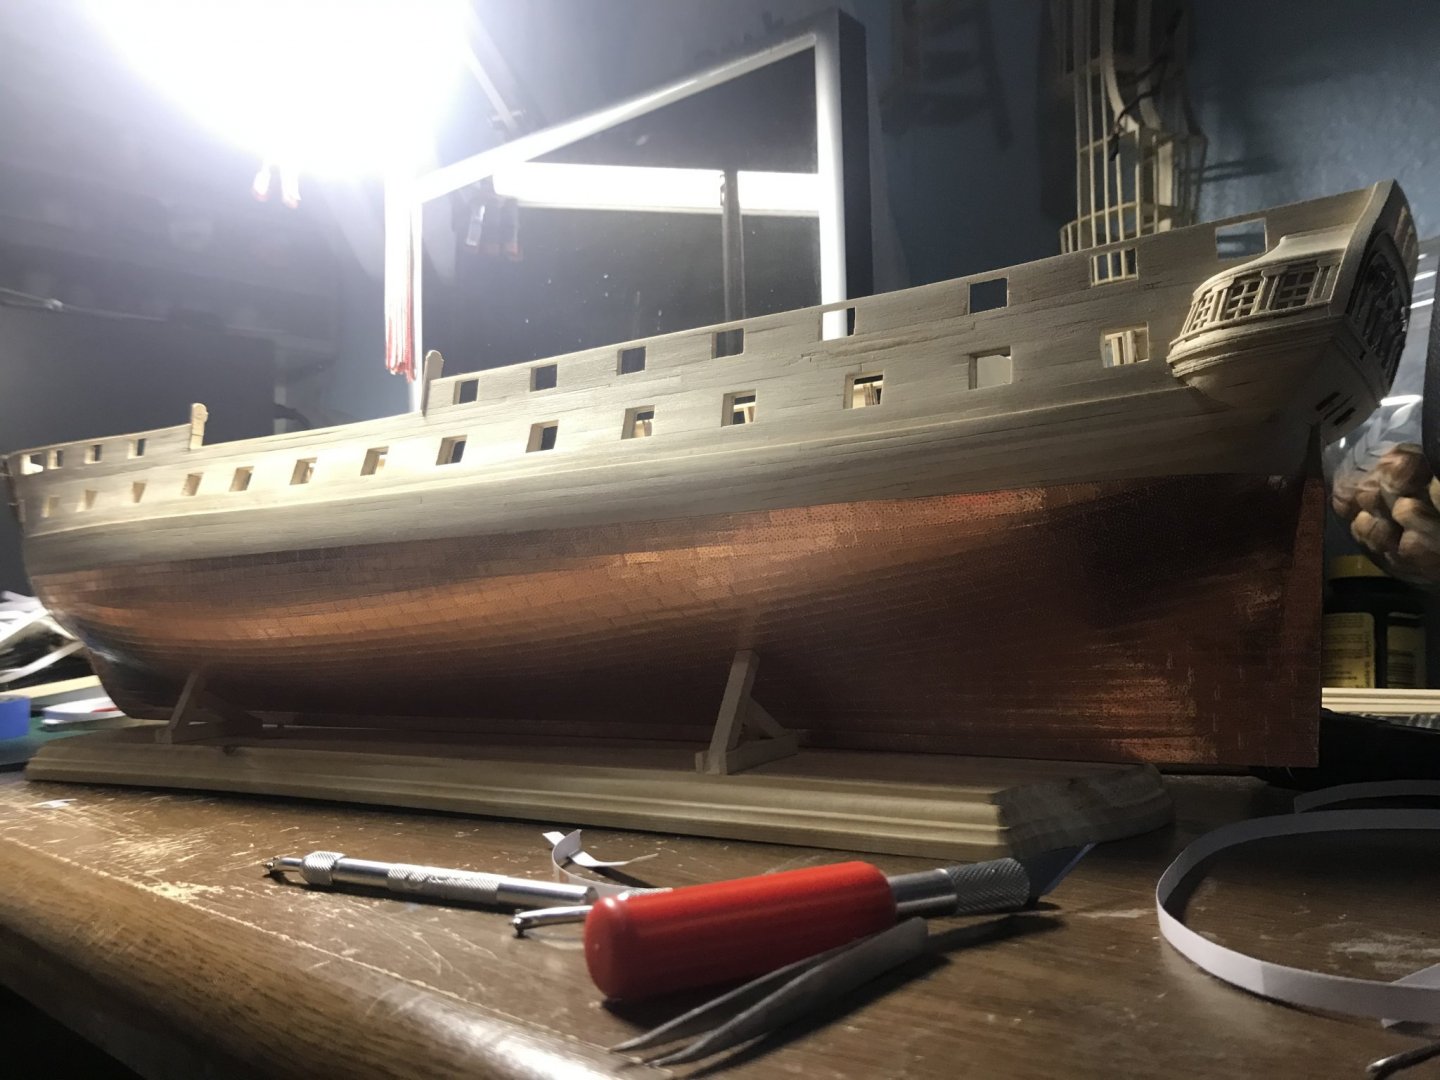
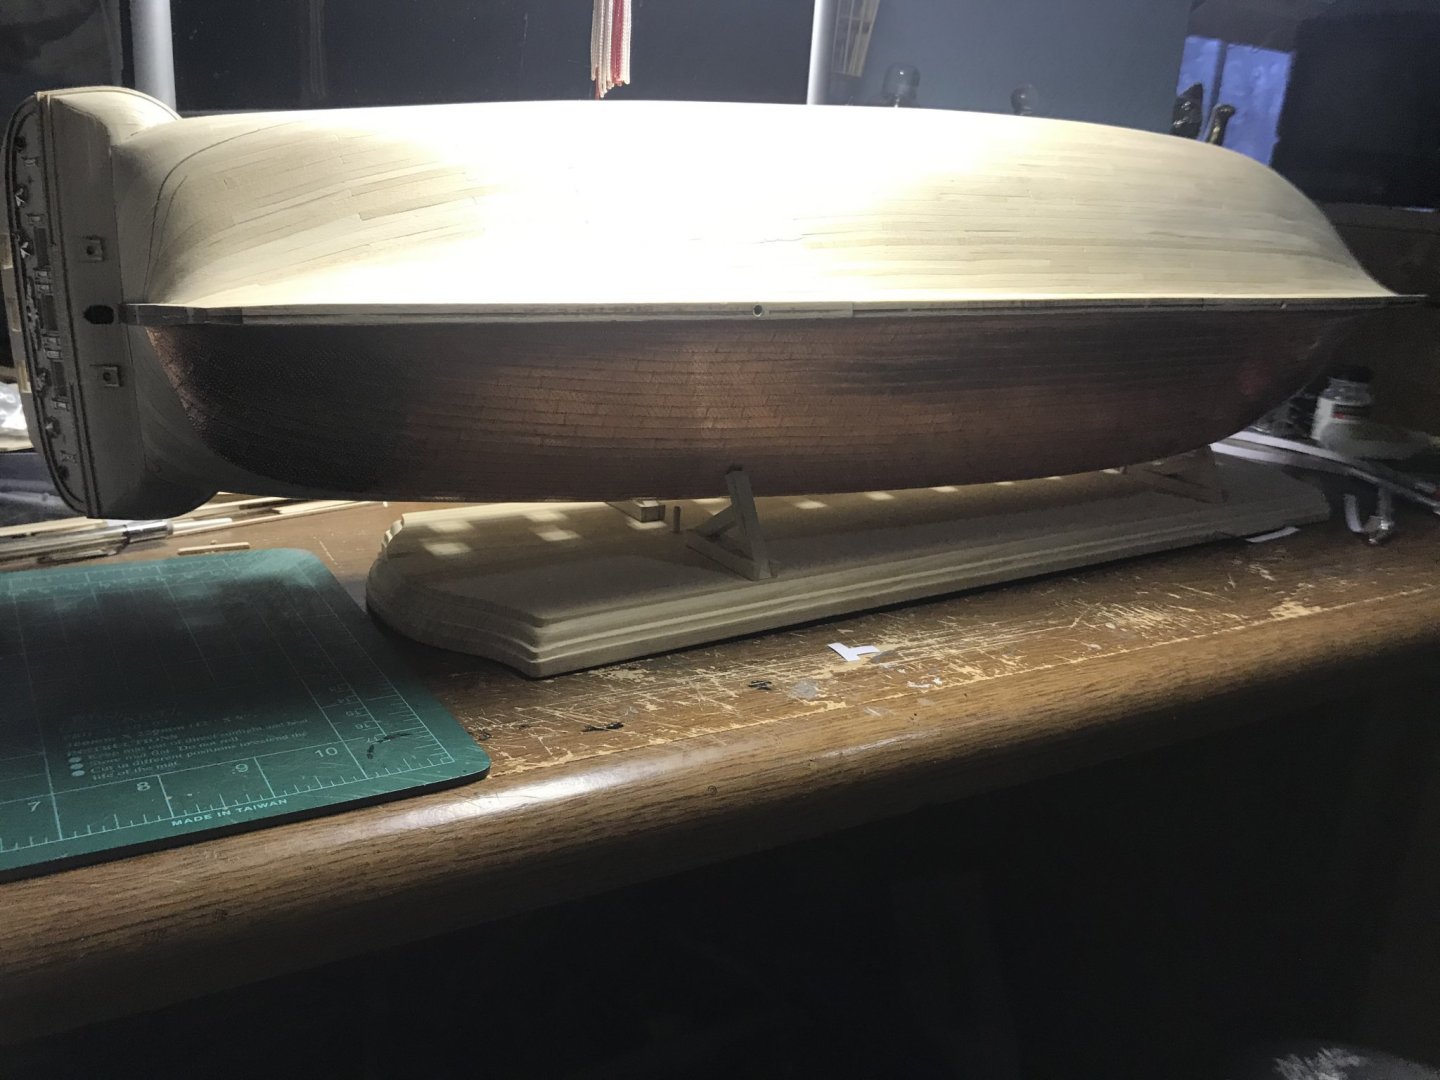
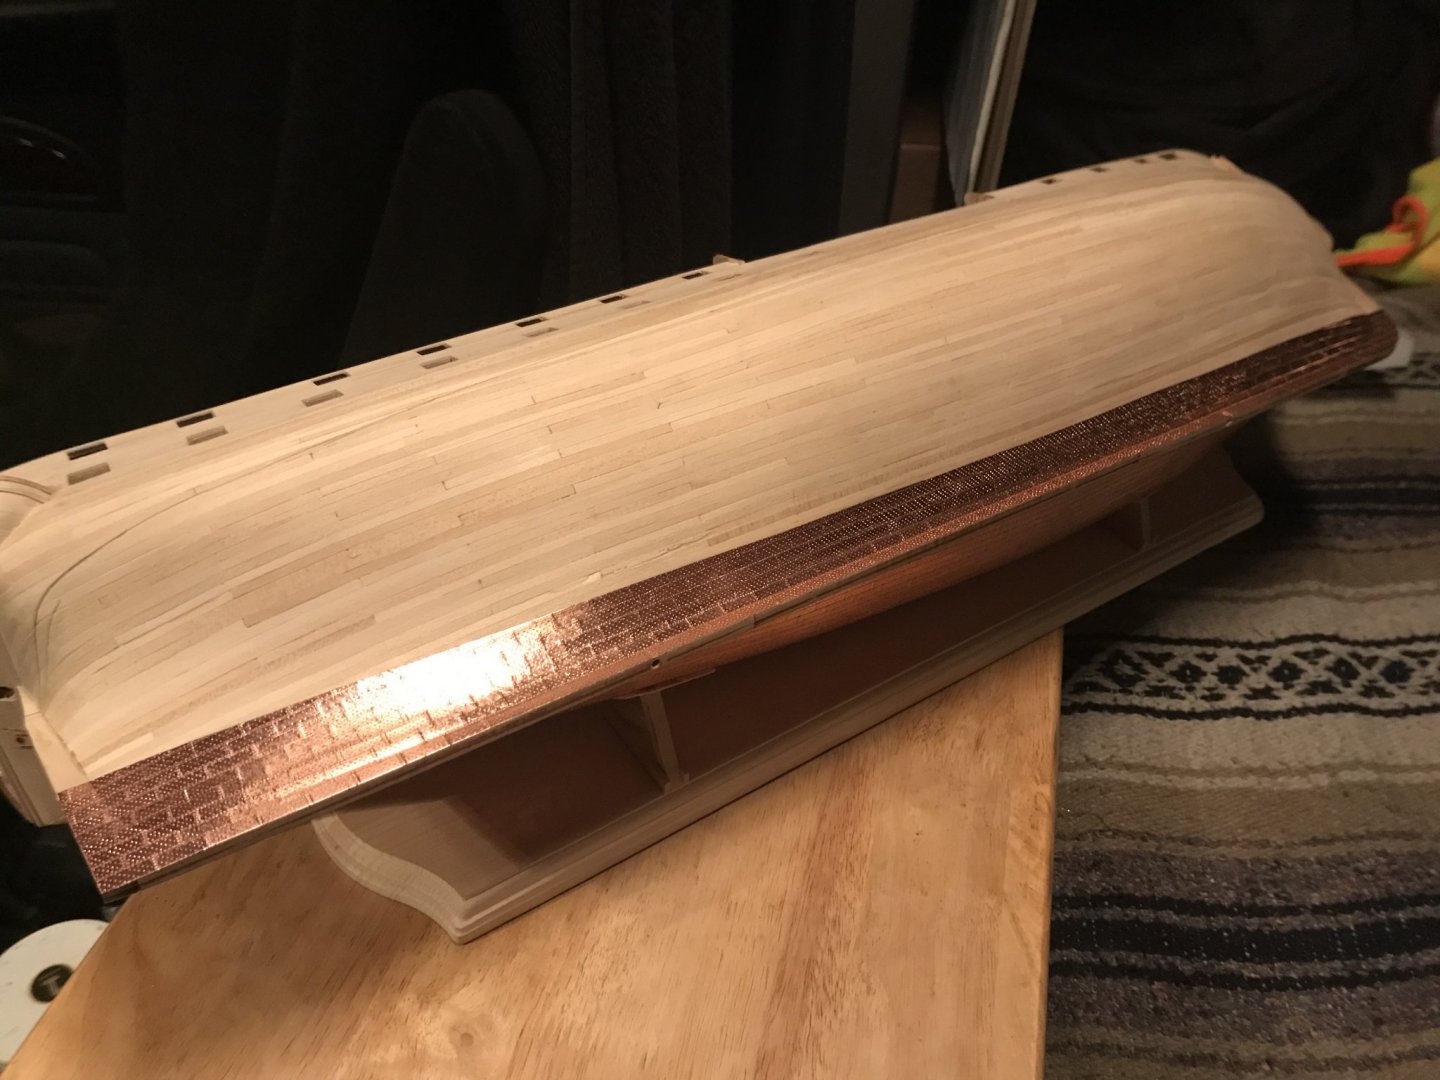
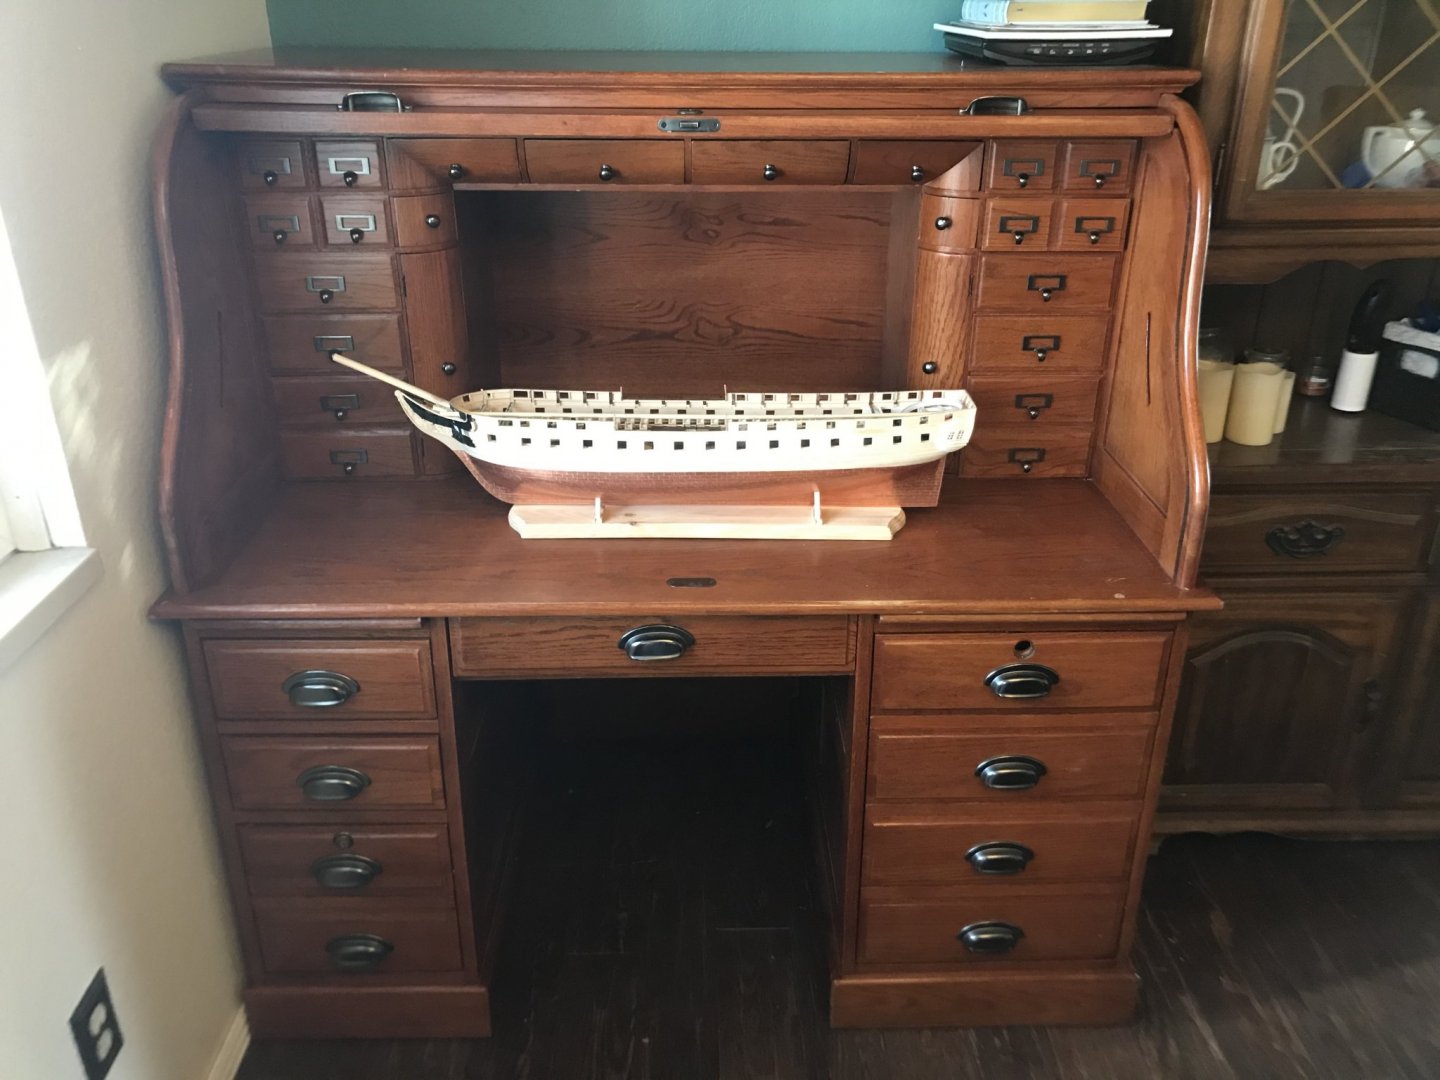
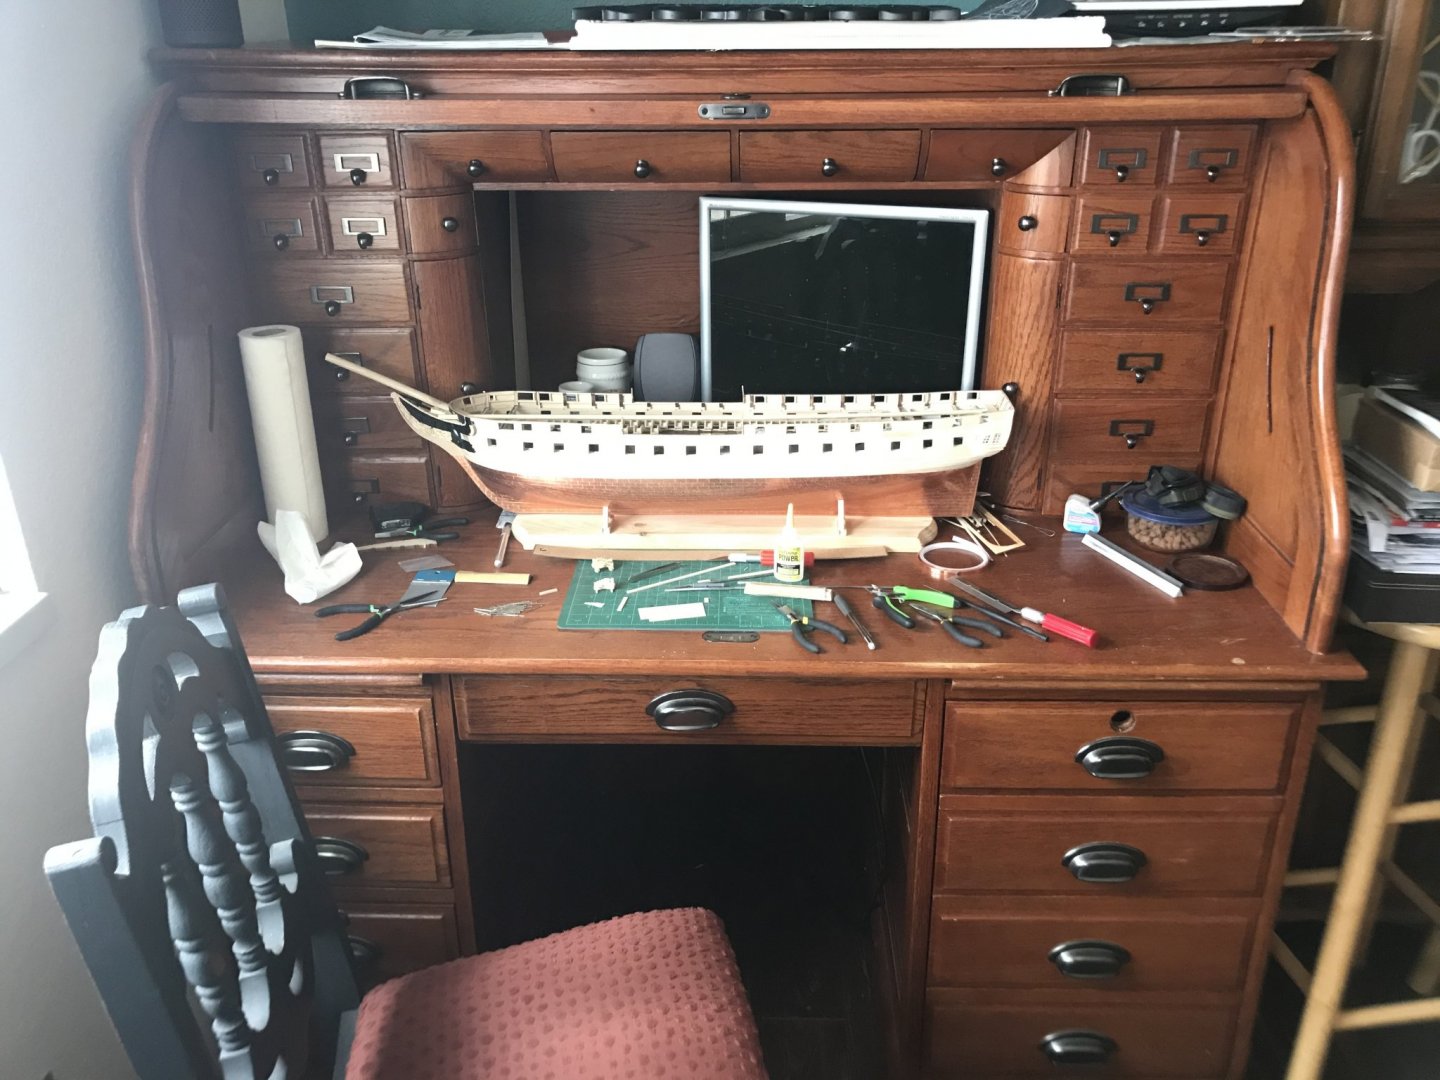
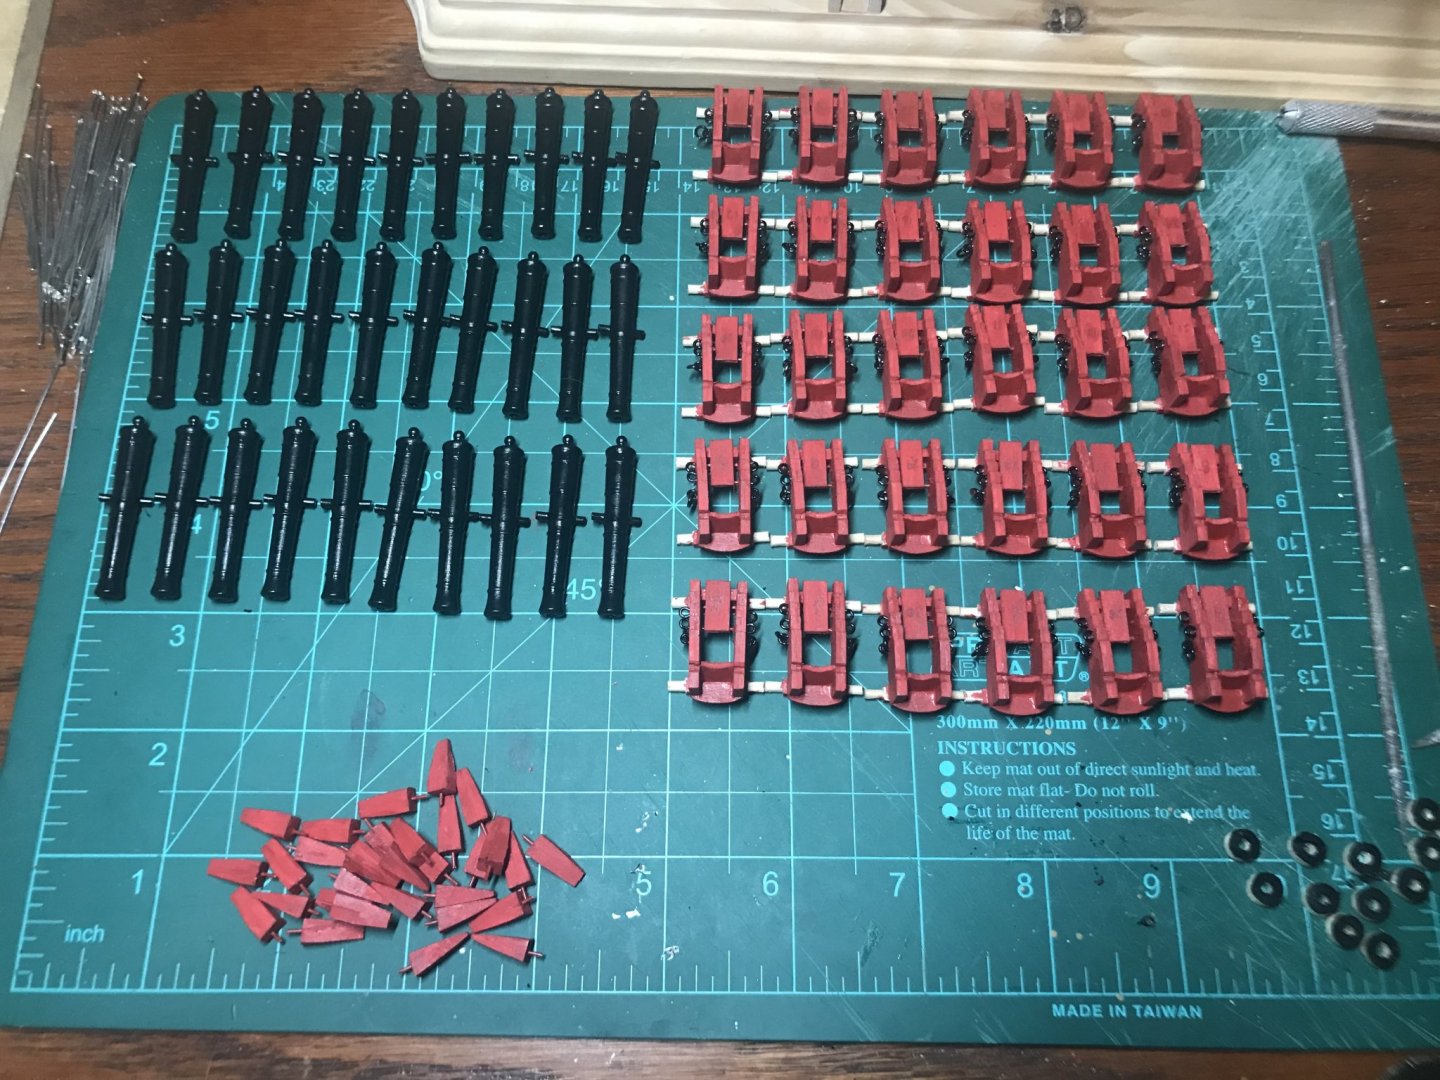
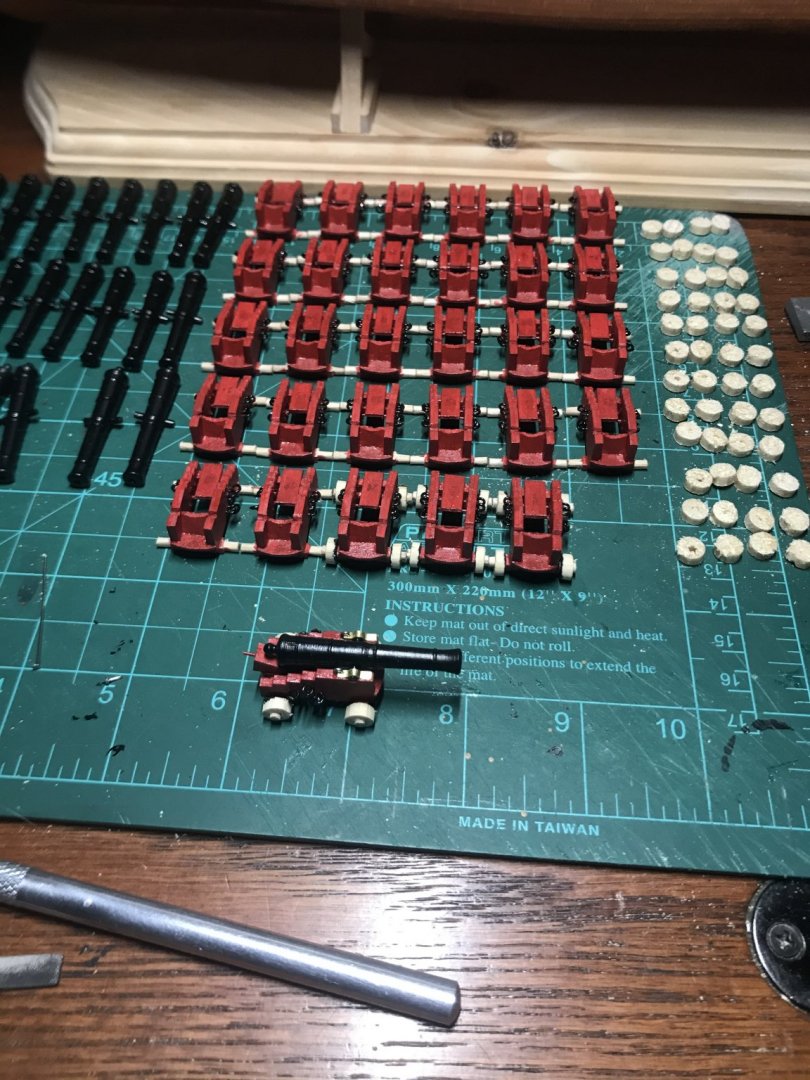
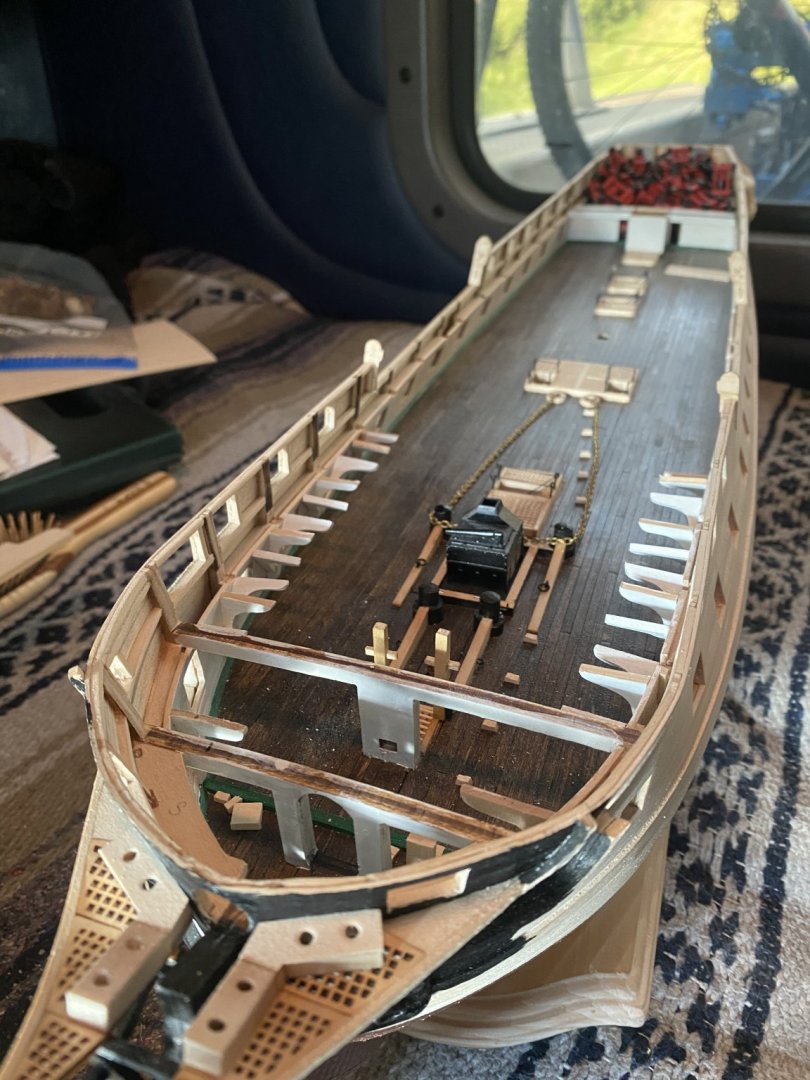
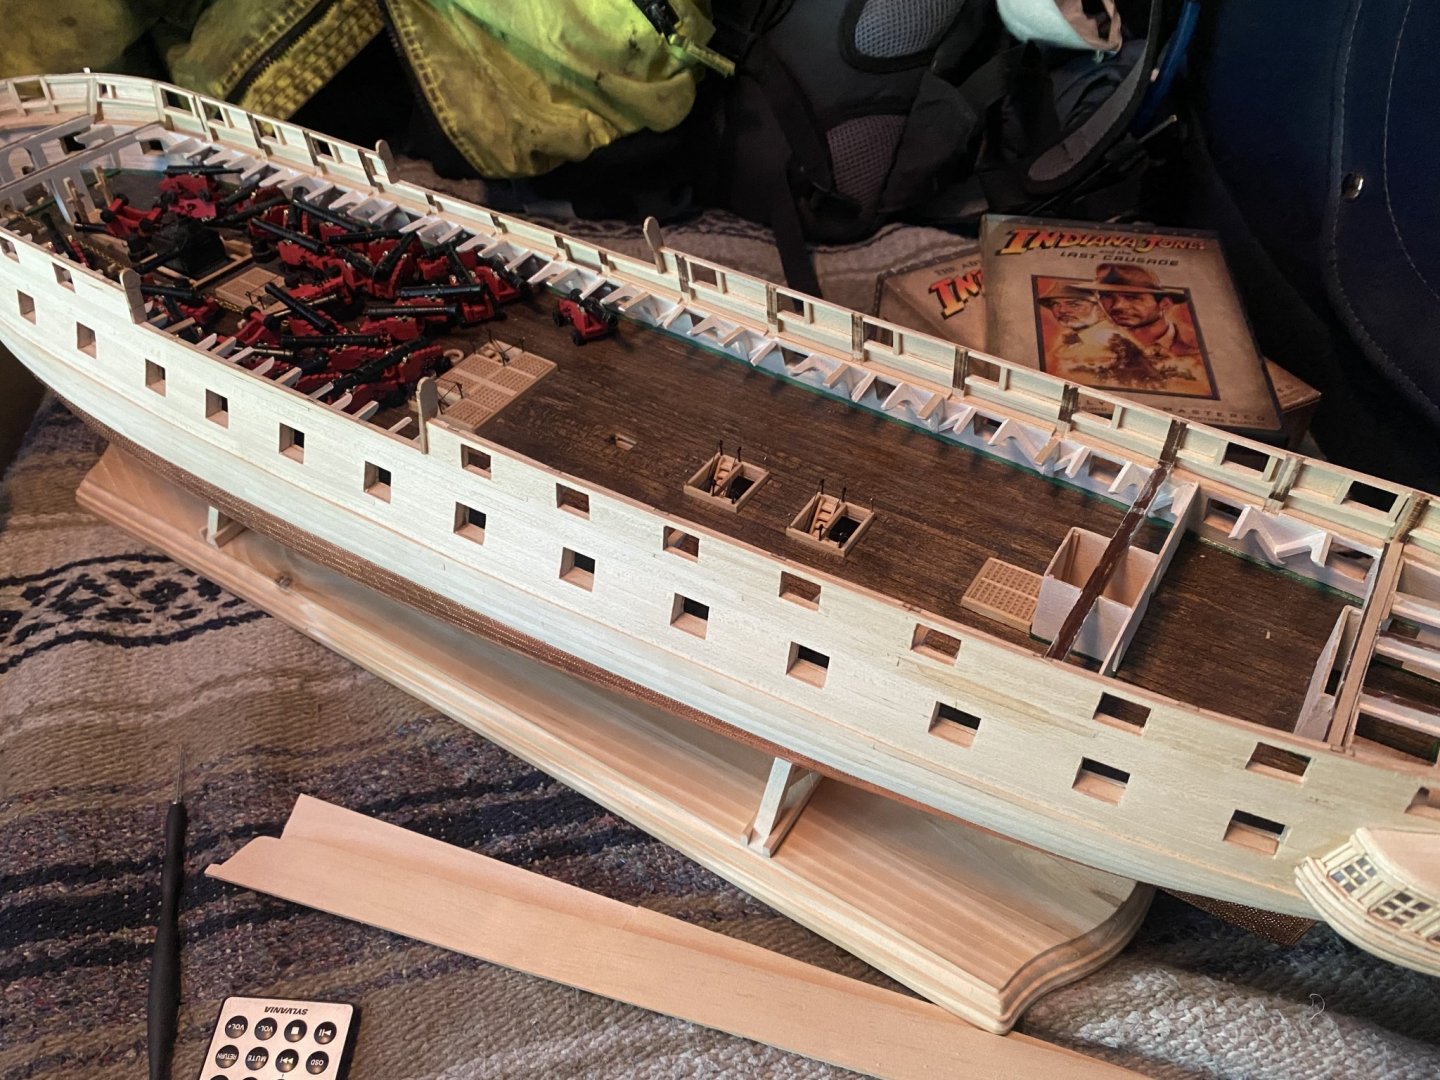
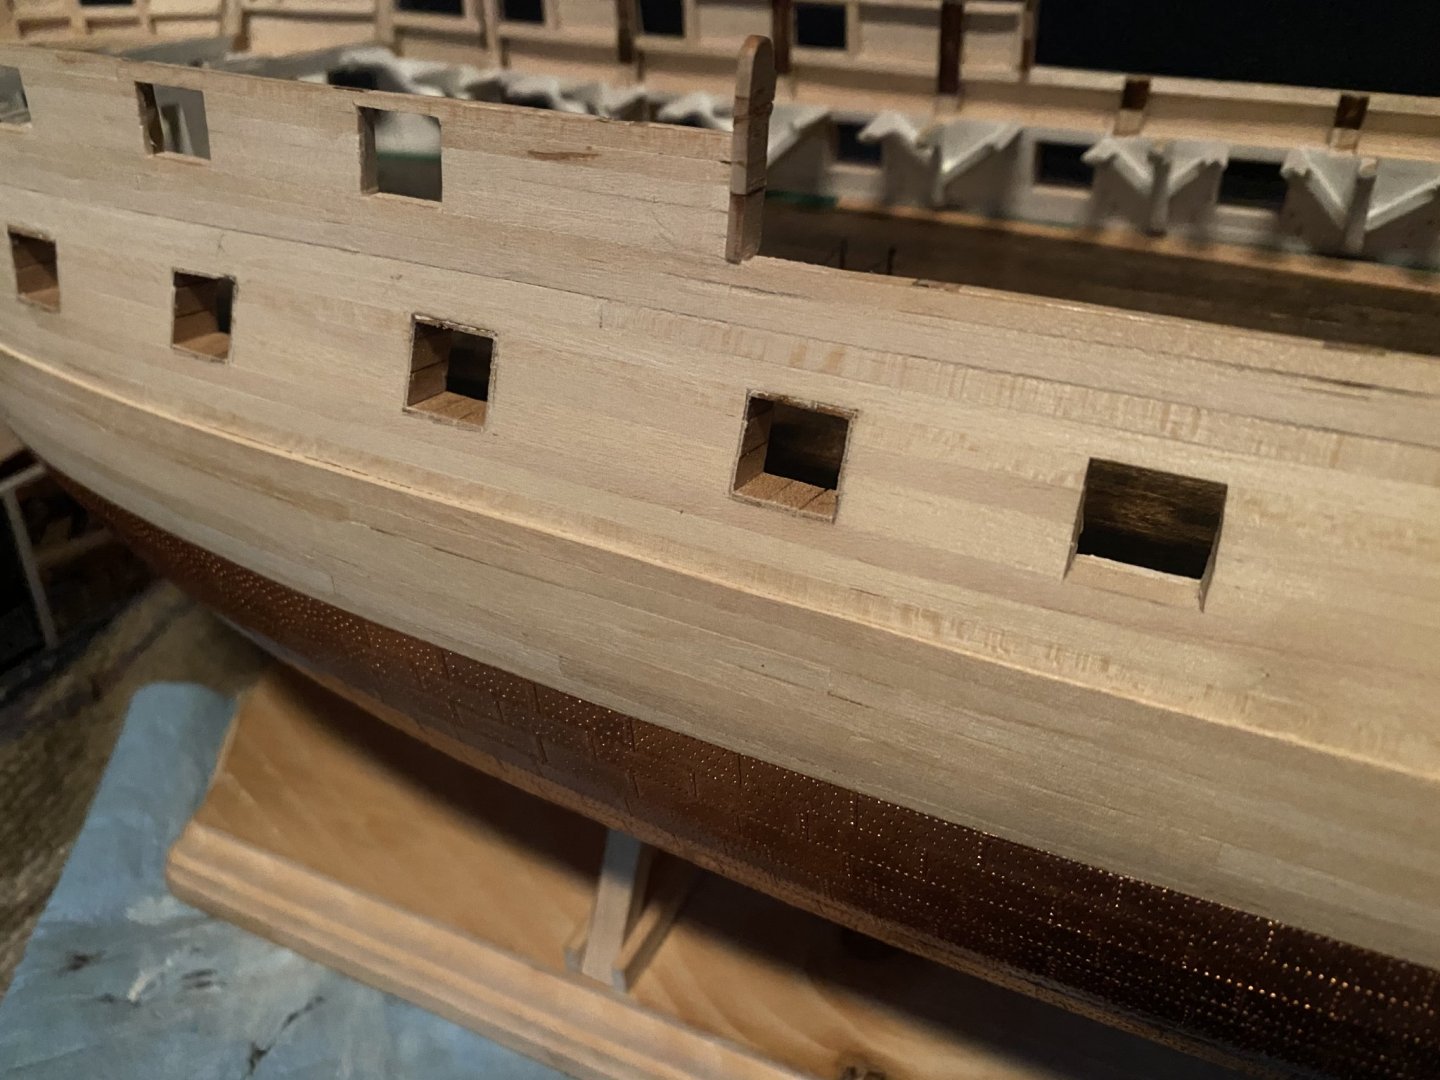
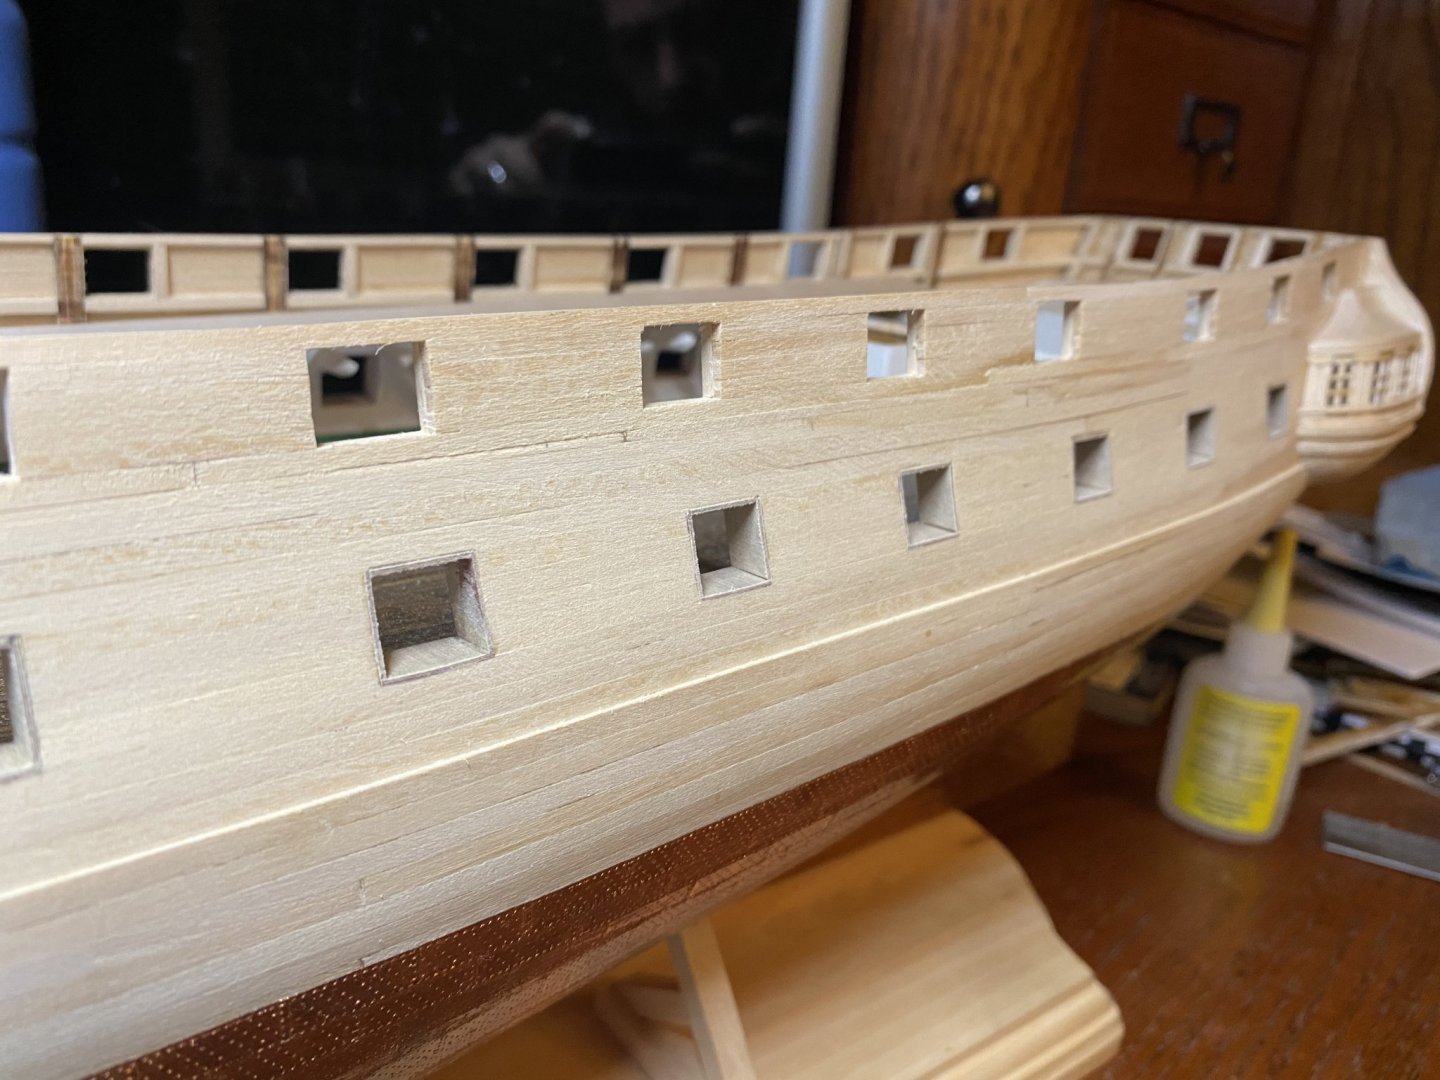
 Better late than never, I guess; but here is my build log for the USF Confederacy. There are many like it, but this one is mine, lol. I started this build over 5 year ago. Then it got put on hold in Jan of 2018 due to my retirement from active duty Air Force, move from Texas to Georgia and starting a new job. Before I knew it, 5 years have past and I was looking at the MDF box the model was placed into for the move on the shelf in my closet. I decided to pull it down and open up the box. Then I decided it was time to start work on it again. I don't have any pictures of my progress up to this point, but I have a pictures of the current state of the build. I am currently in the process of fairing the sweep ports.
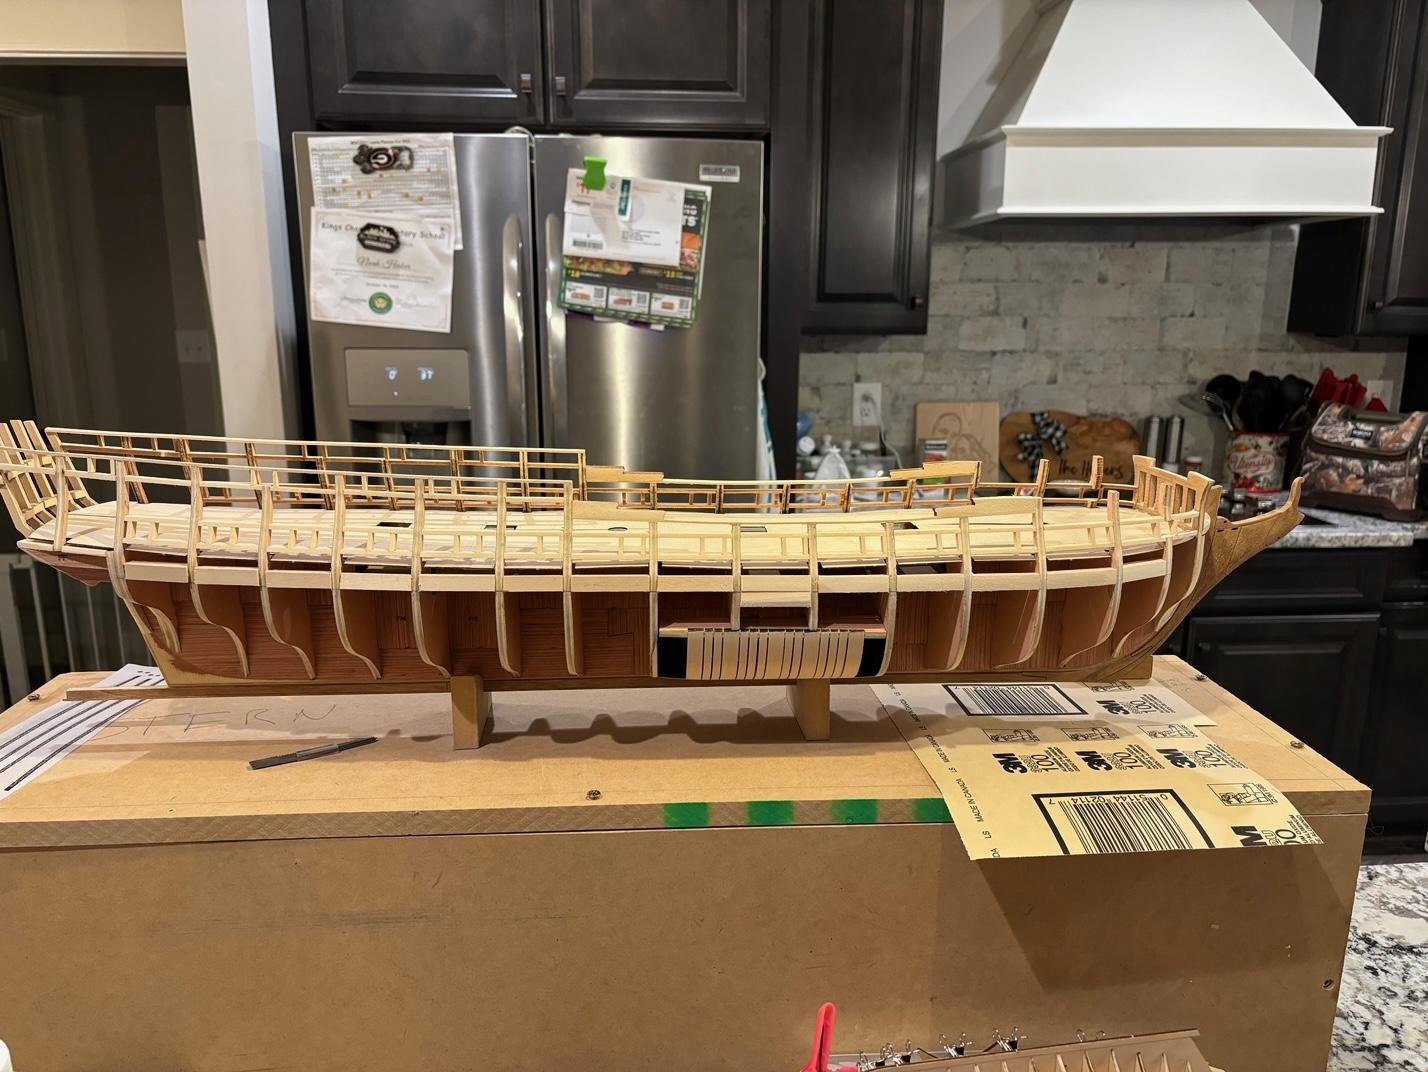


-
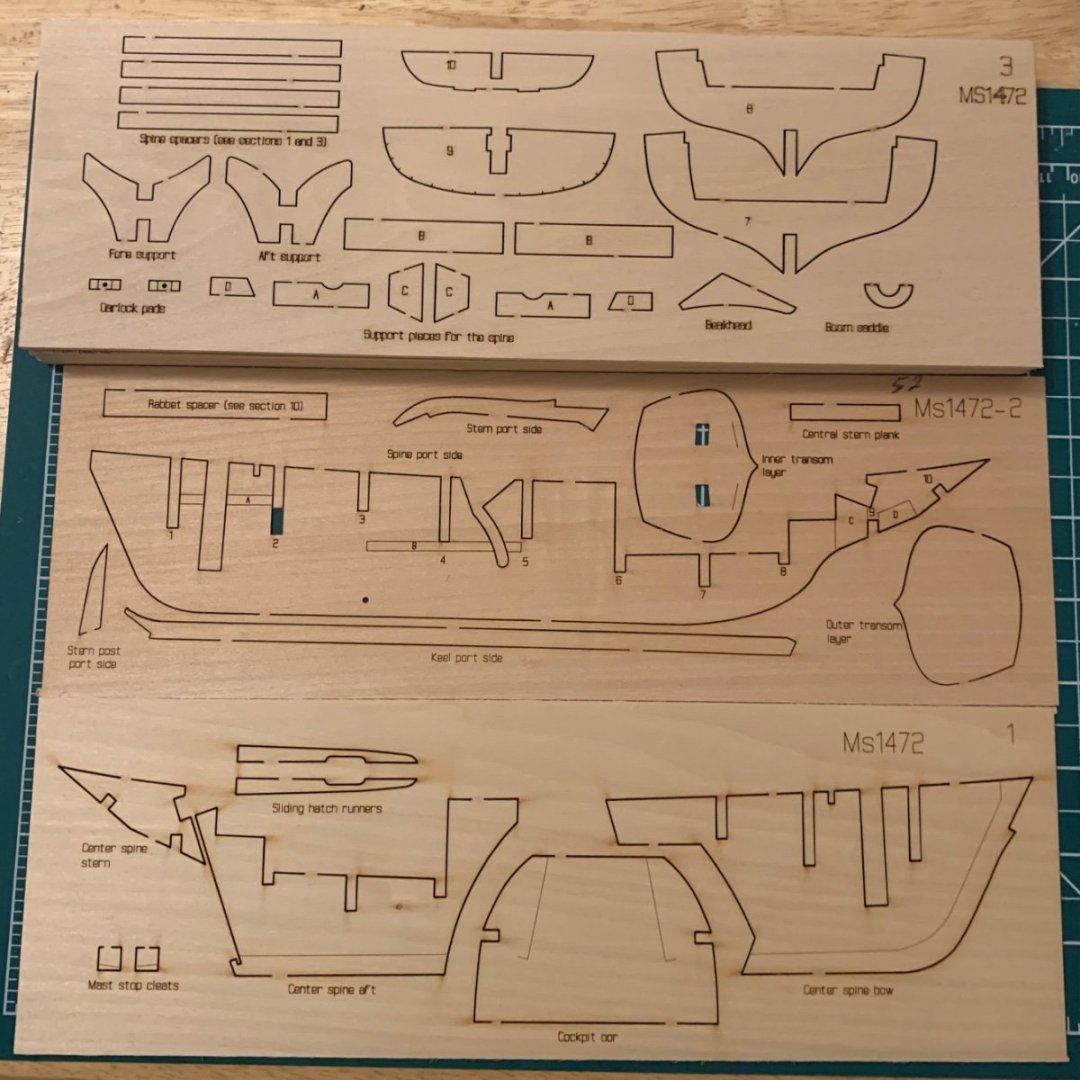
 This is my third model after completing the Dory and the Sailing Pram. I started out by checking the inventory. I found a couple discrepancies on the two inventory sheets with wood thickness and laser cut sheet labels. After inspecting the sheets and checking the instructions I think they are typos on the inventory rather than errors on the actual parts. I cannot tell of the copper wire bundle is both the 24 guage and 18 guage, but I will deal with that when I get to those steps.
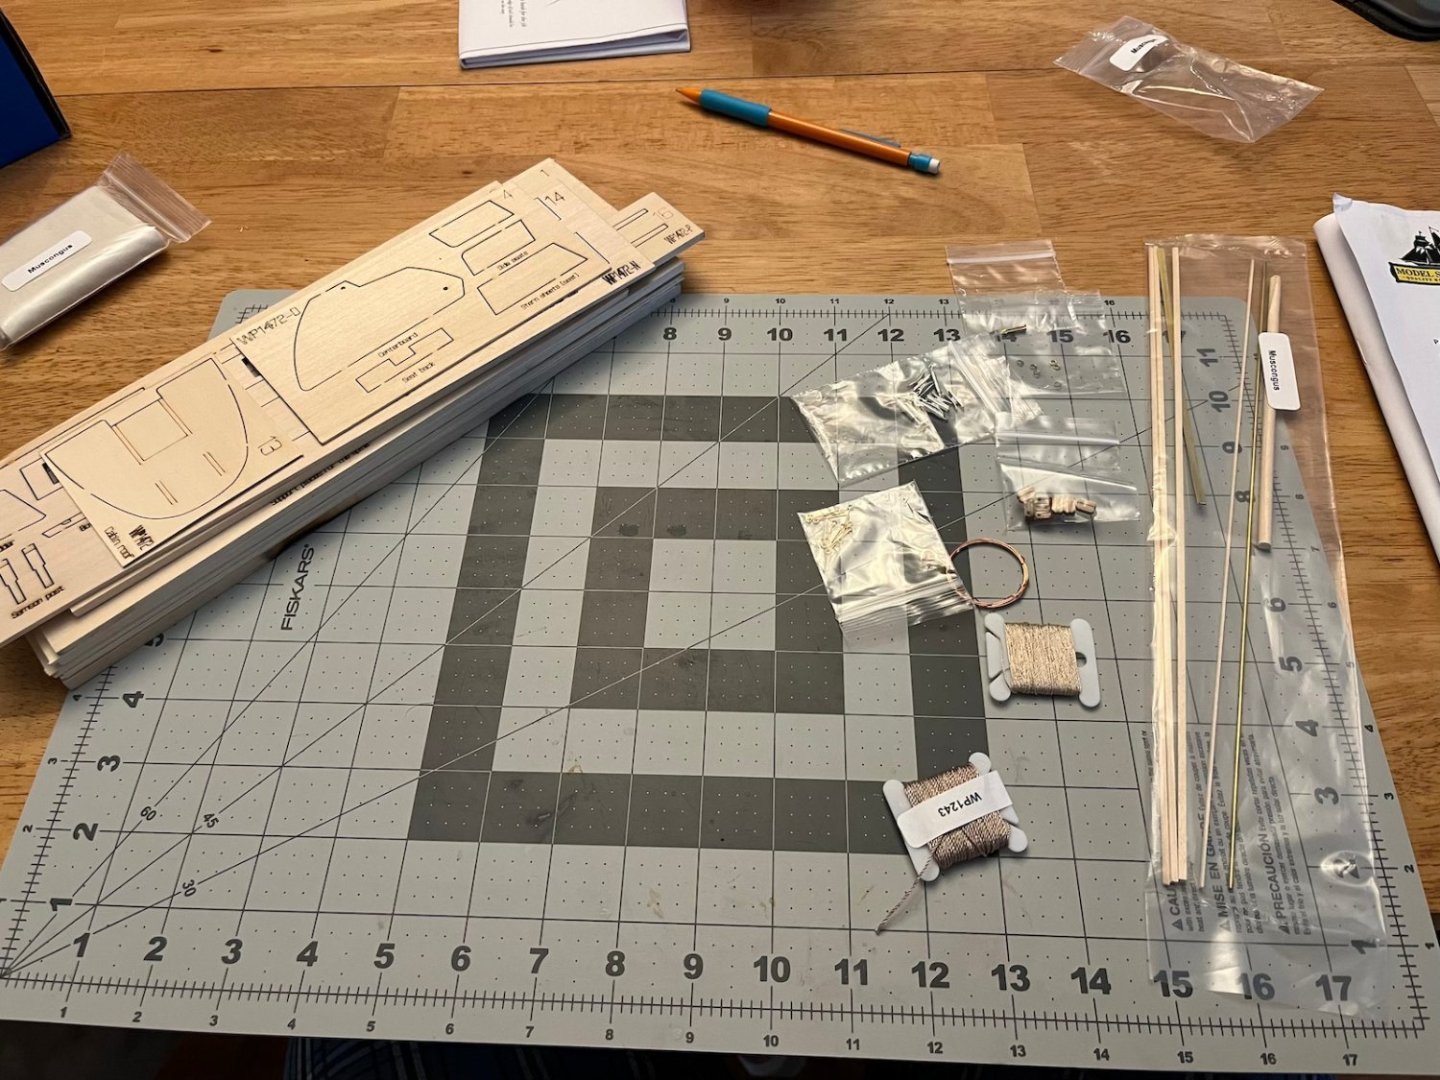
- 61 replies
-
- 4
-
-
- Muscongus Bay Lobster Smack
- Model Shipways
- (and 1 more)
-
 Hello again, I’m back with the beginning of the third and final model in the Shipwright Series kit by Model Shipways: the Muscongus Bay Lobster Smack. It would appear that I’ve fallen slightly behind my cohort here as I’ve been away on vacation for a short time. I’m catching back up on everything Happening in the other build logs and have some really good work to live up to. So far all I have done is take a quick inventory to make sure everything is included and accounted for. I’m eager to get started. Most importantly, though, is that I’m going to take some time to read through the instruction booklet and familiarize myself with the first few steps before getting started. It’s a practice that served me well in the first two models and I see no reason to rush in on the third (even though I desperately want to get straight to the cutting, sanding, and gluing). I suspect this build will be at a bit of a slower pace than the Pram was because I’m transitioning between a very hands-on phase at work where I could have my evenings to myself and into a more creative phase where my evenings are going to become busier with recording or expanding ideas.
- 38 replies
-
- 5
-
-
- Model Shipways
- Shipwright Series
- (and 2 more)
-
This is my fourth boat start. Still working on the third. Starting small to work my way up to something larger when my skills are ready. Model Shipways 18th Century Longboat.

-
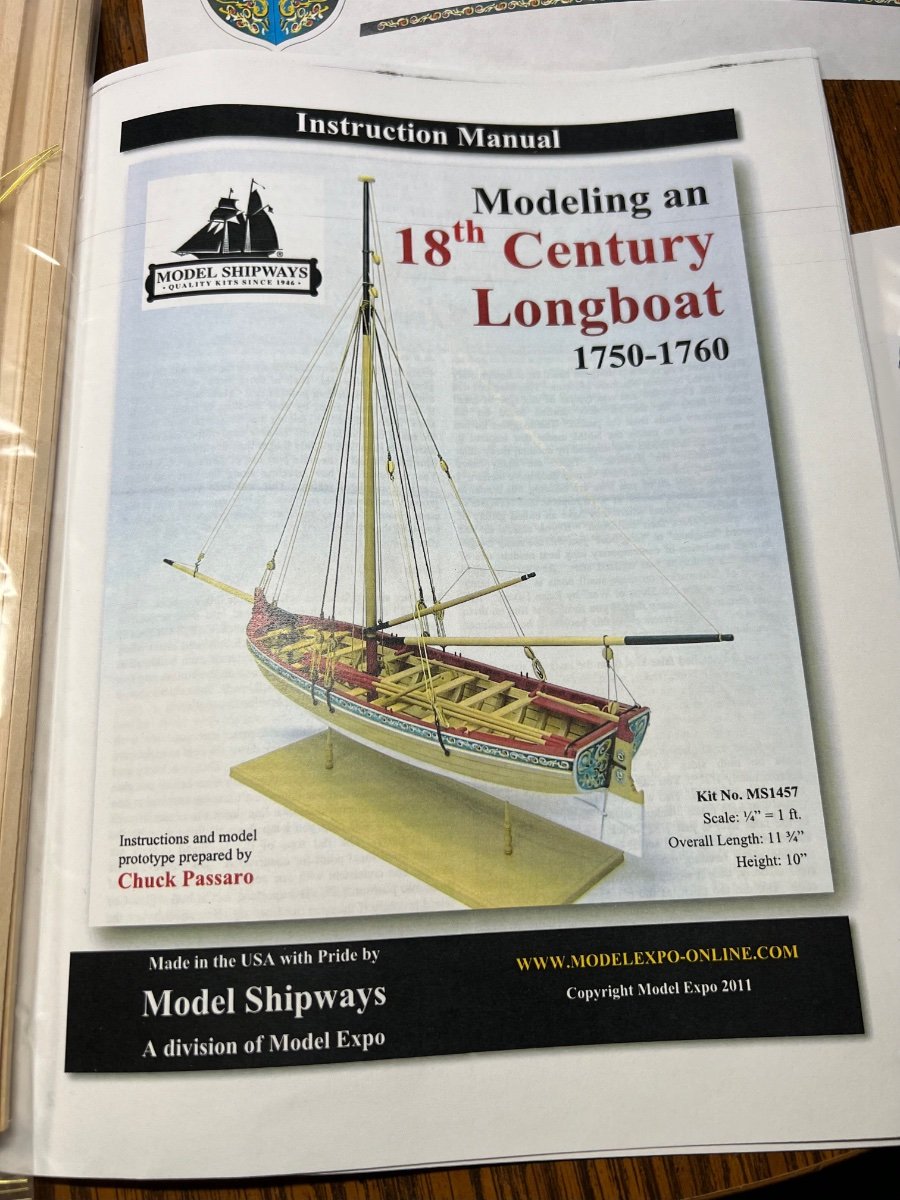
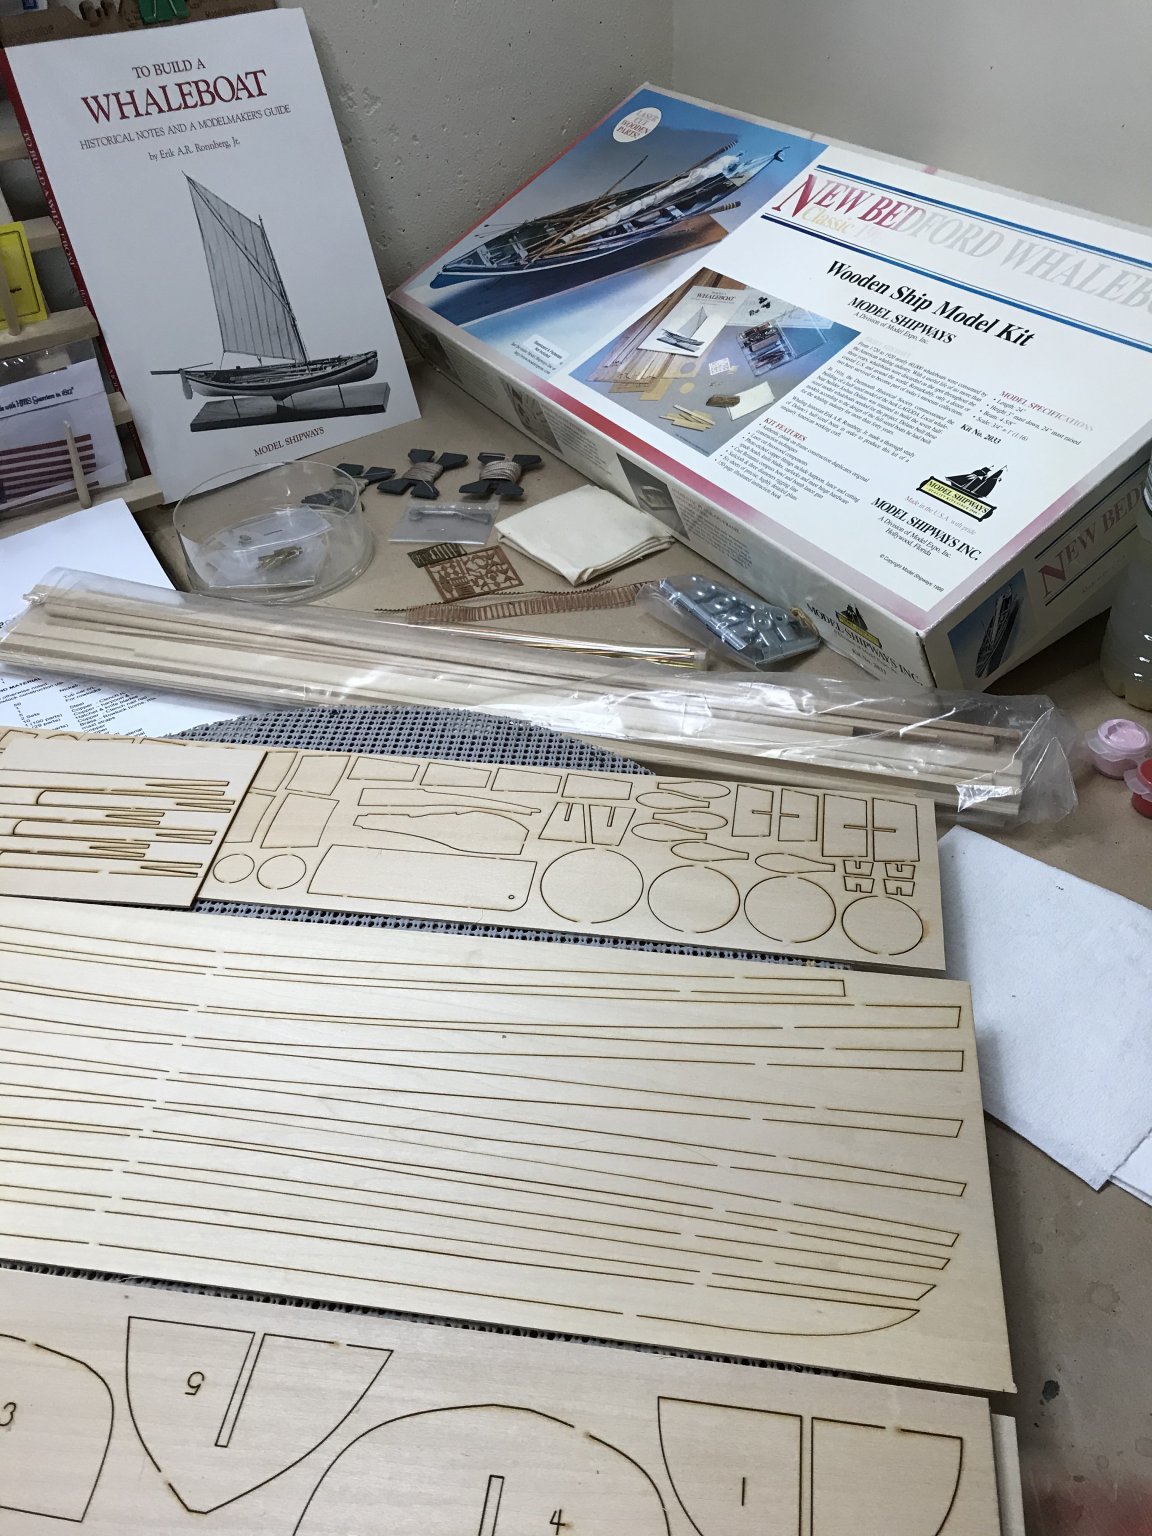
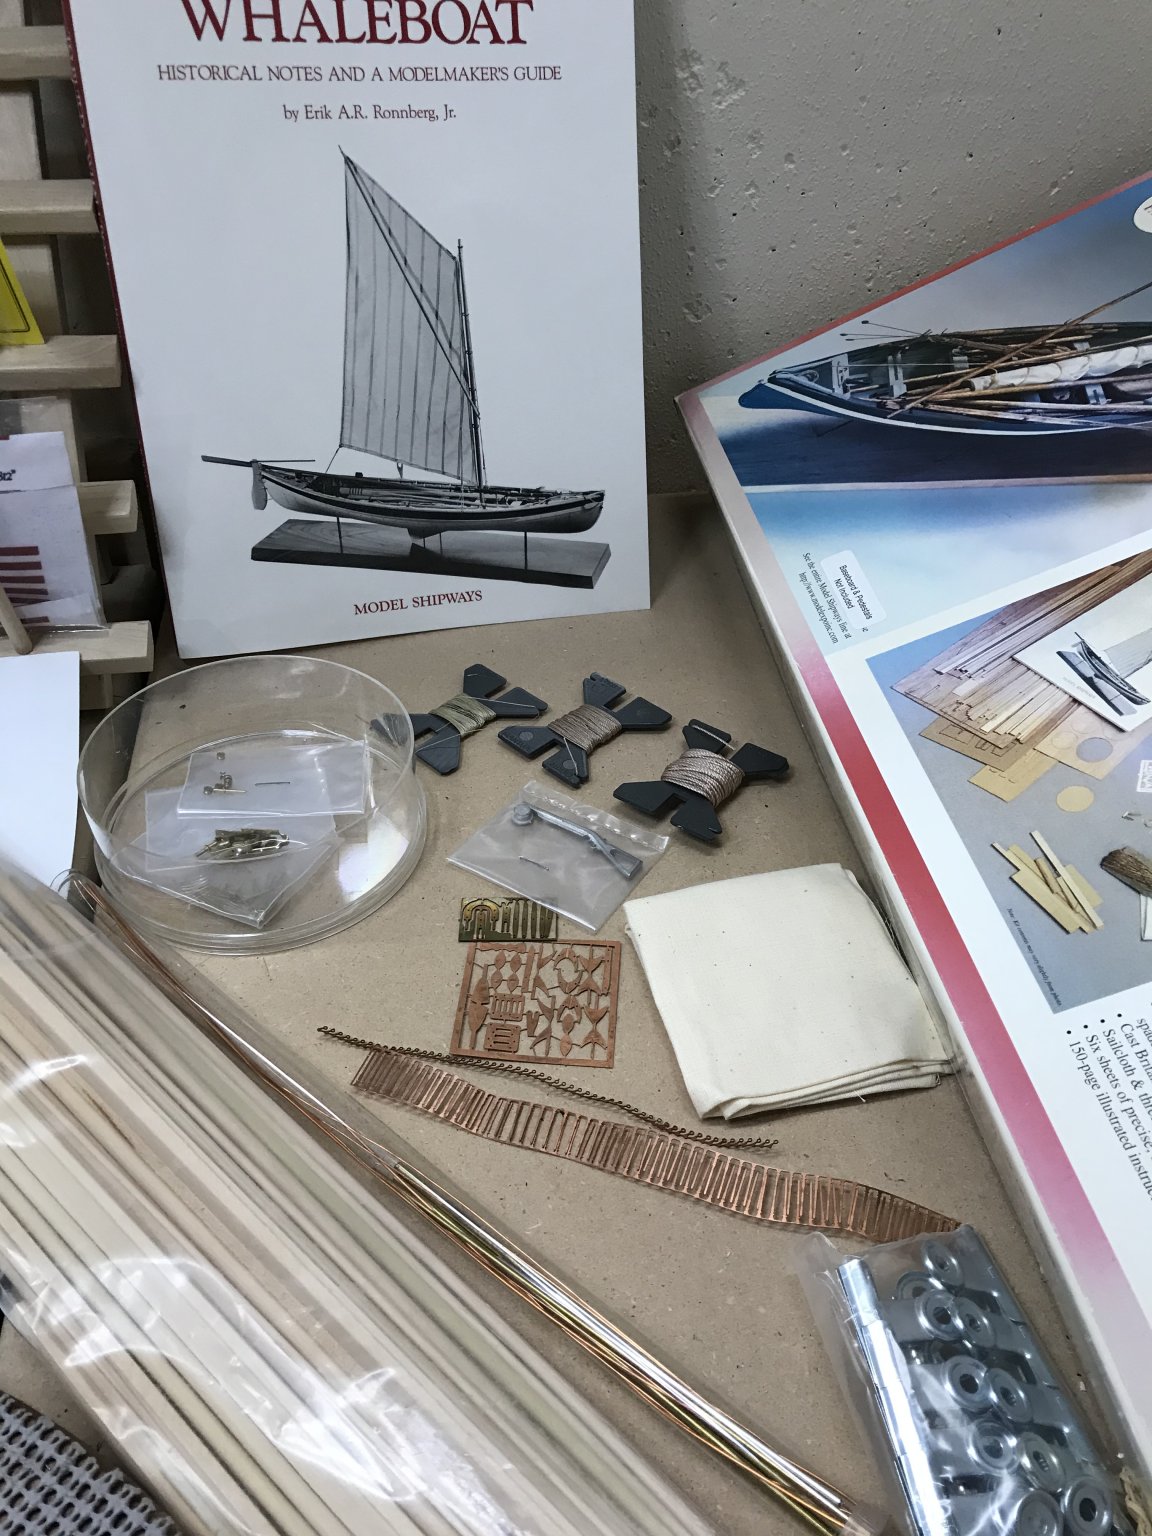
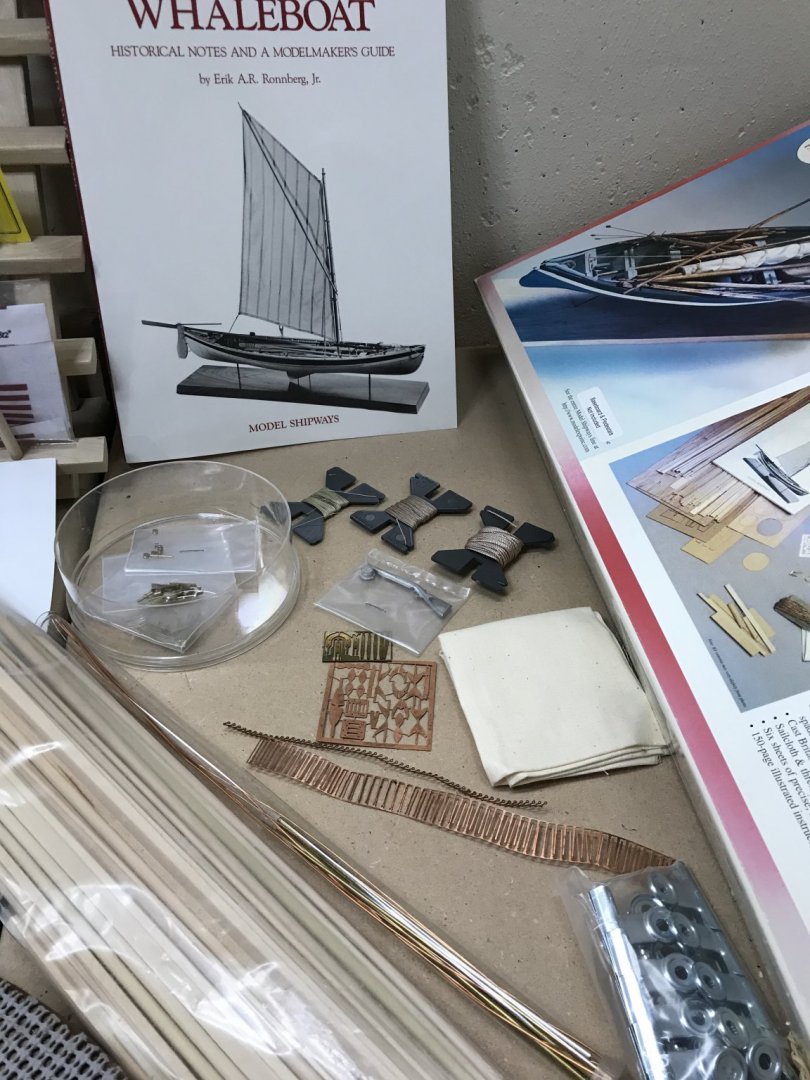
 Just in from eBay, just snagged this kit NIB for $59.00. I have been chomping at the bit for something like this since I started seeing these kind of builds on MSW. Been working on the Charles W Morgan for a while now. This is a perfect follow up to that build. Can’t wait to get started so I have set up both the CWM and the Whaleboat on the bench for multitasking, keeps things interesting. Actually, the detail of this kit will help with finishing touches on the CWM. Very impressed with this kit. It’s my first build of the larger scale 1/16th. I have been working with Vintage kits around 1/96 scale. Instruction “book” and detailed parts look really good. Hope I can do this kit justice, it will be a step up for me in terms of skill sets. The micro carpentry just got more refined. Wish me luck and patients. Latter... 😎

- 104 replies
-
- 9
-
-
- model shipways
- new bedford whaleboat
- (and 1 more)
-
 First log and post here at MSW. For ages every time we moved, a ship's hull appeared, it was the Sovereign Of The Seas that my father started long before I was born (in 64) and he was "going to get to". After he retired he "got to it" and it was amazing. He continued with the Constitution, but was frustrated by all the cannons, so he started the Benjamin Latham. He passed away before finishing it, and helping my mom clean up his projects I guess I caught the "bug" and started building. I was several kits in when my mother passed. I was in the process of finding a museum or collection for the Sovereign, and planned to finish the Latham when a relative decided to take the models. I have no idea where they are now. I've continued to kit bash, and in 2022 decide I was ready to do the Latham justice. I have learned a lot most importantly learning that these models can and really should, take years. I want to thank the many skilled members here, as without a practicum on this model, their excellent and skilled builds have been a reference for details. mattsayer148, GaryKap, trenchguy, and jwvolz.
 -
 I continue my run of New England fishing boats with the Midwest Muscongus Bay Lobster Smack - now manufactured by Model Shipways. Looking back at logs for the Midwest kit, it has been popular with experienced modelers looking for opportunities to modify and enhance the basic kit, as well as inexperienced modelers. It has additional interest for me since my wife's parents had a cottage in New Harbor, Maine that looked out on Muscongus Bay (at least until the trees in the vacant lot across the road grew up). I chose the Midwest kit over Model Shipways' own version in large part because of the fondness expressed by other members for Midwest kits in general and this kit in particular. I am looking forward to an old-school building experience. The kit arrived in good order, in a box that appears identical to the original Midwest box with the addition of a Model Shipways logo. I took a quick look at the contents. Previous logs pointed out two peculiarities/shortcomings of the Midwest-manufactured kit: balsa wood hull planking, and small cotter pins to be used as eyebolts. The sheet balsa planking has been replaced with 1/16" basswood sheet, and there are real eyebolts in place of the cotter pins. The balsa bow filler blocks remain. I'll have to see if the basswood sheet planks can be made to conform to the boat's hull shape. The manual has been slightly updated but still refers to the cotter pins and balsa planking. There are two rolled sheets of plans, small enough to tape to my work surface. I have made some progress, which will be covered in the first posts.
.jpg.cb4646018ffe8988ea6c46220d6c0610.jpg)
.jpg.2200638fd151f8c231eae1fe4dae28f5.jpg)
.jpg.cf531dcf5bf8b8a611cc2b25c49a308e.jpg)
.jpg.f64ac4459e06b5c104a14432980819cd.jpg)
- 21 replies
-
- 1
-
-
- Muscongus Bay Lobster Smack
- Model Shipways
- (and 2 more)
-
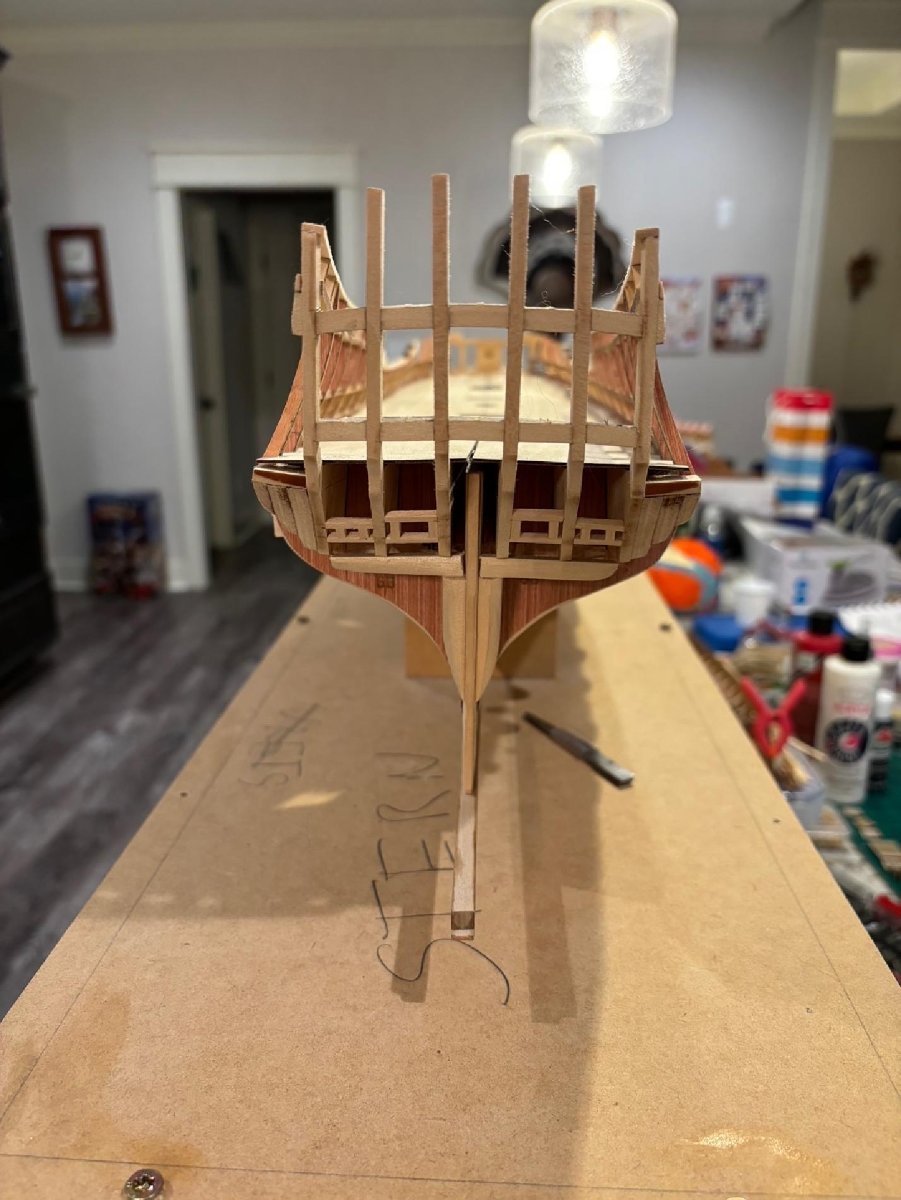
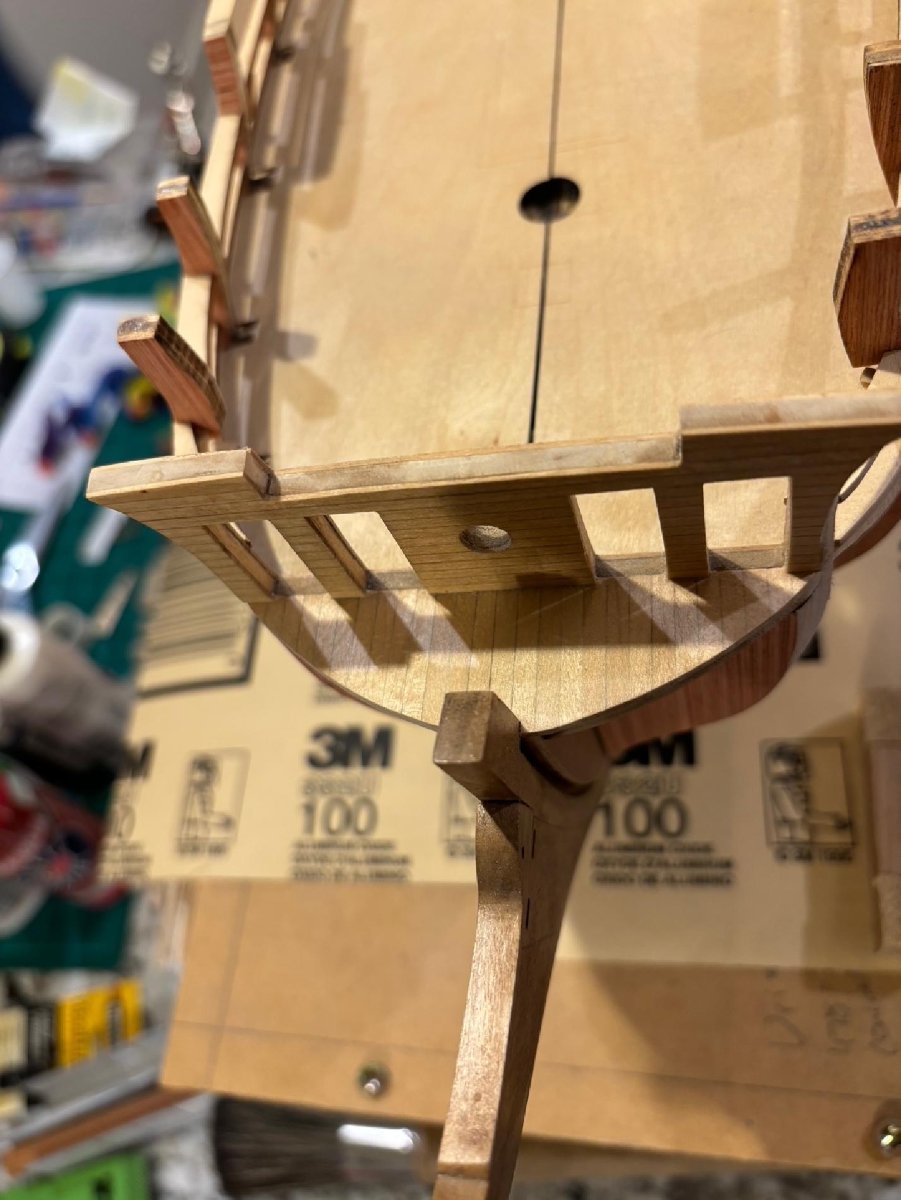
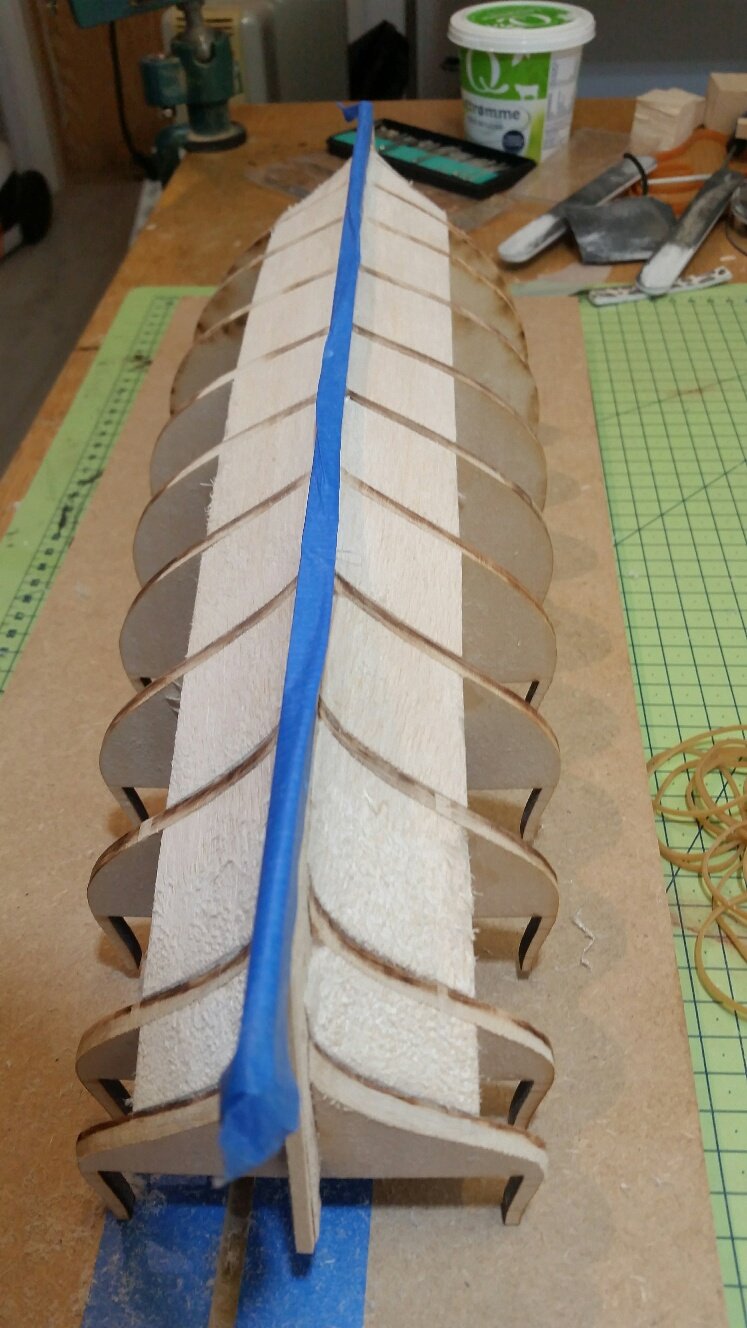
 Any tips on smoothing out the hard angles along the garboard and second plank along the port side? Starboard side faired well and has a pleasing curve from stem to stern. These were caused from the planking jig and I didn't notice until I took the hull off and started to sand. I did prebend all the planks and they fit without force prior to glueing so I really don't know why this happened.

-
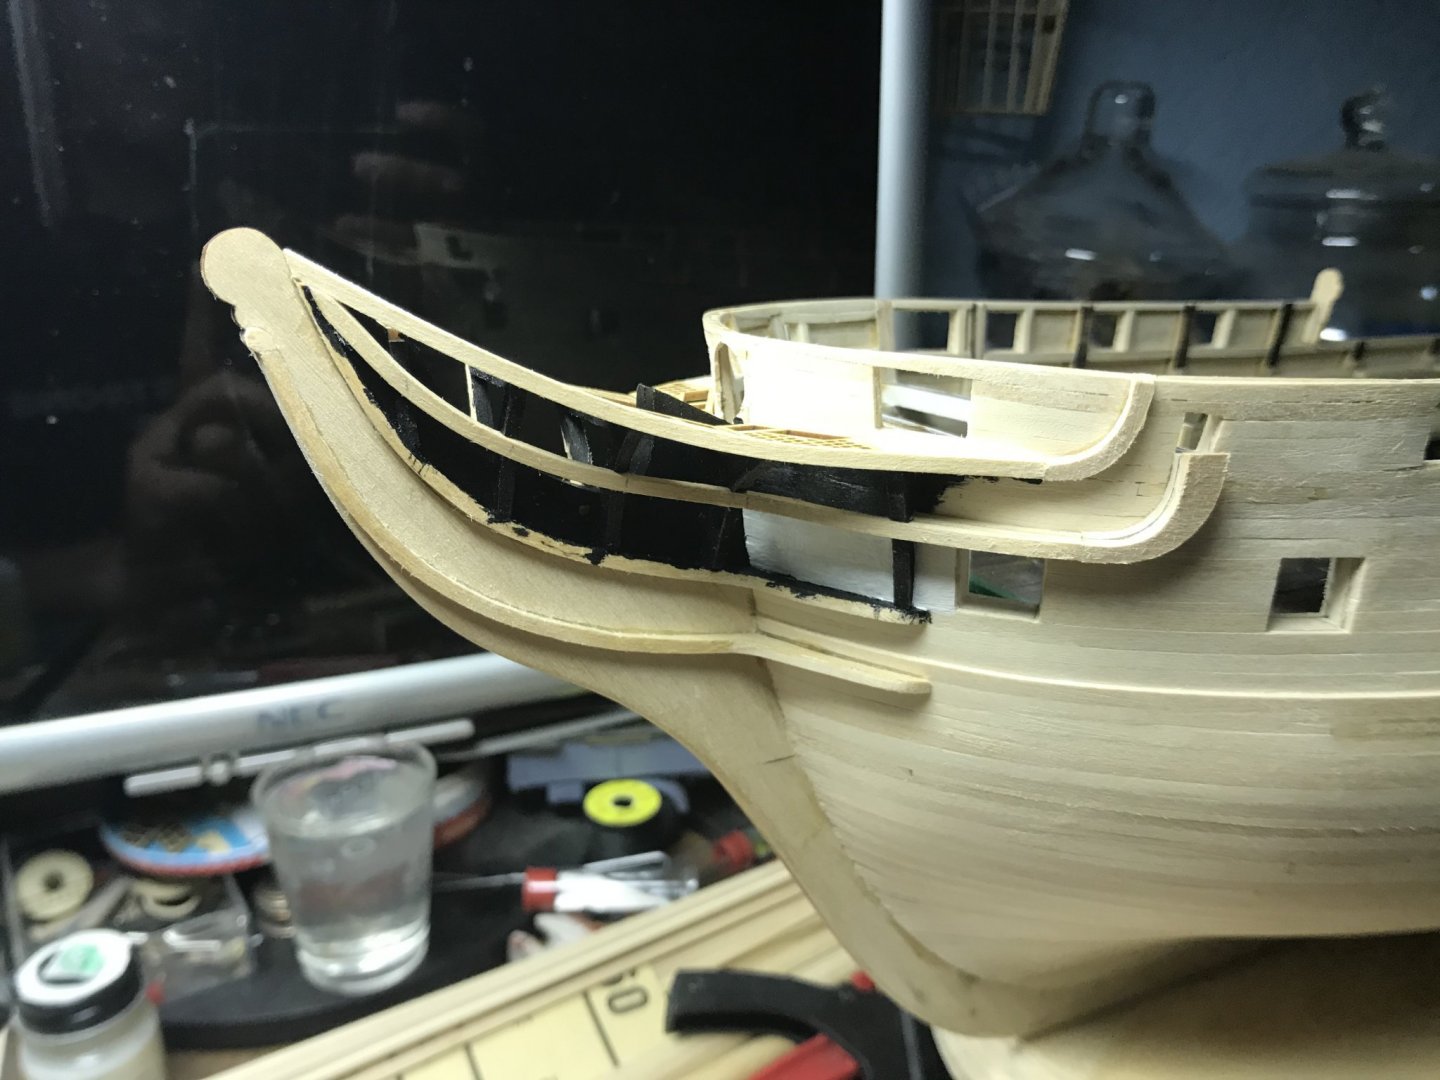
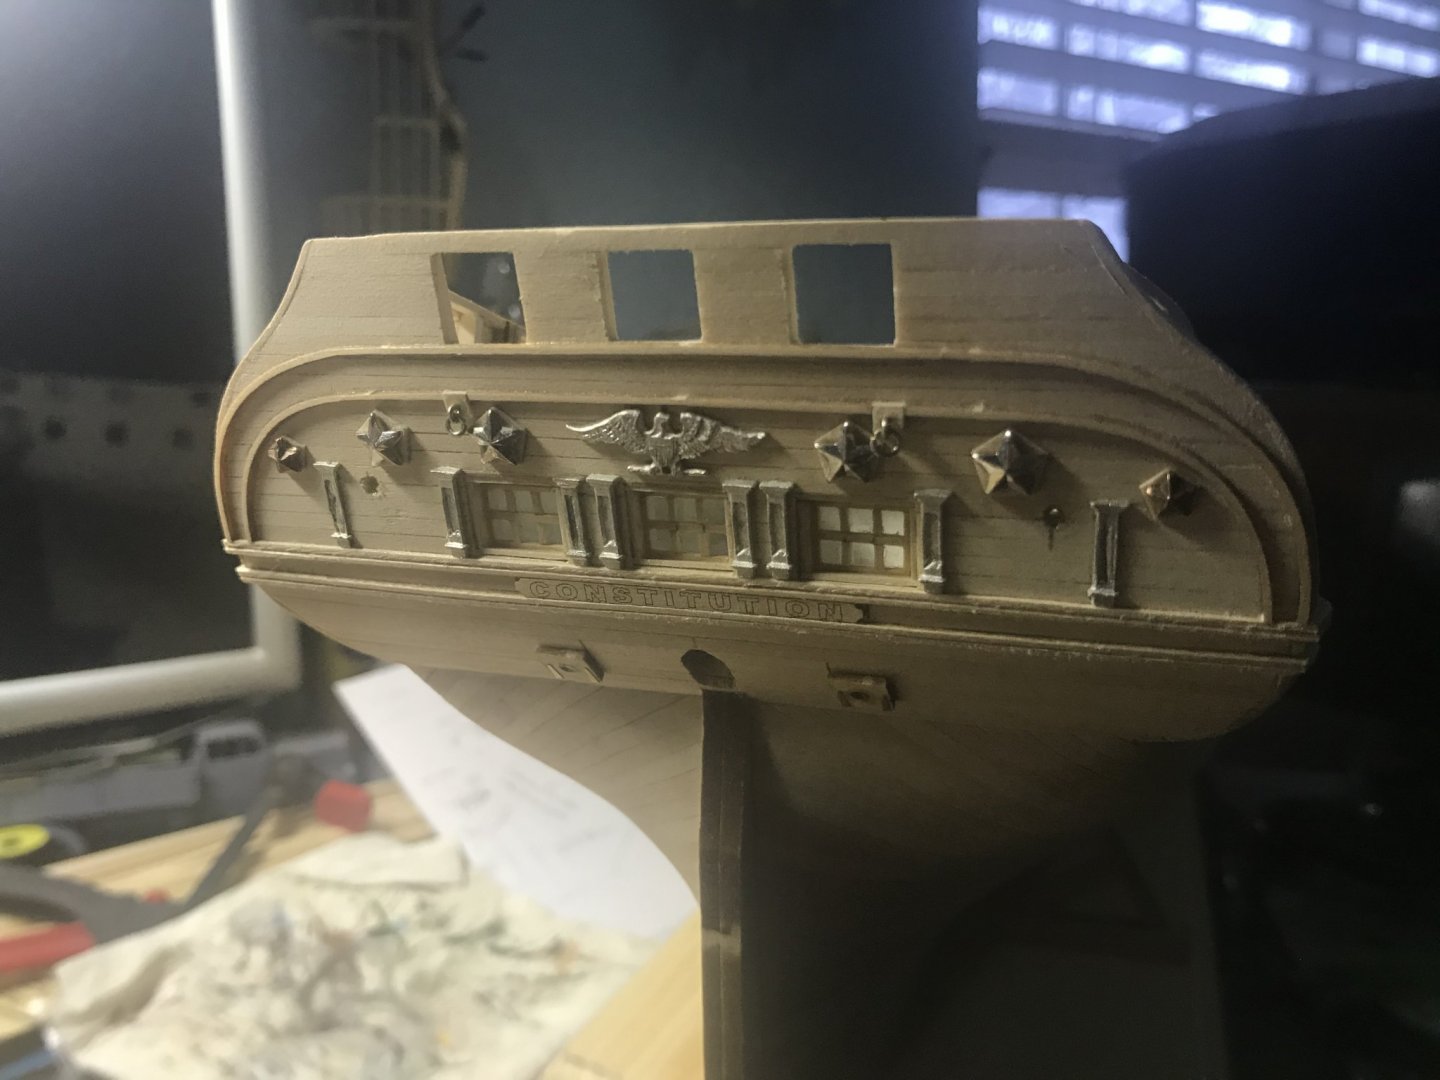
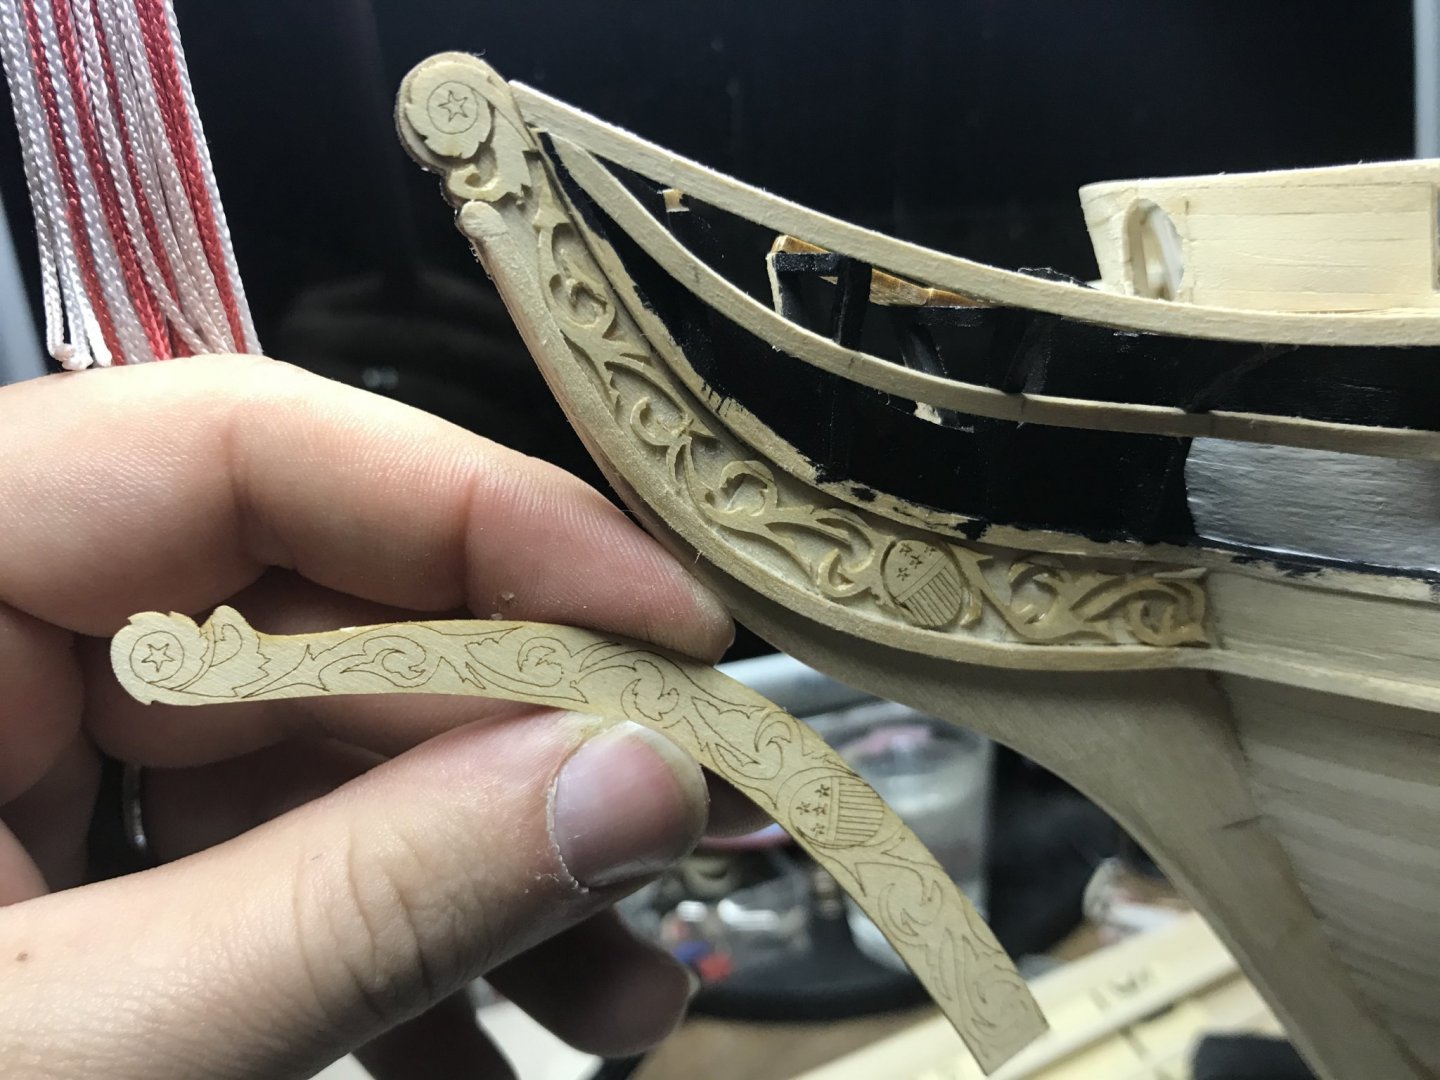
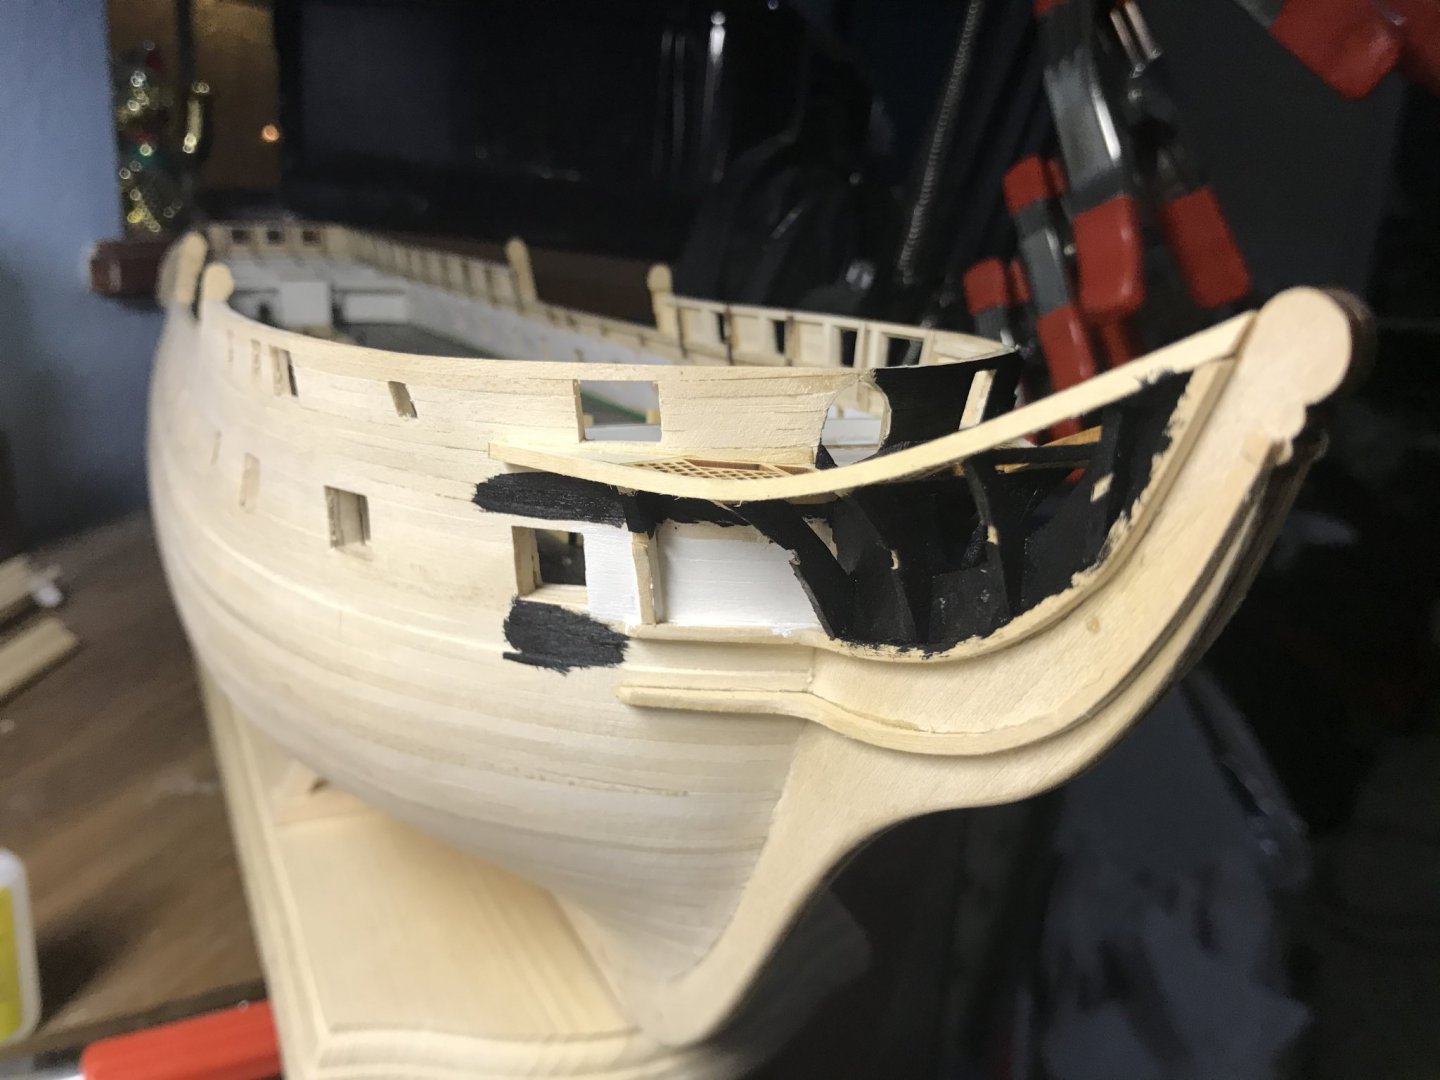
 Introduction This is the Model Shipways Kit No. 2040, 5/32” scale. Kit purchased new about 2005. Notably, after starting (15 years later!), noticed Plan Sheet 5 missing, contacted Model Shipways and they immediately sent a replacement at no charge. Building out of the box - meaning using kit supplied plans and materials, and adding additional hardwood wood if necessary. Update 7/18/20: See this post (currently pending) for upgraded parts and sources. This kit is not for the novice. You should come to this game with at least 1 ship model under your belt, preferably several. And you need an understanding of the nature of wood and how to shape it using chisels, files, and a hand plane. These tools need not be expensive, however they must be sharp. I recommend a 1/4” fish tale chisel from Lie-Nielson located in Maine. Power tools are used, they save time, essential to me for this project as there are hundreds of cuts. Not necessary though. I’ve built many kits and expect this to be some old hat but also I’m stretching into new areas like building stern galleries. So welcome aboard, I’m glad you are here. USS Constitution References: my own photographs of the ship Anatomy of the Ship: USS Constitution College of Model Shipbuilding: USS Constitution Practicum General References: David Antscherl’s: HMS Swan Class Sloops - for construction techniques Mastini: Ship Modeling Simplified George F. Campbell, M.R.I.N.A.: The Neophyte Ship Modelers Jackstay (Inexpensive and Essential) Table of Contents (incomplete, much more in the log) Part 1: Hull Doweling the Stem, Sternpost, and Keel to Centerboard Bulkhead Marking and Glueup Prep Shaping the Counter Block Bulkhead Glueup Completing the Counterblock Transom Frame Prep Bow and Stern Block Prep Shaping the Bow Filler Block and Fairing the Bulkheads Shaping the Filler Blocks (continued) Shaping the Filler Blocks (continued), Starting Bow Framing Bow Framing (continued) Bow Framing Completion Transom Frame Installation Making and Installing the Waterway Tools Inner Planksheer/Bulwarks and Bowsprit Prep Framing and Cutting Out the Gunports Cutting Out the Gunports (continued) Gunport Cleanup and Bulwark Prep Bulwark Completion Leveling the Bulwarks Lower Gunport Upper Sills Lower Gunport Framing and Planking Smoothing the Planking Gunports and Upper Hull Planking Completion Mast Partners/Tenons and Deck Framing Coamings and Hatch Framing Planking the Wales - Planking Without Pins or Clamps Tapering a Plank Planking Starboard Wale Belt A Installation - Starboard Side Forming the Forward Planks Belt B Installation - Starboard Side Belt C Installation - Starboard Side Belt D Installation - Starboard Side Belt B - Port Side, Marking the Belt Width Dealing with Butt Joint Gaps Using Proportional Dividers Plank Glue Up Completion of Port Side Planking USS Constitution Pictures - June 2020 Part 2: Fitting Out Installing Eyebolts for Carronade Tackle Installing Large Inboard Bulkhead Cleats Installing Small Inboard Bulkhead Cleats Fitting the Cathead Painting the Bulkwarks Cleaning Up the Dust Finish and Installing Deck Grates Deck Plank Stock Preparation Planking the Deck - Part 1 Planking the Deck - Part 2 Planking the Deck - Part 3 Planking the Deck - Part 4 Evening Deck Finish Color
 -
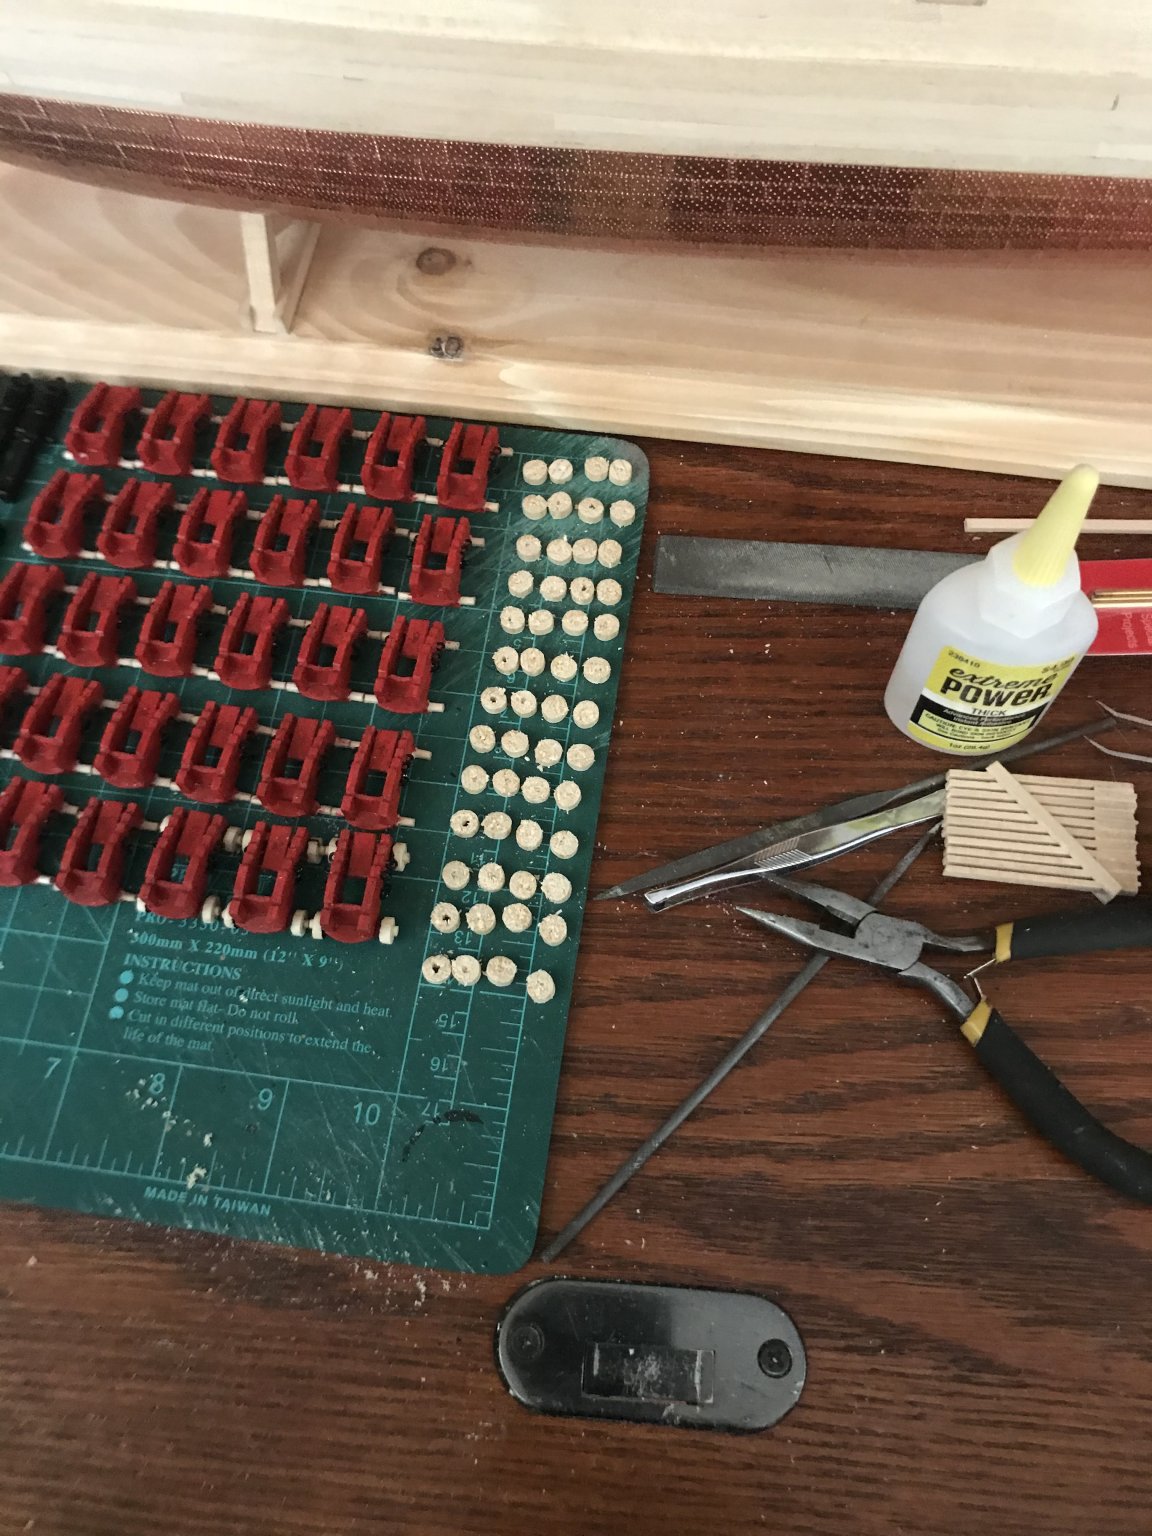
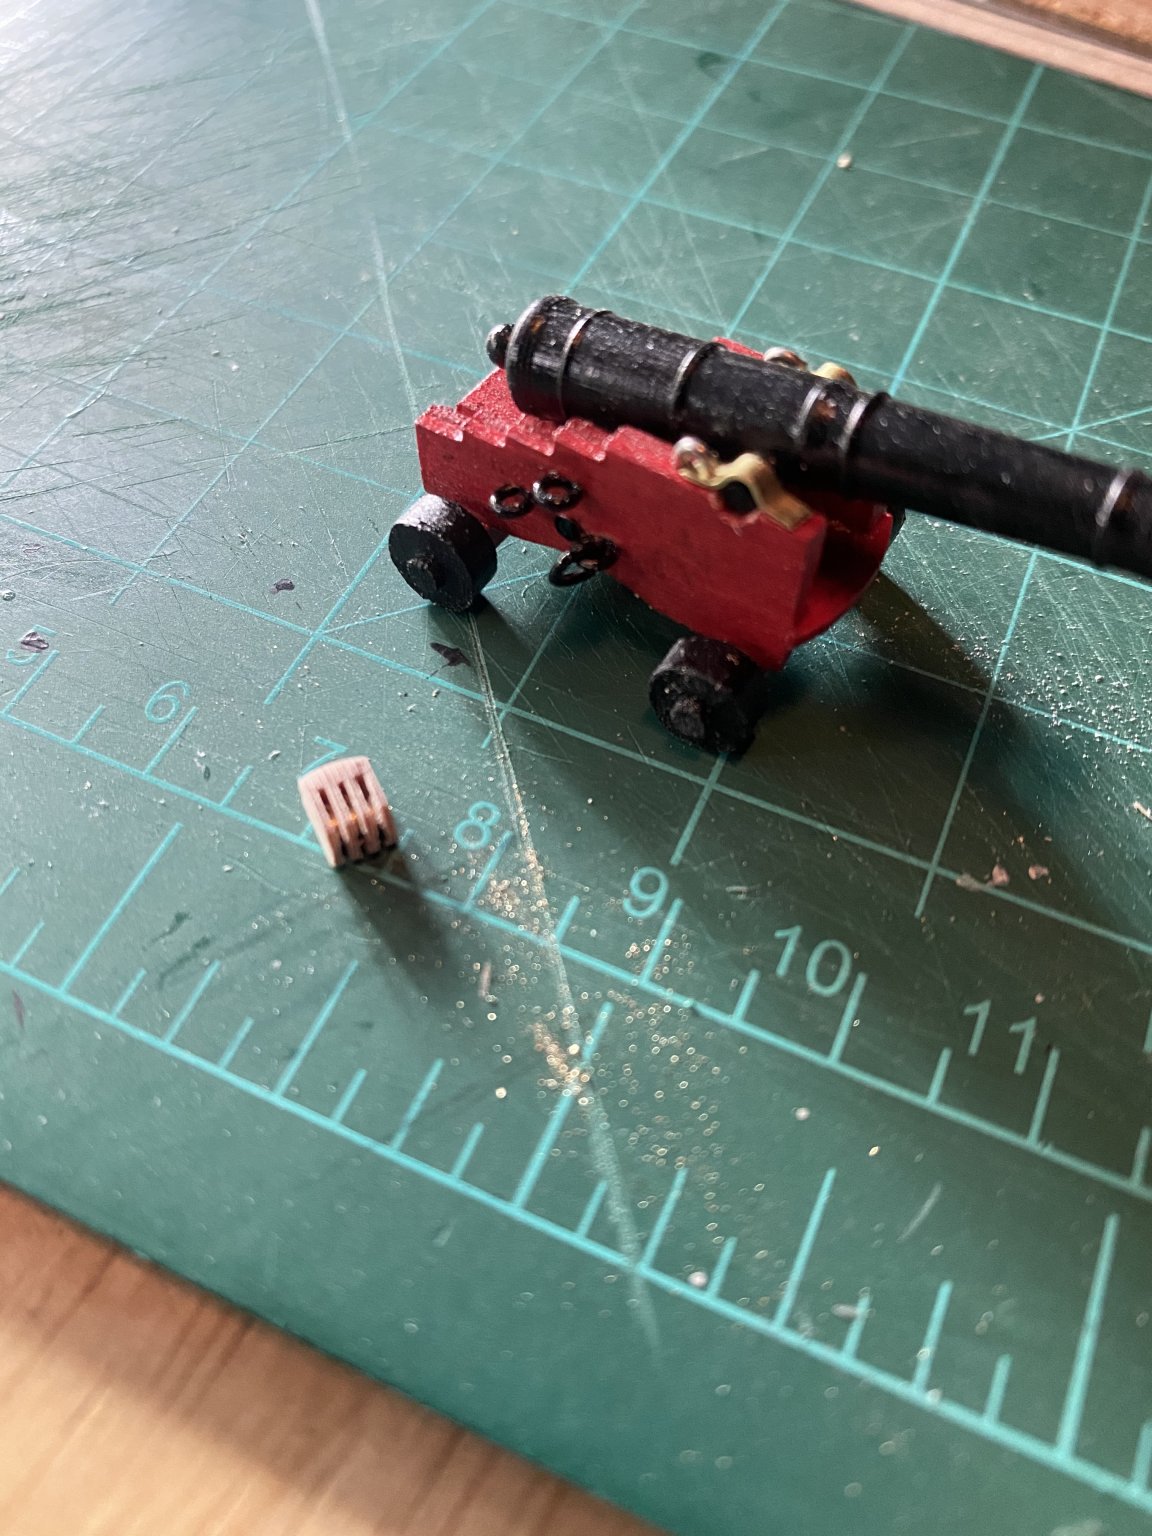
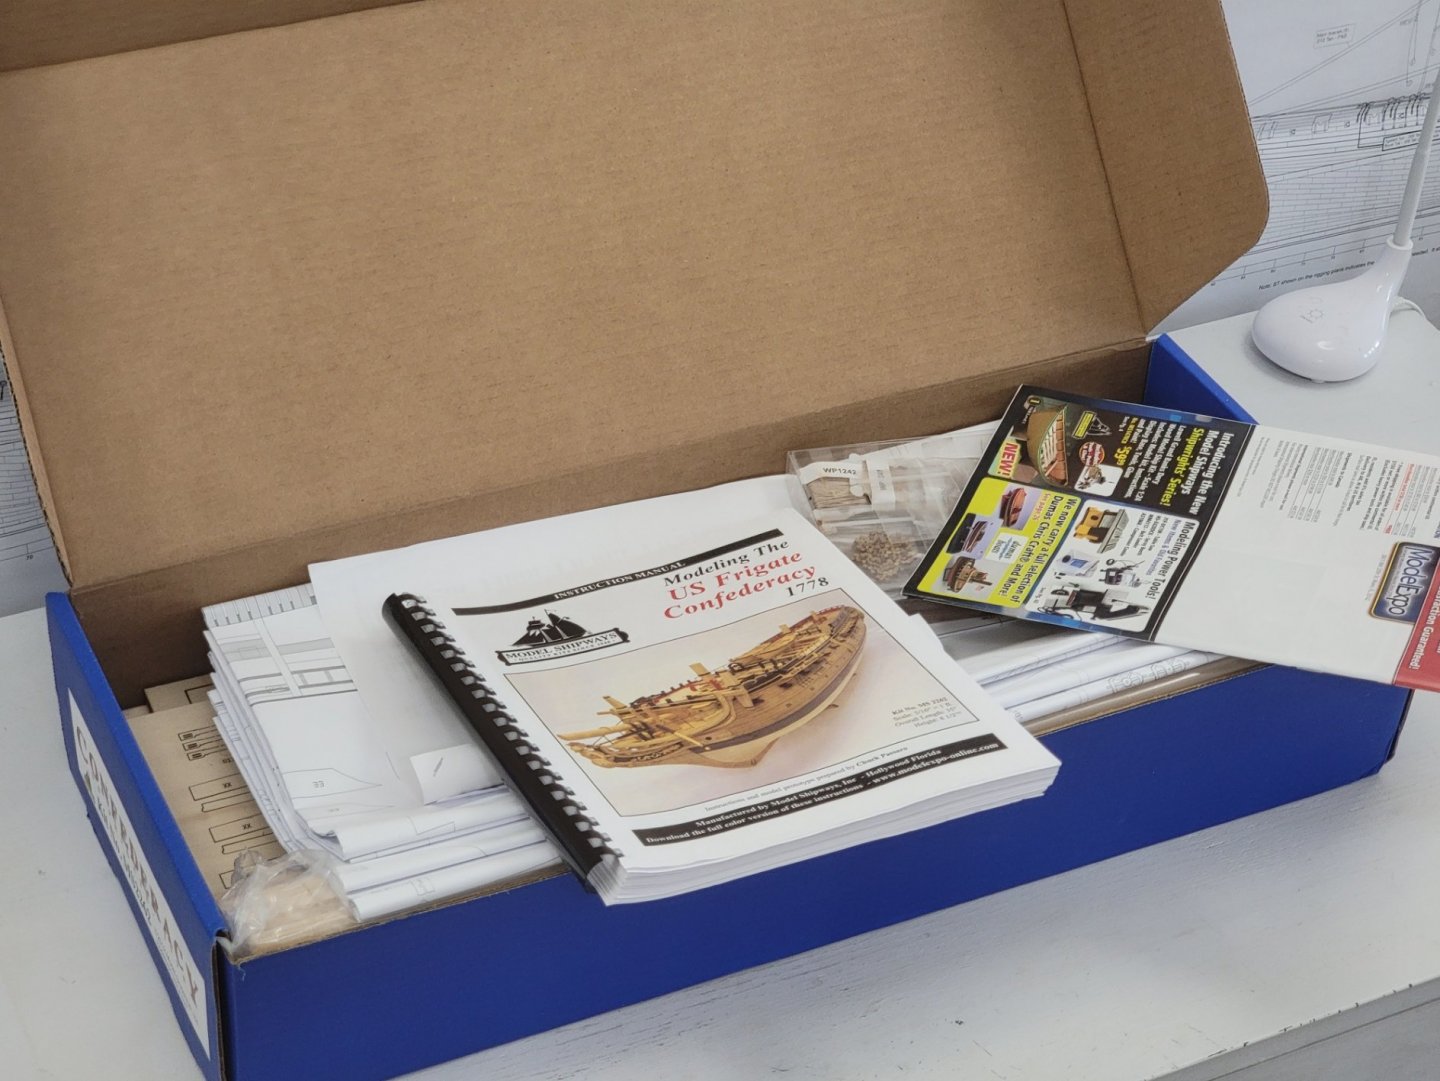
.thumb.jpg.62d1d69fed1f32364417cb1f9cdeb009.jpg) I just completed my Syren build, so thought I'd set up a build log for the Confederacy. From what I have seen, this is an exceptional kit and there are amazing builds on this forum, so I hope to do this ship justice. This will be my third ship build. I plan to use the basswood supplied with the kit, but may upgrade the cannons and the blocks from Chuck. I am also thinking of fully rigging it, but I may change my mind as I progress with the build. I'll be making my own rope for this ship (I have not done this before), so let's see how it goes. This will be a really long project, and will only have time to work on it for a couple hours a day, so it will be a few years until completion. Anyways, I was inspired by @Justin P. to take an opening box shot of the kit 😄, so here are the pics: I will be starting this project in a few days. First I need to check the inventory and see if there are any parts missing.
I just completed my Syren build, so thought I'd set up a build log for the Confederacy. From what I have seen, this is an exceptional kit and there are amazing builds on this forum, so I hope to do this ship justice. This will be my third ship build. I plan to use the basswood supplied with the kit, but may upgrade the cannons and the blocks from Chuck. I am also thinking of fully rigging it, but I may change my mind as I progress with the build. I'll be making my own rope for this ship (I have not done this before), so let's see how it goes. This will be a really long project, and will only have time to work on it for a couple hours a day, so it will be a few years until completion. Anyways, I was inspired by @Justin P. to take an opening box shot of the kit 😄, so here are the pics: I will be starting this project in a few days. First I need to check the inventory and see if there are any parts missing.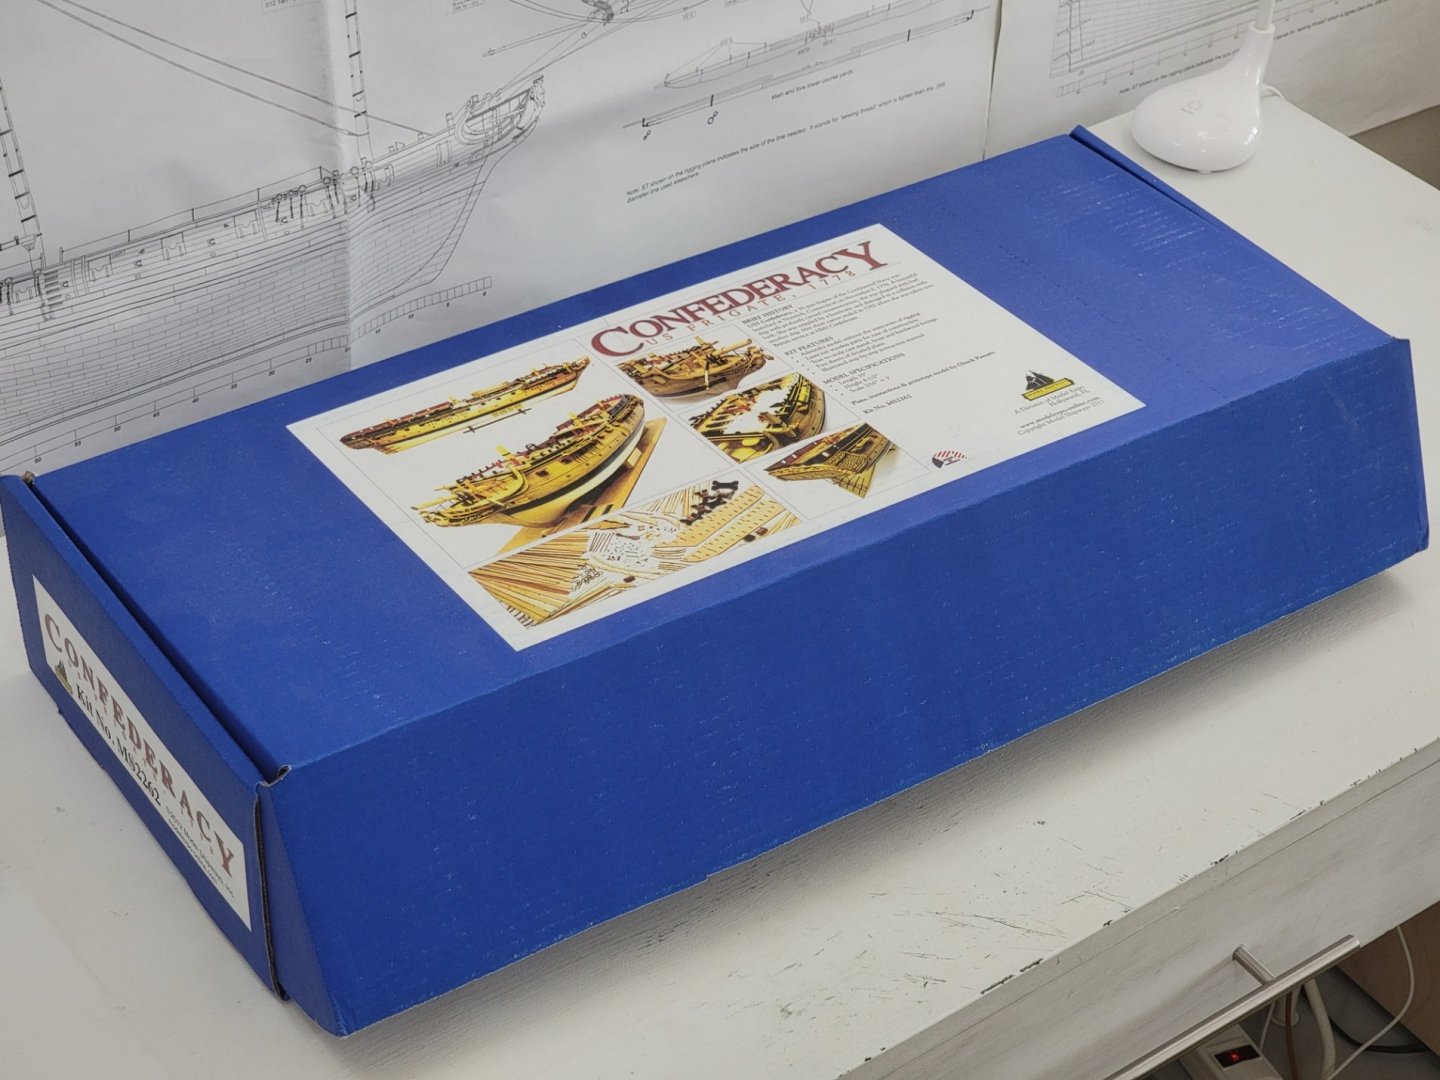
-
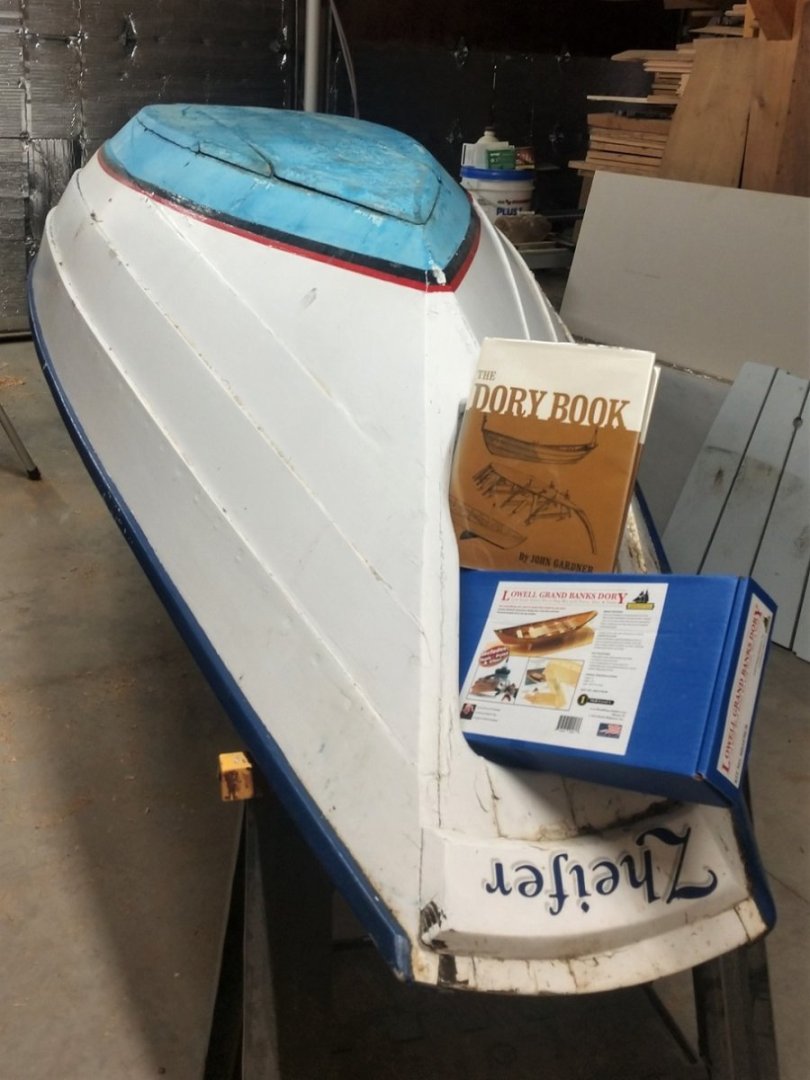
 Having just finished the Lowell Grand Banks Dory, I find myself not yet ready to begin a model of the schooner I'm meaning to build in my garage. And so I reached for the second of the two kits I bought in April 2020 before a bunch of other weird stuff happened, the Willie L Bennett Chesapeake Bay Skipjack. It was quite a contrast opening this kit compared to the little dory model! I'd been advised that this was a good beginner kit when I first looked into this, and I must have even read a build log or two on it before deciding it was a good choice, but if so I had forgotten that I would be greeted with more or less a pile of lumber upon opening the box. It was a little intimidating and I considered putting the whole thing back away since it seems like a lot to get into when I have other projects coming along. Then I got started anyways. I found a 1/4" plywood cutoff just a bit larger than the size shown in the plan, left over from when I built my kitchen cabinets. It was a little bowed, so I fastened a cutoff bit of 5/8" OSB to the bottom and that flattened it right out. I pricked holes through the mold plan into the plywood and connected the dots instead of cutting out that part of the plan and gluing it down, then set the mold up using the cutouts as bracing. I moved on to the keelson tonight. After gluing the three pieces together and sanding it smooth - the laser cutouts weren't quite square, giving it a sawtooth sort of look on end - I sanded an initial bevel into the outer 1/8" strip on each side. I clamped down a straight edge to scribe a cut line, then figured out I could use the straight edge as a guide for an emery board to sand in the rabbet. The keelson sits a bit oddy in the molds, with the forward end sitting quite proud of the notches and the after end recessing in to the point that it will have to be lifted up to fasten the bottom. The next step is going to be some careful measurements and seeing if I need to modify the mold at all.
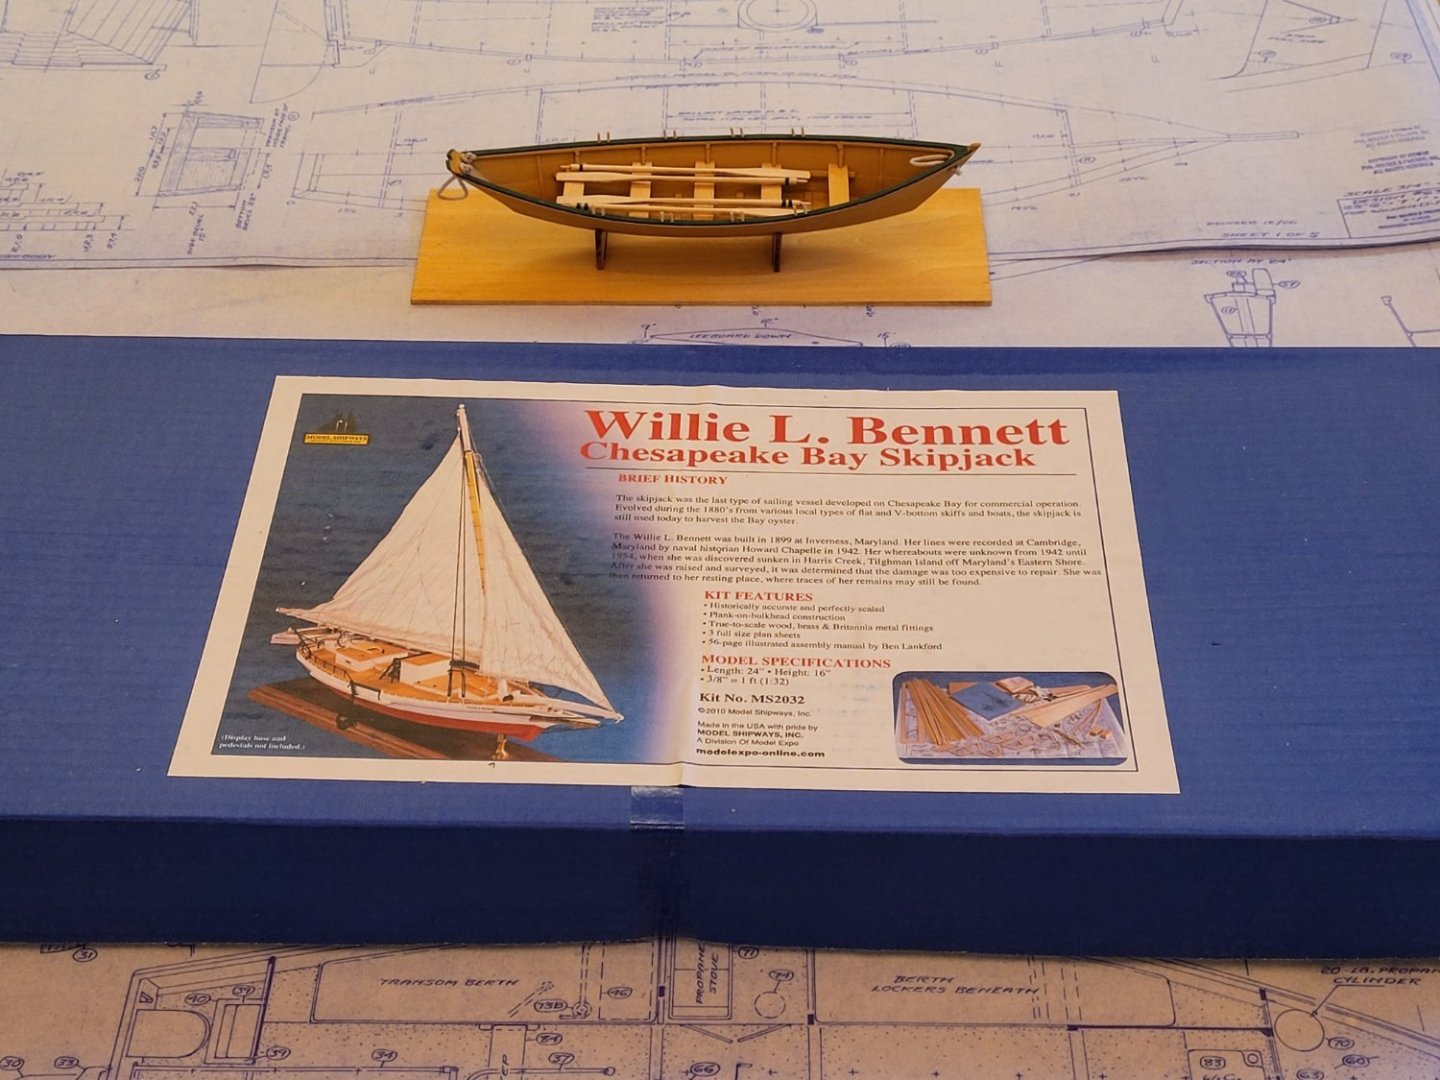
- 2 replies
-
- 4
-
-
- Willie L Bennett
- Model Shipways
- (and 1 more)
-
 Since the Pandemic was declared on Friday (The 13th go figure.) it looked like I would have quite a bit of time available to actually write up a log for this ship that I started way back in 2013. At that time I was still getting my feet wet so to speak with computers. Writing a log, coordinating it with pictures and sending it through the computer was way out of my comfort zone back then. But since I started with my hybrid model of the 1:87 whaler Wanderer by Aurora and am doing a log for that during construction, I thought I’d do sort of a retroactive log of the construction of my Phantom. Since I am quite a ways into the build already, most of it is from memory and my notes. Eventually the log will catch up with the build, but as I am building both ships at the same time, it will undoubtedly take quite a while. Also, the photos were taken recently rather than during actual construction, so they will be mostly out of sync with the log. So without further ado here goes nothing.
 -
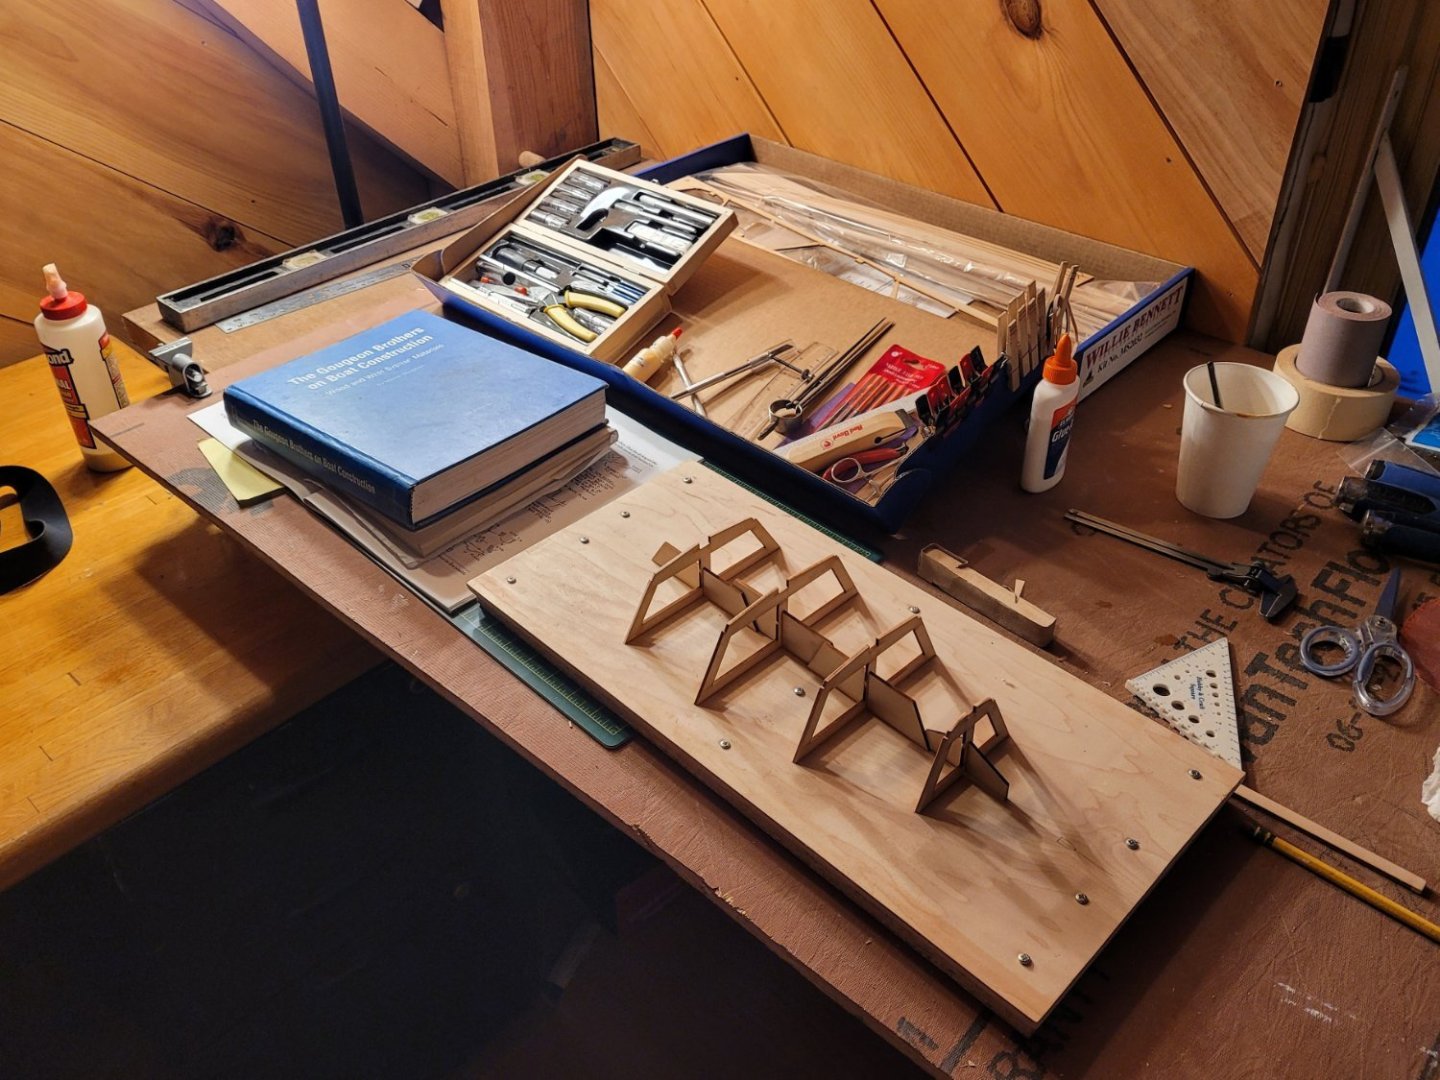
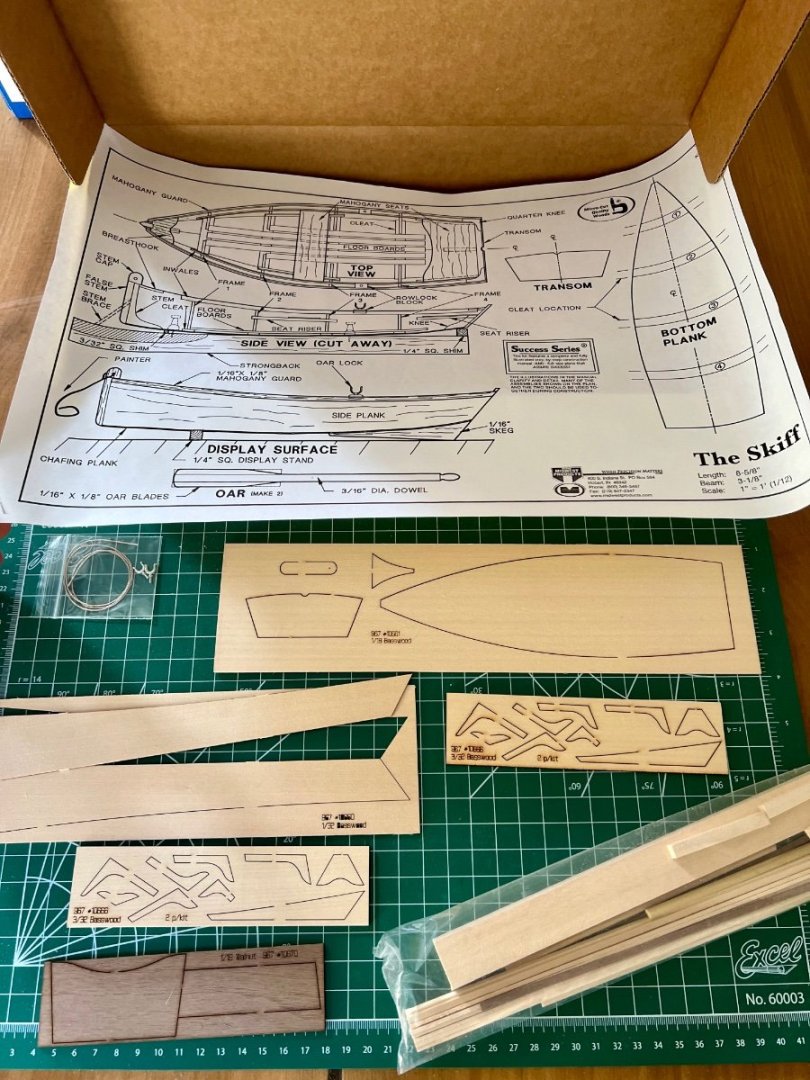
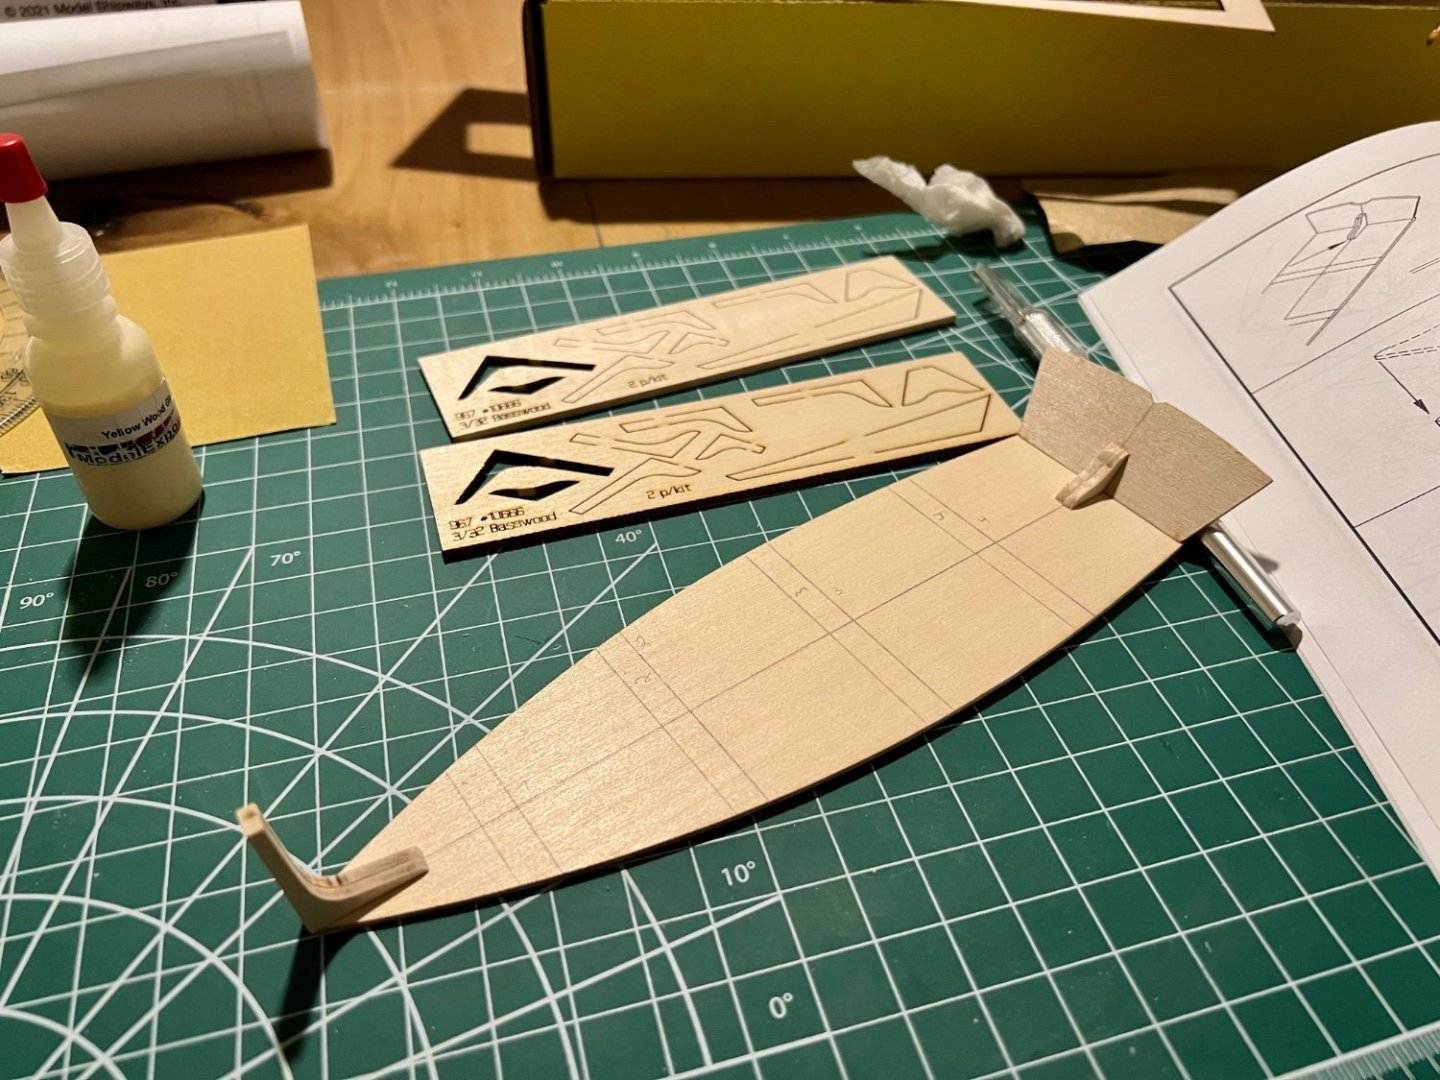
 Greetings! Having completed my first build last month, the MS Grand Banks Dory from the introductory Shipwright Series, I said I was going to practice on another model before moving up in skill level. I am excited that MS/ME has acquired and began reproducing many Midwest kits of the past, as they appear to be perfect for beginners like myself. I chose this Skiff kit with the goal of improving my basic skills, and building on lessons & mistakes I made on the previous model. I've also done some research on the older Midwest kits, so I will try to point out some differences on this Model Shipways rerelease as I notice them. I would skip over the box, but as I haven't seen any build logs for this MS produced Skiff I'll take a moment to show it. First major difference with the box is the picture of the model has an entirely new paint scheme compared to the old Midwest colors. I think the deep blue is attractive and will plan to follow this paint job when the time comes. The box does appear to have a hybrid branding - the old Midwest logo is featured, but also clearly has MS branding added as well. As a result I've titled this build as an MS-Midwest build to help clarify that this is a rerelease version. From the box description and learning about skiffs for this build, later 19th century seems like an appropriate era for this build log. The side of the box has MS '22 trademarks, but interestingly it keeps the original Midwest kit number of 967. When doing some research of the old Midwest produced kits they made two different scales for the Skiff - kit #947: a 1:6 scale model advertised as a "Yacht Skiff." And kit #967: simply titled "The Skiff" in 1:12 scale. As of right now only this single Skiff model appears on the ME/MS website, which is this 1:12 model. Opening the box the contents appeared as expected - same standard as MS laser cut wood. As shown in the picture - one of the side planks was already free but thankfully no damage. Everything appeared to be in order, however the instruction manual had some strange printing errors. I won't go into detail out of respect for ME/MS, as they replied within hours of my email and sent a new instruction manual right away, and said they would check other kits. Starting off with the bottom plank - markings needed to be measured and penciled in. In contrast to the Dory I just built that had guide markings, having to make simple markings like this made me feel more engaged in the build. I then installed the stem, knee, and transom. I took time to make sure everything was square, perhaps more so then my last build, and definitely used less glue as I learned from last time to gauge how much is needed. Next I'll finish getting the cleats ready, and attach the frames in the coming days. So far I'm enjoying the rereleased kit and think it is a great complement to the Dory build.
- 3 replies
-
- 6
-
-
- Model Shipways
- skiff
- (and 1 more)
-
Howdy folks. I made an introduction topic in early 2020, bought a couple starter kits and tools, and then a bunch of weird stuff happened which brought about my never even opening the shipping box. Now as the weird series of events continues relentlessly toward no clear destination, I've arrived at a point where it makes sense to build some model boats. The short version leading to this point involves: Originally living in my vehicle on the Appalachian Trail, and perceiving some time and a need for some hobby to keep me busy in early 2020 while I was living alone in one of the trail maintenance facilities Having to get out of there after it was condemned and deciding it was time to actually try settling down in Maine as I'd long wanted to do Acquiring vacant land which used to be a farm in Midcoast Maine, converting a shed into a cabin, and building a timber frame house Deciding I'd like to get into sailing, falling in with sailors and boatbuilders, and winding up with full-size wooden boats about the place, including an actual Grand Banks dory which my housemate (one of the aforementioned boatbuilders) brought along Deciding I'm really very interested in building a weird 25'6" Phil Bolger-designed schooner, the William D Jochems, and ordering plans Although I have built a house I still work all over the Appalachian Trail, and having a sailboat that I can trailer without great difficulty, use as a camper during the work week, and easily launch and rig in the nearest handy body of water on the weekends seems pretty snazzy Deciding to build a model of that before building it full-sized, and finally Deciding to build the model boats I already have before building a 1:16 scale William D Jochems before building a full-sized schooner in my garage So there's the short version leading up to today, when I made space on the old table on sawhorses that has floated around the house serving in numerous capacities. It was previously sitting against a wall where I'm going to start building a big buffet cabinet for the dining room part of the large open "great room" space. I cut the packing tape, opened up the Lowell Grand Banks Dory box, and took inventory of its contents plus the other tools and stuff I'd ordered so long ago. That's as far as I got tonight, that and the logging back in here, writing this, and hoping it may be of some entertainment. Cheers, Shepherd

- 11 replies
-
- 6
-
-
- Lowell Grand Banks Dory
- Model Shipways
- (and 1 more)
-
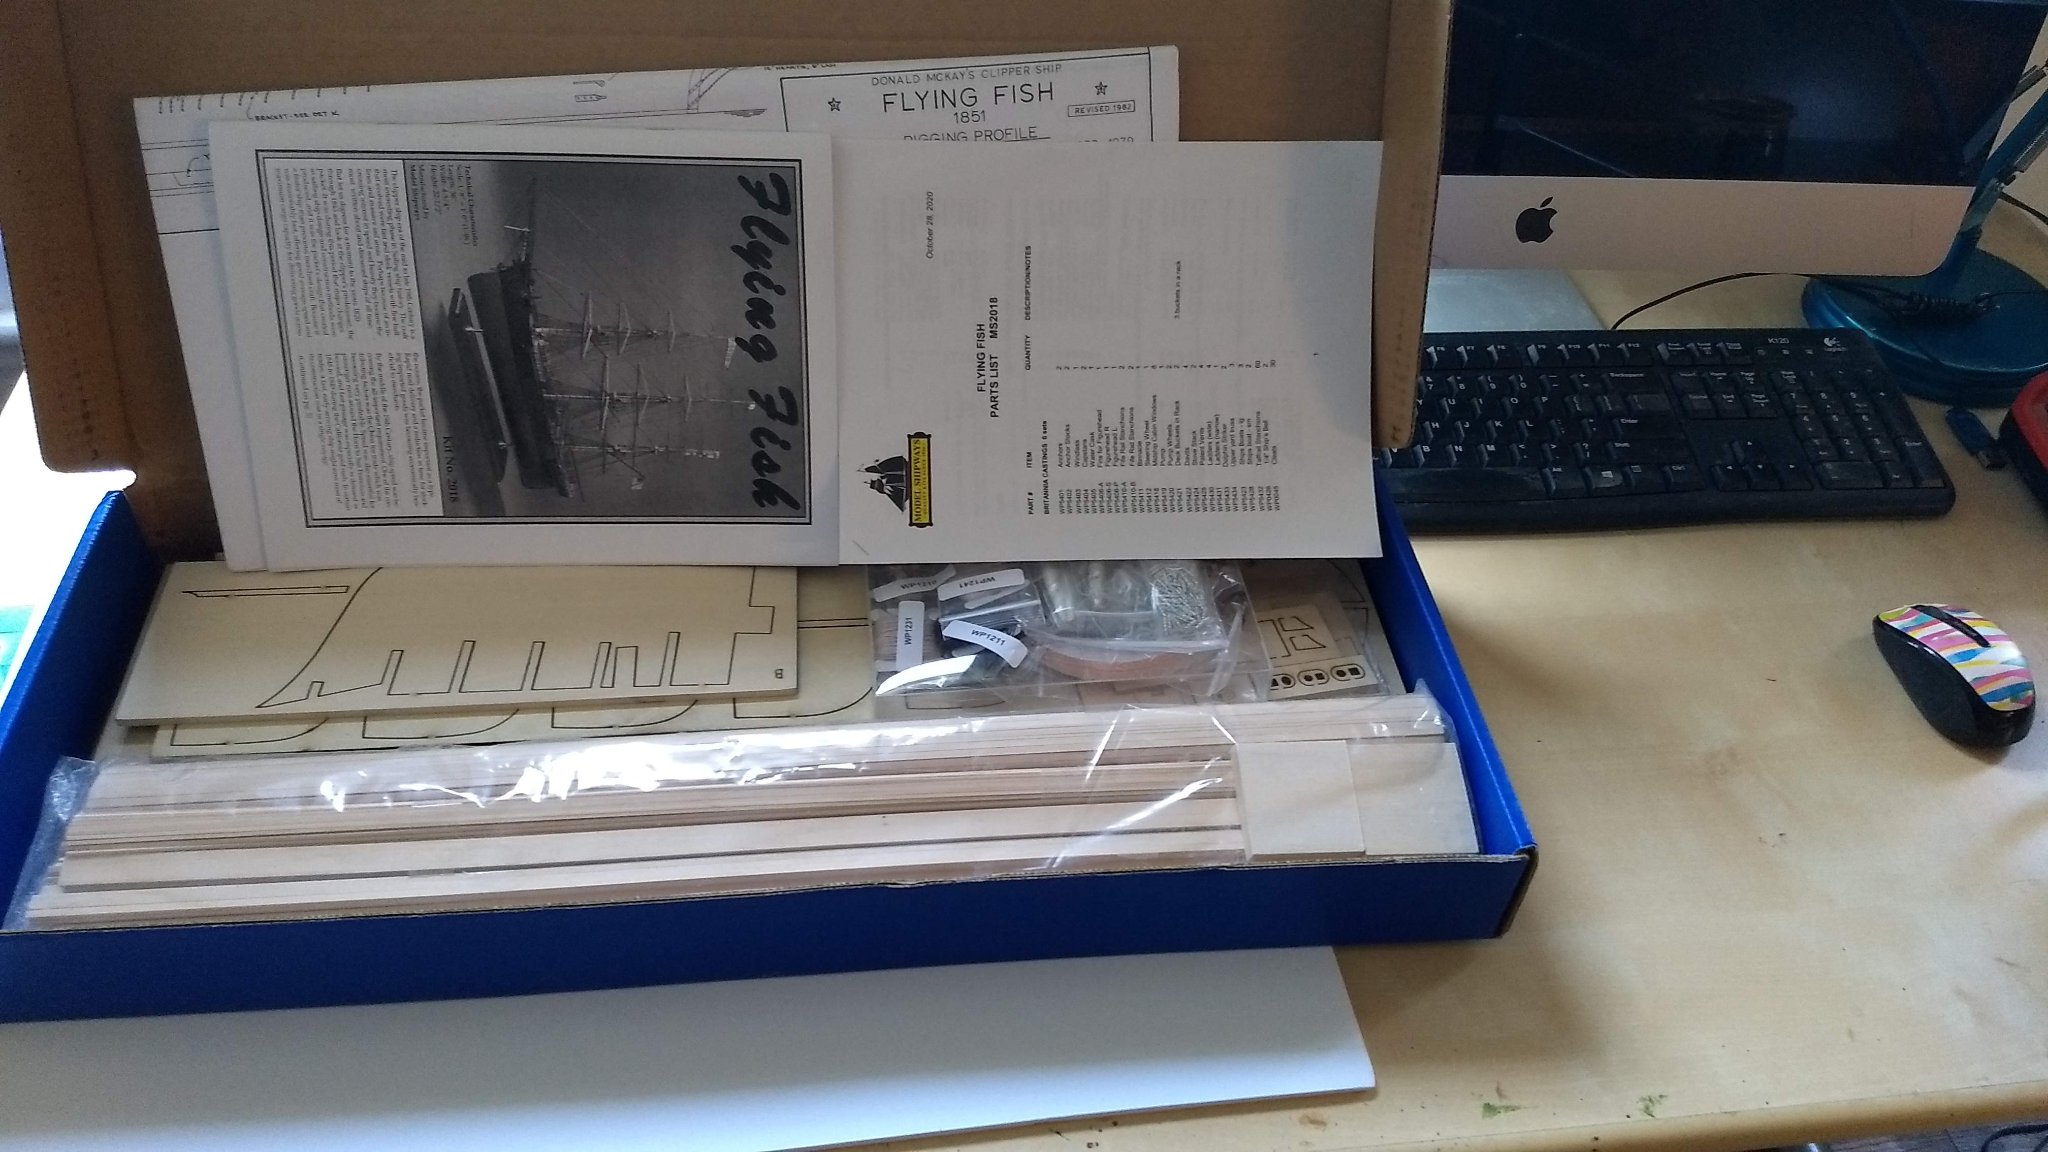
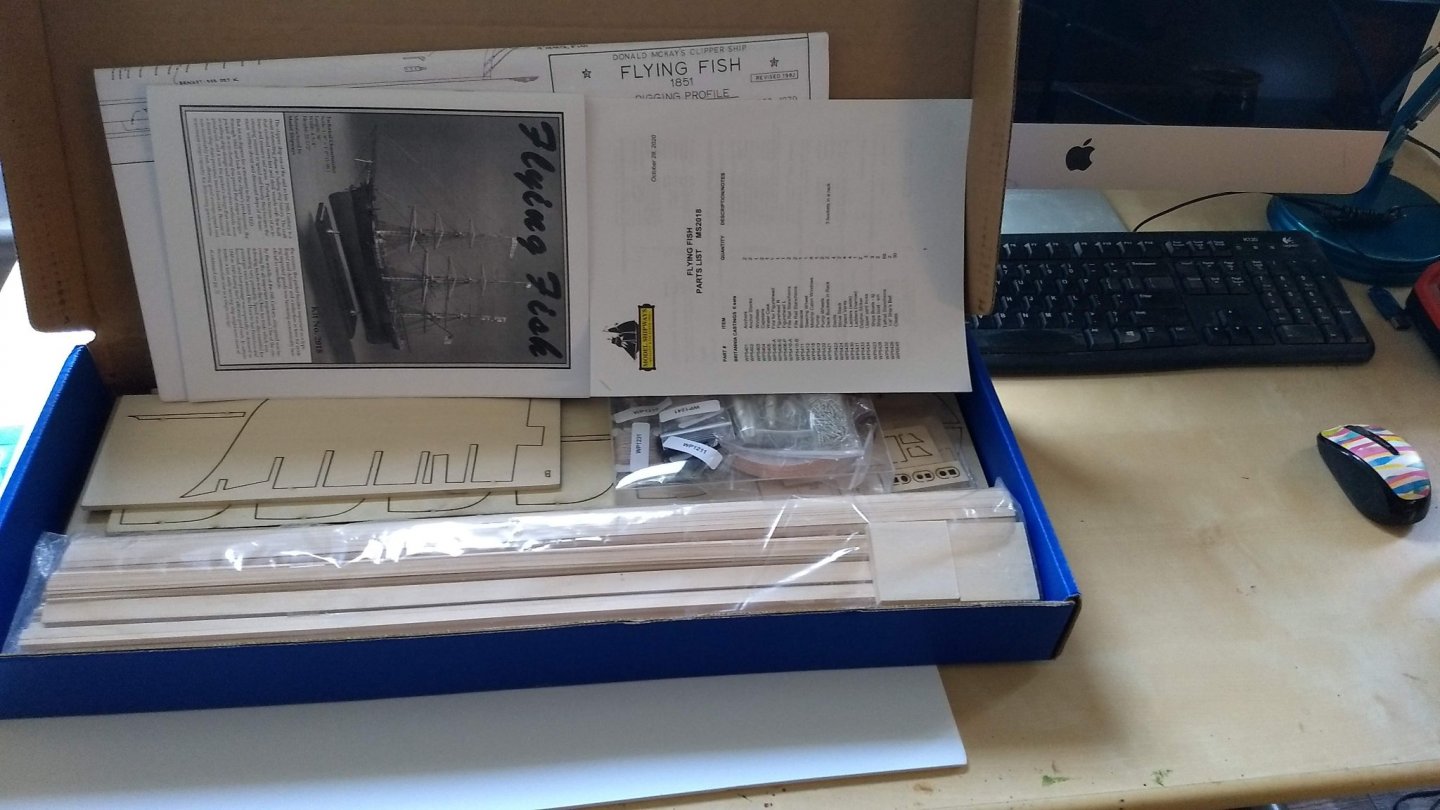
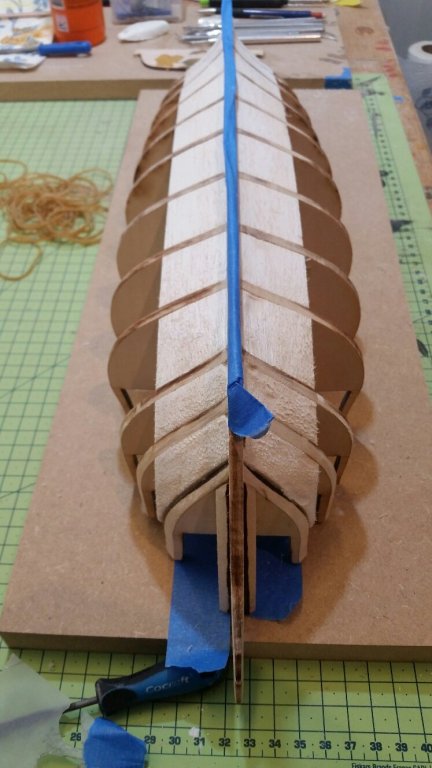
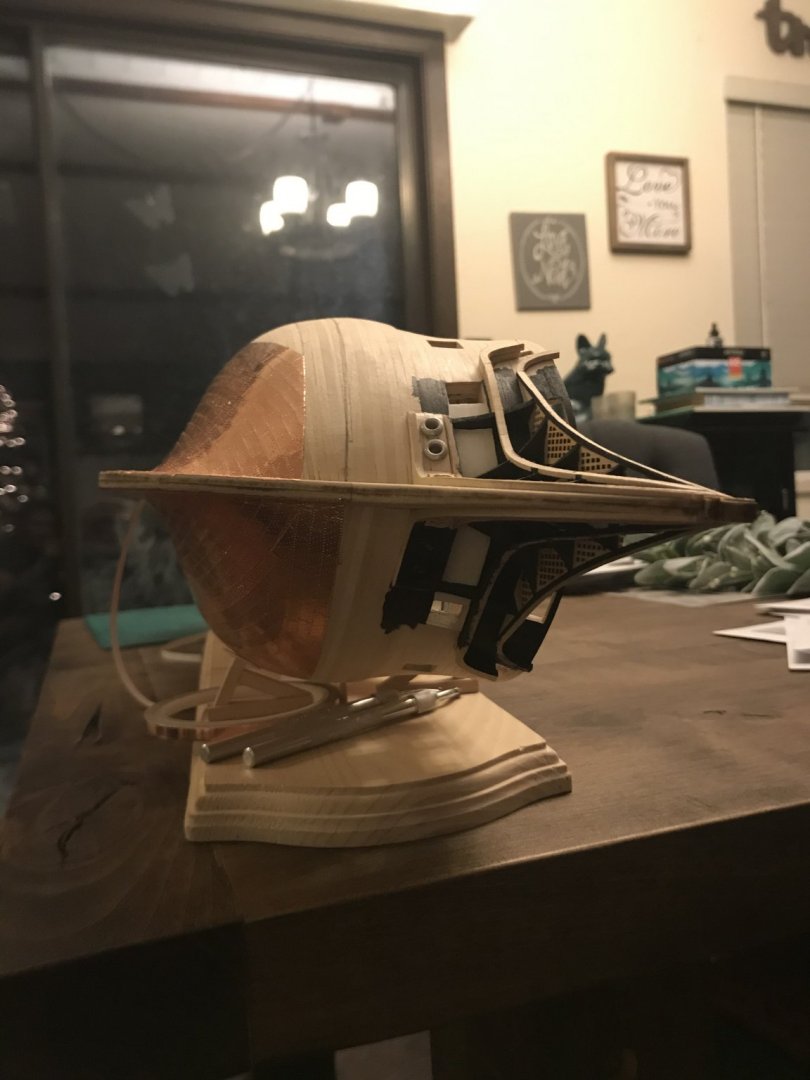
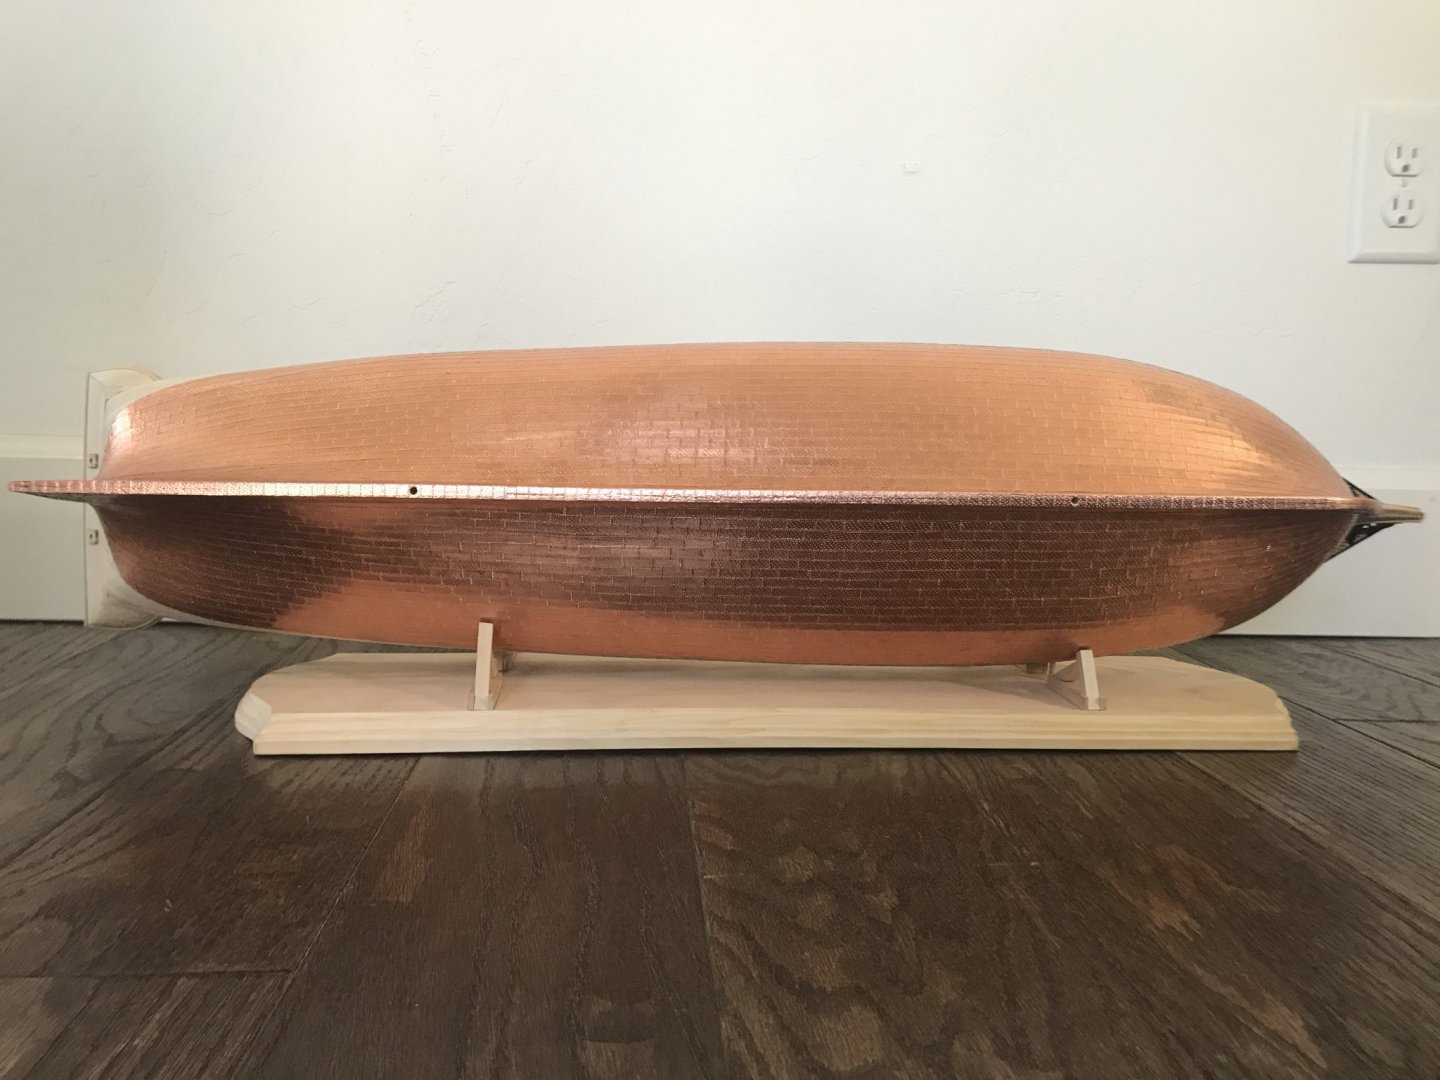
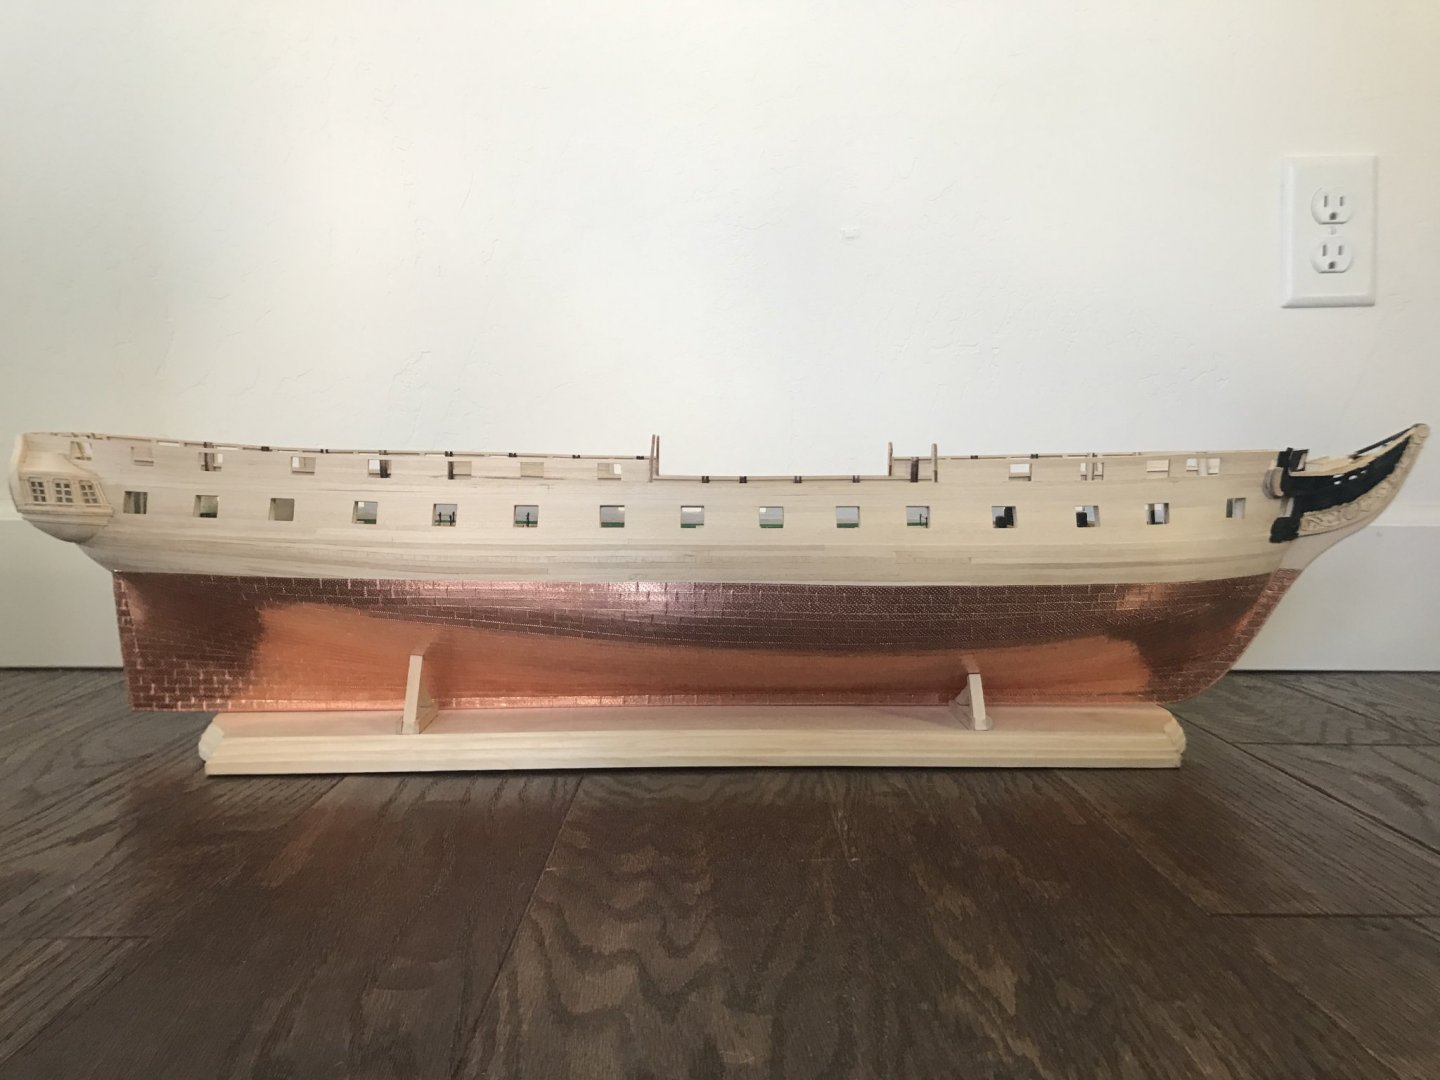
 Hello everyone. This is my first build log and it is for the Donald McKay designed extreme clipper Flying FIsh. The ship has been described well in other logs, but the summary is here: (wikipedia and http://www.bruzelius.info/Nautica/News/BDA/BDA(1851-11-04).html) Built: 1851, East Boston Shipyard Length Overall: 220 ft Length between perpendiculars: 210 ft Length at keel: 202 ft Maximum beam: 40 ft Tons (OM): 1566 tons Originally owned by the firm of Sampson and Tappan of Boston. She was wrecked in Fuzhou in 1858, sold to a company in the Phillipines, and renamed El Bueno Suceso. She eventually sunk in the South China sea. Flying Fish was "coppered" with Muntz metal rather than copper (similar to the Cutty Sark). You can't get Muntz metal tape, alas, but I may try to do something to make the plating more consistent with muntz. I had not originally intended to do this ship. Having recently completed the US Brig Niagara, my plan was to make a scratch model of the RRS Discovery, but COVID-19 put the kibbosh on that for now, as the only plans available are at the Royal Museum Greenwich and they went back on lockdown while processing my order. I can't imagine going through the winter cooped up in the house without some kind of project. If and/or when the plans for Discovery arrive, I will likely have two projects going. But, I've decided that this is a feature, not a bug. While I'm in the doldrums of say ratline tying with one, I'll be in the doldrums of planking with the other. So, while it means that both projects will take longer, I'll be able to at least alternate some of the tasks. And, there will likely be a couple of months of work converting the builders plans into a usable POB design for the Discovery, so, who knows, depending on COVID vaccine timelines, it may be enough to make serious progress on this ship. That's what I've told myself anyway. So, I believe tradition for the first post of a kit build log is a picture of the kit ready to go, so here are mine. Let the construction begin:
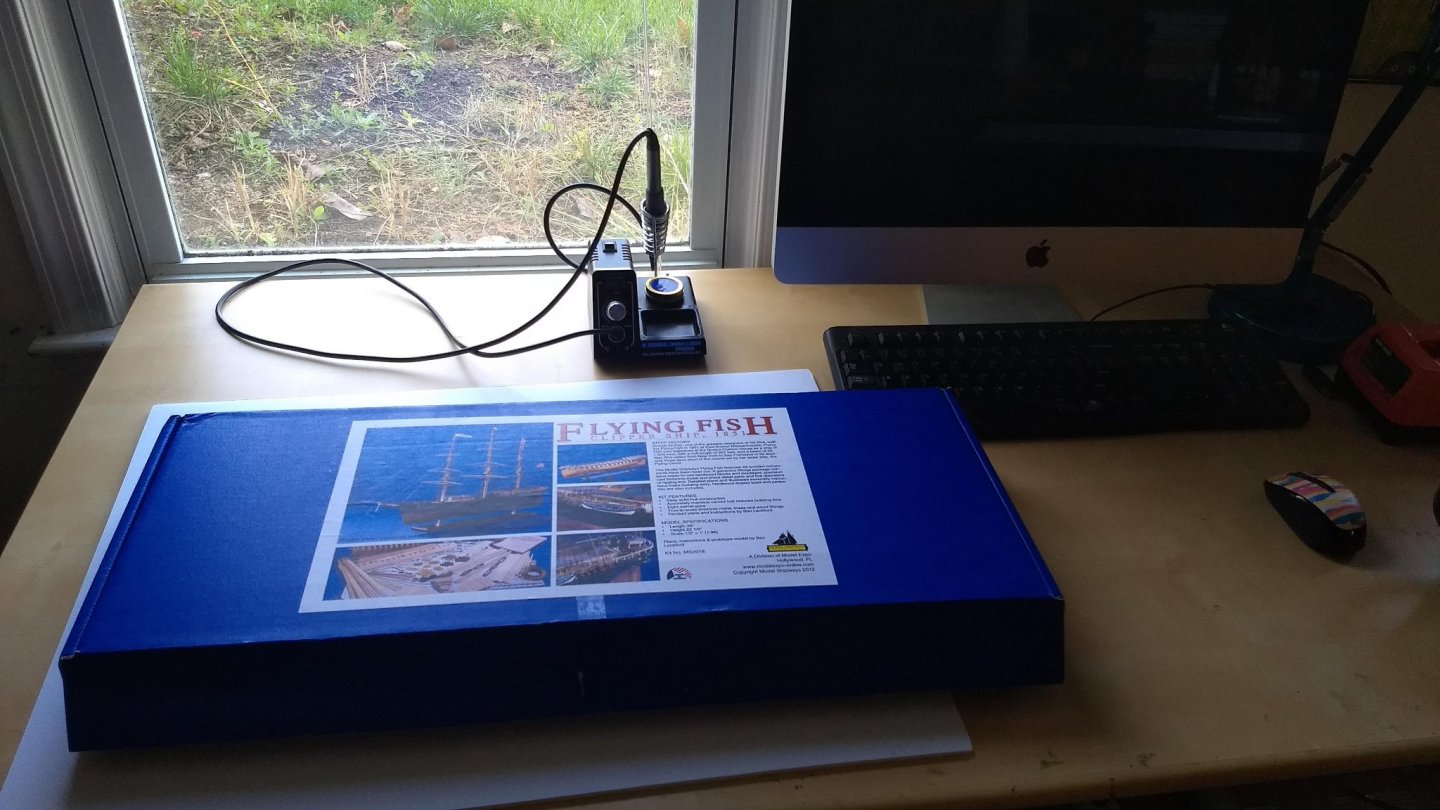
- 600 replies
-
- 4
-
-
- Flying Fish
- Model Shipways
- (and 2 more)
-
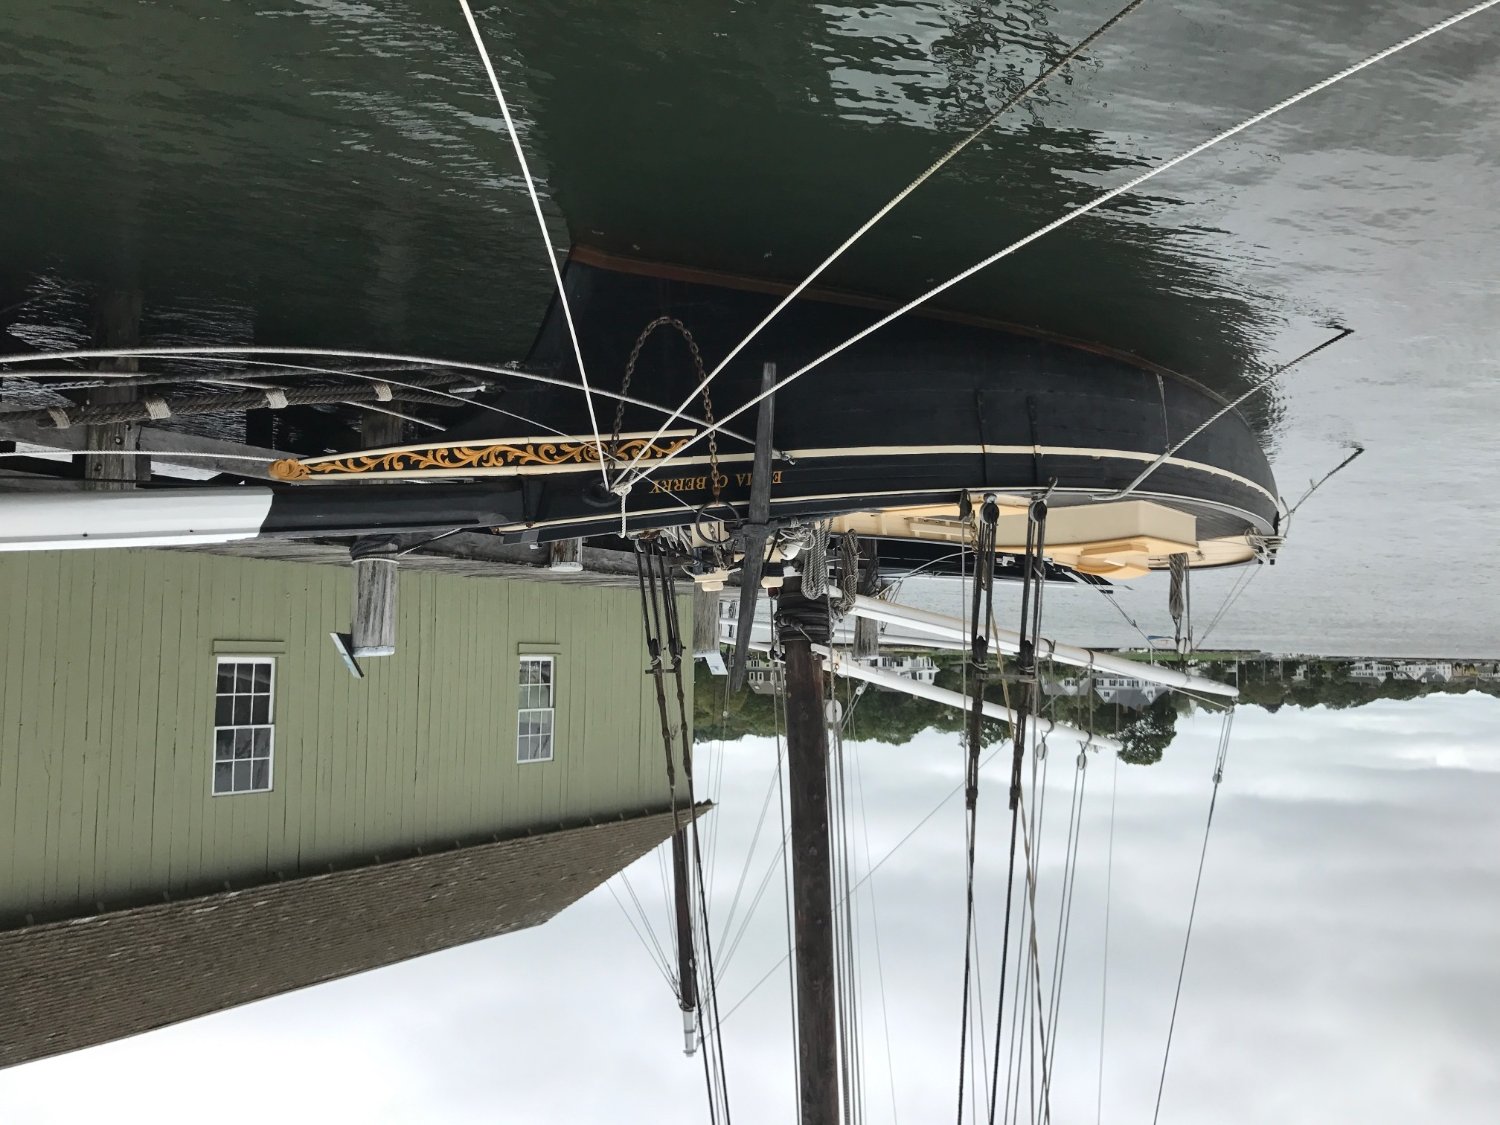
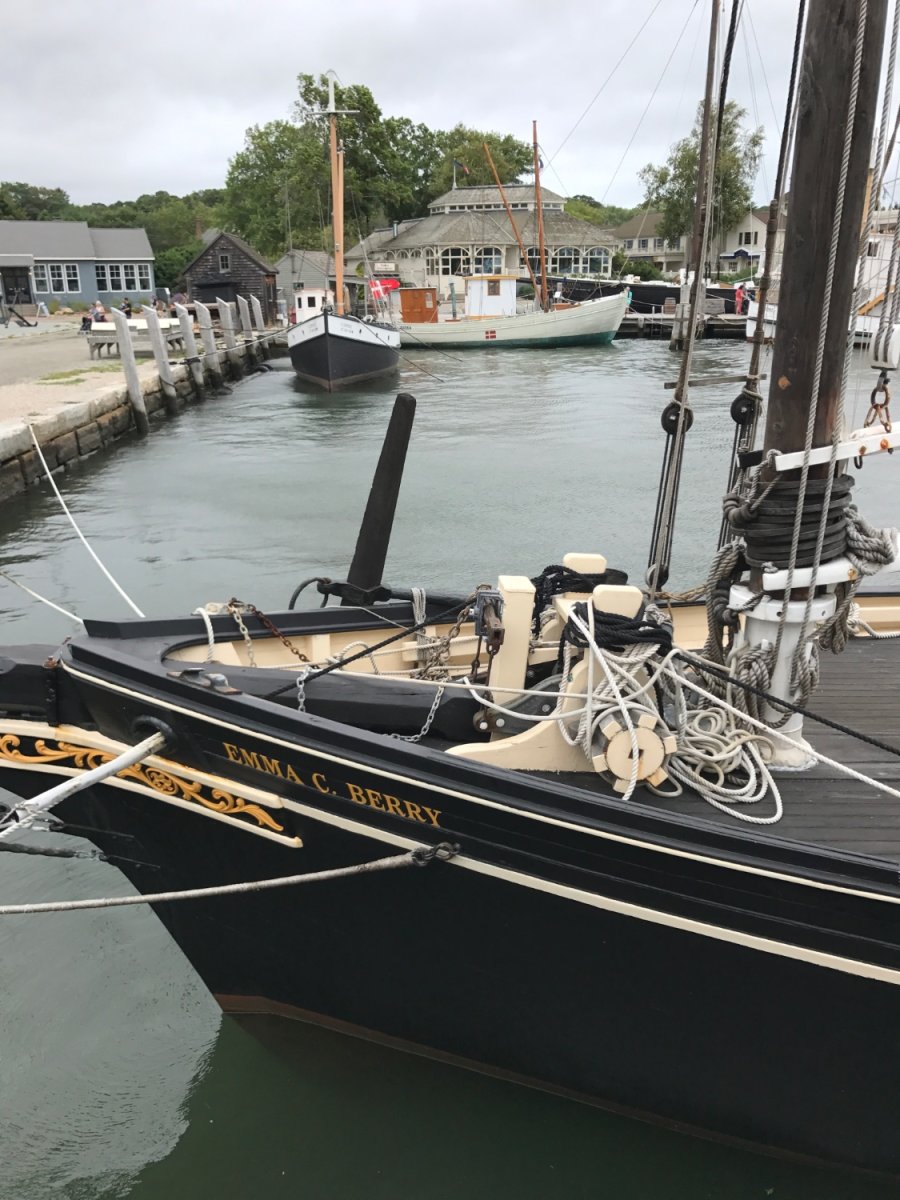
 I’ve never made a build log, mostly because I usually have no idea what I’m doing and am still a beginner at this. However, I’ve learned almost everything I know from build logs on this forum, so maybe it’s my turn to contribute and I will (belatedly) start one on my ECB build. It’s about 70% complete, but I’ll post the pictures I took during construction here (and then hopefully keep it updated until complete). First, some photos I took of the real thing when I visited Mystic a couple of years ago. It’s an incredible place. (Not sure why some of those are upside down)
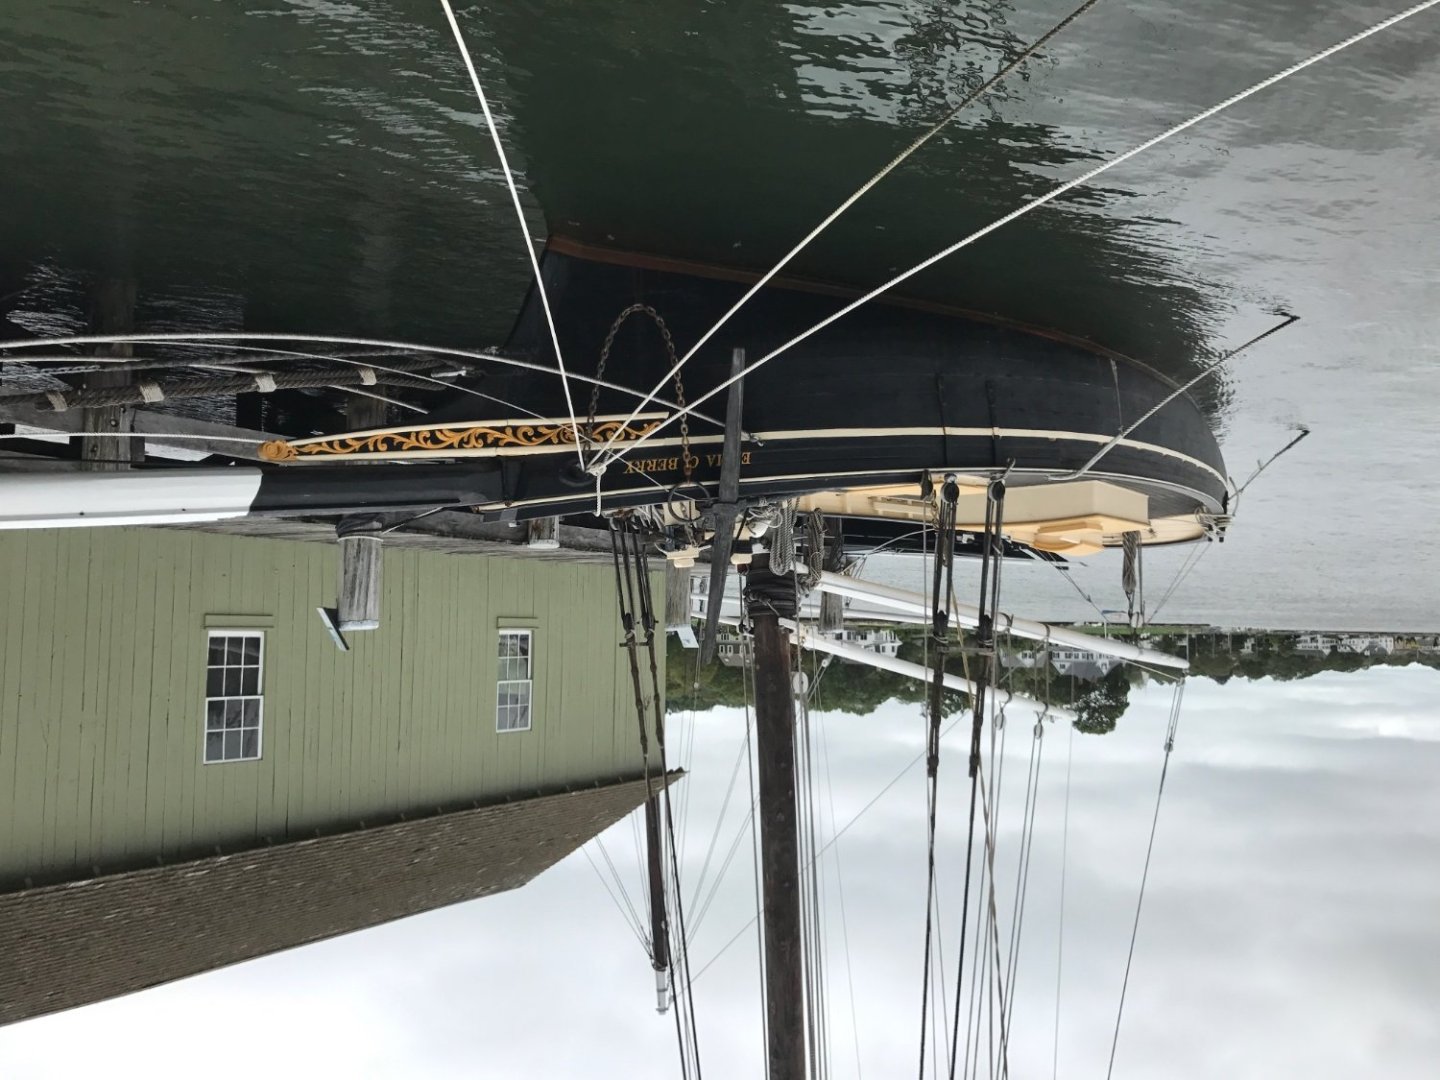


-
 I have begun work on the pram, the second in the progressive learning series by Model Shipways.
-
 Started on building the brig syren, and the first photo so fare am planing to get some lights on, so its know time to plan this before I start going to fast forward


-
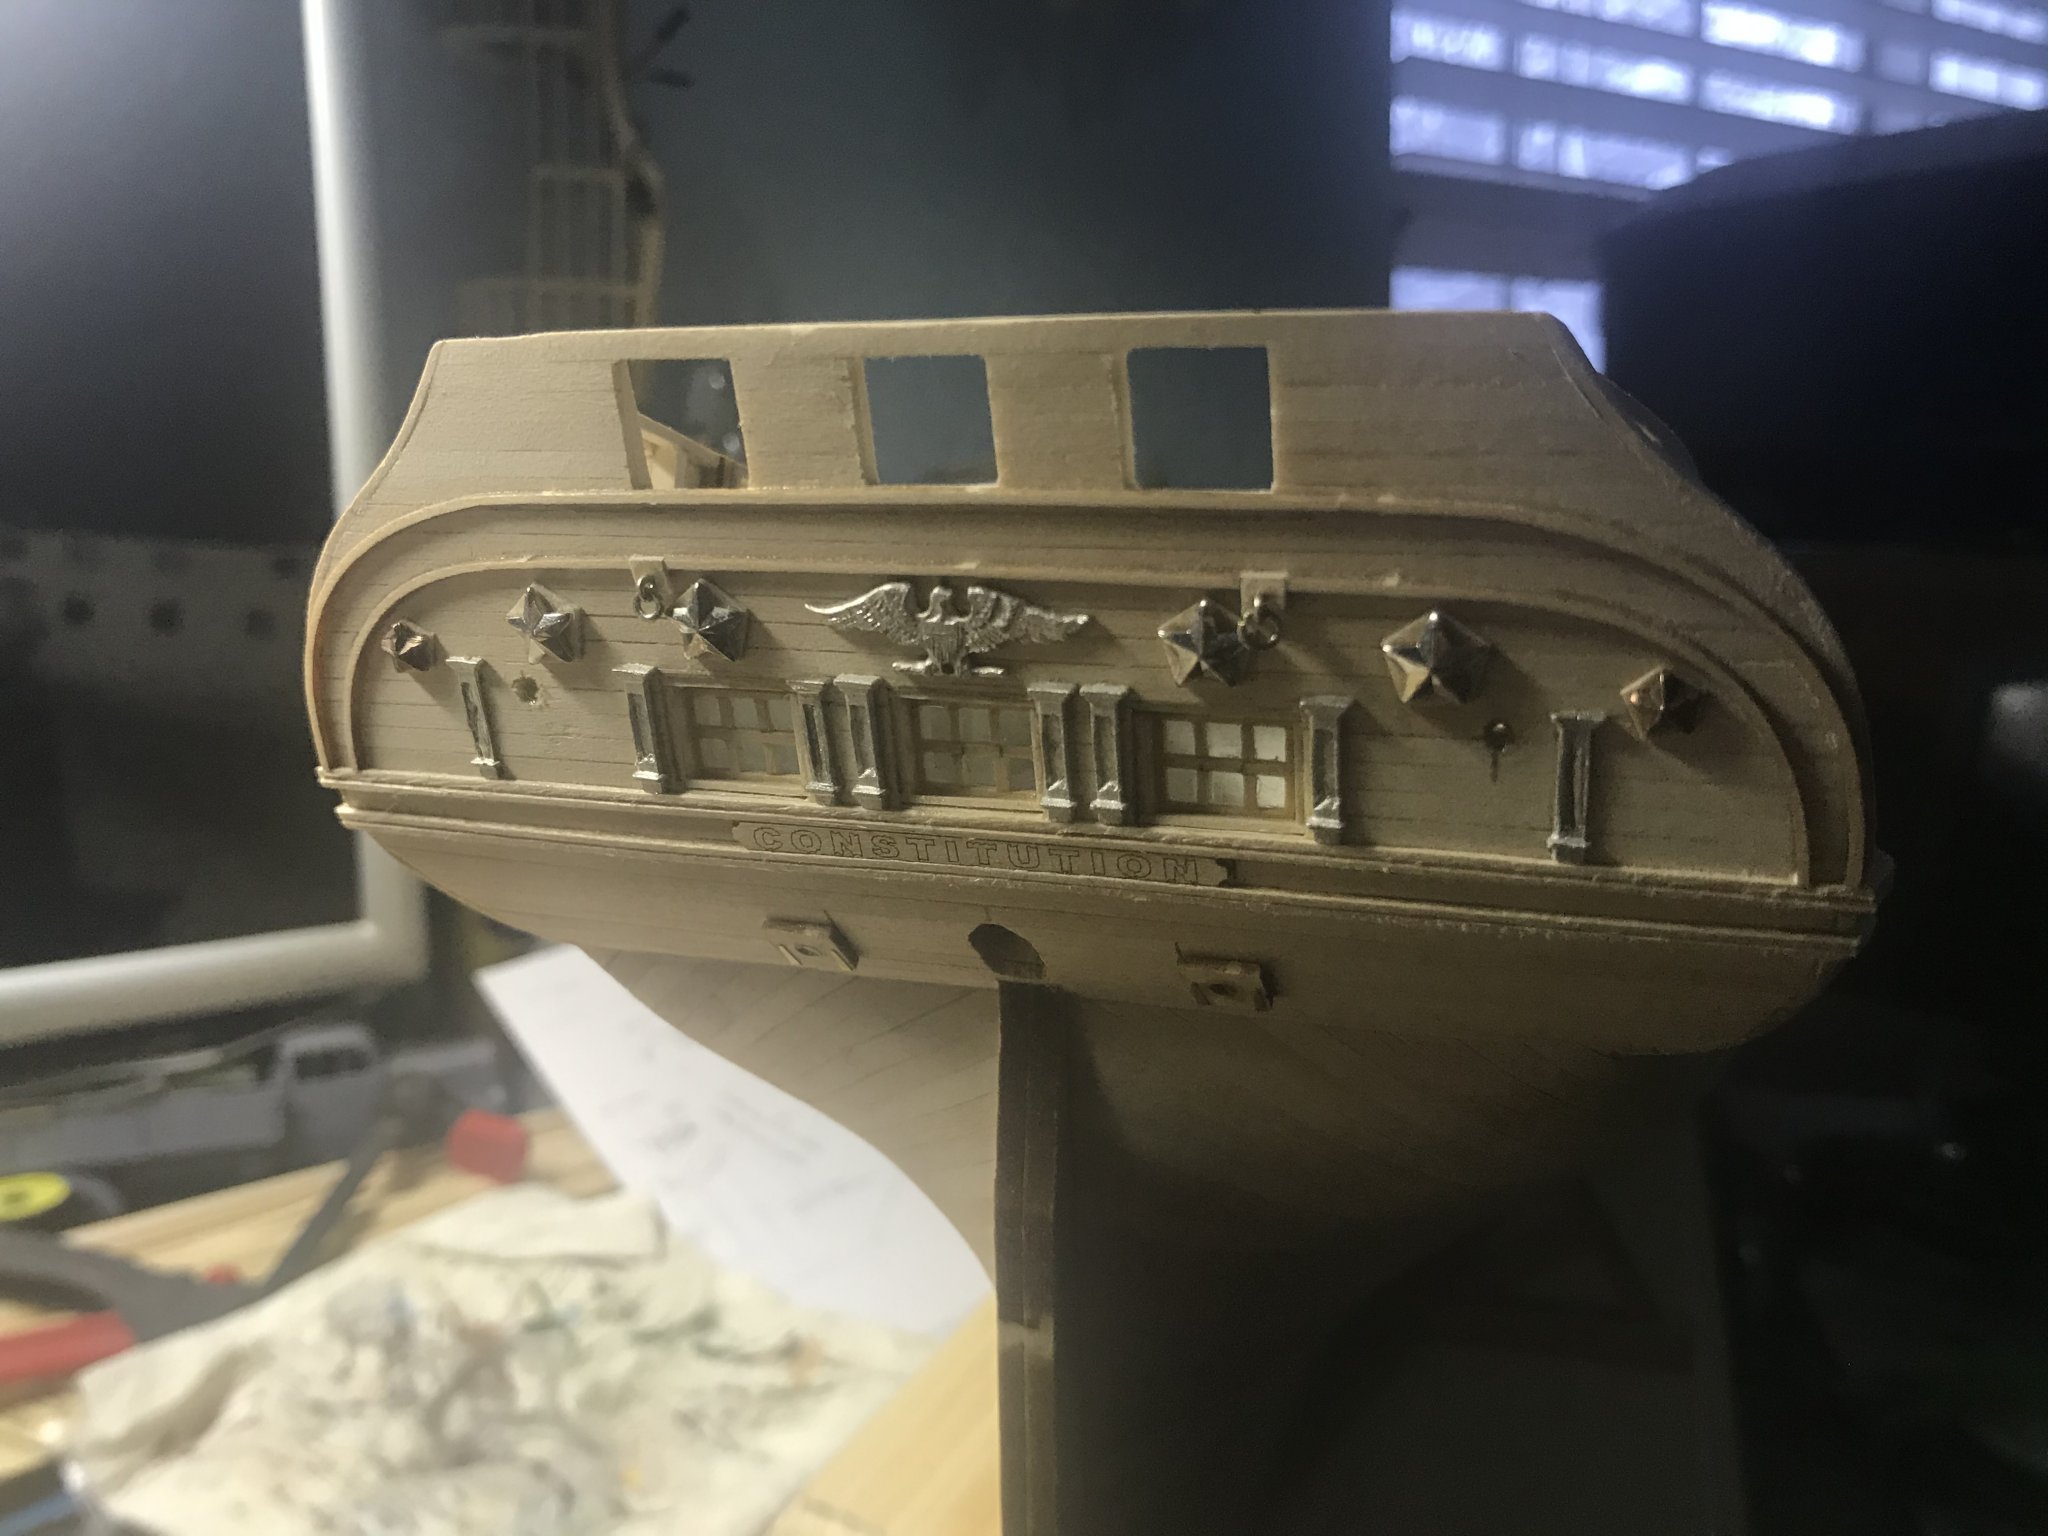
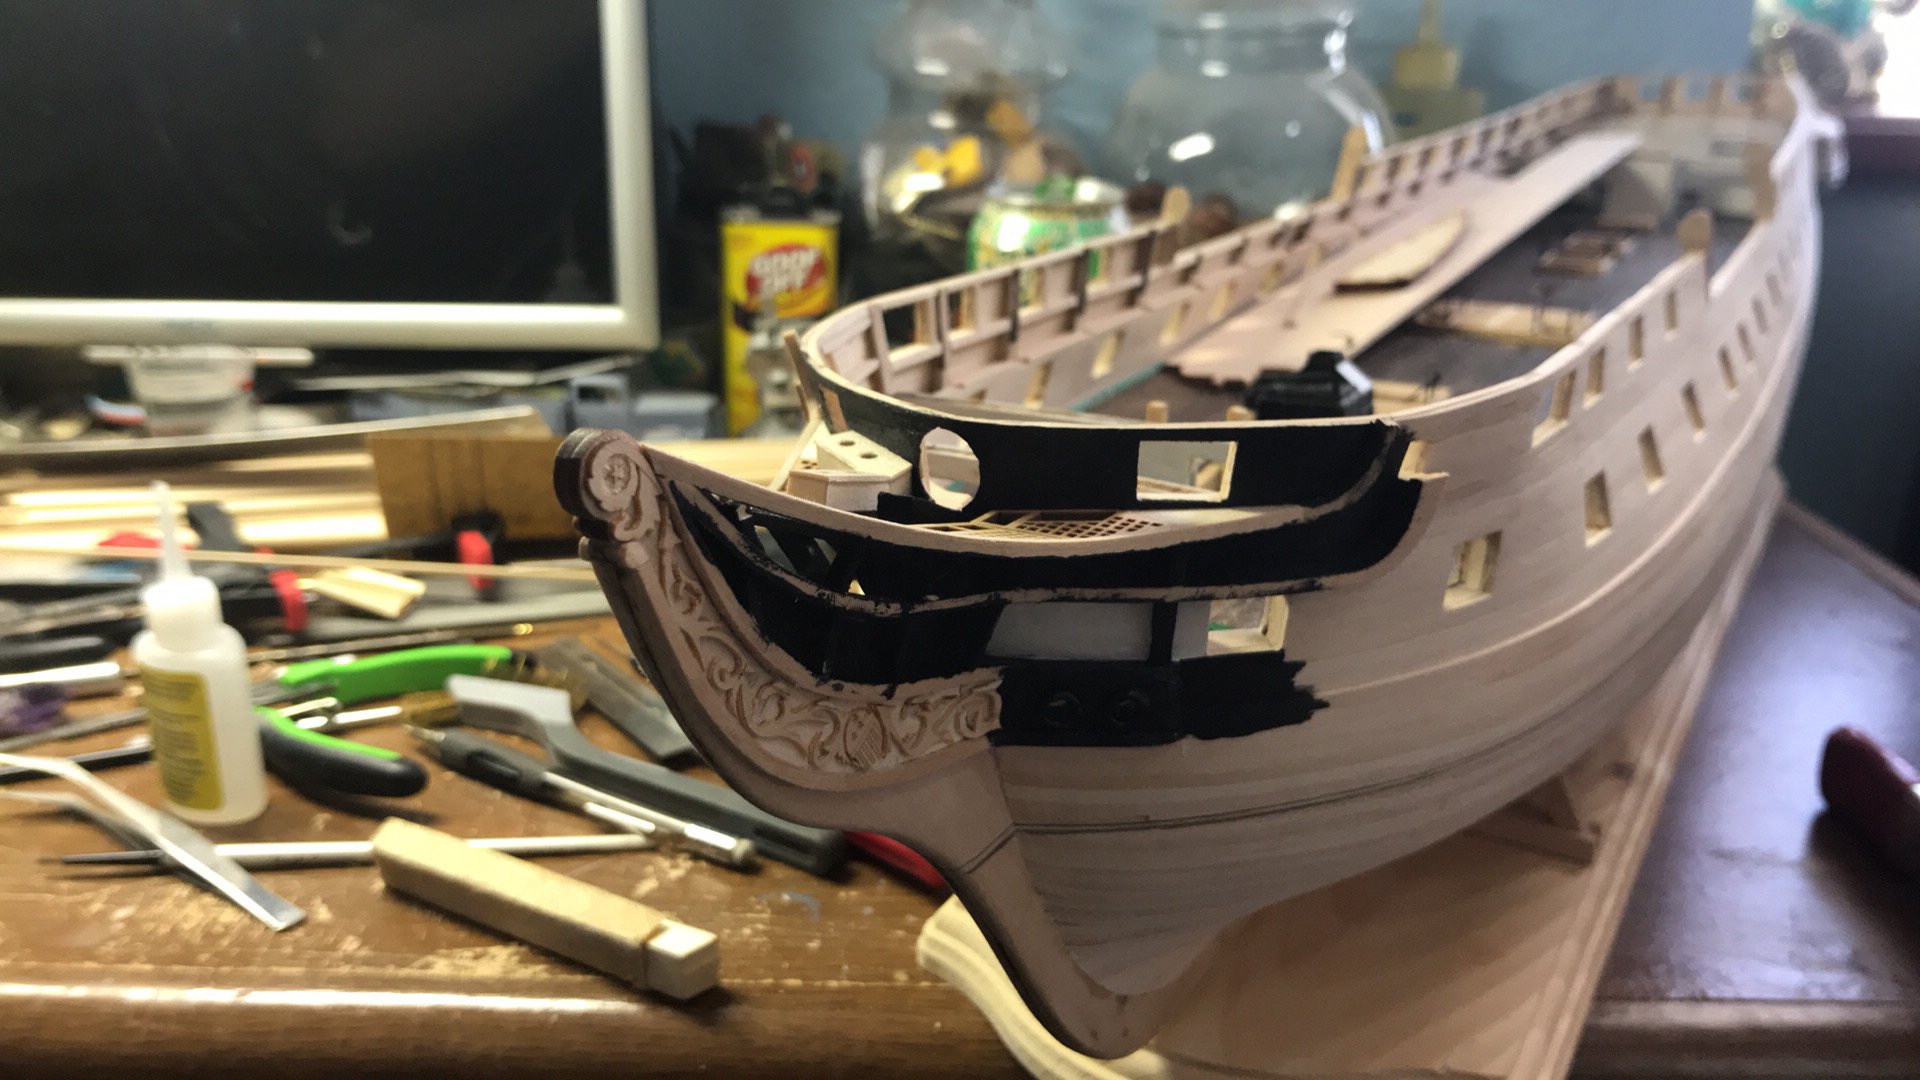
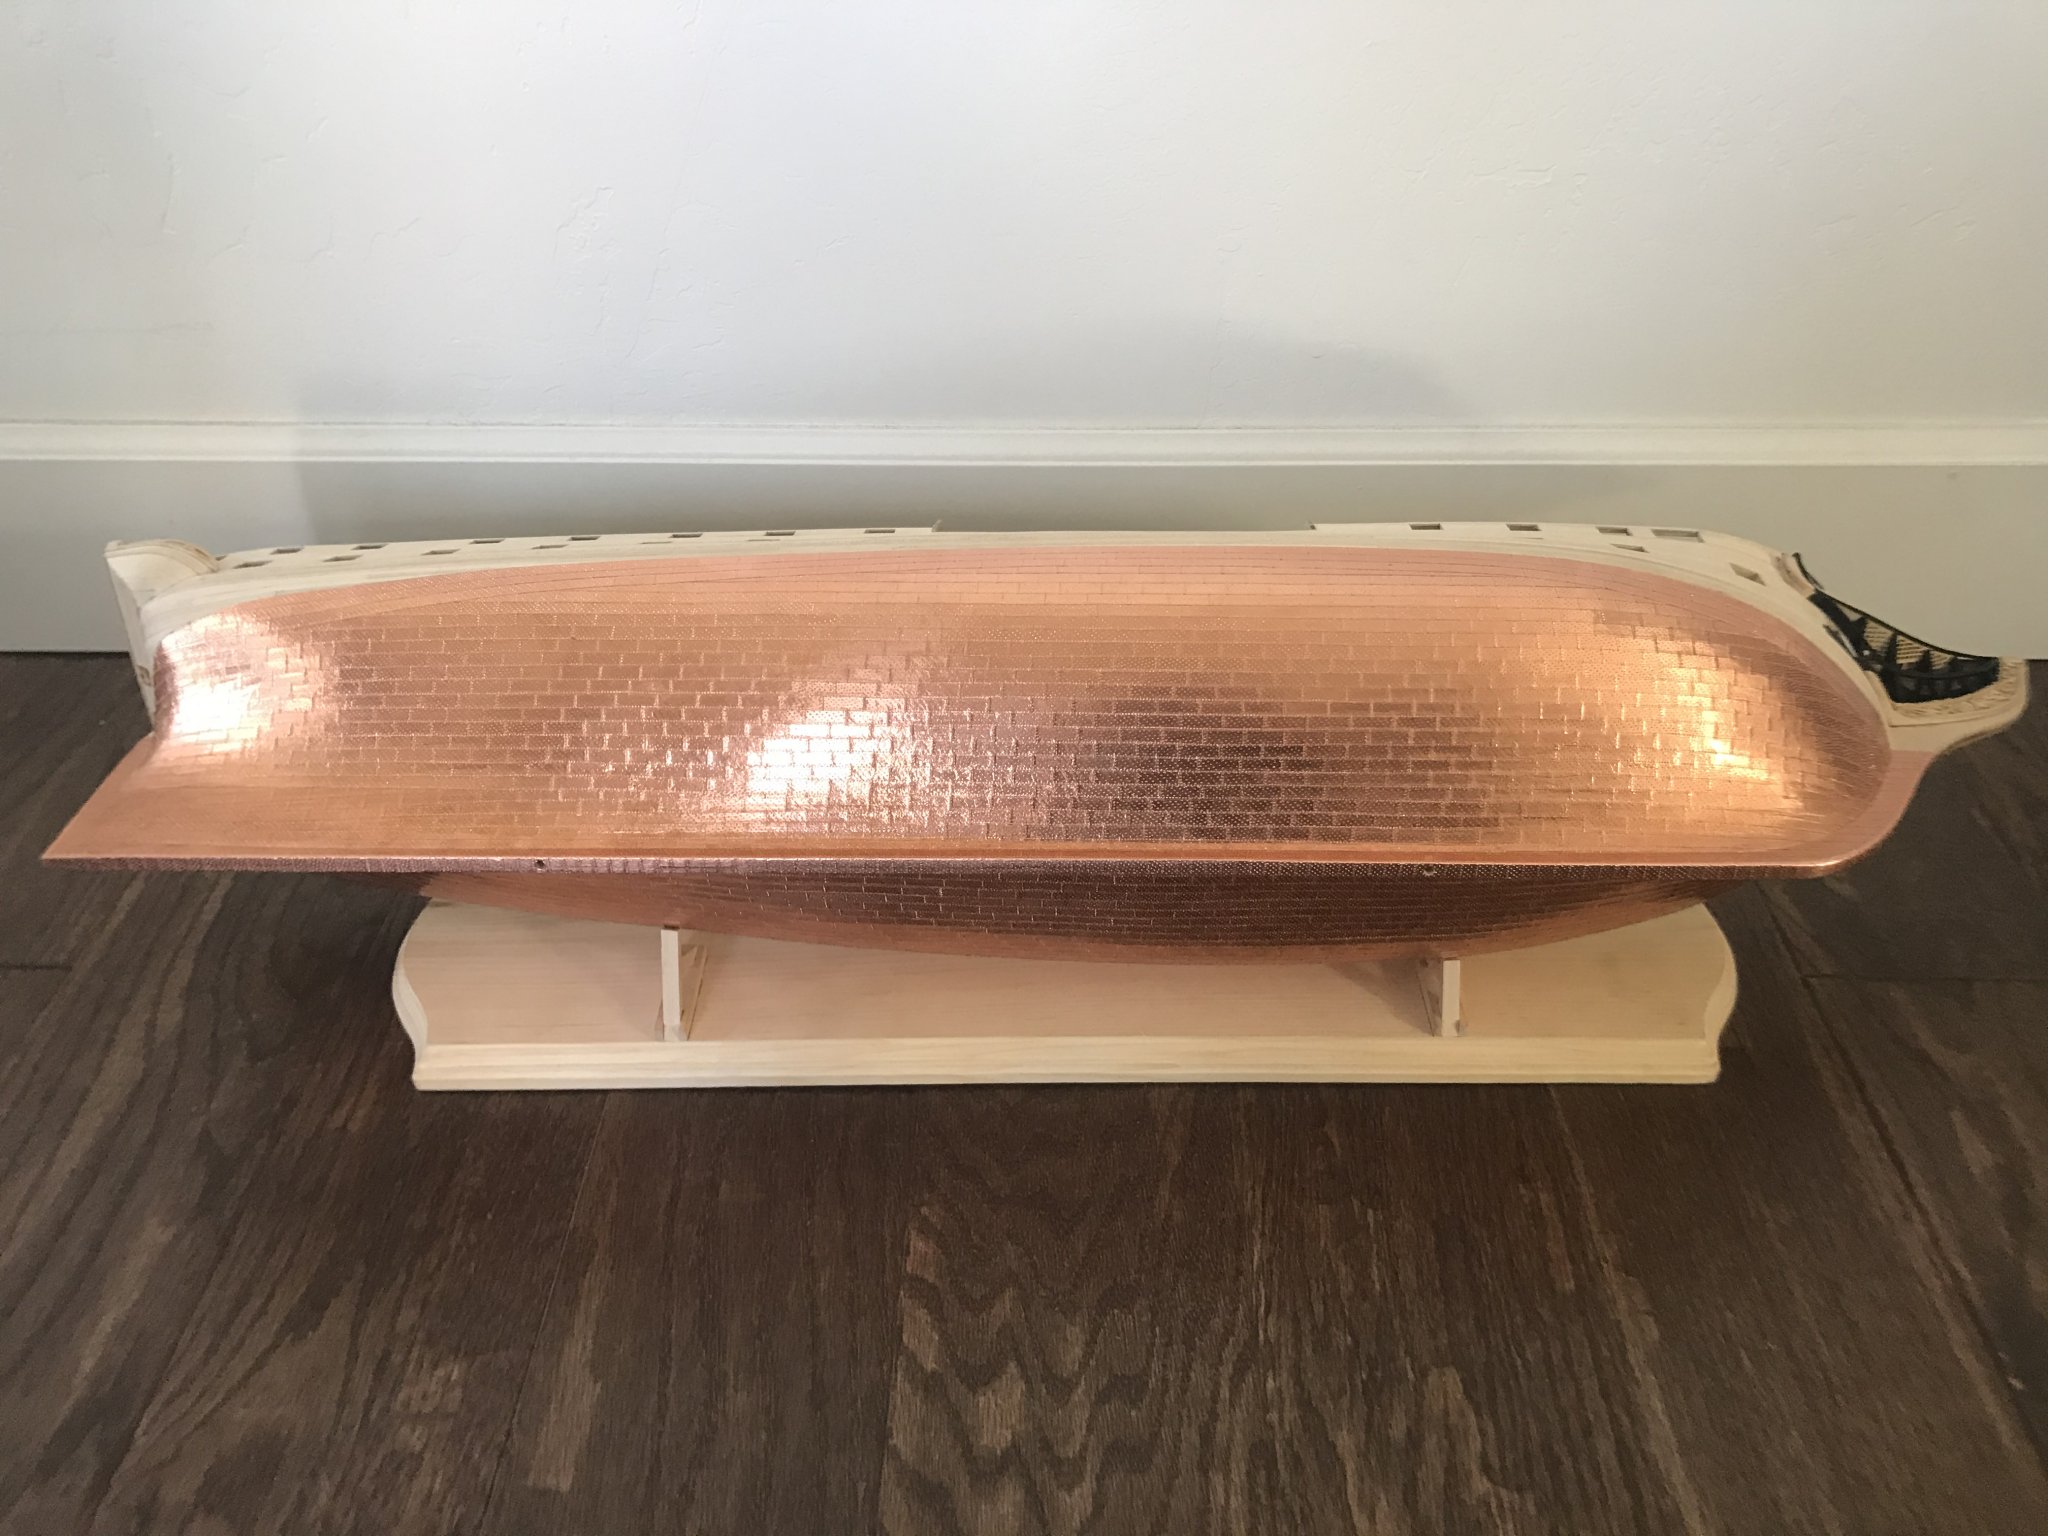
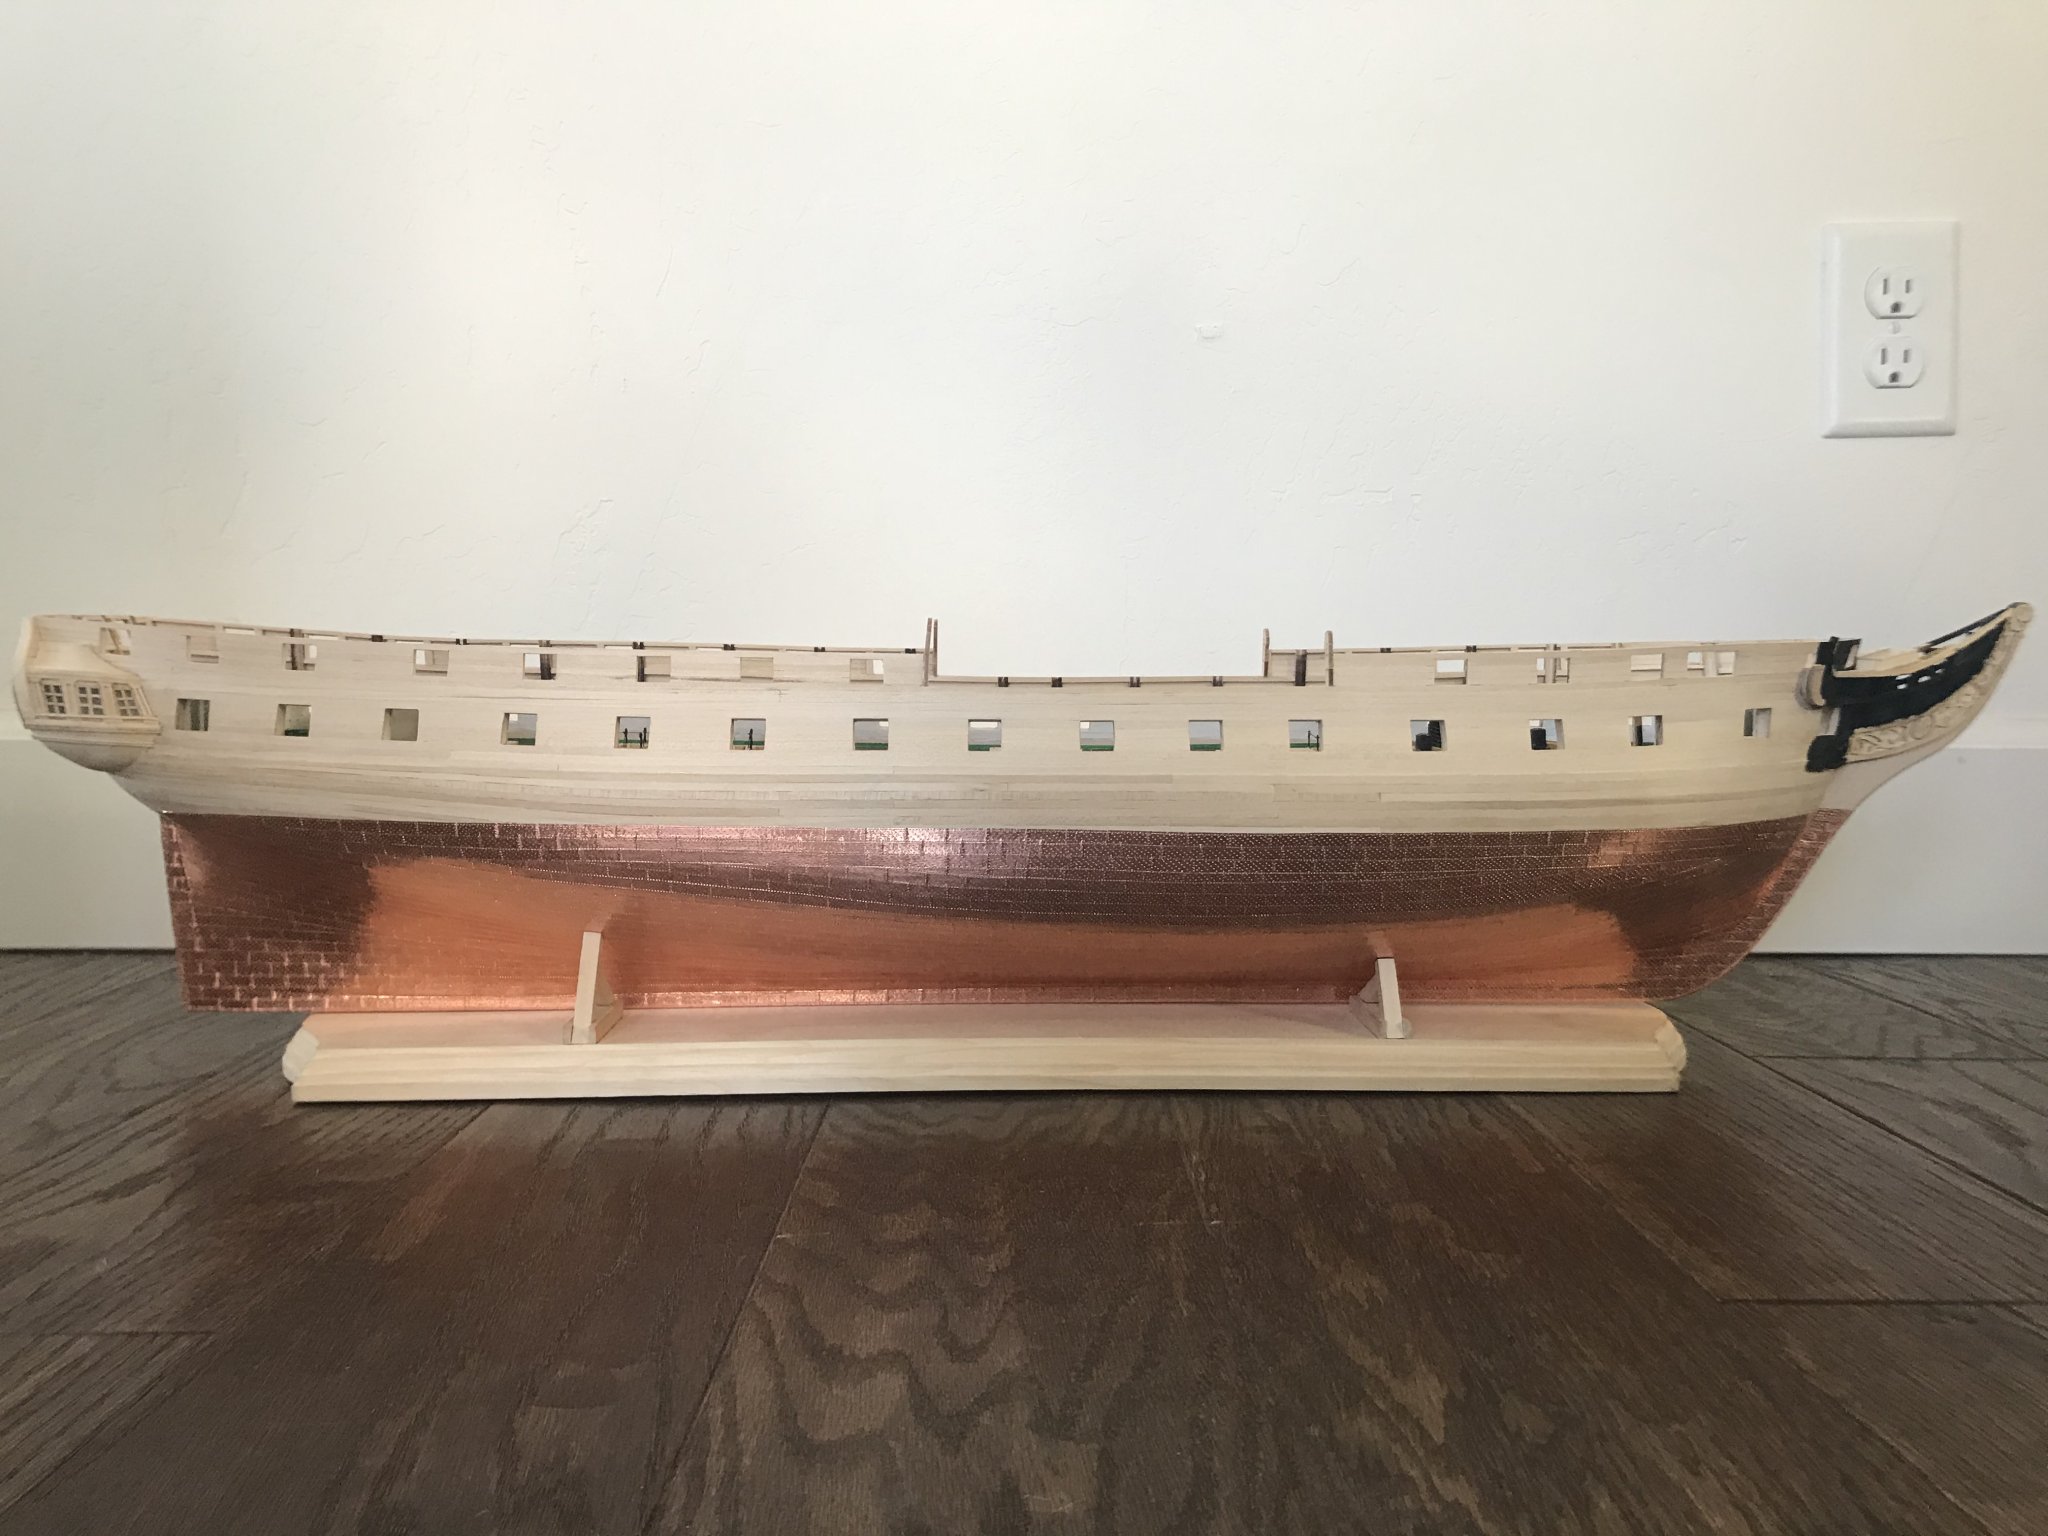
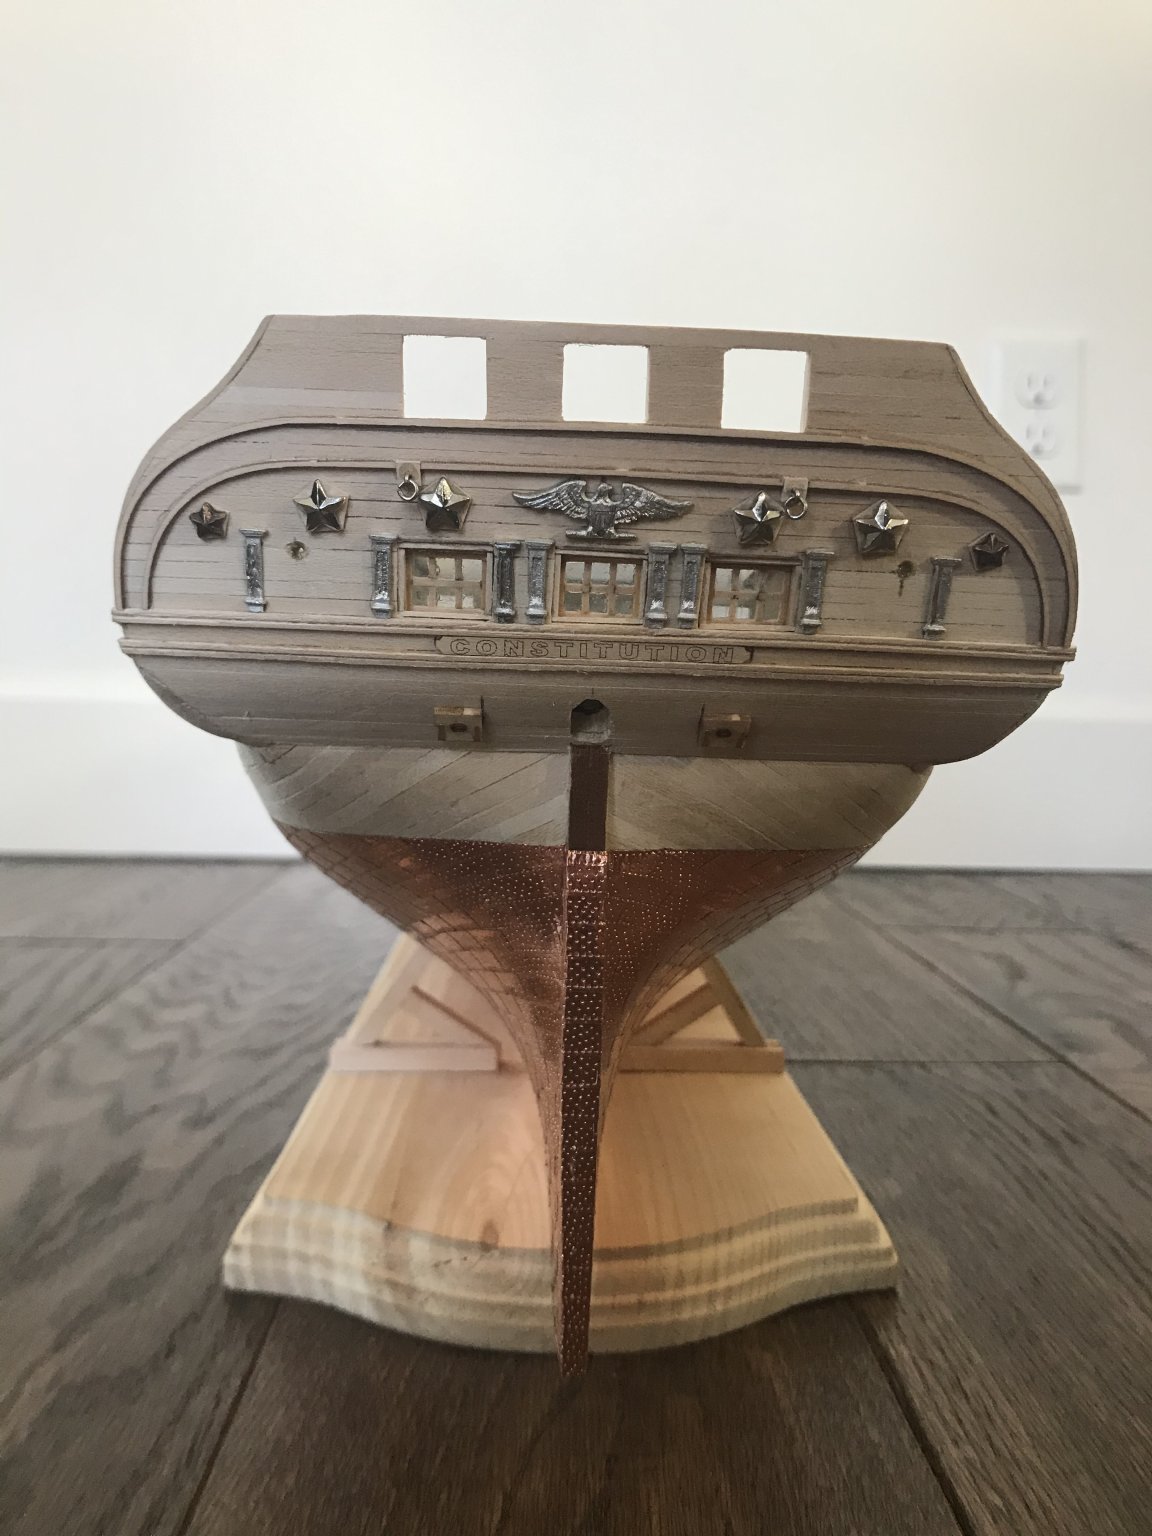
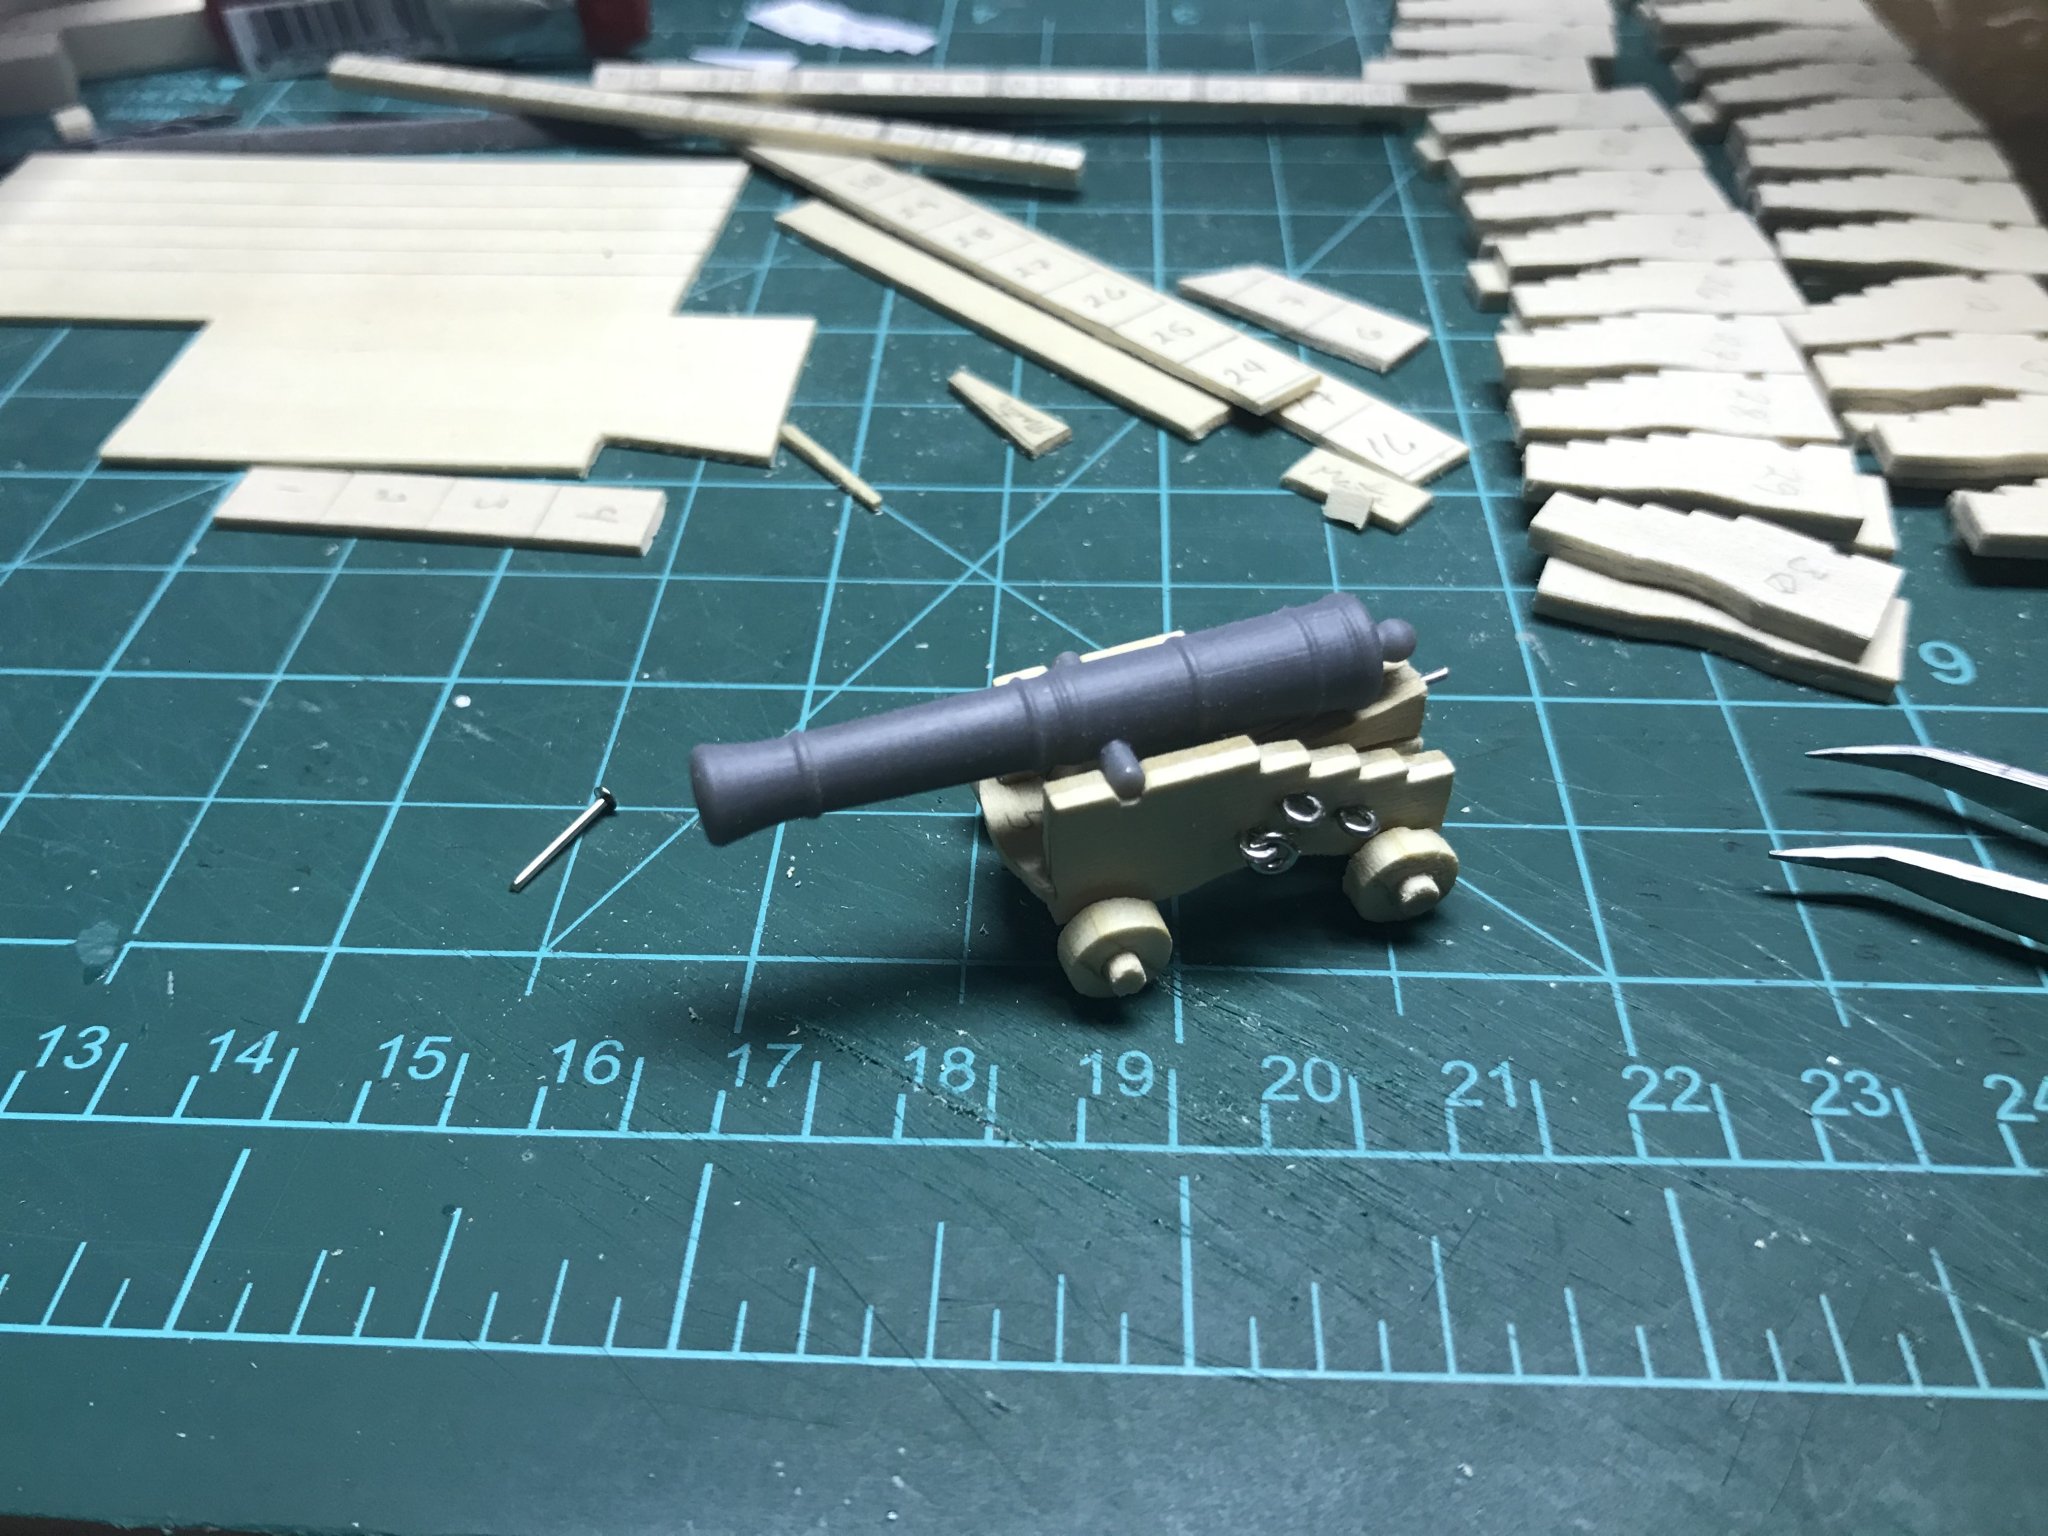
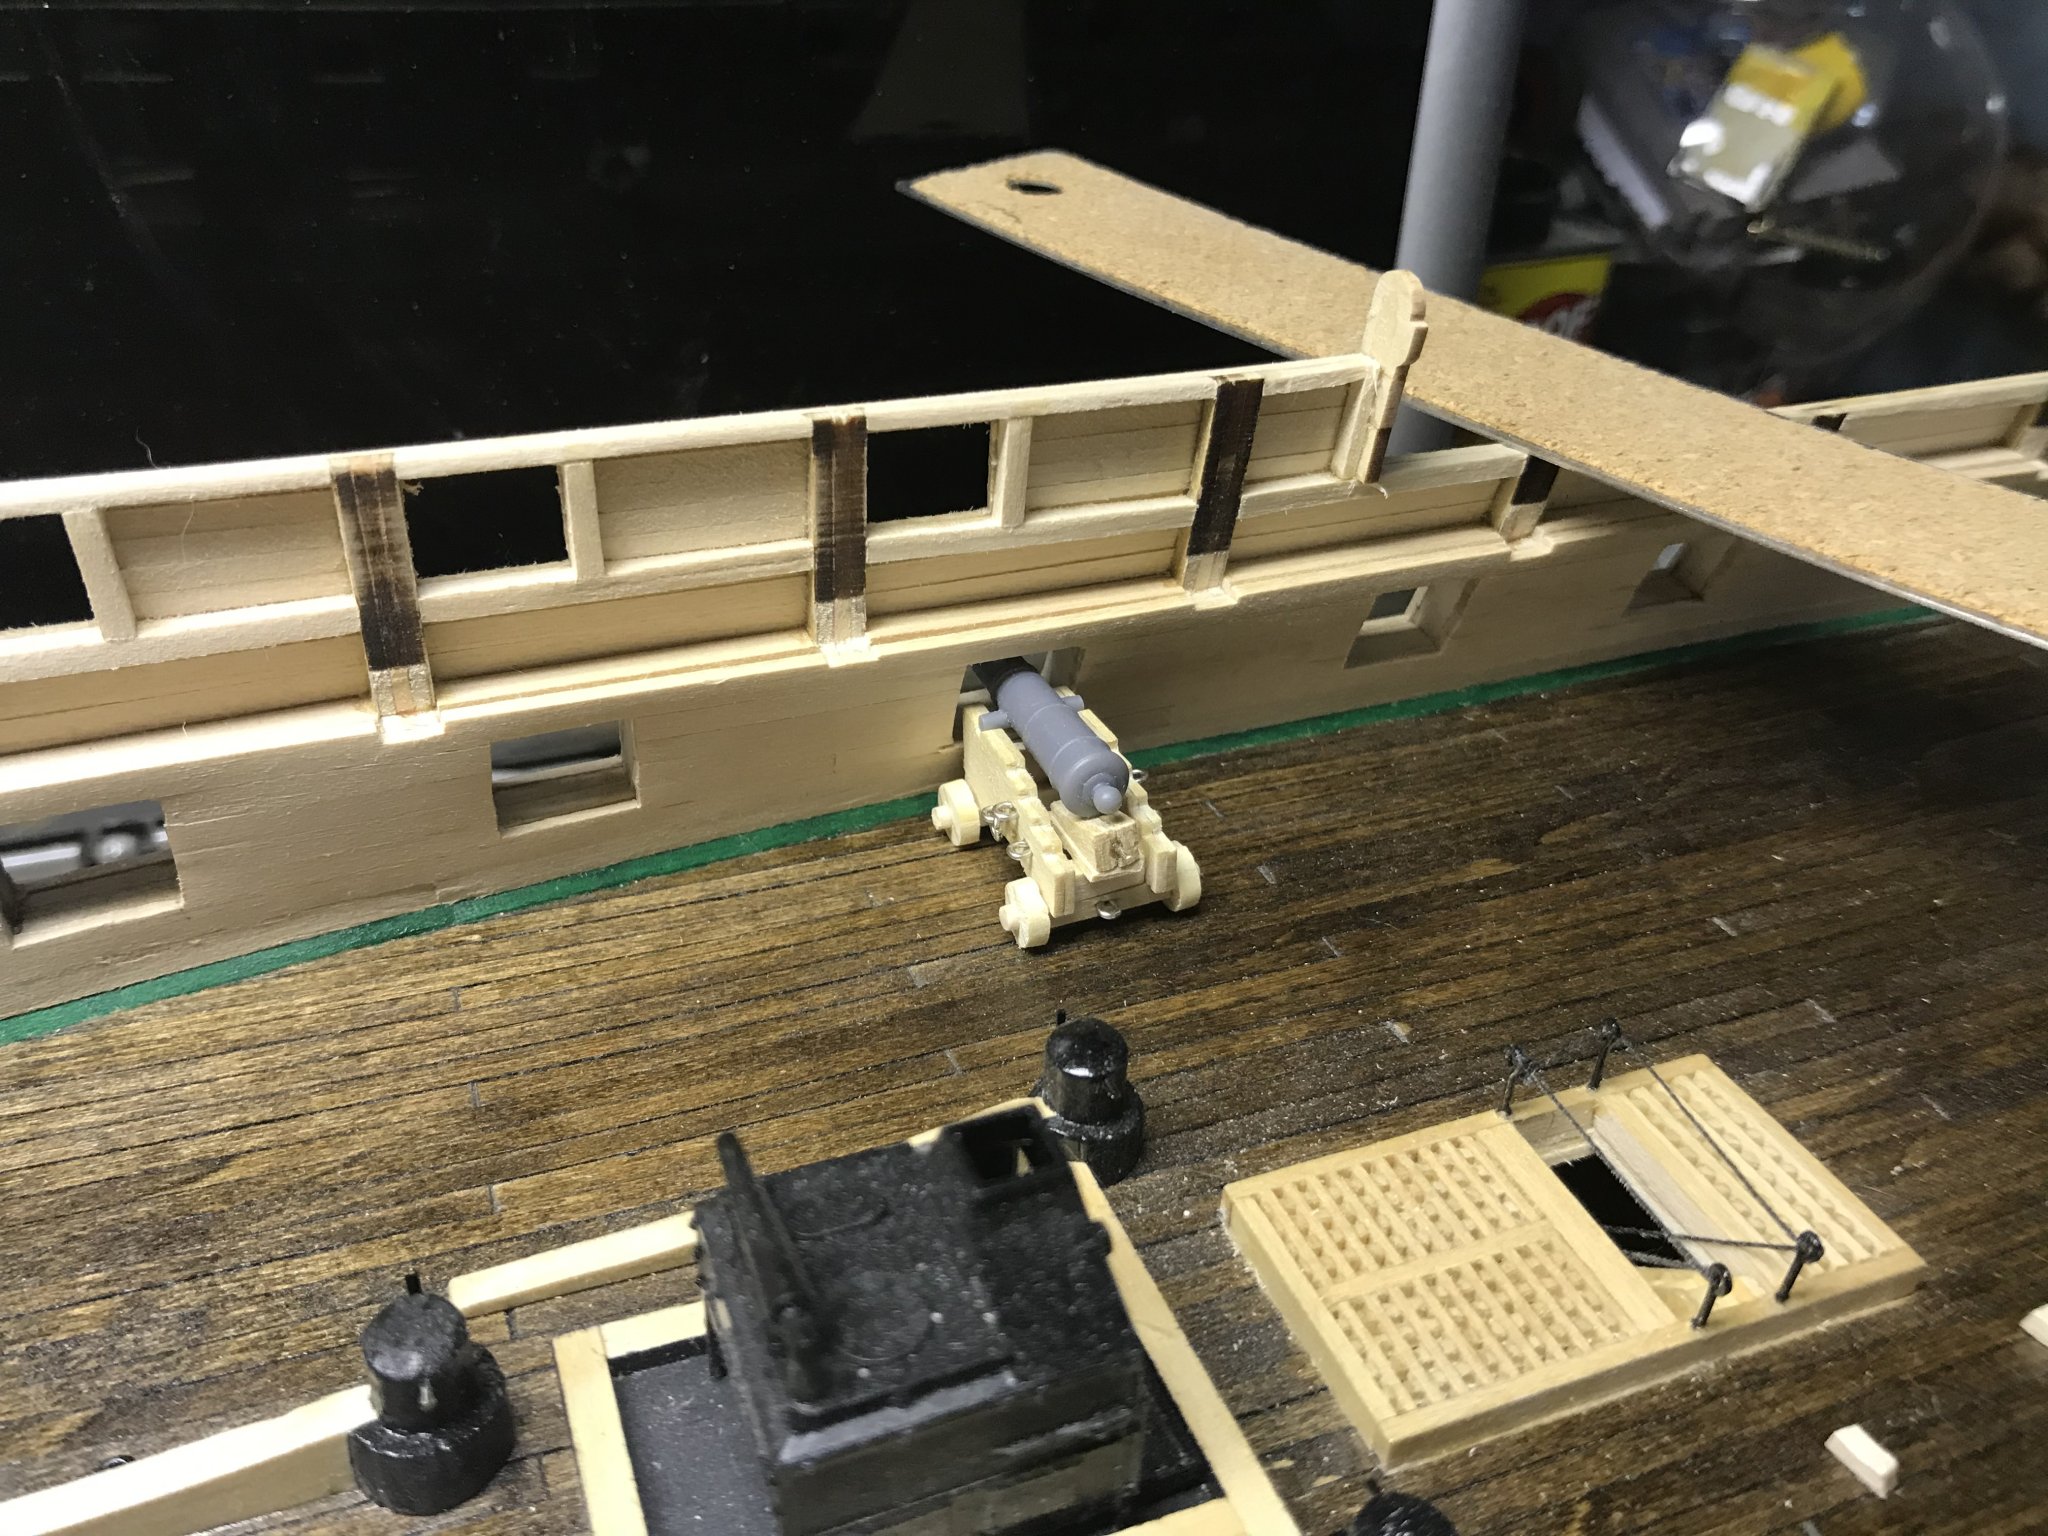
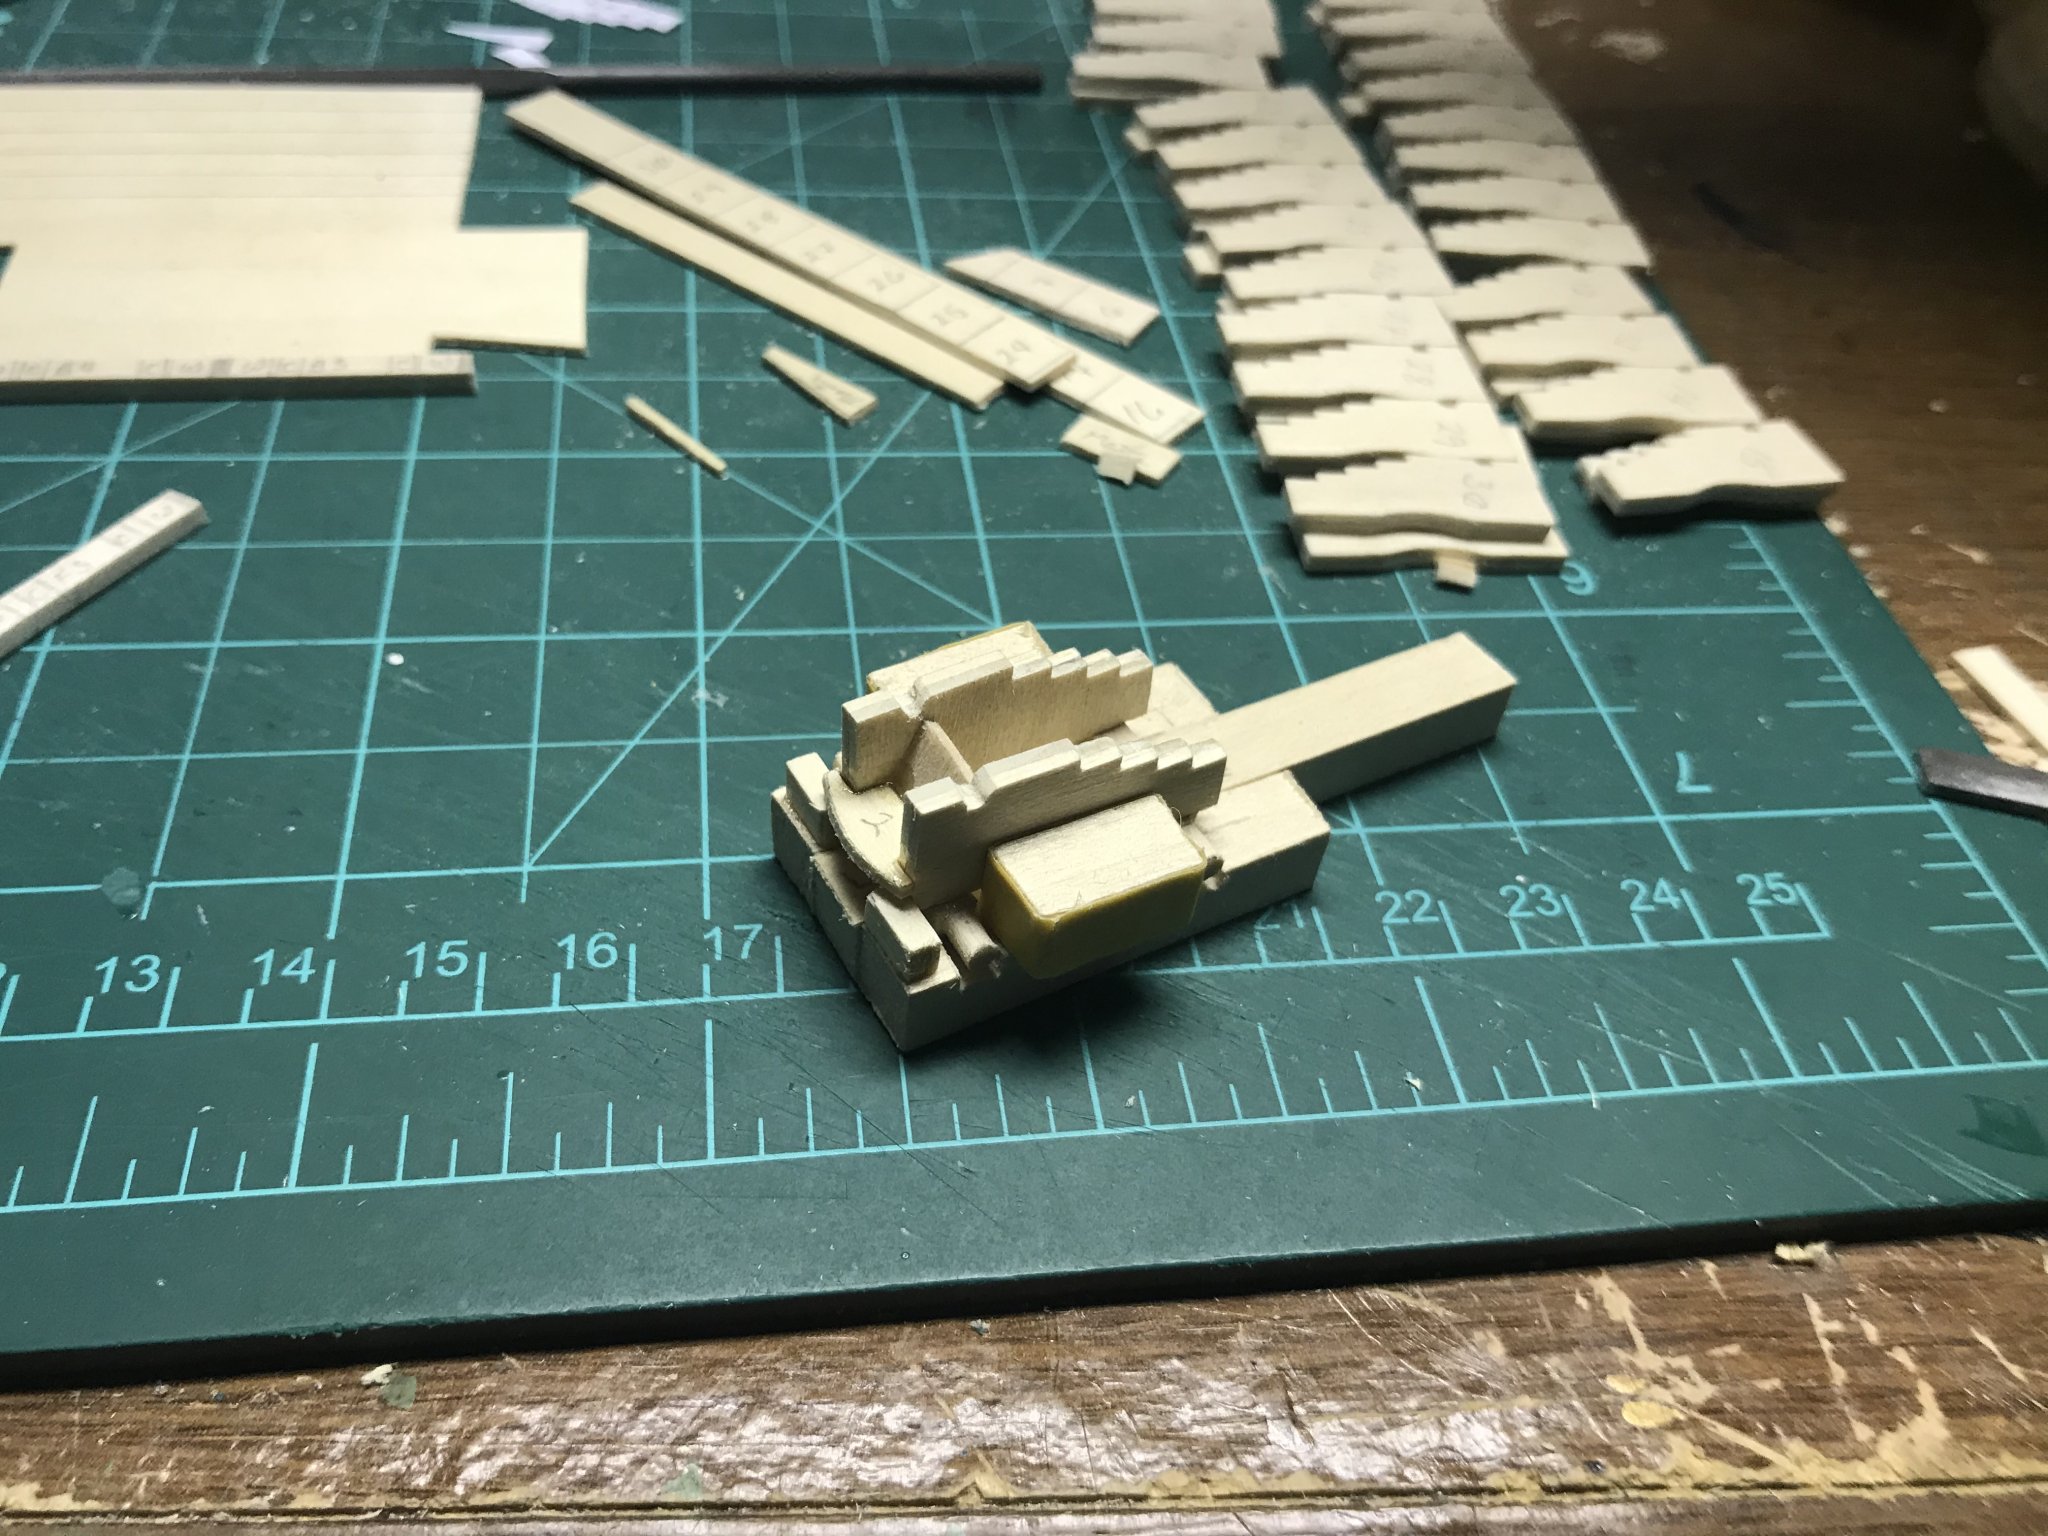
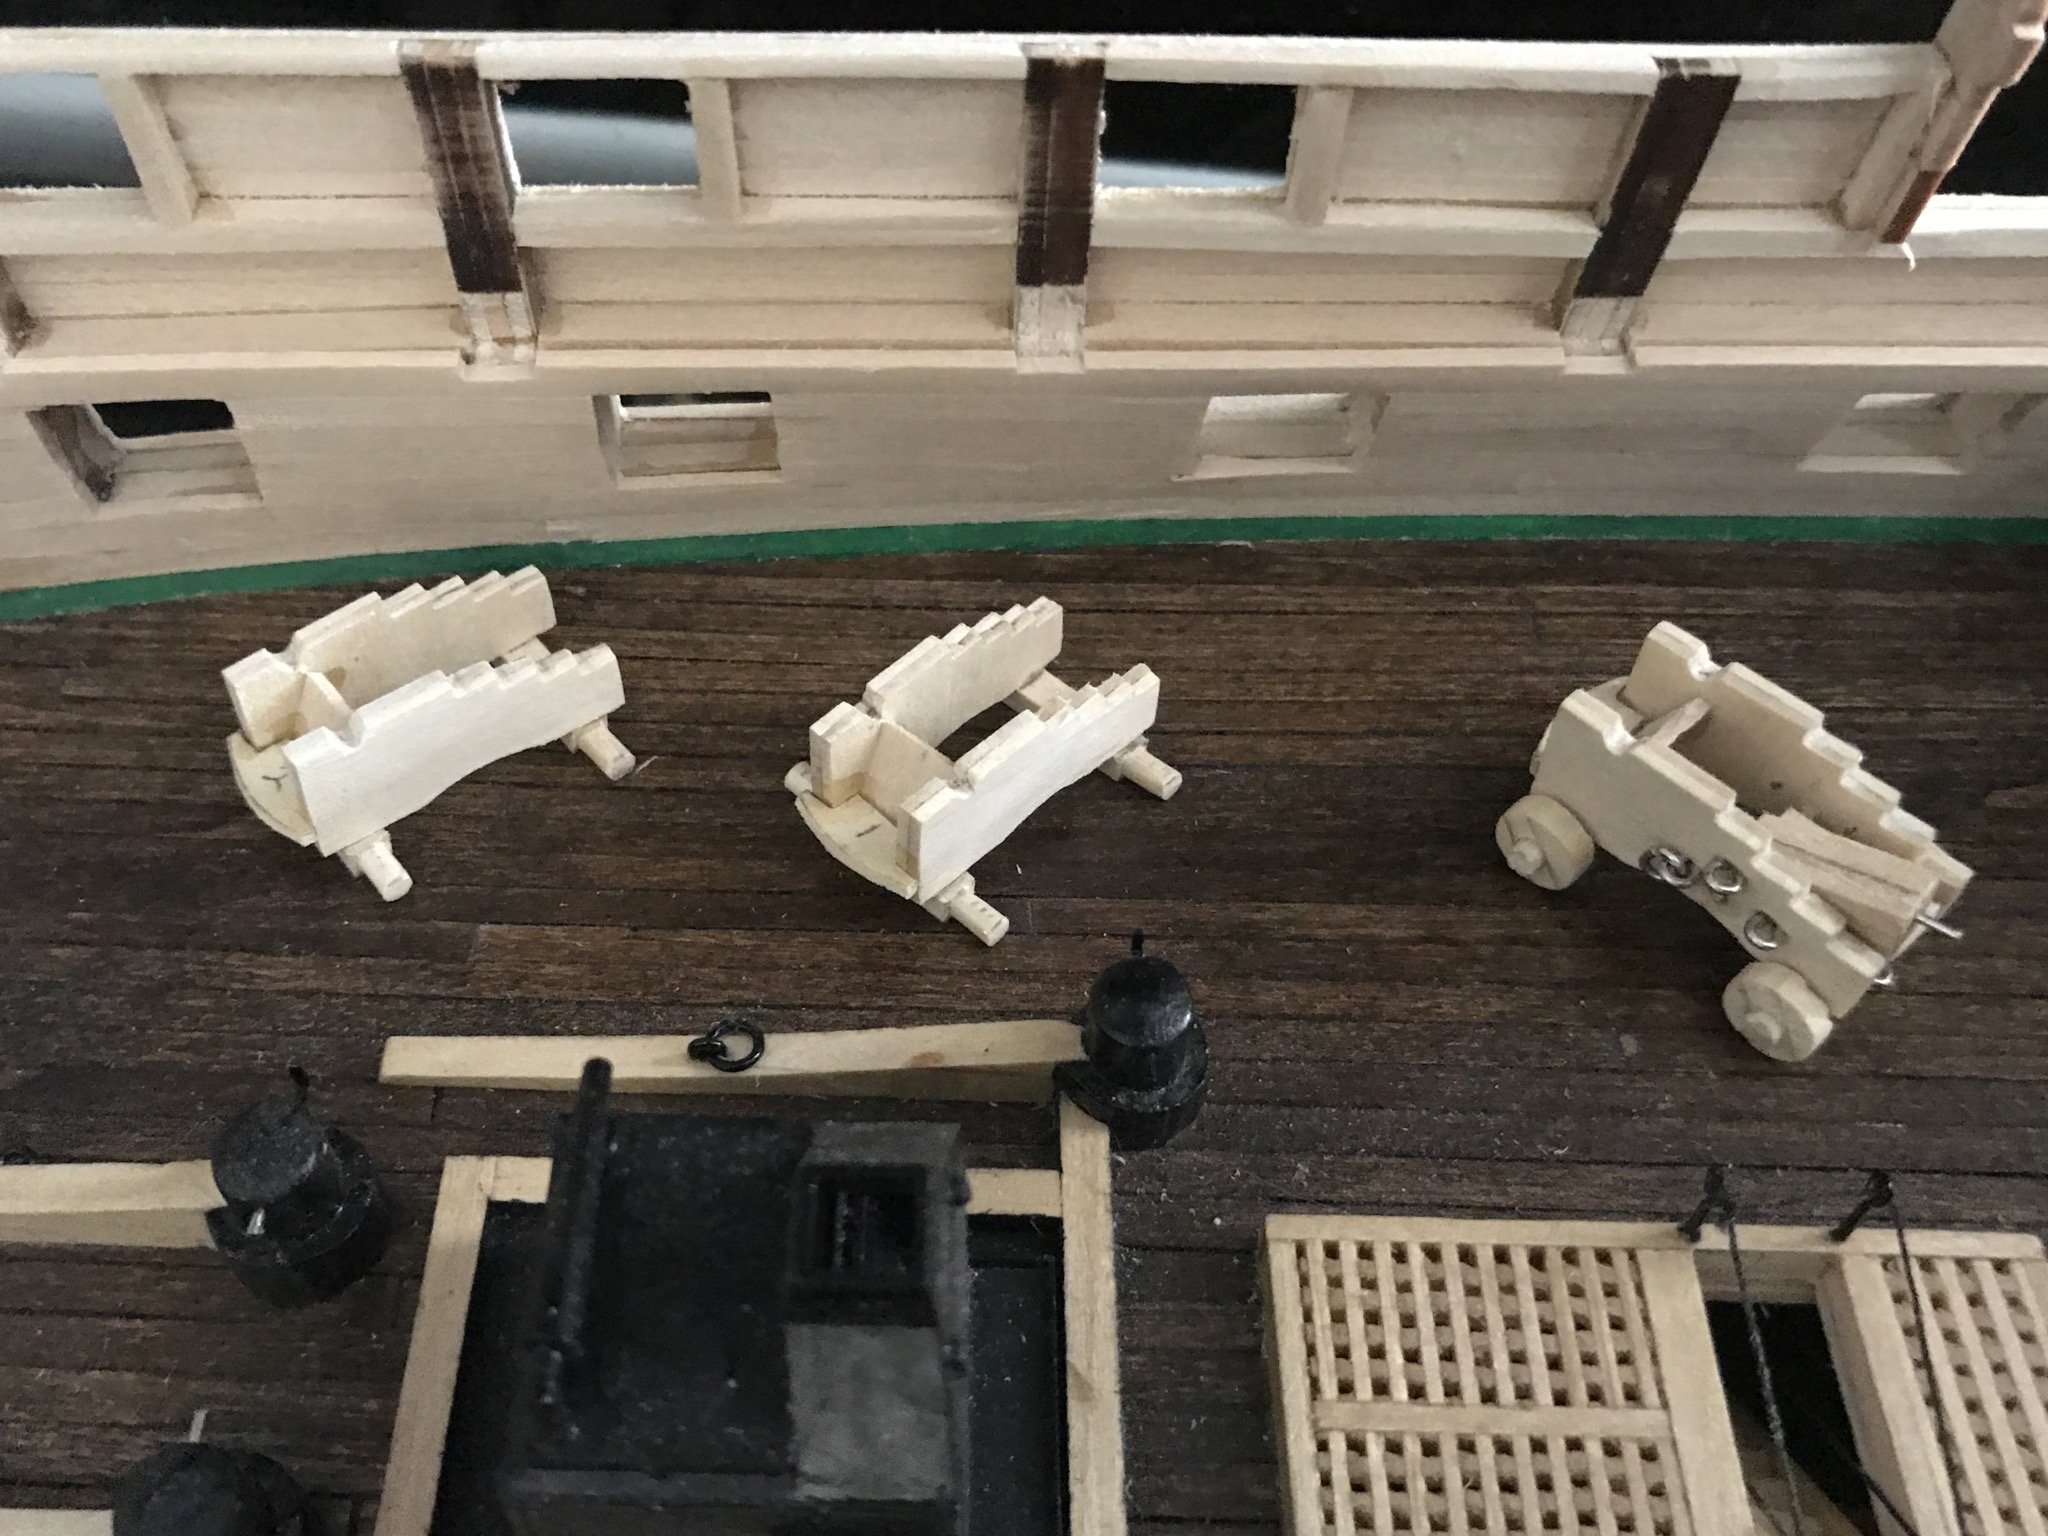
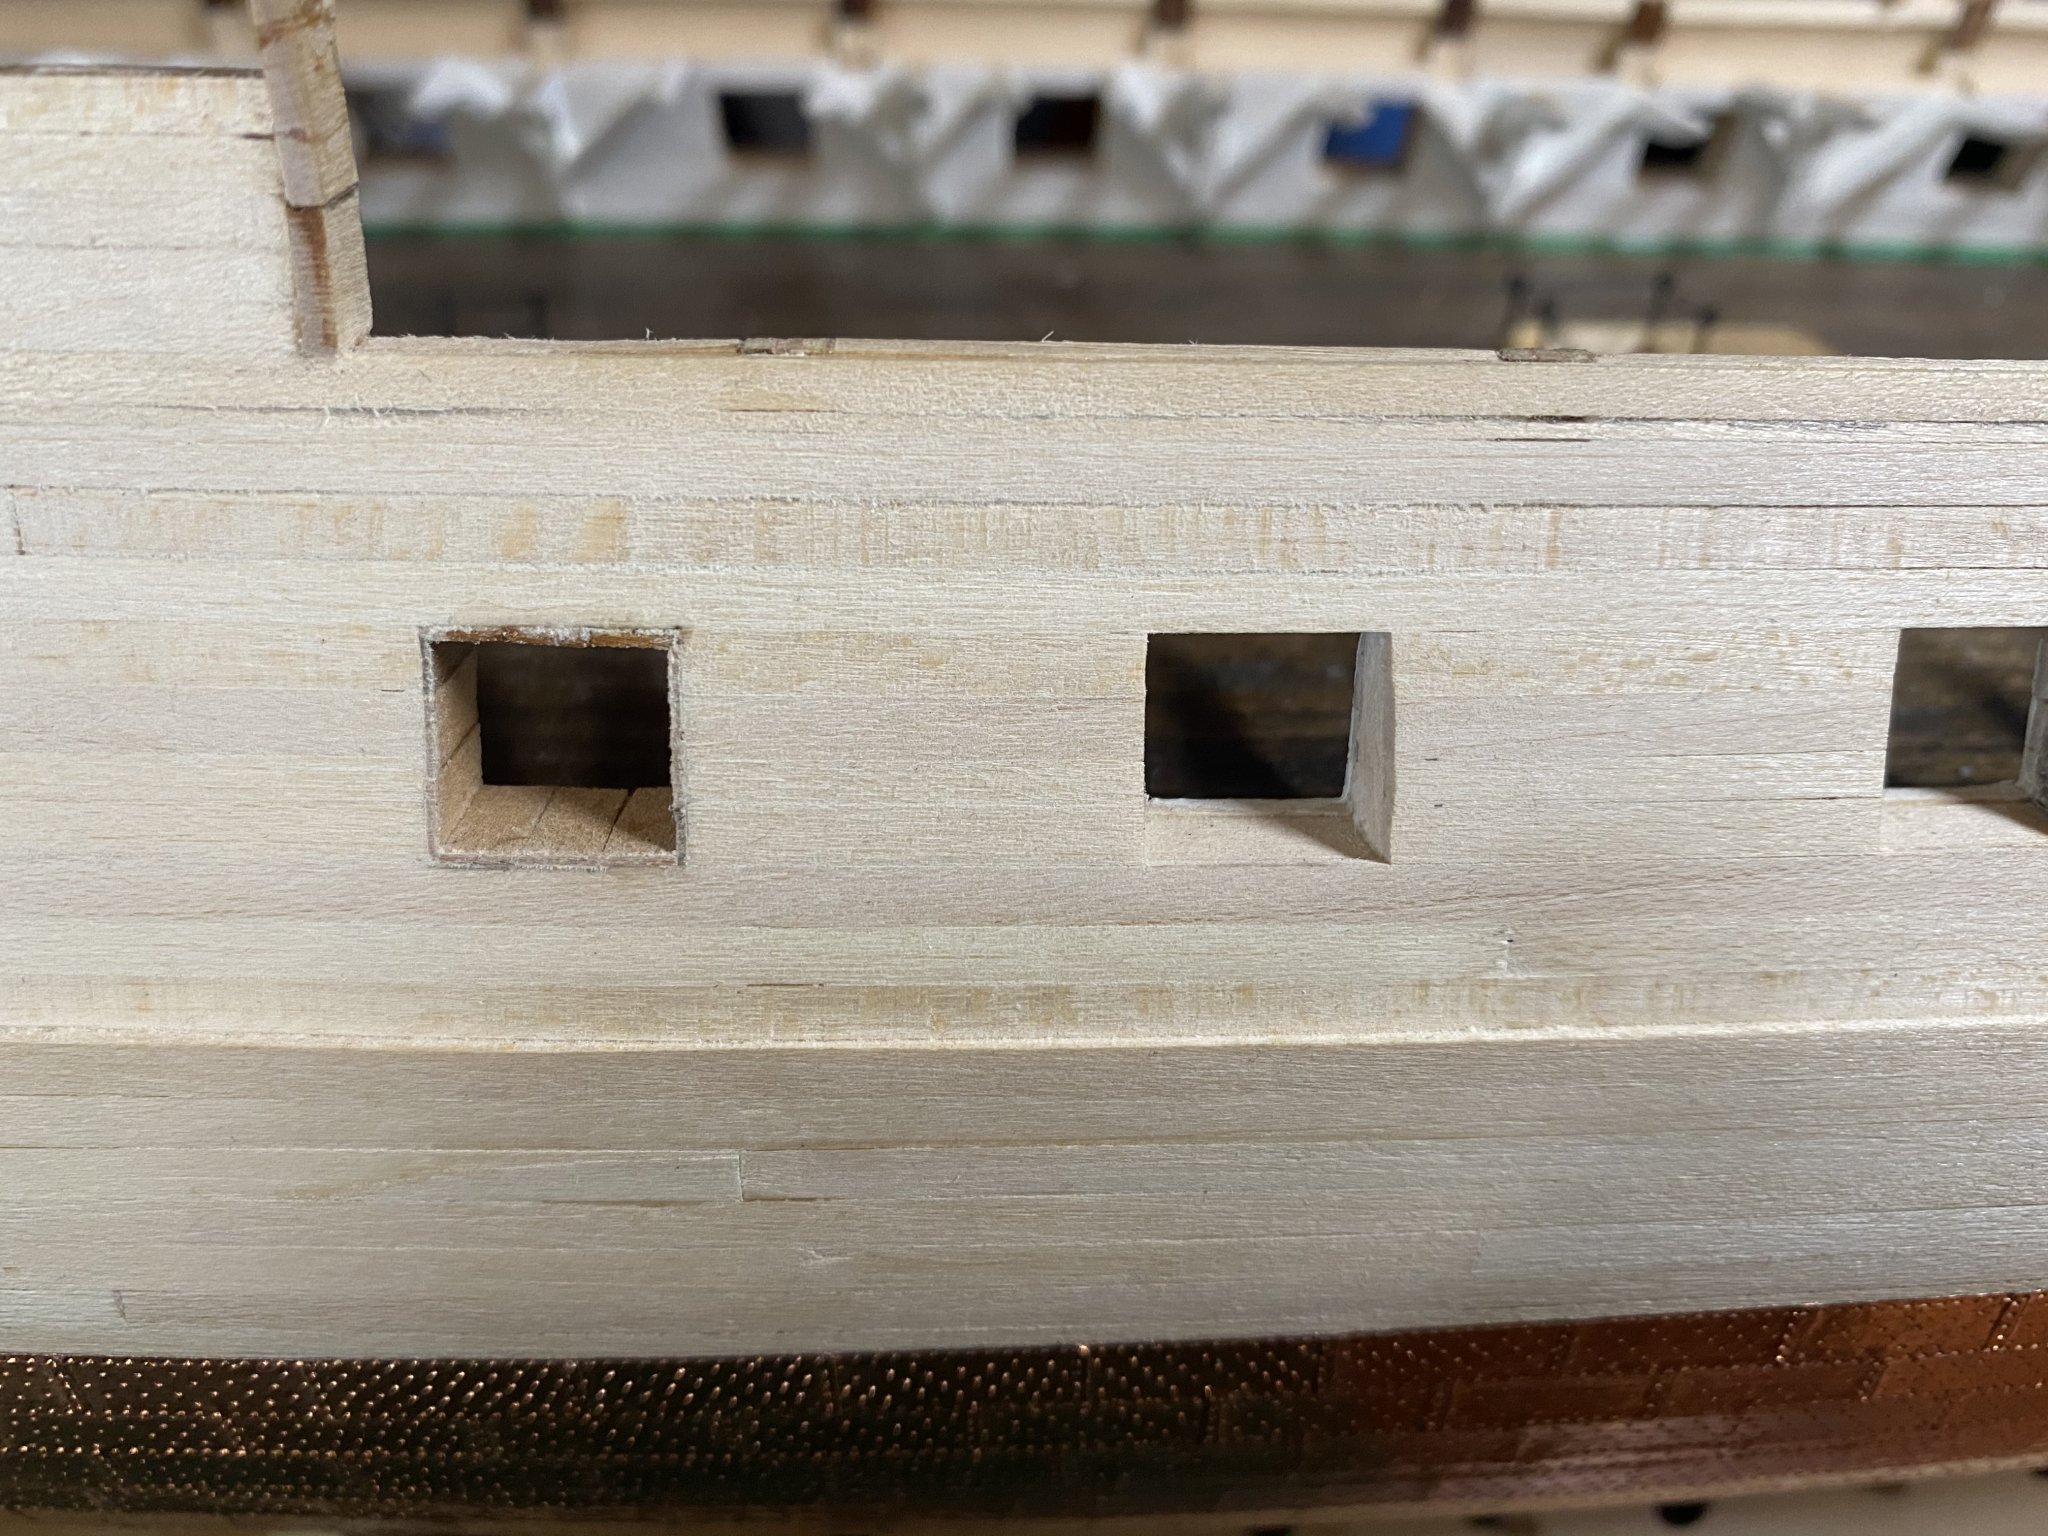
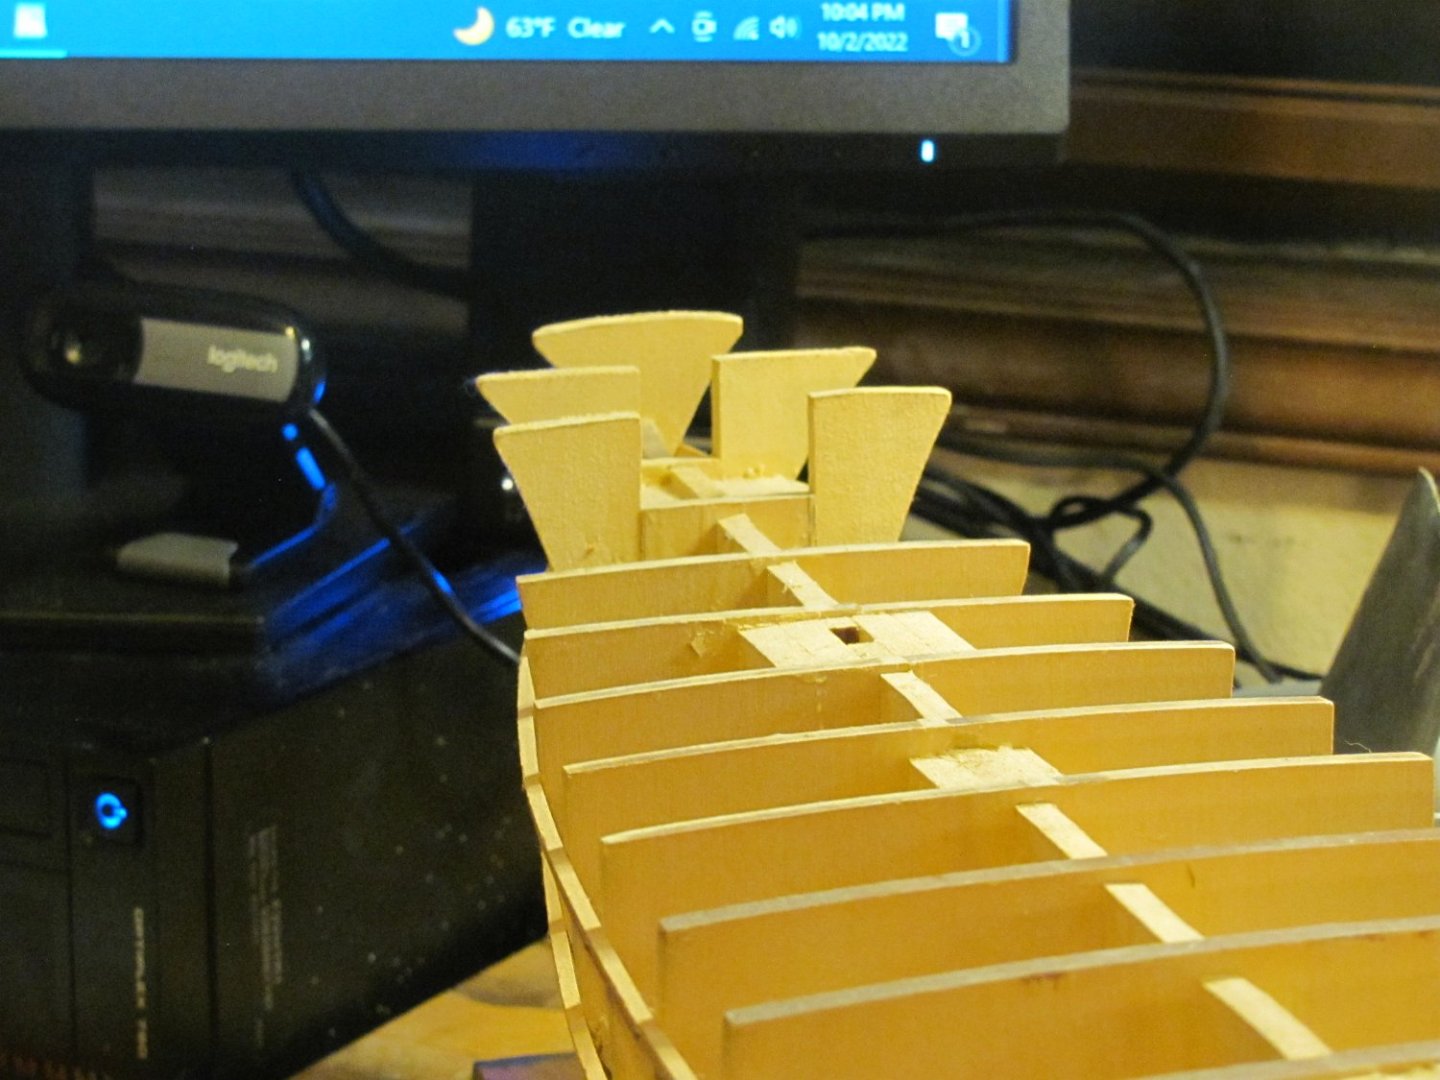
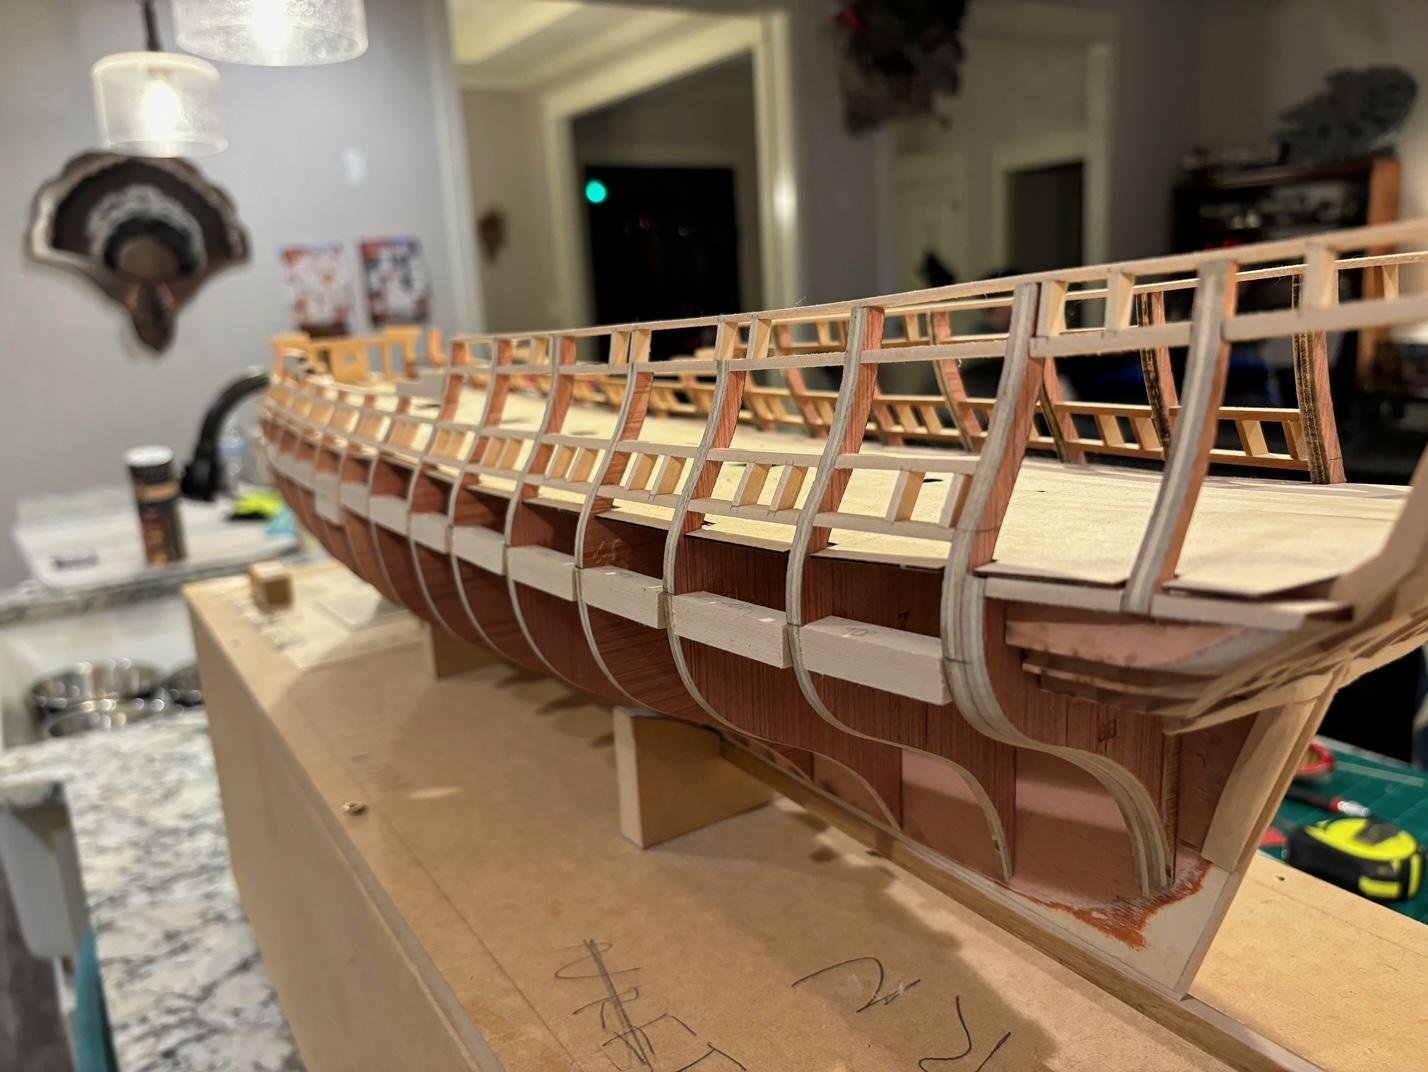
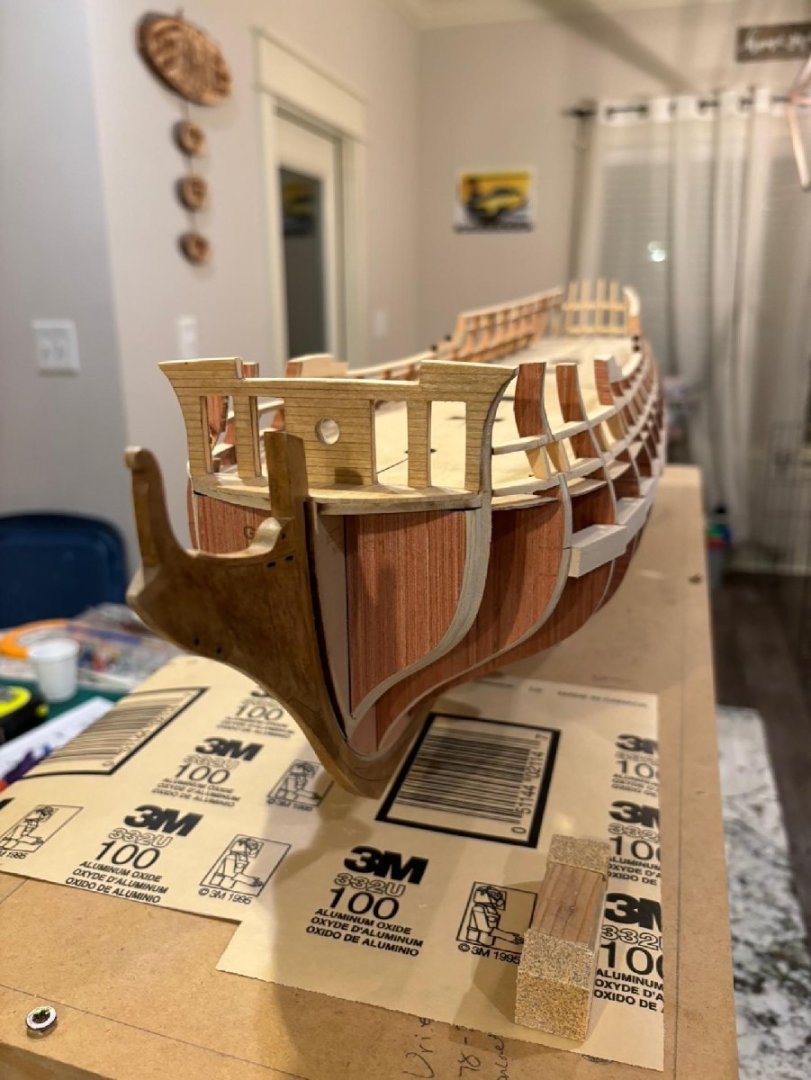
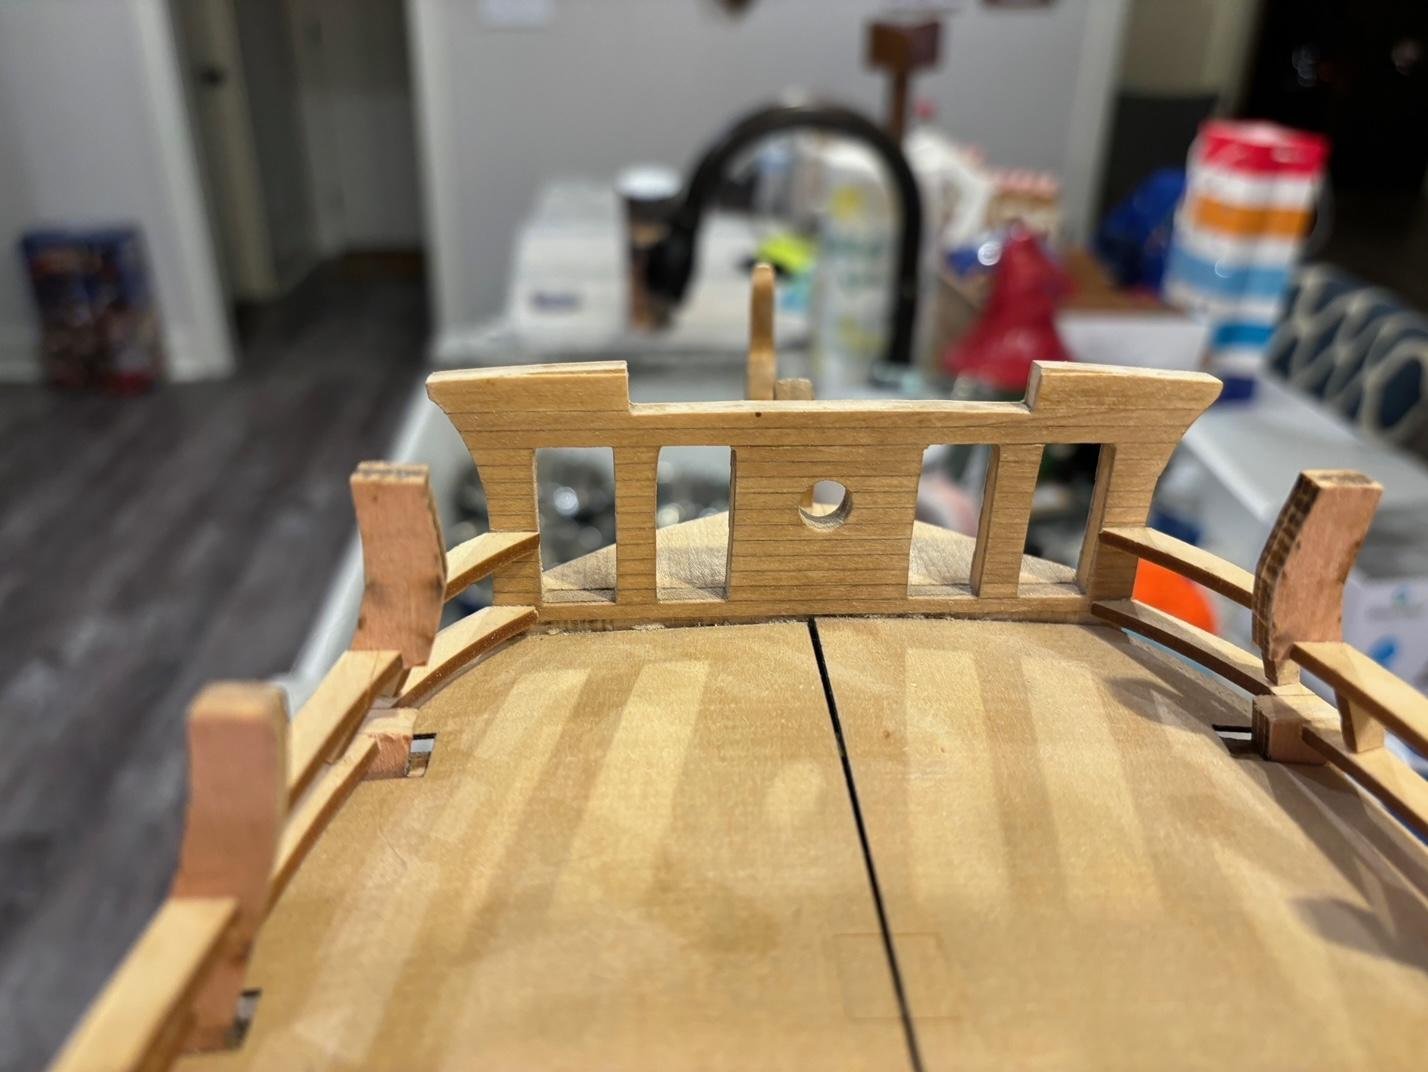
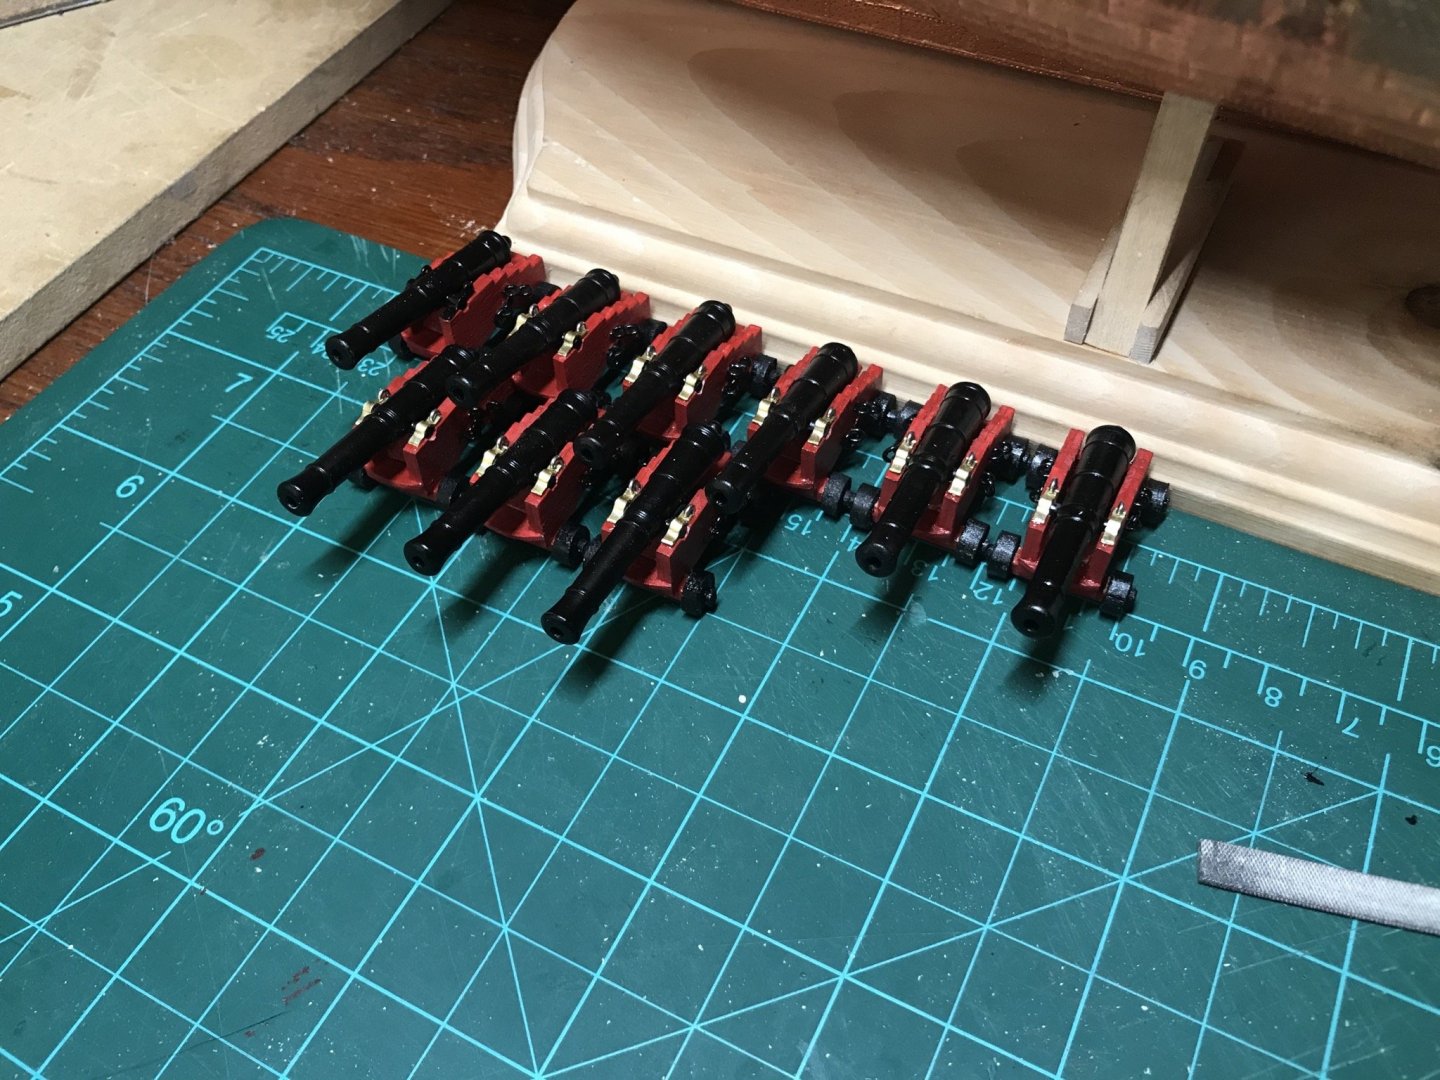
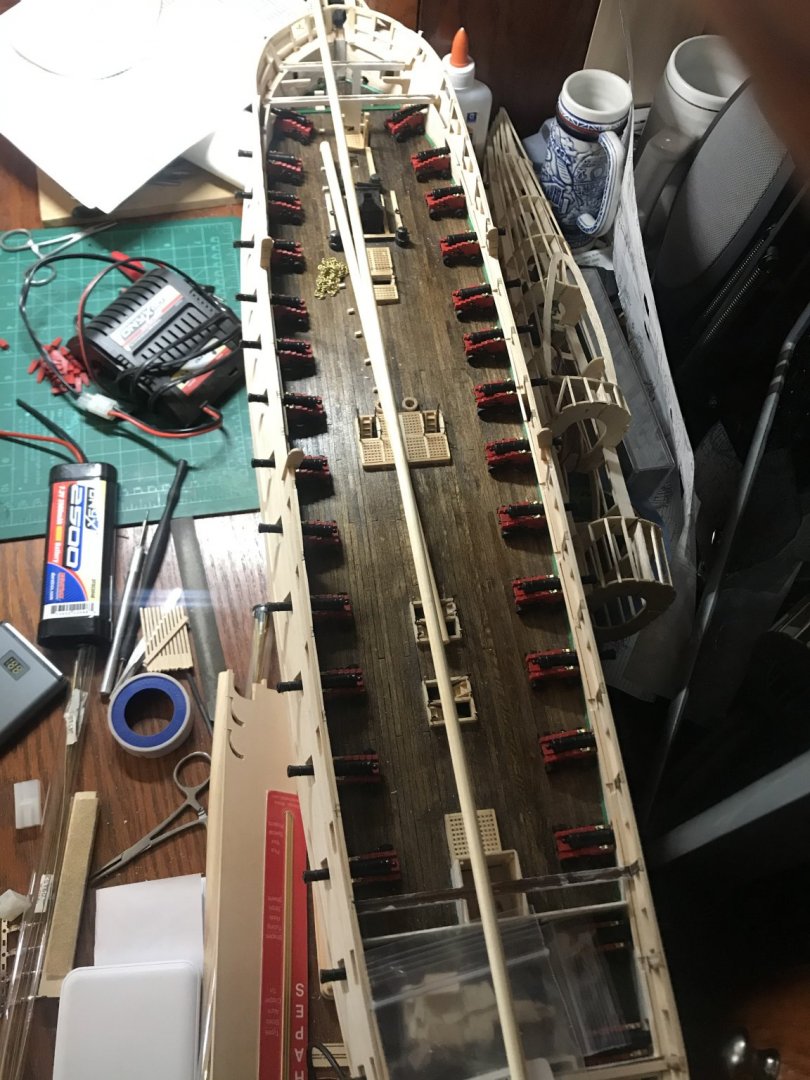
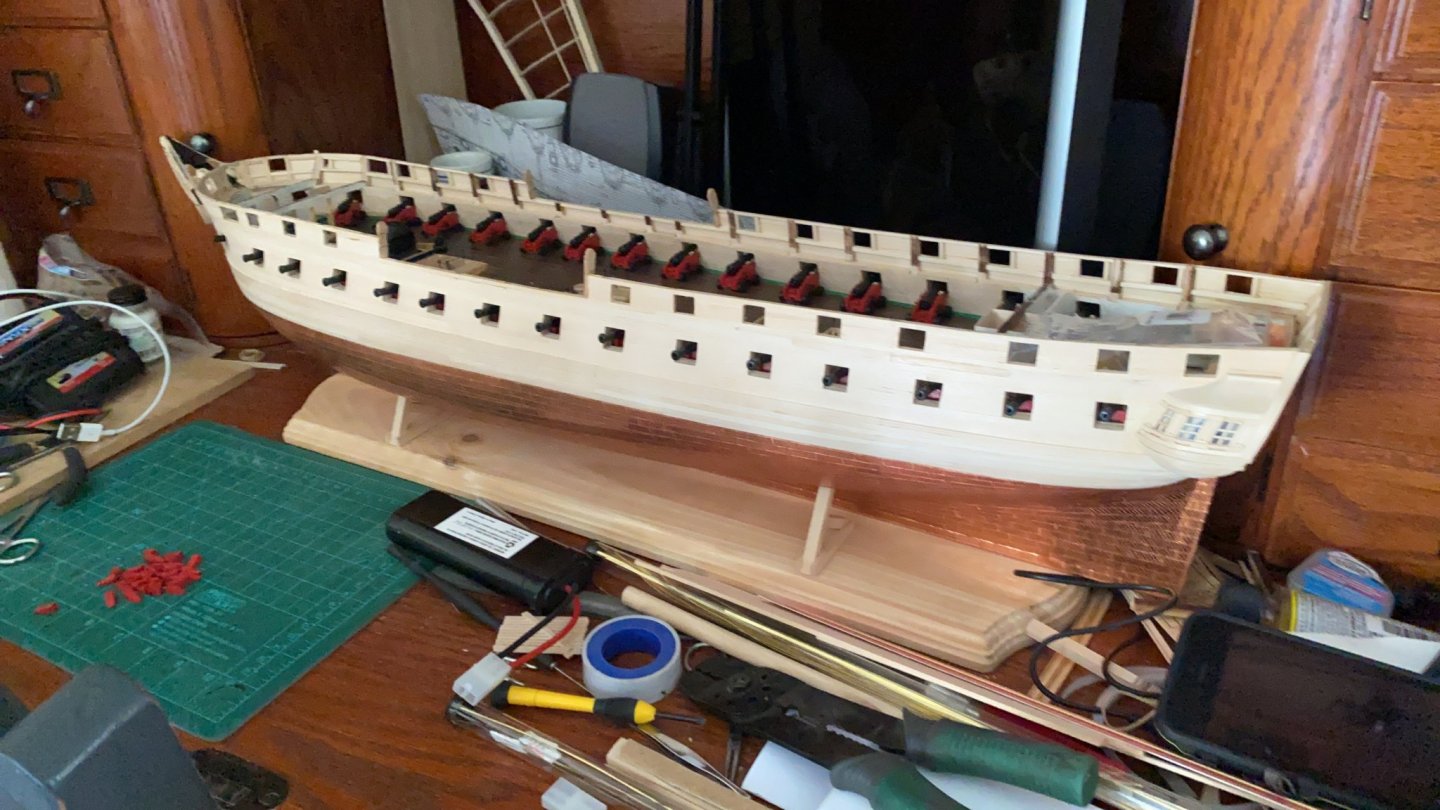
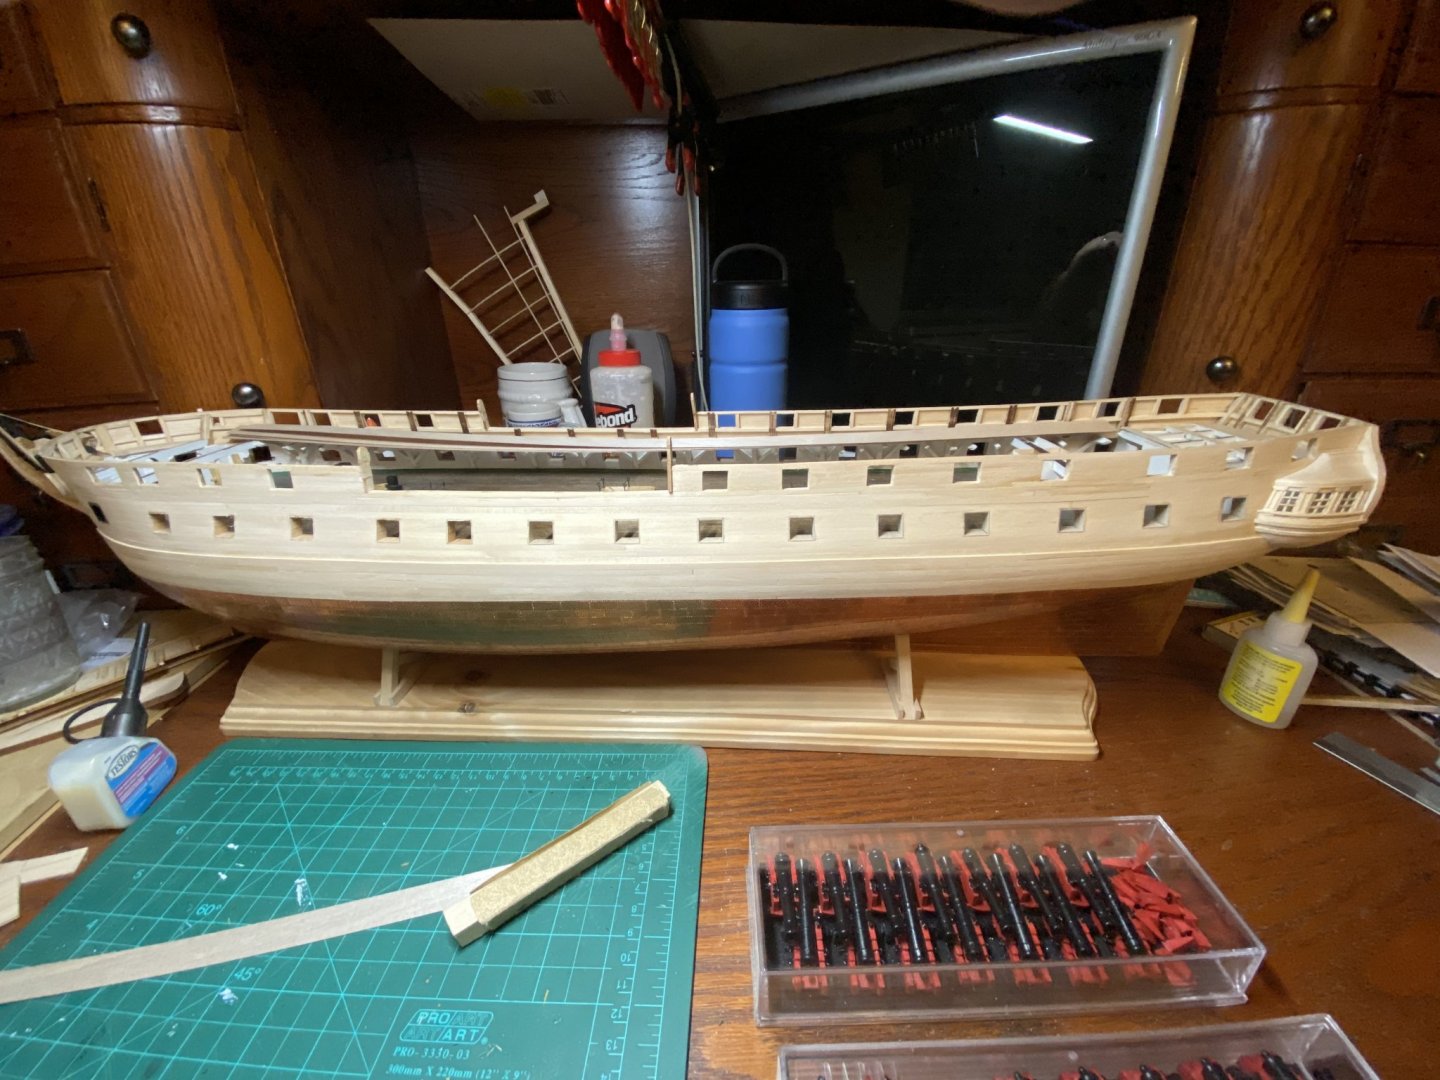
 Ok I’m a little late starting my build log for this one. After doing a lot of research and comparing, I chose the Model Shipways kit of the USS Constitution for my first large scale all wood kit. In my research I came across JSGerson’s build log for the same kit and I got a lot of inspiration from his build! Just like JSGerson’s build I’m building a complete scratch gun deck for my kit. I’ve currently have a lot of my hull done and I just need to finish cleaning up my starboard gun ports and thin I’ll start working on a lot of my finer details.
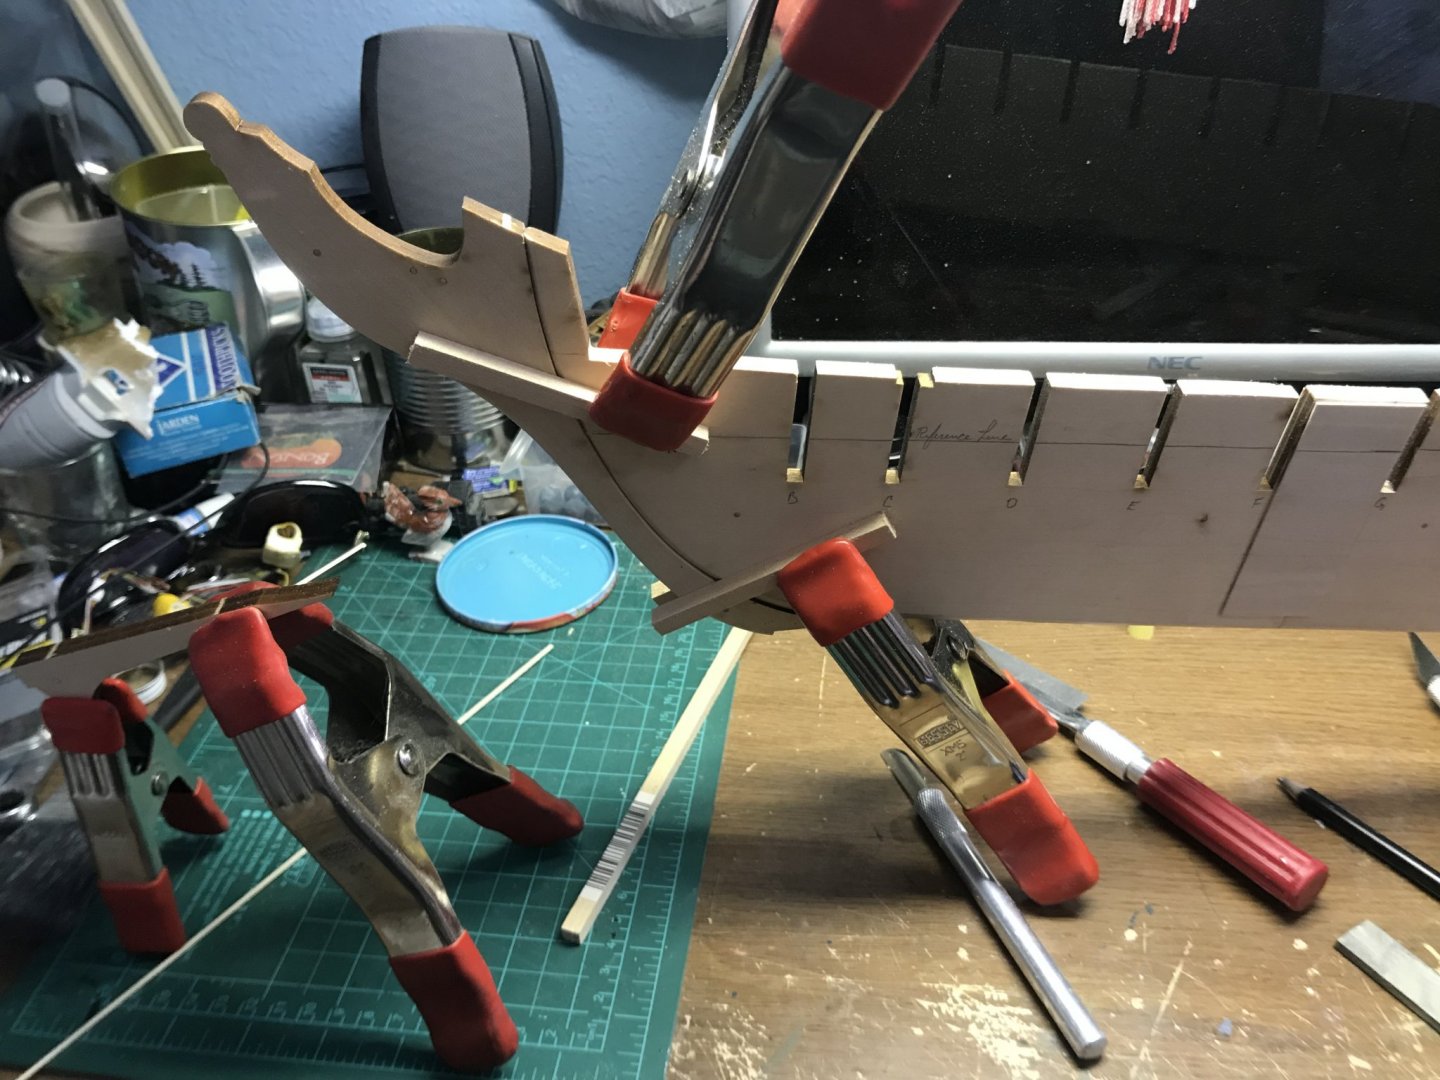


-
 Welcome to my log for the Model Shipways MS2041 US Frigate Essex, Hull Model. I've had my eye on this kit since I started not very long ago in wood kits. I liked the looks of it, and since I'd already known I wasn't going to be big on fully rigged models, the "Admiralty Style" had a lot of appeal to me. This one and the Confederacy immediately went on my wish list. Then I started looking for build logs and realized that there were a number of bad rumblings about the kit. It seems that there was a snafu with MS getting the correct digital files used in the production of the kit in 2013, its first release. The kit was re-released in 2015, but I think by then folks were wary. The designer made a comment herein that they never did incorporate all his changes, though the kit definitely did undergo some changes in 2015, as can be seen in the manual. So not sure what the exact story is. A while back MS put all their kits on sale 47% off and I could not resist so went ahead and got it, so here we are. How bad can it be right? I'll do my best to work around anything I find. I do know that one of the main issues with the initial build being the shape of some frames not matching the contemporary drawings or AOTS exactly, but there were a number of drawings with no way to reconcile them all. If I'm getting the details a bit off I apologize. I have a feeling some of these conversations were occurring offline. My main concerns at my level of experience is that the thing is buildable for an intermediate builder and will create a pleasing model. At this point if a frame shape is a bit off 100% of the historic accuracy, I'm not sweating it. Hopefully by the end of this, if it builds OK it will encourage others, who like myself were a bit wary, to take the plunge. I don't really intend for this to be a very detailed log, mostly a milestones and exceptions kind of thing. If I have trouble that ought to be known, I'll show that and what I come up with to work around it. Thanks all for looking!
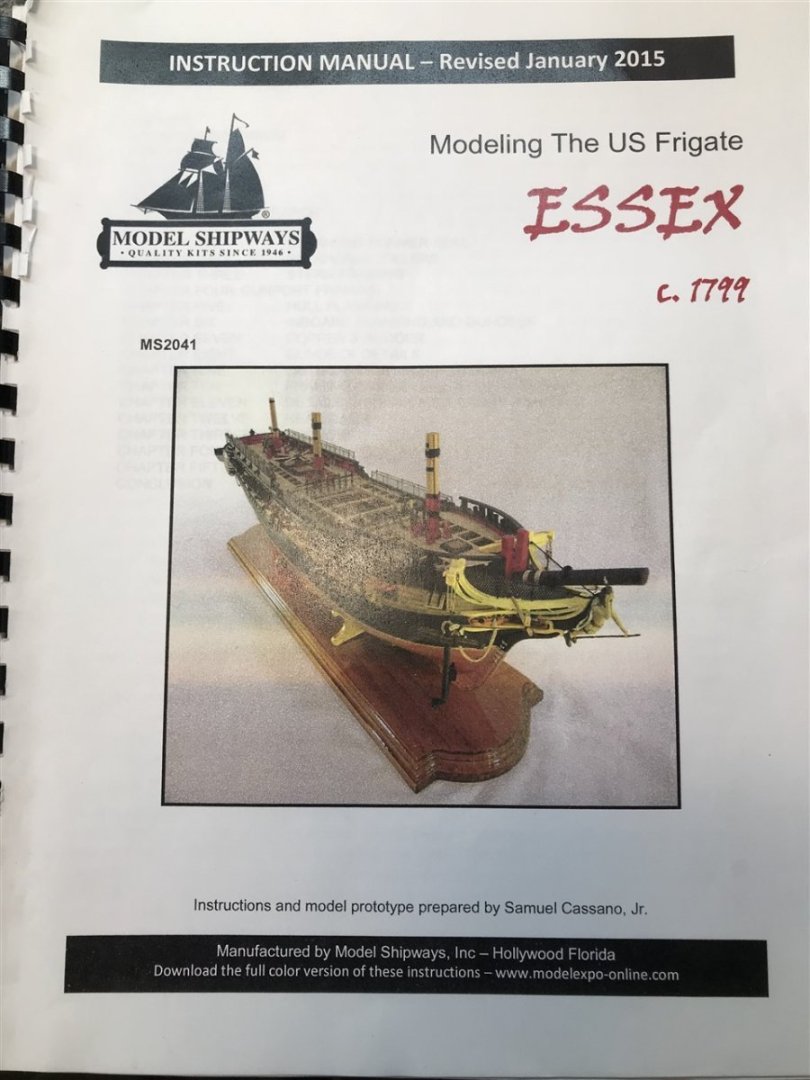
- 41 replies
-
- 5
-
-
- Essex
- Model Shipways
- (and 2 more)
-
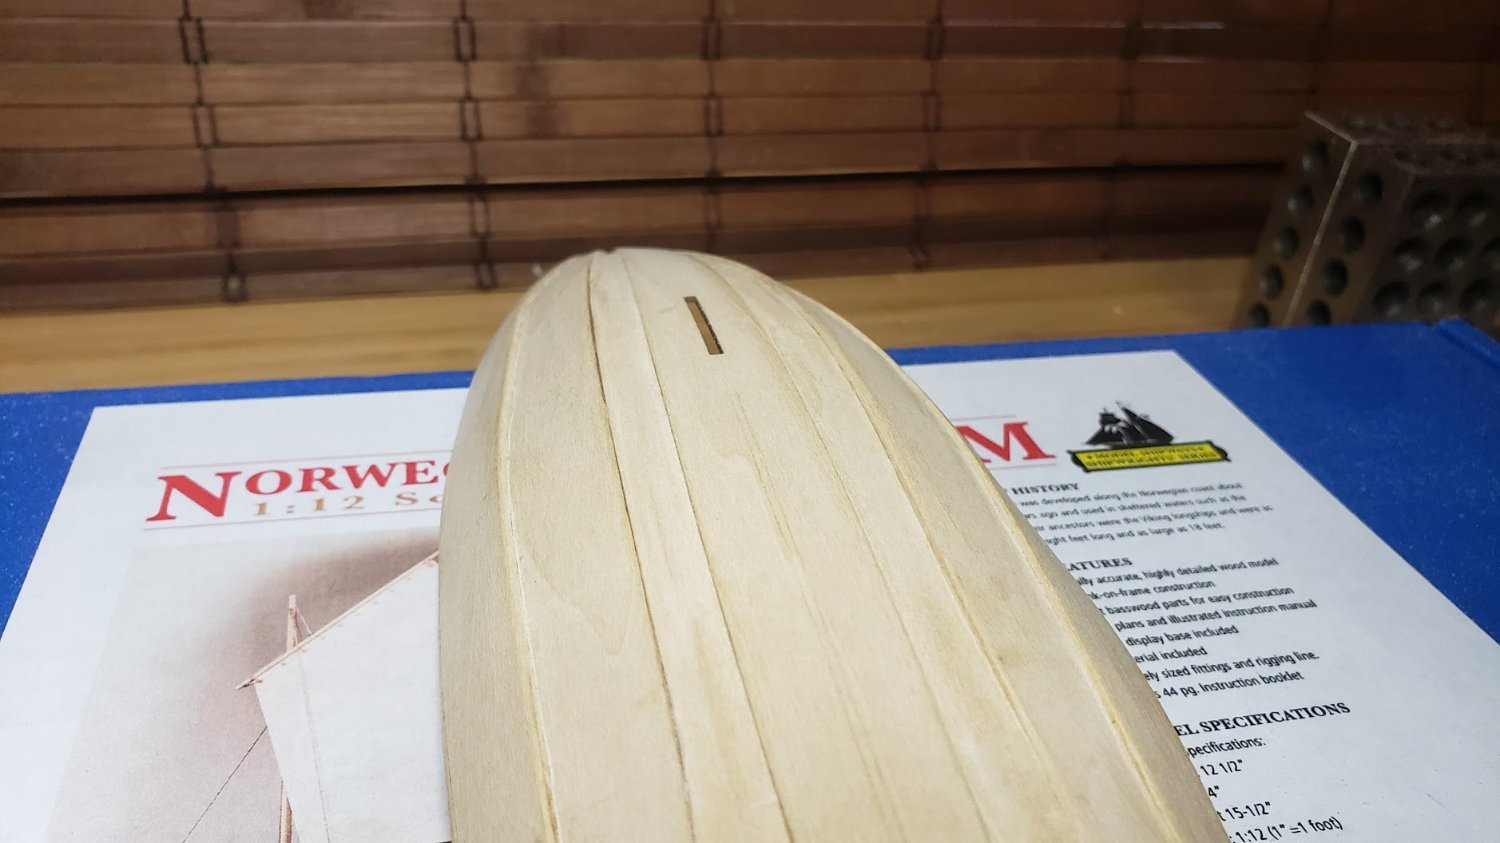
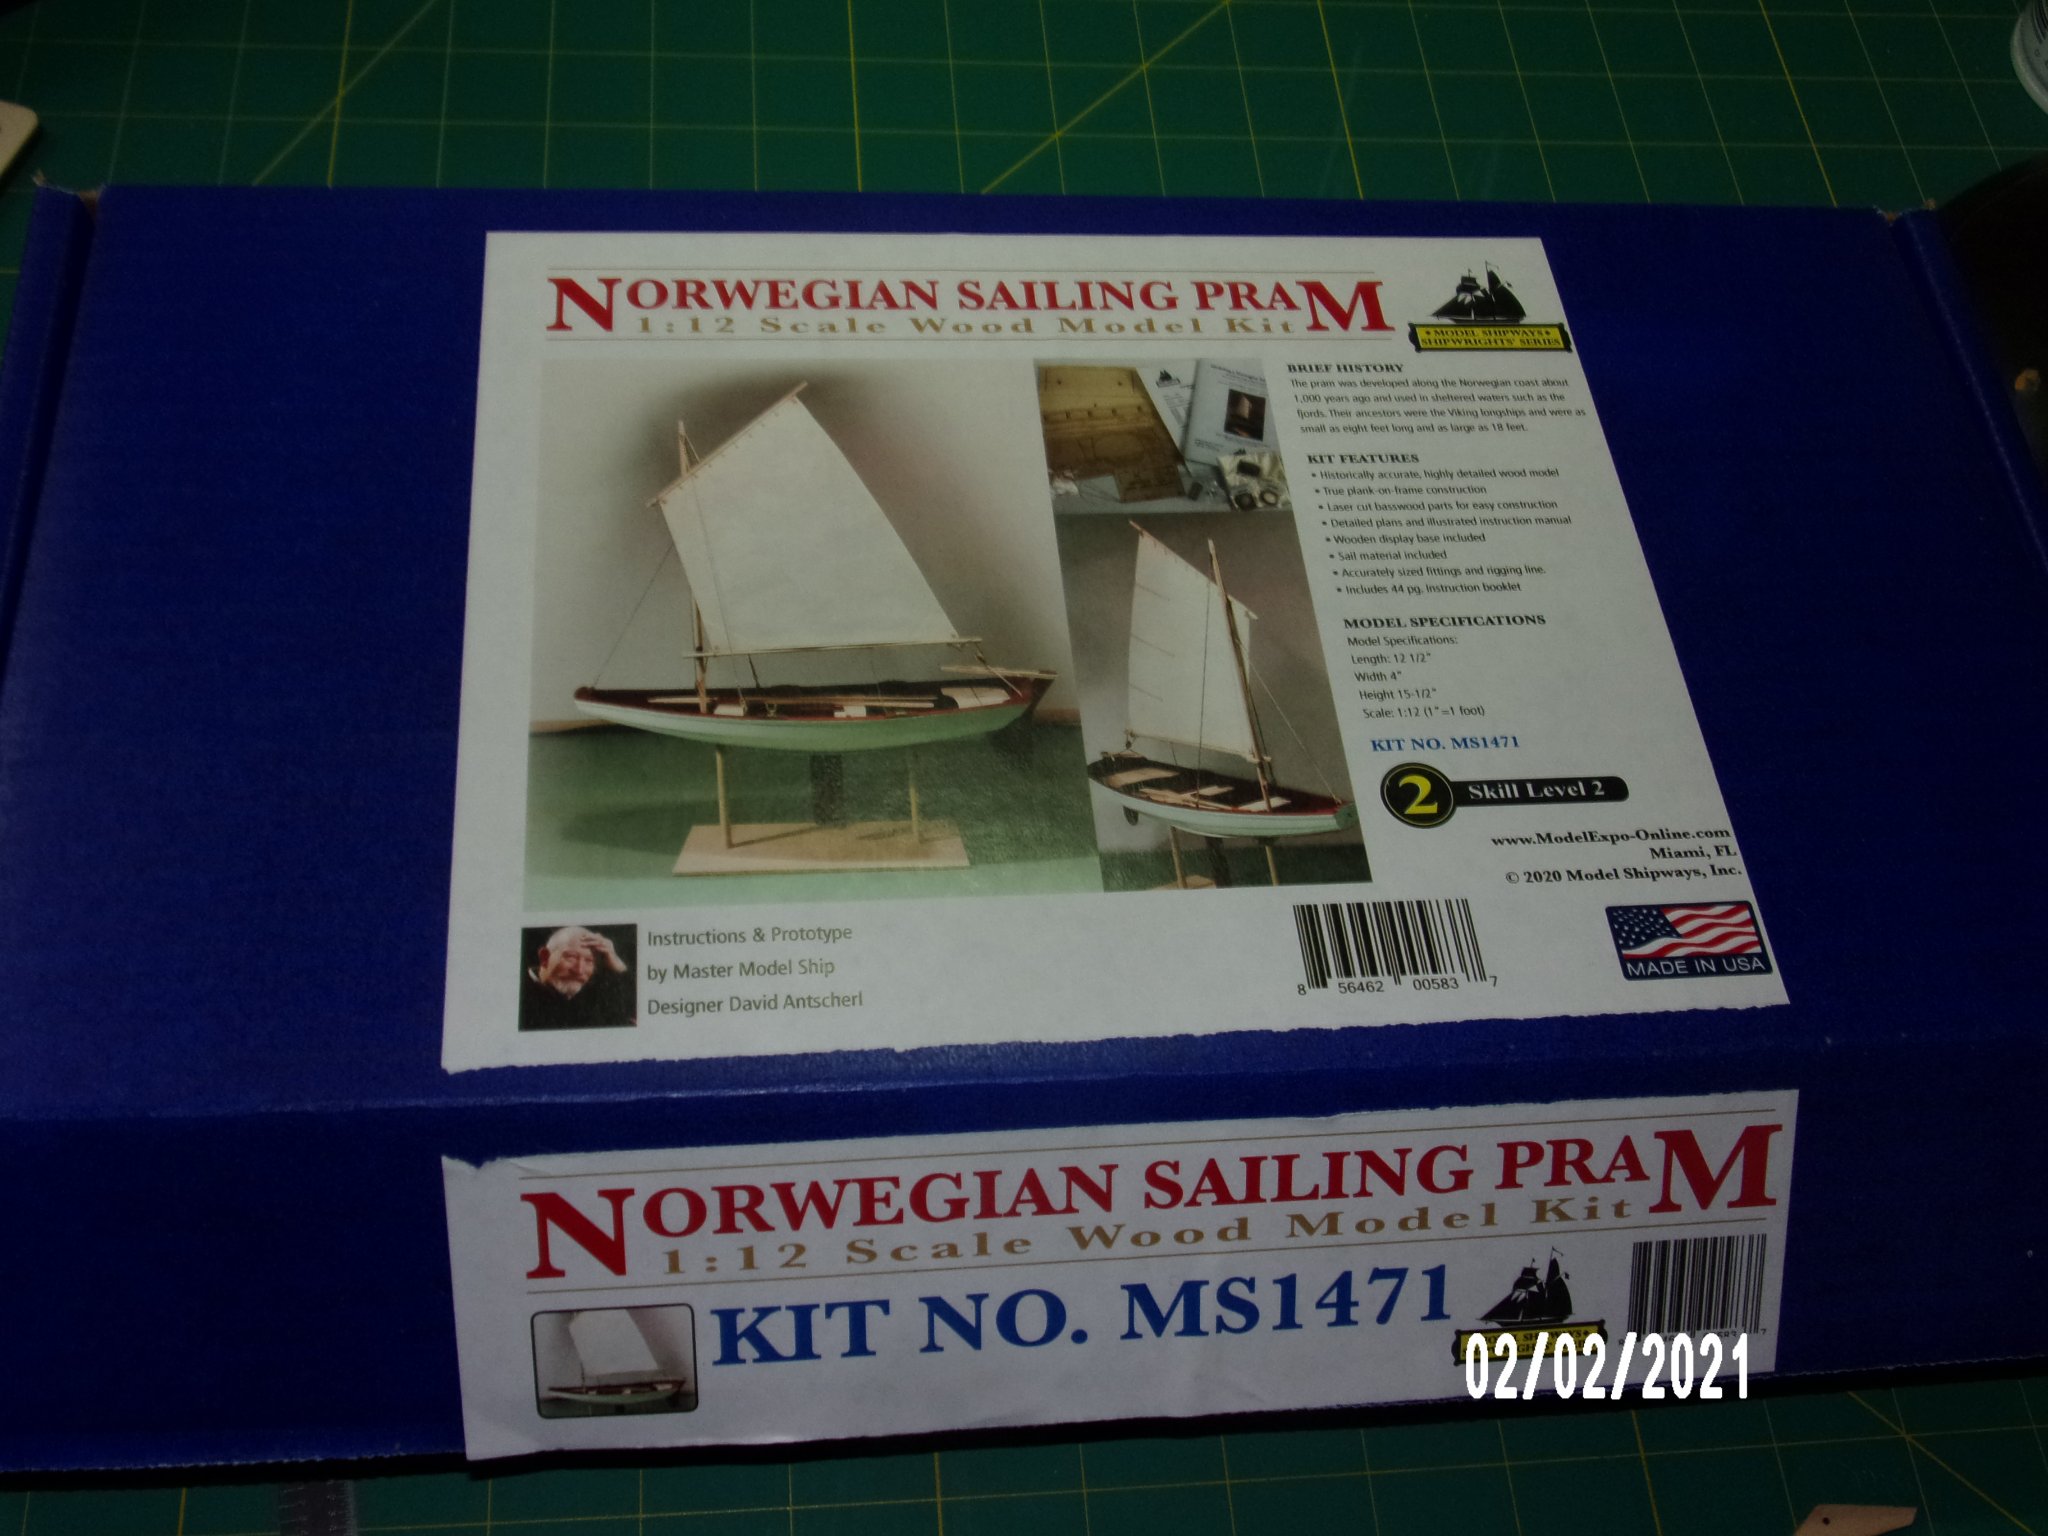
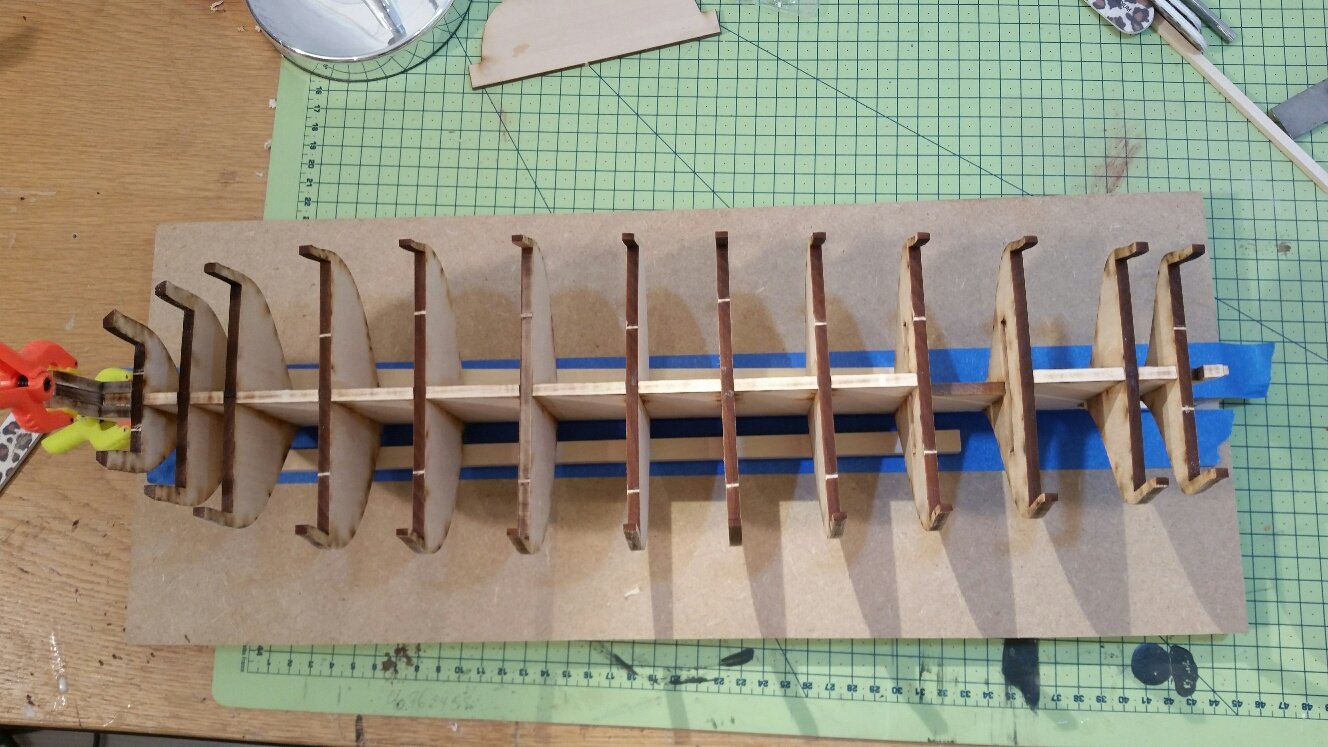
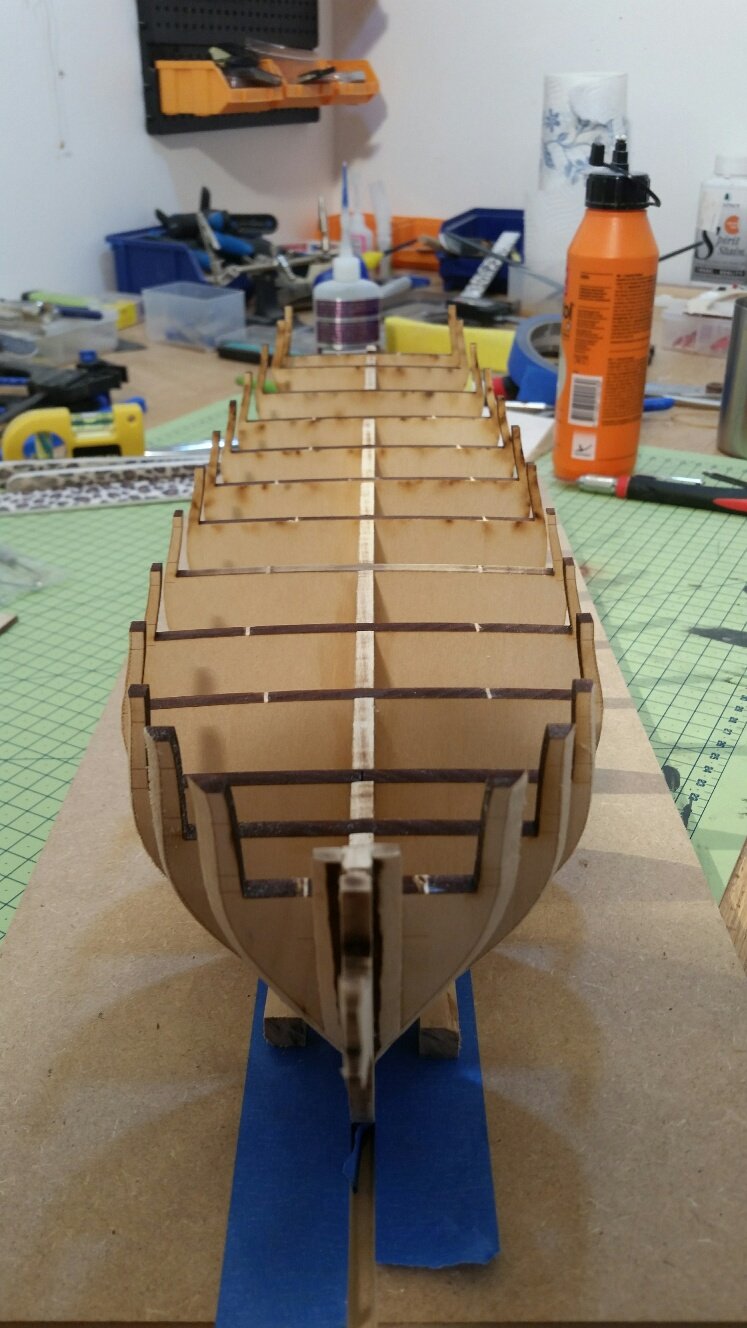
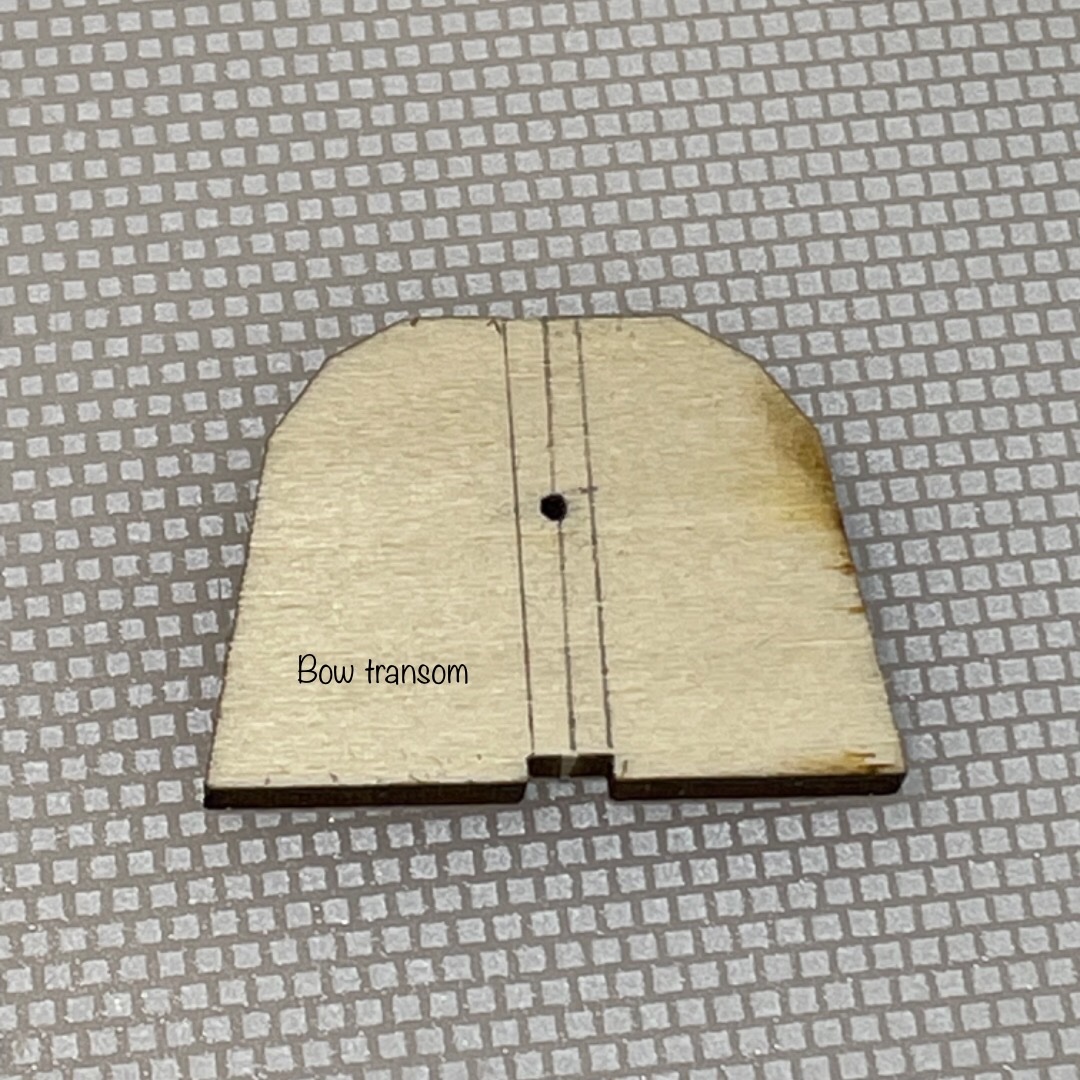
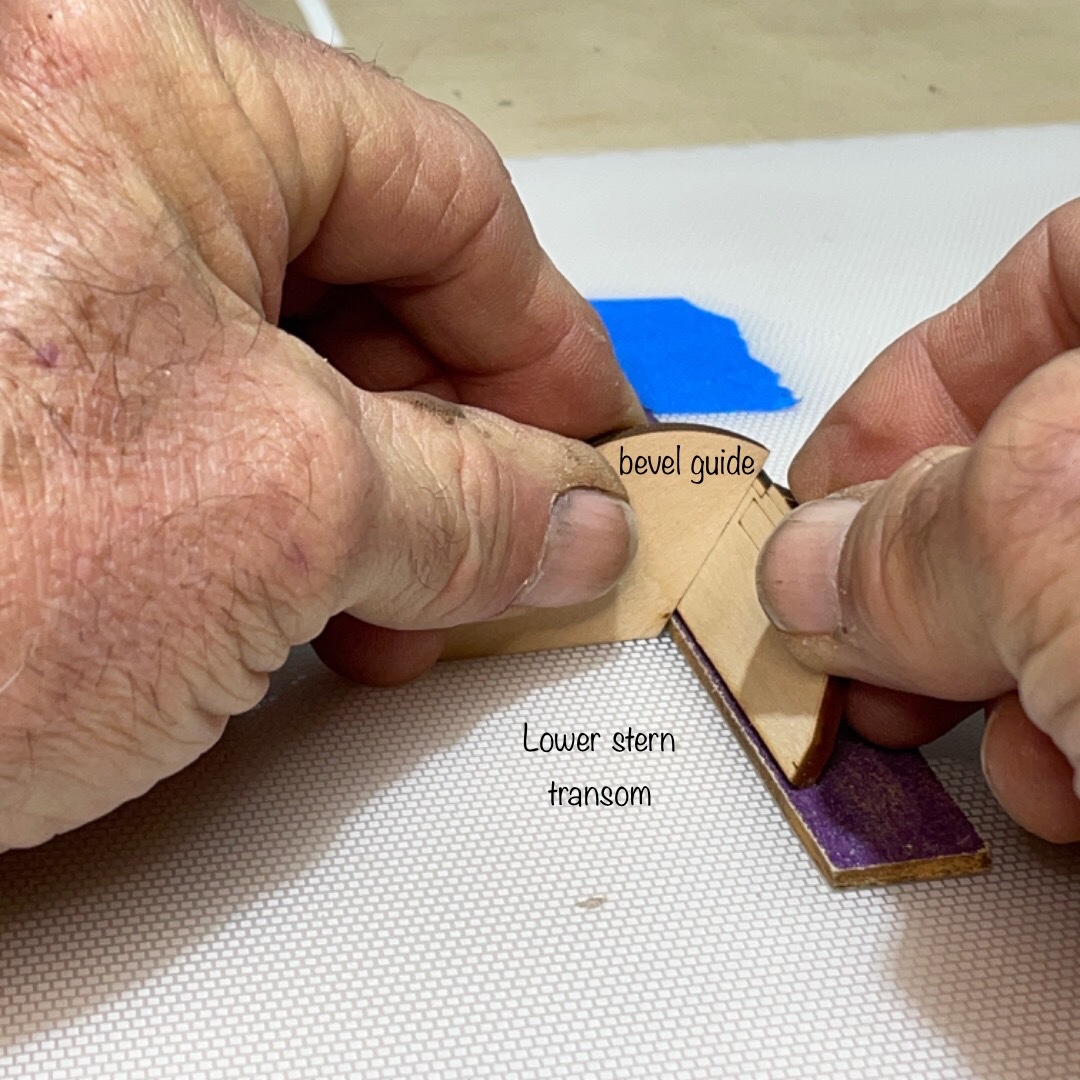
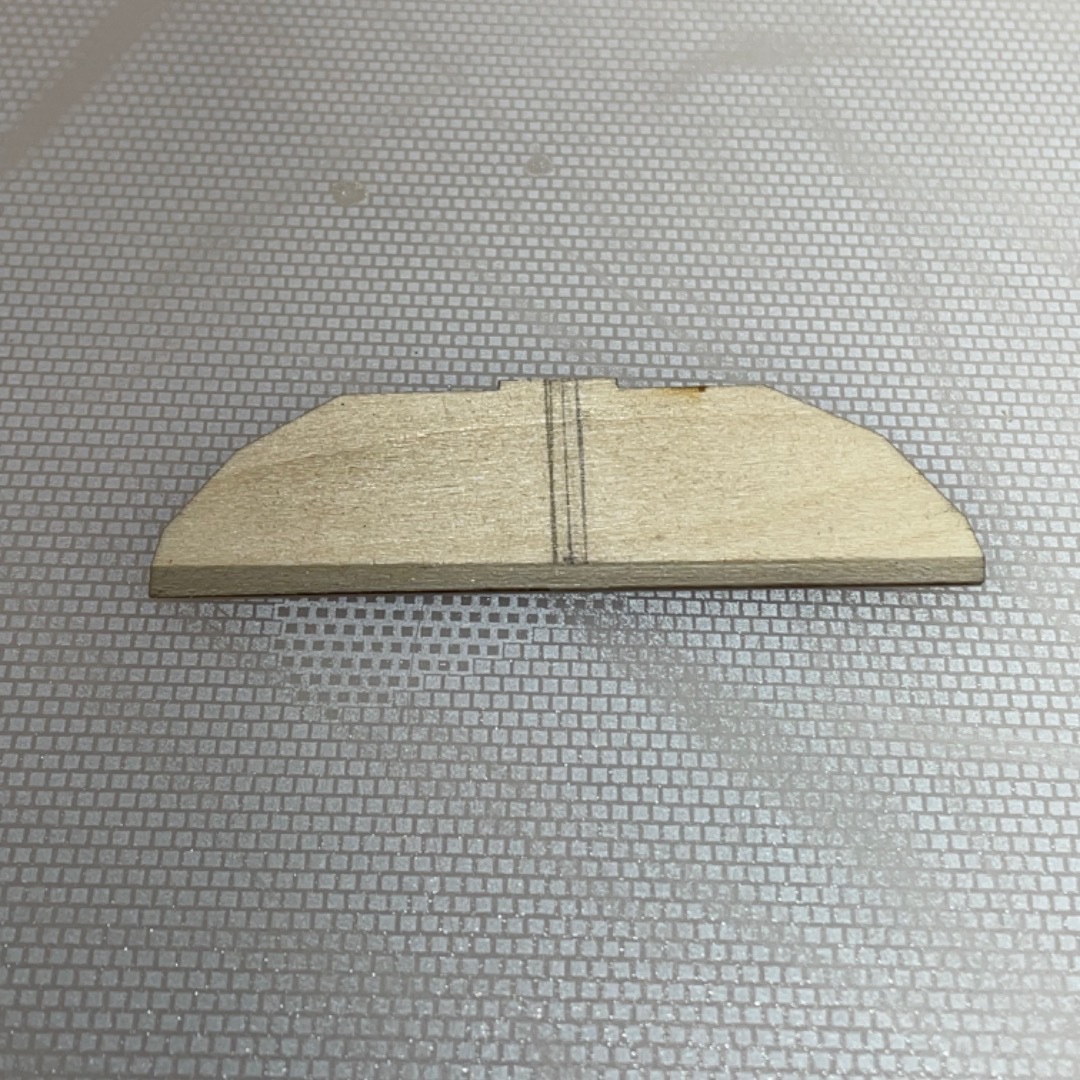
 Slow start on the Pram. On the beginning, I was a little confused about the beveling of the transoms. I just couldn’t visualize it until I went through past build logs (that I had read earlier but didn’t have the question then). The bevel guide took a minute for me to figure out. Placing the stern knee on the lower stern transom, I noticed the knee extended further then the image in the instruction manual. I’m back to the trusted past build logs looking for the perfect image I need to see. Now I need to purchase a bench vice before I begin to bevel the transoms and drill through the bow knee.
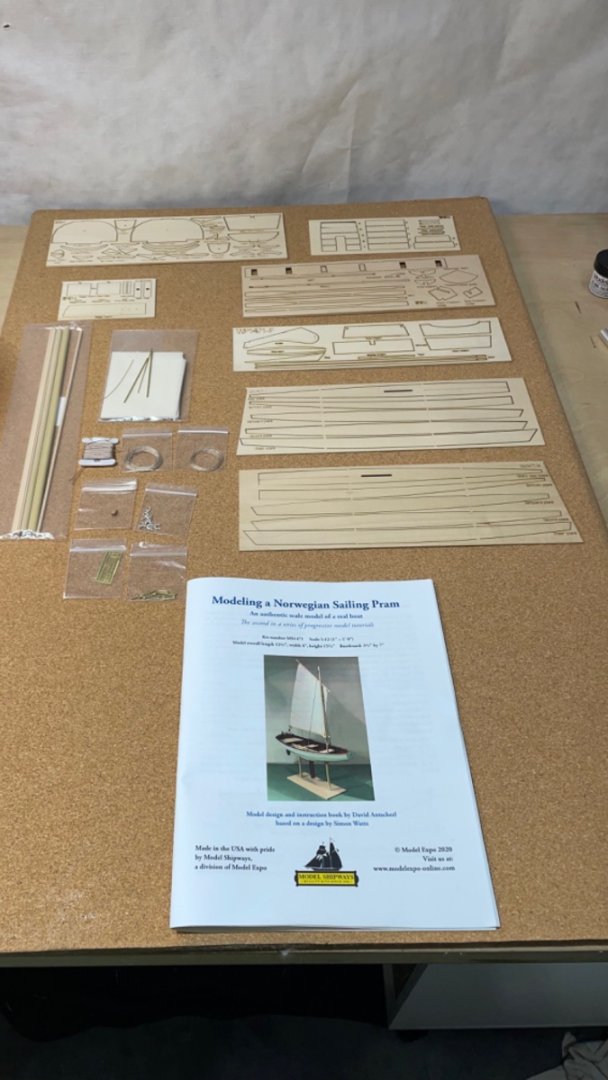

- 21 replies
-
- 6
-
-
- Norwegian Sailing Pram
- Model Shipways
- (and 1 more)