fnkershner
-
Posts
1,595 -
Joined
-
Last visited
Content Type
Profiles
Forums
Gallery
Events
Everything posted by fnkershner
-
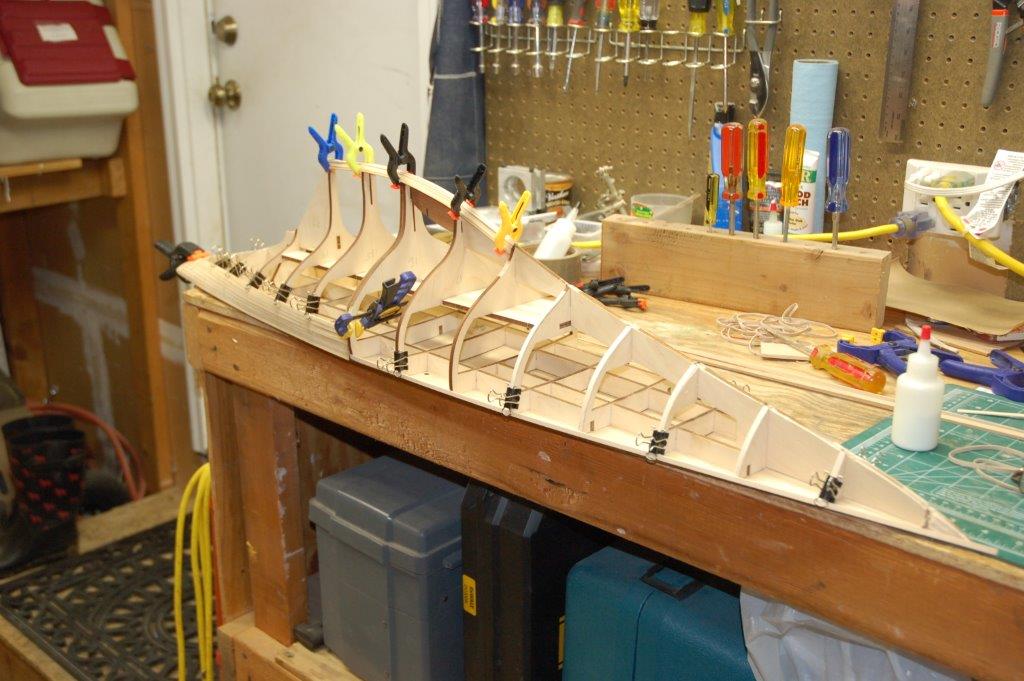
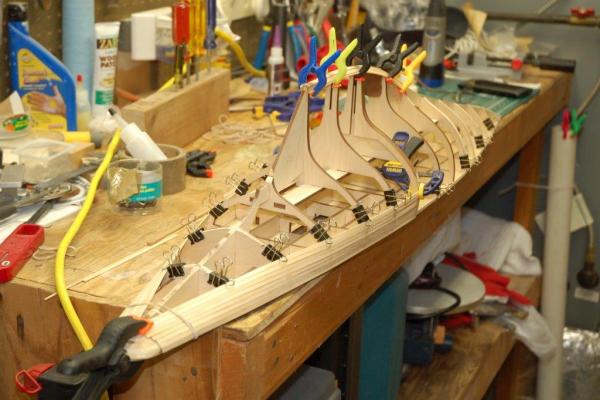
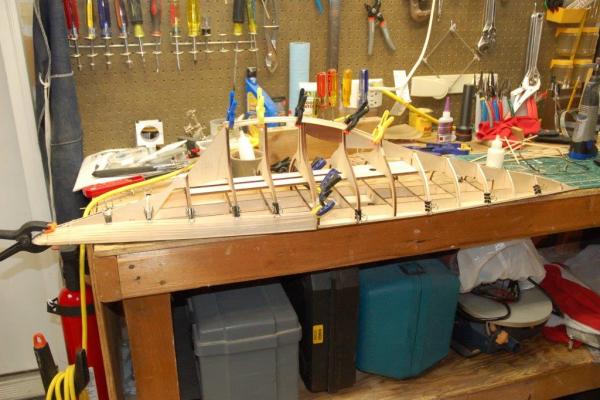
So here is an update on my progress. First a couple of comments - 1. I decided to dispense with the drop keel. It only detracts form the wonderful lines. 2. As discussed in Sailor's log the instructions are very unclear about the first row of planking. but it appears we both agree that it should be flush with the false deck. There is a double wide strip that lays on the edge of the deck that will cover the seam. 3. I had a slight wow in the keel. And thanks to a house call from Dr. Per I discovered the problem before it was difficult to fix. 4. I had to add material to both sides of 5 bulkheads so that the first plank was flush. 5. I should also mention I plan to paint all of the hull. and there will be no 2nd layer of planking. Easy Peasy. So without further delay -

- 80 replies
-
- 9
-

-
- Americas Cup
- Endeavour
- (and 1 more)
-
Thanks for the answers. I spent most of the weekend planking and I decided the same thing. Flush with the false deck. And I didn't bevel. I only plan on 1 layer of planking. And I didn't install the drop keel. I am going to install about 10 planks of "B" on both sides. And yes I am looking forward to all that sanding.
-
Rusty - I think this particular build will be the closest I ever get to scratch building. I will watch your work with great interest.
-
Wow Harvey did you actually post some of your own Pictures?
-
Ok All as requested my build log is started. I will not continue to clog up Richard's build log. But Richard I do have a couple questions if you could help me. I am planning on starting my planking this weekend. Questions: 1. On your first strake of planks at the deck. Did you build it to be exactly flush with the false deck? I have looked at the plans etc. and it is not quite clear on this subject. My thinking it that I may need to adjust a bit to take into account the thickness of the deck planking. 2. On planking the bulb. How did you know when to switch from the "B" planks to the "A" planks. did you just use B until you ran out? Also did you taper the edges of the B planking. The area around the bulb is pretty rounded. So I can see the need for the narrower planking. Now I am wondering if you need to bevel these planks lengthwise. 3. Did you use proportional dividers or Tick strips to measure the tapering? How many planks did you find you had to taper? Did you have any drop planks or stealers?
-
Bill - Unfortunately we sold the house so I don't have my personal piece of heaven in the forest. But in the new place. The Admiral was kind enough to allow me to set up a work table in the Office/Bedroom. As log as I promised there would be no sawdust. All sanding and power tools are in the Garage.
- 80 replies
-
- 2
-
-
- Americas Cup
- Endeavour
- (and 1 more)
-
Bob - I have spent about 2 years doing the 4th option. So now I want to have fun with a relatively easy model. And yes I plan on painting her. No unpainted or uncoppered hulls for this guy! You might see my planking!!
- 80 replies
-
- 3
-
-
- Americas Cup
- Endeavour
- (and 1 more)
-
If the motors are to be used only in an emergency that should be adequate. In Sailing if we have props at all we prefer folding props so that they do not slow the sailing down. I don't know if that is available in R/C. She will do fine under sail.
-
I am Saving planking for Dr. Per. I hope he has a remedy.
- 80 replies
-
- 1
-
-
- Americas Cup
- Endeavour
- (and 1 more)
-
Yes that is one of the options in the design. But I already have 2 R/C boats. So I am going to leave this one for display only.
- 80 replies
-
- 1
-
-
- Americas Cup
- Endeavour
- (and 1 more)
-
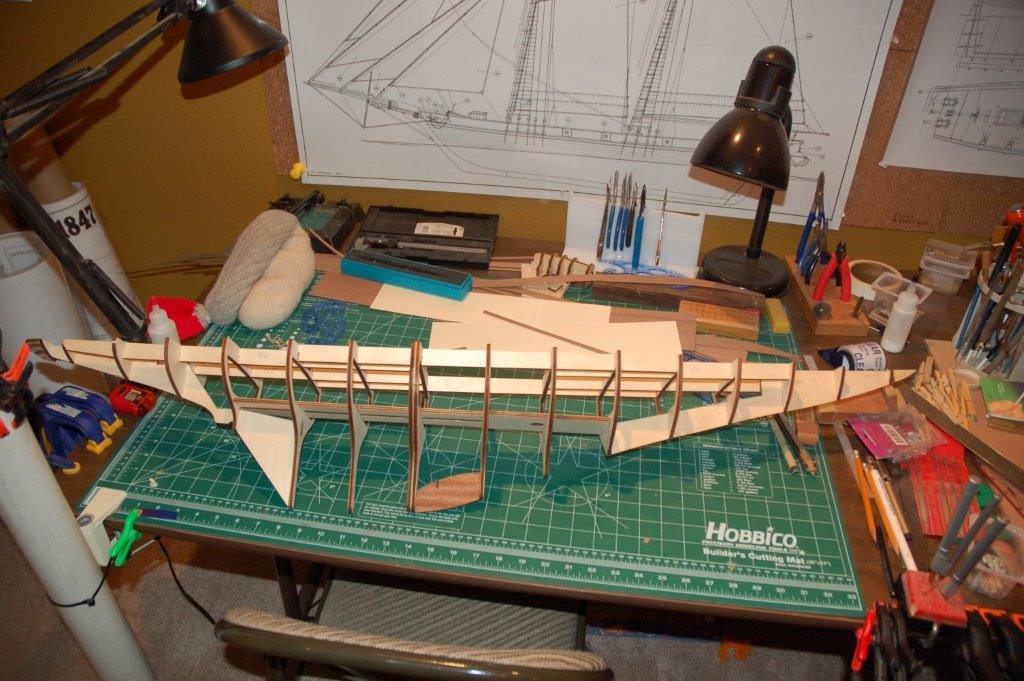
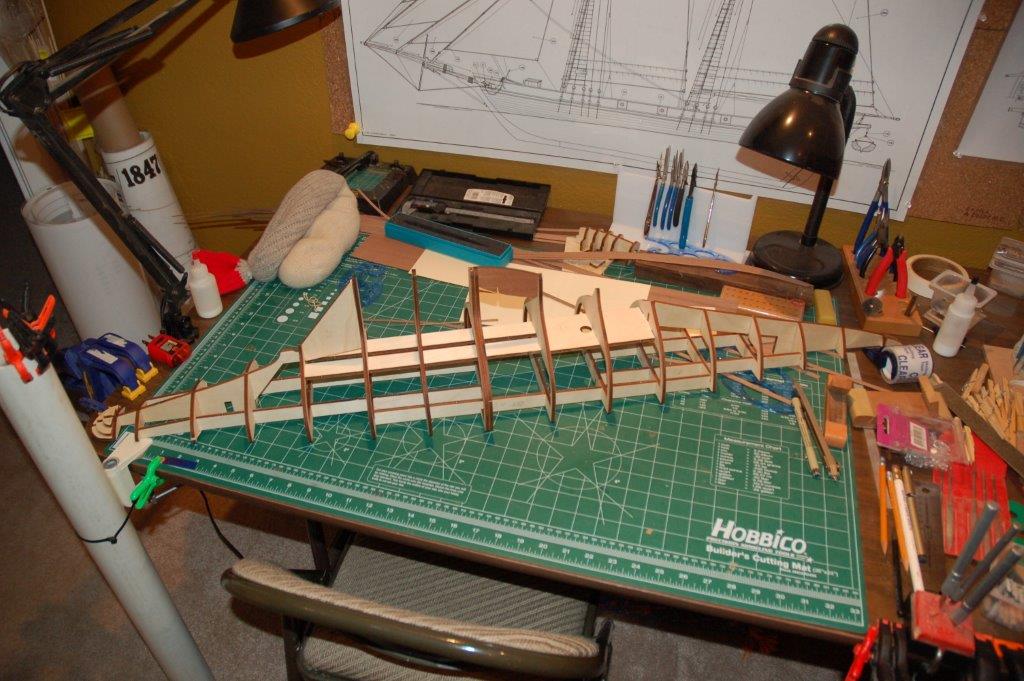
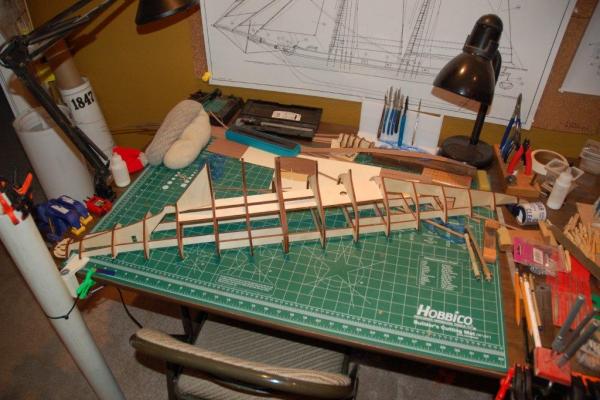
So let me share some of my first impressions of this kit. First off have I said this boat is a monster? She is very big! I am looking forward to a lot of nice detail. The pictures below are the result of about 90 min of tinkering. All of the parts fit together vary nicely with almost no sanding. You will note that the laser burn marks are still evident. What you see in these pictures is also almost completely without glue. Everything is snug and tight. It to some force to get it together, but I am ready for sanding and fairing. The plans are excellent. The instruction are good. They could be a bit more detailed, but they come in several pamphlets. One for each language. I forgot to mention that each bundle of planking is labeled! With dimensions and what it is to be used for. I have not seen this on any other model. The labels are in 4 languages. PS you will note the mat it is laying on is 33 inches wide! This is a whale of a model. Not sure what the admiral will say when I try to display it in the living room.

- 80 replies
-
- 9
-
-
- Americas Cup
- Endeavour
- (and 1 more)
-
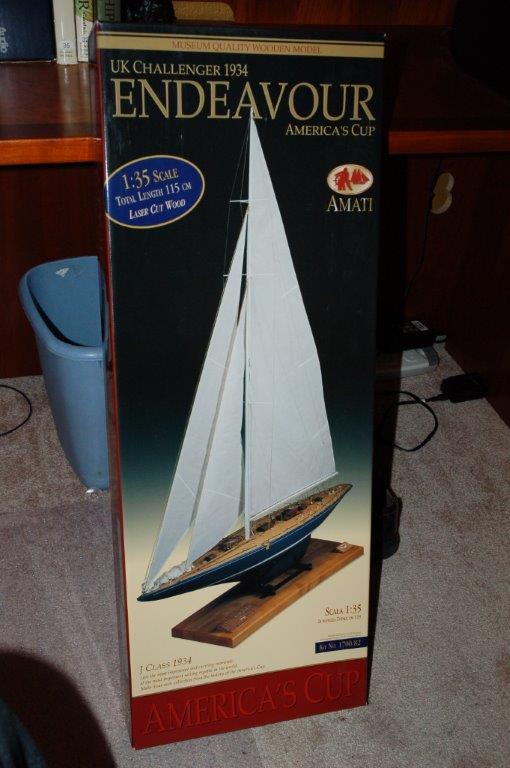
Well when you are getting frustrated with your current project there are only a few choices on what to do: 1. You could continue on. From My experience bad things happen in this situation 2. You could burn the model and give up 3. Or you could just put it away for a bit and turn to another project. The only downside of this is the evil stares from the admiral. and she says "Another project?!!" Elsewhere on this site there is another log of this wonderful kit. Seeing that build reminded me what was on my shelf. One thing led to another and now you will see the results. Being a huge fan of America's Cup I just had to have a nice kit of a famous boat from that series. I think this is one of the most beautiful boats there is. So without Further ado I give you the Endeavour!

- 80 replies
-
- 4
-
-
- Americas Cup
- Endeavour
- (and 1 more)
-
Yes I asked for updates. You keep hinting but never updating. One would think that a doctor would set a better example.
-
Mark - I send my newsletter to Chuck P. Do I have permissions to post on the page you mention? I also send my newsletter to 6 different groups in the US. To the Evil Guild master and his lackey - I send the newsletter to approx. 30 people in the area. we have about 10 who pay dues and most often we have 3 to 4 who regularly attend meetings. As far as getting elected, the last 2 Presidents were tired of running the show asked me if I would consider the role and the rest is history. Of course back then we actually had a treasurer & newsletter editor. We used to have a large group more than 10 who attended every meeting. but most have retired from modeling or simply passed away. The Club has quite a large collection of fittings, wood, books that have been acquired over the years. We used to meet at the Naval reserve center and before that the local Coast Guard facility. Now it is my Garage.
-
You aren't even close to the dark side. :DIf you check in with Dr. Per I think you get a clean bill of health. I suggest that the 4 yr old has an earlier bed time than you do. So you can satisfy him as well as the pull of the model.
-
You have elections? WOW!! I have been President, Vice President, Treasurer, Secretary, meeting host, & newsletter editor for 6 years. And I was never elected to any of these roles.
-
Bob - How long of a rod did you use? Did you modify the rod in any way, such as tapering it? Did you also treat the rod in any way to delay aging? Did you do anything special for bending or spiling the planks?
-
I think there are actually 3 solutions possible here - 1. Use the commercially available plates that come with the model 2. Make your own plates from the tape 3. Use strips of tape and simulate the separate plates. My Impression is that the major difference is that you cannot overlap the plate with #3 above. Comments?
-
Did you get it in writing? You can innocently remind her when the time comes.
-
Now that you point it out I can see the ruler. But It is too dark to see the length. I have rulers of many sizes all the way out to 24 inches. Sounds like just the right size.
-
Chuck - Thanks for your comments. You in particular are someone I have been following very closely on this. Do you have a specific advice regarding your experience using Boxwood? I think you are more of a mere mortal like me rather than that other Chuck.
-
I think it is obvious from this last picture that your woodworking skills will be a huge benefit as you change the scale from carpentry to ships. With such beautiful work I think you should go for a true sailing ship. IE no motor. R/C sailing craft can be lots of fun. What is your overall length now?
-
Dave - Speaking of the Chicago area. (since this is my log I think its ok for me to digress). I have to fly to Chicago in a month for work. I may have some free time while I am there. Is there a maritime museum or similar display that I can visit while I am there?