.JPG.ca33079f5815b861e67b9c2cccd37982.JPG)

Blue Ensign
-
Posts
4,574 -
Joined
-
Last visited
Content Type
Profiles
Forums
Gallery
Events
Everything posted by Blue Ensign
-
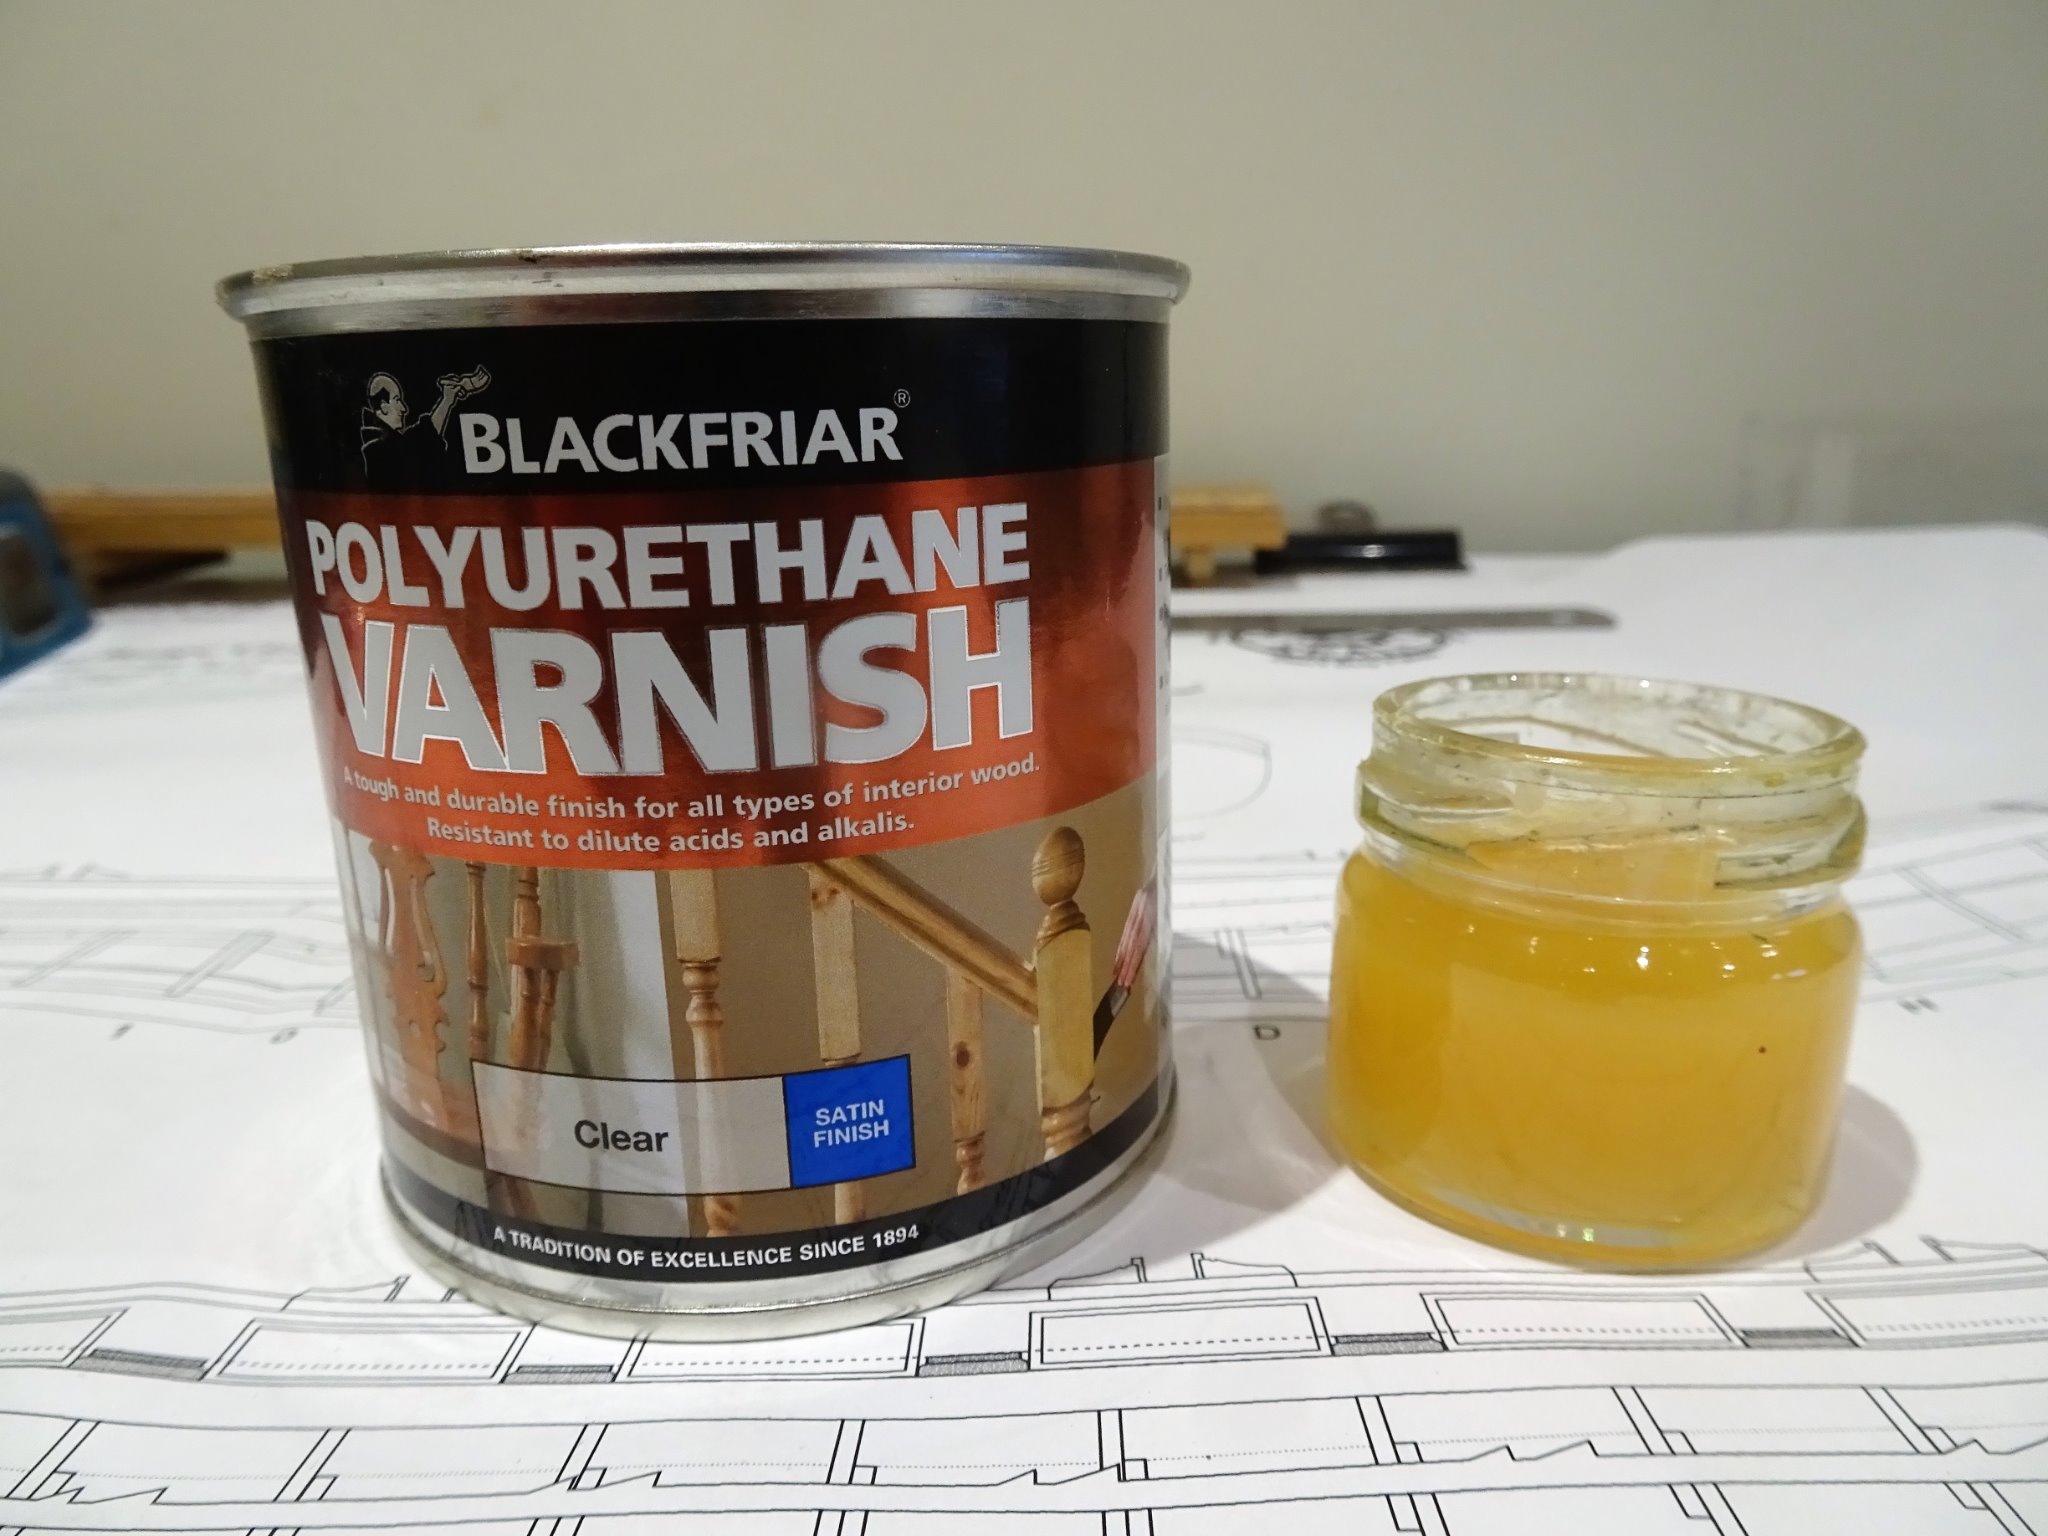
 Satin was what was available but any spirit based polyurethane would probably do, matt or satin. The pot is my diluted wipe-on, it drips readily off the stirrer but does tend to thicken over time requiring addition of further white spirit. If there is plenty of space I wipe it on, but for small areas I use a brush but well layed off. I would use any white spirit available in local stores, in fact I’ve used the make you show, but don’t use turpentine. B.E.
-
Minwax is seriously overpriced in the UK at least. I simply make my own using Blackfriar clear polyurethane varnish (not the nasty water-based versions) diluted with White Spirit to around 50% Used it on my Cheerful Boxwood build and recent Vanguard Fifie and Zulu builds, suits me Sir. 👍 B.E.
-
Cheers Guys, @ Michael - you're so right, open the box and everything exudes quality, as did Cheerful. @ Chuck - this is such an impressive looking subject, thank you for making it possible. if my Cheerful experience is anything to go by my cup will runneth over. 🙂 @ Glenn - as I will following on from those who have gone before, I've already picked up some useful pointers. This log will probably turn into a 'like he did' build. 😄 B.E.
- 185 replies
-
- 2
-

-
- queen anne barge
- Syren Ship Model Company
- (and 1 more)
-
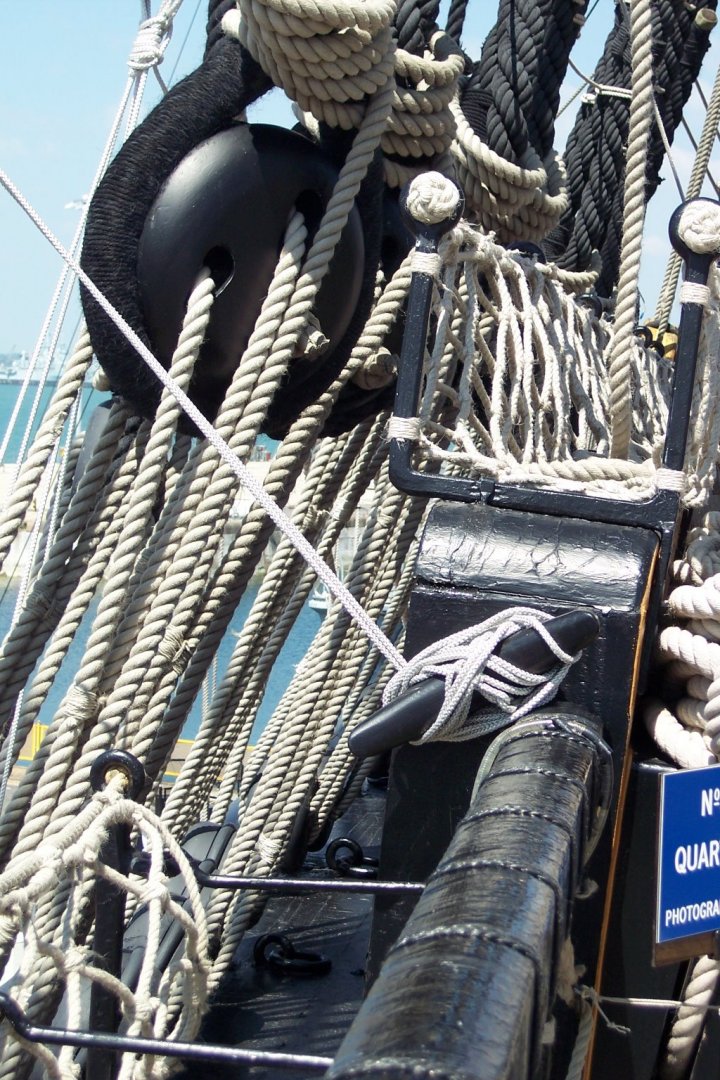
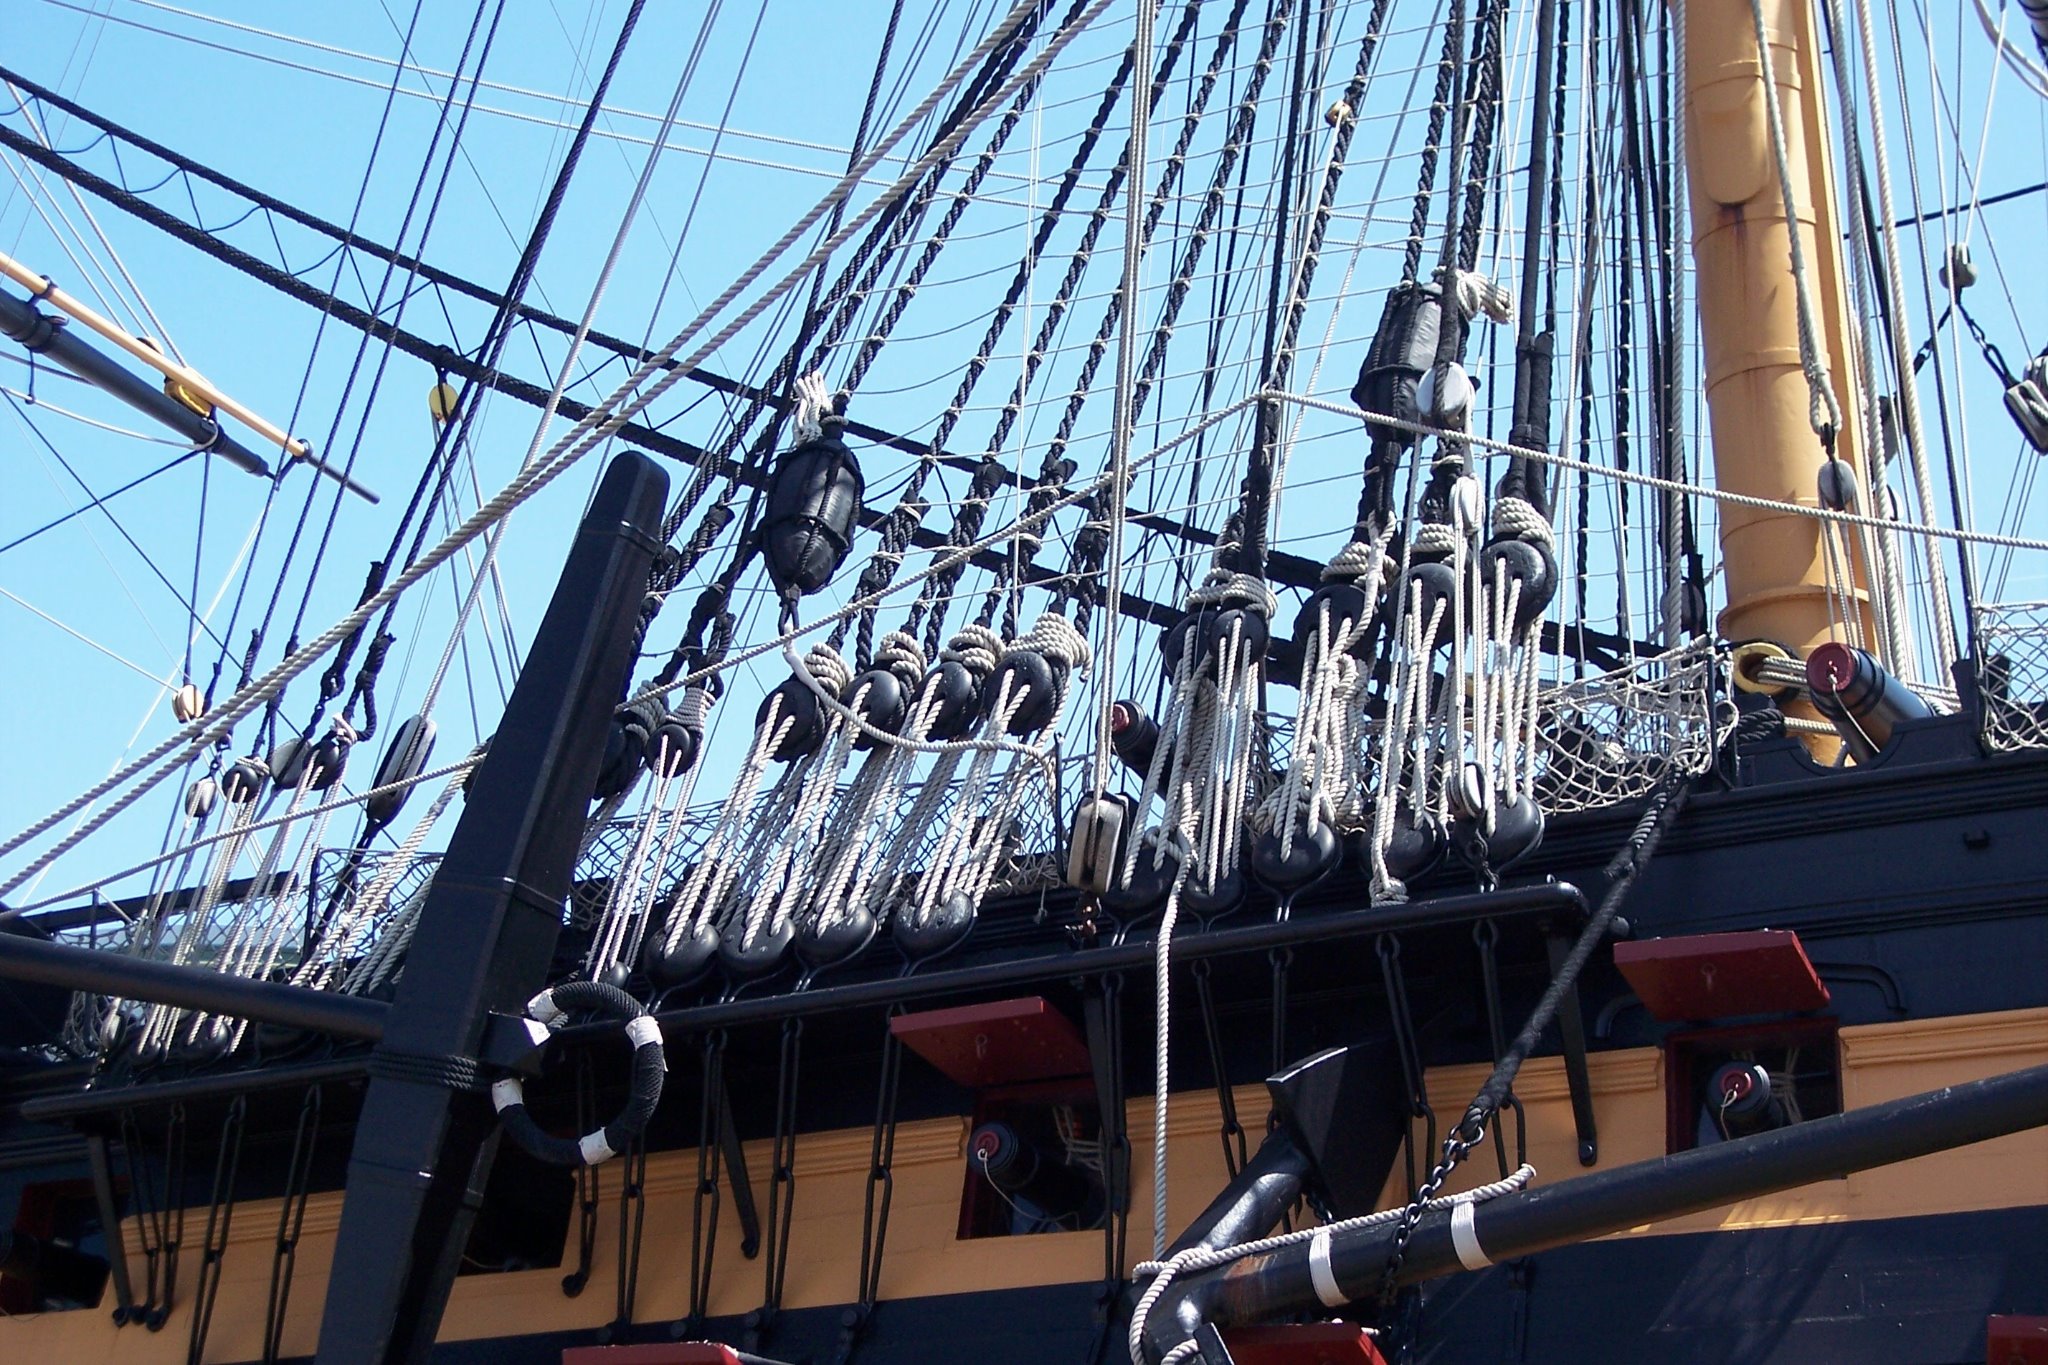
Hi Dave, I suspect that Amati have provided 1mm ø line for the Fore and Main shrouds which is not that far out at 1:60 scale. Bounty had 7” circ shrouds (4½” for the Mizen) 7” circumference equates to 0.94mm ø at scale. Kits mostly have a too limited number of line sizes which reduces your options, but my best guess would be to use the smallest of your lines for serving. At model scale the idea is to get the effect without too much bulk. Here’s a photo of the Fore shrouds of Victory I took some years ago. These lines are probably synthetic and slightly smaller than the equivalent hemp versions of the day, but give you the idea. Note the relative sizes of the foremost served shroud and the others. Note also how the serving goes all the way around the deadeye, another point to consider in relation to the model scale line. B.E.

-
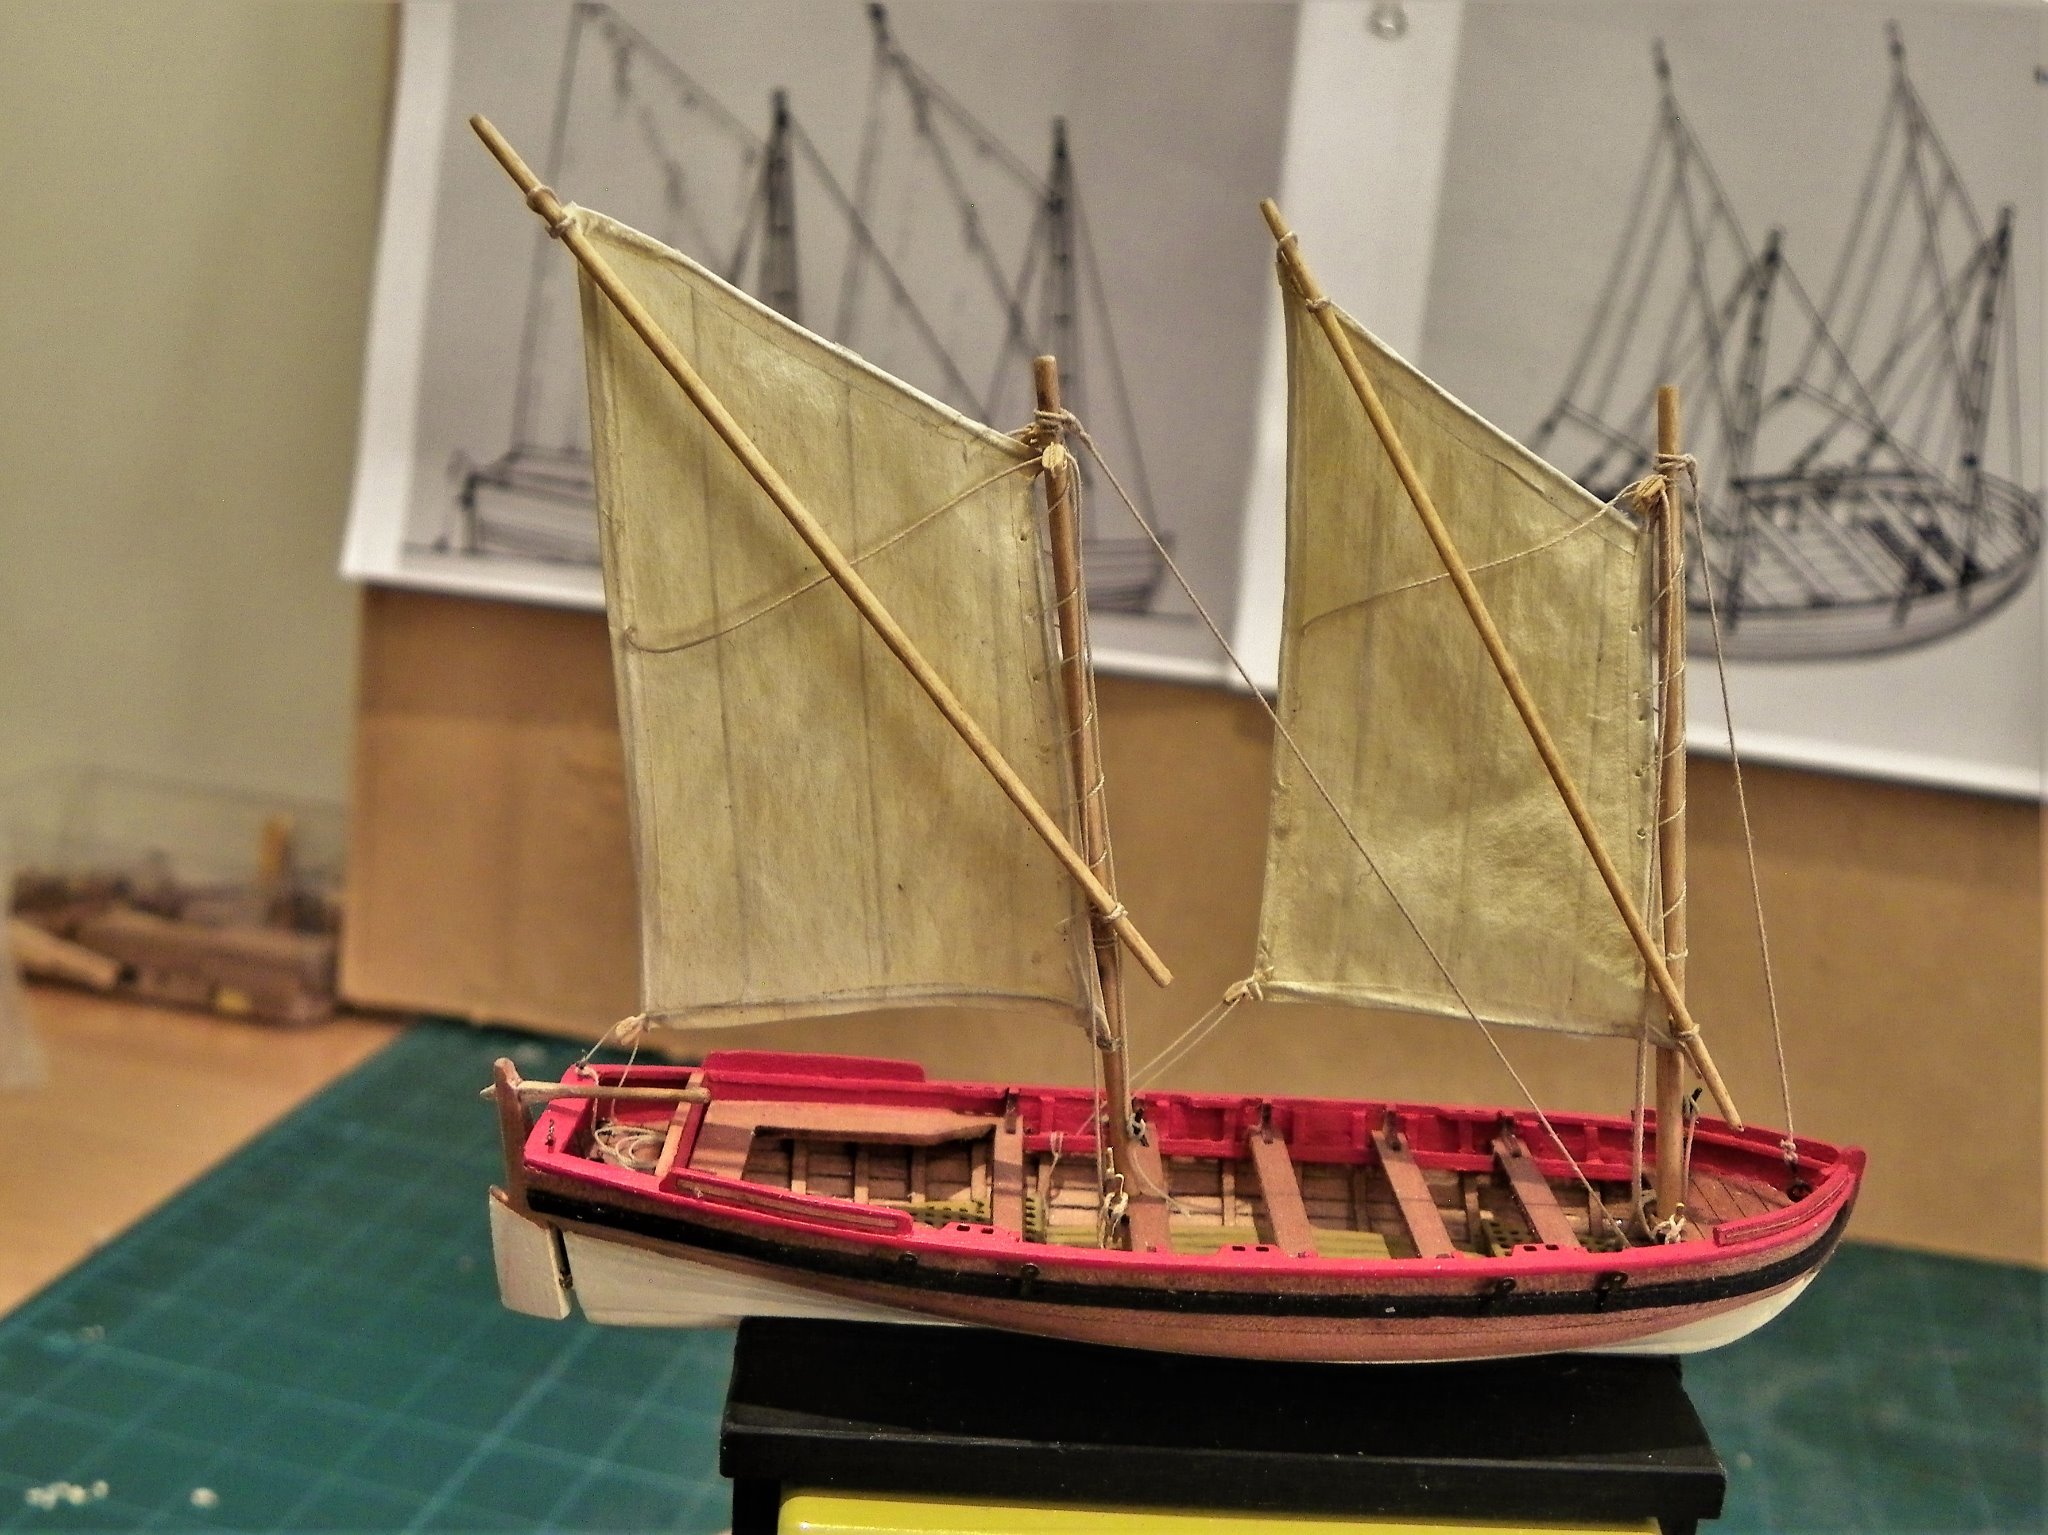
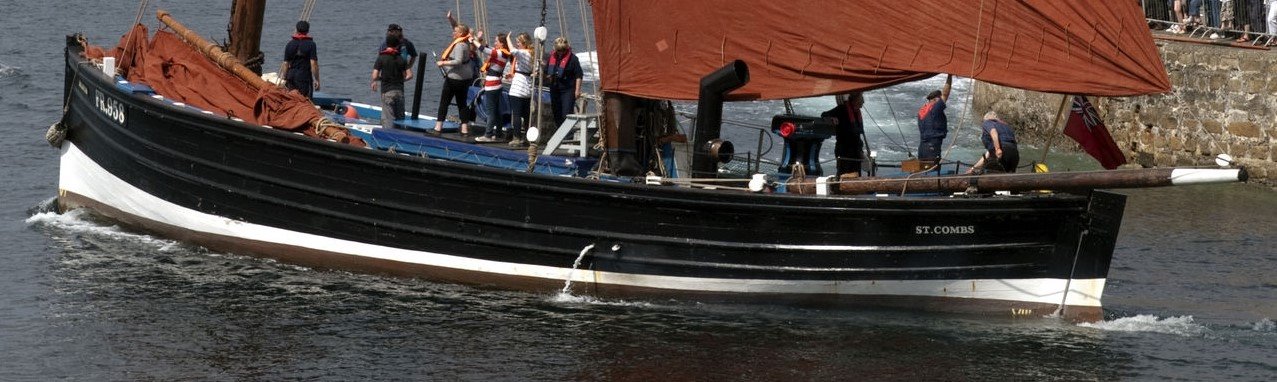
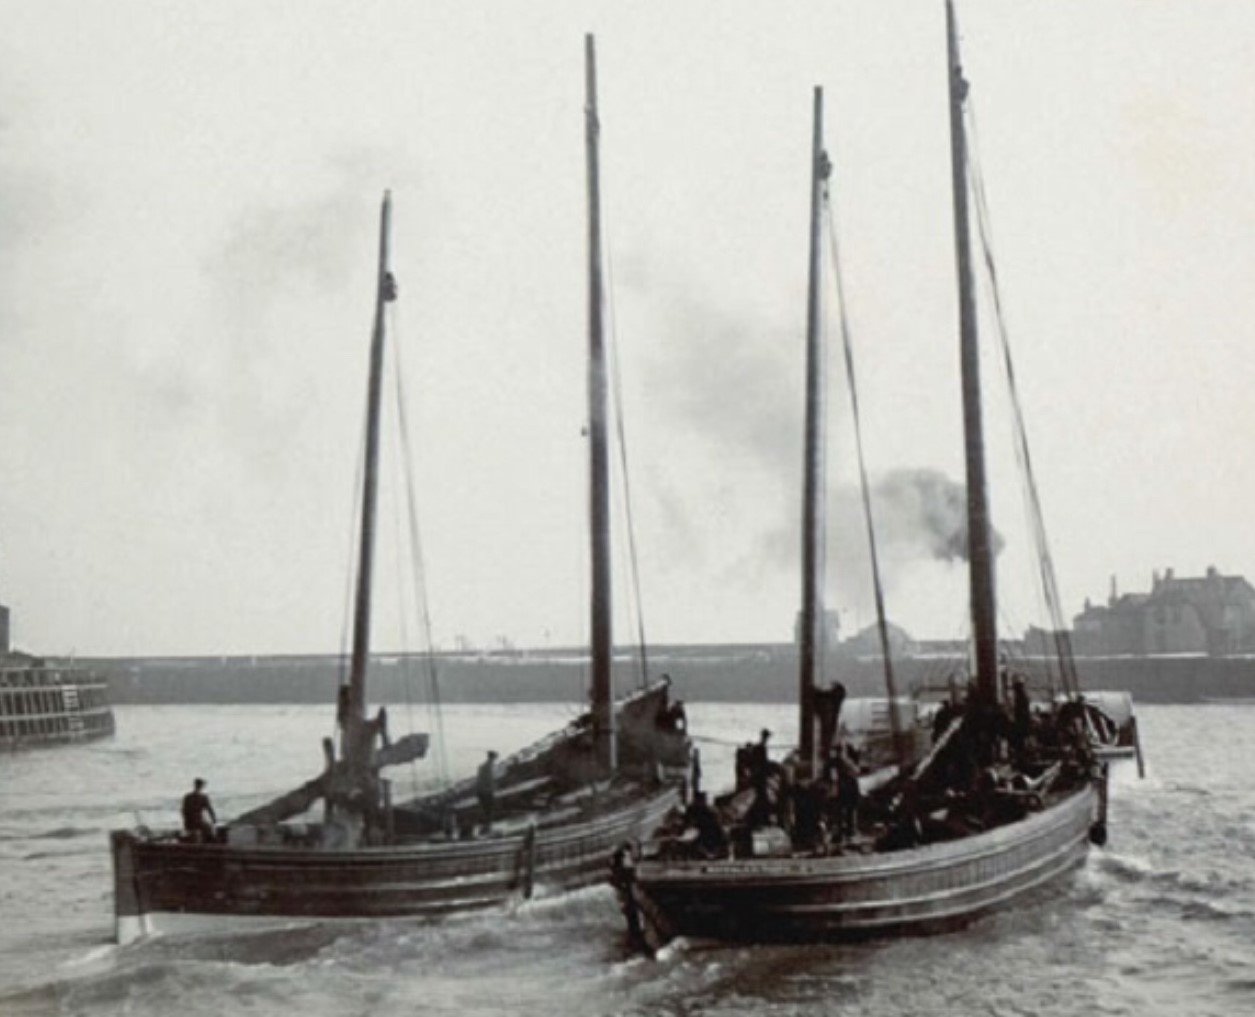
Hi Mario, you can't do better than the Edgar March book when it comes to Sailing Drifters. As far as the sails arrangement is concerned, if the sails are down so are the yards, there are some old photos in the March book. This is the Reaper with the Fore lug yet to be raised. This is an old shot of a Fifie and a Zulu leaving port. Cheers, B.E.
- 27 replies
-
- 6
-
-
- Lady Isabella
- zulu
- (and 2 more)
-
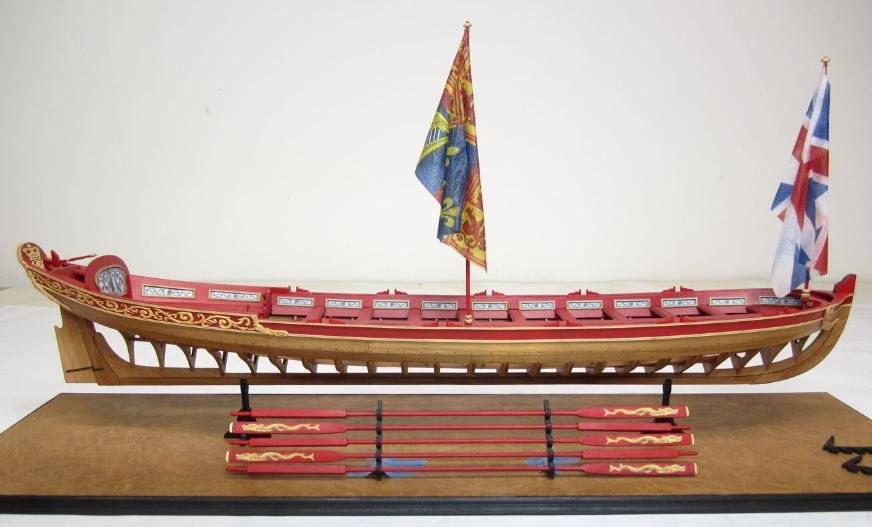
Queen Anne Royal Barge circa 1700 –1:24 scale. This build has been waiting in the wings for three years, long overdue to get stuck into Chuck’s wonderful creation of this early18thc Royal Barge. I can only hope that I do justice to this high-end kit as indicated above. I am fortunate that there are around a dozen recorded builds on MSW at various stages. Half of them are completed, so I will have the benefit of a wealth of experience from those who have gone before. My first step will be to read through Chuck’s comprehensive build manual and the logs of my fellow members to get a feel for the build. B.E. 24/02/2021
- 185 replies
-
- 15
-
-
- queen anne barge
- Syren Ship Model Company
- (and 1 more)
-
I was hoping you would post a photo of your new assistant, he looks a fine little chap - hi Winkie. has he met the neighbours yet - those large furry brown ones. I think you would find the Proxxon mill ideal for model making, I don't use mine a lot but it comes in for slotting and profiling, and when you need it you need it. B.E.
- 467 replies
-
- 1
-
-
- fly
- victory models
- (and 1 more)
-
The Crowsfeet look good at this stage Derek, they really are tricky beasts to get the tension right without distorting the stays. Thinking back to my Pegasus build I think I resorted to stiffening them with diluted pva to stop them running off line. I still like them as a feature on models tho'. B.E.
- 725 replies
-
- 1
-
-
- vanguard models
- speedy
- (and 1 more)
-
Yes Dave, just a simple knot to secure the ends, pulled tight, sealed with a spot of glue, and trimmed close. B.E.
-
That looks a fine little model Bruce and makes my recent subjects look positively chunky by comparison. The fineness of those ribs is something to behold but will add authenticity that simply adding internal strips to represent them can’t truly replicate, but at 1:64 scale real ribs would be the ultimate nightmare. I look forward to your return to this build once you have garnered the necessary resolve. Regards, B.E.
-
Generally no, there is little point in adding parcelling as it is hidden by the serving. Worming may be appropriate at larger scales on large cables. In serving you do need to be conscious of the final effect at scale. I sometimes find that serving over true scale lines makes the overall effect look too bulky. The smallest serving line is around 0.1mm diameter, and I usually reduce the host line diameter a little to compensate. I use a small knot at the start sealed with pva and smear pva along the line as I proceed to keep it tight and reduce the risk of unravelling. At the end I use a spot of glue to hold the line before fixing with a simple square knot. B.E.
-
Thanks guys for looking in, these bijou projects can get kind of addictive, I may be tempted to do one more when Chris brings out his 36' Admirals Barge. B.E.
- 70 replies
-
- 3
-
-
- 22ft Yawl
- Vanguard Models
- (and 2 more)
-
Very nice planking James, I'd be very pleased with that. 👍 B.E.
-
Good to hear from you Martin, and great to see your Fly emerge from her hibernation. Sorry about the damage but at least it wasn’t the headworks, so all should be good. That is an amazing workspace for you to set things out to best effect. Remember the basic rule, you can never have enough power points. I’ve got eight in the space of six feet, and twelve overall in my office/workshop set up. Pleased you have taken on a new shipyard companion, hopefully once he/she starts to feel safe, trust will return. Looking forward to Fly progressing. Regards, B.E.
- 467 replies
-
- 1
-
-
- fly
- victory models
- (and 1 more)
-
That looks so impressive Chris, even in its raw state, if only I were younger. B.E.
-
Looking good Tim, the design of those chains and plates is very well done. I do recall that I had to fiddle with the chains for the Main channels to get the plates to fit above the wale, hopefully you will fare better. B.E.
- 164 replies
-
- 1
-
-
- fly
- Victory Models
- (and 4 more)
-
Your copper is looking very good Richard. I found it useful to have a small pot of Acetone handy and a supply of cotton buds or similar, to clean the worst of the ca staining as I went along. It meant the final cleaning up was a lot easier. B.E.
-
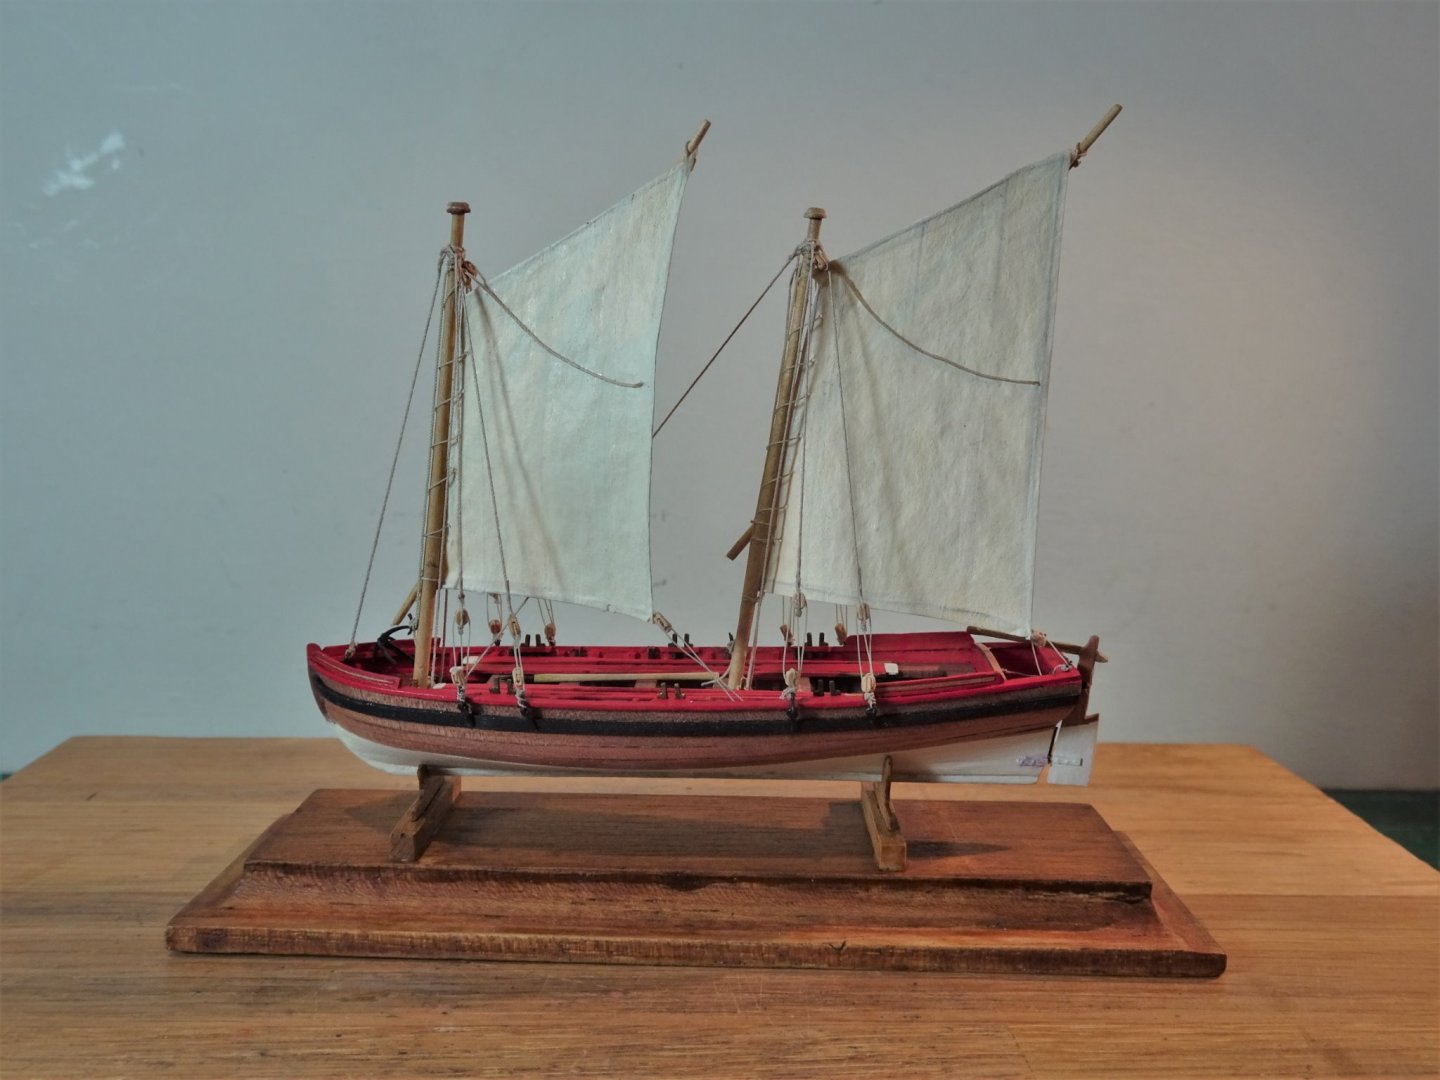
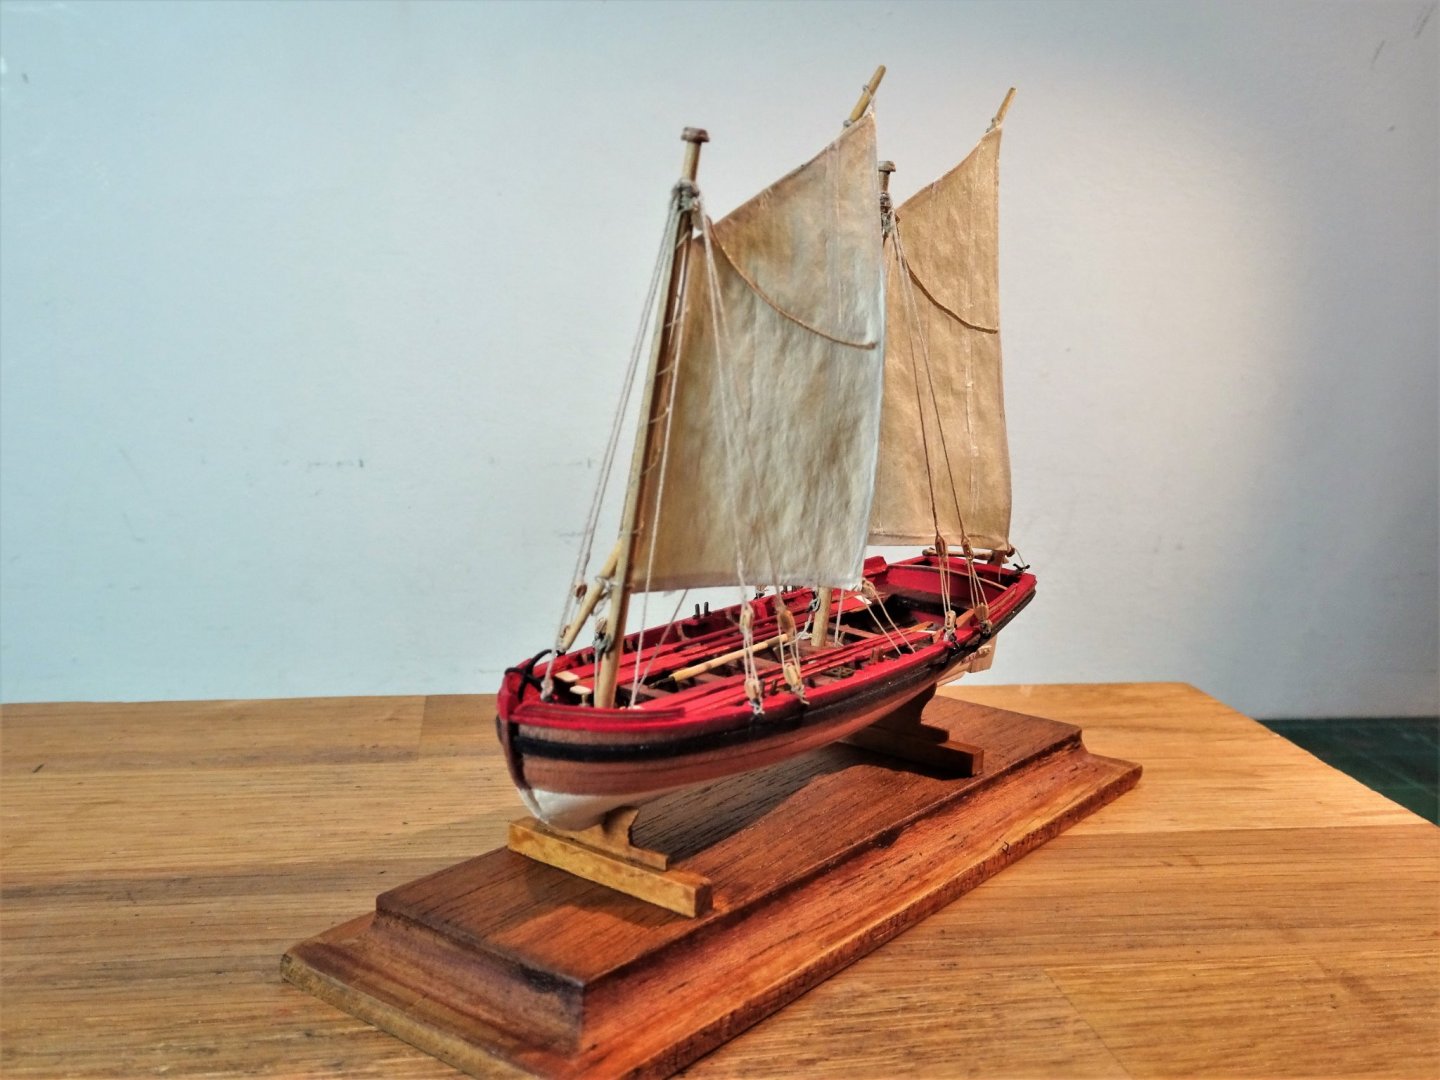
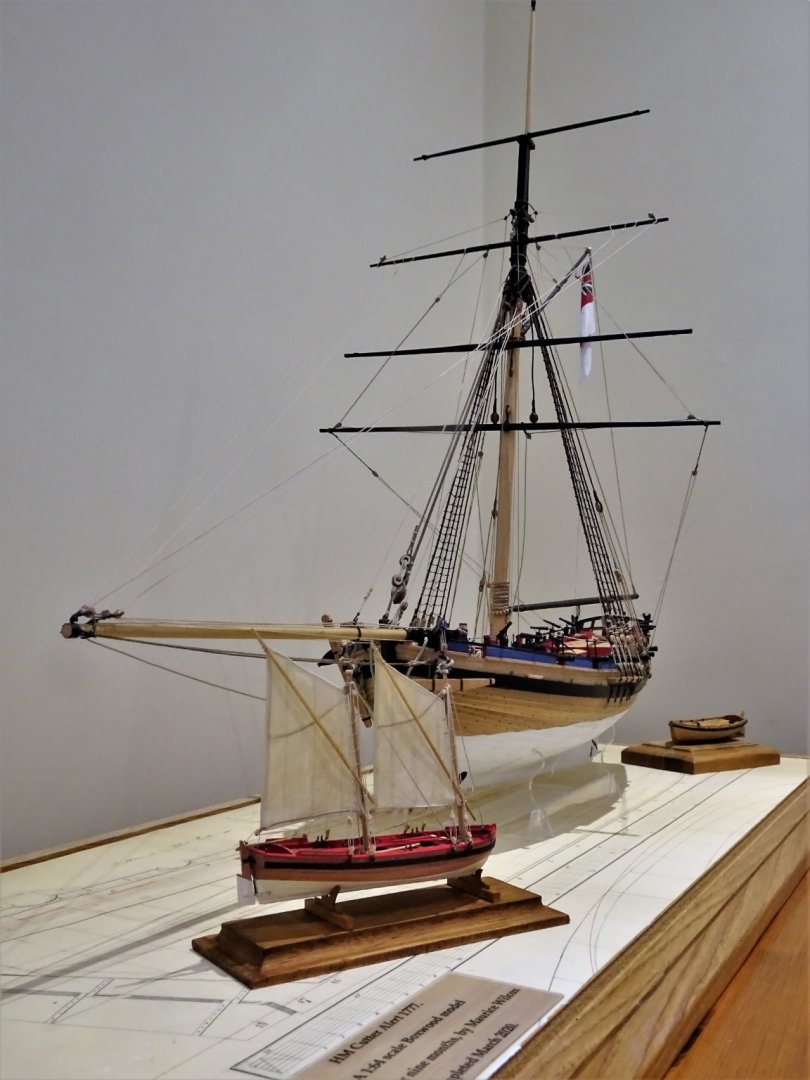
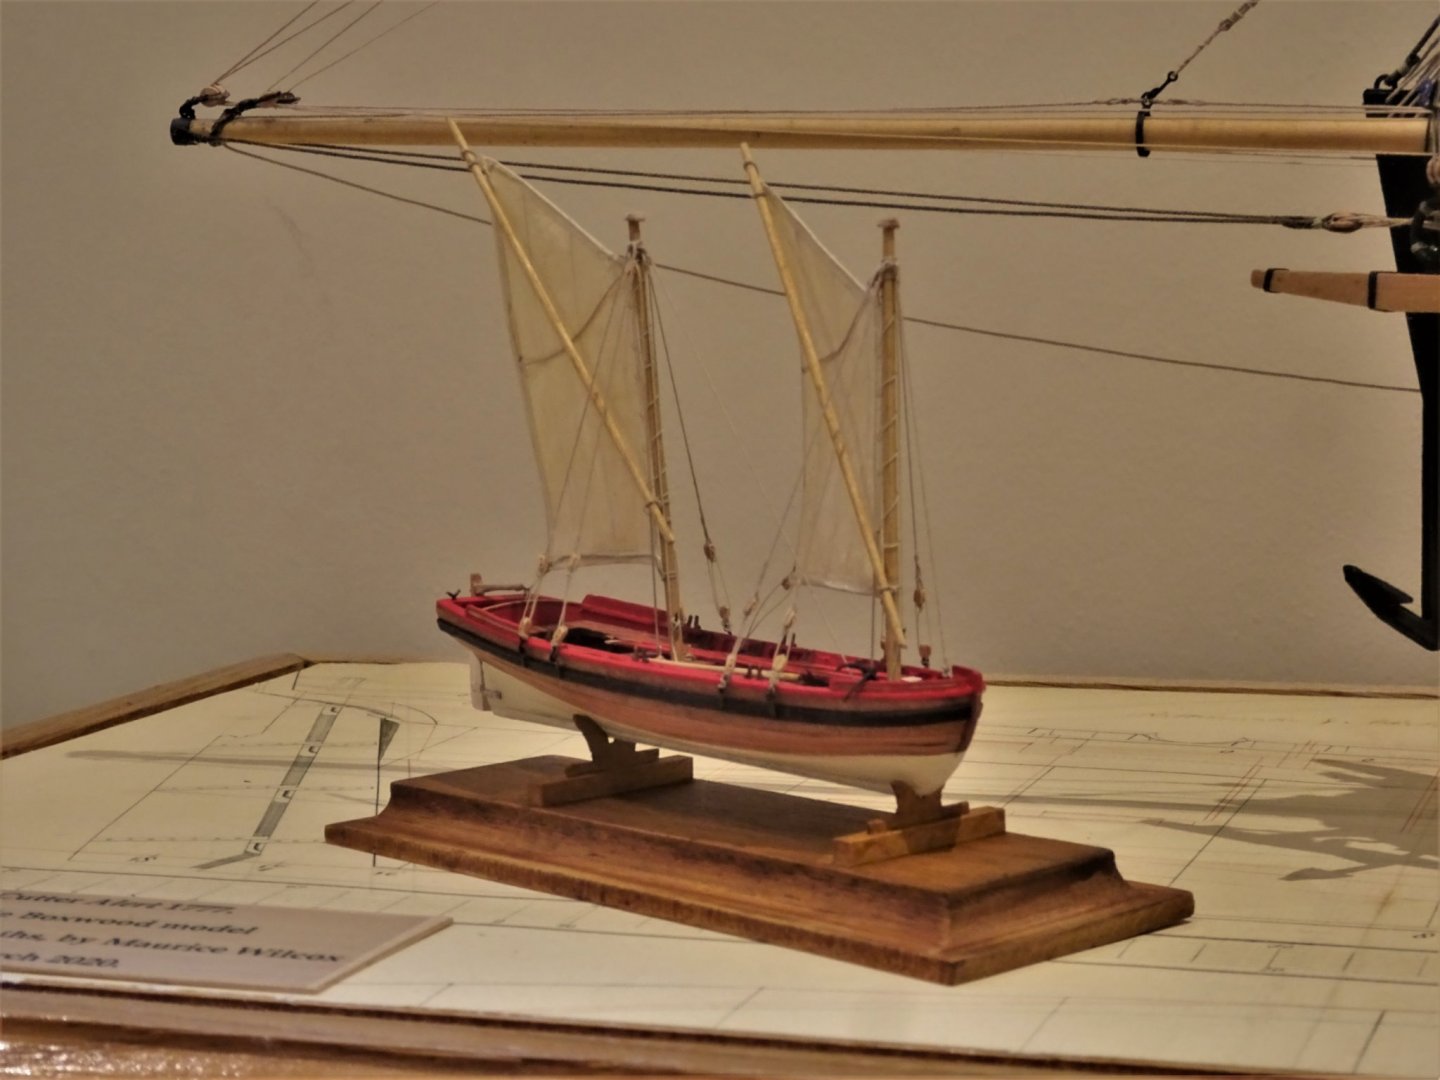
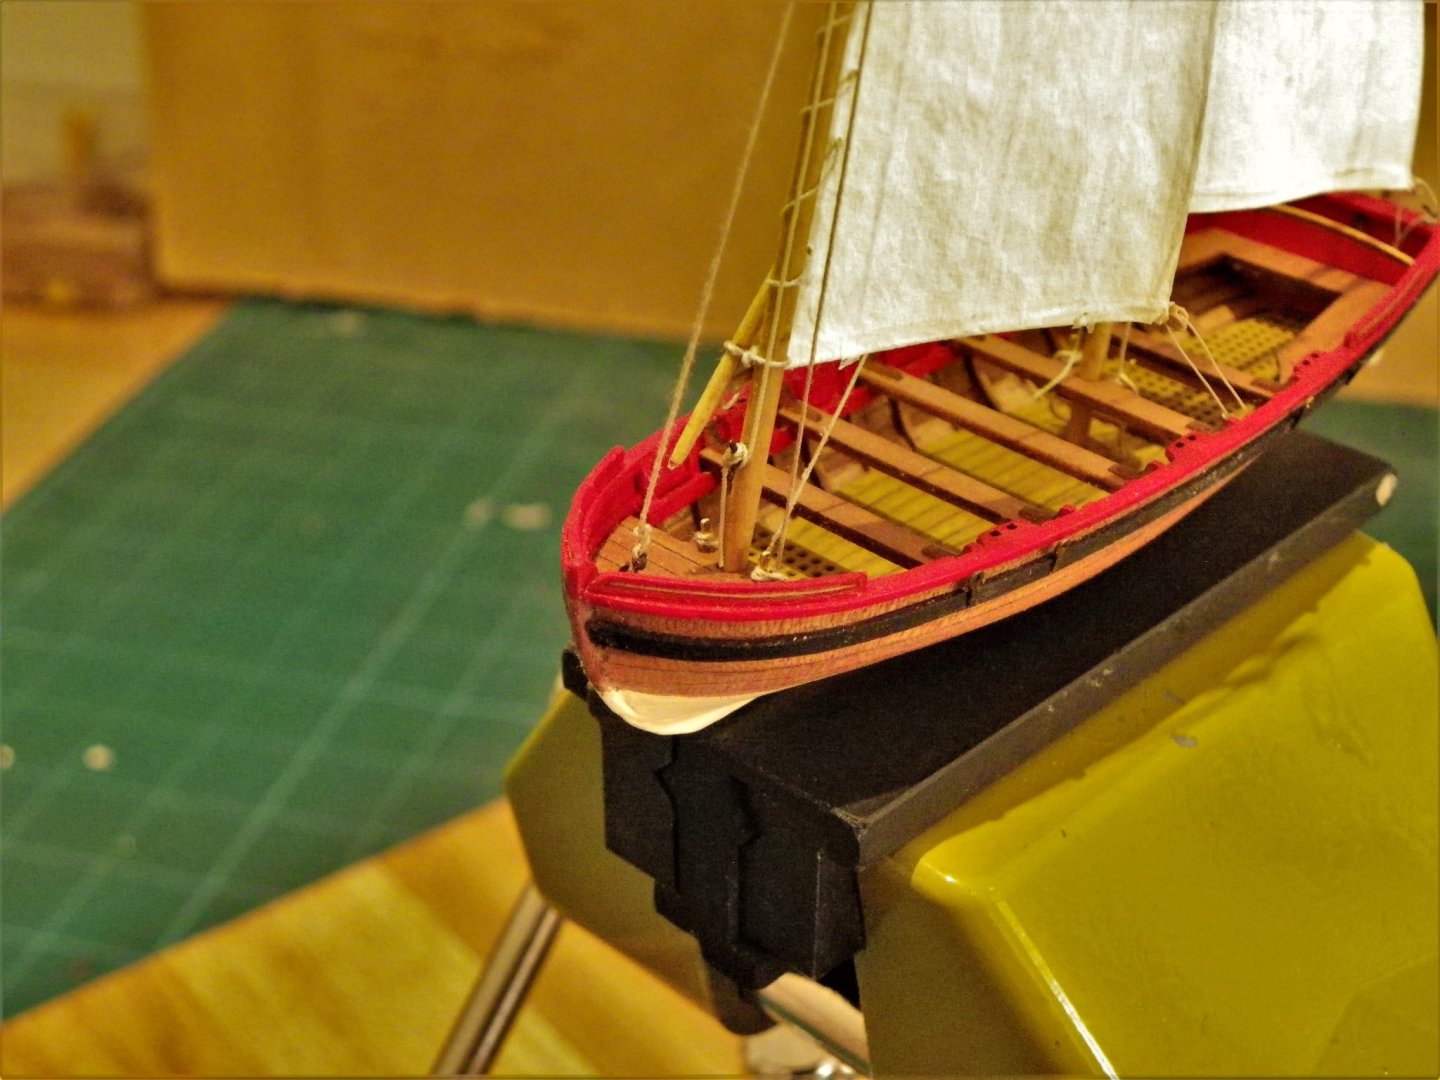
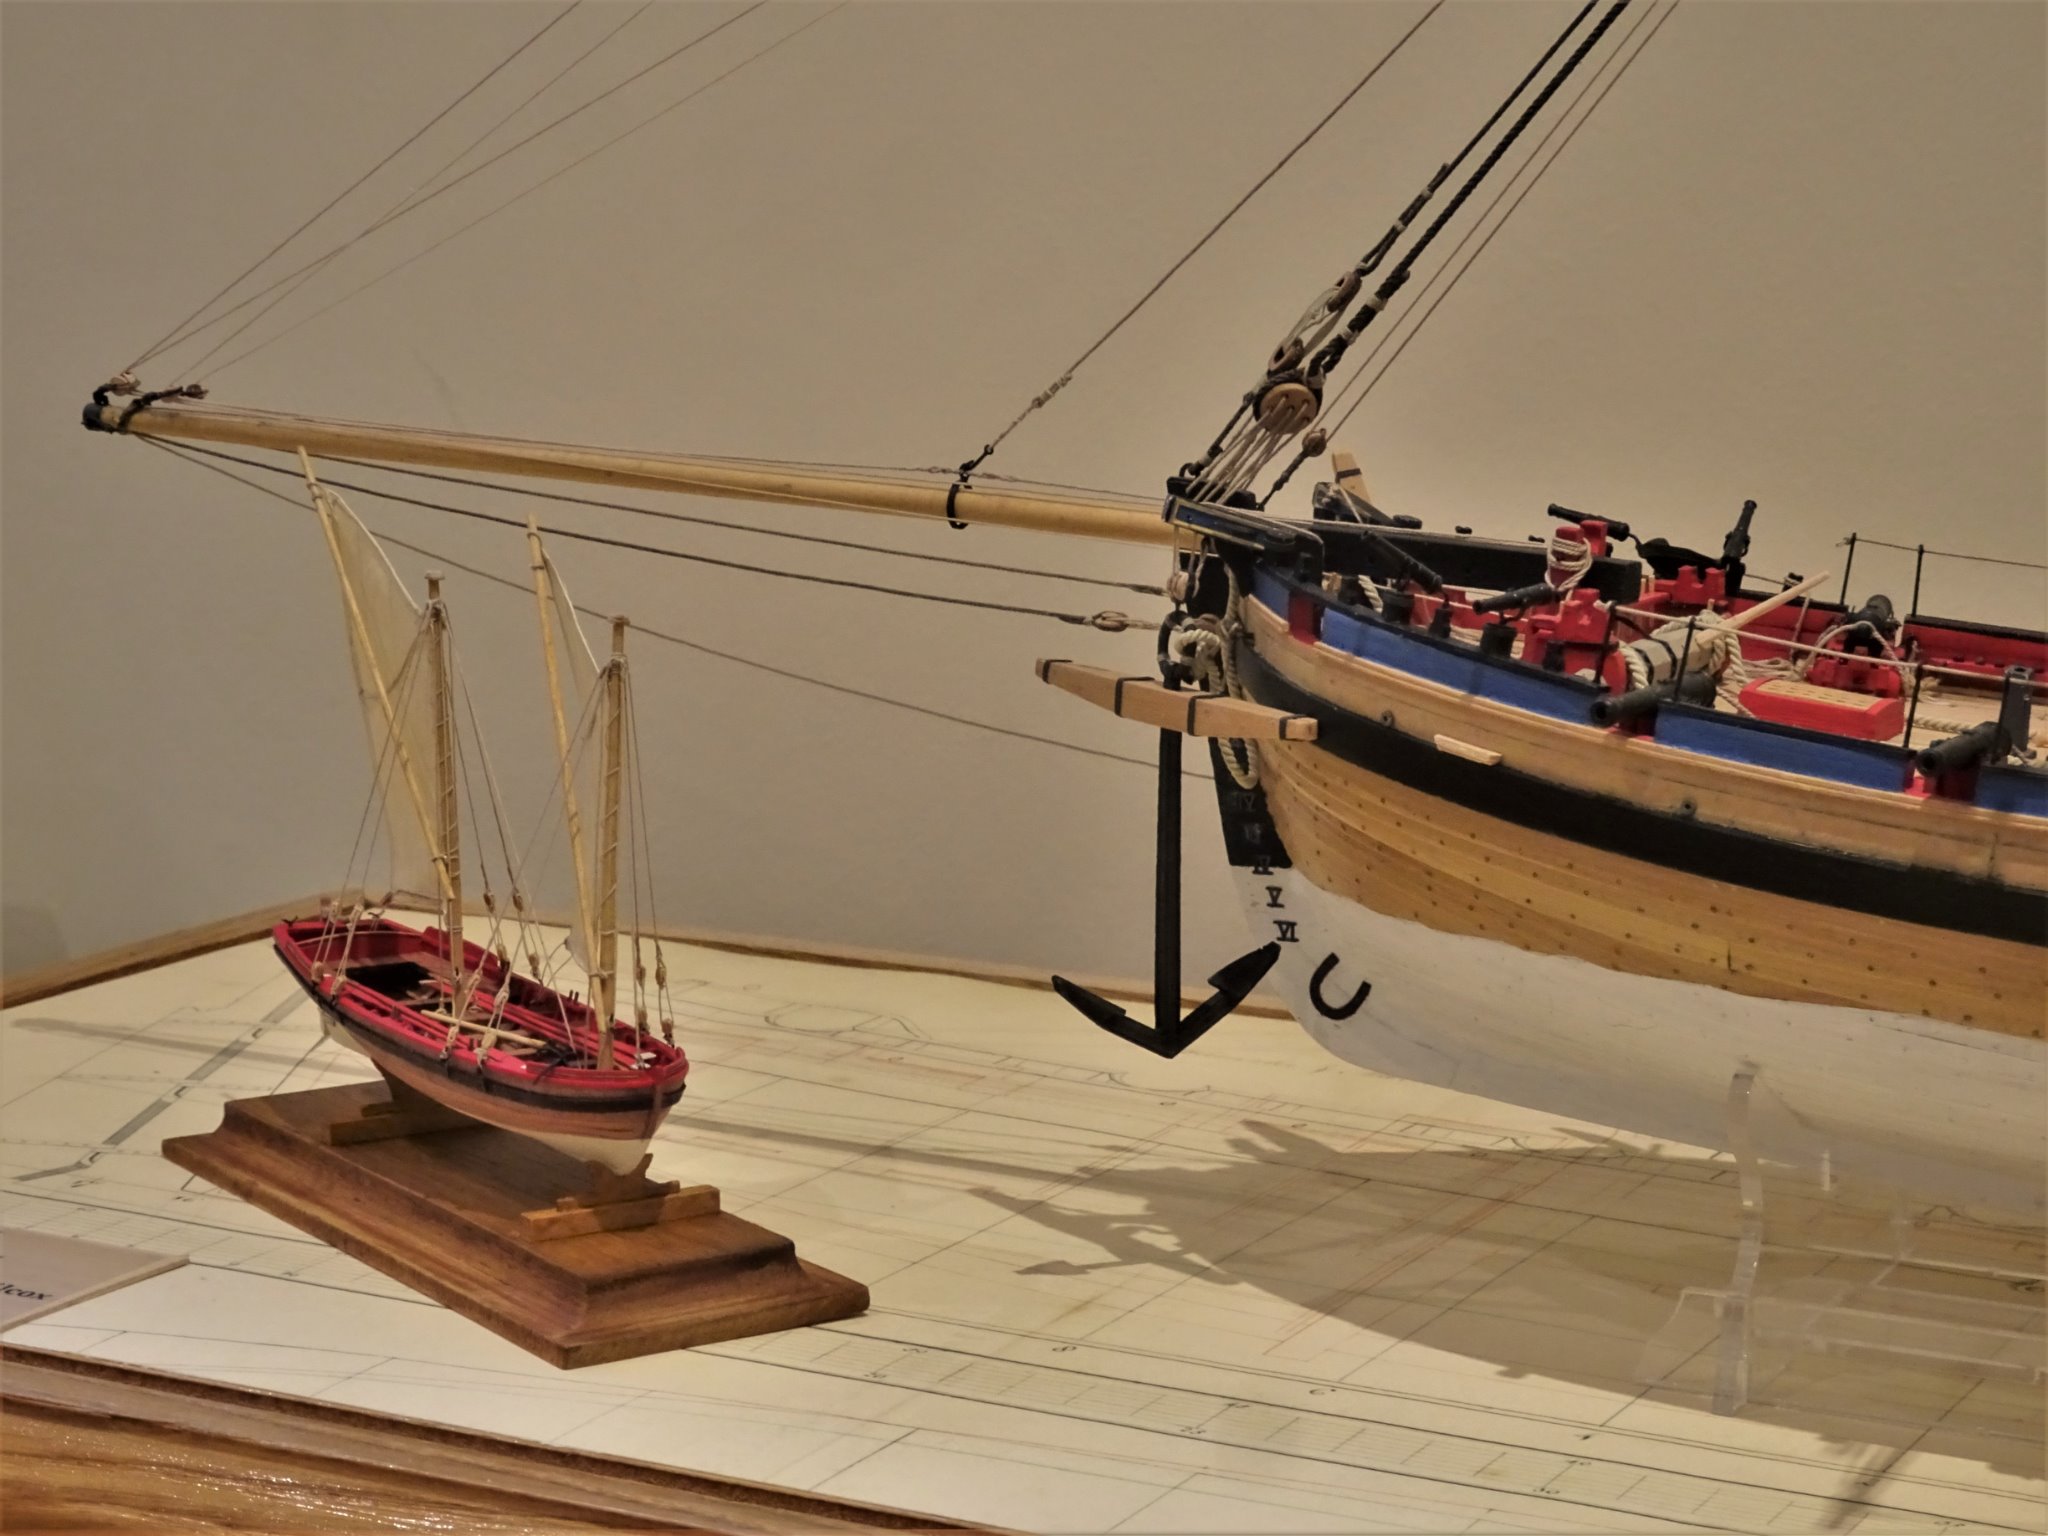
Post Twenty Completing the build. I have used the laser cut Pearwood oars and modified the boathook to fit in a wooden handle. The grapnel was silver soldered and chemically blackened. The final addition are the thole pins; I used the provided etched kit versions, I simply couldn’t contemplate trying to make wooden versions of that tiny size. 0620(2) 0627 0628 0631 0636(2) 0640(2) Together with the original 18’ cutter which I made in Boxwood. On balance I think I prefer the Boxwood finish for small boats. The Yawl now joins the Cutter Alert in her case along with the 18’ cutter. 0642(2) 0649 0653 0654 0656(2) After five weeks of effort this little project comes to an end. I can’t say with certainty that the way I have rigged it is fully accurate, but I think it looks ok at the scale involved and gives an idea how these boats were sailed rather than rowed. B.E. 19/02/21
.thumb.JPG.4af2f910ec0e2de5083ef76ebbd65515.JPG)

.thumb.JPG.d1c2b48b0fbefffc9a33238560fc65aa.JPG)
.thumb.JPG.8d66f007039dc853341c81b4dfee72f8.JPG)
.thumb.JPG.46518a60c5b8eea6779b5a5346951d64.JPG)

.thumb.JPG.89a045a9568483f8f50f20d44715fa69.JPG)
- 70 replies
-
- 14
-
-
- 22ft Yawl
- Vanguard Models
- (and 2 more)
-
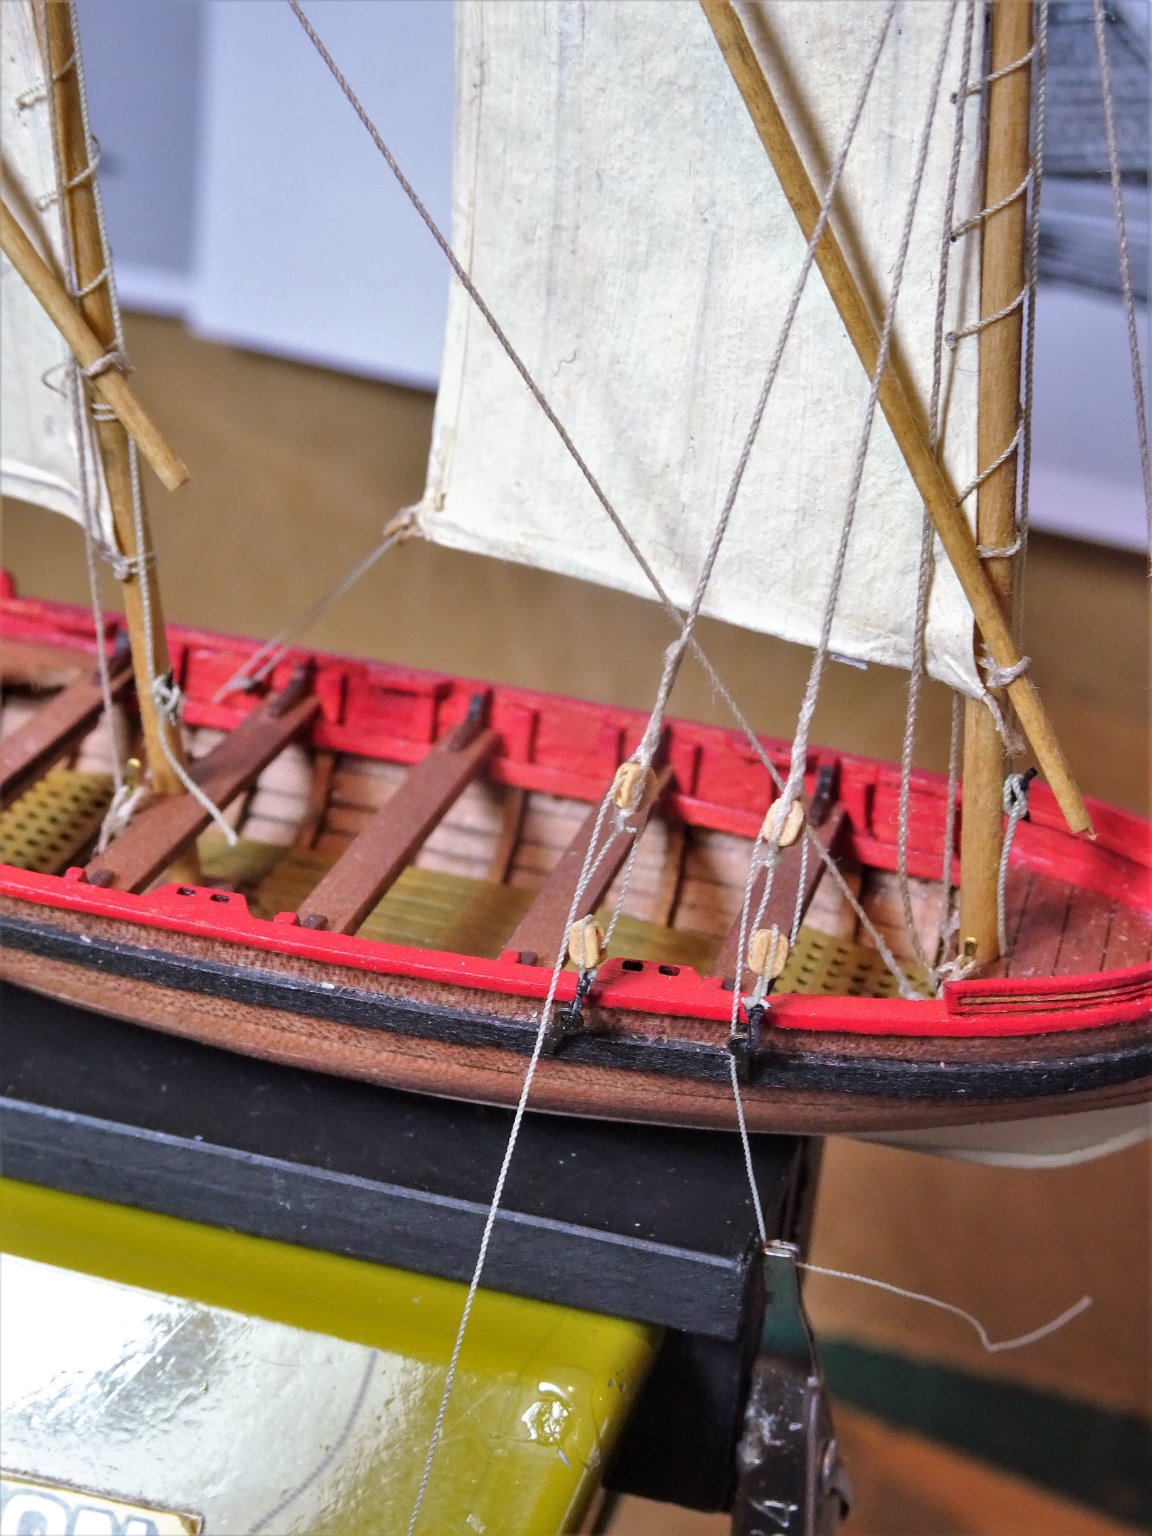
Post Nineteen Stay tackles For the stays I am using Syren 0.20mm line and for the Lanyards Morope 0.1mm line. For the blocks Syren 2mm with Syren (now withdrawn) 3mm black plastic hooks. The stays are simply looped around the Masthead and fitted in pairs. 0511 The trickiest part is attaching the hooks of the lower blocks to the hull straps. 0562(2) Fore stays in place, it took quite a few hours to strop and set up, rather like rigging the side tackles on 6 pounder guns, but without a convenient jig. 0565(2) 0553(2) 0561(2) 0534(2) With the stays completed there only remains for the equipment to be added. B.E. 18/02/21

.thumb.JPG.60fee9121856c7f7198d01ef538dbf3e.JPG)
.thumb.JPG.d7b2c1ea59e719e2a995300e4a690086.JPG)
.thumb.JPG.b3896f2c195e90f51f2c4e71f9244975.JPG)
.thumb.JPG.8948e08a6c37a3726f90640ccead380f.JPG)
.thumb.JPG.7fb7103650fecfe0b6d21a9cfc9dbfc6.JPG)
- 70 replies
-
- 10
-
-
- 22ft Yawl
- Vanguard Models
- (and 2 more)
-
Thank you Radmancoop, The Truss pendants secure the yards to the mast as indicated above. The other pendants you refer to are the Burton pendants or Pendants of tackles. These go over the masthead before the shrouds, thimbles are attached to the ends to take tackles for heavy lifting, altho’ sometimes blocks are secured directly to the pendants. Regards, B.E.
- 366 replies
-
- 1
-
-
- pegasus
- victory models
- (and 2 more)
-
Post Eighteen Rigging continuation The rigging continues with the placing of eyebolts and cleats to take the sheets, and the eyebolts to secure the Fore and Main stays. Drilling through the forward ‘brass’ grating to take the Main stay eyebolt was the most difficult part. The tacks are simply secured to the mast below the snotter. The sails have brails added which allow the quick furling of the sail against the mast. 0043 Running each side of the sail through a grommet in the leech of the sail, thro’ small blocks at the masthead to belay at pins set in the mast benches. 0041 For the belay pins I used brass etched versions unused from my Cutter Alert build. 0039(2) 0038(2) I will continue to tinker with the brails to persuade them to hang with a natural sag. The less than appealing task of making up eight sets of mini tackles now looms. B.E. 15/02/21
.thumb.JPG.a66c0b276a55677f58dbebc70053442b.JPG)
.thumb.JPG.1144bd1768dc5a23f2657b6fcd2e197d.JPG)

- 70 replies
-
- 8
-
-
- 22ft Yawl
- Vanguard Models
- (and 2 more)
-
Thanks for looking in Ras, I’m pleased it has been of help. @ Bob - the books are Landscape format 28cm x 21cm. B.E.
- 261 replies
-
- 2
-
-
- muirneag
- vanguard models
- (and 2 more)
-
Thanks Tony, Lateen rigs were used on naval boats and there is an example shown in the Pandora book of a Pinnace with such a rig (but without the fine detail). These yards needed to be shifted around quite often so a simple set up as shown would probably apply. B.E.
- 70 replies
-
- 2
-
-
- 22ft Yawl
- Vanguard Models
- (and 2 more)


.JPG.9378dd9fbff75d99900b3aafcbc512b0.JPG)


.JPG.f1a826ade8e39f8cb63251c0ea06dbf0.JPG)
.JPG.54dee0f5a2020be0bbb39263e1d96c34.JPG)
.JPG.af9ee69873b7f9cf5228abb897035efa.JPG)


.JPG.580da123abadd00942a1d8b1475b1052.JPG)
.JPG.3413e69c38934541b43956d5ce02c604.JPG)
.JPG.b157e6b3f294f1621d75ff8ed36f6d43.JPG)
.JPG.d41dc9ae59559cb9c6506ab09d94b4fc.JPG)
.JPG.199d74192523e3b663fe1b80406801c0.JPG)
.JPG.8f52bdb156ee3acb53cb8e2c36067a14.JPG)
.JPG.c400cbff87a7a7ae52cf93c4ce654b64.JPG)
.JPG.90ea5c823547f69afc3bca3693ff3510.JPG)