


SawdustDave
-
Posts
1,770 -
Joined
-
Last visited
Content Type
Profiles
Forums
Gallery
Events
Posts posted by SawdustDave
-
-
Subtle vs. bold caulking.... I agree David. Thanks for the input.
I tend think the scale of this build allows for the caulking seen here. However, once the decks are installed, I will dry fit a few of these and see if it fits my eye. If it doesn't, I have a thinner kerf blade I can go to with the same jig. This, of course, would allow me to use a thinner caulking line.
As for smoothing the deck, the depth of the slots is quite sufficient in this case.... no issue.
UPDATE:
This experiment did not go as well as I had hoped....too much work to get the staggered end butts to look right.... And, I tend to agree, the caulking was a little too bold for the eye. Not my first or last experiment.... to me, it's just part of the shipyard fun.
Part of the fun
-
-
Since one of the early tasks, along with getting the first layer of planks onto the hull, is planking the decks, I have been playing around with trying something new (for me). I like the initial results and thought I would share it this morning.
I have always liked basswood planking, using the jumbo craft sticks (1" x 8"). It takes a nice edge and stains up quite nicely.

I also like to use black fishing line as caulking between each plank, as opposed to paper, or simply drawing in with a pencil. So the question became....
How can planking be done without fitting each and every single plank individually, and improve the technique of applying the caulking lines.
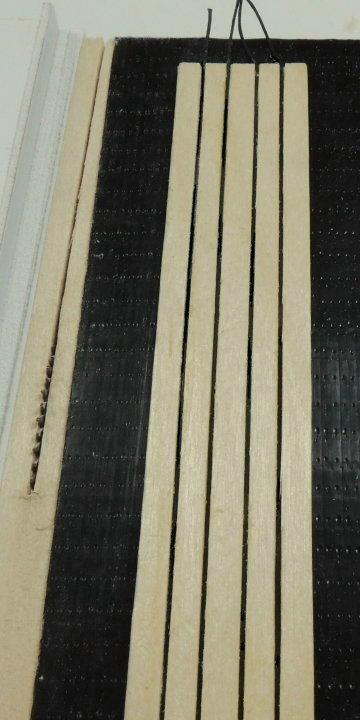
Here's what I came up with....
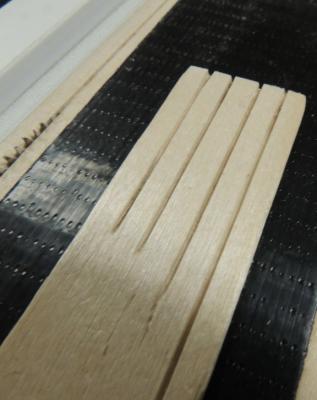
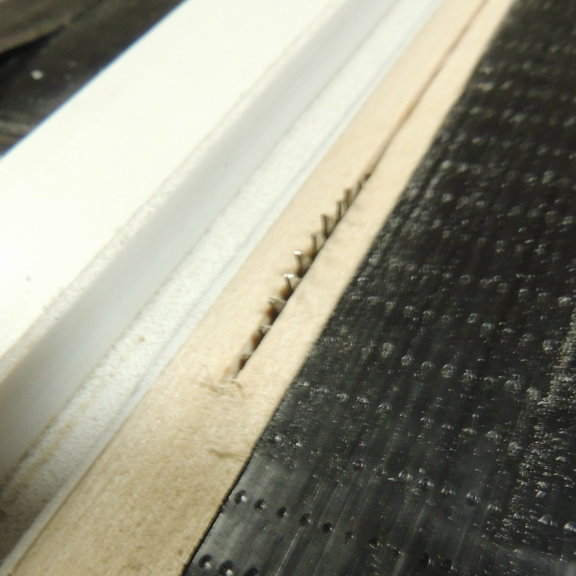
Created a rip fence jig for my mini table saw with a spacer shim.... the jig is set at a height to give me a perfect slot cut on each edge without passing through the thickness of the board.
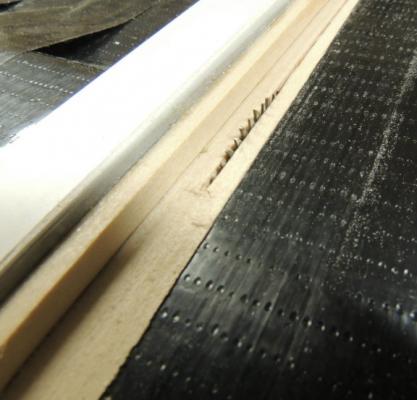
Removing the shim allows me to get a second, perfectly spaced slot on each edge....

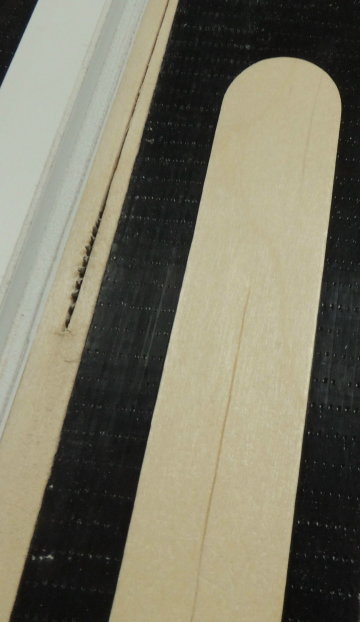
The result looks like this....
-
-
-
-
-
-
Jagger.... You have raised my curiosity, but left me somewhat confused.
So if I want to check the dimensions of the plans I have and compare the keel length and beam width found in the Wikipedia research article, can you tell me (in the simplest terms possible), exactly where do I measure my plans (point to point) in order to be comparing apples to apples.
Wikipedia .... Keel length 127 ft..... Beam width 47.6 ft (after re-build)
-
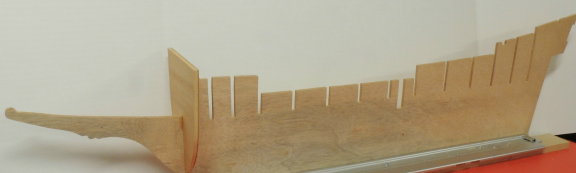
Spent the day tracing keel and frame patterns.... ready to take the old DeWalt saber saw to the keel this morning.... the frames are small enough to allow me to play with my ancient band saw.
Nigel.... just knowing you might pop in occasionally is kinda intimidating, but will only serve to pressure me to "up my game".... so long as you allow me to use your amazing build as a primary visual resource.
Jaager.... Thanks for the info (way over my head), but technical "discrepancies" are not really much of an issue to me.... no apologies to those of you who I admire for your dedication to the art. But I decided long ago, as long as my kids, grand kids, and great grand kids, look at what I leave behind and say "WOW!" it will be fine with me.
Welcome aboard mate.
Rest assured my friends, regardless of the end results, this should be the ultimate fun challenge for someone of my moderate skills.
Now, let's make some sawdust.
- Keith Simmons, BANYAN, edmay and 4 others
-
 7
7
-
Third time through this amazing build.... Learned something new each time. This is a serious study in excellence. Thank you Bill. I too am looking forward to your next posting.
-
Toni - Looking at that rudder, I had to double check.... thought for a second, I had stumbled into Remco's build log by mistake. I consider his joinery second to none I know of. This rudder makes the grade for sure. Nice!
-
Once you get into her history, it is quite spell binding. This ship is a perfect example of a king, being so carried away with his own selfish image, that he managed to bring a great nation to it's knees with the financial burden of his folly. Obviously, Charles I was a very vain and foolish ruler, and SOS proved to be his downfall.
Hmmm, I wonder if.... better not go there.


-
My carving skills.... although I do love to carve, I'm leaning more toward using Skulpy for most of the ornamentation....much faster than shaping raw wood and can get the same details. Some of the carvings I see are redundant and can be replicated with molds.... also kinda neat to do. It's going to be a while before I get around to the fun part, although I might decide to play around with some of the figures to break up the monotony of forming and planking her hull.
Sounds like a plan for now.
- Keith Simmons, GLakie, BANYAN and 2 others
-
5
-
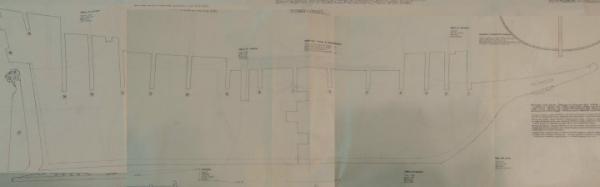
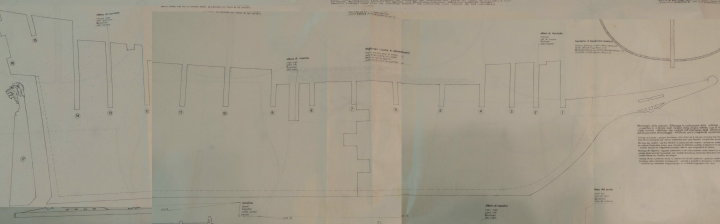
Plan sheets arrived today - Carta Augusto (Italian Mfg.).... Appear to be very old, maybe 25 or 30 years or more. My friend tells me he has had them forever and doesn't even remember where he got them from. He came across them while looking for something to donate for the April Show in Fayetteville.
Actually, after spending hours going over several really fine build logs posted within MSW, except for the patterns for her keel and frames, I'm not too sure there will be much of these plans I will be using in my build.
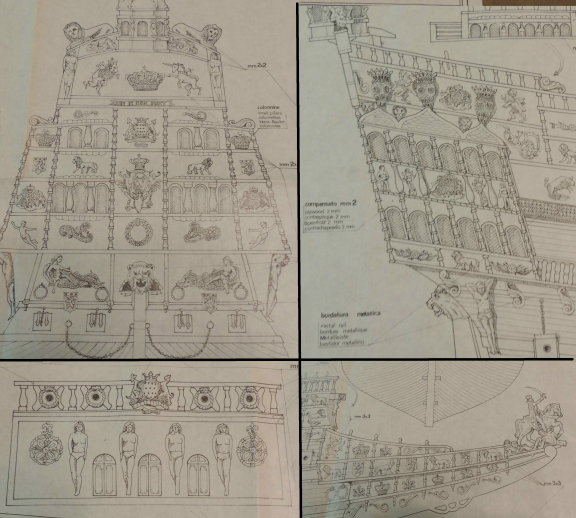
The drawings of all the ornamentation do not represent anything like I want to create after reading Bill Short's extensive research.
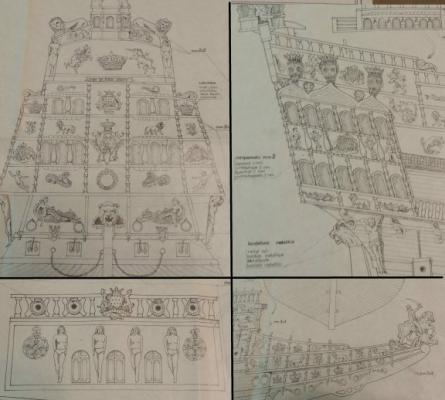
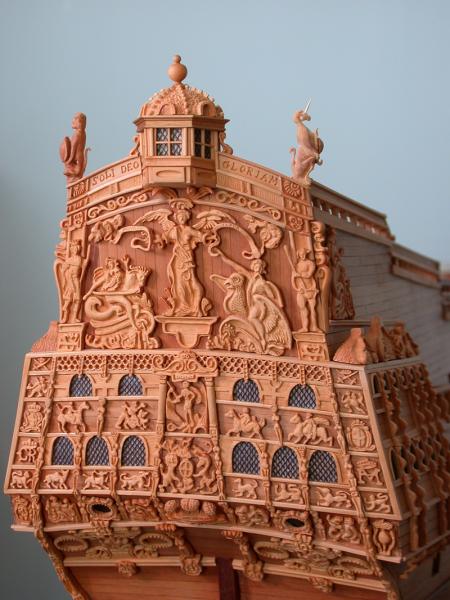
For the most part, I will be using his interpretation of this ship. Here is his amazing stern creation..... pretty impressive huh?

Here goes nothing! Wish me luck (I'll need all I can get).
- qwerty2008, tarbrush, Piet and 18 others
-
21
-
-
Sitting on the porch waiting for the mail truck....
- GLakie, CaptainSteve and mtaylor
-
3
-
Sovereign of The Seas....
Man! Do I feel really stupid this morning.
Please do not laugh when I admit, I have just last night discovered there are several very excellent build logs posted for the Sovereign of The Seas!
I have to remind you, I am just an old woodworker who took up modeling several years ago and fell deeply for the art. Never had much interest, nor claimed to be much of a historian on the subject of navel war ships. Simply enjoy the challenge of creating them the best I can.
So all my searching for build logs on name I was given for the plan sheets.... "The Royal Sovereign" had me going in circles of panic.
My dilemma was, as a scratch builder.... How in heck am I going to be able to interpret the plans of such a complex model from nothing but plan sheets, with no instructions, if I cannot find a good visual reference.
I'm sure some of you must have thought I was a little nuts (and you are so right about that).
Having said all that, after spending hours last night, plowing through the beautiful work of several very impressive builders, most notably the logs of Bill Short and Nigel Brook, I am even more excited about the challenge. If I can come anywhere even close to the quality of their work, I will be very happy.
This looks like it might be a two or three year project, with all the ornamentation.
- Piet, CaptainSteve, Jack12477 and 5 others
-
8
-
There's a great product used by auto body repairmen..... called "Bondo" I find it much superior to any other filler in the world. Sets up quickly and can be sanded smooth as a baby's butt.
- Ulises Victoria, GLakie and mtaylor
-
3
-
Piet .... (Just learned - pronounced "Pete" for all of us native born rednecks).... I'm hoping I will have some sticks glued together by the time you come cruzin up here for the weekend.
Plans are due early next week.... Warming up the old band saw.
Did you get The passenger seat to fold back far enough for that tube boat to fit inside?
-
Catching up on your build CapSteve.... Your barrel post put me in the floor holding my sides. Beautiful launch.
- CaptainSteve, mattsayers148 and GLakie
-
3
-
Thank you one and all for all the nice comments and words of encouragement throughout this build. Like I said to Chuck, I think his Mayflower was a perfect choice for me to shake off the rust after taking two years away from modeling. It was a lot of fun, and allowed me to re-sharpen some of the feel for the art that had definitely dulled with the layoff. His advise to me...... "SLOW DOWN".
My reply to him.... "I'm too old to slow down. If I slow down, I might run out of time." har de har
We will soon find out as I step it up a notch to take a whack at the Royal Sovereign.... or.... "Sovereign of the Seas".... whichever of her names you prefer.
See you over there once I get my hands on the plan sheets.
-
I will be following this build closely as it appears to be very similar to the Royal Sovereign, which I may be soon starting as a scratch build. Looks like it will be quite a challenge and I think your build will be very helpful.
- GLakie and Ulises Victoria
-
2
-


Sovereign of The Seas by SawdustDave - FINISHED
in - Build logs for subjects built 1501 - 1750
Posted · Edited by SawdustDave
Jack.... Nice suggestion, however, still requires individual one-at-a-time planking. A big part of my effort here was to come up with a five-plank unit to install.
Cap. Steve.... The butts can easily be achieved with a knife....interlocking the units in the waste area where longer planks will be required. The staggered butts will also be scribed in with a sharp Exacto blade. Been there - done that.