


Landlubber Mike
-
Posts
4,543 -
Joined
-
Last visited
Content Type
Profiles
Forums
Gallery
Events
Everything posted by Landlubber Mike
-
 I'm in for this one Greg. I have some of the similar Japanese subjects in 1/700 scale on the shelf, but always liked the Langley - especially this one as compared to the CV-1 with the full deck. What do you think of the kit? It doesn't look like it builds into too large of a model at this scale?
 -
Fantastic PE work Craig. And glad you were able to find the lost barrel. I've spent hours on the floor looking for parts like that as well. My problem is I often times work on my kitchen island, and the floors in the kitchen are a medium brown oak, so brass doesn't show very well The apron is a great idea. I've also heard some put a white sheet on the ground to make the dropped parts easier to spot (maybe you were the one to suggest the sheet).
- 225 replies
-
- 6
-

-
- I Love Kit
- Hood
- (and 2 more)
-
Ange, I'm sorry to have missed your log but wow, what a beautiful model! Fantastic job! Love the display case too. Can I ask - did you use dry transfer letters for the name? The lettering looks perfect! I'm trying to figure out what to do on my Charles Morgan but the name is so long that I worry about having the letters oriented the same/right way.
-
amati 1:200 Bismarck - coming soon!
Landlubber Mike replied to James H's topic in Wood ship model kits
When you add up all the Pontos or Mk.1 add-ons to the Trumpeter kit, you probably come out to around the same cost. I know with the Trumpeter kit some question the shape of the hull, so it will be interesting to hear if Amati will satisfy the hull shape critics. Kit looks great, but personally, I'm unsure about planking the hull that will just get covered up in paint. A little different from other subjects whose hull is painted but (1) the hull is wood, and (2) the scale is much larger than 1/200. That being said, will be looking forward to seeing the write up and build logs on this kit. -
Looks fantastic Kevin! Great display for your works of art!
- 273 replies
-
- 3
-
-
- panart
- amerigo vespucci
- (and 1 more)
-
Will, your work is fantastic! Super impressive that this is your first build, wow! To give the copper a little patina, there are some solutions out there that might work. I think they are typically used for things like getting an antique patina on lamps, but seems like it could work here as well. I picked up a bottle but haven't yet tried it. https://caswellplating.com/metal-finishing-solutions/antiquing-solutions.html
-
Nice work Craig! Hope the rains weren't too bad down where you are.
- 225 replies
-
- 5
-
-
- I Love Kit
- Hood
- (and 2 more)
-
Sorry to come late to this log, but wow, you're doing a great job and that diorama is looking fantastic! Glad to see that others are working in the 1/700 scale - I really enjoyed mine and have a stack of others to start working on. The subjects are a lot more varied especially on the auxiliary side.
-
Wow, this is going to be epic Yves!!! Looking forward to following along!
- 321 replies
-
- 7
-
-
- Finished
- Flower-class
- (and 1 more)
-
Awesome work Greg! At first I thought you joined a few of us crazies in the 1/700 pool, but then noticed this was 1/350. Either way, a fantastic build, congratulations!
- 53 replies
-
- 4
-

-
-
- photo etch
- resin
- (and 3 more)
-
Another beauty Greg, nice job!! Can I ask what paint and color you used for the white? I really like it as it's not stark white.
- 53 replies
-
- 5
-
-
- photo etch
- resin
- (and 3 more)
-
I love the look of the natural wood - nice job! My kit is one of the later editions which includes a wooden deck. I asked Parkins about using it, and he thought it would be better to paint the PE deck instead. Personally, I would prefer actual wood rather than trying to replicate it at this scale with paint.
-
Fantastic Craig! You set the bar too high for when I do mine though!
- 127 replies
-
- 5
-
-
- Akitsushima
- Pit Road
- (and 2 more)
-
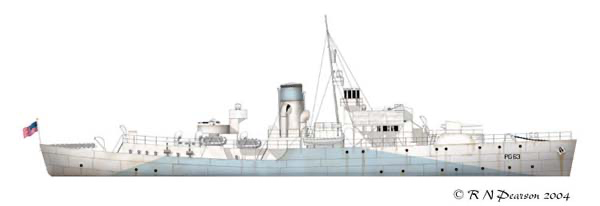
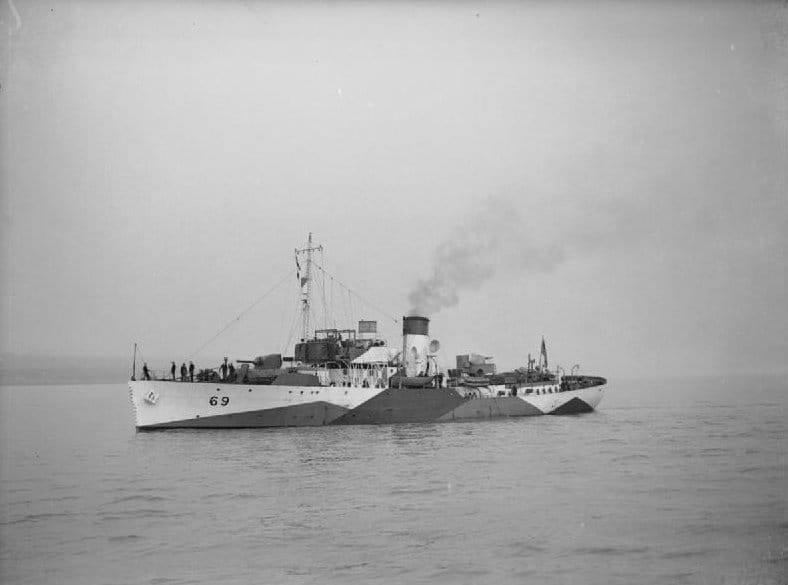
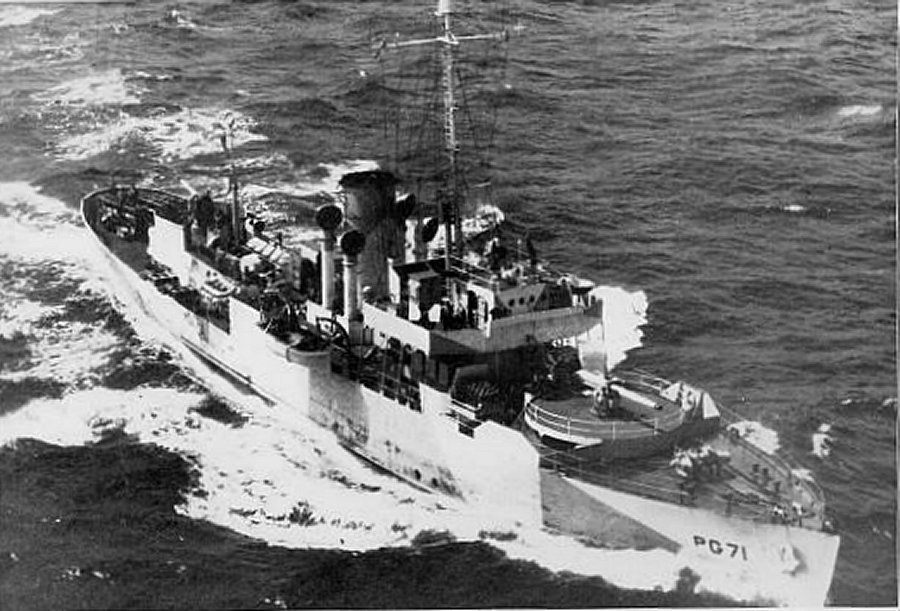
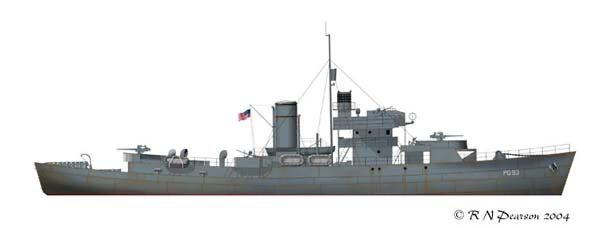
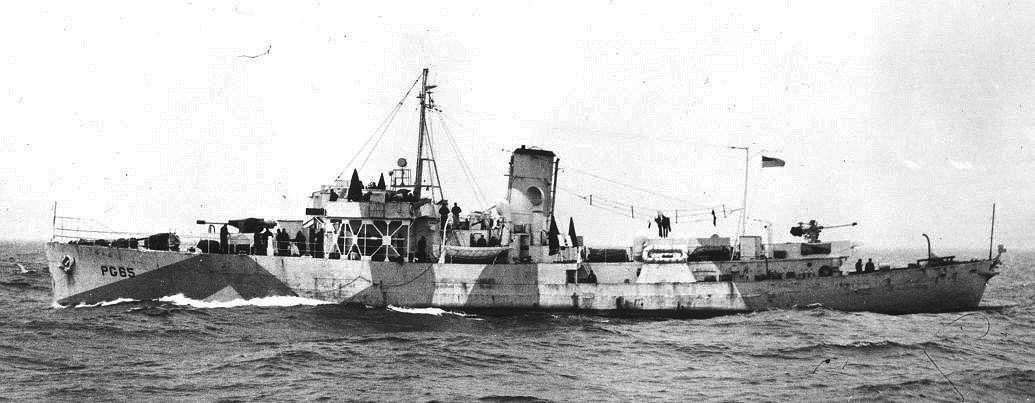
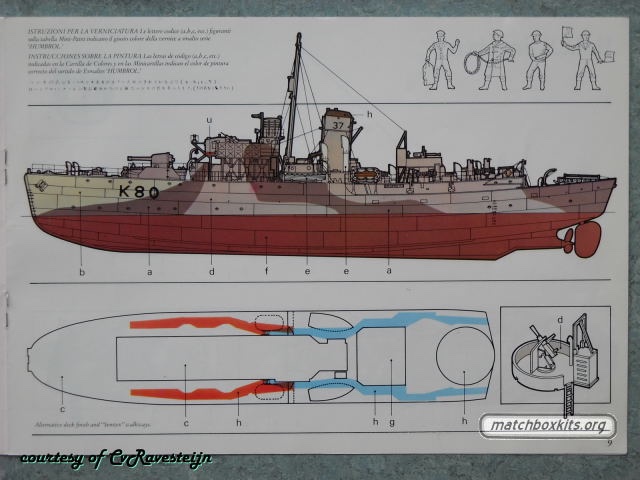
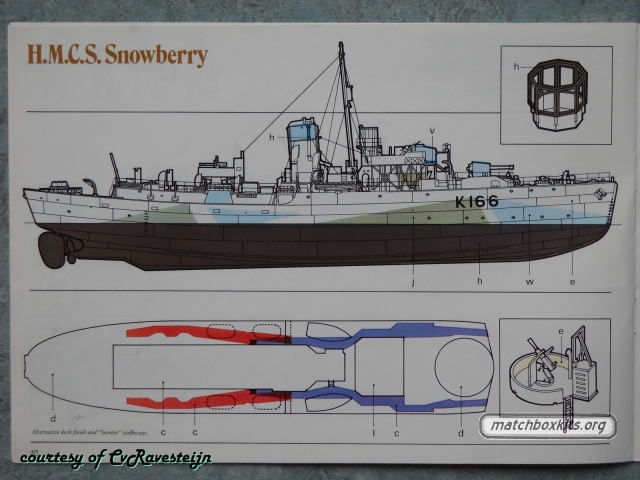
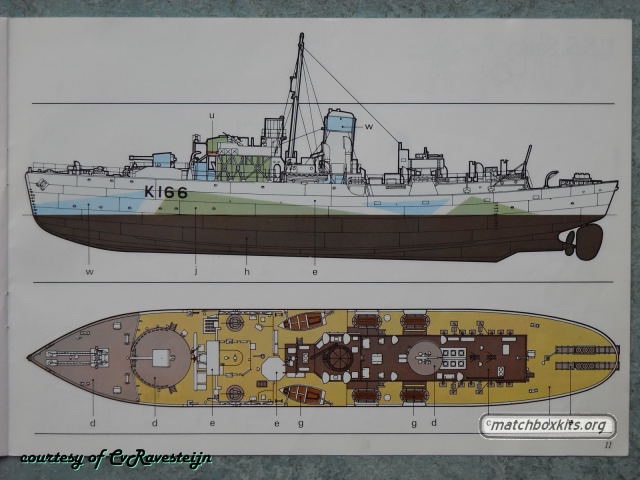
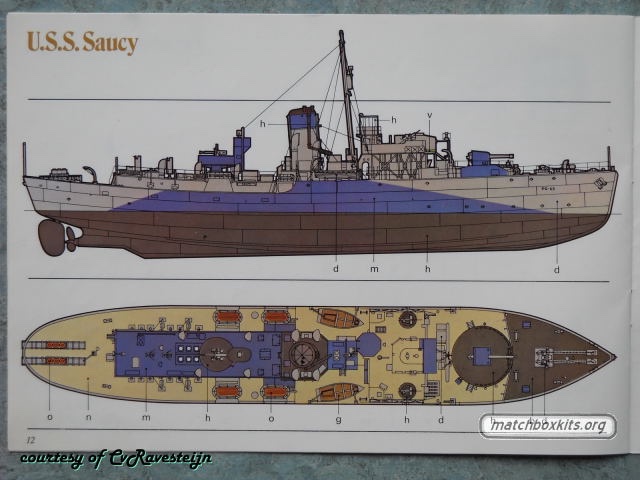
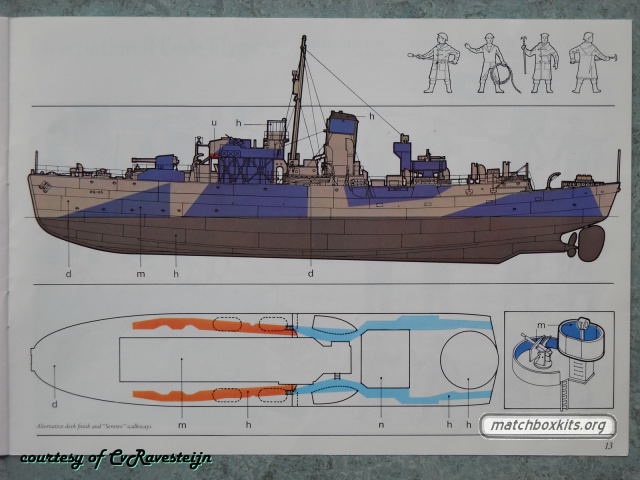
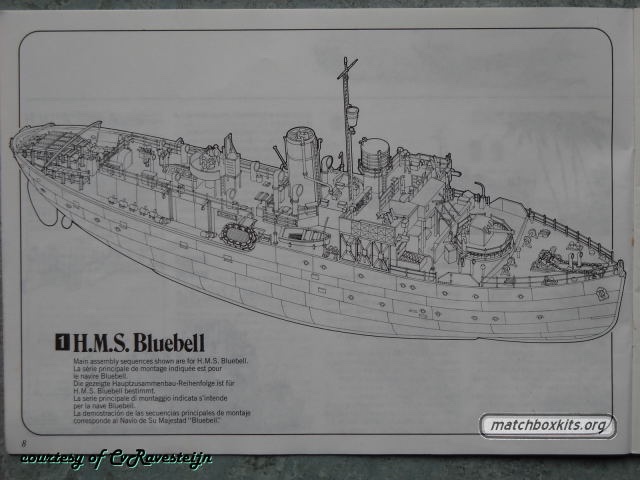
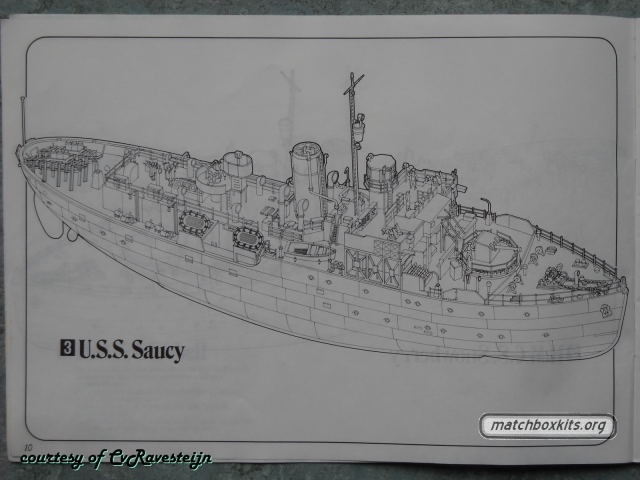
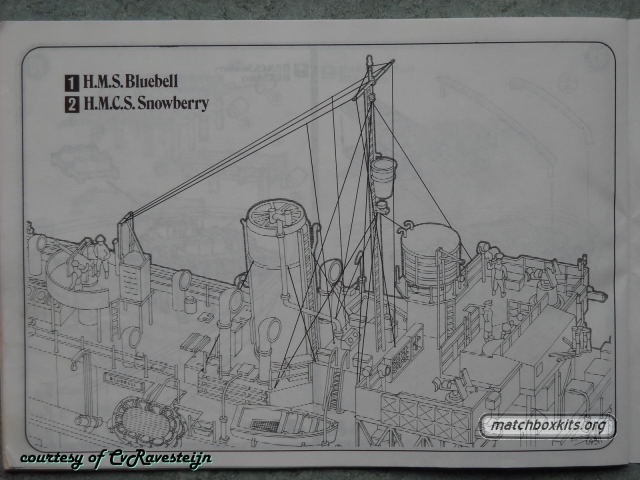
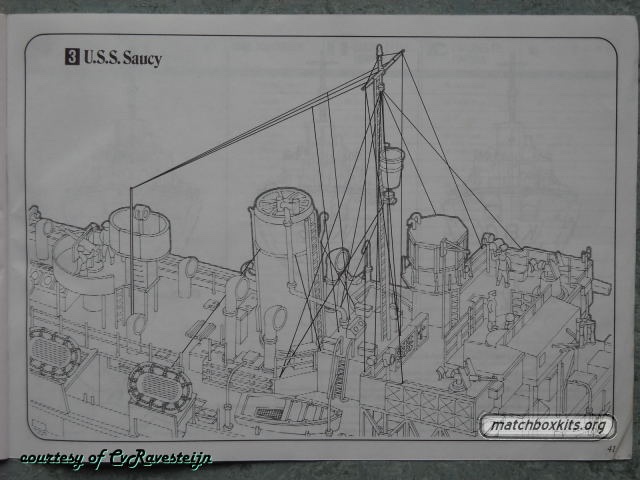
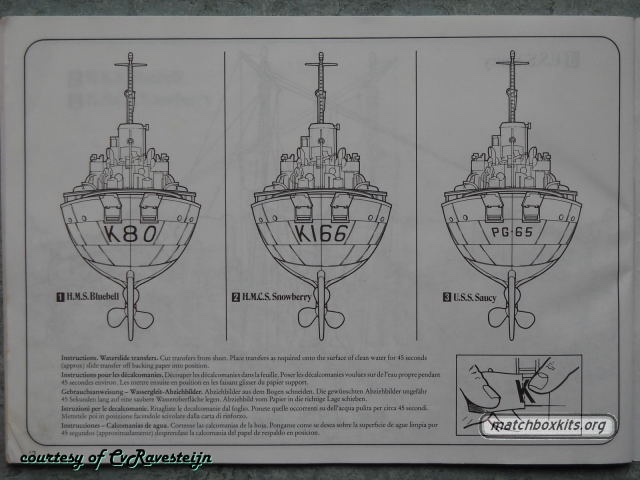
Thanks for posting those pictures, really appreciate it! The model seems to be in the configuration of the Matchbox kit, and from what I can tell, might be consistent with this picture below from May 1942, a month after HMS Arabis was transferred to the US and renamed as the Saucy: The picture above is from the link below, a great summary with profiles of some of the US flower corvettes: http://www.cbrnp.com/RNP/Flower/ARTICLES/USN_Flowers.htm From that link, a suggestion that the Saucy later was reconfigured as shown in your last picture: The first batch of US Flowers replaced the forward Mk.IX 4" gun with a US 4" gun with no shield, and the 2pdr in the bandstand aft was replaced by a 3"/50 in a new location at the extreme end of the engine room casing. US SG radar eventually replaced the RN Type 271 radar. The later ships carried 3"/50 guns both fore and aft. Since I have both the 1/144 and 1/72 kits, I'd prefer not to build both as the Snowberry (I can also build the HMS Campanula with my 1/72 version). Also, I seem to like torturing myself by not building OOB, so I'd like to convert one (or both) to US corvettes. The Saucy seems the easiest conversion, particularly with the 1/72 kit which I believe has the extra parts for it. But, given the relatively lack of pictures and plans, and the need to get lettering and other decals, I don't know if I will go through with that idea. Would be fun to also do the USS Fury... ...or the USS Tenacity in either of her camo schemes: The USS Intensity would require a lot of scratch building given that the ship was based on the modified endurance version of the flower class corvette:
.jpg.57f1a7fed269f3c3293ef9890167d746.jpg)
-
Ensign 3 - Flower class Corvettes by Anthony Preston and Alan Raven has drawings for Buttercup and Begonia.
-
Thanks for posting that. Interesting! And prior to it's designation as the USS Saucy, it was the HMS Arabis: https://www.tapatalk.com/groups/theflowerclasscorvetteforums/viewtopic.php?t=670
-
Yeah not sure about the colors. Here is a picture I found of the Saucy - the camo looks a little different from the Matchbox instructions (maybe it was repainted at some point).
-
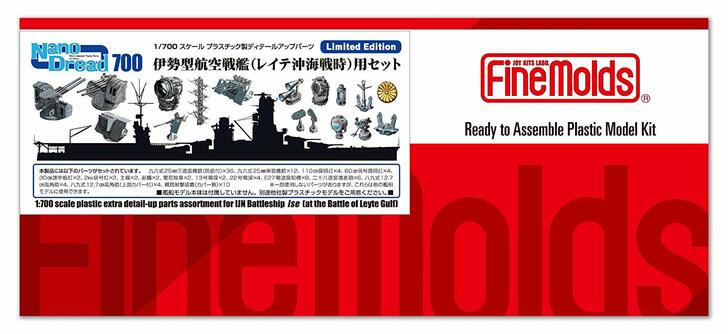
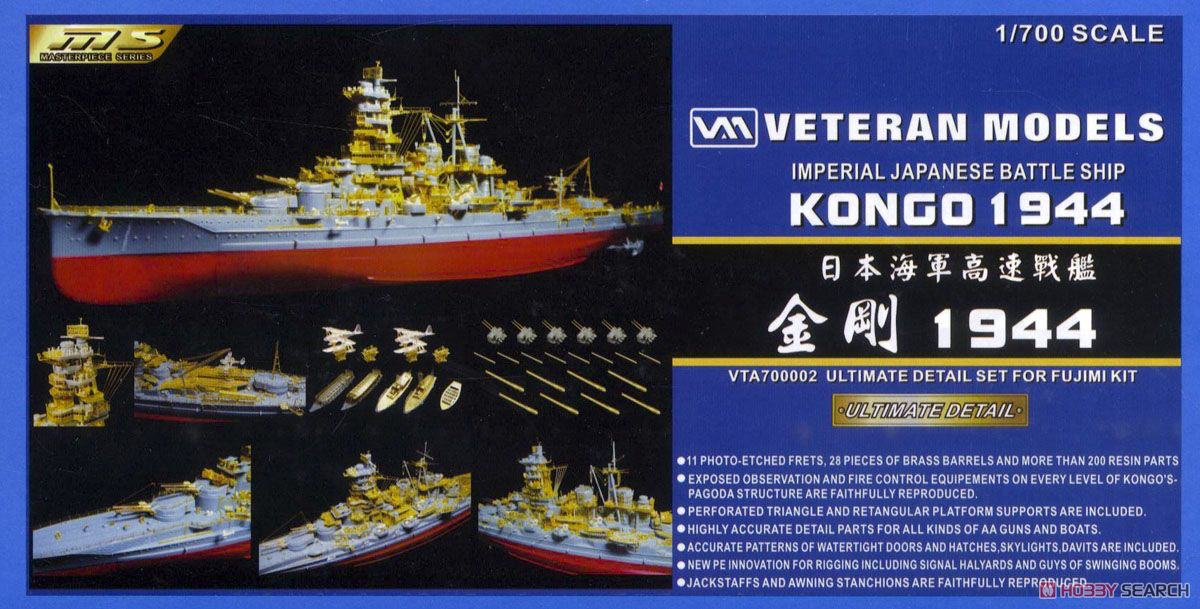
Thanks for passing along the source. I have been recently picking up resin upgrades as well. Expensive for sure, but will save time and aggravation in trying to bend two-dimensional PE to create guns, rangefinders, etc. I had enough of that on my destroyer - I couldn't imagine doing that for a cruiser or battleship! By the way, along with Fine Molds, you can get resin parts from a number of outfits, including Five Star, North Star, Black Cat, Veteran Models, etc. across all scales - 1:700, 1:350, 1:200, 1:144, etc. I don't want to think about how much I've dropped on those sets, but for some things like guns, I think having resin or 3D printed will look much better as the barrels for example will be tubes and not 2D representations. You can also look to outfits like Master barrels who combine resin/plastic with brass PE and barrels. I just picked up some sets to upgrade the guns on my Gambier Bay. I also saw that Fine Molds makes resin upgrade sets for particular ships. One stop box to fully upgrade your model. Here's one they did for the Ise in 1/700 that I was excited to find: I wish Veteran came out with more sets like this one - talk about pimping out a 1/700 kit! 11 PE frets, 28 brass barrels, and more that 200 resin parts! I happened to see it randomly on eBay for a steal and quickly bought it. Set was from 2009, and for some reason, Veteran didn't do too many other sets like this. http://www.modelwarships.com/reviews/pe/veteran/vta700002-kongo/vtm-review.html Ultimately, hopefully Flyhawk and others will come out with more all-in-one boxes with full upgrades. Five Star and Niko are doing that in releasing 1/700 resin hulls with full PE and resin/plastic upgrades. Otherwise, it's a bit exhausting trying to source various upgrades, particularly when you have to match them to a particular kit. Fujimi for example might have half a dozen different iterations of the same ship so you need to be a little careful when picking out the PE to match the kit (or vice versa).
- 127 replies
-
- 5
-
-
- Akitsushima
- Pit Road
- (and 2 more)
-
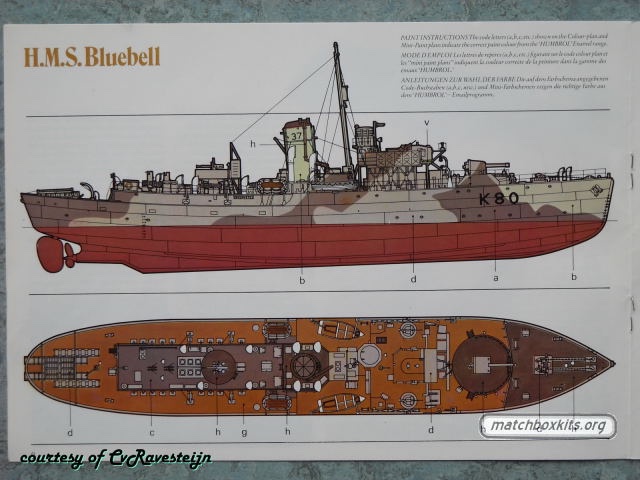
Nice work with the sanding down of the hull and deck. I have to say, when I saw that GLS suggests you do that, I almost didn't get the kit! It will be all downhill (in a good way) from there! Thanks for posting those pictures from the instructions. Very helpful! Here are some of the color profiles from the old Matchbox instructions. I'm happy to delete them if you don't want them cluttering up your log (if so, my apologies in advance!). The instructions also show the minor differences in the parts construction here and there - happy to send or post them here if you'd like to see.

-
From the pictures, it looks pretty good to me. Hard to tell how low the stern is in the water but overall I would say it's looking great or at least very close. I know there are some people that are sticklers on this who hopefully will give their thoughts. Can I ask - in cutting the bottom as you did, I see there is an open hole in the bottom. My guess is that the hole would be perfectly fine using your sea approach of a styrofoam base. I'd probably be a little nervous with a hole if using liquid resin to create the sea. I have been thinking about sea approaches for some of my models, and have always wondered about cutting the bottom of the hull as you did.