


mtdoramike
-
Posts
2,054 -
Joined
-
Last visited
Content Type
Profiles
Forums
Gallery
Events
Posts posted by mtdoramike
-
-
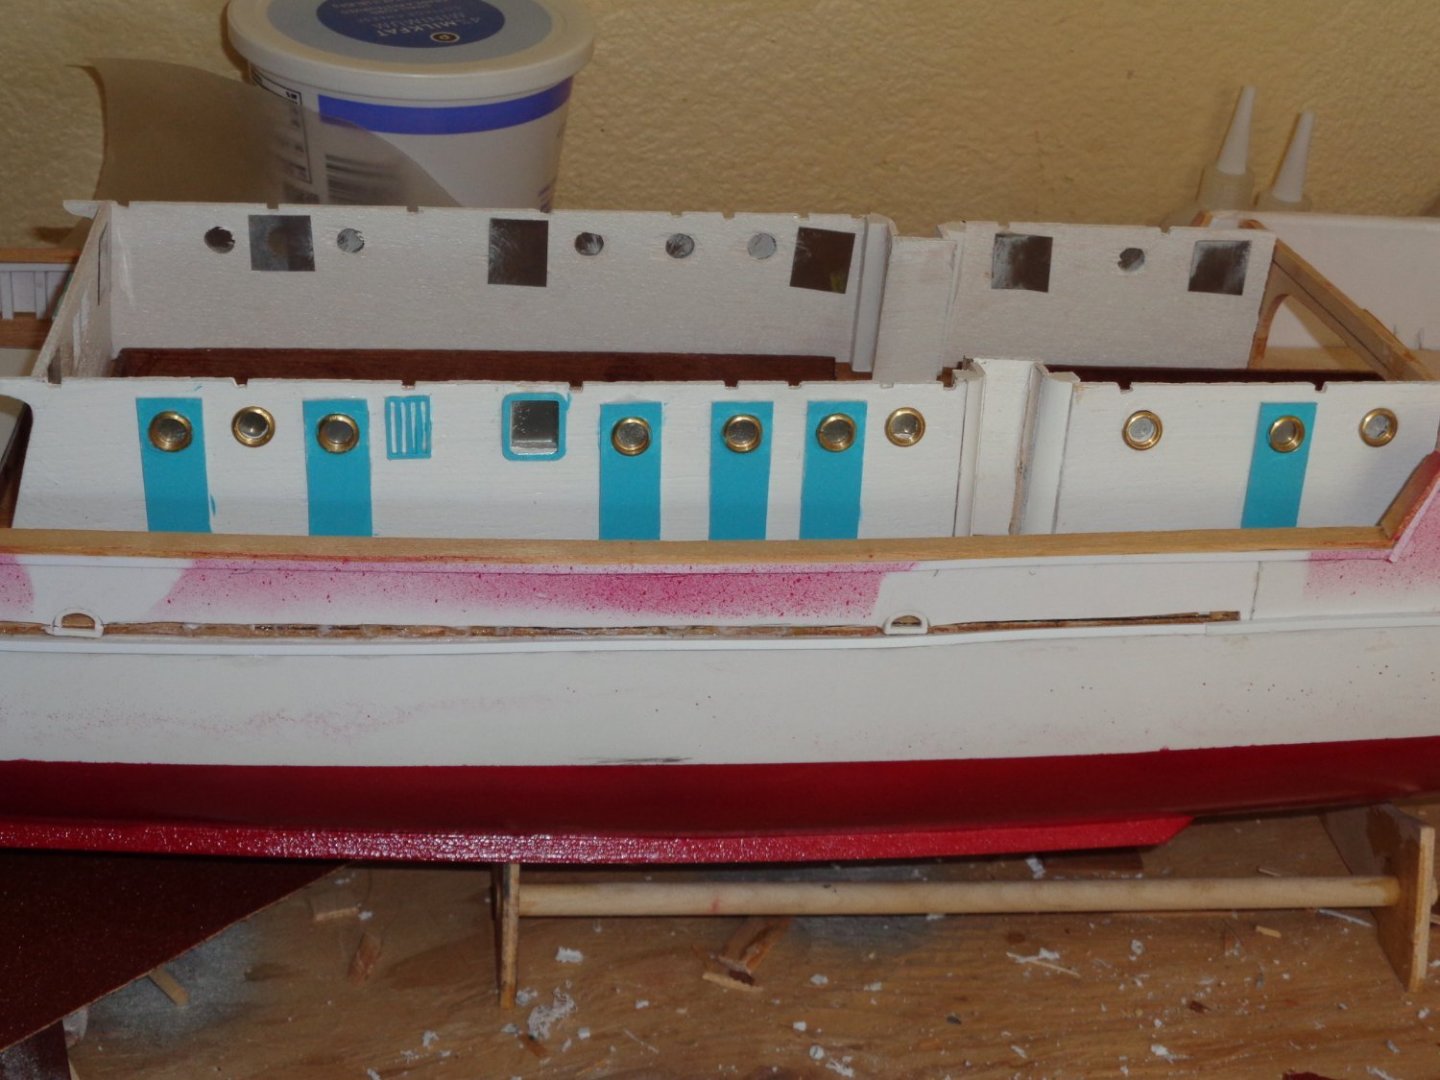
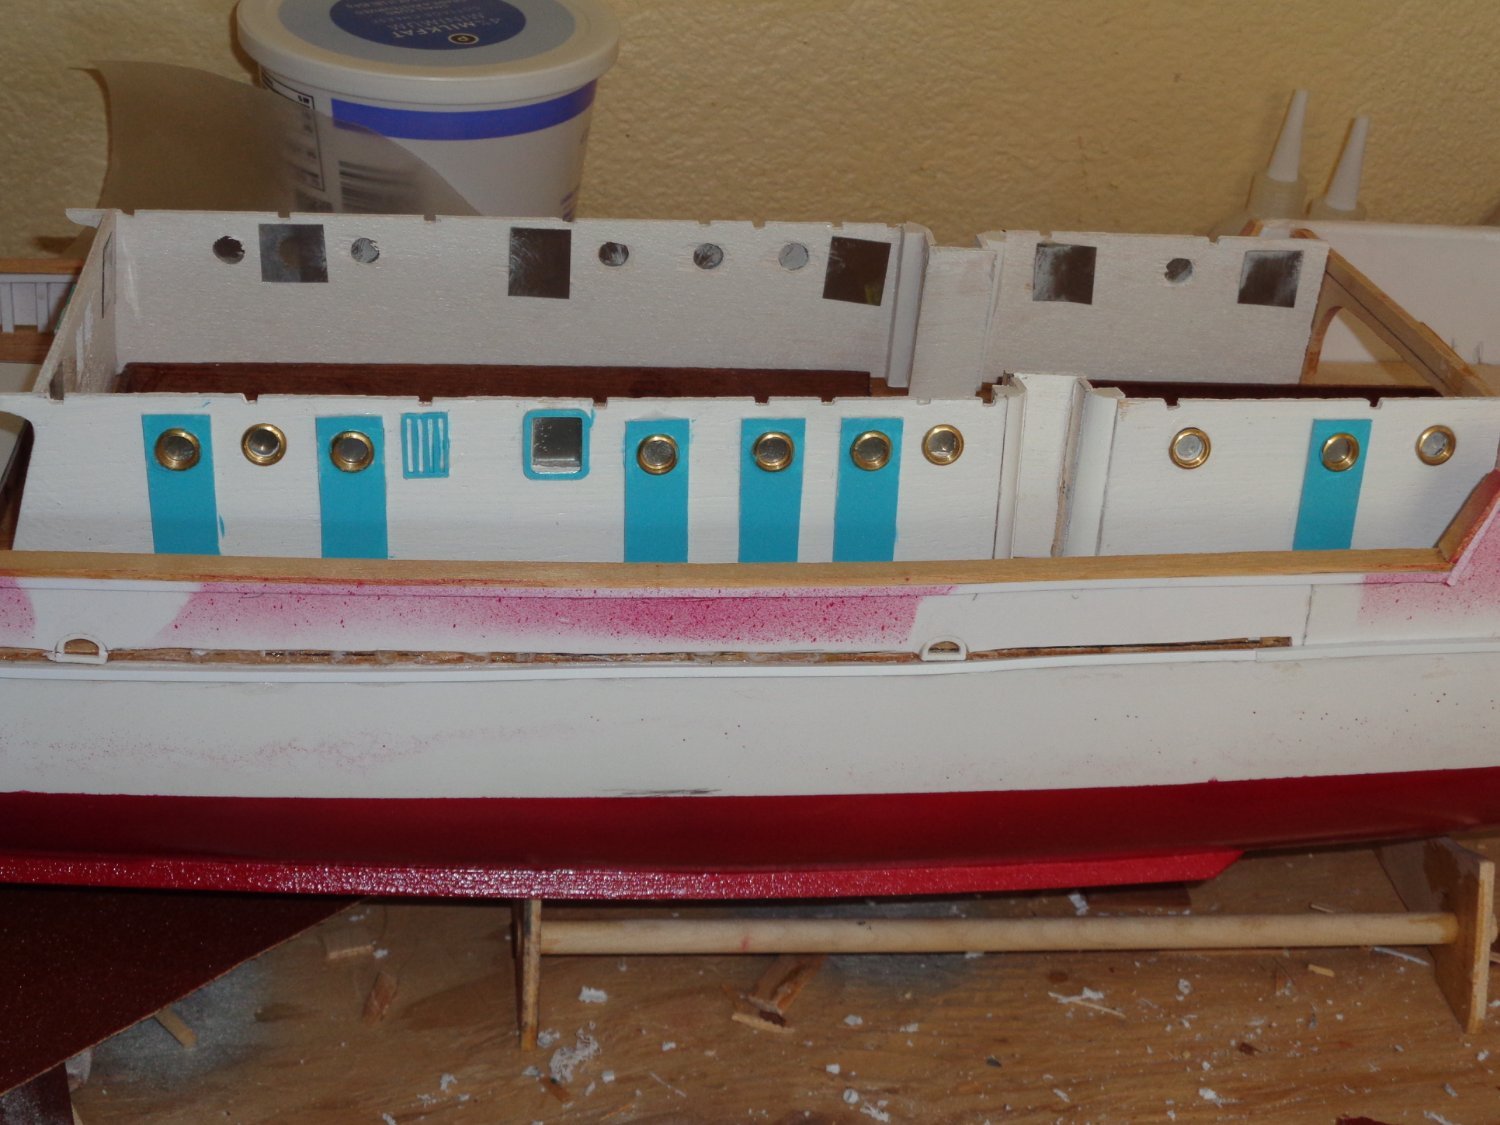
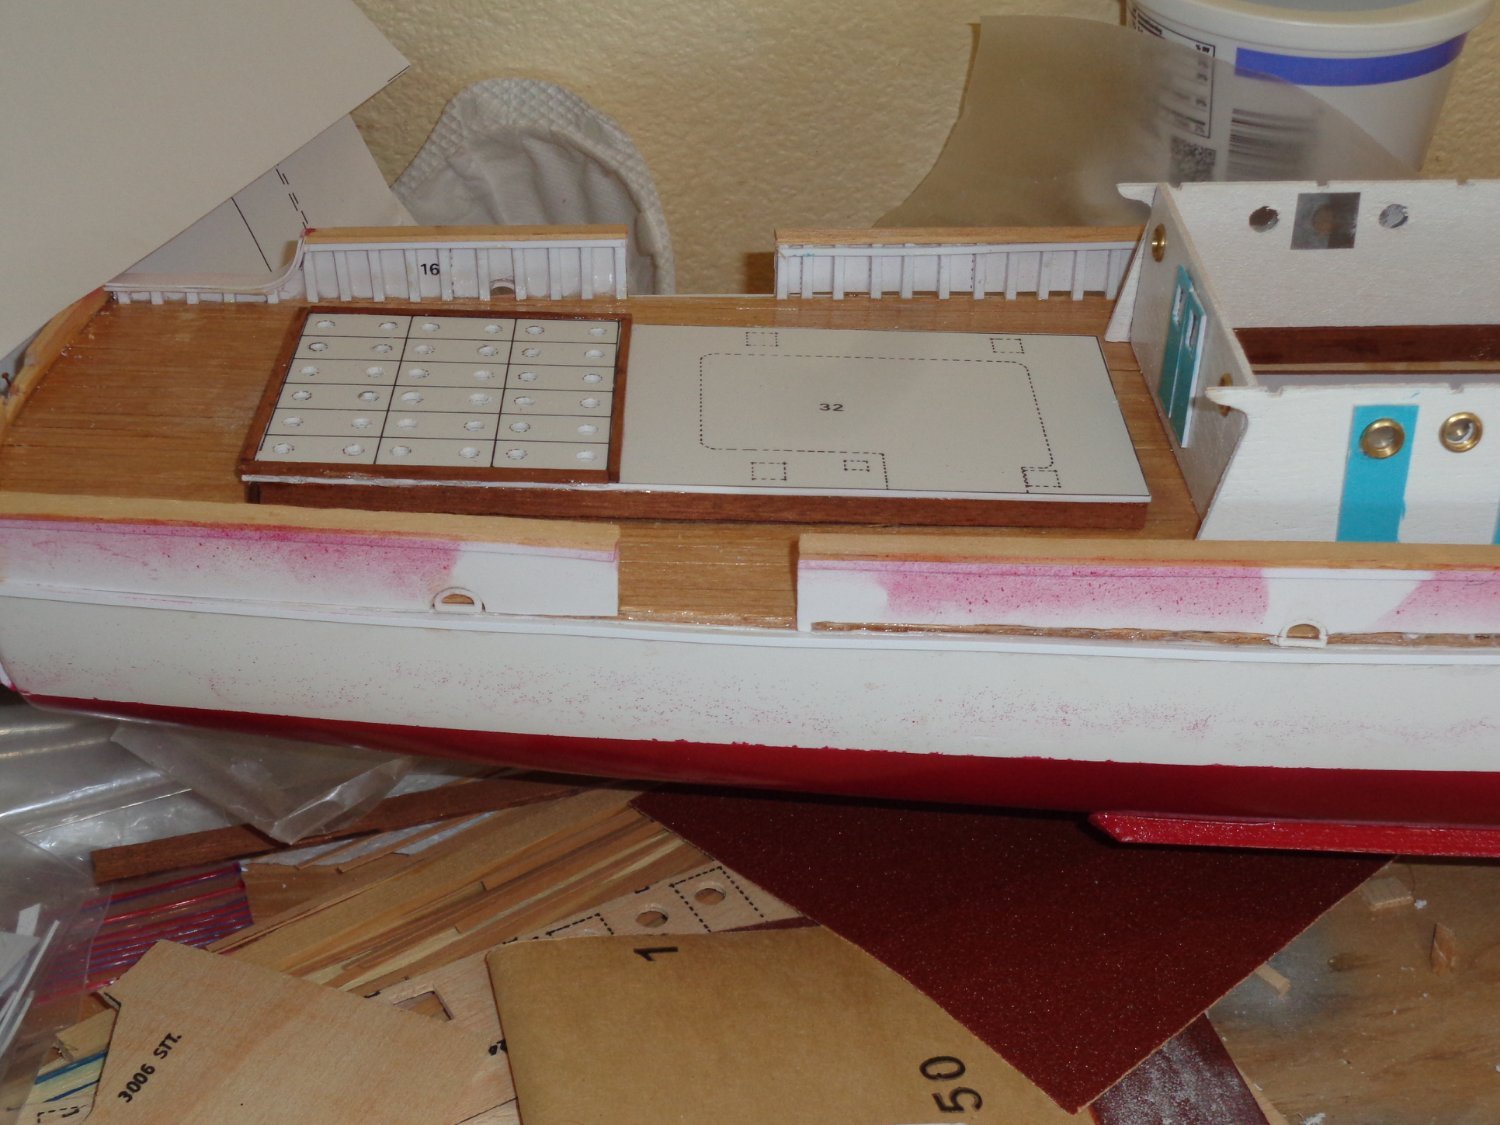
I was able to spend a little time on the Calypso between honey do's. I'm not going to be stuck on the colors. I will try to stay as true to the actual Calypso as myself will let me. But I just have to add a little extra color.
- GrandpaPhil, BobG, yvesvidal and 3 others
-
 6
6
-
1 hour ago, CDW said:
Huge box that Missouri model comes in. Impressive kit to be sure.
Yeah, it ain't one of those you can stick under your arm and casually walk into the house with giving your spouse a head tip like saying "what's up?" hahahaha. No, she was the one to actually meet the mailman at the door and yes, the box was well over 4ft in length and weighed about 10lbs. The previous owner included the running hardware with the kit which included all the drive train shafts, two motors, brass props, which came from Dean's marine from across the pond.
Unlike most Trumpeter ship kits, this hull is in two pieces. Trumpeter usually makes their hulls one piece. So the box was a tad shorter than some of their kit boxes.
-
The Big Mo arrived today in perfect condition. The previous owner included some extras with it like some scale sized men and other stuff I haven't had a chance to check out yet. But I put it away for quite a while since I won't start on it until after the Calypso is finished.
- Dave_E, BobG, popeye the sailor and 9 others
-
12
-
Now that's hot right there, I don't care what anyone else says and a bit nerve racking too. Any time I drill into a perfectly good hull I get the nervies.
- yvesvidal, GrandpaPhil, CDW and 4 others
-
7
-
-
WOW, I can't believe these are still here. If I were still building tall ship models, I would buy them both.
-
I spent a little time one the calypso in the last few days.
- Titanicphile, Ian_Grant, CDW and 7 others
-
10
-
-
-
NO, I love seeing your build. Now I see what you are talking about. I'm used to seeing the entire bottom cabins being removed on most R/C builds which is why I assumed this to be no different. But now that I see your's and I looked through all the plans and deck parts, I see how it is to be done. I'm glad you caught me before I did all that work for nothing.
-
1 hour ago, yvesvidal said:
I am not sure what you are trying to do here. The main cabin is NOT being removed for an RC control model. The upper deck is removed and there is plenty of space to access the RC components inside. Of course, you would have to plan the installation of the motor and batteries support ahead of time....
My model is RC equipped and has navigated on all kinds of lake and seas. I do not see why you are concerned with the support being glued on the deck: the resulting structure is very solid and I have never broken anything. My Calypso is now 40 years old and still in one piece.
For a static model, the building is even simpler as you do not have to plan for inside access.
Yves
PS: if you need, I can post a picture of my model, showing how the upper deck fits on the cabin.
yes, i would like to see a picture of it if can post or send to my email mtdoramike2@aol.com
-
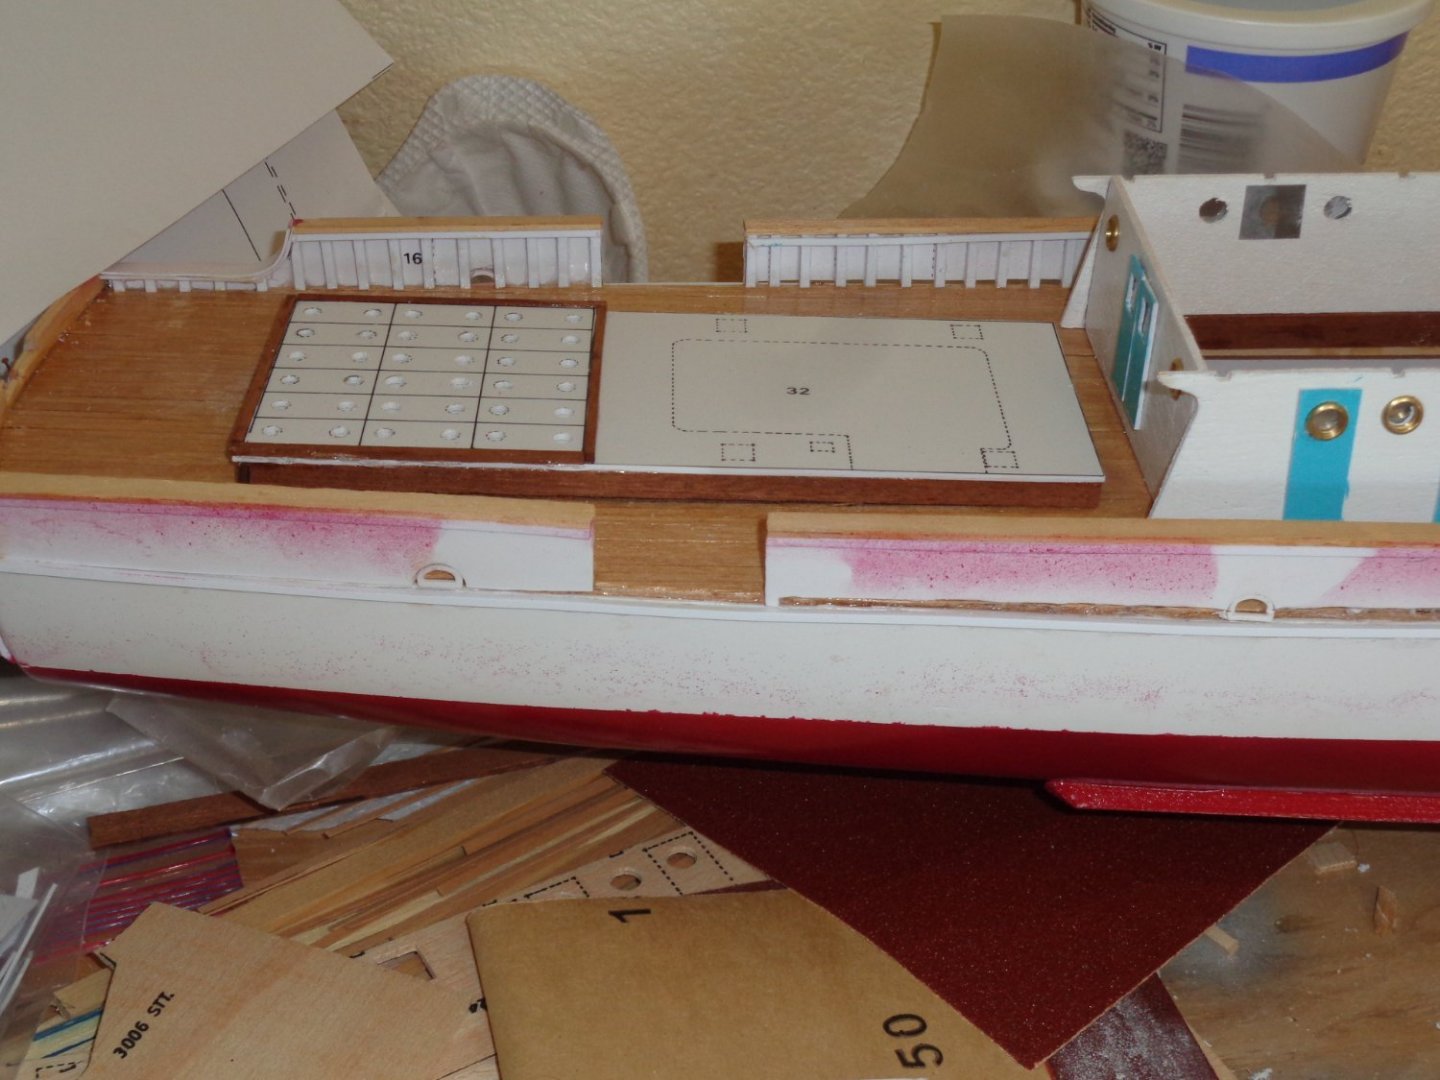
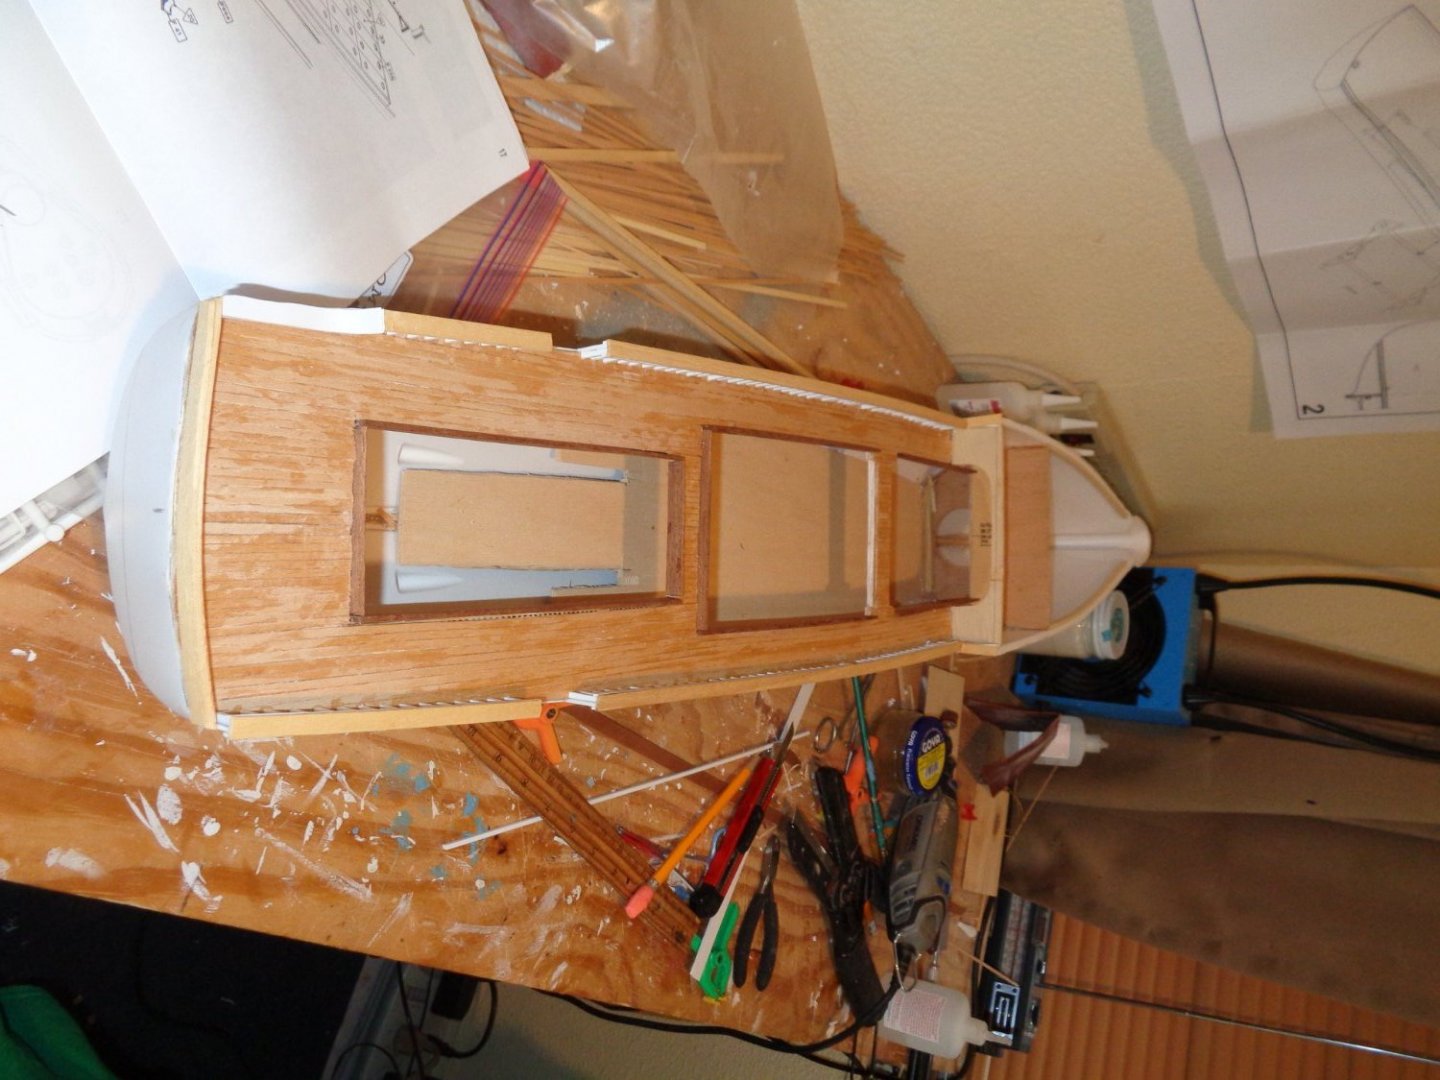
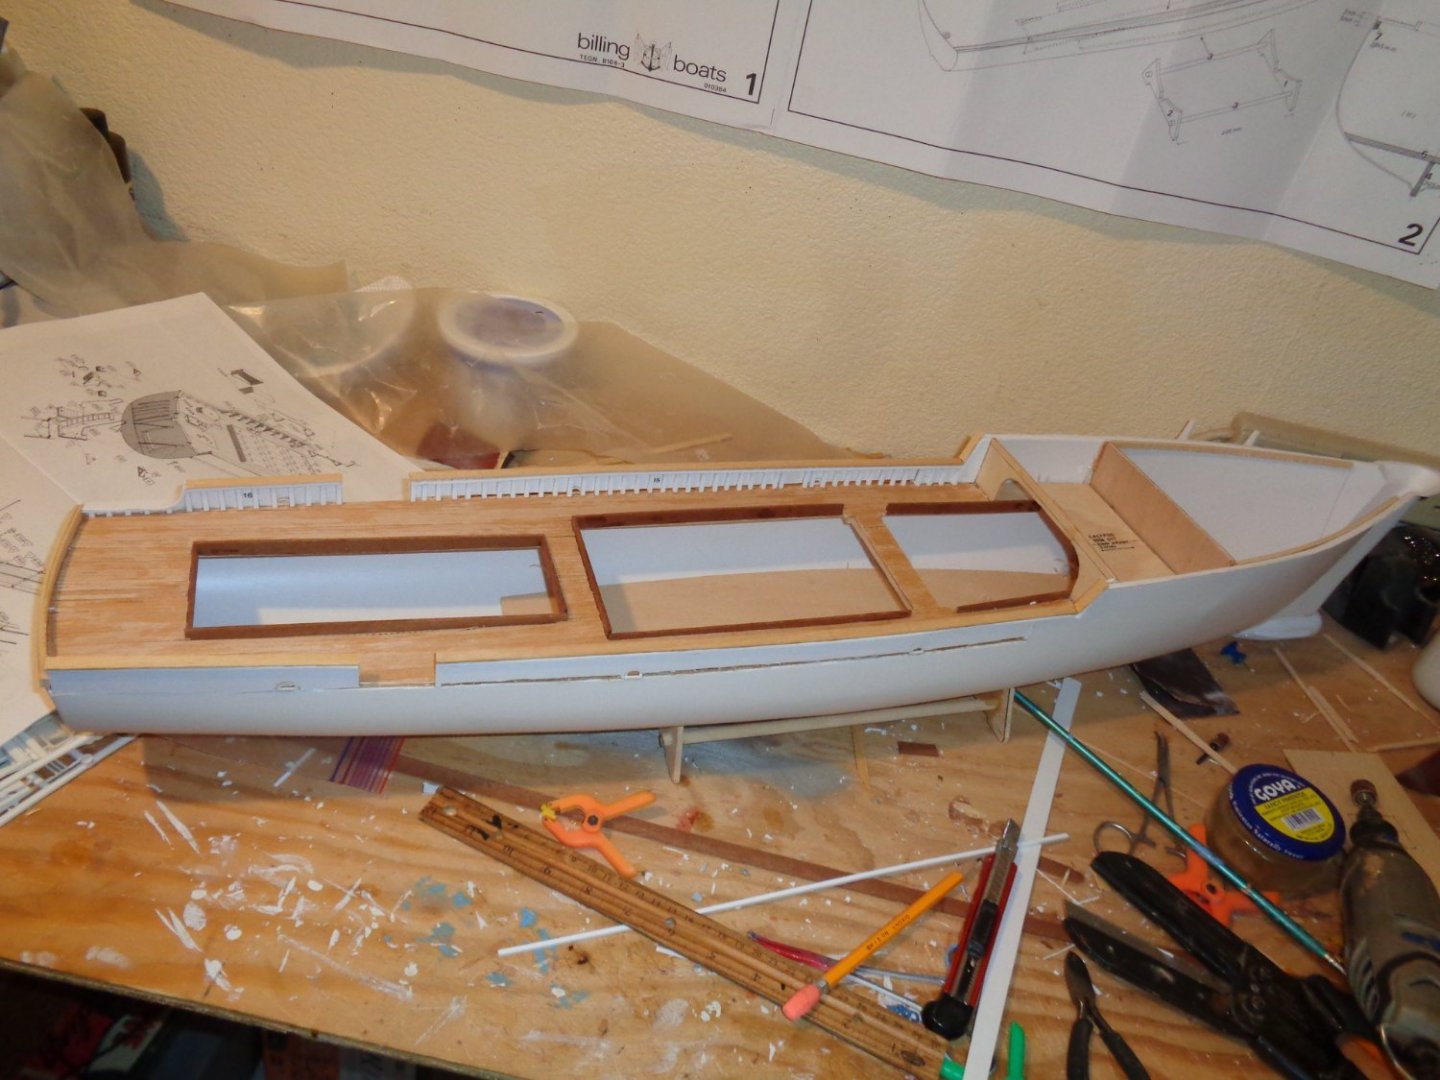
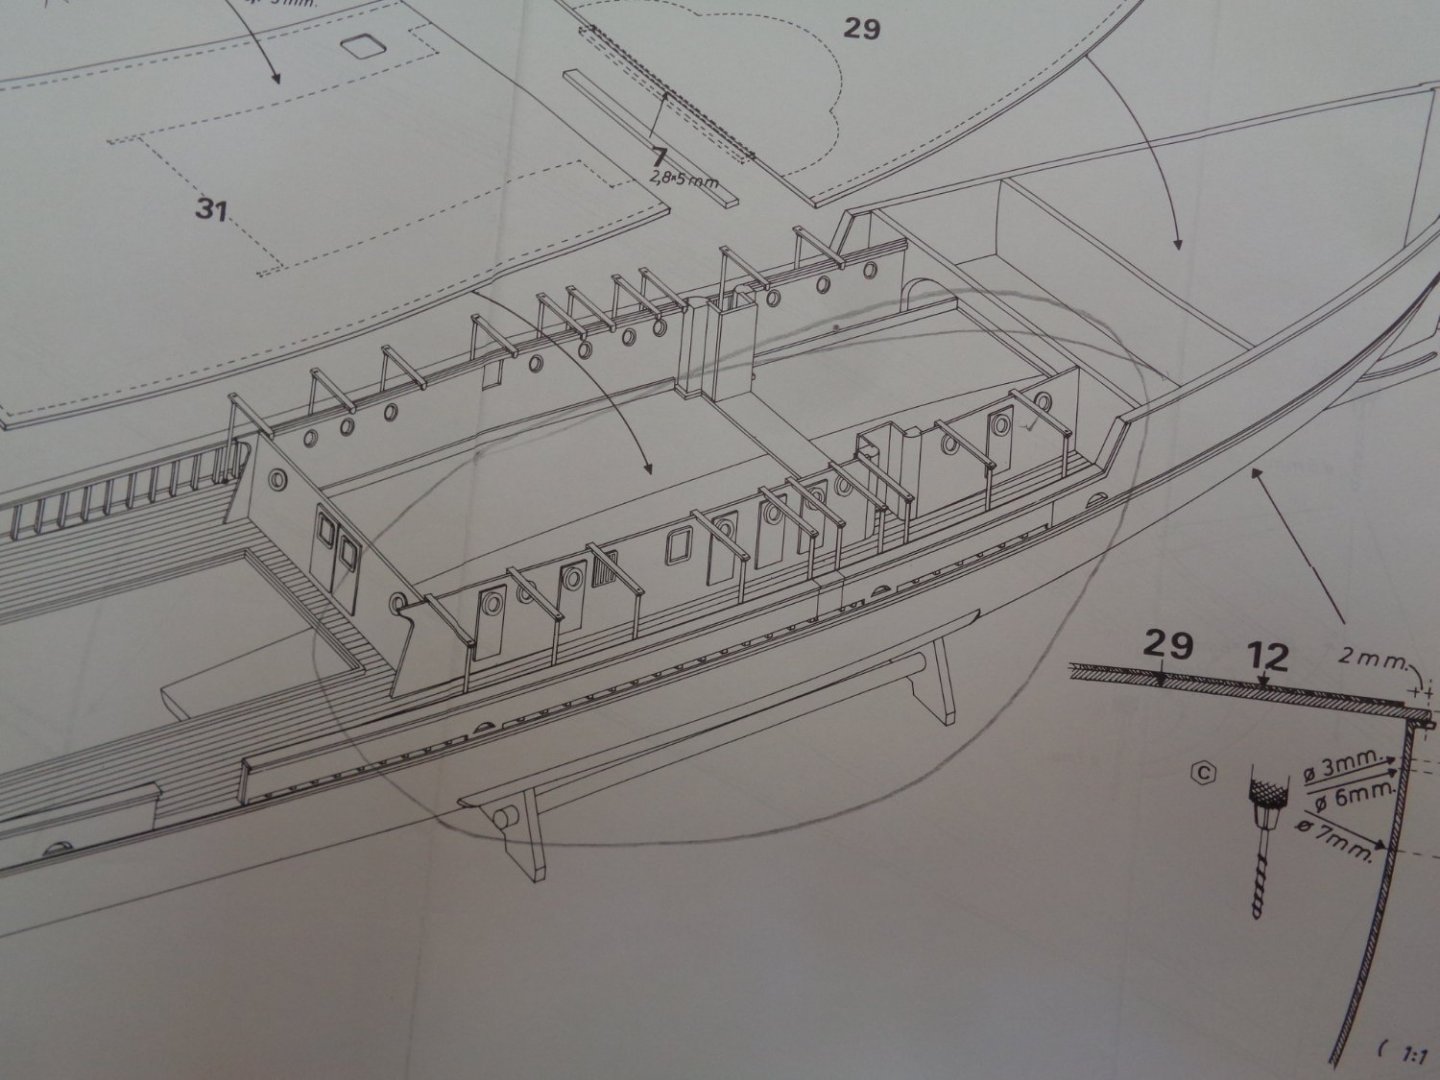
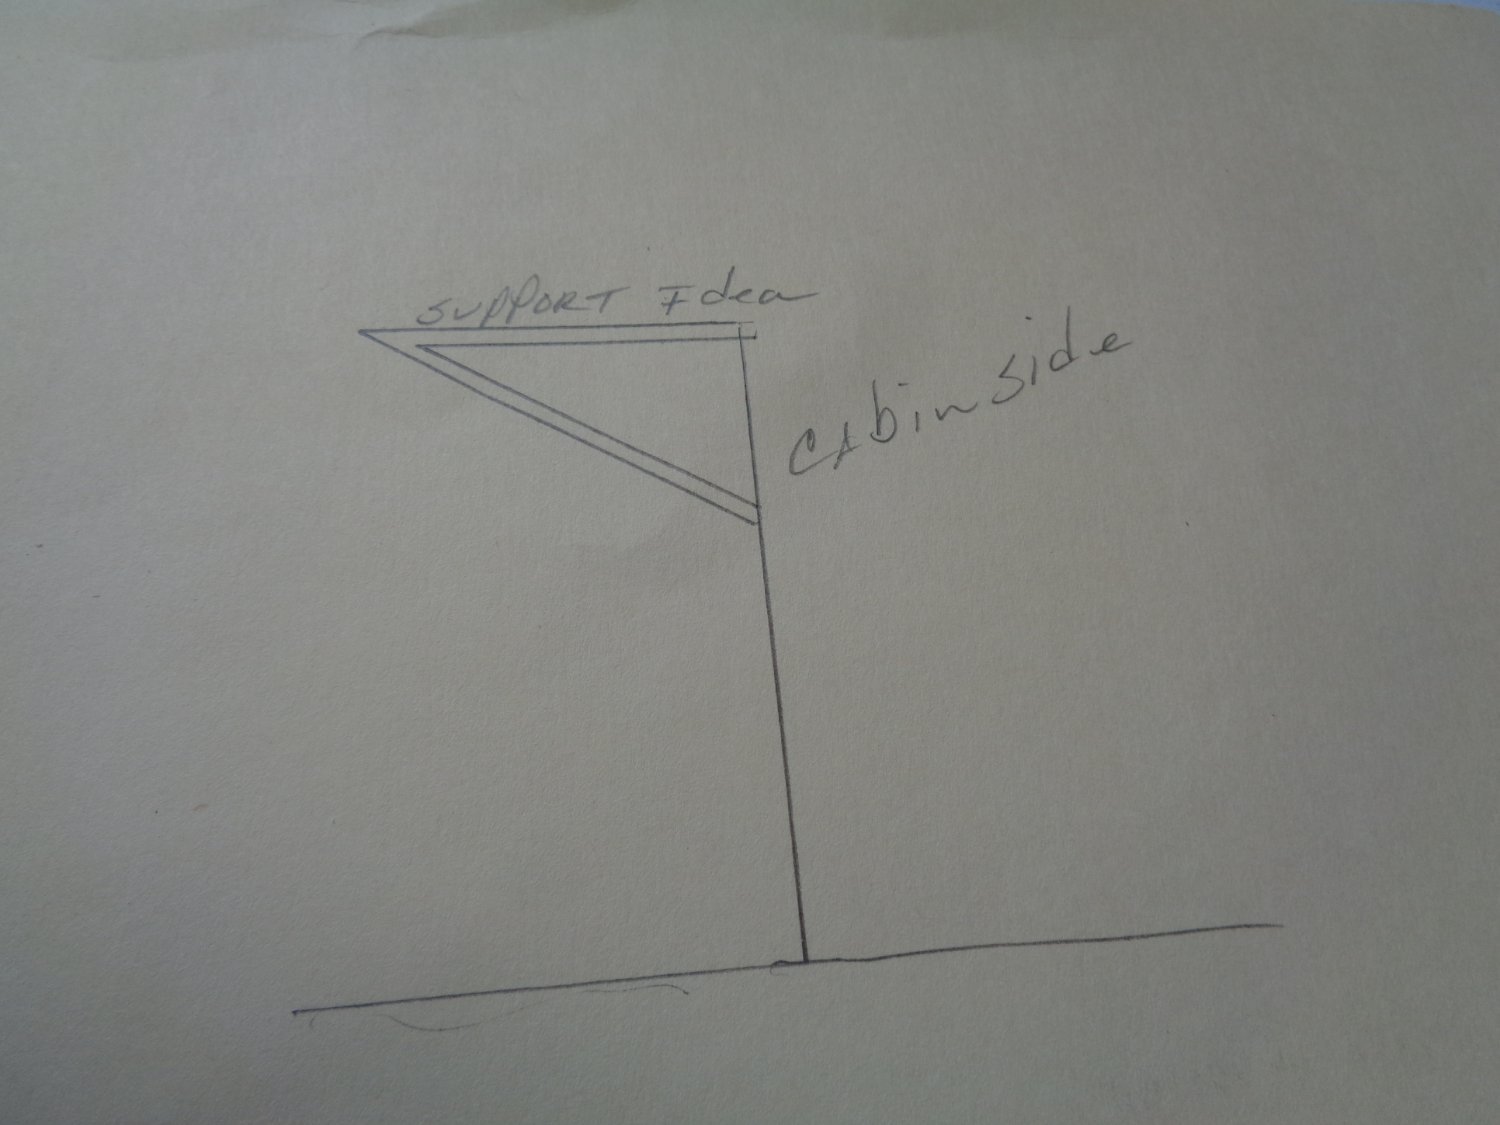
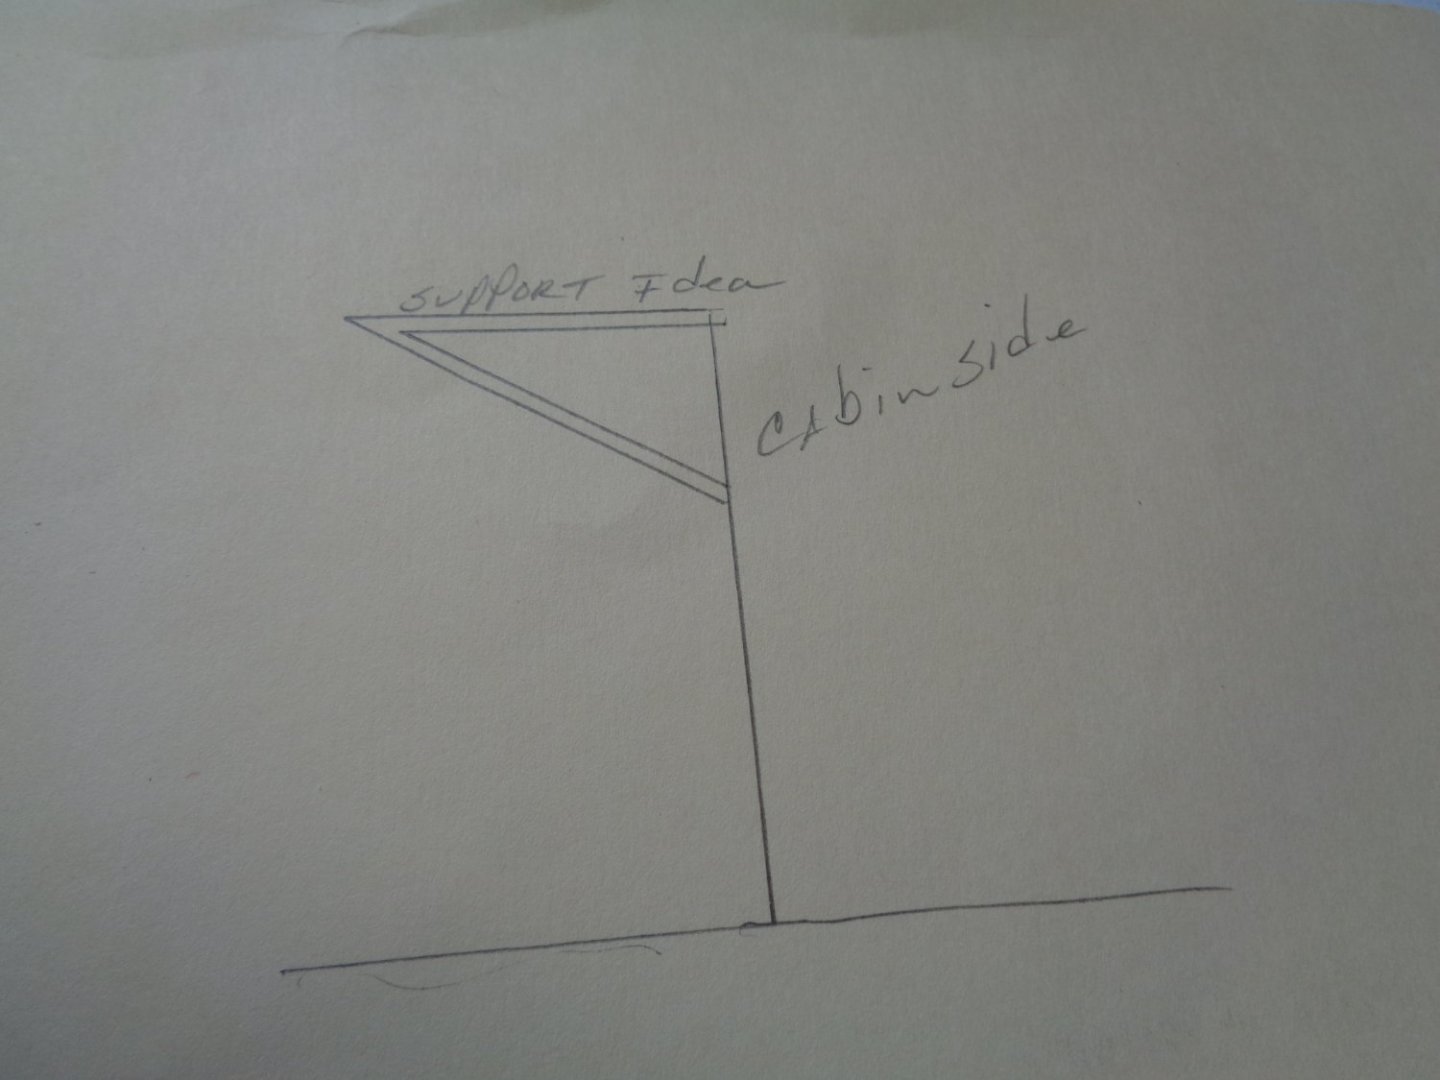 But with all builds, there comes some bad with the good and making an R/C model out of a static model always poses extra problems and make no mistake, the Calypso is mainly a static build eventhough they suggest a motor drive train setup diagram. Case in point are the support posts for the roof of the bottom main cabin, which extends to the deck of the ship on ten places on each side of the cabin. This will not work for radio control operation because the main cabin has to be removed to gain access to the interior of the hull for motor adjustments, battery changing switching the model on and off. So this, won't do. I will have to reconfigure this, yes, I could just install them as the plans show and just not secure the bottom of the post to the deck, but they could easily be knocked off. I may end up doing a cantilever type support like a triangle making it terminate into the sides of the cabin instead of the deck. Now if this were going to be a static build and built to represent the Calypso as museum quality or close to it I wouldn't dare think of such a dastardly deed. But since this build is more fuction than form, I'm open to it.
- mtaylor, GrandpaPhil, BobG and 2 others
-
5
-
15 hours ago, Beef Wellington said:
This subject and kit are very intriguing Mike, will definitely be following along. There seem to be a multitude of molded plastic/resin (?) parts which I'm hoping the kit provides elements to further detail these.
Like with all Billings kits, there are always a lot of plastic parts for detailing where wood would be difficult. Yes, there are also quite a bit of molded plastic parts as well like the boats and helicopter.
-
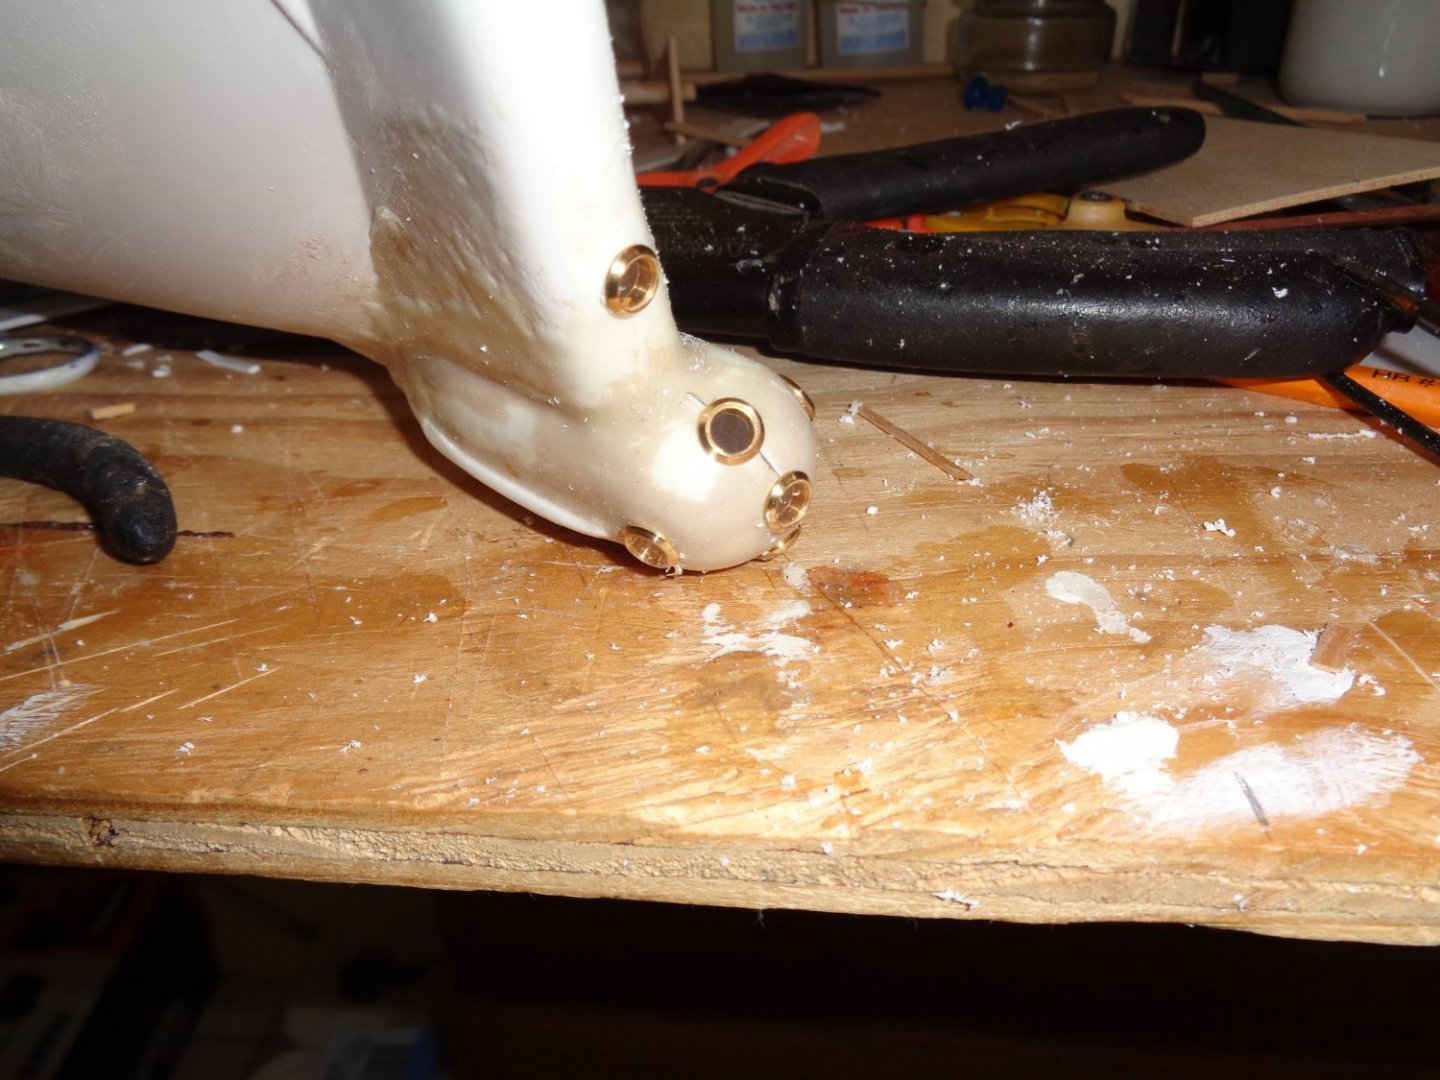
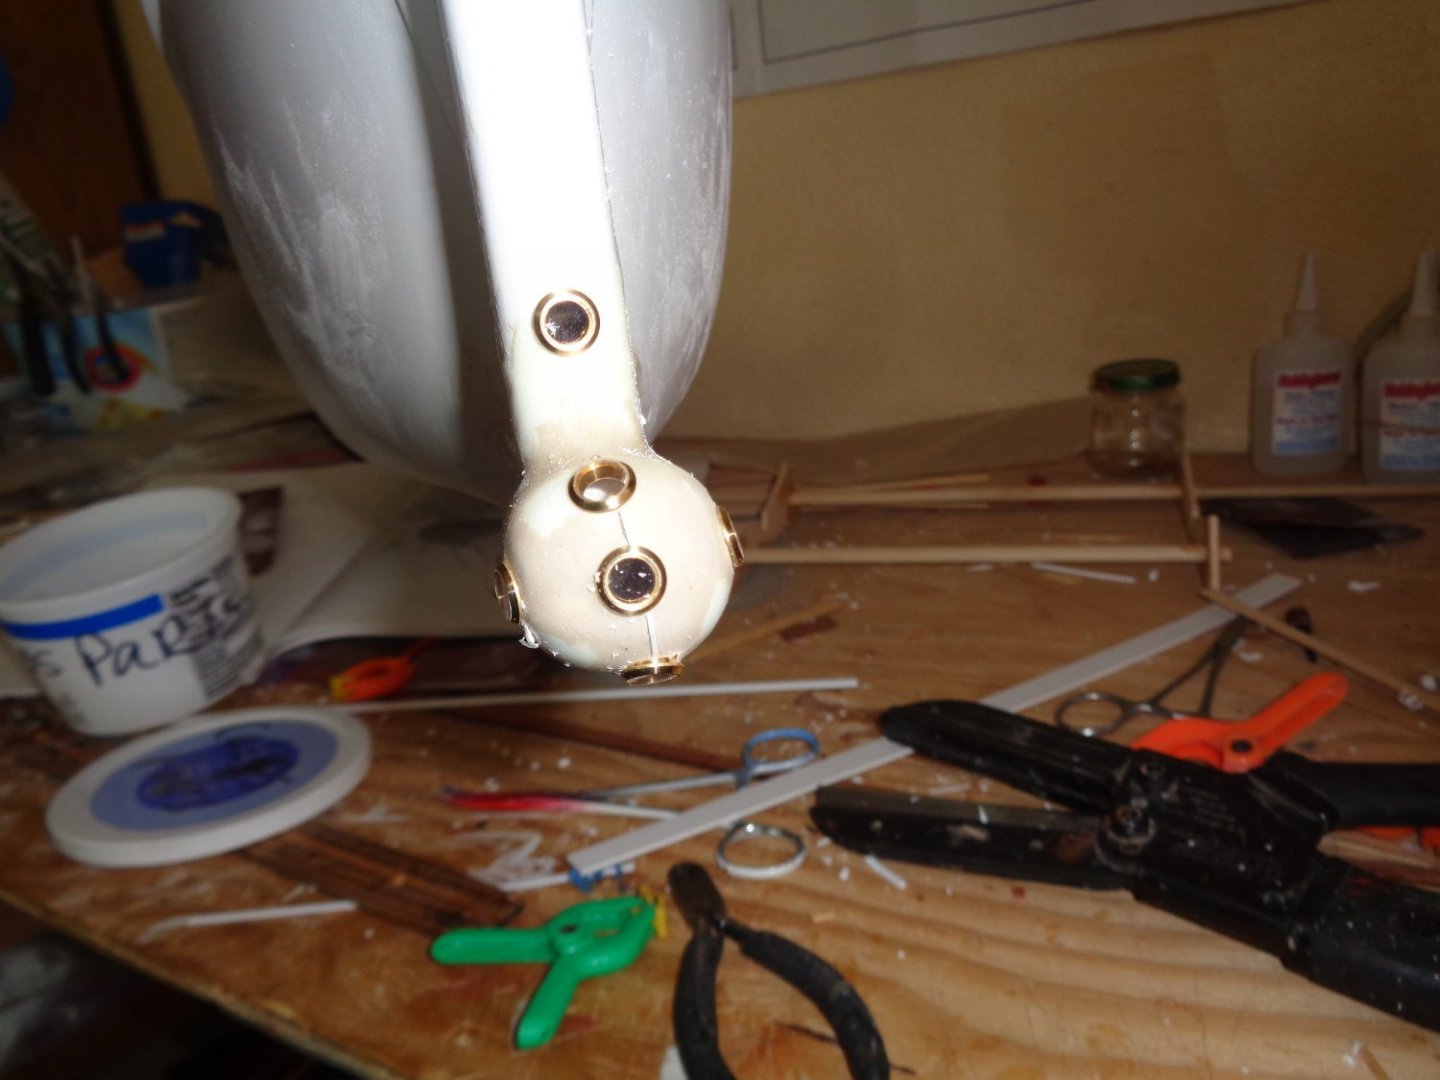
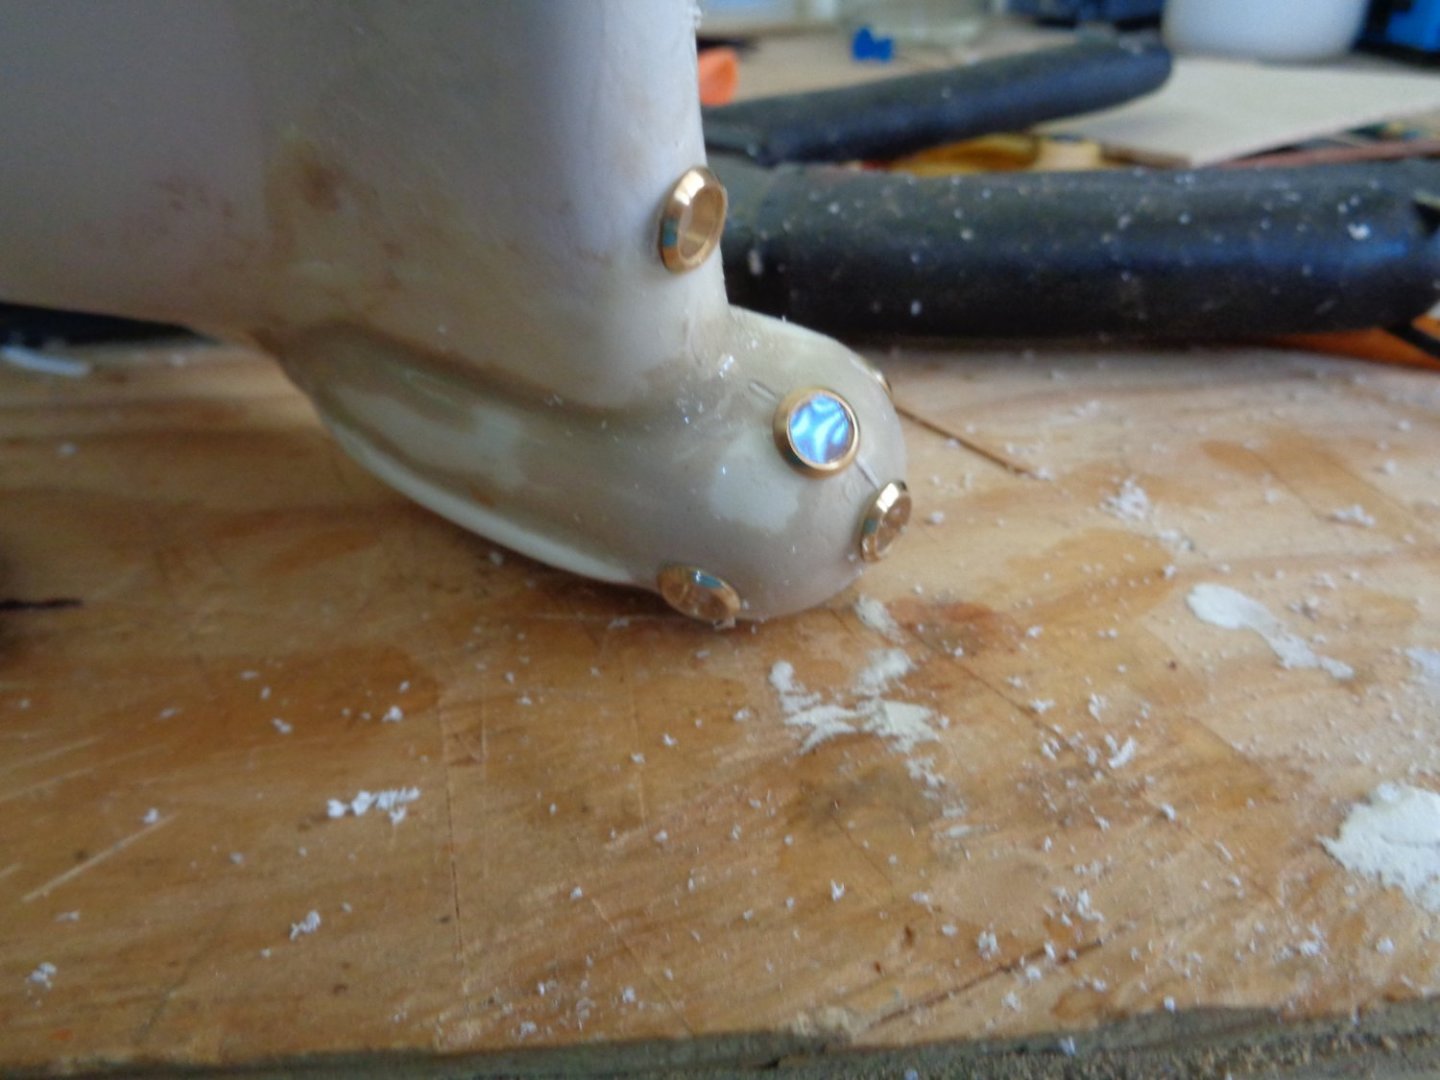
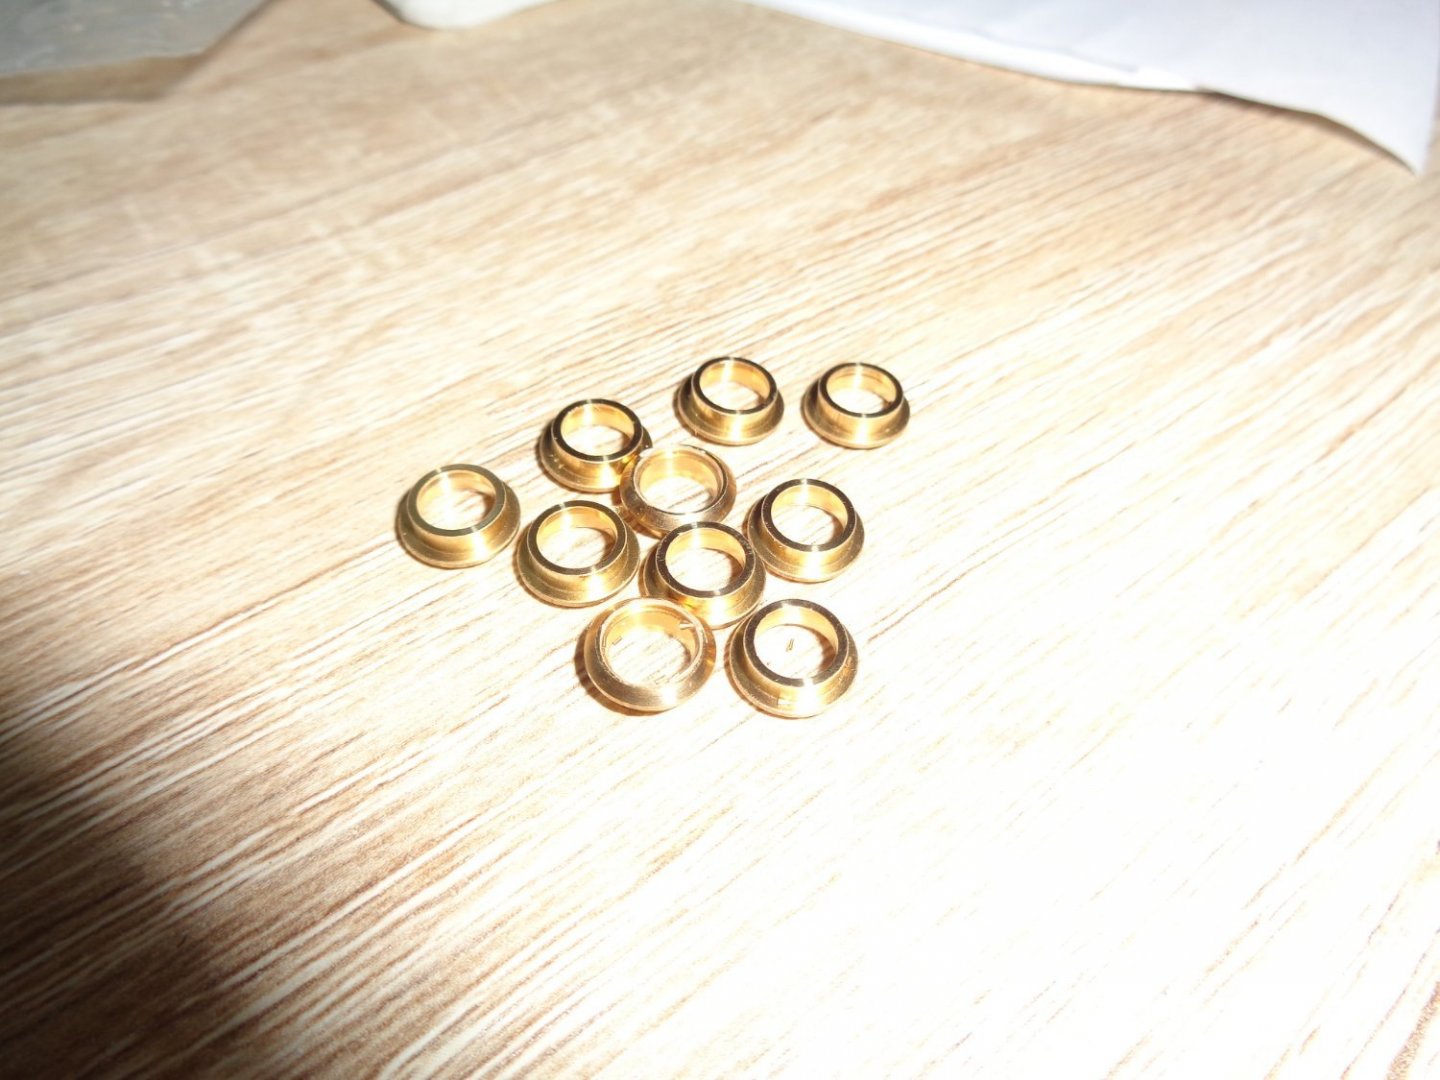
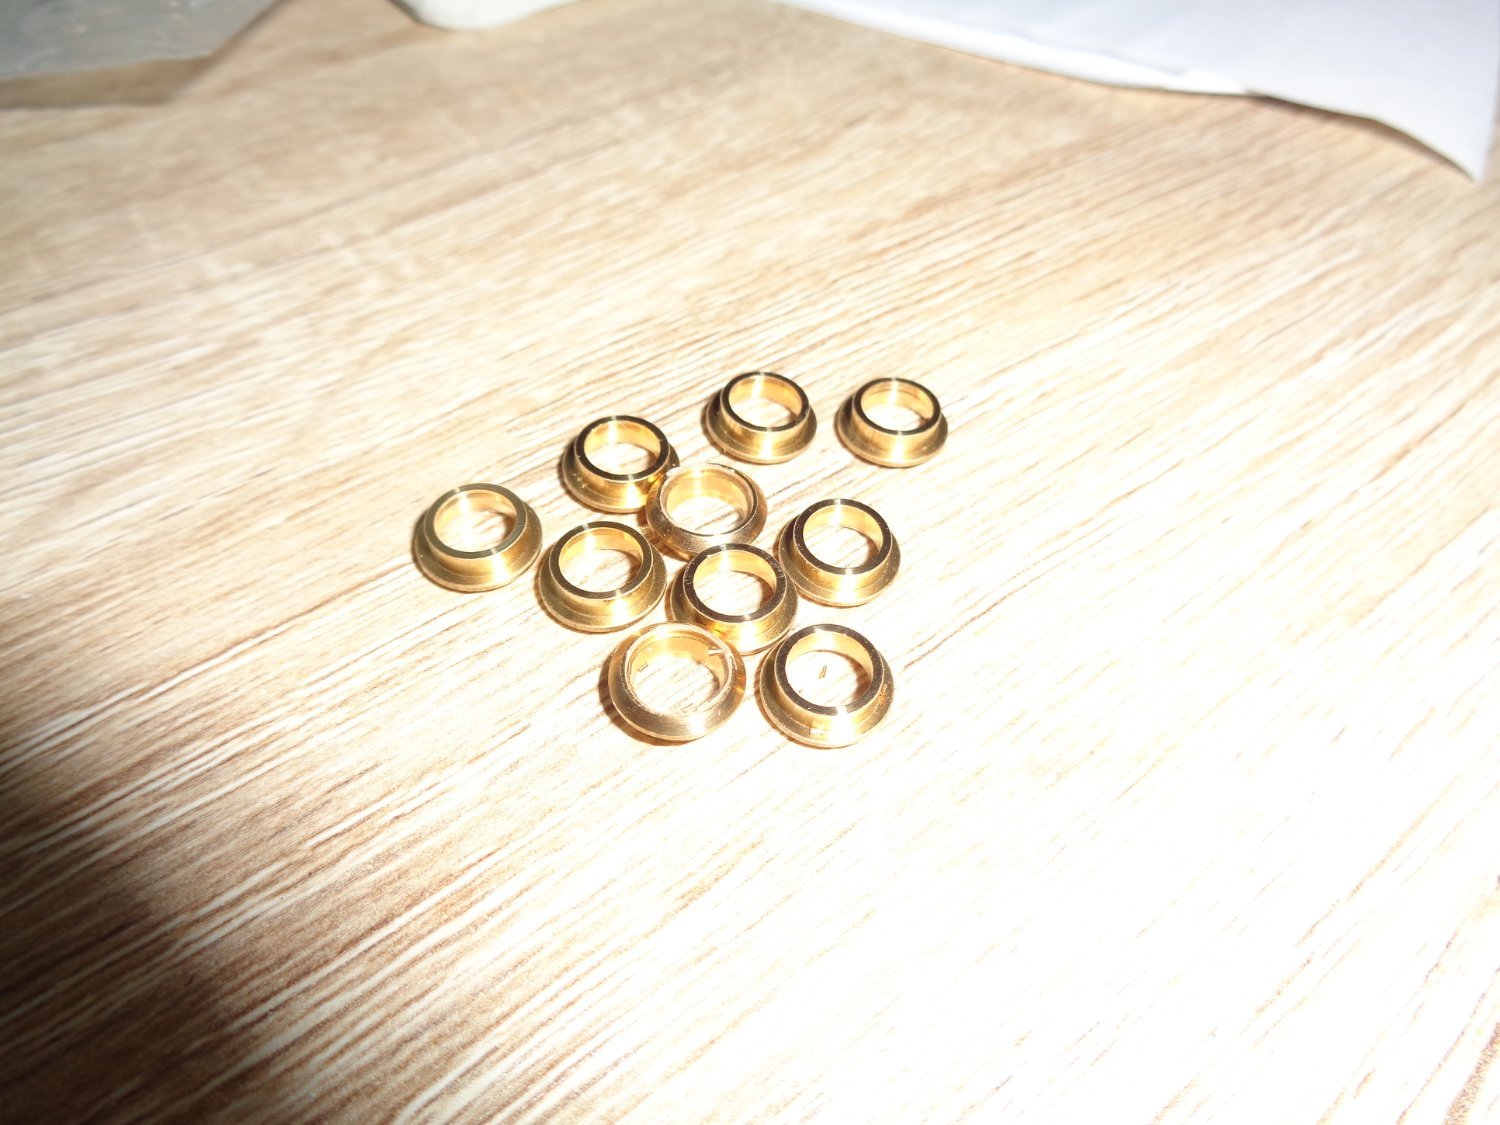
I got the glazed portholes in from Modelboatbit in England. It took about 2 weeks to get them, but well worth the effort. They will be going in the observation pod on the nose of the Calypso. The potholes in the kit are unglazed. I needed the ones that had glass for it to work in the water.
- mtaylor, yvesvidal, GrandpaPhil and 4 others
-
7
-
With the finished model being 50" inches, shipping would be an issue and quite expensive so I may end up donating to a local VFW or similar. They can always raffle it off or what ever they could do with it. I've donated a Victory model to my local city Library and donated a Montanes tall ship model to our local hospital that held a silent auction and used the proceeds for some new equipment. But, we'll see.
- Bill Morrison, Jack12477, Canute and 9 others
-
12
-
12 minutes ago, druxey said:
Oh, dear. You have it bad. Fortunately there is no model intervention or recovery group in your area.
No, no class, no cure and the closest thing to an intervention is my wife's 7 1/2 foot hahahaha.
-
42 minutes ago, lmagna said:
It's an addiction that has no cure. Even if you stop building them they just keep showing up anyway.
That is what I keep telling my wife, it followed me home without the slightest encouragement from me.
- popeye the sailor, GrandpaPhil, Canute and 9 others
-
5
-
 7
7
-
The walk of shame for me is when the postman drops the package at the front door. Once I get passed that, then I start looking toward the opportunities awaiting me. I've also believed the old adage "it's easier to beg forgiveness than it is to ask for permission" I practice this a lot.
-
I had planned on slowing down a bit on model building and planned for the Billings Calypso to be my last for awhile. But as luick would have it I picked up a little orphan kit of a Trumpeter 1/200 scale USS Missouri or Big Mo as she was called back in the day. I have had an itch to build a trumpeter kit for quite some time and this was my opportunity. The kit had been sitting around for a bit being neglected so I figured what the hell. I thought I had gotten the monkey off my back, but I guess not. So now I have to do that walk of shame.,
-
It's been two years, anything happening on the Calypso build?
-
To give you an idea, second hand kits usually sell for around 50% or less of retail meaning, if the retail price of a kit is $1200.00, expect $600.00 or less for it. There are exceptions to every rule, like if it's a rarely seen kit, or someone at that time is interested in buying a specific kit and having a hnard time finding it, then the sky's the limit.
-
Well, The little 1955 Chris Craft Cobra orphan that turned into a beautiful swan has found a new home up in Jacksonville FL. The new owner couldn't wait to adopt the little beauty, it was love at first sight. I'm really going to miss that for sure. I miss all of them when they get all beautified up and sail away, but there are a few that really makes me a bit heart sick for a while, but then another poor little deliquent will show up and the process begins all over again.
I'm building the Billings Calypso now and feel that it could very well be my last one for a while. But we'll see, I never like to say never.
-
Well, it's about time they got off the stick, welcome AL.
-
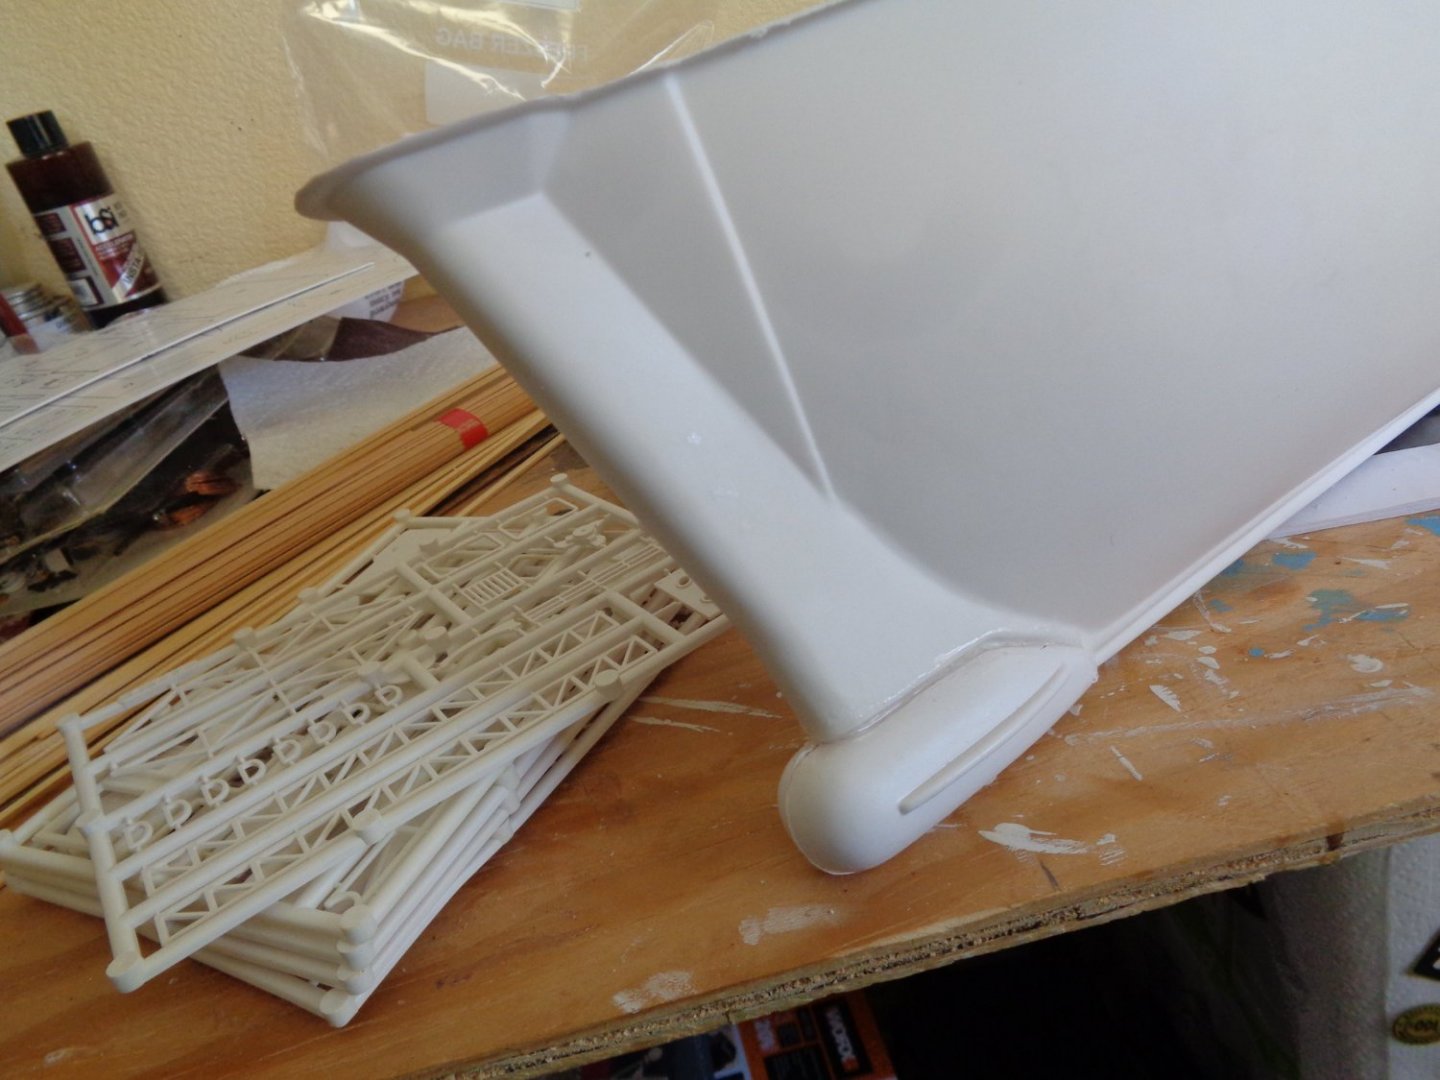
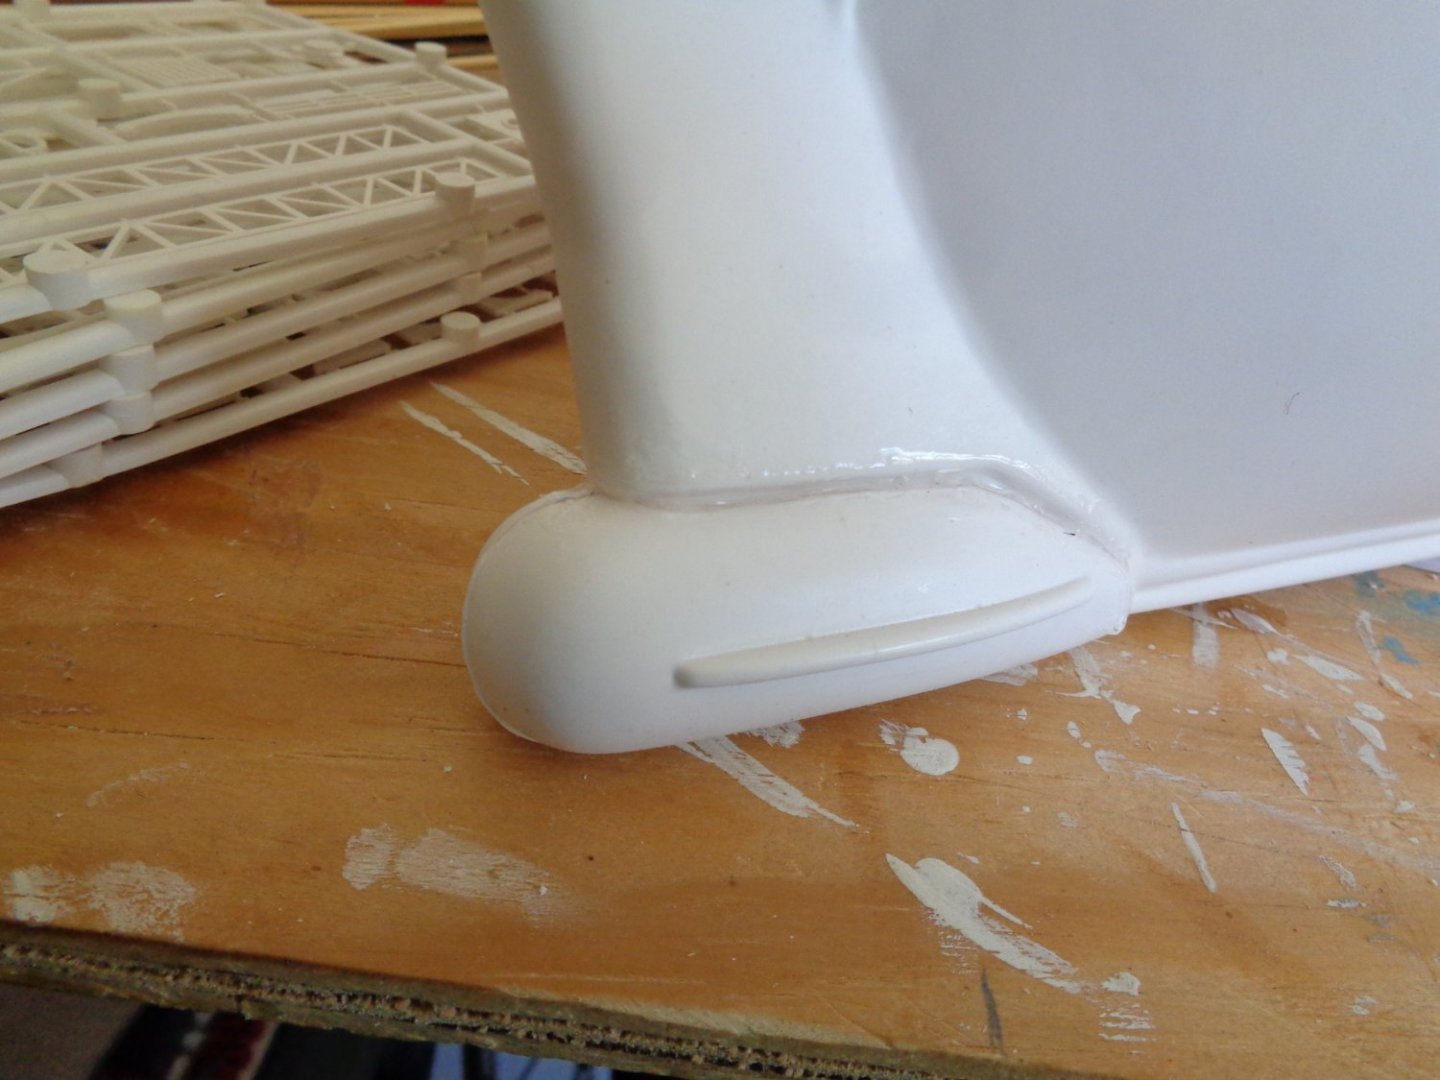
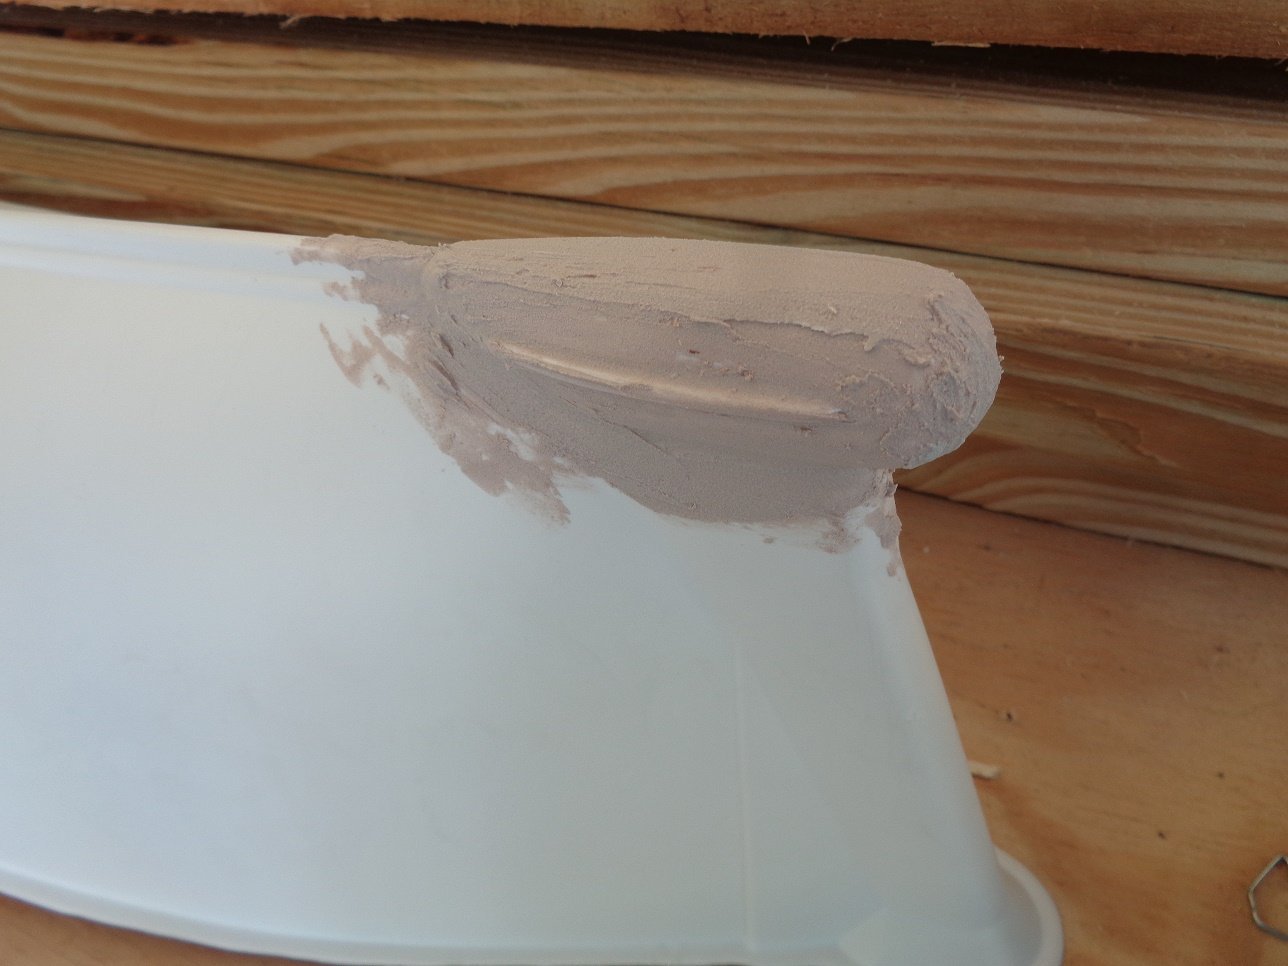
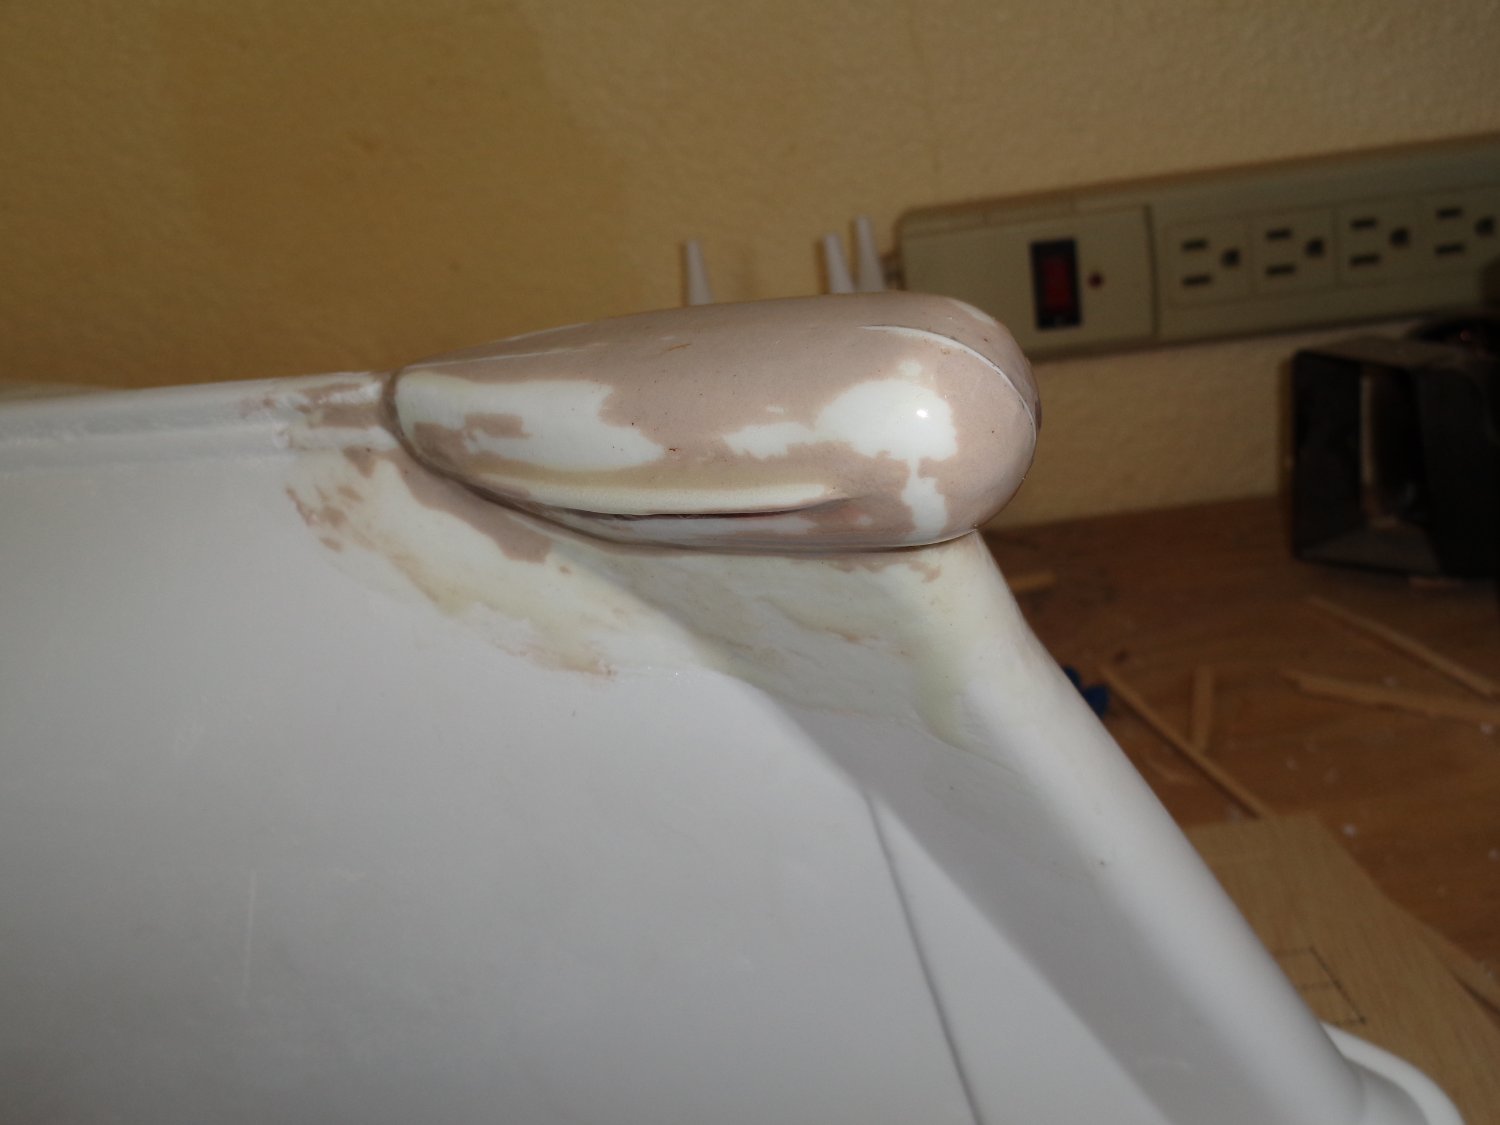
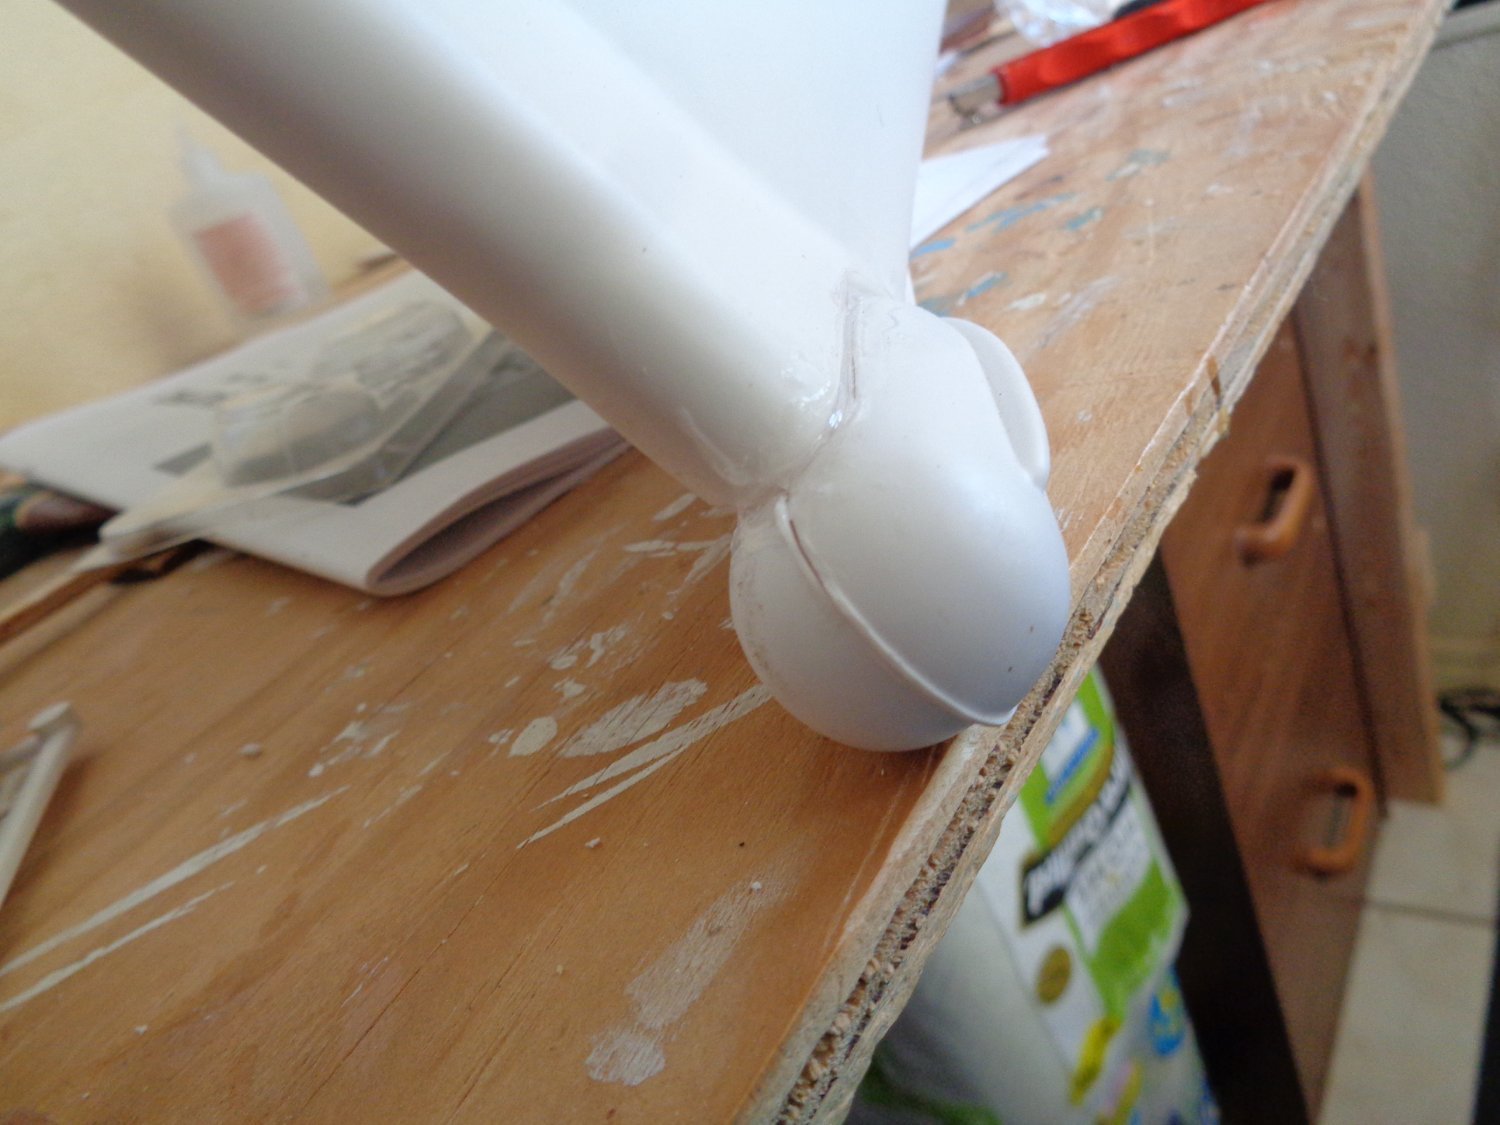
I'm going to fair in the observation pod on the lower stem of the boat using bondo body filler. I'm then going to drill out for the port holes on the observation pod. But before I install the port holes, I'm going to inject some clear silicone caulking into the pod through the port holes to make sure the is no open void that water could by chance leak into the pod.
I'm going to order some 7mm glazed port holes because the once furnished in the kit are unglazed meaning their open, which might work fine for the upper cabins, but not for the observation pod.

- GrandpaPhil, AON, yvesvidal and 5 others
-
8


Calypso by mtdoramike - FINISHED - Billing Boats - 1:45 Scale
in - Kit build logs for subjects built from 1901 - Present Day
Posted
This is how my work bench looks when I'm working on a project. I try to keep it clean, which lasts all of about two days.