Jack12477
-
Posts
5,676 -
Joined
-
Last visited
Content Type
Profiles
Forums
Gallery
Events
Everything posted by Jack12477
-
 You could also stop by a good art store (as in artist supply) and pick up some pastel chalk in various tones. You can apply with Q-tip as above or scrape them with a razor blade to create a fine dust - then using a clean dry artist paint brush apply them when you want. The chalk dust gives it a nice texture as well as color.
- 296 replies
-
- 6
-

-
- chaperon
- model shipways
- (and 1 more)
-
WOW ! Very nice, Ken. Those fire extinguishers look real. Actually everything is excellent. Beautiful model
- 162 replies
-
- 6
-
-
- dirty dozen
- fishing
- (and 2 more)
-
PM is Personal Message - click on the user's avatar or screen name it will open a dialog box for that user's profile - in the center of the top line is a label "send me a message" Click on that to send that user a PM. I believe Canute is located near Ashville. Contact him via PM.
-
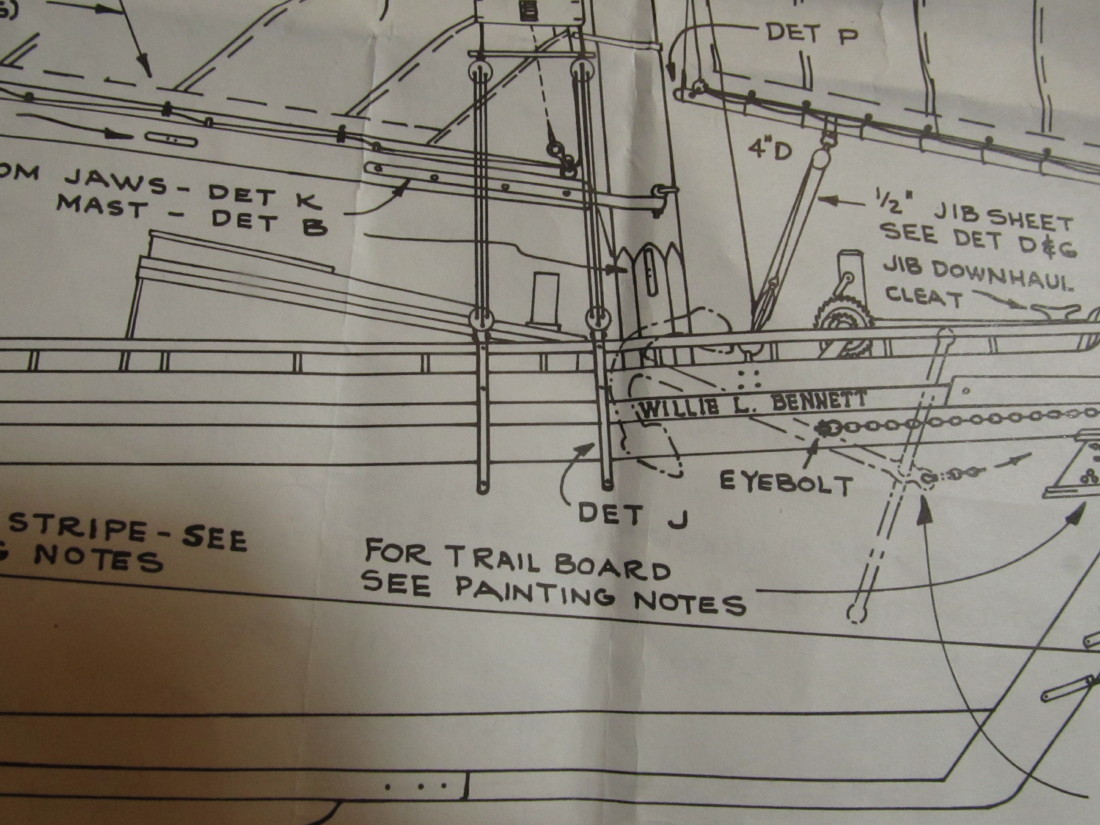
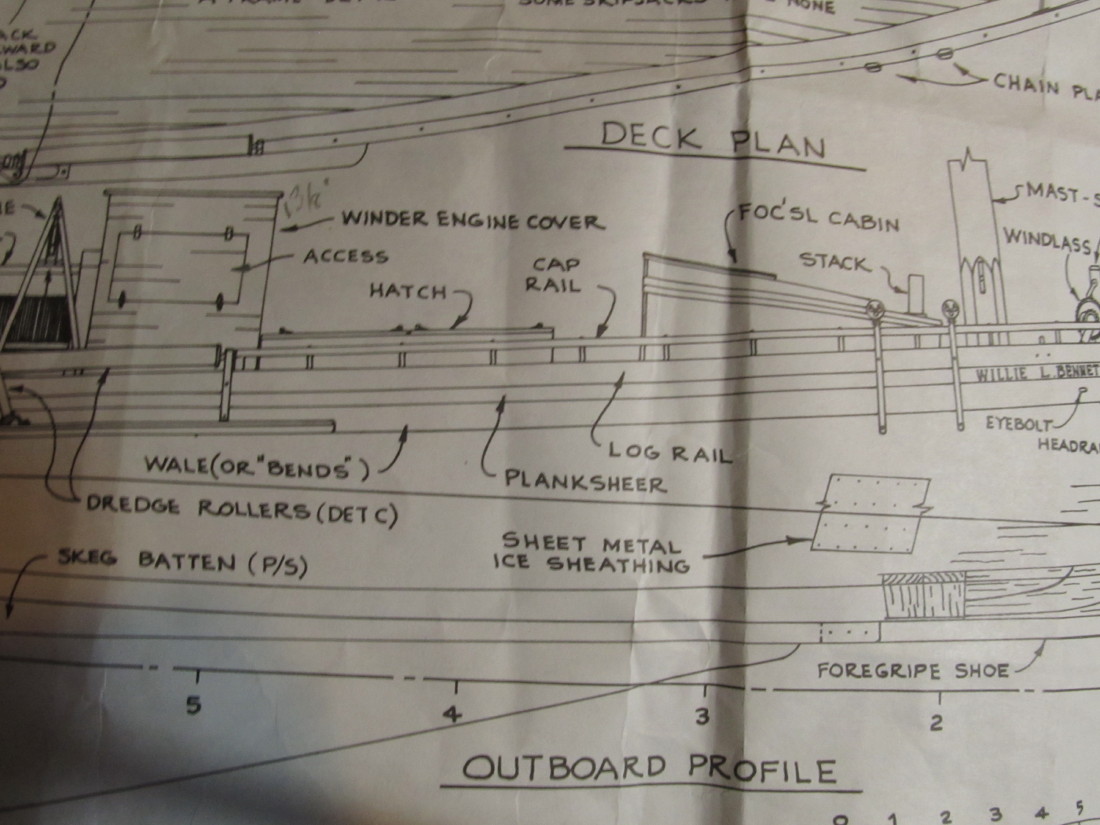
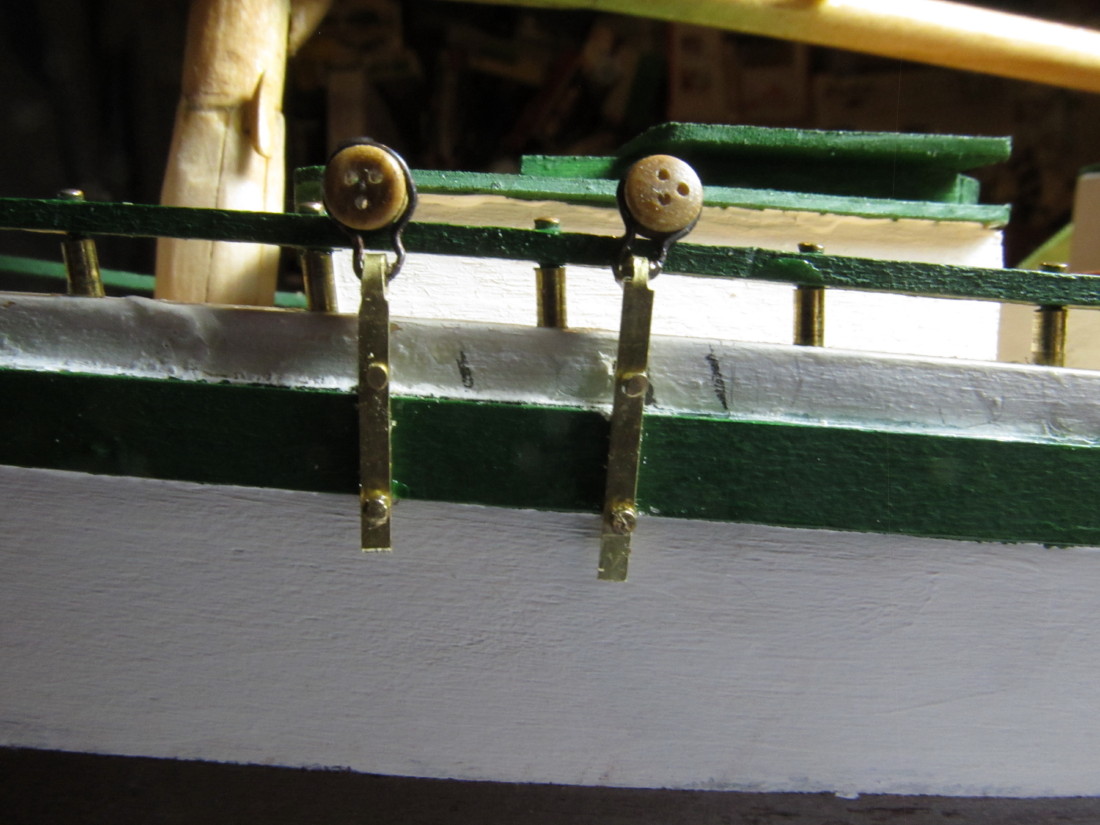
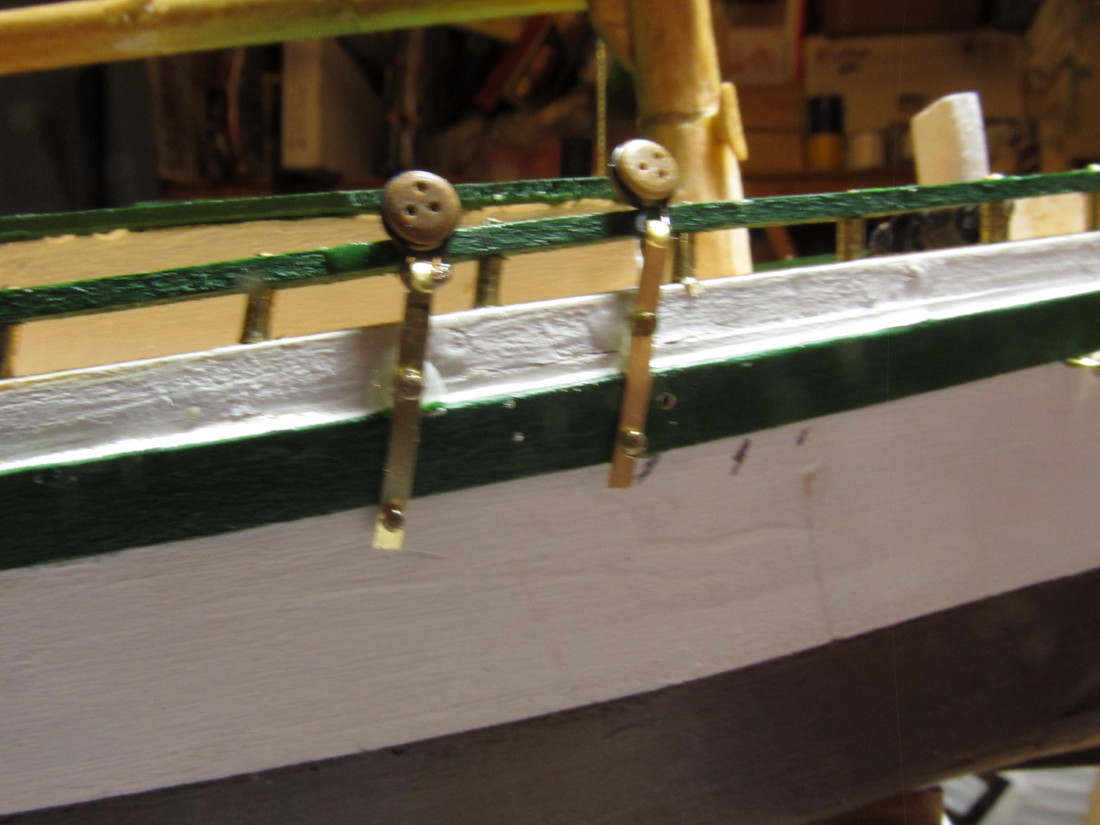
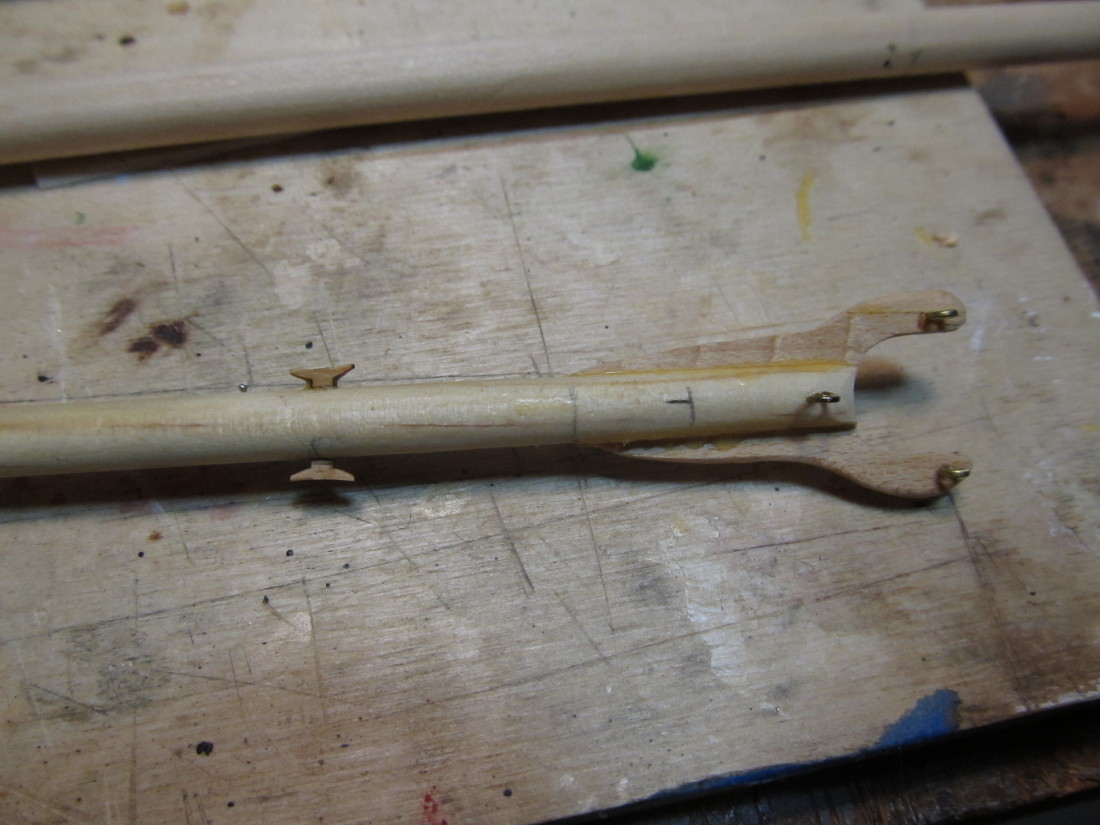
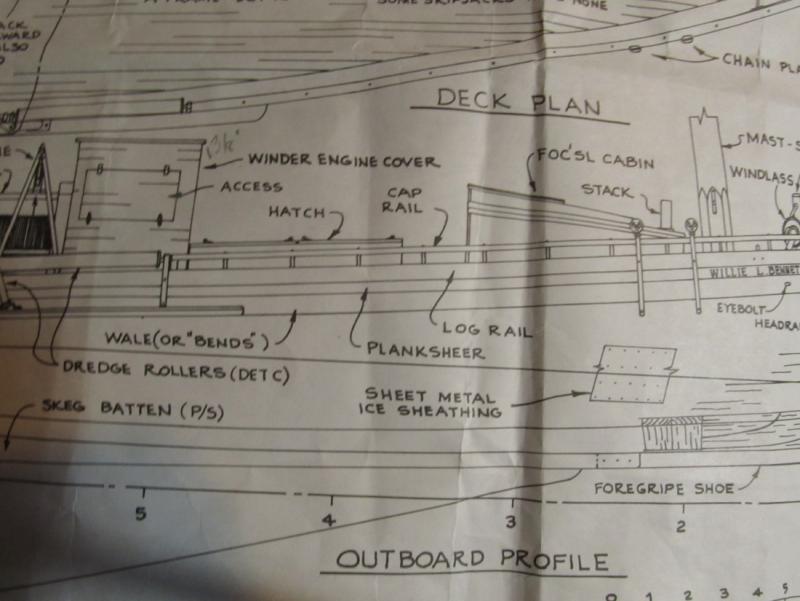
Thanks, Carl, always good to have an extra pair of eyes looking at something. The 2nd drawing (photo 2 above) had me confused; couldn't tell if it was 90 degrees to the plane or not. Easily fixed - see photos below. Re-checked the plans and the chain plates do go over the wales (or bend as they call it) on this model. Jack iron - redone Chain plate drawings:


- 250 replies
-
- 6
-
-
- willie l bennett
- model shipways
- (and 1 more)
-
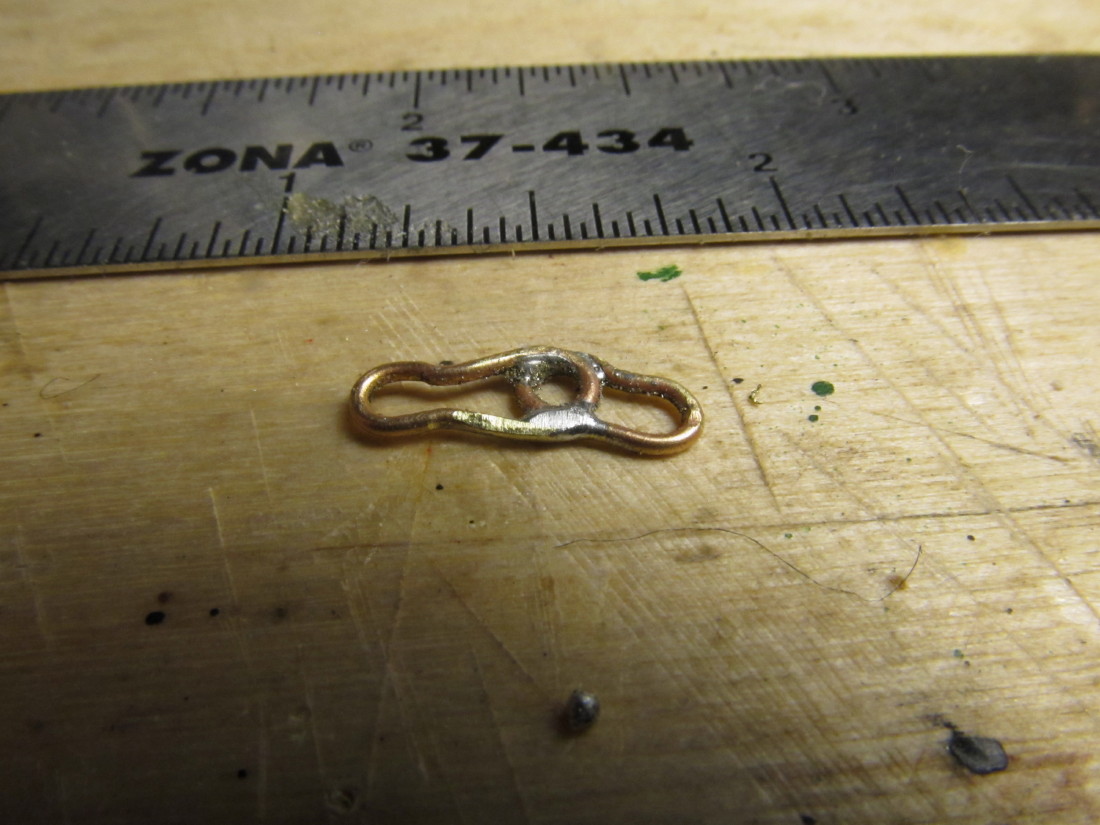
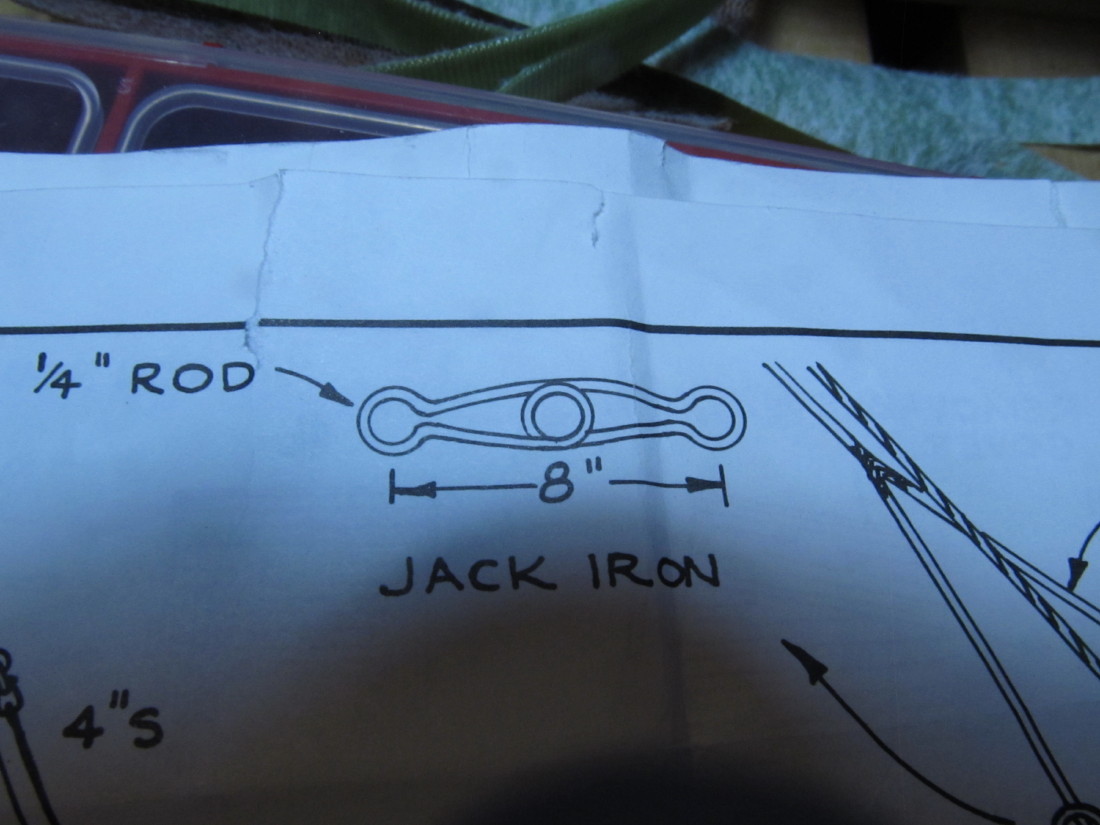
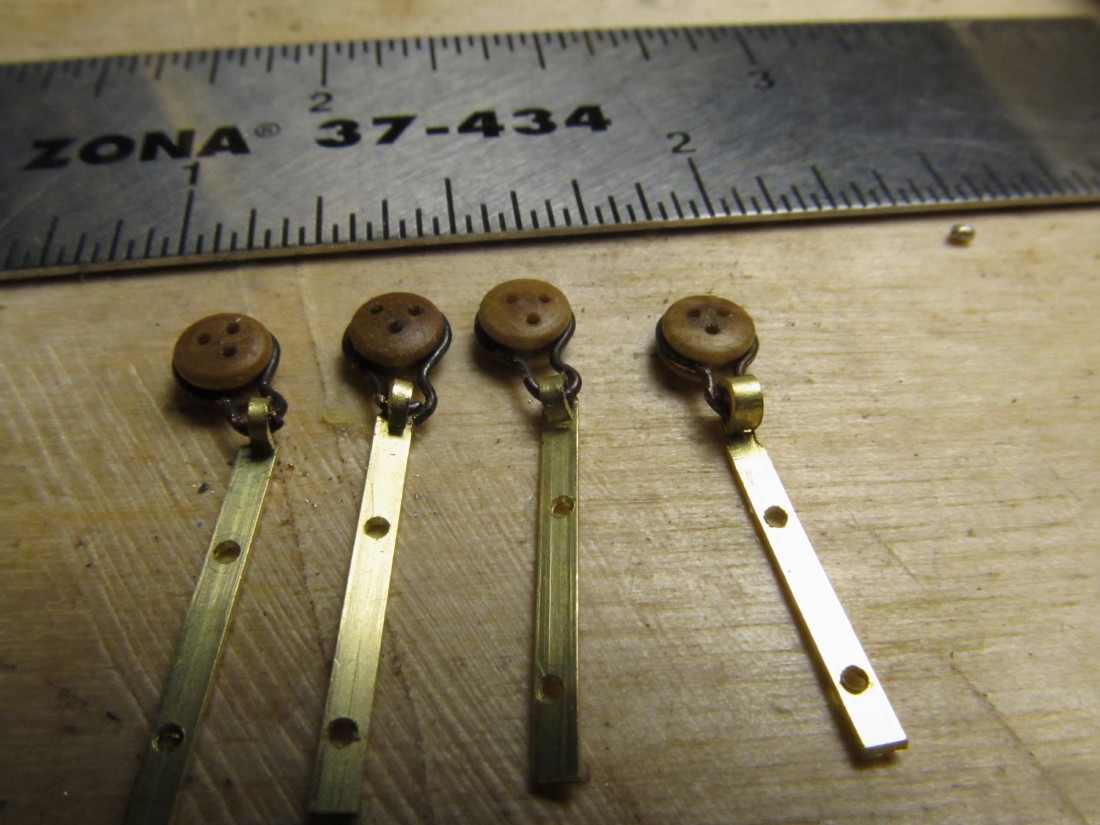
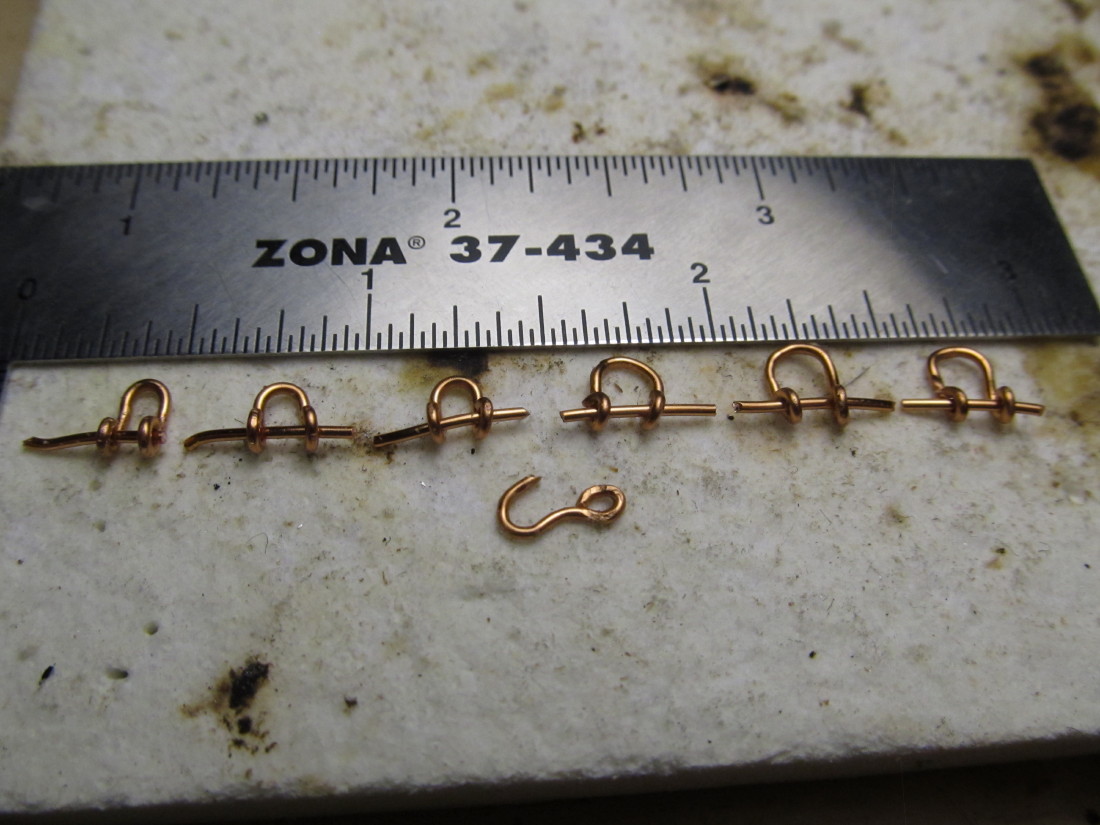
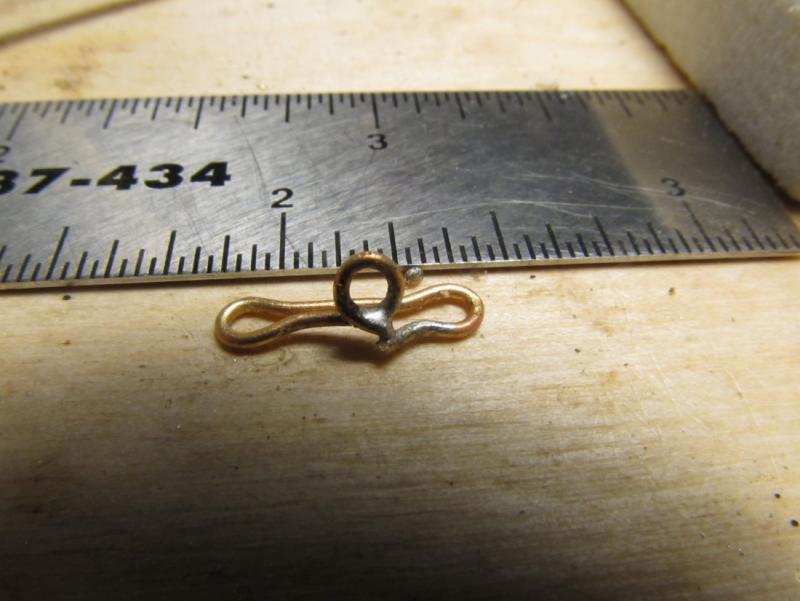
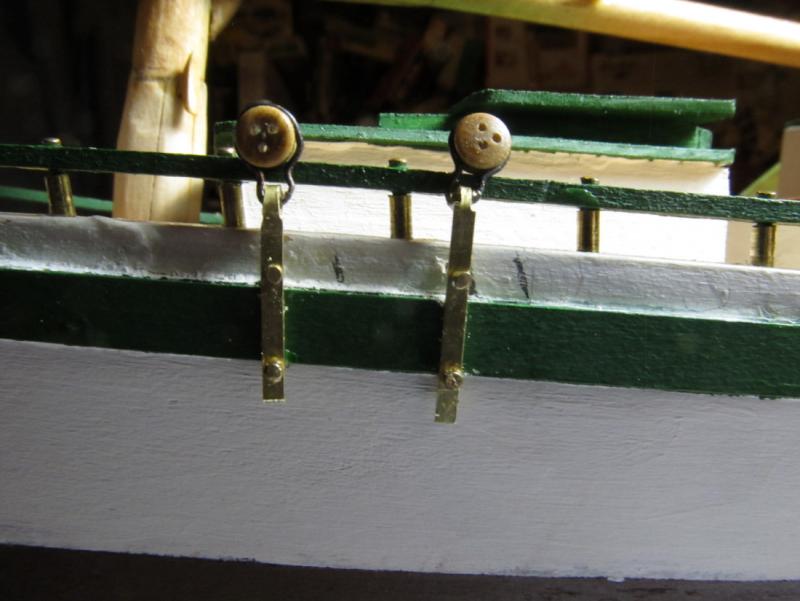
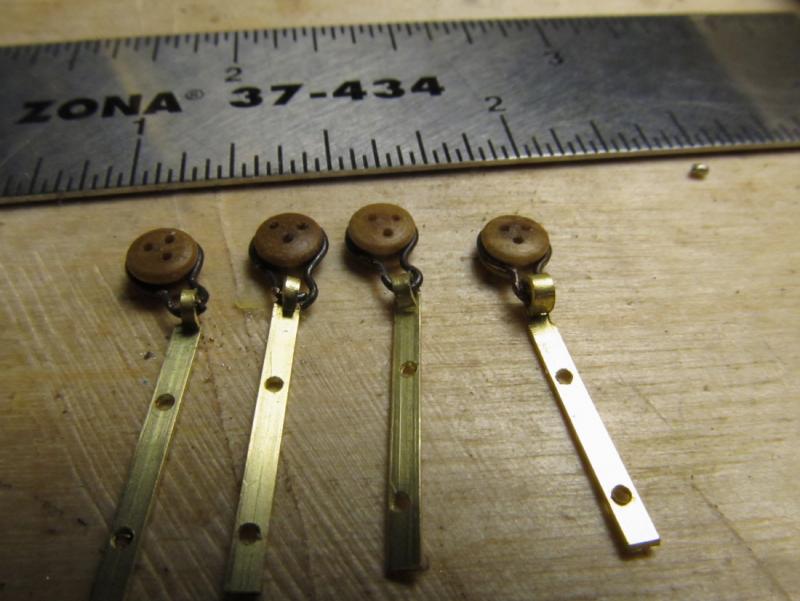
Since the east coast is experiencing a Nor'easter all day today, I decided to spend some time in the shipyard. <our area is getting mostly rain today; overnight we had about 3 inches of snow/sleet, temps are hovering around 35 F all day >. Worked on getting the chain plates made, and the dead-eyes hooked up. Not to keen on MS' dead-eye metal strops tho, the bottom of the strop band is too flimsy and doesn't want to hold well in the chain plate . Ended up using a drop of medium CA to ensure they would stay installed in the chain plate loop. Plans called for a "jack iron" - weird looking loop - wasn't too hard to shape and solder. I've been accumulating a bunch of jewelry making small pliers with various "pointed round tip" that have come in quite handy for this kind of bending. Photos below: Jack Iron <as shown on plans> and my interpretation of it. Chain plates and dead-eyes: Before creating the loop in the flat piece of bar stock, I took a small file and thin the width down a bit on each edge; then bent it around into a loop. The holes were drilled by hand without my Wecheer micro drill tool; it actually went faster and easier than with the power tool.


- 250 replies
-
- 7
-
-
- willie l bennett
- model shipways
- (and 1 more)
-
Denis, now you know fancy rope is never in the plans It's just something sailors do when they are bored
- 250 replies
-
- 4
-
-
- willie l bennett
- model shipways
- (and 1 more)
-
Could it be related to the marksmanship of the ship's gunners ? You know if you put enough lead into the air you are bound to hit something sometime. :D That's how the US Navy's new Phalanx system works against incoming missiles.
-
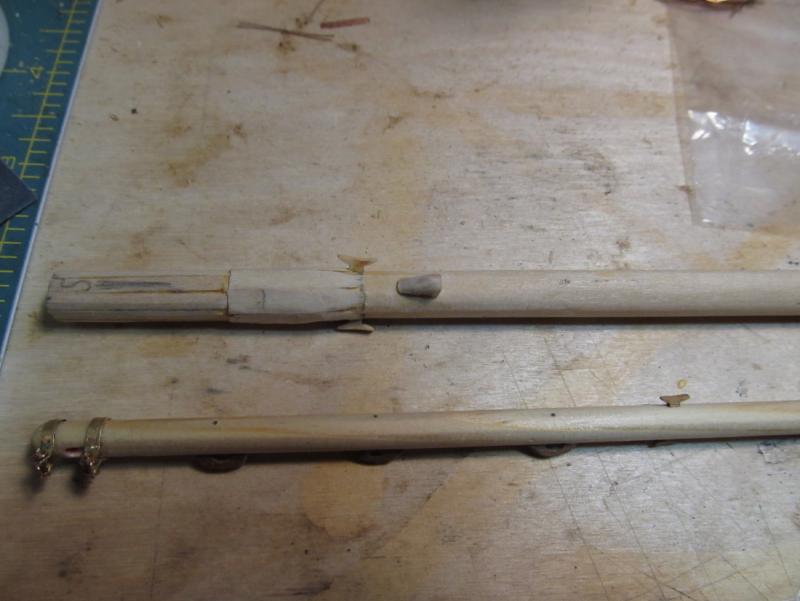
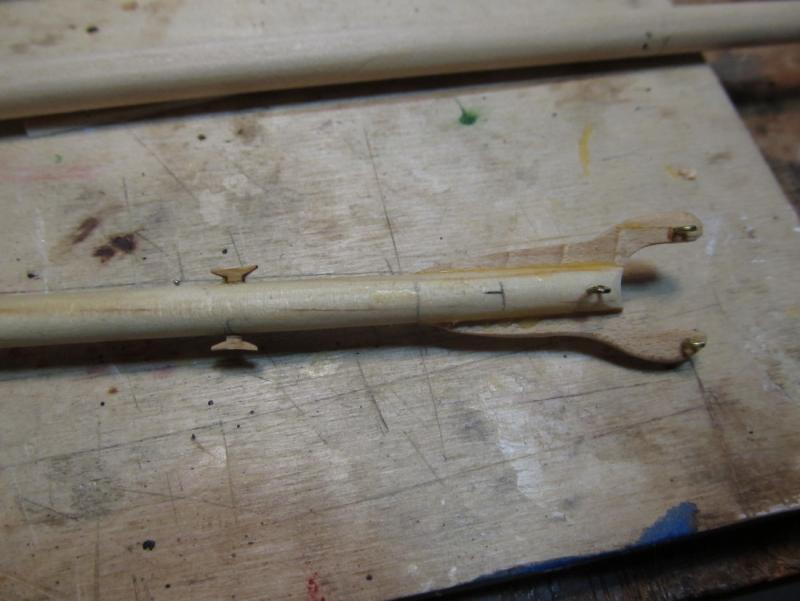
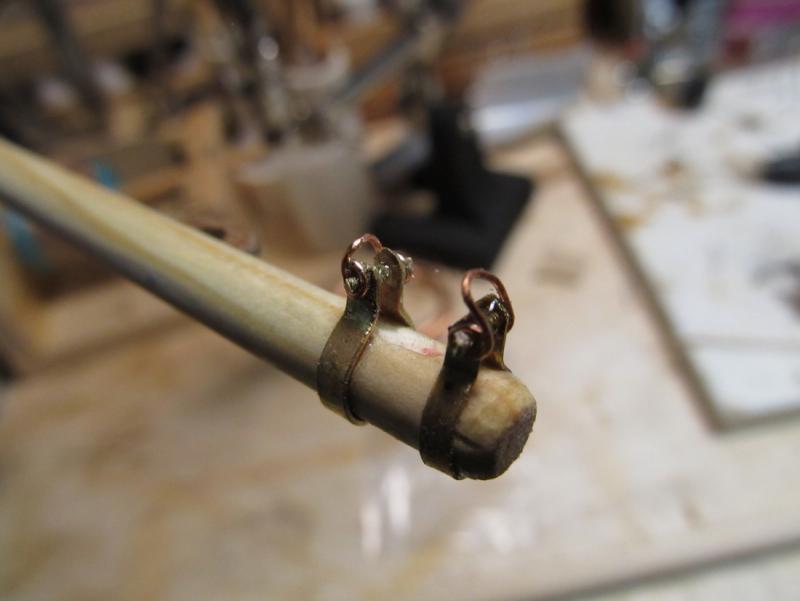
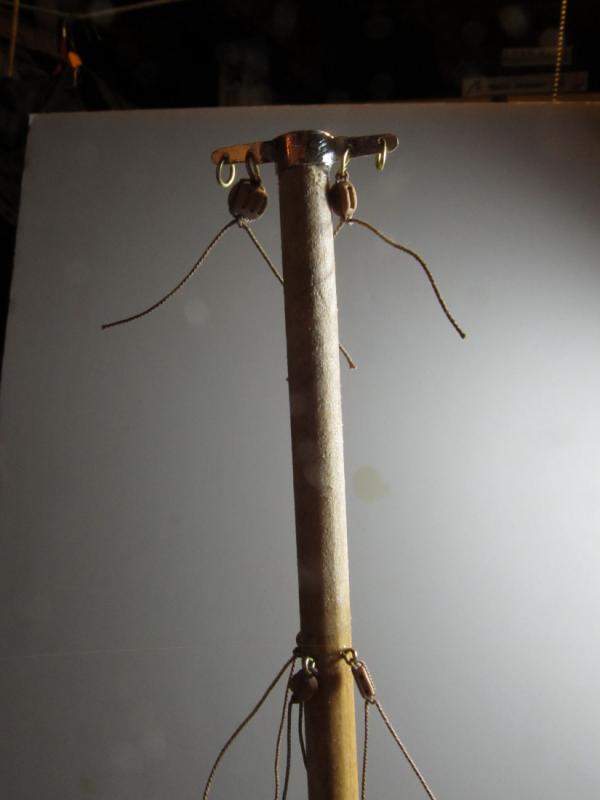
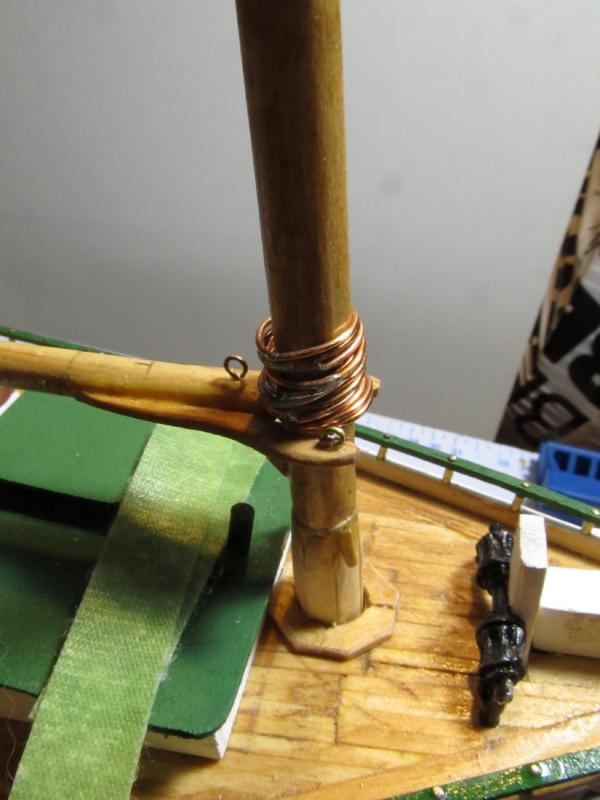
Thanks everyone for the comments and likes. A small bit of progress on the main mast and boom. I decided to leave a small personal touch on the boom, some fancy rope, which all sailors seem to enjoy creating. I'll leave it to all of you to find and identify it. I left the "tails" on the blocks until I determine what other things need to attach to the block. Then I'll clip them off flush to the block(s). Soldering is still a major challenge for me. I used Minwax Ipswich Pine to stain the mast and boom then gave it two coats of Minwax Gloss Poly spray to seal it.

- 250 replies
-
- 7
-
-
- willie l bennett
- model shipways
- (and 1 more)
-
Hmm. something is wrong - I can get the pop-up every time on any post in your log. You got any tech savvy friends close by who can come look at your PC. I assume you're doing this from a PC or laptop and not a Tablet or Ipad. Correct ? I'm working from a Windows laptop.
- 1,135 replies
-
- 3
-
-
- model shipways
- syren
- (and 2 more)
-
Rich, place the cursor directly over the #1 in your first post, then right mouse click on it without moving it. A popup window should appear with a list of actions, select the one labeled "copy link location" and left mouse click on it. That will place the link into your clipboard. Then proceed as above.
- 1,135 replies
-
- 4
-
-
- model shipways
- syren
- (and 2 more)
-
Rich, first go to the top of this build thread, right click on entry #1 and select "copy link location", the go to your profile and edit it as you did to create the signature. highlight the entry "USS Syren" etc in your signature, then click on the link symbol in the full editor window (center block, 2nd line to right of B I U S symbols - 3rd box over) when the window opens, select it and right click again, select Paste, the close windows. You can also at the same time select the Bold symbol to highlight it in bold face type. Hope this helps/.
- 1,135 replies
-
- 4
-
-
- model shipways
- syren
- (and 2 more)
-
Marc, you can get the PC program and related supplies that Denis is talking about here at DecalGear You can also get the decal paper at Hobby Lobby as well as the Decal Bonder. I used this on my Marie Jeanne to create the ship's name and ID plus the Coat of Arms decal for the sail.
- 165 replies
-
- 6
-
-
- cape cod catboat
- Finished
- (and 1 more)
-
Welcome back Glenn, your weekly posts have been missed. Beautiful work on the roof, chimneys, pawls and window glazing.
-
Yea, I can attest to that. I have a AL Morgan Whale boat that I built some 20-25 years ago. All the harpoons, cutting knives, oar locks are made from some type of soft white metal (probably lead based bismuth or something) - all have become brittle, cracked and broke under their own weight. I've tried gluing them together with CA but another section will break off in time.
- 396 replies
-
- 3
-
-

-
- Idea
- Bright Idea
- (and 1 more)
-
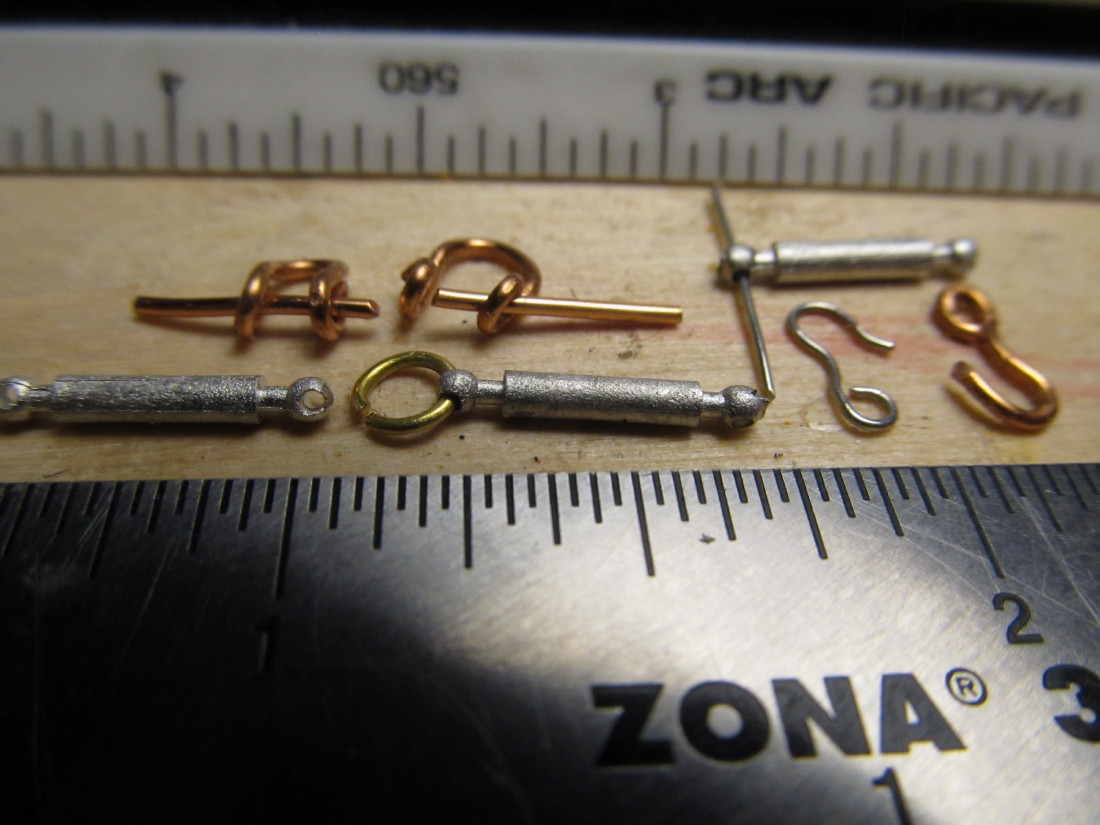
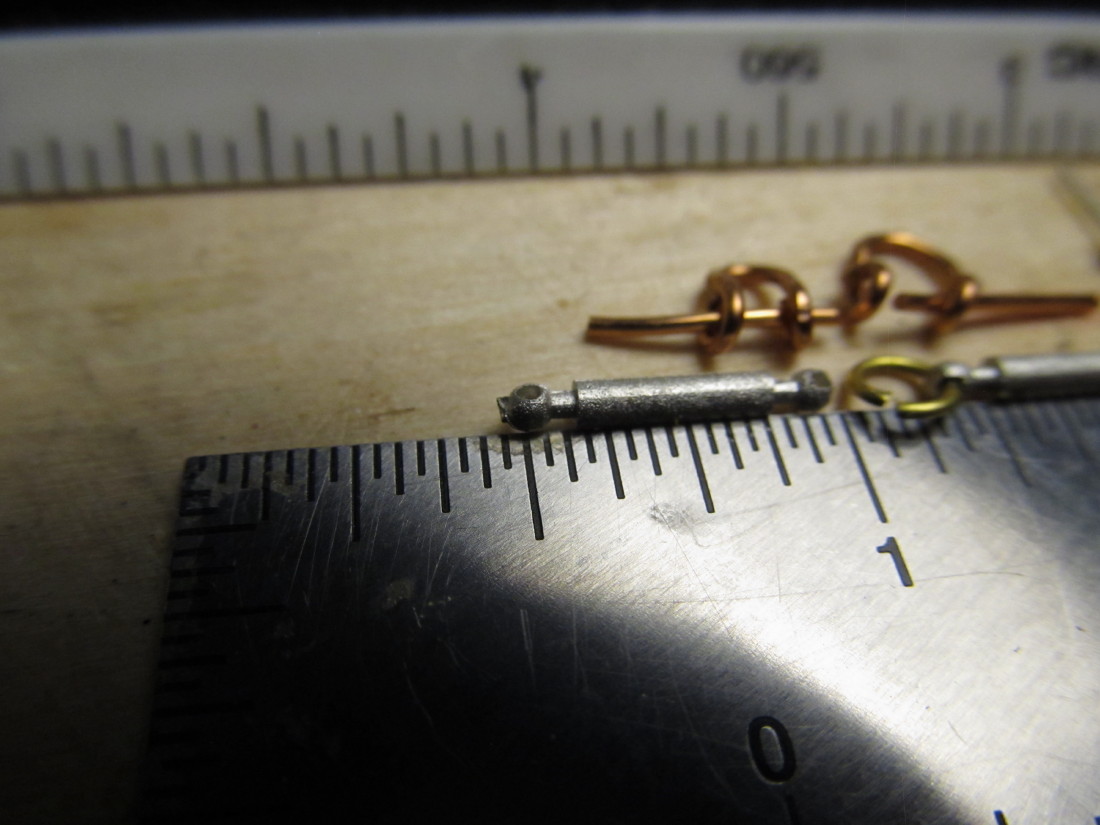
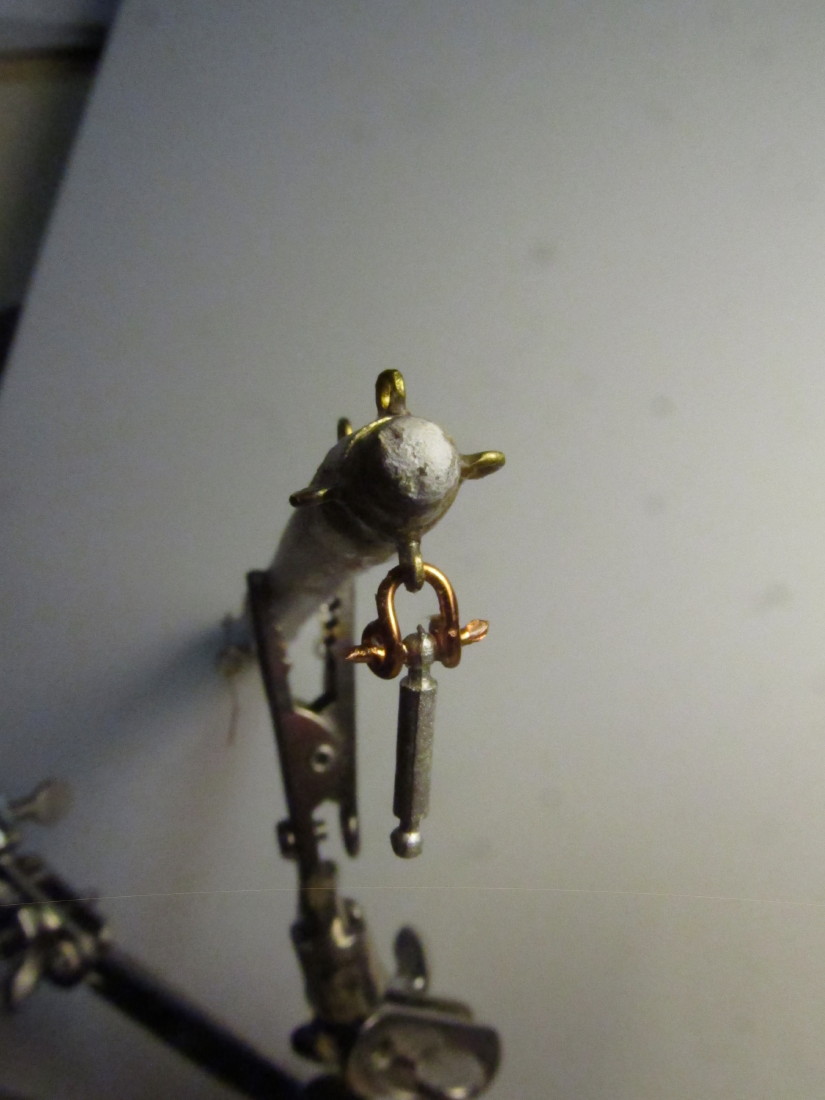
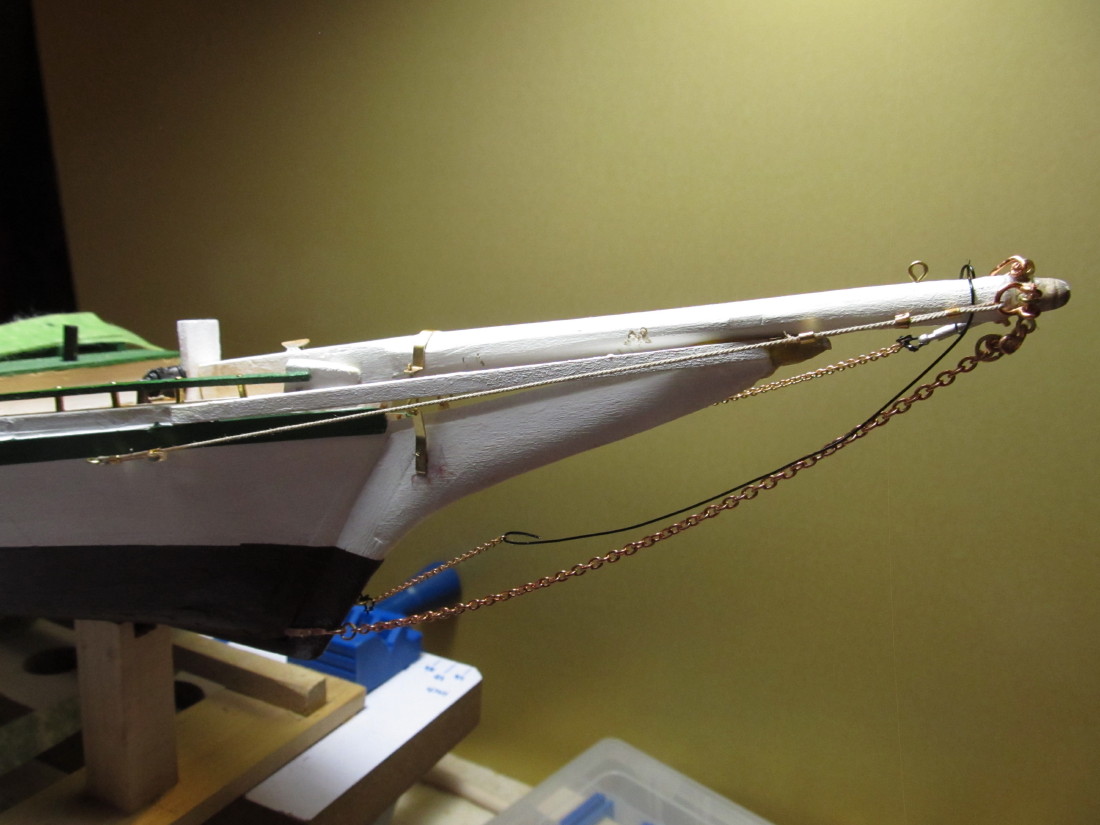
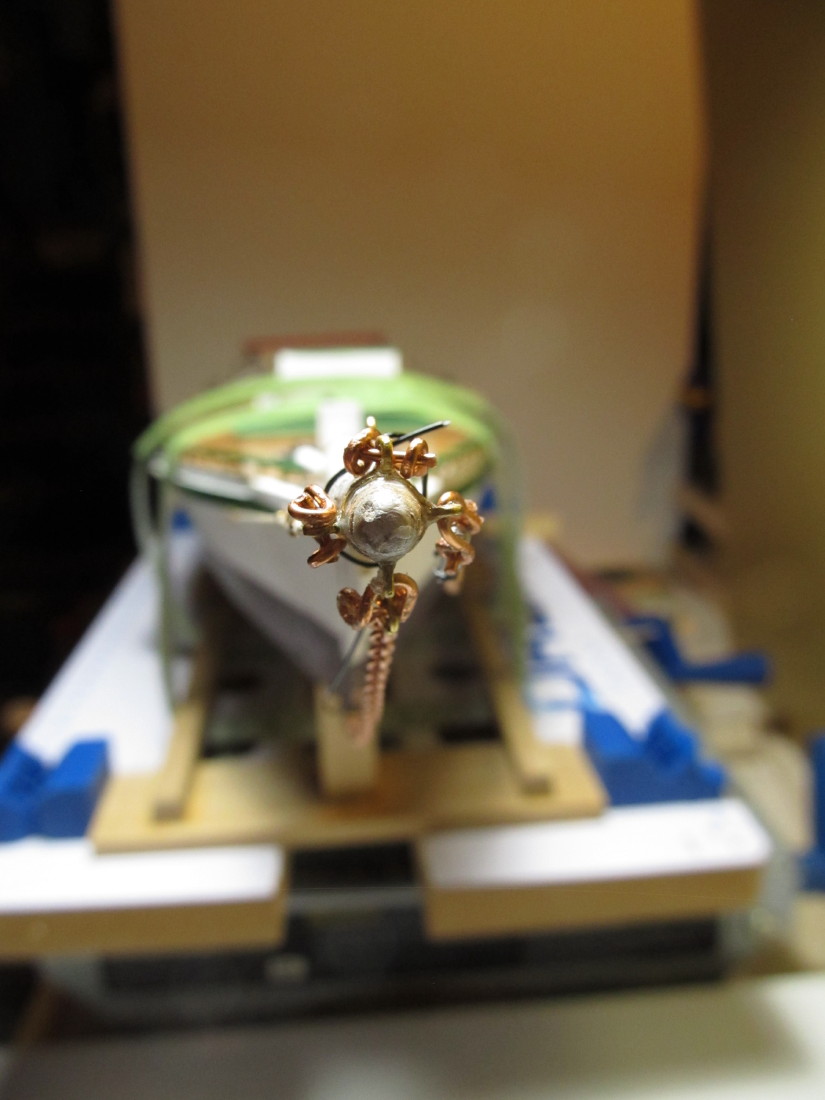
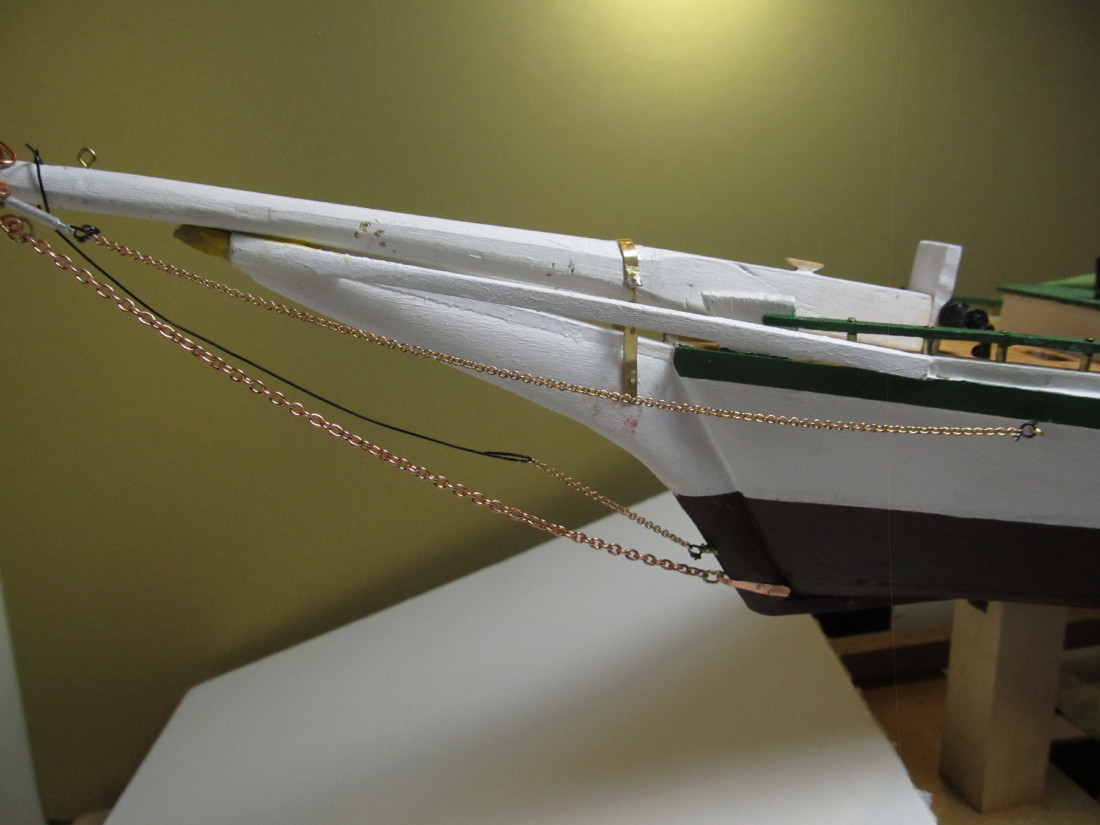
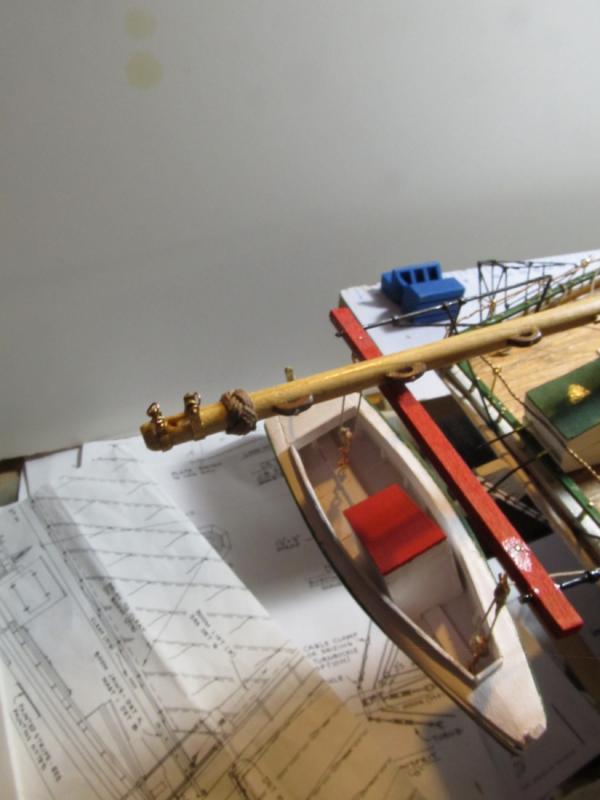
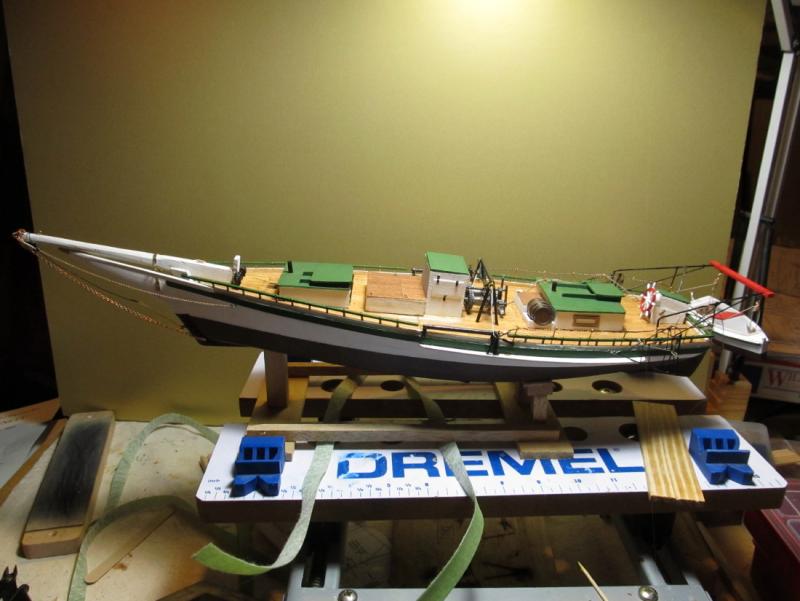
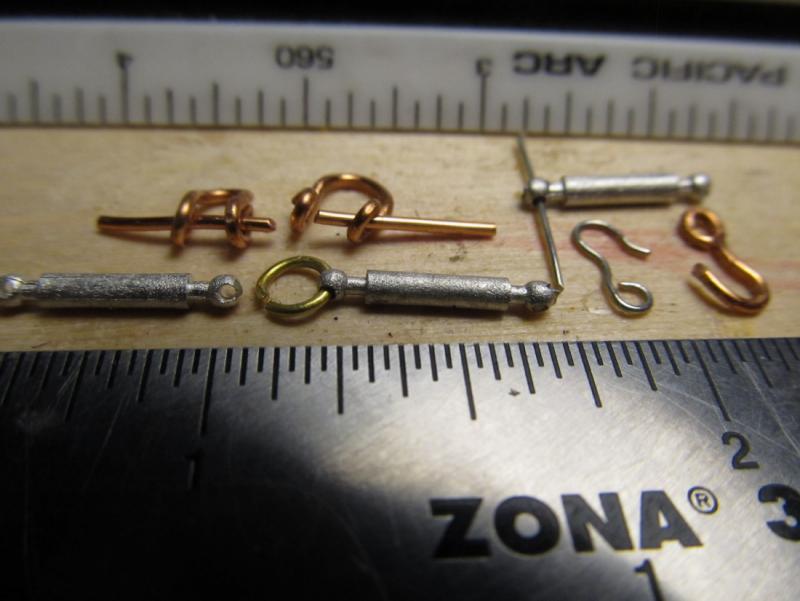
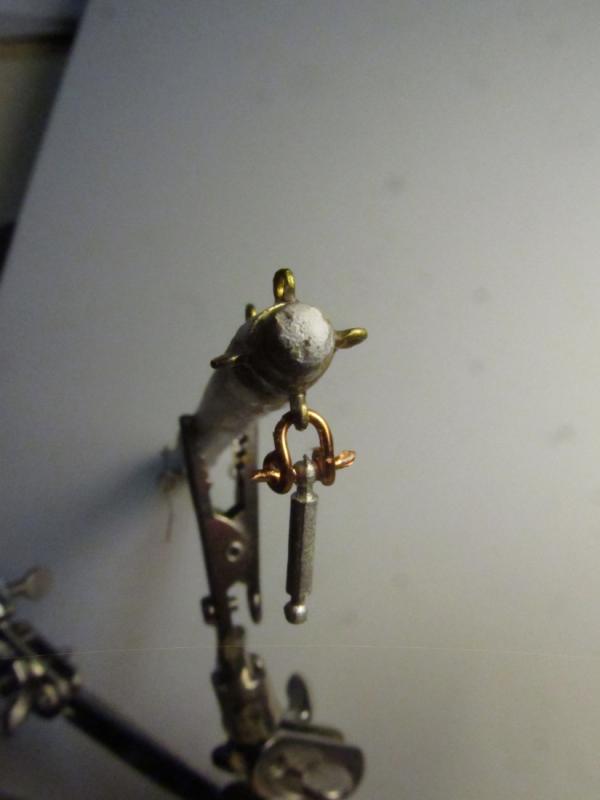
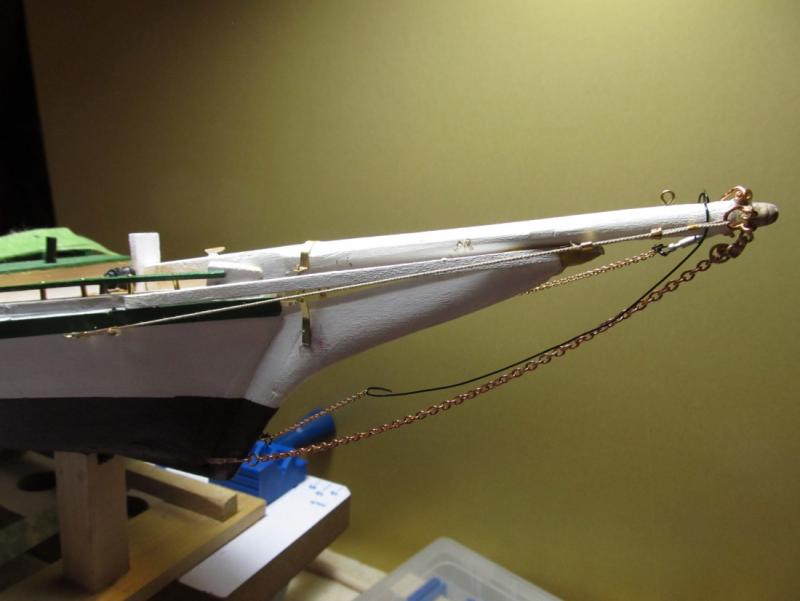
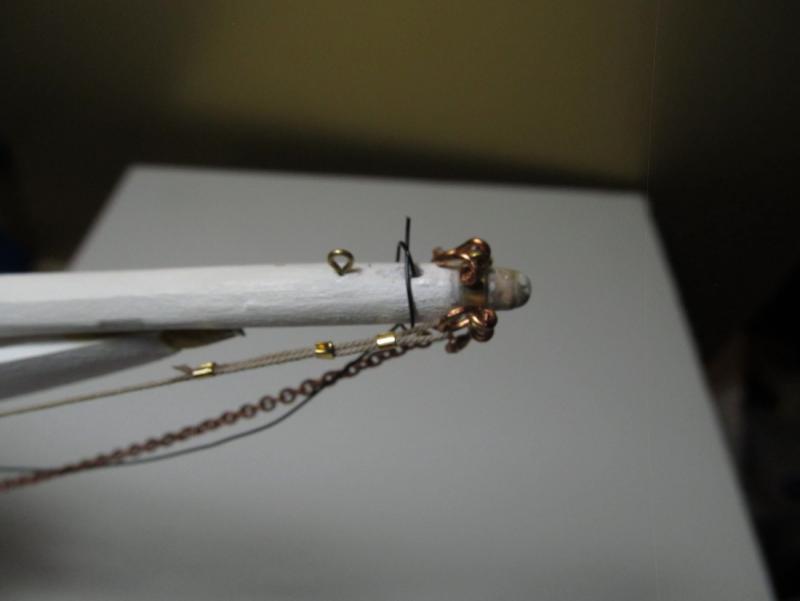
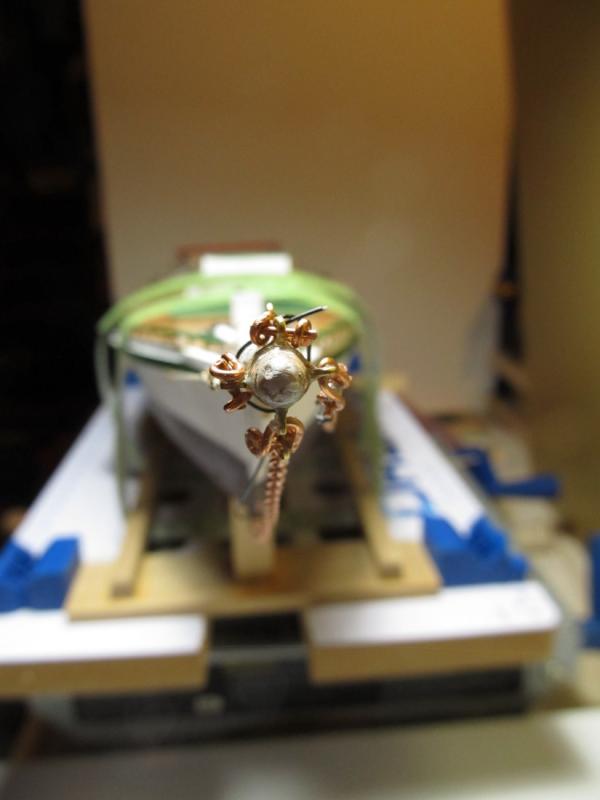
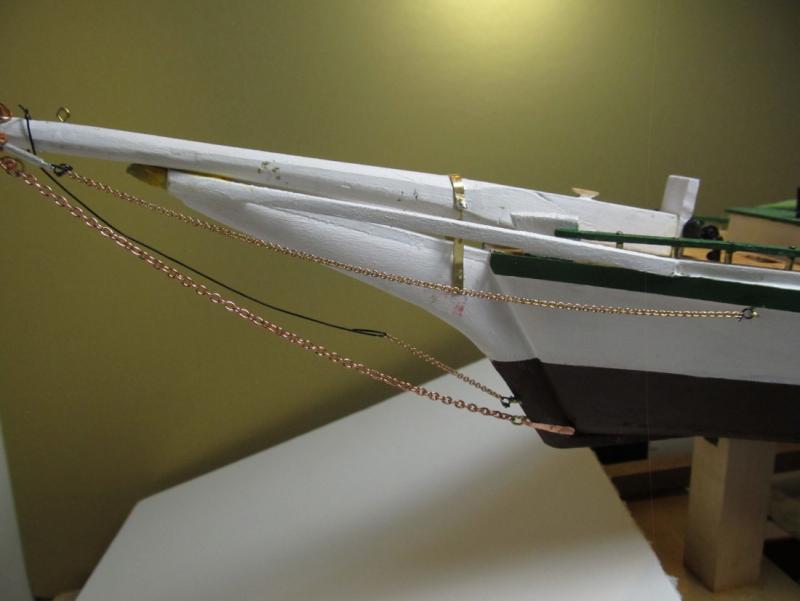
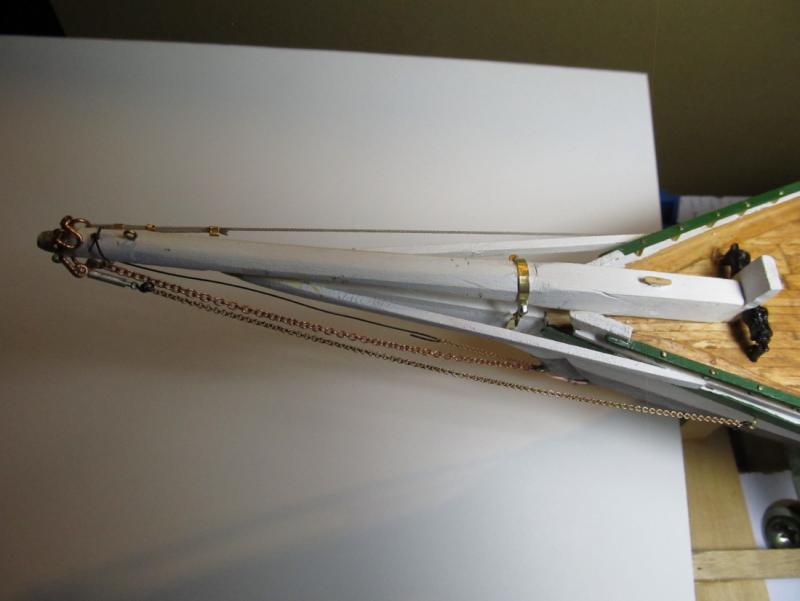
Short Update: After struggling with the white metal casting turnbuckles provided in the kit and busting thru one of them I was left with one usable turnbuckle of two, so I had to improvise. Making shackles at this size is not fun. First tried 26 GA black wire, then 24 GA silver wire, while both were probably within correct scale neither of them could hold up under tension, so I switched to 20 GA (or maybe it's 22 GA - the paper label fell off and got lost). The next struggle was with the "scale chains". Yikes ! They gave me three different sizes of scale chain to use to attach the bowsprit to the hull. "3/8" = 1' 0" scale model: Chain links per inch: 5/8" = 16, 1/2" = 20, 3/8" = 25" The 5/8" scale chain is usable; the 1/2 " barely usable, only 26 GA wire can pass thru the links; none of my jump rings are made from small enough diameter wire to pass thru. The 3/8" is totally unusable IMO. Not even 26 GA wire nor Chuck's smallest rope will pass thru a link. I'm all for scale appearance but when the actual item becomes so small it is unusable why bother including it. The plan directions are strange also. In the detail view of the bowsprit tip it says "port view" and shows the mid-size chaining running along the port side and rope running along the starboard side back to a point just under the wales, but in another top view it shows just the opposite - port and starboard are reversed. Oh well ! I went with the detail view. Of course the way the parts are, there is no way to tension the chains properly (reason why I tore thru one of the turnbuckles - pulled the O-ring thru the hole). So the main chain droops a wee bit. Here's photos of the progress. My attempts at making shackles: No jig was used. Done free hand. Eye-balling it. The improvised solution: The black wire attached to the upper bow chain is temporary - it's holding the chain up until the mast is installed and the forestay is rigged thru the bowsprit and connected to the chain.


- 250 replies
-
- 9
-
-
- willie l bennett
- model shipways
- (and 1 more)
-
Caution Ken, since MSW is hosted in the US not UK it's the US Copyright Law that governs what can be placed on this site. And, yes, it is a minefield.
-
Ken, you could try directing your question to the US Copyright Office for clarificantion their website is https://www.copyright.gov/help/ I think what you are planning to do, if I understand you correctly, is allowed under the US Copyright Fair Use Law but check with them for clarification.
-
Glasses for detail work (changed by mod)
Jack12477 replied to Bob Blarney's topic in Modeling tools and Workshop Equipment
Nah it's still within my range of focus - yards aren't a problem. -
Glasses for detail work (changed by mod)
Jack12477 replied to Bob Blarney's topic in Modeling tools and Workshop Equipment
Or be like me and just remove the regular glasses entirely and hold the object closer. -
Nigel, the way I thin the gesso is to pour some onto a pallet (I use the plastic ones from Michaels that have dimples like a deviled egg platter), dip the brush in water and swirl the brush in the gesso to thin (repeat as needed till you get the consistency you want) - don't get it real watery. You want some thickness to it. It will raise the wood grain slightly - but okay - lightly sand with 400 grit when it dries - leave dry overnight for best results.