hof00
-
Posts
1,654 -
Joined
-
Last visited
Content Type
Profiles
Forums
Gallery
Events
Everything posted by hof00
-
 Hi Chap, Drill small first, the lager bit will always follow the small hole.... The Bulwarks and Planking look great!! Are you planning on "Scuppers" on your lovely, finished Bulwarks? (I don't think you have to, this is your own piece of Maritime art. (I would have thought that with an updated kit, A/L would have built these in?? Cheers and Regards, Harry. (HOF)
 -
Nice progress Chap!! interesting Avtar, definitely a NZ feel to it.... 🙂 Ditto Kiwi John's previous post. Cheers and Regards.... HOF.
- 63 replies
-
- 1
-

-
- bounty jolly boat
- artesania latina
- (and 2 more)
-
Hi Chap, No Prob. patience, esp. in Ship modelling, is definitely a virtue. 😀 (I'm interested to know what you will be producing with your refurbished/restored machinery.) Cheers....HOF.
-
Hi Chap, Thanks for the complement!! Nice progress on your build. I'll watch progress with interest. Cheers....HOF.
- 146 replies
-
- 1
-
-
- artesania latina
- bluenose ii
- (and 1 more)
-
Hi Chap, Had a look-see at my version of BN II, I think that the Keel is of correct proportions.... (My BN is the the older A/L kit) Yup, Fillers, maybe a judicial plank/s faired in? (I think my BN II is on this site? If not, I'll post some pictures.) Your Planking looks great, mine not so good, it was my second ever wooden ship build. (Paint covers a myriad of errors.... 🙂) Maybe "Pin" the Keel also with Dowel/Toothpicks to add strength? Cheers....HOF.
-
Hi Chap, Had a look at the width/thickness of the Keel, thought that's not right.... You've fixed it, looks good. Regarding the gaps between Keel and Hull, Walnut Filler if you are not going to paint, you won.t notice the fillet of filler once sanded. My thing that I have learnt with A/L stuff is to place the Keel after the 1st Planking is complete, more learned members may have a different opinion regarding sequence? Wot Gaps? 🙂 Your choice between Paint or not. Looks great regardless. Cheers....HOF.
- 146 replies
-
- 1
-
-
- artesania latina
- bluenose ii
- (and 1 more)
-
Nice work Sir!! Brings back fond memories.... Ditto on the Deckhouses. (Minatare Joinery.) Cheers....HOF.
-
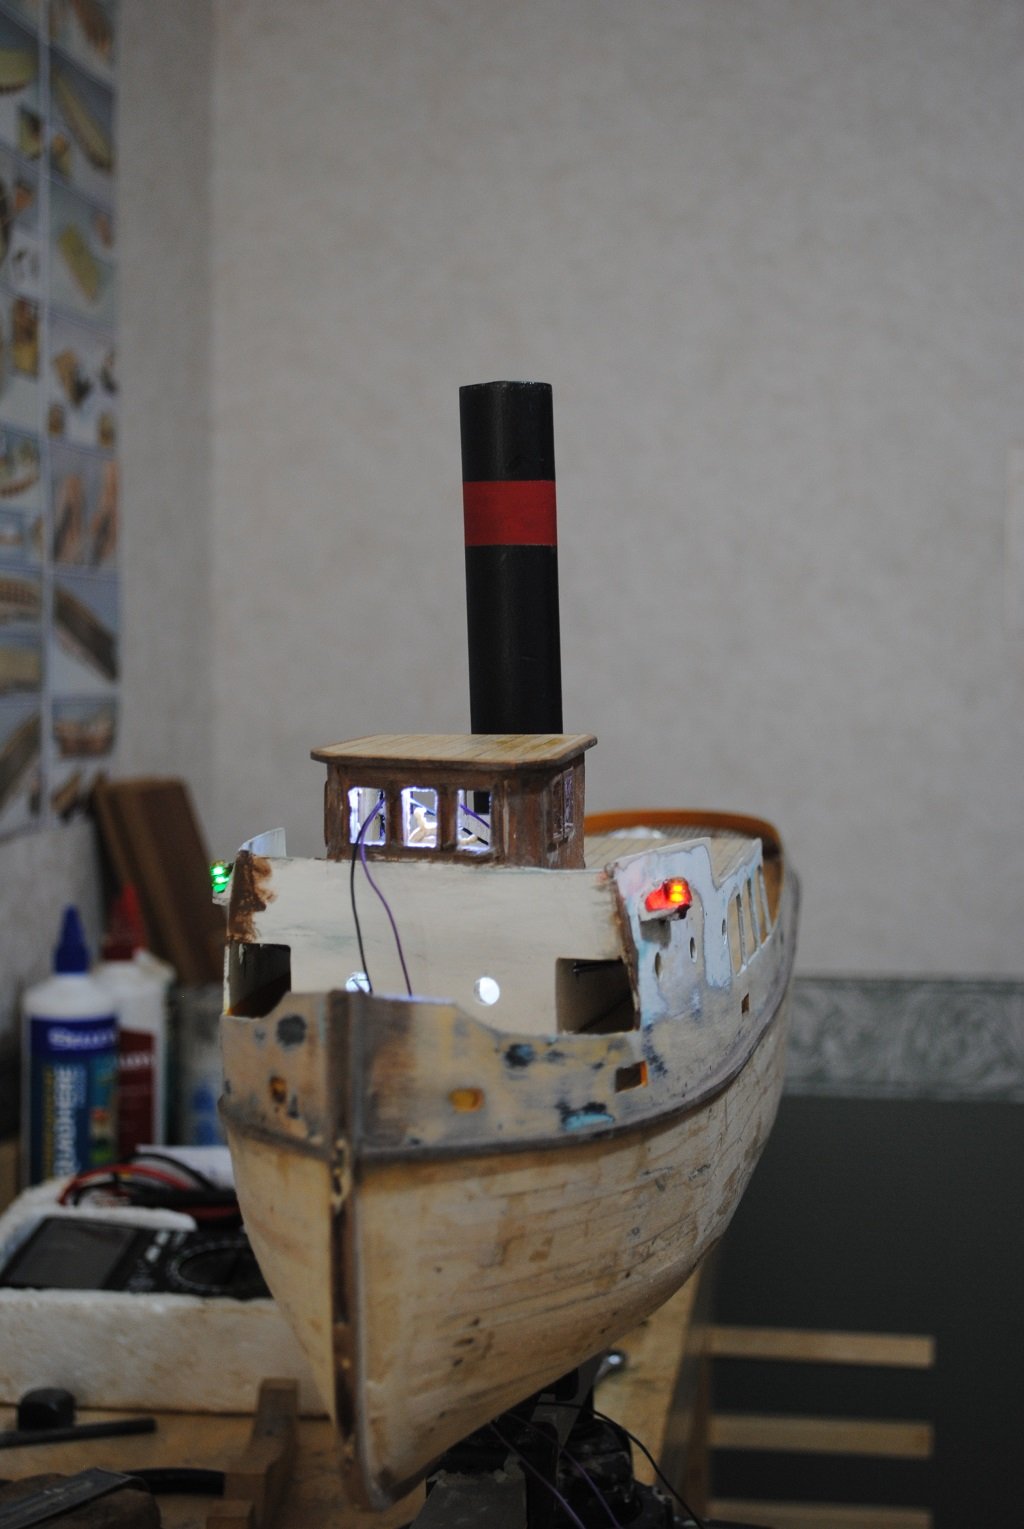
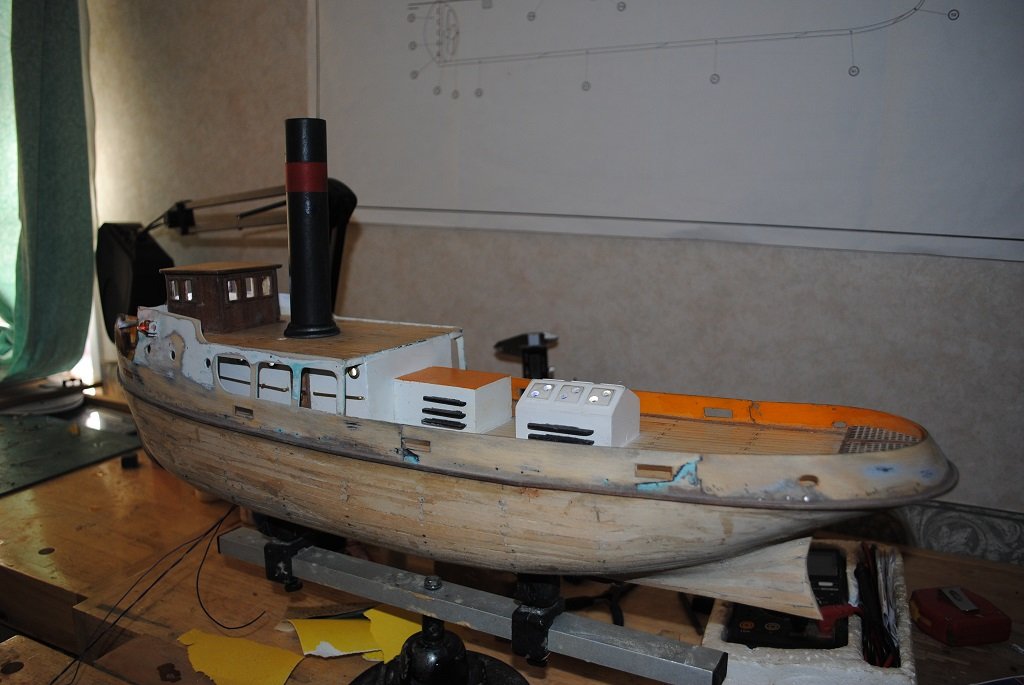
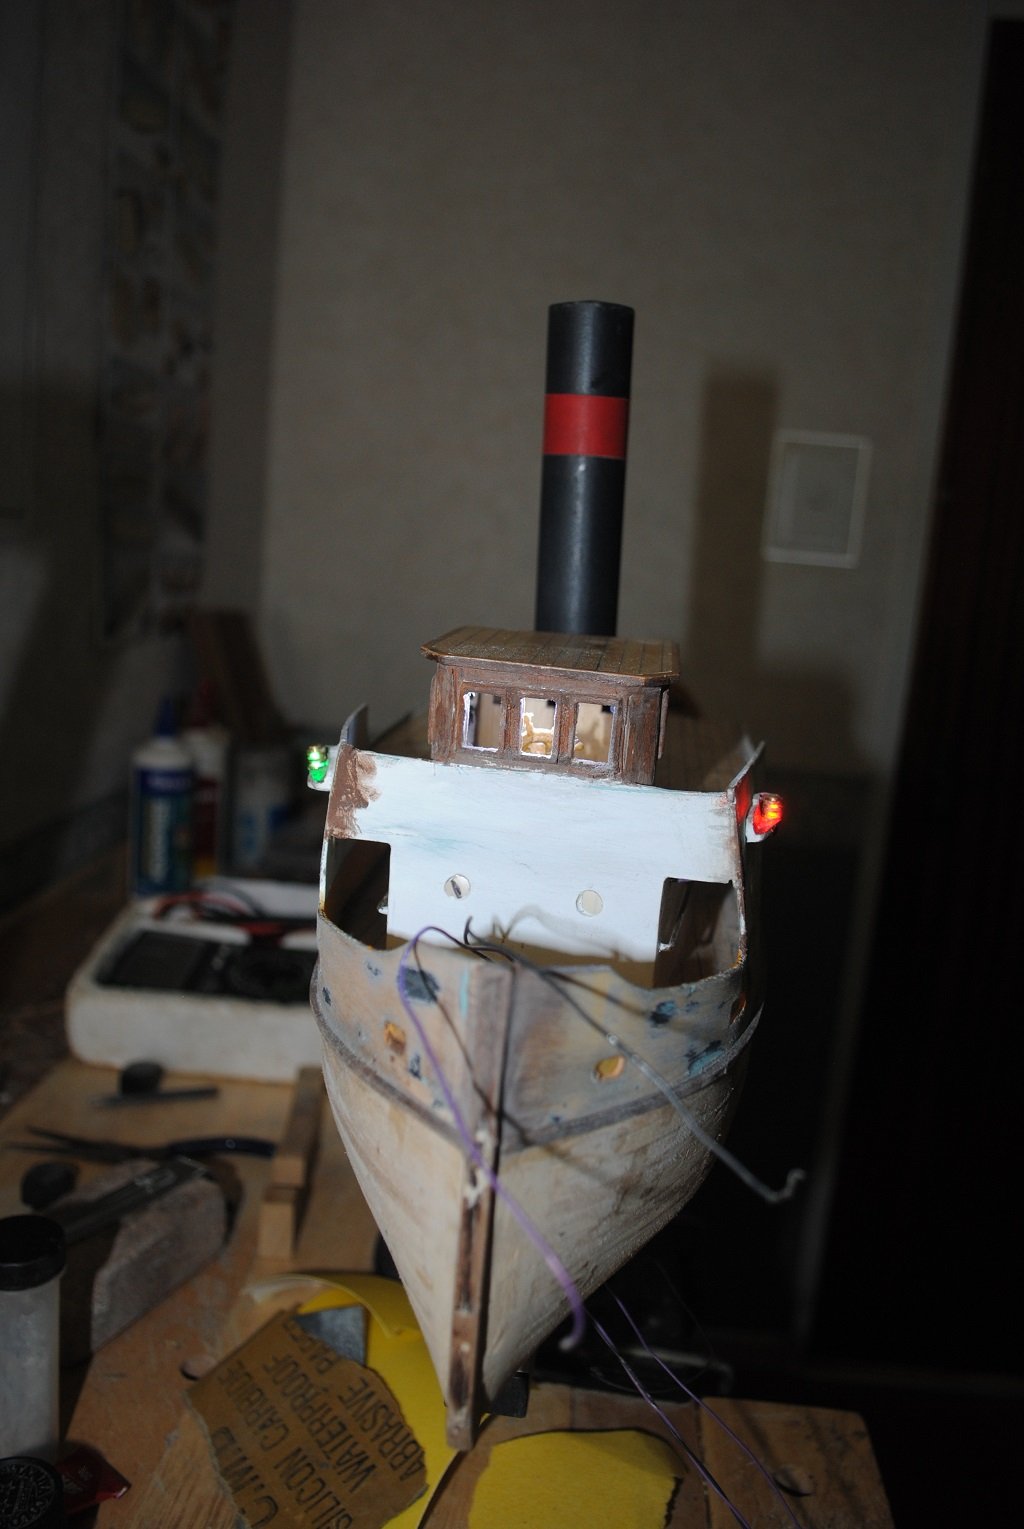
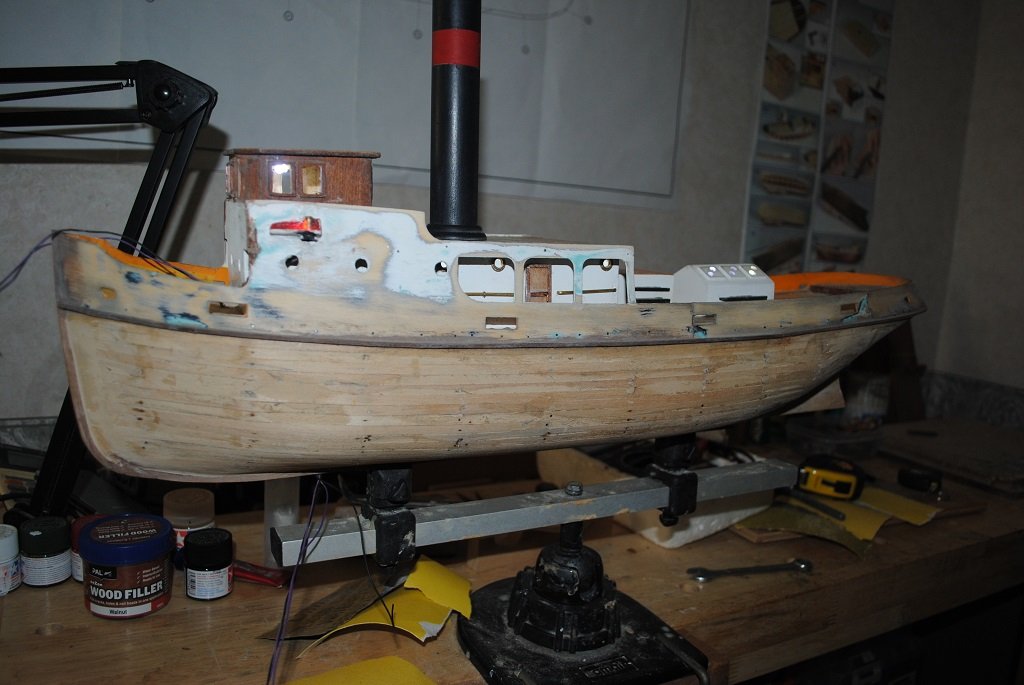
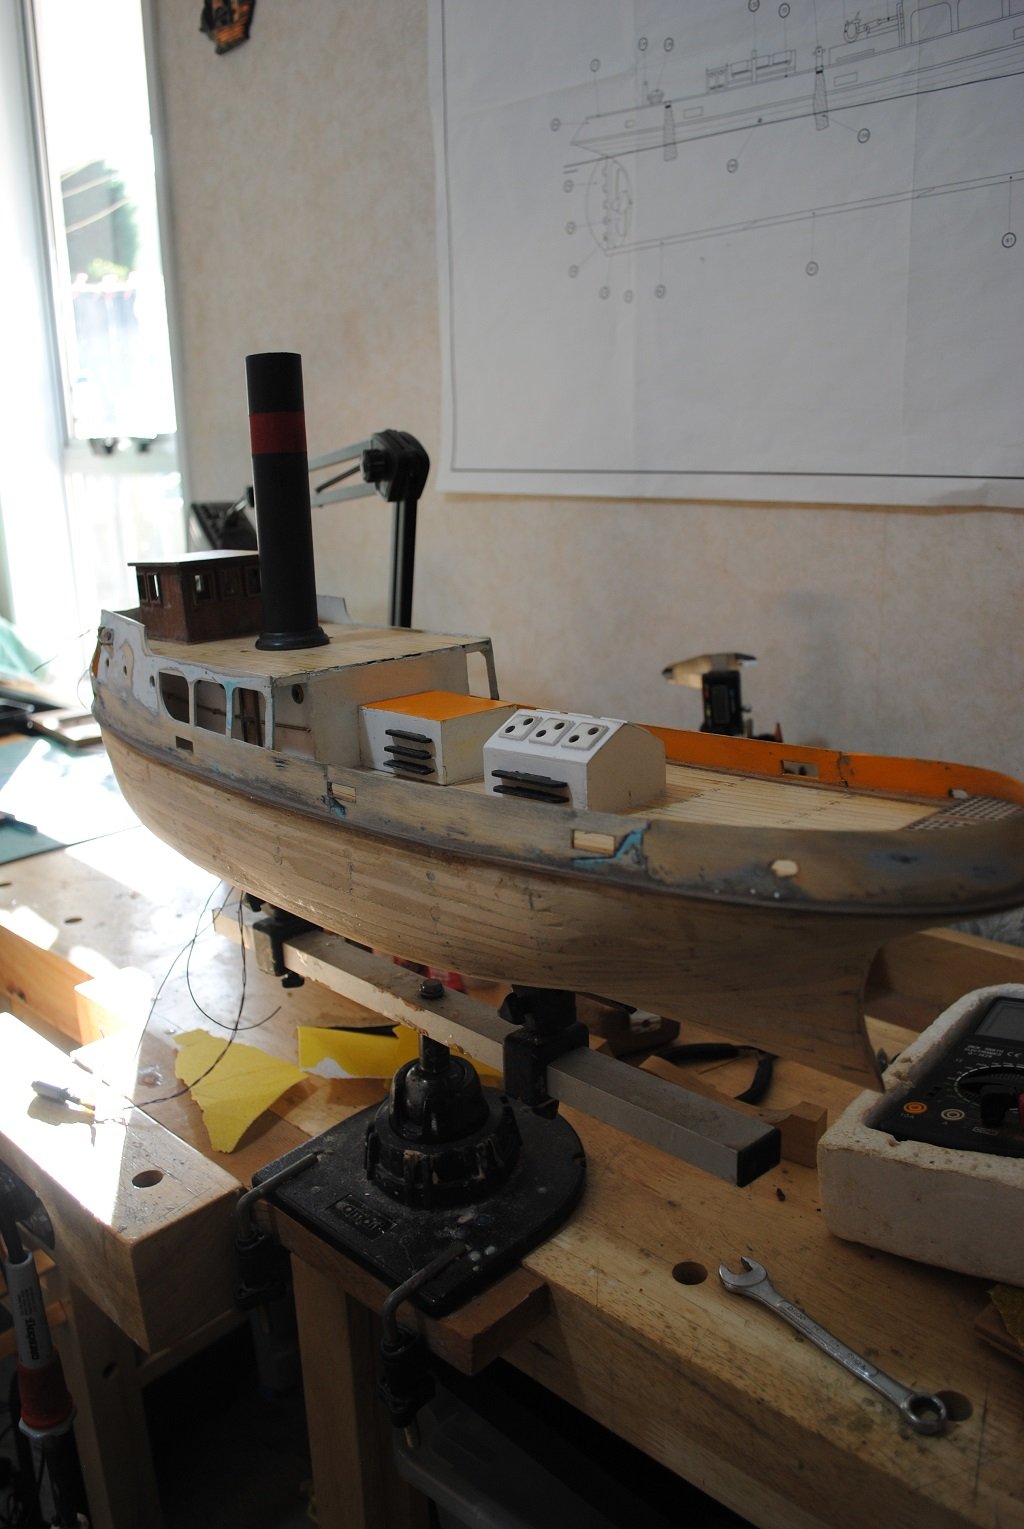
Hi All, Long time, no post.... (One day past one year....) been getting the house/gardens of my "Forever" home ready for sale, not 100% happy, but that's another story. So, "Chipping" away at the Tug over the past few weeks, when I get the inspiration, it's not looking too bad, no correction, it looks like !@&* Its a rebuild, first cut wasn't good. Anyway, got the 1st planking complete, Light Boxes for the Nav. Lights and wiring complete apart from Masthead Lights. Bulwark Rubbing Strakes and Keel added, Second Walnut Planking to follow soonish. The Stern Post is too long, but that's A/L. The LED's work ok after planking and I continue to check this after a day/night's work.... I cannot get to the Resistor N/W as it is now sealed in the Hull. Anyway, after a few more hours sanding away my errors, it will be a matter of Masking, Painting, Masking, Painting.... I promise to get a few photos up very soon. 😀 (Within the next 24 Hours) Regards to all. Cheers....HOF.
-
Hi Chap, Looking forward to your updates. Cheers....HOF.
- 525 replies
-
- 2
-
-
- cutty sark
- mantua
- (and 2 more)
-
If I may say so Sir, Awesome Work!! Cheers....HOF.
- 207 replies
-
- 1
-
-
- billing boats
- cutty sark
- (and 1 more)
-
Looking Awesome!! I have the Movie on DVD and 2010. At 42 inches long, it's "Long...." How are you intending to mount this? (Maybe with an asteroid spinning/tumbling silently through the void?) (The thing with the Kubrick film that stands out is the absolute silence of space) Cheers....HOF.
-
Hi Chap, Merry Christmas, Happy Guy Fawkes! (Belated) How's the Cutty going? Long time, No see.... 😀 (You could say the same for my updates.) Cheers....HOF.
- 525 replies
-
- 2
-
-
- cutty sark
- mantua
- (and 2 more)
-
Awesome!! (I'm a fan!!) How long is Discovery? Looking forward to the Antenna. (Alpha Echo 35 Module inclusive....) Cheers....HOF.
-
Nice recovery and continued build!! I do like the "Joggled" Deck detail, wish I had done it on mine.... The Bulwark Stanchions look great, there's a lot of them. In the past, I had started this model but my Abyssinian cats put paid to that, chasing a largish Bush Rat inside, upsetting the Kit contents and pretty much trashing the whole thing. Hence my Sergal/Mantua version.... (I do have an "Updated" A/L version in my closet, one with Sails. I have heard that this is a Chinese kit? Don't know....) Anyway, I'm following with interest.... (Guess I'm a "Cutty Nut.") Cheers....HOF.
- 82 replies
-
- 3
-
-
- artesania latina
- cutty sark
- (and 1 more)
-
Thanks you. Nice answer!! 🙂 Following the build with interest regardless. Cheers and Regards, HOF.
-
Nice Build thus far.... I do have a question for you, perhaps not appropriate for public consumption, how do you determine the cost of this build for your customer? (I have this kit in waiting for my partner one day soonish….) Cheers....HOF.
-
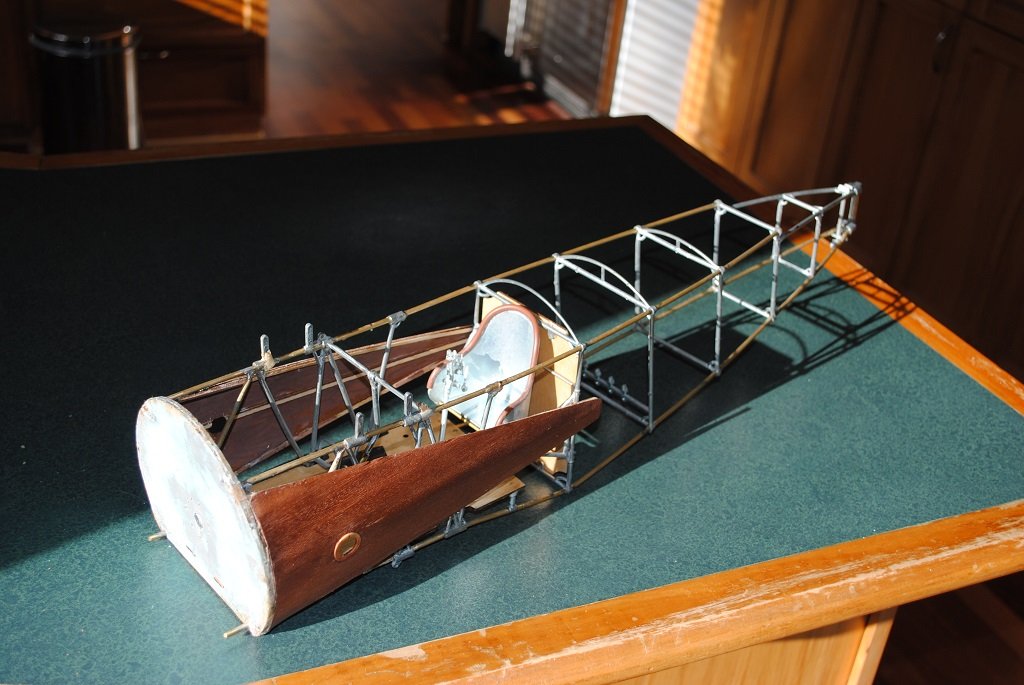
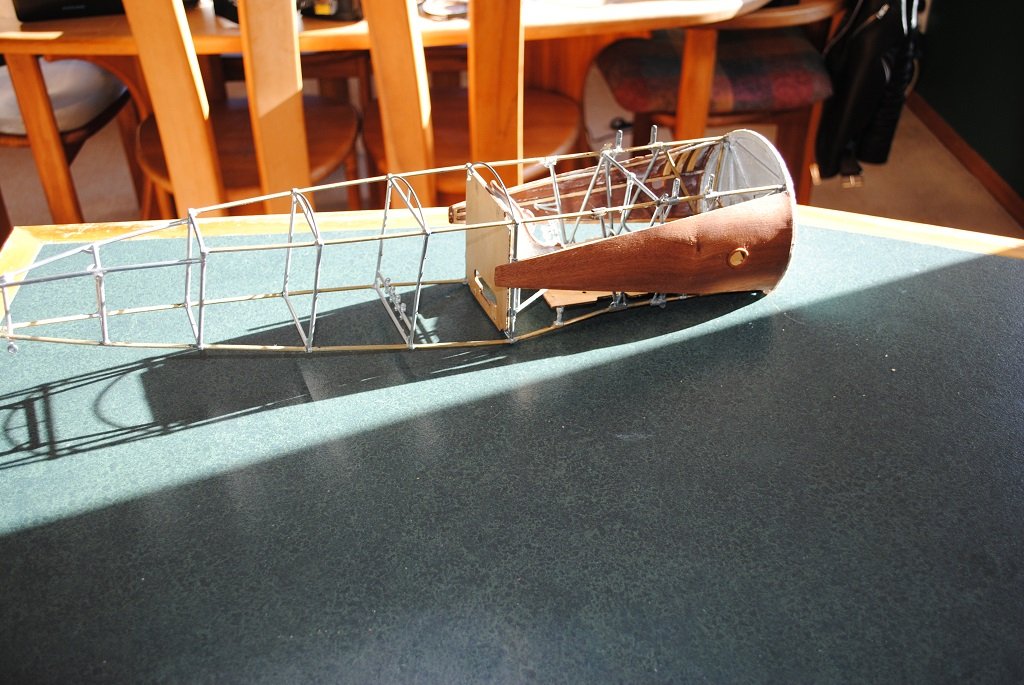
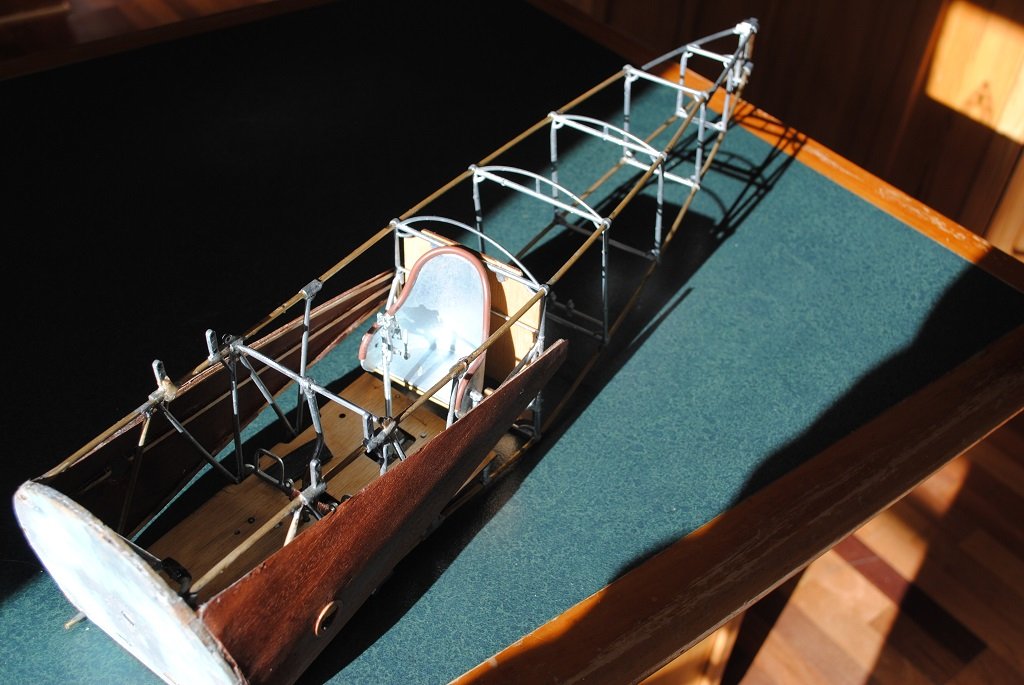
Thanks All!! Yup, the Frames have Thread Rigging, Fore/Aft/Across every frame, up to the Pilots Seat, but, my question is more centered around the actual Control Cables for the Flying Surfaces. I was leaning to "Multi Strand" wire? Mark: If Multi Stranded, would it not be already "Pre-tensioned?" to some extent? (Yup, I hear your advice.) I guess I'll have to experiment.... 🙂 With the continued issues with this, I'm looking forward to getting back to the Sanson. (At least I can correct "Irregularities." Small update: Have finished the various Instruments/Cluster but I'm having trouble getting the Instrument Cluster Support bar to fit across the Cockpit Frames.... I have words of frustration which I will not utter here!! Simulated Glass of the Instruments with clear Nail Varnish. Cheers....HOF.
-
Hi All, Take care, hope that things give you Chaps a miss.... We are seeing on CNN at present. (Even in New Zealand.) Take care. Cheers....HOF.
- 52 replies
-
- 2
-
-
- dumas
- Chris-Craft
- (and 1 more)
-
Hi All, I'm after some "Learned" advice.... The Control Column/Rudder Bar are linked to the Control Surfaces, Aileron/Rudder/Elevator. (Working surfaces.) My question, should I go with Thread for these moving things or maybe go with Multi Stranded thin wire? (Stripped insulation, of course.) I'm leaming to the wire as it's not going to fray and I can easily solder the terminations whilst retaining the tension required. Any advice/opinion wold be very welcome. Cheers....HOF.
-
Thanks Carl/Mark, Wot I call "Muntz_ is called "Minatz" or similar in the instructions. (White Metal.) (I call it Muntz as that is what I have called it before.... It's horrible stuff.)) Anyway, a couple of photos.... Have an awesome weekend!!
-
Small update.... Work continues on the Fuselage.... I'm not too happy with it, there are no accurate measurements in the "Destructions" it's just go with the flow and try to get things lined up/square. As stated before, there are many, many issues.... One of the se is the fragility of the components, Esp, the "Muntz" ones. (Filed a bit of a groove tonight for the Instrument Cluster, it just fell to bits with the most gentle touch, anyway, rebuilt/fixed with CA/Epoxy.) I think that this one has been languishing too long and over time, if not assembled, the parts degrade. Haver completed the Control Column, Rudder Bar, Cockpit Floor and am reasonably happy with the Firewall and "Cockpit" Veneers. I have also to fabricate some Lugs for the Landing Gear/Interplane Struts as the most forward Cockpit Frames were missing and I had to Fabricate these also. So, we'll see how it goes.... I'll post some photos tomorrow. Cheers....HOF.
-
Nice start!! Congratulations on purchasing an "Early" version of this subject. You'll find that it builds to a great model, Just take your time. Have a wee think about the instruction sequence, from memory, some things should be done before others.... Cheers....HOF.
-
Thanks Dennis/Lou, Progress with the Firewall, It's a bit of a mission.... There are "Veneers" that attach and a whole host of other stuff. Thinking about some "Mods" to make stuff more accurate/secure. As stated, some time ago, this Model/Kit leaves a lot to be desired. (I'll try my level best to complete....) Cheers....HOF.