Louie da fly
-
Posts
7,990 -
Joined
-
Last visited
Content Type
Profiles
Forums
Gallery
Events
Everything posted by Louie da fly
-
 Wow! Those flags are amazing! I've just completed a flag from fabric, but now I'm thinking of following your lead instead. How difficult was it to print on tissue paper? Is this the kind of paper that comes on rolls and is used in the kitchen when baking?
- 197 replies
-
- 1
-

-
- santa maria
- carrack
- (and 1 more)
-
-
I'd always intended to contact the NMM and let them know the picture was wrongly attributed. I've finally done it.Let's see if anything comes of it.
-
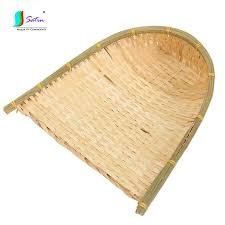
Fascinating stuff. This "winnowing shovel" looks a lot more like an oar than a winnowing fan does. Just reinforces the fact that translations can give a wrong impression, just as in the "red-cheeked" vessels we discussed earlier. It's very difficult if not impossible to give an exact translation from one language to another and retain the full sense of the original. On the other hand, I've learnt something from all this - I didn't know there was an implement like that shovel thing - very interesting.
-
I think you've made the right decision - but that might just be because you agreed with me . . .
-
Oh, yes. No argument about that! If you want to see how good it can look, see the completed model at
-
Ok. Clear as mud.
-
Ok, you did ask, so; to my eye the skirt doesn't look right. As you say, none of the period artwork has one. It depends how historically accurate you want this model to be. I can understand the tension between "I want this to be accurate" and "Hey, it's for gaming; it doesn't matter that much." If it were me I'd leave the skirt off and But it's not me. It's your model and your decision, and you should do what you think is best for you.
-
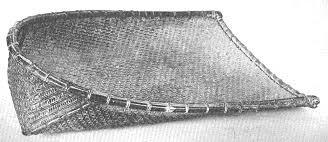
I'm assuming Homer used the word λίκνον [líknon] (info from Wikipeidia) for a winnowing fan. Throughout the world and the ages, they all seem to be a similar shape: Easy to understand why Homer would have referred to an oar as looking like a liknon - particularly the ones below, with a handle: There was even a knight named Robert de Septvans who had seven winnowing fans as his coat of arms (Sept is seven in French ).
-
To be honest, I doubt that warships were in the habit of hanging the shields on the sides unless for battle or display (and I have my doubts about battle - where would you rather have your shield - on the side of the ship or in your hand?). I think they would interfere with the efficient sailing of the ship, not to mention the likelihood of falling out of their "socket" into the sea in rough weather. It might end up being the best solution. Use this one to get experience solving the problems, which you then apply to the new one. A little hard to see from the photos, Matt. Do you mean that you shave the bottom of the planks thinner than at the top, so they taper down to about half the thickness at the bottom? Oh, and no relation to James H? You have the same surname
-
Well, imagine my surprise on visiting Scotland to find that our Queen is officially Elizabeth the First - because Elizabeth Tudor was never Queen of Scotland.
-
Quite the contrary - the main stuff is all good. Looks like it just needs a bit of tidying up to be a model to be proud of.
- 118 replies
-
- 1
-
-
- sanson
- artesania latina
- (and 1 more)
-
Looks like you're well on the way. Don't get too worried about mistakes - we all make them. And most of the time they can be remedied - wood is a very forgiving medium (don't ask me how I know!) Looks like one of the "specials" that they developed for Normandy, along with the floating tank and the flail tank for exploding mines - that's the Sherman/Grant/Sheridan tank that could fly upside down!
-
Glad you liked it. Are you sure that's the same James? He's described as James I "of Scotland" - my reading of that, unless the author got mixed up, is that he's referring to James I who reigned from 1406-1437 (thanks, Wikipedia!), given that he then goes on to describe the Great Michael as having been built in the reign of James IV. James VI who became James I of England on the death of Elizabeth Tudor, on the other hand - his character you've described admirably.
-
Not sarcasm, surely - that would be unworthy of you. I think irony "the expression of one's meaning by using language that normally signifies the opposite, typically for humorous or emphatic effect" is a more accurate description. Regarding the planking - Yes I think steaming would be wrong - that way madness lies. On first inspection, perhaps you could loosely clamp the planking to each frame and gradually move the planking inward bit by bit. Starting with the planks nearest the keel - add a dab of slow-drying glue (white glue - PVA - for preference) between those planks and the frames. Clamp them loosely to the frames, not too tight when you first put them on, then as you would with the wheel nuts when you're putting a wheel back on the car - go round them again tightening each one a little until they're all a bit tighter, then do it again till they're all a little tighter - until the planks are all fully in contact with the frames (or as close as you can manage). Once the glue is fully dry, move the clamps outward - loosely clamp to the frames all the planks that are a bit further from the keel (adding a dab of glue first), going round and round the same way, tightening them all a little bit each time. And then move outward from the keel again, until all your planks are nice and tight to the frames. This would need adjustable clamps, of course - G-clamps or something similar. I can't guarantee this would work, but the planks look thin and flexible enough that you might have a good chance of success if you take it gradually and spread the load evenly by clamping to all the frames. The only alternative I can think of is to follow your skipper's advice - chucking it away and starting again. (I note that James H's last post is from 2018!) But it would be a shame to do so after all your work if there's any chance this model can be fixed. Worth a try? Have a think about it and see what you want to do. It's your build and your decision. And the very best of success with it! [Edit - As I'm sure you're aware, Matt H has successfully completed an Amati Drakkar just recently - but he didn't seem to have any issues of this sort. However, you might be able to get some help from him to see if he encountered the ame problem [/Edit]
-
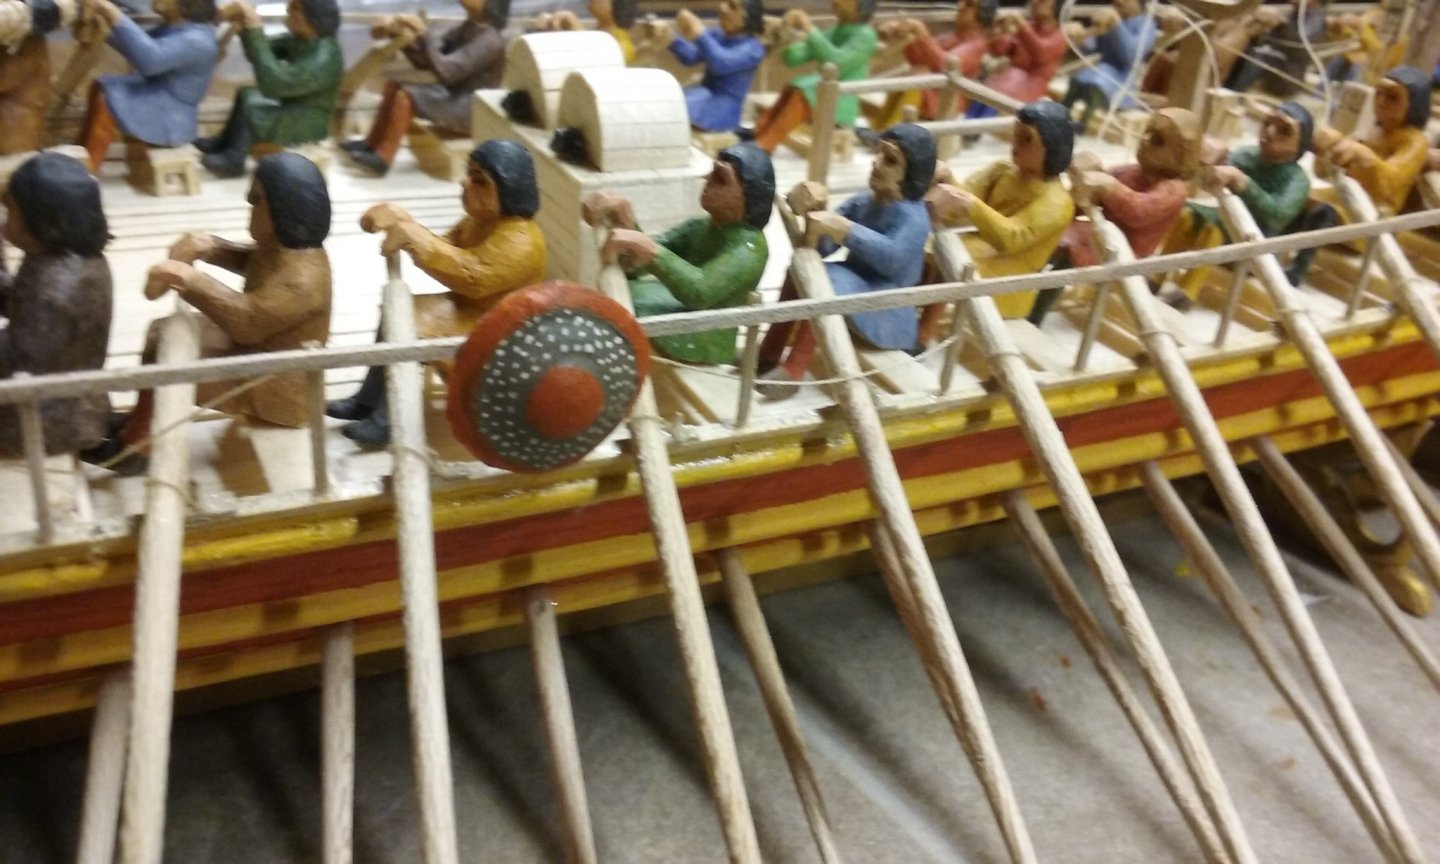
On the other hand, it's about all we have to work with. Though some of the earlier representations (the pictures in your post above) are rather primitive, part of the problem is surely that they hadn't worked out a way to show perspective - thus the uncertainty whether the ship is a monoreme with both sides shown or a bireme. And as far as the later pottery is concerned, I'm prepared to believe it shows a pretty accurate rendition of what was actually used. And if we accept the details of the hull as being accurate, shouldn't we do the same for the thickness of the oars? (I'm not getting into whether their length is right - I don't feel qualified to comment). The other point I would raise is that though the oars on the trireme reconstruction Olympias were thick on the inboard side of the fulcrum, the rest of the oar was quite slender, and these oars have been tested in use and worked well. It's not proof that these are the kinds of oars used by the ancients, but I think it is worth taking into account. Apparently (and unfortunately I don't remember where I saw it)archaeologists have found lead counter-weights in the form of strips of metal formed into a ring to go around the oar handle to overcome the imbalance in handling oars (where most of the length and weight is on the seaward side of the fulcrum) .
-
A little bit of extra information that might be of use in this discussion. It's taken from the preamble of a 19th century reprint of the 16th century "Complaynte of Scotland" - needs to be taken with a pinch of salt but the direct quotes from contemporary stuff could be worthwhile.

-
Nau Portugal with 48 cannons
Louie da fly replied to Daniel Filipe's topic in Nautical/Naval History
Dunno. Portugal was neutral, though I doubt it was "business as usual". -
Hi Brownbeard, The best place to look is here This has been assembled to give new people plenty of choice, of models that are relatively easy to build and have clear instructions. Have a look through and see what attracts you. And when it comes to starting a build log, have a look here: Have fun with it!
-
Hi Christos, Your question regarding the oars inspired me to put together a bunch of pictures from Ancient Greek sources (mostly pottery) at which has a lot of depictions of oars. As you can see, they are quite long and slender. Many of the pictures also show the oarblades clearly enough to understand their shape and size. I'm hoping this helps not only you, but also others who build models of Ancient Greek galleys. Very best wishes, Steven
-
That makes a lot of sense - I had my doubts right from the start about that. There's also the difficulty of fixing marble to wood - how would you do it? With glue? some kind of pin through a hole in the marble? It does leave the question - so what were the marble eyes used for? Those oars seem very thick and heavy. Are they the ones supplied with the kit?
-
Nau Portugal with 48 cannons
Louie da fly replied to Daniel Filipe's topic in Nautical/Naval History
AAAAAARRRGGGGHHHH! My heart skipped a beat as she keeled over. There's this horrible inevitability about it all. I'm so glad they raised her again. And what a beautiful ship. I'm just sorry I don't understand Portuguese. And in the final scene she is moored with the monument to Henry the Navigator in the background. Very appropriate. -
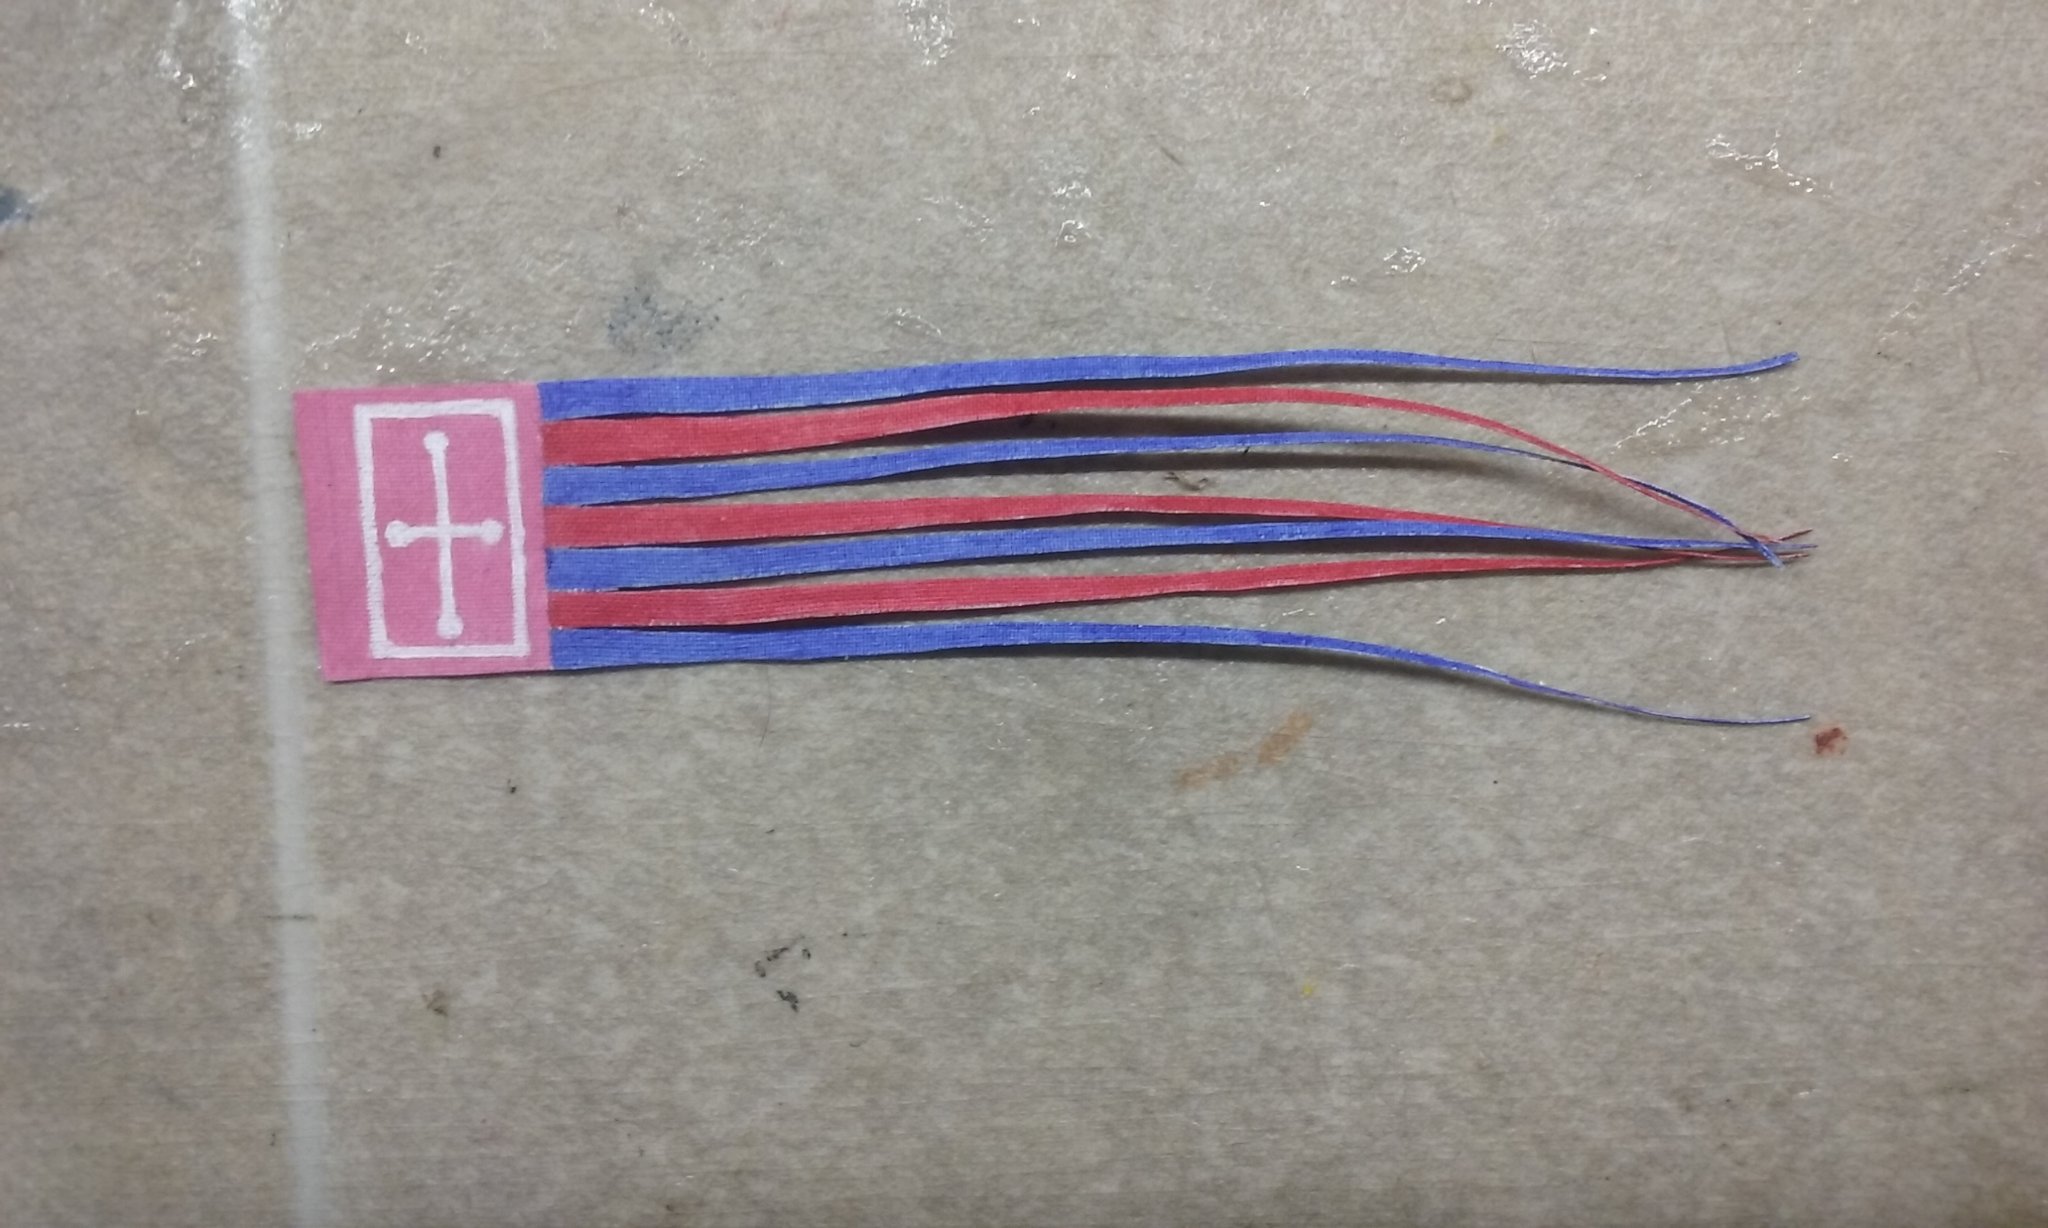
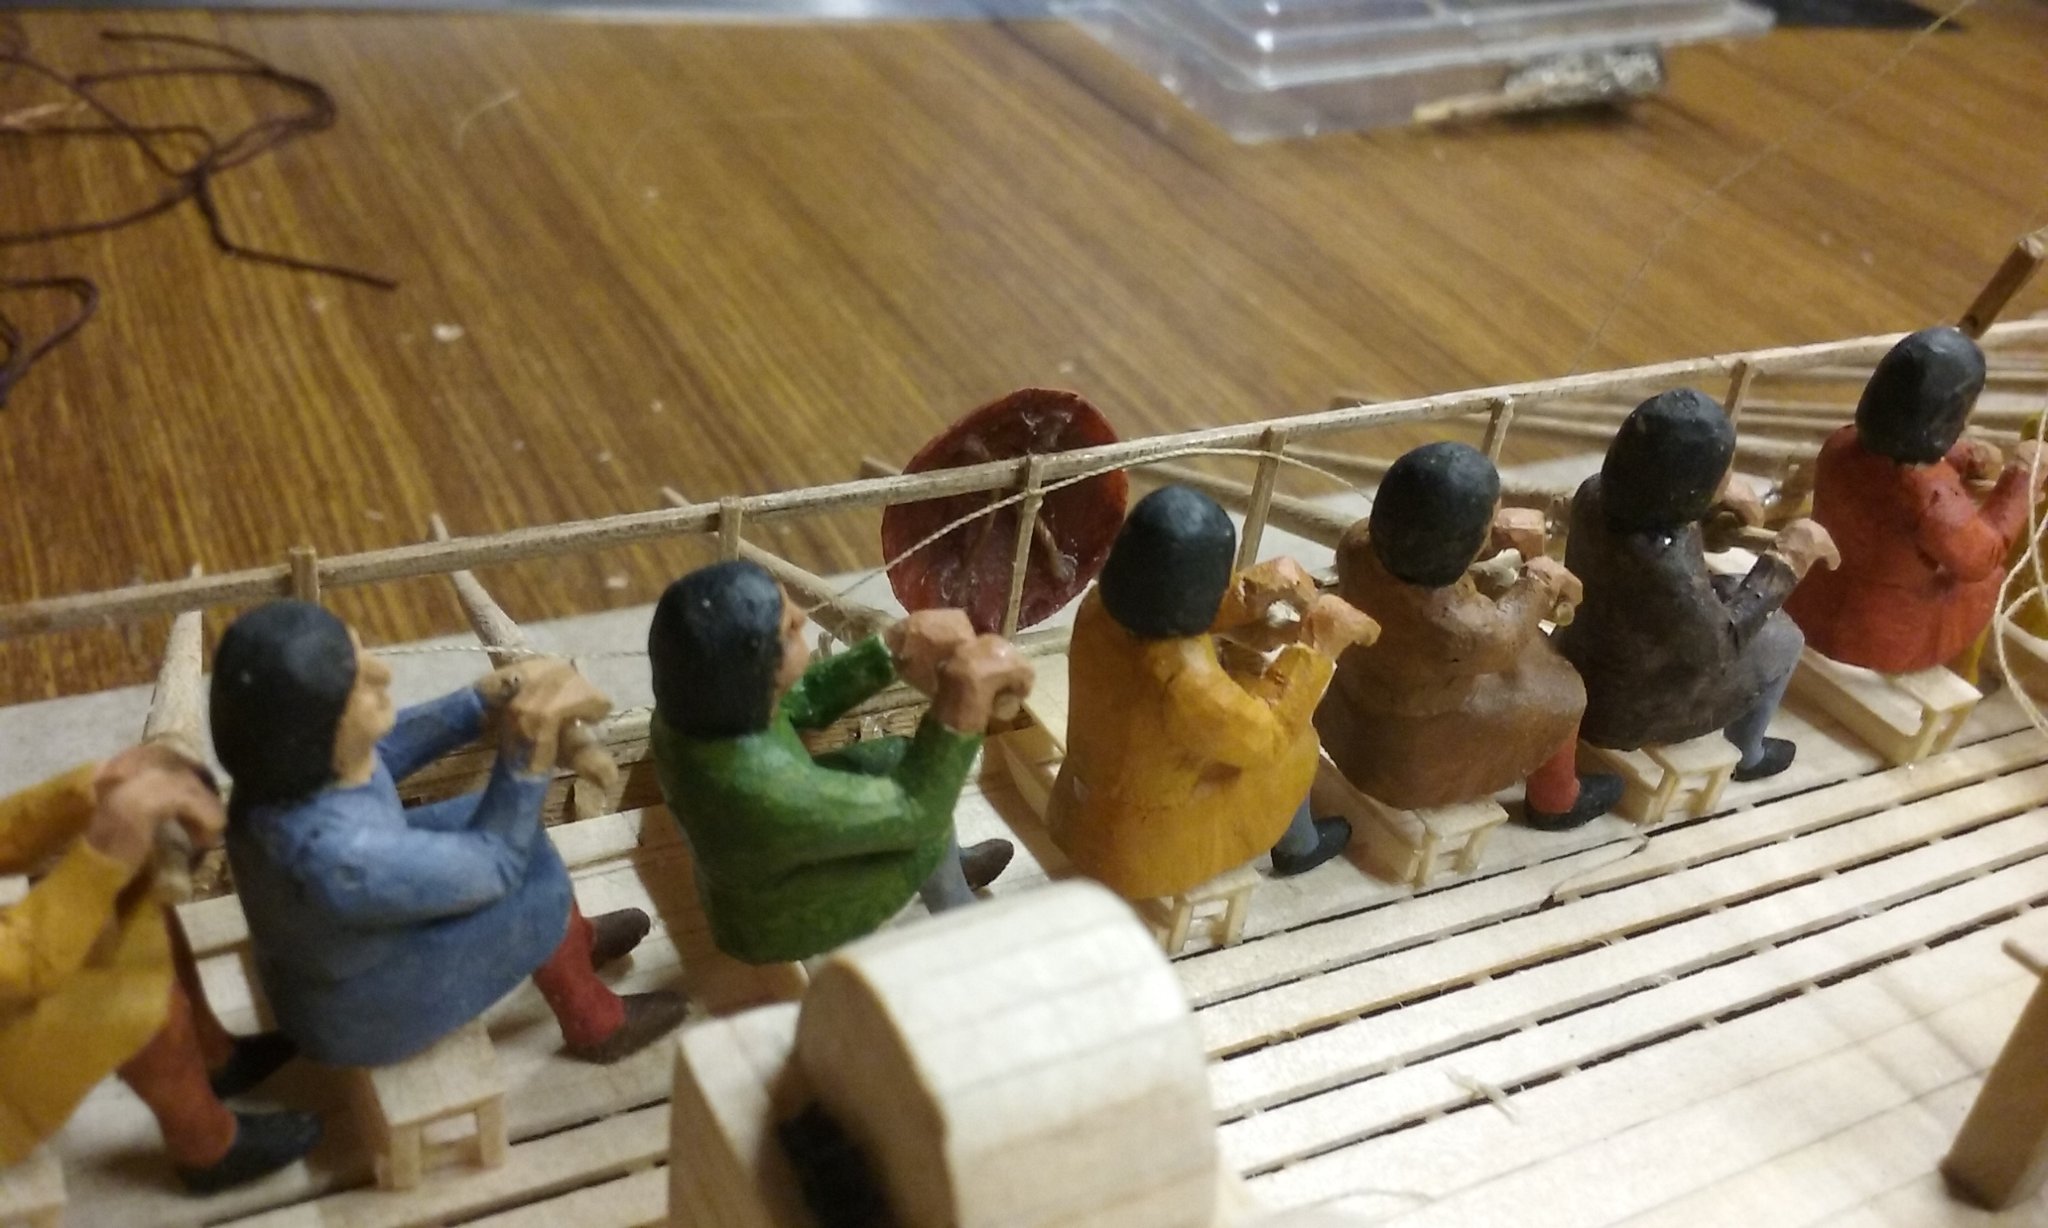
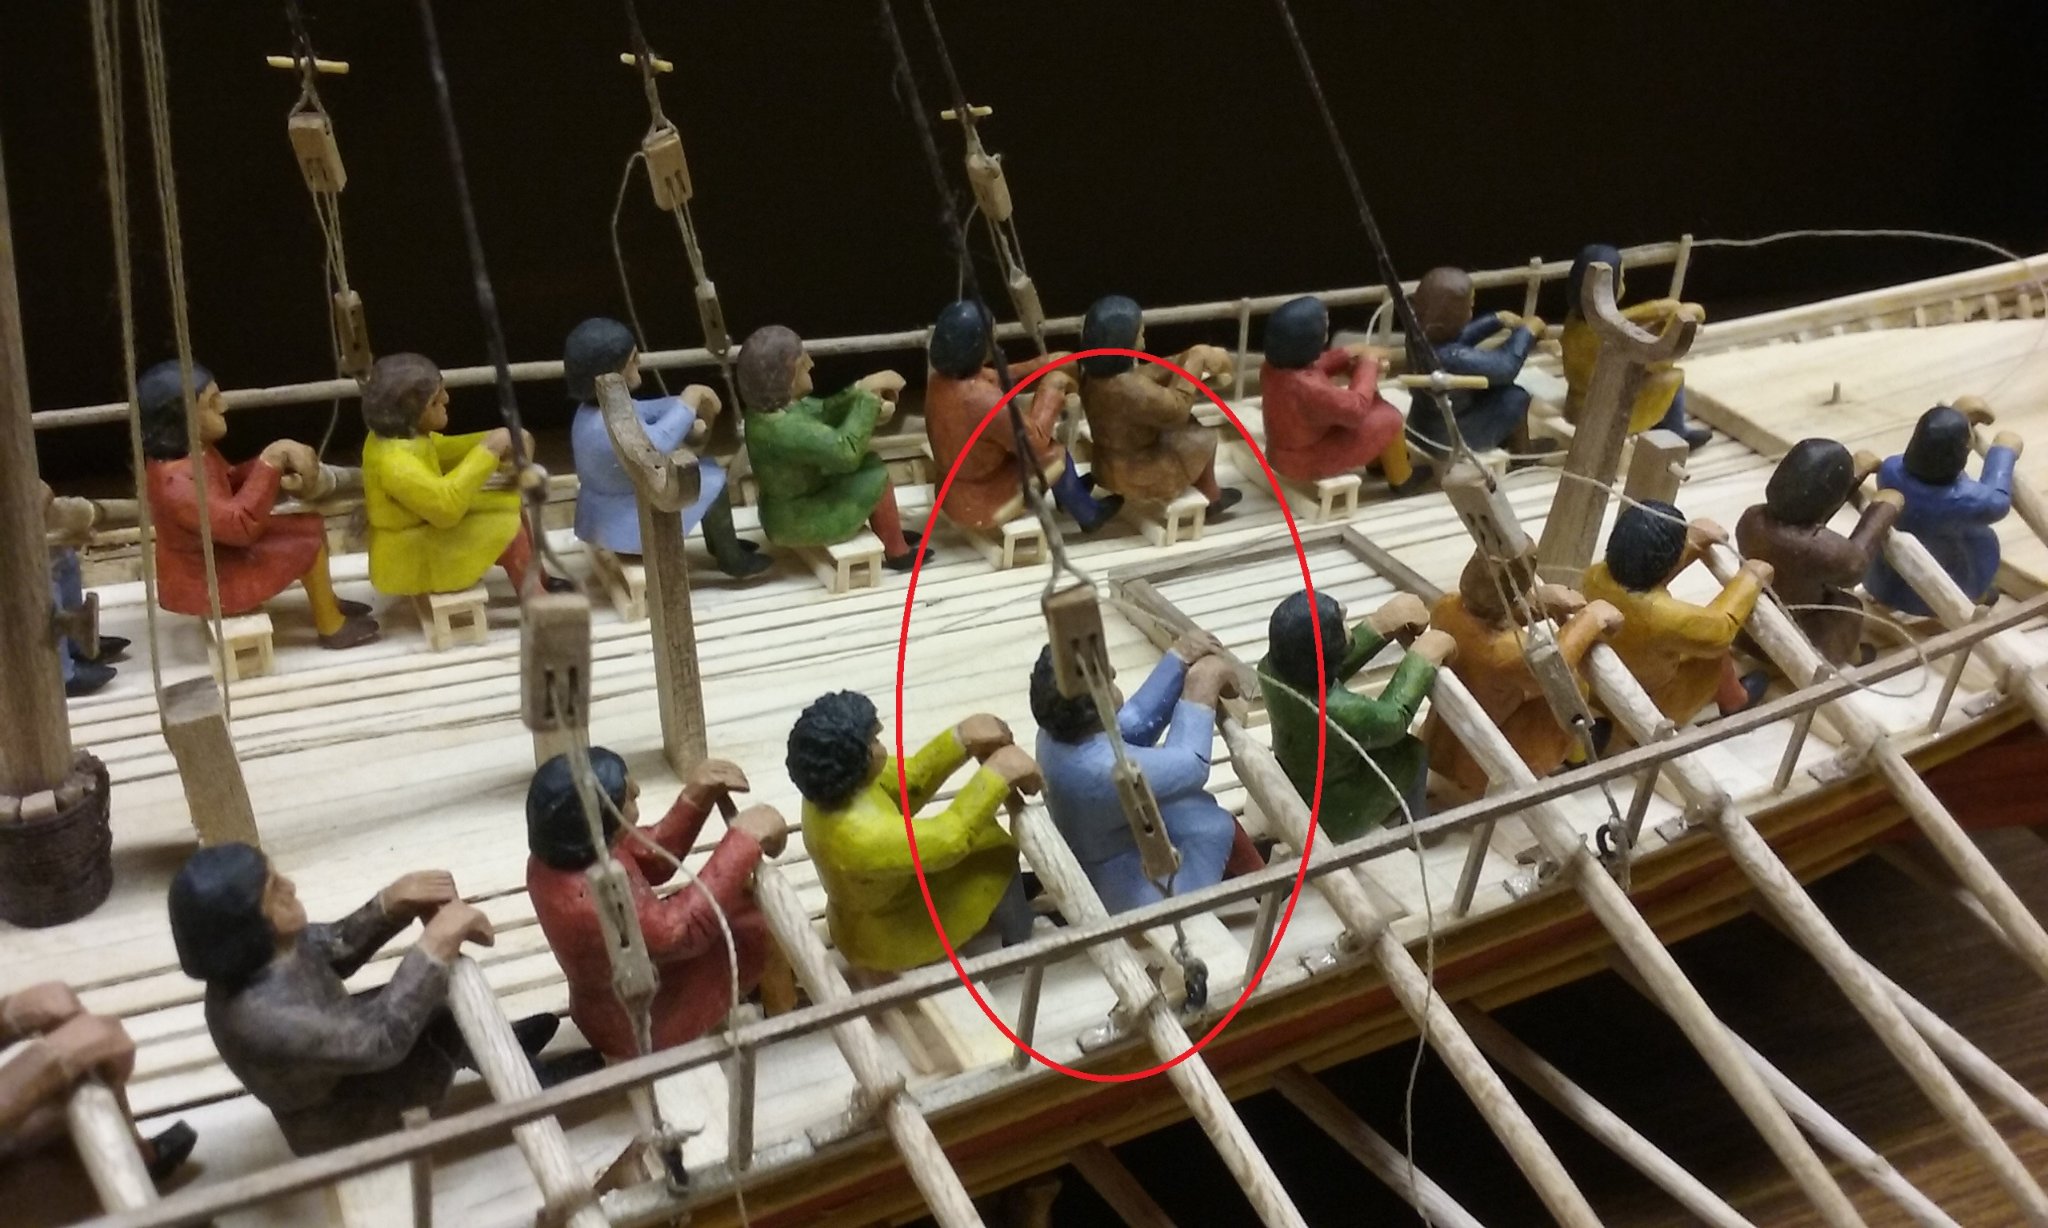
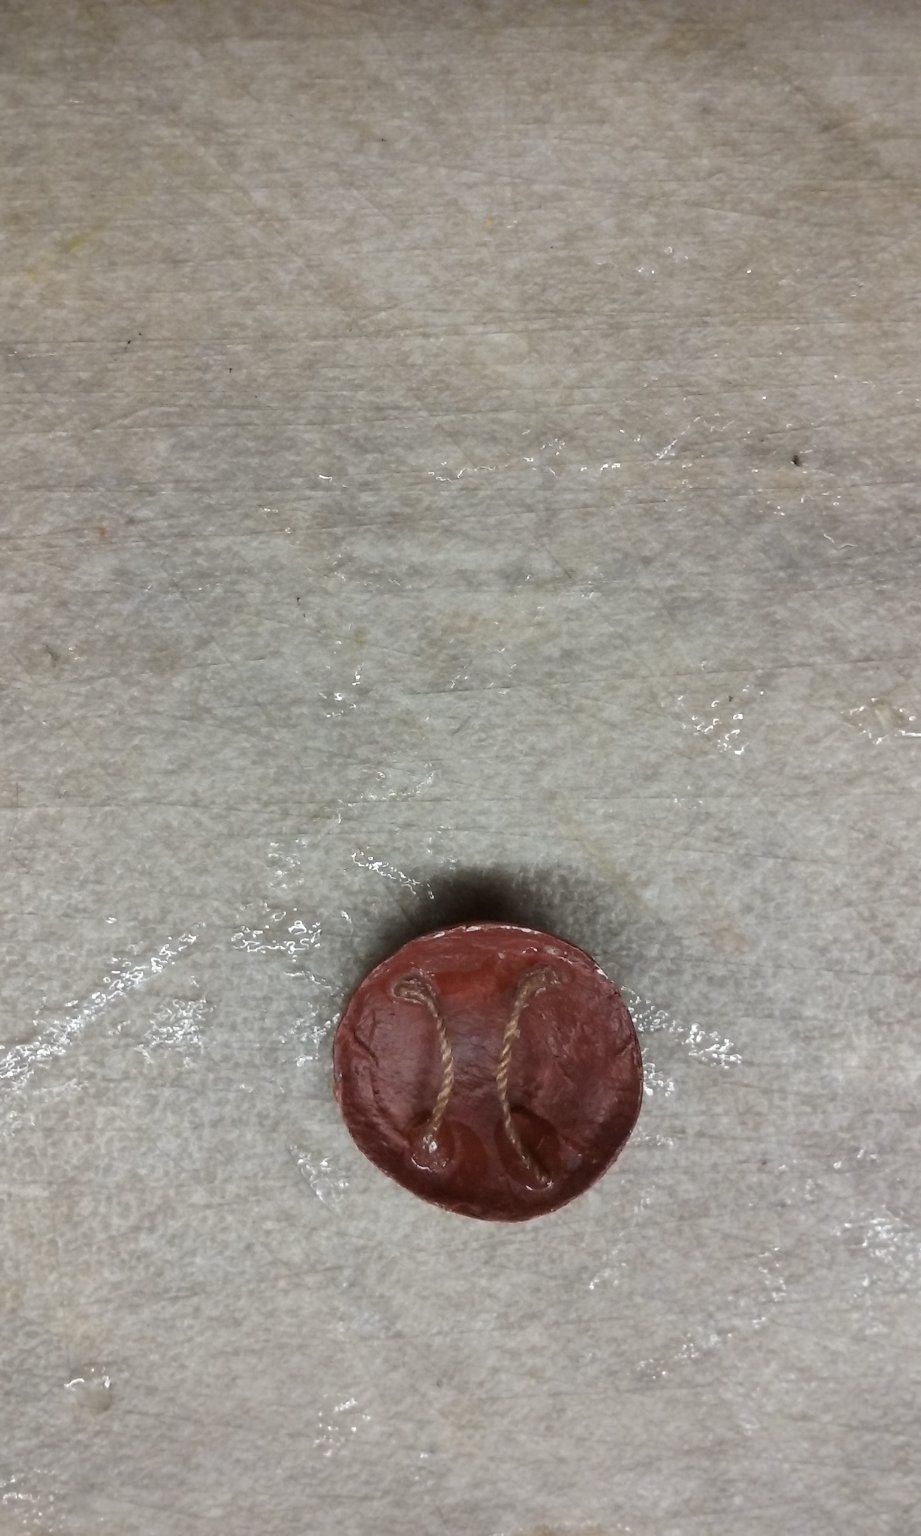
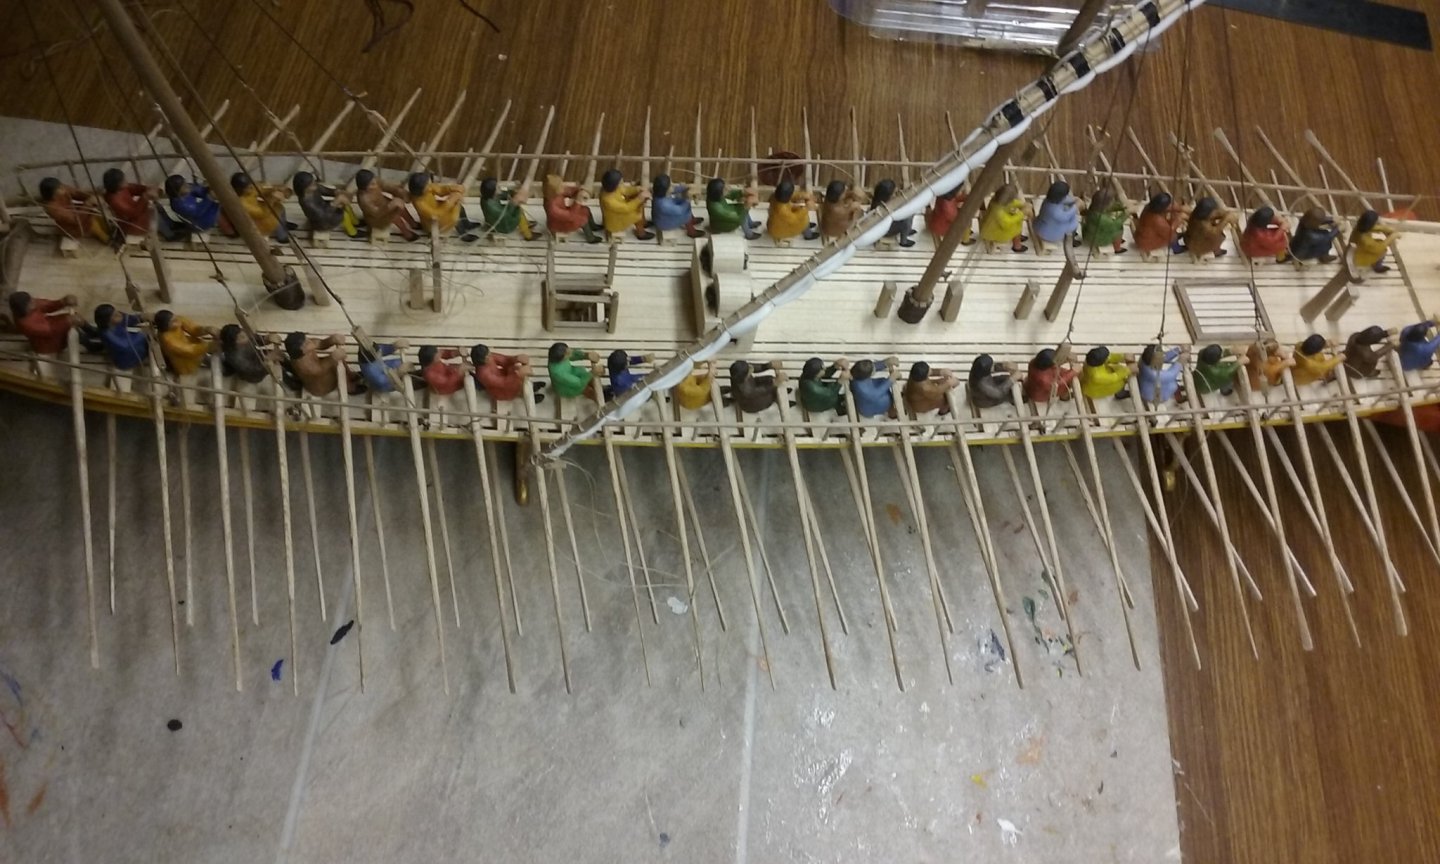
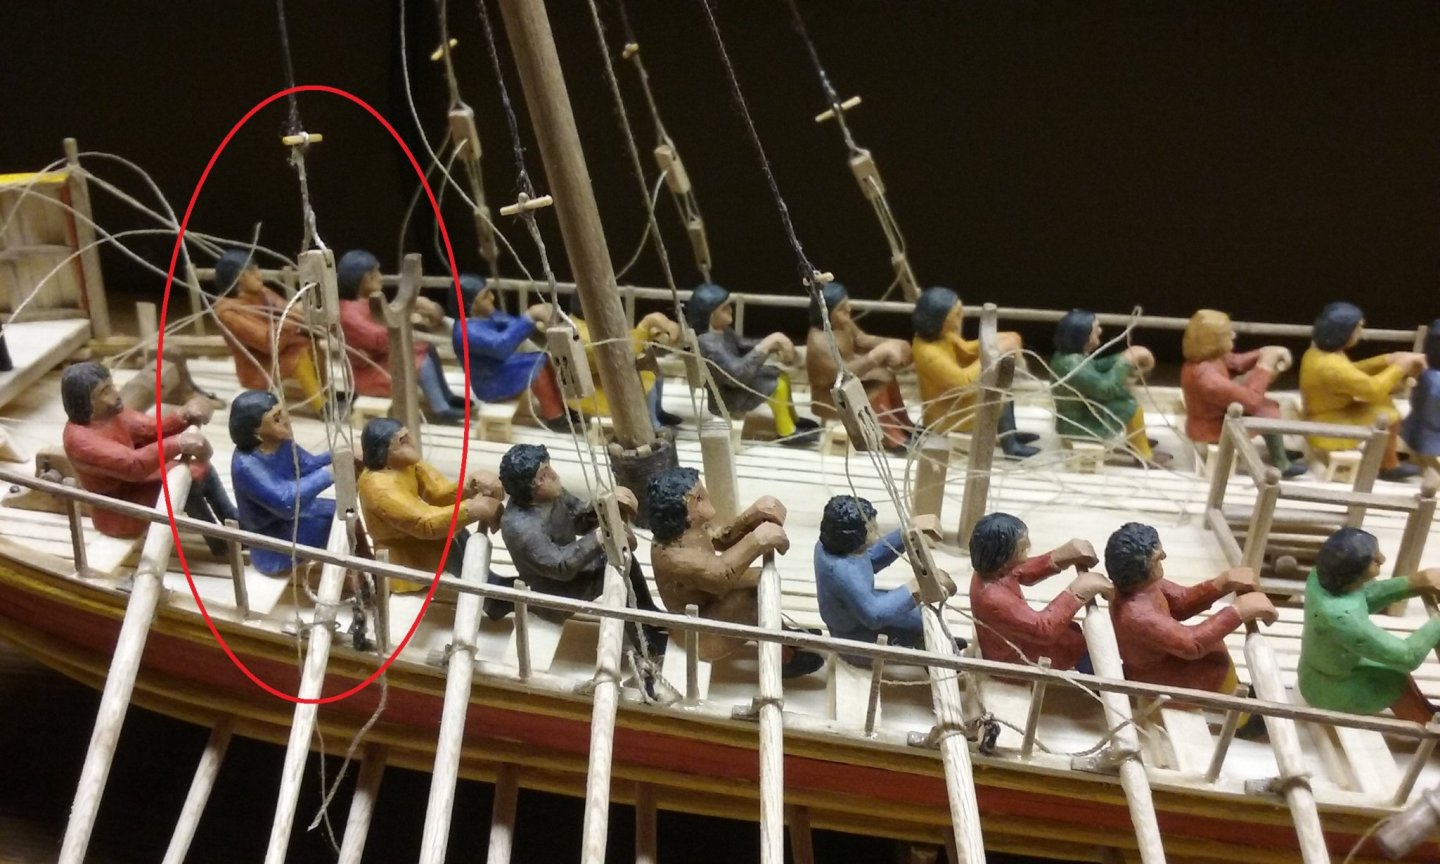
Well, I wasn't satisfied with the shrouds, so I've re-done the blocks. The problem was that the block assembly took up too much room compared with the length of the shrouds themselves - like having a hammer with a huge head and too short a handle - no good (unless you're Thor, of course). Here is the "old" way and the new As you can see the "tails" below the single block and above the double block are considerably shorter, making the whole assembly maybe a centimetre (just under 1/2") shorter (about half a metre or 1'7" in full scale). As it turns out it didn't make as much difference to the overall look of the things as I'd expected - in the photo below the shrouds for the after mast have been changed and those on the foremast haven't - but I'm still glad I did it - I would have been unhappy with it if I hadn't. I've also finished the banner. Unfortunately because I'd put down a white undercoat I had to paint both sides and they didn't quite line up when I cut the banner out - so I ended up having to paint the overlapped bits to get rid of the white. A fair bit of work, but I'm pretty happy with it now. I've also finished the anchors, which have been sitting there incomplete for quite a while: I needed to add the rings and make a couple of extra stocks. These anchors are taken from those of the Serce Limani "glass wreck" which went down in about 1025 AD, pretty much contemporary with this dromon. And I've done a trial run on how I'm going to fix the shields to the pavesade - the railing that supports them. Byzantine shields were held by a pair of ropes attached to the back, called an ochanos. Here's mine - I had to use CA to get them to stick to the paint at the back of the shield. I drew the line at putting tiny metal rings on the back (and anyway, most contemporary pictures don't show them). I didn't quite get the ropes symmetrical about the centre, but I'm not too bothered - they won't be visible anyway. I'm just chuffed that I've found a way to attach the shield that would have worked in the real world - just untie the rope and you can pick up the shield. Then mounting the shield on the pavesade, with a bit of rope passing through the ochanos and tying it to the upright of the pavesade. And here's what it looks like from the outside. This is just a trial run, but it seems to have worked pretty well. Now I know what to do when I add them to the ship. I haven't quite finished changing the shroud blocks over. I expect to have that done by tomorrow. Then tidy-up - adding downhauls for the trusses that hold the yards to the masts, belaying the downhauls for the blocks and the downhaul for the fore halyard and making a coil for the free end - working out how and where to belay the tacks, adding the vangs - oh, it's all fun and games!


-
I've enjoyed following this build, Chris. And you've done a superb job on it.
- 179 replies
-
- 5
-
-
- shipyard
- wütender hund
- (and 1 more)