


GuntherMT
-
Posts
2,213 -
Joined
-
Last visited
Content Type
Profiles
Forums
Gallery
Events
Posts posted by GuntherMT
-
-
Like Ulises, I use diluted white glue, or clear flat varnish to stiffen or secure knots. Either works very well, and my rigging shows no signs of glue at all once it's dried.
Zoltan - when I use diluted white glue, I literally soak the line in it, then tie the knot (or belay it to the cleat or whatever). The nice thing about using the white glue mix is that if I need to re-fix the line, I can just soak it in water to loosen it up and redo it. I use the varnish for securing things that I don't think will ever have to be redone, like an eye-splice that holds the lifts to a spar, or seizings, etc.
-
-
-
As a newcomer, the biggest issue for group builds for myself is timing. The group build of the long-boat got me interested and I purchased the kit, but there are other things in the queue ahead of it, so I haven't started it yet.
The Cheerful might have been a good group-build, given how many started it (myself included!), and in theory could still be a group build if all the current logs were moved, but I'm not sure if there is any real benefit to doing that?
I'd eventually like to step into full scratch-building, probably with something like the Triton cross-section, so hopefully that will still be available when I dip my toes into that pool, but my current stack of waiting to be built kits are probably not group build material since they've been around for a long time and there are a fair number of old build logs in the forums for them.
Sorry I don't have any better suggestions - although I personally don't see why the group build sub-forums need to be shut down when the slow down, as it's really not that big of a deal to scroll past them if you aren't interested or nothing is currently going on. Lots of sub-forums really don't bother me, and seem like a really good 'reference' for anyone that decides to do those builds in the future, rather than having to try to find them all via search.
FYI - something that I noticed when you moved all the long-boat builds - the forum loses track of what has been read and not, so the currently running builds were all marked 'unread' to me, so when they were updated I was unable to just start where they had last been when in the group build sub-forum. Probably no way to prevent that when you move the logs.
-
-
Very much better. Still think it looks like you'll need to shim the bottom of a couple bulkheads just like I did, but the tops look right on now.
- Elijah, captgino and zoly99sask
-
 3
3
-
-
If you used wood glue, just use water and/or alcohol to soak the joint, and it will soften the glue and you can pull them out, then you just need to file/sand either the false keel, or the notch in the bulkhead a bit at a time until they drop down to where they are flush at the top. That will be a lot easier than trying to sand and shim both top and bottom, and I'm not sure how that would come out to be honest.
If you do decide to shim the bottom, the basswood supplied for the decking is the perfect width, and will bend nicely around the curve of the bulkheads. If you look at my AVS build log index you should be able to find the spot where I showed shimming the bottom of some bulkheads, but that was after getting the tops even.
The alignment of these bulkheads is really one of, if not the most important parts of the build, since everything you do from here on out relies on how these are all aligned. It's worth the time to unglue them and get them right. All of the bulkheads should align as close to perfectly as possible with the false keel at the tops.
Good luck!
Edit: It also looks like you will probably need to shim the next bulkhead forward along the bottom, as the gap between the bottom of the bulkhead and the top of the keel appears too large. The gap should be just wide enough to accept the planking (the basswood first layer plus the walnut layer) into it. This also is the width that should define your rabbet thickness where the planks come in near vertical to the keel.
Edit 2: It also looks like your first bulkhead forward of the mast slot is not at a 90 degree angle to the keel. You can probably fix that with reinforcement blocks between the bulkheads like I did on mine, but if you do that you'll probably want to put them in from one end or the other all the way through so that the tension from the block on that bulkhead isn't being solely supported by the next bulkhead without any other support. Hopefully that makes sense - I documented that pretty well in my build log, and there should be an index link in the first post to get you pretty close to it in the log.
- DocBlake, Keith Simmons, captgino and 2 others
-
5
-
Those aft-most few bulkheads on the main deck section look like they are sitting a bit high. The bulkheads need to line up with the top of the false-keel, and you can then shim or sand as needed to get the lower edge to align with the bearding line/rabbet. If they are too high it will be next to impossible to get a good flow of planks, and you'll have to sand a lot of material off the top before being able to do the deck.
Can you give a shot directly from the side of that area? Would be easier to see how the bottom edge looks, and also would show how the extensions at the top line up.
- zoly99sask, Elijah and Ryland Craze
-
3
-
It's always difficult to tell from a photo, but it looks like you may have your rabbet much to 'angled' along the bottom and the stem. At the stem the planks come in at a quite sharp angle, and the rabbet is more of a squared off "U" shape than an angle. This holds true for the bottom along the keel for the widest portion of the hull as well, as the garboard plank is at a steep angle away from the keel to flow into the bulkheads.
Luckily, it probably doesn't matter, as you can get the flow along the bulkheads and build in fillers between the bulkheads if needed in order to get the planks to drop into the rabbet, so it doesn't really need to provide any support on the bulkhead side.
Edit: Based on what I can see, it looks like you've done a very nice job with the difficult part of flowing it into the stern along a large area.
-
-
Keeping in mind that I already have 2 projects started and 4 kits on the shelf, so this would be 'far future' sort of a build for me...
I would like to see a west coast counterpart to the Pride of Baltimore II - specifically the Californian (or the C.W. Lawrence which it is a replica of, if you prefer to build it w/o power). Maybe make it buildable either way, no idea if that would be feasible.
1:48 scale (yes, it would be fairly largish).
It's from the US.

I have not done POF, but that would be interesting. POB would be fine too, but would need to be short spaced bulkheads like the Cheerful or AVS, not like far too many kits where fillers are almost a requirement.
Price - would depend on materials. Given how much of a kit I replace with other wood anyway, and how long kits take me to build, it wouldn't bother me to pay well over $500 if the kit was well made, with good plans, and included quality wood that I didn't need to replace, including stock for masting (i.e. no dowels).
Build time is going to vary hugely from person to person I believe. Lets call is 1200-1500 hours, rather than trying to say 1 year or whatever.
Difficulty? Intermediate to advanced by the time I could get this one onto my bench.\
-----------------------------
In more generalities - I enjoy, and would be interested in building ships from the mid 1700's up through the early transitional steam stuff like the Alabama or Kearsarge, but I have little to no interest in the earlier era ships like the Mayflower. For a completely different style, I eventually want to build a 1940's era Chriscraft speedboat, as I think they are quite beautiful.
- EJ_L, mtaylor, skipper1947 and 1 other
-
4
-
-
Brian,
Fascinating. . . . .
How did you bevel your bulkheads in a way that looks so uniform? I like the planking plan that is laid out on the bulkheads so clearly.
Looking forward to seeing more.
Respectfully,
John
John, the bevel lines are laser etched on the bulkheads, just have to sand down to the line.
-
-
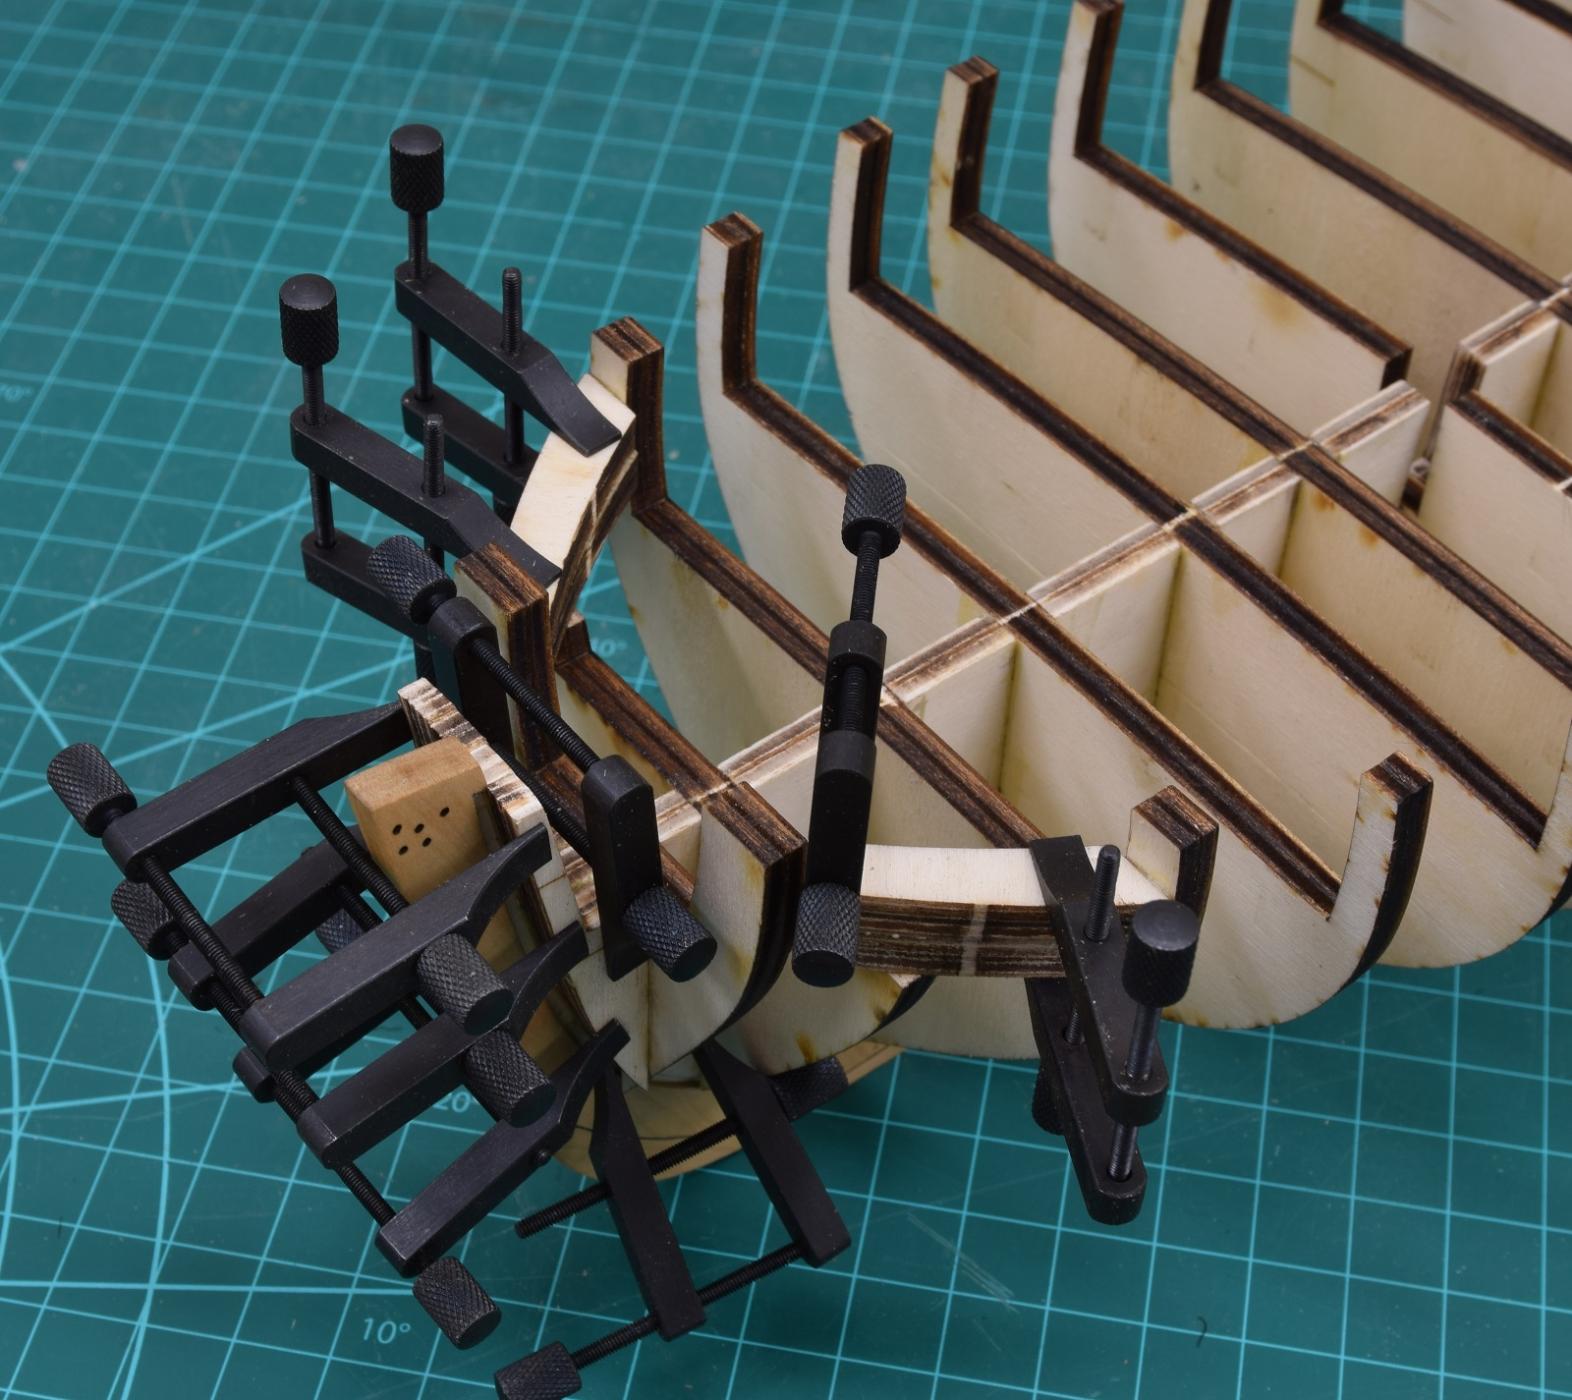
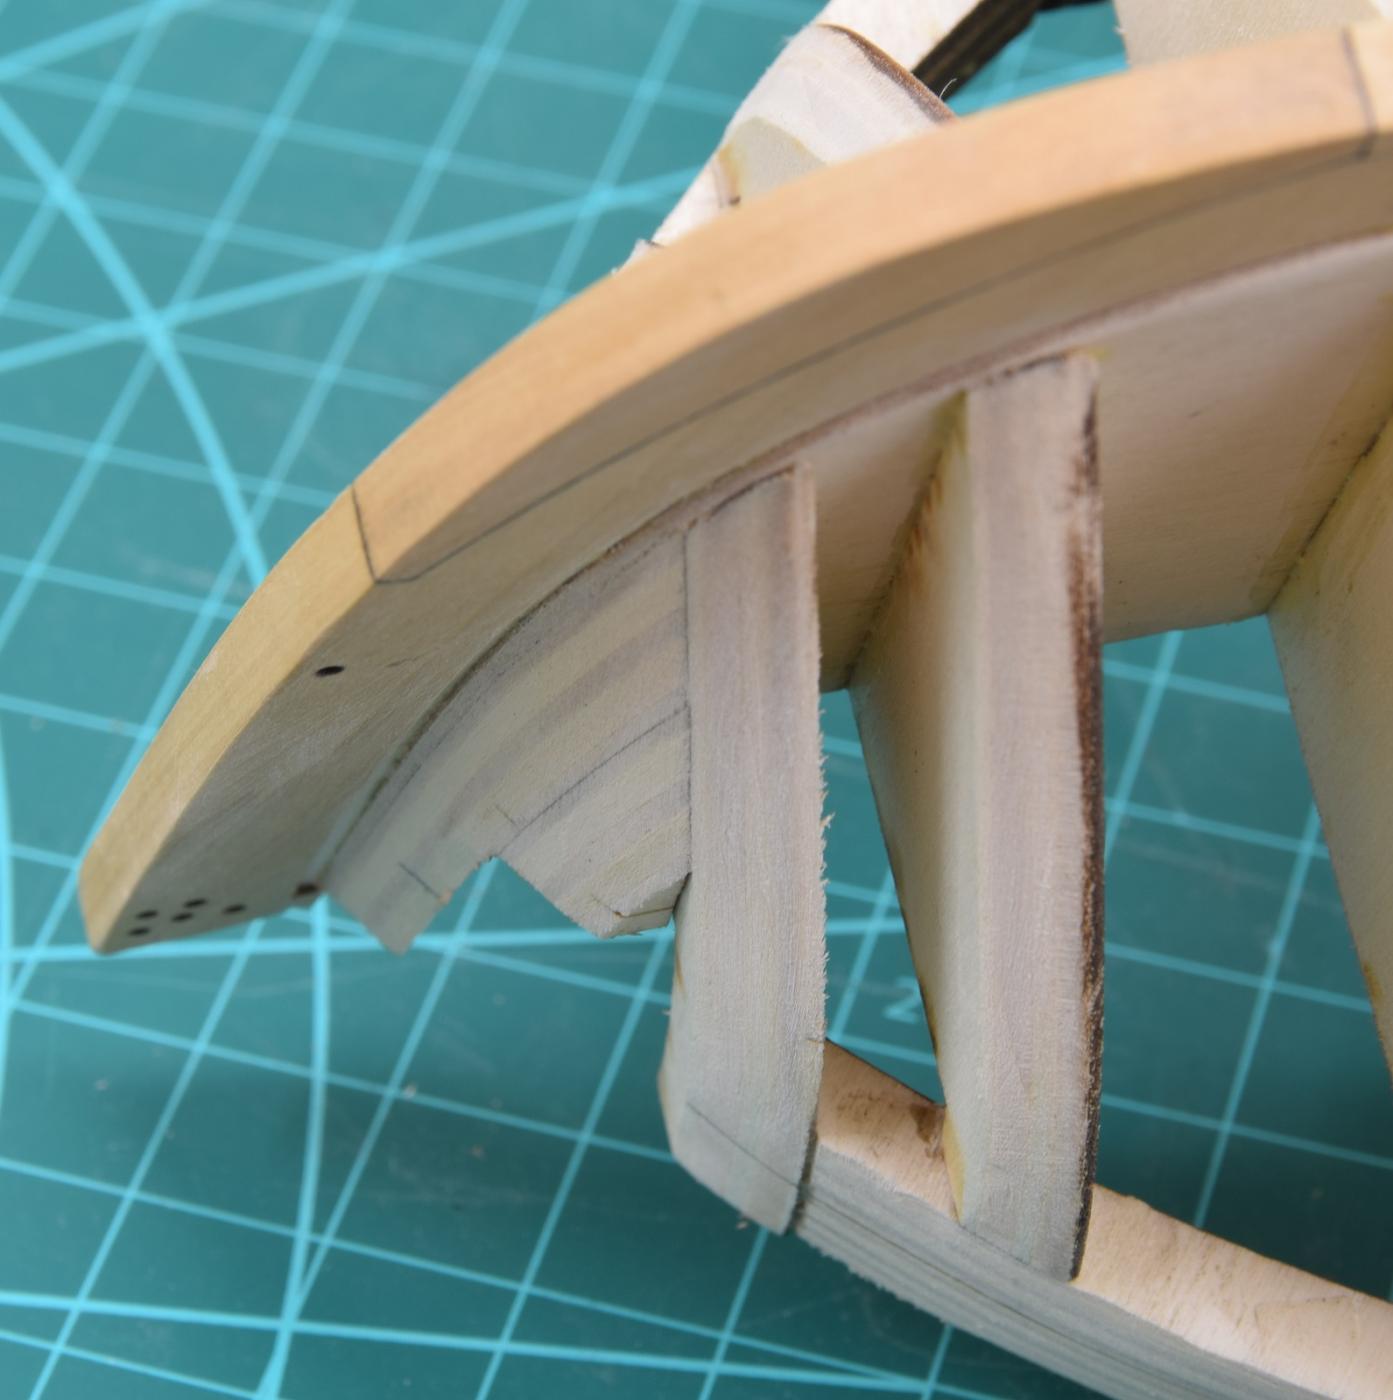
I'm currently working on one of the more time consuming, and least enjoyable parts of the build (at least to me) - the hull fairing.Before fairing began, I added some port fillers and bow fillers. Forgot to take any pictures of these in place prior to beginning the fairing, but here are a couple of shots of them being clamped in and glued.

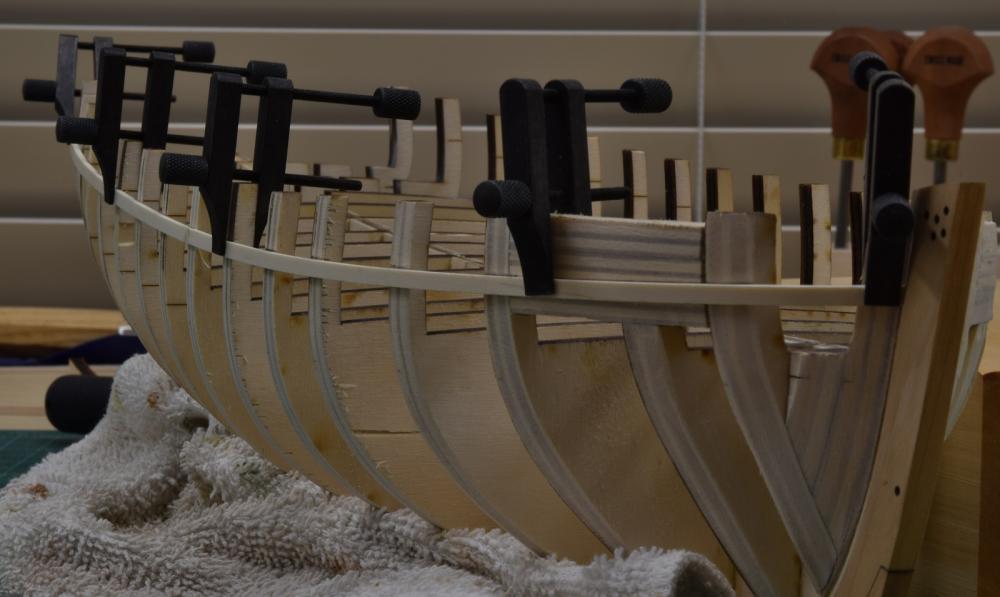
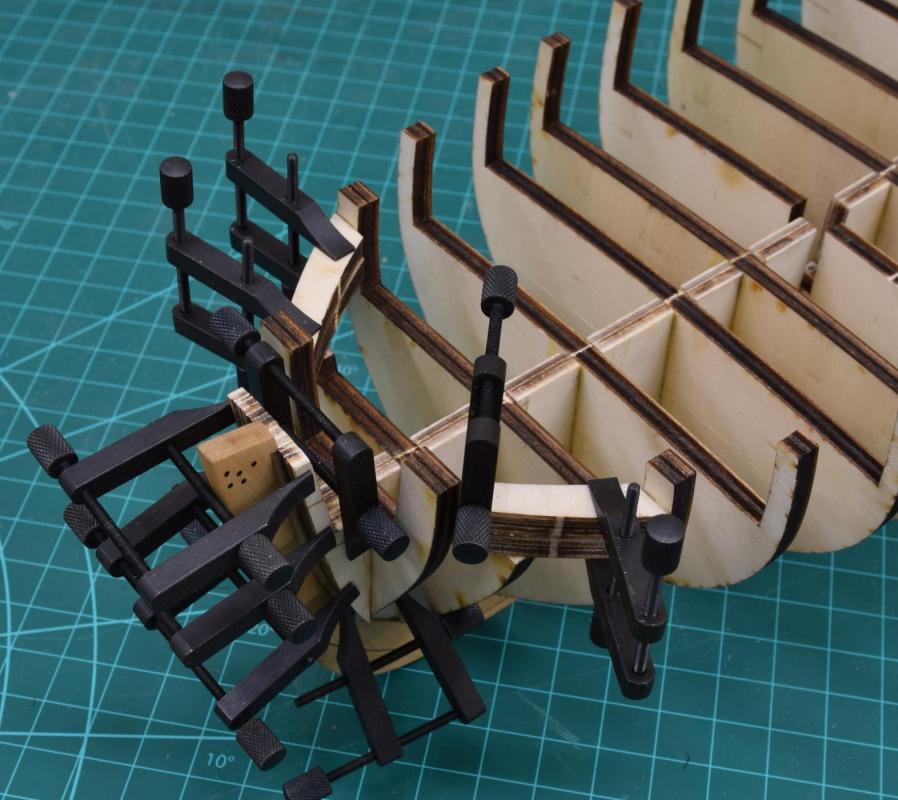 The hull is now rough faired on one side, and all except 'finish' faired on the other (just some minor sanding left to do with 220 grit sandpaper to finish this side). The last photo is with a strip clamped in place to show the flow along where the top of the gun-port sills will be. At the front I'm going to have to add some wood as those port fillers should be flush to the top of the bulkhead extensions. The third picture is me trying to get a good angle to show how the fairing will allow the planks to smoothly flow into that 'rabbet' along the keel, which is why that strip was placed between the former and the keel earlier in the construction.
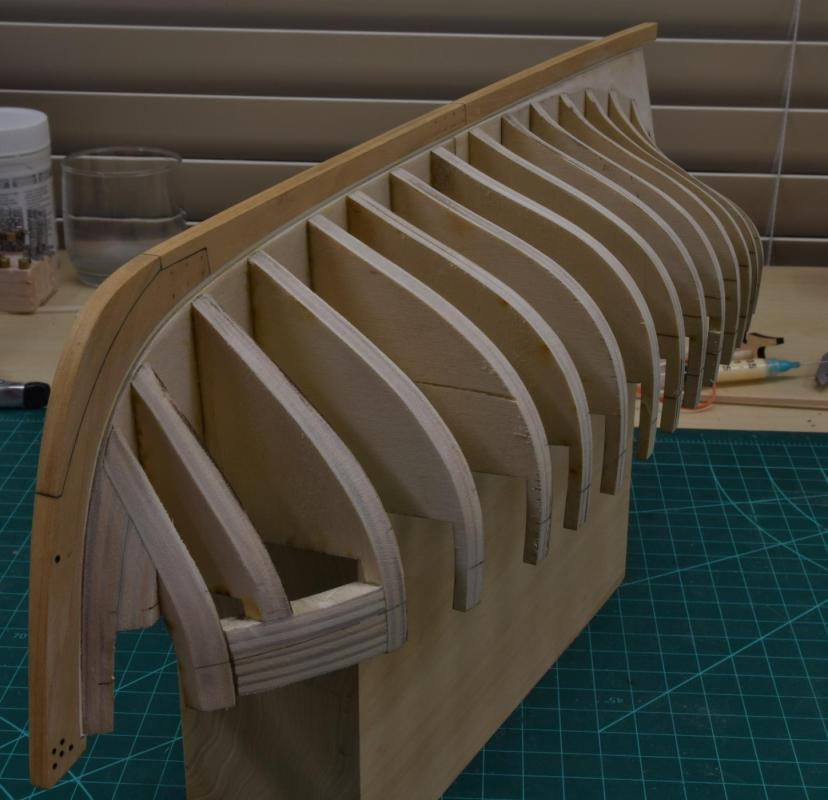


 Changed the oil in my car today too!
-
-
Great news Daniel, glad to see someone is carrying on their line!
- cobra1951, Daniel Dusek, EJ_L and 7 others
-
10
-
-
So far I do enjoy rigging. It's the "home stretch" where the build really comes alive and looks like a real ship, so it's very satisfying to me to work on it and see the ship's rigging come together.
- Canute, EJ_L, CaptainSteve and 2 others
-
5
-
-
Nice work on the trunnion caps, I just gave up on brass and used painted card-stock (paper) on my AVS. Yours look good!
- zoly99sask, Canute, mtaylor and 1 other
-
4
-
-


USS United States by gvaughn1 - Revell - 1/96 Scale - PLASTIC - my first true model ship!
in - Kit build logs for subjects built from 1751 - 1800
Posted
Good looking hull coppering, nice start. That's a darned big plastic sailing ship model at 36" long, nice buy!