


GuntherMT
-
Posts
2,213 -
Joined
-
Last visited
Content Type
Profiles
Forums
Gallery
Events
Posts posted by GuntherMT
-
-
I was going to say the exact same thing. Gorgeous, with fantastic photography!
- CaptainSteve and mtaylor
-
 2
2
-
-
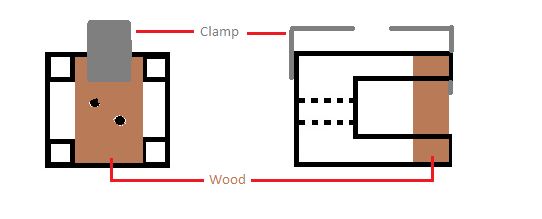
Hi Brian - I guess I didn't understand your idea. I'd love to hear it again - always looking for different and better ways of doing things.
I think your execution accomplishes the same thing, but here was what was in my head that I was trying to describe (hopefully my amazing MS Paint skills are somewhat clear):

It would of course be directional based on the thickness of your deck clamp and the width of your frames, and would work perfectly fine with four holes like you did it. I was trying to describe it as the posts being long enough that you could put a piece of wood backing between the posts and use that to clamp it with possibly, but not sure if that would even be necessary.
-
All I can say is... wow. That is some awesome work.
- giampieroricci and mtaylor
-
2
-
-
-
- mtaylor, Canute and J T Lombard
-
3
-
-
How did you make the cool little red knobs on the end of the yokes?
I just dipped the end of the brass rod in a puddle of CA glue and let it hang with that end down. Repeat as necessary to build up to the size of knob you want, and then when dry paint it.
This is the system that Chuck gave me when I asked him that same question.

-
Looking good. Where did you end up getting your brass swivel's? Those ones are shaped quite a bit different than the Syren swivels (different scale of course).
Hope you figure out a way to solder up the mounting brackets so that they don't make all your handles fall off. I had sooo many re-do's because of that. Next time I'll get the various temperatures of soldering paste so it will hopefully alleviate that.
-
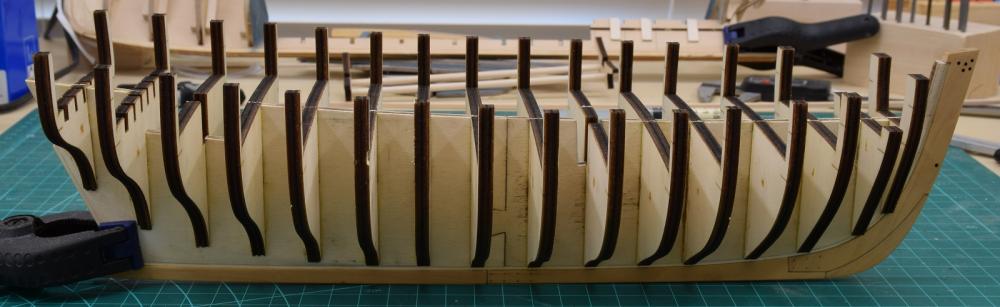
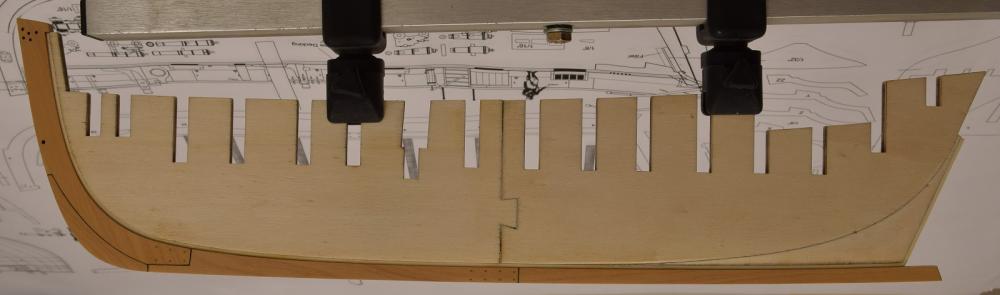
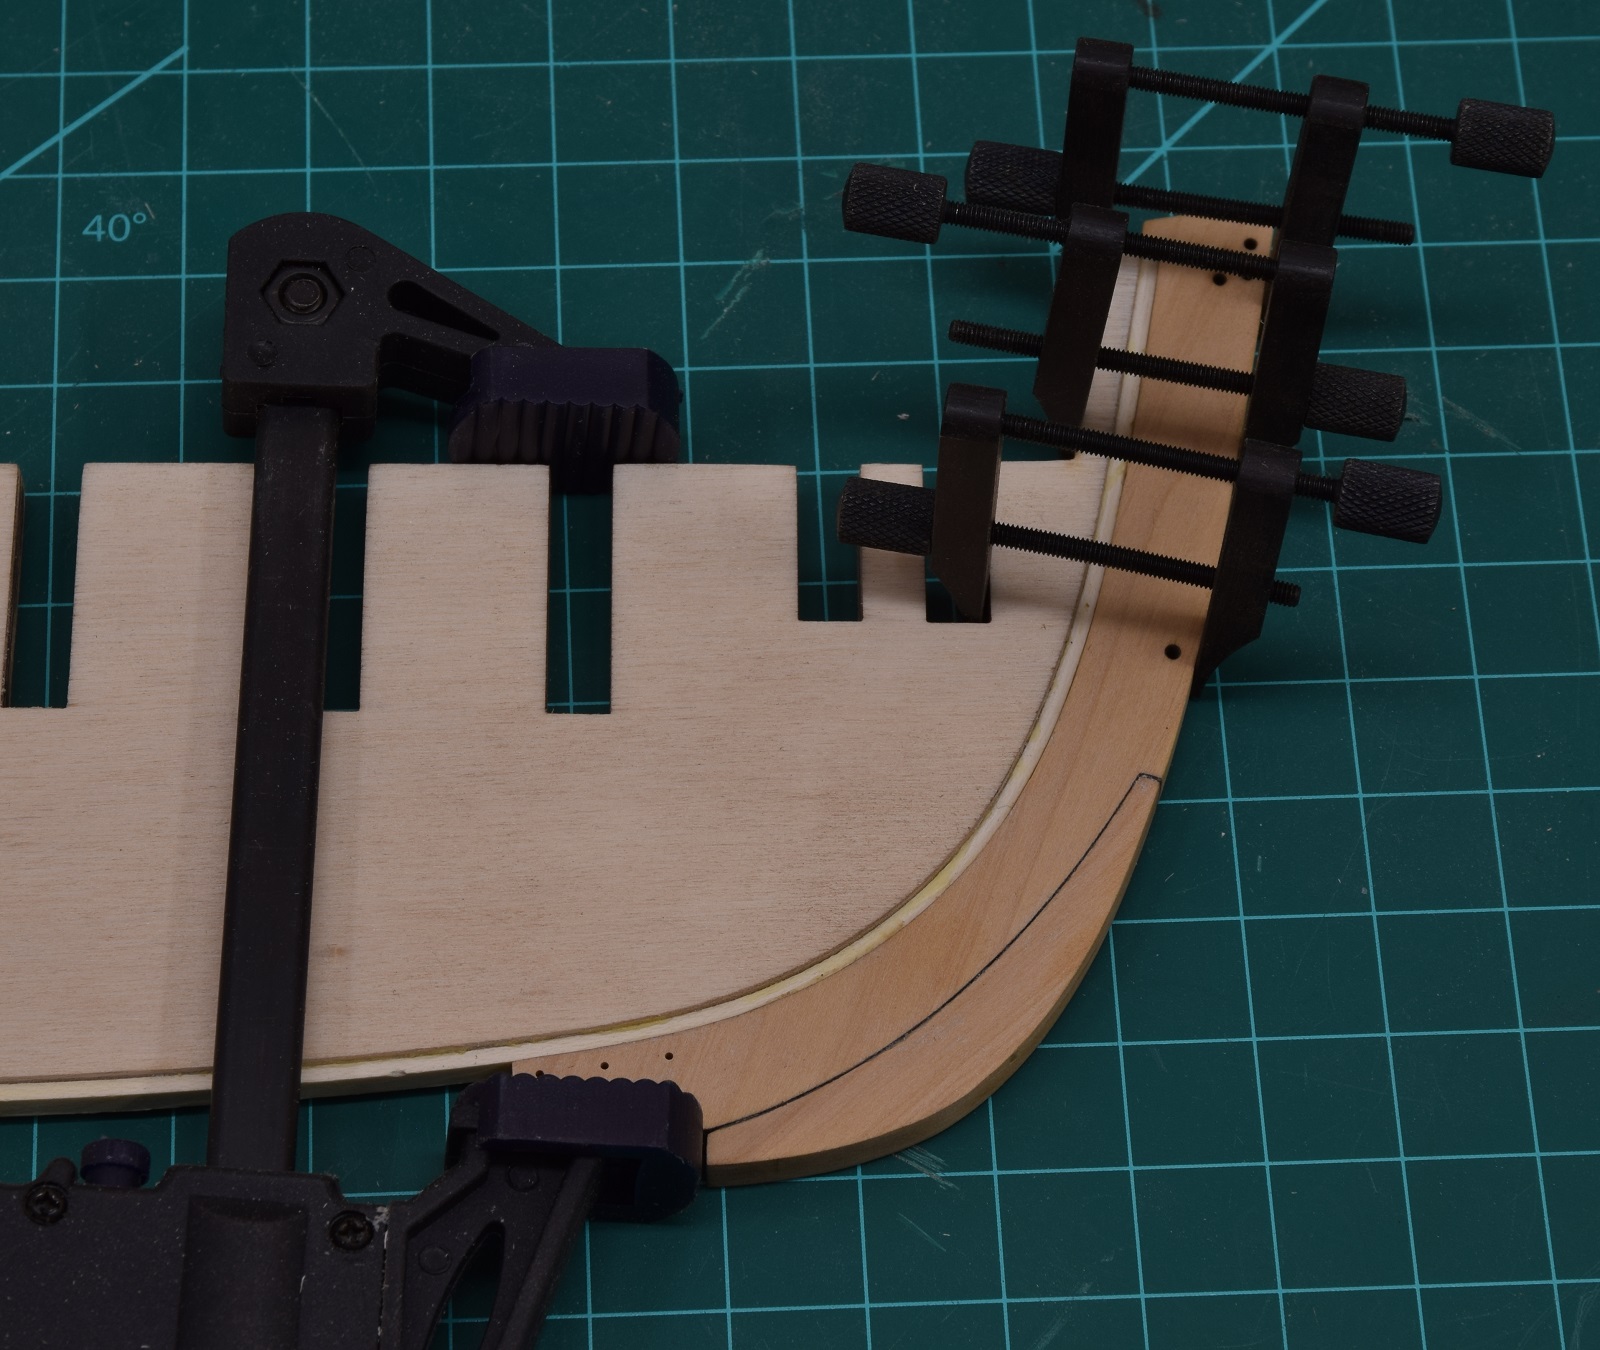
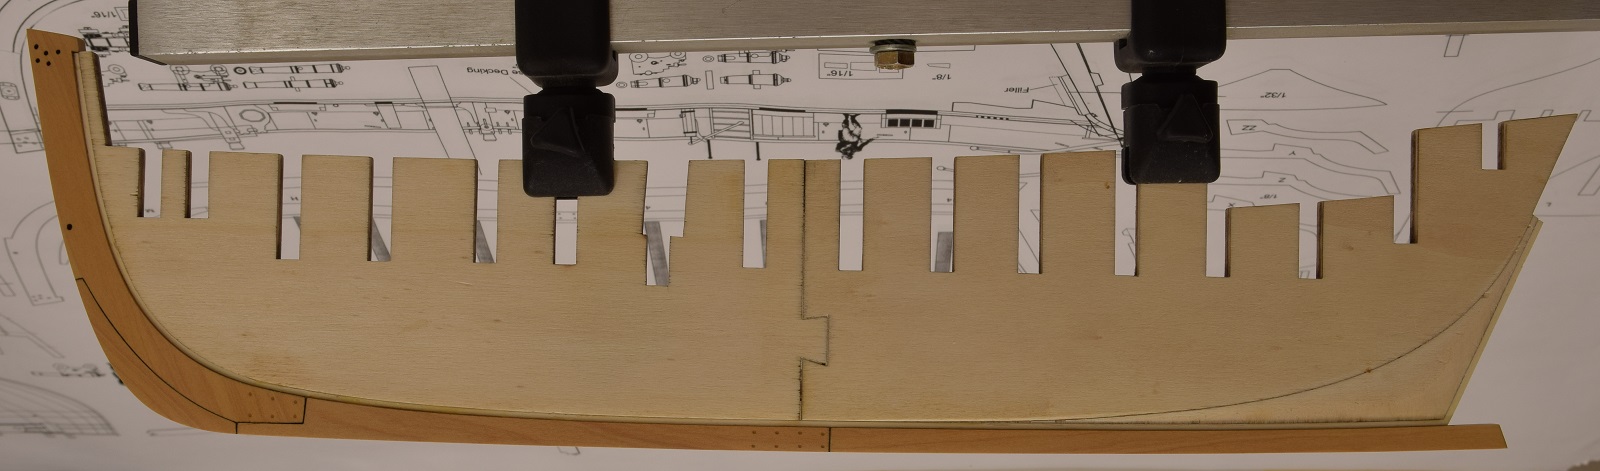
It's almost sort of shaped like some sort of a boat now. I continued adding bulkheads using the same system for alignment that I started with, but adding a couple more clamps as I got to the wider bulkheads.

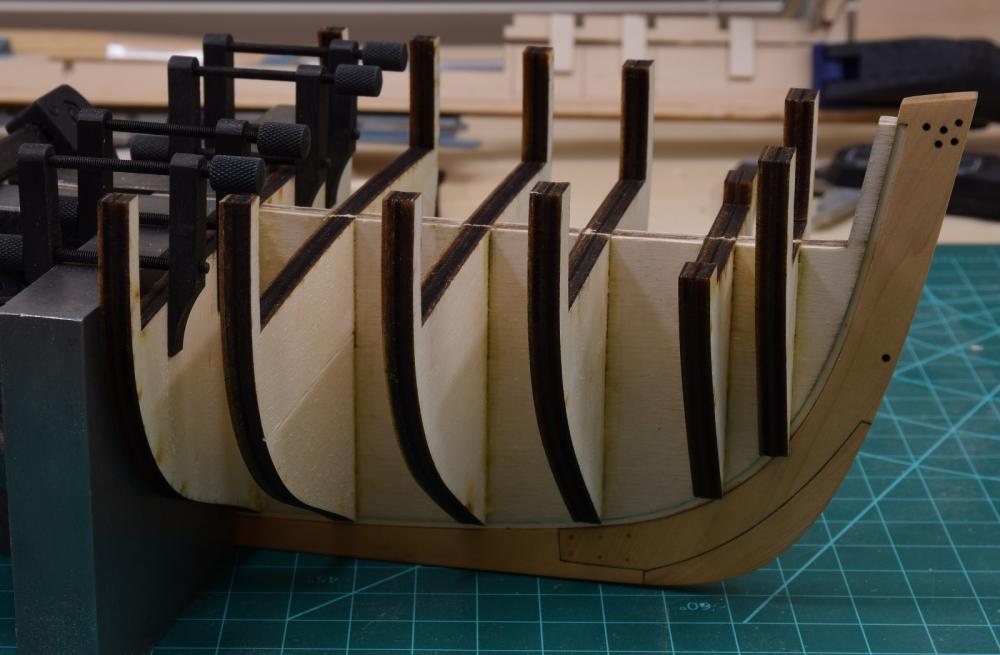
 At a rate of 2-4 bulkheads per day, eventually all 16 bulkheads were completed earlier today (yay for work from home days where I can sneak in every couple of hours for 10 minutes to do the next bulkhead).
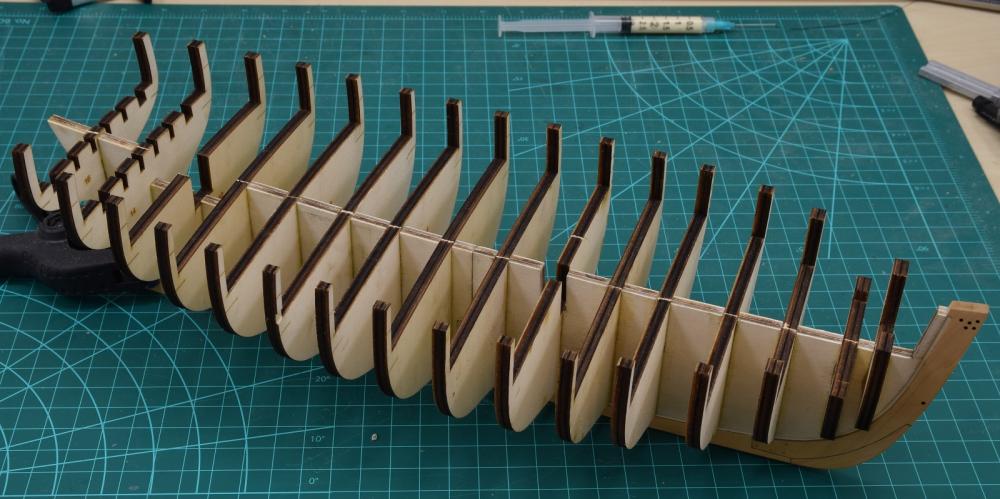
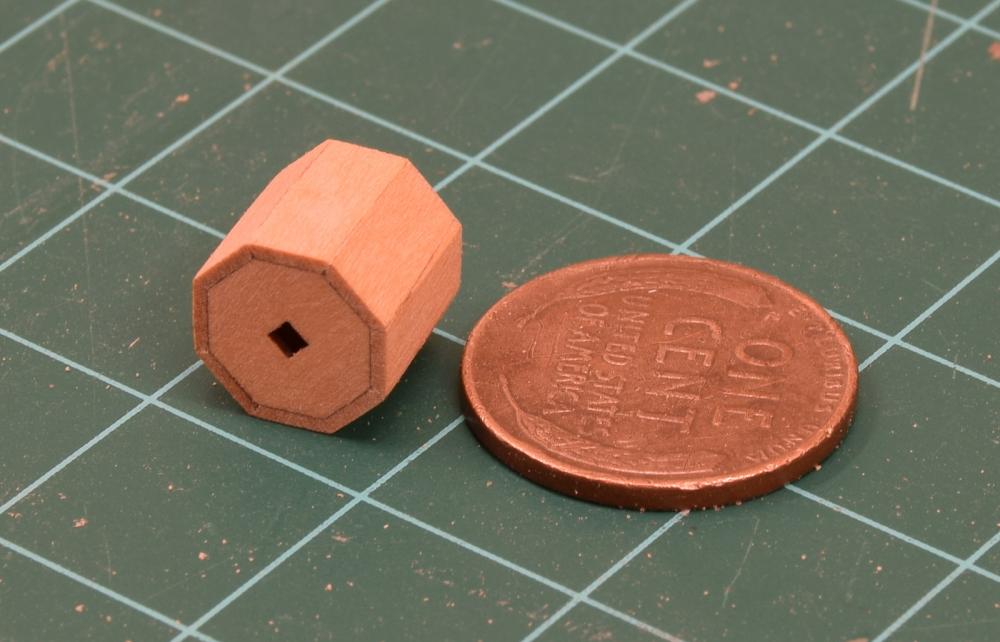
 One evening I even had some time to work on the windlass, and got the first section that's angled done. Took less than an hour by switching to a sanding stick instead of the tiny file so I could sand across the entire width instead of along the grain. The sanding stick takes off material much faster than the file, so have to be very careful, but massive difference in time. Here it was after gluing, then after finish sanding once dried, and finally, where this piece will drop into the overall windlass model.
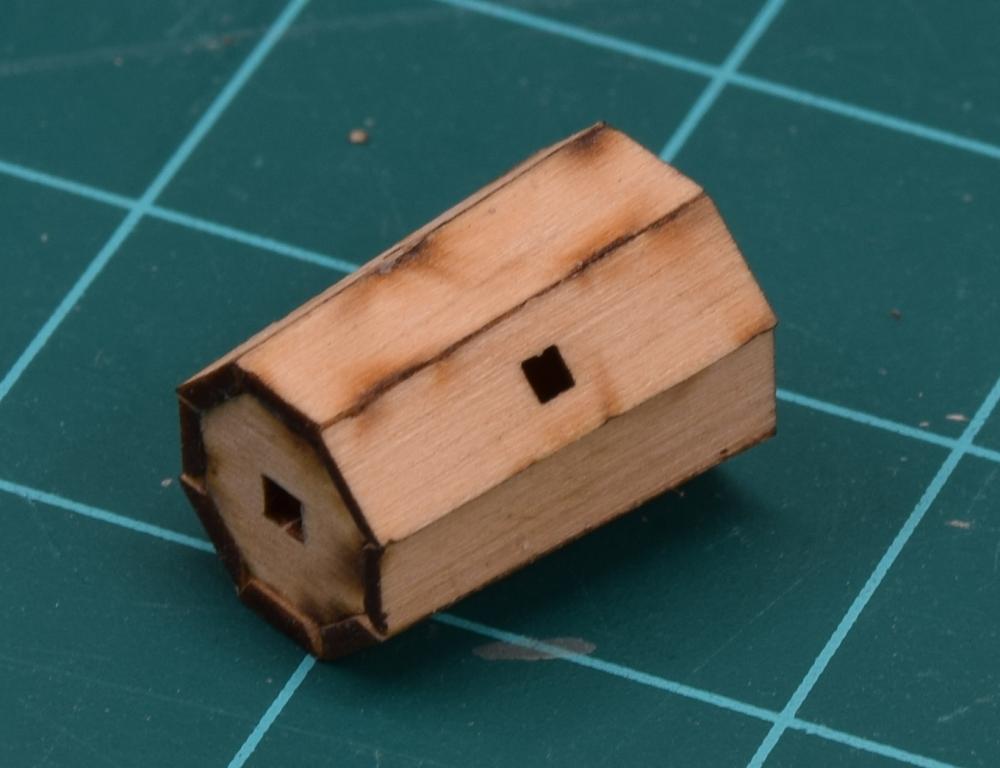

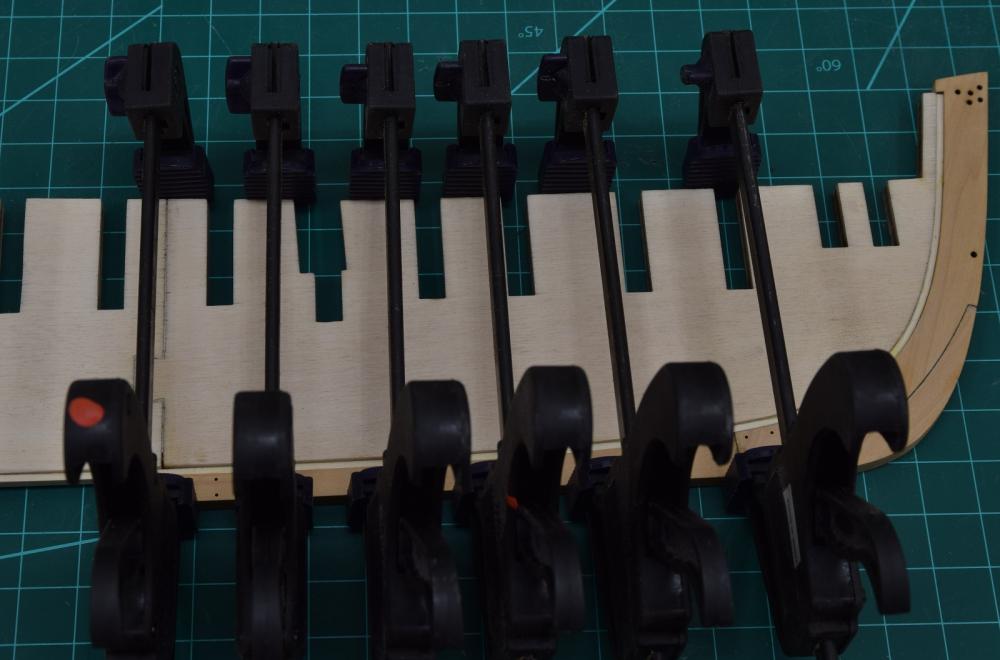
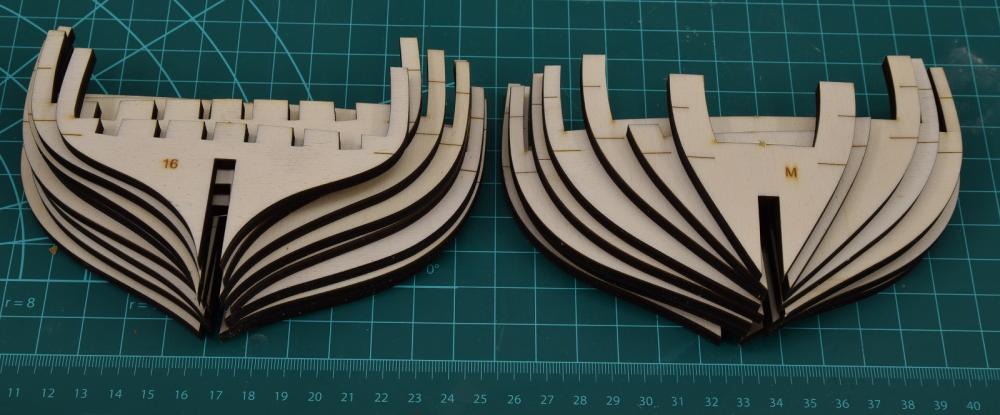
 Next up is bow fillers & port fillers before I can start fairing the hull, which will be a very time consuming task, but as we all know is the most critical part of any build.
-
-
-
Howie didn't specify new or used.
Howie - to answer your initial question re: Shipping. Go to the Byrnes website, select the item you want to buy (saw, any accessories, etc.) and click on the "Order" button. This will take you to a page where you can enter your location and calculate shipping.
If that doesn't work for your location, they have a contact section where you can contact them and inquire about shipping, I'm sure they'd be happy to assist you.
-
-
-
I use Tamiya tape. It comes in various thin sizes and works great for this, and for masking.
-
-
Frank,
I think you should just continue, as when it's done, the only person in the entire world that would know (if you hadn't posted this) would be you. I doubt if even expert judges at a wooden ship show would pick up on that mistake (I could certainly be wrong, but I'd be willing to put money on it if you didn't point the error out to them).
It is still looking great.
-
The key to making masts on a lathe, at least for myself, is to use a support for the material that follows the tool head. I do not know if this is possible with the Proxxon.
The Proxxon could be used for freehand turning like you would do with a drill, as long as the masting stock will fit through the hole as John mentioned.
-
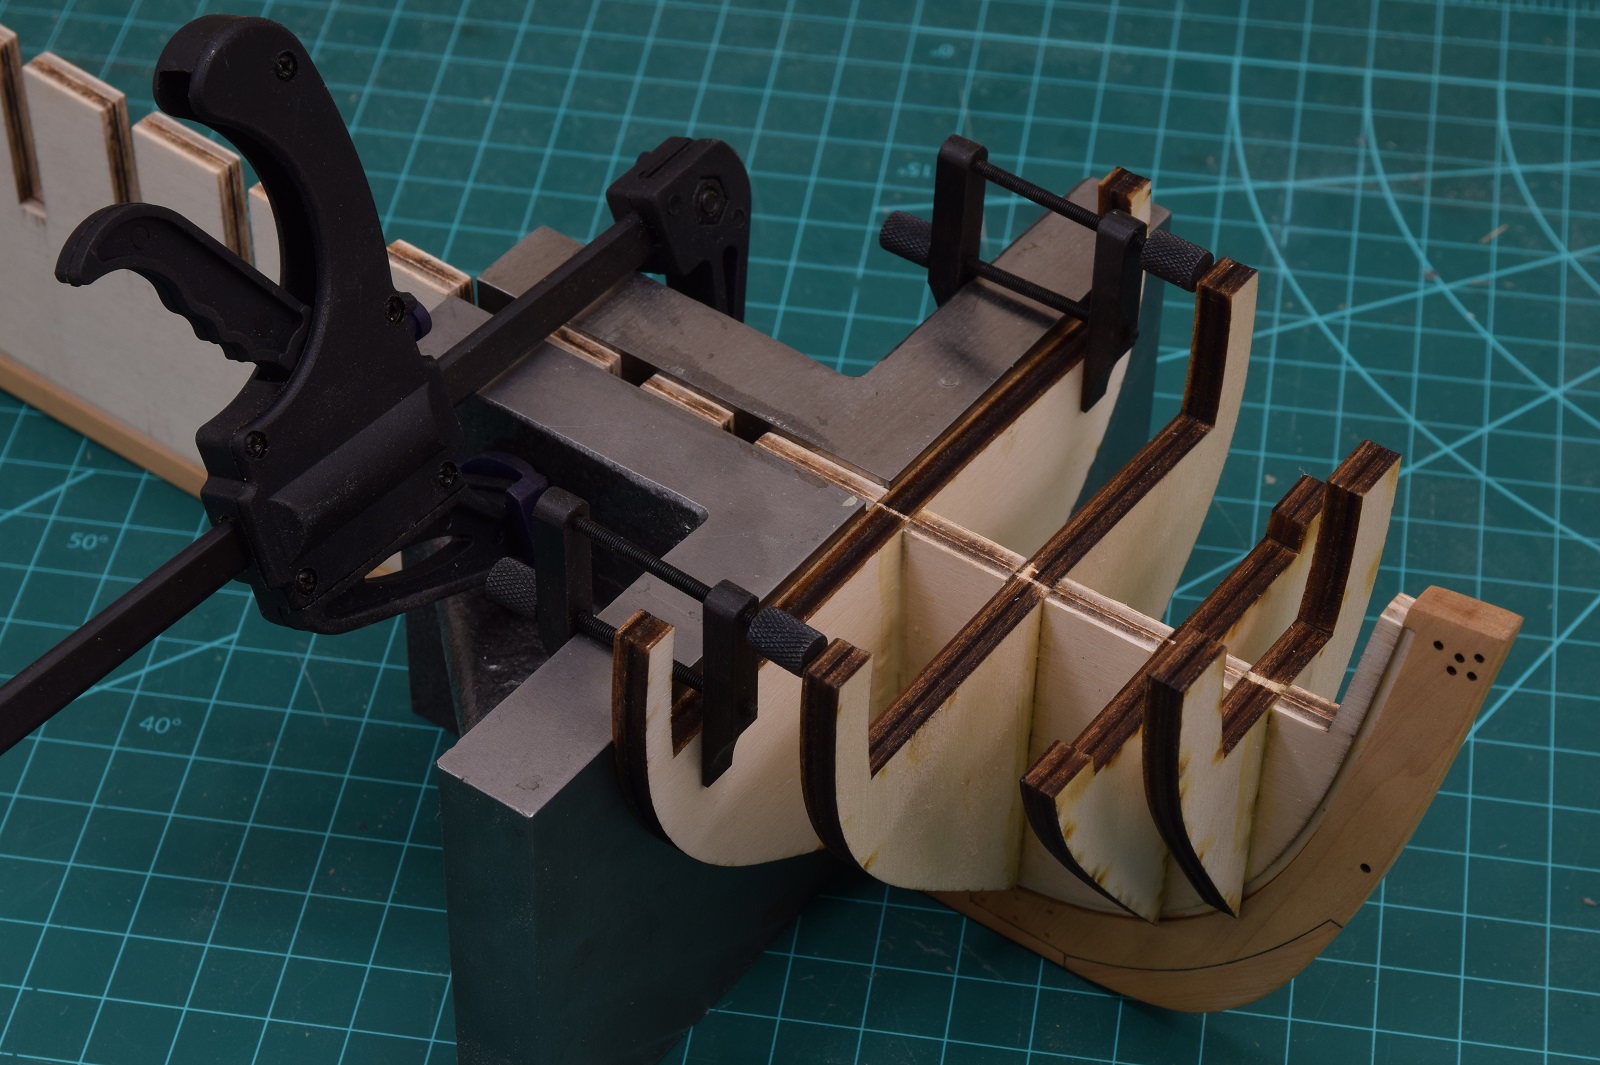
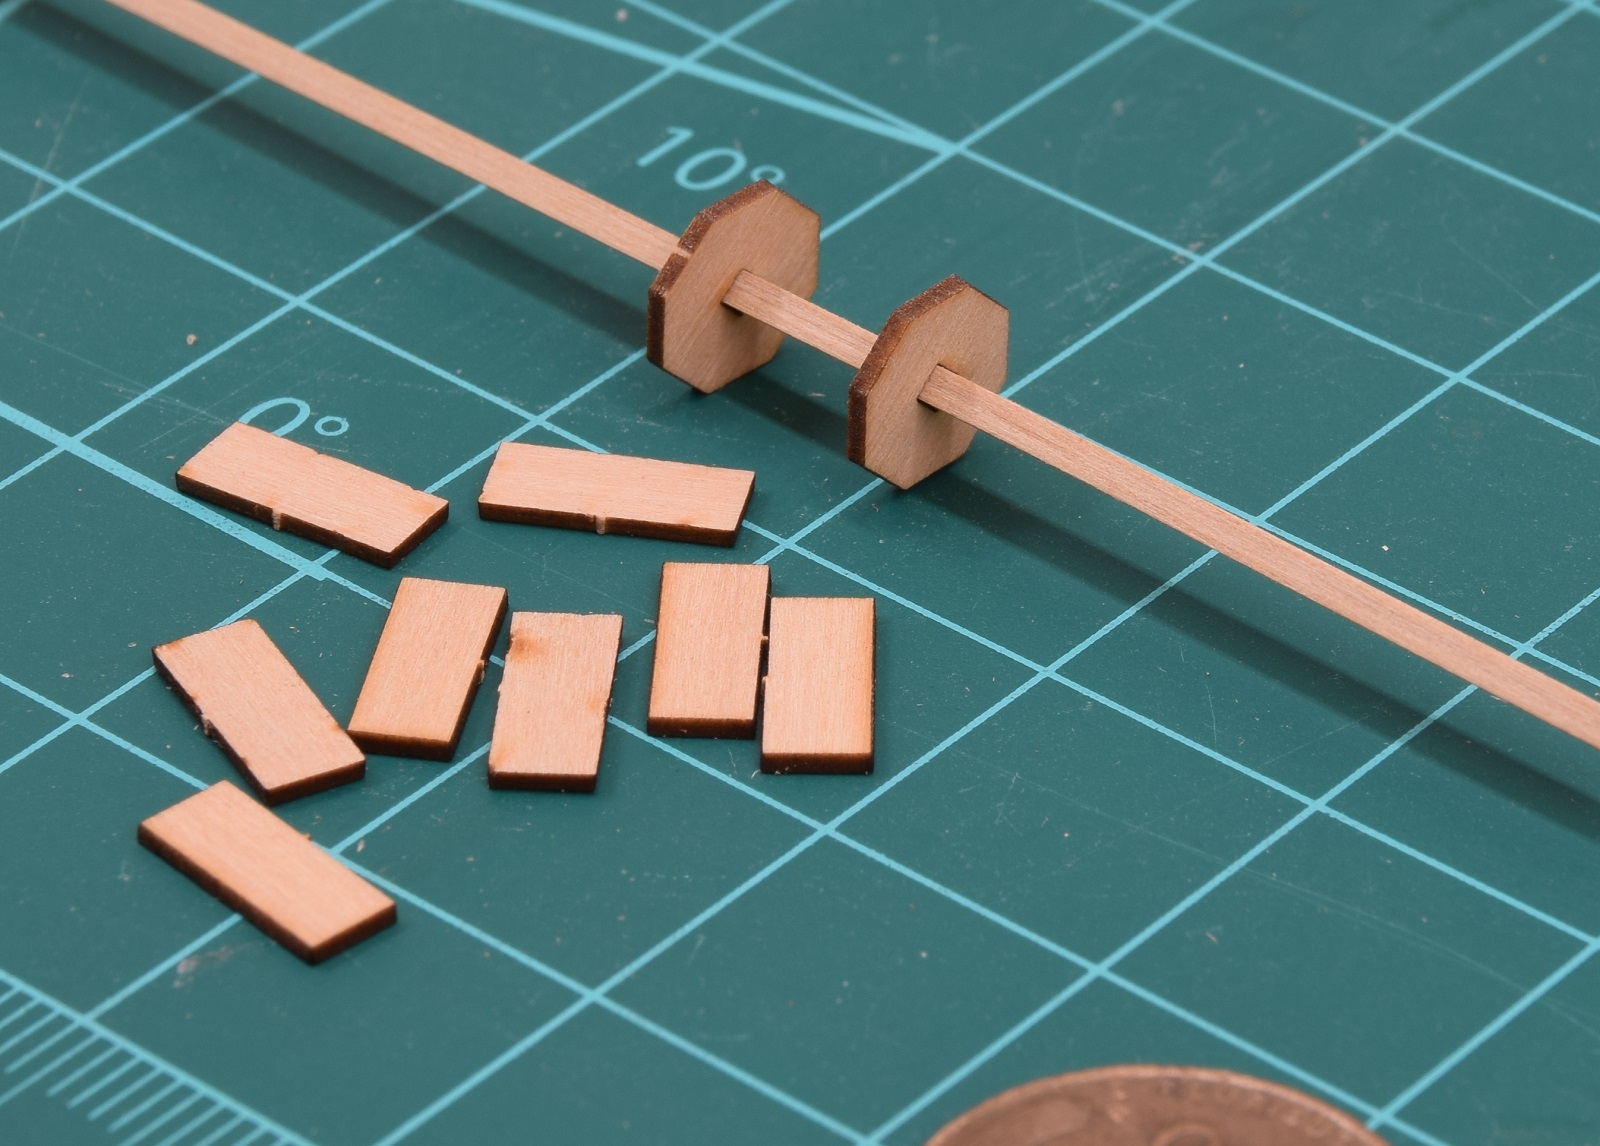
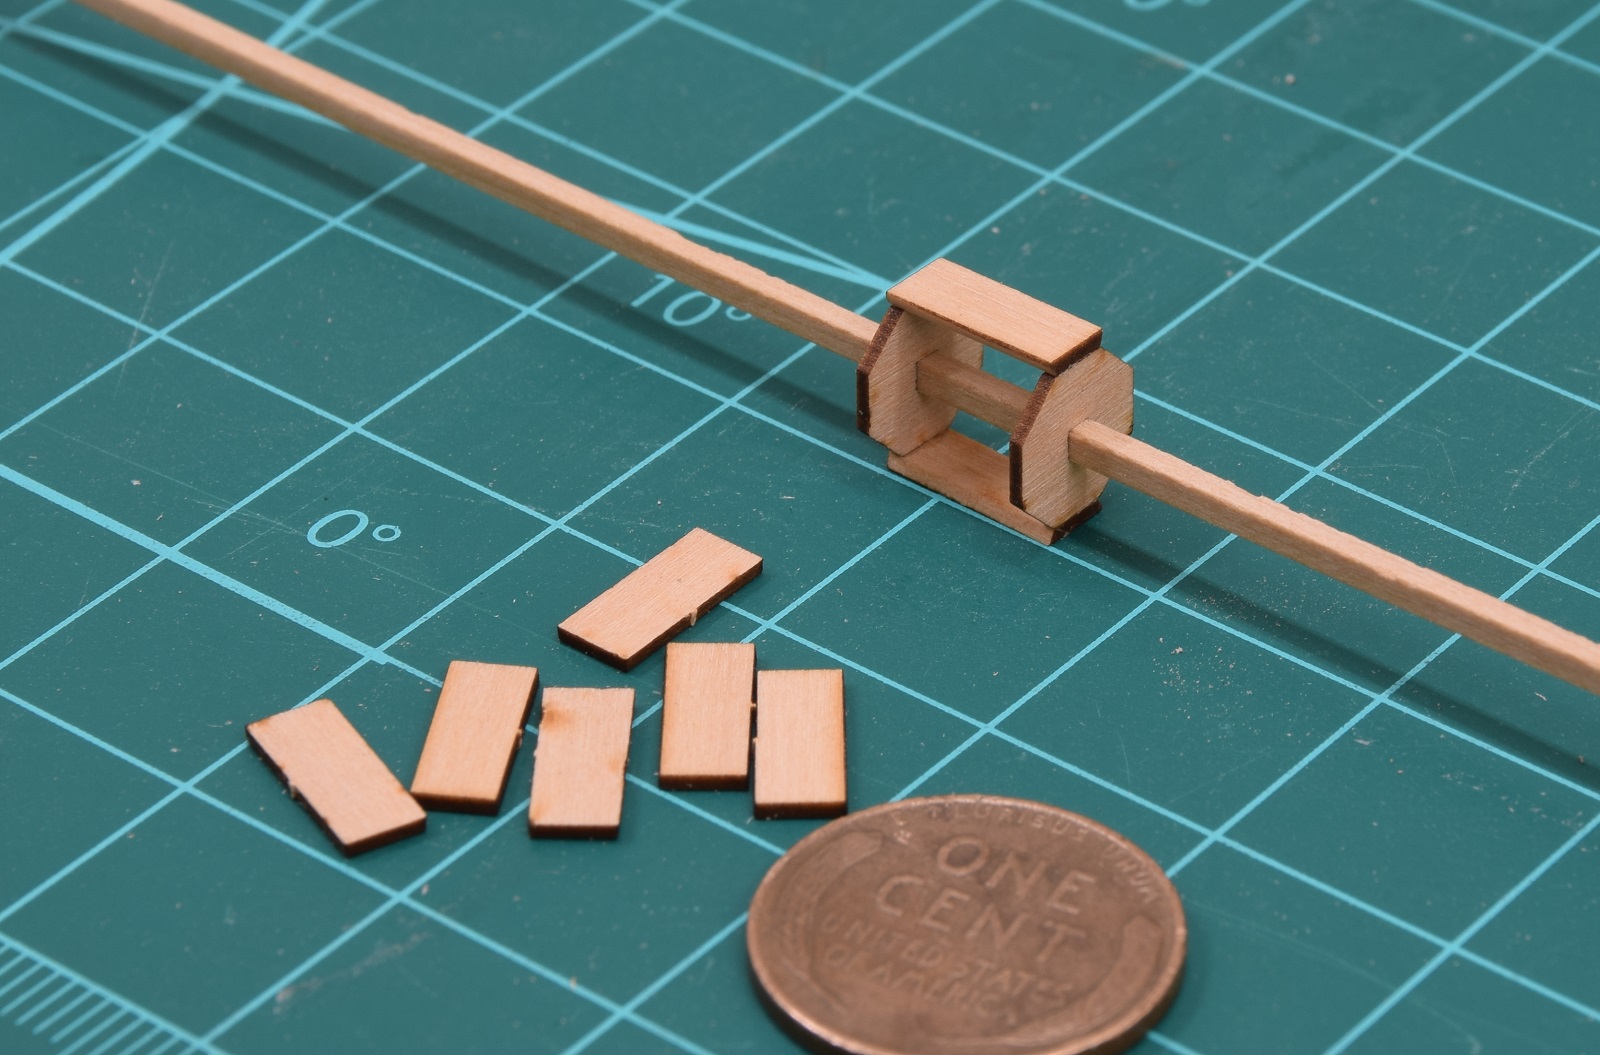
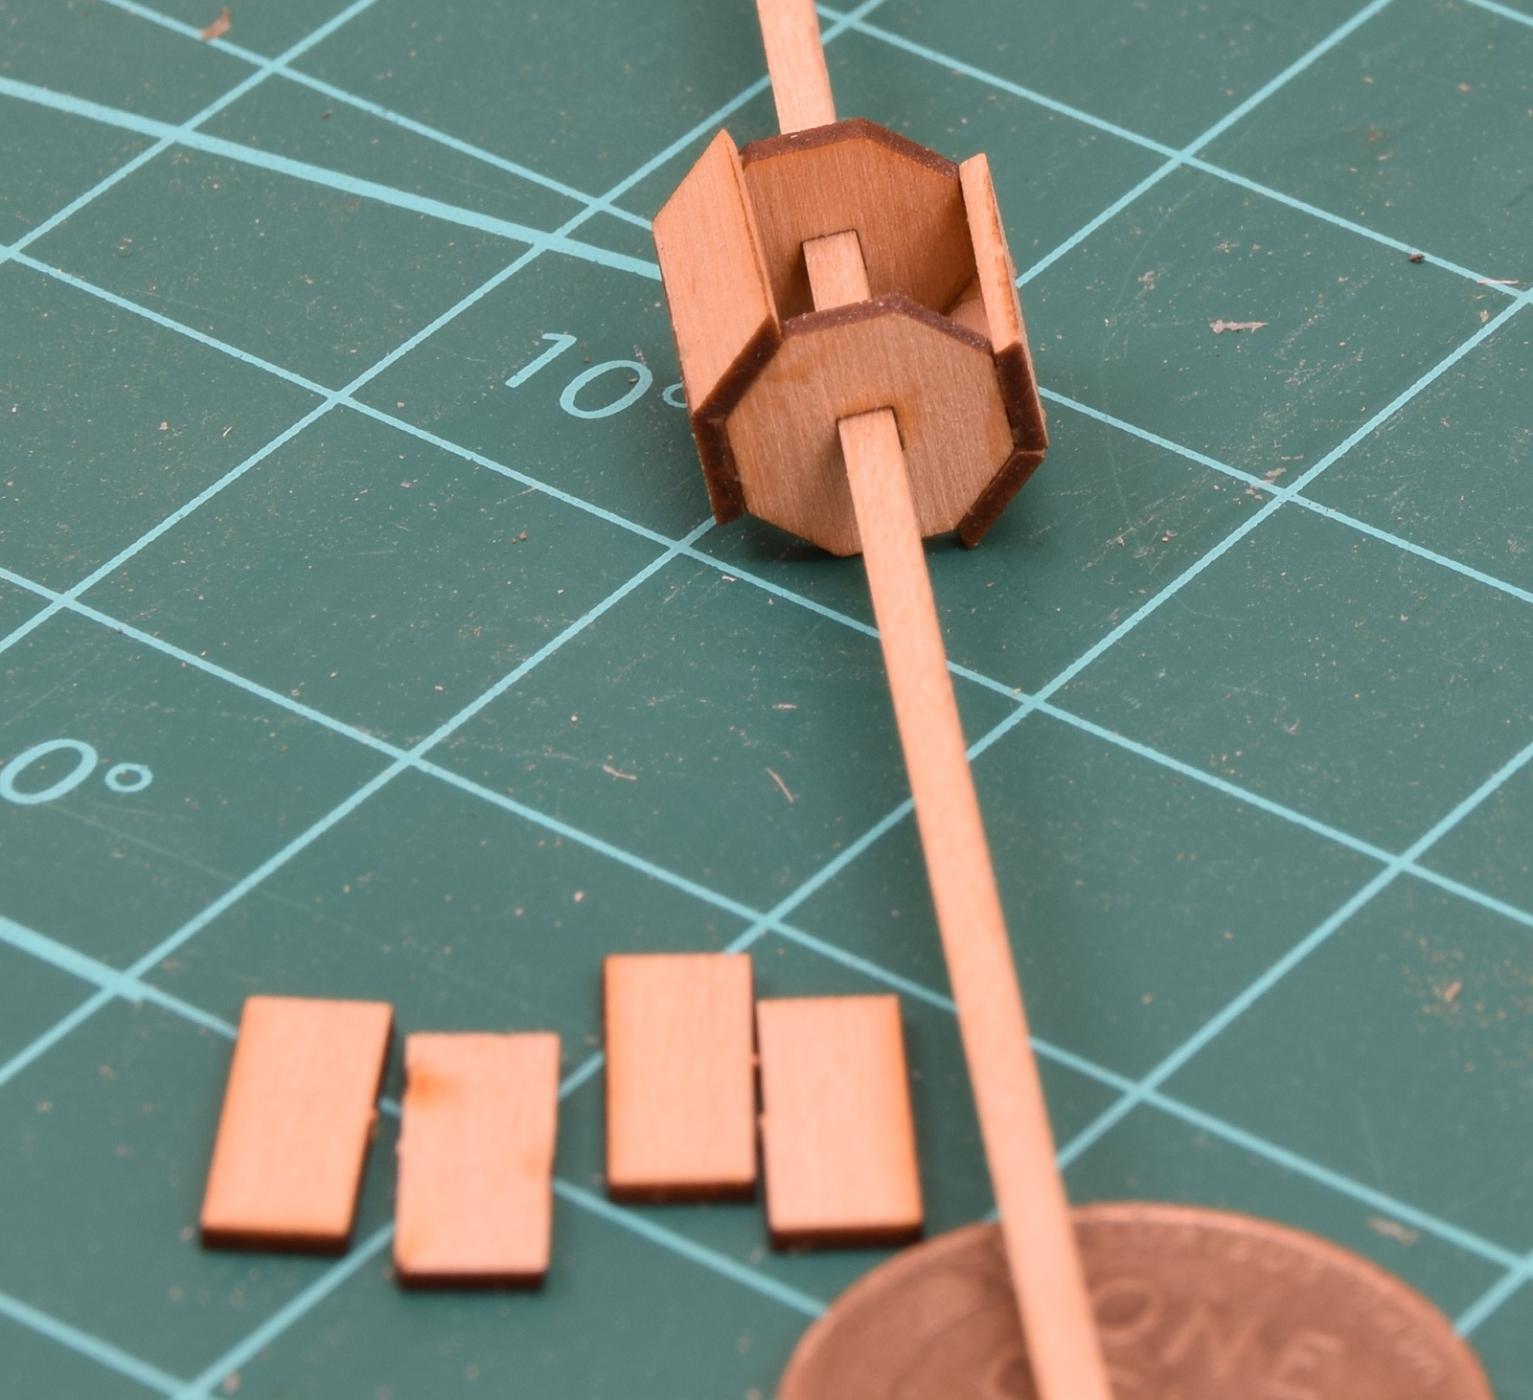
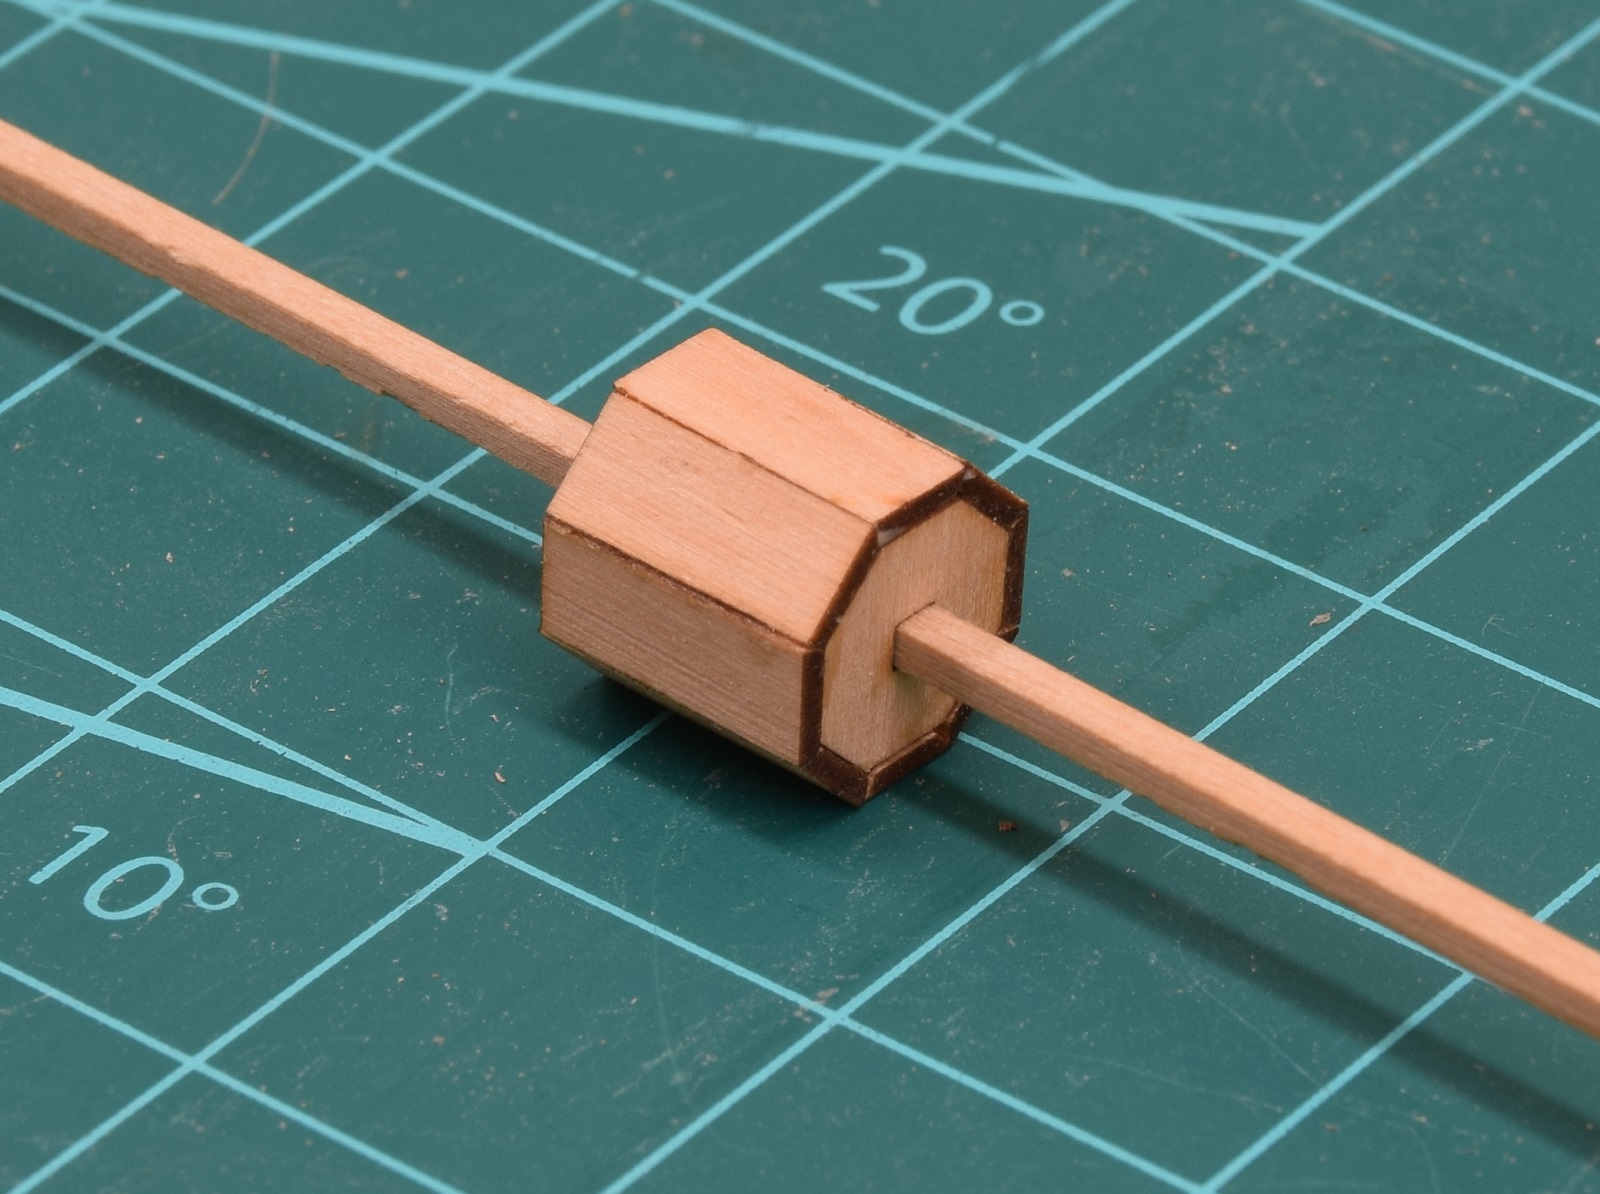
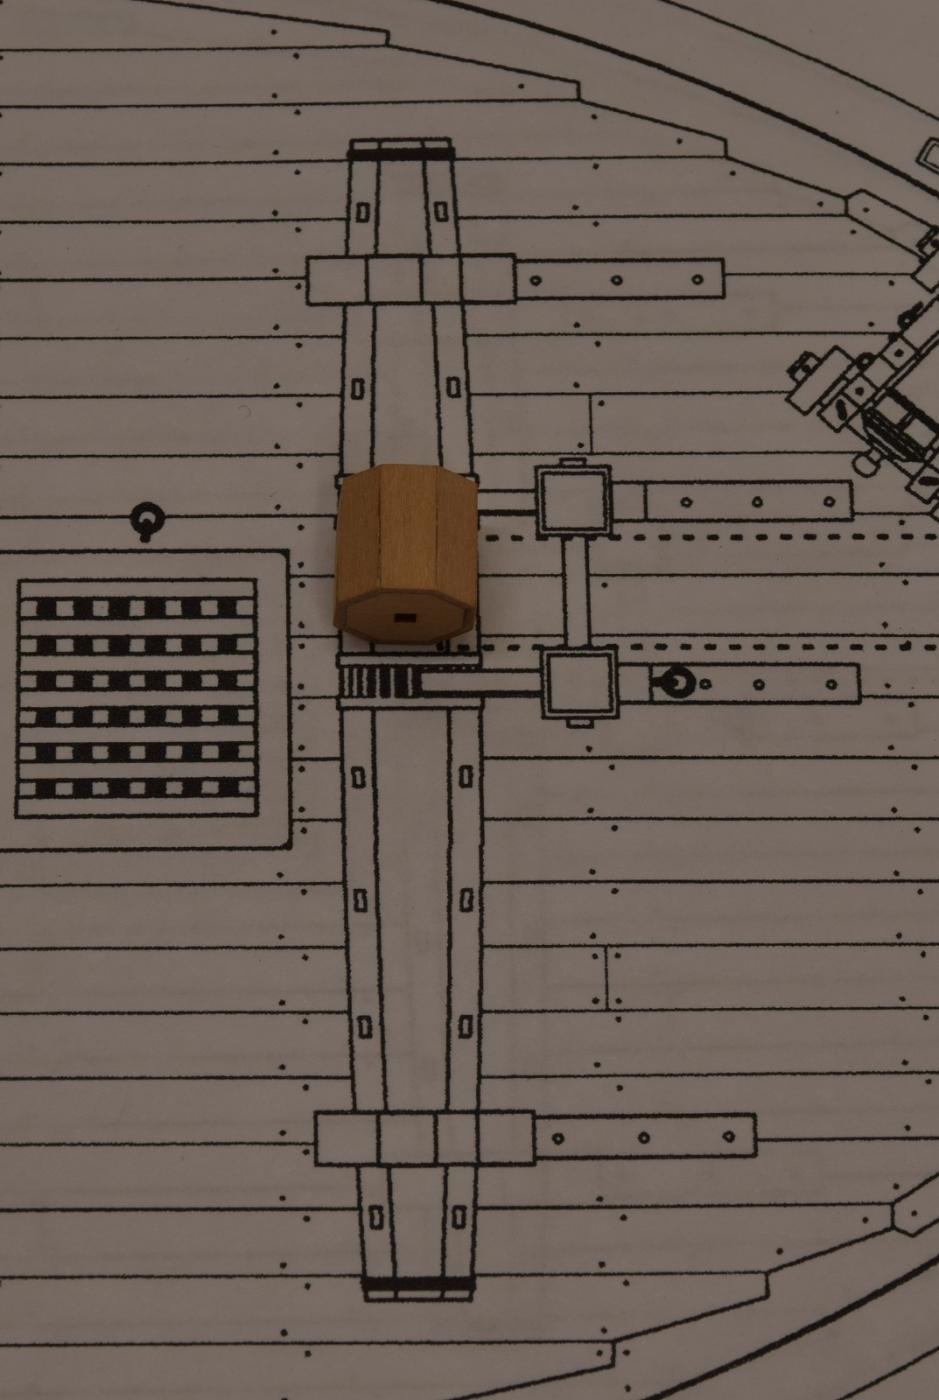
I went back to working on the bulkheads and got started gluing them into position. Because I have to wait quite a while in between each bulkhead for the glue to dry before moving to the next one, I decided I would start on one of the little mini-kits for deck furniture, and grabbed the one for the windlass.The AVS didn't have a windlass or a capstan, which is probably not very realistic, but the Cheerful has a windlass and also has a separate winch too.No better time than the present, so lets do this. I started with the inner drum, which is made out of 10 parts, two octagonal end pieces and 8 'slats' for lack of a better word. Each one of these 8 tiny slats has to be beveled on both edges where they meet the next slat, or there will be ugly gaps between the slats (and they won't fit). Construction starts by putting the end pieces on a 1/16" square stick, and then beveling a couple of the slats, which are then glued onto opposite sides. More slats are then added until all 8 are on and the drum is complete. The entire assembly is then removed from the square stick, and finish-sanded being careful to retain the nice octagon shape.


 End result, 3 hours after I started, is that this much of the windlass is done!
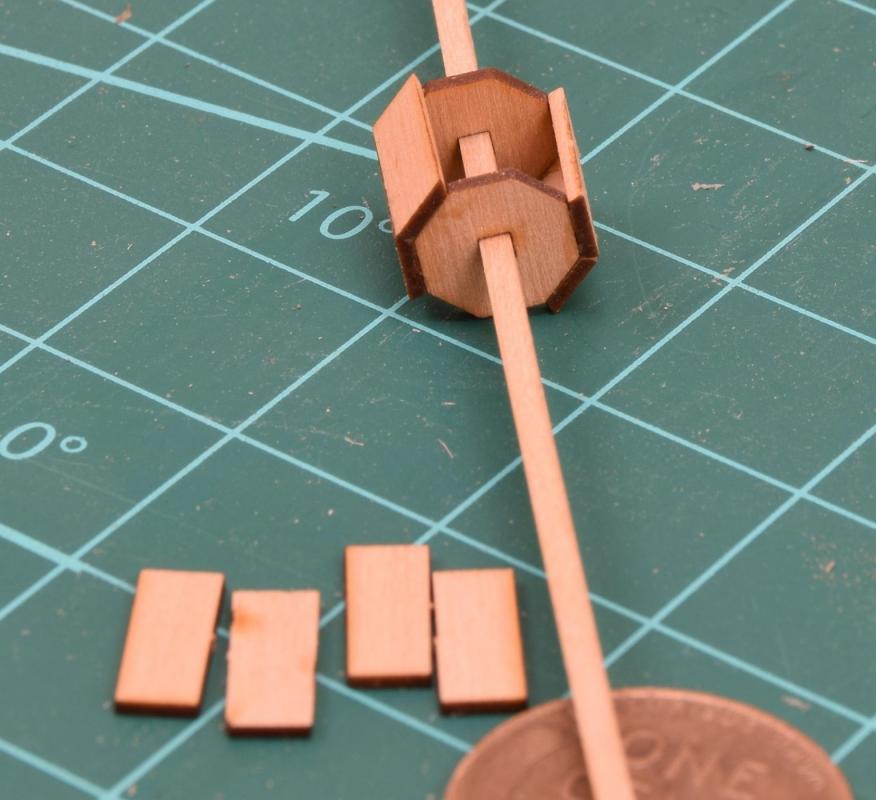
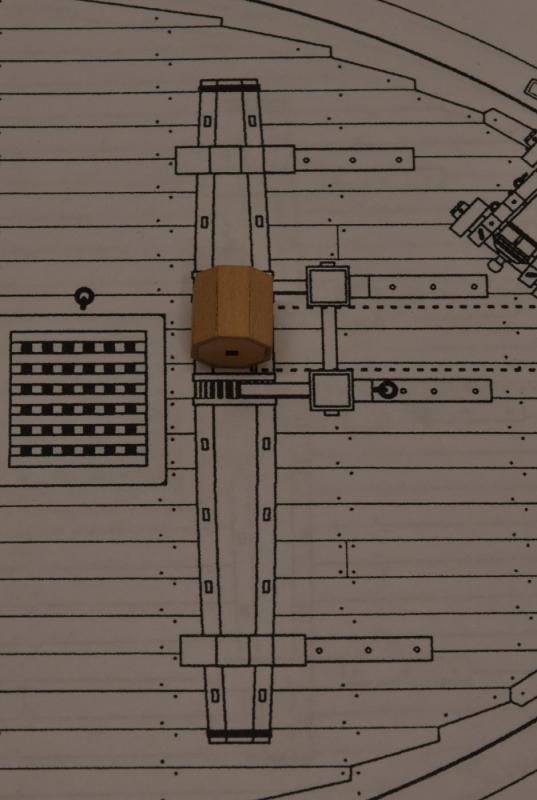 This is the rest of the pieces... 4 more sections, plus other bits, but to make it more interesting, the rest of the drum sections are tapered too!
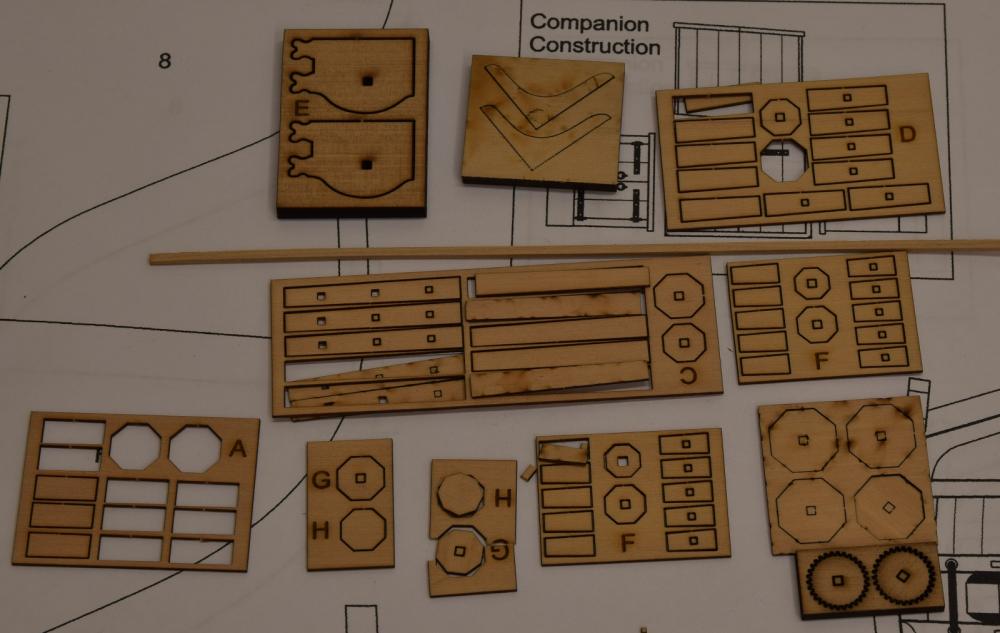 I also got the first 3 bulkheads done.
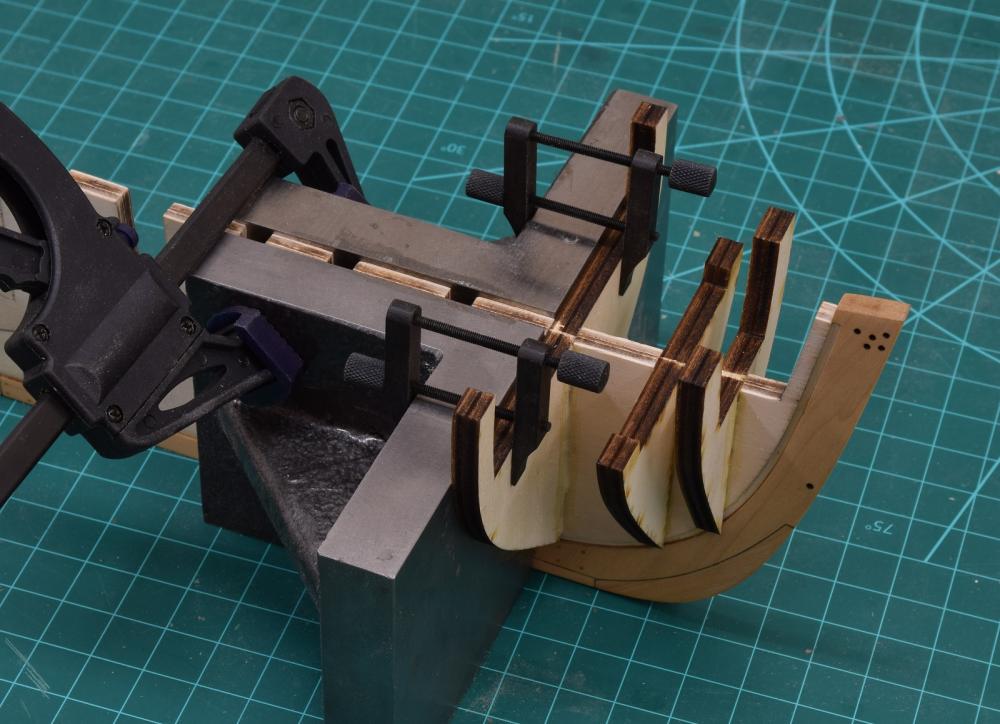 Now I need to fold laundry and get some sleep for work tomorrow I suppose.
-
-
Everything about this model is impressive, and your attention to details is simply amazing.
- WackoWolf, PeteB, Mirabell61 and 2 others
-
5
-
Two updates in the same weekend. Something is terribly wrong!
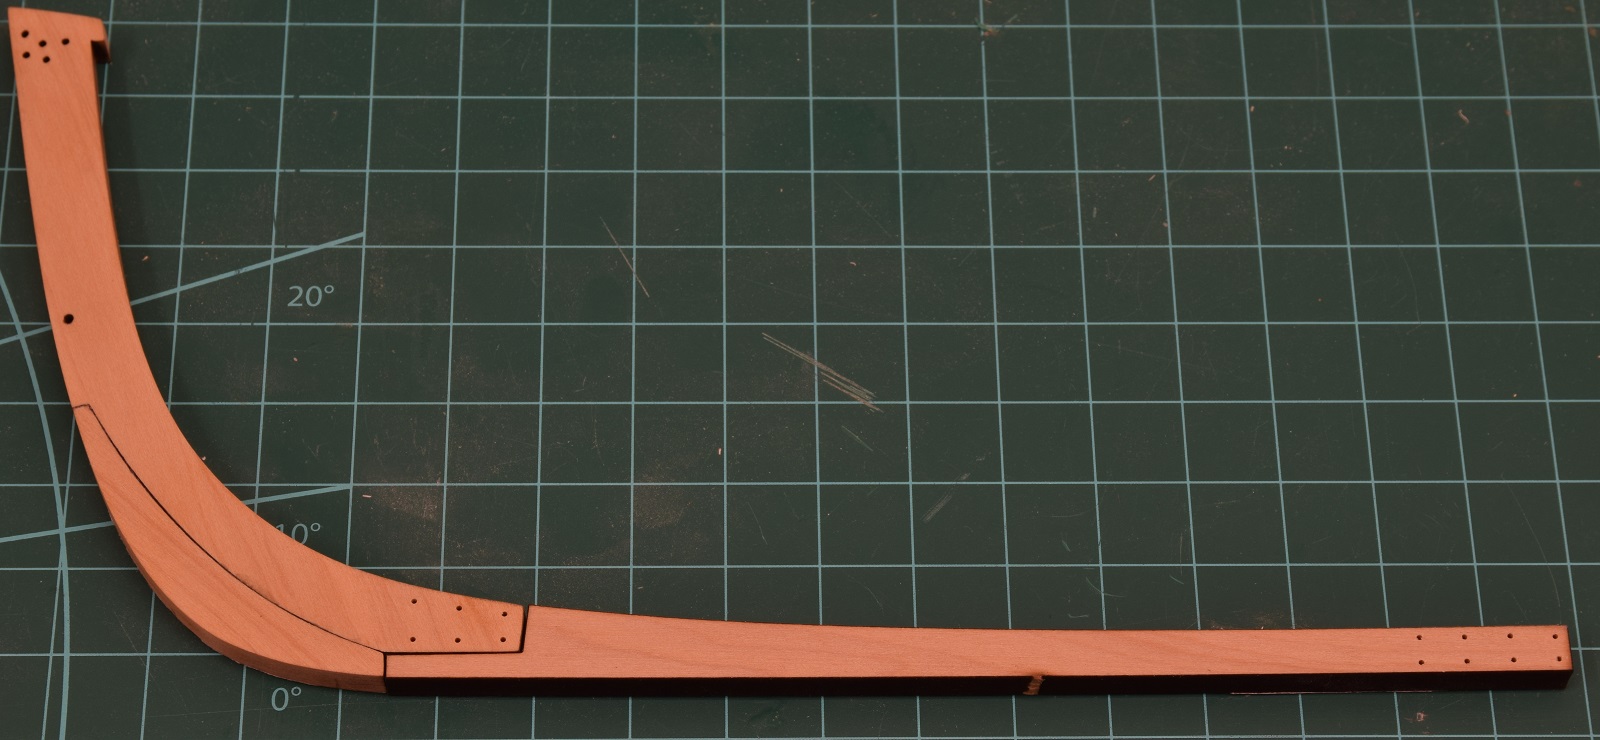
To get the treenail placement correct in the keel, I pasted the pattern from the plans onto the parts using a kids type gluestick. For actually drilling them, I did a number of test holes in scrap wood and decided to use a larger bit than Chuck did on his proto-type, and not do the pencil, instead I chose to use a #68 bit and a darker wood filler.
Instead of drilling holes partially through, I used the mill and drilled all the way through instead of trying to make a mirrored pattern for the other side. There was a slight bit of cleanup to do on the holes where the drill exited doing it this way, but I probably should have been running a much higher RPM on the mill.


Attachment of the stem was next, followed by the forward portion of the keel, and finishing with the aft portion of the keel (not pictured).

I then used a 'golden oak' wood filler to fill the treenail holes and then sanded everything and cleaned it up prior to applying a coat of Min-wax satin wipe on poly. The result...
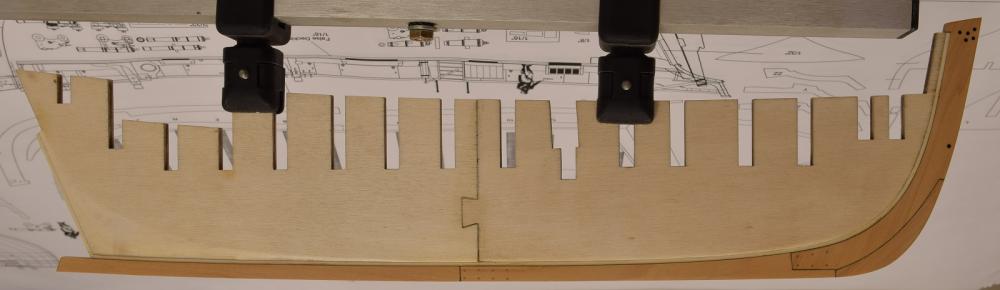
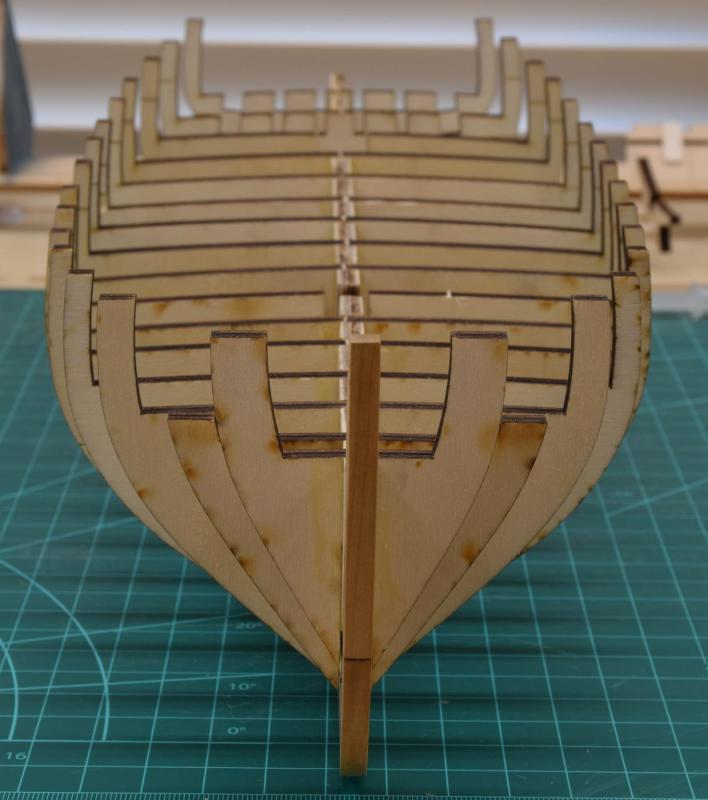
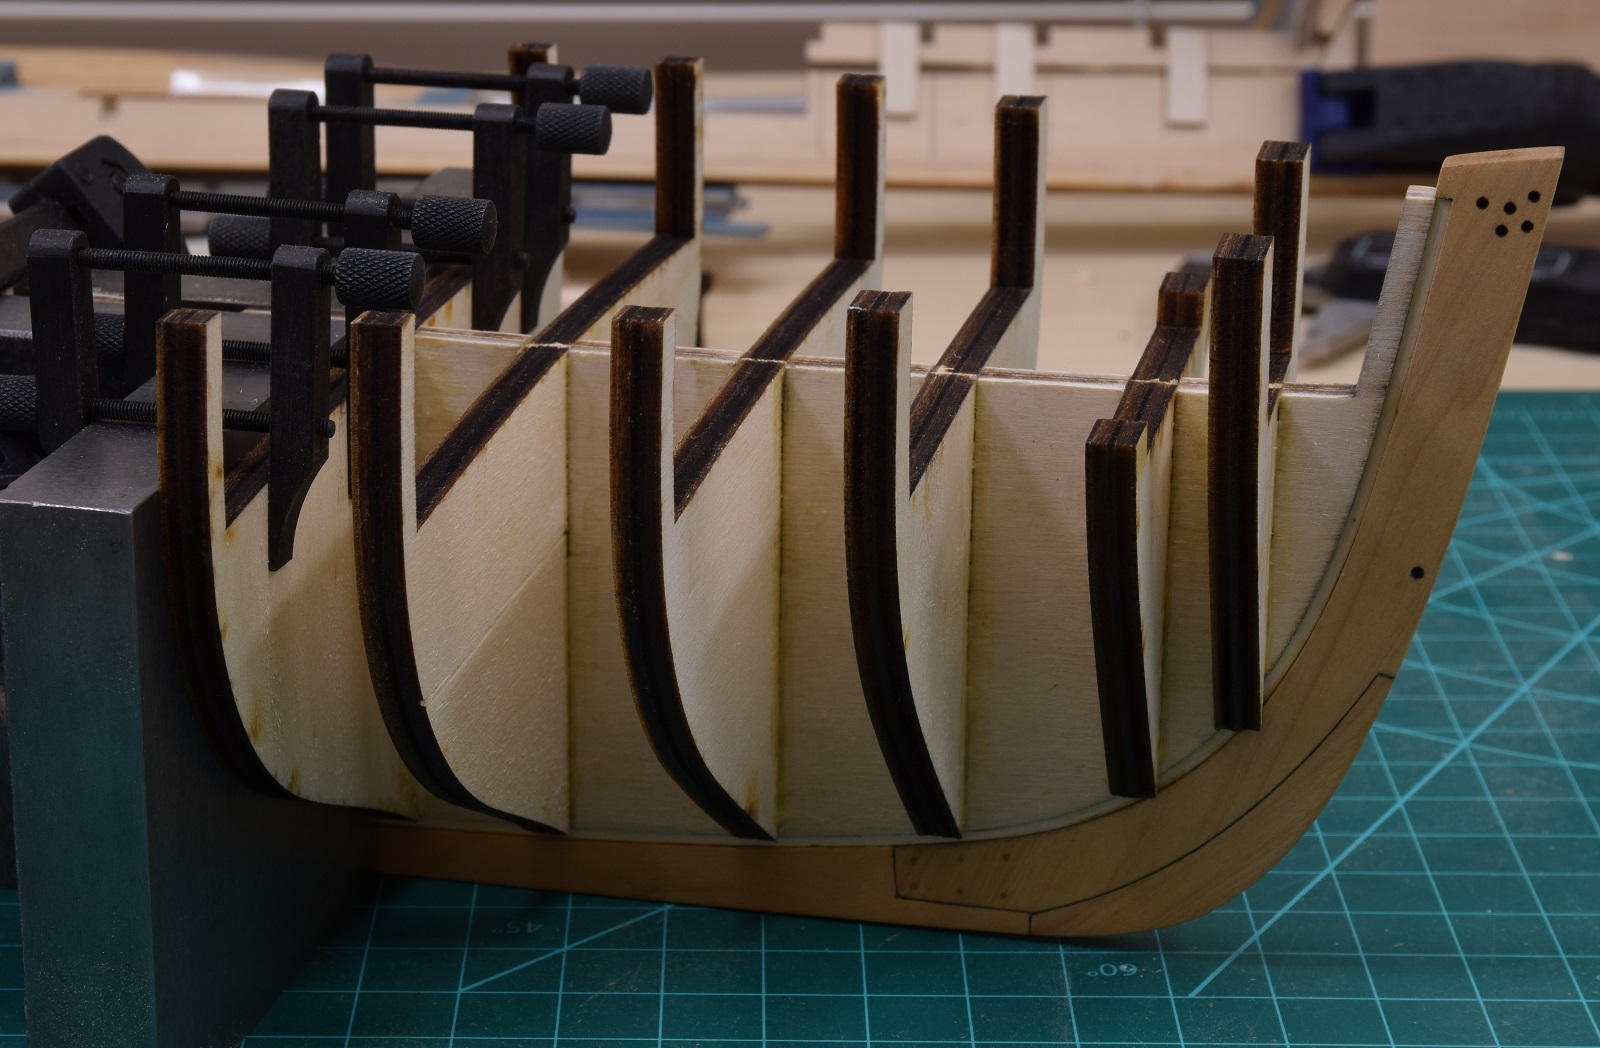
The sternpost is later, after the bulkheads and stern framing. Next up, this pile of bulkheads...


Dunbrody by Mahuna - FINISHED - 1:48 - Cross-Section - Irish Famine Ship
in - Build logs for subjects built 1801 - 1850
Posted
Looking good, and nice progress Frank.
Are you doing anything like marking one edge of the planks with pencil to highlight the edges/caulking, or do you prefer it to be clean?