


GuntherMT
-
Posts
2,213 -
Joined
-
Last visited
Content Type
Profiles
Forums
Gallery
Events
Posts posted by GuntherMT
-
-
Really like the looks of these boats, someday I'm going to have to build one, if for no other reason because of how the finish is done, which I've always found beautiful.
Good luck and have fun!
- trashboat, Gerhardvienna, mtaylor and 2 others
-
 5
5
-
-
-
I don't have much experience in this area, but in general it seems like old kits go for fairly low amounts. I was able to pick up a MS kit that's probably from that same era, maybe a bit later (pre-blue box though) for about 23% of retail ($80 for a $350 kit), and I didn't try to negotiate at all, might have gotten it down even cheaper if I had. (also consider that MS regularly sells their kits for 50% off, so this is really 1/2 of the regularly available price of $175)
I also got a barely started MS Constitution (also pre-blue box) for free, because someone wanted it out of their closet but couldn't bring himself to toss it in a garbage bin.
One other point of reference, guy in my IPMS group is trying to sell an MS Bounty launch for $40 (newer blue-box kit) and has had no takers for over a month now.
Obviously the desirability of each kit will vary from person to person, but I certainly wouldn't offer a very high price, based on my limited experience with used kits.
-
You have a great looking Niagara going there Darrell!
I think you made a superb choice in using your own wood for the masting instead of using dowels. Another wood to look at for future use for this if you want to leave the masting unpainted is Castello Boxwood. It has a very fine grain and is as good to work with as Holly. I used all Castello for the masting (including yards and bowsprit) on my AVS build and I'm very happy with the result.
As far as leaving the bowsprit unpainted... that's certainly a builders choice thing, just go with whichever way you think it will look good, as ultimately you are the one who will enjoy looking at the finished ship on the shelf every day.
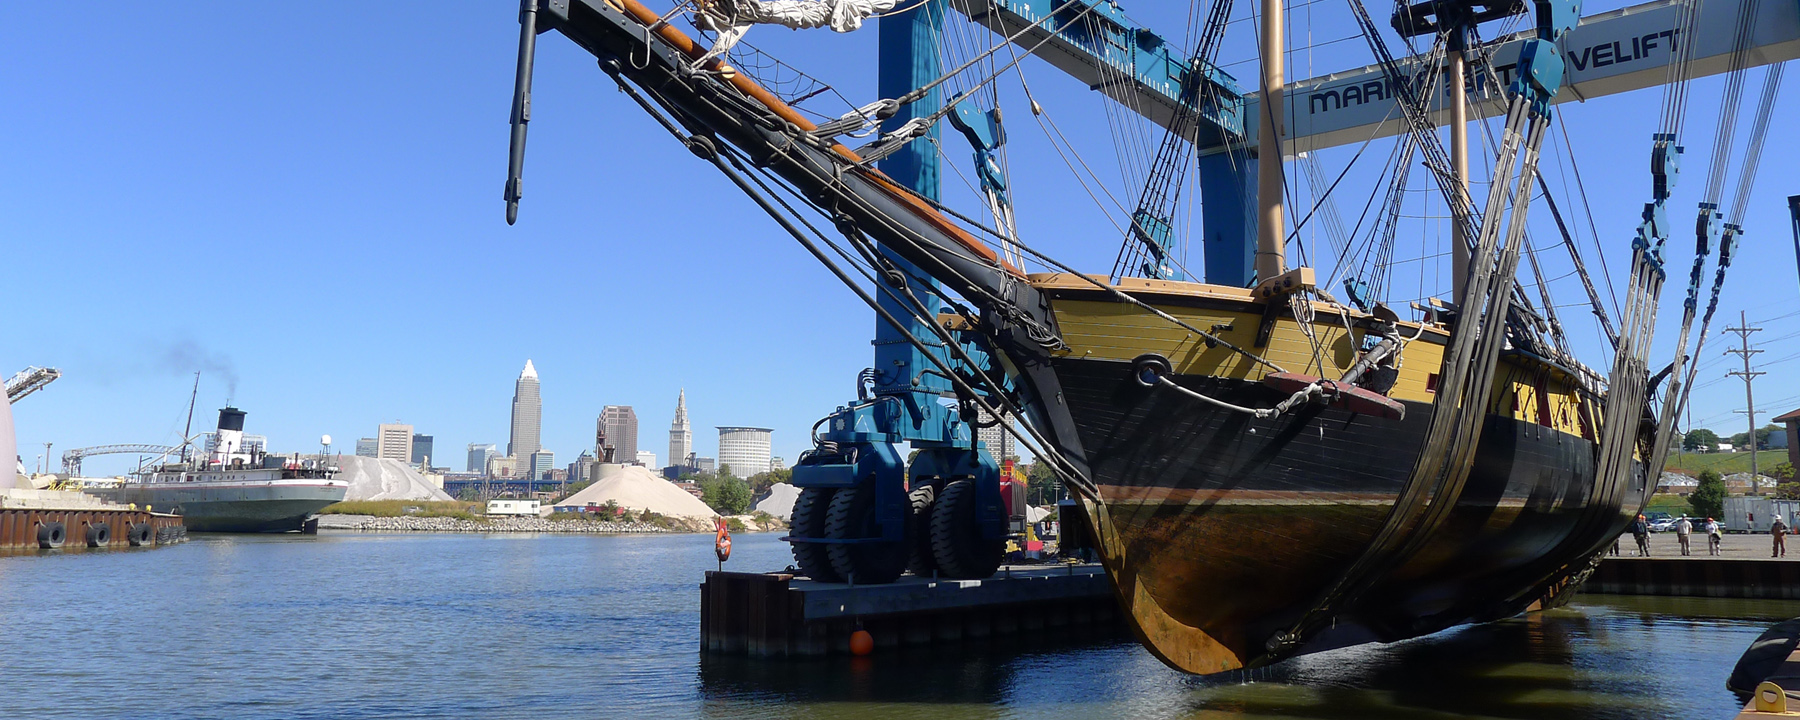
The black hull looks good, but just as information (I certainly wouldn't change it at this point), the actual Niagara does use a different color below the waterline. I was able to find an interesting photo from a haul out, but unfortunately Google gave me nothing as far as what it looked at just prior to be put back into the water.

Looks like a two-color stripe along the waterline, and then some indeterminate color below that. Based on the faint coloration right below the waterline paint stripes, it could be a green, but whatever color it is, the water-flow has so badly eroded it that it's fairly difficult to be sure. I've seen the same effect on the Pride of Baltimore II on her haul out photo's, the erosion from the water nearly completely removes the paint from the hull between haul outs.
I did notice one thing in your very first post with the current photo's. The guns have not been painted black inside the barrels. This is something that is very easy to fix, and I think you should do, as especially under the light of flash photographs, the fact that it's not black inside the barrel really jumps out. Just use a fine brush and a matte black paint and swish it around inside each barrel.
-
The sails look great, to my eye you pretty much nailed it!
- Cathead, mattsayers148, Jack12477 and 3 others
-
6
-
-
I love the pear. It's a great wood to work with, IMO. Got a question for you. Did you fit the decks before planking? I'm asking because of the notches and a couple of models I did, you couldn't plank the deck until it was fitted otherwise you'd have some big gaps where the notches are.
Nope!
Guess we'll see how it goes. I did do a couple test fits of just seeing how tight the slots fit over the bulkheads without them being assembled at all, and they seemed like a very good fit.
Thanks,
-
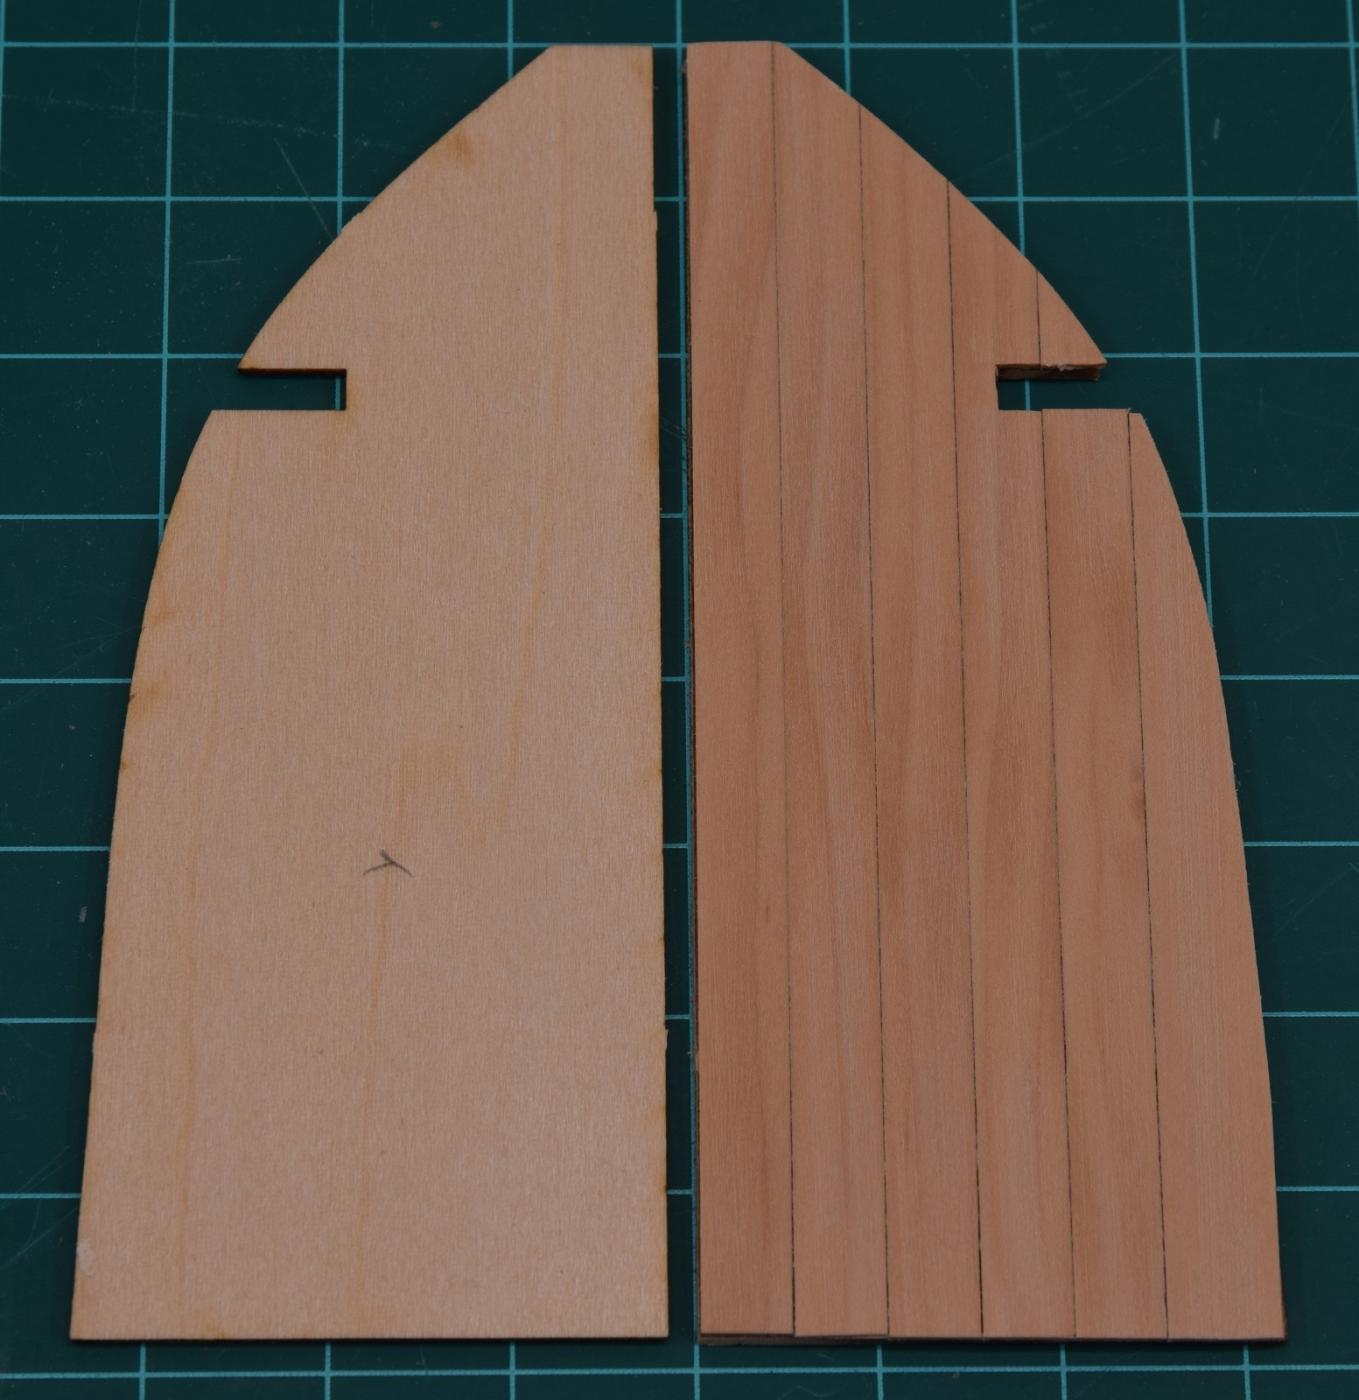
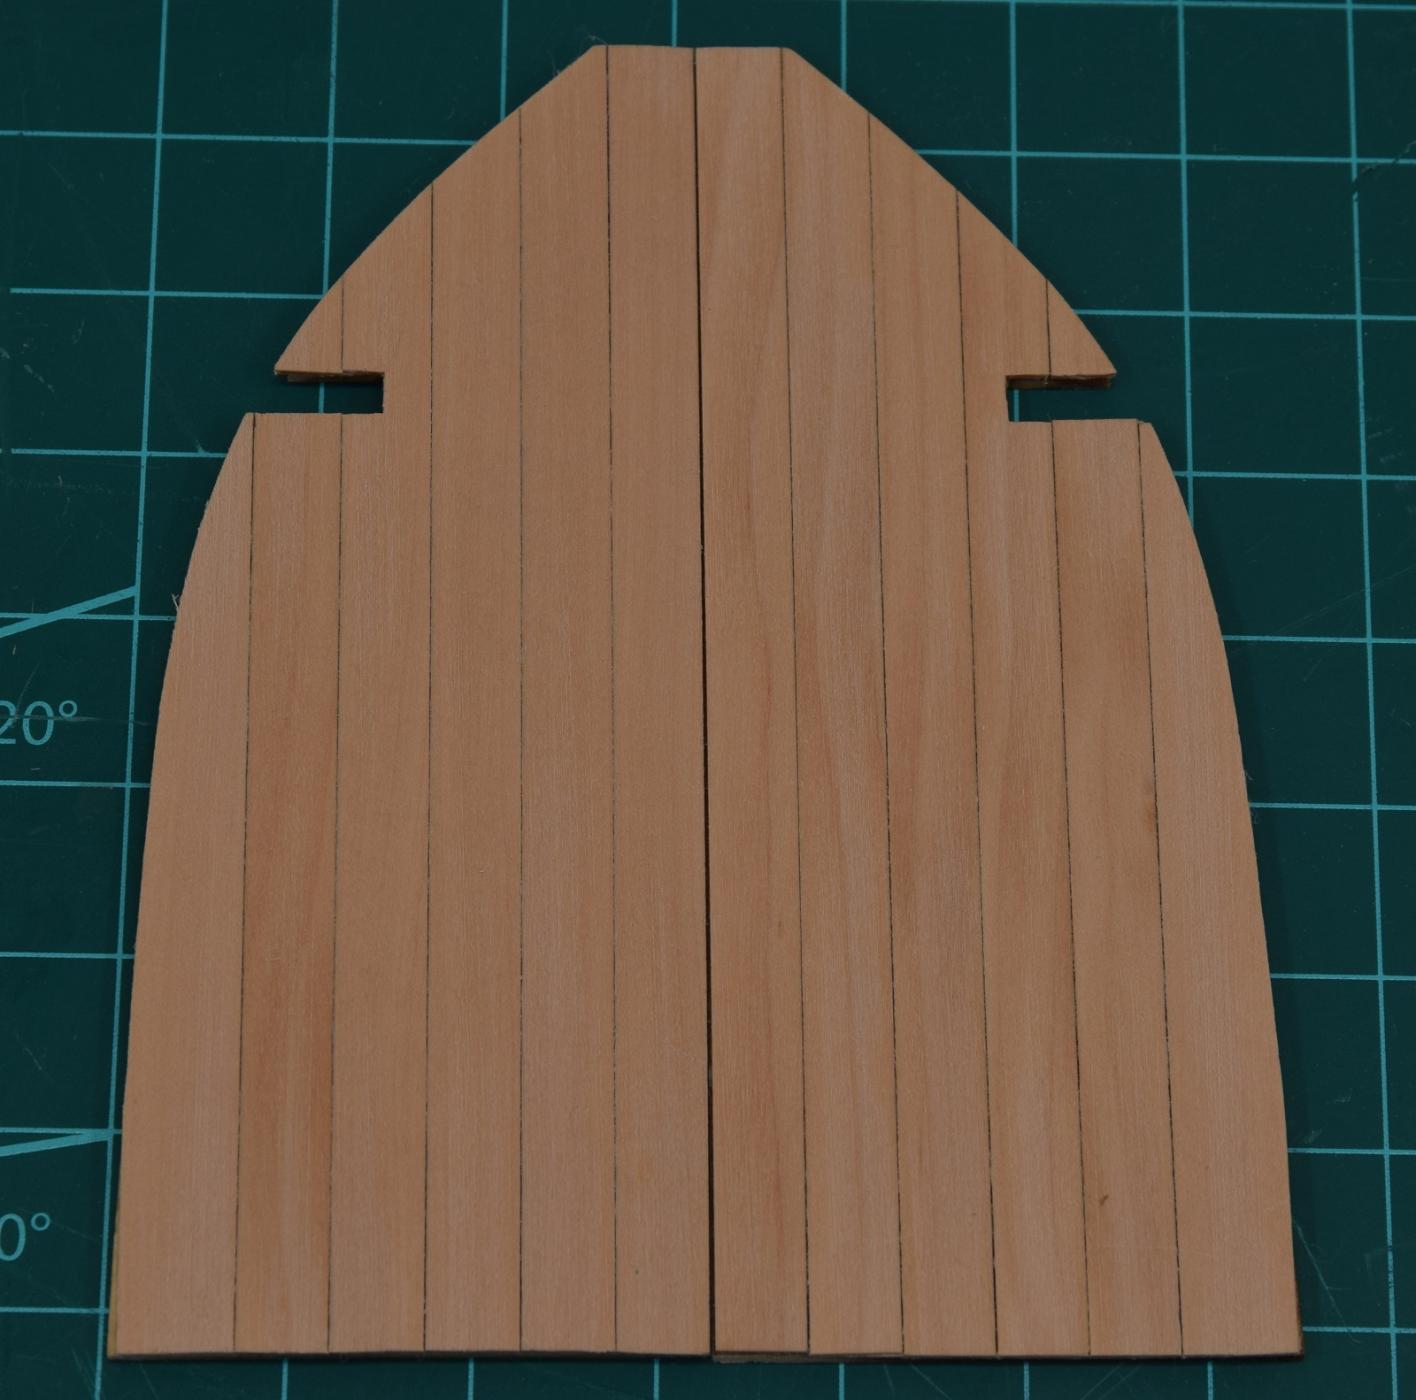
So I finally got the wood I've been waiting for, so I started to do some work on the picket boat.There are a number of different deck parts on this kit that are just 1/16" thick basswood, and the instructions are to 'scribe' the lines onto the decks to simulate planks. This is probably because those decks are supposed to be painted (or stained) in the instructions, but I don't care for how the scribed decks look, and I also think I want to keep the planked deck portions natural wood to contrast with the painted hull, so I got some 1/32" thick Swiss Pear, and I'm planking all those sections, like most of the other builders of this kit have done before me.On the left, the basswood that I'm supposed to scribe fake planking into prior to staining it. This is the floor of the rear cockpit. On the right is the first planked section with Swiss Pear. Then both parts complete. It will darken up a bit when it gets a coating of wipe on poly.

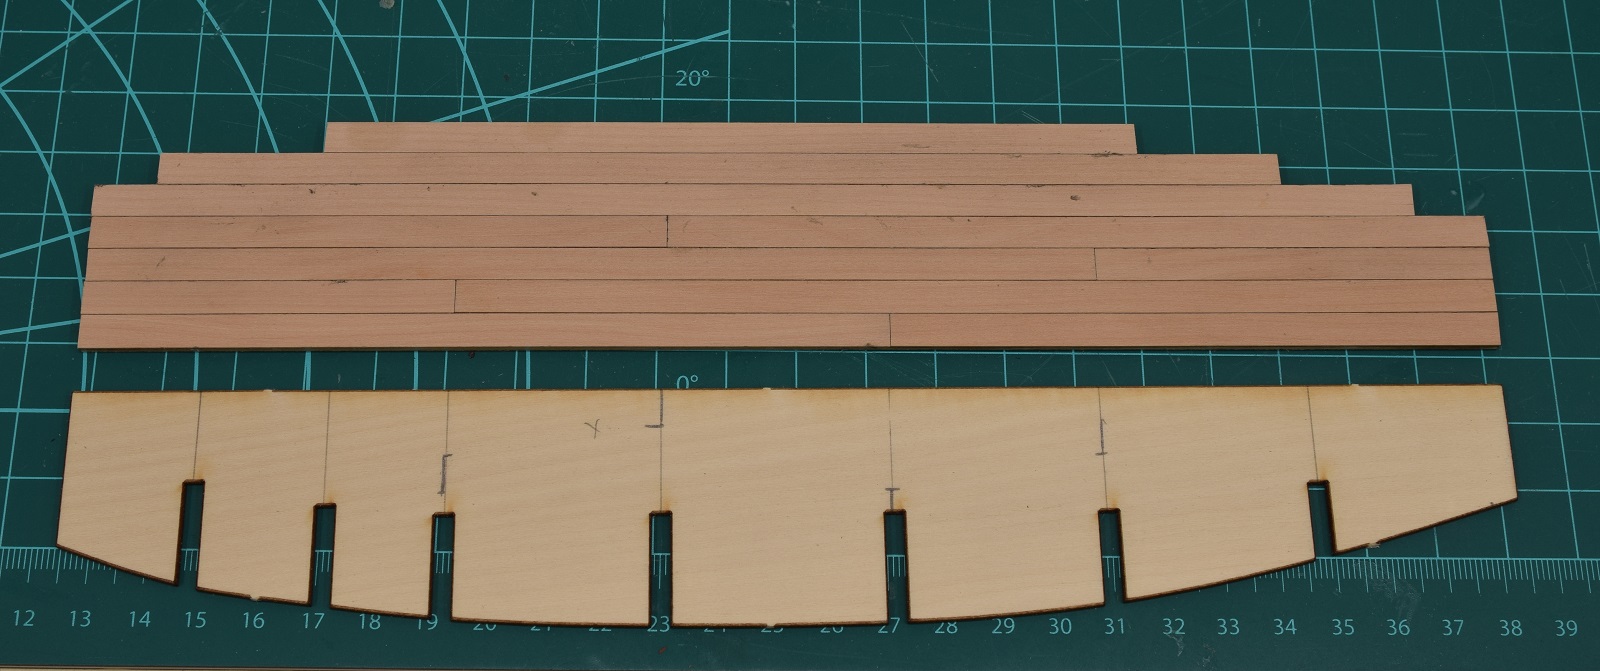
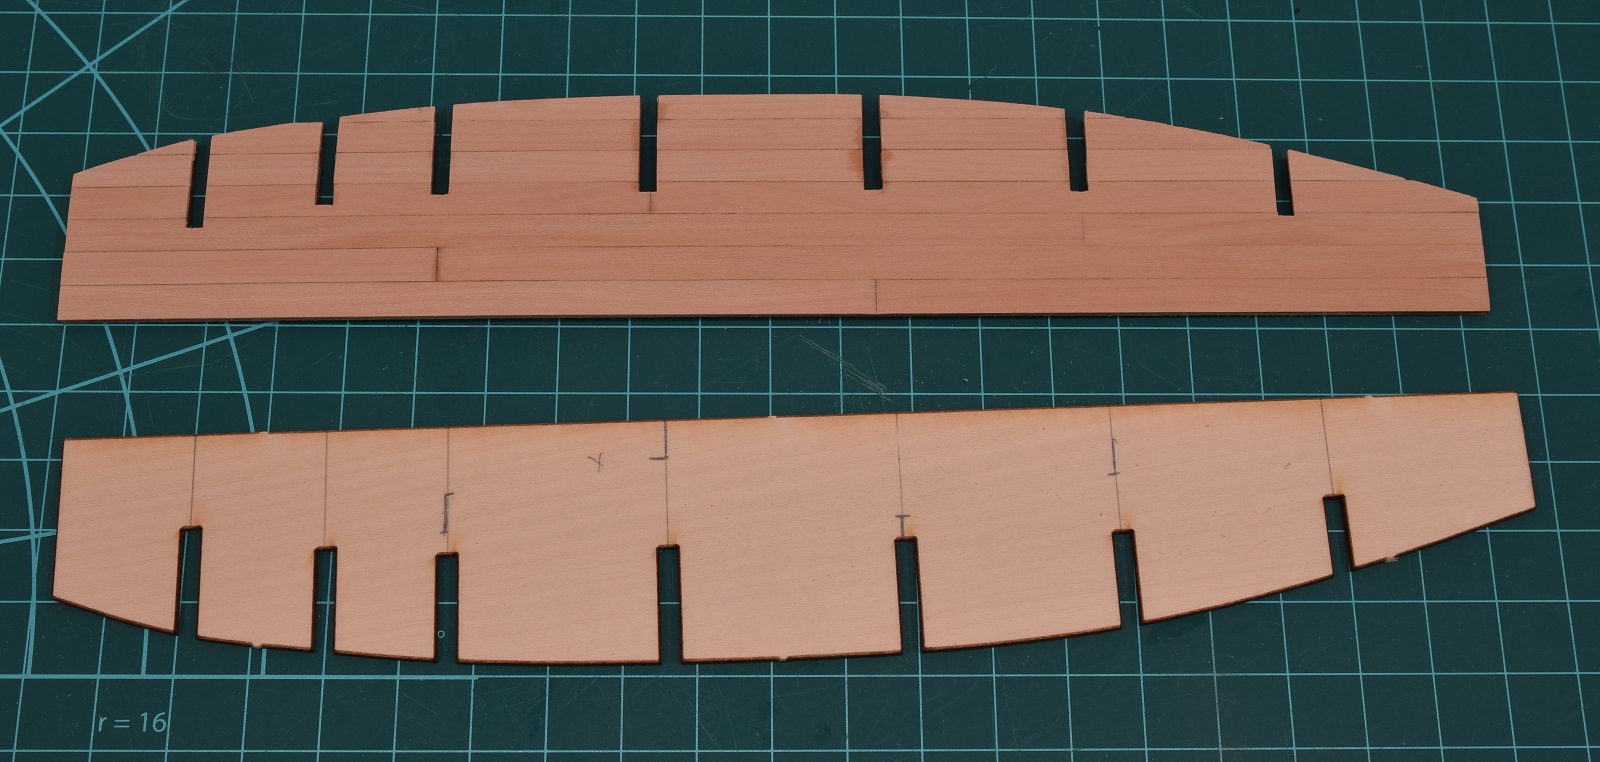
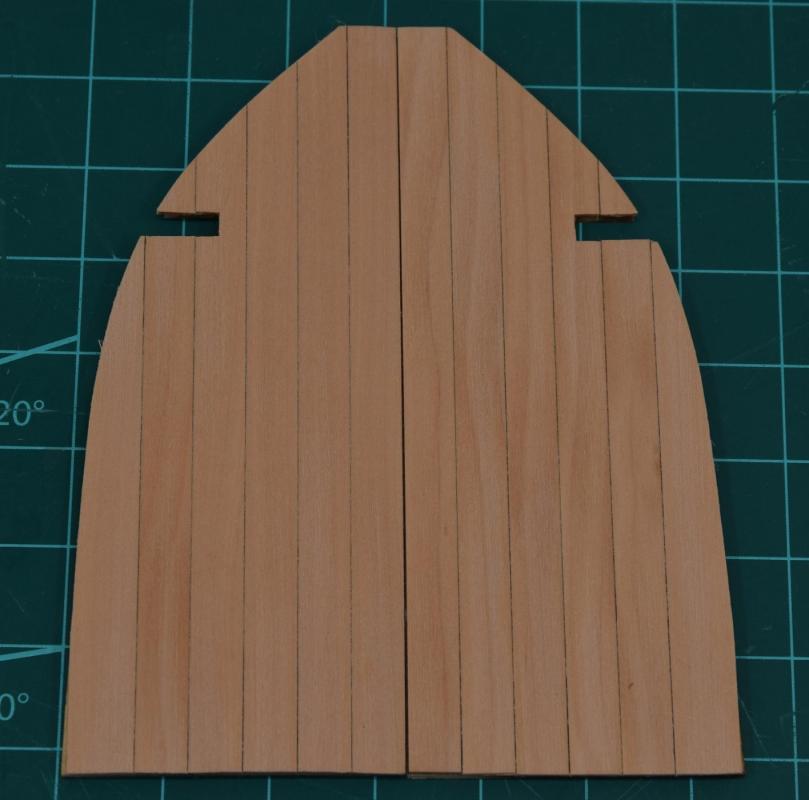 The large floor sections of the main cockpit of the boat, again showing the basswood kit piece, and then the planked but not yet trimmed down piece, and then after finishing it.
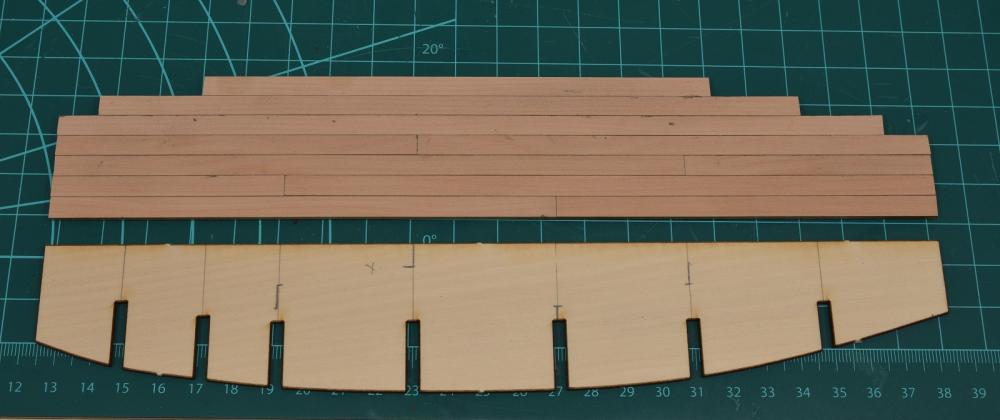
 I have the benches of the rear cockpit, the deck of the bow and stern, and some bulkheads that are exposed to do. Some of those parts get margin planks, so they'll be a bit trickier and require cutting custom shaped planks out of 1/32" sheet rather than using straight planking.Hopefully I'll get some more done this weekend and post another update.
-
Weld-bond is a general purpose white PVA which will dry clear. Tite-Bond is a yellow wood glue PVA. I find that I can get a quicker and stronger 'set' using the tite-bond, so I use it the vast majority of the time, while the Weld-bond requires a much longer clamping time in my experience. Either should give a good result though.
I even use normal Elmers white school glue for a lot of things, like making the 50/50 glue/water mixture for securing rigging and rope coils. It will also work fine for securing wood to wood.
In the places that I do use CA for securing metal to wood, a good epoxy like Mark suggests is the best choice, but make sure you never want to remove it! I generally avoid epoxy just because I don't like dealing with the mixing and smell.
-
I use regular old yellow wood glue 90% of the time (TiteBond). For things where I'm worried about the glue showing later I'll use white PVA like Weldbond.
The only time I use CA is for attaching metal to wood, as I don't like how CA reacts with, and soaks into the wood and is very difficult to remove if it's visible.
Also, PVA (wood glue or white glue) can be removed by soaking the joint in water, or alcohol, whereas CA requires the use of a debonder or acetone.
-
The lining off certainly looks fine to me from the photo's, but ultimately it's your eyes on the hull that will be what makes the call, and it if 'looks' good, it probably is!
As for the photo's, no reason to remove them, as it's the process photo's like this that someone else can potentially learn a lot from later when they are looking at your log trying to figure this step out for themselves. Storage space is pretty darned cheap and plentiful these days, so I certainly wouldn't be worried about the space they are taking up, as that is sort of the entire purpose of having everyone post build logs!
-
-
So there's no need to get huffy about modellers saying what they'd "like" to see, especially when that's what was asked for. If we can get a nice explanation from the developers of what actually goes into the business model of kit development, maybe then we can give more "realistic" answers. Until then, just take the feedback here at face value as a narrow sampling of a limited community of dedicated modellers and get what value you can from it.
My intention was not to be 'huffy', it was to point out the exact same thing you did about the vegetable farming. You can't have everything, you need to consider all the factors going into the product, and that it's kind of unreasonable to say "I want this awesome thing made out of the best possible components which are all expensive, but I want it to cost a dollar".
Sure, we all might *want* it, but that doesn't mean that it's reasonable to ask for it.
I don't need to really understand the industry to go to Crown and look at the cost of a wood package, then see what a set of plans costs somewhere, what do various bits of fittings, ropes, etc. cost, and add it all up to get at least a vague idea of the materials costs that would go into a given project, then consider that any business has development costs (in time and materials both), and that they need to make a profit of some kind.
Hopefully nobody takes my earlier post (or this one) personally, as neither was intended that way at all.
- Stuntflyer, dgbot, coxswain and 8 others
-
11
-
Dan Vadas has an excellent description of tying ratlines.
That's certainly the right way to do it, but not my lazy way to do it.

-
I used scale plank lengths, actually a bit short at 16' scale, but they worked out well for my hull size. I think 20-25' is generally accepted as how long planks were generally used.
If you want to use full lengths though, and you are happy with how that looks, then that's all that really matters. I purposely used different colors of walnut on my final planking to make the different planks stand out for the appearance, so it's all about personal taste I think.
-
-
The tick strip method is probably better explained by reading the PDF that is in the NRG resources for planking a hull. Go here - http://modelshipworldforum.com/ship-model-framing-and-planking-articles.php
I'm fairly sure that you want the 'lining off the hull' article by Chuck Passaro.
I adjusted the bands by eye for what I thought was a pleasing 'flow', with no consideration given at all to any of the things you are worried about. I made drop planks or stealers whenever I got to the point where I realized that I needed them, and I alternated sides of the hull (by band, not by individual strake) and just made them as close to the same as possible on either side.
I know some people think that drop planks or stealers are a crime suitable to be hanged for, but they were used in the real world ships when needed, so if I'm not following a real planking plan that exists for a ship (i.e. like the Cheerful), then I'm just going to wing it. I think drop planks and stealers add a very nice 'look' to a natural finish hull (as long as they aren't overdone).
-
Very nice Dave! Where did you get the tiny little painting?
- Canute, zoly99sask, mtaylor and 1 other
-
4
-
I hope you have better luck than I did with the sharpie. I found that when I applied poly, it caused the sharpie ink to run and bleed, and I never could get it to stop as it was soaked into the wood much more than paint does, it just kept bleeding, every time I tried to add another layer of poly. I regretted using the poly over and over again (I used it on the wales as an experiment, which went fine until later when I had them installed and added the poly).
My wales are still patchy looking if you hit them with light at the right angle, because the poly doesn't seem to want to seal and stick to them properly, so there are sections that just look 'flat' instead of the semi-flat of the rest.
At a guess, I spent a couple dozen hours doing clean up work because of that, and I'll never use a sharpie on a ship again!
- DocBlake and pythagoras
-
2
-
Preference for complete kits of frigates and ships 1750-1840ish as described by many....POB ..1/48 scale or 1/64....with better materials.....huge detailed instructions with crisp Hi res photos in color....high end fittings and not the usual crap...better rope and blocks....all for what has been averaged out to around $200-$500. Dont make a ship already available as a kit......plenty of particular ships mentioned so thats not an issue. That is a tall order. There are a few willing to pay more but most are not....we are talking years to develop each project and thousands invested in that development. I probably should have opened up a pizza parlor instead.
I feel for you Chuck and Dave, as I've noticed the same thing, and I have to think that these people are being completely unreasonable and not really thinking through what they are asking for.
I'm going to use Cheerful as a 'talking point', since it's my most recent purchase, and it's a great example, as I've put together the components very much like what they are asking for, yet it's a much smaller kit than what they are asking for.
Starter kit w/laser cut keel, bulkheads and stern frames.
All the mini-kits available.
Full timbering kit including pre-milled planking for the hull.
Guns and carriages.
All of that adds up to about $565 if you pay normal price, and does not include shipping. Not included - more wood stock for the masting, all the rigging rope, fittings, stuff like anchors that kits normally include, and we are easily into the $650~$750 range depending on what all you add, and this is a 1/48 scale single masted cutter. People that expect to get a 1/48 scale frigate kit using that quality of materials for under $500 are never going to get what they want. It's simple math really. If you want a 1/48 scale HMS Surprise that uses Boxwood or Pear instead of Lime & Walnut, and replaces bad generic fittings with high quality fittings, it is going to be $1000+ even from a large company.
What is really surprising to me is that people don't seem to consider the value of the purchase over the time spent building it. The AVS took me 13 months, and probably 1200 hours to build. So what if I spent $600+ on materials to complete it, that's pretty cheap 'entertainment', especially if you spread the 1200 hours out over a longer period of time like most people do.
Most plastic modelers (or at least the ones in my IPMS group) spend $50 per month easily on kits, and that's just the ones they actually build, not the ones that just get added to the stash. At $600 per year, if you build a really nice frigate in 2 years, that's $1200. Yea, it's all at once, but over time, it's the same as buying a $50 plastic tank model every month.
You get what you pay for, and if you want a high quality model, you buy a high quality kit, which isn't going to be as cheap as a low quality kit of the same subject.
-
You can always paint the brass belaying pins to appear to be wood if they are properly scaled, probably a lot easier than trying to source realistically dimensioned ones from another source, and certainly cheaper!
- Canute, JerseyCity Frankie and mtaylor
-
3
-
Bit too late since you've got it epoxied, but I didn't glue my mast in place at all, it's held entirely by the rigging, and it's very secure. I also left the bowsprit off completely until the last possible moment so that it would not be in the way (and subject to myself breaking it through being clumsy).
Interesting that you planked over the area where the hatches go, do you plan to just stick the hatches on top of the planking rather than butting the planking up to them, or are you going to cut out the areas where they go?
-
I used the first method, but instead of thread I used narrow Tamiya tape, easy to move around and sticks where I put it without using glue or anything. I didn't create any tables or 'plans', I just got the strips where they looked about right to my eye, and then used the 'tick strip' method of measuring the width of the planks for trimming them.
Seems to have worked out pretty well, so I see no need to get all complicated with spreadsheets and tables. Will that bite me in the future builds? Who knows!
Friendship Sloop by DRW-FJ40 - BlueJacket Shipcrafters - Scale 1:12
in - Kit build logs for subjects built from 1901 - Present Day
Posted
The 'eye' is probably the right way to do it actually, since when it's complete, it's the 'eye' that will be looking at it to see the form and appreciate it. Nobody is going to be applying templates and measuring it.