hornet
-
Posts
661 -
Joined
-
Last visited
Content Type
Profiles
Forums
Gallery
Events
Everything posted by hornet
-
 Least enjoyable - Corel Victory. I didn't have the skills to take on this beast at the time. In addition instructions were awful. Took me 20 years off and on to complete. Most enjoyable - current build Caldercraft 'Supply'. I have scratch built almost all of the fittings, learned how to use and airbrush and how to silver solder while working on her.
 -
Proxxon 12v Pen Sander?
hornet replied to Landlocked123's topic in Modeling tools and Workshop Equipment
I have this sander. Yes, you do need to purchase a transformer for it - Proxxon make a couple which are fairly cheap. You can buy a single outlet transformer or one with multiple outlets just in case you invest in other 12 volt tools.. The pen sander comes with a variety of different shaped attachments. Sanding pads fit onto these attachments via an adhesive backing. From my experience, the pads don't last very long but they are inexpensive to replace. I don't use mine a lot, but it is good for getting an even sanding job done on hard to get at spots such as the edges of a deck. It is not a 'must have' but is inexpensive and handy at times. -
Better known for selling Caldercraft kits.
-
Lionfish, between 20 and 25 psi. Much the same as for acrylic paint. I use a dual action Sparmax model DH 103 for Acrylic paint and a single action badger model 200 for poly/turps mix.
-
Matt or satin poly, diluted 50:50 with low odour turps and applied to larger areas (hull /deck ) with a single action airbrush. Very light sand between coats. 4 coats applied. The 50:50 mix dries a lot quicker than undiluted poly and gives a smooth even finish.
-
This thread may help. http://modelshipworld.com/index.php/topic/413-chamfer-a-plank/?hl=%2Bchamfer+%2Bplank
-
Gluing 101
hornet replied to CPT_D's topic in Building, Framing, Planking and plating a ships hull and deck
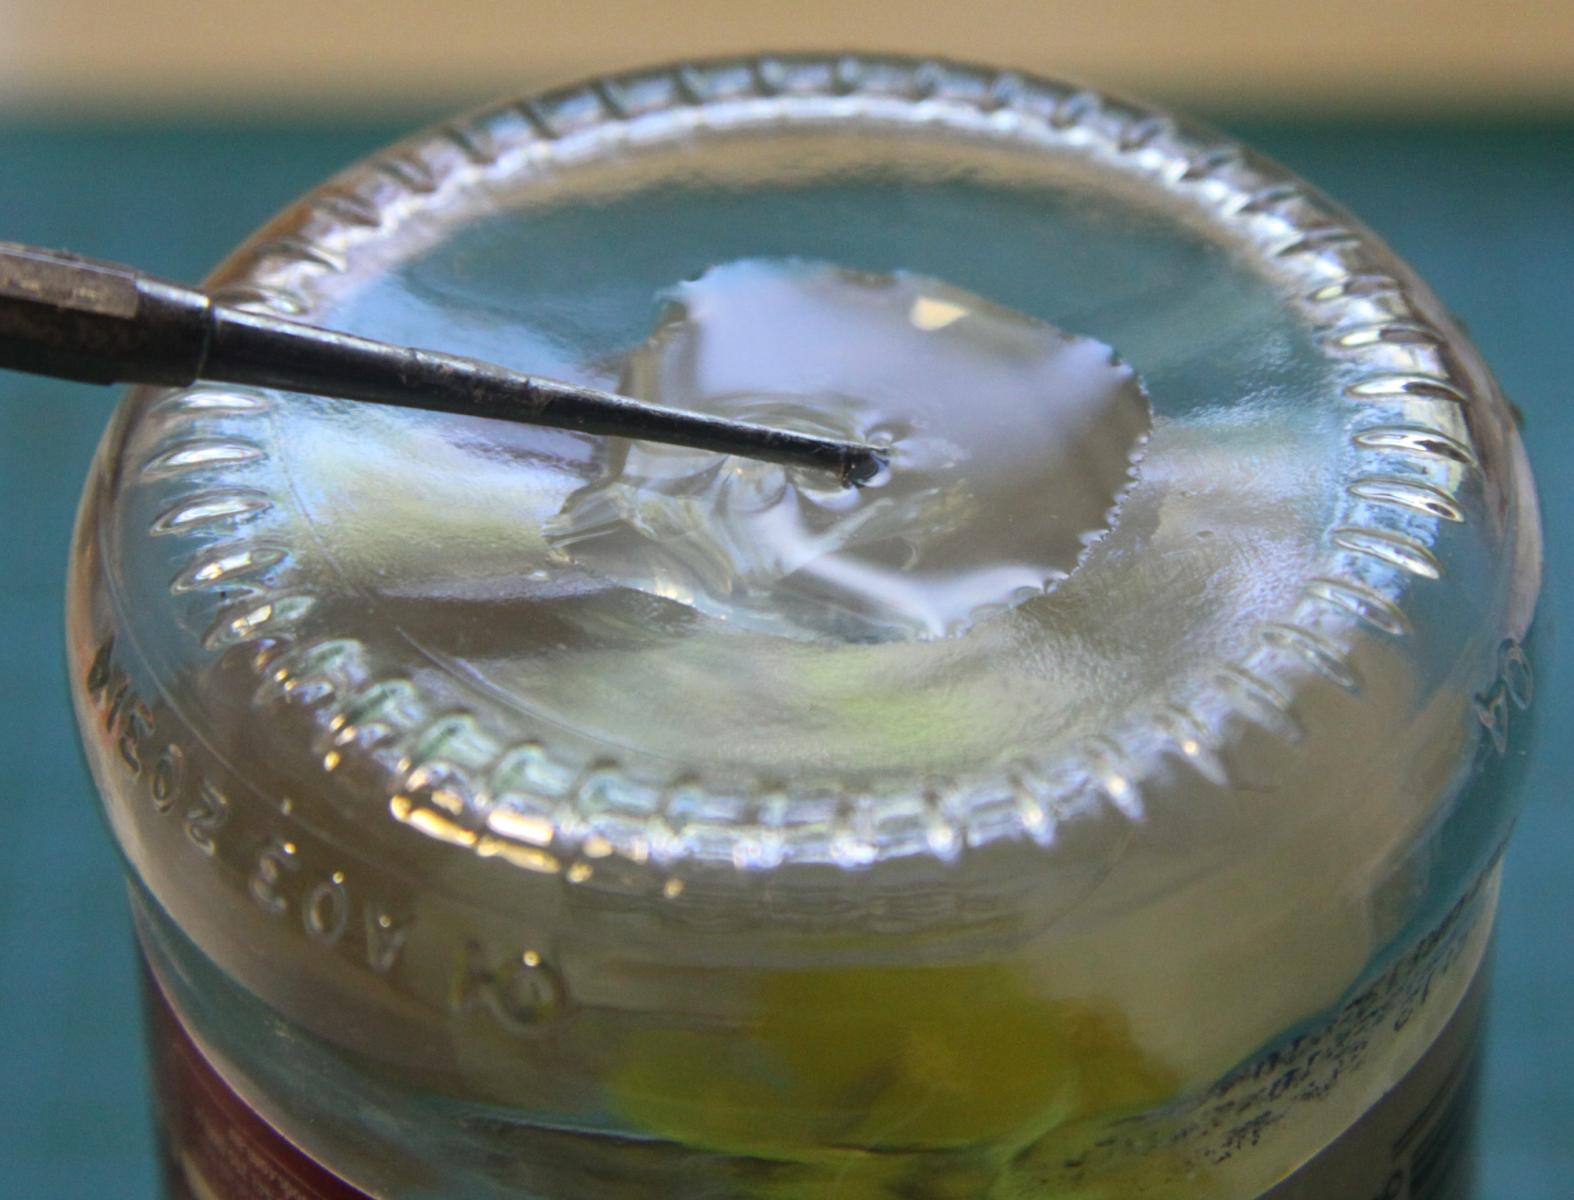
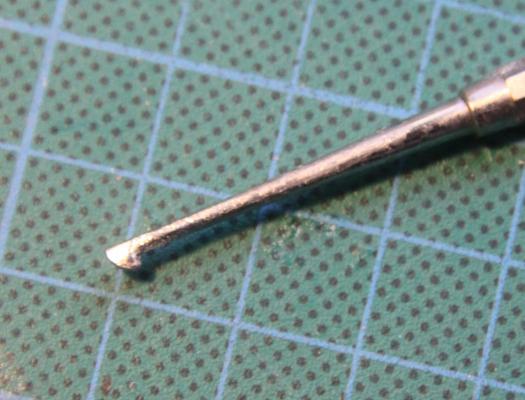
While coppering the hull of my HM Brig Supply, I came across this handy CA glue applicator from Squadron (just google Squadron glue applicator) The hooked end of the applicator traps a small amount of CA glue which is transferred to the copper plate as soon as the applicator touches it. Very clean and easy - no plates stuck to fingers The applicator is made of stainless steel and was quite inexpensive to buy The hooked end of the applicator holds a small drop of CA glue As I mentioned in a previous post on this thread, I use the concave end of a glass jar as a reservoir for my CA glue. Steve

-
I use CA for gluing down copper plates, holding the end of hull planking down until quick dry PVA glue sets, making a pointy end on thread. Other than that I avoid CA glue. The flu like symptoms resulting from inhaling even a small amount of fumes from it is a real issue for me
-
Because the decks are on three different levels, the thickness of the planks may not be an issue. However, because the hull planks are three times as thick as the deck planks you may find that things like scuppers and ports may not line up properly. In addition, if your decking timber is different from the timber used on the hull - for example hull planking - basswood and decking timber - Ash, then using two different timbers on your deck will give an inconsistent finish. You may also find that your deck planking s a different width to your hull planking. I think your best bet is remove the planking and redo it with the supplied deck planking. In the overall scheme of things it s not a big job to remove and replace with the correct timber.
-
I suggest you slip a No 18 X acto chisel blade under them and remove them carefully. Resand and replank with the correct decking planks.
-
I have built he Corel version. I would not recommend it as the instructions are woeful. I am currently building the Caldercraft Supply and have the Caldercraft Bounty and Endeavour on the shelf Both instructions and fittings are very good - although I have done a lot of scratch work on the Supply. Timber used for the second layer of planking is of inconsistent quality but there is plenty of it. On the basis of my experience with these kits, if I were to build another Victory, I would seriously consider the Caldercraft version.
-
Double planking technique
hornet replied to Roubaix's topic in Building, Framing, Planking and plating a ships hull and deck
Hi Shaun. A while ago I posted a method of making planking screws using clothes pegs. They worked well for me. Check out the link to the thread if you are interested. http://modelshipworld.com/index.php/topic/3734-planking-screws-moved-by-moderator/ -
Looking for a Bench Top Drill Press
hornet replied to FlounderFillet5's topic in Modeling tools and Workshop Equipment
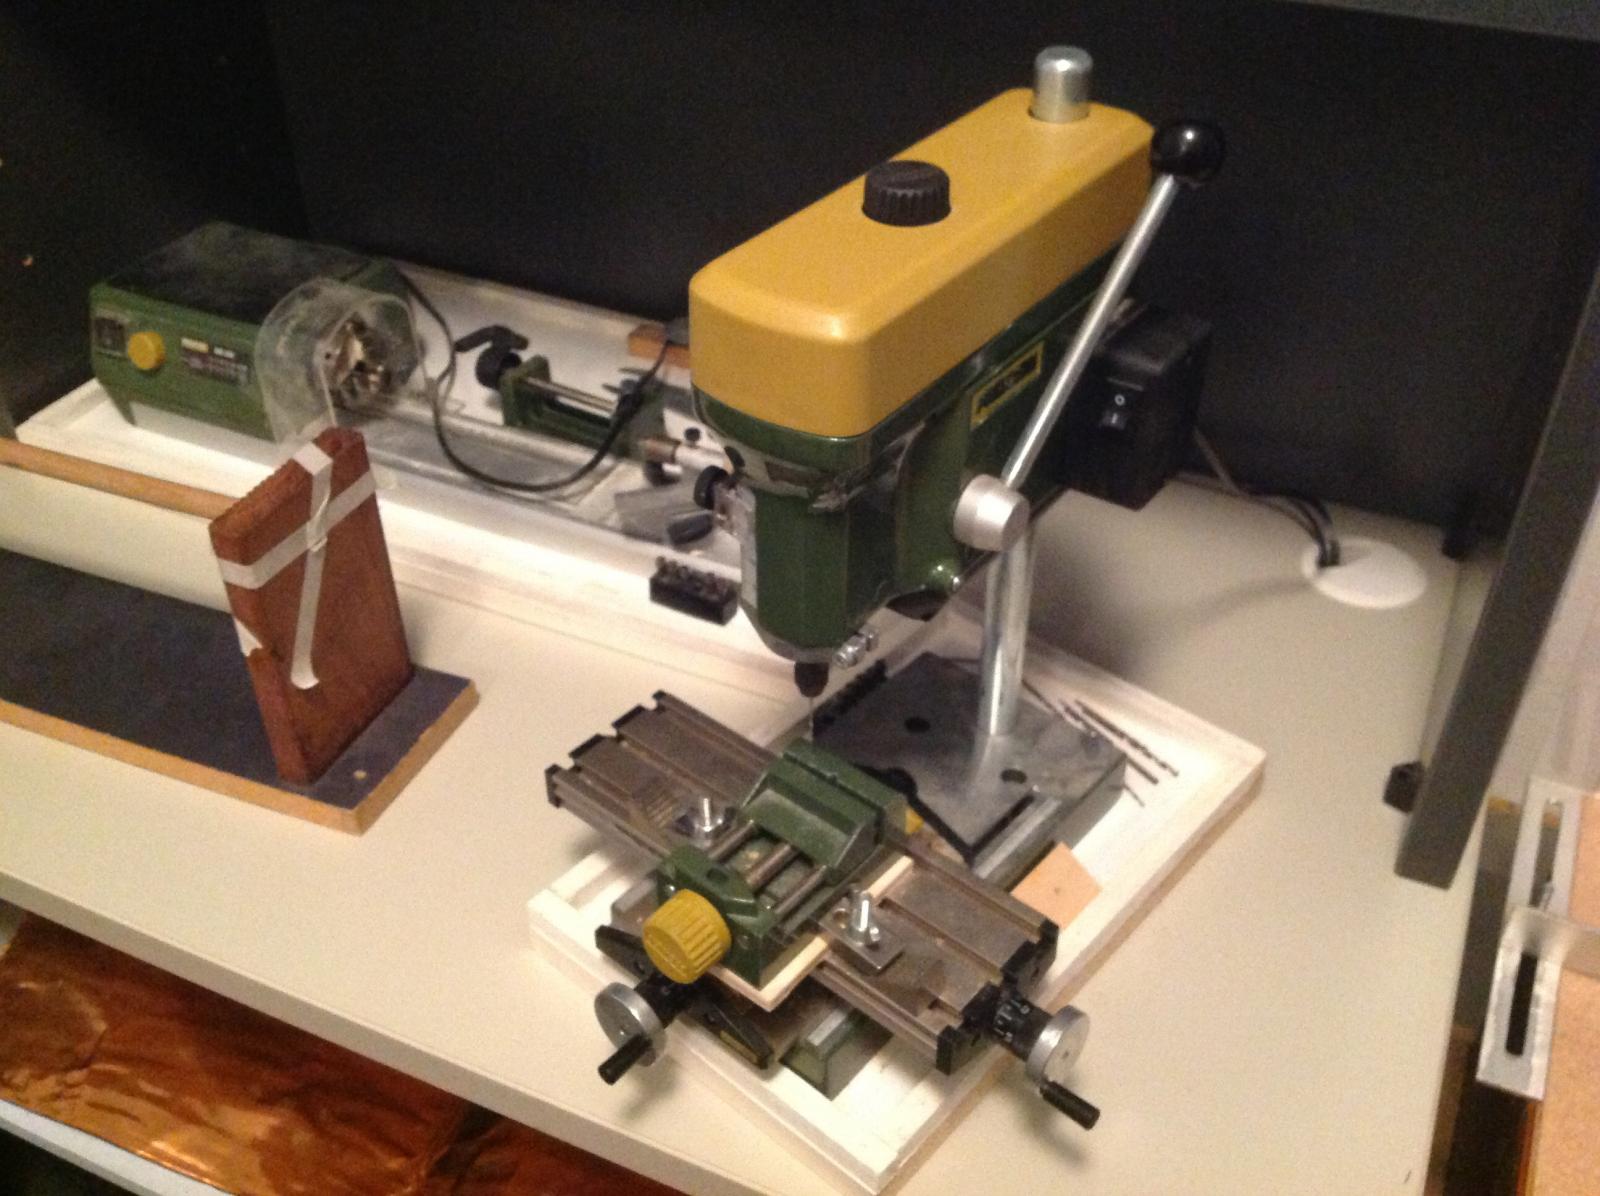
I'm with Grant. I too have the Proxxon drill press. Collets take very small diameter drill bits. I have teamed it up with the Proxxon XY table and it works very well.
- 31 replies
-
- 6
-

-
- Drill Press
- Microlux
- (and 1 more)
-
The Proxxon KS 230 is a bit more pricey, but still very reasonable. It is much more substantial than this 'toy' and does have safety features.
-
Daniel You are setting the 'love your ship' bar very, very high indeed. My ship is very jealous of your ship. Love the views. Steve
-
Check this thread for ideas. http://modelshipworld.com/index.php/topic/1310-making-rope-coils/?hl=%2Brope+%2Bcoiler#entry210607
-
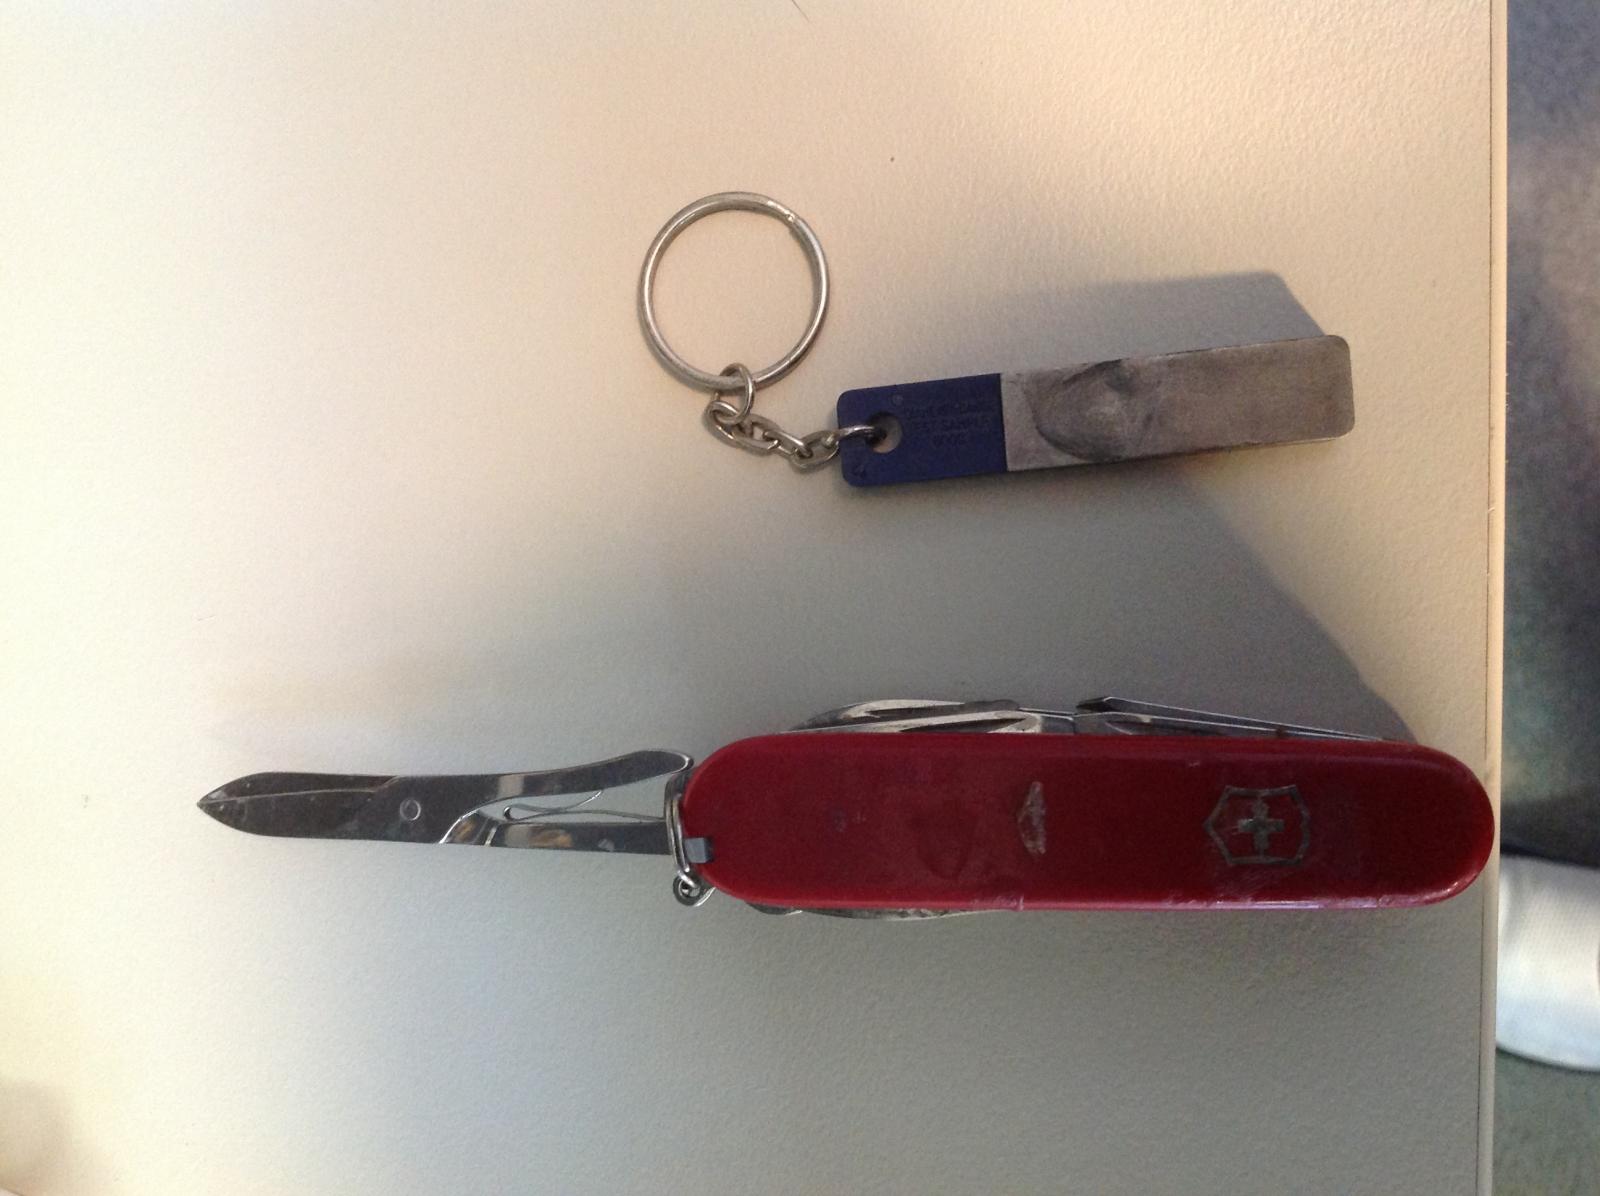
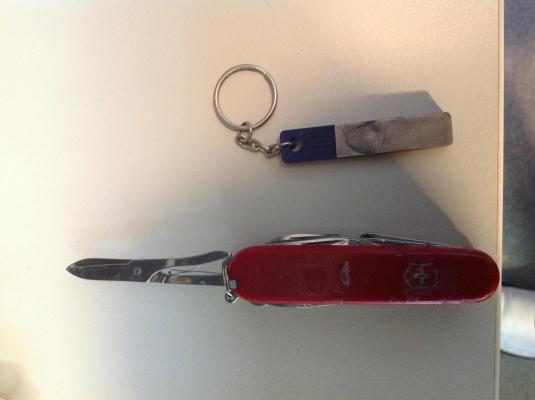
I find that the scissors from my Swiss Army knife work well. Good quality steel.I keep them sharp with a diamond sharpening stone.
-
I must say, some very, very talented people inhabit MSW! Can't wait to see this project completed!!
-
As someone who has been toying with the idea of buying a milling machine for quite a while, but being unsure if I would have enough use for it or not, I will be following this thread avidly. Keep the ideas coming.
-
This looks like a good idea, but I wonder if the rubber tubing will stand the test of time. Like most things that are rubber based, would it not start to perish or break down over time? A couple of my models are 30 years old and I am not sure this would last that long. I'll be sticking with copper or cardboard.
- 396 replies
-
- 5
-
-
- Idea
- Bright Idea
- (and 1 more)
-
Danny I remember following your restoration of an old HMS Victory model. It was a great job. I'm sure you will do this one justice as well. Cheers Steve
- 59 replies
-
- 4
-
-
- norske lowe
- billing boats
- (and 1 more)
-
Domanoff serving machine 2.0 or 2.5
hornet replied to CPT_D's topic in Modeling tools and Workshop Equipment
Another modification I made to the powered version was to replace the perspex brackets holding the spools with ones I bent up from some scrap aluminium. I found that the perspex ones flexed too much for my liking and I had difficulty getting them to hold the spool firmly enough. The aluminium ones fixed the problem.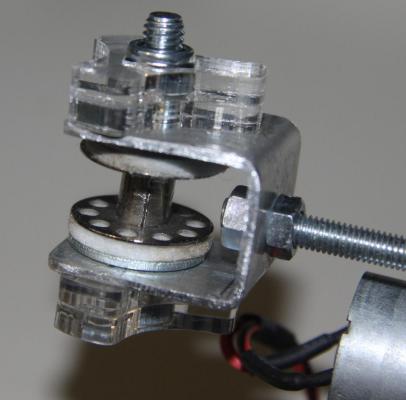
-
I am currently building the same kit and have the same problem. The only good thing is that there are more than enough walnut strips provided so I was able to pick out the best ones. I also have the Caldercraft Endeavour and Bounty 'on the shelf. ' the walnut in them is no better
-
Domanoff serving machine 2.0 or 2.5
hornet replied to CPT_D's topic in Modeling tools and Workshop Equipment
I agree with Brian, although I did make an addition to mine. Check it out on the link below. Modification to Serving Machine -
Gluing 101
hornet replied to CPT_D's topic in Building, Framing, Planking and plating a ships hull and deck
I made up a simple but effective scraper for removing excess glue using a reversed No 11 blade. See link below. http://modelshipworld.com/index.php/topic/4679-the-kit-bashers-guide-to-the-galaxy/page-6