


Canute
-
Posts
6,193 -
Joined
-
Last visited
Content Type
Profiles
Forums
Gallery
Events
Posts posted by Canute
-
-
-
Gentlemen, please do follow along. And thanks for all the "likes". The more the merrier.

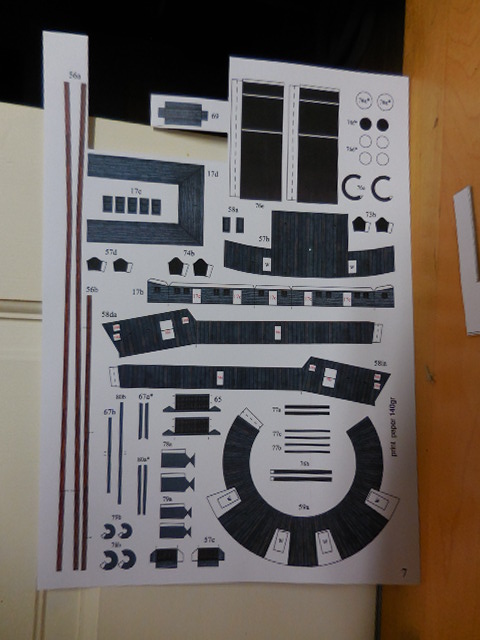
I took some photos to give you an idea of what's happening, so here goes:
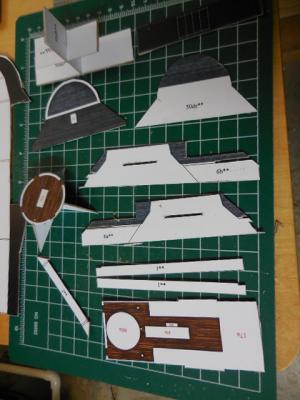
These are some of the thick parts I've been cutting out. They represent the under pinning of the superstructure and paddle wheel housings. The elongated pieces on the right middle have slots cut into them. The brown and white part in the lower righthand corner fits into the slots, for what believe is called the texas deck. This will sit between the paddle wheel housings.
 The stern sections
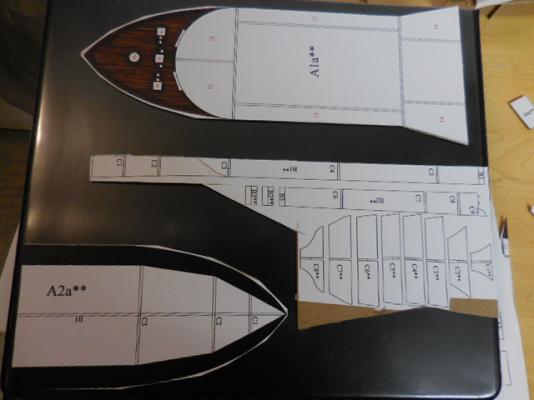 The bow sections and hull bulkheads.
This is a full hull build. Remember, this boat had a draft of about 8 feet.
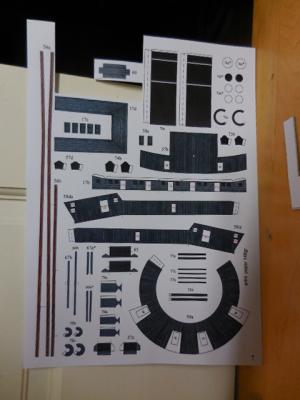
A selection of the parts not needing to be glued to thicker backing card. The overall color is a dark blue gray. Looks like some of the WW II colors used by the USN and RN.
I have to sand down the bows and sterns to "sweeten" up the curves, The front "turret" will also be fun to cut as something approaching a circle. Time to go off to my volunteer job, with the County Sheriff.
- mtaylor, GLakie, Captain Slog and 11 others
-
 14
14
-
I have a long time interest in the American Civil War. One particular subject is the Brown Water ships used by both sides on the Mississippi and its feeder rivers. I've spotted a few kits I like and they lured me off the Bounty launch for a while.
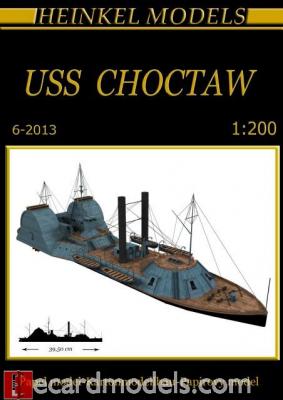
Some of the Union ships were initially started by the US Army, but eventually ended up under USN control. The Choctaw was originally a commercial ship launched in 1856, purchased by the US Army in September 1862, converted into an ironclad ram and finally commissioned in the USN in March 1863. Choctaw was a 260' (79m) long side paddle wheel steamer, with a beam of 45' (14m). She carried 1 x 100 lb rifle, 3 x 9" Dahlgren smoothbores and 2 x 30 lb Parrott rifles. Choctaw took part in operations along the lower Mississippi around Haynes Bluff, MS, up the Yazoo River and participated in the Red River expedition, up to Alexandria in Louisiana in 1864. She was decommissioned in New Orleans in July 1865.
This model is a card kit I purchased from ECardmodels.com. There are 8 pages of parts and 4 of instructions. It's a download only, so the purchaser has to print out the pages. Since Heinkel Models is located in Spain, his designs are done on A4 paper (8.3" by 11.3" or so). I got some 110 lb paper in that size, along with a small pack of heavier card. You'll end up laminating a number of parts to about a 1 mm thick card backing for this model. Here's the cover sheet. The model is almost 18" (40cm) long. The instructions say there are over 350 parts in this beast.
I reread Chris Coyle's card tutorials a time or three, then made sure I has appropriate card stock and glue. I glued up enough heavy card stock for 3 letter size pages of 1 mm backing. Instead of using3M spray-on cement for laminations, I used some 3M Positionable Mounting Adhesive. No warping of the card stock. I let it sit overnight and laid out the appropriate parts, as marked in the kit, that should be mounted on the 1 mm backing. And there are a few more parts going on another sheet of .5 mm backing.
Then the fun began. Make sure you have a good supply of sharp cutting tools. The 110 lb card on top of 1mm backing was murder on blades. Not too bad cutting the straight edges, but the curved parts (bow and stern, paddle wheel covers) were challenging.
 I felt like I had regressed to the '70s or early '80s in model railroad structures. Multiple slices and retouching any interior corners with a file/sanding device. Many of the parts need to have cutouts so that the superstructure parts interlock. And the hull has a keel and bulkheads. I'll get some pictures of the parts I've got cut out so far next time.
Thanks for reading this.
-
-
Really like how your hull is turning out. Excellent workmanship!
- mtaylor, mattsayers148 and Cathead
-
3
-
Jonny, you may have to scrape some and then polish it out with finer and finer sandpapers. Most solvents that remove the CA will probably mar the Plexiglass.
Look for a company named Novus.http://www.novuspolish.com/
They sell plastic polishing kits with some liquid cleaner and polishing pads. Their website says they have distributors in the UK, Europe (Holland) and France. I've used the liquid on watch crystals and it cleans up light scratches well.
-
Matt, very nice Coehorn mortars. And clever employment usage.
Can't wait to see your next design(s).
- mattsayers148, GLakie, thomaslambo and 2 others
-
5
-
J, I'm pulling up a seat to watch. I, too, will be doing this build.
-
-
Newspapers of the opposing sides back then would print up stuff reporting errors and failures by their opponents to buck up the morale of the hometown populace.I'd bet the New York Times or Herald Tribune in those days, put a different spin on it.

I believe since WW II, all negative occurrences are treated as some level of security/need to know by a country's press.

- uss frolick and mtaylor
-
2
-
The Passaic class was the first class supposed to have a 15" gun in the turret. Monitor had 2 x 11" Dahlgrens. Firing out of the "cheesebox" must have been pretty exciting,no matter what caliber cannon.
 Up-gunning must have been a real eye watering experience, with all the goings on reported above. Wowhee-zowhee! :o
- uss frolick and mtaylor
-
2
-
Sharp looking rigging on the pivot gun, Matt!
 Kudoes to your crew.
- mattsayers148, mtaylor, GLakie and 1 other
-
4
-
Bob, put a little drop of canopy cement on a small palette and then apply it with a pin or even an opened paperclip. No muss, no fuss.
- mtaylor, thomaslambo, mattsayers148 and 2 others
-
5
-
-
Matt, the rigging turned out well. Keep the clans at it.

- GLakie, mattsayers148, Bobstrake and 2 others
-
5
-
Matt, the cannon/platform look great. So do the blocks. You working under magnification with those? 2mm by 3mm is tiny.
- GLakie, mattsayers148, mtaylor and 1 other
-
4
-
-
-
Matt,
really like that turret cannon. You and the clans have done some good work. Keep at it.
- mattsayers148 and GLakie
-
2
-
-
-
-
-
Family first, they say. We'll see the photos when you can get them done. Bye the bye, aren't wee pups fun critters? Unconditional love wrapped up in fur. Very nice!


USS Choctaw by Canute - Heinkel Models - 1/200 scale - CARD
in - Kit build logs for subjects built from 1851 - 1900
Posted
Jack, thanks. Come on along. I haven't done this much cutting and pasting since I stopped flying fighters.
Cut out the keel and formers/bulkheads. Some of the bow and stern bulkheads will need a little work with some sanding tools to impart the appropriate compound curves. And the deck sections are in need of some improvements to the bow and stern areas. Who said those ironclads were boxes on rafts. One quick picture of the keel parts. Starting to look like an egg crate, eh?
I'm going to need a number of corner blocks to keep the frames square when I attach them to the decking. These pieces are each about 1.2 mm thick and they're the heavy stuff. Hope to get the 4 deck parts sanded and glued up tomorrow.
Thanks for reading.