ccoyle
-
Posts
10,593 -
Joined
-
Last visited
Content Type
Profiles
Forums
Gallery
Events
Everything posted by ccoyle
-
 We lose a lot of zealous newbies in the "Valley of Despair" -- they just need to stick with it until they get to that "Plateau of Sustainability."
- 20 replies
-
- 1
-

-
- Amati
- lady nelson
- (and 1 more)
-
With this update, I'm now finished through Step 5 of the construction process. The forward companionway and the locker aft of it were easy enough. The superstructure was more challenging. It consists of of two sections, which I prefer rather than having the whole thing as one piece. The forward half had joiners to bridge the gap between the port and starboard walls. But once I got both halves finished and placed them on the deck for a test fit, I discovered that the walls of the forward half were about 1mm too long on each side. So, I had to remove the joiners, trim off the excess length, and re-do the folds -- nothing too difficult, but it took a little time to do carefully and make sure everything fit correctly. I then glued the two sections of wall to the deck, added a replacement joiner to the forward section, and also added some thick cardboard to the insides of the walls to make them straighter and more rigid. Next up will be the various life jacket lockers. Incredibly, they actually have the words "life jackets" printed on them, which -- at this scale -- can only be read under high magnification; at normal viewing distances, they just look like a smudge. 😜
- 63 replies
-
- 14
-
-
kit review 1/72 Brockley Combe, 1938 Cargo Ship - Navarino Models
ccoyle replied to James H's topic in REVIEWS: Model kits
I'm no expert, but it looks like the hull would need significant modification to make room for any RC gear.- 6 replies
-
- 1
-
-
- brockley combe
- navarino models
- (and 2 more)
-
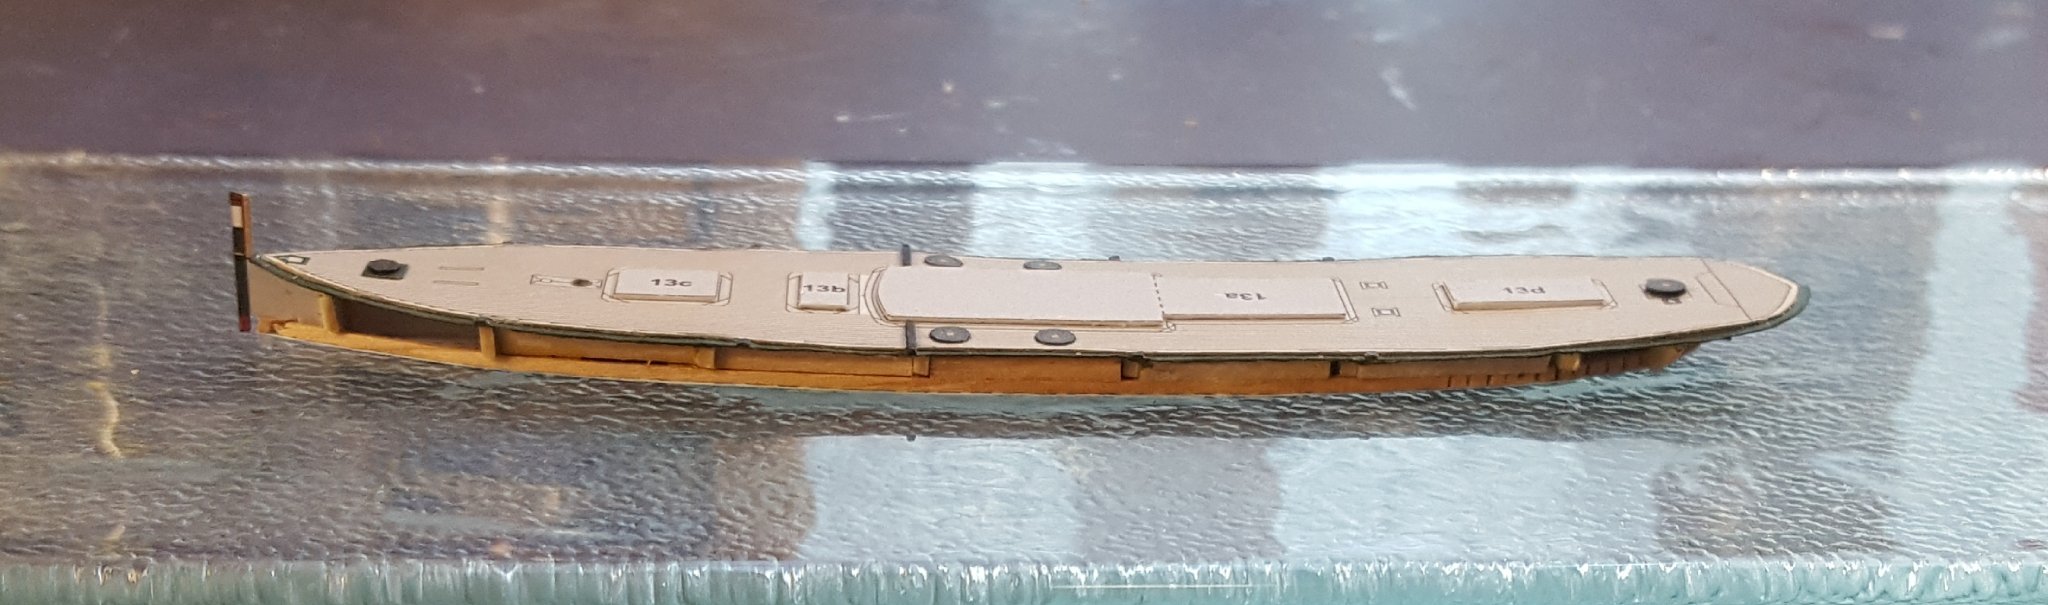
Not much to show for today. The big headache at this point was creating the eight mooring posts. These were originally to be made of card, obviously, but they are so tiny that folding them properly was a real pain, and I didn't like the results. So I decided to replace the paper parts with wood square stock. The kit includes microscopic angle braces for the posts, but I have omitted them, because they are just way too tiny to work with. I also did the little deck at the stern, the rub rails, and the aft companionway. Now it's on to the main superstructure.

- 63 replies
-
- 14
-
-
Papegojan 1627 by mati - FINISHED - 1/48
ccoyle replied to mati's topic in - Build logs for subjects built 1501 - 1750
Congratulations, Mati! That's a gorgeous model. -
Hallo, Tobias. Do you work for BMW by any chance? BMW's North America plant is just a few kilometers away from me here in South Carolina.
-
So sorry to see, Eric. I hope you get everything dried out -- mold can be a real booger.
-
The person to direct your question to would be Tomek (0Seahorse), since he designs card models that utilize just such a planking technique.
-
Novice is greeting from the Bavarian Alps
ccoyle replied to XS400DOHC's topic in New member Introductions
Welcome! Lots of good things come from Bavaria. 😉 -
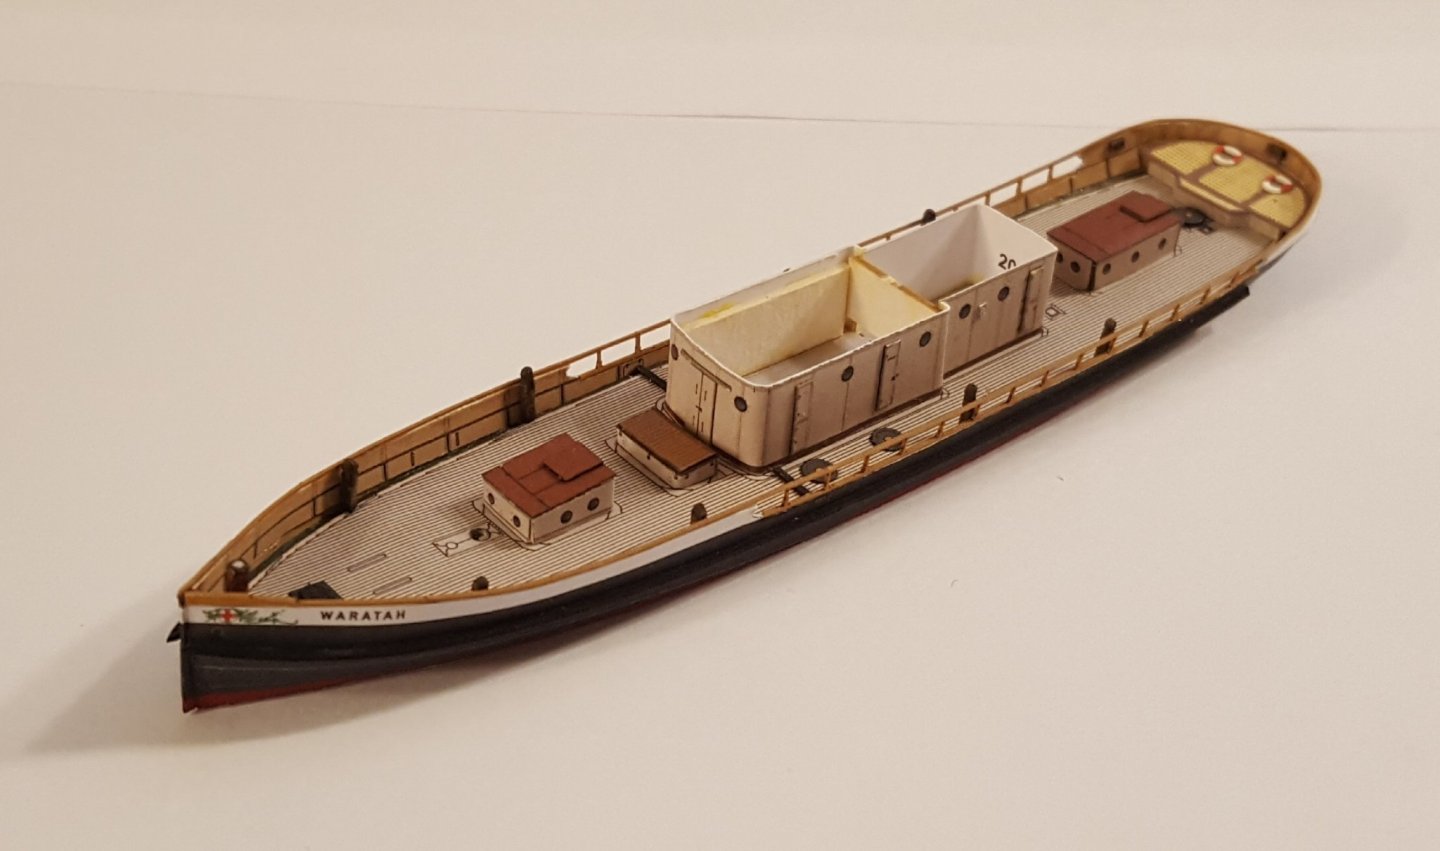
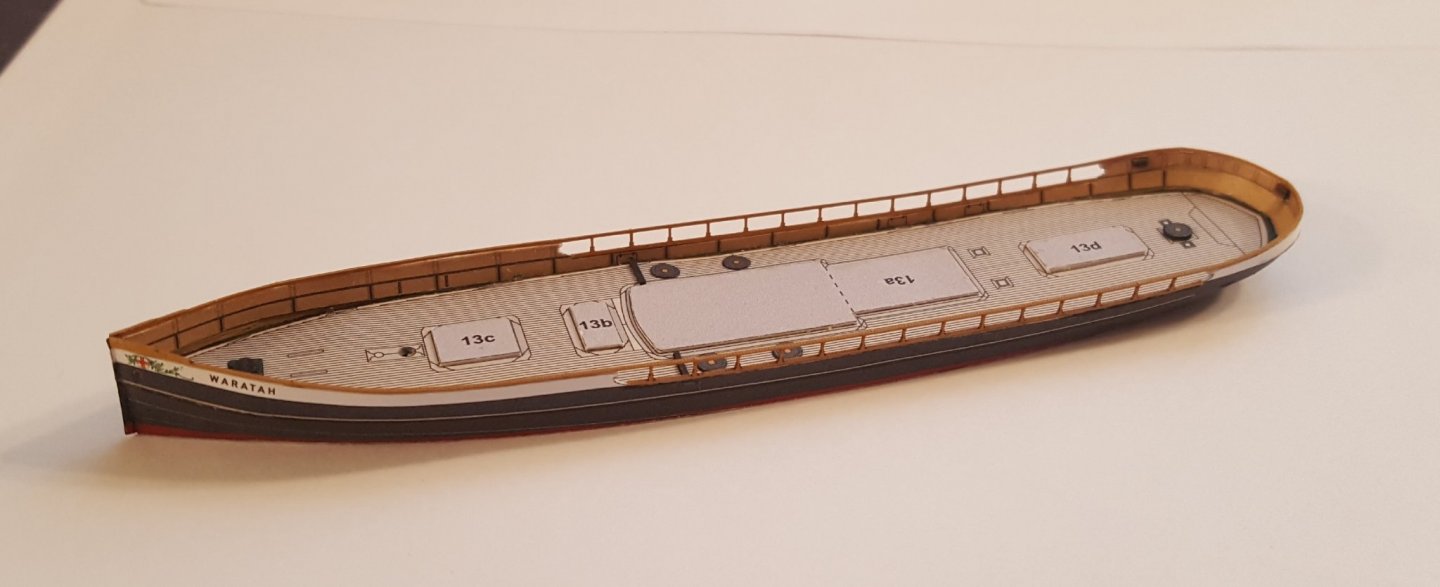
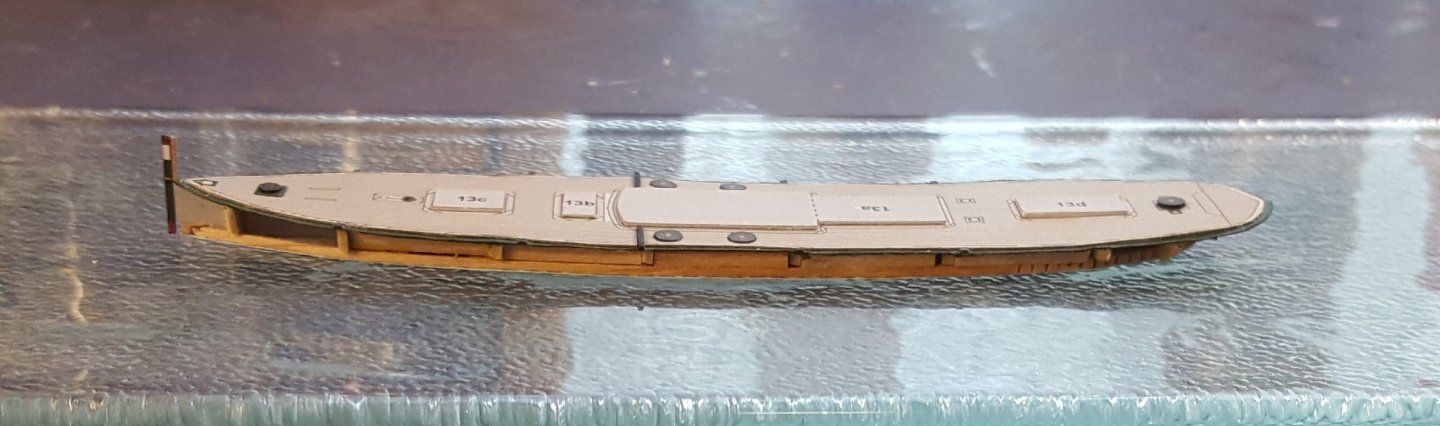
Okay, today I got the hull sides on -- quite the trial, as it usually is for me with these things. The worst booboo that resulted was a gap of about 2mm between the two side pieces at the stern. I filled the gap in with card stock and touched everything up as best I could, but the ship's name will forever appear as "WAR ATAH." I also replaced the printed cap rails and stanchions with the optional laser-cut parts -- the entire cap rail, from stem to stern, and the amidship stanchions are a single part, one on each side. That bit was not as difficult as it may sound, and I like the finished effect.
- 63 replies
-
- 13
-
-
Yes, that's correct. That's essentially what the spacers are doing. On my next small card model (whenever that should be), I'm seriously considering using a plywood underlayment for the entire deck and removing the requisite amount of material from the hull formers. For the HMV USS London kit, which I reviewed a few months back, there is actually a 3D printed hull available to which one affixes the hull skins. It costs about $55(!), but I think it is worth adding to my Christmas wish list.
-
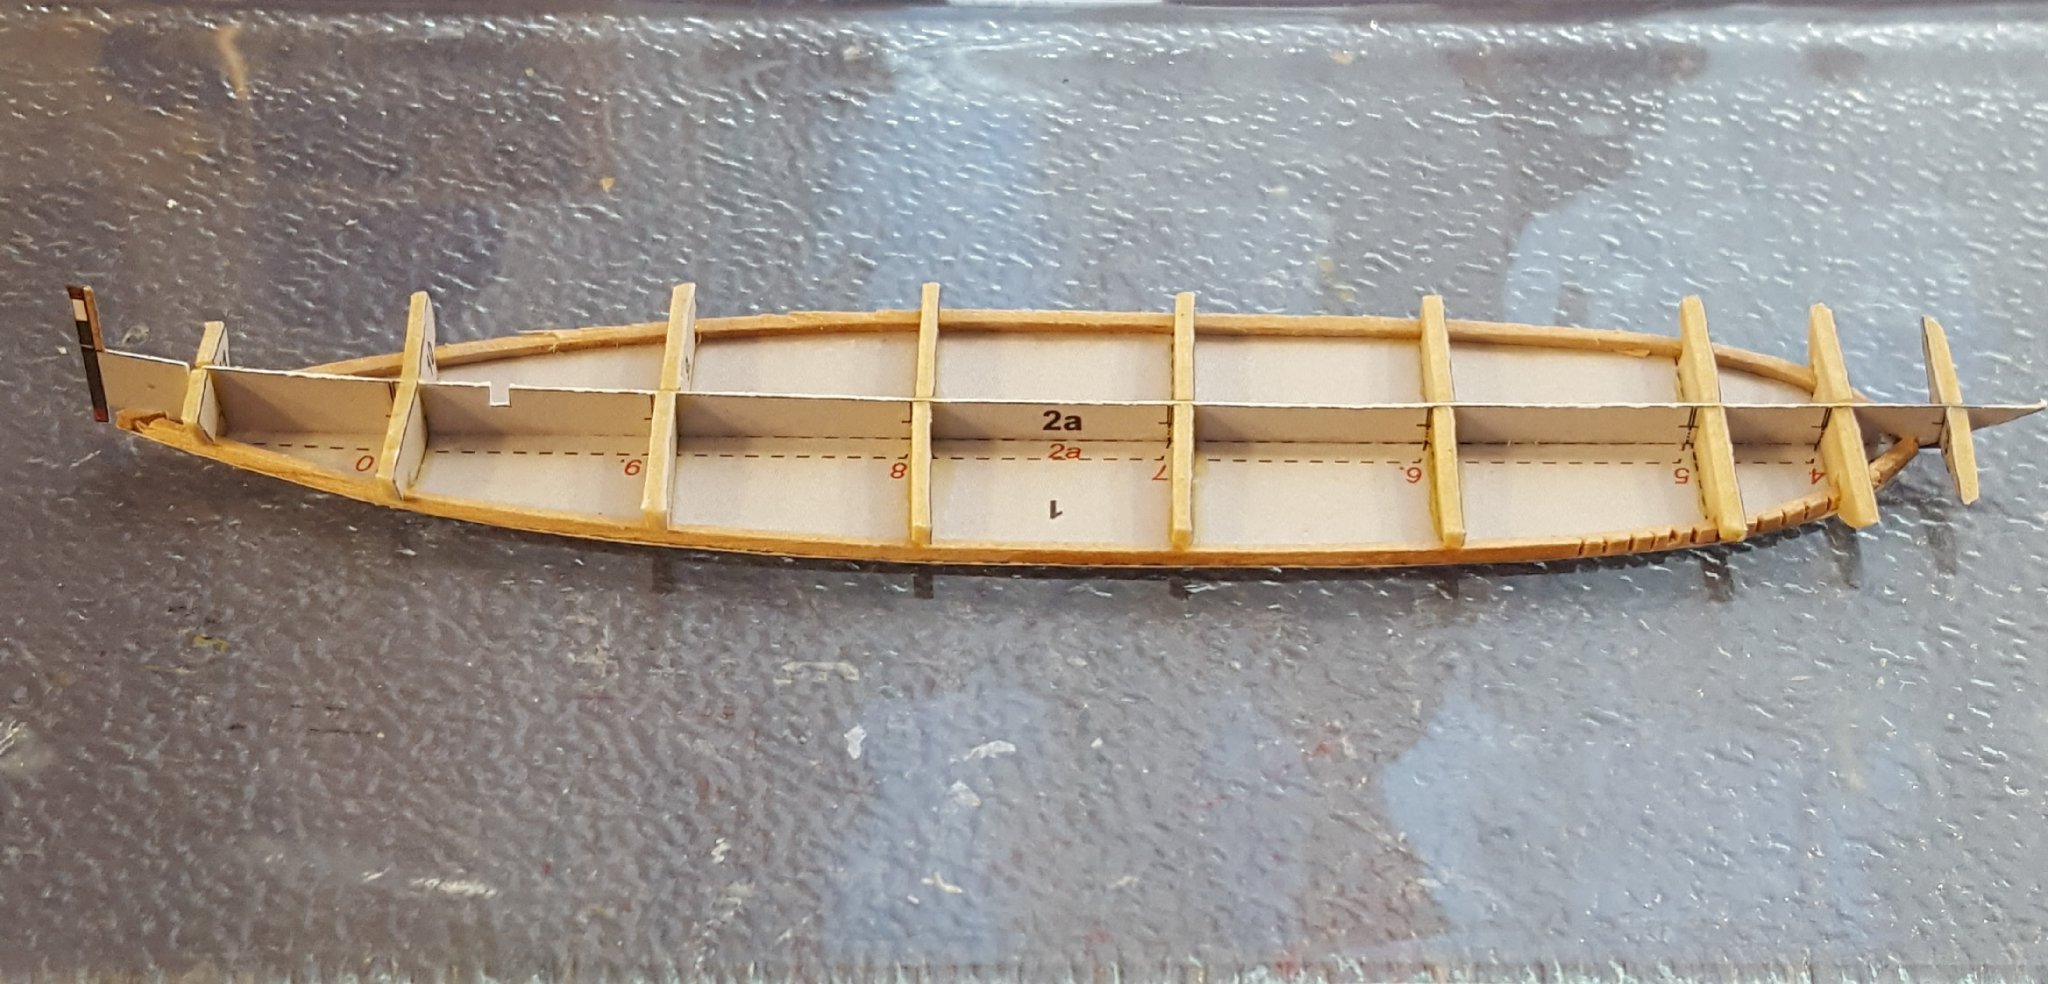
The last 24 hours have been a trying time for the construction of poor Waratah. First of all, I had to double some rather large parts (including the deck in last night's photo -- this actually happened prior to the previous post), so I went to the garage to give them a shot of 3M 77. When I came back to my man cave, the AC kicked on, which flipped one corner of the paper towel I was carrying sticky parts on. The deck and some other parts landed sticky sides together. 🤬 Happily, I was able to get everything apart without too much obvious damage. Then, I left my desk for several hours, and when I came back the deck had warped significantly. So I did my best to straighten it out and then left it under the glass sheet overnight. Fast-forward to today. Once I got the deck glued down, I was treated to the dreaded STARVING COW look. 🤬 I still haven't figured out how to defeat this particular card modeling nemesis. So I spent most of the day cutting spacers from bits of scrap plywood veneer and using those to shore up the sagging areas. I now have the run of the deck edges sufficiently straightened, to my eye, and am ready to tackle the hull sides. That task will require some trial fitting to see if I need to remove bulkhead material anywhere. One unintended side effect of building such a small model is that simply cropping a photo of the hull properly results in something like an enlargement. Hmm.
- 63 replies
-
- 10
-
-
Beautiful subject with an old-school kit design -- it will be interesting to see how this comes together!
- 118 replies
-
- 1
-
-
- billing boats
- meta 484
- (and 1 more)
-
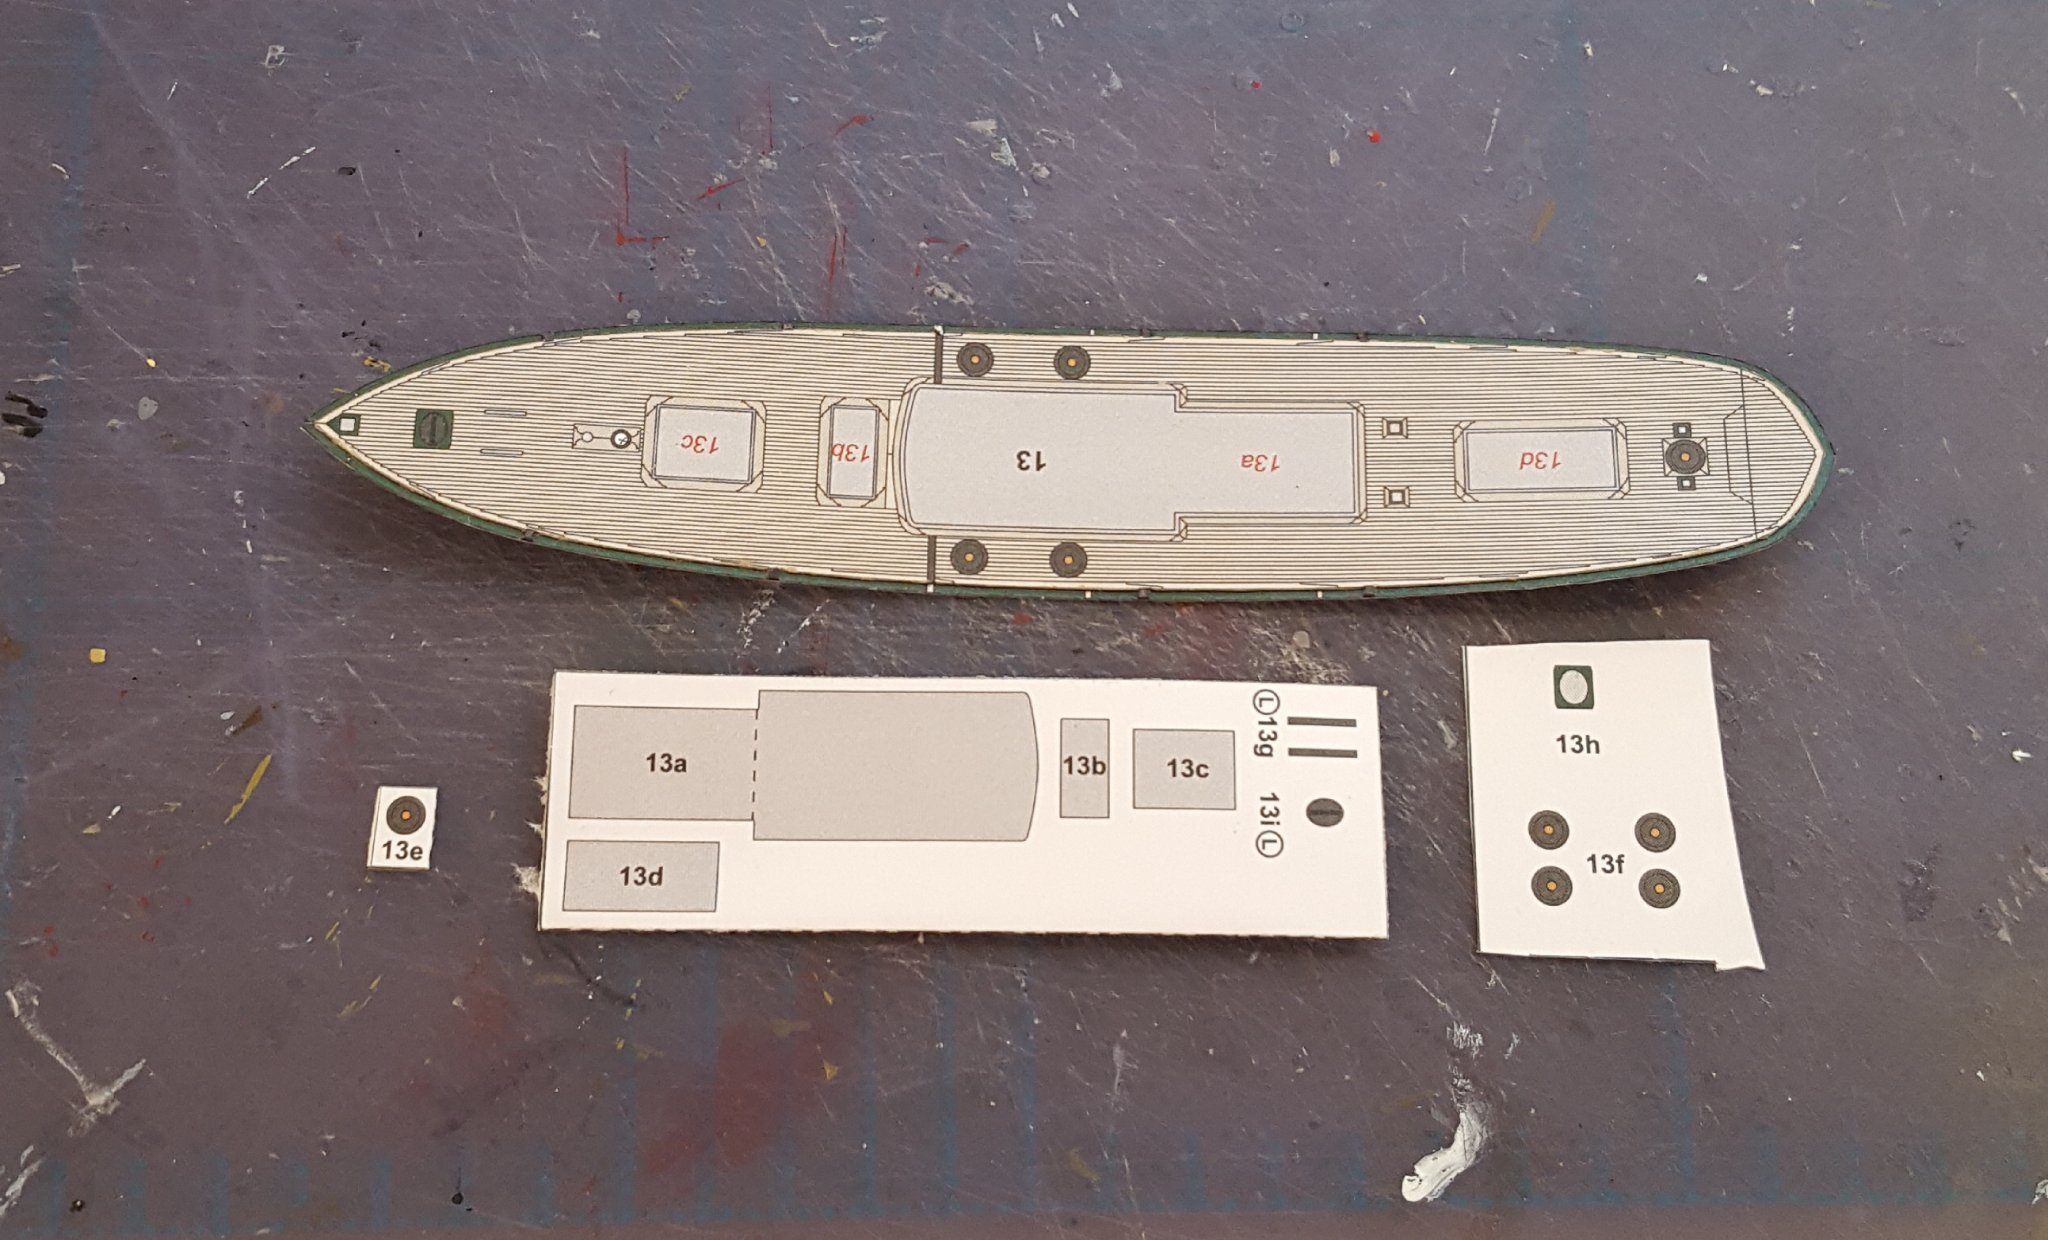
So I finally got some time to work on this project, and here's what I've done so far. Base plate, longitudinal profile, and bulkheads. As is my habit, I cut the glue tabs off of the base plate. I laminated the bulkheads onto card stock and wicked thin CA into the edges so that I could sand them. Afterwards, I began to think that this might all be overkill for a model that is only 113 mm long, but oh well, too late. Here are the deck parts. Many of the parts, including the deck itself, are doubled, and a few of the parts will be replaced by laser-cut details. One nice feature of this kit is that all of the deck furniture will be mounted on form-fitting card bits that will be glued down to the main deck; this will eliminate both the usual glue tabs and the need for my furring strip technique as seen in my Tijger build. Another thoughtful feature, though I haven't needed to use it yet, is that many parts that don't have enough room for a part number to be printed on the face side of the piece have the number printed on the reverse side, just in case the modeler forgets which part is which after cutting it from a parts sheet. Next will be cutting and dry fitting the hull sides before gluing the deck and sides to the hull skeleton (shudder) -- this is where the dreaded "starving cow" look might crop up. Fingers crossed!


- 63 replies
-
- 13
-
-
Shoot, if I only ever had just one problem per card model kit I've ever built, I'd be thrilled!
-
Craig, with the HMV kits laser-cut card has generally replaced the earlier PE detail sets. I'm not super-familiar with some other publishers. I believe that JSC offers laser-cut details for some kits, but most of the other Eastern European publishers I know of are still sticking mainly to PE..
-
That got a chuckle out of me. Advantage indeed!
- 14 replies
-
- 1
-

-
- dory
- BlueJacket Shipcrafters
- (and 1 more)
-
It's not just the difficulty of the kits by themselves, but rather a combination of factors. As I said, I purchased the PE brass detail set to use with Maine. HMV was not yet offering laser-cut card detail sets at the time, so PE brass or, in some cases, nickel-silver were the only options -- or just to use the card parts provided in the kit. I don't like PE metal parts all that much, though I know that they work wonders for plastic kit builders. I don't like the prep work, the painting, and the meticulous folding that is required, even if the final results do look awesome. I much prefer the laser-cut card sets. The Maine kit also had a number of small but niggling design issues, such as coloring that didn't match up on adjacent parts and vague positioning of some parts in the diagrams. Neither of those is a deal-breaker by itself, but I just kind of lost interest in the kit, and it hasn't come back yet. Maybe it will at some point, but I don't make a habit of working on kits I'm not enthused about in the moment. BTW, the Maine kit is no longer available from HMV, which means it might be undergoing a revision, which would be both good and bad. Good, because a revised kit with a laser-cut detail set would be awesome (I love pre-Dreadnoughts), but bad because that would probably kill off any residual desire to finish the current iteration! Emden is a sad story. I started building her as part of a book project, but I really should have chosen a less ambitious subject -- Emden is rated sehr schwierig (very difficult), and the rating is thoroughly deserved. The book project died (sorry, Bob) for several reasons, one being that I had talked Danny Vadas into working on the project with me, and he subsequently was unable to contribute as he would have liked due to his deteriorating health; I was depending on him for writing the material on rigging, which is a real weakness in my skill set, and Emden has a lot of rigging. I also lost most of the early in-progress construction photos thanks to computers dying and my penchant for packing up and moving every few years, including a cross-country move smack in the middle of construction. The final nail in the coffin might not seem like a big deal, but it was the laser-cut railings for the forecastle; the diagrams did not present their locations clearly, they did not fit correctly, and I ended up damaging them while attempting to mount them on the model, a construction failure for which their is no easy fix. If you damage a part on a wood model, you simply make yourself a new part; you can't really make a new laser-cut railing. I also discovered that the present location of the bridge superstructure will interfere with the placement of the foremast. So, add those all together -- the long build time, the difficulty of the model, the momentum for the book project waning, and the significant obstacles to completing the model after so much effort had already gone into it -- and it drained away any remaining build mojo. So, there you have the whole story. One final thing I will say about the Emden tropo version kit (HMV also offer the same kit in gray) is that upper works color is really much closer to straight-up orange than to buff. I don't know if the actual color used by the German Navy was that shade or not, but it is a little off-putting on the model. I do have the HMV SMS Undine kit in my stash, with both PE and laser-cut card detail sets for it. Undine was a Gazelle-class cruiser, very similar in design, layout, and armament to Emden, so if I ever feel up to the challenge someday, she may yet wind up on the workbench.