ccoyle
-
Posts
10,579 -
Joined
-
Last visited
Content Type
Profiles
Forums
Gallery
Events
Everything posted by ccoyle
-

F4-D Phantom by rvchima - FINISHED - Dumas - 1/25 Scale
ccoyle replied to rvchima's topic in Non-ship/categorised builds
Wow, great job! (I had to delete your tags, though. We don't use tags other than 'done' in this area.) -
Yup, that's fine.
-
Welcome aboard!
-
I'm not sure what they applied, but it's supposed to replace some of the binding agents that are lost from the original pavement due to wear and exposure.
- 45 replies
-
- 2
-

-
- Great Henry
- Henry Grace a Dieu
- (and 1 more)
-
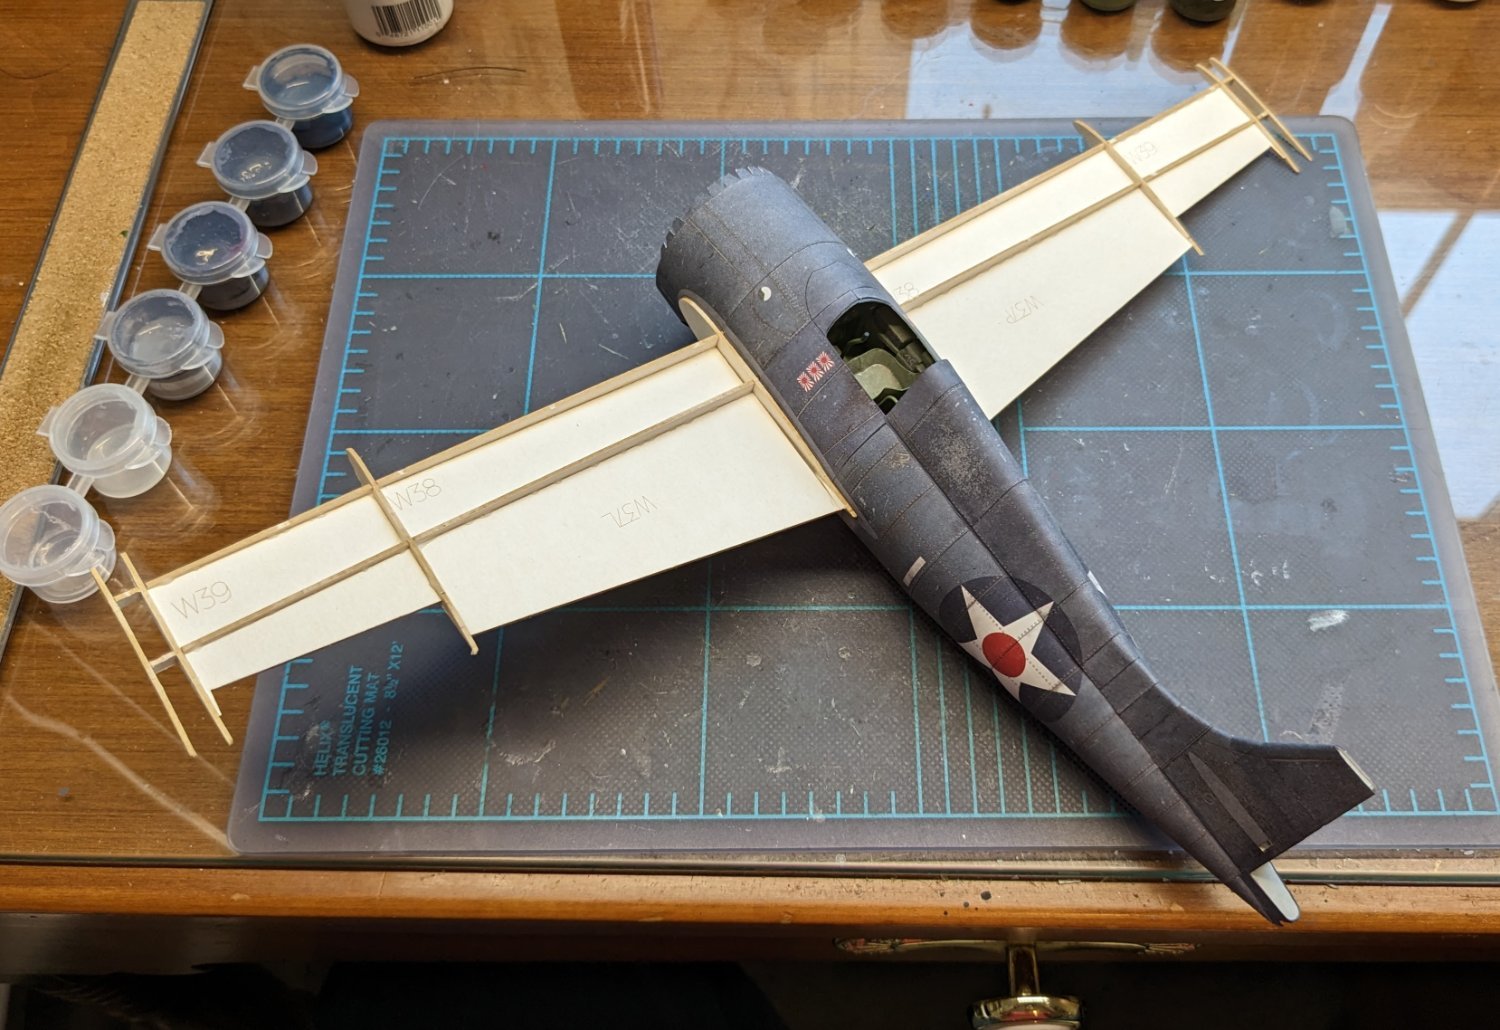
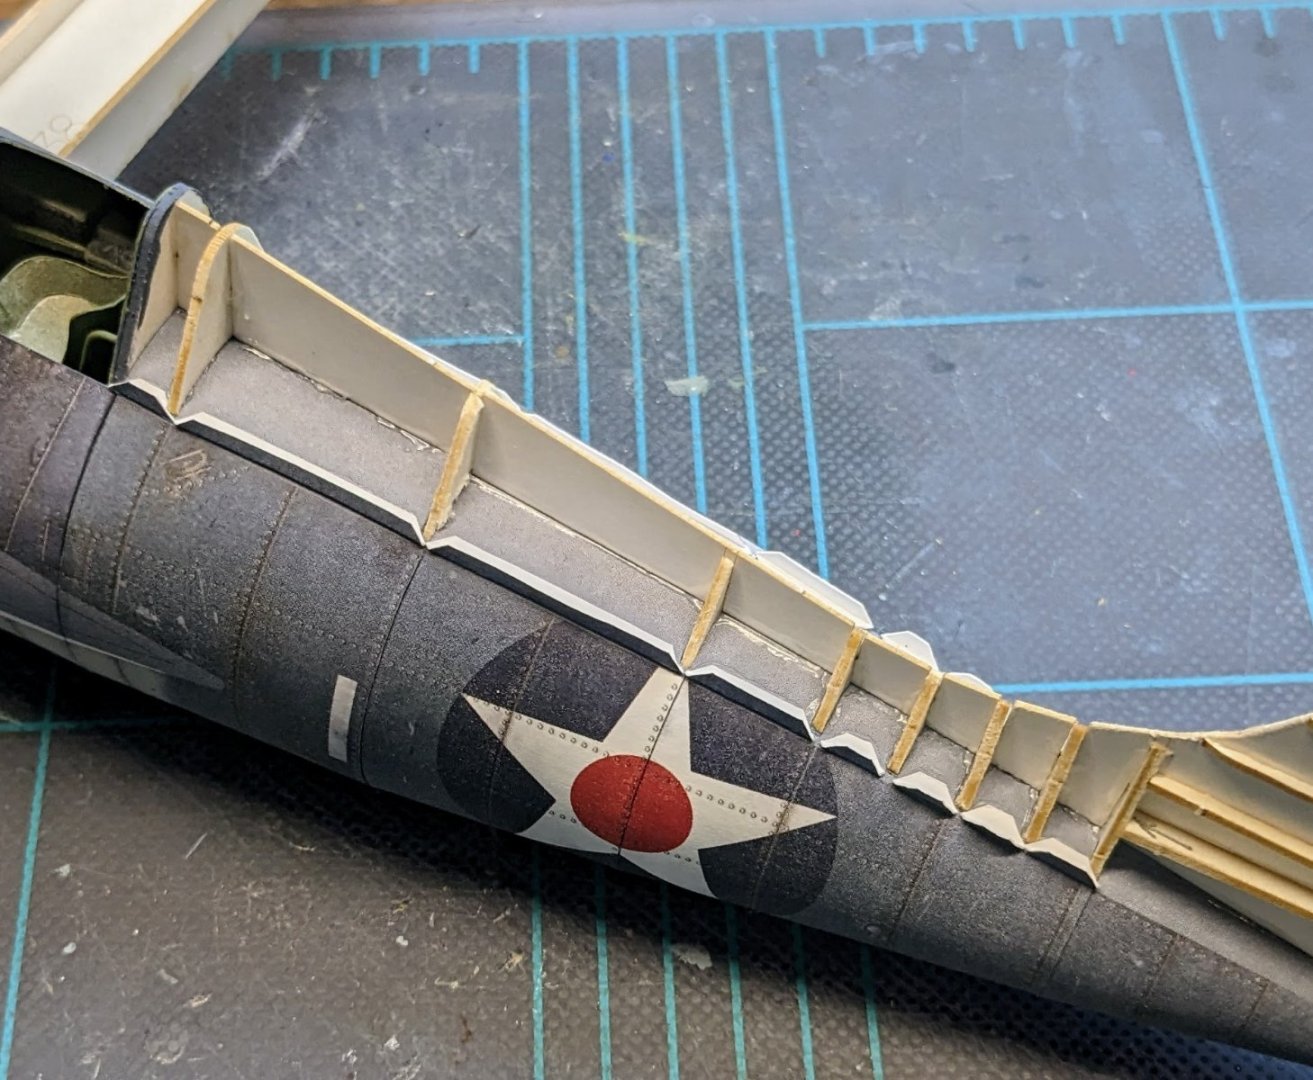
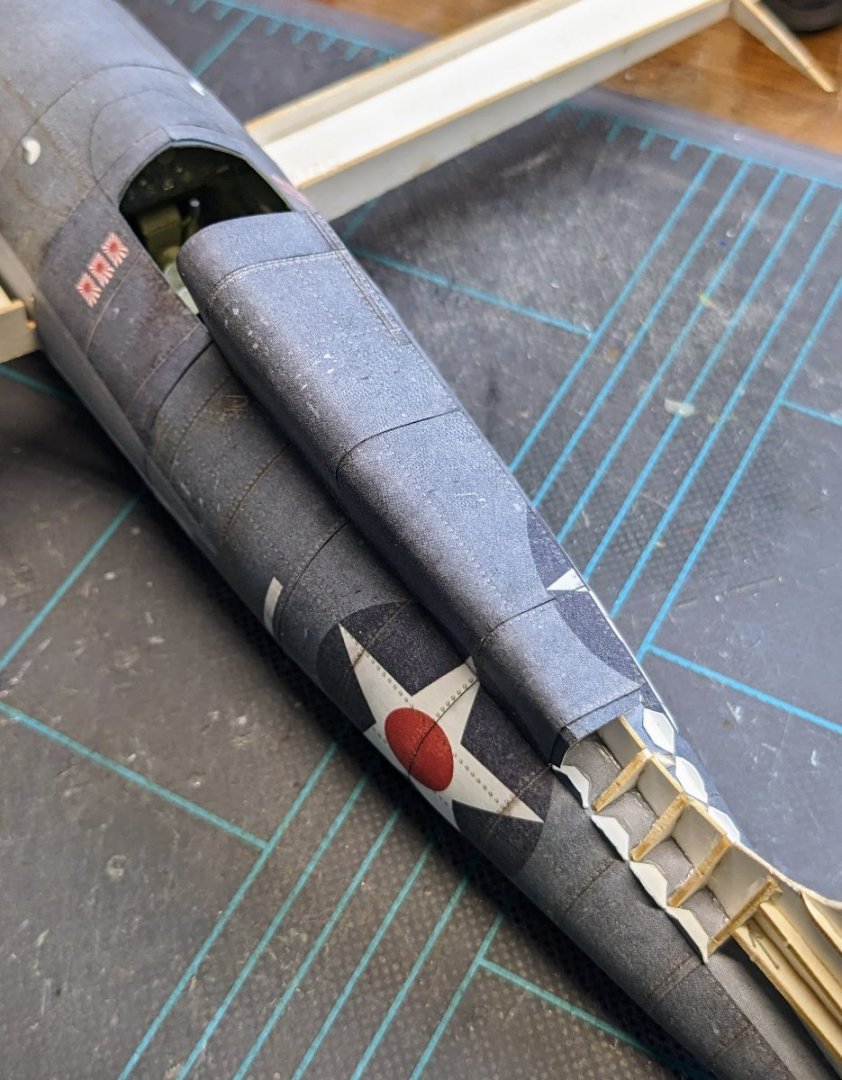
First step in making the wings was adding the remaining internal frames. Each skin is a single piece, shaped, folded, and glued with the help of a joiner strip. Each wing structure is then slipped into its finished sheath. No fillets have been added yet. That's it for now.

- 150 replies
-
- 25
-
-

-
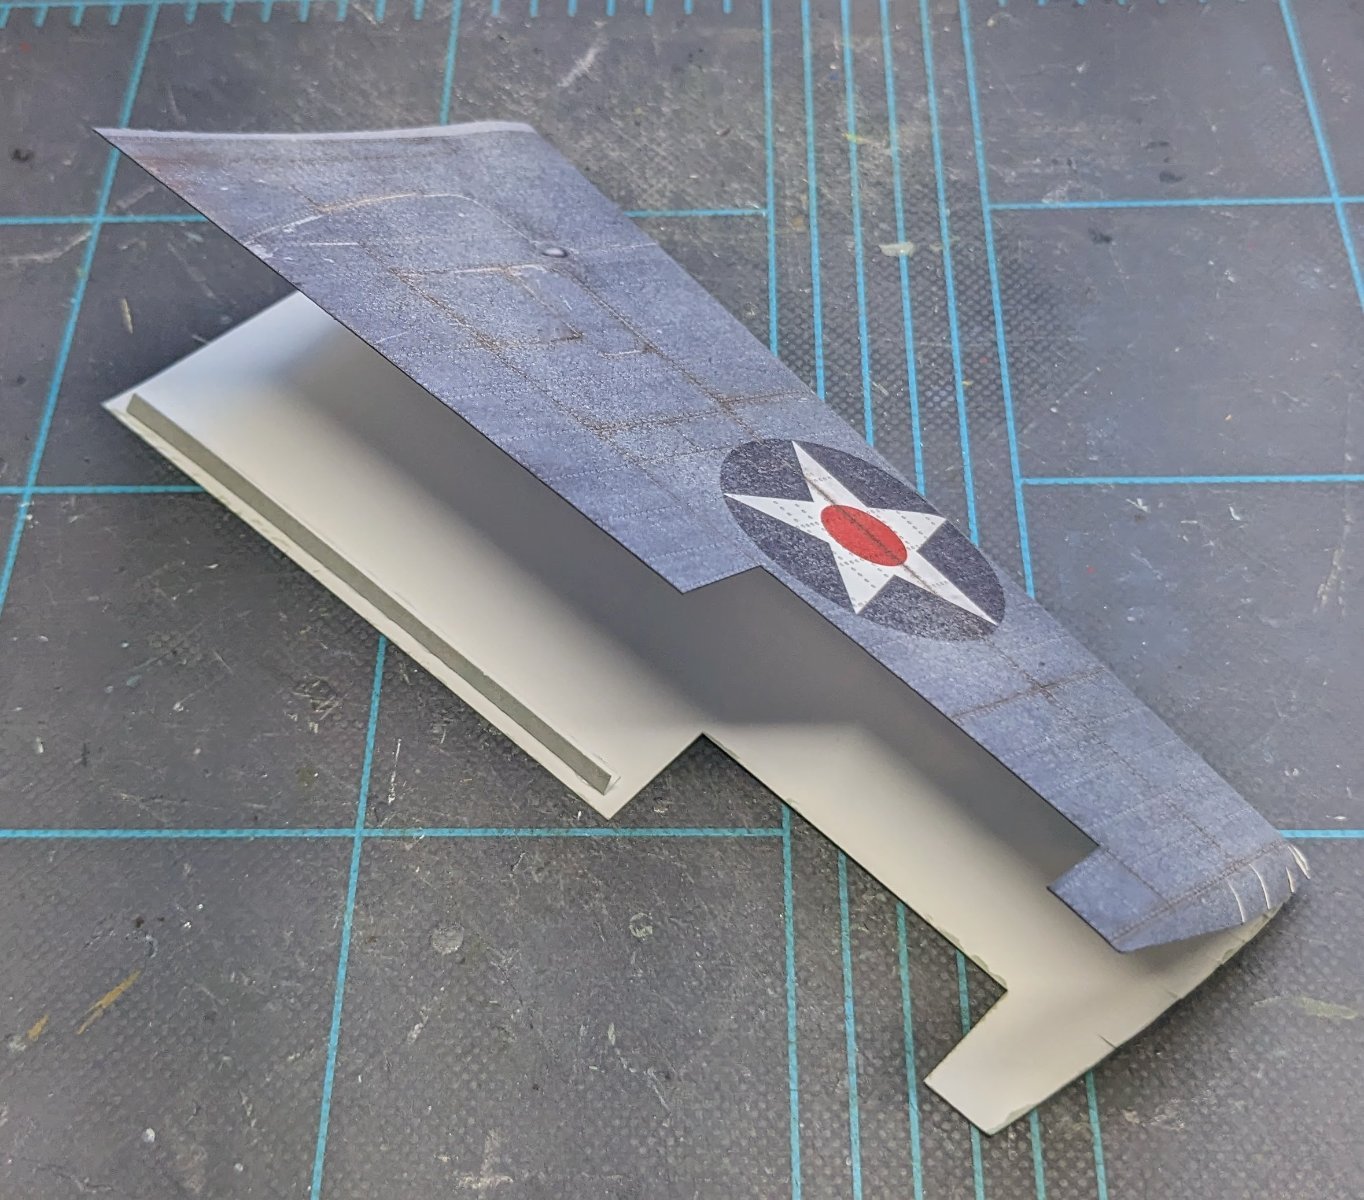
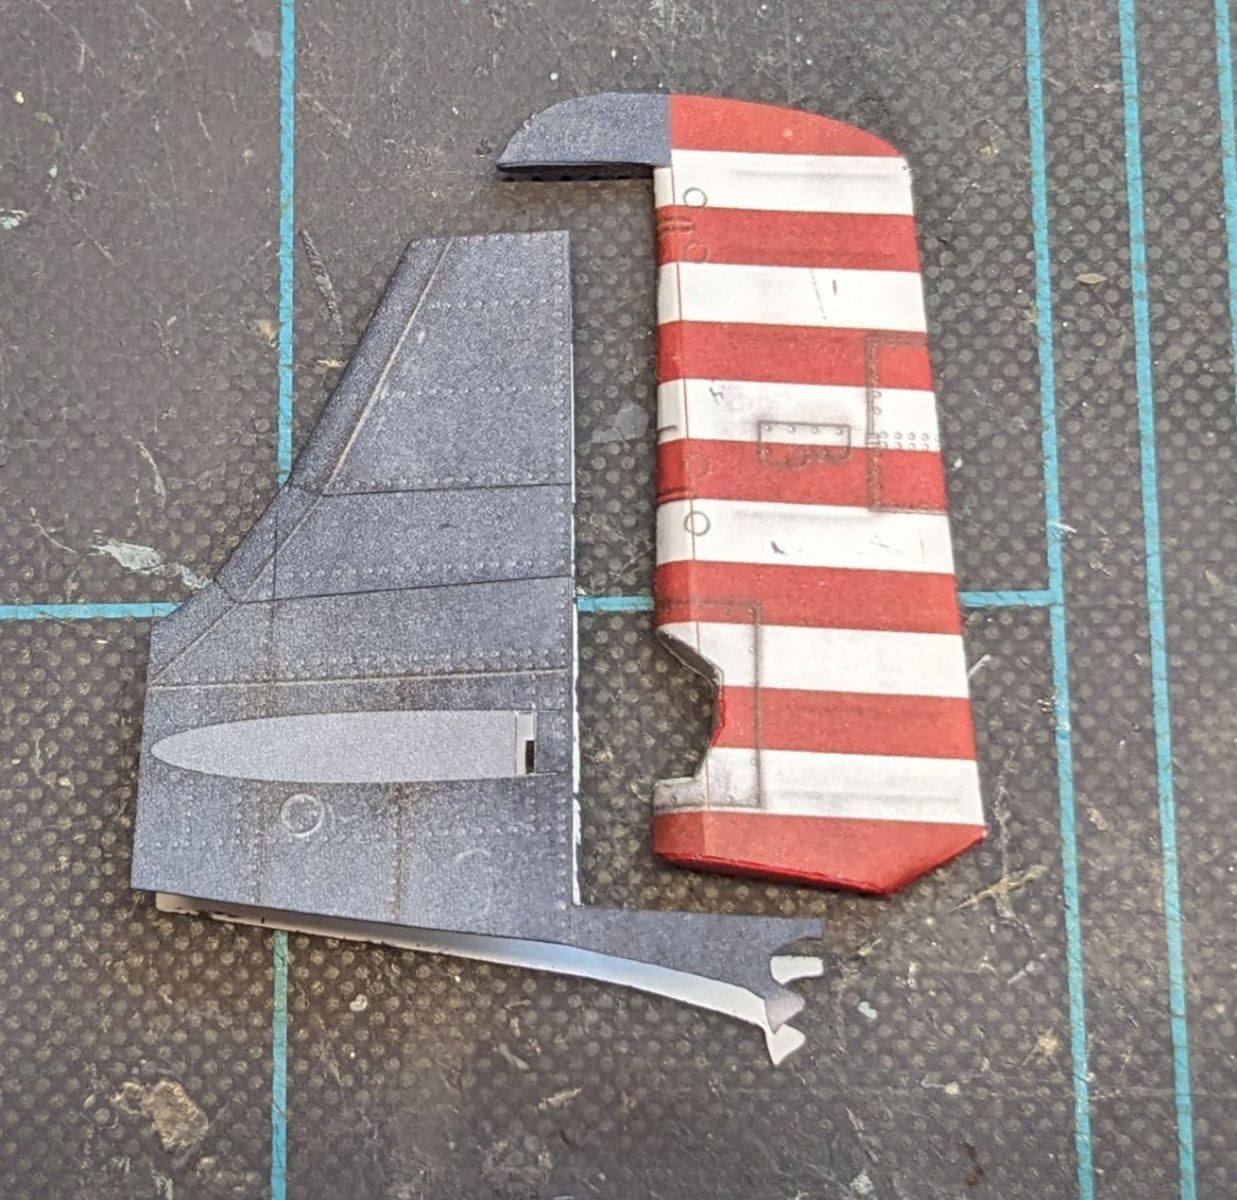
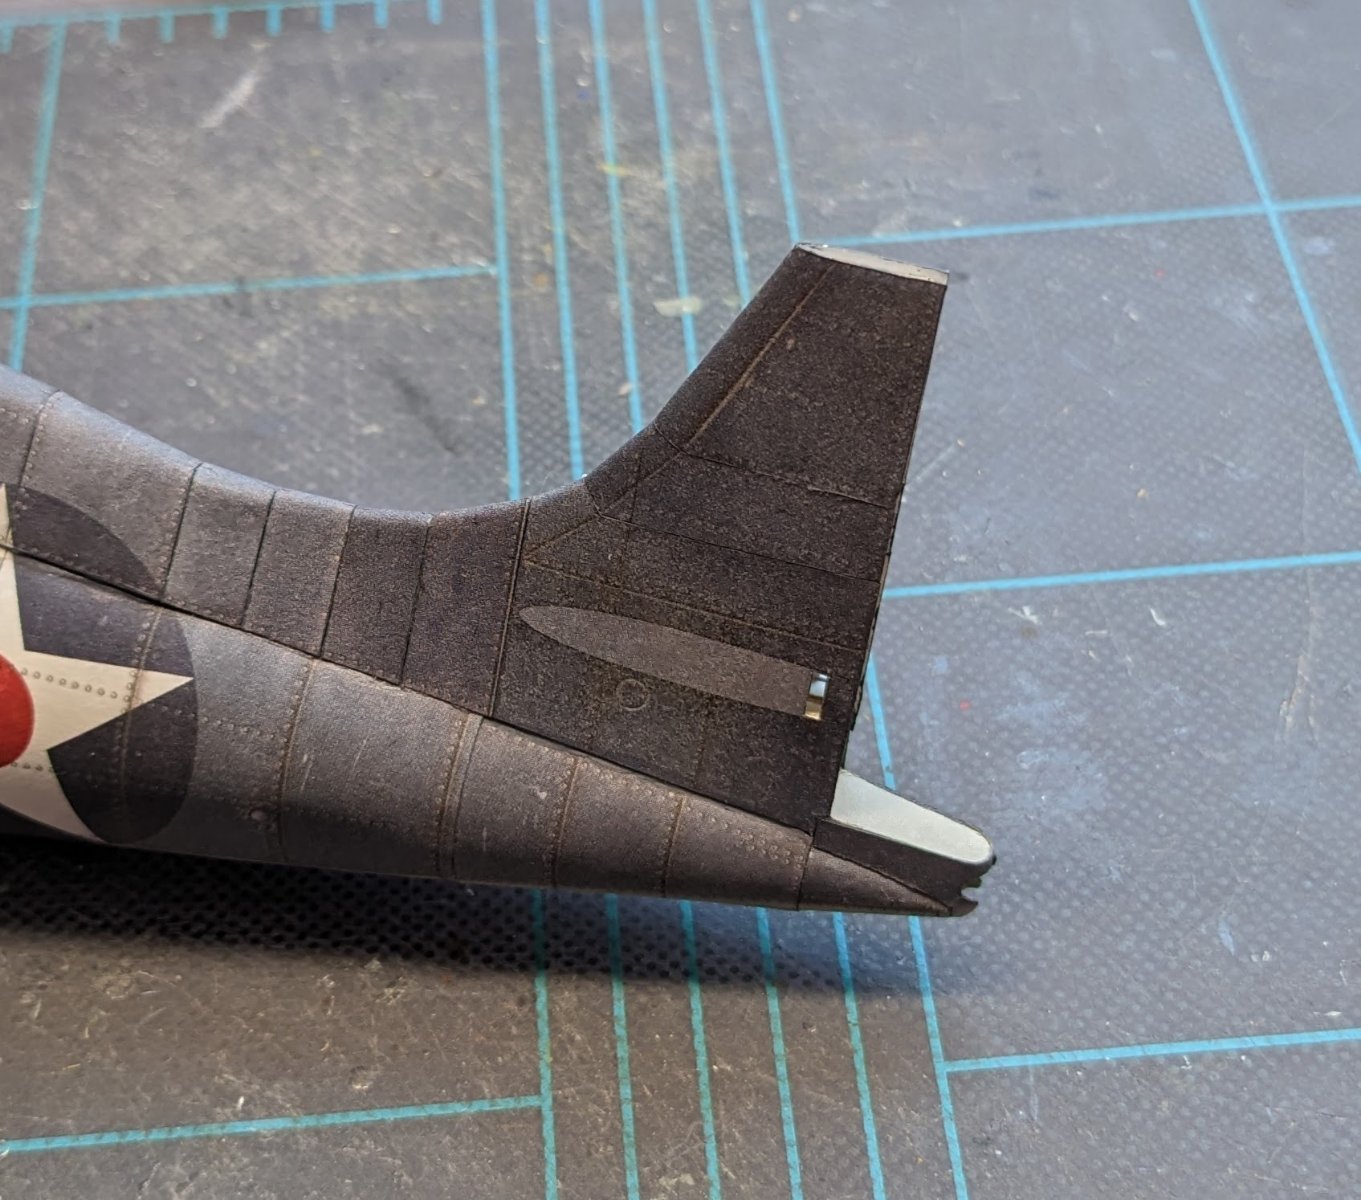
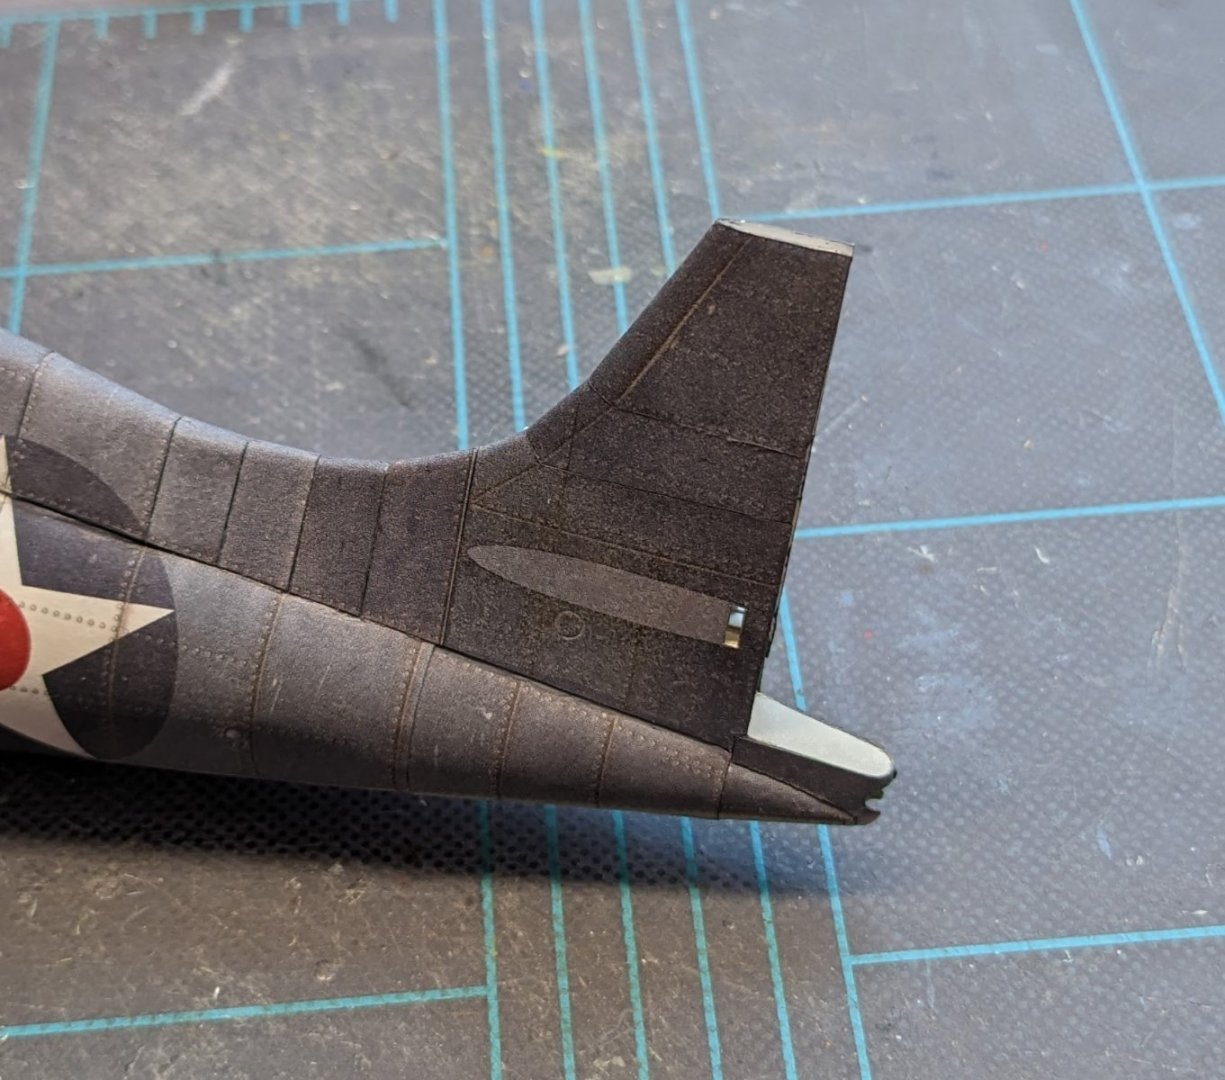
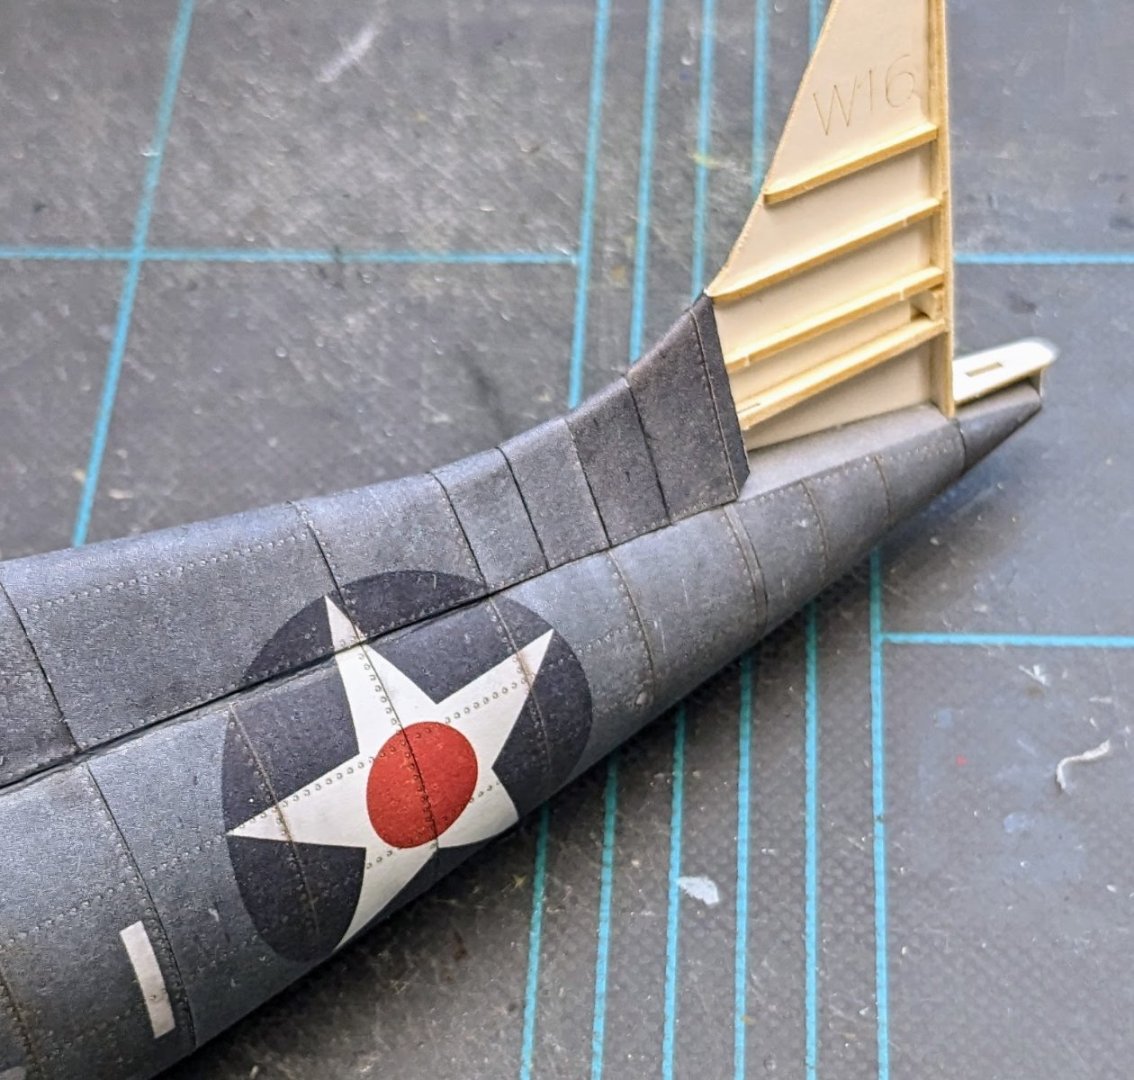
A bit more progress. I needed to take a slight detour and make the rudder so that I could confirm the positioning of the vertical stabilizer skin. Unlike many kits, the rudder has no internal framing. And then the vertical stabilizer was skinned. And that's it for the moment. Next up will be the wings' internal framing, but first I need to take a break and watch the Champions League final (I'm strictly a neutral for this match).

- 150 replies
-
- 20
-
-
-
Good luck on this project! I built the 1/100 scale Agassiz from Modelik many years ago. I also have the HMV kit of USS England on pause; it's another product of Agassiz's designer, Darius Lipinski. He has a few 3D-printed parts available for Agassiz at his Shapeways store. https://www.shapeways.com/product/AWDN9DUAN/agassiz-js-0005-upgrade-for-paper-model?optionId=62825248&li=marketplace
-
Sad news indeed.
-
Awesome! I love to see some off-the-beaten path working boats being built!
- 16 replies
-
- 6
-
-
- Sophia Rose
- Block Island cowhorn
- (and 1 more)
-
Very nice! Proves the point that even these 'basic' sort of kits can produce wonderful results.
- 55 replies
-
- 1
-
-
- sharpie schooner
- Midwest Products
- (and 1 more)
-
Nope. My kit is already boogered, and I have no great desire to take a second crack at one.
-
Coincidentally, the streets in my neighborhood got sealed today -- wife says they got the work done before the afternoon showers started. I'll have to see how it looks when I get home.
- 45 replies
-
- 1
-
-
- Great Henry
- Henry Grace a Dieu
- (and 1 more)
-
Wappen Von Hamburg by MikeE - Corel
ccoyle replied to MikeE's topic in - Kit build logs for subjects built from 1501 - 1750
Mike, you can start your log at any point in its construction. -
Good luck on this beautiful little steamer! The original is still in operation.
- 45 replies
-
- 4
-

-
-
- Earnslaw
- Paper Shipwright
- (and 2 more)
-
Lindberg Jolly Roger -- Can you send a ship back in time?
ccoyle replied to Dan DSilva's topic in Plastic model kits
That's a pretty long list of modifications, considering you'd be starting with a mediocre plastic kit in the first place. A complete scratch build might be easier. -
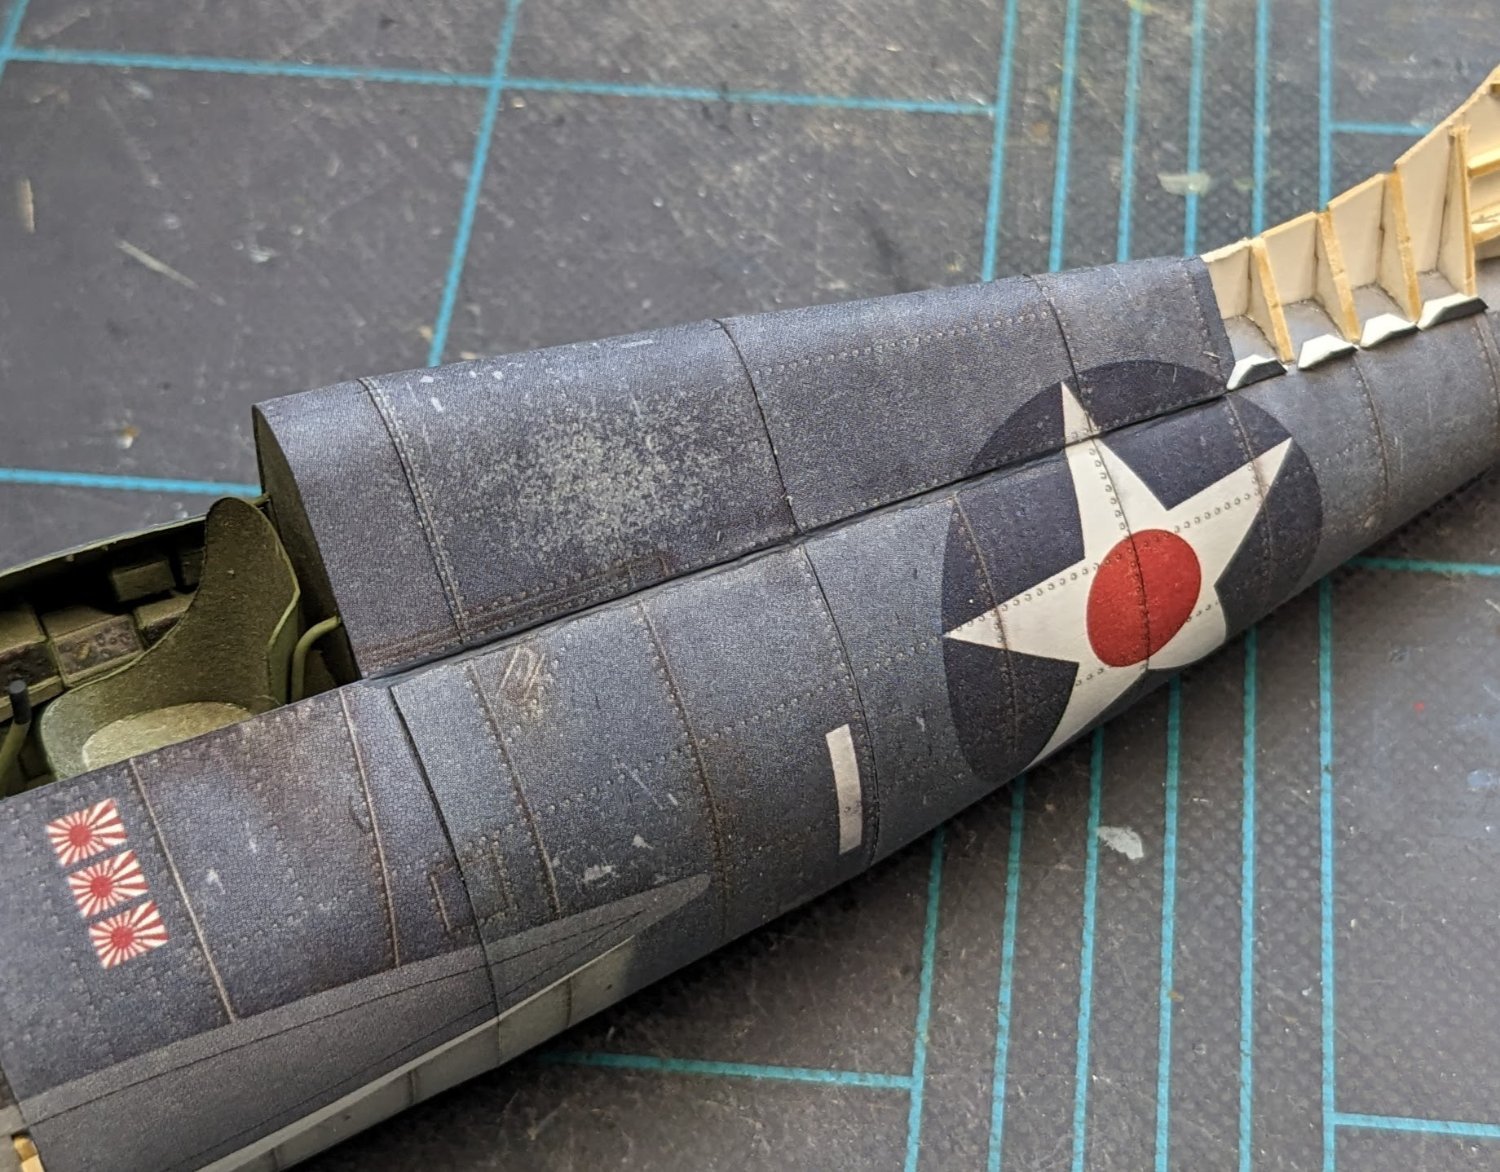
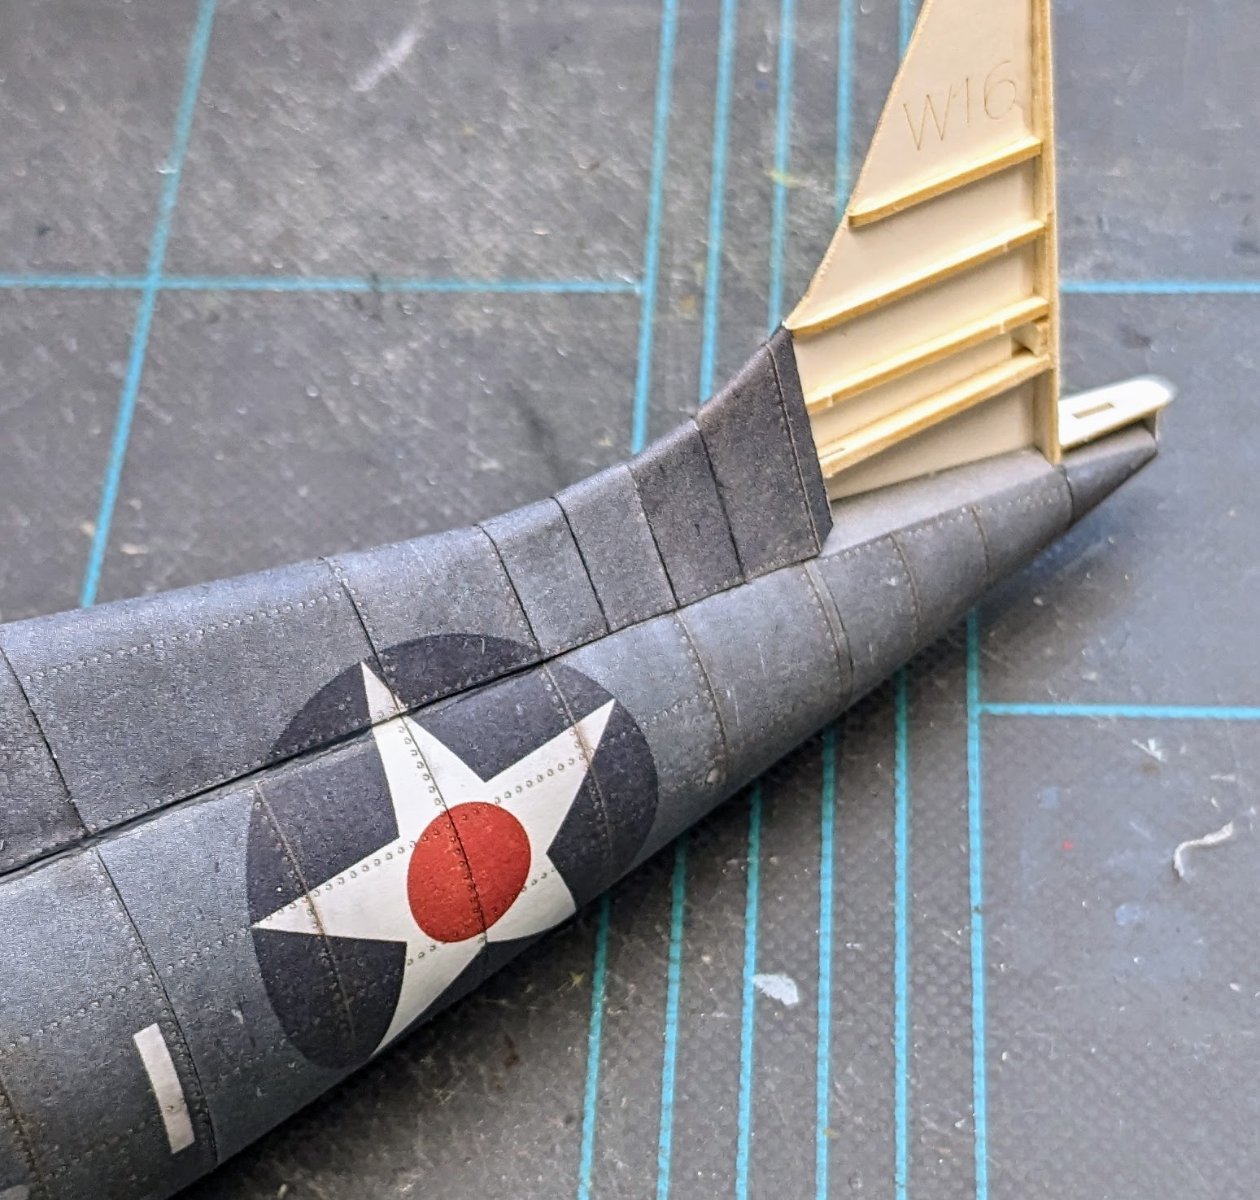
Here's the patched-up seam. I first filled it without about three passes of canopy glue, then applied a thin wash of appropriate edge color, followed by a shot of matte clear spray to take the shine off the filler. It doesn't look too bad -- certainly not the Polish Touch, but better than the untreated gap looked. Naturally, bright lighting and closeup photography makes it look worse than it does at normal viewing distances and lighting. And here's the rest of the spine.

- 150 replies
-
- 22
-
-
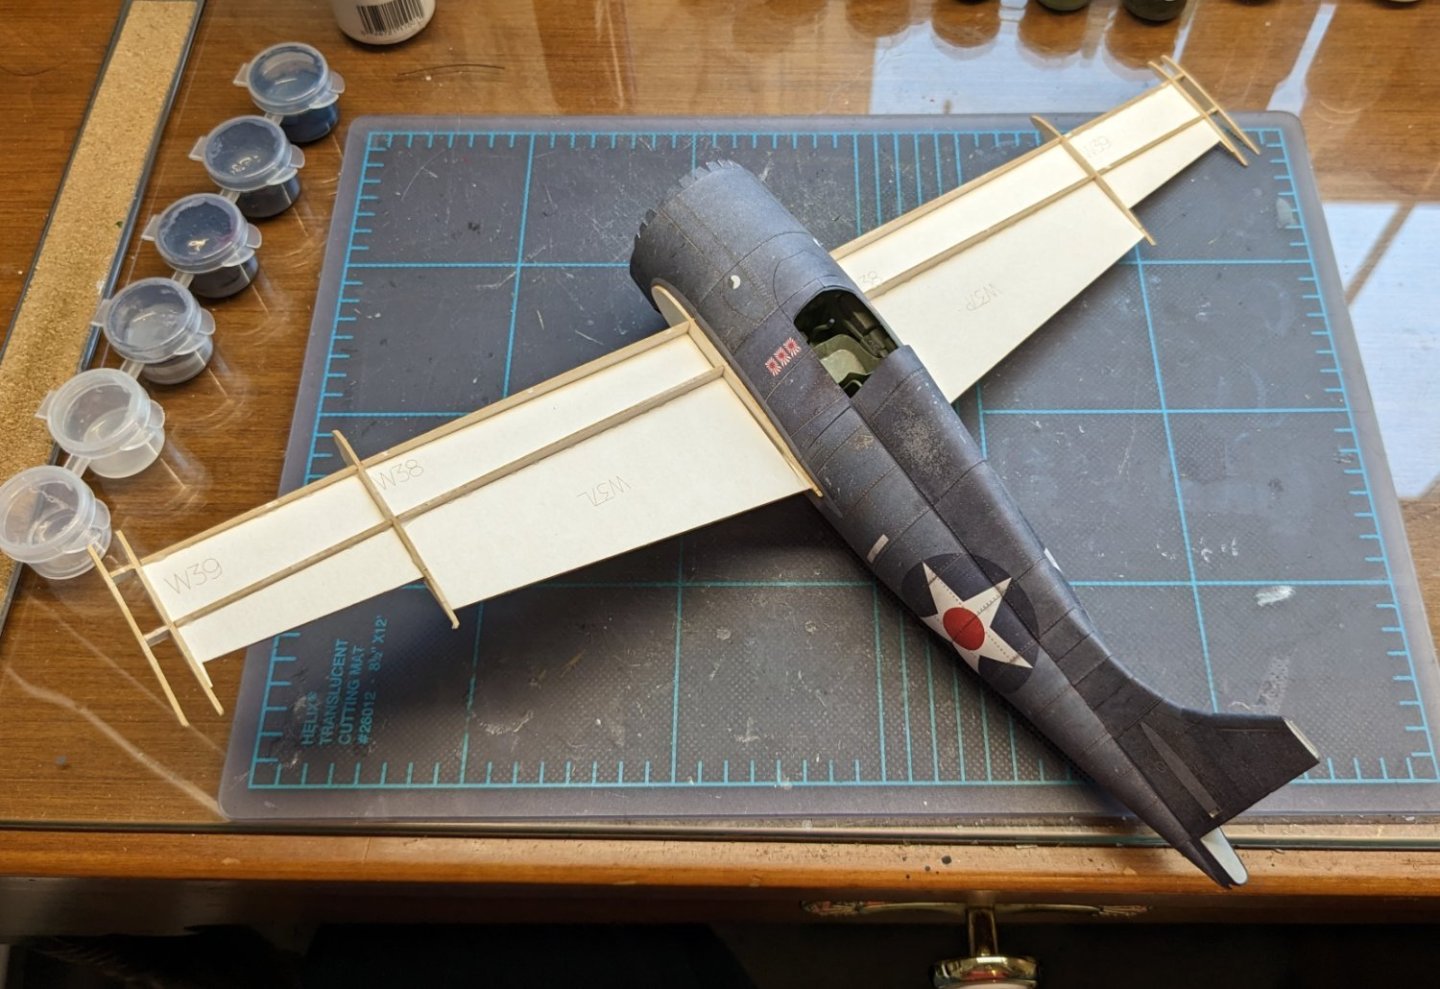
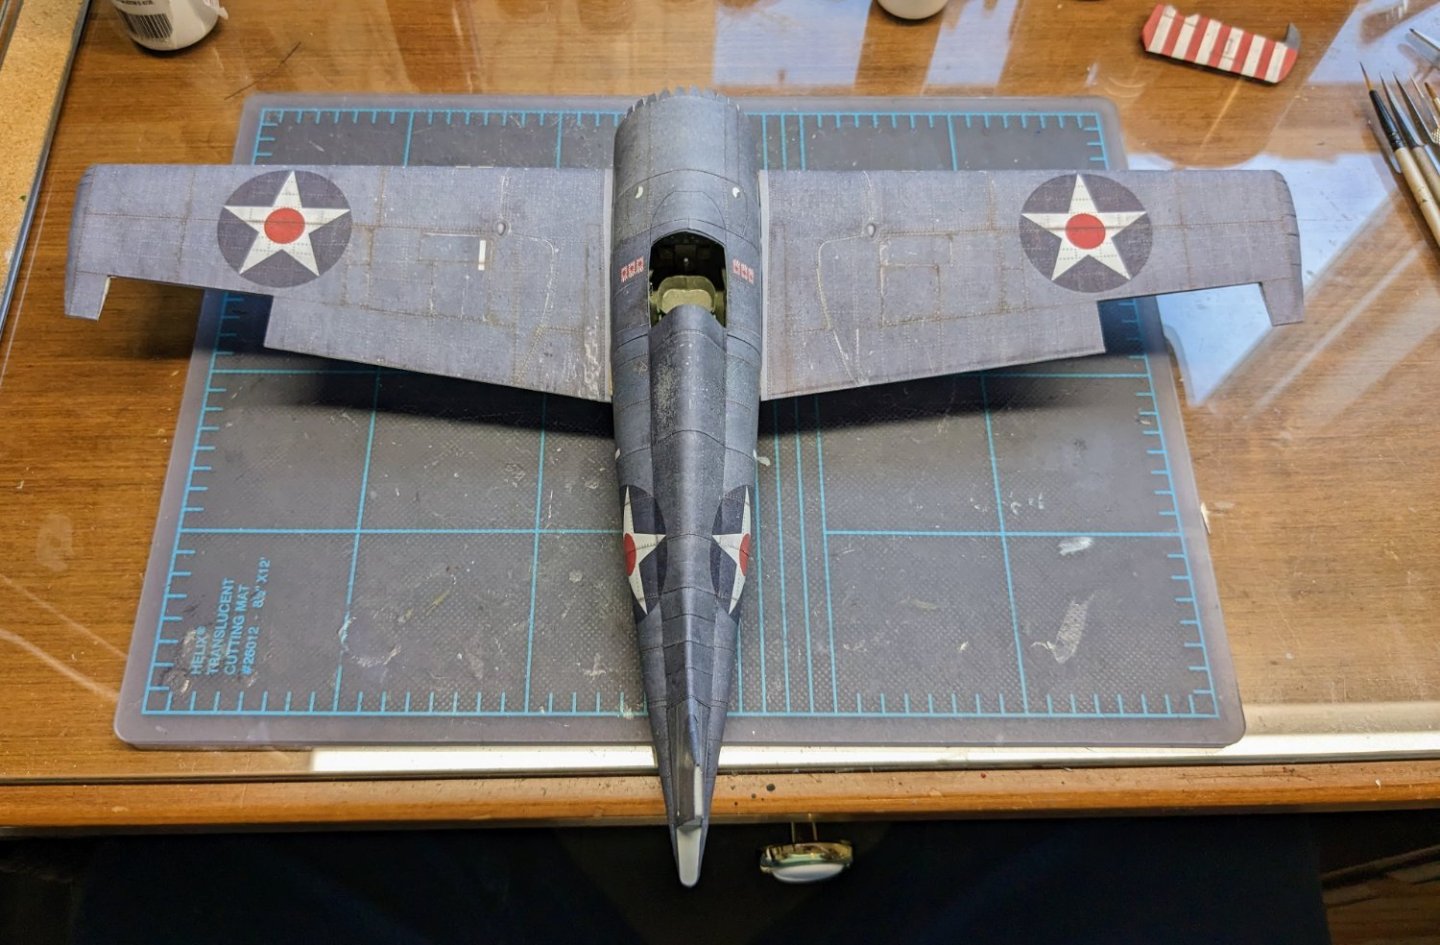
Yep, they are all card. They are part of the laser-cut frames set, cut from what the Poles call "beer mat" stock -- it is the same stuff used commercially to make disposable coasters. On to skinning the spine. The kit includes joiner strips, which is nice -- I would have made them myself but the kit spared me the effort. I glued the first four pieces together using their joiner strips, then glued the entire piece first along one side . . . . . . and then along the other. The color registration is good. I got a bit of a seam gap on the other side, which I'm going to try to remediate. We'll see how that goes.

- 150 replies
-
- 21
-
-
-
No finished ones here, but there are plenty of finished gun brigs from that time period for more general reference.