HOLIDAY DONATION DRIVE - SUPPORT MSW - DO YOUR PART TO KEEP THIS GREAT FORUM GOING! (Only 24 donations so far out of 49,000 members - C'mon guys!)
×


russ
-
Posts
3,086 -
Joined
-
Last visited
Content Type
Profiles
Forums
Gallery
Events
Everything posted by russ
-
This is a very fine looking model. You did a great job. Congratulations. I will look forward to your next build. Russ
- 701 replies
-
- 4
-

-
- phantom
- model shipways
- (and 1 more)
-
Pat: Thanks. There is a down side to this. I use commercially available pre milled sheets and on a larger scale model this would mean more wood to be used, but the rewards outweigh the costs. Russ
- 420 replies
-
- 2
-
-
- captain roy
- lugger
- (and 2 more)
-
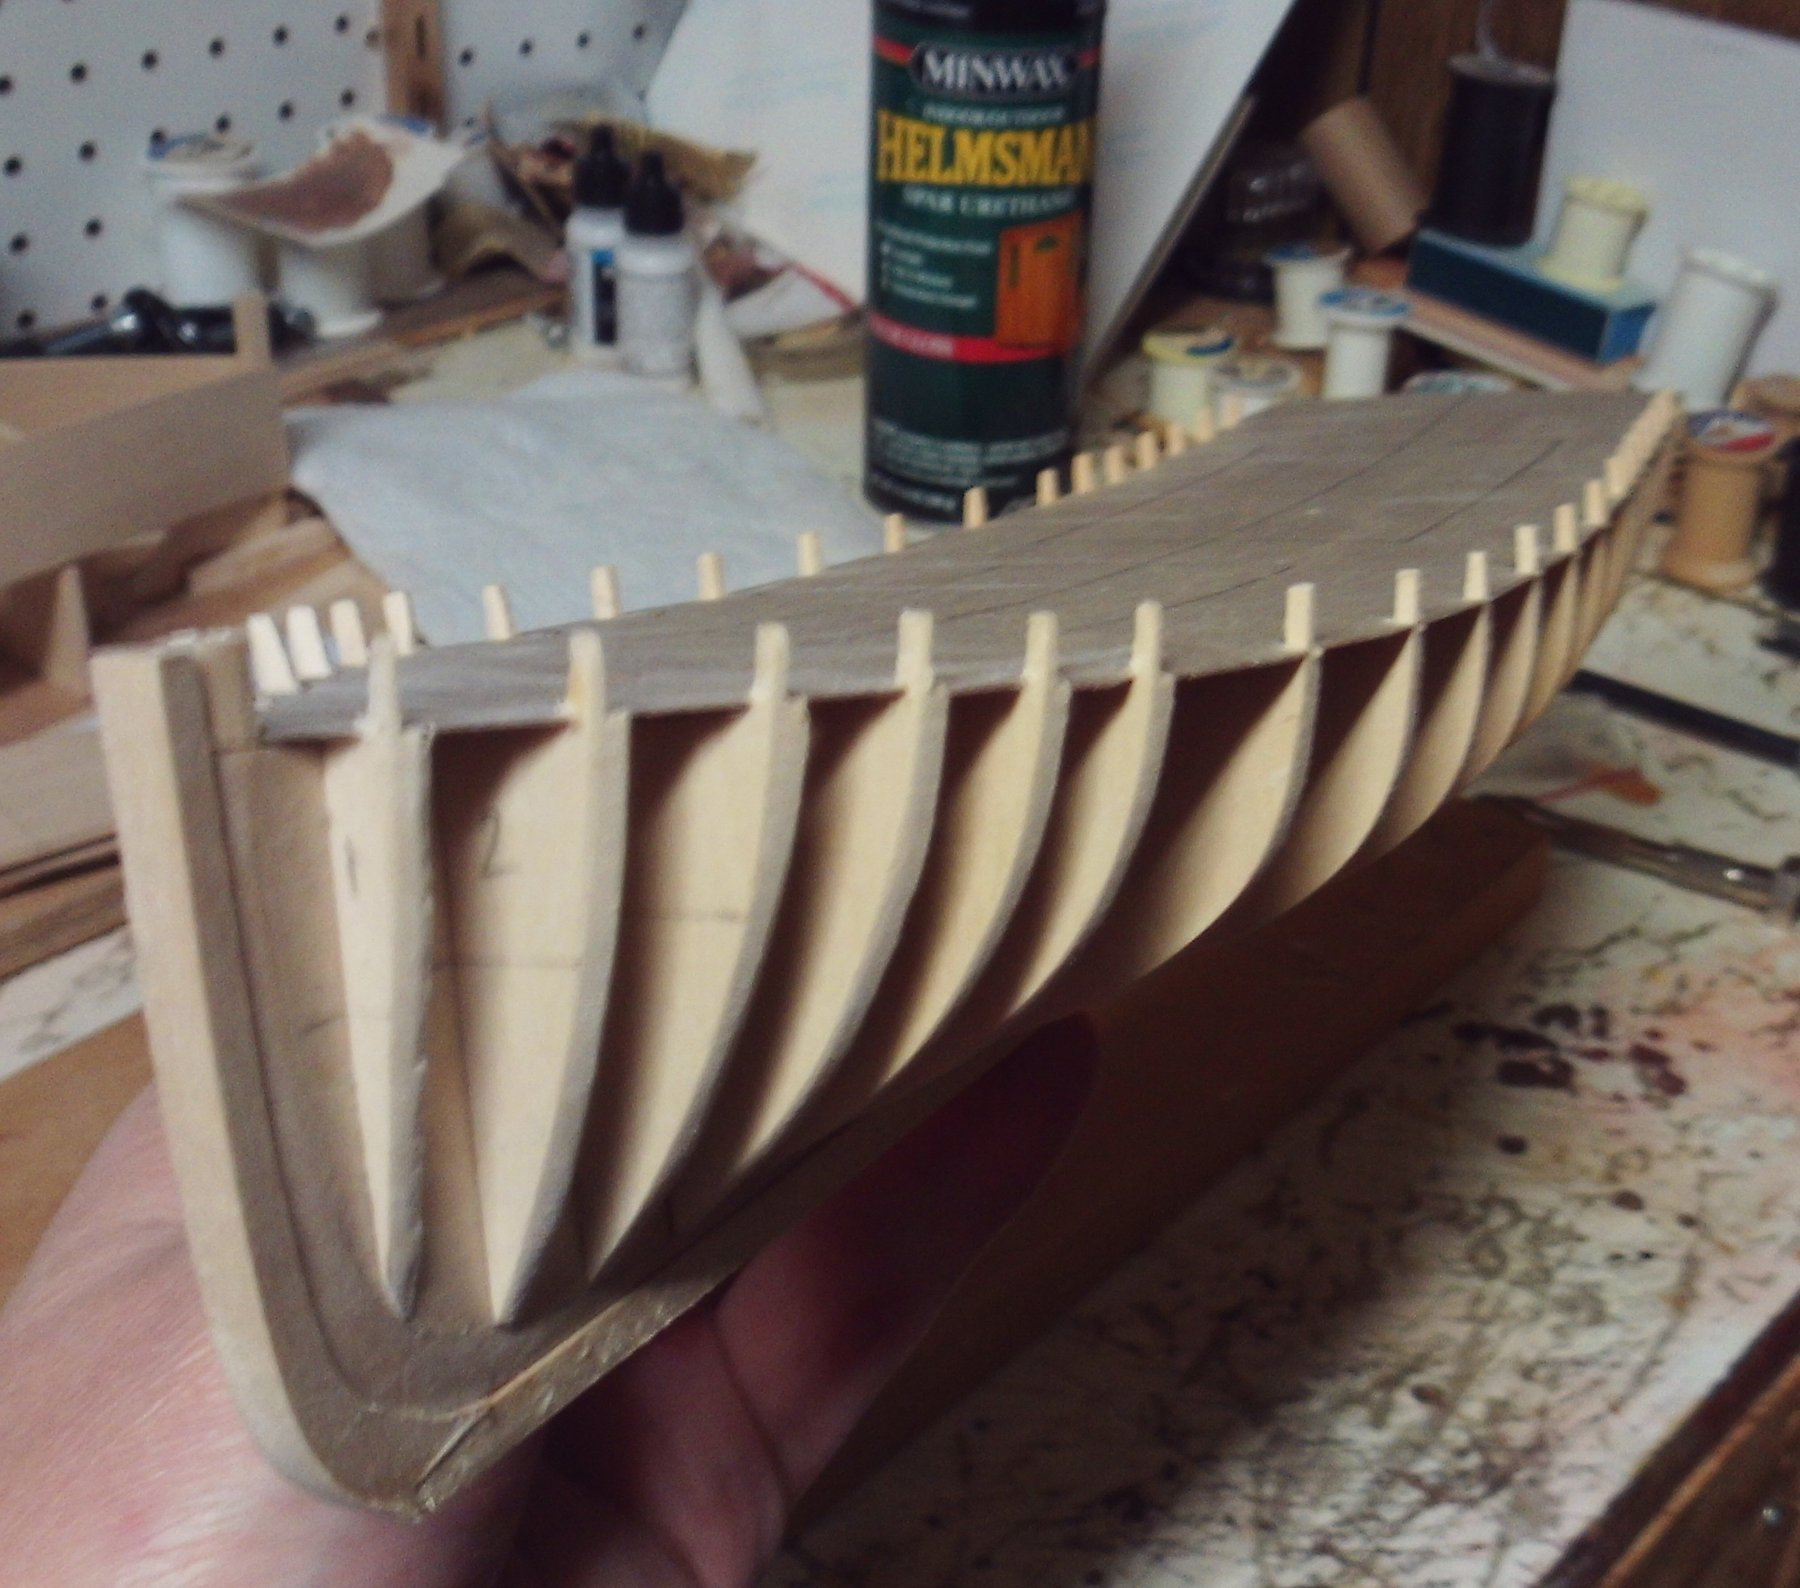
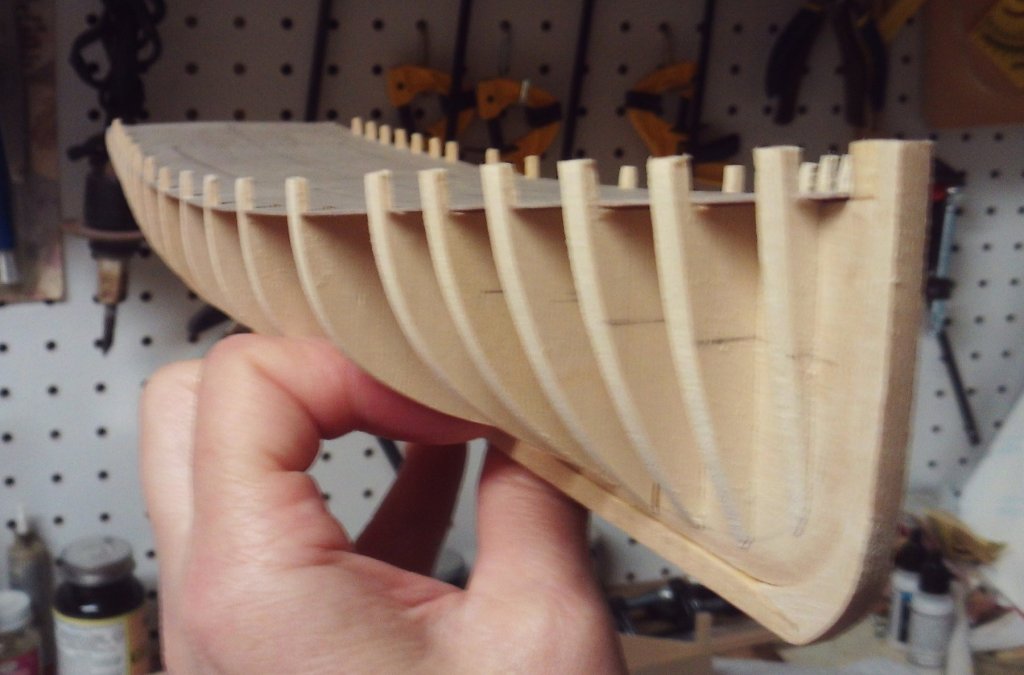
The bulwark stanchions need to be trimmed down about 1/16" square or nearly square. Here is an instance where a choice that I made early on has worked in my favor. I decided to have the grain of the wood on the bulkhead frames run vertically. On the schooner model, I had it running horizontally and I had several of the bulwark stanchions snap on me. I decided in that case to make the stanchions as separate pieces that were glued to the inside of the bulwark planking. That worked but it was extremely fussy work. On this model, I really wanted to have the stanchions as part of the bulkhead frames so I chose to cut the bulkhead frames with the grain running vertically. The stanchions are much more rigid and they were fairly easy to trim using a small razor saw. This worked so well that I think I will follow this practice on subsequent models. Here is a photograph showing their appearance after trimming. Not too bad. Russ

- 420 replies
-
- 13
-
-
- captain roy
- lugger
- (and 2 more)
-
The tops of the knees need to be beveled to meet the beam. But I think you saw that. Russ
- 108 replies
-
- 2
-
-
- mamoli
- constitution
- (and 2 more)
-
I agree with Denis. Very nice presentation. Good work. Russ
- 250 replies
-
- 5
-
-
- willie l bennett
- model shipways
- (and 1 more)
-
The black doublings are a typical treatment and it looks good. Russ
-
Another beautiful model. Congratulations. I will look forward to work on the Halifax. Russ
-
Kenny: Your cross section came out really well. Great display case. Congratulations on a fine model. Russ
-
Just one photograph for now. This is a bit out of focus, but you can see the sheer line is shaping up nicely. Russ
- 420 replies
-
- 11
-
-
- captain roy
- lugger
- (and 2 more)
-
Looks good. It will make planking so much easier. Russ
-
Frank: This is a good looking boat. Very good subject matter. I like the system you are using for framing. Russ
-
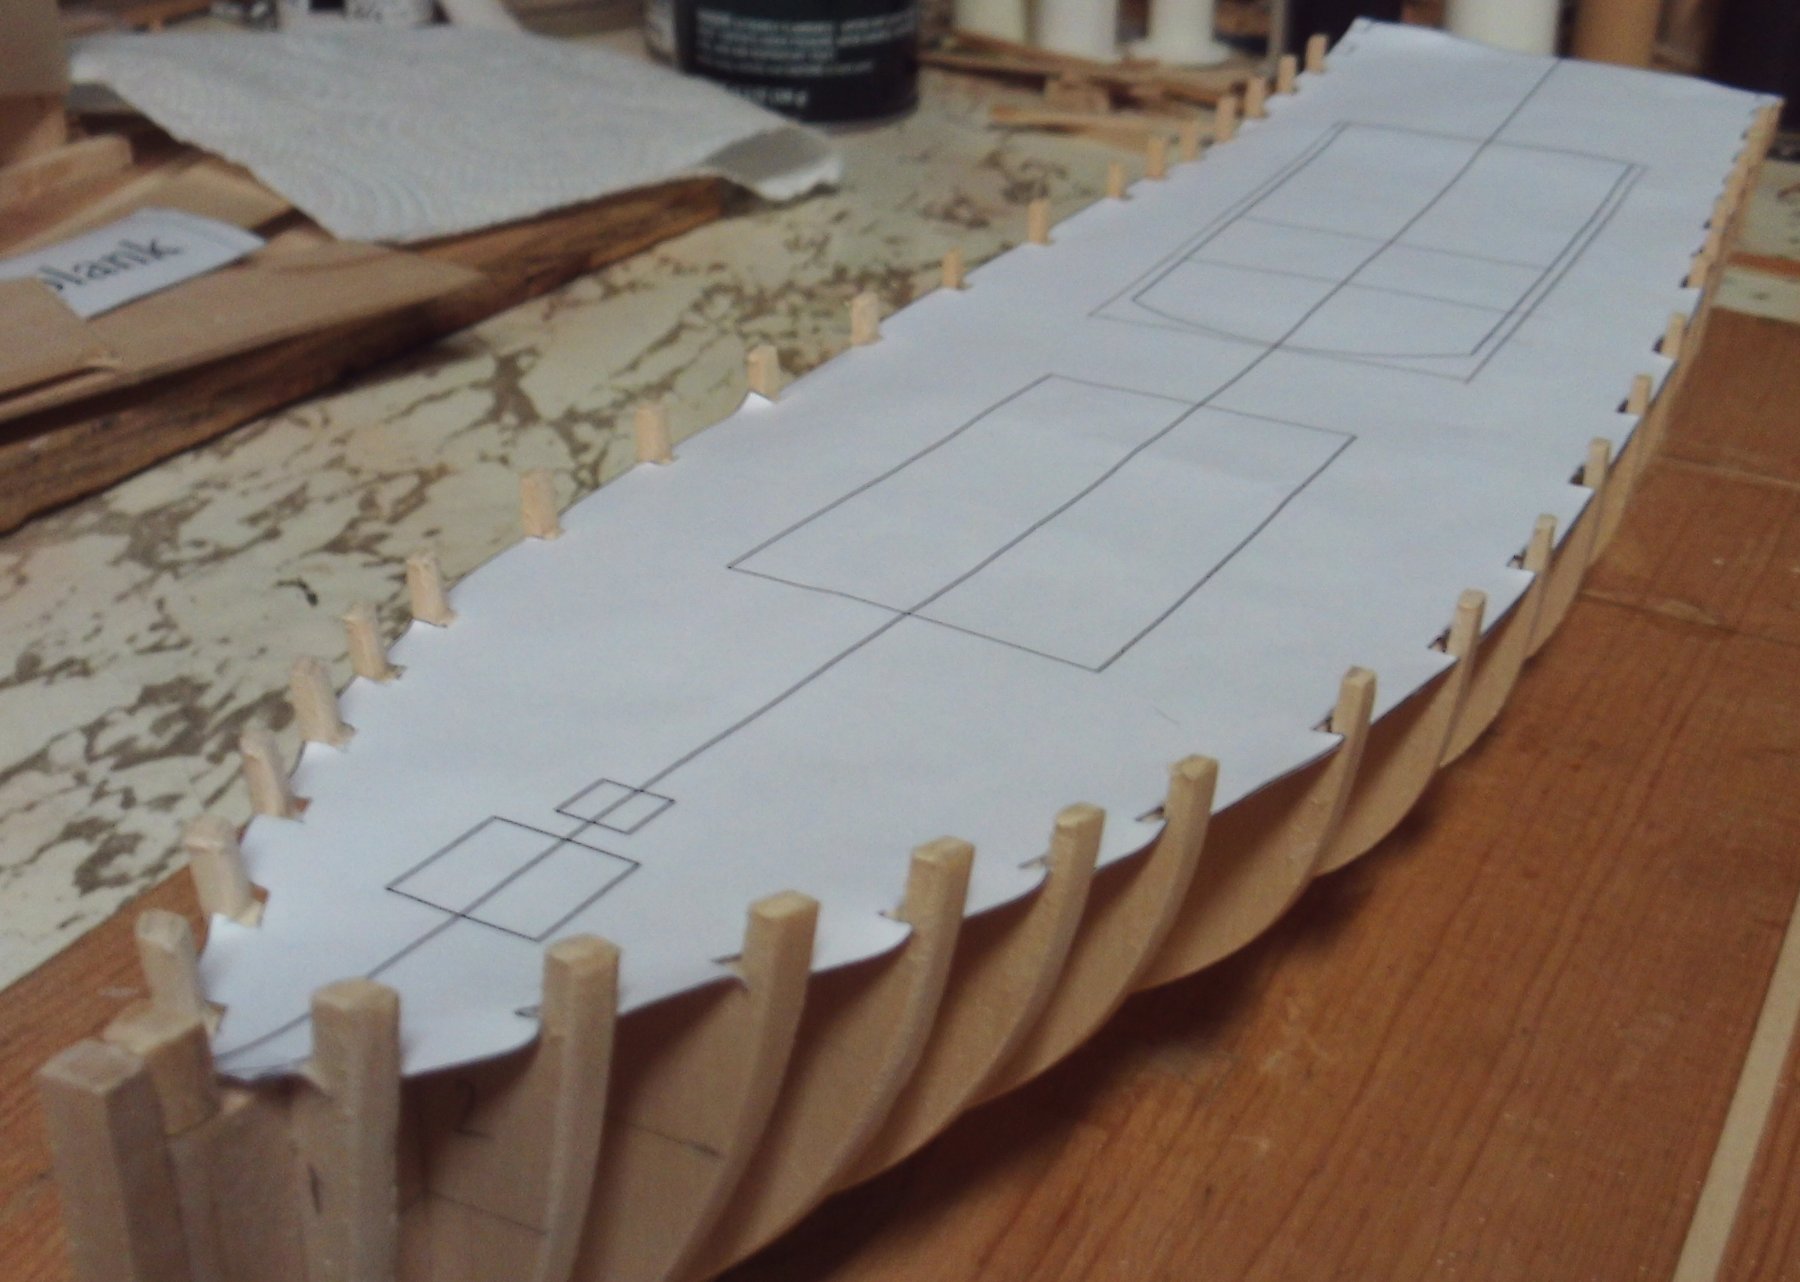
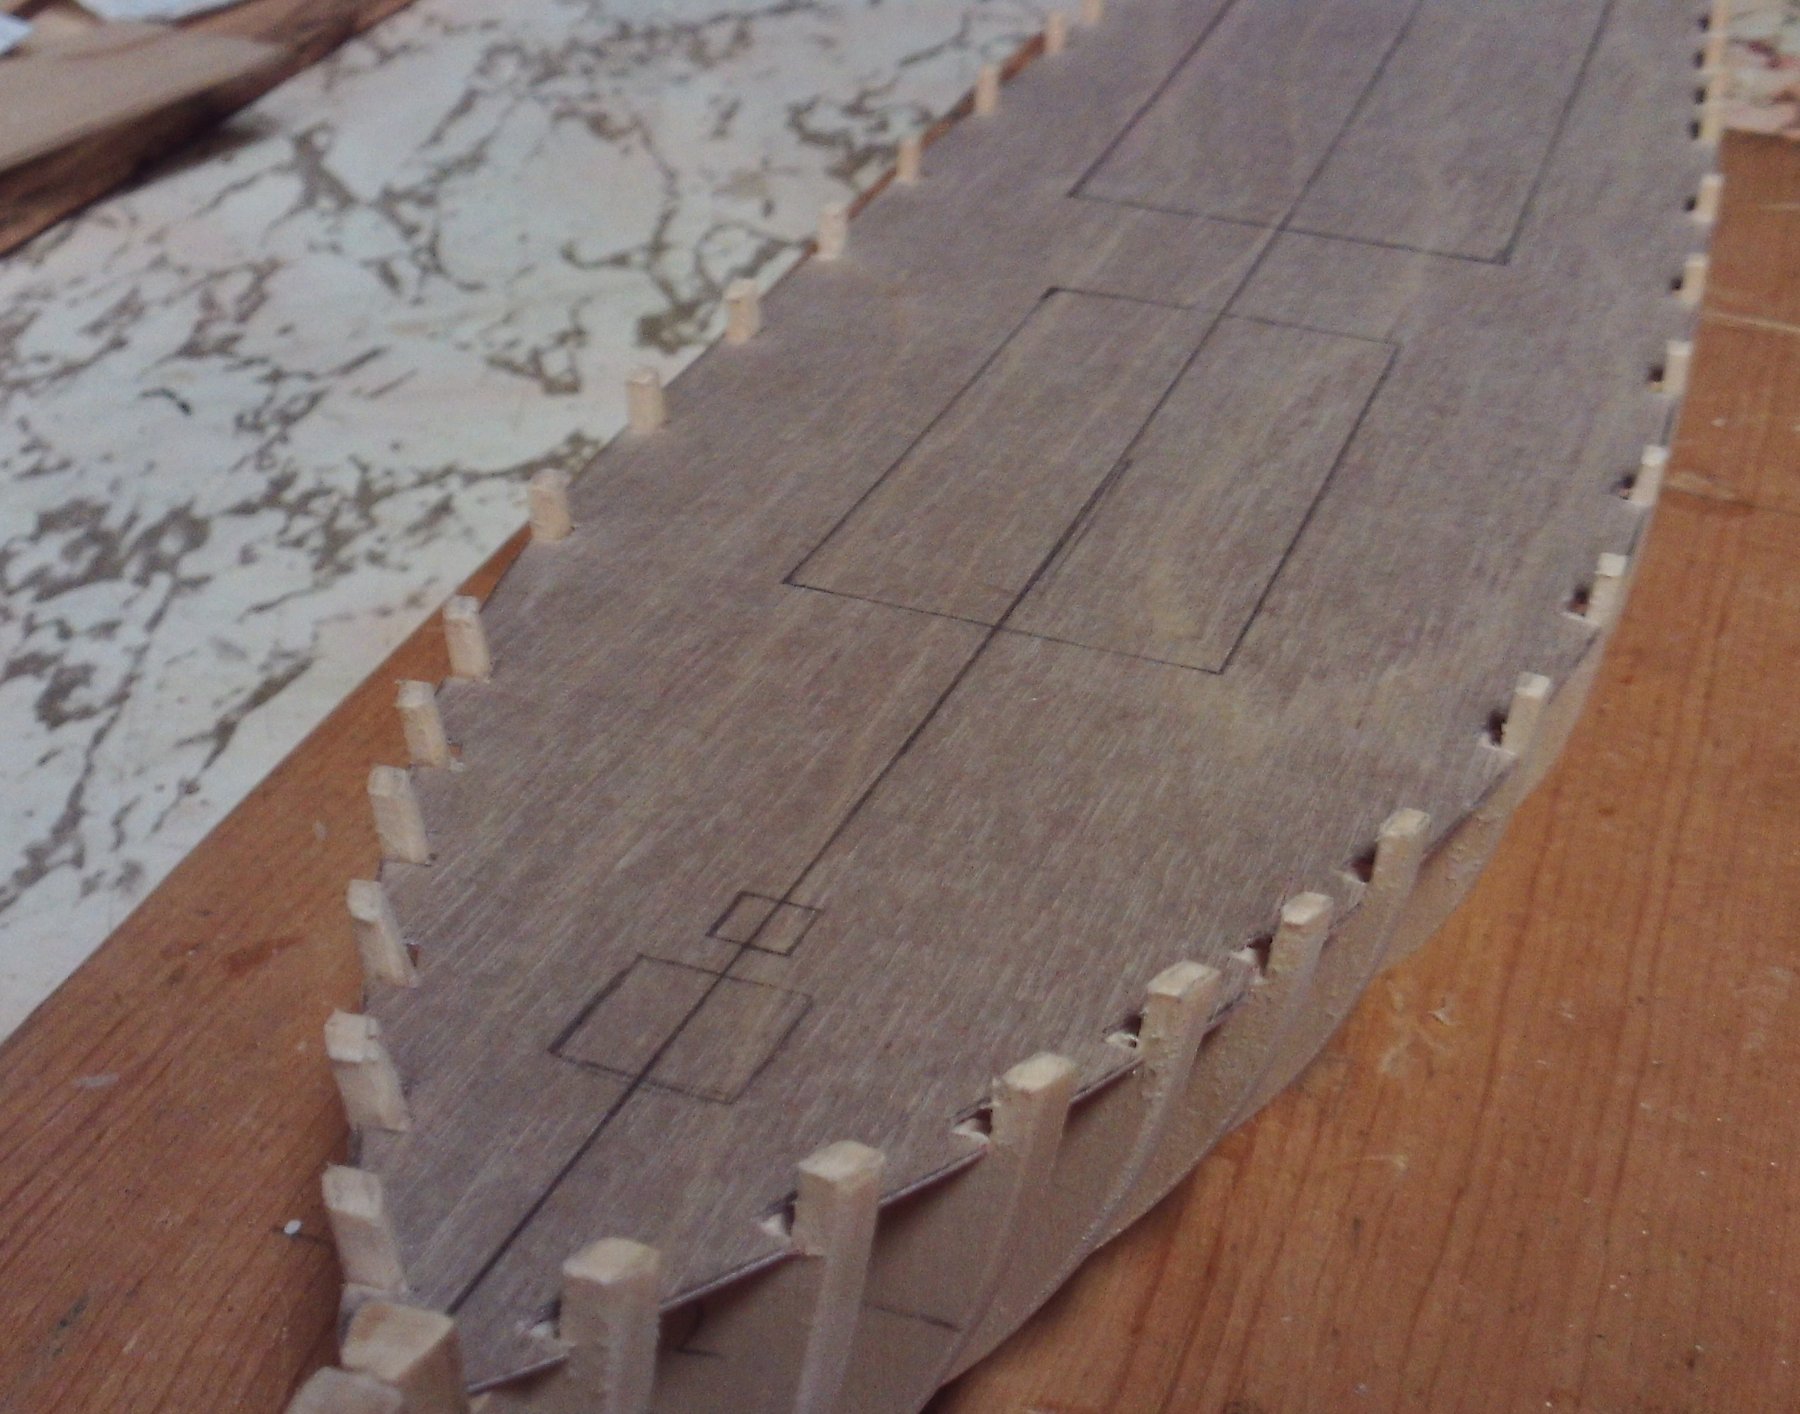
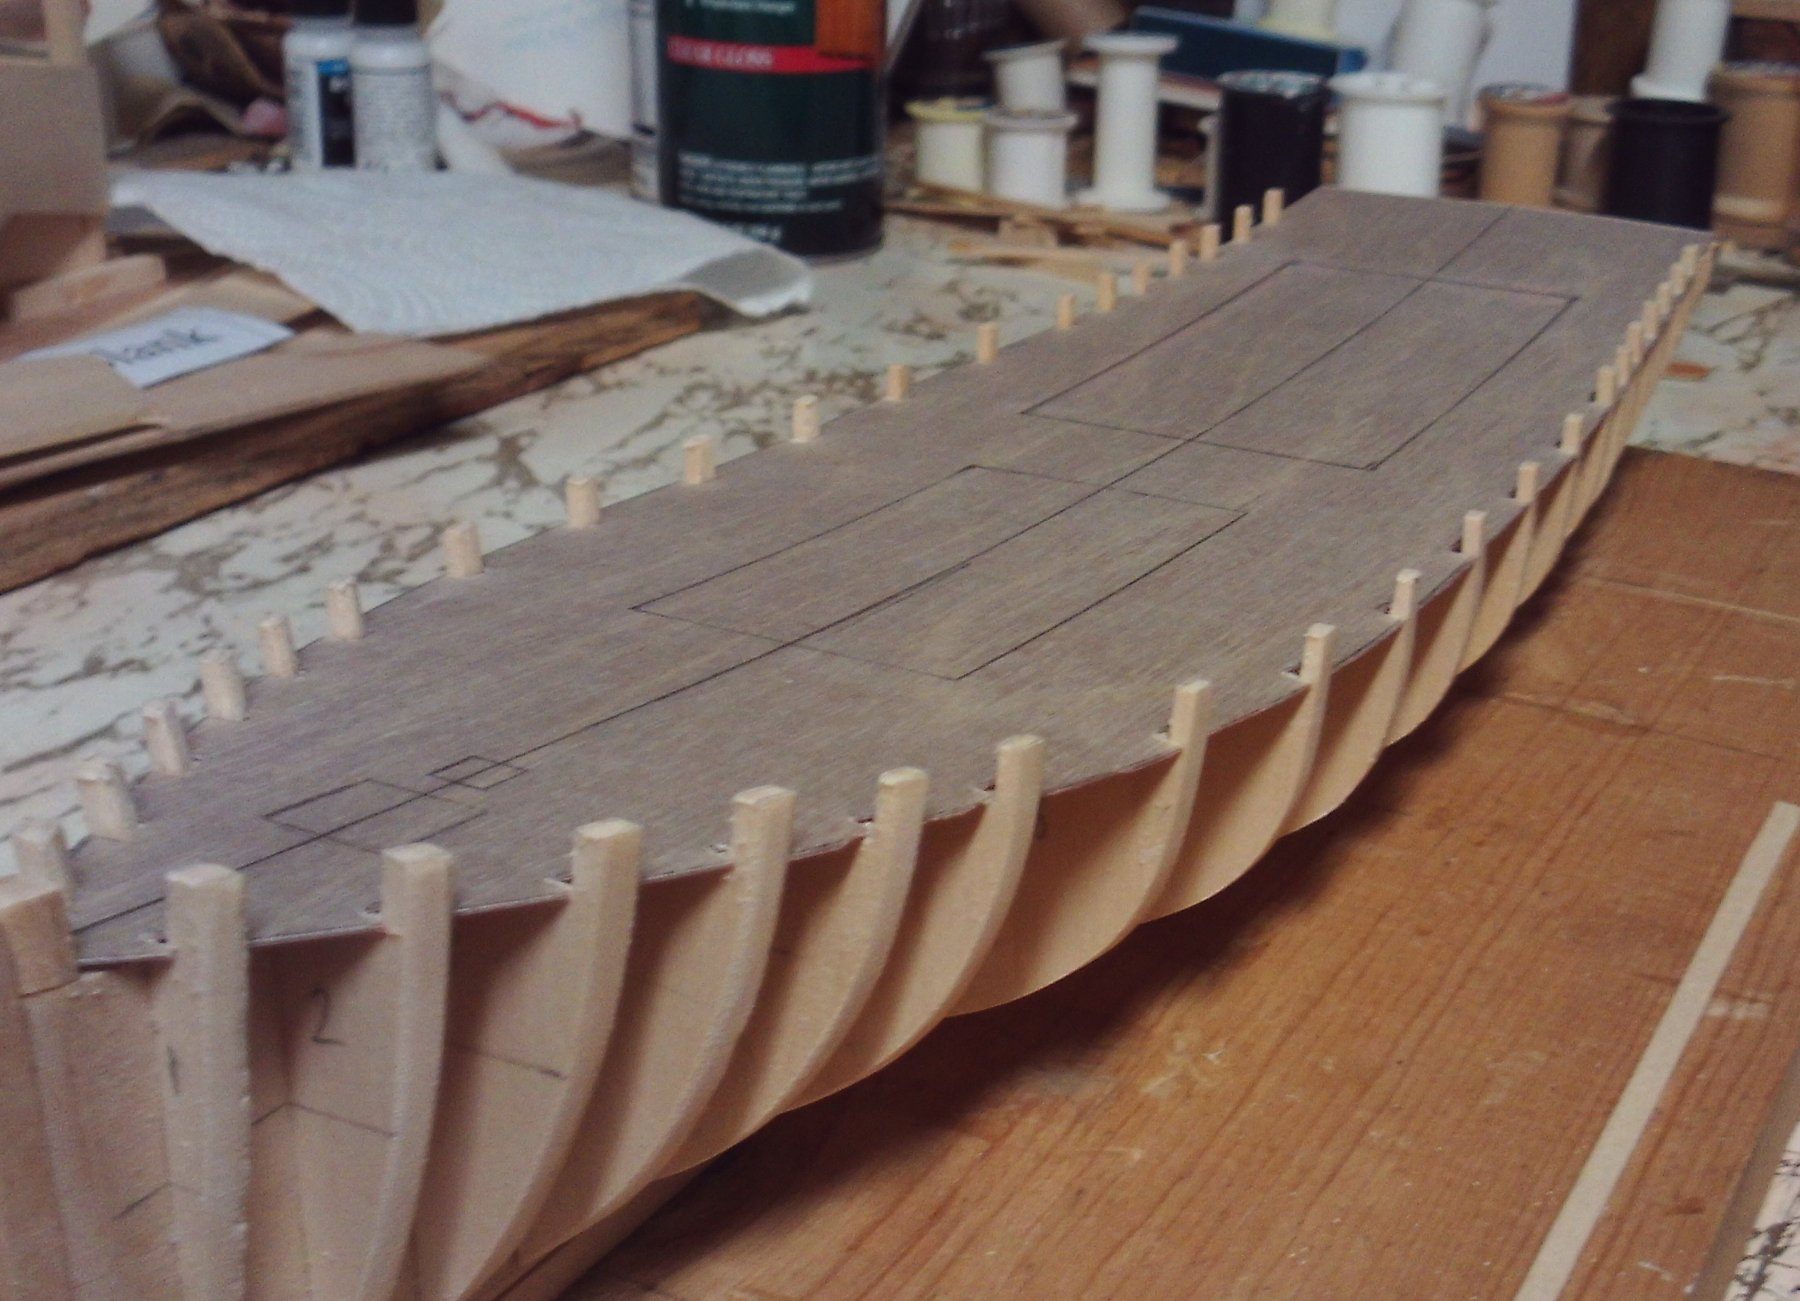
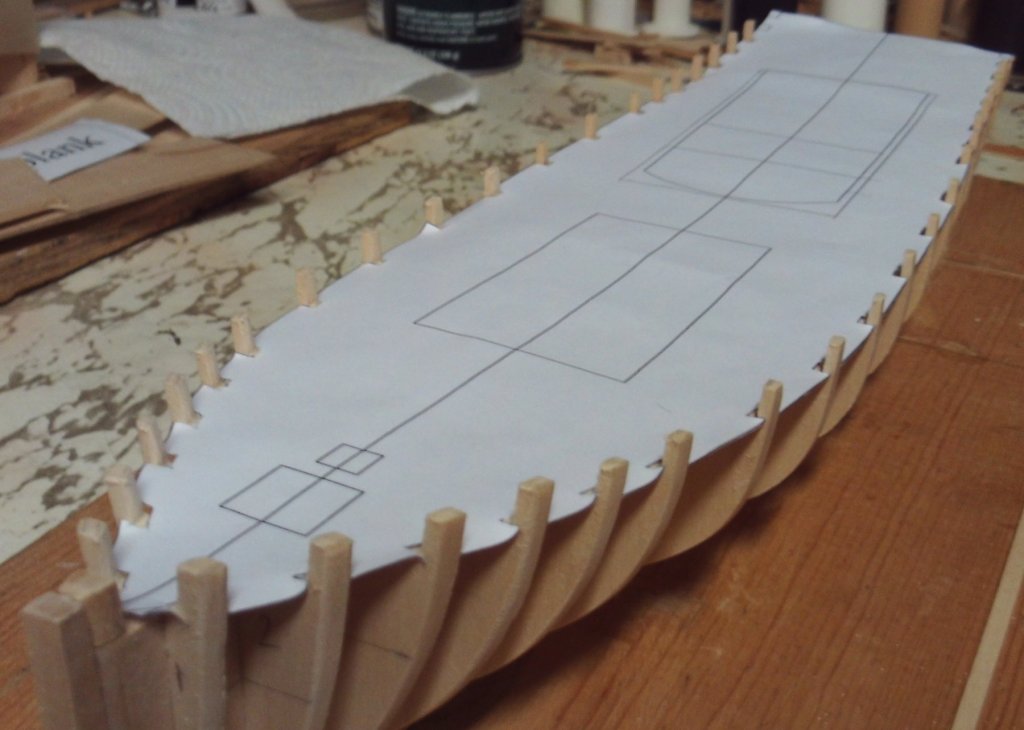
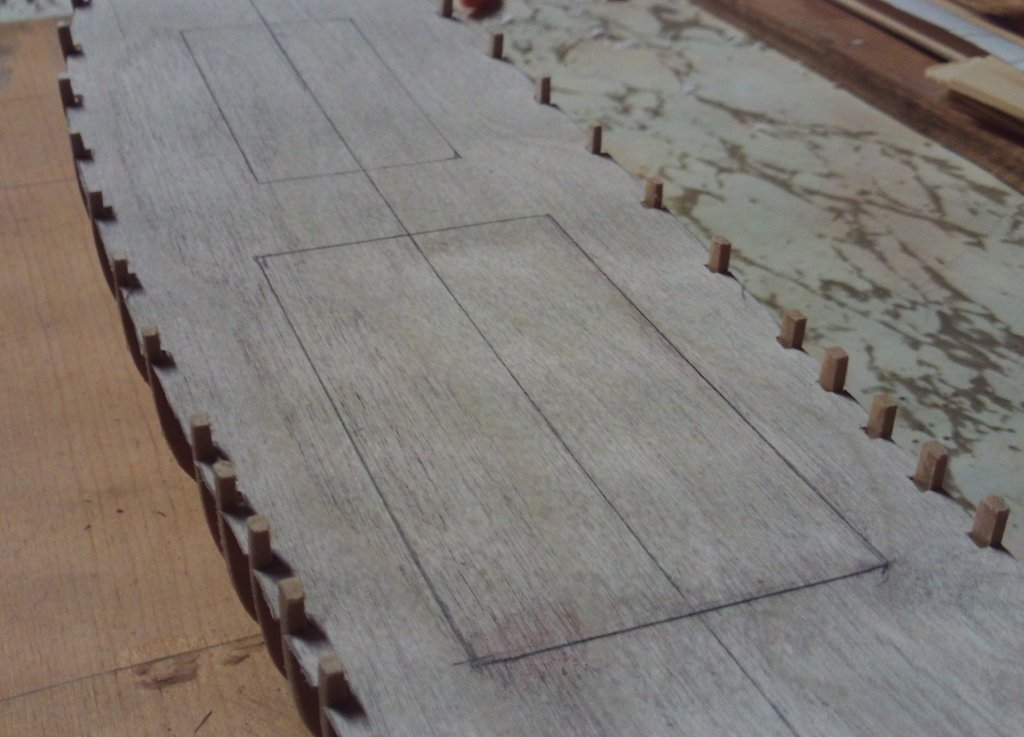
I have moved ahead with the subdeck. I wanted to install this prior to finishing the sanding of the outer hull so I could have a little more rigidity while I complete the hull fairing. First I cut and fitted the paper template and then used the template to make and fit the actual subdeck. Once the subdeck is glued in place, I can proceed with hull fairing and then planking. Here are the photos. Russ


- 420 replies
-
- 12
-
-
- captain roy
- lugger
- (and 2 more)
-
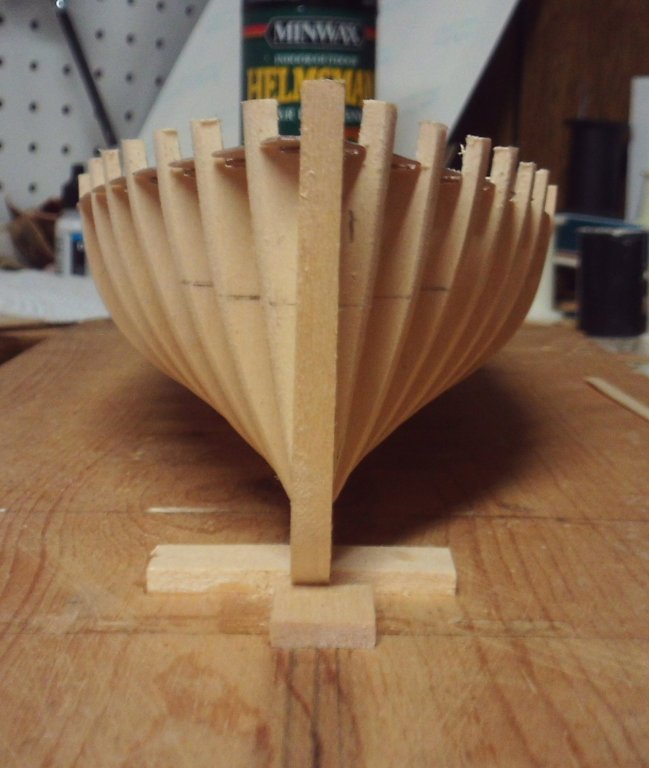
Very interesting stand and very artistic as well. Nice work. Russ
- 250 replies
-
- 5
-
-
- willie l bennett
- model shipways
- (and 1 more)
-
That looks good. I think the blackened brass wire would do the trick. I keep some blackened annealed steel wire around for such items. Russ
-
Congratulations on your completed Mayflower. She looks very good. Be very proud of her. Russ
-
Very good progress. The masts look great. Nice work. Russ
-
Pat: The challenge here is that the inside of the pilot house will be visible, as opposed to a schooner's trunk cabin interior which is not. In this pilot house, I will need to install the interior paneling, dashboard with wheel, and the bunk. I am working it out, little by little, but it is a challenge to get it to look right. Russ
- 420 replies
-
- 8
-
-
- captain roy
- lugger
- (and 2 more)
-
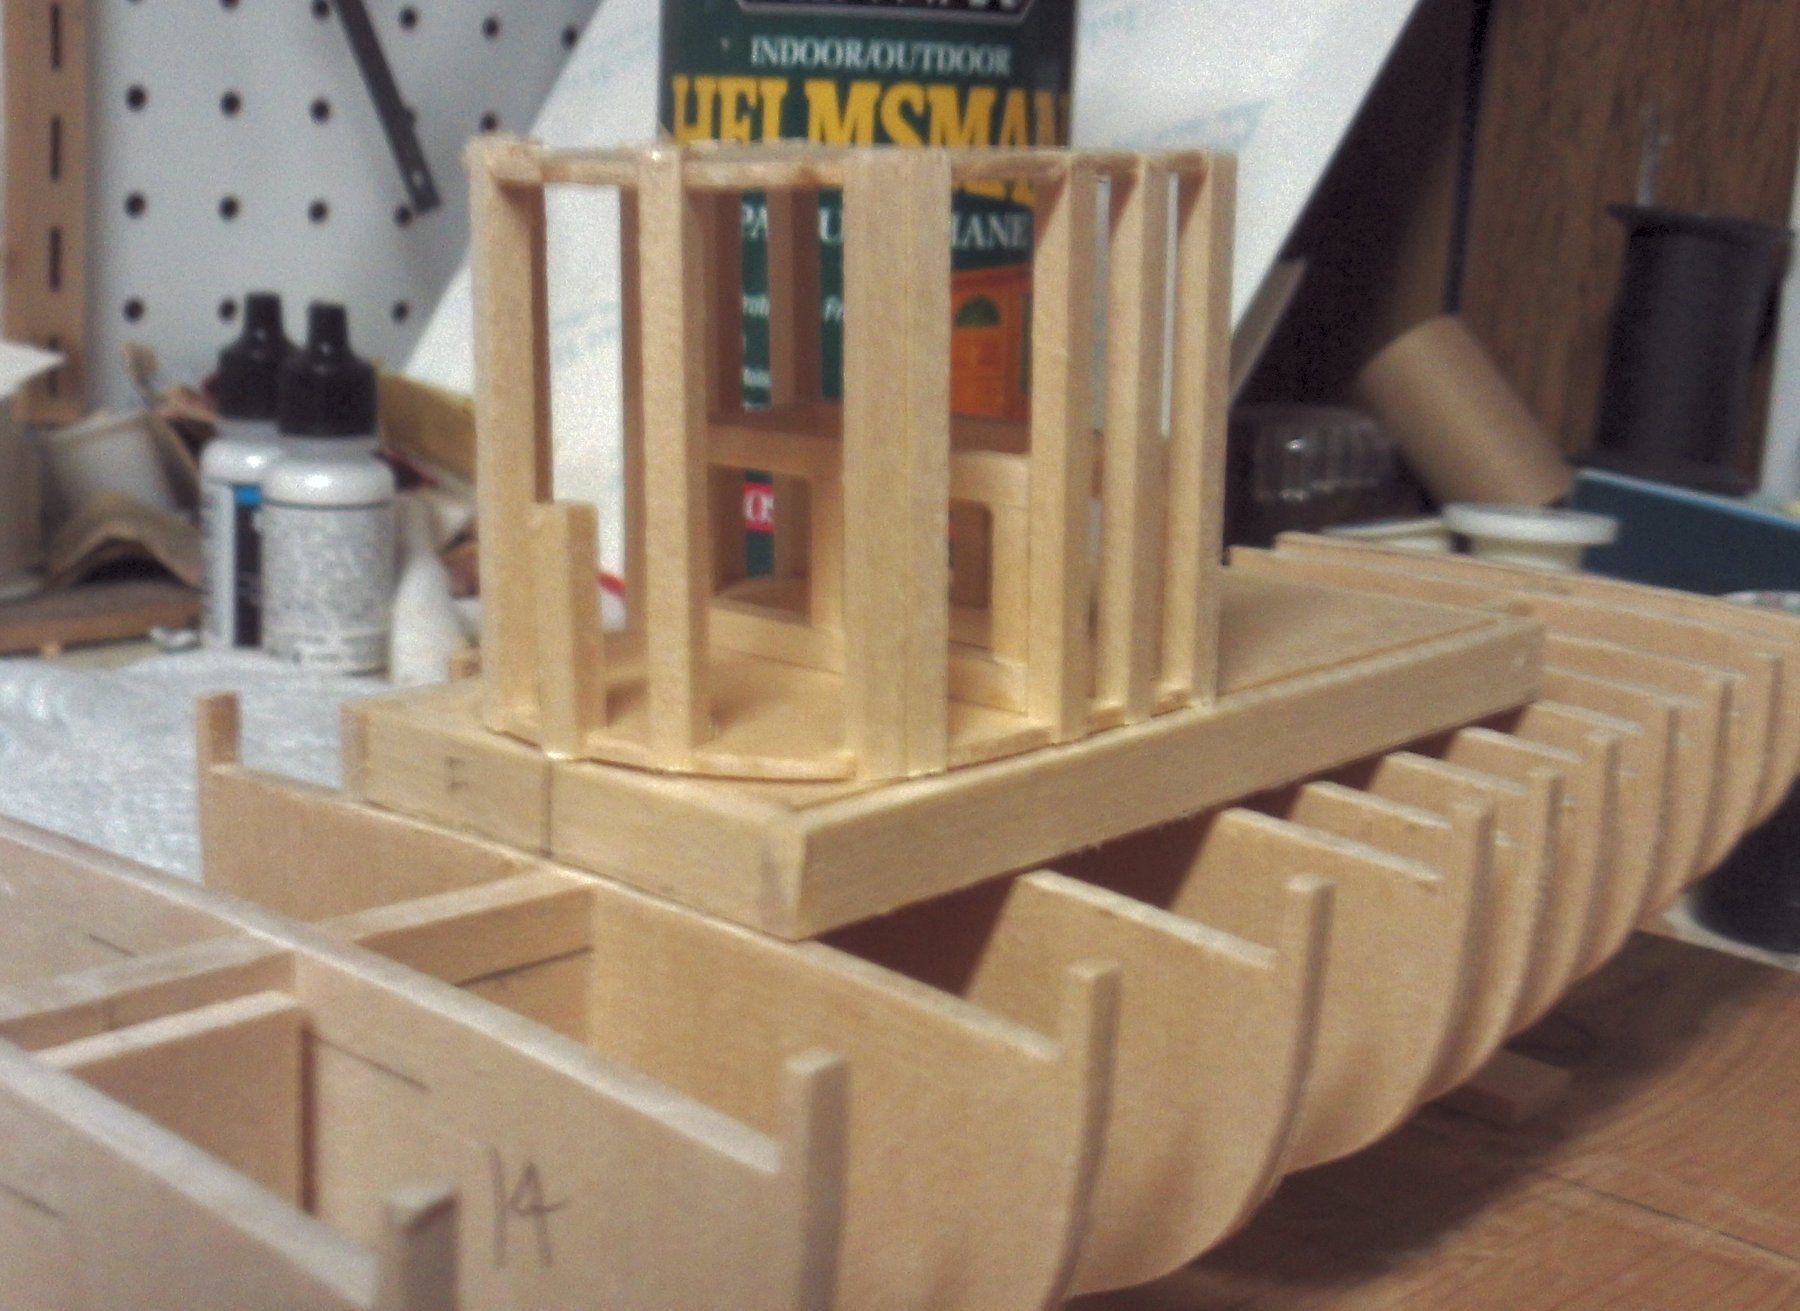
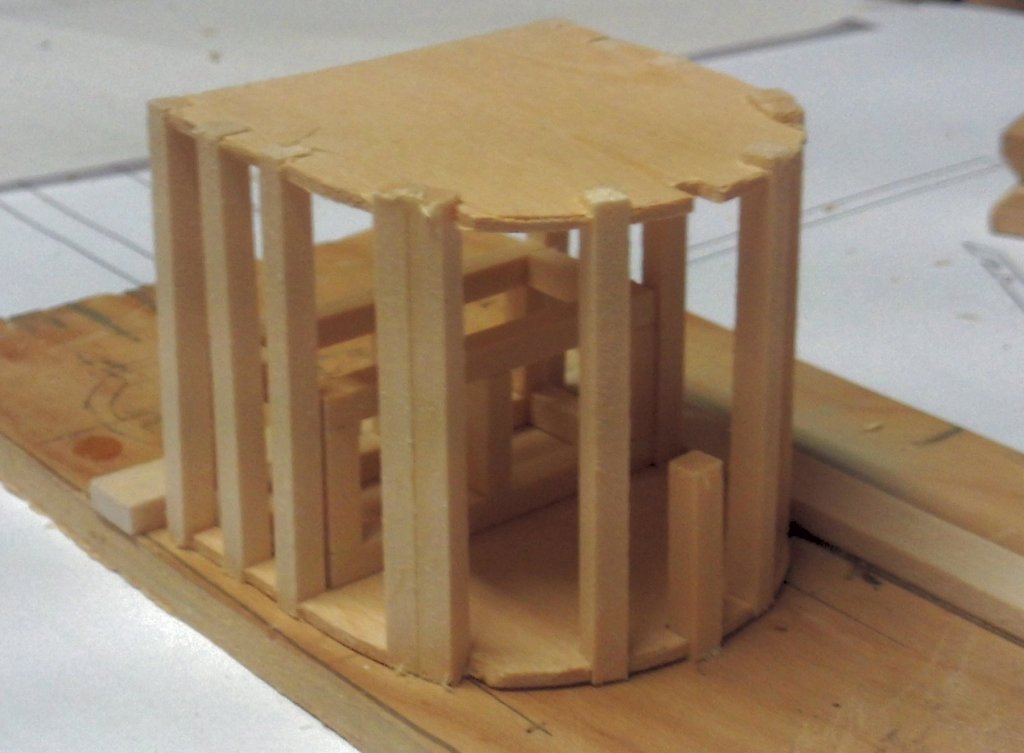
Here are some pics of the early work on the pilot house. This is my first pass at the pilot house structure, but I may have another go at it. Not sure at this point. In the pics, everything is dry fitted. The framing is extra heavy because I am looking for some rigidity. It will be hidden in the finished product. Russ


- 420 replies
-
- 16
-
-
- captain roy
- lugger
- (and 2 more)
-
Very nicely done. The fly tying thread was a good choice. It gives that very light feel that is necessary at this scale. Excellent work. Russ
- 481 replies
-
- 2
-
-
- rattlesnake
- model shipways
- (and 1 more)
-
Thanks. I have been working with the pilot house a bit the last few days. I will post some progress on that soon. Russ
- 420 replies
-
- 2
-
-
- captain roy
- lugger
- (and 2 more)
-
Wow!!! That is an incredible piece of work. Beautifully done. Congratulations. Russ
- 745 replies
-
- 3
-
-
- francis pritt
- mission ship
- (and 1 more)