HOLIDAY DONATION DRIVE - SUPPORT MSW - DO YOUR PART TO KEEP THIS GREAT FORUM GOING! (Only 68 donations so far out of 49,000 members - Can we at least get 100? C'mon guys!)
×


russ
-
Posts
3,086 -
Joined
-
Last visited
Content Type
Profiles
Forums
Gallery
Events
Everything posted by russ
-
Frank: They look okay, but this is really a personal thing. Your eyes on the model and you have to be happy with how they look. One thing to remember is that making the distance between the strings even will not necessarily be the best approach. The strings should reflect natural, graceful lines with no abrupt curves or bumps that disrupt the lines. The planking tends to narrow as you approach the bow. Aft of the midsection the planking widths will temporarily contract a bit and then fan out as you approach the stern, especially in the lower belt. This is a general statement and is not strictly accurate for all hulls. Can you take a photo looking at the stern like the one you have looking at the bow? That might tell us something. Russ
-
Frank: You will enjoy planking like this. Once you see how it works and get used to doing it, you will not want to do it any other way. Have fun. Russ
-
Mark: When I plank, I do the upper belt of planking first, then the bottom belt, and then finally the center belt. It looks like yours is coming along fine. However, I would plank that center belt from the top down since it is the upper edges of those planks that are most likely to need spiling. With the wider spaced bulkheads it is not always possible to get the arrangement of butts to work out perfectly. So long as you get the butts so that there are none lining up on adjacent planks and there is at least a bulkhead or two in between butts with a strake or two between them, it should be fine. When I plank, I mark out on the frames about where the butts will fall so I know ahead of time how they will work out. Russ
-
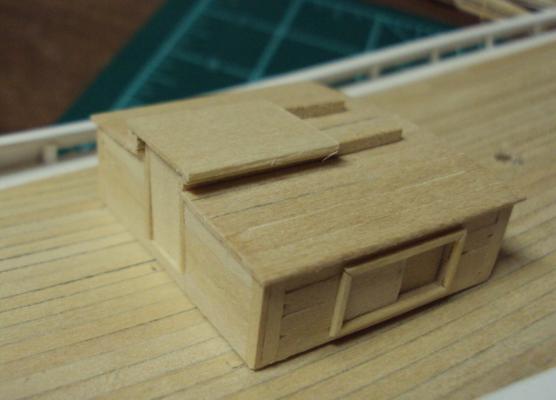
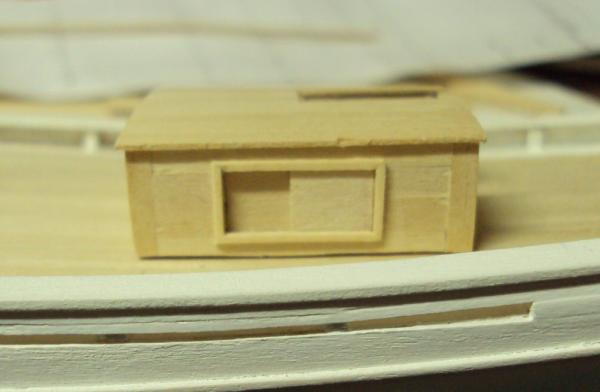
David: Thanks for the kind words. The deck house assembly still needs some sanding and filling in some places. The deck house will get a white paint job. I might go gray with the deck house roof and hatch cover. That was a common theme on these boats. Russ
-
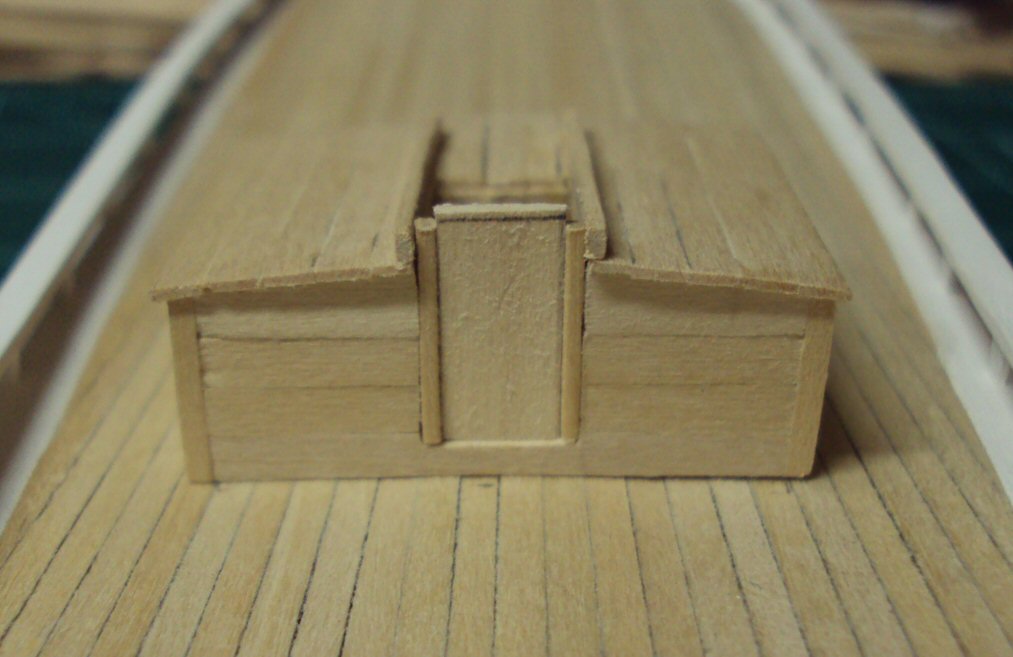
And another small step forward. The hatch has been fitted. You can also see the alignment runners on its underside. These align the hatch cover on the rails. Russ
-
Mayflower by SawdustDave - Finished
russ replied to SawdustDave's topic in - Build logs for subjects built 1751 - 1800
Dave: This is really nice work. As for the bell, if you had not said otherwise, I would think it was an actual bell. Nice work. Russ -
Beautiful hull form. Great work shaping the hull. Russ
-
Dave: Good to see you back. I am glad you like the schooner. Russ
-
Gary: I think the paper or card will be the answer. You need a little thickness on these as they go over the trunnions so just a coat of paint will probably not get it. Russ
-
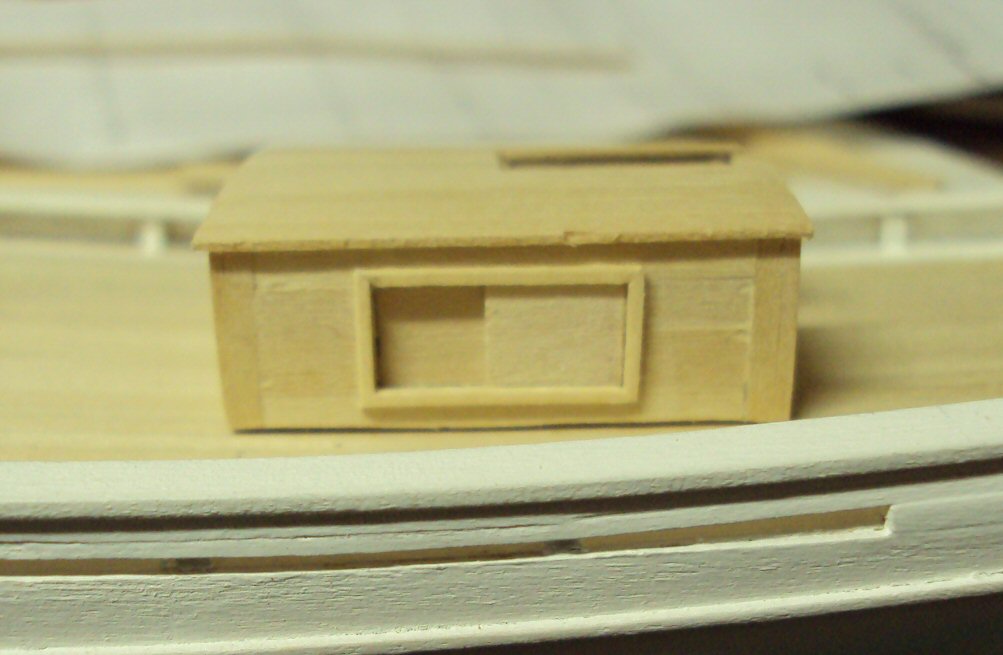
Pete: Thanks for checking in. Popeye: Thanks for the kind words. The deck house and all of the deck furniture will get painted. Bob: Thanks. I considered making the window panels slide, but at this scale, I did not think I could get it to look right. So, they look real enough, but they do not work. Thanks for all the likes. Russ
-
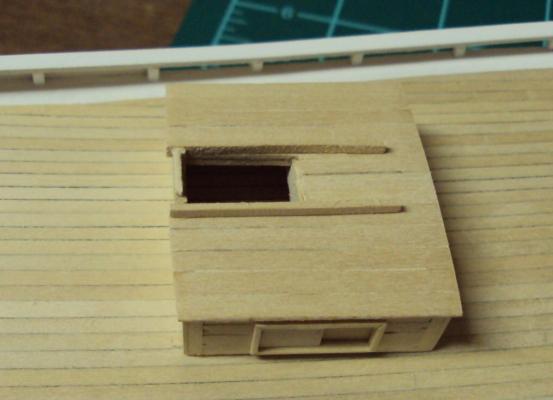
Here is another small update. I do not seem to do any other kind. The starboard deck house window is fitted. This one went a little easier being the second try at it. I have also begun fitting the hatch rails and the door. Comments and questions welcomed. Russ


-
Ken: Thanks for dropping by. Russ
-
It all looks very good so far. Nice lines and good joints on the planking and the deck. Russ
- 296 replies
-
- 1
-

-
- herreshoff
- buzzards bay
- (and 1 more)
-
Frank: Thanks. I am hoping to get some more done on the other window this evening. Russ
-
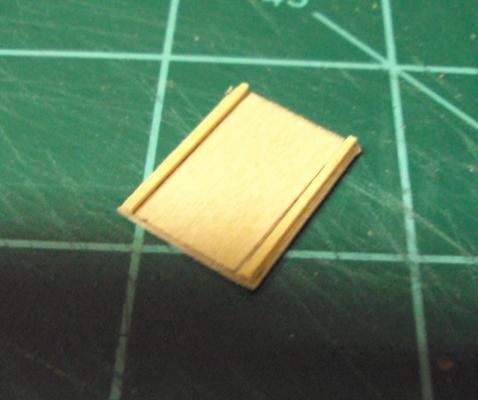
Another small update. Here is the window framing and fake panel. Still needs some clean up, but once it is painted, it should be presentable. Russ
-
Mike: She is looking really good. The port lids look great. Keep it going. Russ
-
Steve: I have never used Model Expo paints, so I cannot help there. You need to experiment a little on some scrap pieces and see what happens. Russ
- 569 replies
-
- 1
-
-
- shenandoah
- corel
- (and 1 more)
-
Gary: The cap square is a strip of metal that holds the trunnion (bar on either side of the cannon barrel) to the gun carriage. It can be made of brass strip or, as Alistair suggests, a strip of card or even paper or masking tape painted black. Its width should be slightly less than the thickness of the carriage sides (called brackets). Russ
-
I think that looks fine. Very nice fit and finish. Russ
-
US Brig Syren by Gahm - Model Shipways
russ replied to Gahm's topic in - Kit build logs for subjects built from 1801 - 1850
The davits look great. Using pear wood, it is almost a shame to pain them. It made for beautiful job though. Russ -
Sherry: Thanks for looking in and for your kind words. I am indeed having fun when I am able to get back into the shop. Martin: Thanks for dropping by. I appreciate the support. To everyone, thanks for all the likes. It is greatly appreciated. Russ
-
Chuck: She is coming along very well. It is an impressive build. Russ
-
Pete: Thanks. I am also curious to see if I can get the idea from my head onto the model. Russ
-
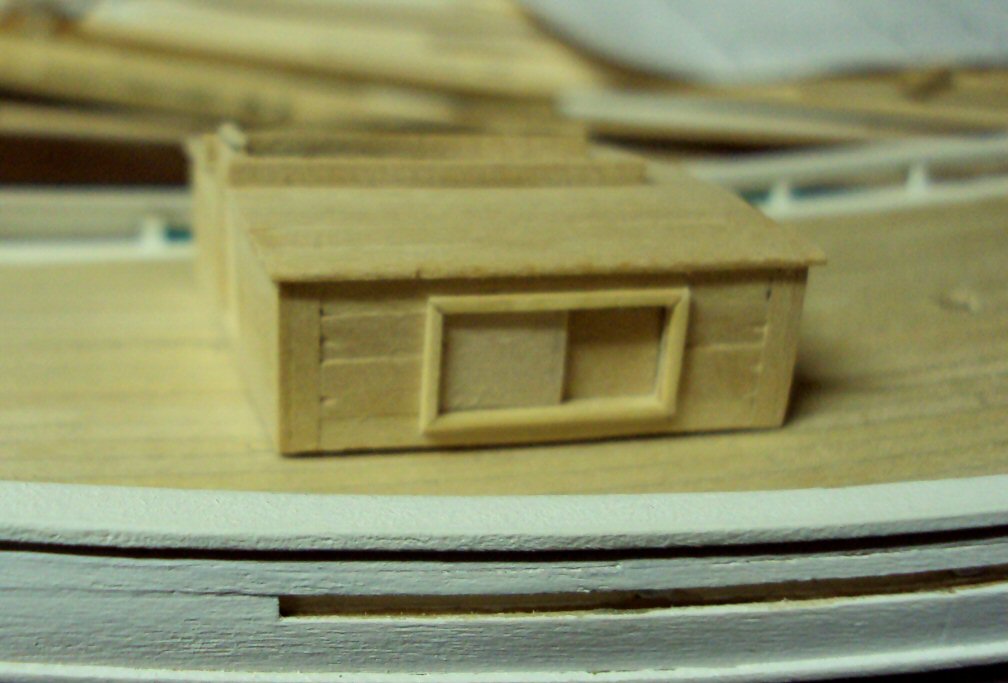
Sam: Thanks. Yes, the recesses will be windows. The deck house window unit usually had two panels that slide back and forth in the window frame. What I will do is to place a panel in the recess about half the length of the window opening to represent one panel. The solid wall panel will then represent the second sliding panel. A window will be placed around the opening and the entire thing painted. That should give the illusion of a fully functional window unit. Michael: Thanks for looking in. Russ