


bdgiantman2
-
Posts
359 -
Joined
-
Last visited
Content Type
Profiles
Forums
Gallery
Events
Posts posted by bdgiantman2
-
-
Very impressive model. I have been fascinated with Ketch rigs for a long time, they have a uniqueness about them as there never seemed very many throughout nautical history. Most seem to have been private fishing or small cargo vessels. Enjoying your blog and looking forward to more.
Brian D.
")
- dvm27, hollowneck, Keith Black and 2 others
-
 5
5
-
First it was Mr. Passaro, now there's at least three others since who have had mini's of themselves inspecting the ship models.
- FrankWouts and Dave_E
-
2
-
The mini-me imitators are hilarious and thriving well.
- Dave_E and FrankWouts
-
2
-
1 hour ago, Canute said:
And they chewed up the APC's armor. Our targets looked like Swiss cheese after a few weeks.
58 minutes ago, lmagna said:I almost wish we could send all 280+ into the Ukraine along with the proper pilots and support systems. Putin could not say that we were sending in modern "State of the art" weapons.
When Zelenskyy was first asking America and the NATO forces about supplying his country with additional aircraft, and the first pictures afterwards starting coming out of destroyed lines of Russian ground vehicles, I thought someone had sent over some A-10s to Ukraine. The miles long line of Russian tanks and attack vehicles looked like Swiss Cheese with all the bullet holes in the vehicles.
- Landlubber Mike, lmagna, Egilman and 1 other
-
4
-
10 minutes ago, lmagna said:
You may want to look at adding some nose weight as well. I think the A-10 in model form tends to be a tail dragger.
The instructions said to place weights into the ammunition drum for the nose cannon, which I have done. Its pretty heavy for the size of it. I have considered the possibility of adding so additional weights around the cockpits if space allows for it.
- Old Collingwood, mtaylor and Egilman
-
3
-
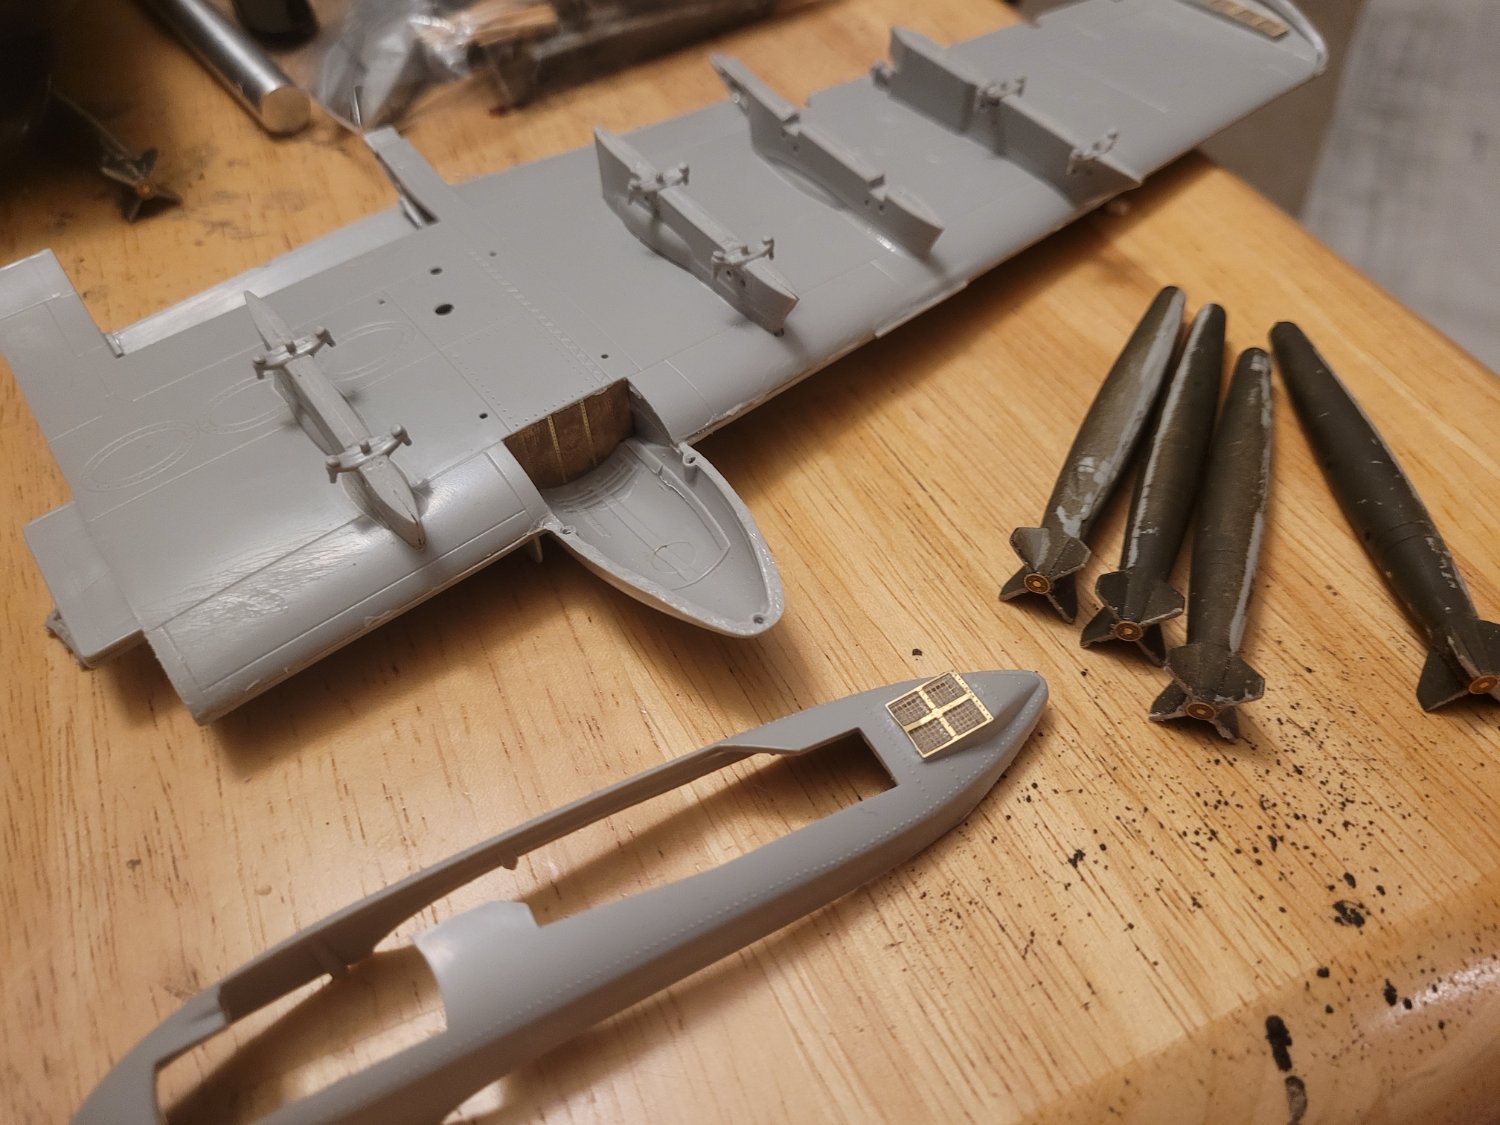
I am planning to arm her with both the Mavericks and the MK-82 cluster bombs. Will be using the Triple Ejector Racks for both weapons on either side of main gear pylons. I have been considering too having the external fuel tank on center rack just to give her some extra range abilities.
BRRRRRRRRRRRRRRRRRRRRRRRRRRRRRRRRRRRRRRTT
- mtaylor, Old Collingwood, Egilman and 1 other
-
4
-
-
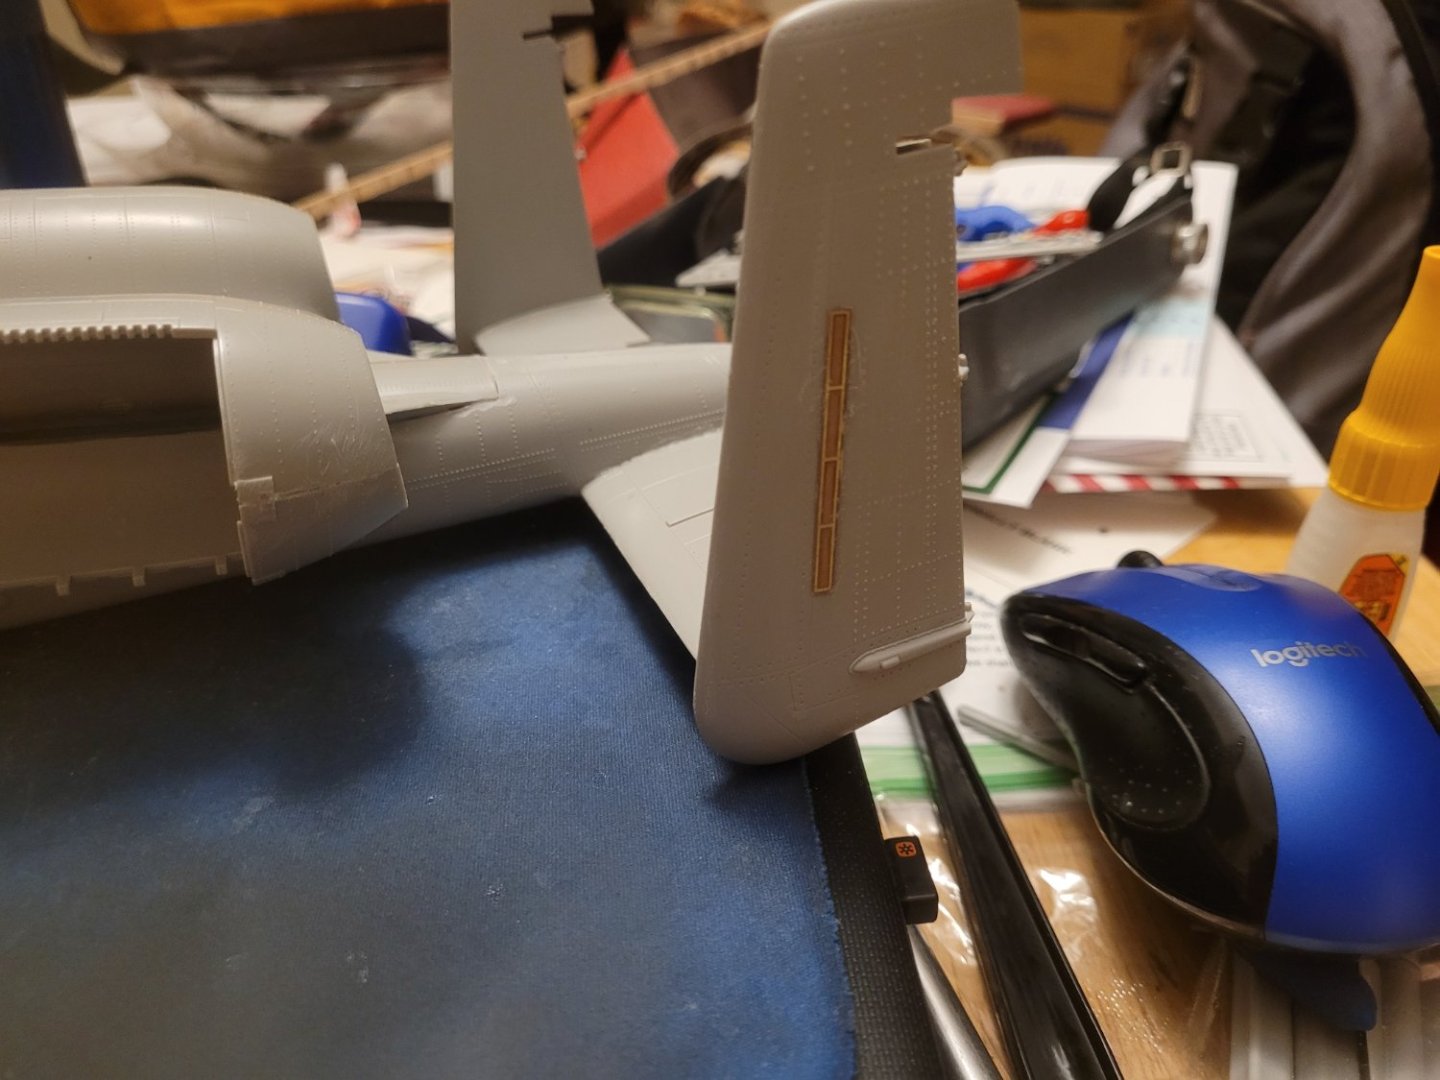
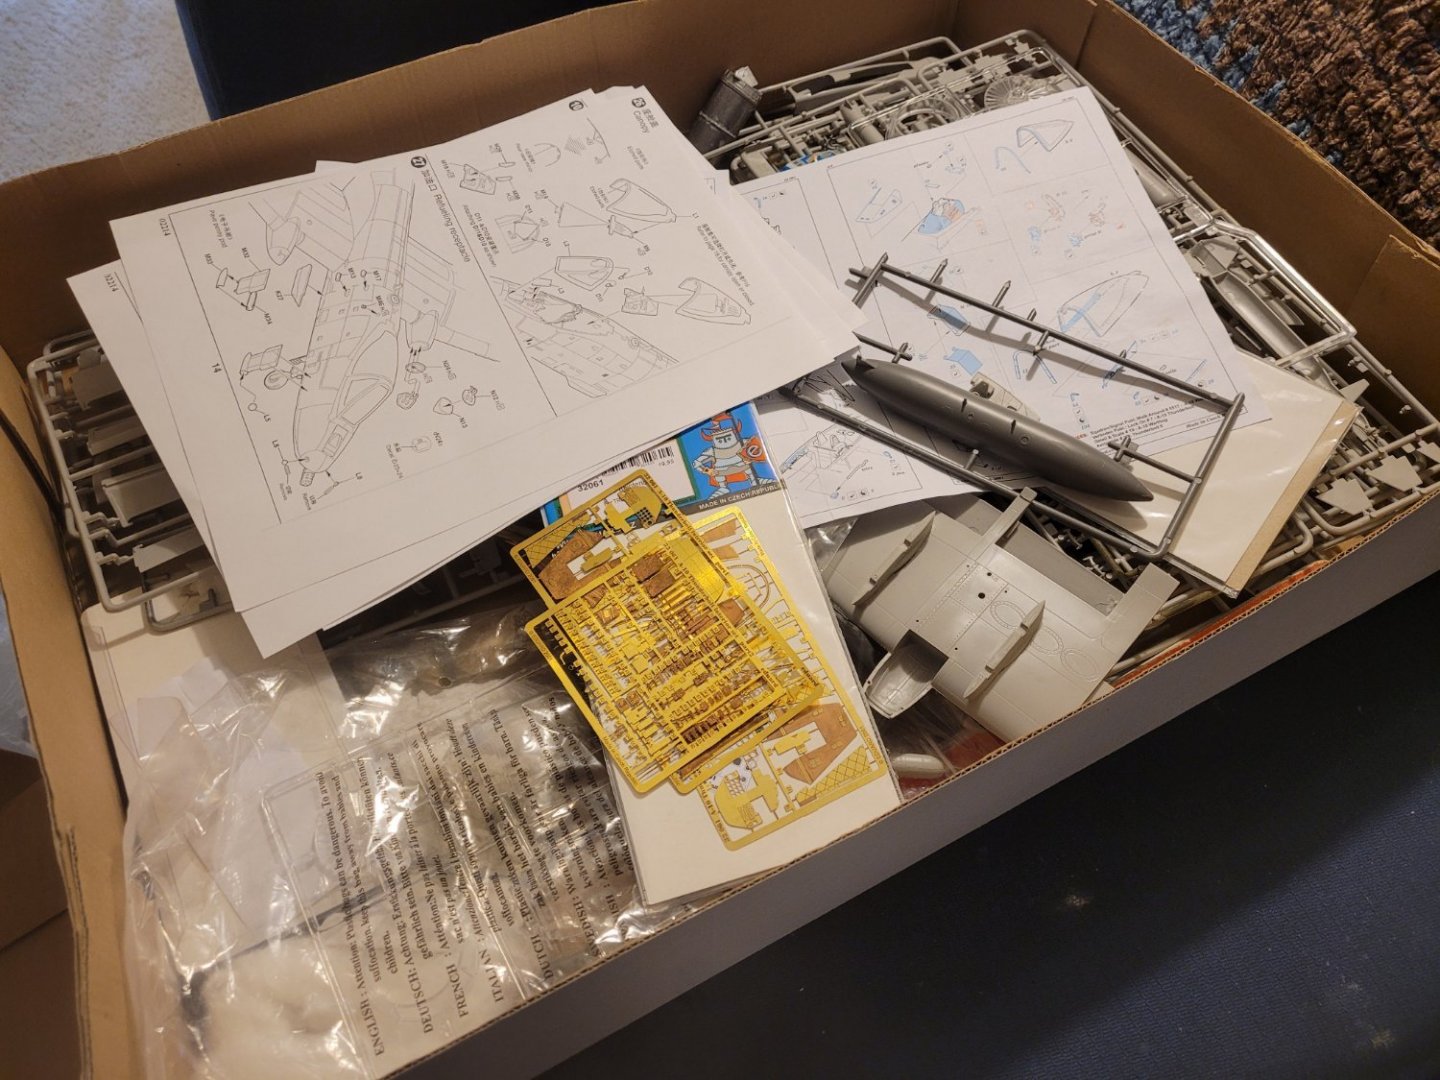
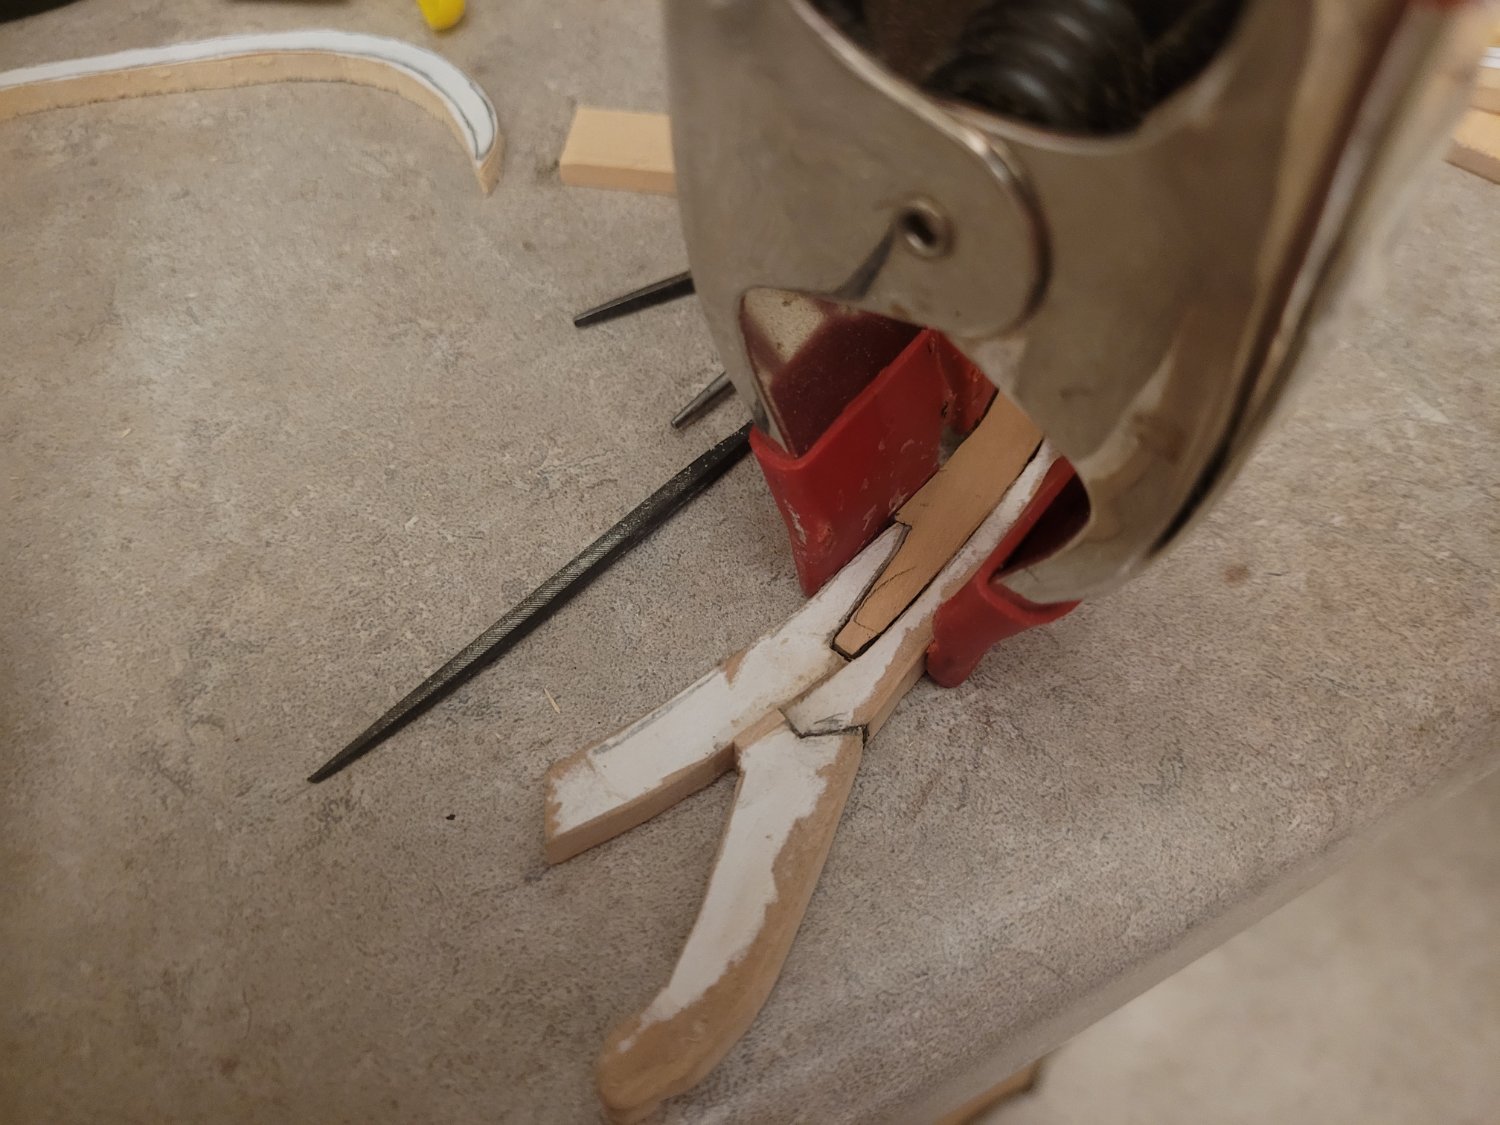
Hello friends, I have been making some progress on this model aircraft. Having to use superglue to apply photo-etch brass to plastic is always interesting, and yes, I have come close a few times to gluing fingers together or even to the plane. Even the weapons are getting pieces of brass installed. I am at the stage now where I will have to make the cockpits in order to proceed further with the construction of this plane. Yay me, I get to learn how to do weathering and applying color washes!! 😃

.thumb.jpg.77a636d4ba48cbf381e79806095af0a6.jpg)
- Canute, Landlubber Mike, hof00 and 5 others
-
8
-
Finally I have a little update about Eagle. Feels good to be making sawdust again. I have had to remake part of the stem of Eagle. Should have left the original alone, sigh. Also am starting to tackle making some of the bow and hawse timers for Eagle, been doing a lot of research on here about how you guys make these pieces. I didn't take any new pictures of this part but am also making some more stern timbers.
- CiscoH, GrandpaPhil, VTHokiEE and 4 others
-
7
-
Timmo, as someone who used to work in logistics with FedEx Ground, there are a number of potential reasons. The first one that comes to my mind is the possibility that the shipping label somehow came off the package (happens way more often than you may think) and having to do research to find out where your package is going to -- or there is the fact that some labels just become unreadable with the scanners being used and having to guess at some information. Another possible issue could be going through Customs. Some packages just take longer even if the shippers writes on the outside what is inside. There also are some shippers that just don't provide tracking of tracking which I know is a inconvenience to anxious recipients.
- FrankWouts and Timmo
-
2
-
Impressive model and great explaining of your processes building this ship. I am curious about one thing. I can understand the louvers and air ventilation for around the anchor ropes storage and the sail storage room, but why do they do this on the pump room as well? It has to be more than worried about a fire in the powder storage areas, as the powder rooms always seemed pretty protected.
-
I apologize in advance that didn't start this blog sooner of this project.
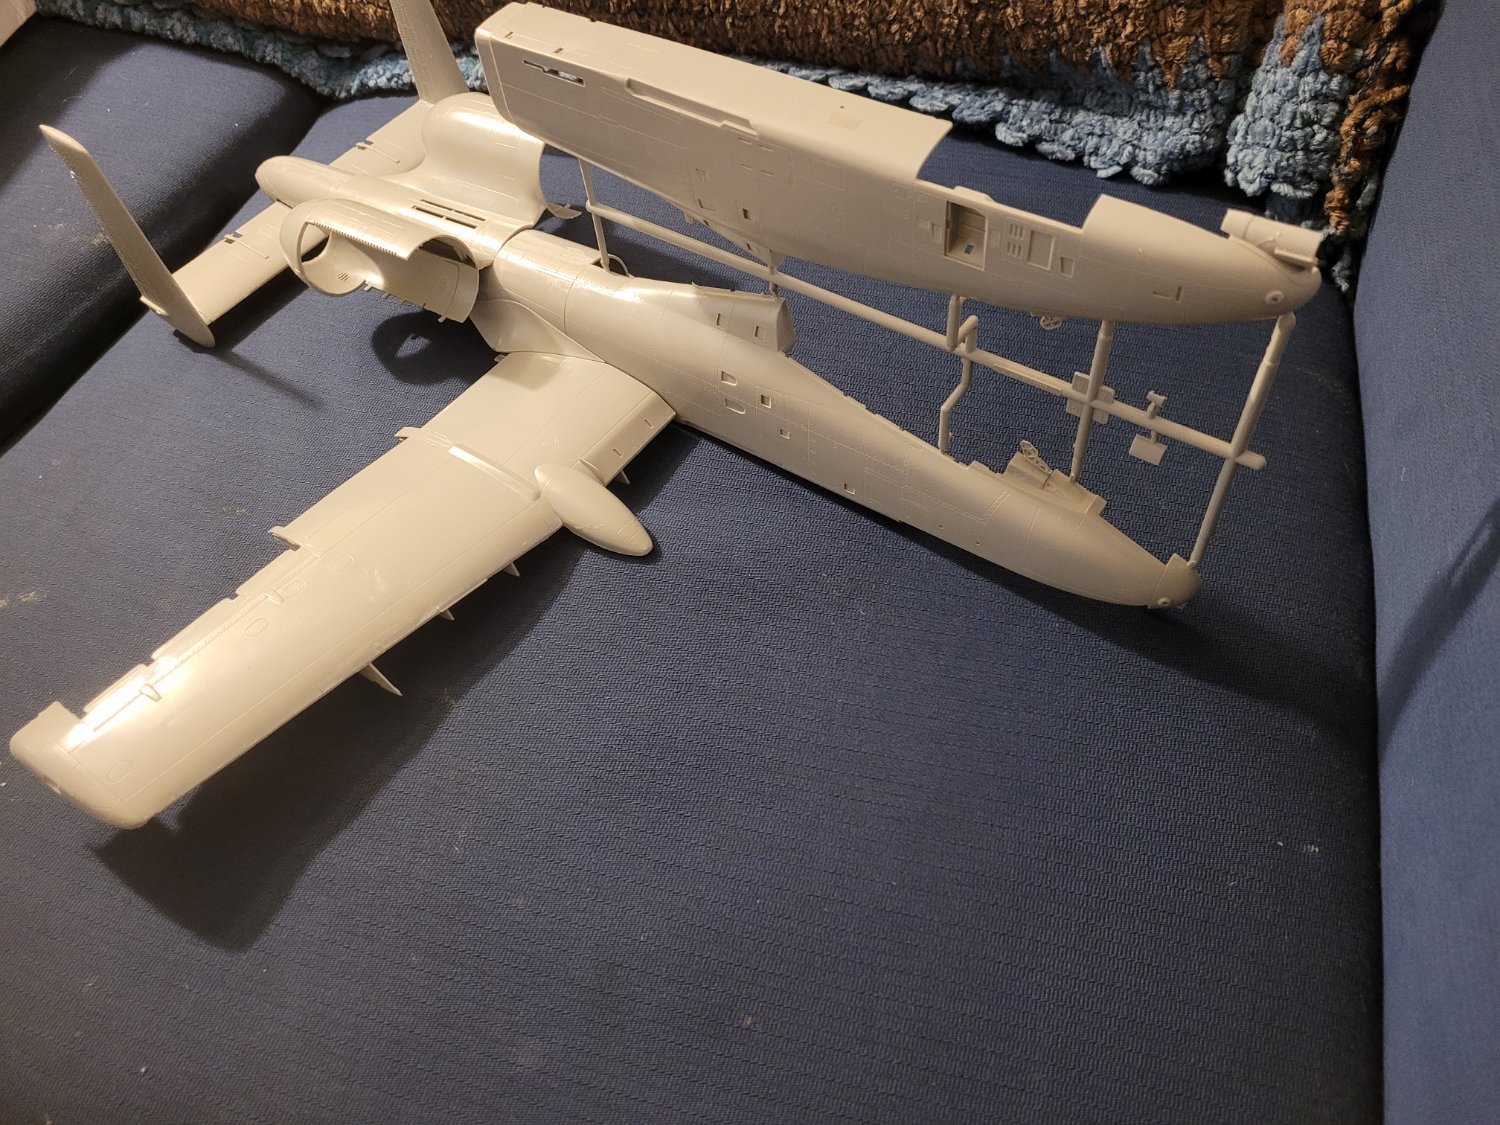
While I continue doing research around my work schedule as well as cutting pieces at a pace slower than evolution to make the laminate frames for Brig Eagle, I am undertaking a fighter-jet kit of interest I found online. This jet is the N/AW A-10B Warthog by Trumpeter, the experimental two-seat model that enabled the warthog to excel in night aviation attacks as well as adverse weather. This plane was launched in 1979, the same year that I was born. I have largely found in my personal opinions that the two-seat models of many American fighters are way more attractive than the single-seat usually in service in the military. Unfortunately only one model of this aircraft ever came off of the assembly line and never saw squadron service.
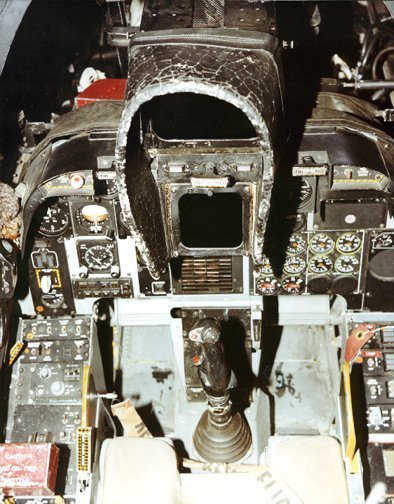
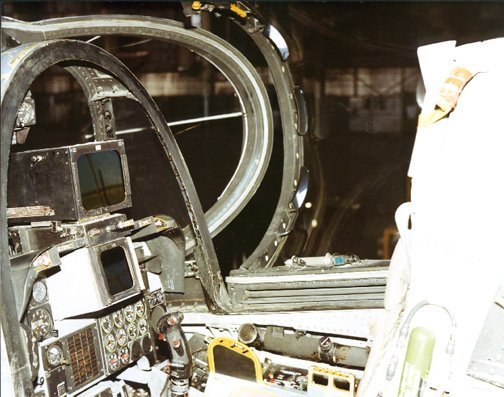
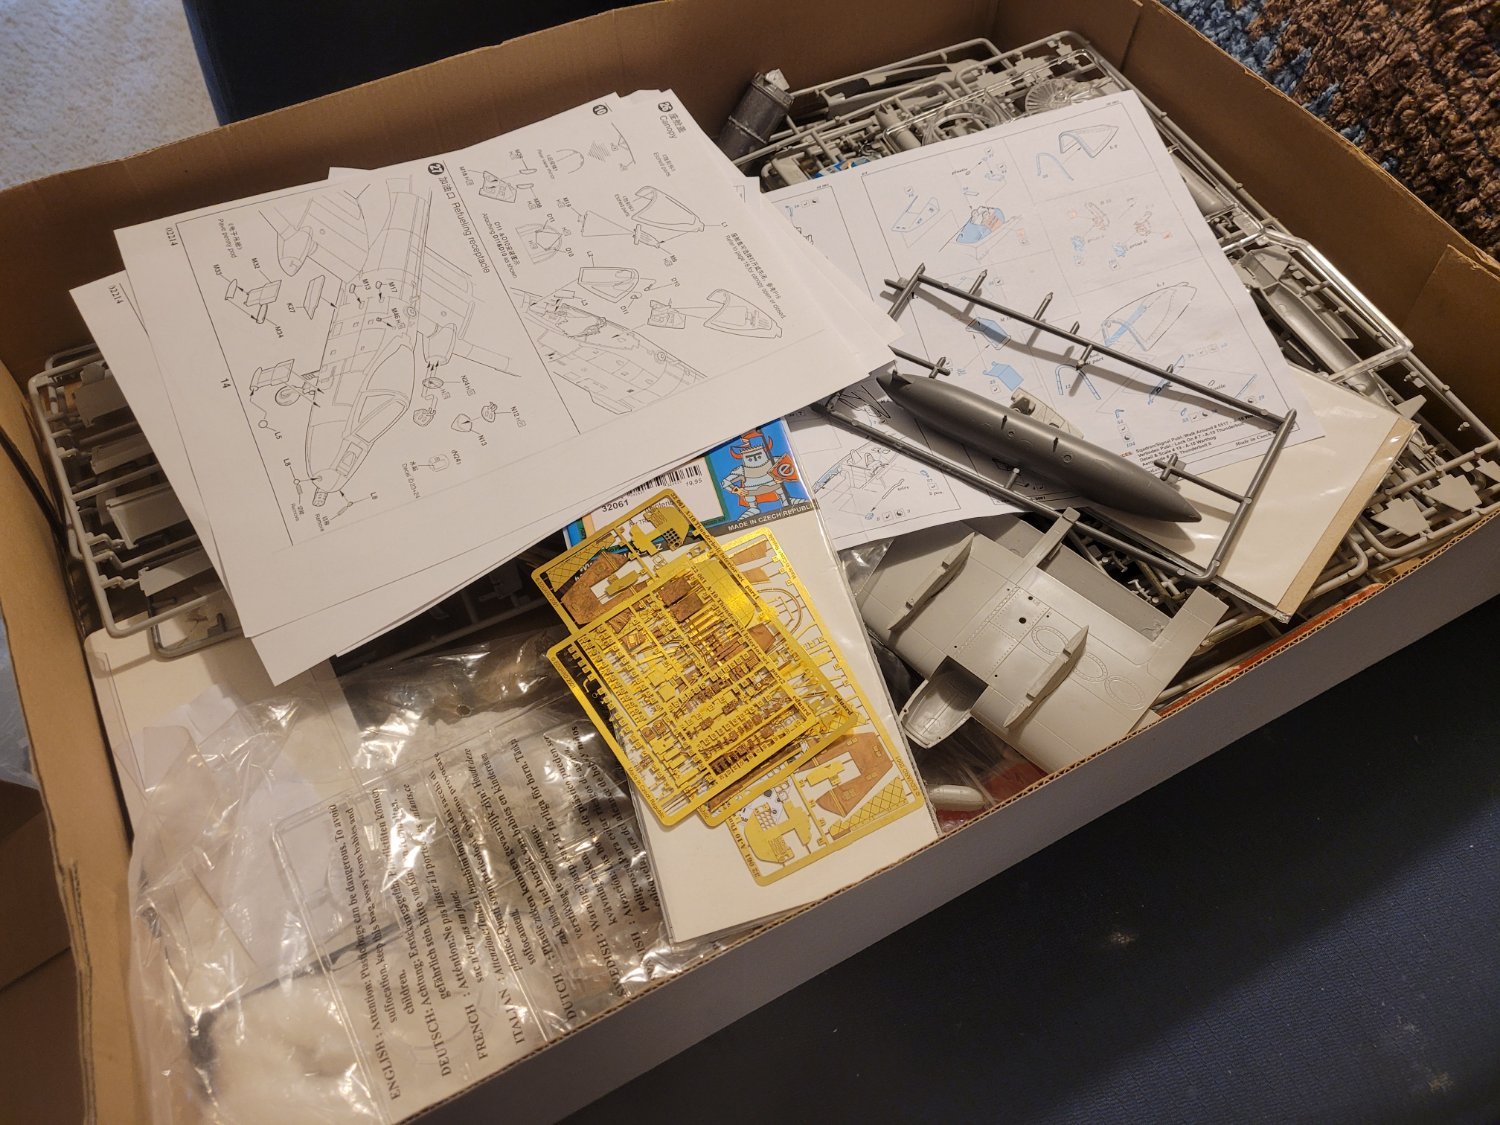
Overall, my opinion of this kit is good quality of parts except for cockpit details considering that this kit was made in China. There are these lame decals suggested that don't even resemble the real planes cockpits at all. For a kit of this scale I have come to expect better details especially of cockpits. Thankfully, after conducting research, I was able to come across quality photo-etch brass detailing of front cockpit and will kit-bash the back-seat. Also purchasable are fuselage detail pieces as well as a kit for detailing the weapons. Included are two pictures that someone took of the back-seat of real jet when it got downgraded from test aircraft at Edwards Airforce Base to museum exhibit status. The instruction manual has good illustrations of the construction and even included a short history of real plane with some pictures. Also of interest with this kit are metal landing gears as well as two high-detail resin engines.
Again, even though the real jet never saw active service in any squadrons, I plan to take artistic license and display her with a squadron. The chosen group is Eielson's Ice Hawgs stationed in Fairbanks, Alaska. Fully armed, this plane is definitely a bad-*** bird wouldn't want to mess around with.
The wing, tail assembly, and engine casings are not currently glued to the fuselage, I just have them placed to show how big this kit is.

-
Thank you again for the information, Allan. I don't know why I mentioned Google in my last response, although I am certain that I did try them in the past. Also, this is what I get responding over my cellphone later at night than I ought to be. This web site is super helpful, and so many skilled ship builders.
-
-
I have a question involving the deck pumps. Am building a model of Brig Eagle 1814, the ship has two Elm Pumps. I can't tell from the plans if the tubes (not sure this is the correct term for them) for the pumps are vertically straight or if there is a slight tilt to them away from the keel. I see many diagrams of the chain pumps which clearly have a tilt to the tubes. I have the books by Wolfram zu Mondfeld and Bernard Frolich, but I didn't see specific answers about regular elm pumps.
Thank you for your help.
Brian D
- mtaylor and Keith Black
-
2
-
The Sphinx is getting her teeth now! Keep up the progress on your model, she is coming along!
Brian D
- Dave_E, Old Collingwood, mtaylor and 1 other
-
4
-
Great story, Brian! What an amazing experience, glad that you and your wife were able to reach out to those men at the museum like that and go behind the scenes. I am a little jealous, I confess -- LOL.
Question for you: Looking at the pictures provided of the grapeshot, I am guessing that they are eighteen inches to two feet in length and probably 6-8 inches in diameter??
Keep up this amazing model, you are doing a very accurate job and I enjoy following this thread.
Brian D.
- mtaylor, FriedClams, Keith Black and 2 others
-
4
-
 1
1
-
You are the first builder on this project including the shot racks, they look great on your model. Did you use bearing balls for the cannon shot? You have done a great job on your Winnie model.
-
I used to live in San Diego, I was in East Central San Diego -- the La Mesa and El Cajon areas. An uncle lives in the Escondido area. While I was in San Diego I used to be with the San Diego Maritime Museum. the model shop was always my favorite part. The club at the San Diego Maritime Museum is good if you want to drive there, have meetings on Tuesday nights. Long Beach has a good model club if you want to drive up there also.
- Keith Black, Chuck Seiler and mtaylor
-
3
-
Welcome to this group, sir, and thank you for your service. Which part of Southern California are you from if I may ask?
- mtaylor, Ryland Craze and Keith Black
-
3
-
Is there a reason that the swivel guns have a more rustic/aged look compared to the main long guns? I can only assume the crack gun crew you have was polishing the main battery and haven't gotten to the swivel guns yet with the polish and grease.
-
-
Hello Friends, and Happy Easter/Resurrection Sunday to all of you.
I am finally able to post again on my blog. After a rollercoaster employment situation since the end of last year, I am back on my feet with steady income and been able to splurge a little too. I am back to the Eagle.
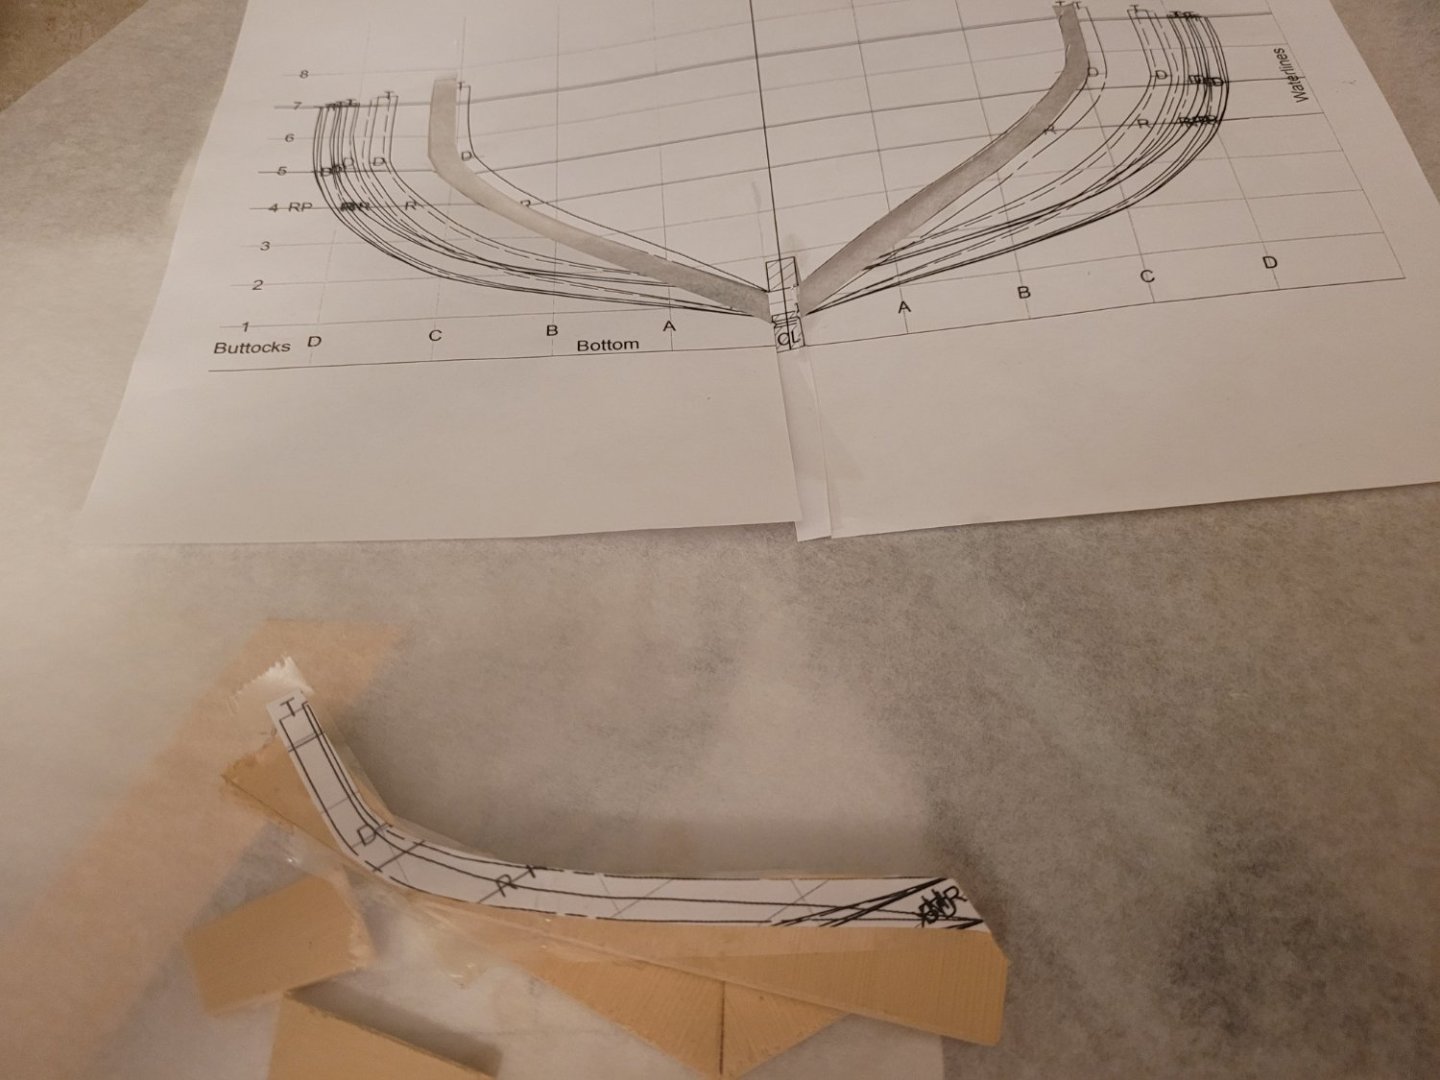
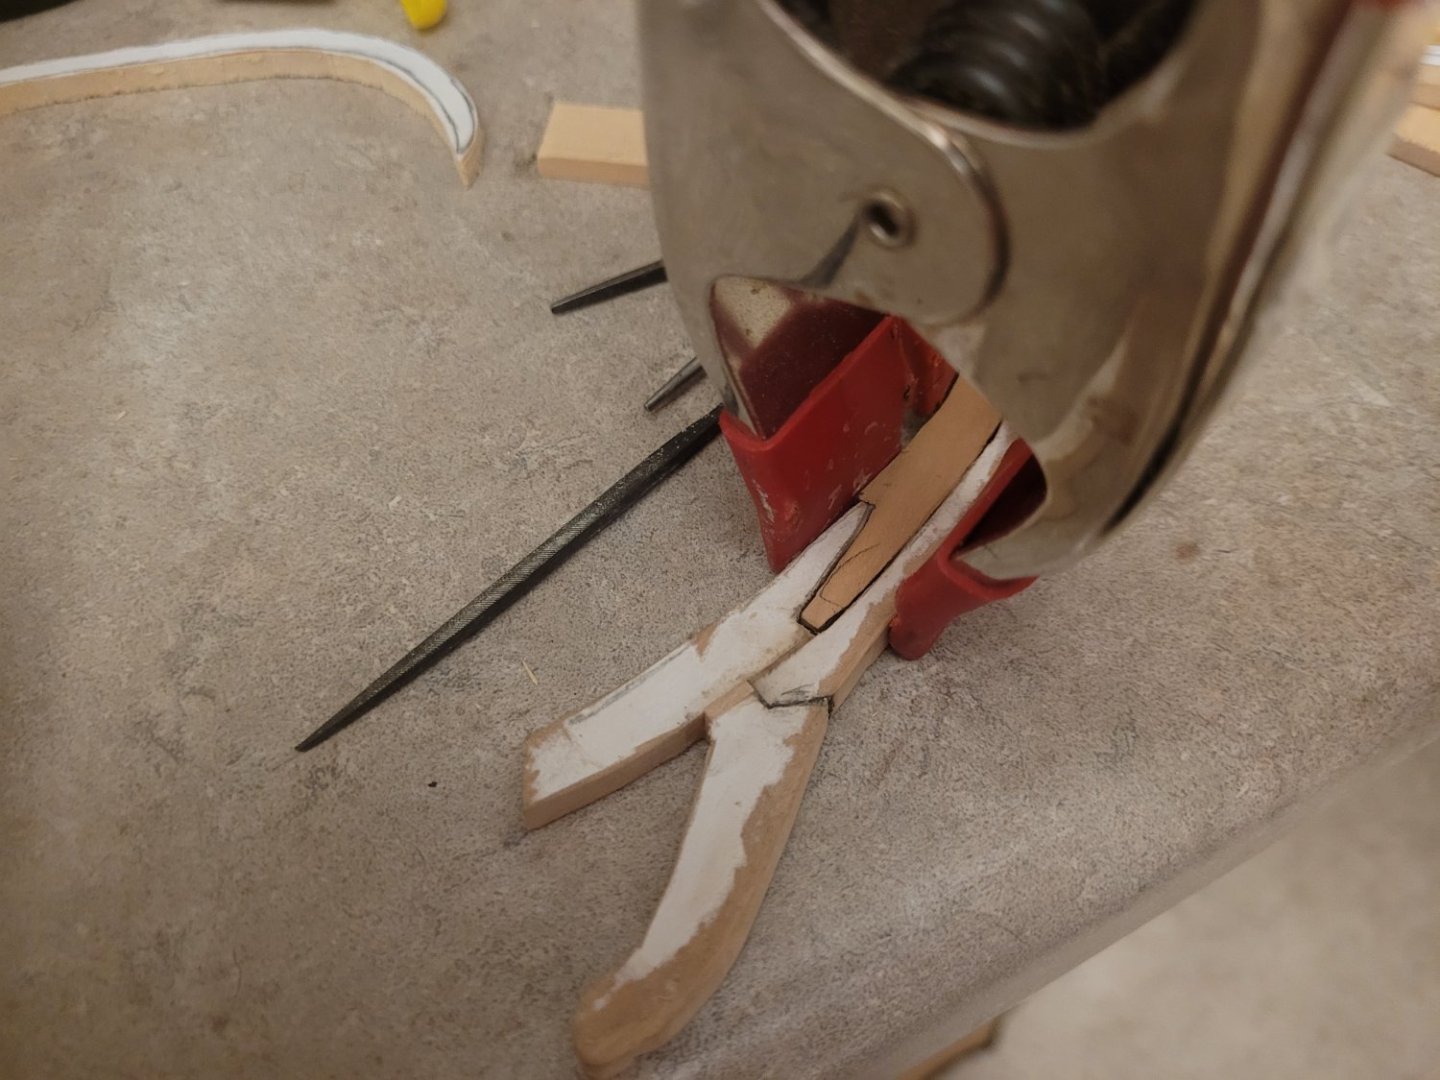
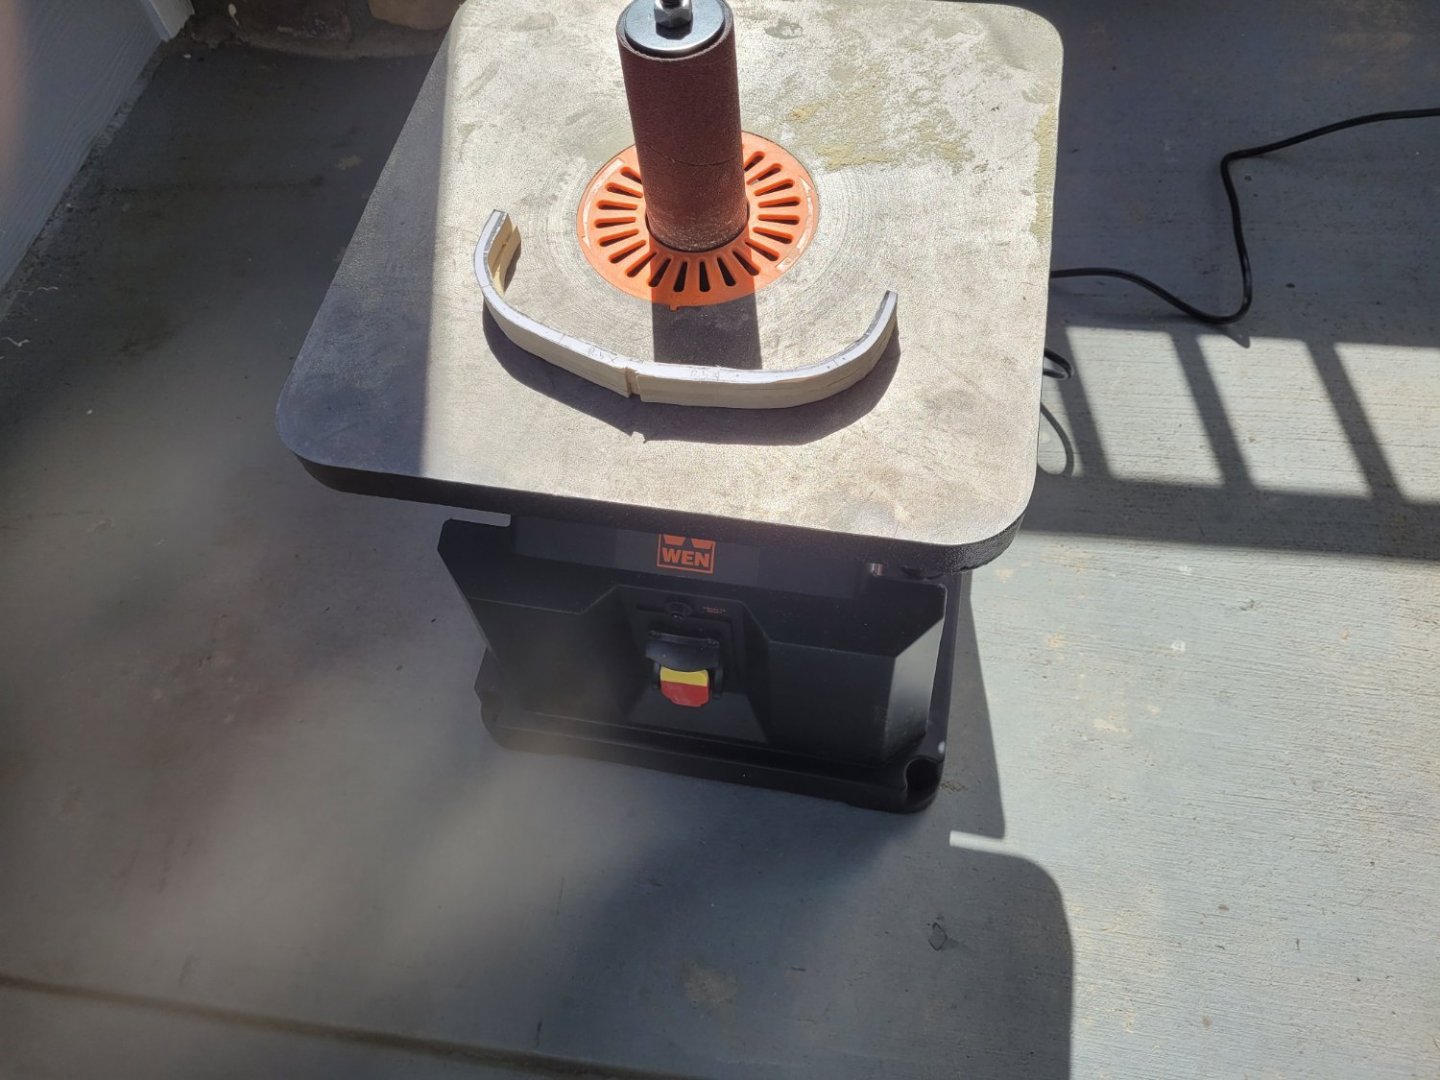
So I have been working slower than evolution it feels on the rib sections of the Eagle. I have made the first ribs of the model, it turns out joint Frames 7-8 and not X as had originally thought it was. Placing the frame on the model I see that I need to do more trimming both inside and outside. It was the inside part giving me the most trouble. Also apparently the rib is too thick even though I am using 3/16 thick boards as drawings indicate. In trying to get the insides of the ribs better I have found two issues. First I rigged one of my Dremel units to a router tabletop and tried using it as a spindle sander. Took too little off and wasn't effective. I knew would need something bigger with more bite to it. So after researching I bought a Wen Spindle sander with an angled top. It arrived today and I eagerly tested it. This machine is a BEAST!! Made substantial progress compared to the Dremel, going to need to trim more with scroll saw first and get closer before I use the Spindle sander again -- I left too much meat on the bones. Also in the meantime I have been construction of several futtock pieces that have yet to have rest of frames glued on.
And following some ideas from the Winnie projects, I have ordered some supplies from CraftySailor which should be arriving next week.
-
The galley stove turned out great, Mark. Your model of Sphinx is looking great.
- Dave_E, Keith Black, mtaylor and 2 others
-
5
.jpg.7e2611cad9a0a3ba8e1348c8566227cd.jpg)


Brig Eagle 1814 by bdgiantman2 - 1/48
in - Build logs for subjects built 1801 - 1850
Posted
Hello my friends, I have a question for you as I attempt to slowly continue. I know that this is my model, but I just want to see what you all suggest.
In the enclosed picture, you see a close-up of Eagle's keel and the start of her keelson. My question involves the first piece of the keelson. Currently this piece is cut from Boxwood, I will have to re-cut it either way to get the correct shape as well as sand down the outer pieces. I am debating making the keelson out of Yellow Alaskan Cedar like the ribs will be.