


bdgiantman2
-
Posts
378 -
Joined
-
Last visited
Content Type
Profiles
Forums
Gallery
Events
Posts posted by bdgiantman2
-
-
If I remember correctly, wasn't this ship caught in some hurricane like around Fiji and either ran aground or strike a reef? Don't remember the full story, but she was listing pretty badly after the hurricane. She was talked about in a book that my dad has about a number of ships in nautical history.
Brian
")
- Keith Black and mtaylor
-
 2
2
-
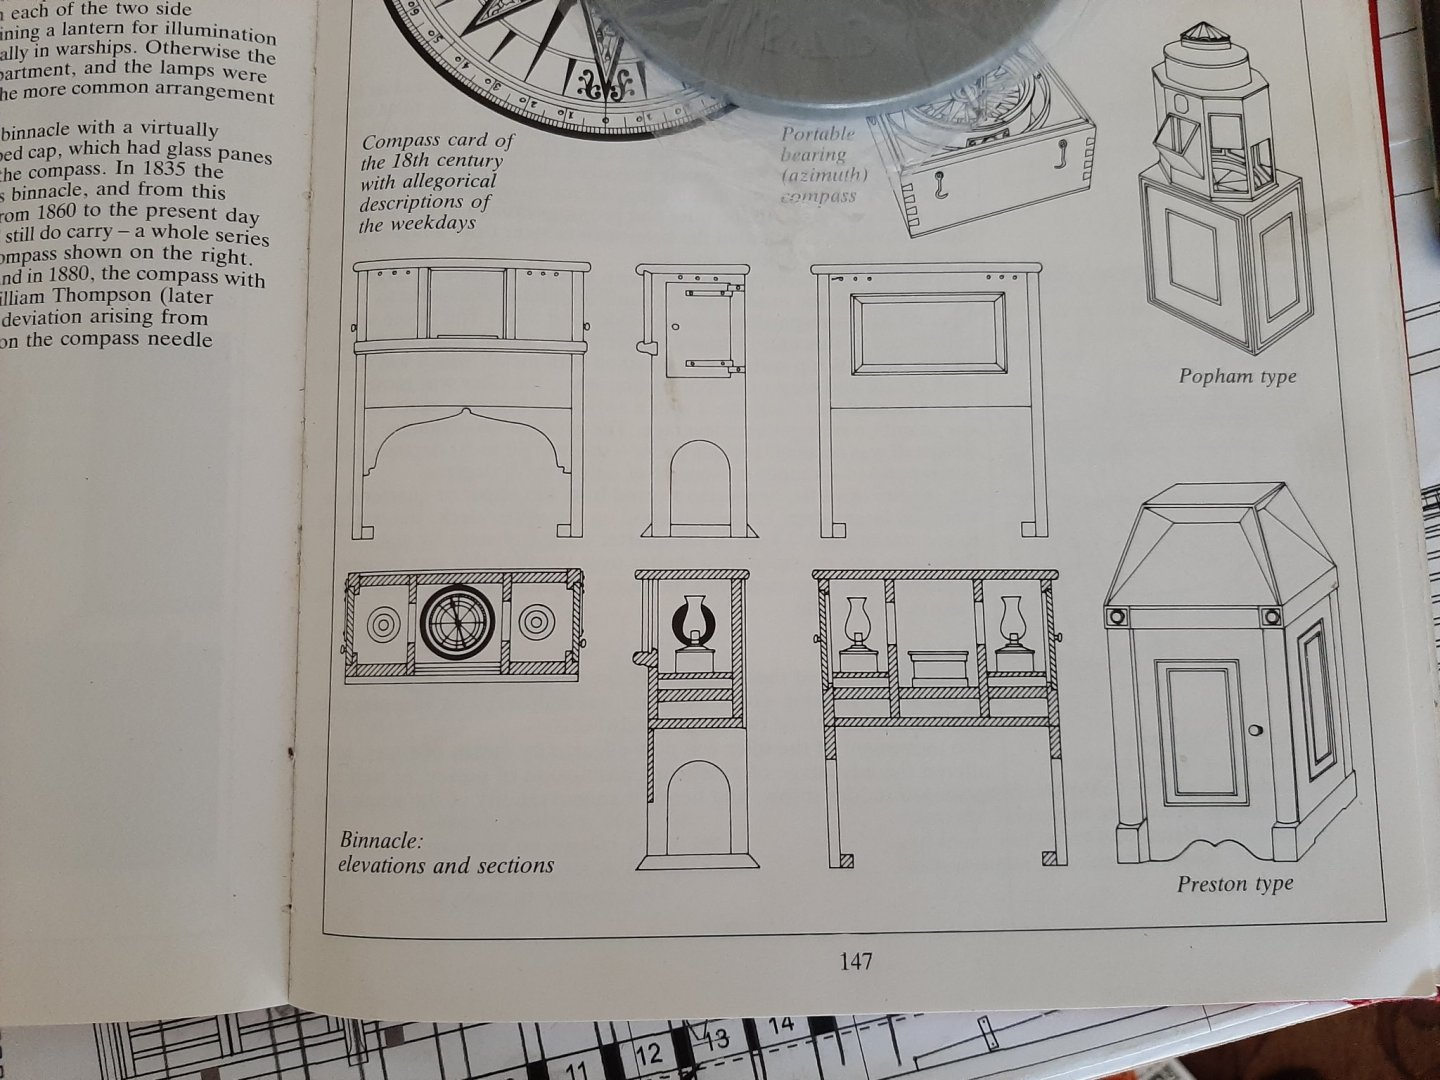
Here is a illustration I photo'd of a compass binnacle from the book Historic Ship Models by Wolfram zu Mondfeld. I will be using this same binnacle on my model of Brig Eagle with some potential modifications. Mr. Mondfeld says how warships would have two compasses with a lantern in the middle station, merchant ships would be the opposite.
-
Very unfortunate. I remember her being in San Diego many times during the Summer Festival of Sails fundraisers at the Maritime Museum and volunteering for this event.
- Chuck Seiler, thibaultron and Canute
-
3
-
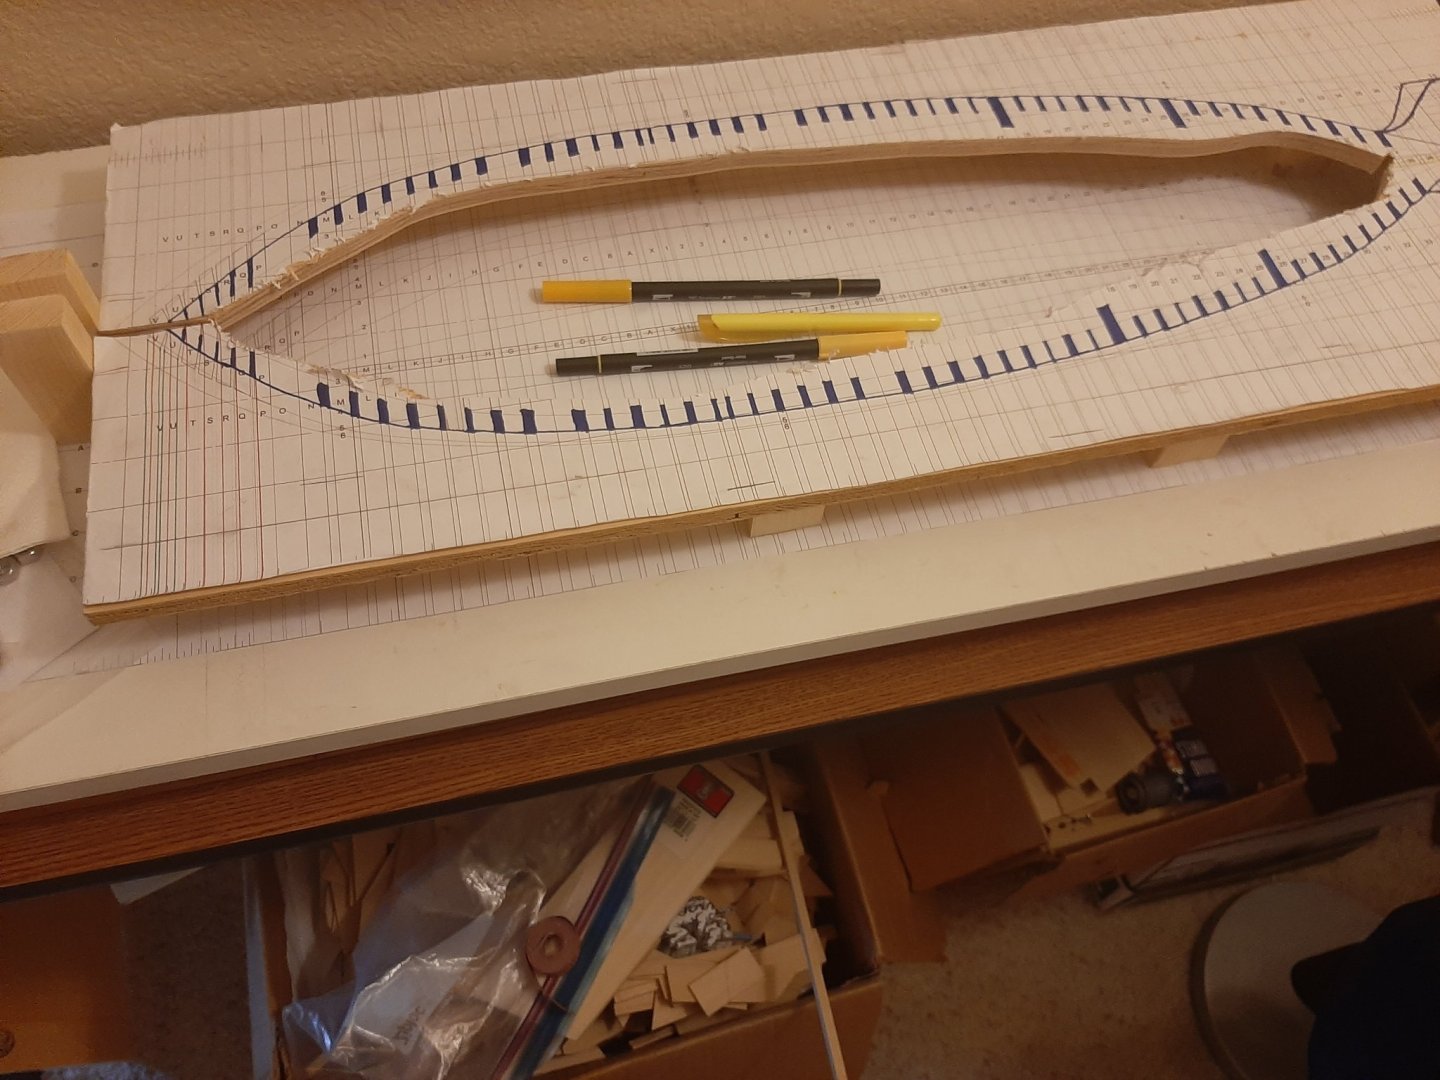
Hi Casey, is this the ship model you are talking about modifying with the wheel? If so, my personal suggestion would be right in the middle of the upper deck. The area I circled in yellow over the centerline plank would be a good placement. I really like the ketch rigs myself and some day will make a model of one.
Brian D.

-
Hello Malazan, welcome to this site. I am in Colorado myself. Success to you with model ship building. Which area of the state are you in if I may ask?
- mtaylor, JeffT and Keith Black
-
3
-
Hey Mark. If you visit the blog of Winchelsea by Chuck Passaro (which is the same time period), you will see that he has double-layered the planking where the wales go. This would definitely be more noticeable at the larger 1:48 scale he is building in compared to what you are working with. Your model of the Sphinx is looking great, buddy. Keep up this project.
Brian D.
- hollowneck, mtaylor, Jack12477 and 2 others
-
5
-
-
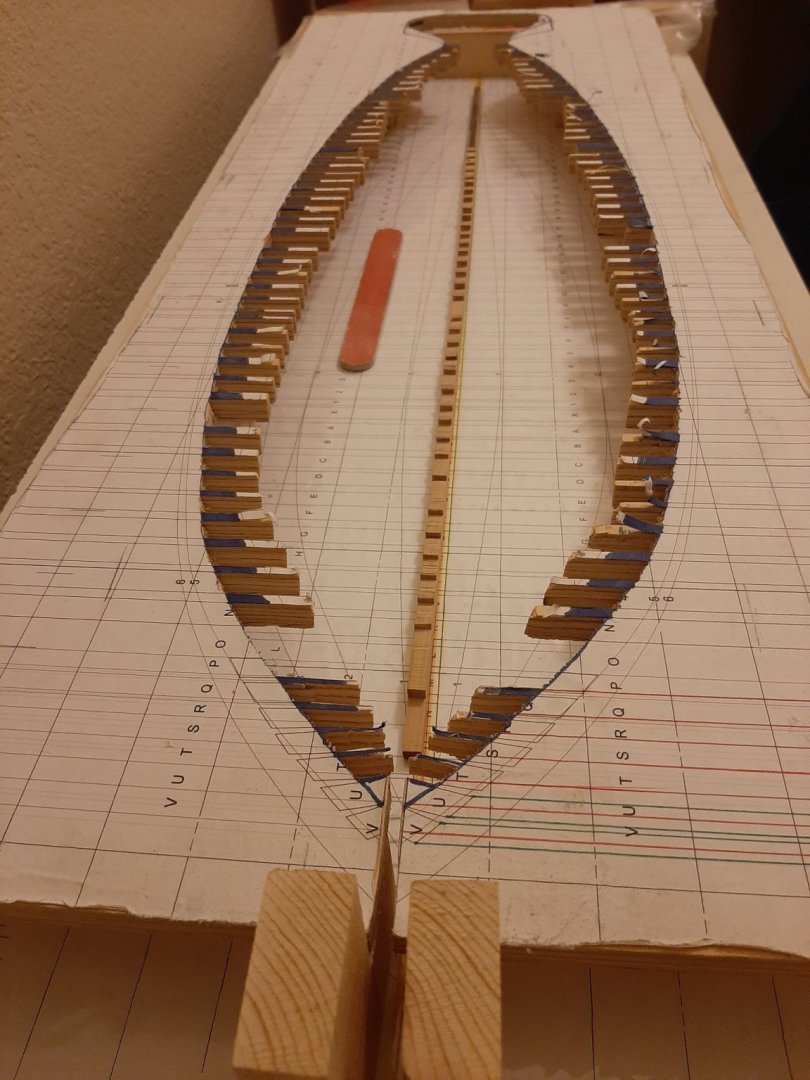
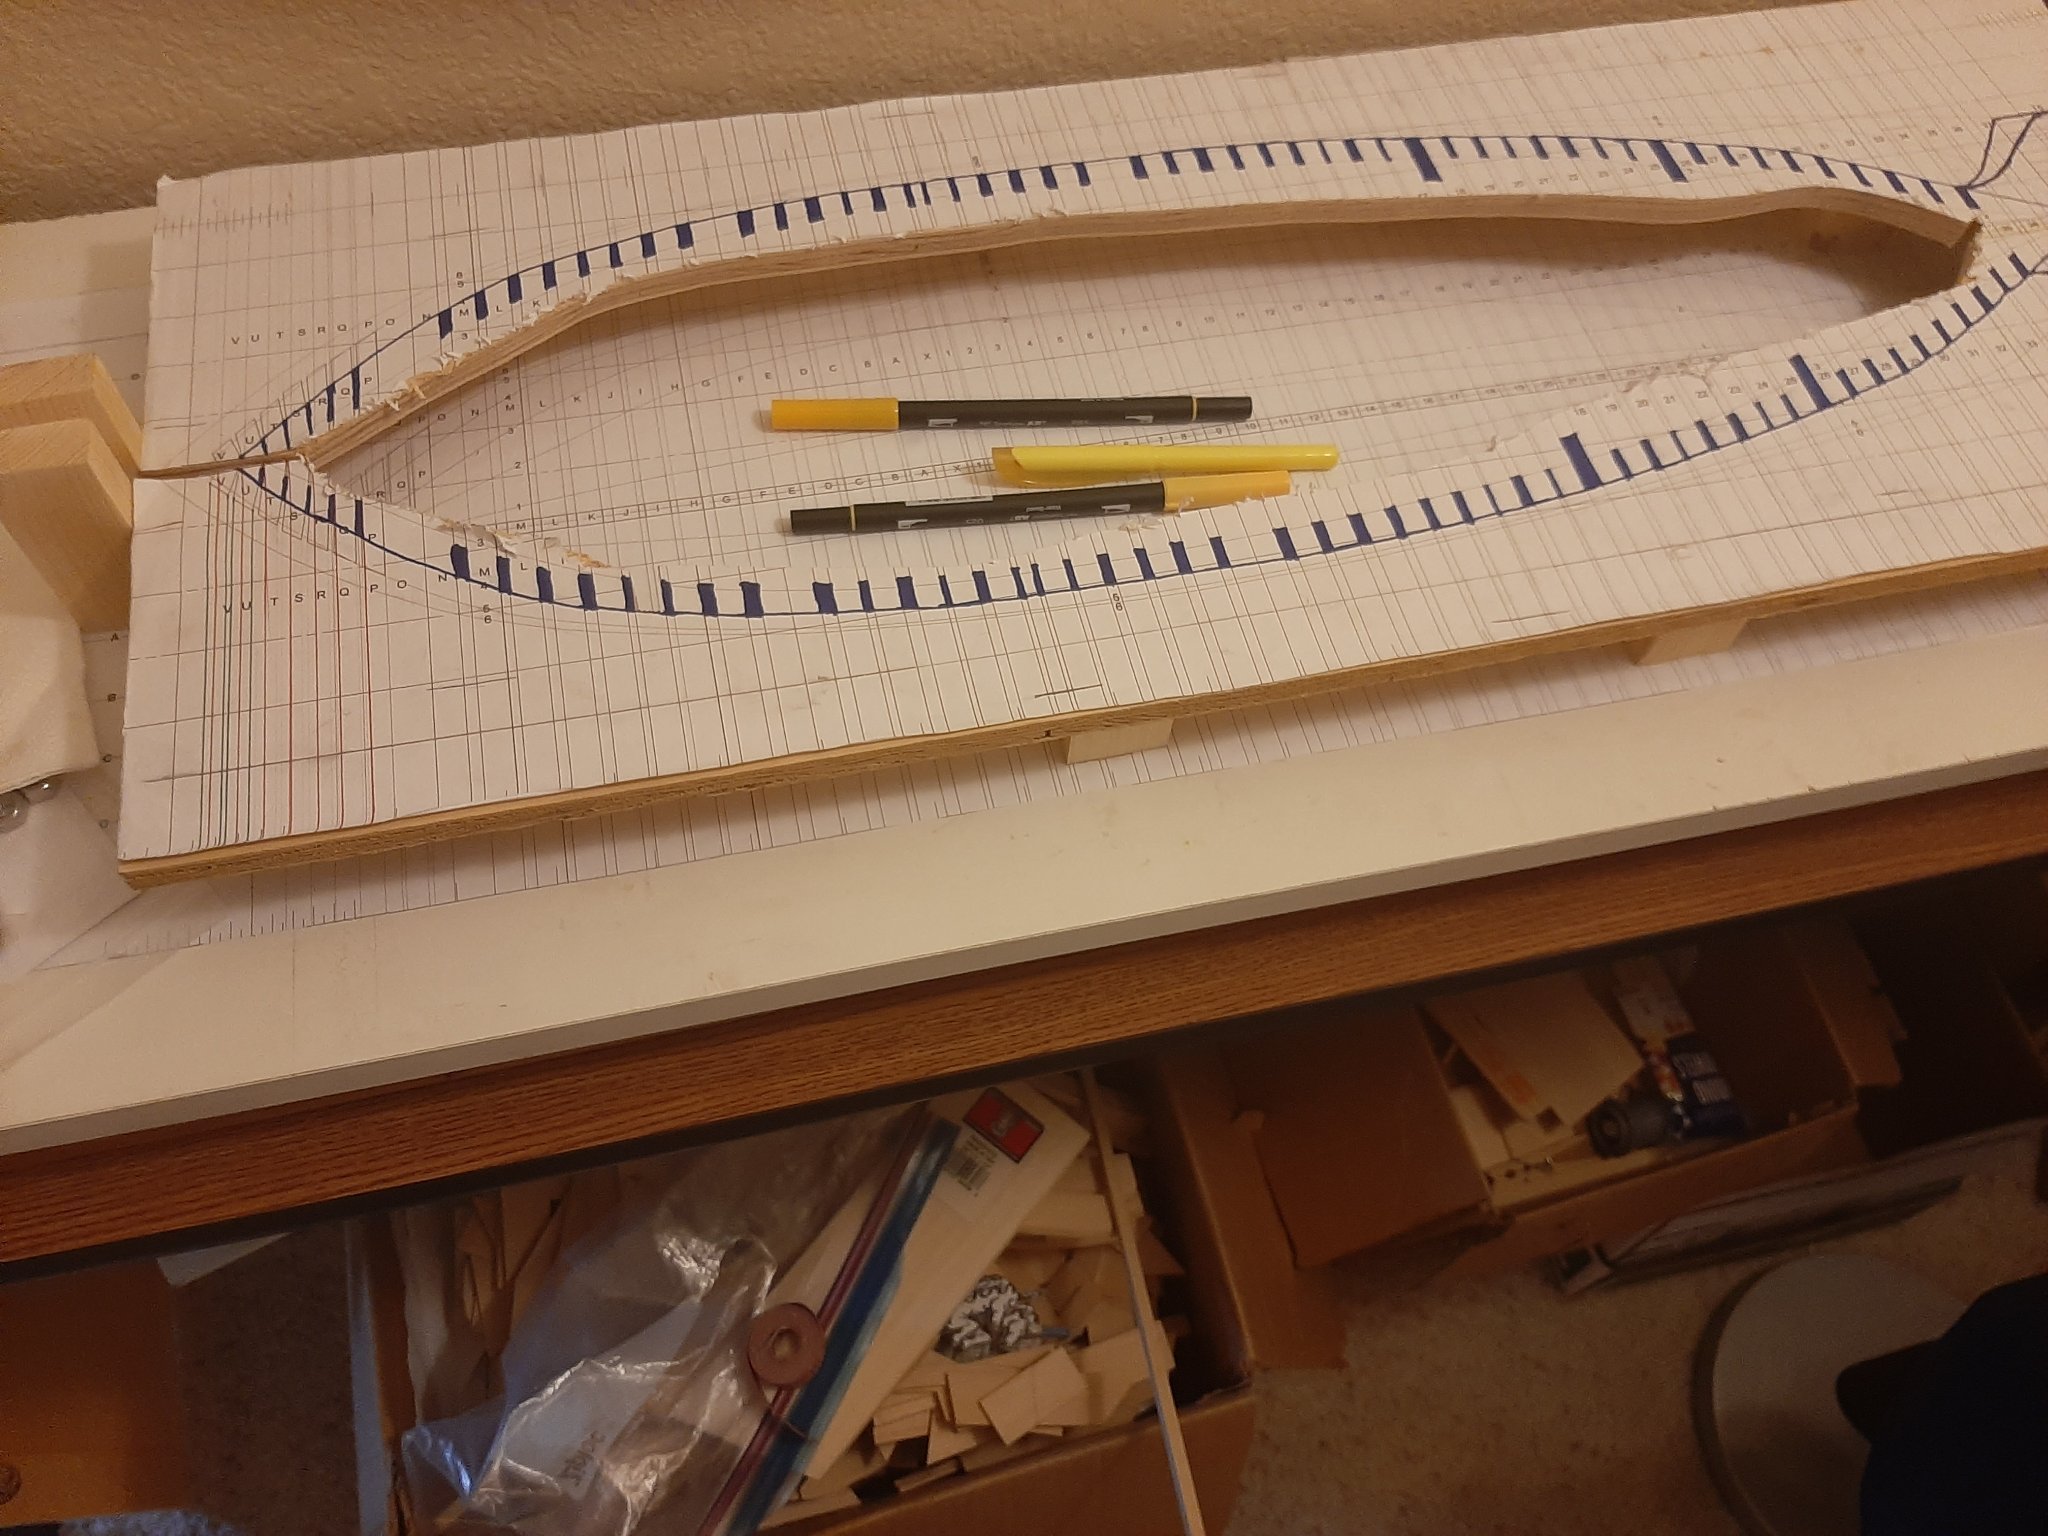
It took longer than I was desiring and expecting, but I have finally finished cutting out the top-board of my building jig. As I mentioned in my last post, I removed a big piece out of the middle using a jigsaw and then was forced to slice and whittle away at the groves using my Dremel scroll saw. Still needing to get the blade back onto the wheels of my bandsaw. Going to glue the top board onto the support pieces overnight and tomorrow I will attempt to drill in the holes for the hex-bolts that will be holding everything steady. Then I will be finishing the remaining pieces of the stem.
- Edwardkenway, AON, GrandpaPhil and 3 others
-
6
-
-
Your model is incredibly like-life and it's been a pleasure to follow you on here. Can we get a picture of this beautiful model, the whole ship as she is?
- mtaylor, Keith Black, archjofo and 4 others
-
7
-
-
As I continue to slowly make progress with my building jig top-piece, I have a survey for those of you more experienced model builders than me. Like ChadB on here, I am planning to make my model with the winged transom pieces in the stern as most real ships styled back then. Using the plans by RobnBill (Bill Edgin), the deck transom is 3/16" thick and he shows no other wing transoms in his plans. Should I use the same thickness for the rest of the transom wings or go more with the same thickness of the other hull ribs, which measure 3/8" thick double-layered?
Thanks so much for the input in advance.
Brian D.
-
Mighty fine looking ship so far, buddy. Keep up the progress on her.
Brian D.
- mtaylor, Canute, Edwardkenway and 1 other
-
4
-
Micro-marks has blades available, a little smaller than the 4in diameter you are looking for, but I have had good success with this company and they have reputable products.
Brian D
-
-
On 6/13/2021 at 2:45 PM, druxey said:
Now what would be really interesting is for you to build this kit, then build a modern kit version and see how the two compare!
My first model ship was the Muscongus Bay Lobster Smack. Looking over the pictures and instructions and pieces, its almost exactly identical in a large amount to the kit by Midwest, which is what I built. Midwest has made better instructions with good illustrations, and most of the pieces all came on laser-etched basswood and Balsa boards. Keep up the good work on this kit.
Brian D.
-
Hello everyone, just a small update. I think that I have better straighten out the deadwood for Brig Eagle after triple-clamped it to a spare piece I have of half-inch ply. I will have to keep it clamped down for a while longer, but I think it looks better. Will have to provide a picture of this later.
I am continuing to slow make progress on the building board for this project. After carefully cutting by handsaws a section of desired size, I proceeded to glue a spare copy of the top-view of all frames onto both top piece and bottom piece of the build jig. A while back someone in the condo complex I live in was throwing away a piece of wood that was 1.5x1.5x72 inches that I helped myself to use for this project. I carefully cut pieces off to the right height needed and then sliced in half using hand saw and bandsaw. Having a bandsaw can be super helpful but also have quirks. Today I started to carefully cut out the middle sections of the upper board of building jig only to have the blade twist and slide right off the wheels. Also bought a jigsaw from Home Depot which helped some as an alternative but still cuts too rough in comparison to bandsaw.
- Saburo, archjofo, GrandpaPhil and 1 other
-
4
-
I have been fascinated about the A-10 for a while now, a very unique aircraft. Am working on two builds of the two-seater night and all-weather versions of this aircraft in two different scales.
-
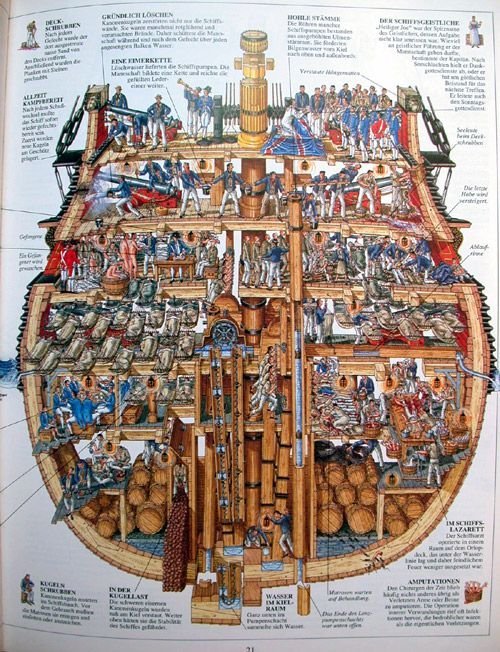
Greg and Druxey, thank you for providing more details about this. I did not realize that the dales were removeable, but agree that they would be a tripping hazard in a already confined space.
Brian D.
-
Mike, your model continues to be an amazement to follow and you give great teaching. Great work on here and keep it up. I have one question involving the chain pumps. Looking at the book Cross-Section Man-of-War, the book shows wooden chutes (apparently named dales) that would transport water from the pumps out the side of the ship. However, these chutes (dales) would be extremely close to some cannons. Neither you nor Mr. Passaro have shown these thus far. Would these be accurate?
Brian D.
- FrankWouts and Jorge Diaz O
-
2
-
-
I am envious of how clean and precise your work always is, especially your keels and the deadwood. You, sir, are worthy of the title Maestro 🙇♂️
- dvm27, billocrates, druxey and 3 others
-
6
-
Nicely made Brodie stove. Wish I could get a copy of this design. Great job on this model ship.
Brian
- billocrates, Bitao, Keith Black and 1 other
-
3
-
 1
1
-
There he goes, off and running


HMS Sphinx 1775 by mtaylor - FINISHED - Vanguard Models - 1:64
in - Kit build logs for subjects built from 1751 - 1800
Posted
Port side of hull looks great, buddy. I know I need to work at planking myself, have that half-hull tutorial kit to do. Will be having to take top planking off of long boat and reglue it on because of positioning errors I made.