KeithAug
-
Posts
3,980 -
Joined
-
Last visited
Content Type
Profiles
Forums
Gallery
Events
Everything posted by KeithAug
-
 Looking very smart Valeriy.
 -
She is quite a cute little ship with a lovely smoke stack.
-
Roger - I think it's called technical dementia. Thank you John.
-
Eberhard - When I think you are done you find even more detail to add. Do you have an end point or is it a project for life?
-
Beautiful looking hull Gary.
-
Pipes have never been so interesting.
-
Lets hope she lasts longer than the original. A great project.
-
Flashing along at your usual pace Nils. If I blink I am going to miss the next instalment.
- 299 replies
-
- 8
-

-
- lightship
- Feuerschiff Elbe 1
- (and 1 more)
-
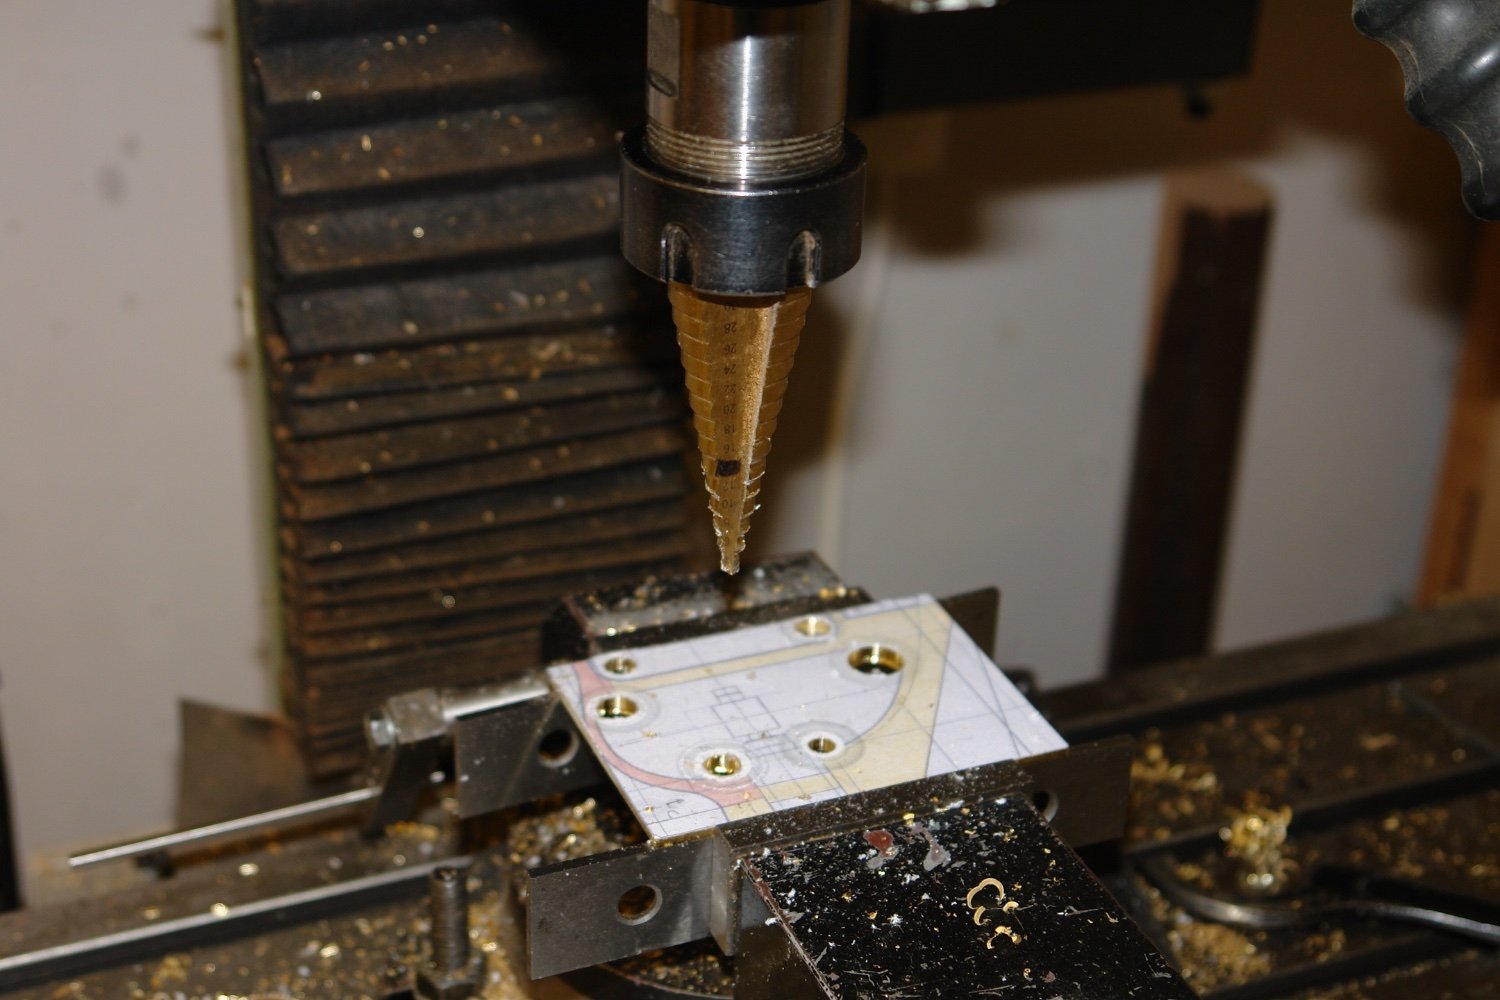
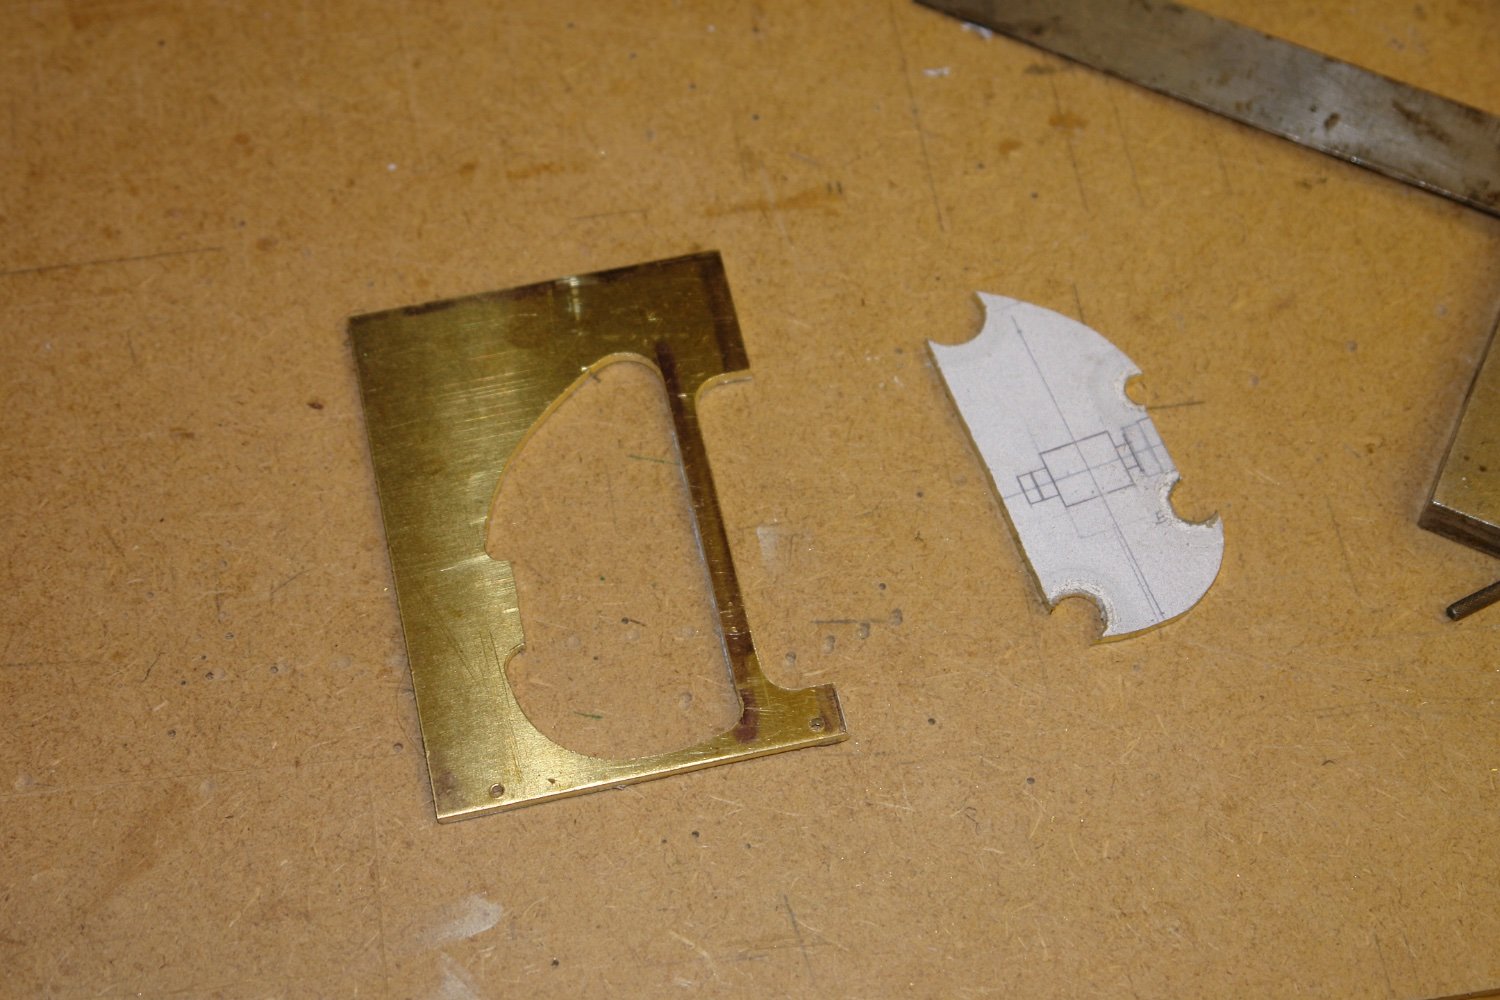
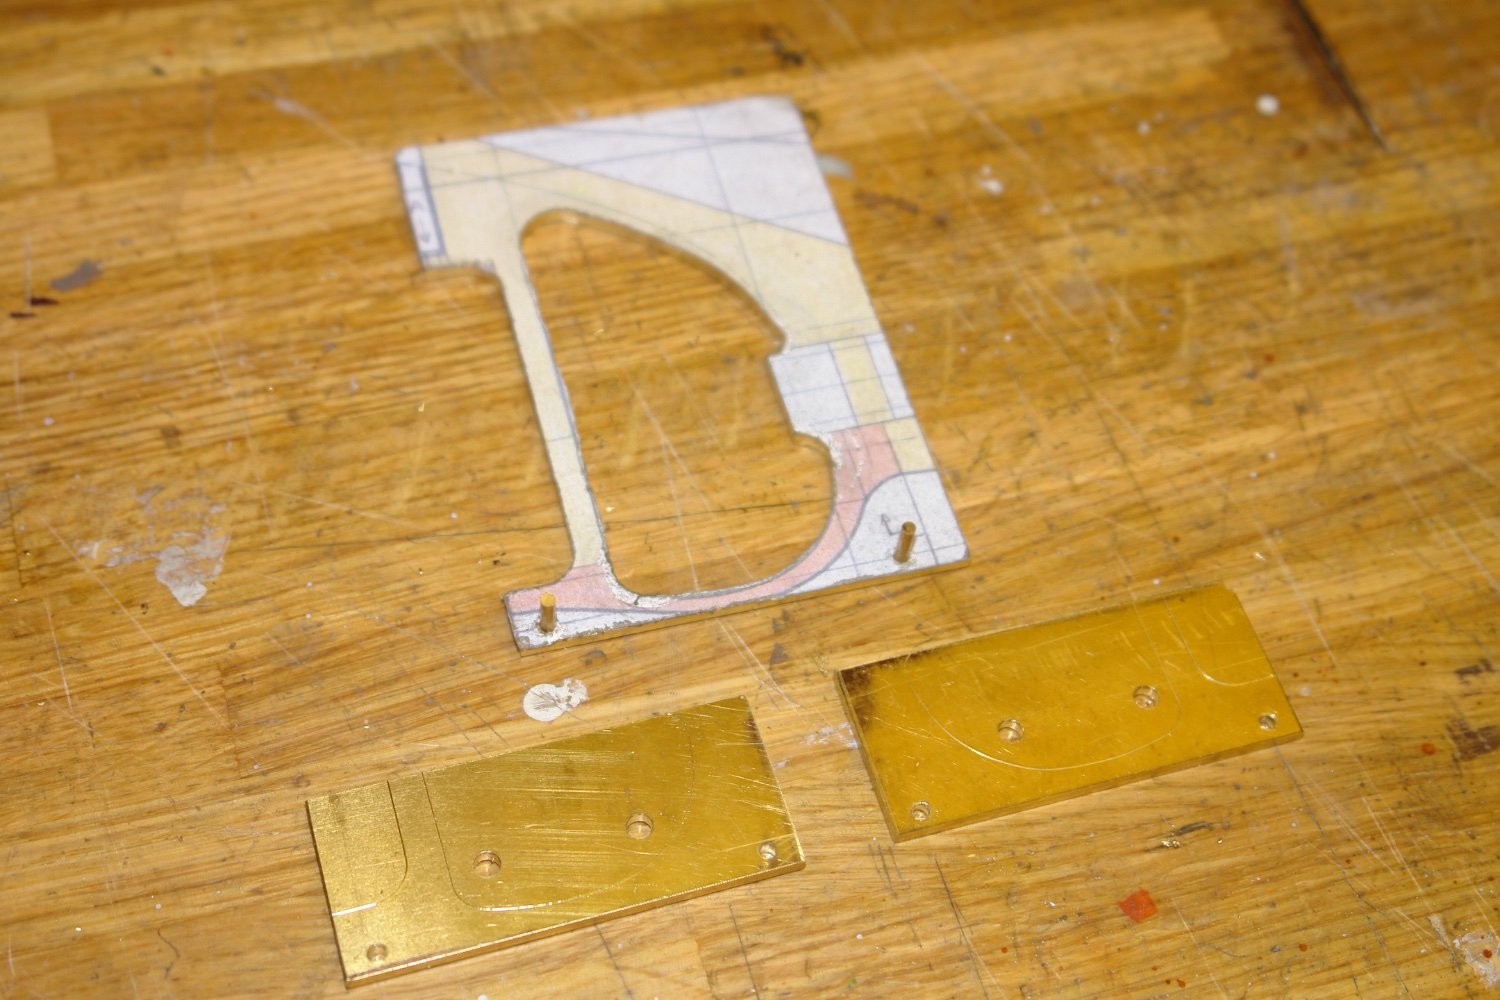
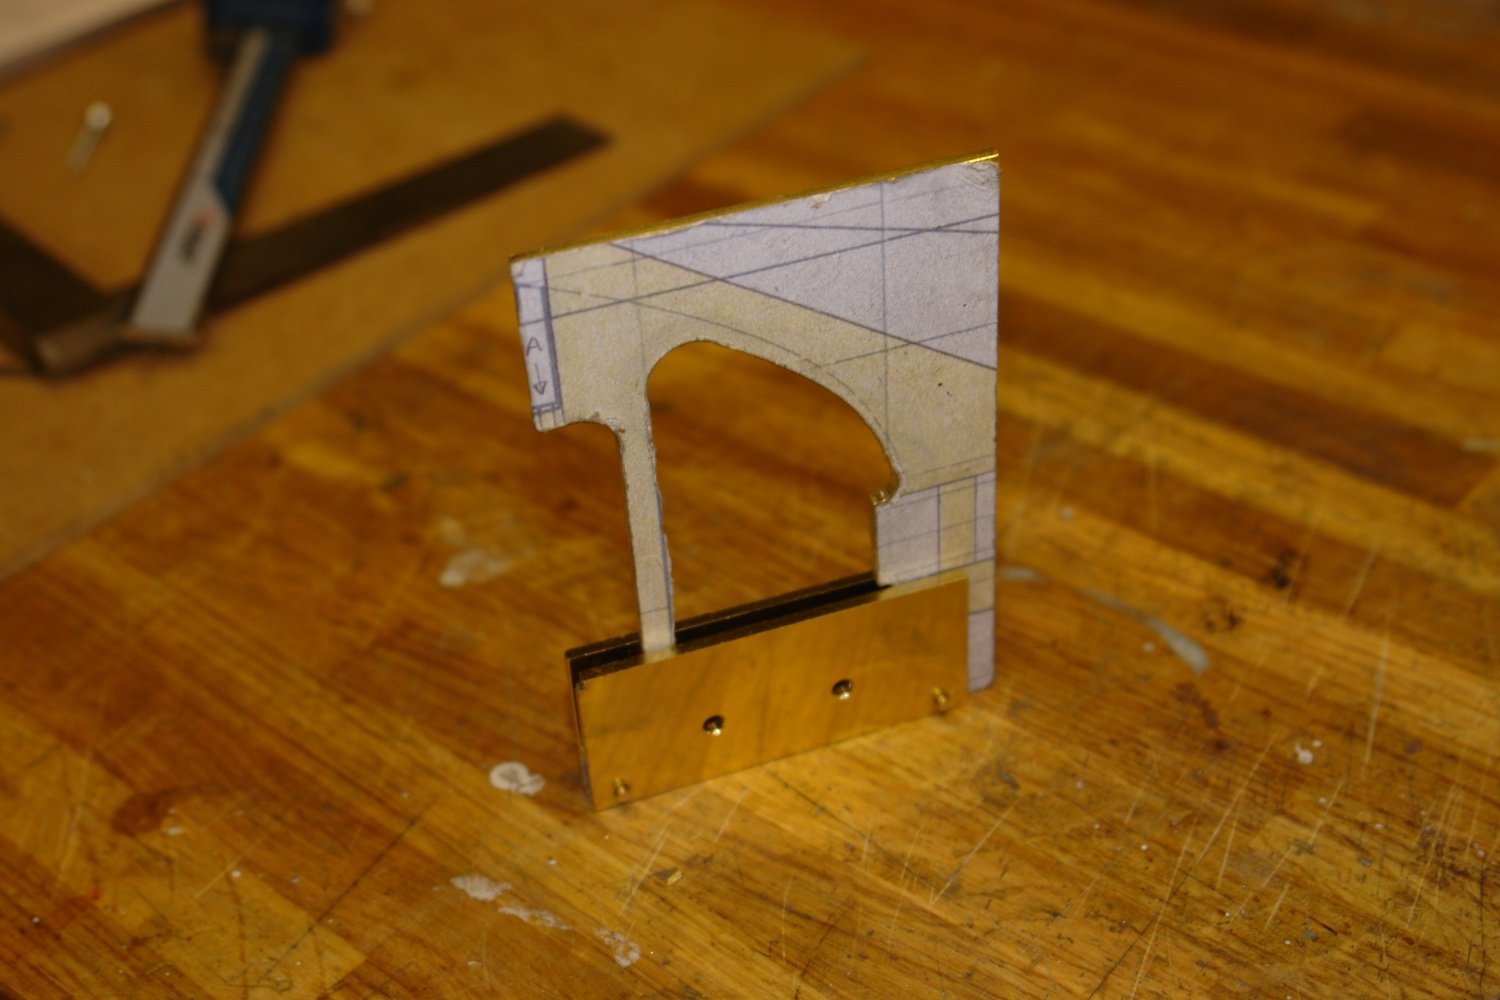
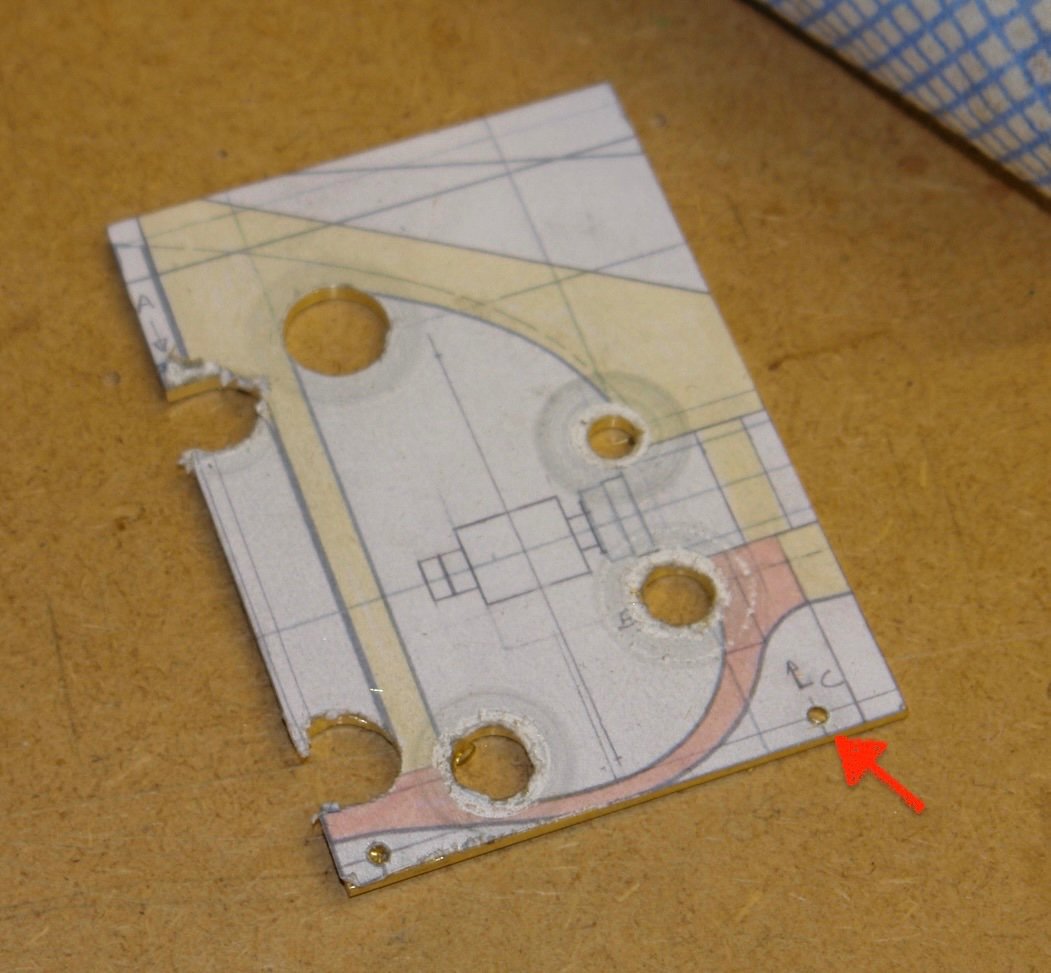
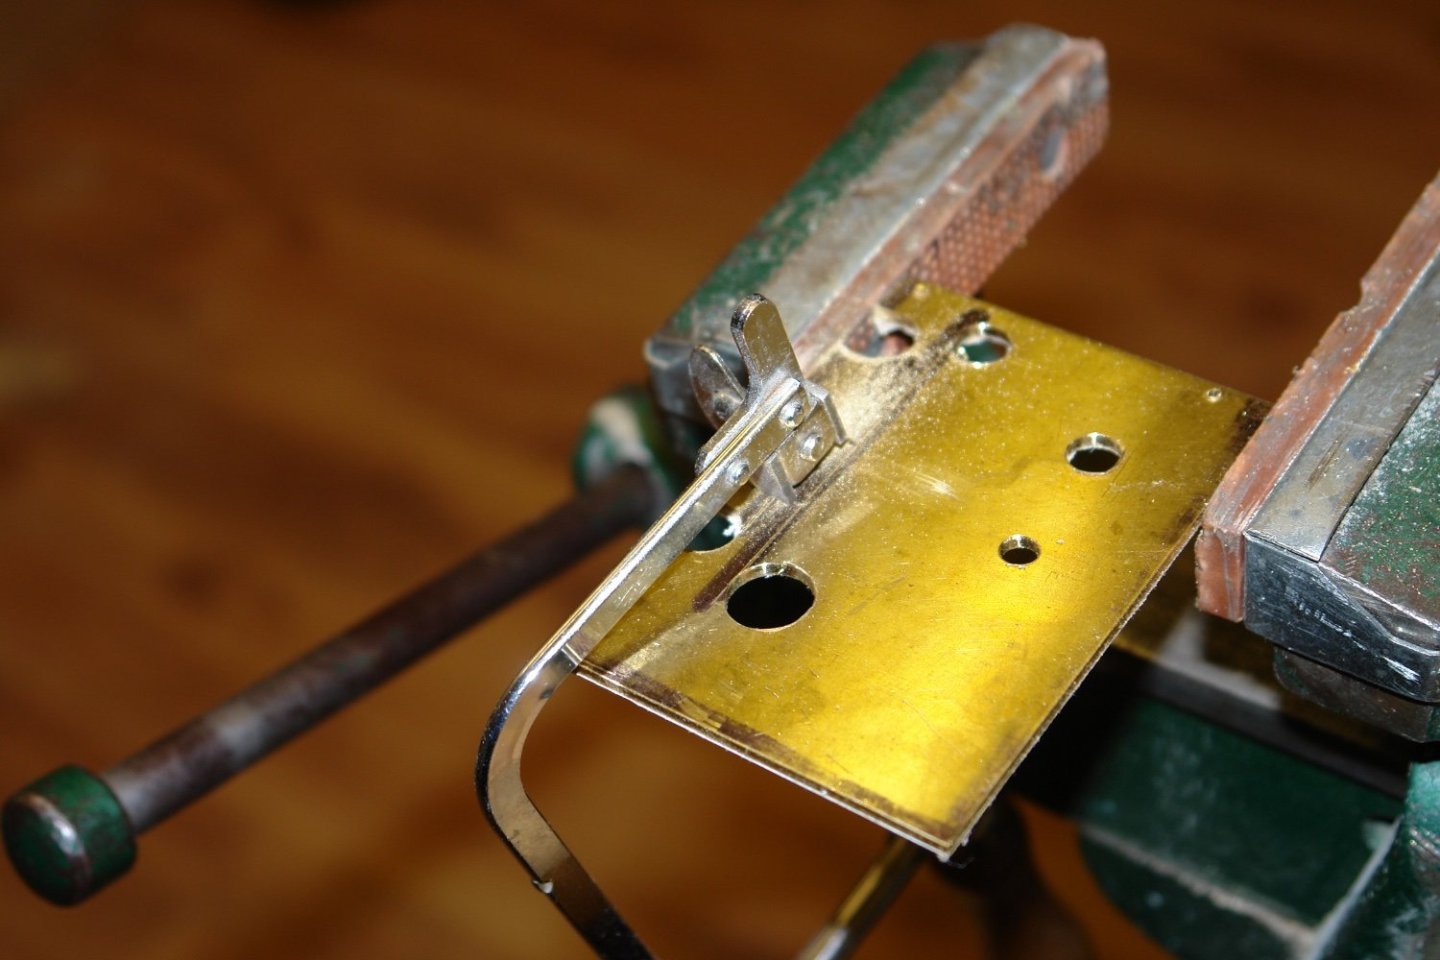
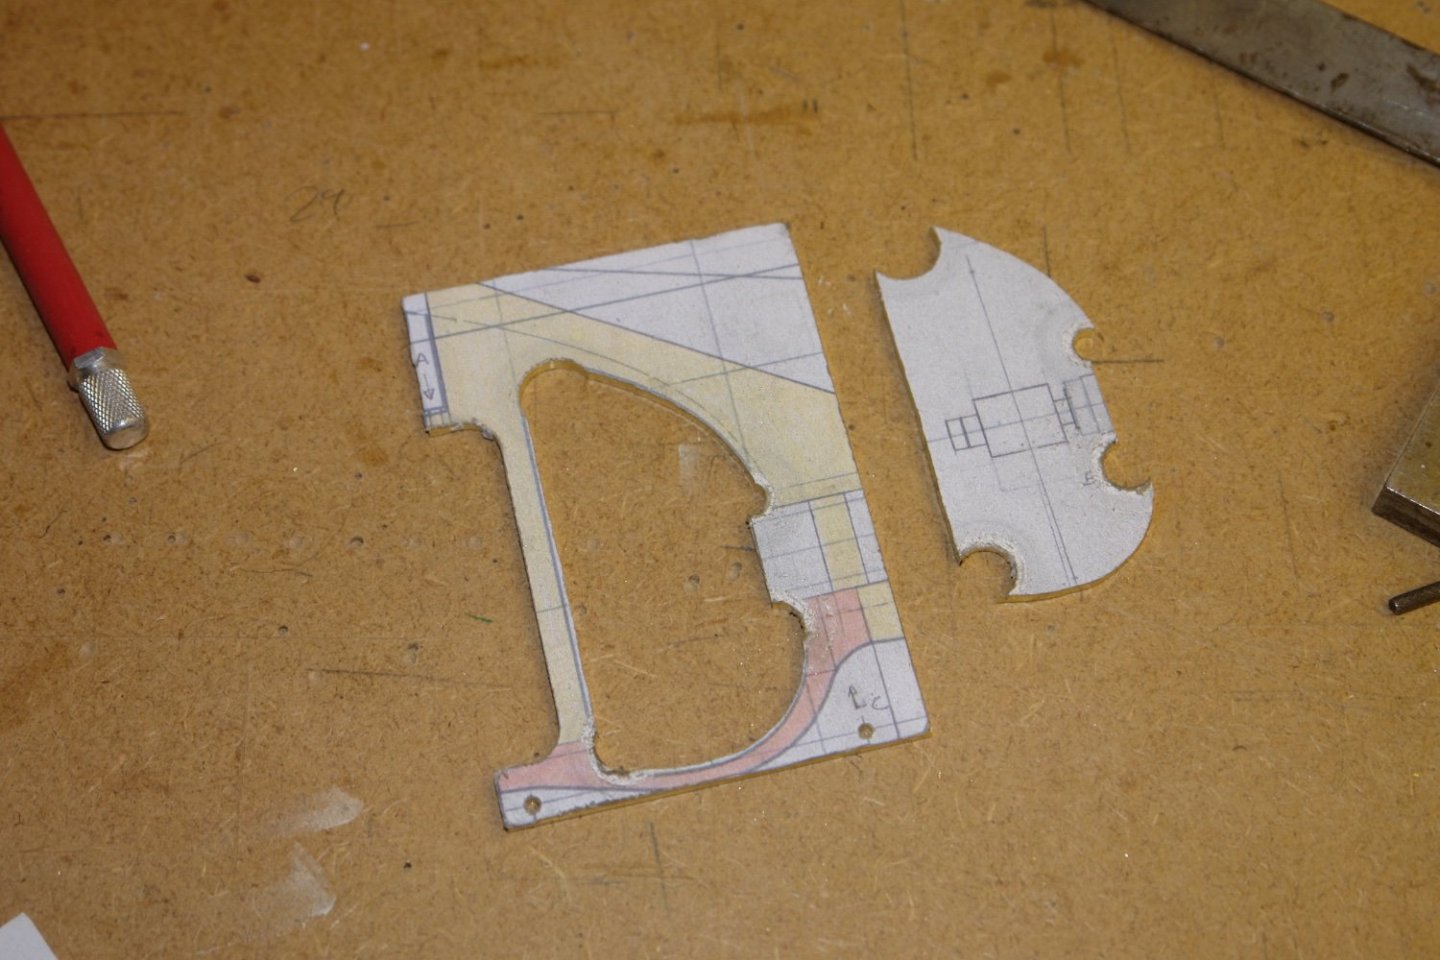
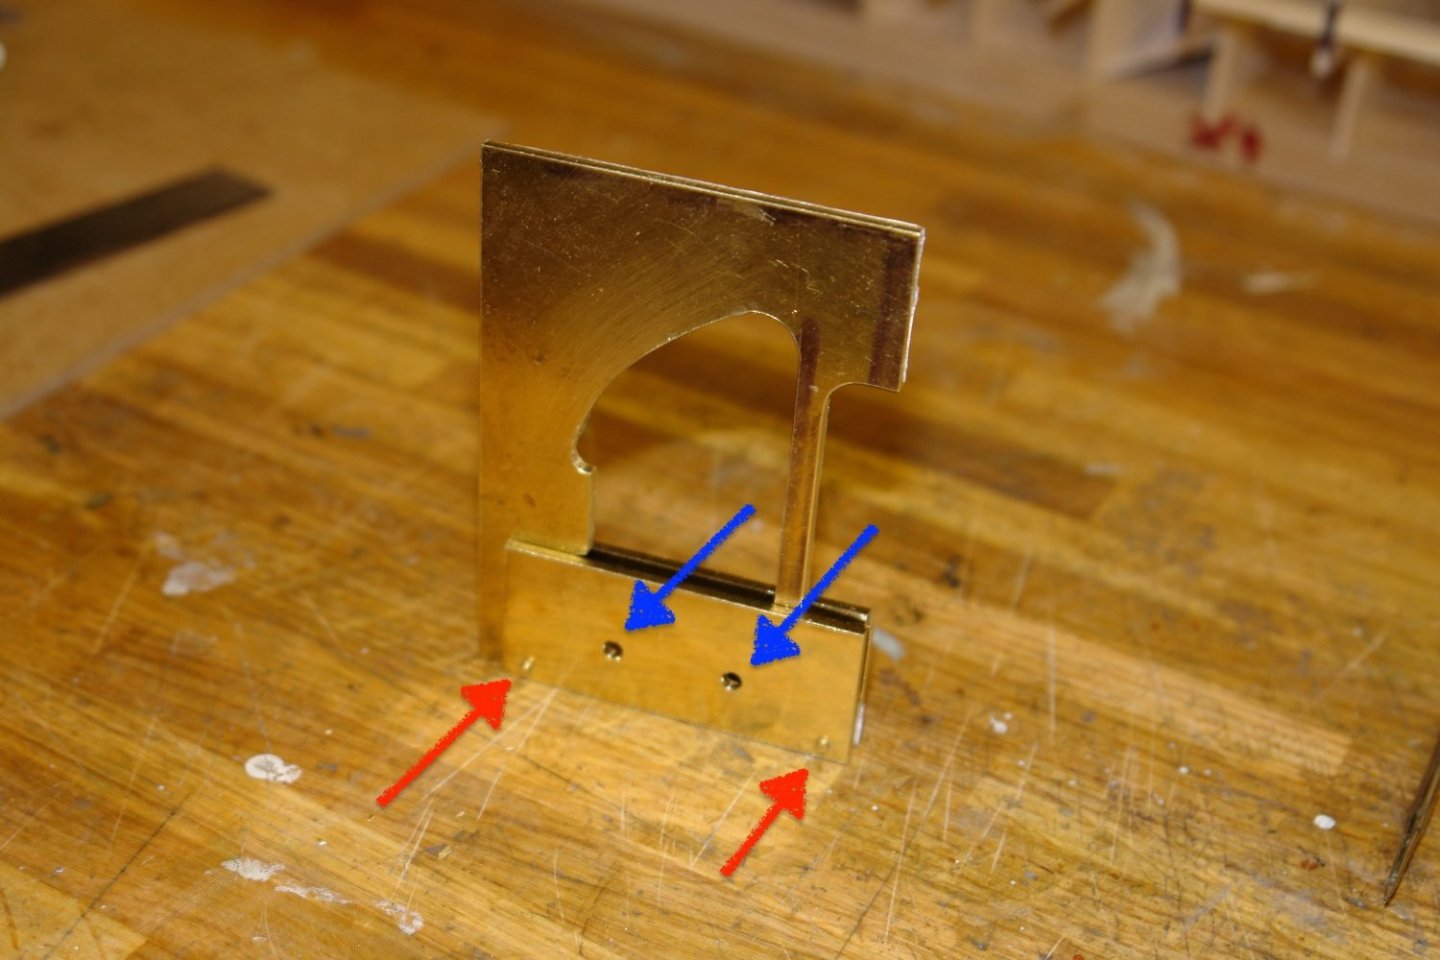
Exactly so! Back to boats:- I did a bit of pencil and paper draughting and dimensioned up the centres for cutting the various circles that will eventually form the core of the frame. I then glued the template to the brass sheet and mounted it on the mill. The various diameters of circular features were then cut with a step drill. At this stage I also drilled location holes for pinning the thickened sections of the frame in position (red arrow). These were drilled in a location that would subsequently be removed. I then started sawing away the unwanted parts of the frame. I didn't have coarse enough jewellers saw blade but I ploughed on anyway, taking an excessive amount of time and breaking an excessive number of blades. I really must listen to my own mental advice in future and put stuff aside until I have the correct tools to hand. Anyway - some time later:- Next a bit of filing:- Then the 2 thickening plates were cut and drilled with 4 holes. The lower pair of holes match the location pins in the central frame piece (pins already inserted in the photo). The upper pair of holes are for retaining screws to clamp the ticketing plates for later machining operations. They are also in the scrap area and will be cut away later. Now back to moaning about planned obsolescence. 🙂


-
Rick - I have an excellent Samsung Smart TV but it is increasingly failing to support recently updated Apps. I am committed to doing without the Apps. Eventually I think I will be watching a blank screen!
-
Ian - BMW tried it but it turns out that the public weren't as stupid as BMW thought they were. When I heard about it my thought was "never go into a BMW showroom ever again". See official update below. BMW has decided to stop charging car owners a subscription fee to use their heated car seats, though the German automaker remains committed to paid on-demand services. The manufacturer began selling access to factory-installed heated seats and the heated steering wheel in 2020, though only in some markets, such as South Korea and the United Kingdom. In South Korea, seat heat was available for the equivalent of about $18 per month, or $406 if purchased in perpetuity. In the UK, the price was about the same. This was after the company said it would charge an $80 annual subscription fee to use Apple CarPlay in BMWs and subsequently reversed that decisionfollowing customer complaints.
-
Veszett, I know they do it on purpose I just think they should make an exception for a 70 year old pensioner. Fortunately I avoided buying a car where I had to rent the heated seats and steering wheel. I think this subscription world is mad. Eberhard - My wife reminds me that she won it at a school headteachers conference some years before she retired in 2012. It may be that it is 2 decades old. It's useless but still going strong - a bit like me.
-
Not much progress this week - life gets very confusing when you get to my age. The easy bit was buying a new car. I then realised that my old and trusty iPod was no longer supported by the new cars software. Accepted the iPod is over a decade old but I like it and I don't want to pay a subscription to buy access to music I already own. So then I thought I'll buy a flash drive and put my music on that. I did, but once again the car refused to co-operate. It would only access a few of the albums on the drive and ignored the other 90%. So then I thought I will put all my music on my iPhone. This wasn't my preferred option as it only has 64gb of memory which I tend to fill quite quickly with videos of the grandchildren. pictures for my build log etc., etc. However it seemed the only option. The next problem was the MacBook refused to talk to the iPhone. It turned out that the iPhone software hadn't been updating because of lack of memory so I had to transfer the grandchildren on to an ancient iMac which paradoxically was quite happy to talk to the phone. This then freed up enough memory on the phone to accept a software update. Finally after significant frustrations the MacBook and phone struck up a conversation. This took about 24 hours in total to sort out. I might have been better served by not changing the car!!!!!!! I never really believed that IT made things easier. After all they managed to build Dreadnought in 13 months when the only available IT was a phone and a mechanical typewriter.
-
Built by Uncle Sam! After a lot of tribulations the capacitor arrived today. Amazon failed to deliver and after 4 weeks of excuses offered me a refund. I reordered one from eBay and it arrived in 3 days and it works perfectly.
-
Eberhard, Rick, Tom. Thank you. Yes - but not sure why. May be just to confuse novices during docking. I can't see any other obvious purpose. Andy - My plan is a mixture of pre and post assembly shaping but I think inevitably the plan will develop as I proceed.
-
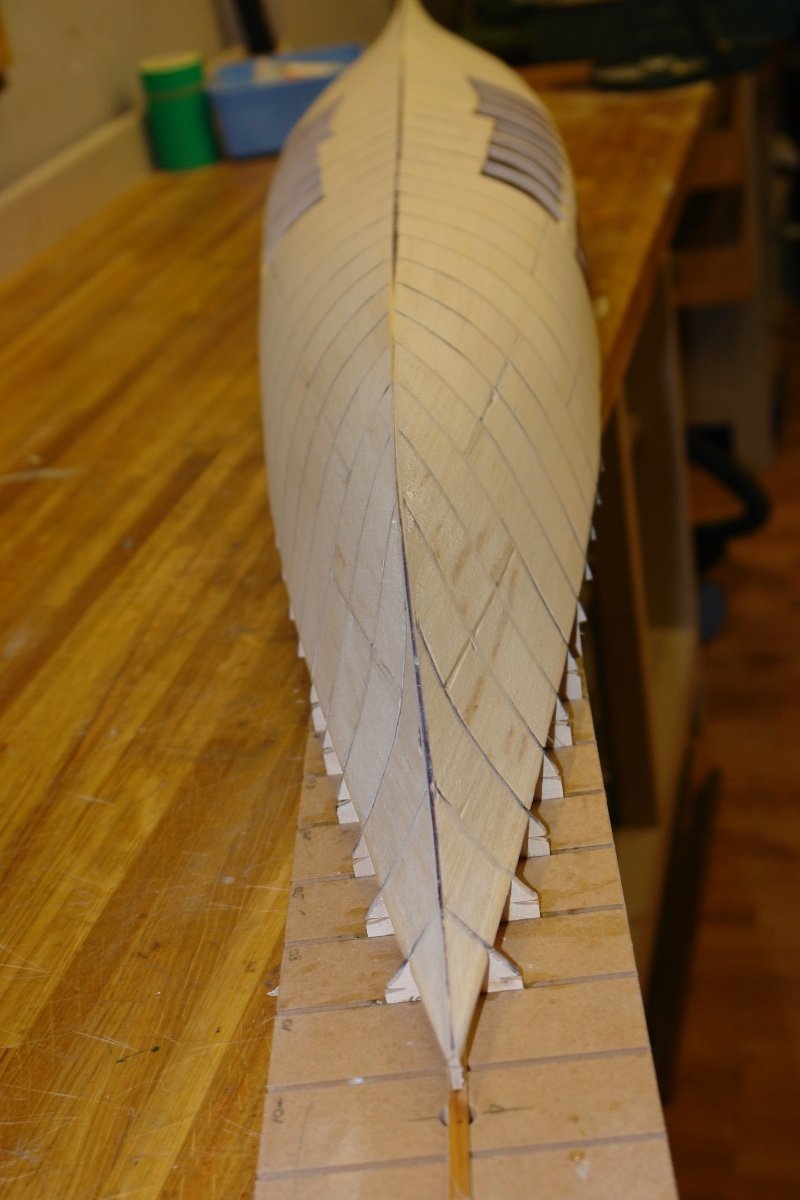
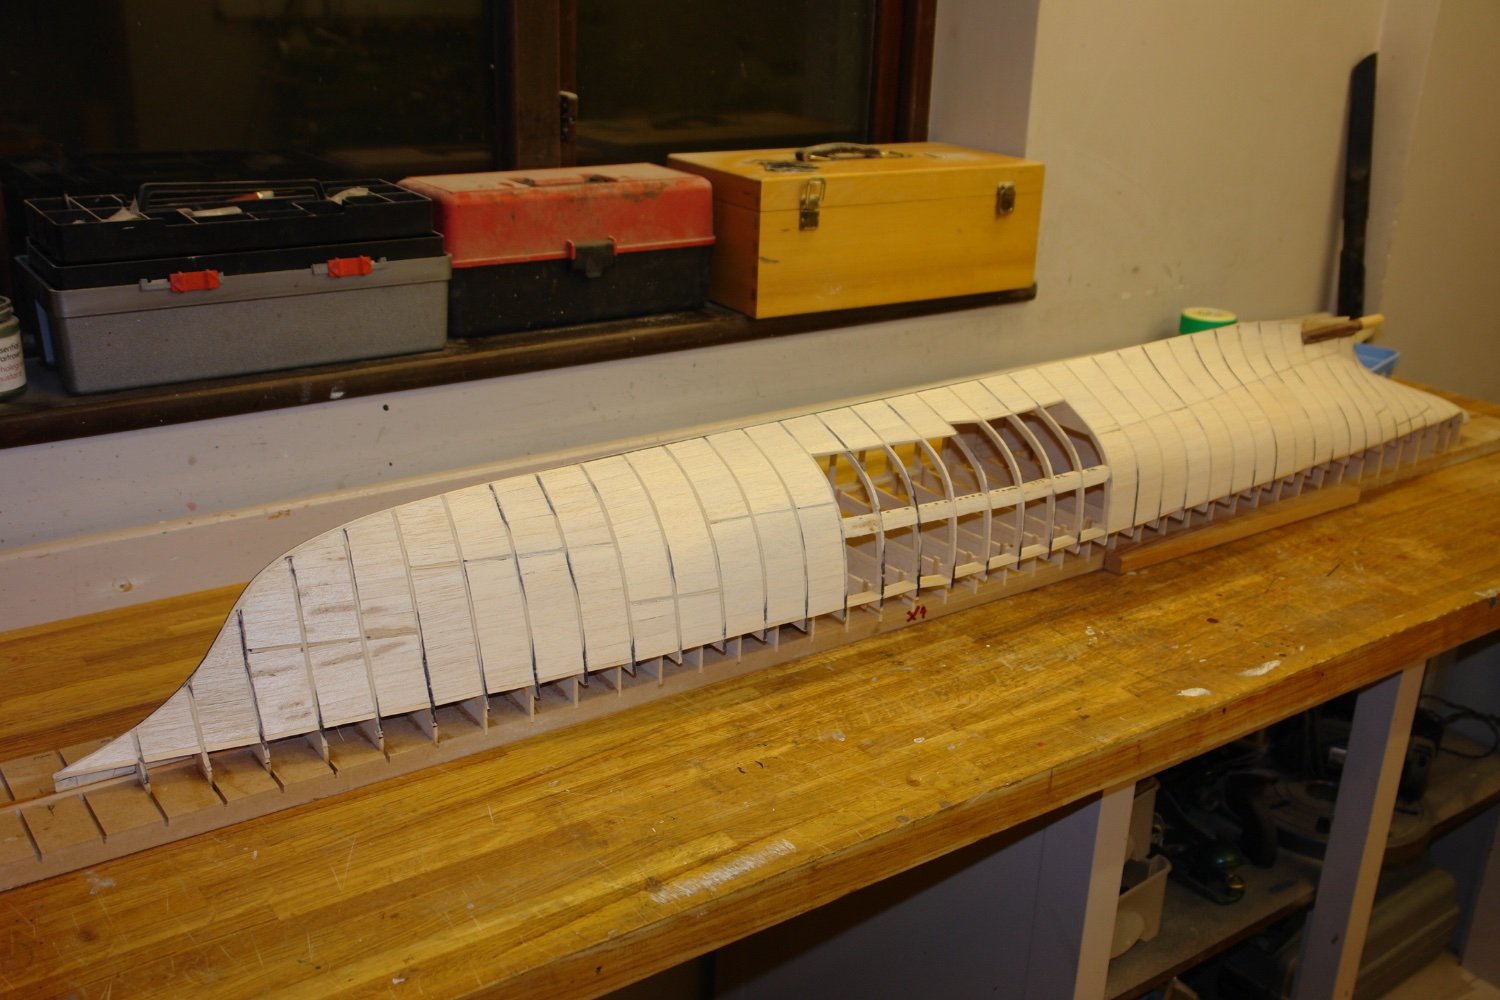
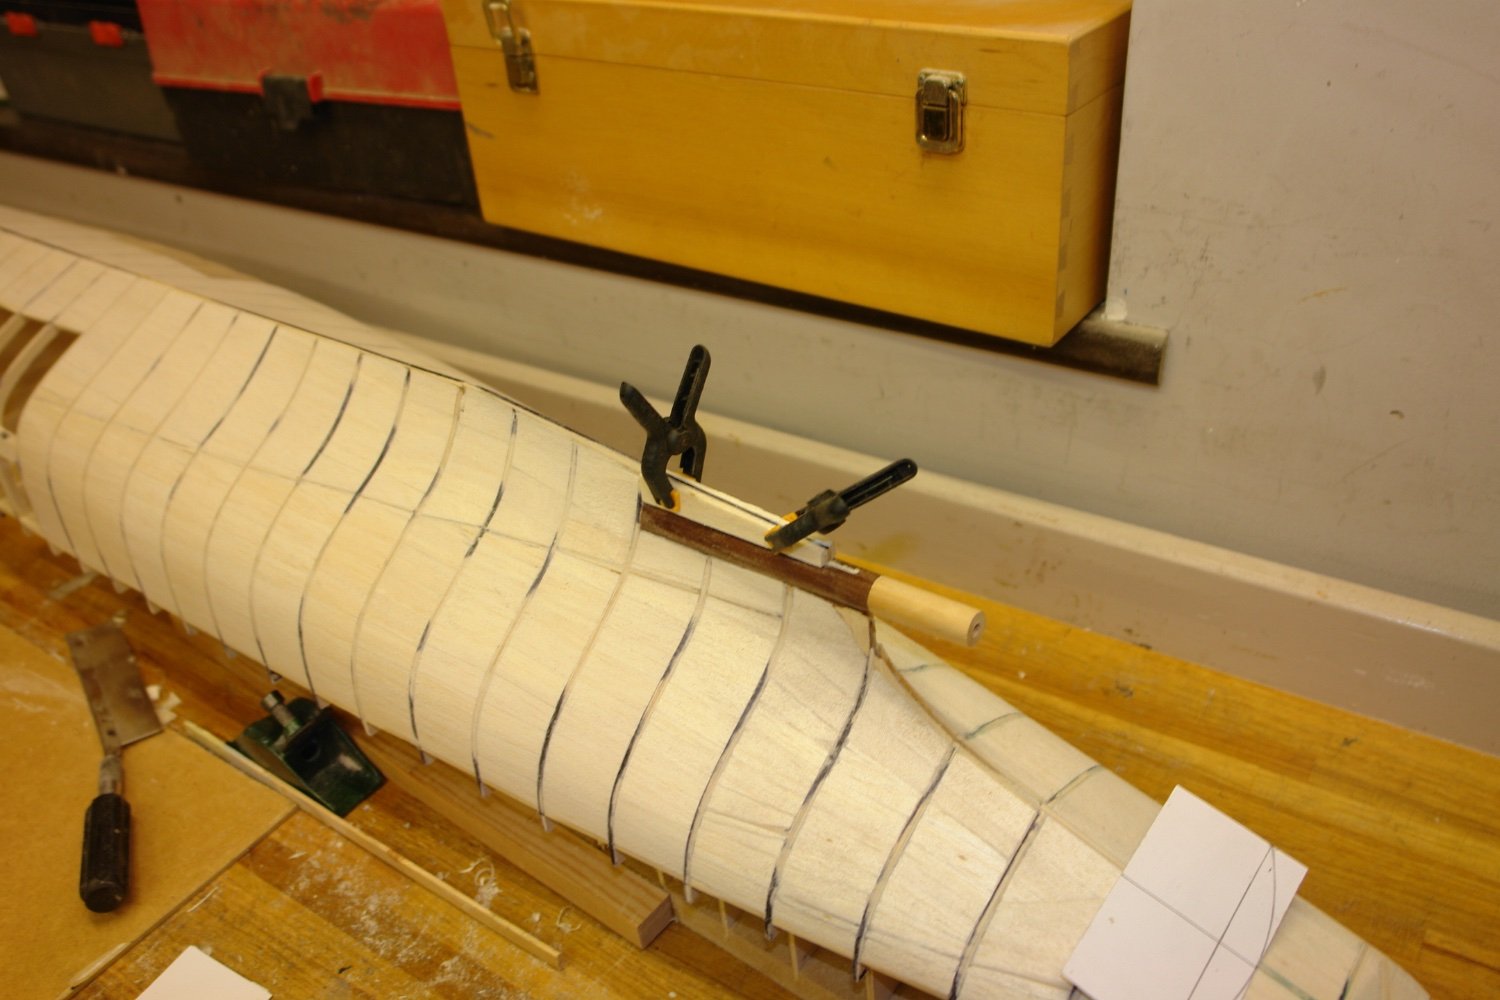
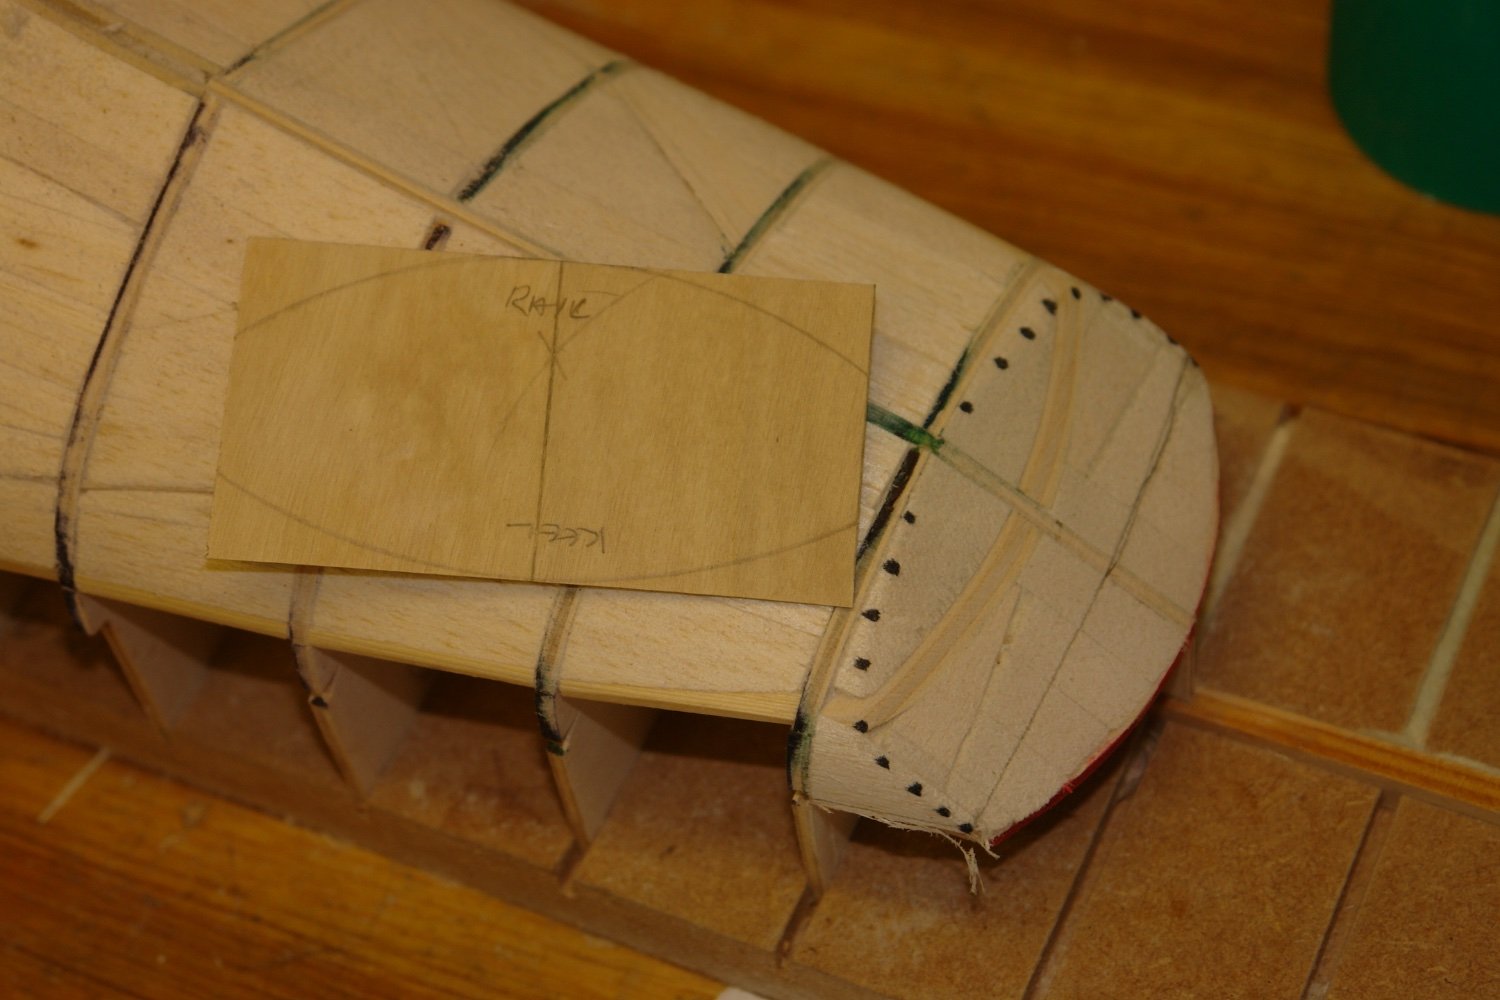
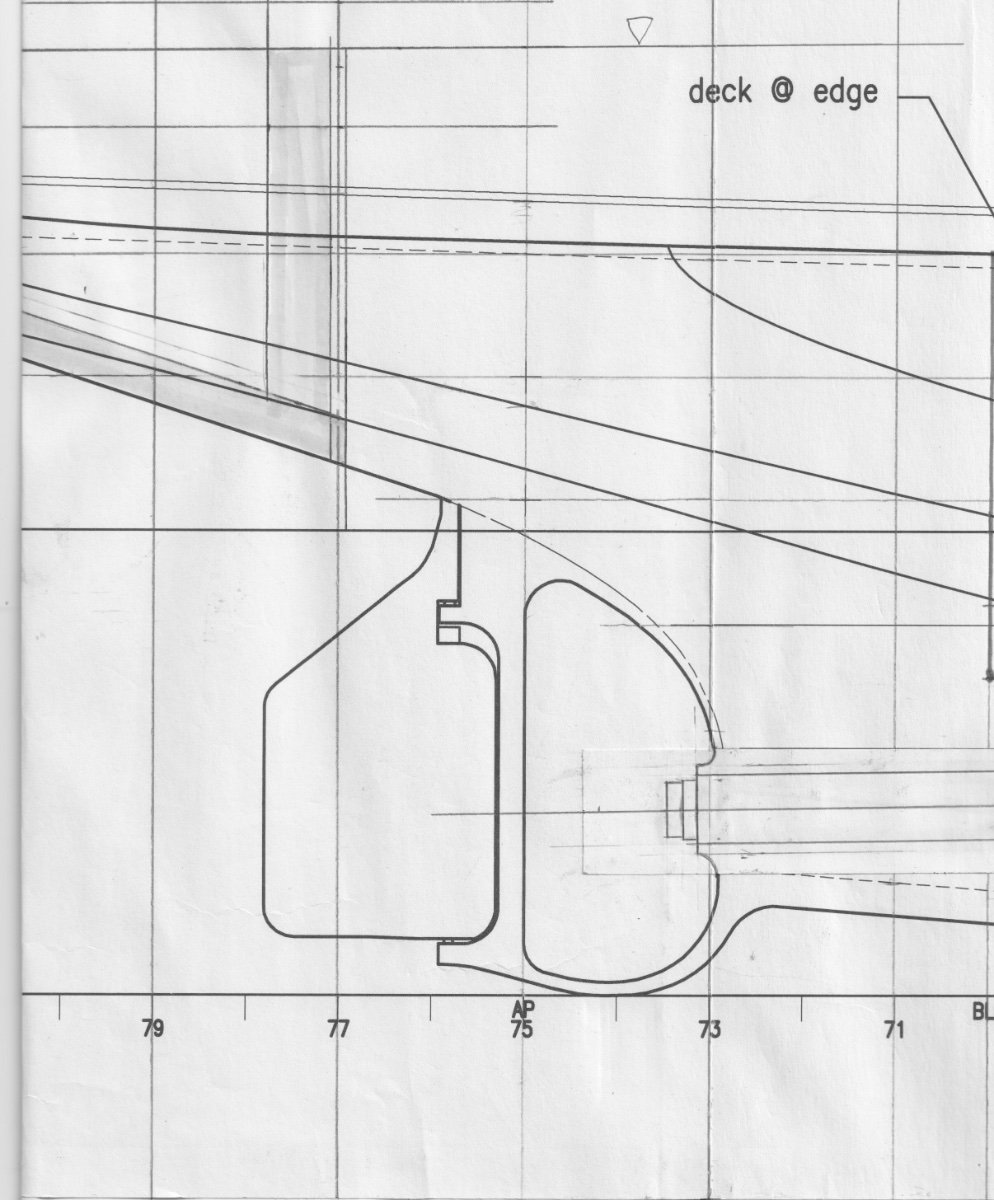
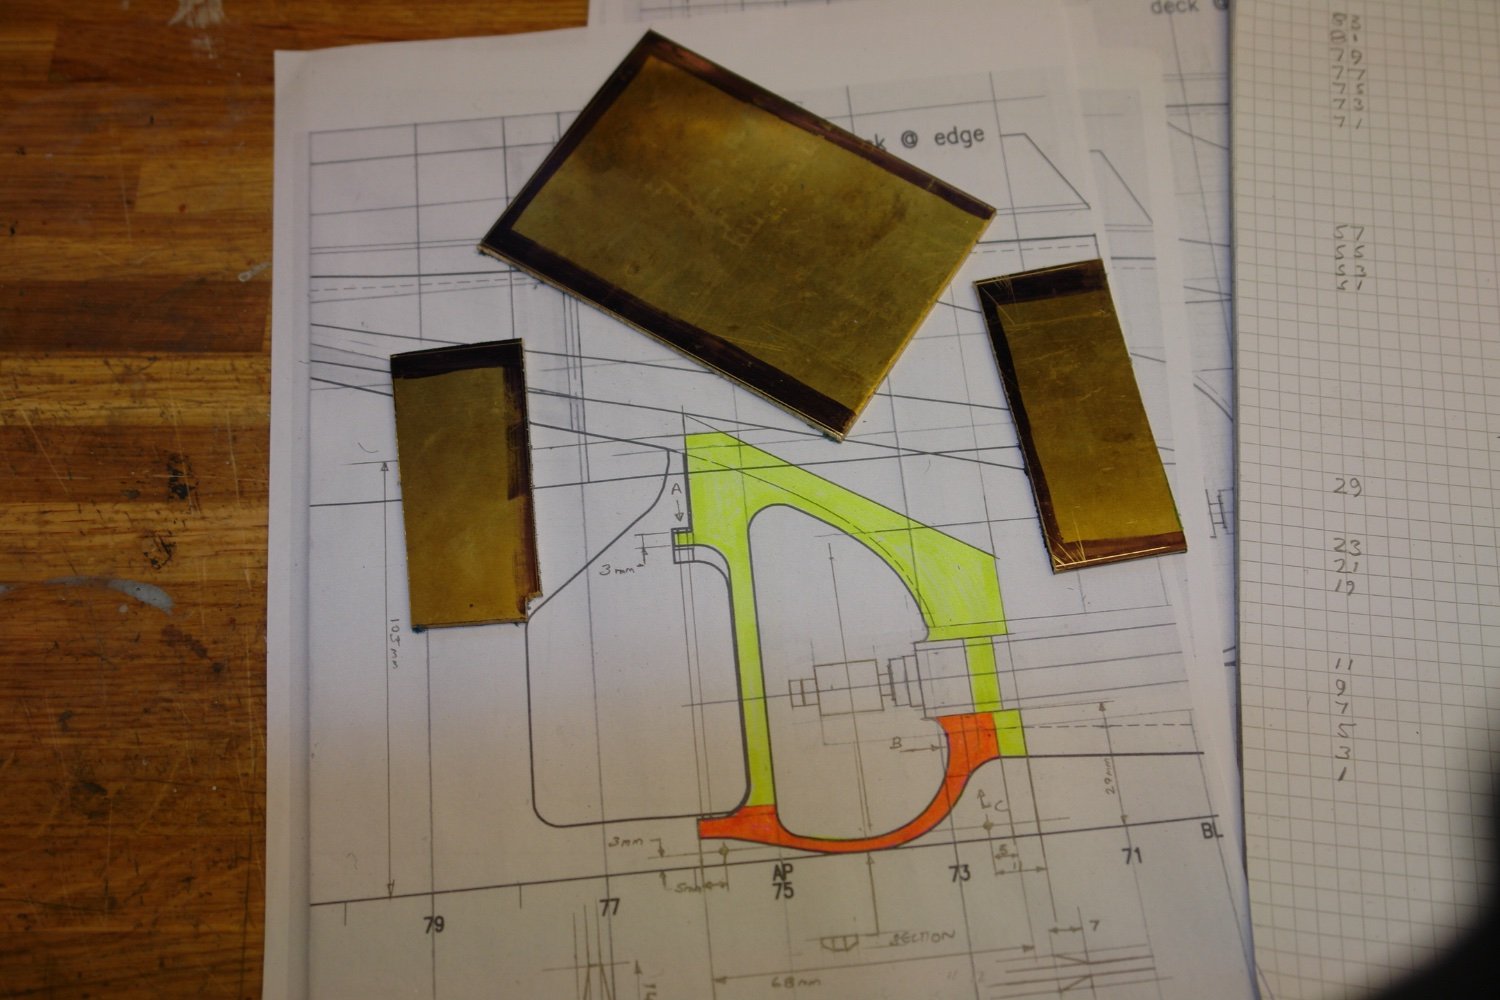
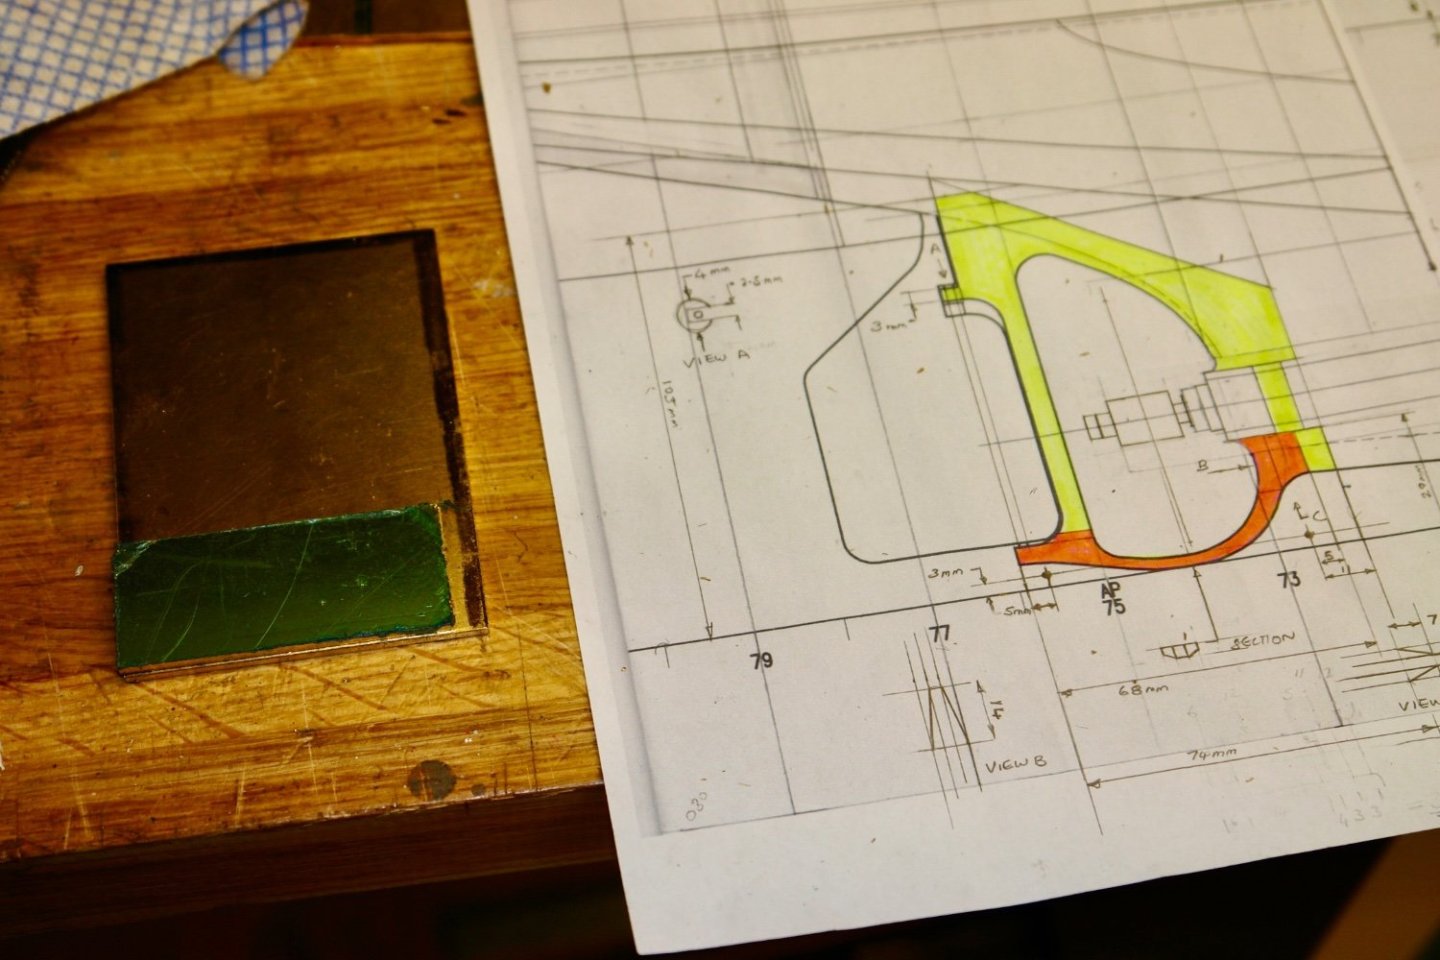
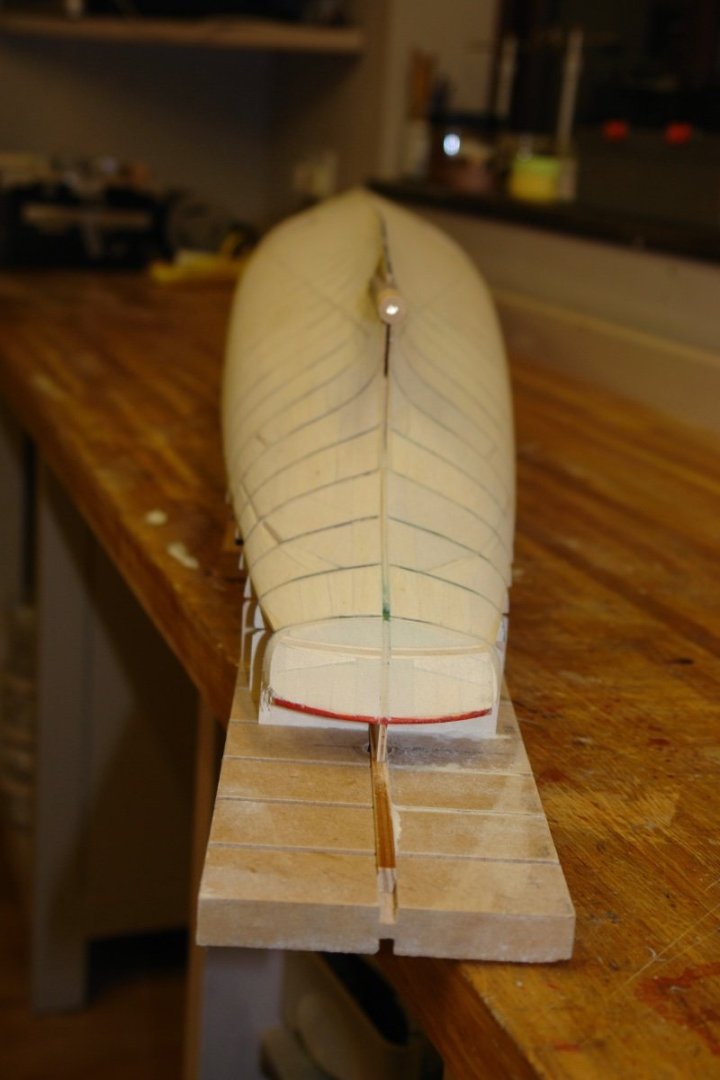
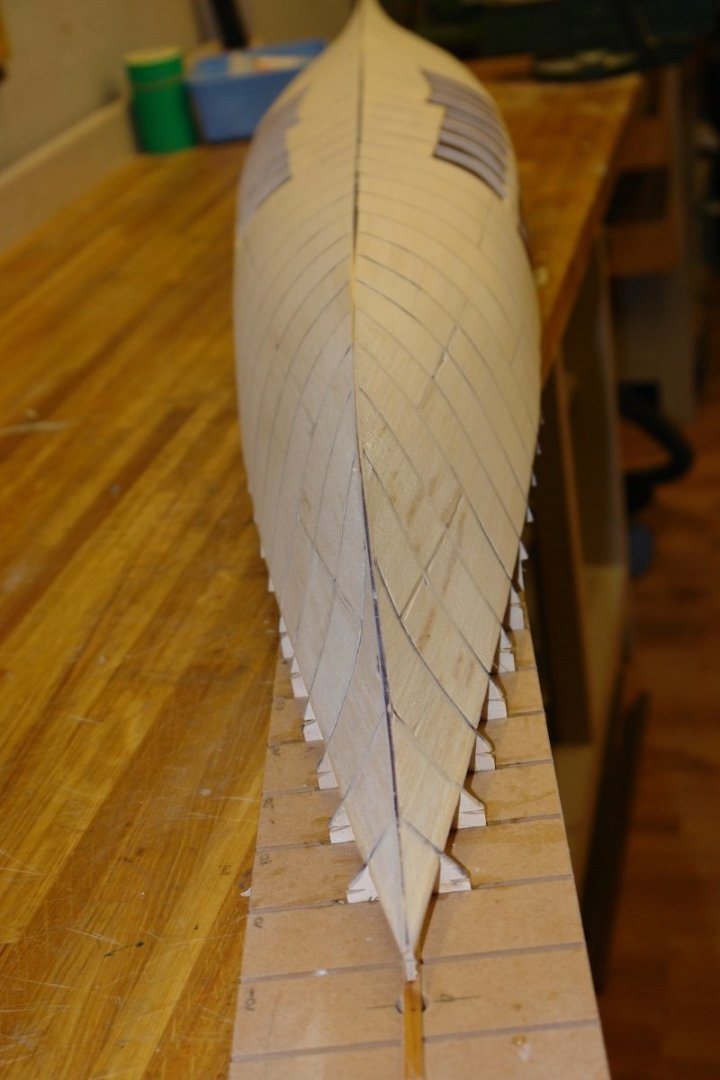
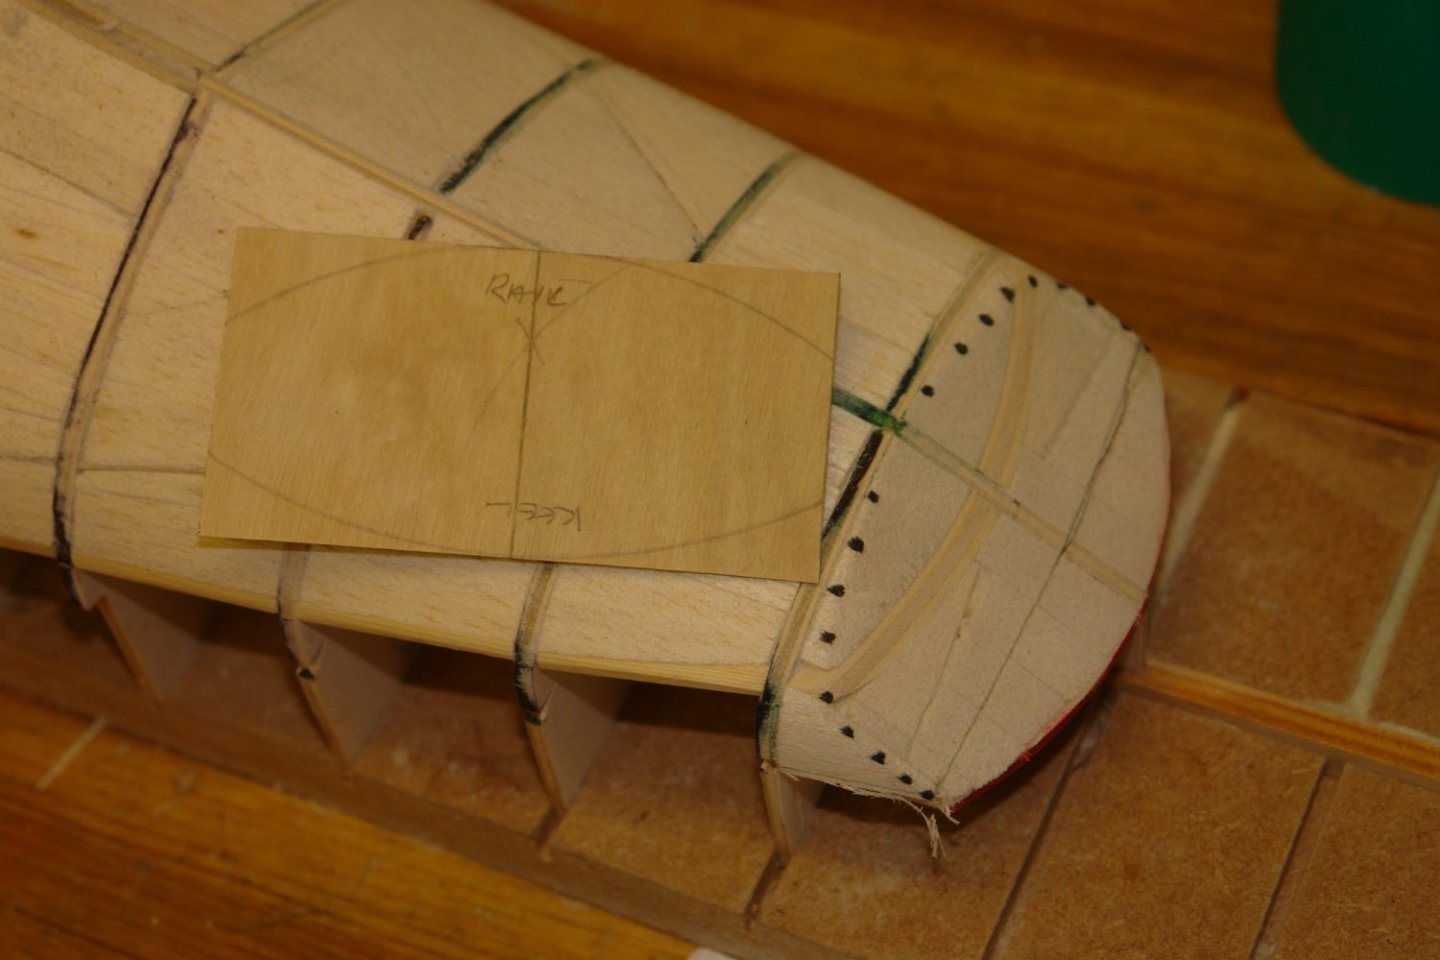
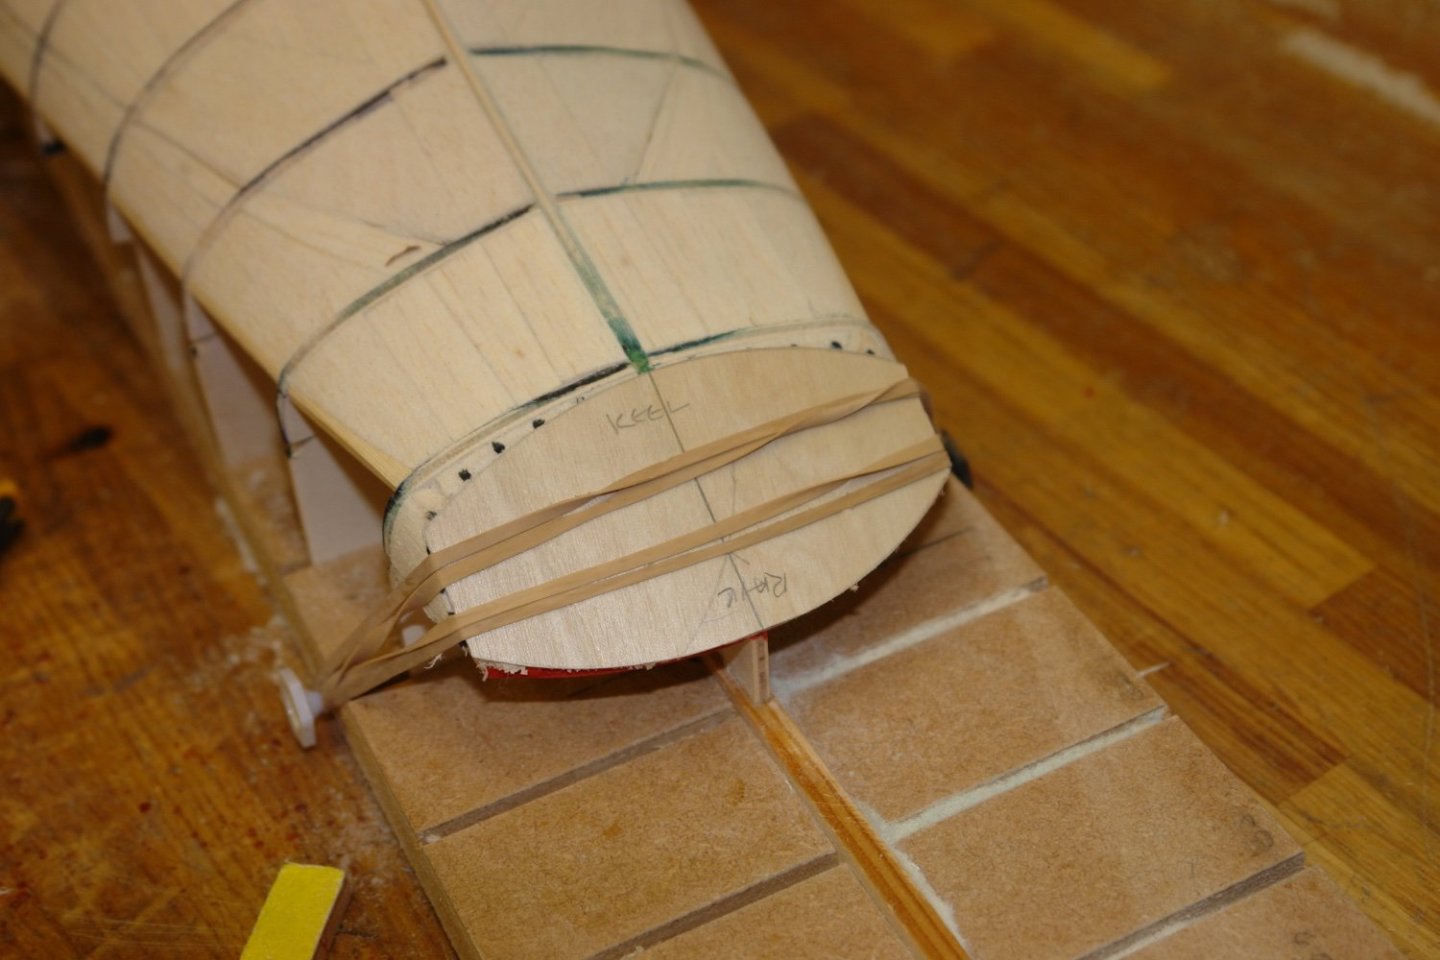
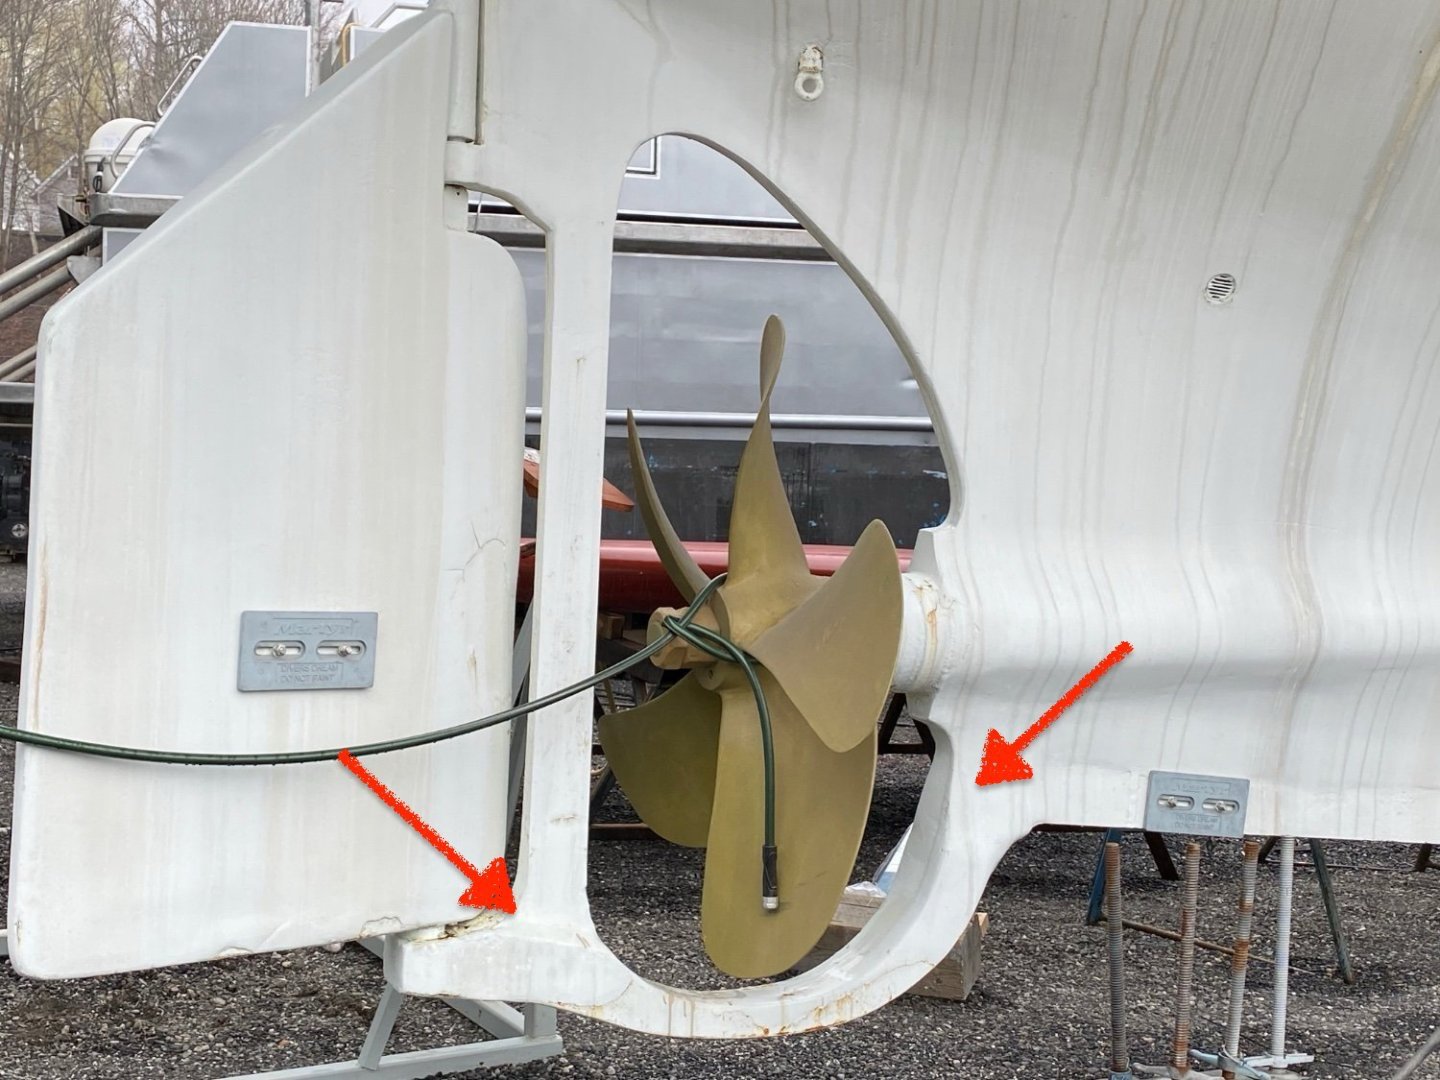
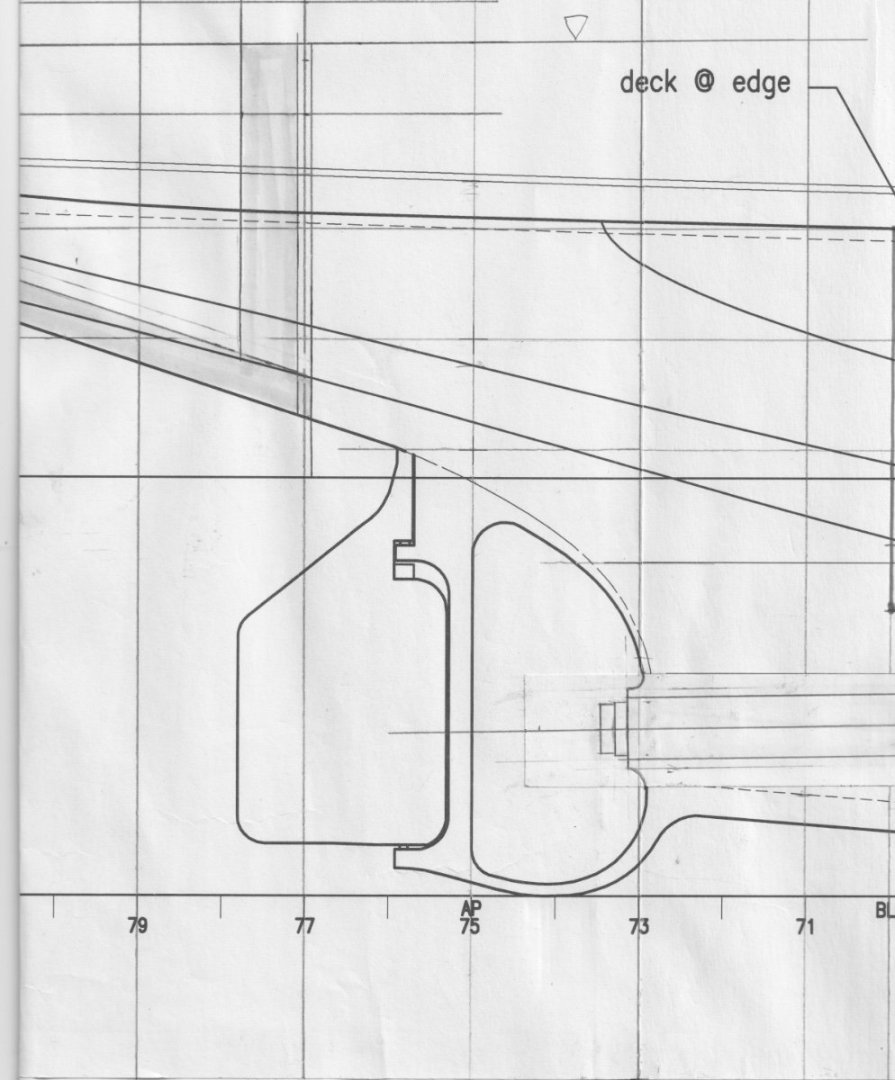
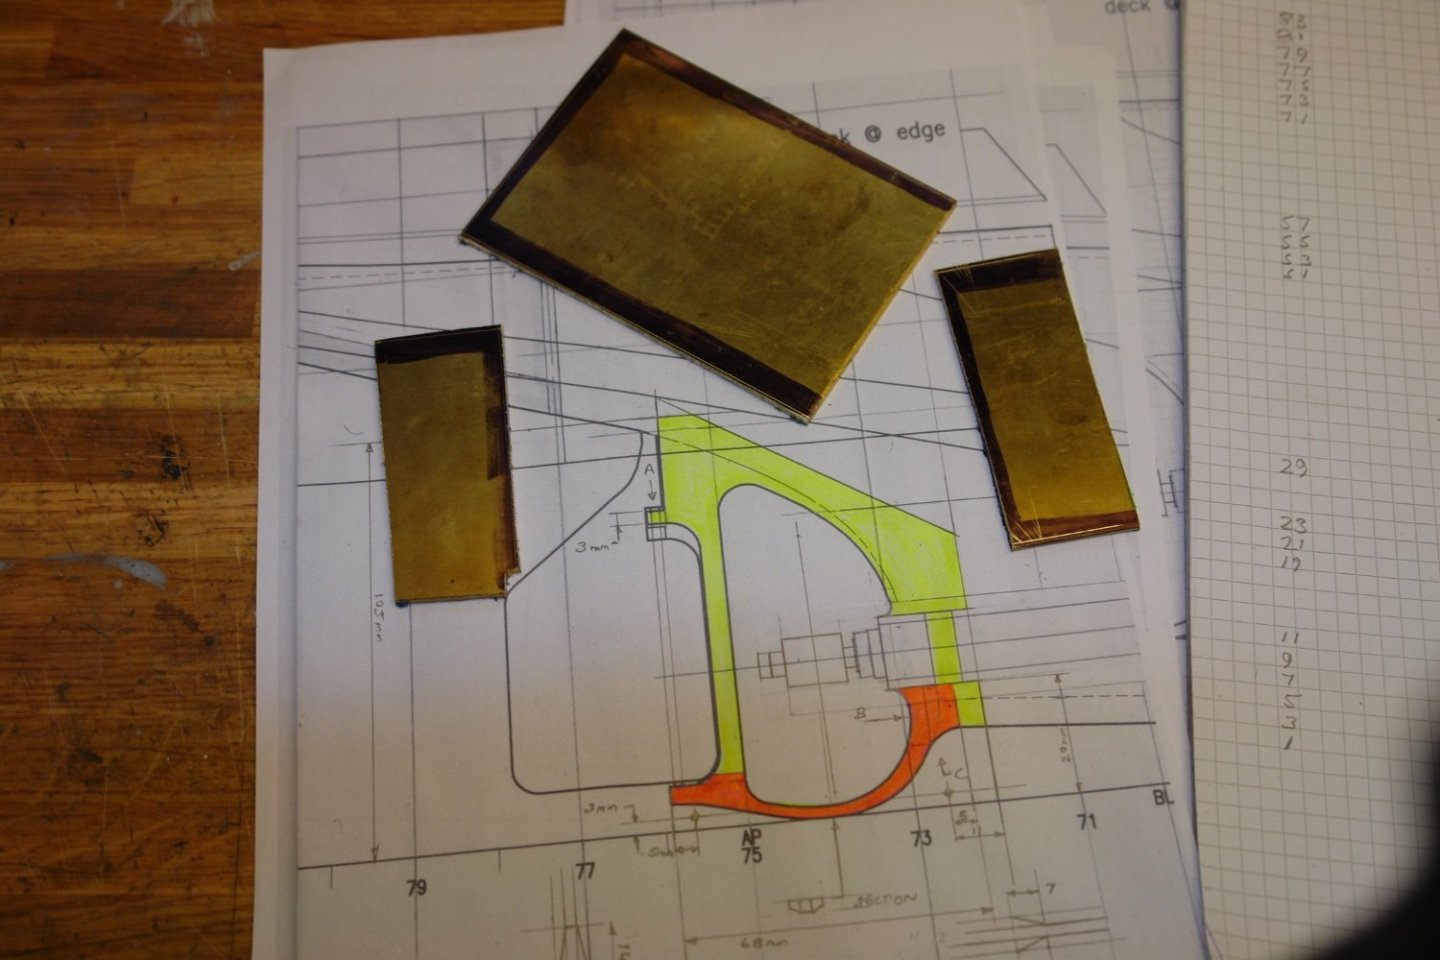
I'm nearly at the end hull sanding. I just needed to build up the keel slightly. I also needed to get the transom to the correct shape and "fix" the shape by attaching a pre-shaped piece of ply. Shaping the ply took a bit of fiddling with card templates but eventually I sorted it. I have had enough woodworking for a while so I am now figuring out how to make rudder post. I plan to make this out of brass. The key complication is that the lower portion (red arrows) is somewhat thicker than the remainder of the frame surrounding the screw. I plan to fabricate it out of 3 pieces of 0.1" brass plate. In drawing the yellow is the 0.1" portion while the orange is the thickened 0.3" portion.


-
The hull has turned out well. Planking when the frames are widely spaced is quite tricky but you seem to have made a success of it. Well done.
-
Good point, must get back to the day job.
-
I like it when solution develop - it's so much more educational. Nicely made smoke stacks Eric.
-
Too true Keith.
-
I have to agree - beautiful work.