KeithAug
-
Posts
3,986 -
Joined
-
Last visited
Content Type
Profiles
Forums
Gallery
Events
Everything posted by KeithAug
-
 Hi Michael, although Germania has spherical thickened sections on the stanchions a lot of modern yachts have thickened sections which are cylindrical. I prefer the aesthetics of the cylindrical design and they have the advantage of being easier to make. Without the advantage of photographic magnification it isn't very obvious anyway. Thank you Richard, I periodically look at your bluenose but she seems to have been going slowly of late. Shipyard labour problems I assume?
 -
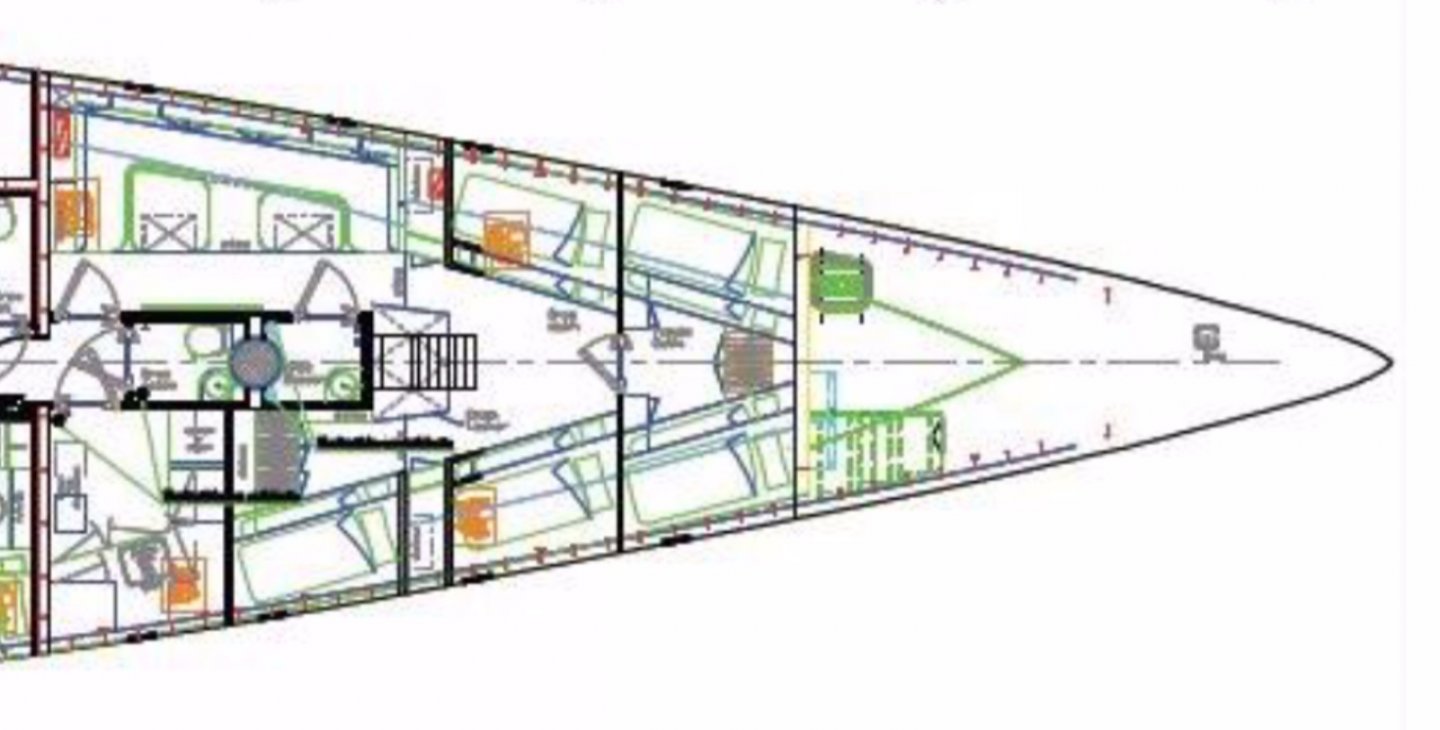
Eberhard - Thank you, I keep telling her she is developing a fan base. Keith, i don't think so. You can see from the following plan that washrooms are positioned centrally in the crew accommodation area. I think the area below the vent is for sail stowage. Presumably it is ventilated to dry stuff out. I think my wife sees me as the helpmate. In hierarchy terms I come after the dog.
-
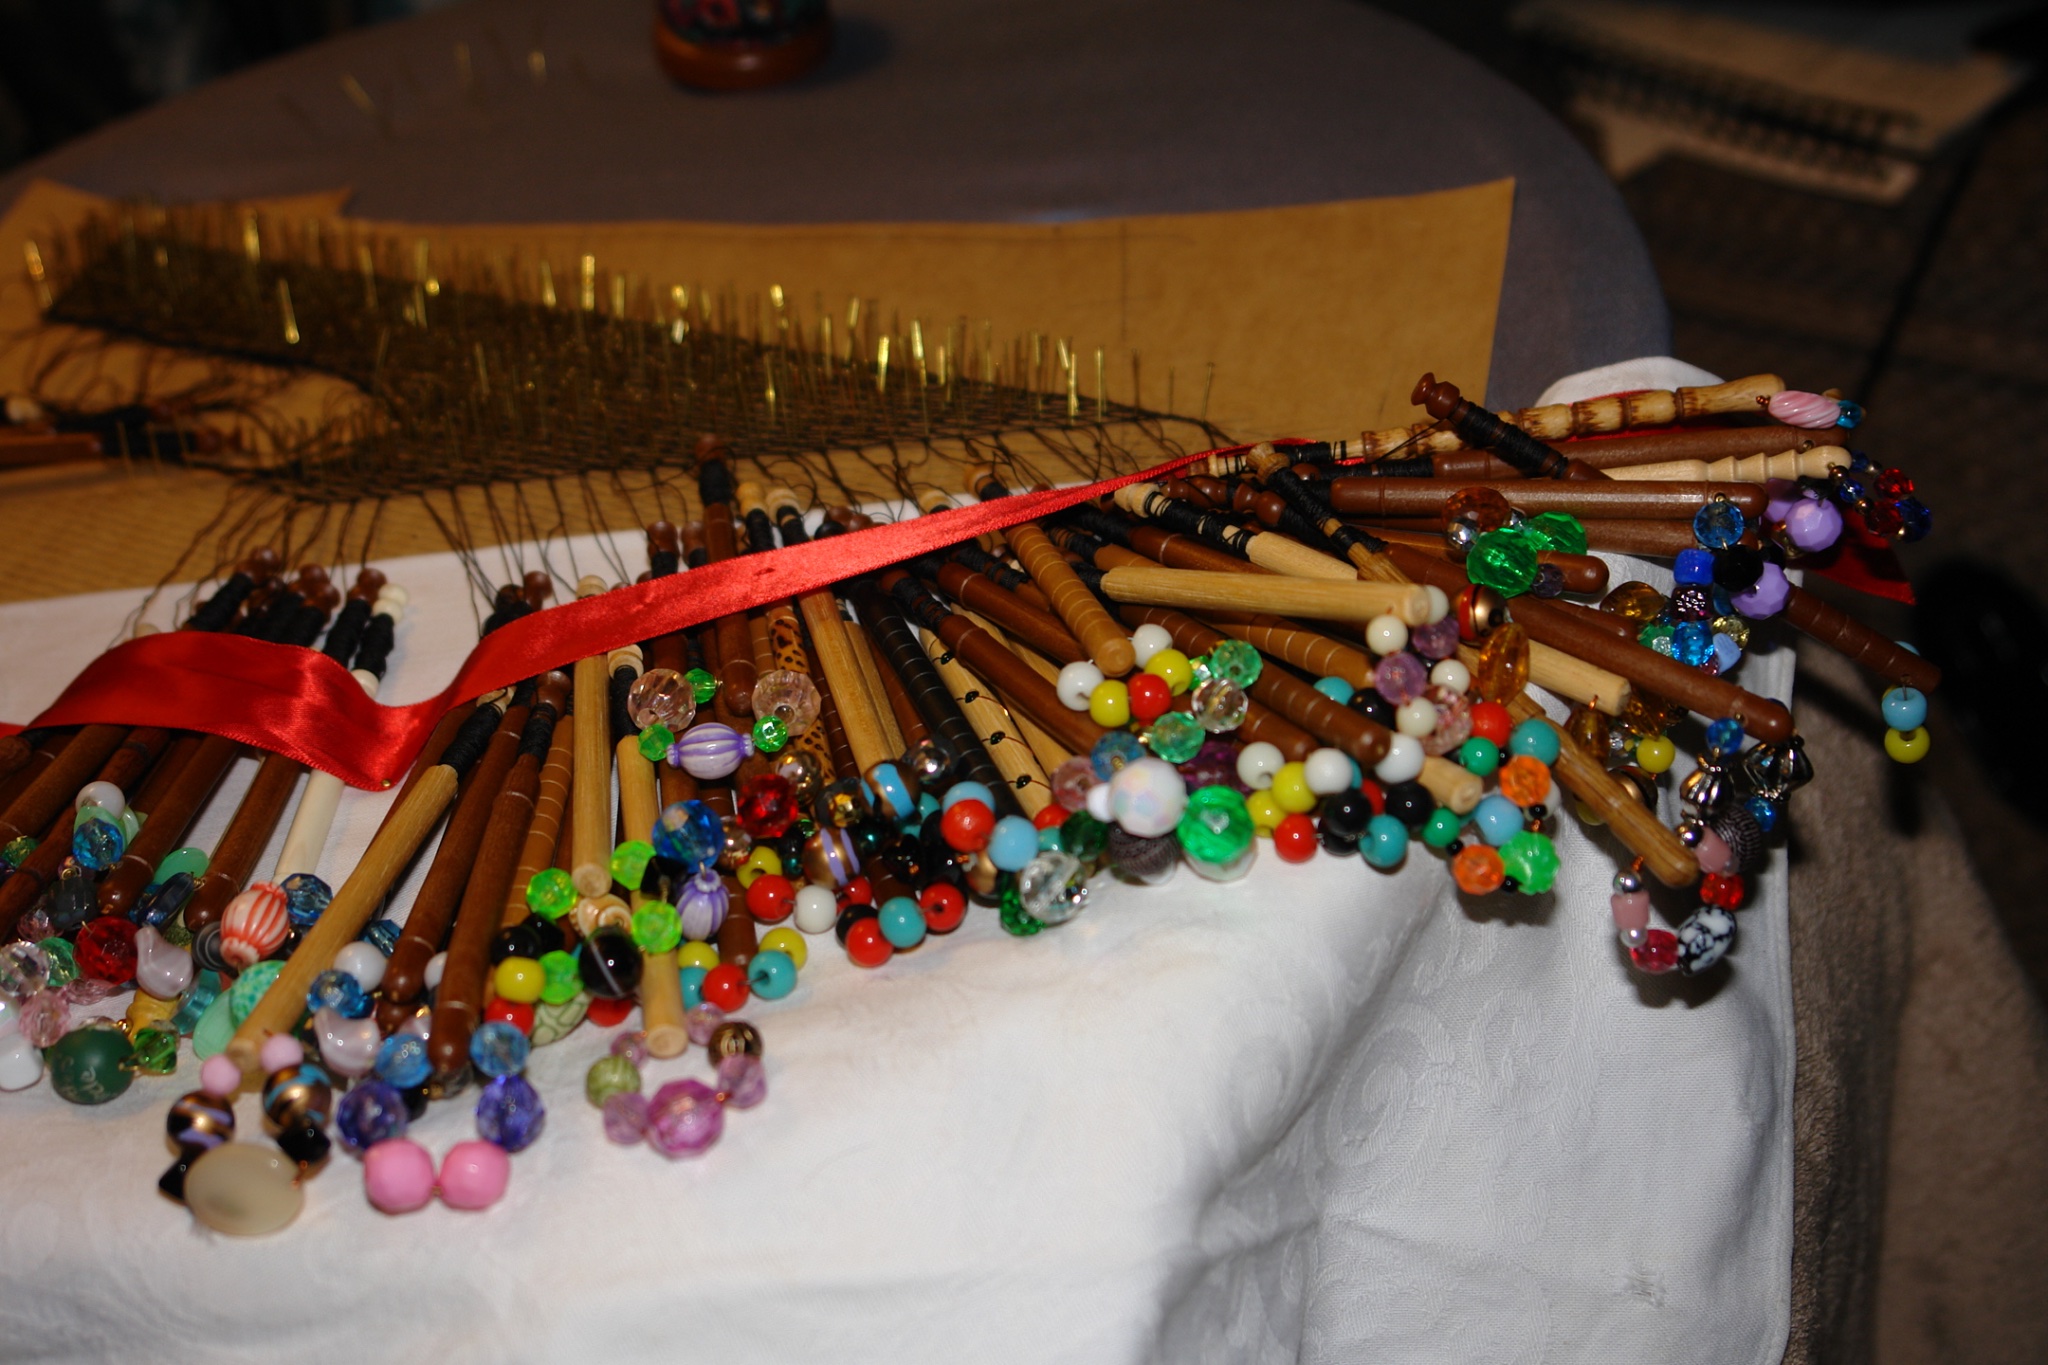
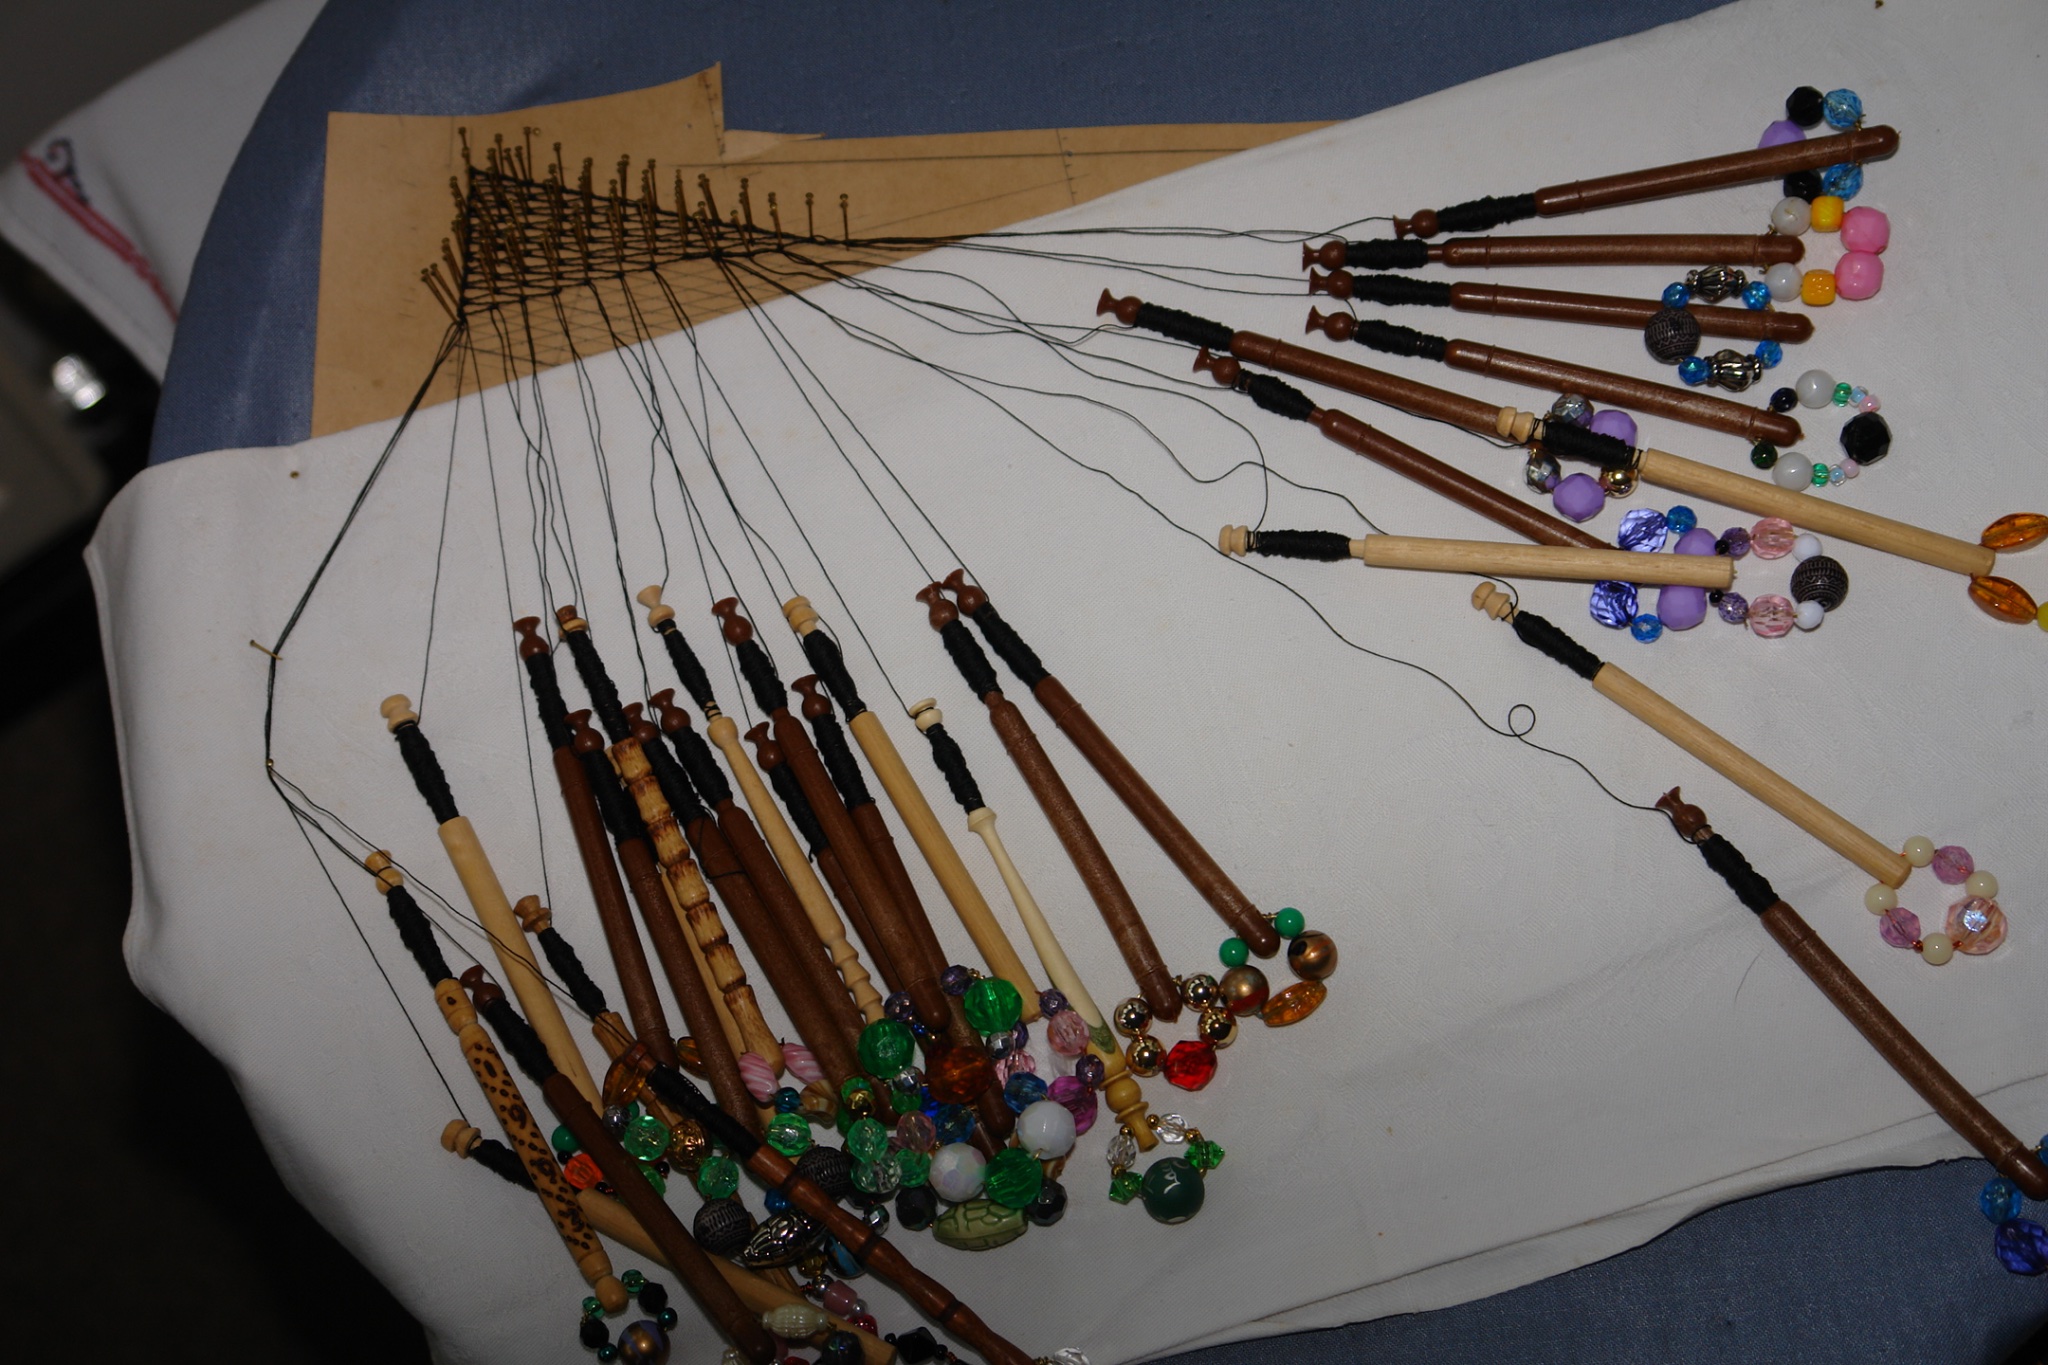
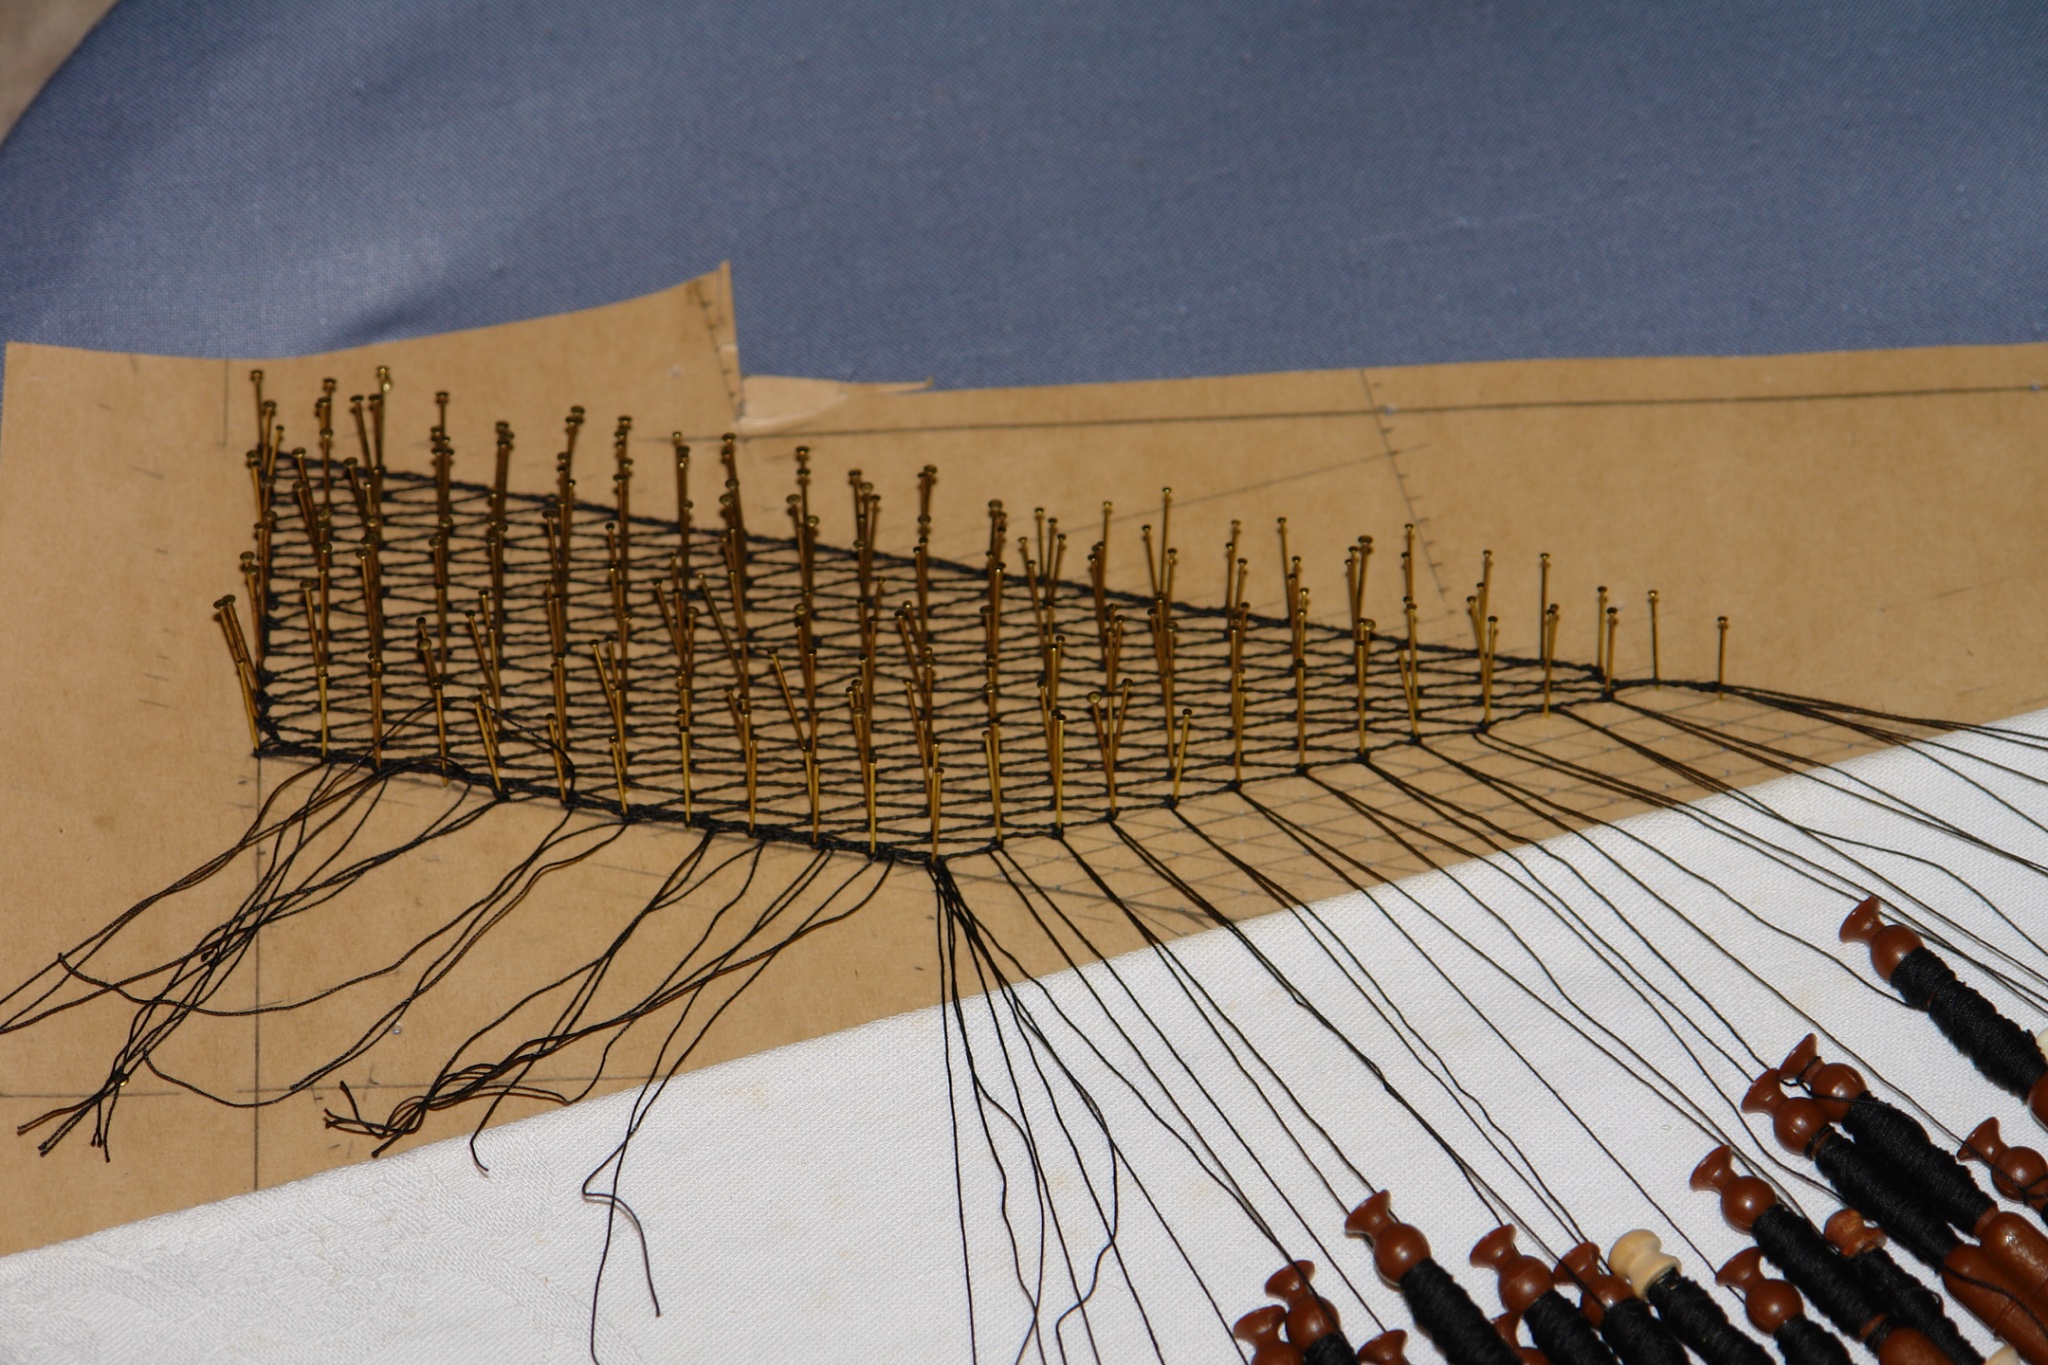
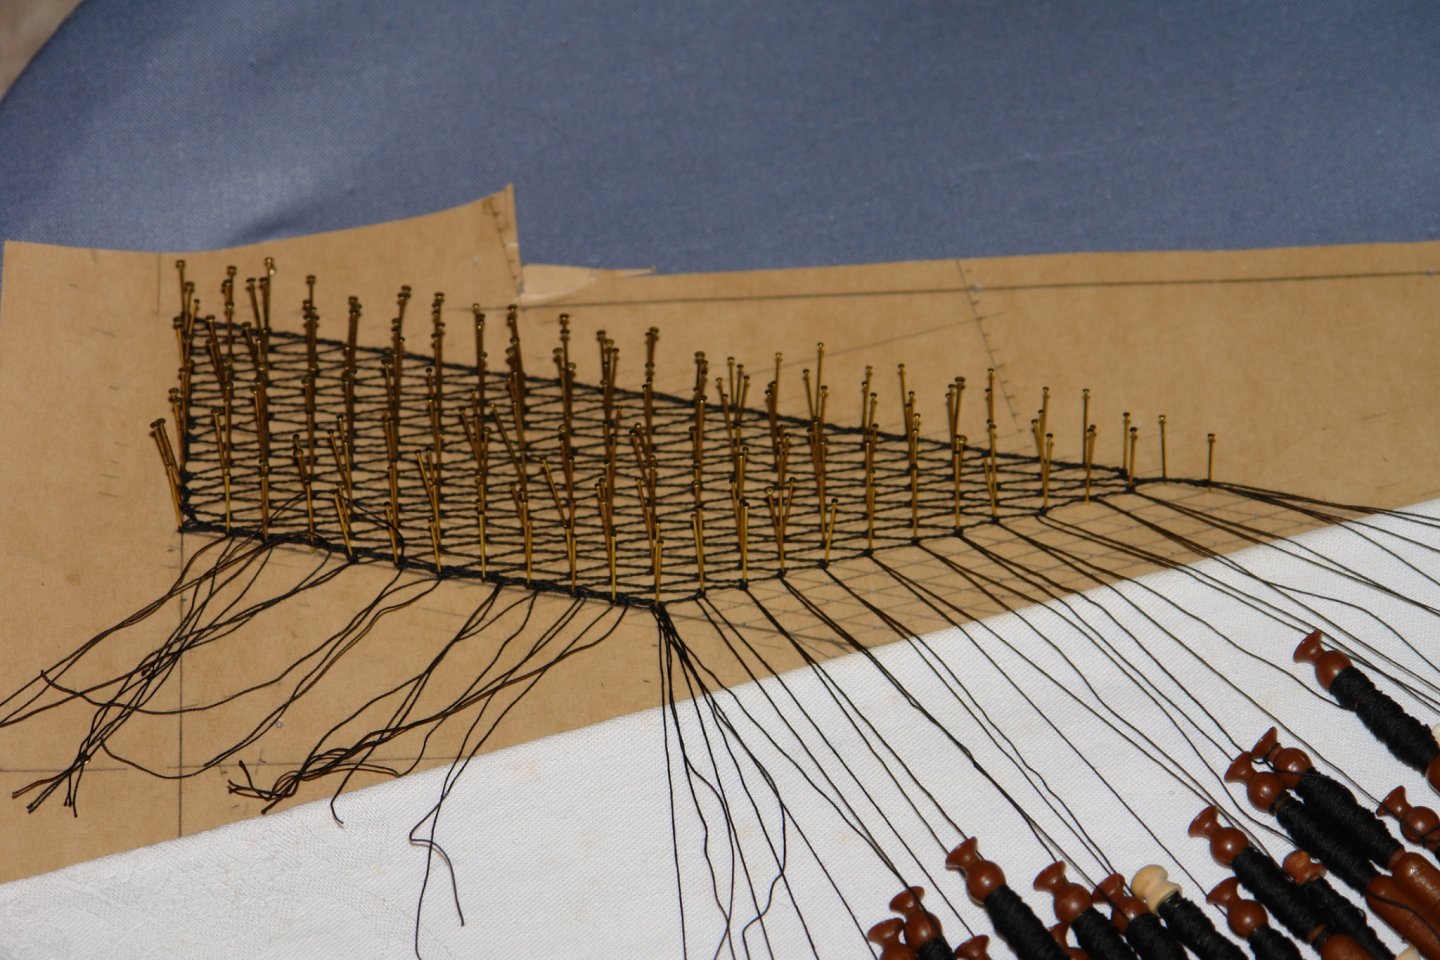
Meanwhile the hired help is plodding on. She is complaining about the difficulties of keeping track of the bobbins. I did a rough count - she seems to have about 70 on the go and all seem to need to be operated in sequence. a bit of a knotty problem so to speak. But she is making progress. We both have our covid jabs booked for Friday - I hope your turns come soon.


-
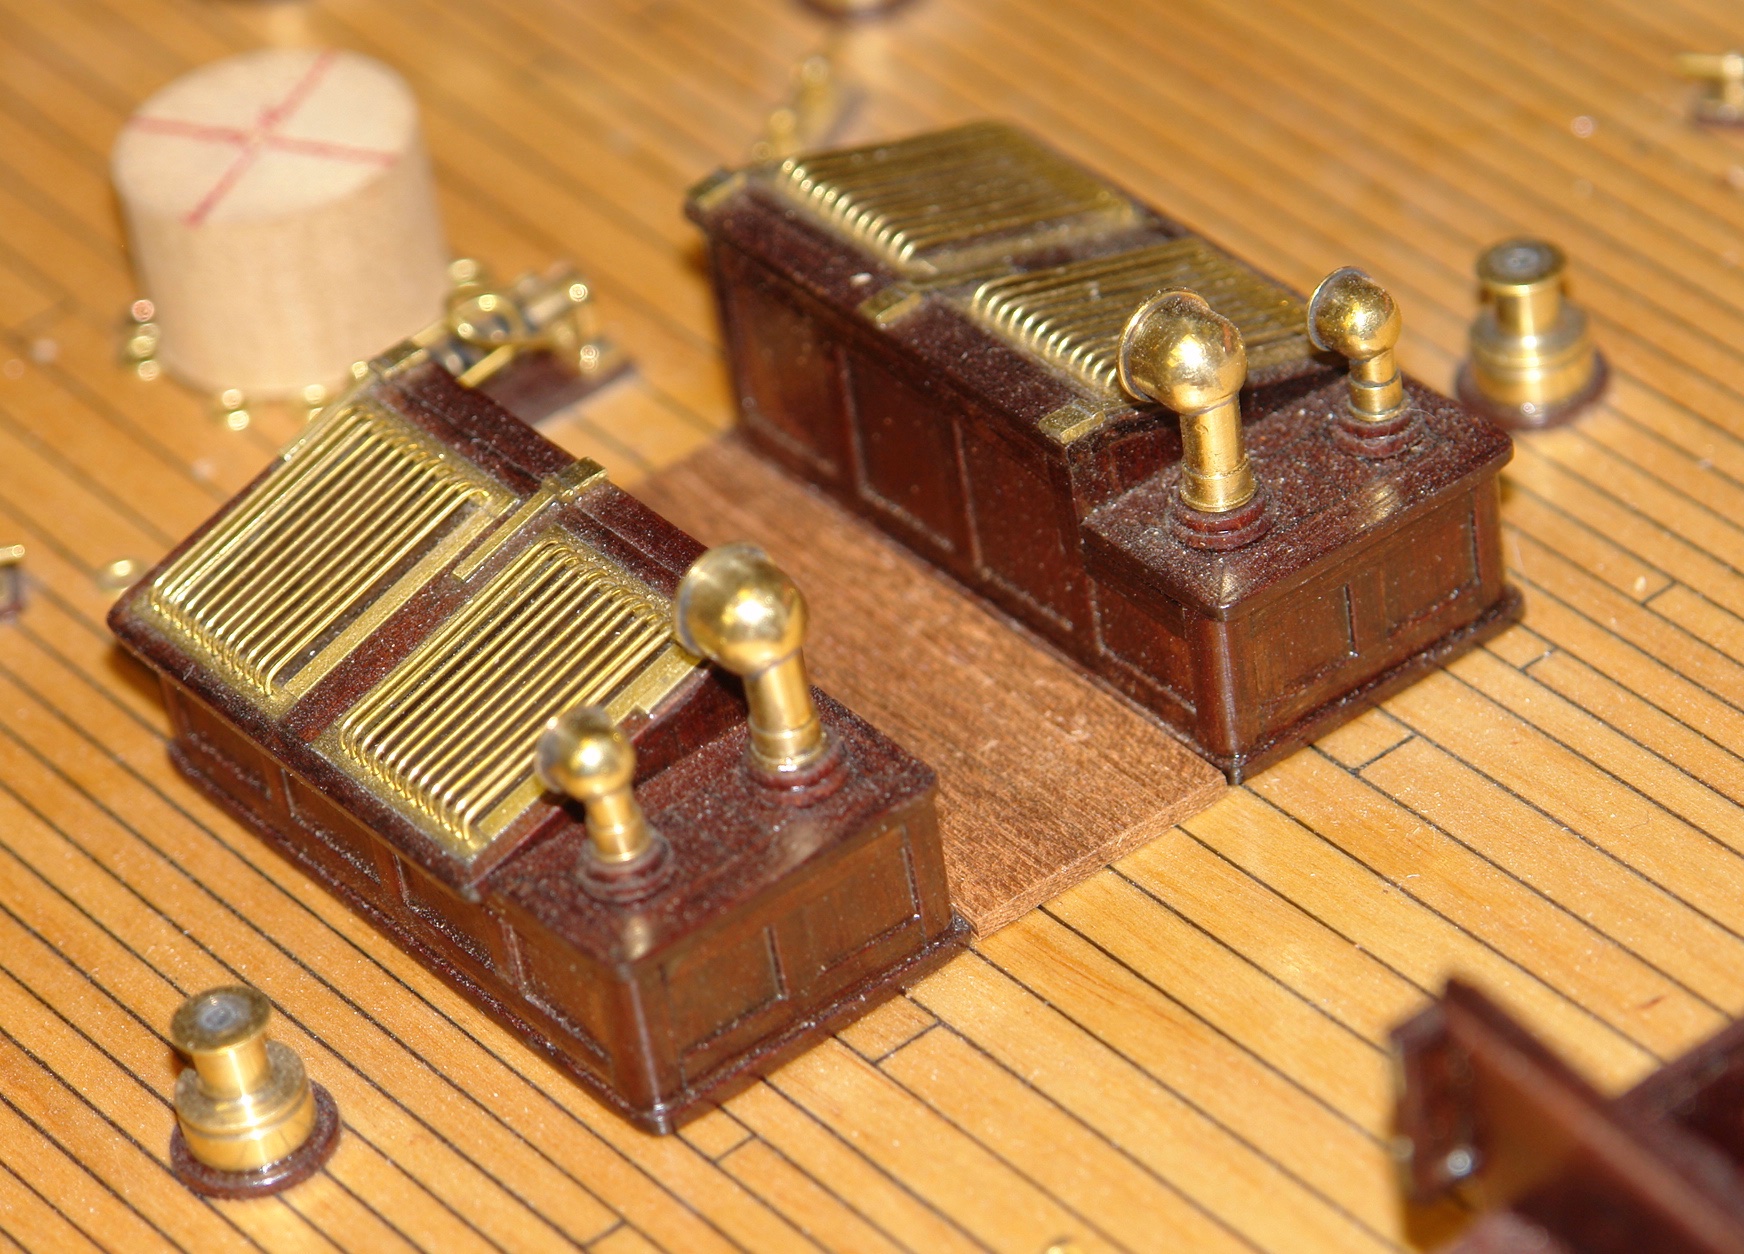
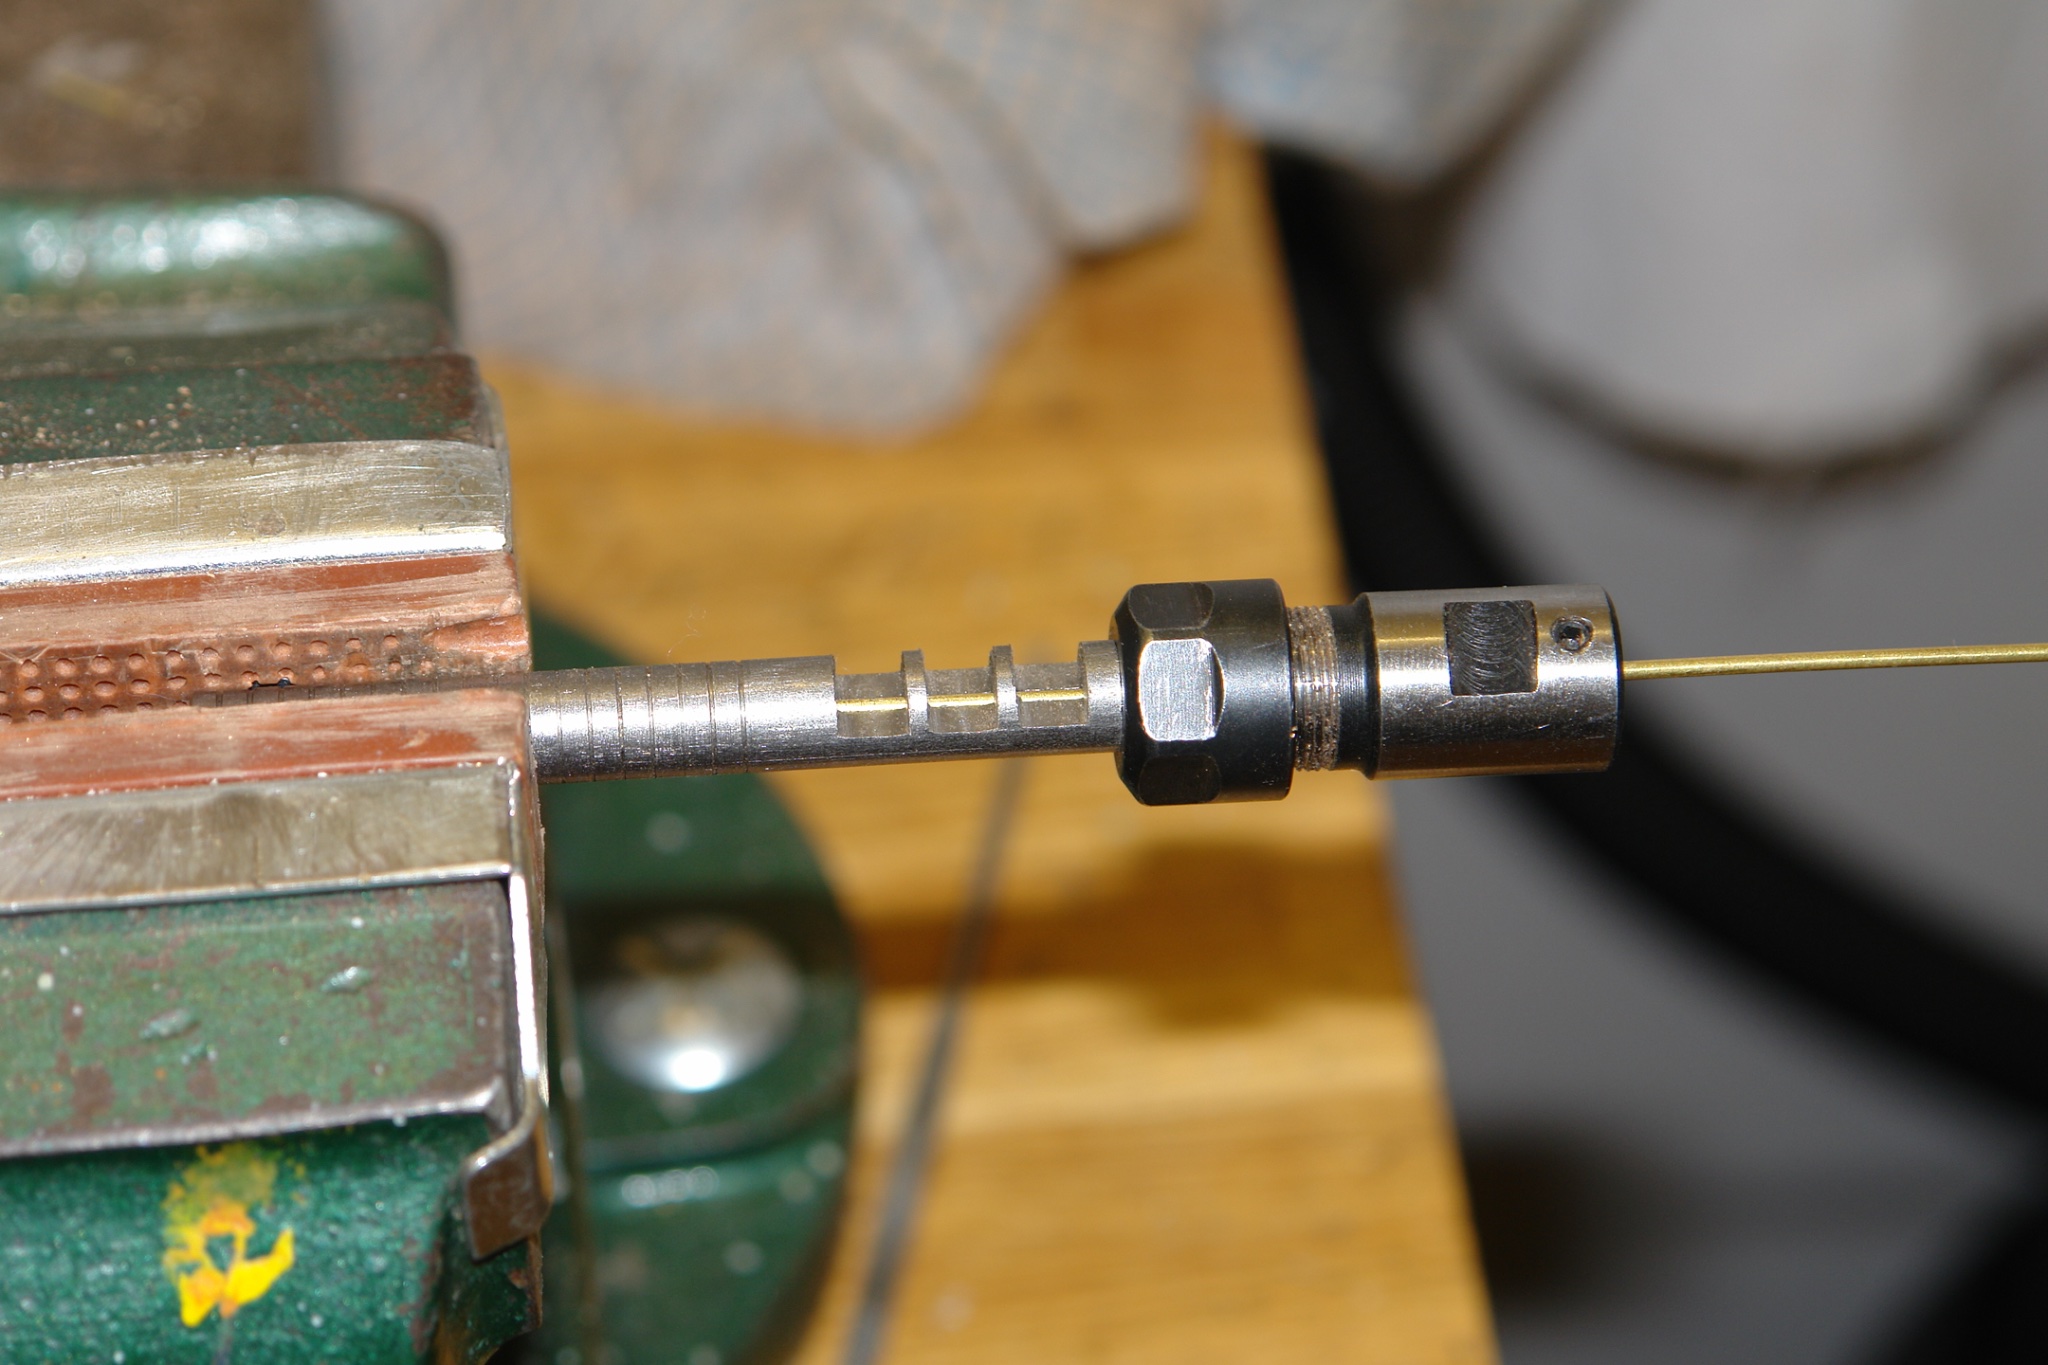
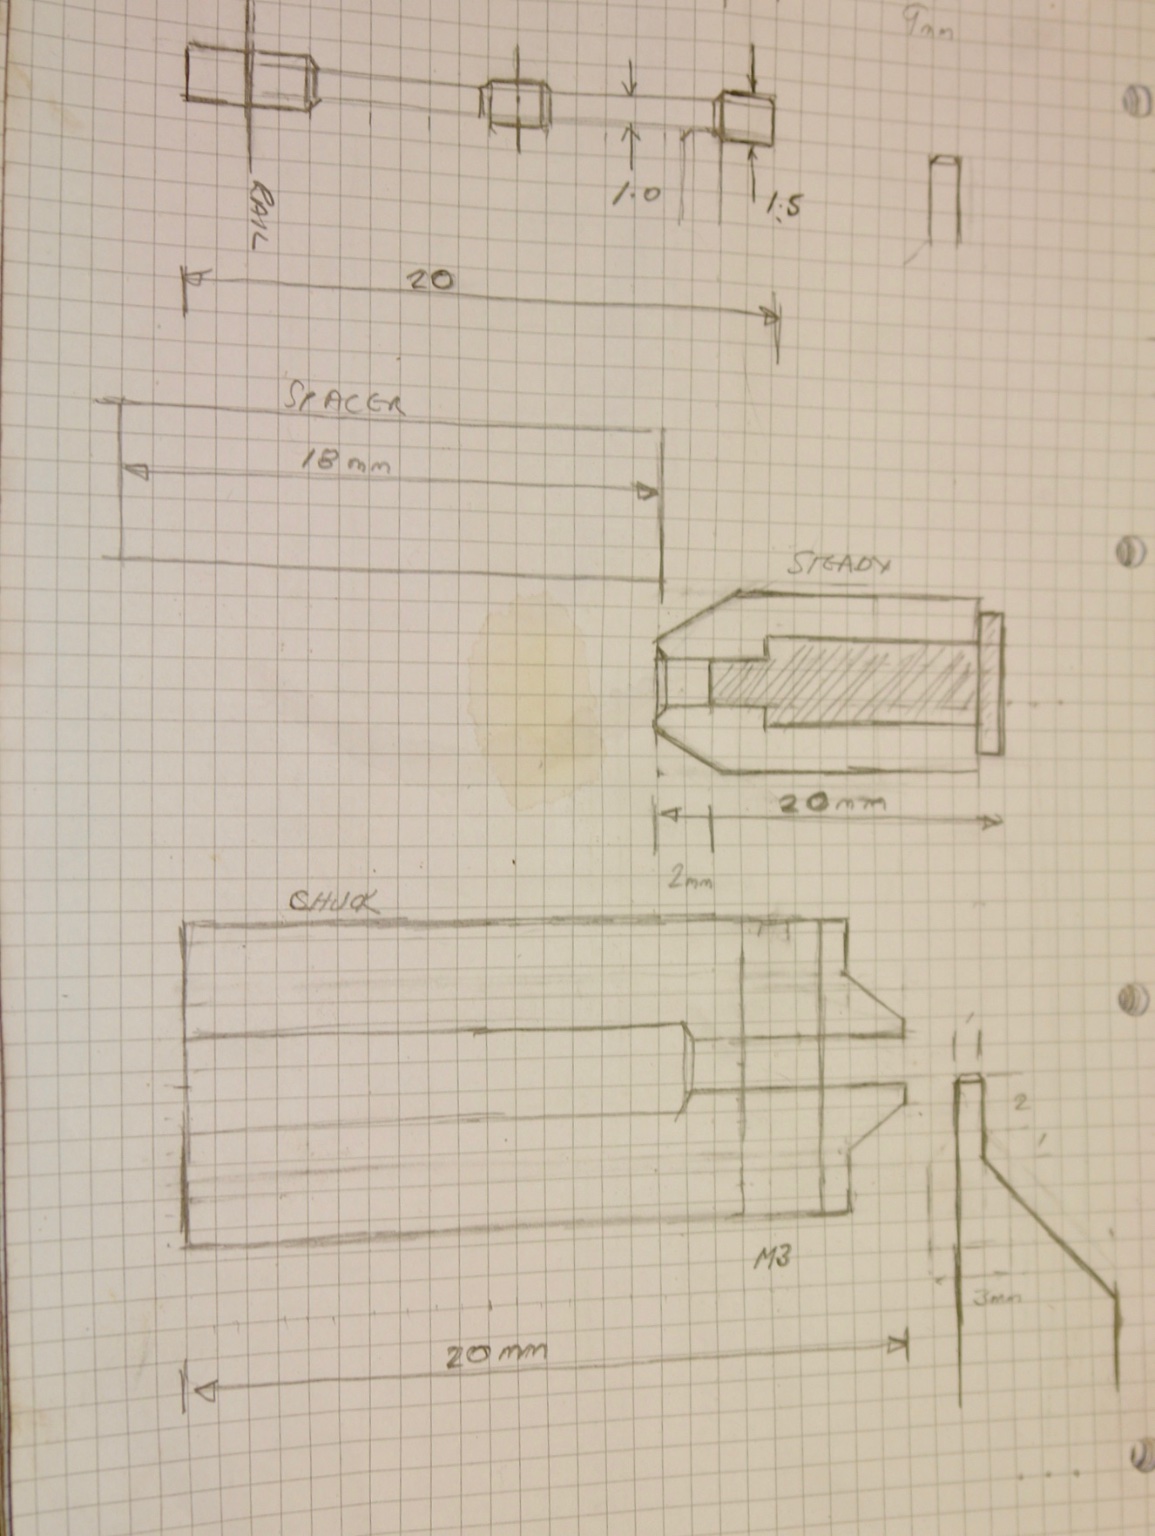
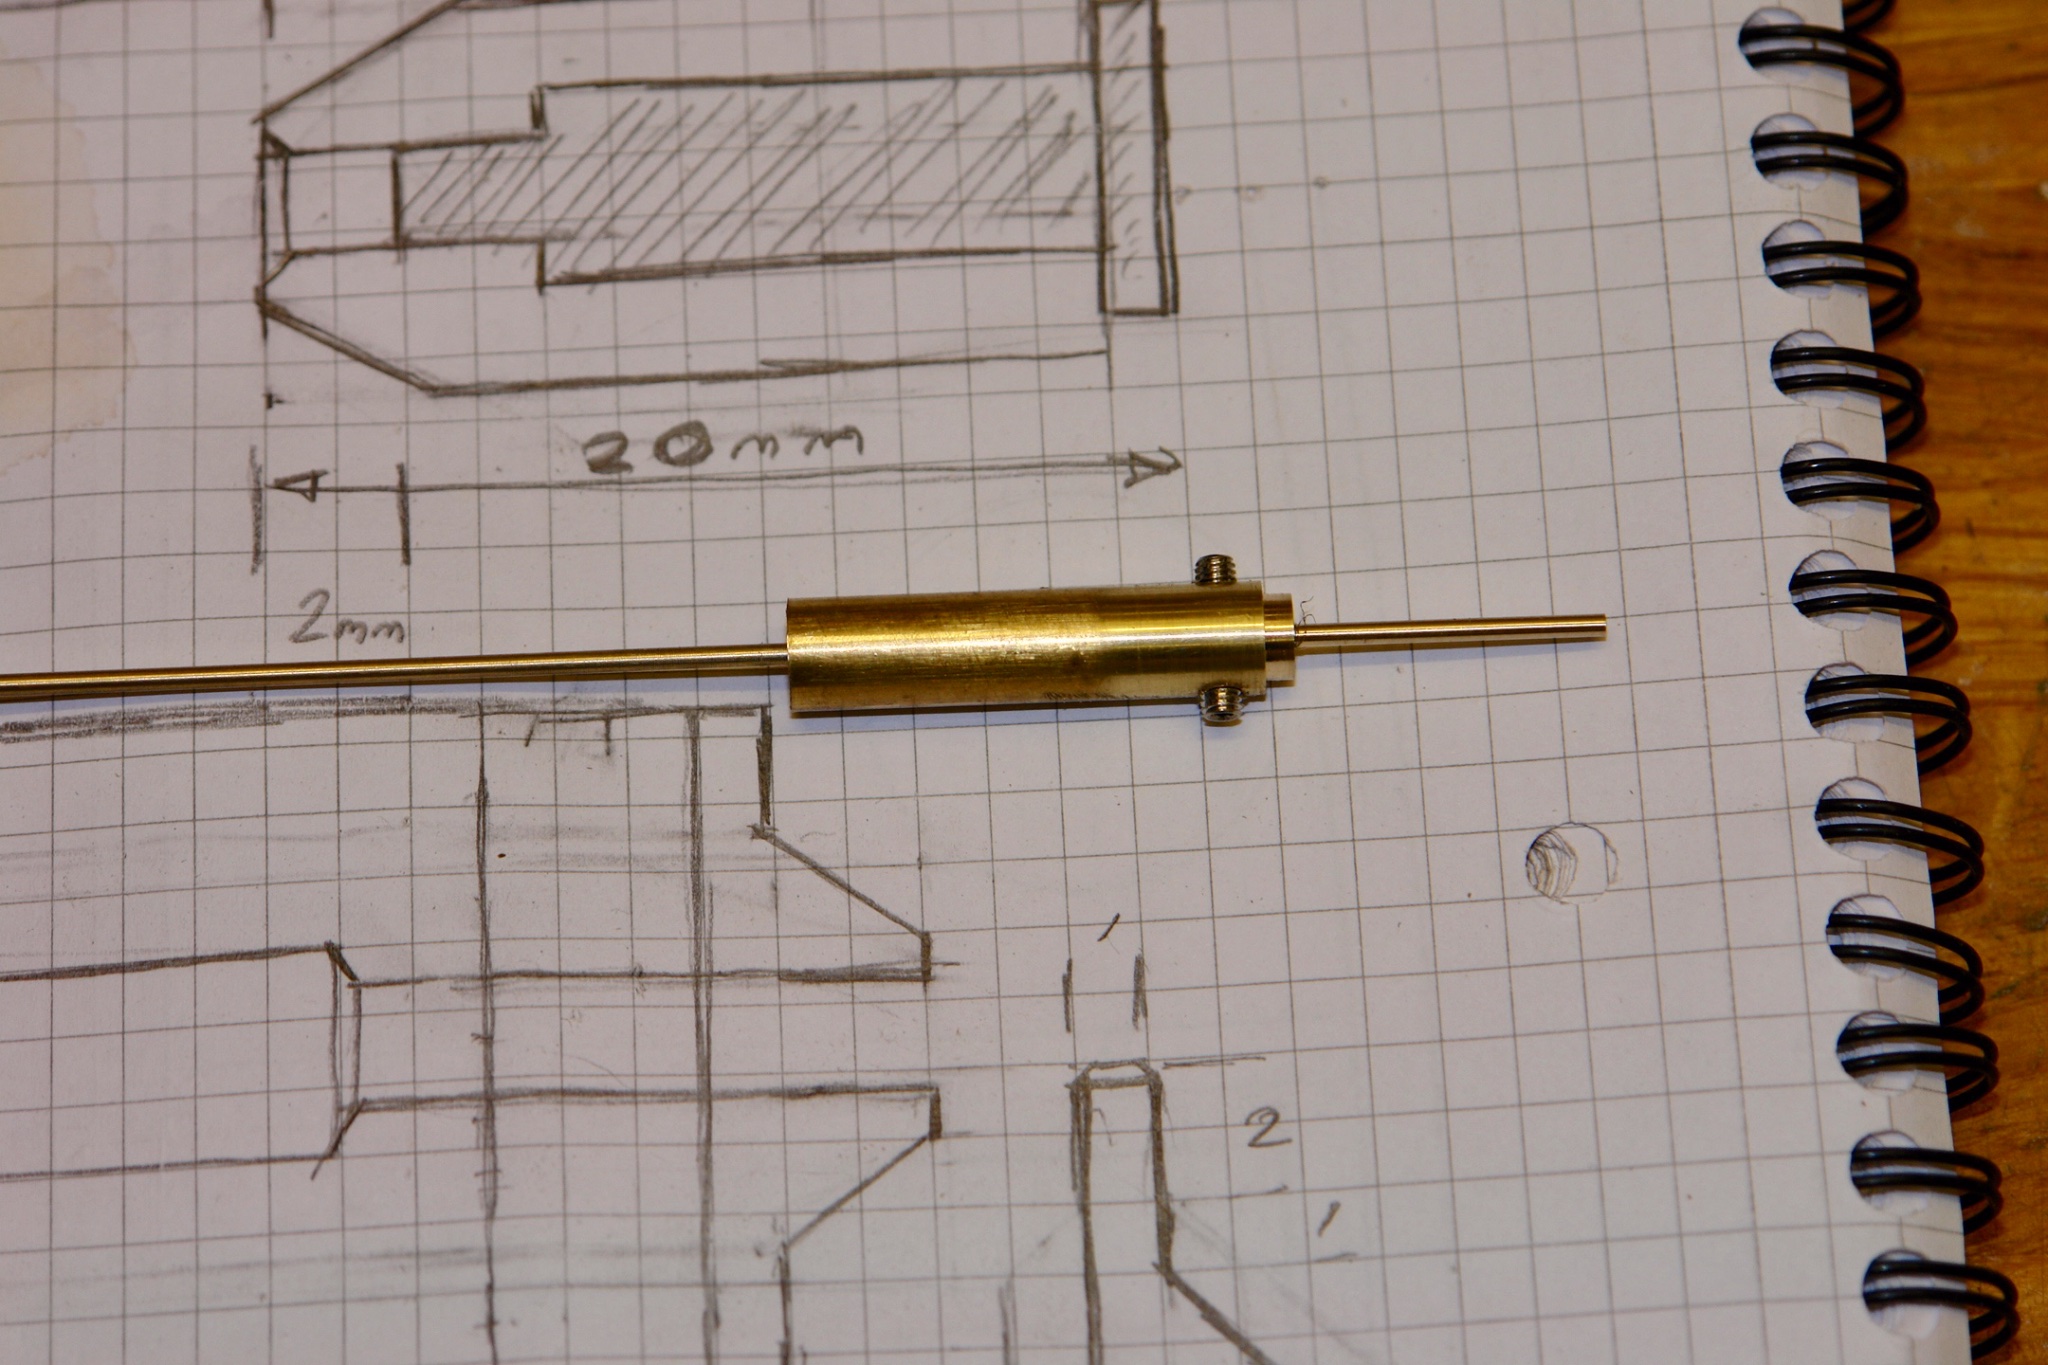
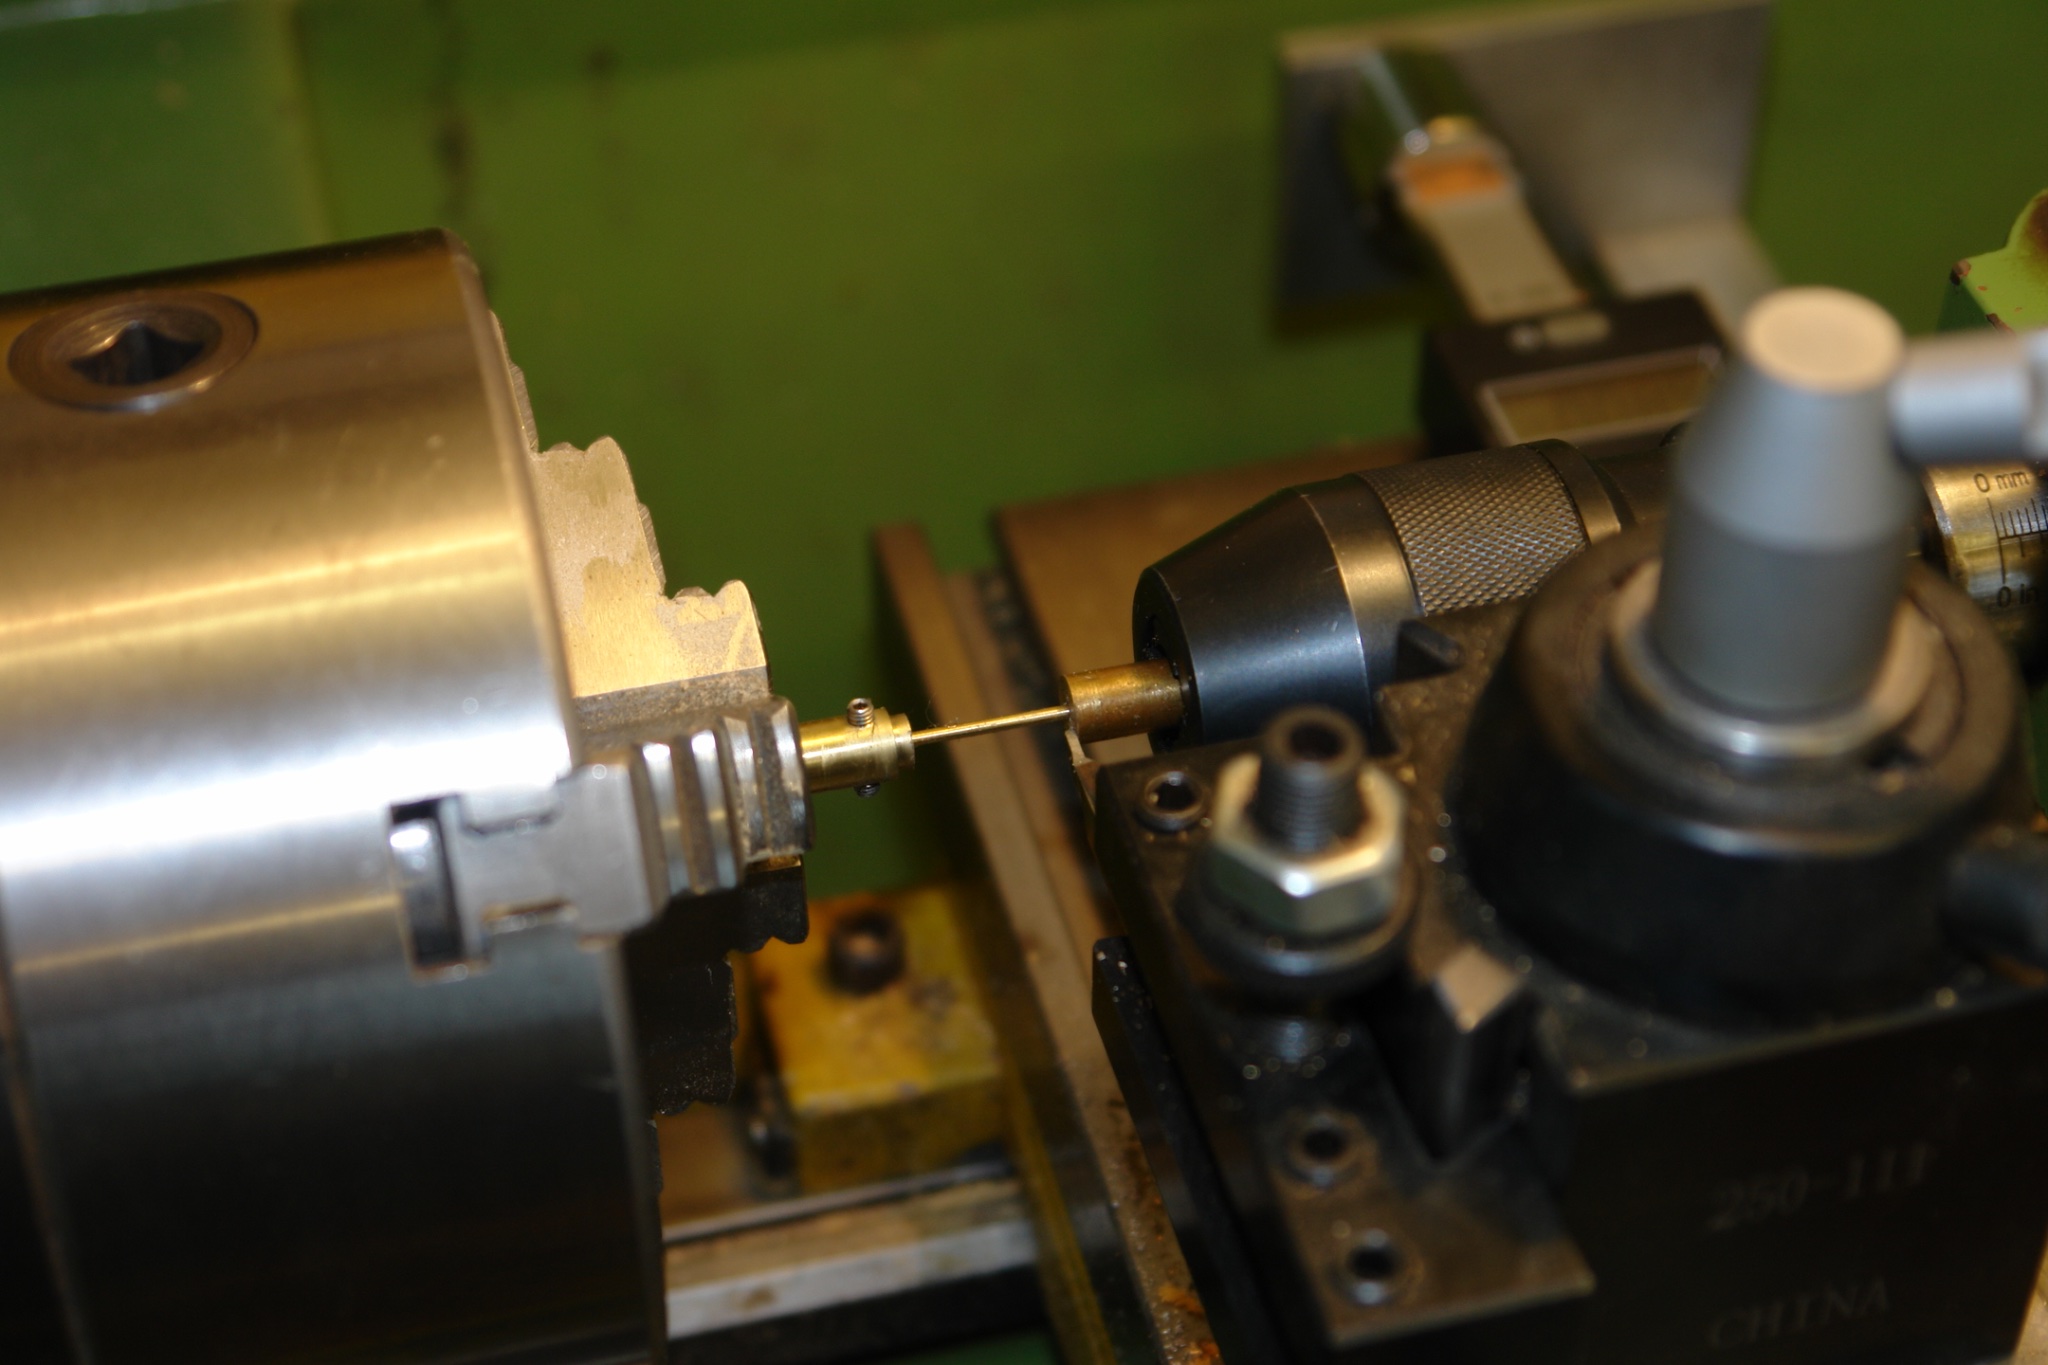
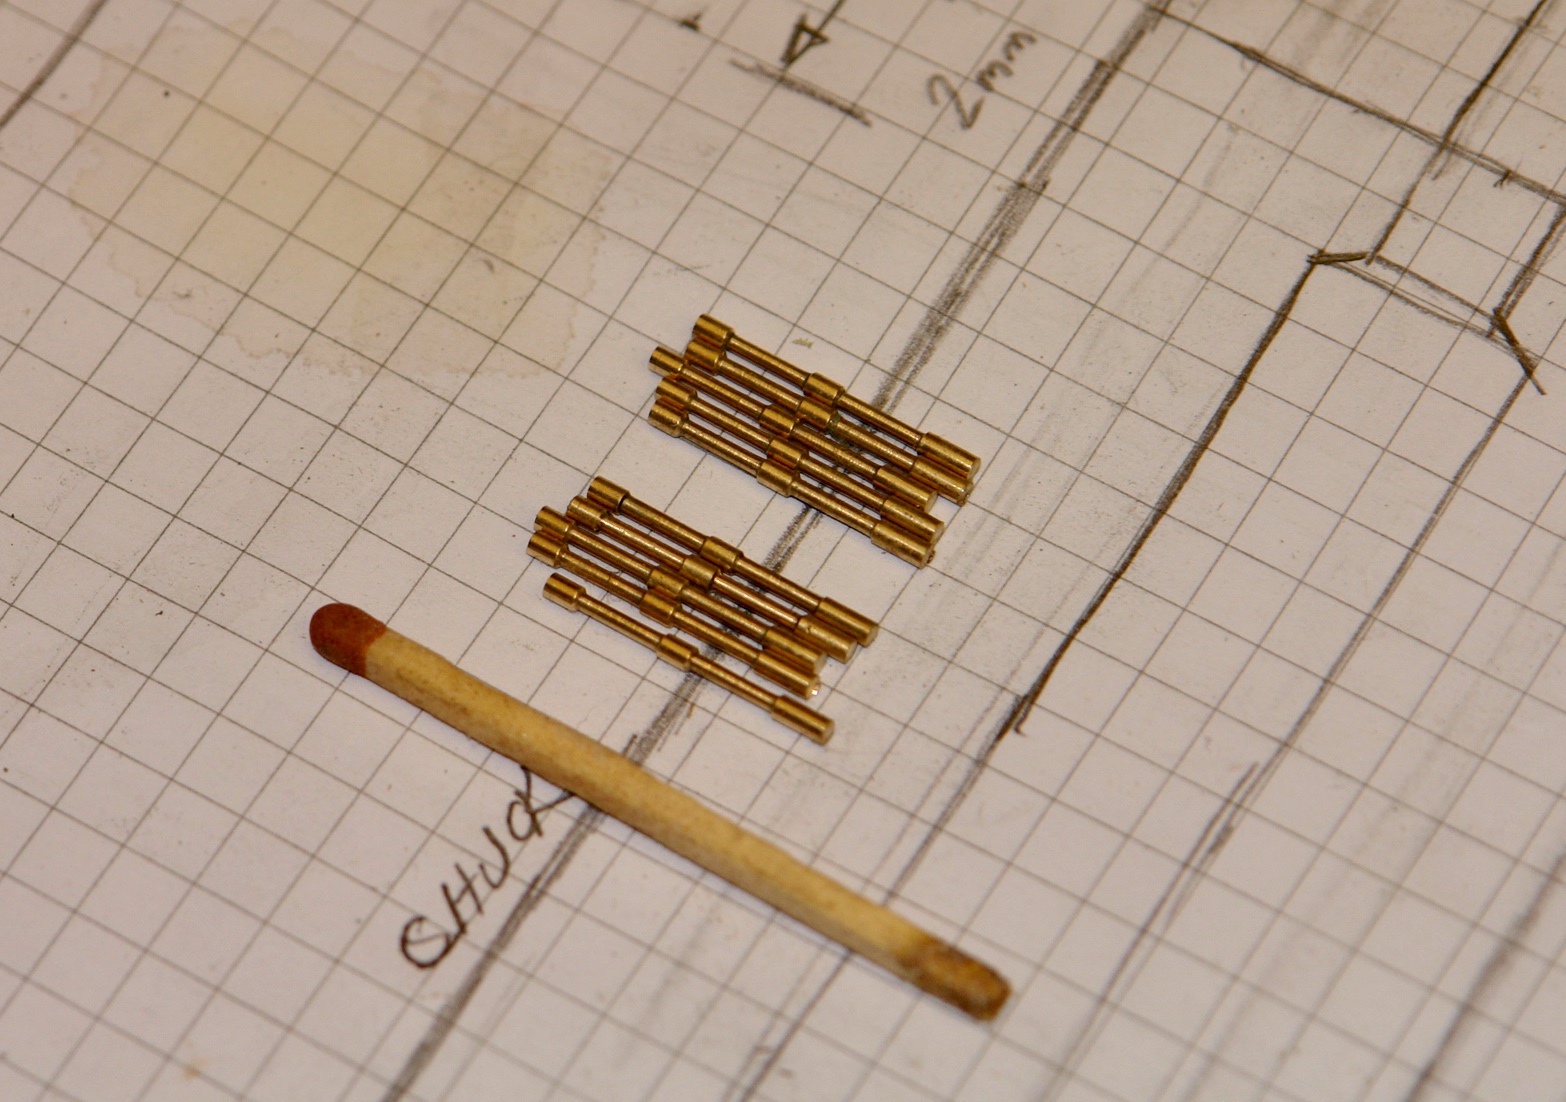
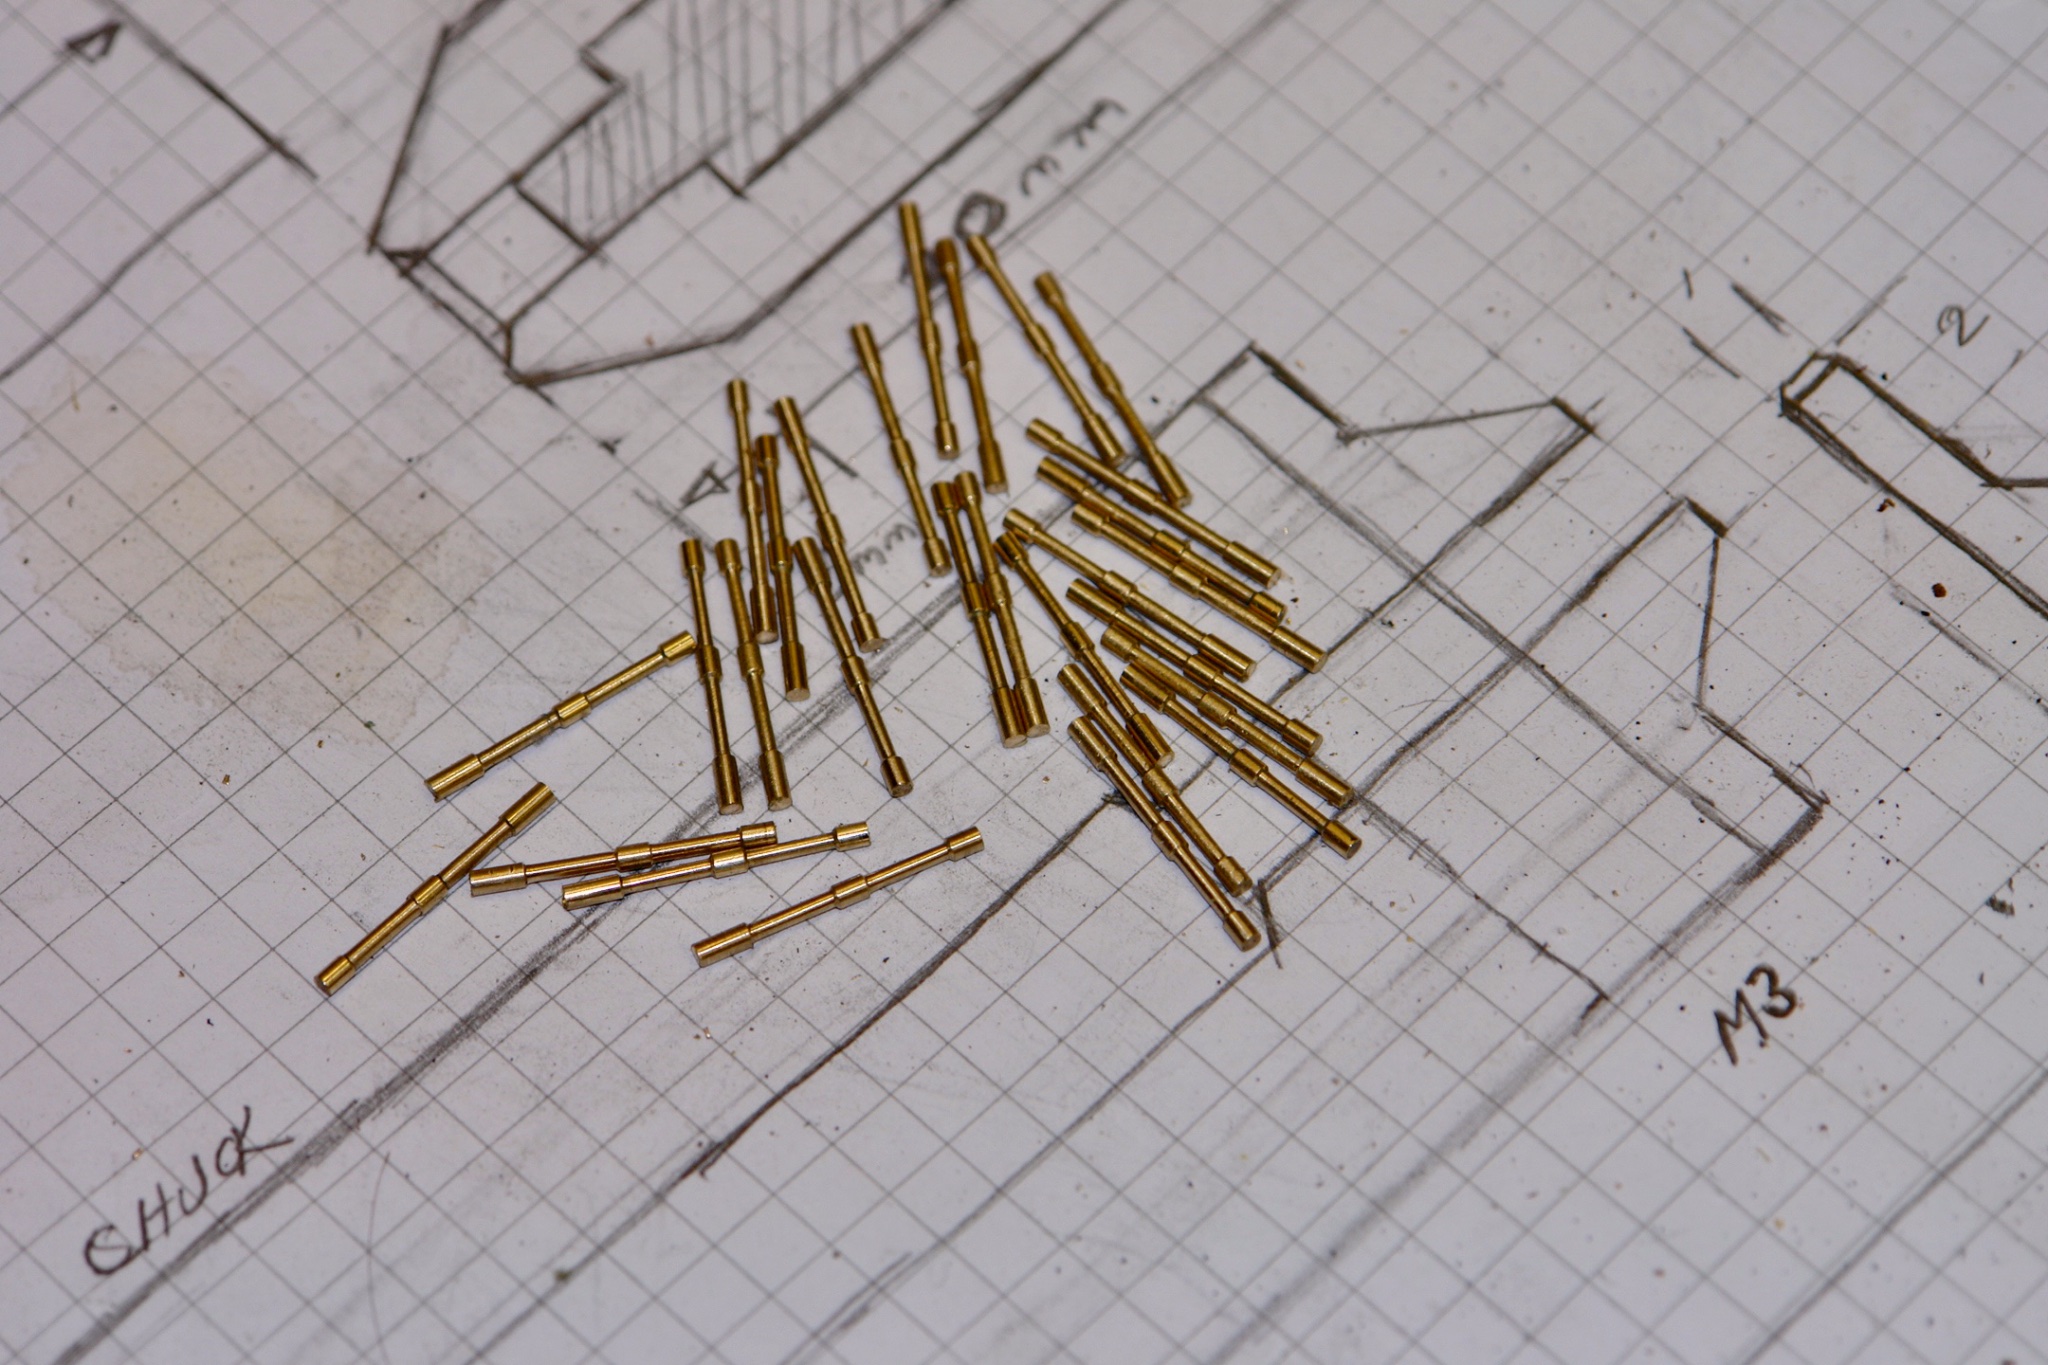
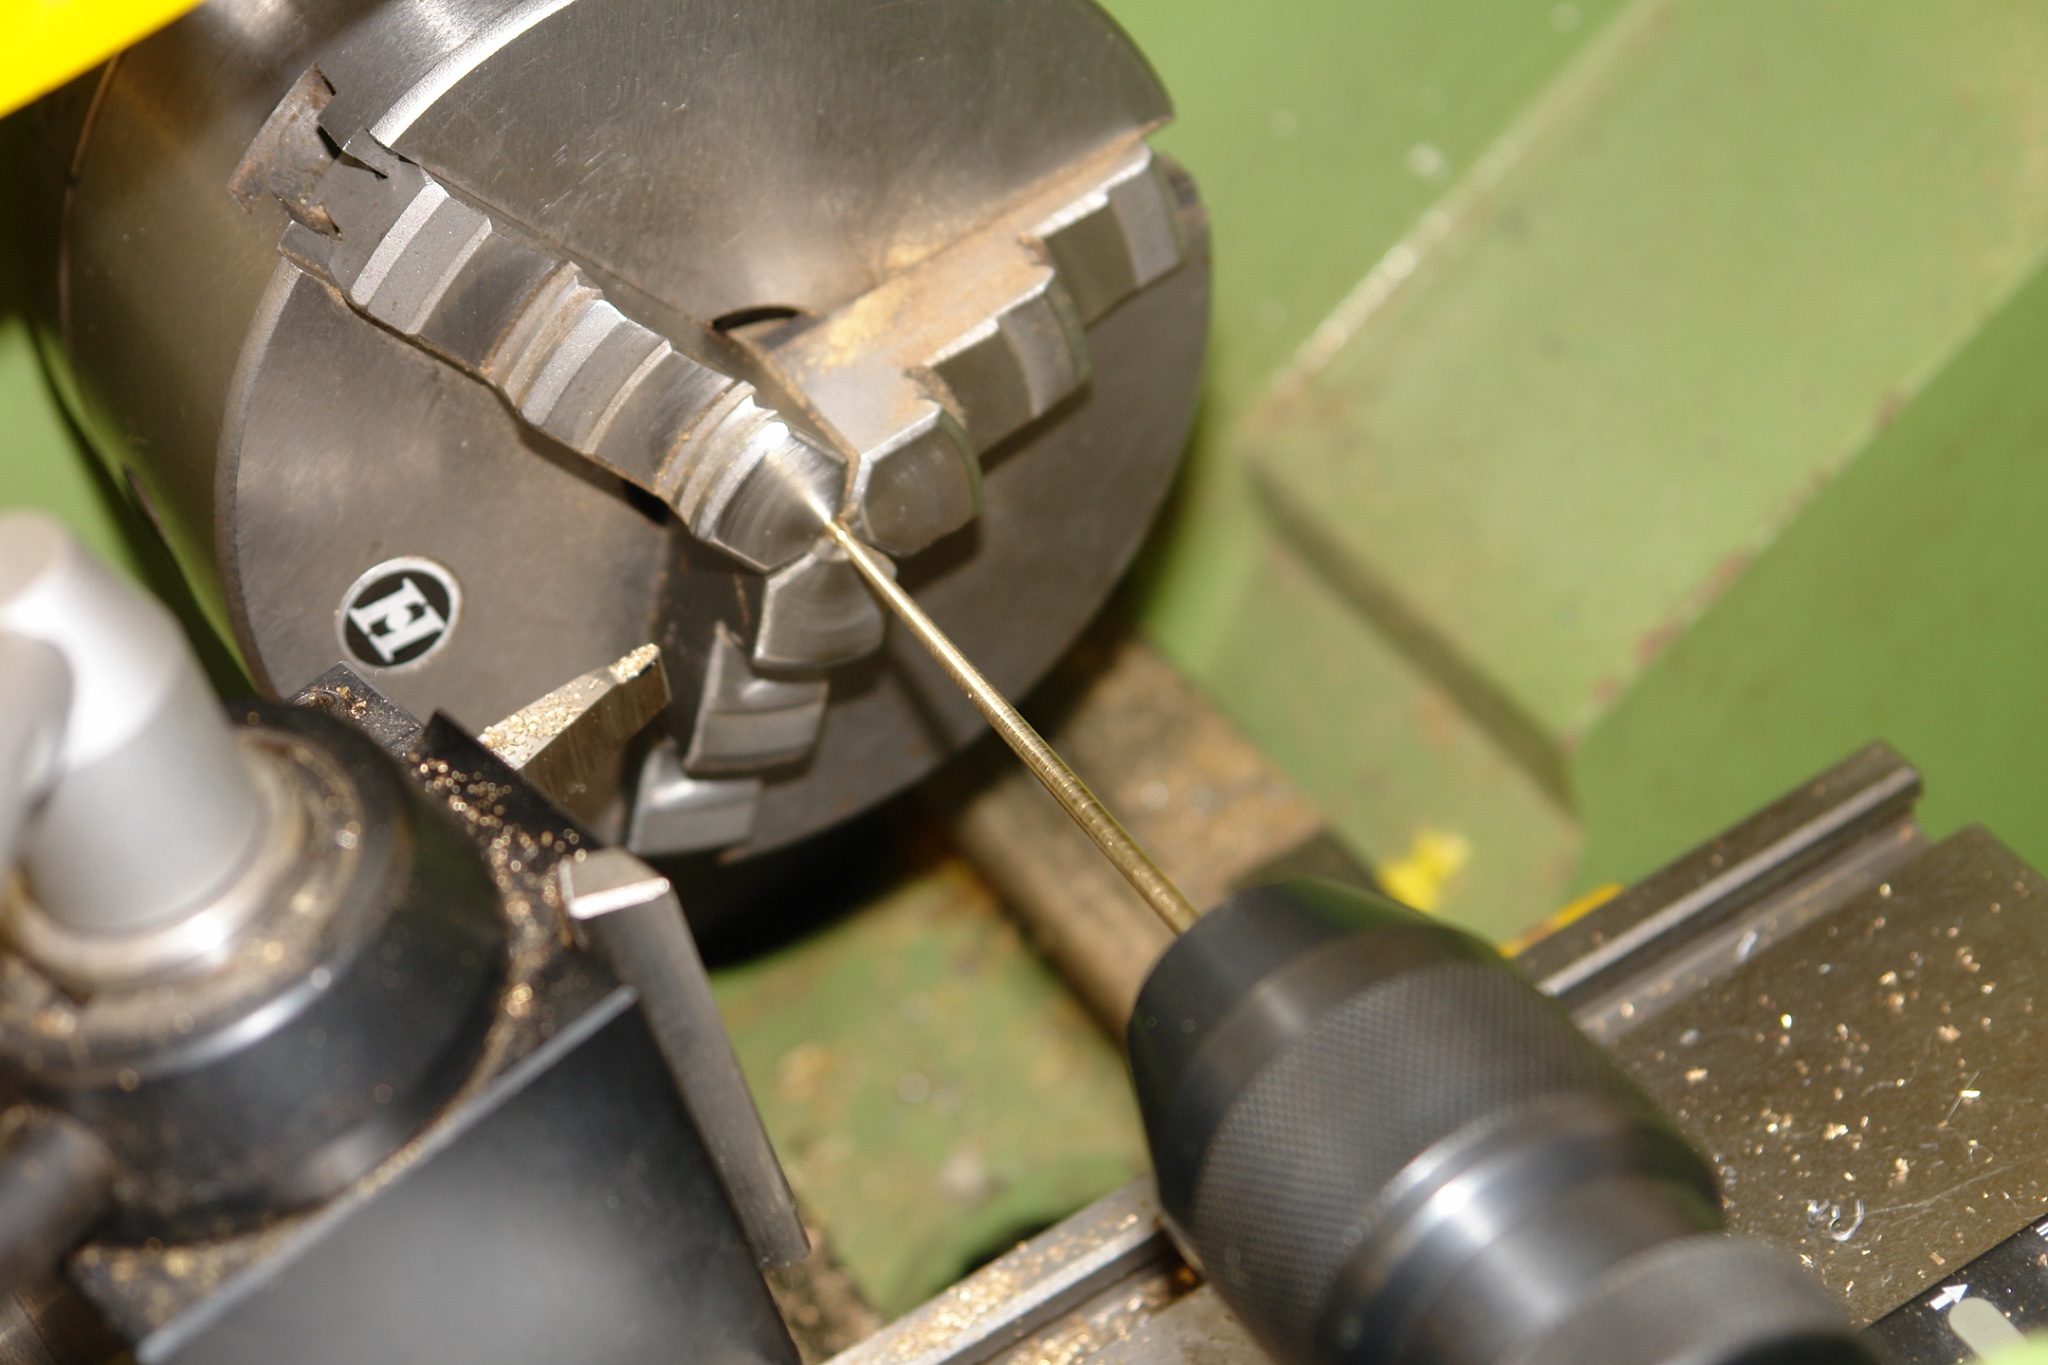
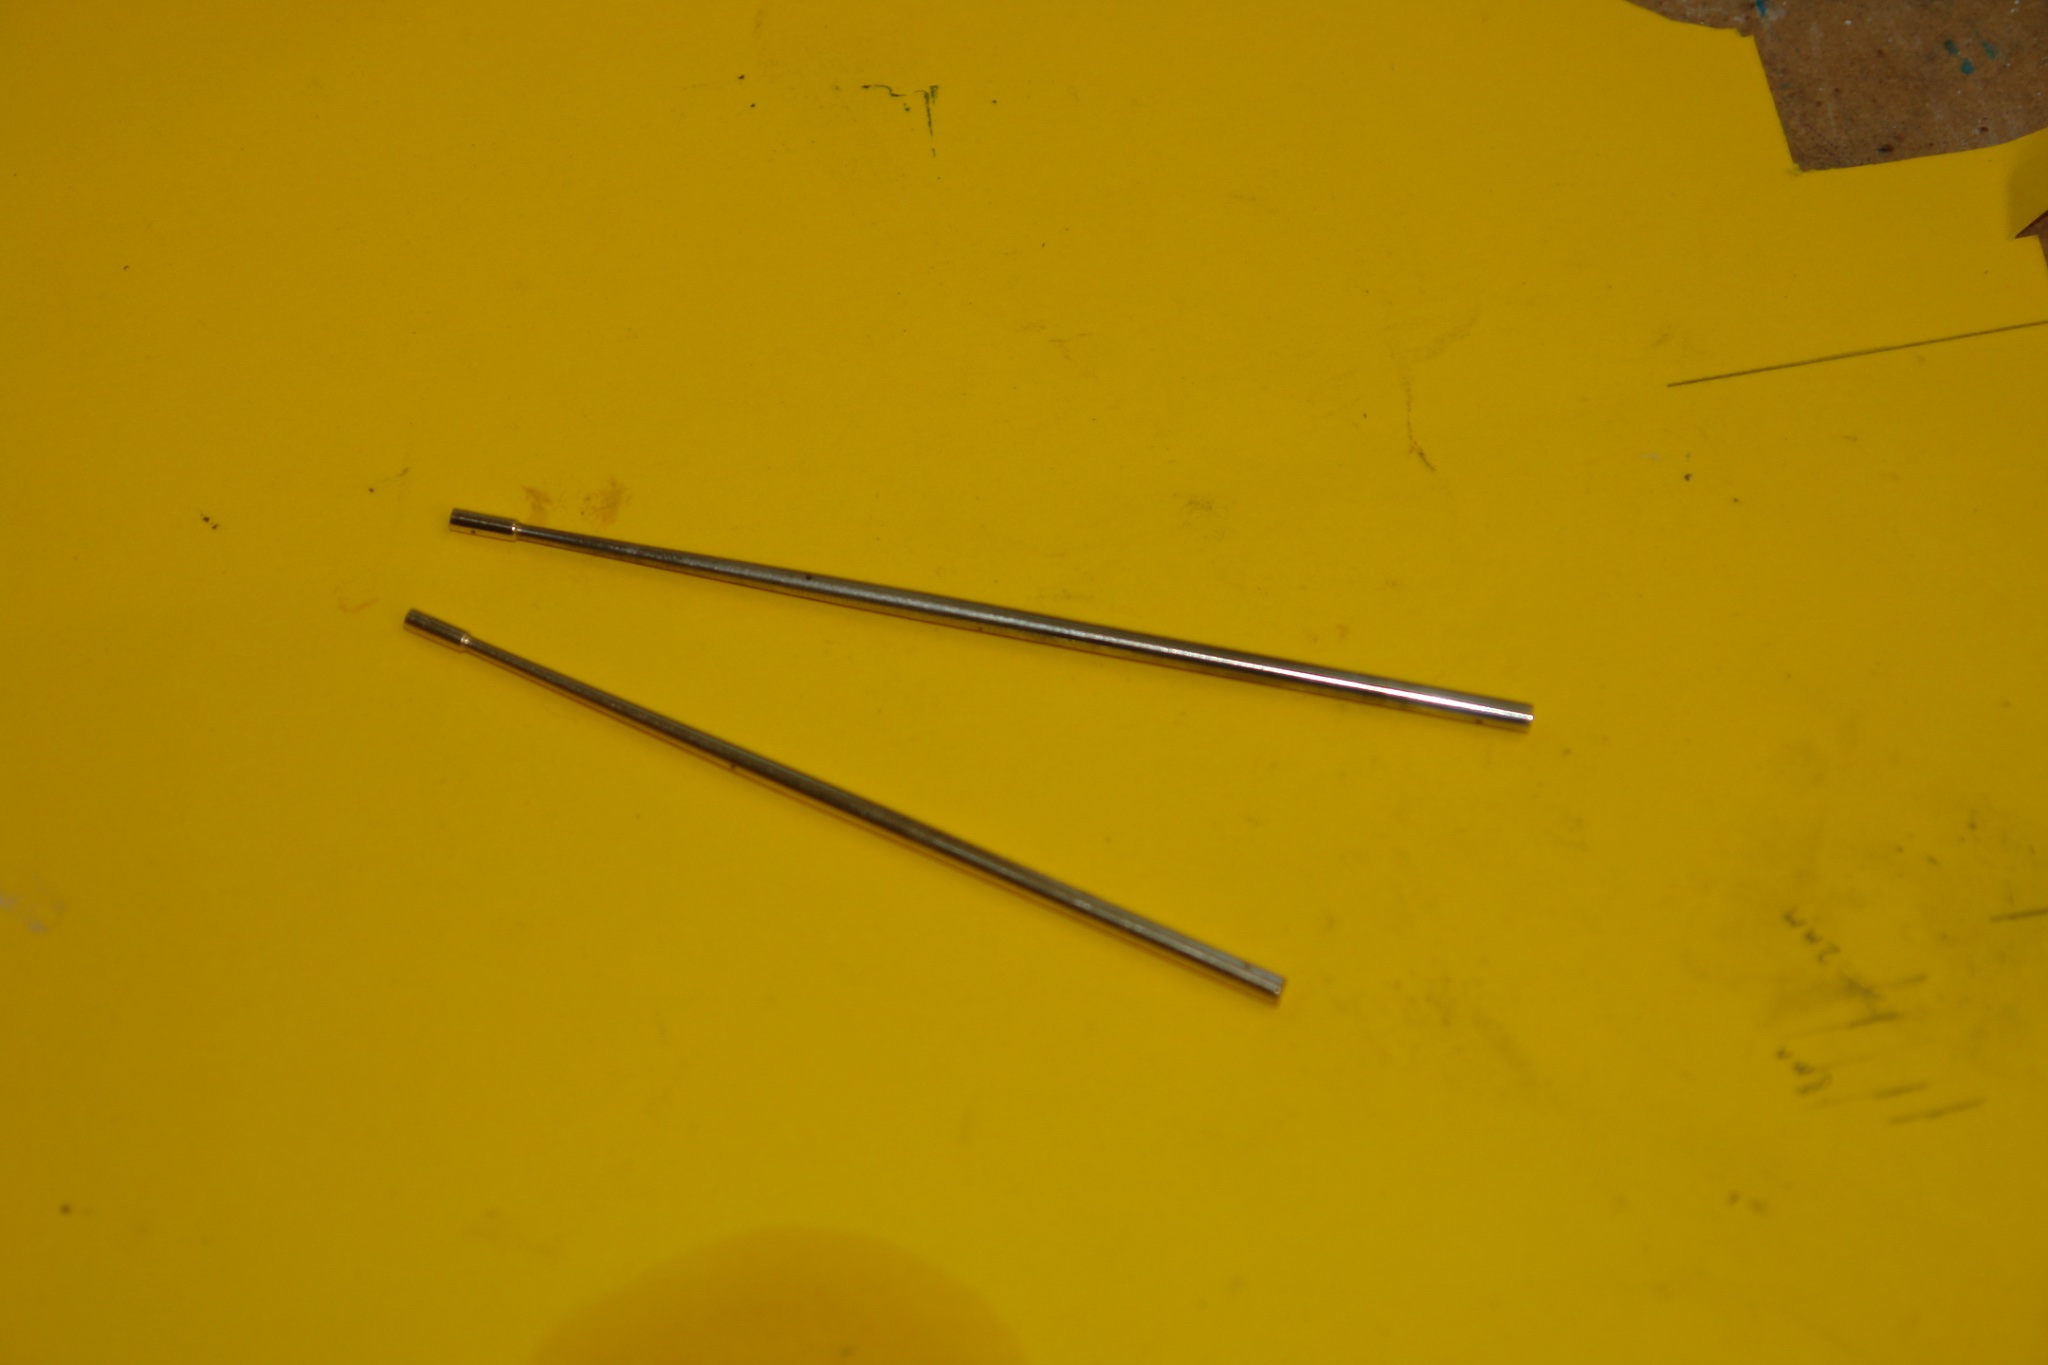
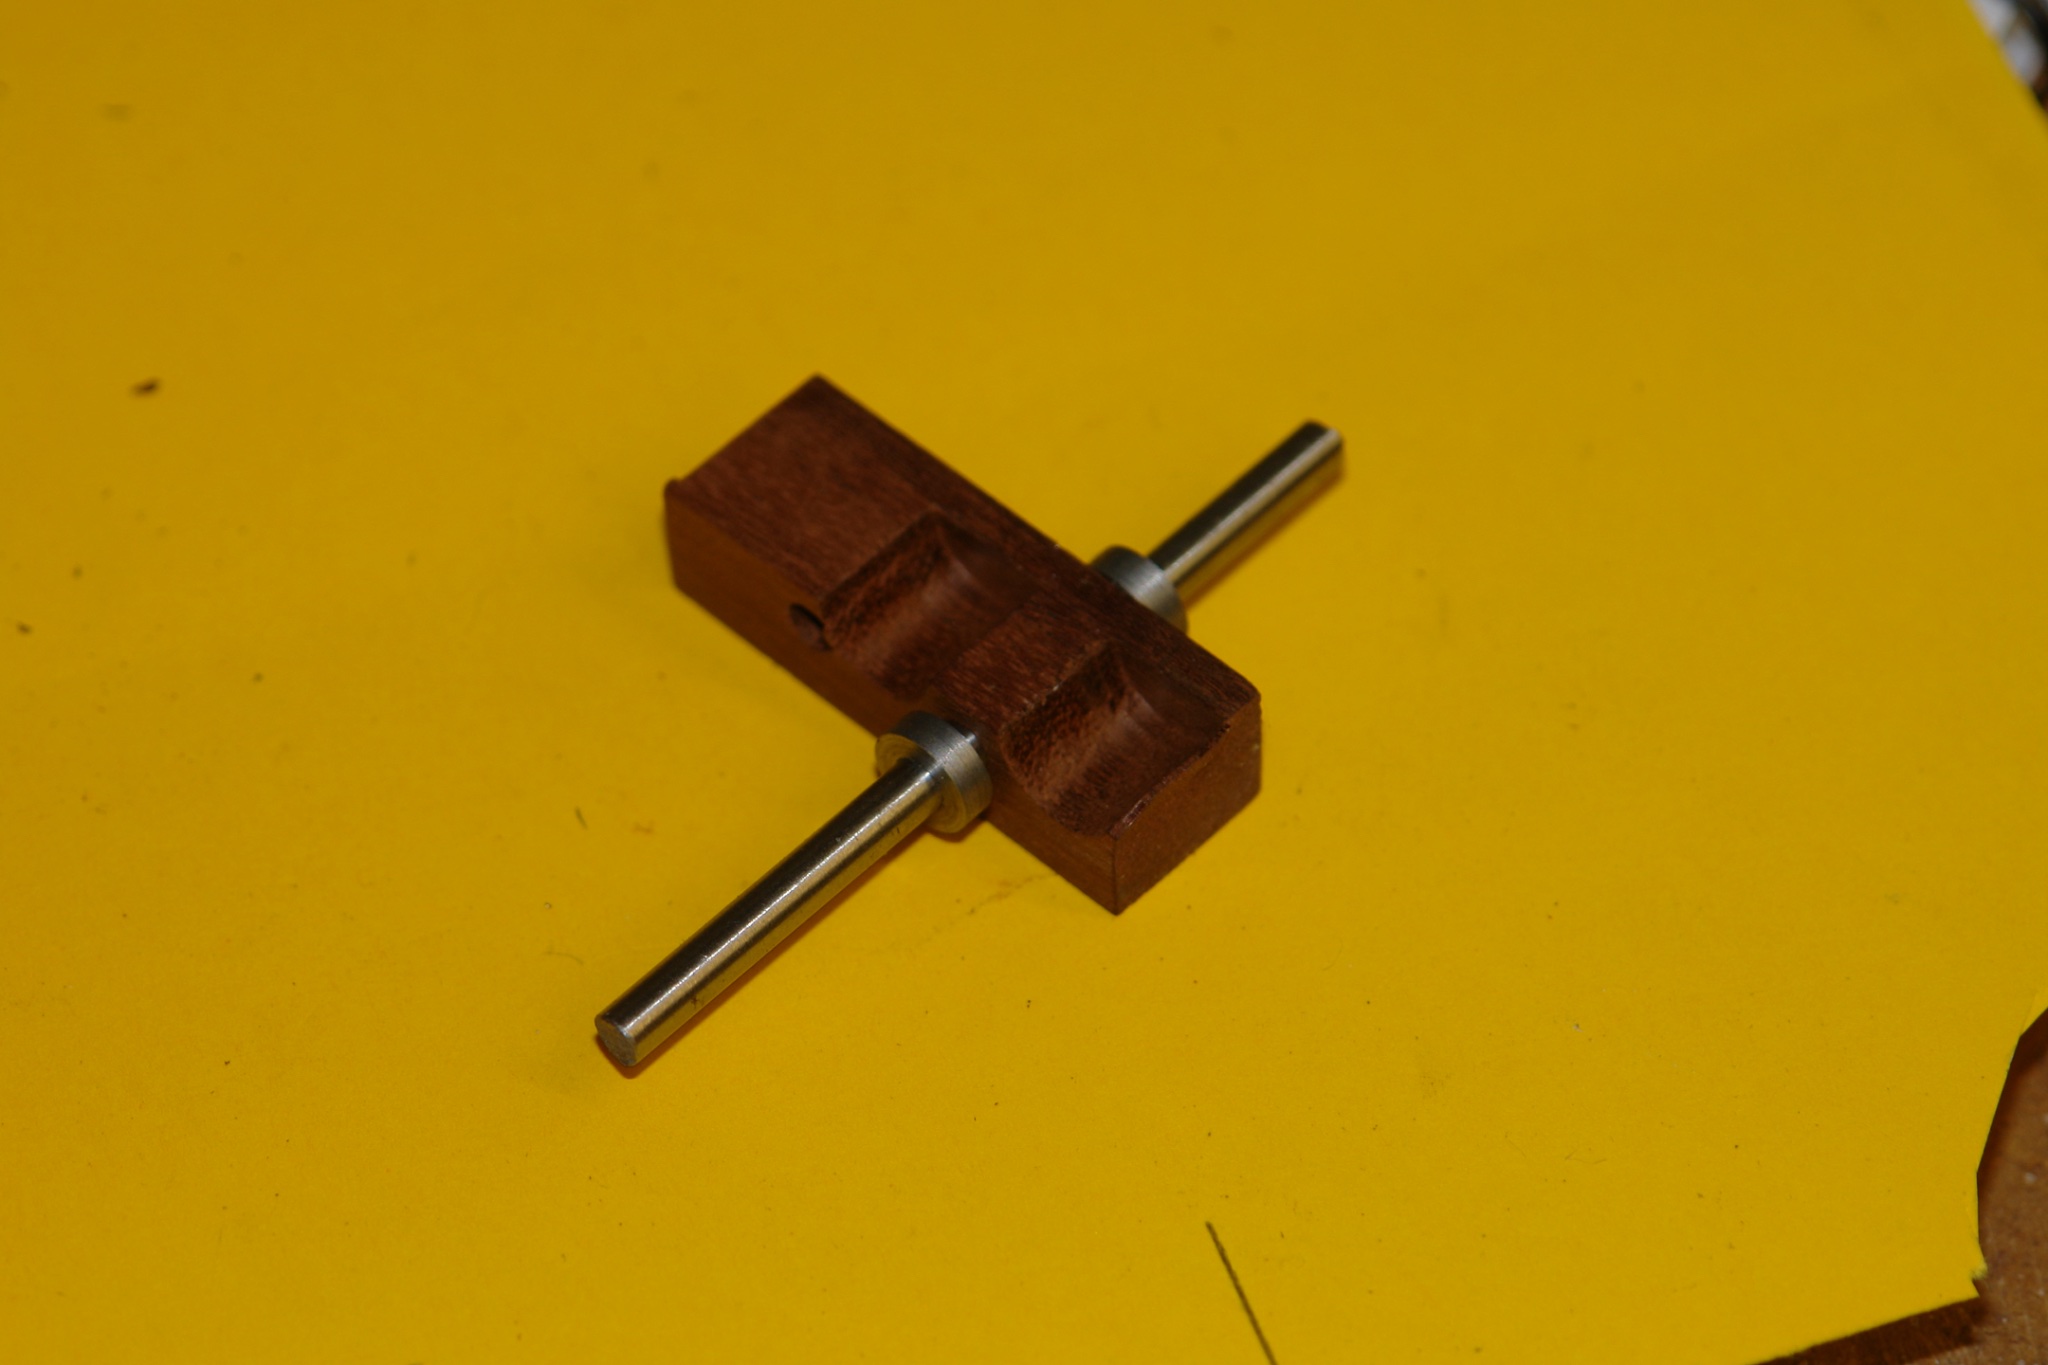
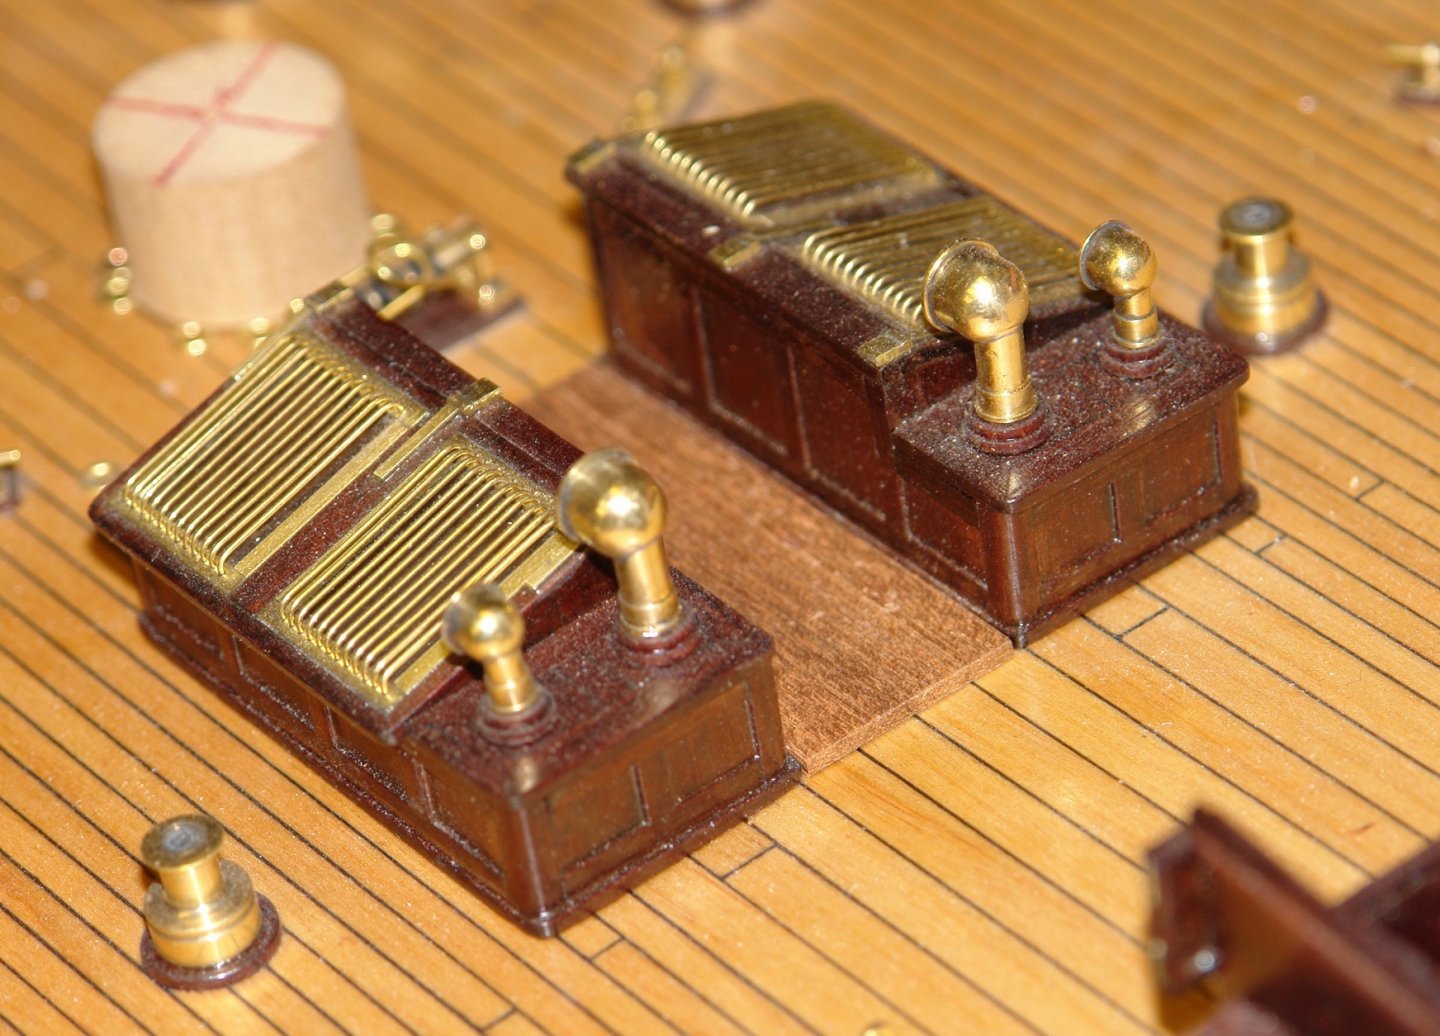
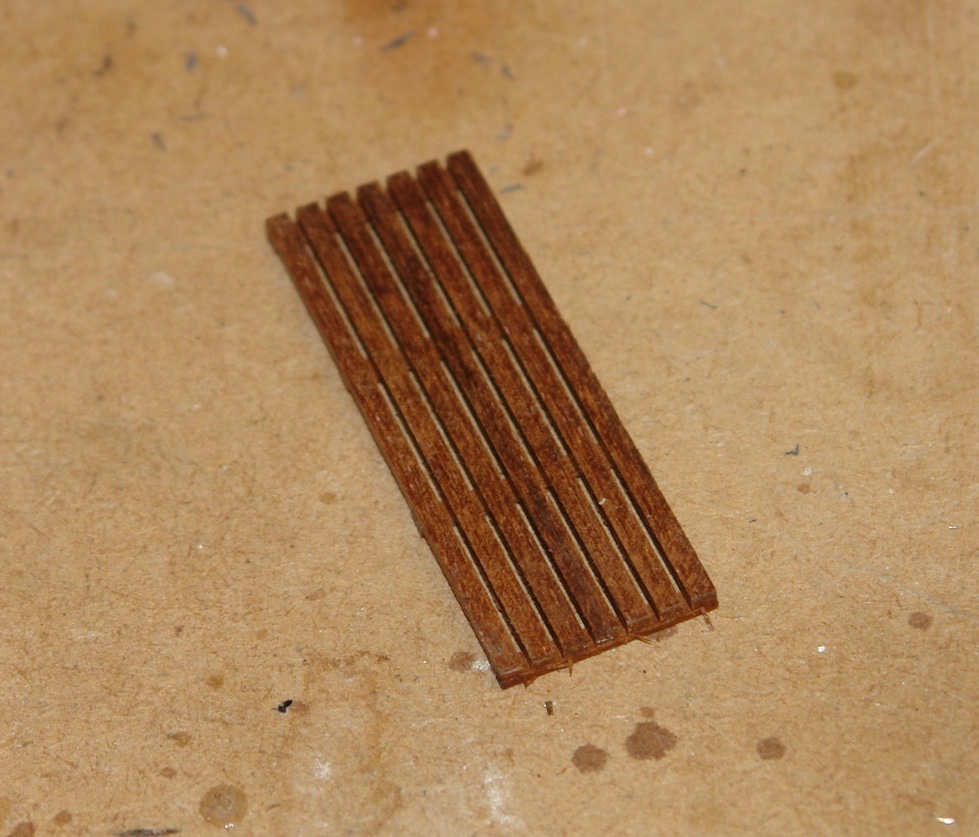
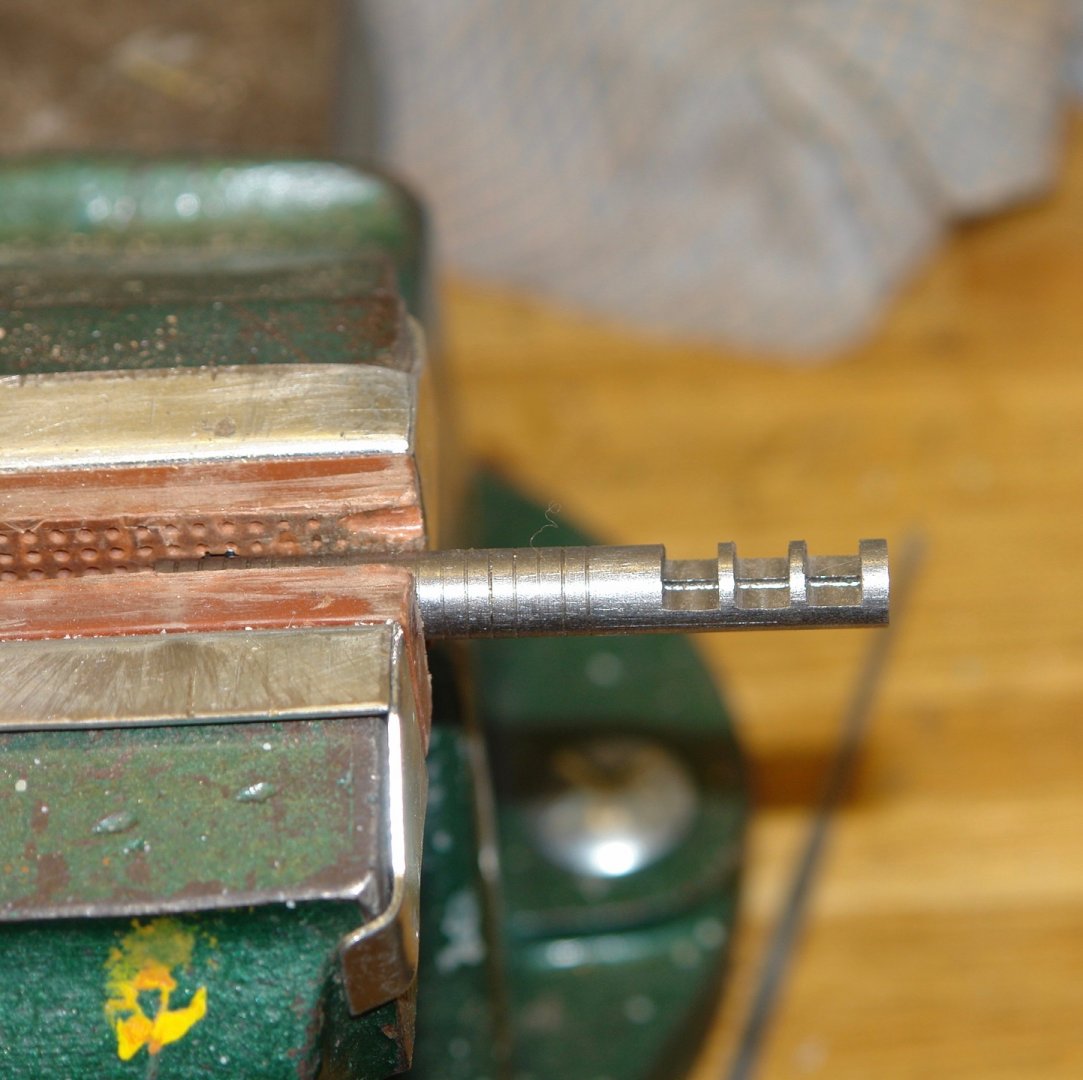
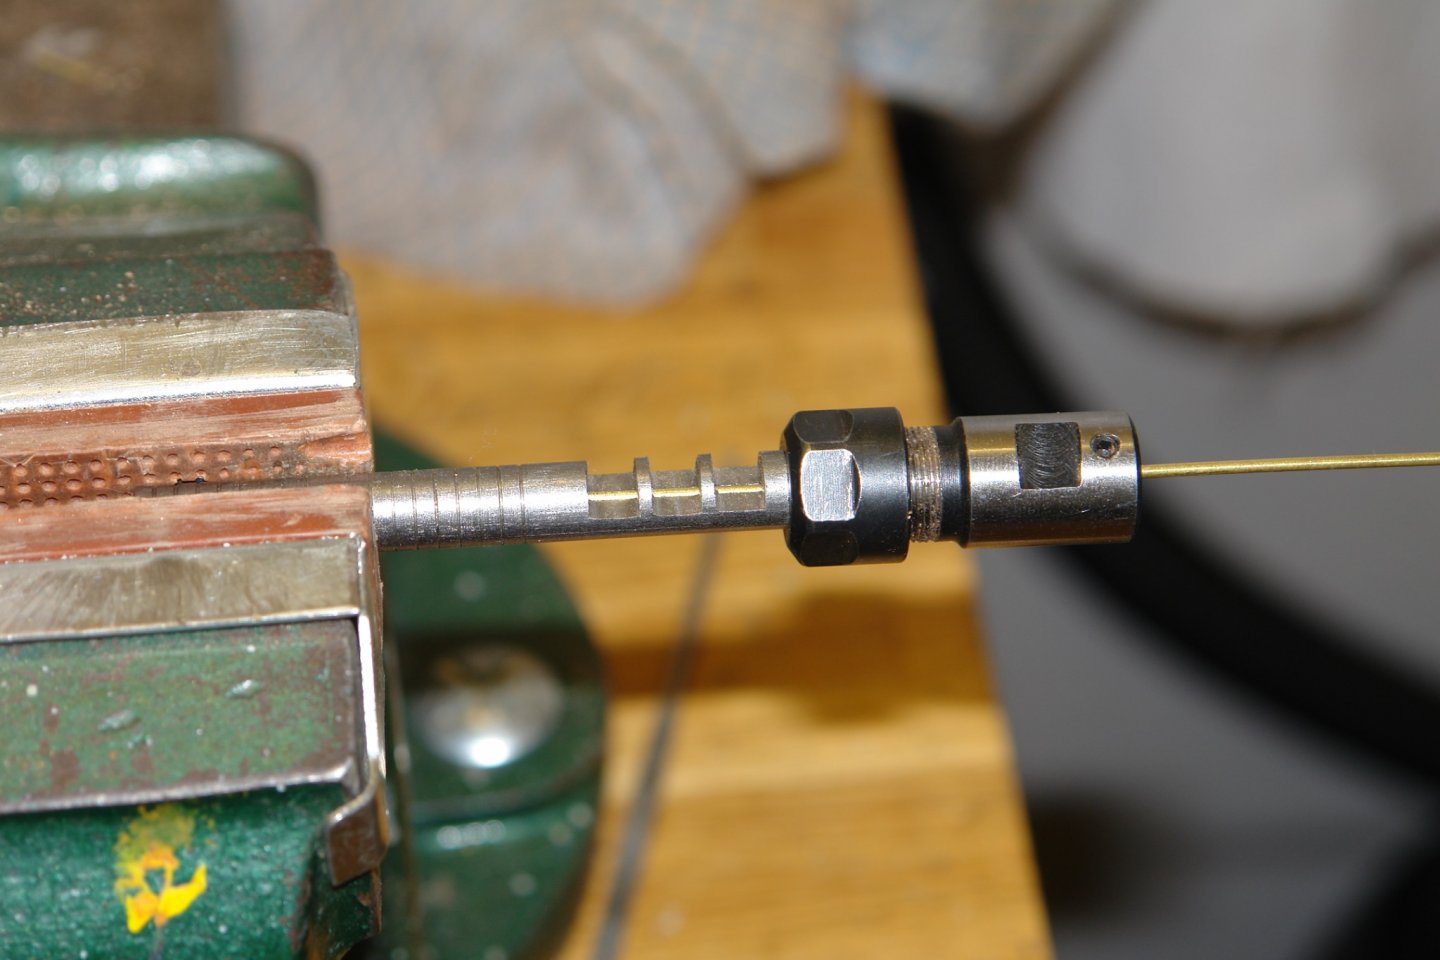
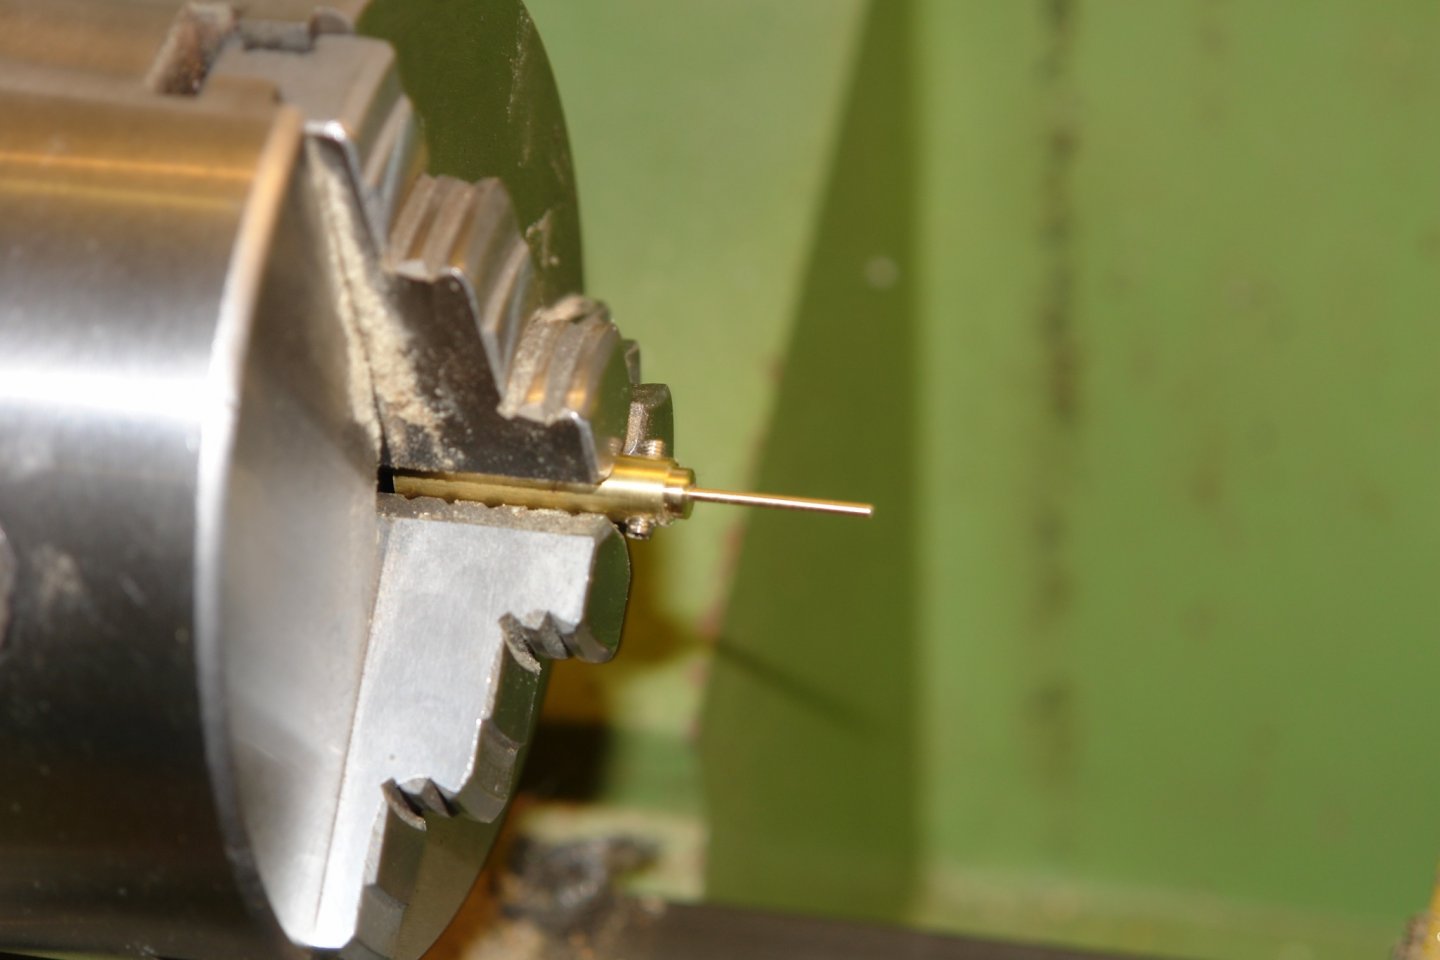
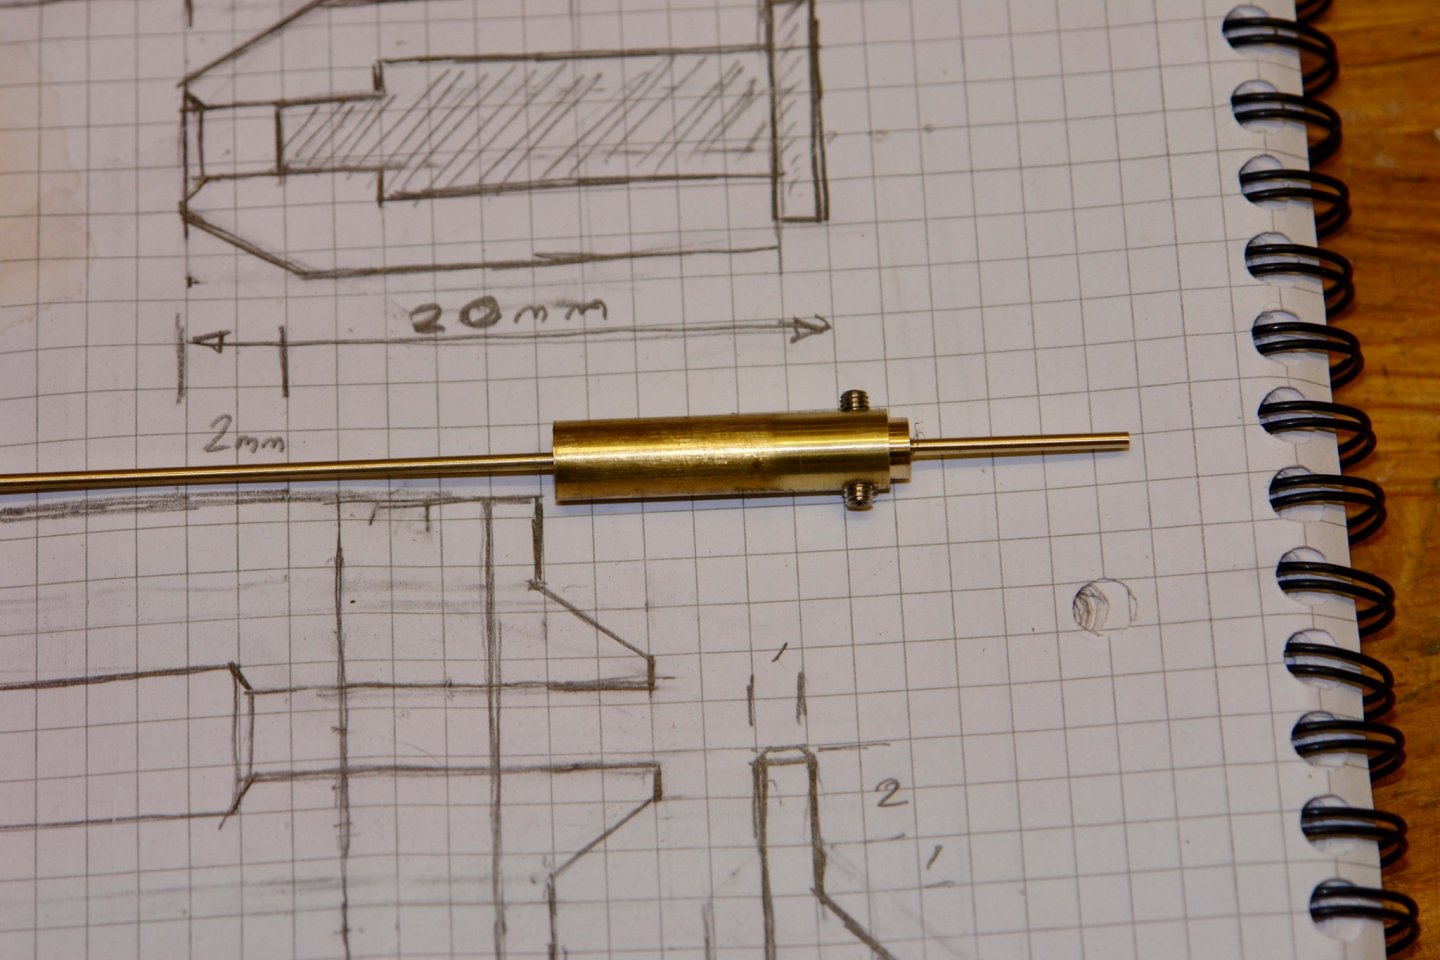
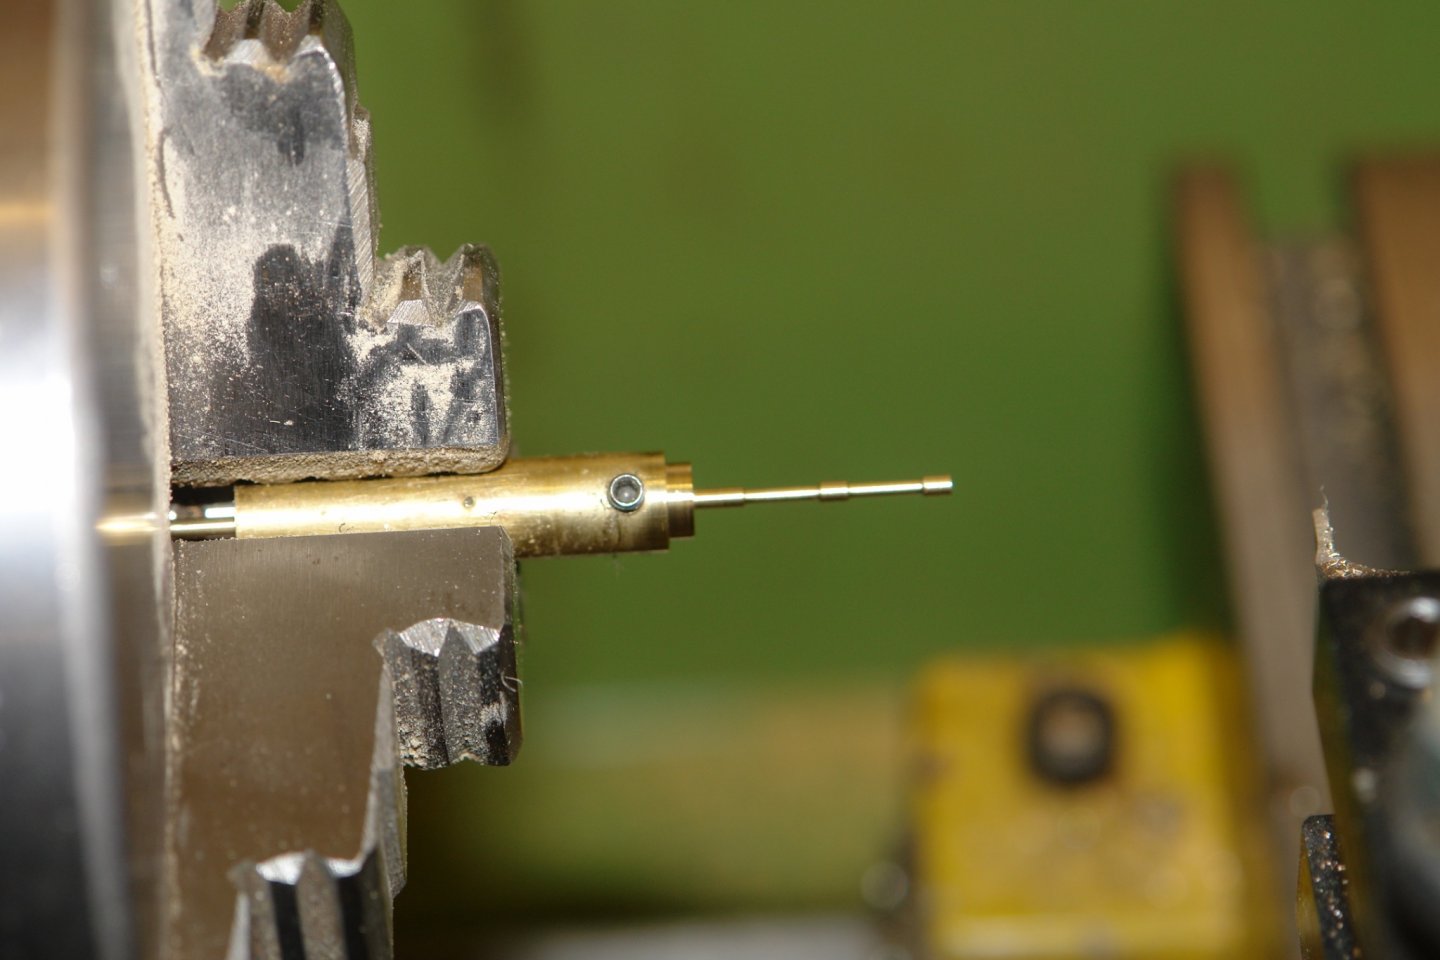
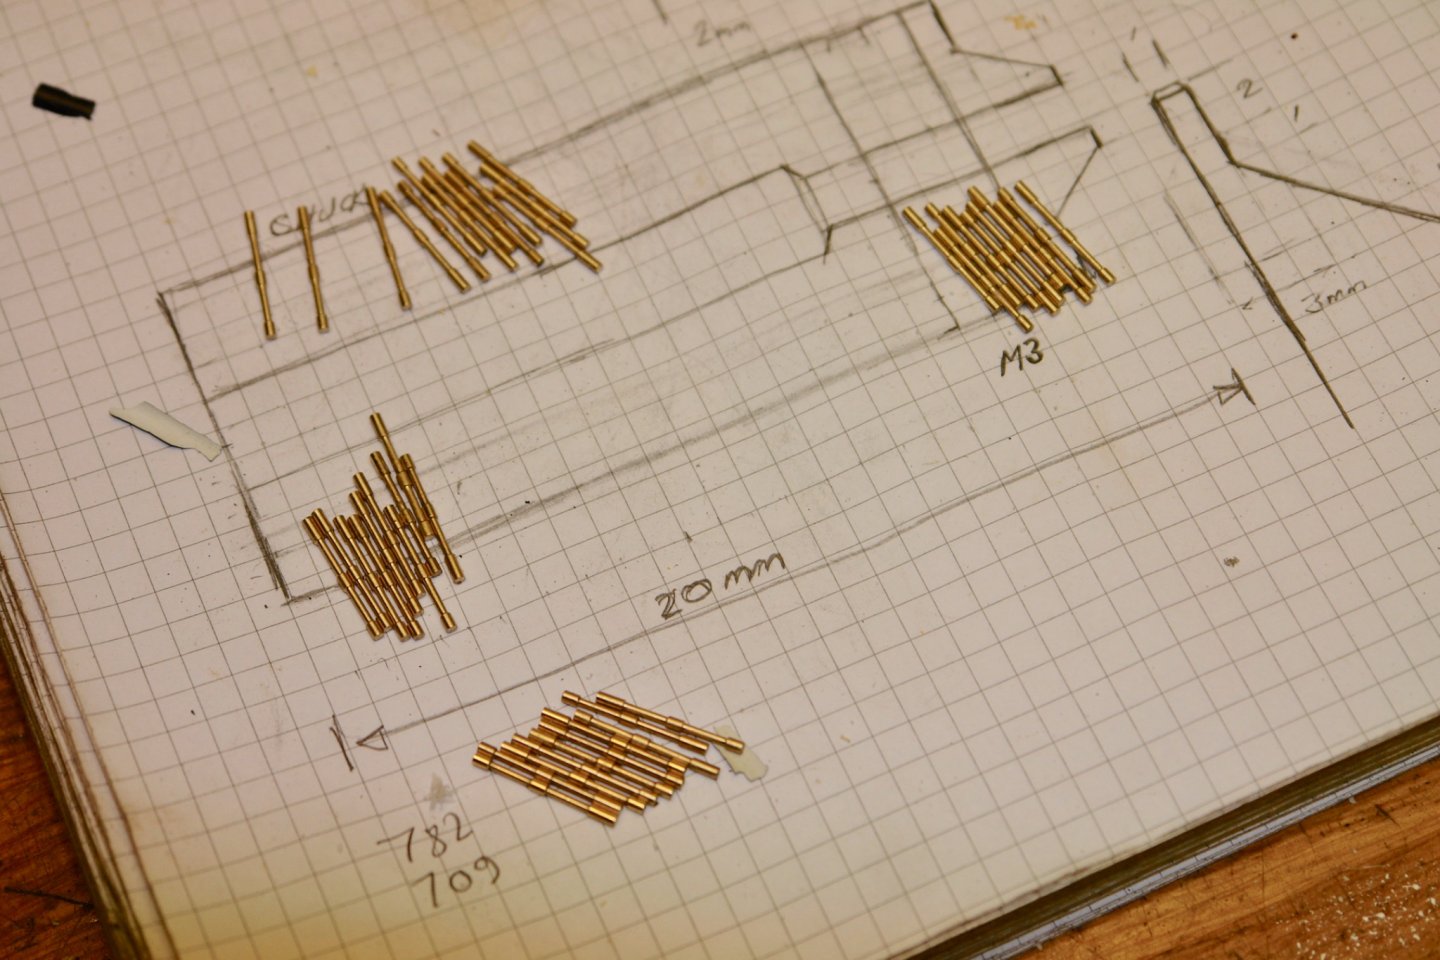
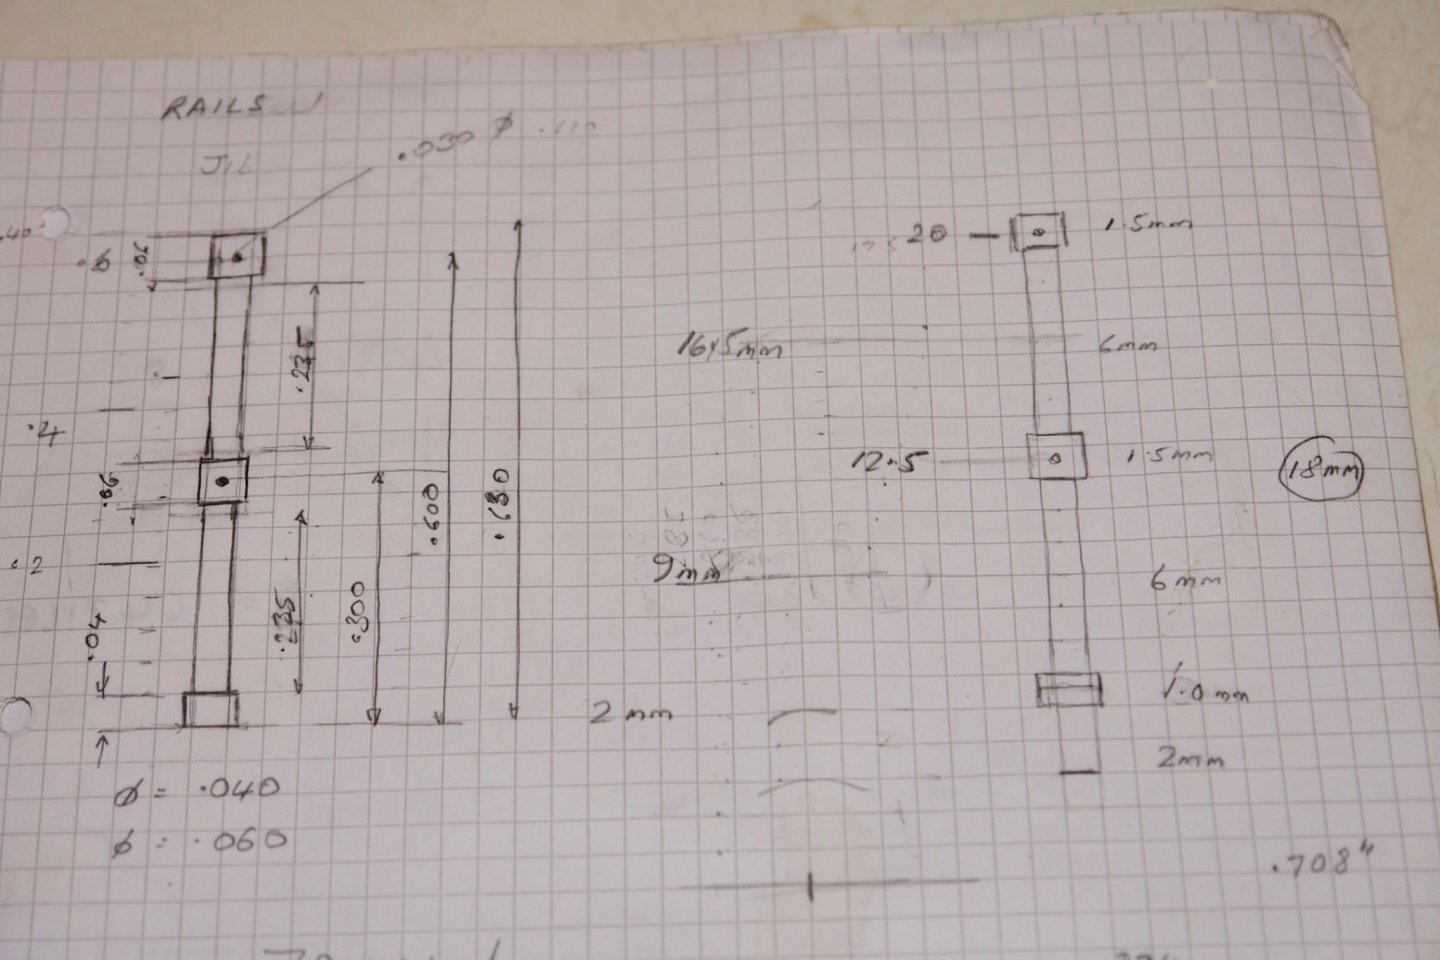
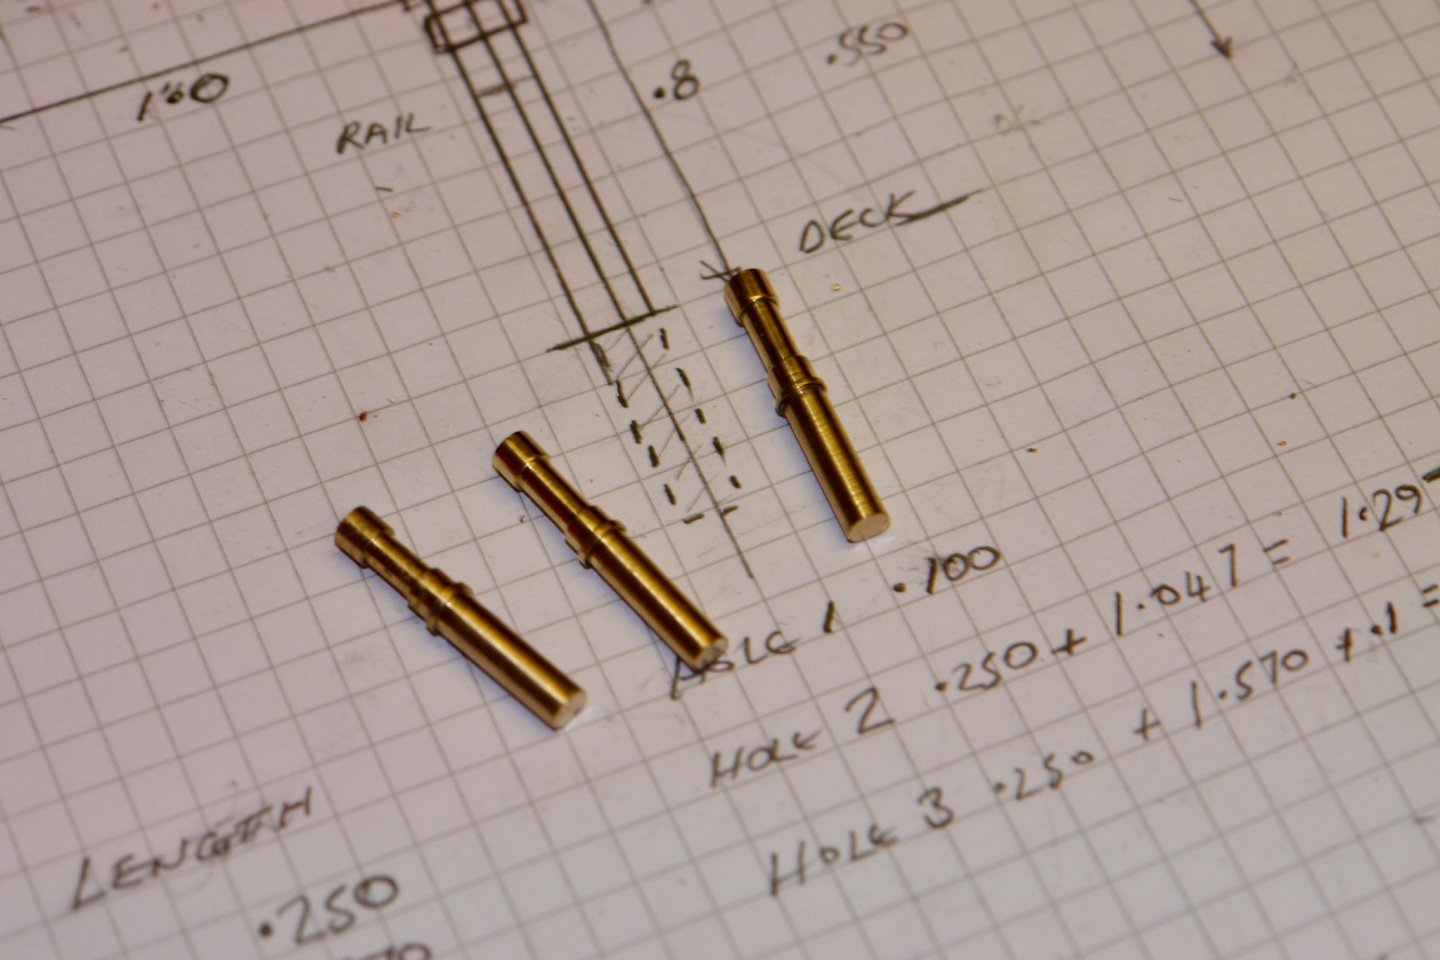
I finished a couple of deck bits off over the weekend before commencing the manufacture of loads of stanchions. Firstly the final cowl vent went in. It is mounted on a small box structure and sits well forward on the bow. A deck board sits between the pair of skylights. I made the top solid on 4 transverse planks and then used a slitting saw to form the top planks. I counted up the stanchions and came up with a requirement of about 80. Quite a lot I thought. They are turned from 1/16 inch brass rod as per the attached sketch. I wanted to make the task as easy as possible so I created the following jig. The spaces and fillets were supposed to control the position of the cutting tool and to be fair they did. Unfortunately running the rod within the jig badly scored the un-necked part to the rod and I wasn't satisfied with the finish. Plan B involved making a "2 jaw chuck" and a tailstock support (The lathe chuck won't hold anything less than 3/32 inch diameter rod. With this set up I was able to set the distance between the new chuck and the tailstock and then use these fixed points as reference for the subsequent turning operations. Then it was just a load of repetitive manufacturing operations. Now I just have to cross drill 160 .025" holes.


-
Sad news Michael. You catch them in the corner of your eye for many years after they have gone.
-
Very good JD, however if you are anything like me it will be a mess again by the end of the day. Nice progress on the framing and transom.
-
Warmer today - time to crack on. Great work on planking.
-
Thank you Geert, Eberhard, Michael, Dan. I passed your lacemaking comments on to Ann as an incentive to starting a class but she just referred me to a book and the internet. I pressed on, persuading her to show me. A bit complicated I thought "better to stick to my own knitting", so to speak.
-
Thank you Steve and Geert. I was being naughty. I did the prep work and then used my skills to convince the admiral to do the actual lacework.🤫
-
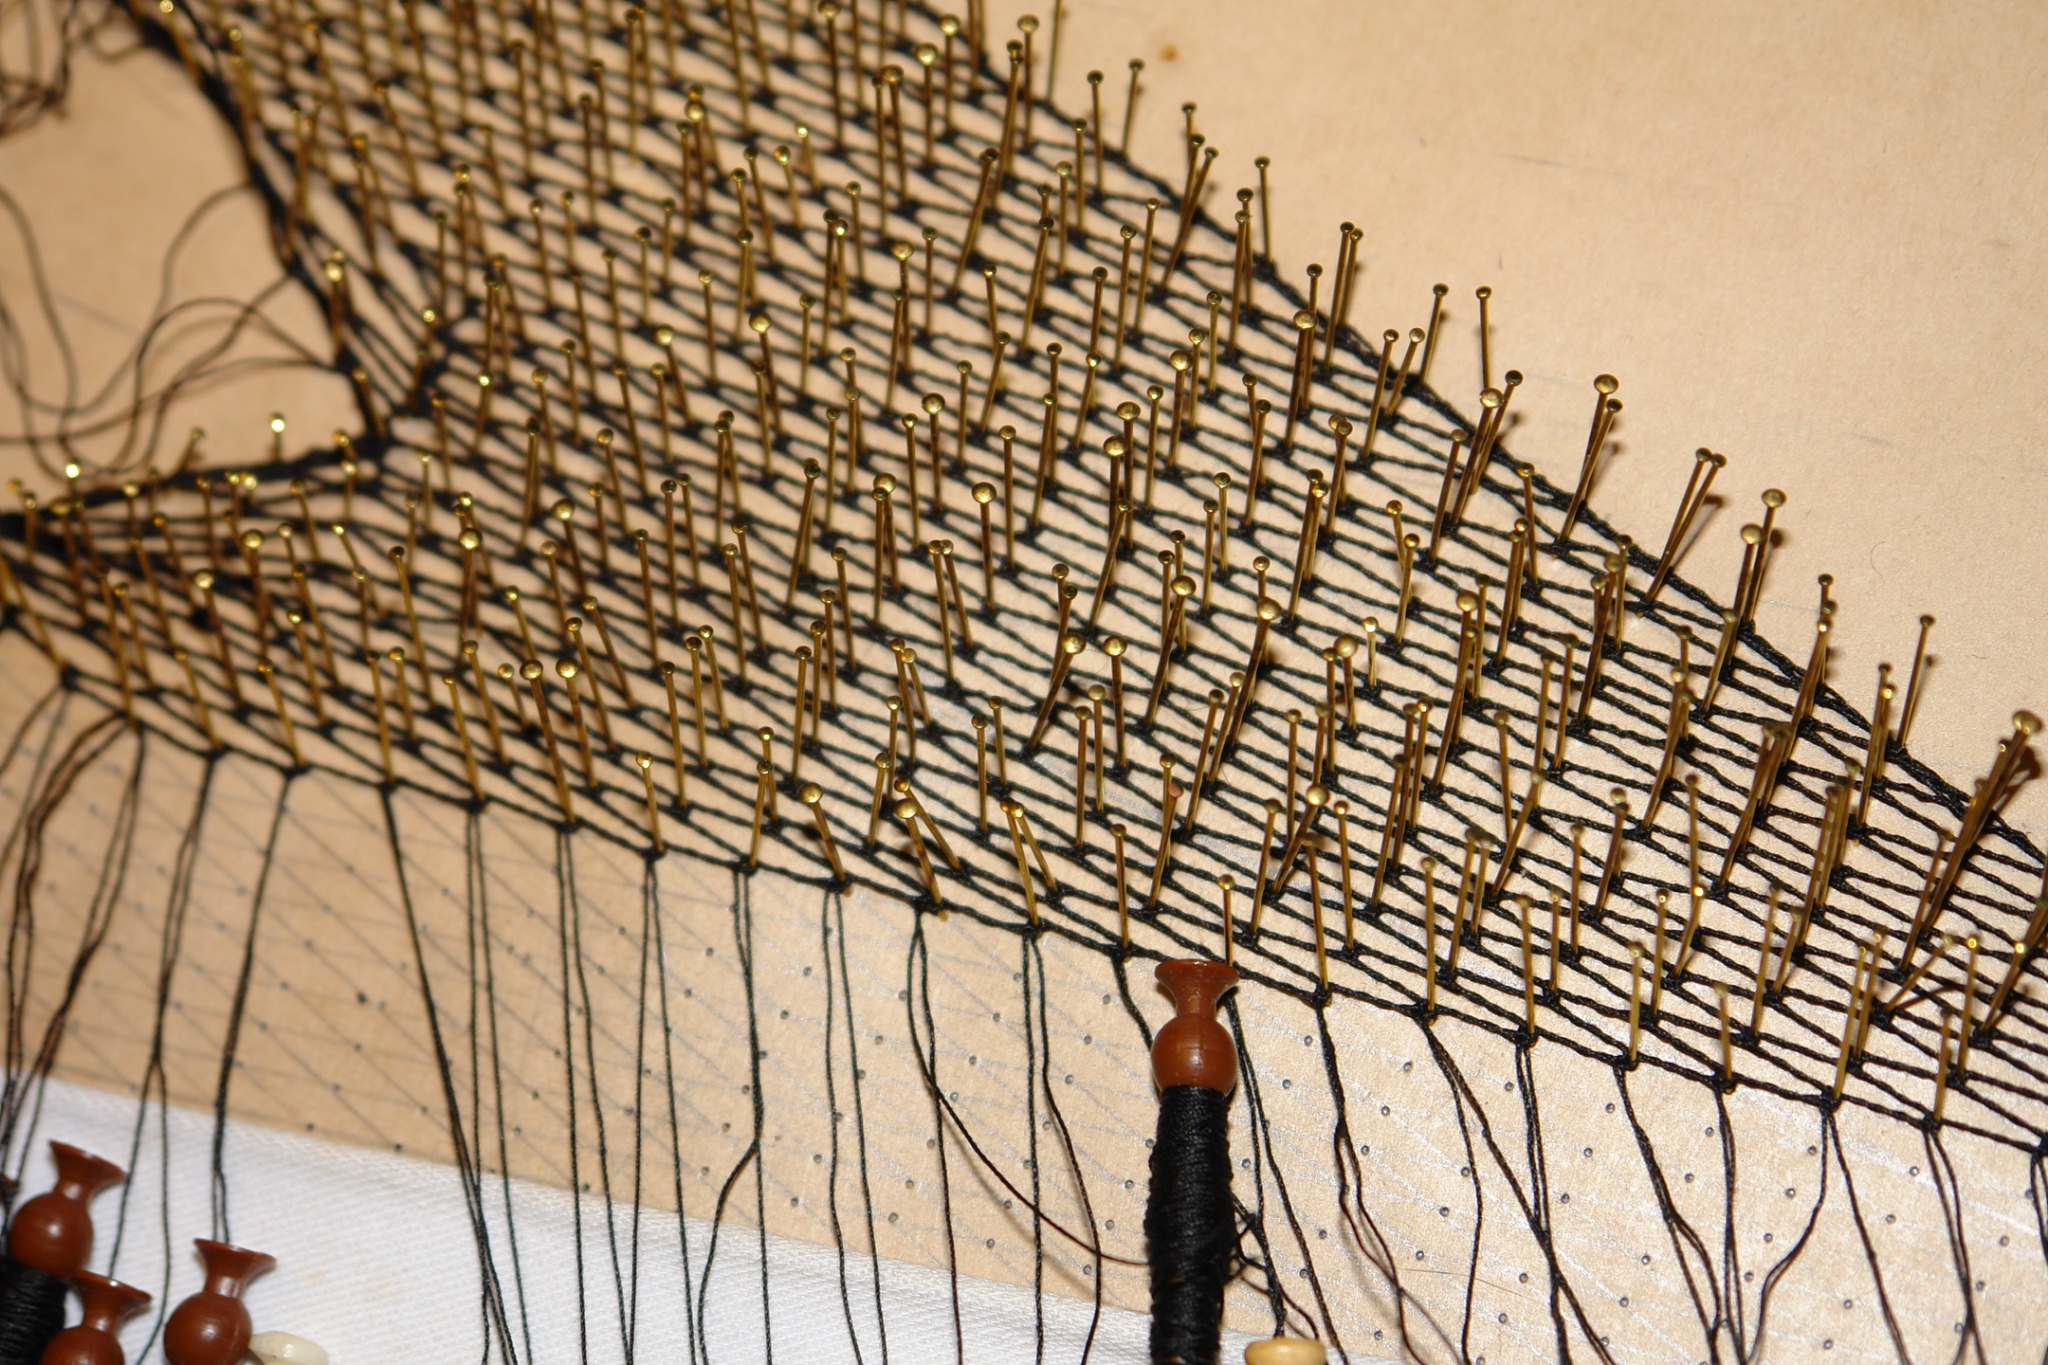
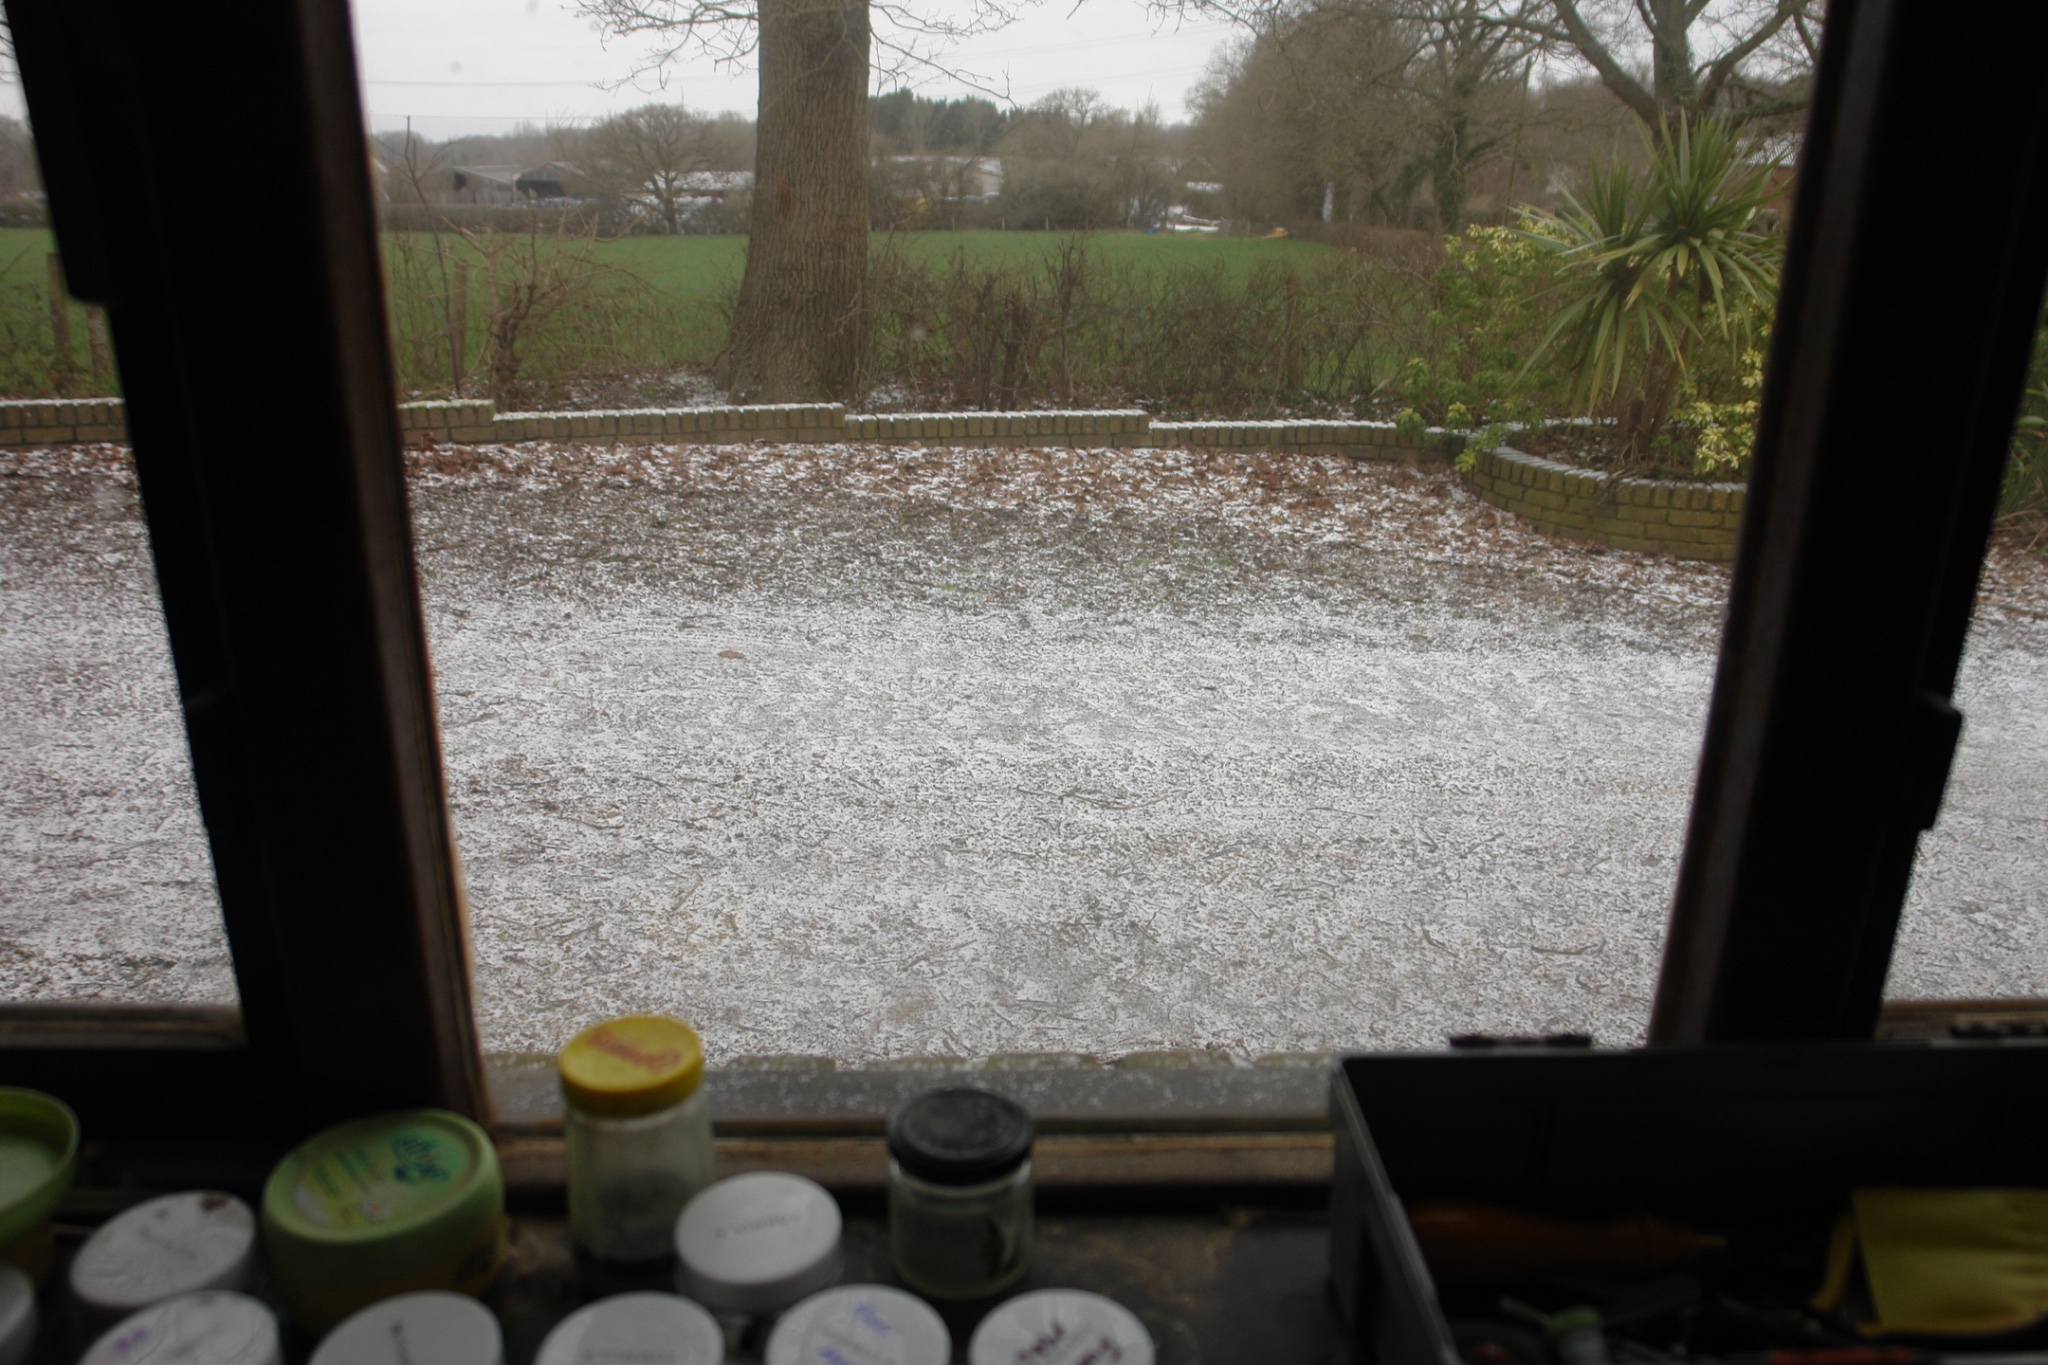
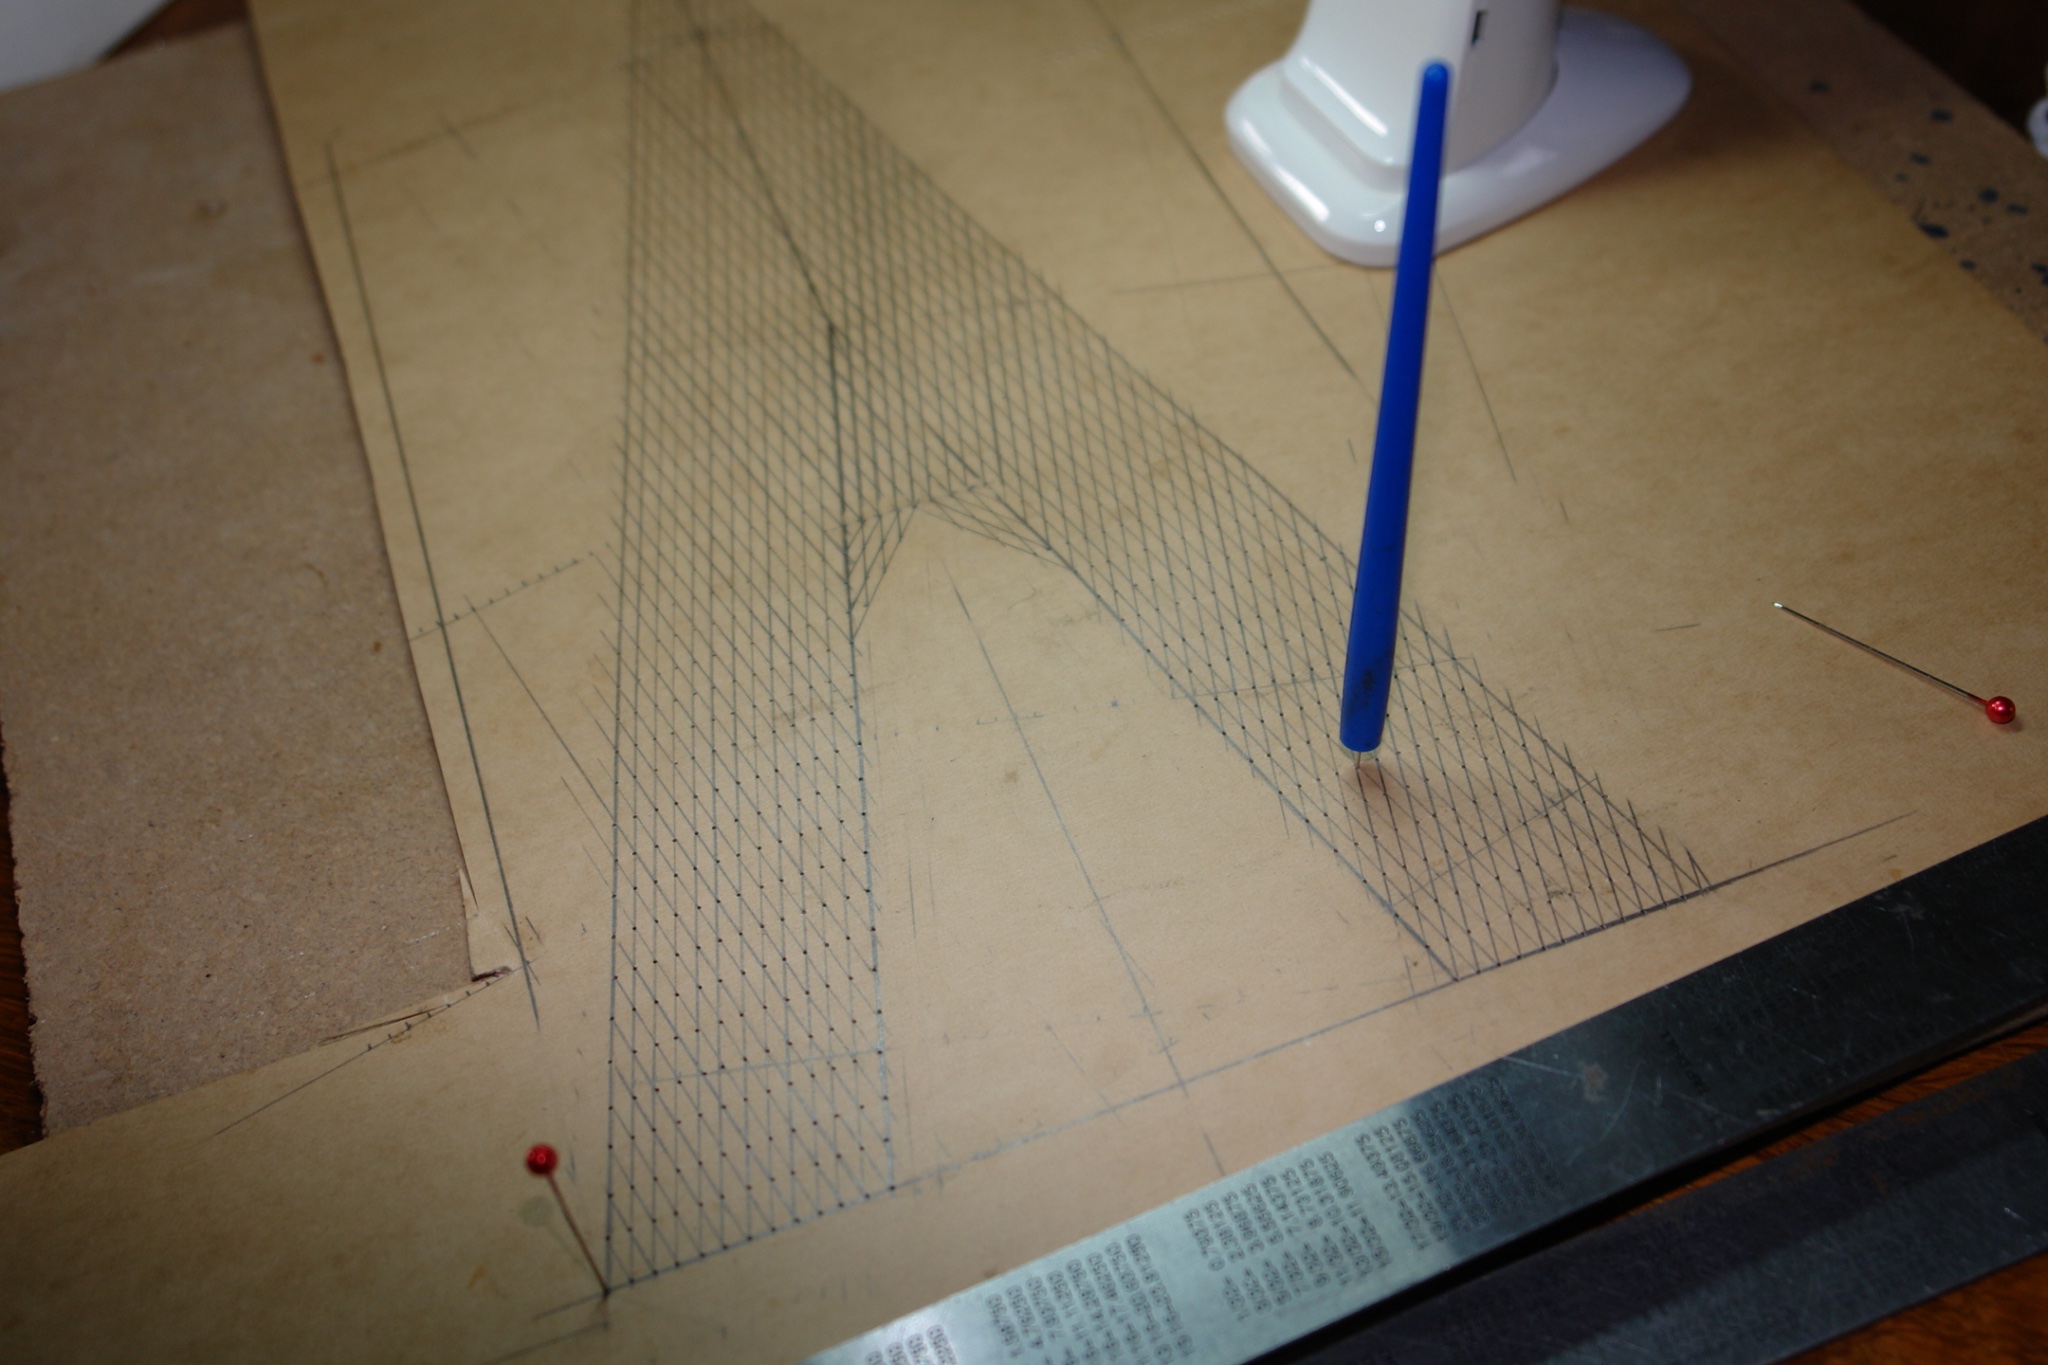
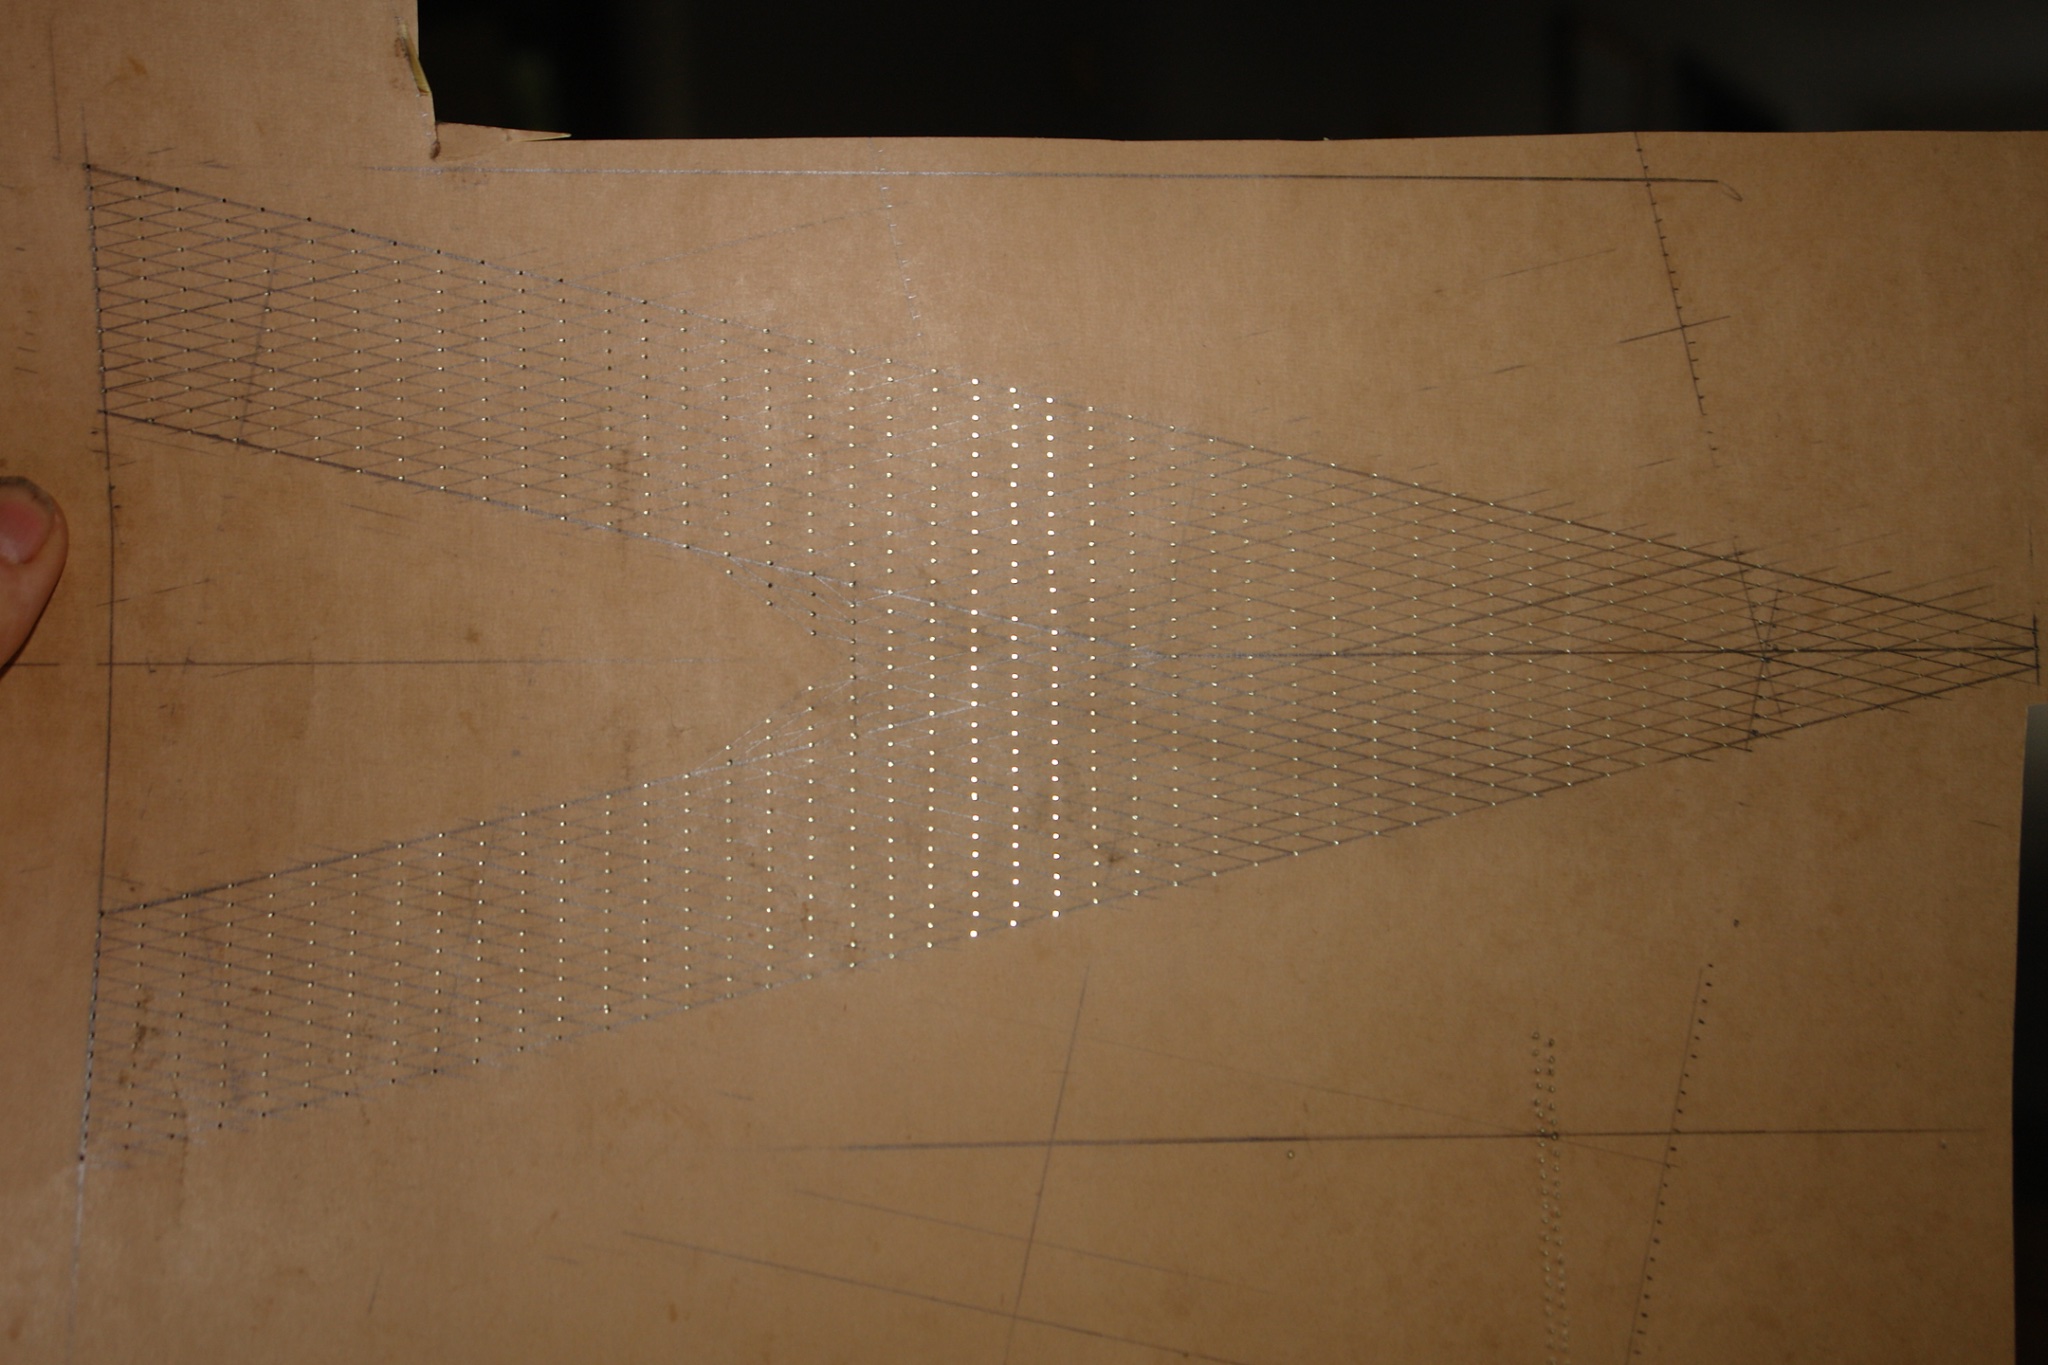
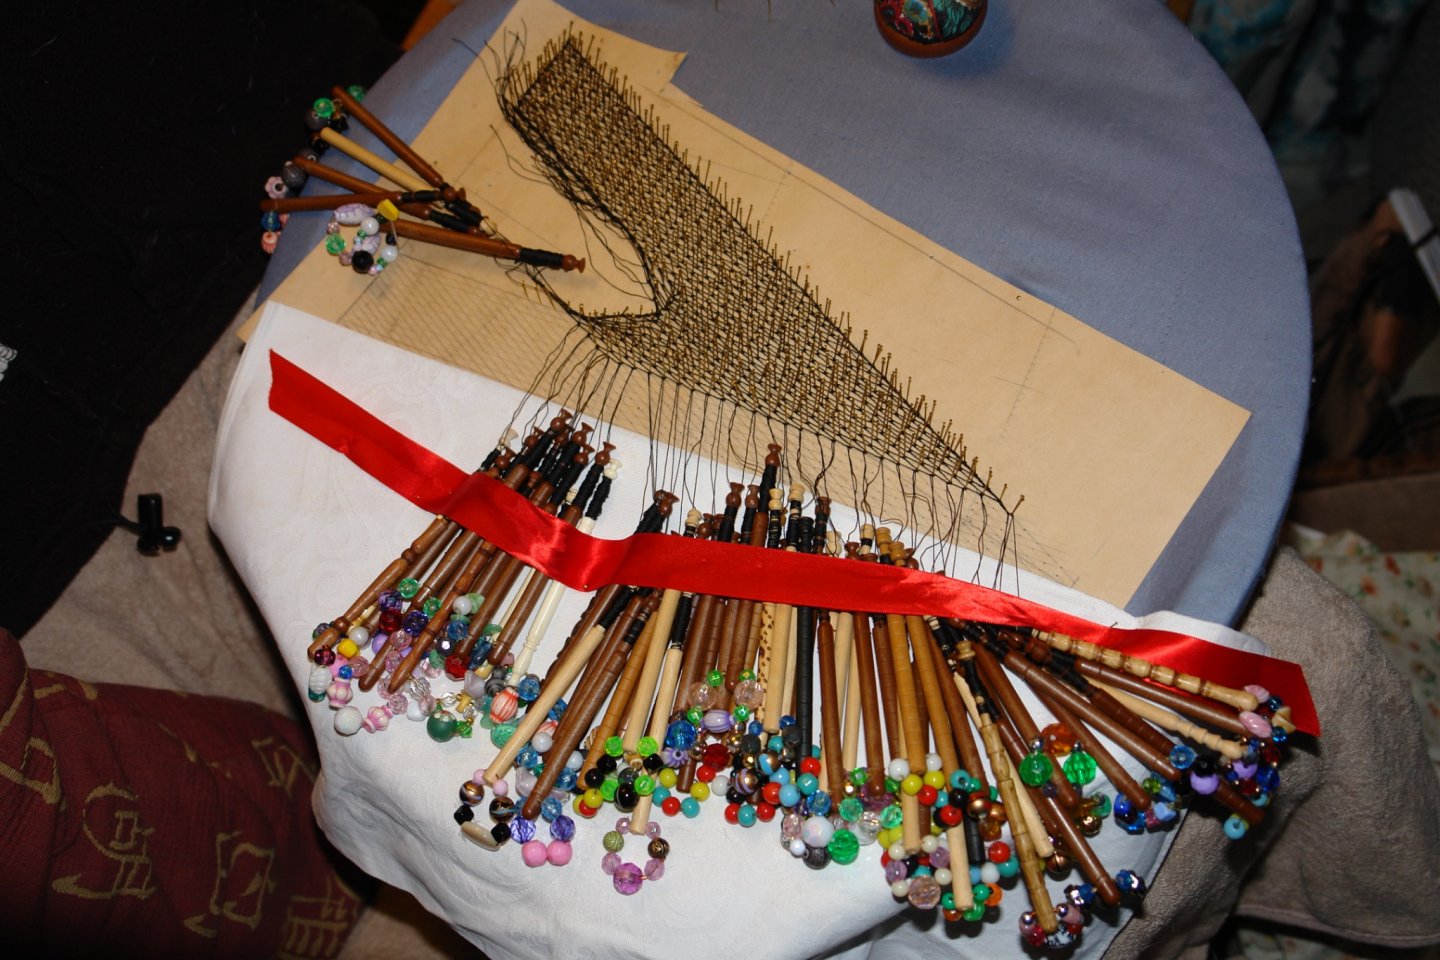
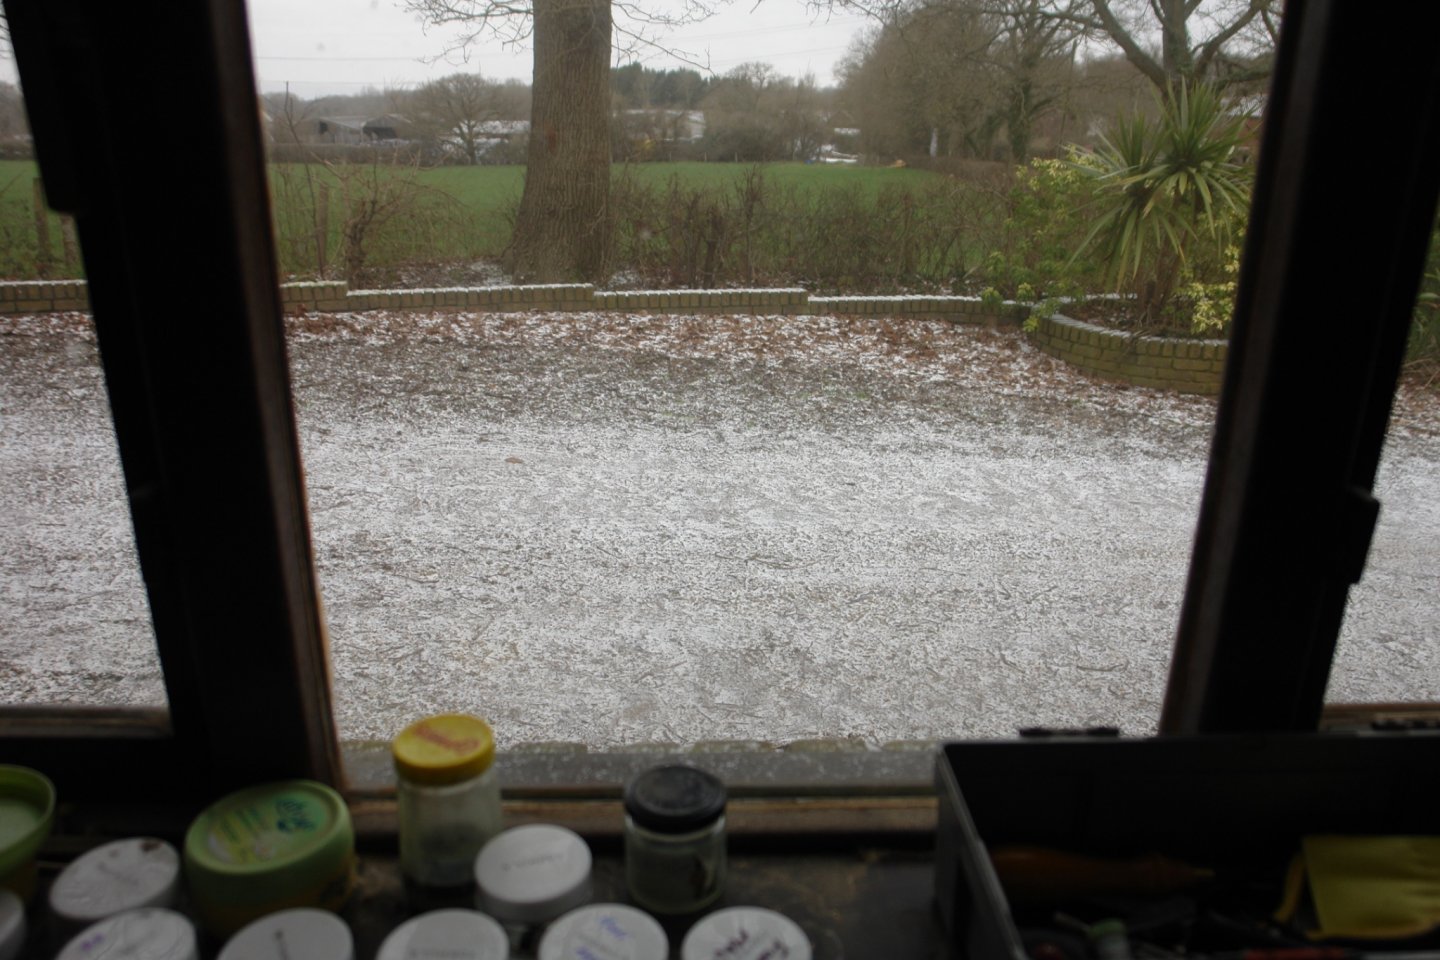
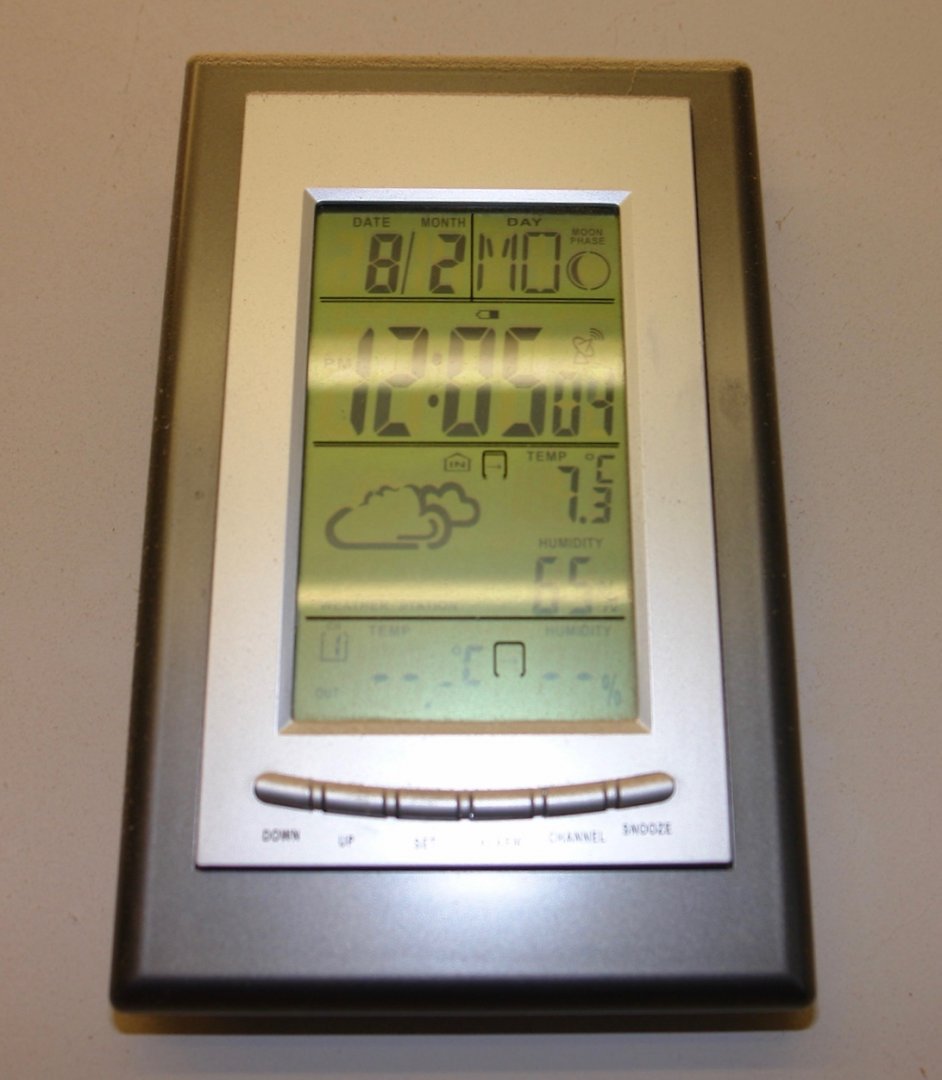
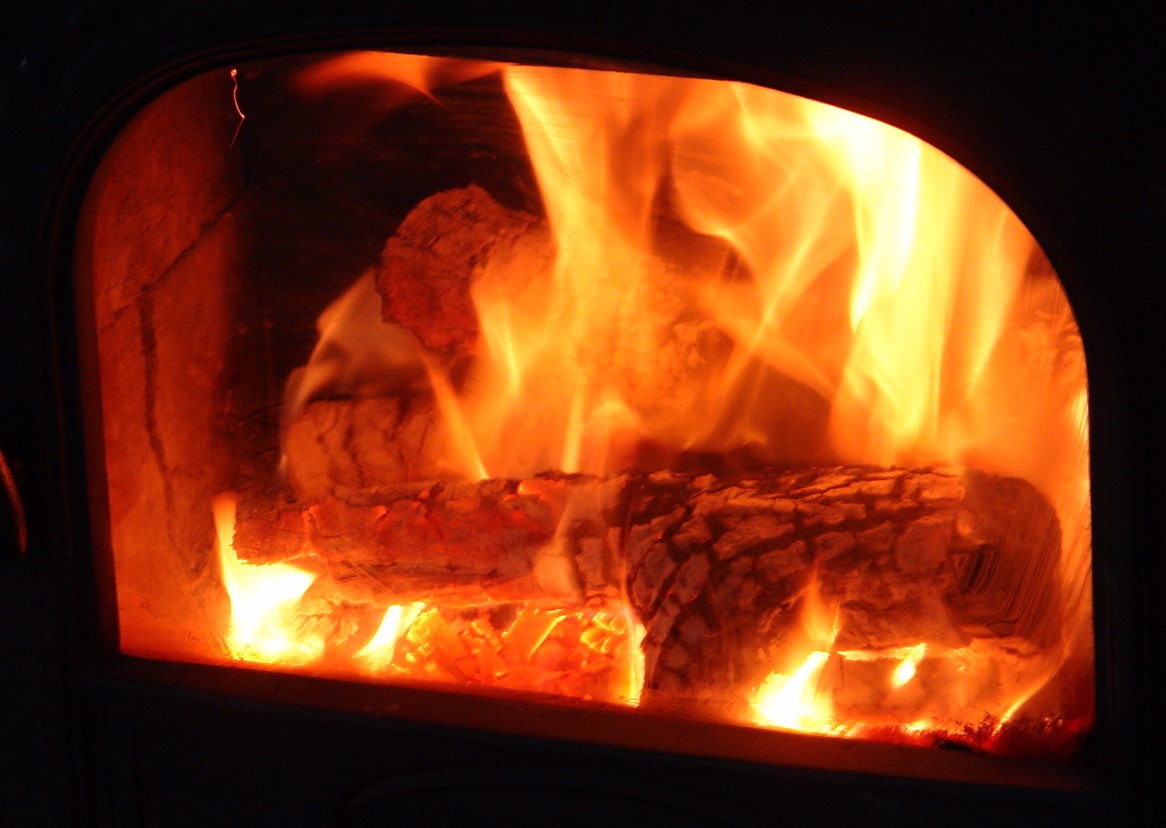
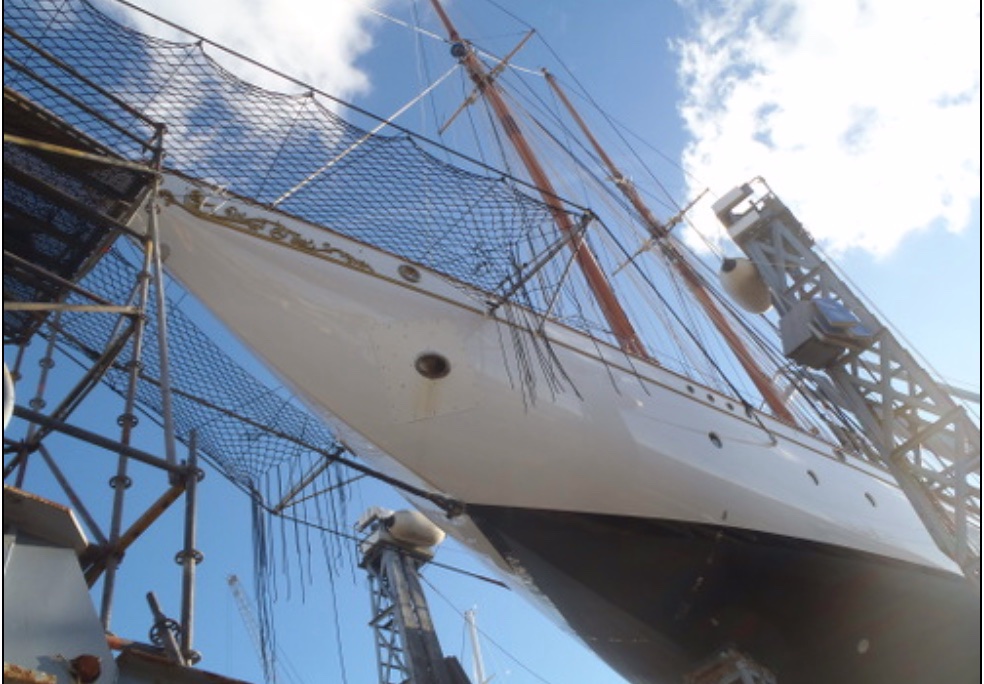
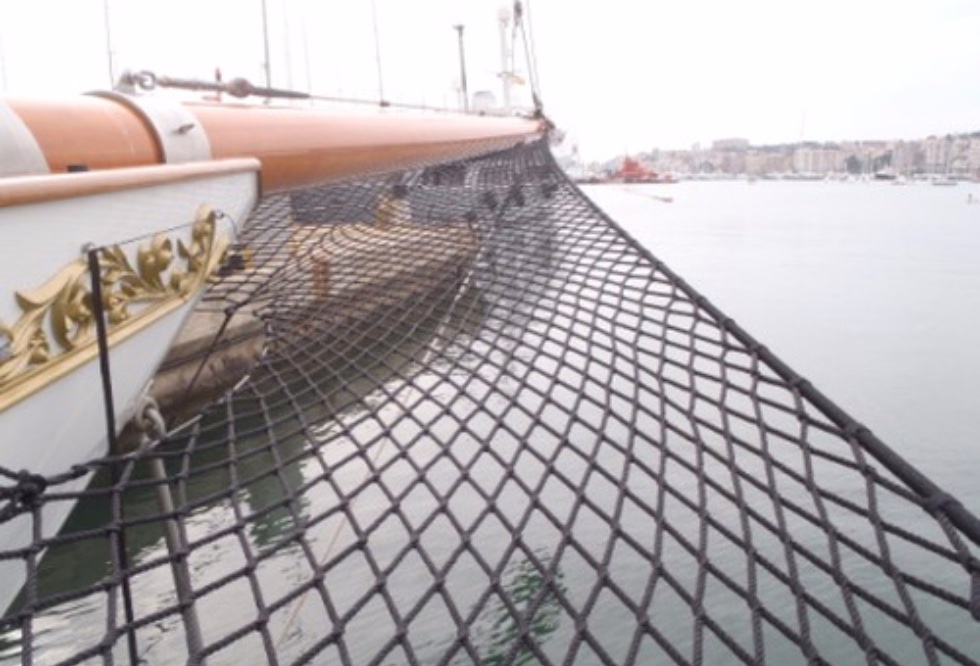
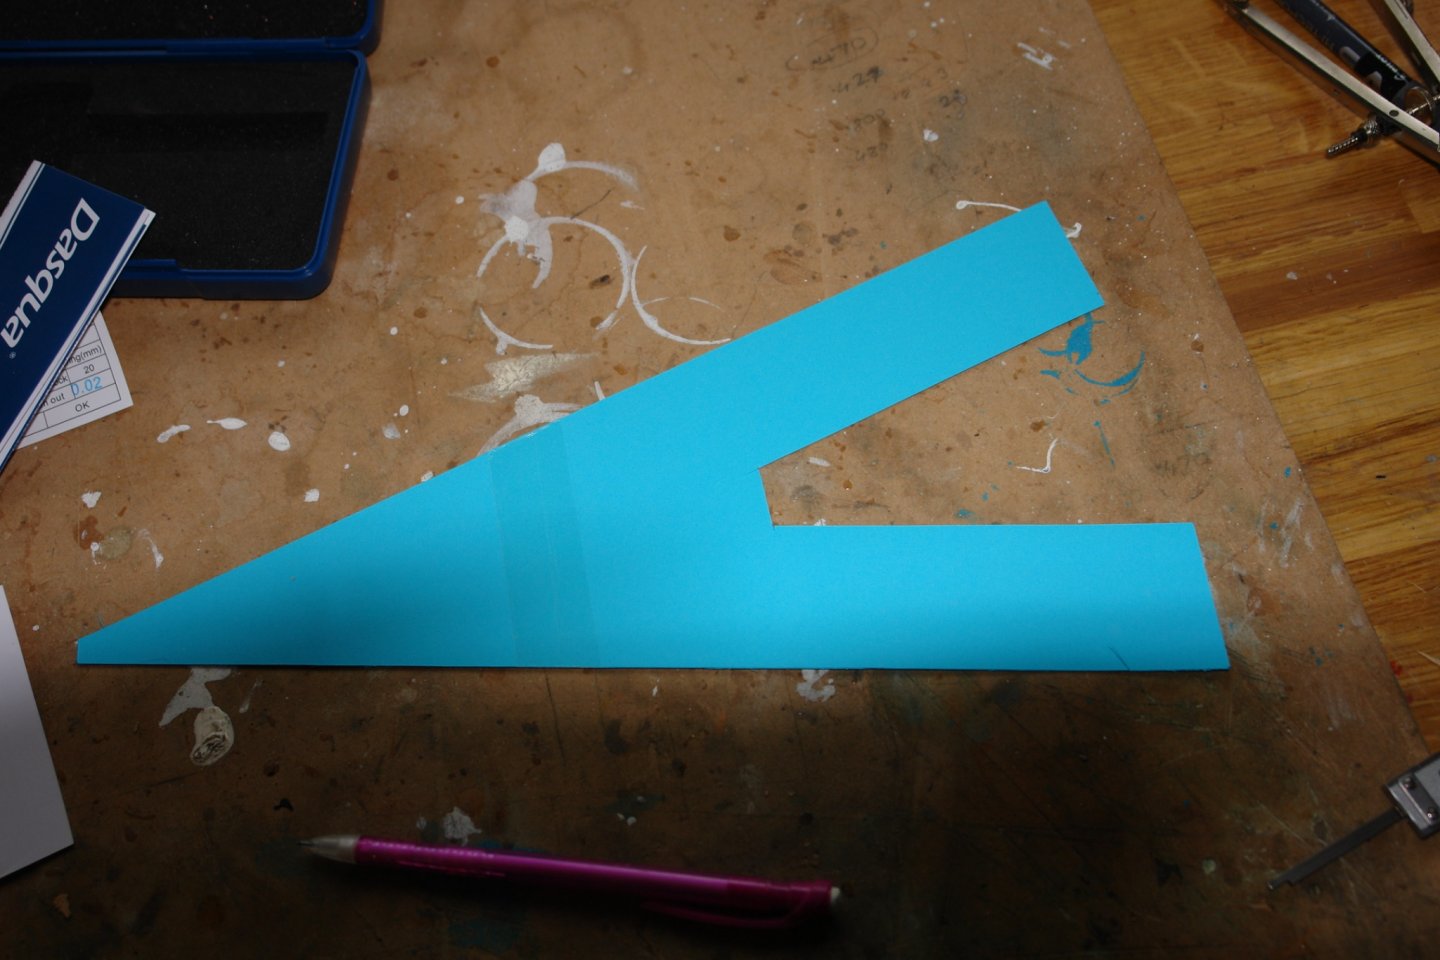
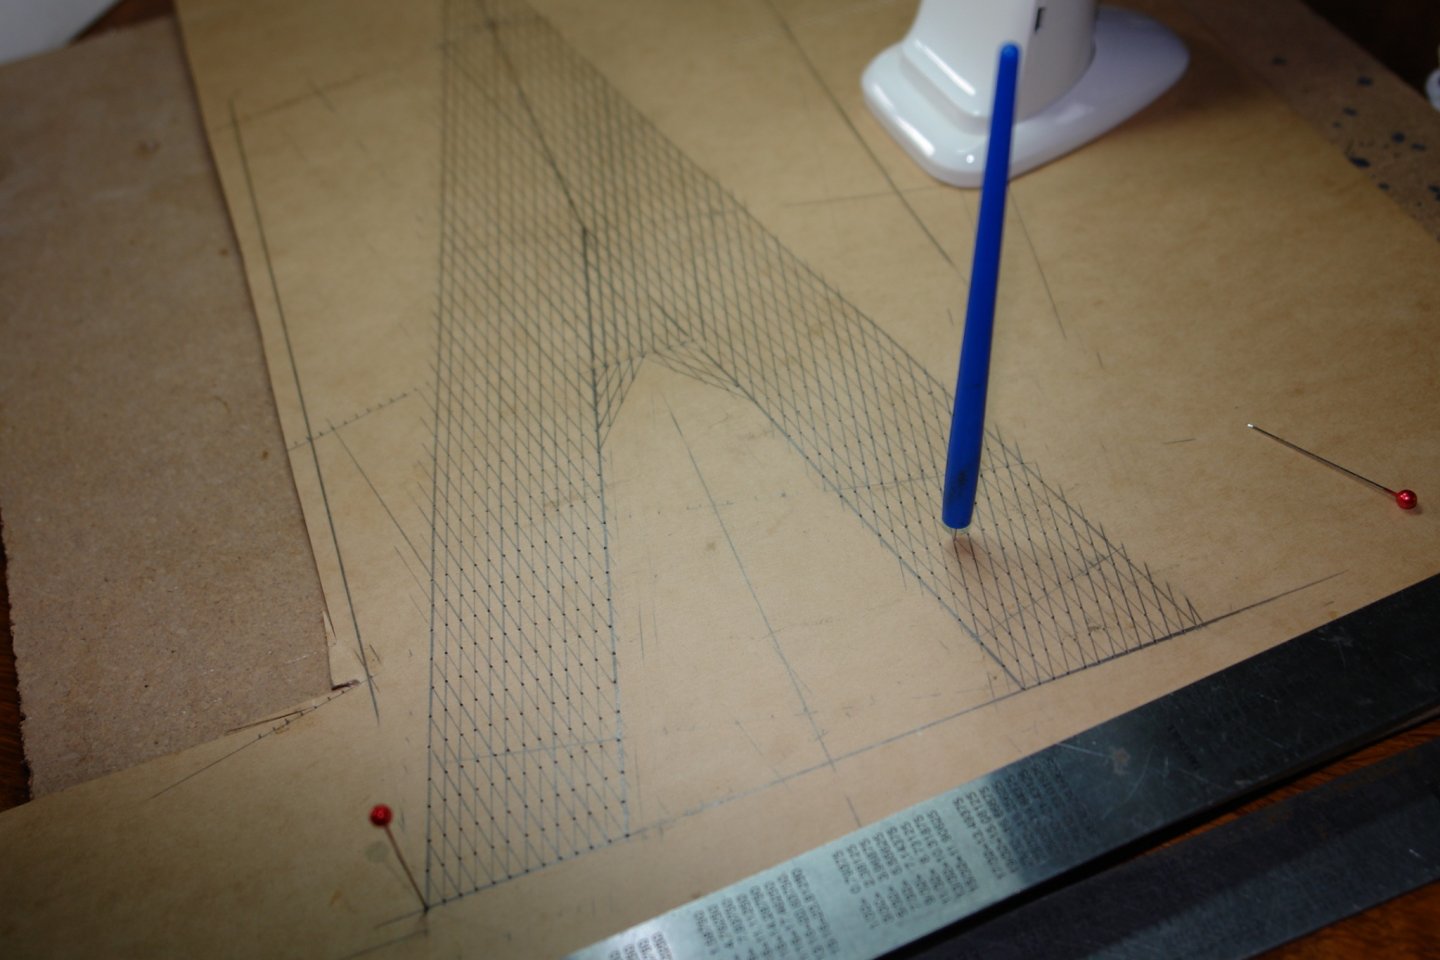
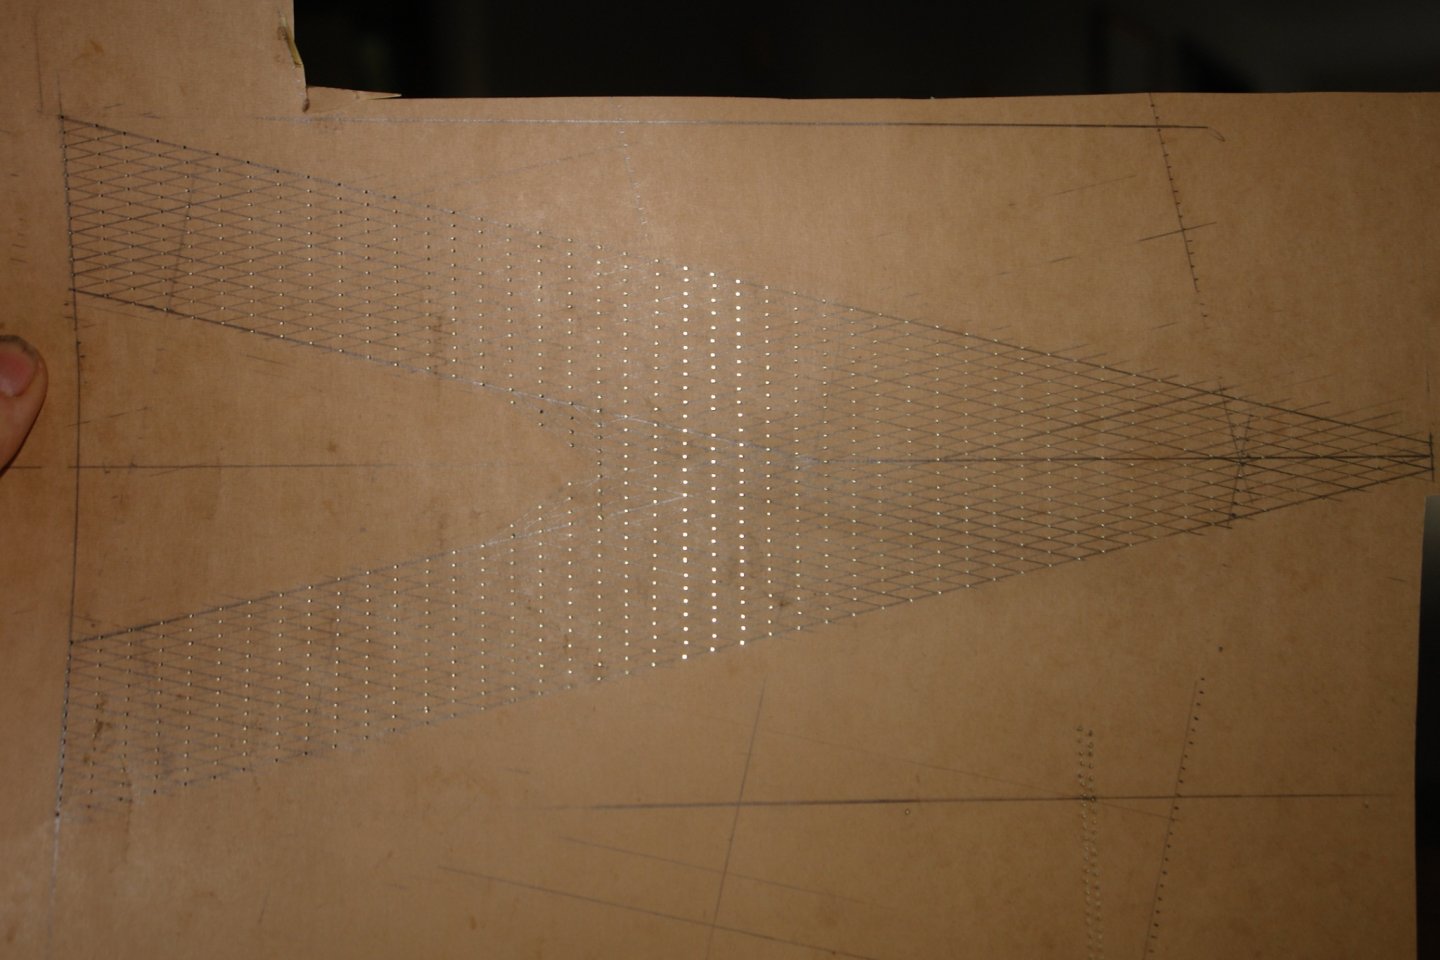
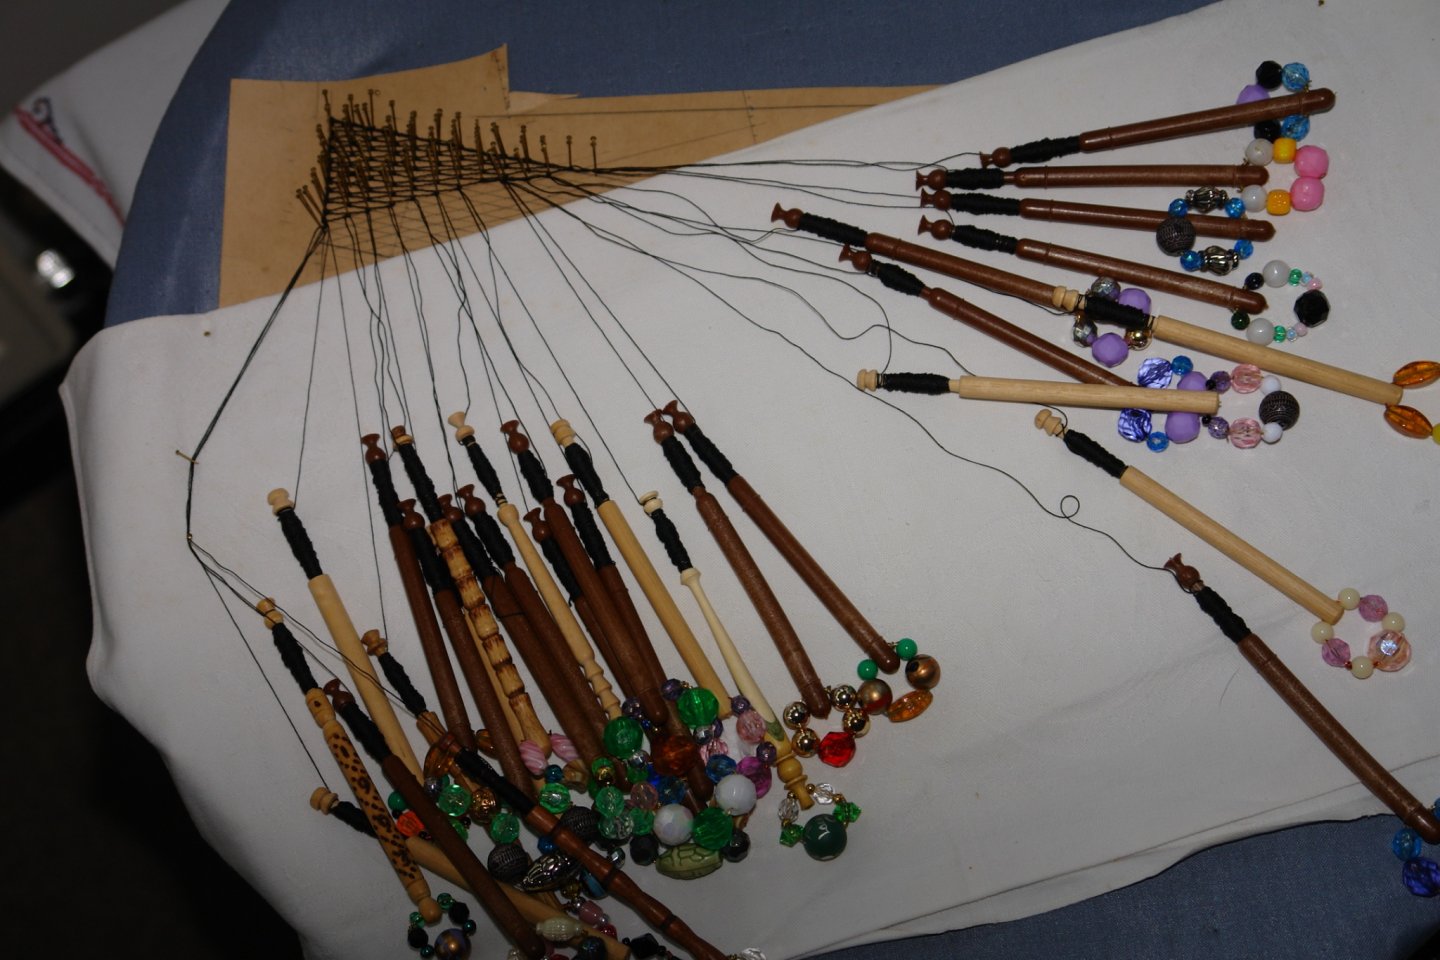
Thank you Pat and thanks to everyone for all the likes and visits. It has been pretty cold here for days. By noon on Monday the workshop temperature had struggled its way up to 7.3c (45f) After the morning in the workshop I had had enough. The draw of the lounge wood burner became overpowering. I decided I needed an armchair job so my thoughts turned to the bowsprit netting. I had previously looked at samples of window netting and fly screen netting but wasn't really satisfied with either. Making the netting seemed to be an option but I decided it would be quite a test to resurrect reluctant traditional skills. I made a card template to get the rough shape and size of the net. I used this to create a lace making template by drawing out the netting form. The next step was to accurately pick out the 1000 plus holes at the intersections of the net diamonds. This took me the best part of a day. I found a reel of mercerised black cotton which seemed appropriate for the job. This was wound on to 34 lace making bobbins. and creation of the net commenced. This job is going to go quite slowly in parallel with workshop activity. I will post an updated image of the netting as I describe parallel build progress in future posts. In the next post I will try to explain a bit about how to make lace making simple.

-
I think they must have been very fast swimmers or rowers in those days Keith. I'm assuming you discovered the ladder in your research? Did you discover its purpose?
-
Cap San Diego by mikegr - 1/160
KeithAug replied to mikegr's topic in - Build logs for subjects built 1901 - Present Day
Superstructure is looking quite smart, nice detailed work in cutting out the windows, well done. -
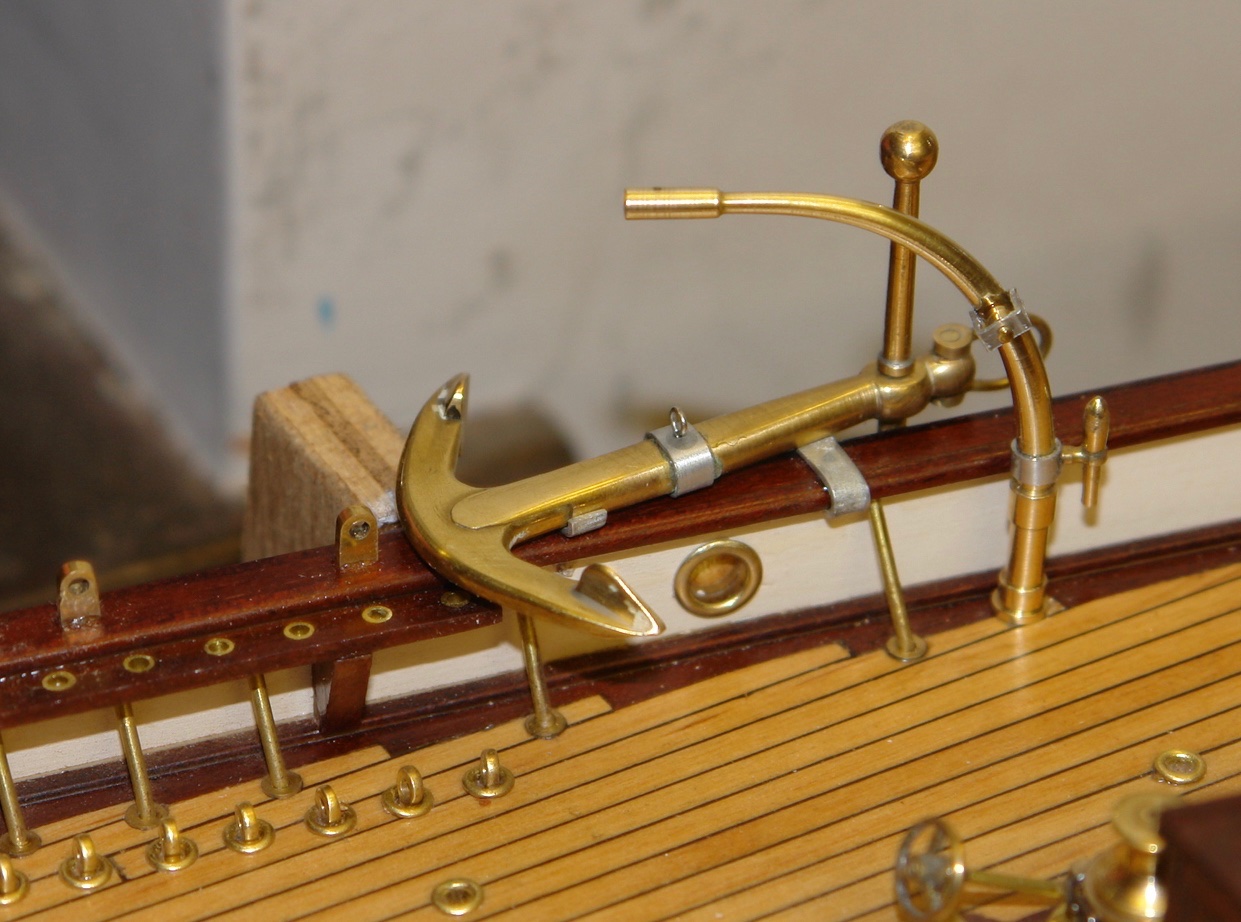
Thank you Keith, Gary and Michael. I spent the weekend making the davits for the embarkation steps and for the anchor. Basically smaller versions of those previously completed but in this case neither pass through the rail. But first a better picture of one of those already made. The next two slot into up-stands which rise from the deck. The steps davit:- And the anchor davit:- Next time something completely different!!!!!!!
-
Hmmmm! Time marches on. Not long before we find ourselves being strapped to a commode in a nursing home.
-
George, About 15 years ago I spent a happy day with friends wondering round the Averof in Athens. She was being refurbished as a display ship at the time and we were lucky to find an enthusiastic technician who took us on an extended tour (the asbestos was a bit worrying). She is a fine example of a WW1 armoured cruiser and I look forward to seeing your model develop.
-
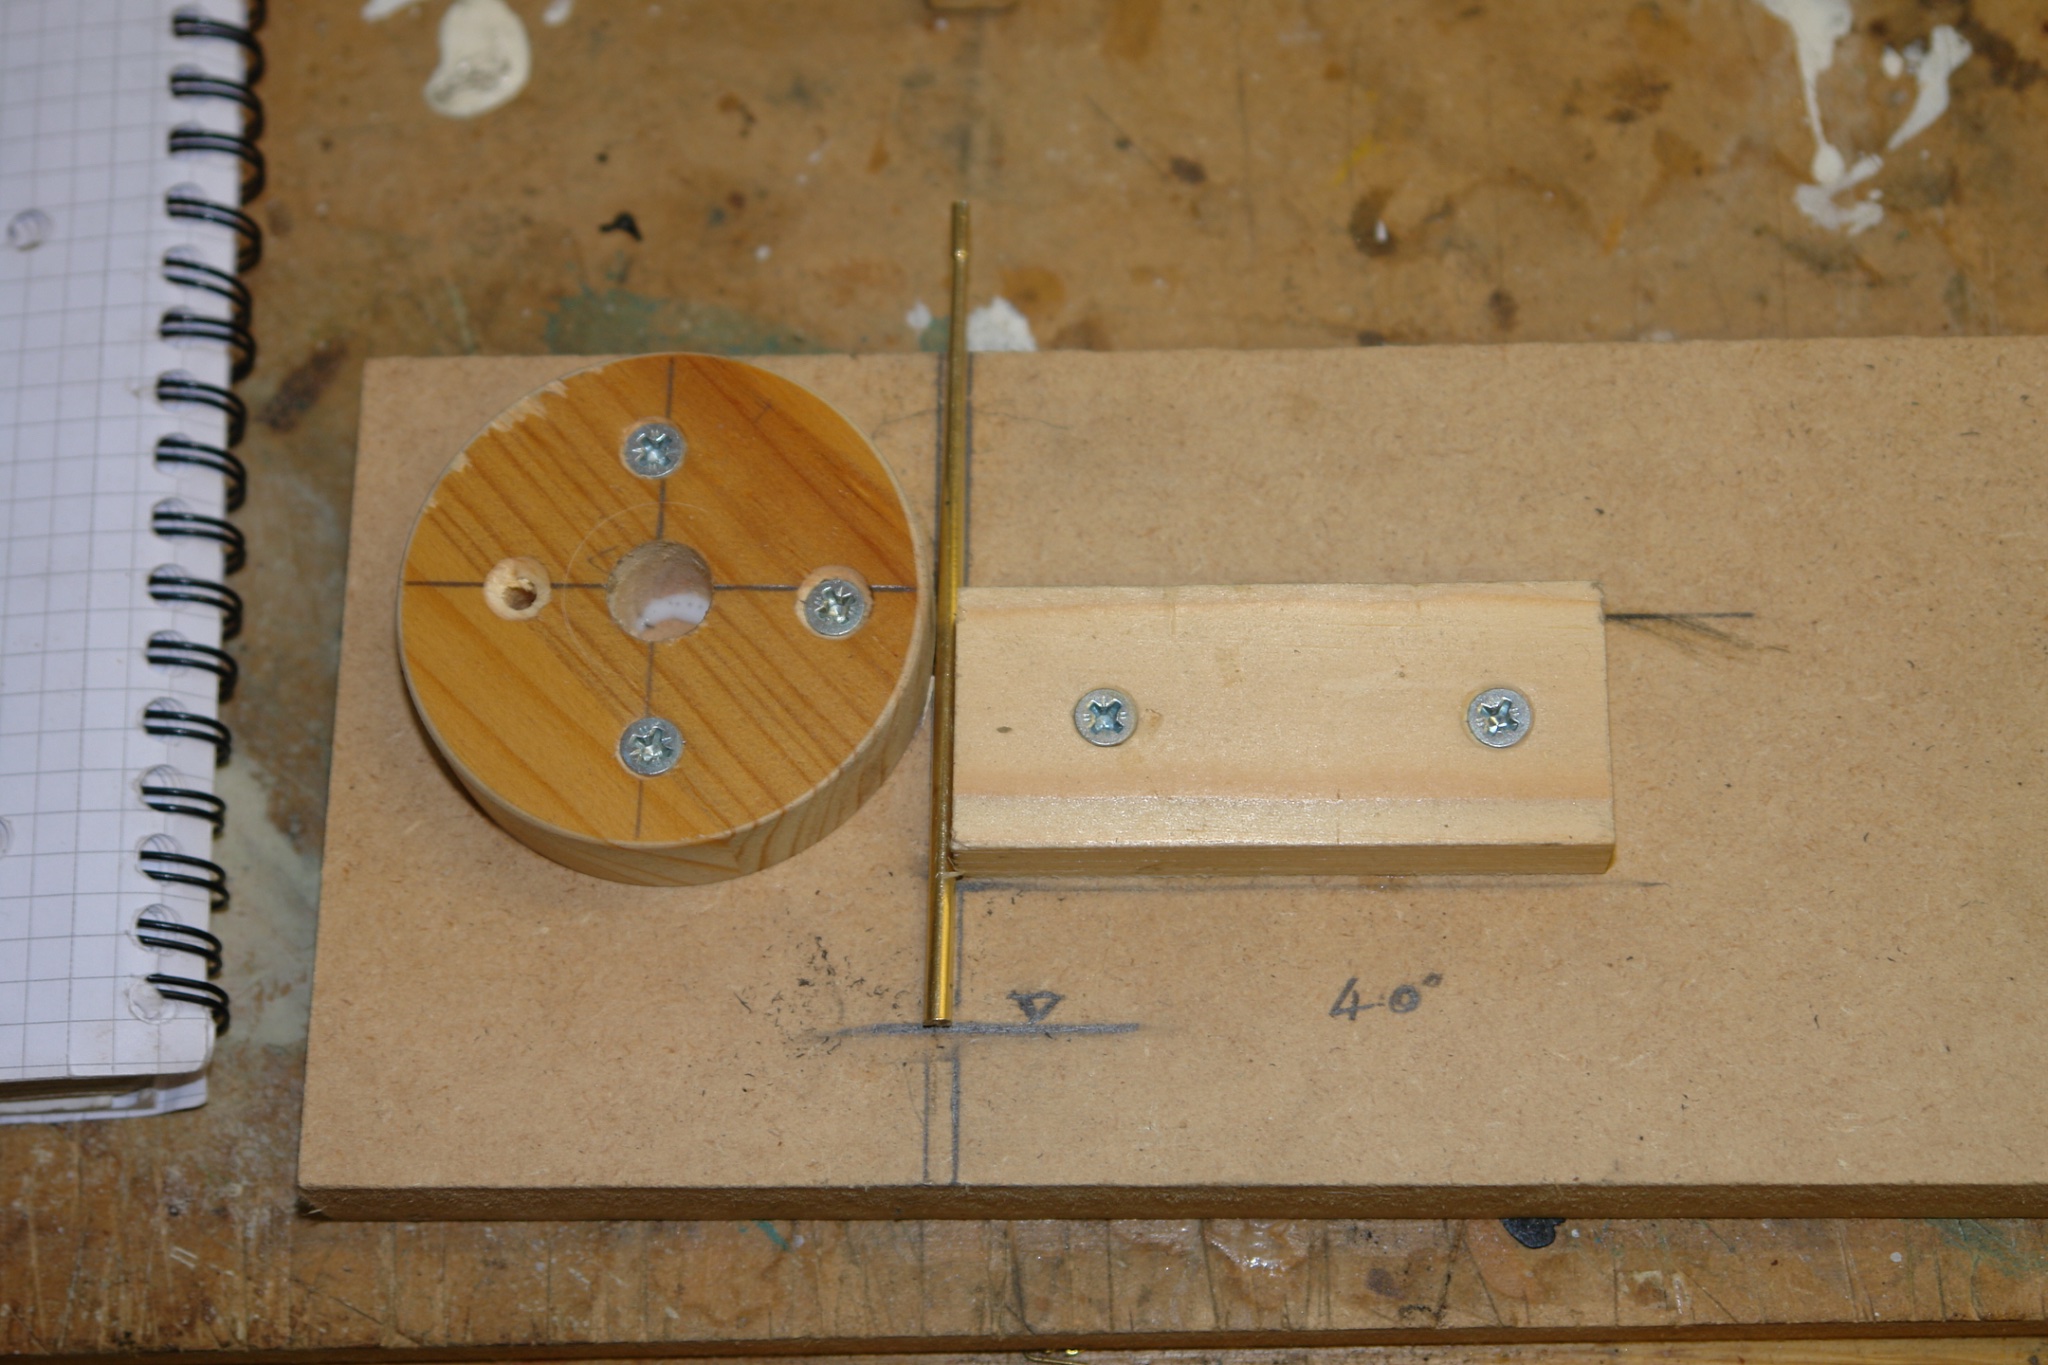
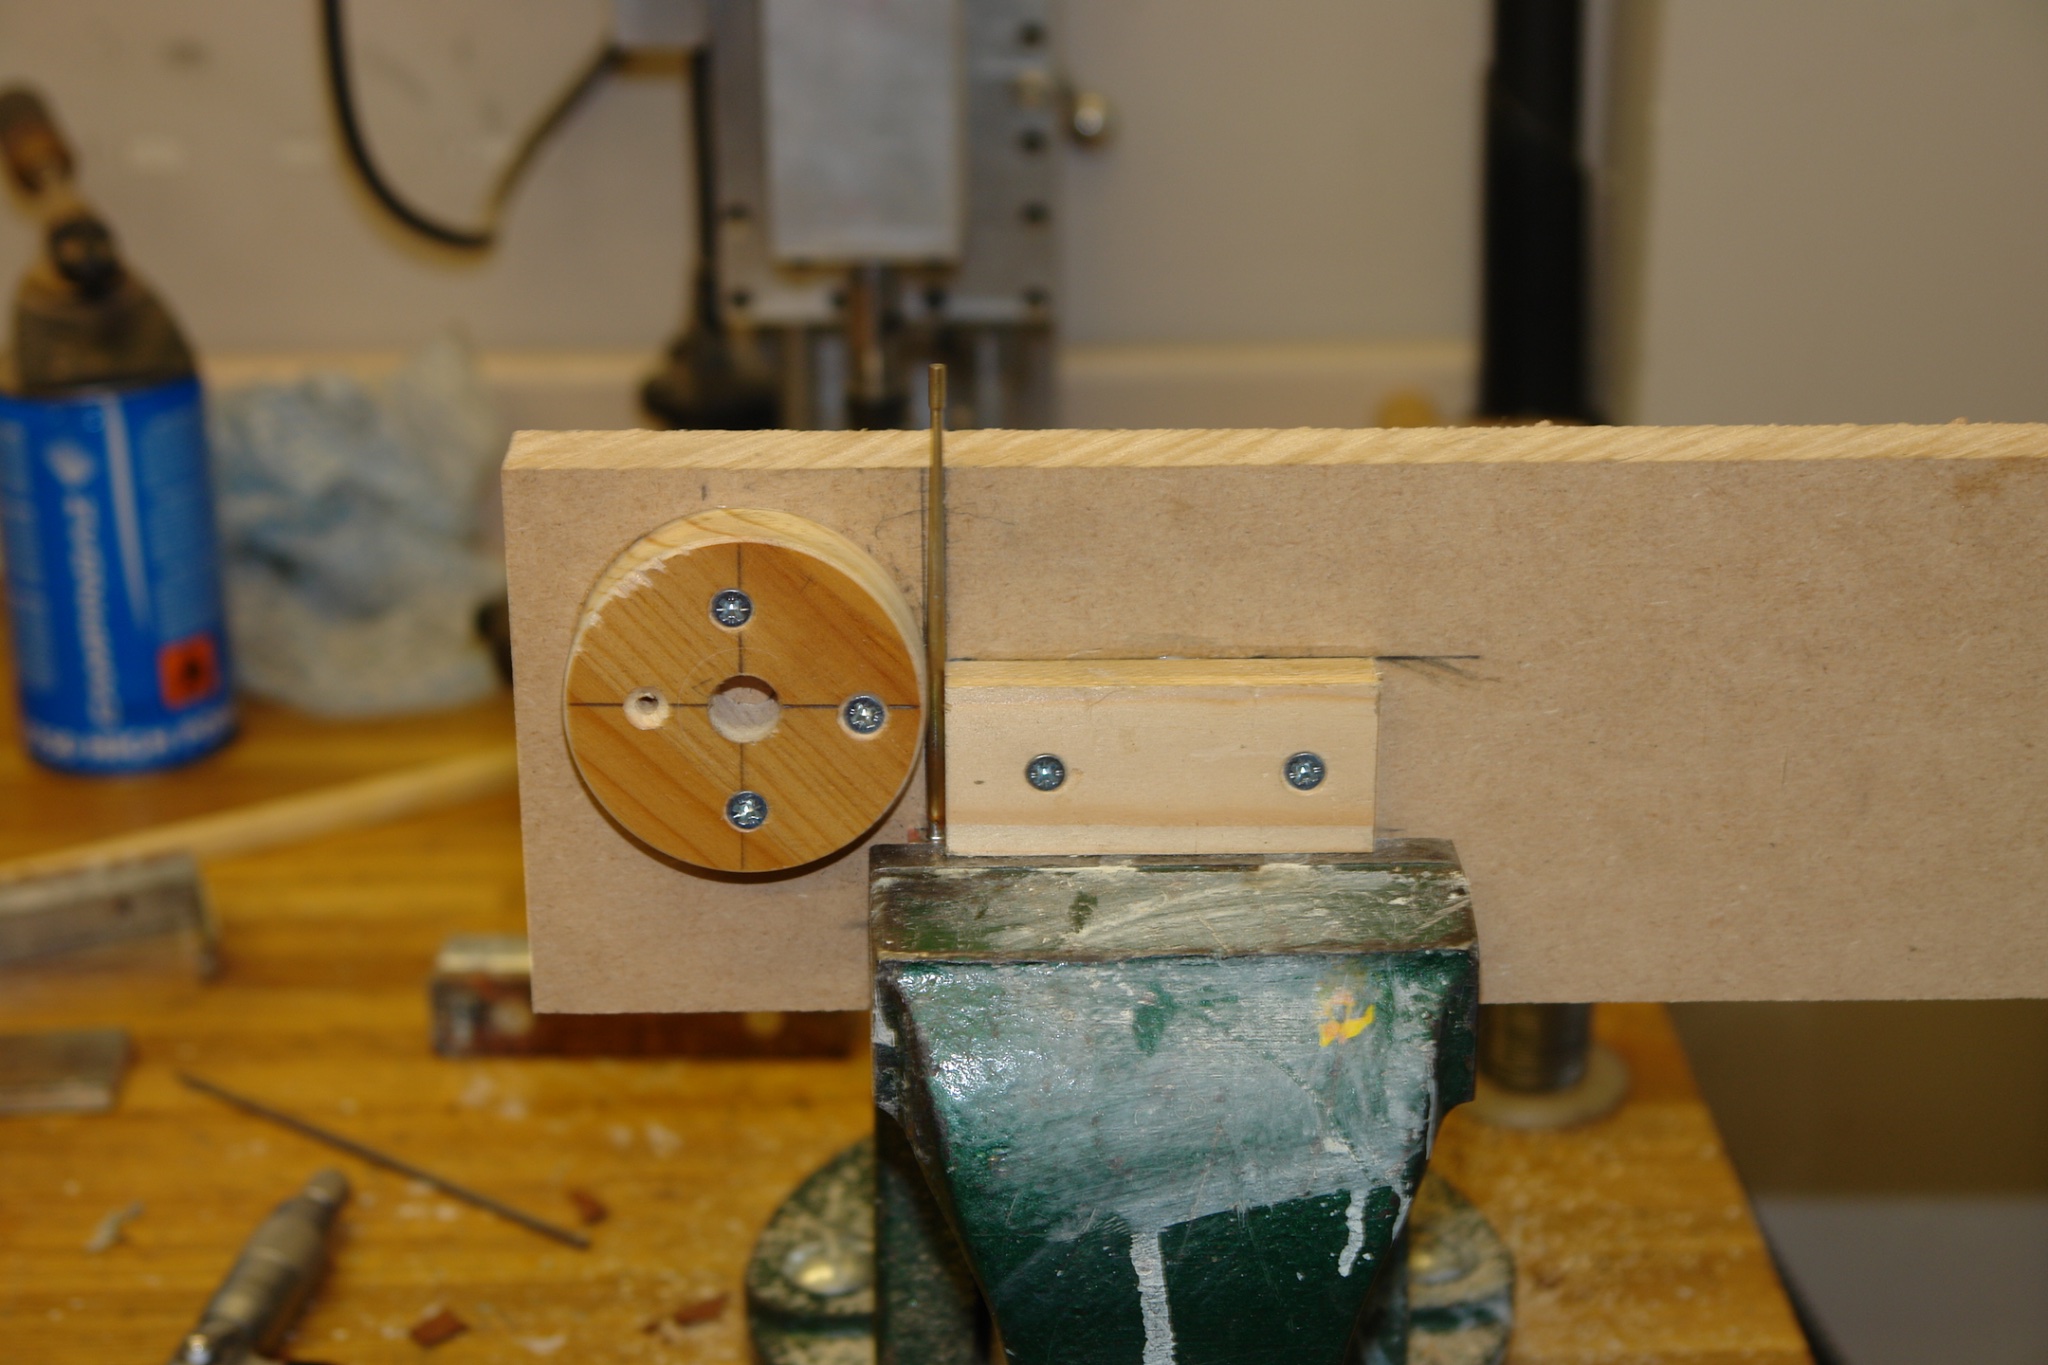
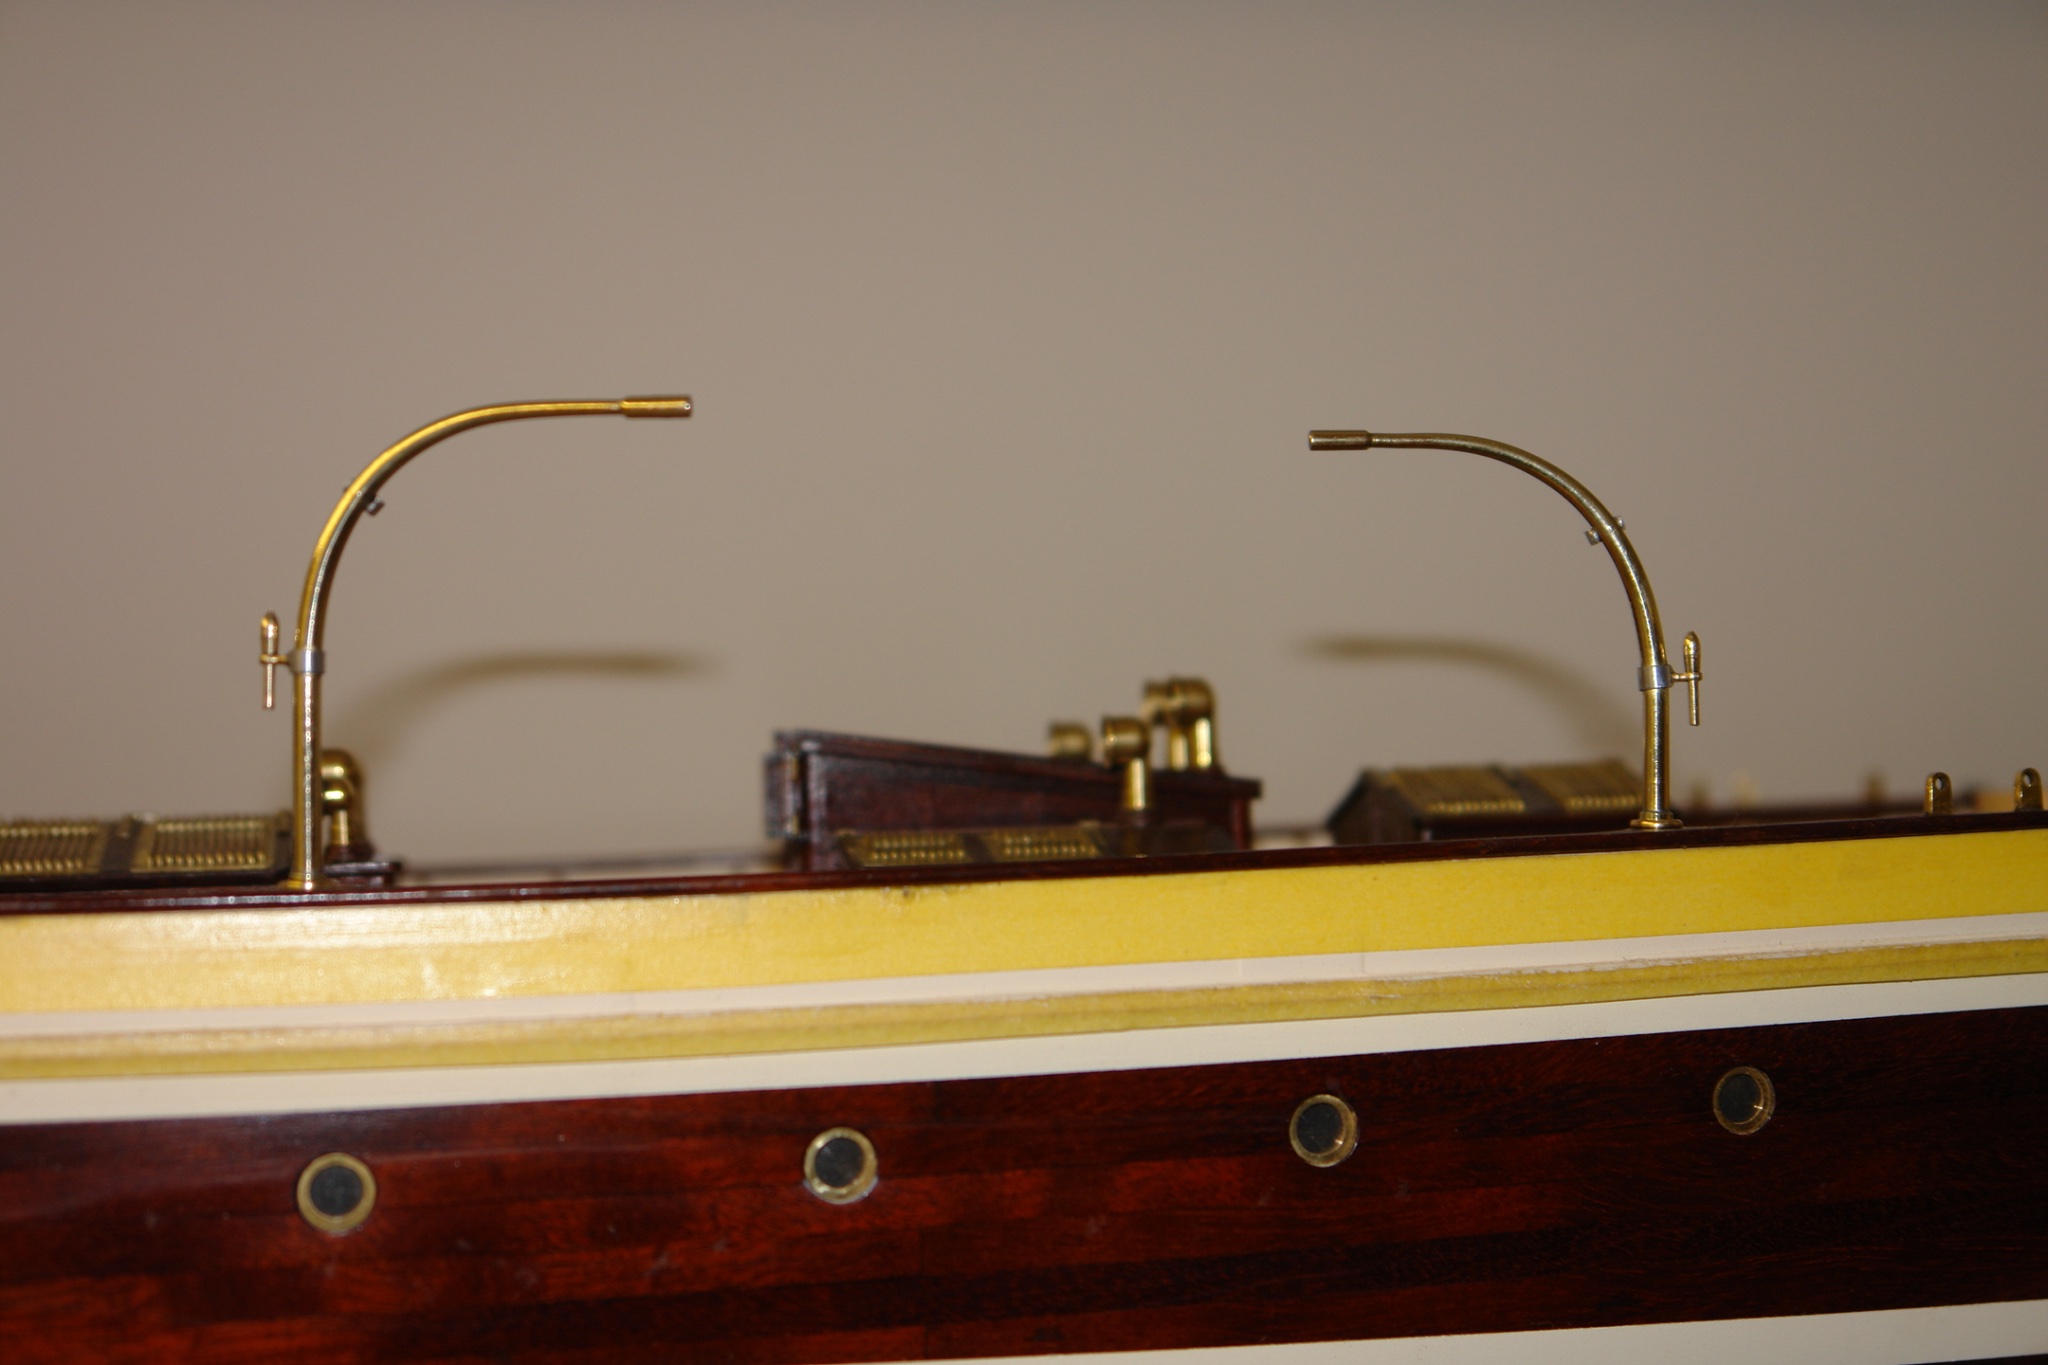
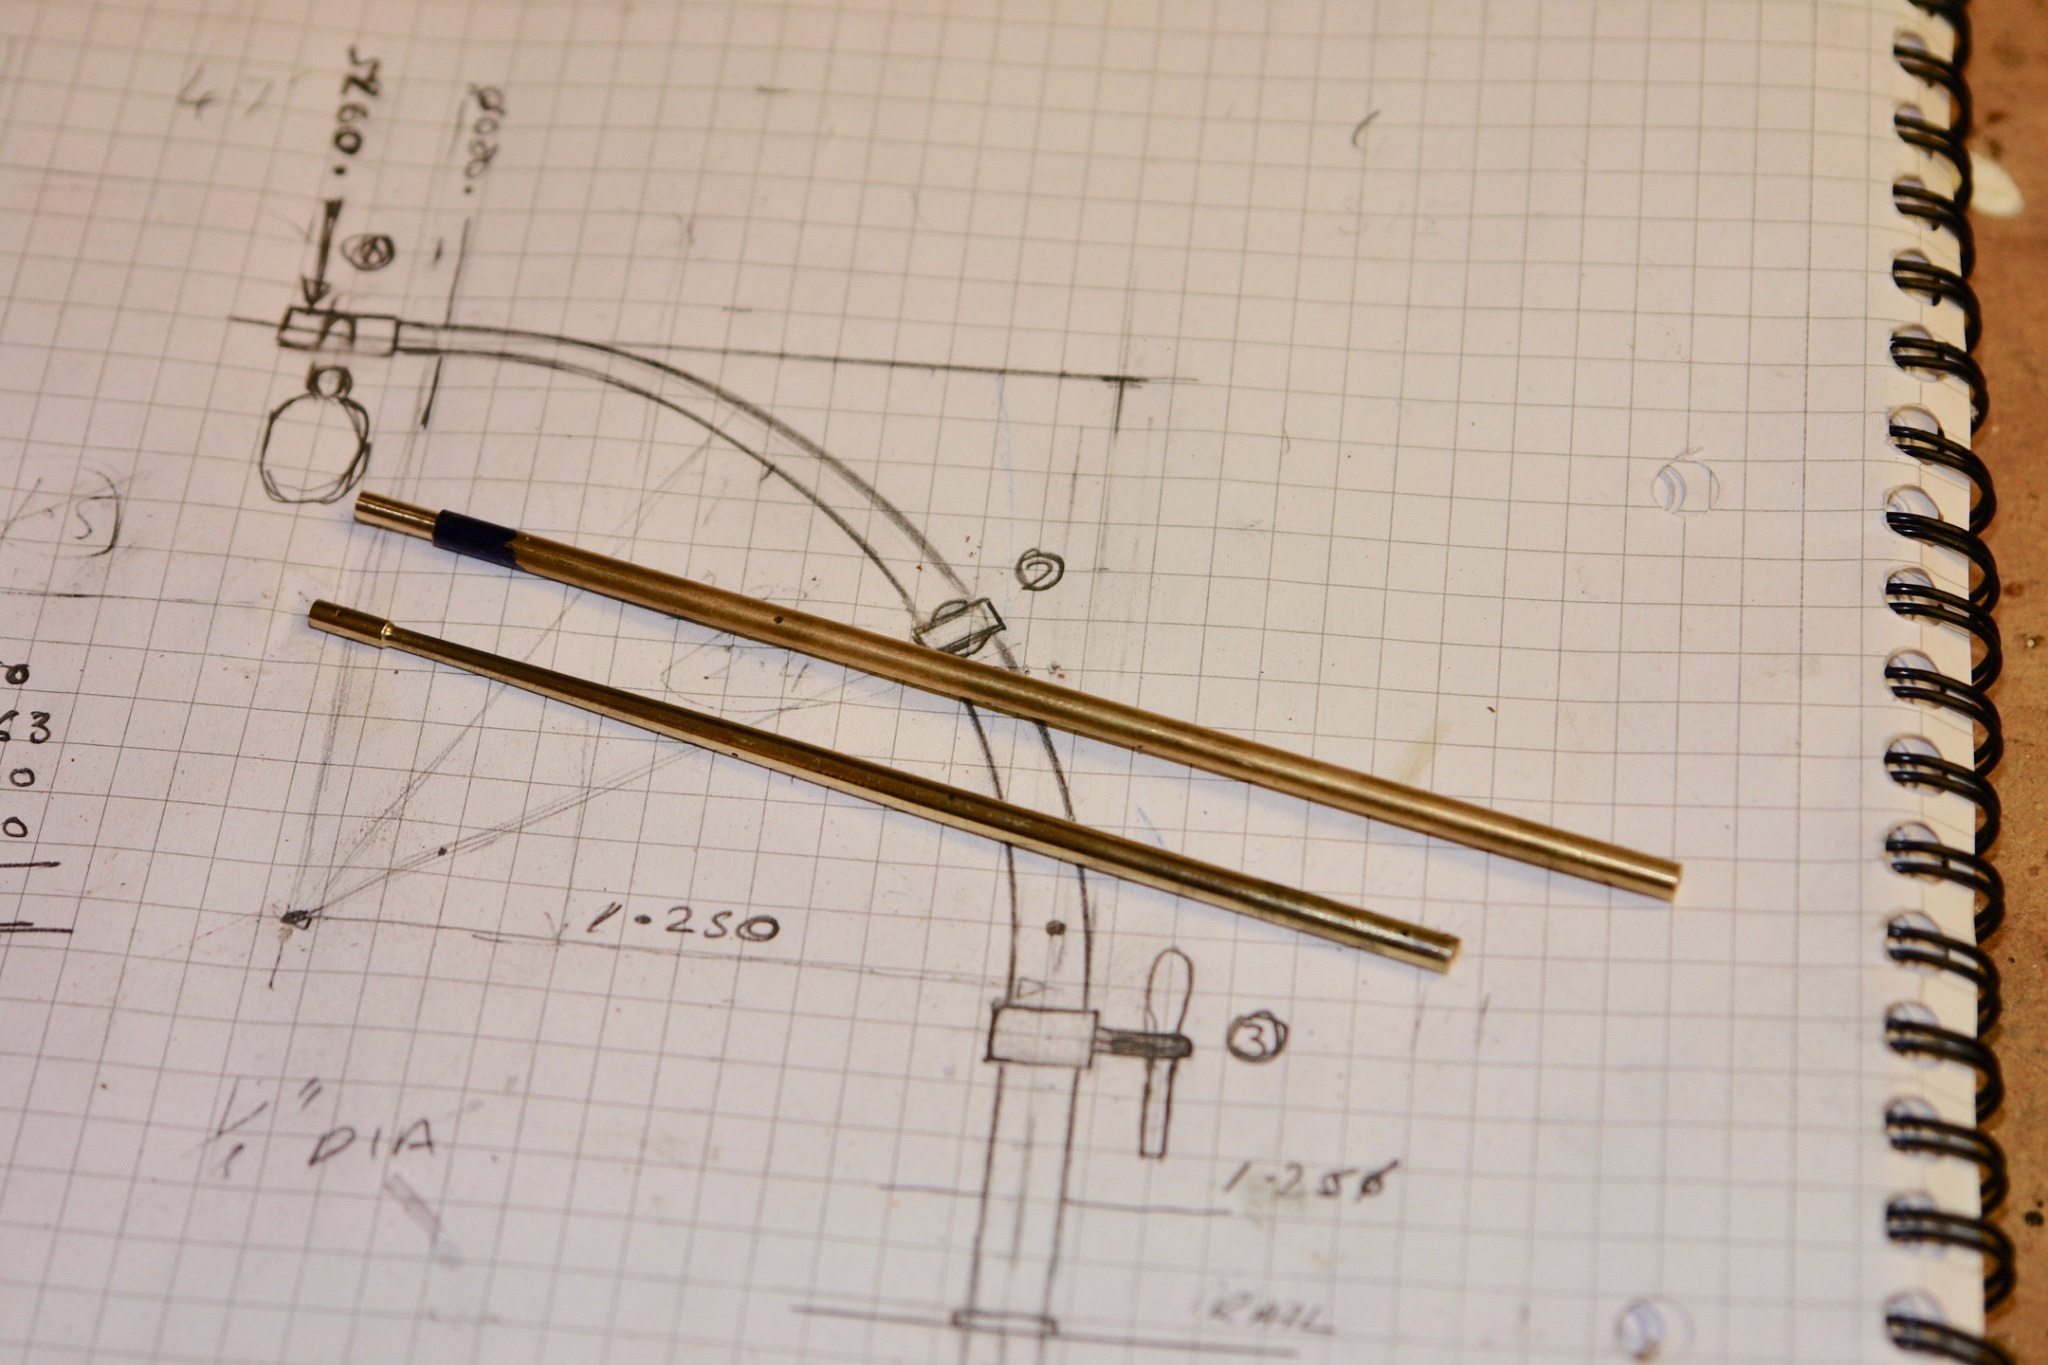
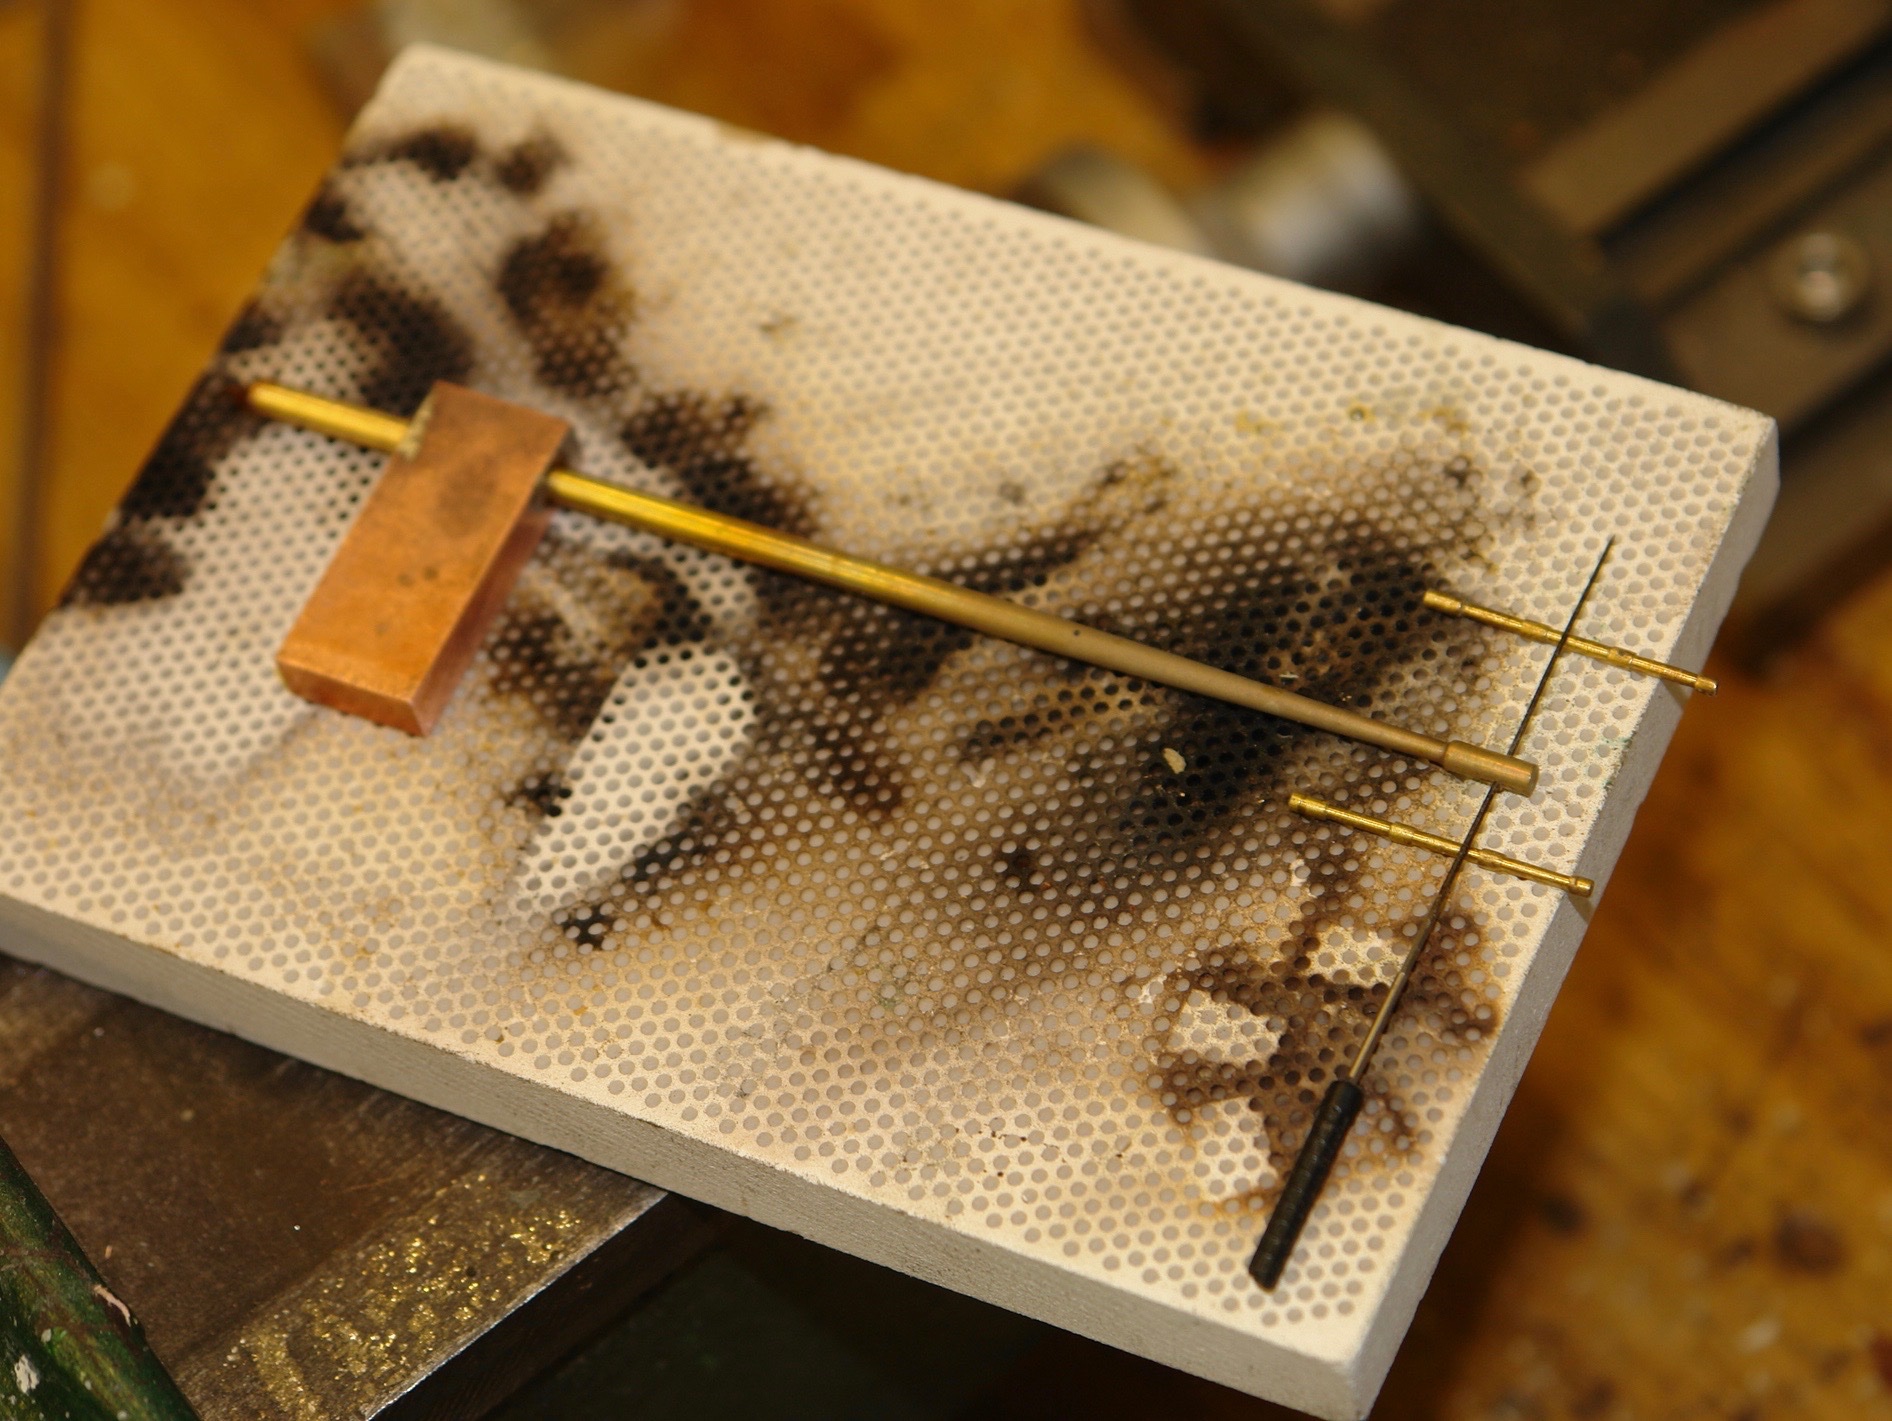
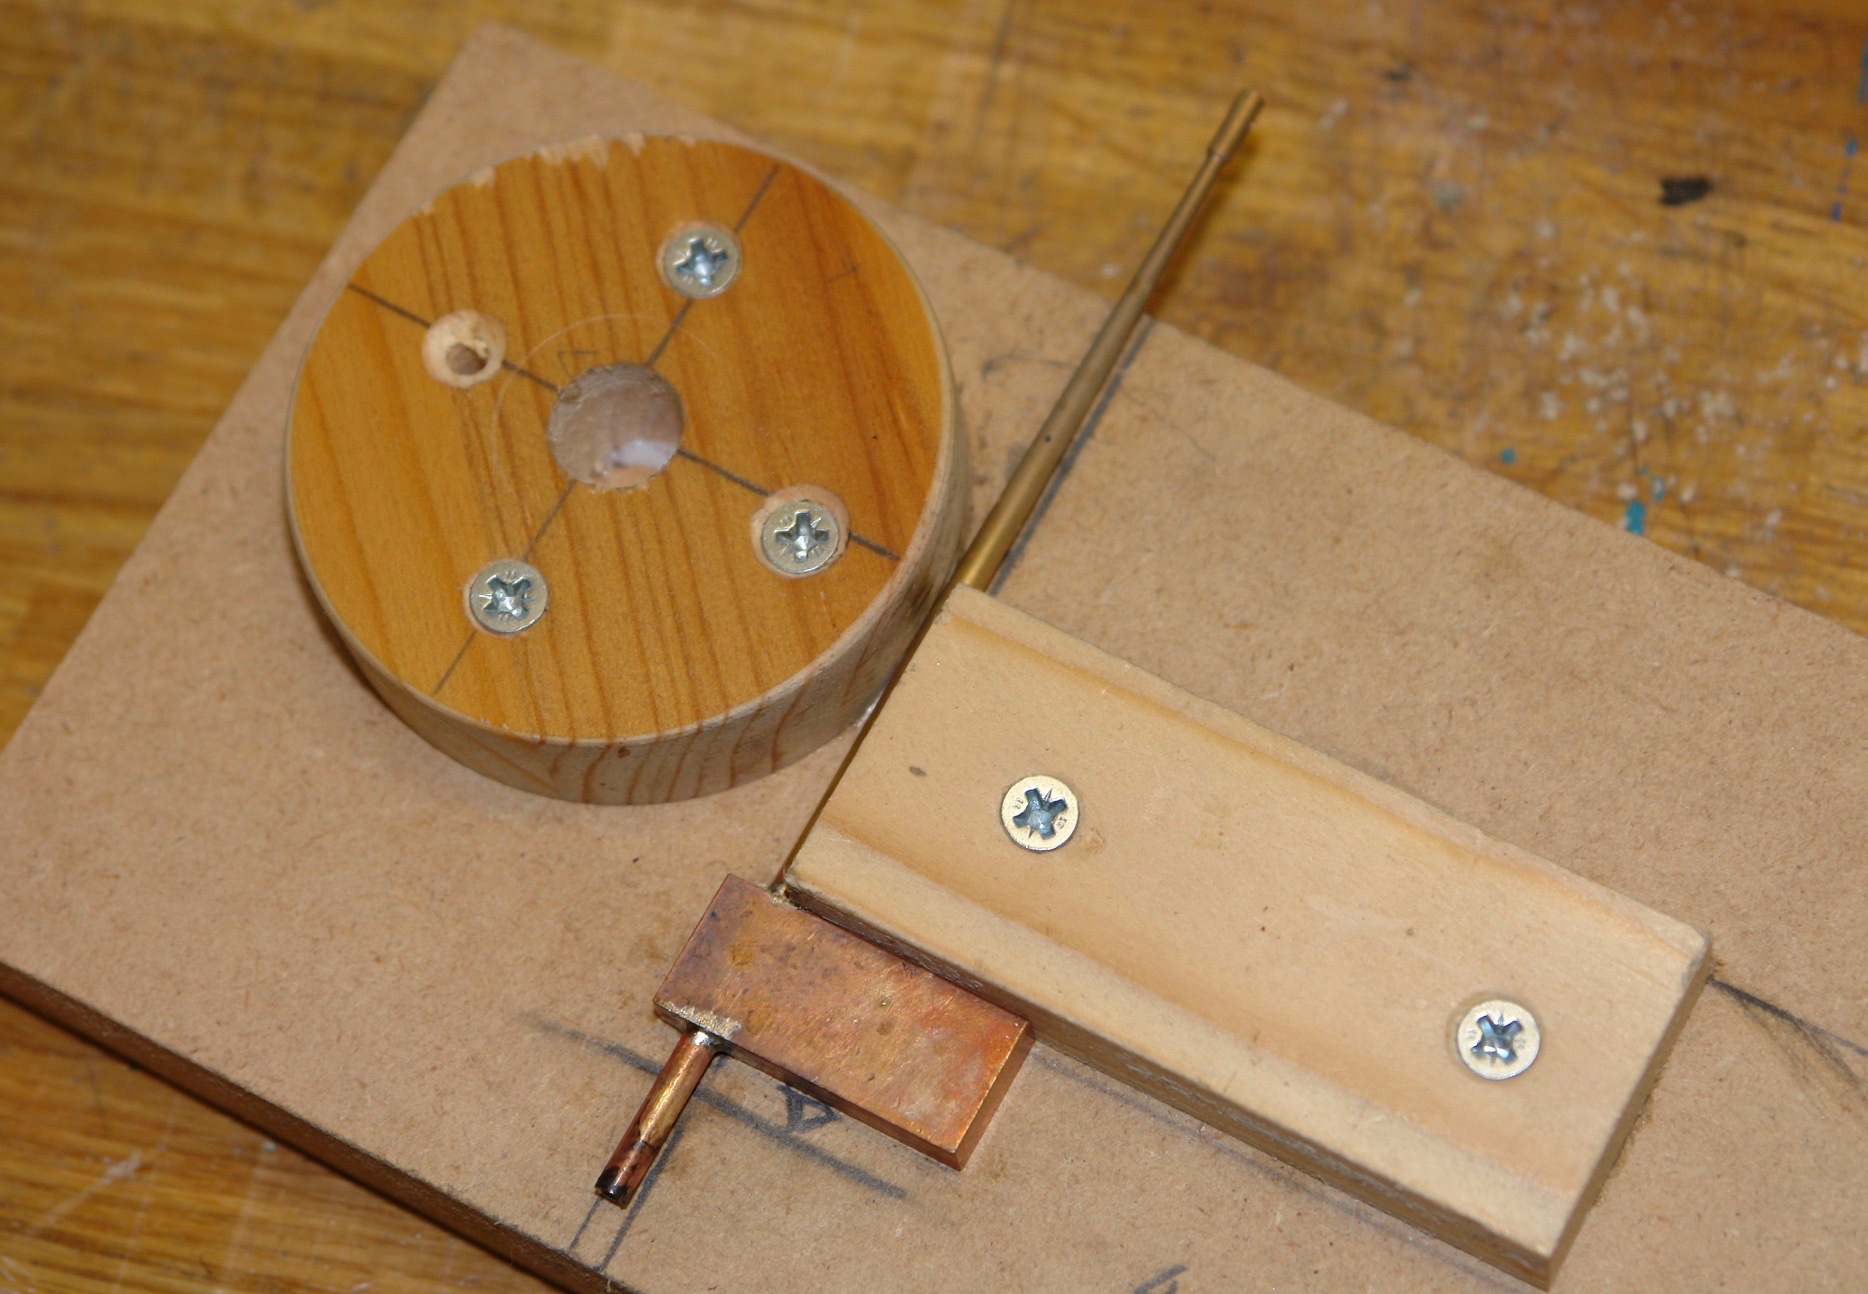
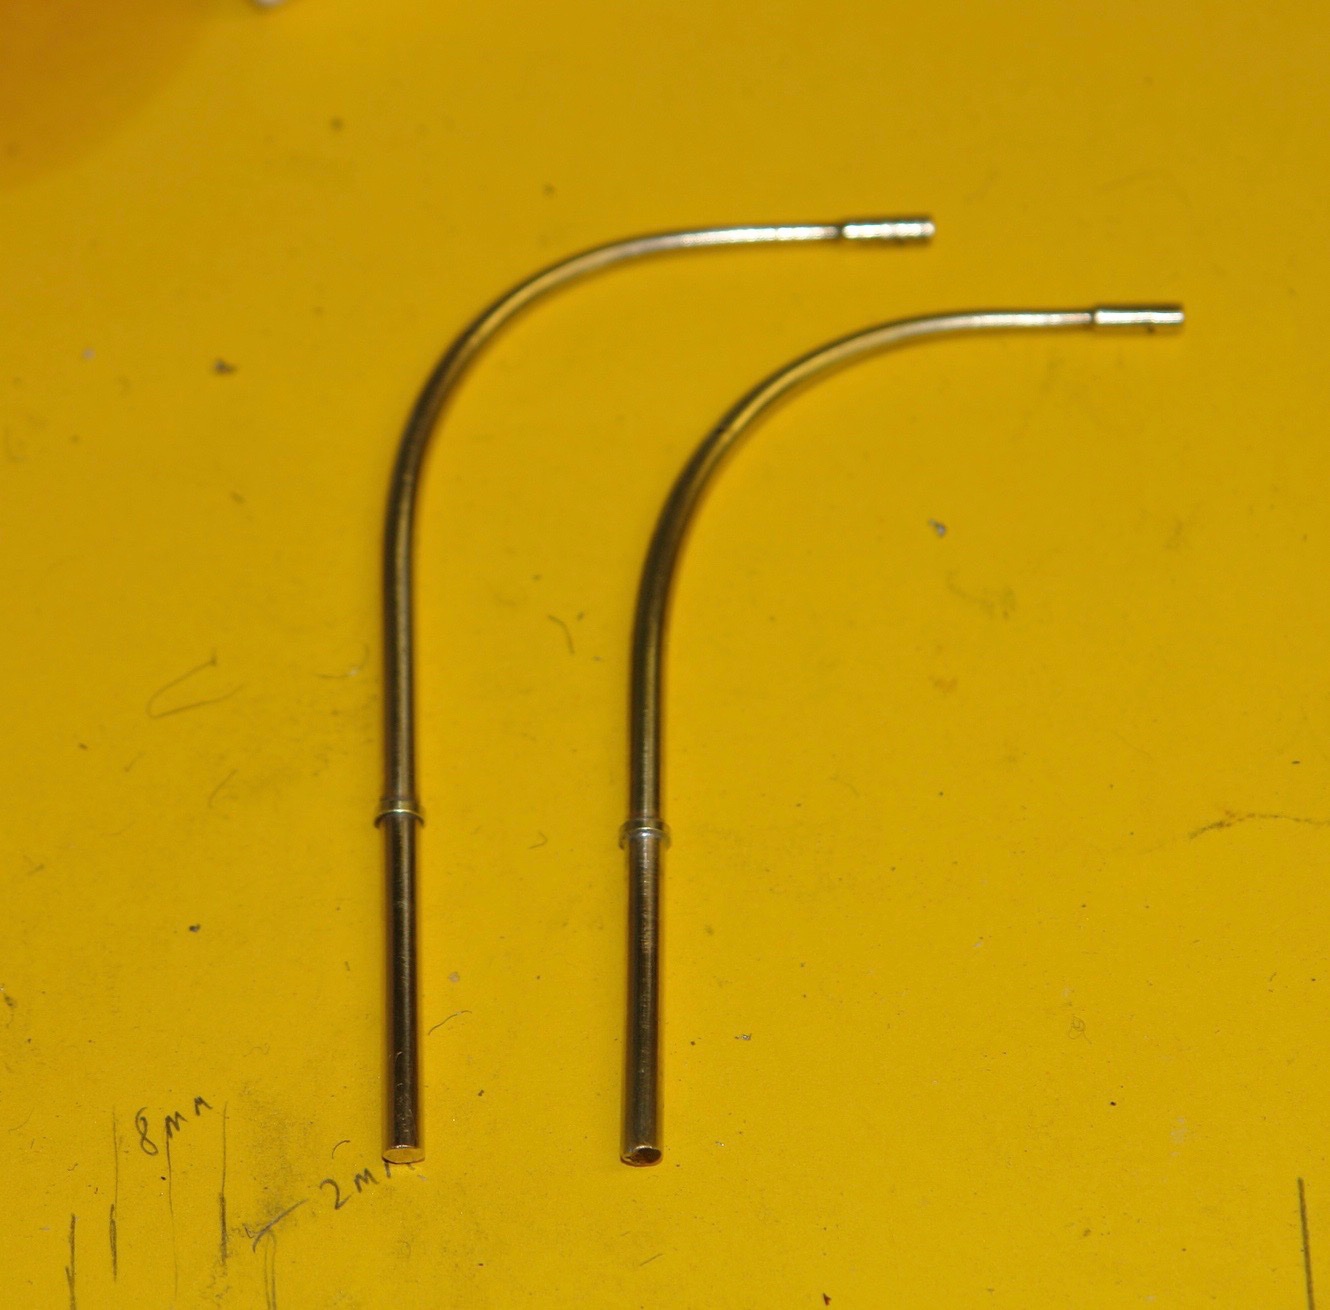
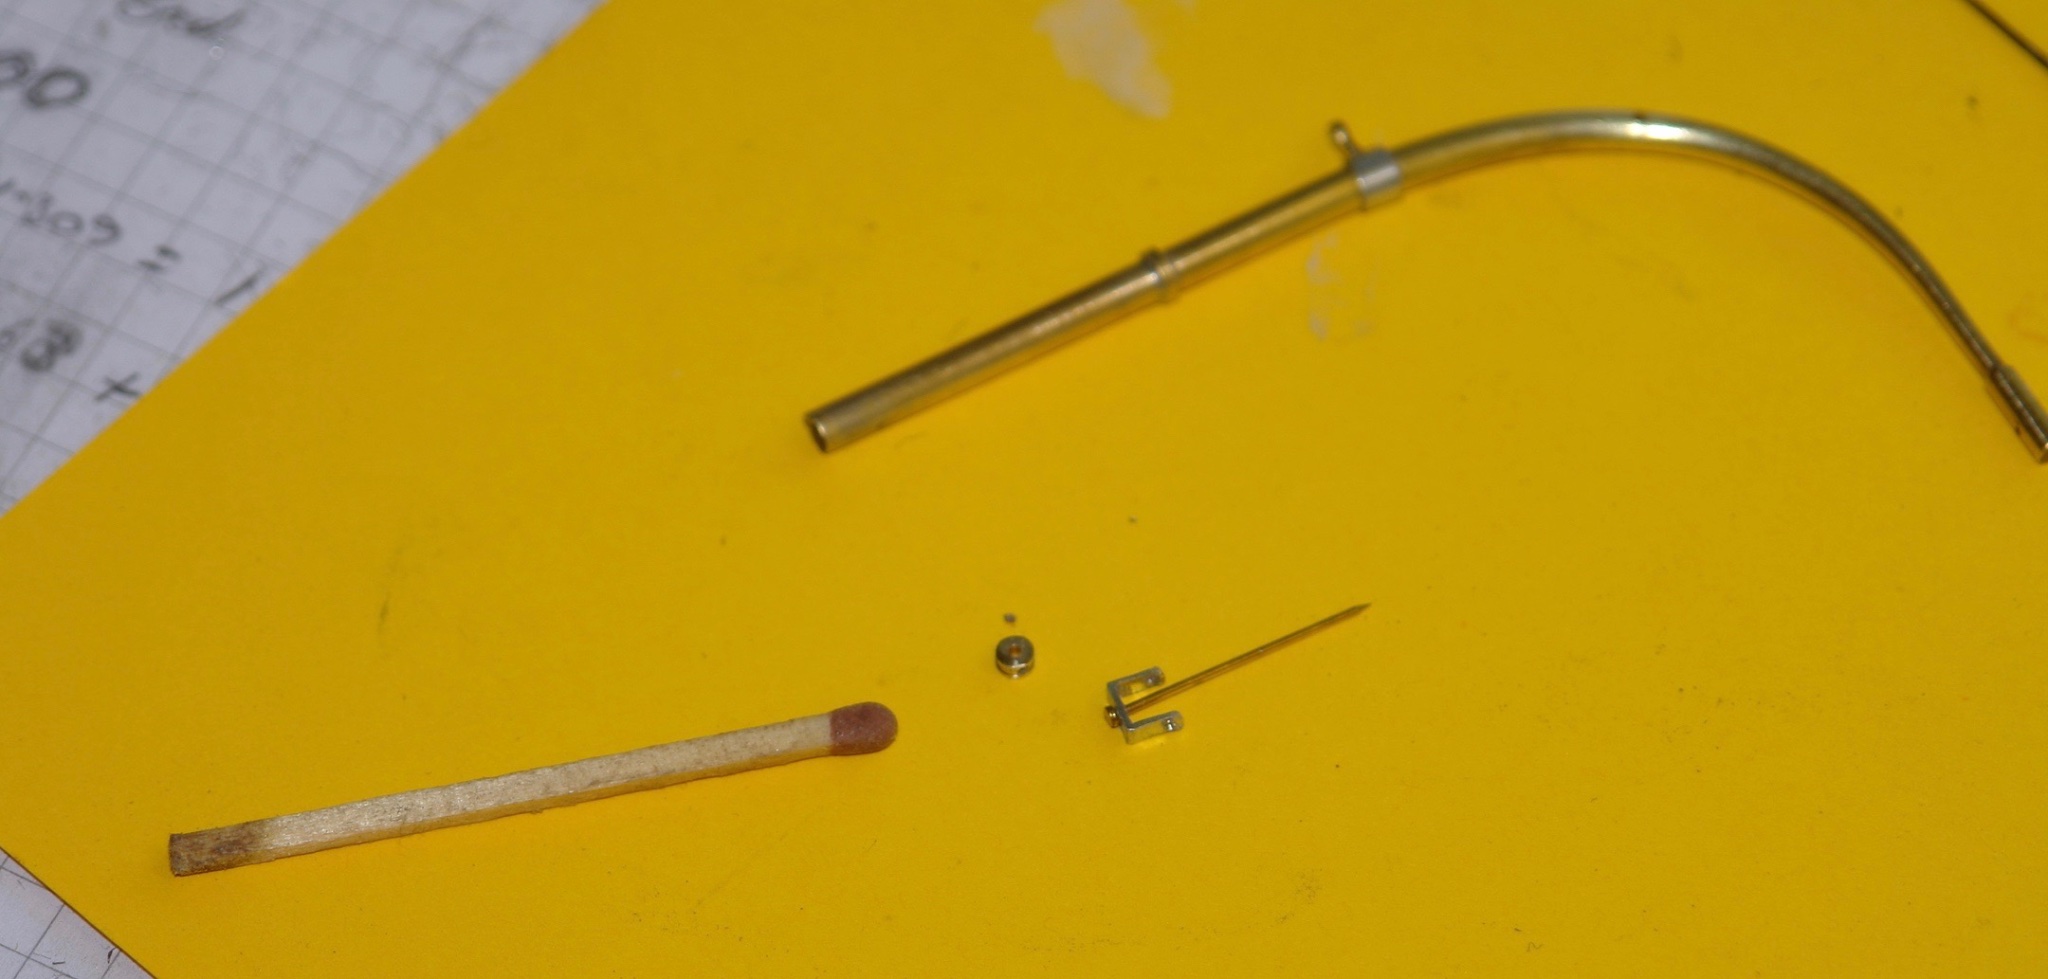
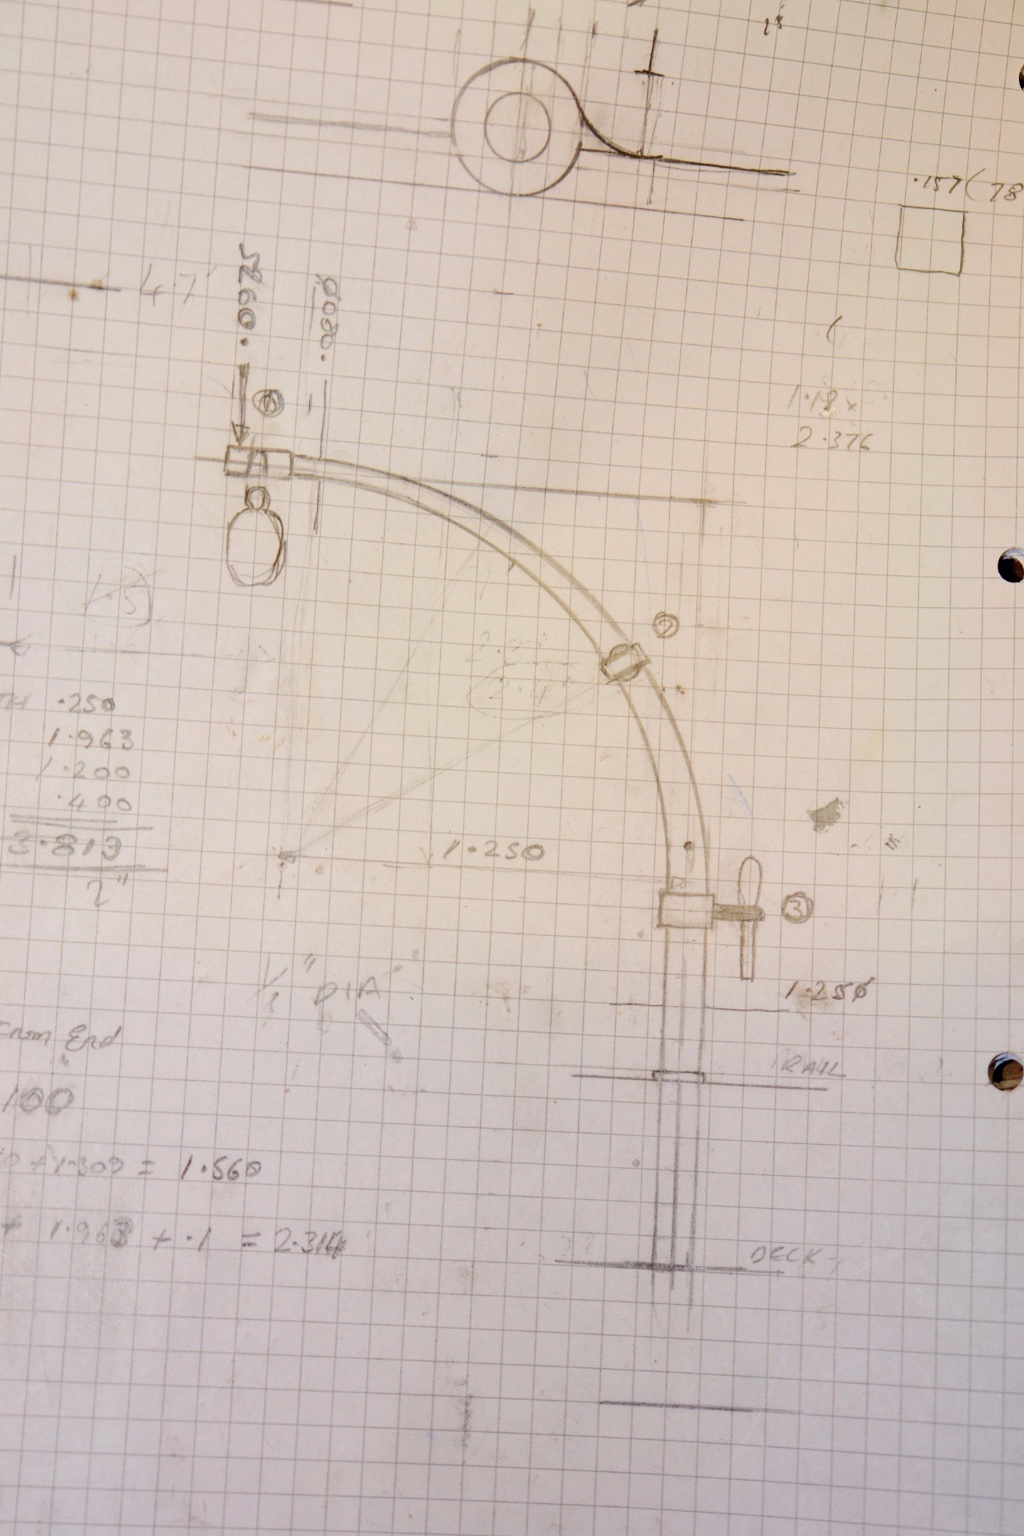
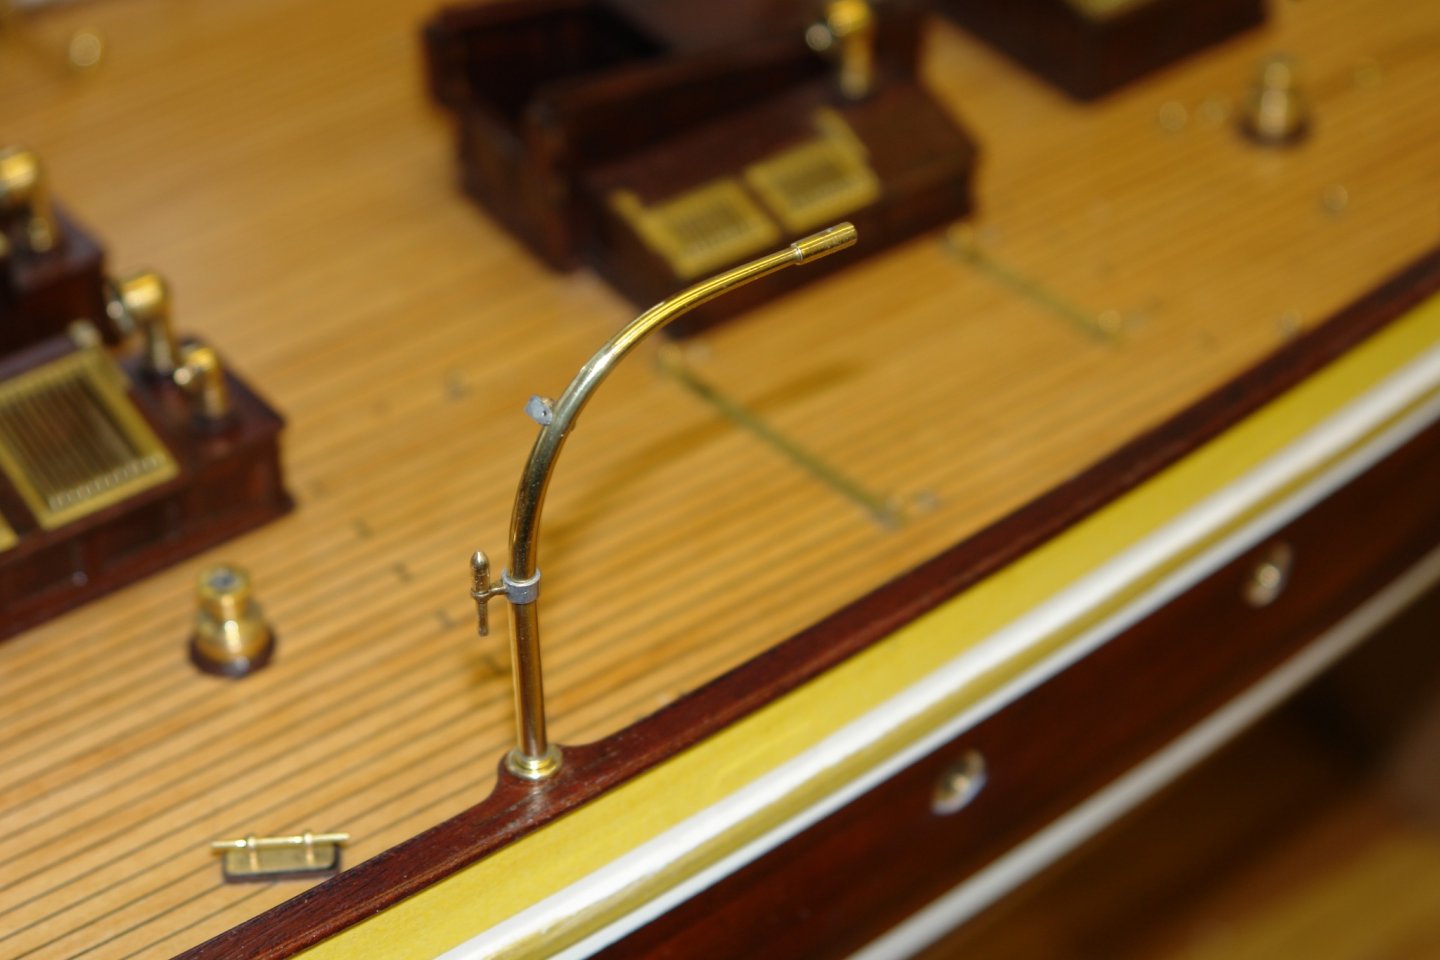
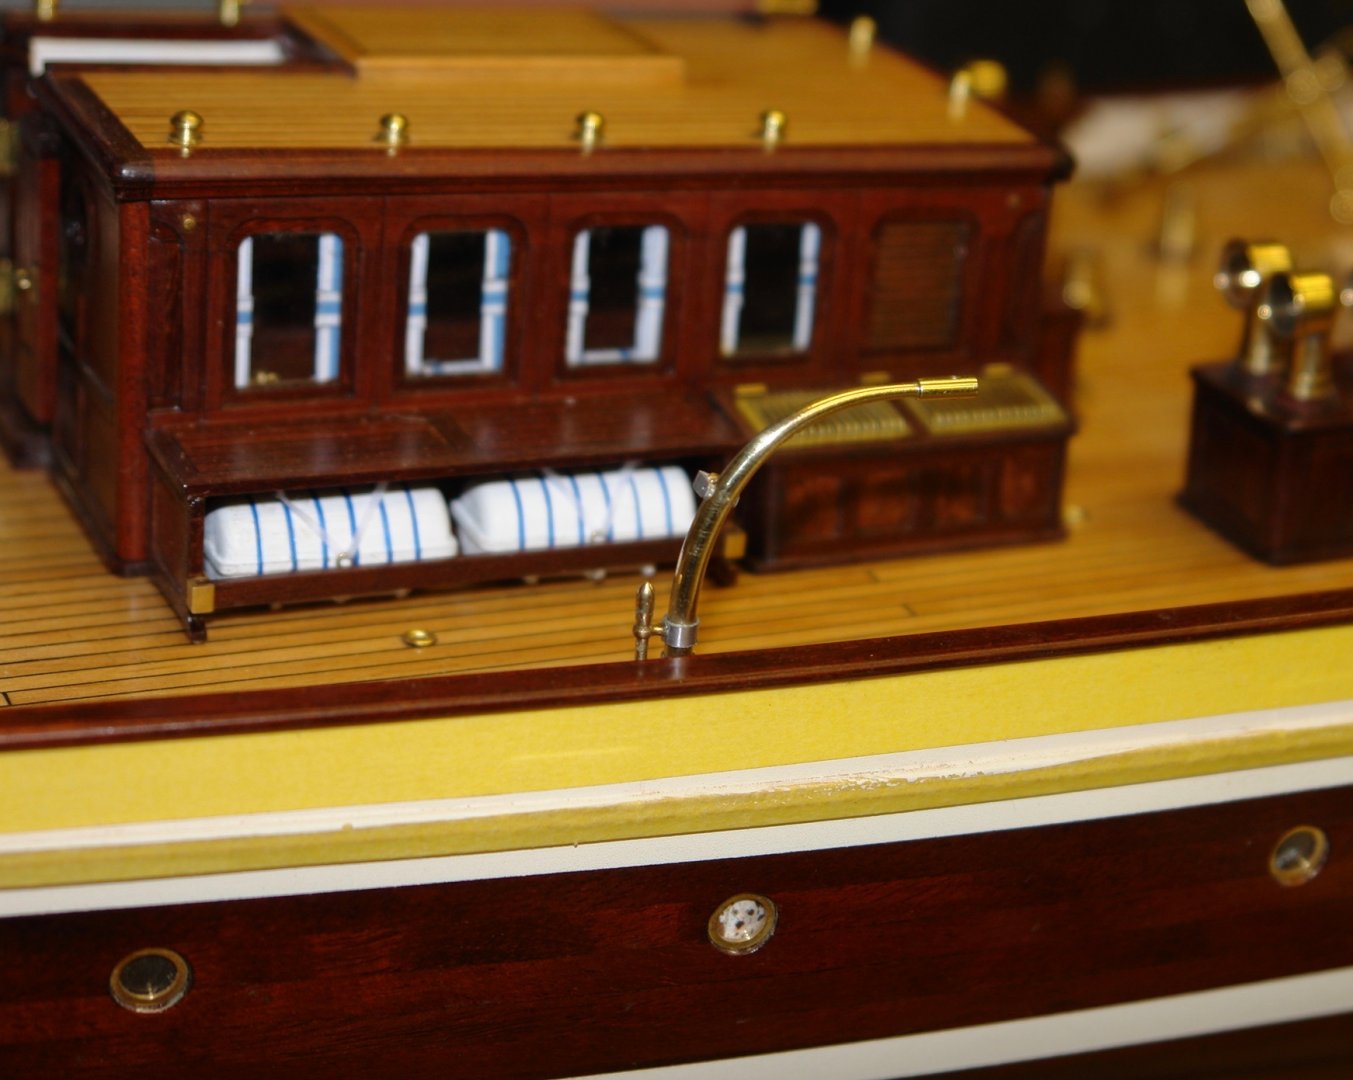
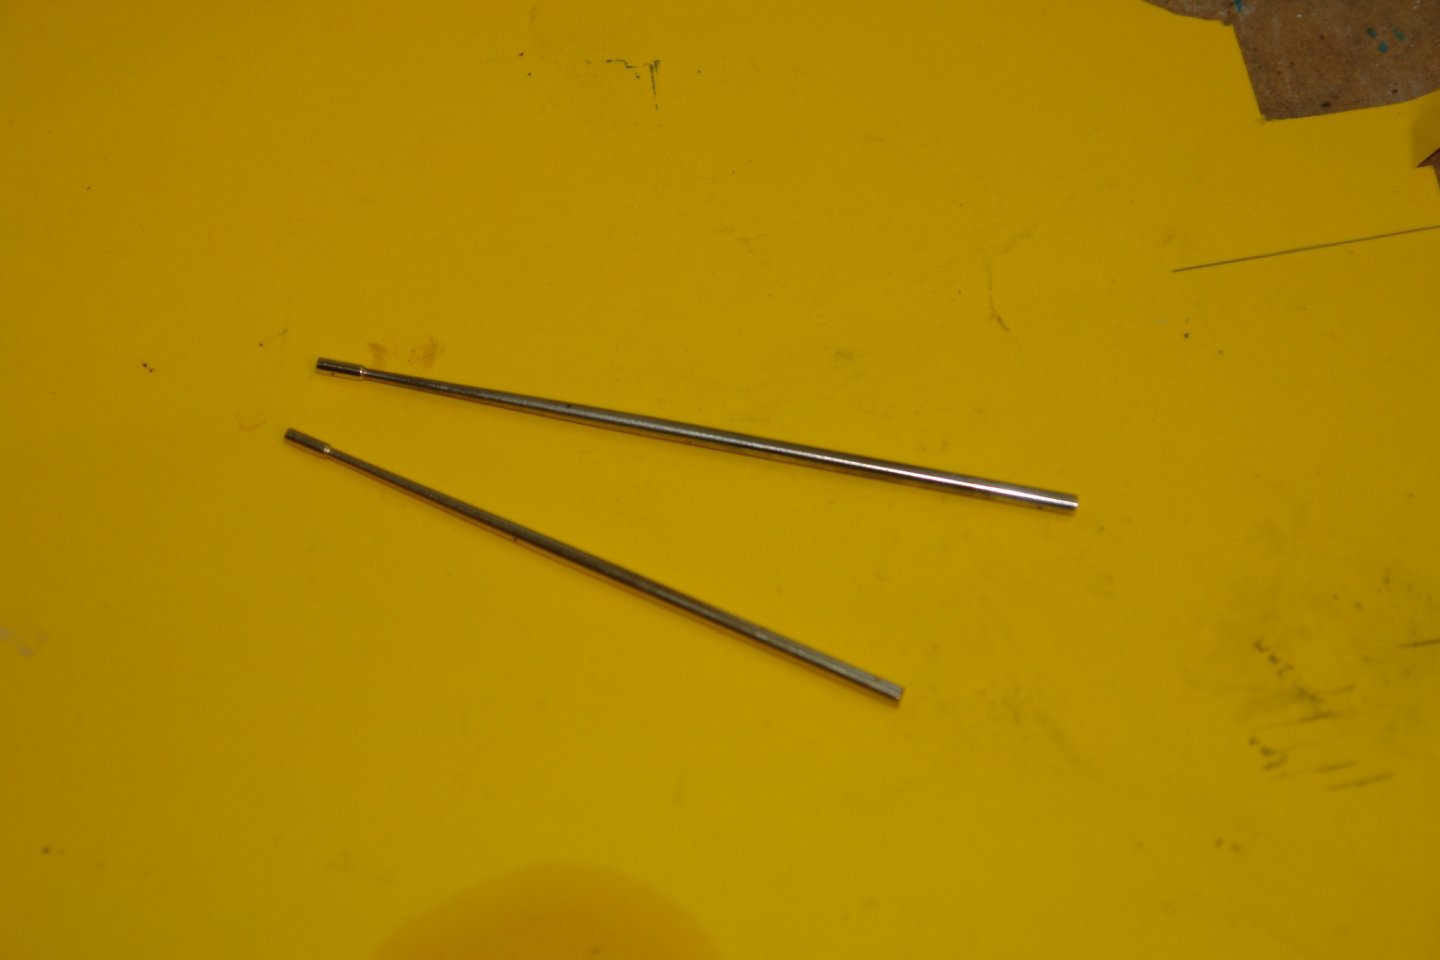
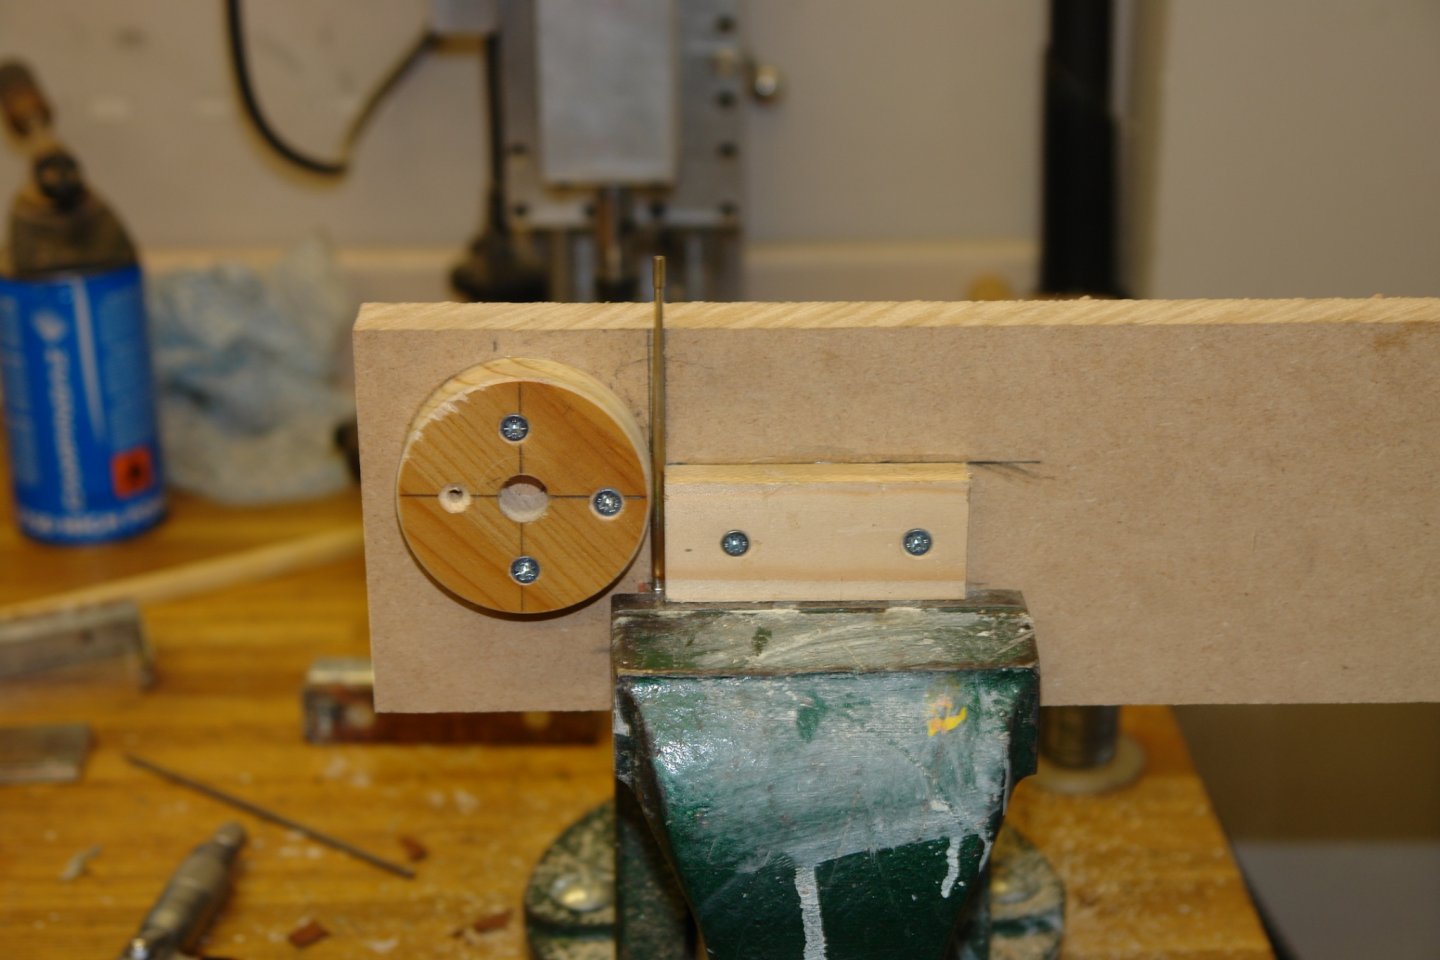
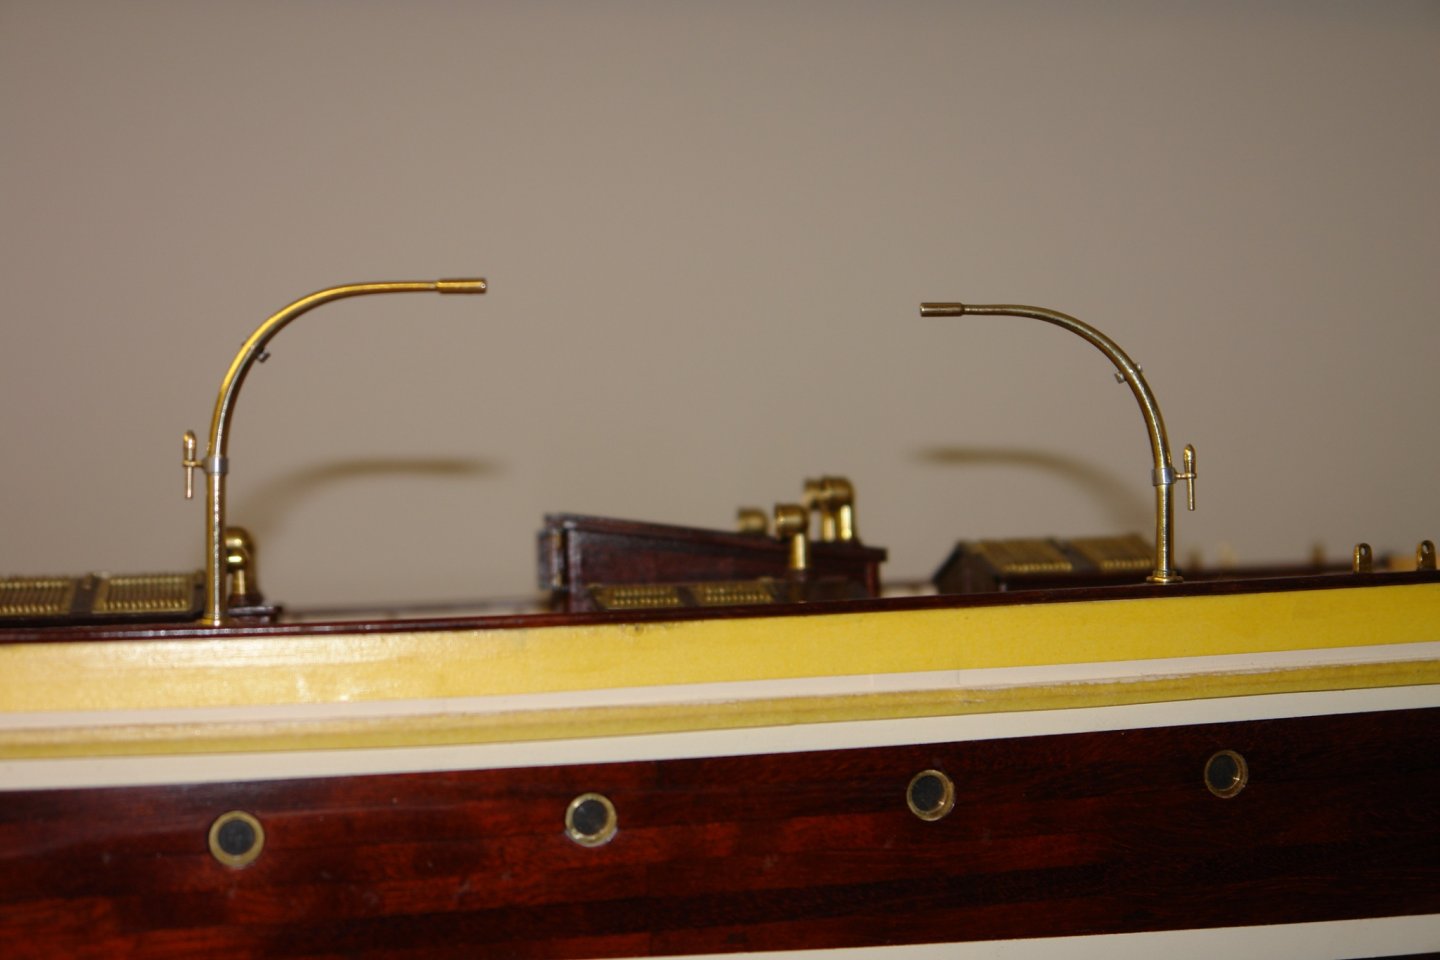
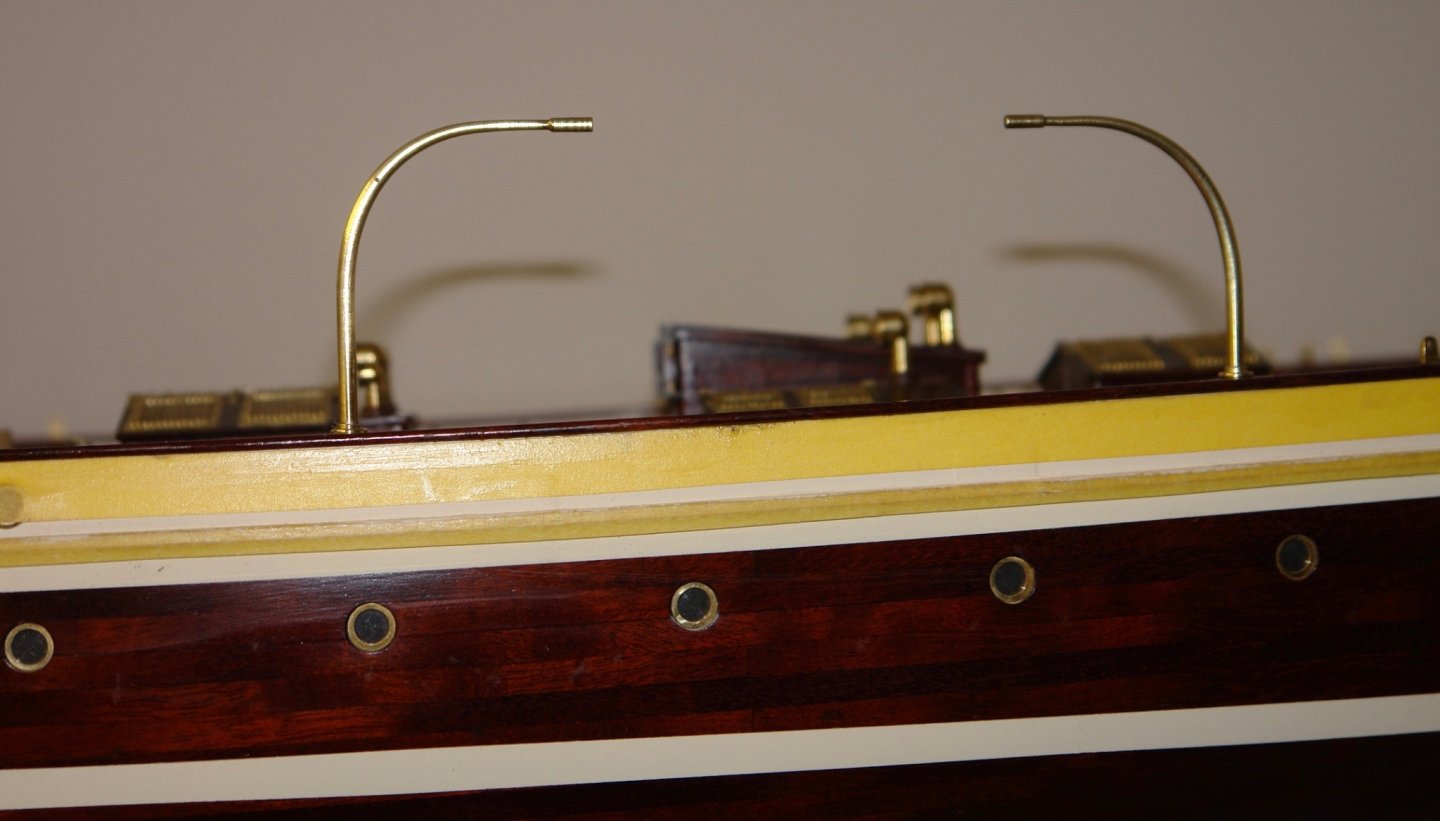
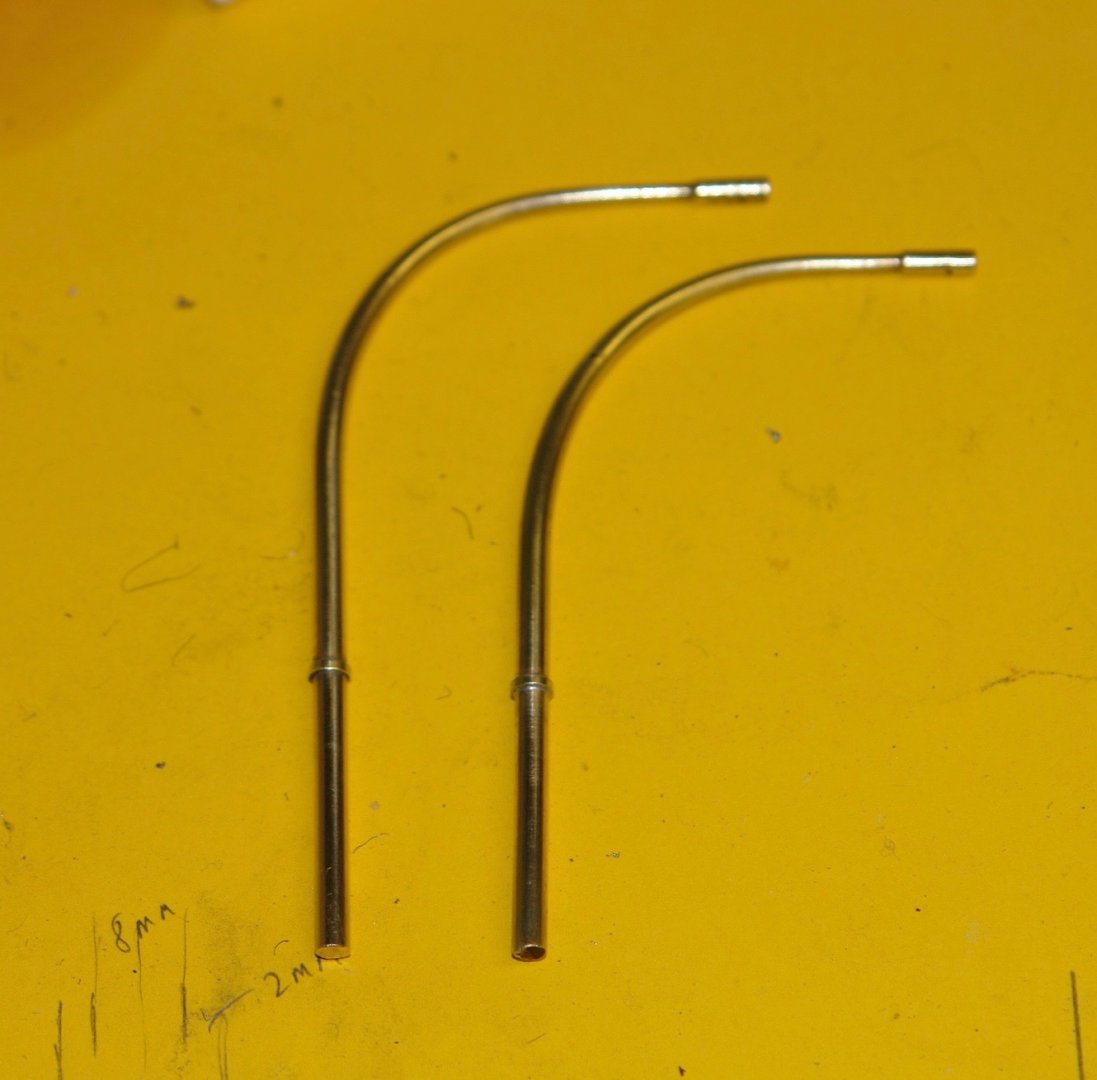
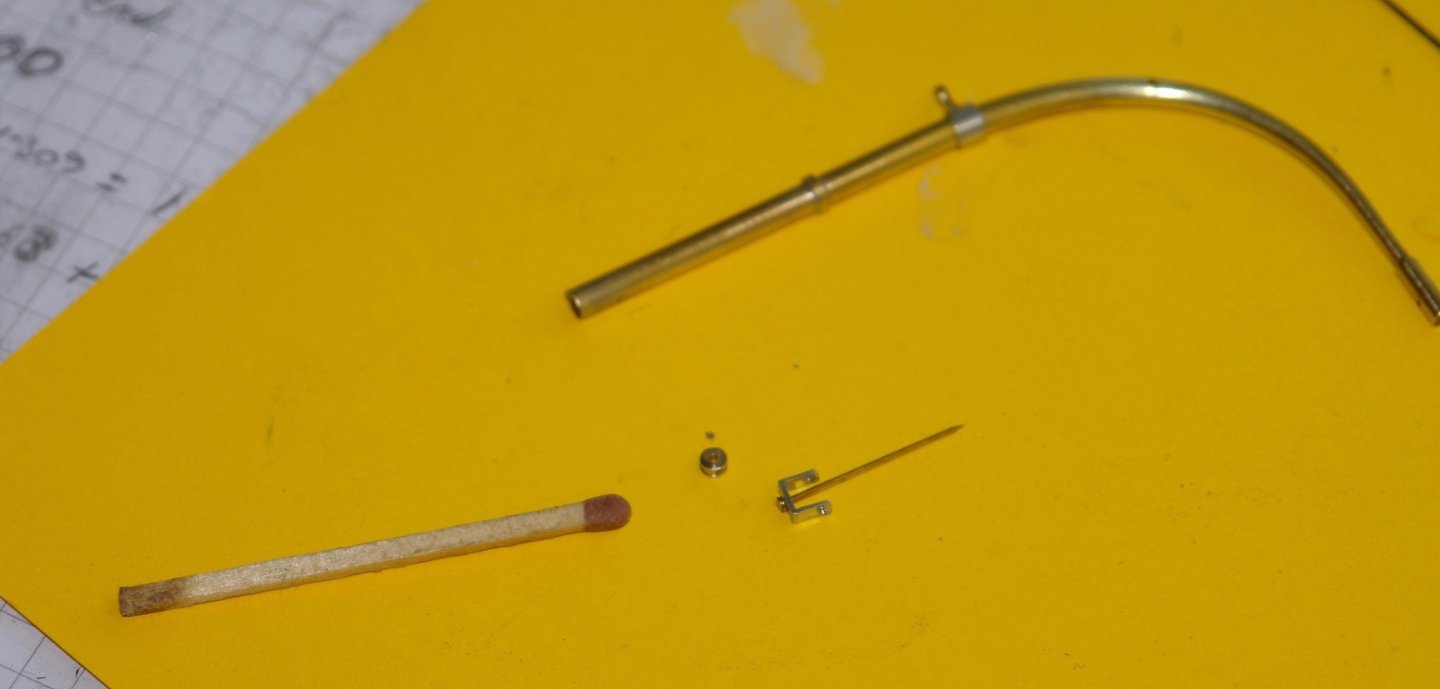
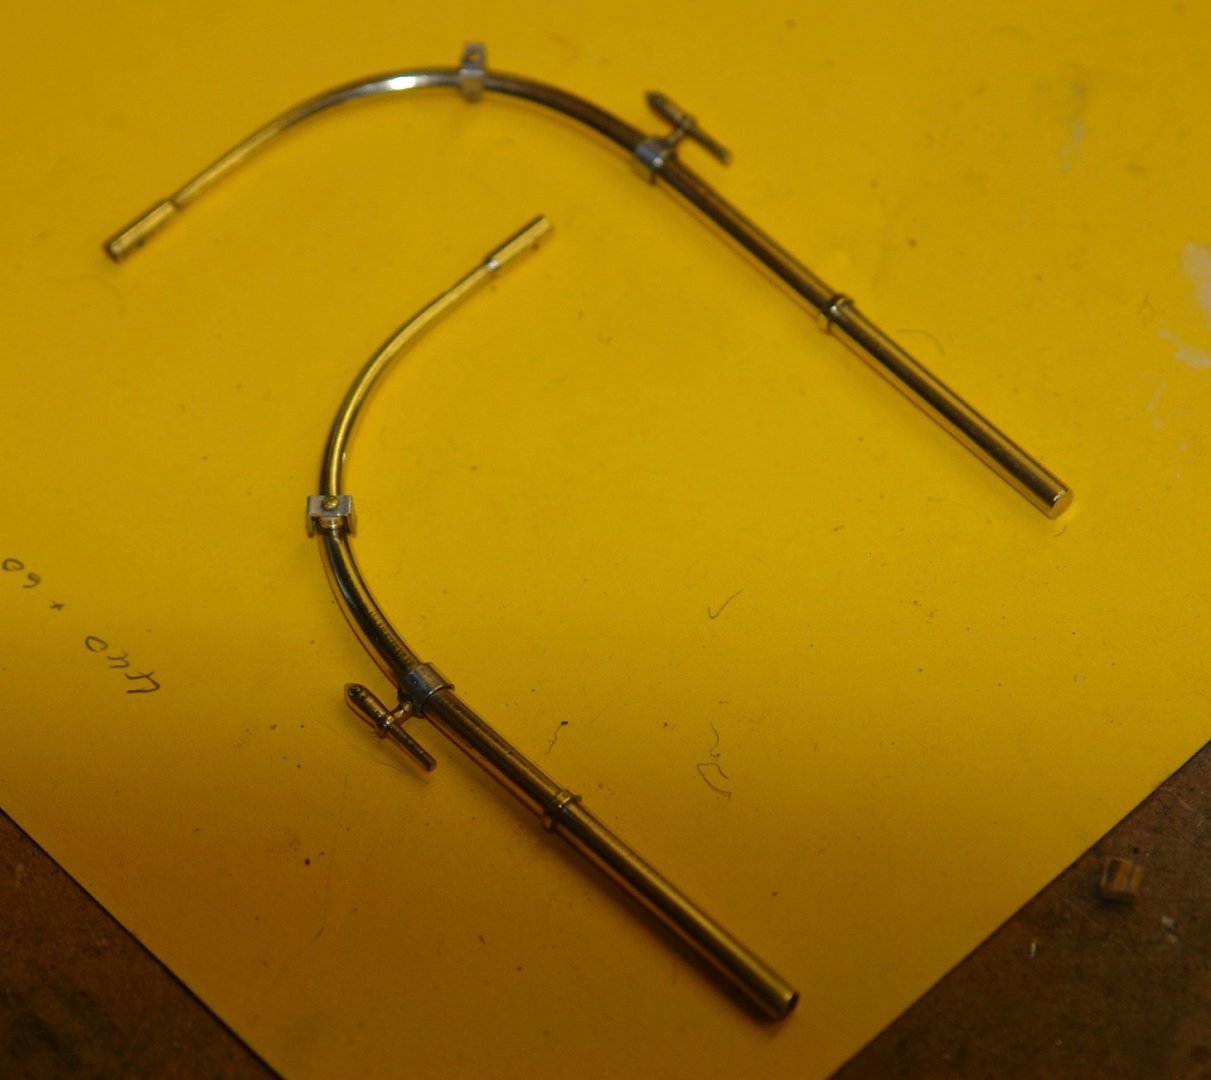
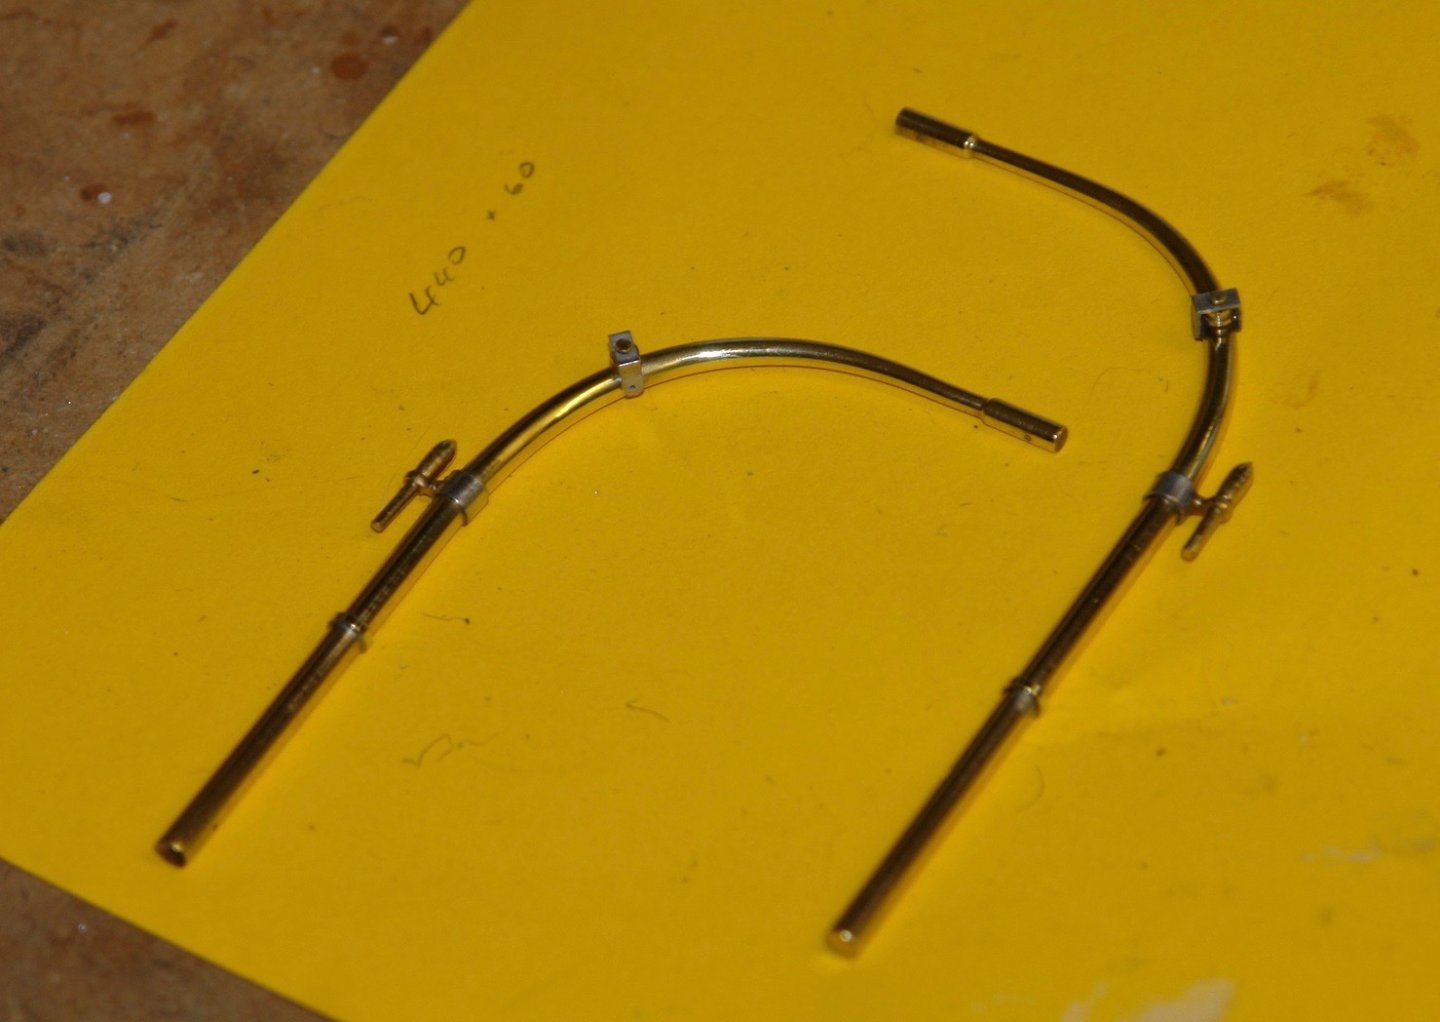
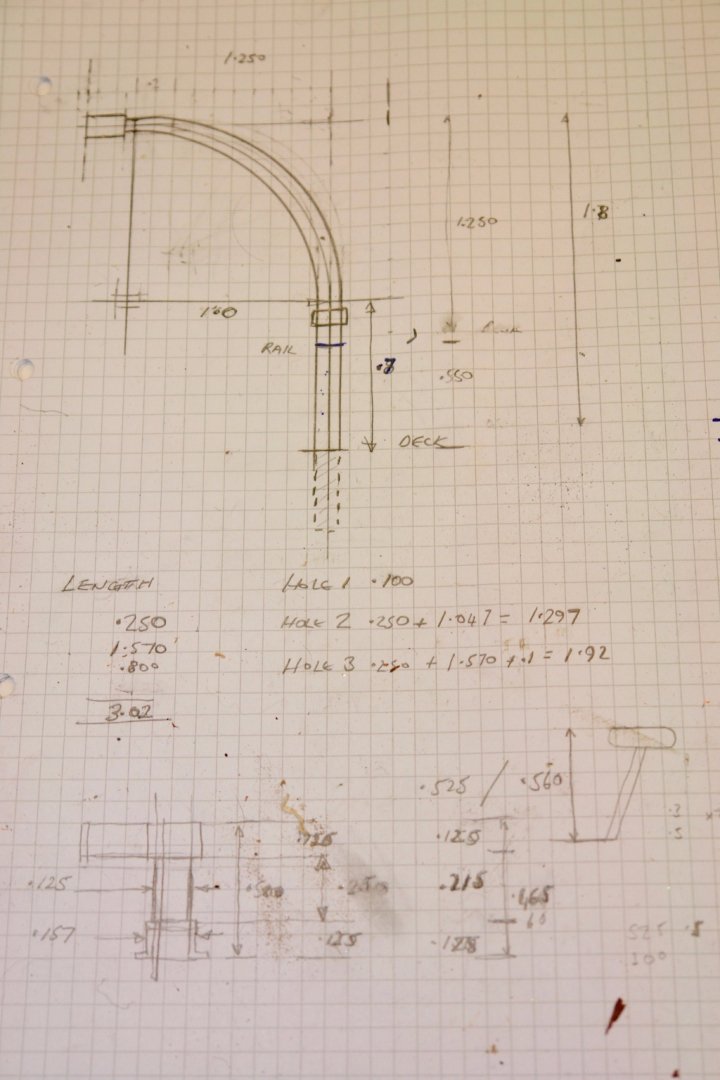
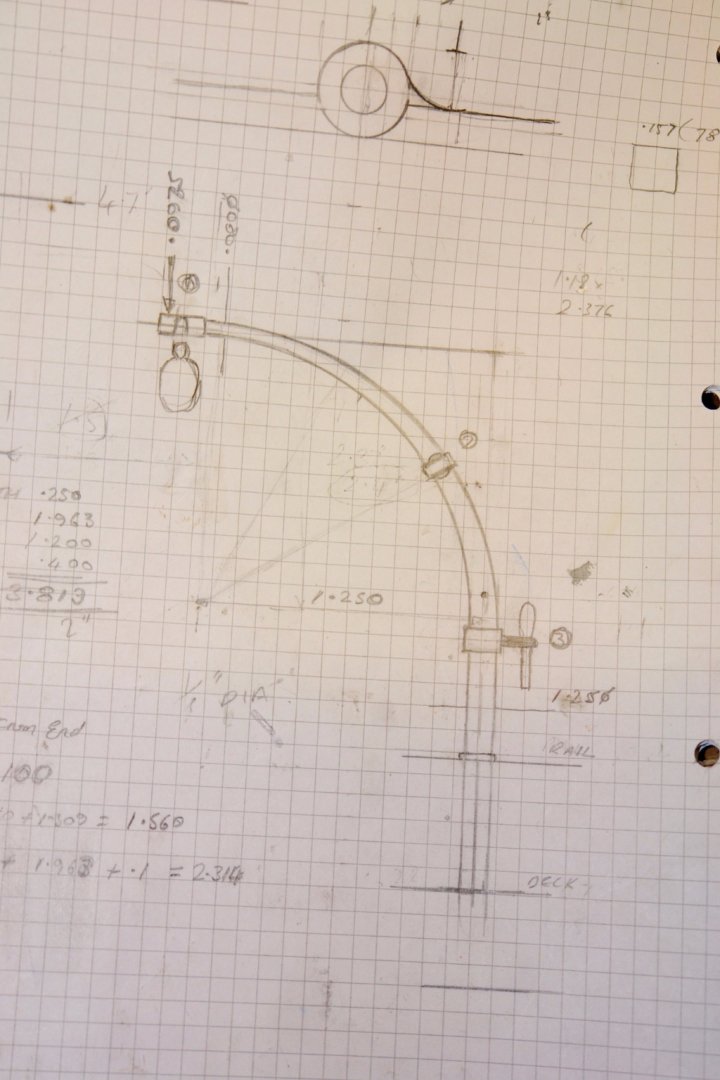
Hello Michael, thanks for stopping by - I don't think I can get LED's small enough to fit under the rail without being able to see them. I did contemplate putting LED's behind the hull portholes but I figured I would never switch them on after the first couple of months. I worked on the boat davits this week. Germania has davits on the starboard side for handling the tender. The inflatables on the port side don't have any handling aids. The davits started as .125" brass rod. I cut the rods over length before drilling 3 transverse holes (.025" diameter) to take the block, the sheave and the belaying pin. The next step was to turn down the block end to finished size, before turning a very shallow taper over the length of the ultimate curved section. I initially set the taper at too large an angle and then, working from the narrow end, I gradually reduced the angle until the taper covered the desired length. Both ends of the rod were supported for this operation for obvious reasons. You can just about see the traverse holes in the next photos. I needed a bending jig to get bend curvature accurate. I did a very sophisticated job on the jig. I needed to get the transverse holes in the correct orientation and I also wanted the length around the curve accurate so I soldered on a piece of scrap copper to control both the orientation and length. The broach at the right hand end is maintaining the orientation. The jig was then set up for bending and clamped in the vice to secure the davit in position. The davits had previously been heated to soften them so pressing them round the former with the end of a piece of wood was straightforward. The copper was then desoldered before a pair of rings were soldered on to create the stops that control how far the davits sit above the rail. The sheaves and their brackets were made (and lost), and made again. The rings for the belaying pin were also turned and milled to shape. The bracket was formed from a piece of aluminium tube. A pair of belaying pins were made and the davits were assembled. I now have 2 more davits to make - one that is shared by the anchors and one that handles the steps.


-
Nice to be able to pick up this build again Jon. I look forward to seeing how she goes.
-
Your approach to planking is very meticulous. Much better than my winging it approach. I look forward to seeing how it turns out.
-
Tom, it is hand operated for this purpose but I can attach the mini electric drill if I need power. Thank you for your encouraging comments.
-
Yes Eberhard - that's why I was putting it off. Good luck with the 1mm wire I look forward to seeing the results. Pat - just a standard brad point wood drill, hand cranked with very little pressure. The drill was new and quite sharp. I have a lot of drilling of the rail to do - to mount the stanchions. Druexy - It railed against the operation but finally succumbed.
-
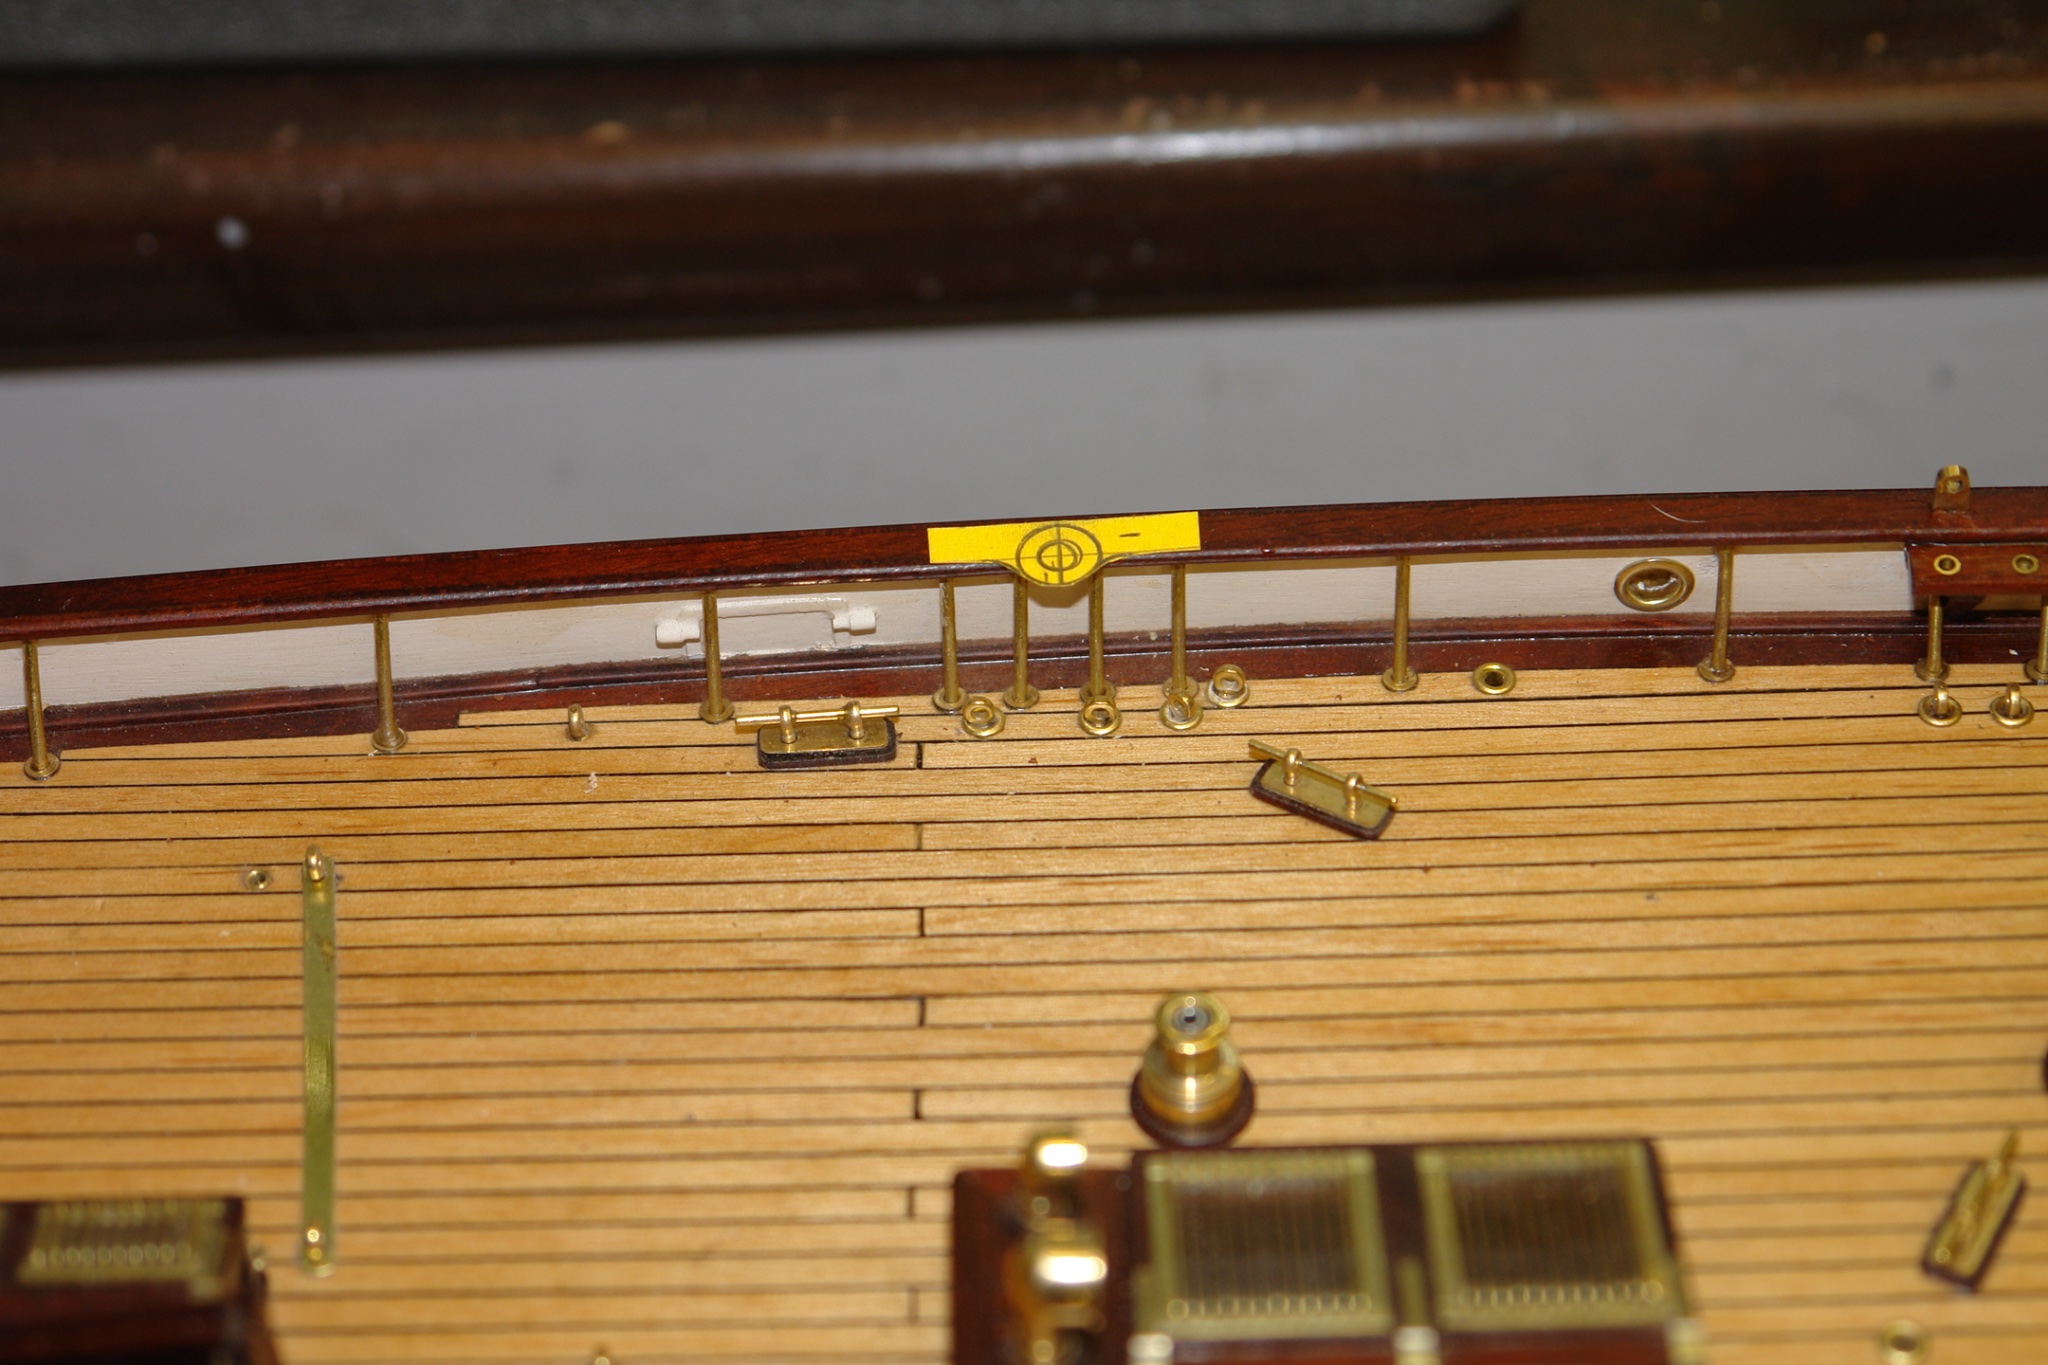
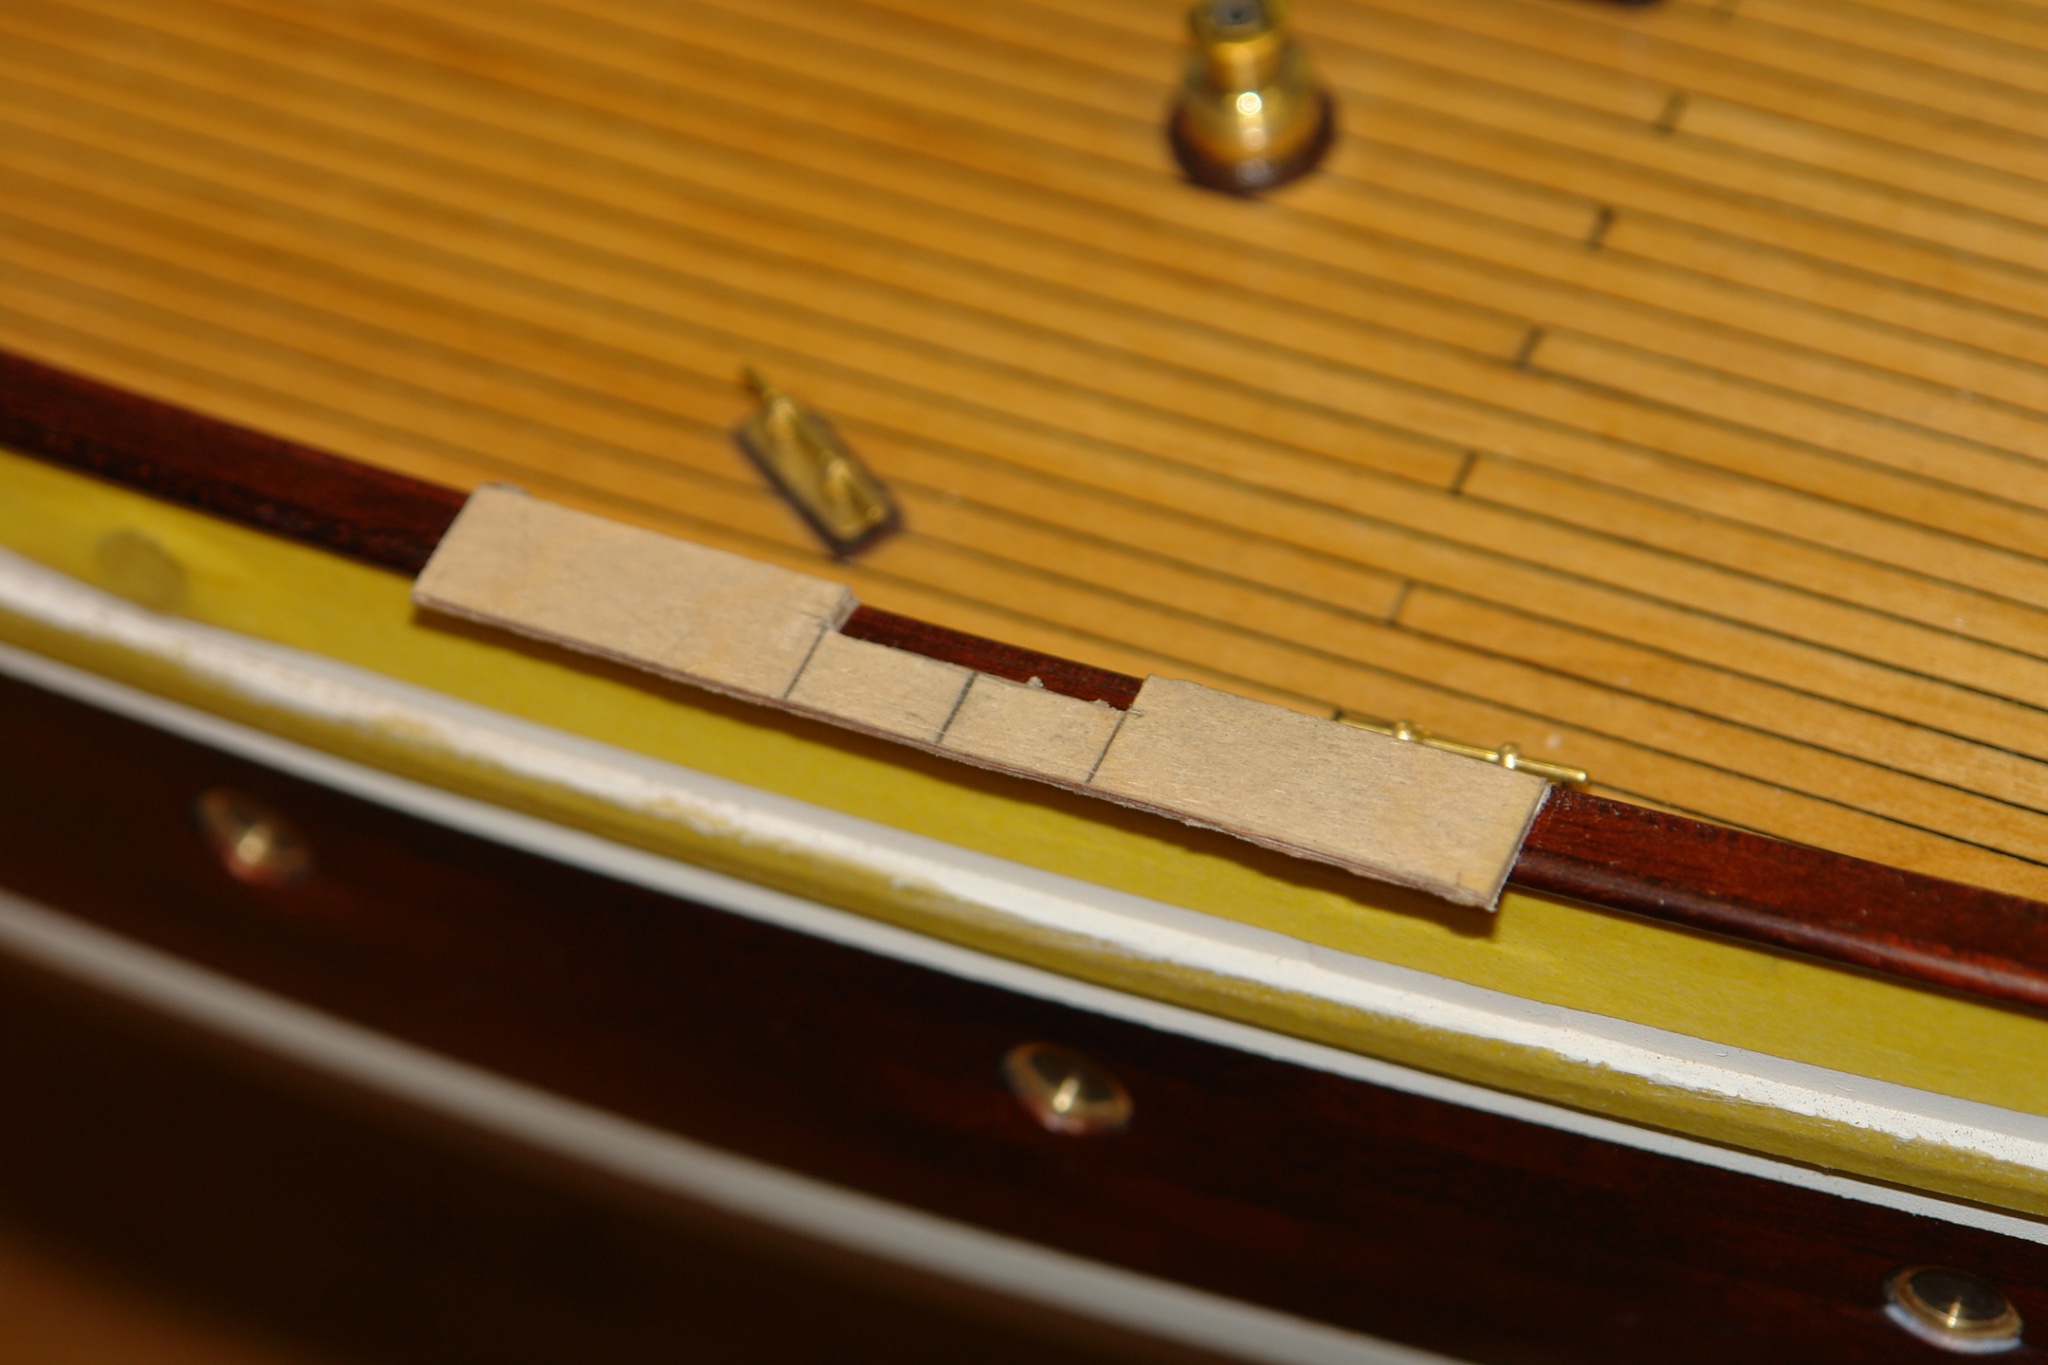
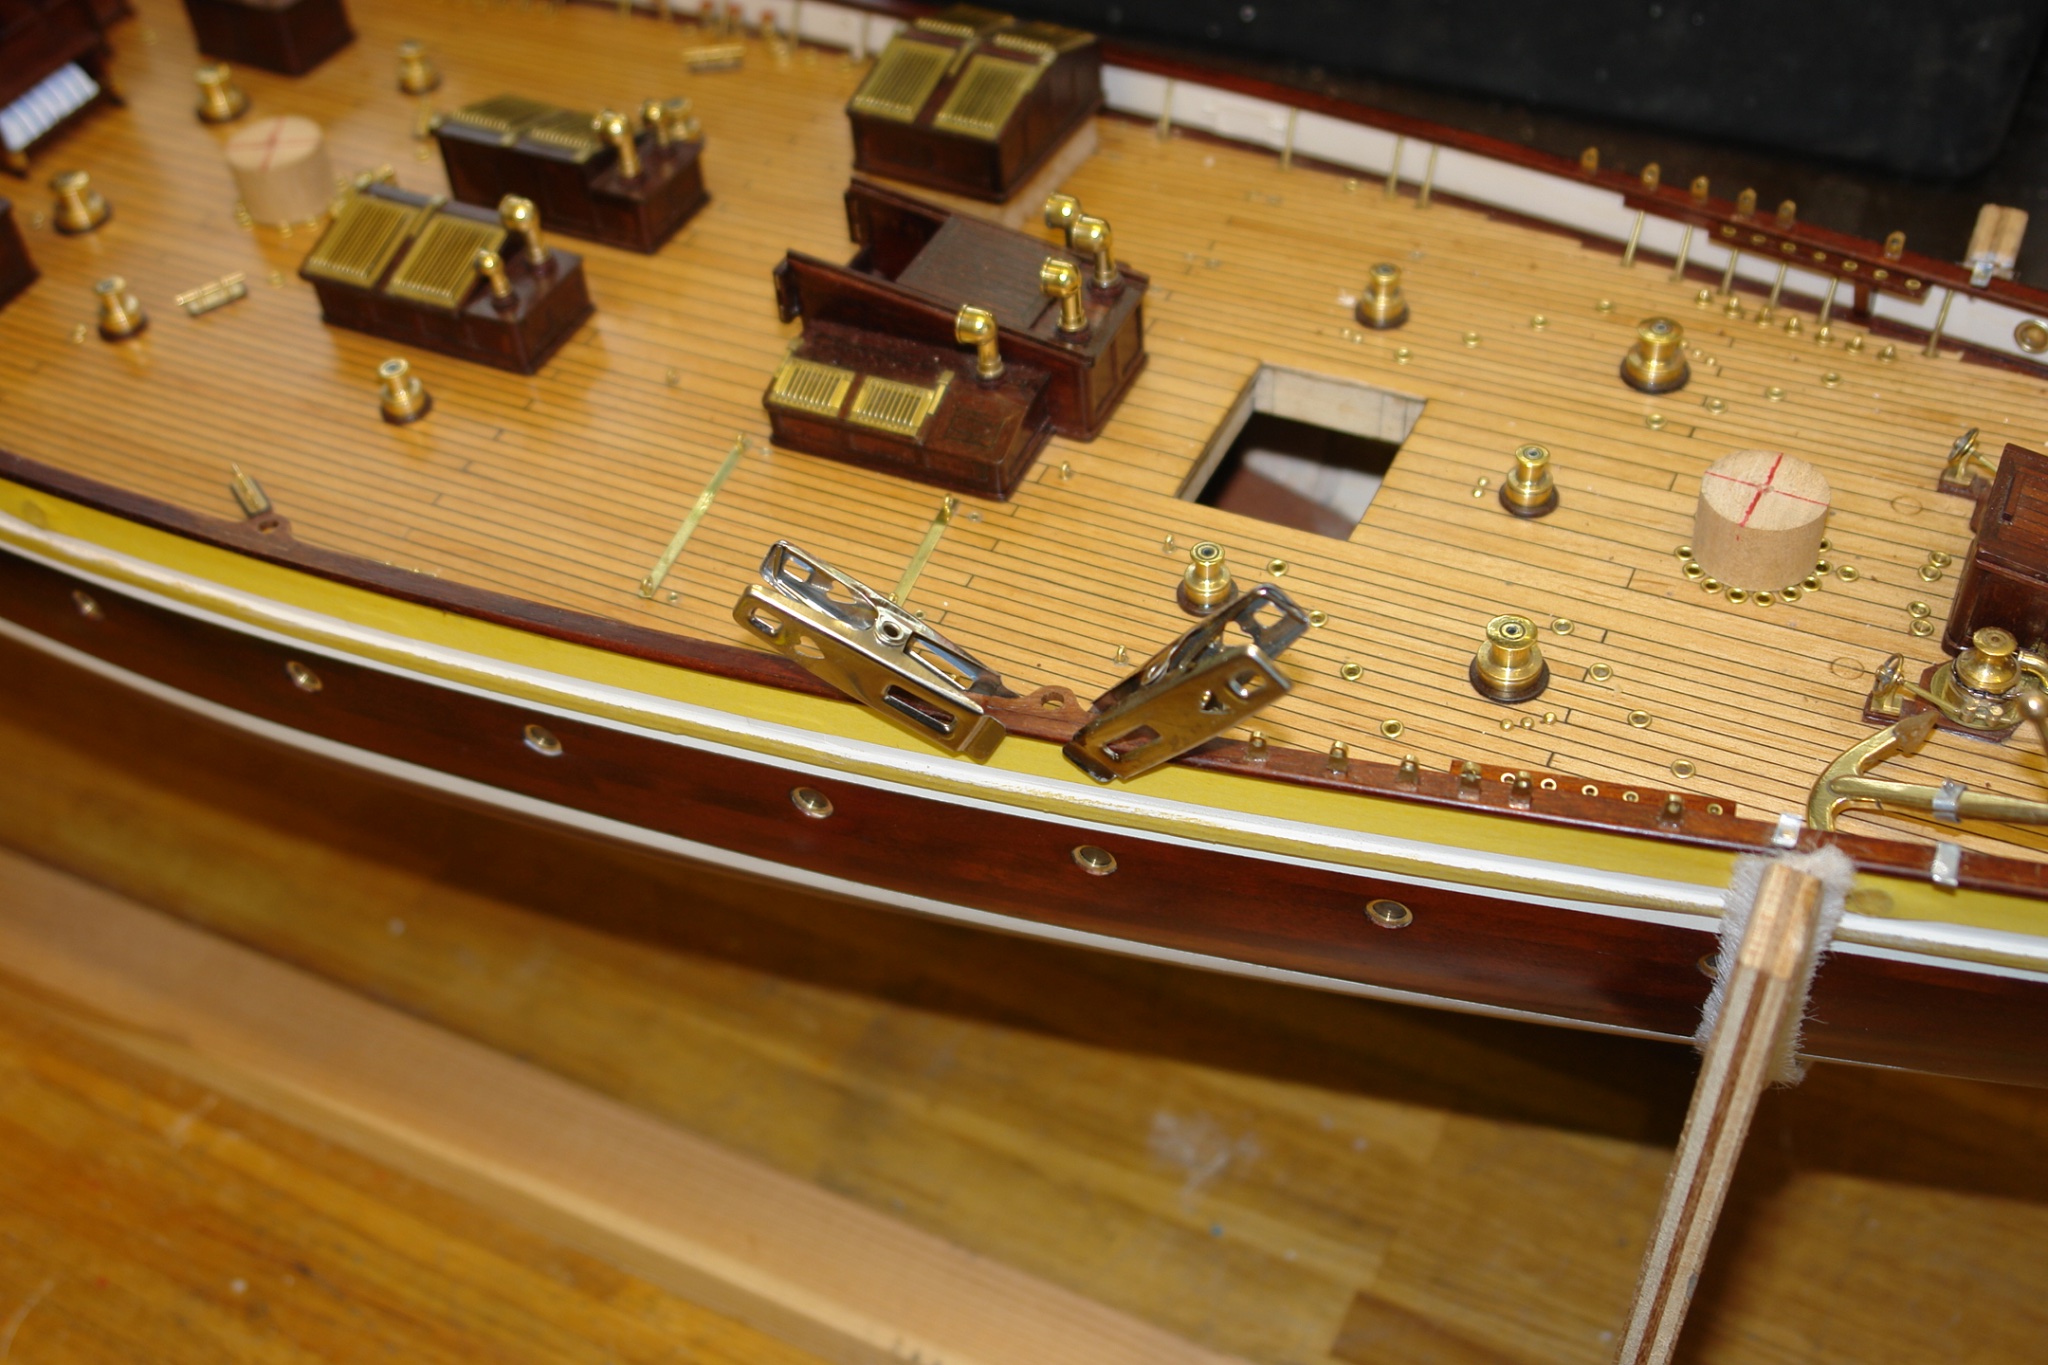
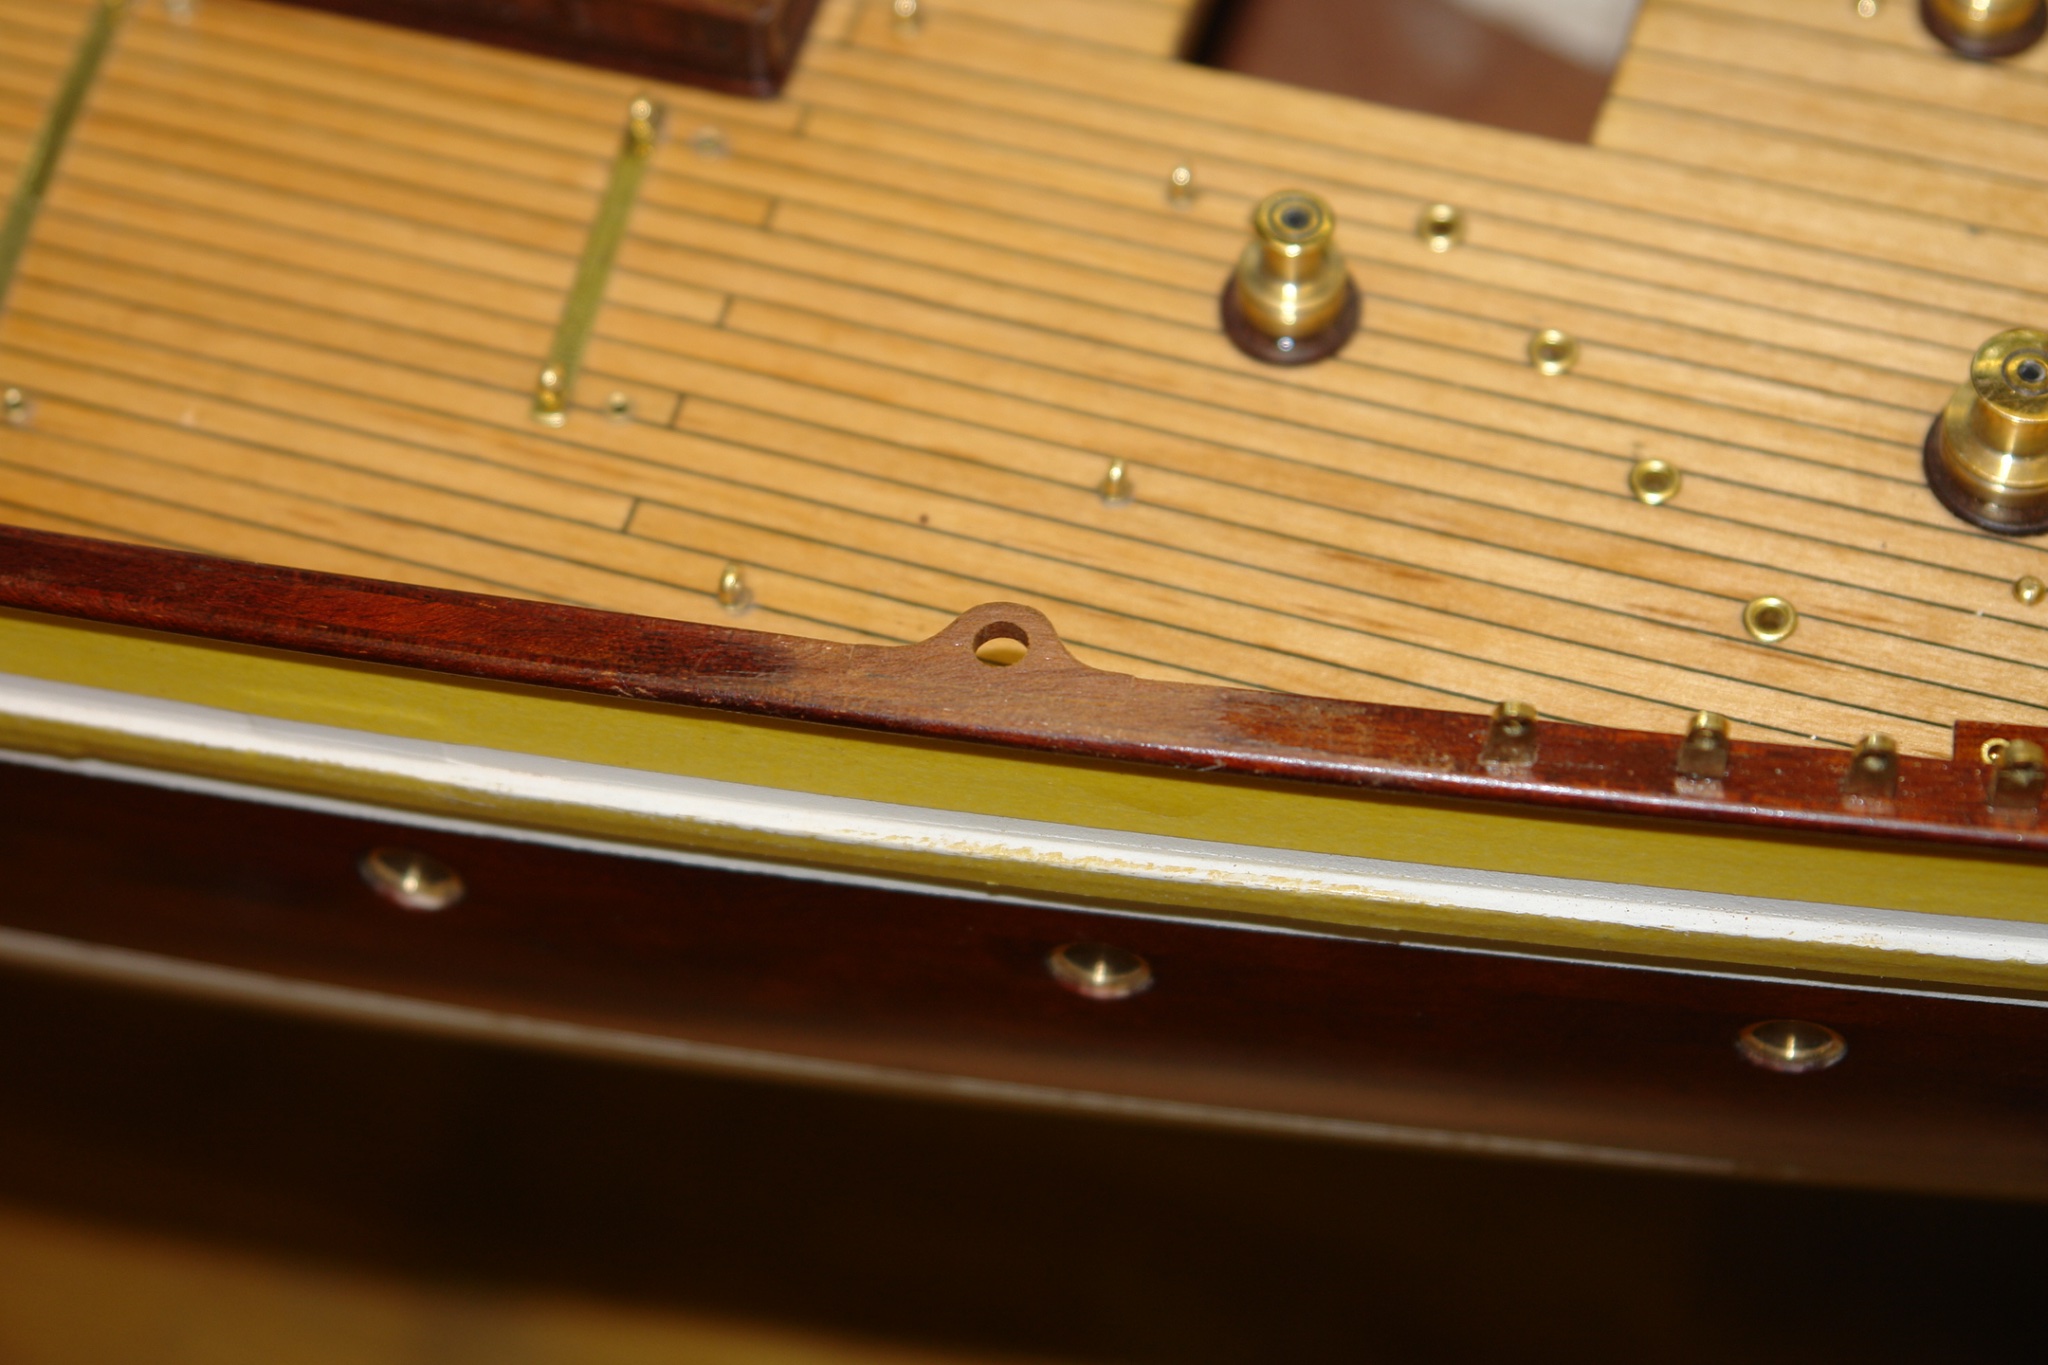
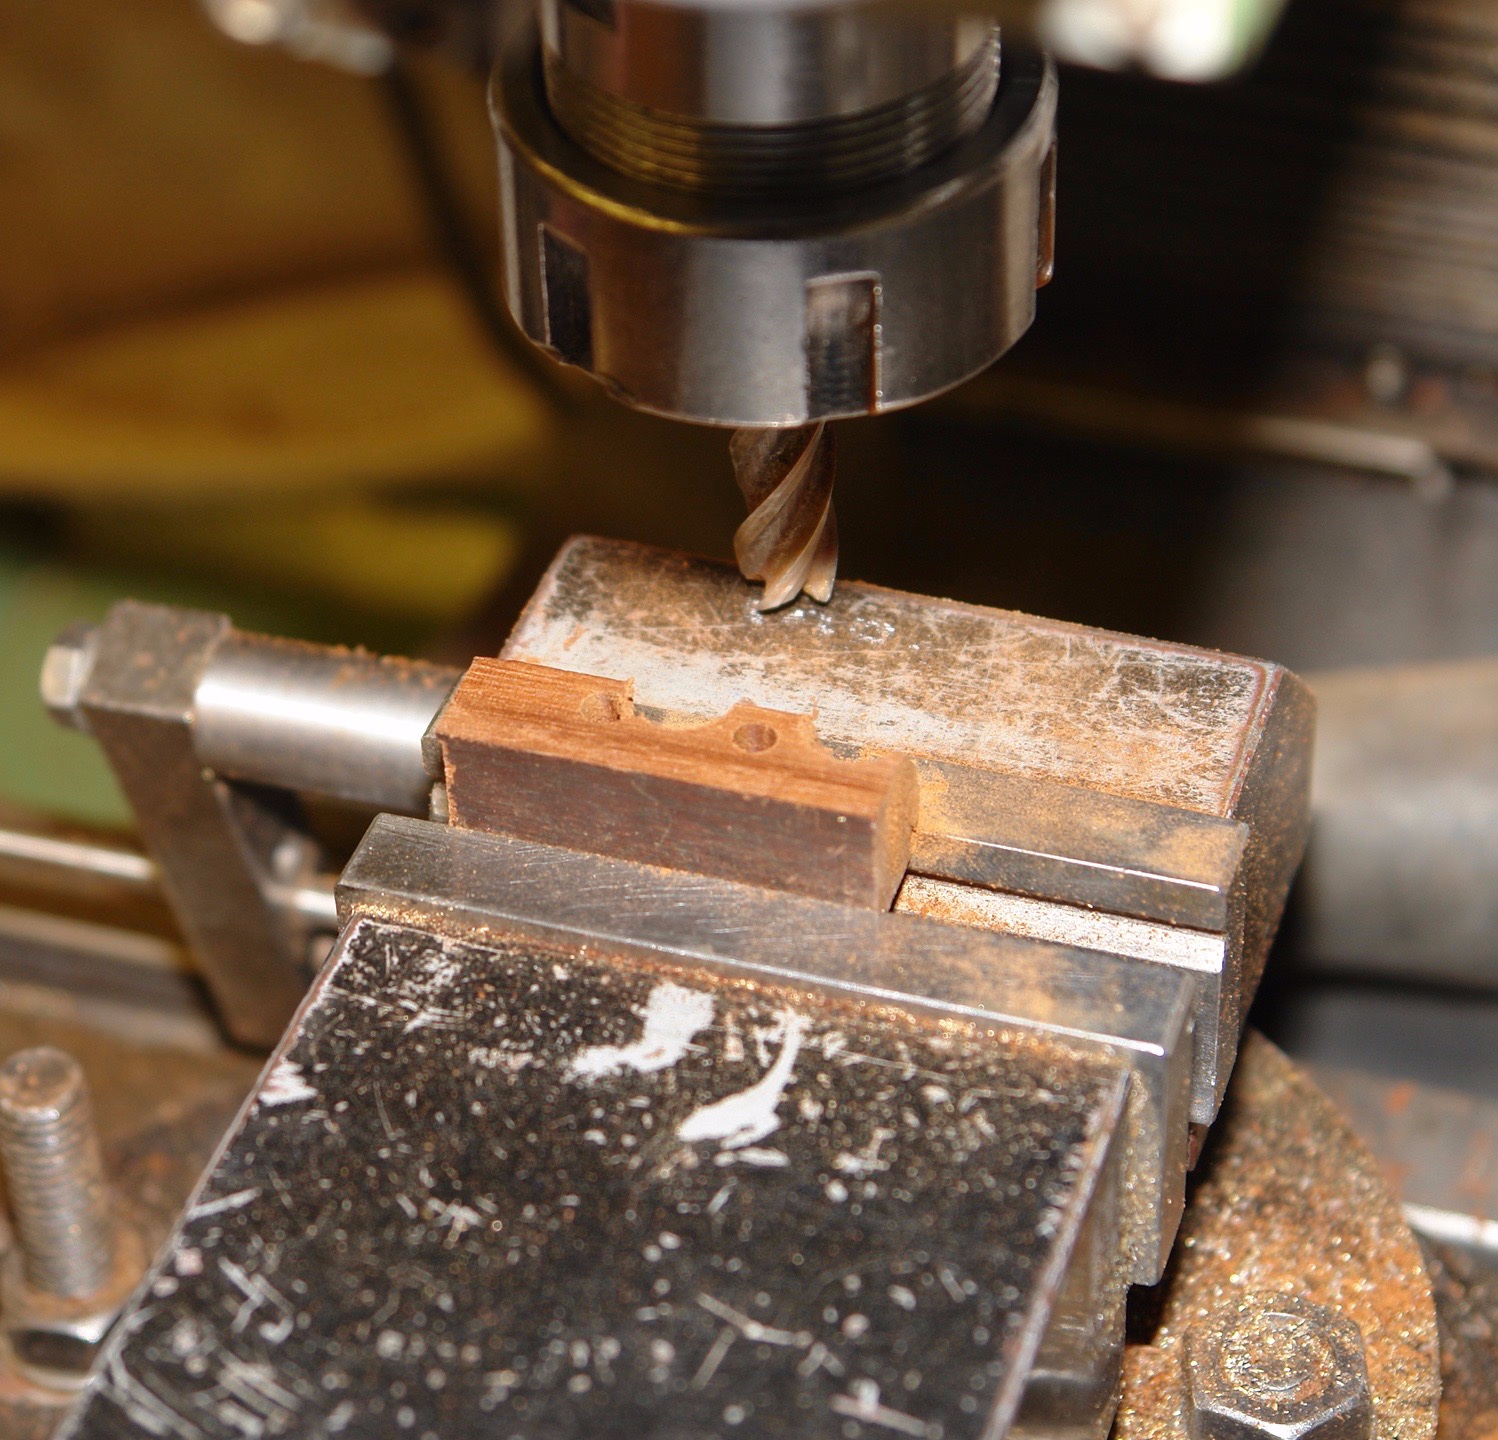
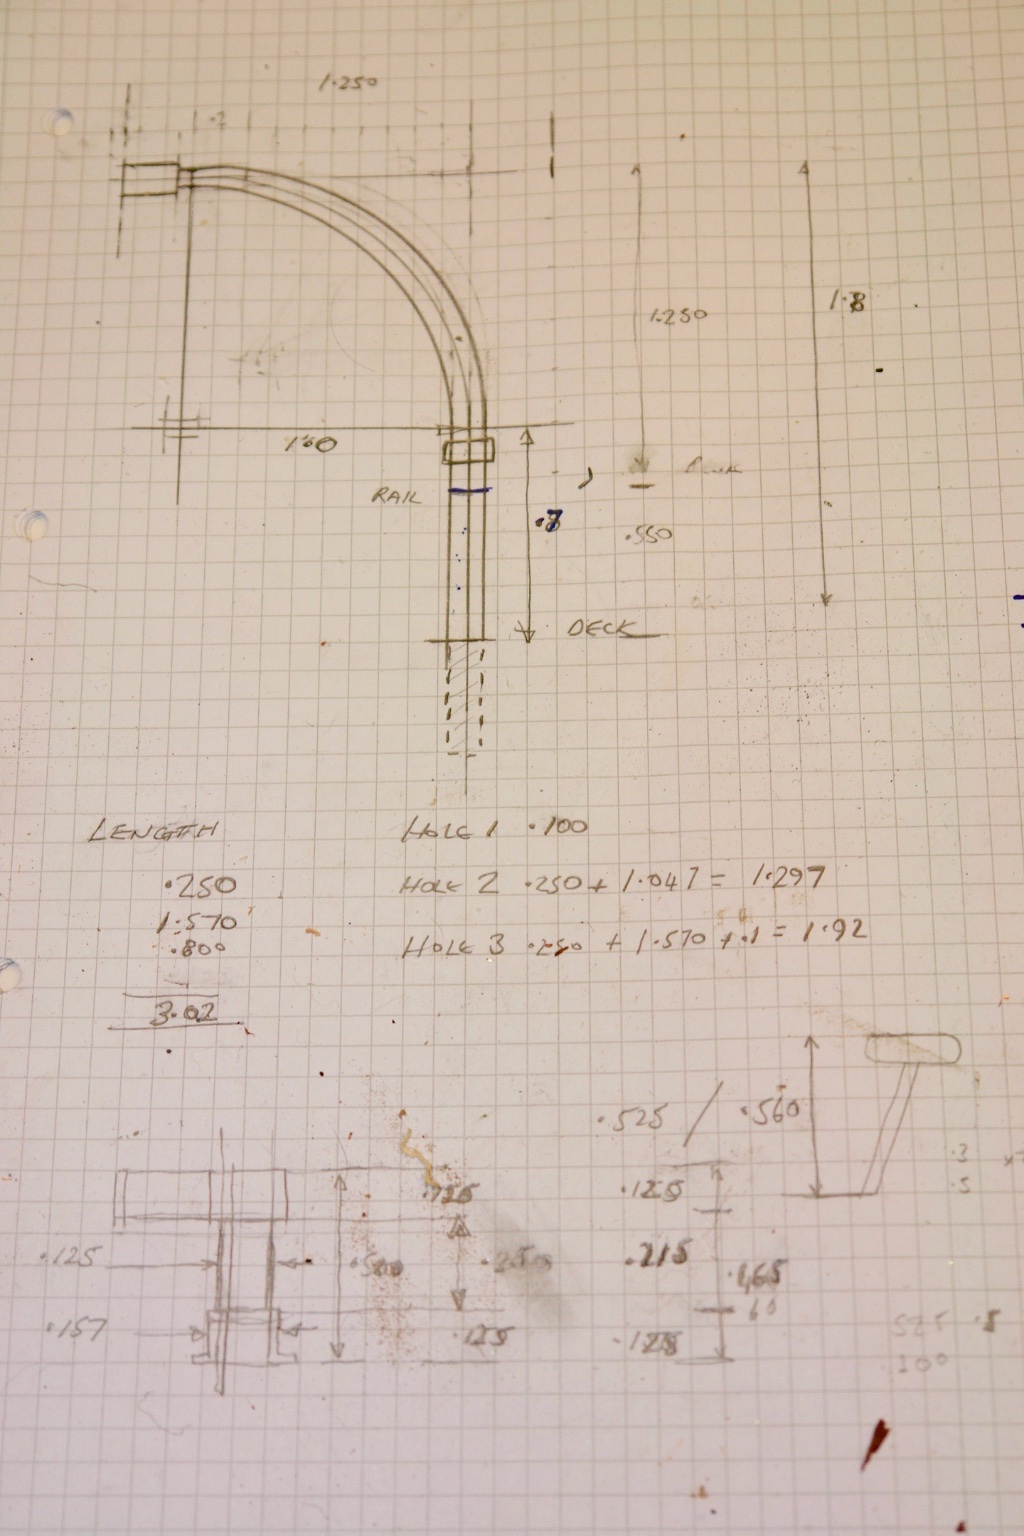
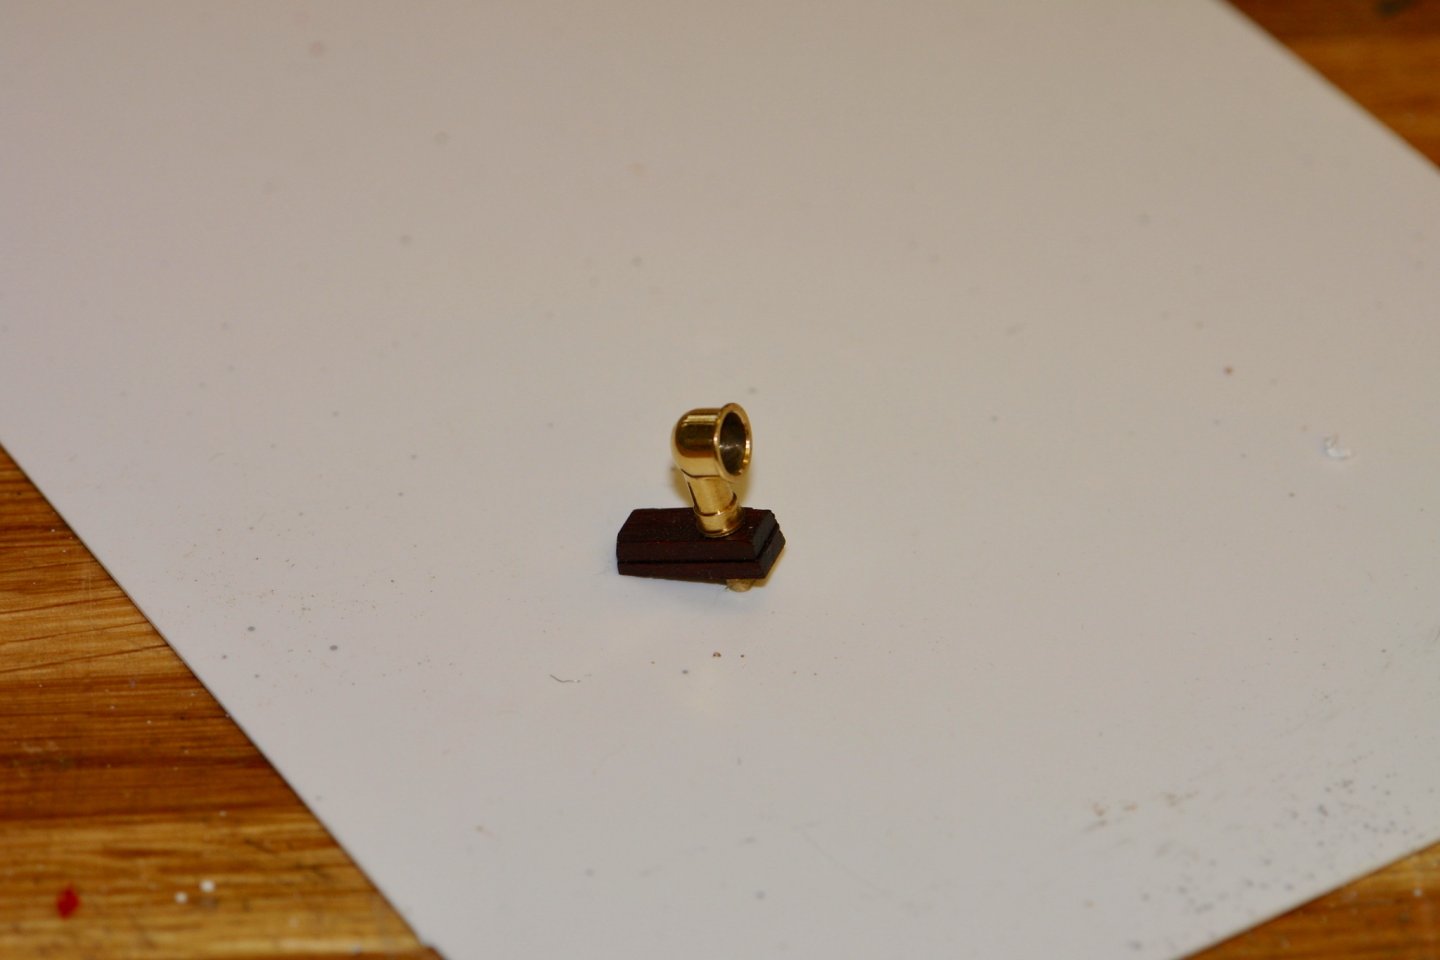
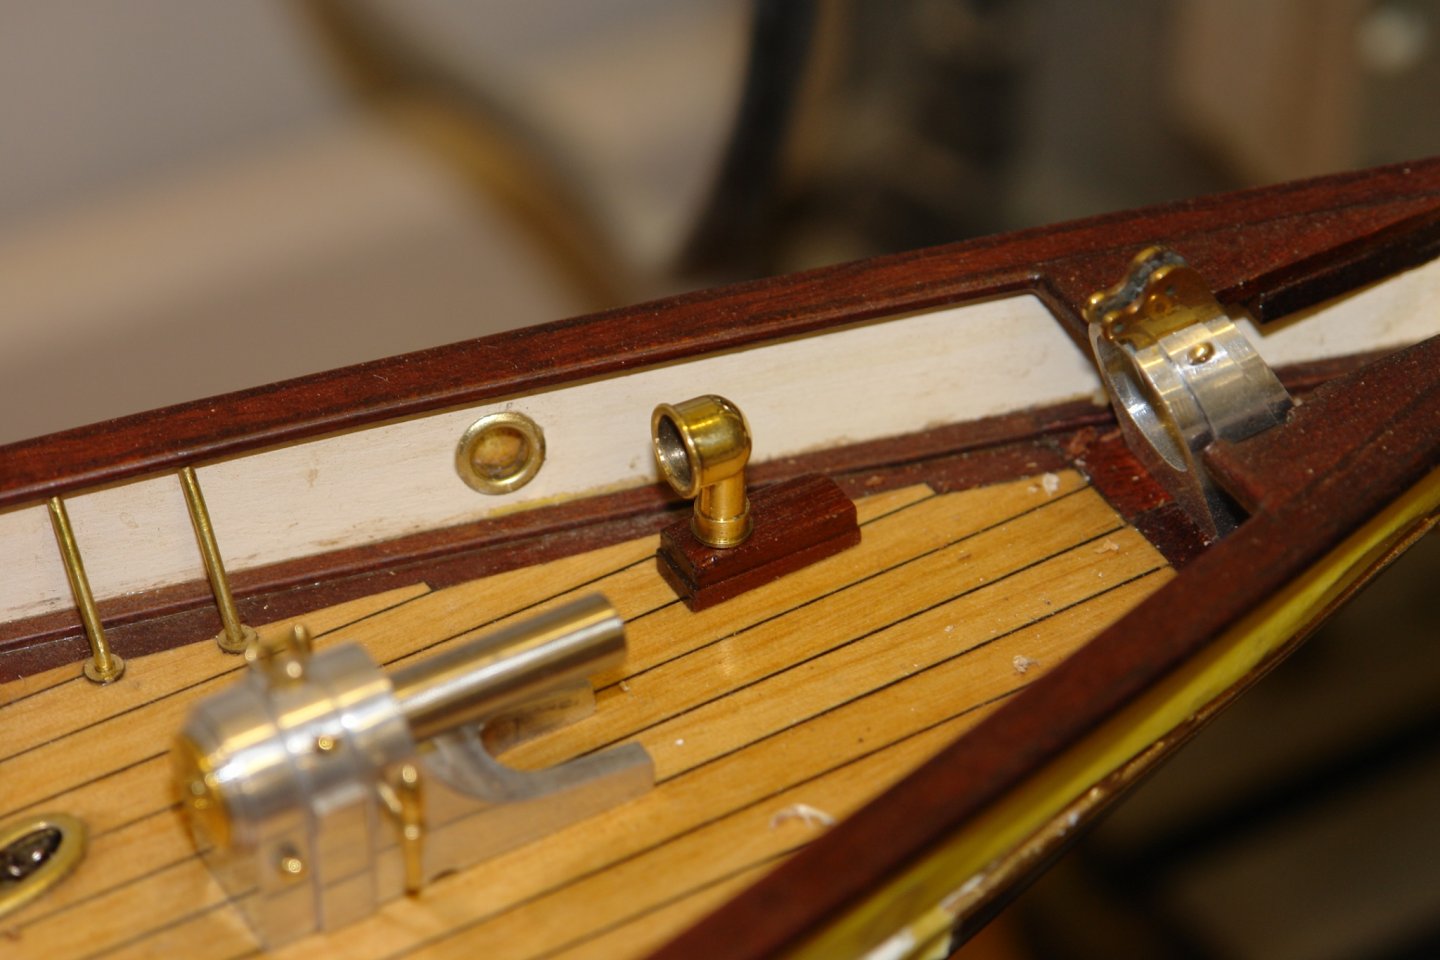
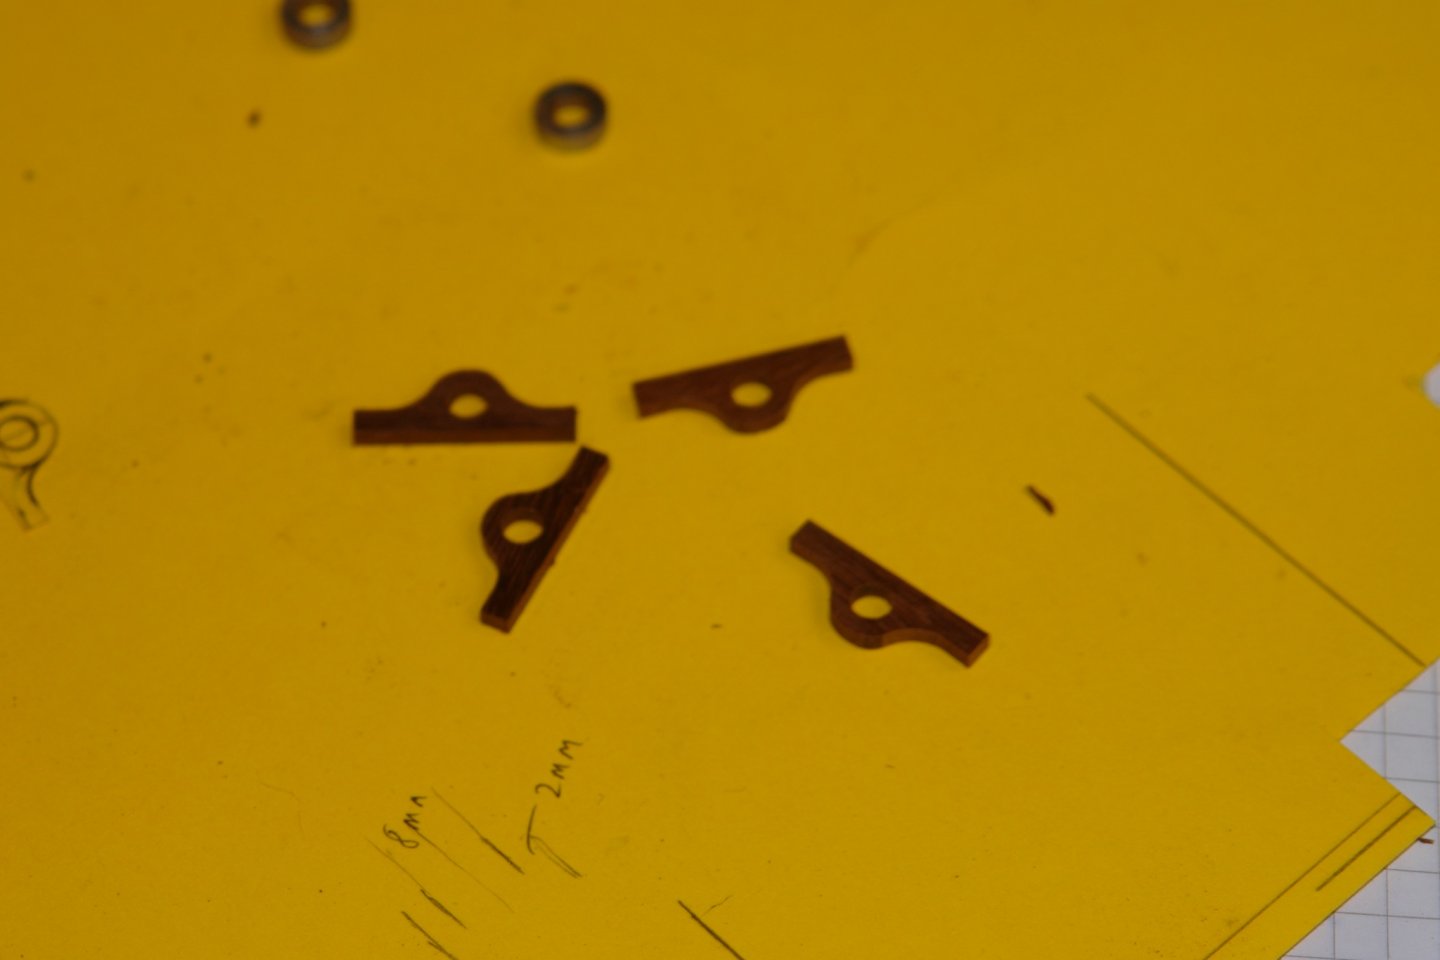
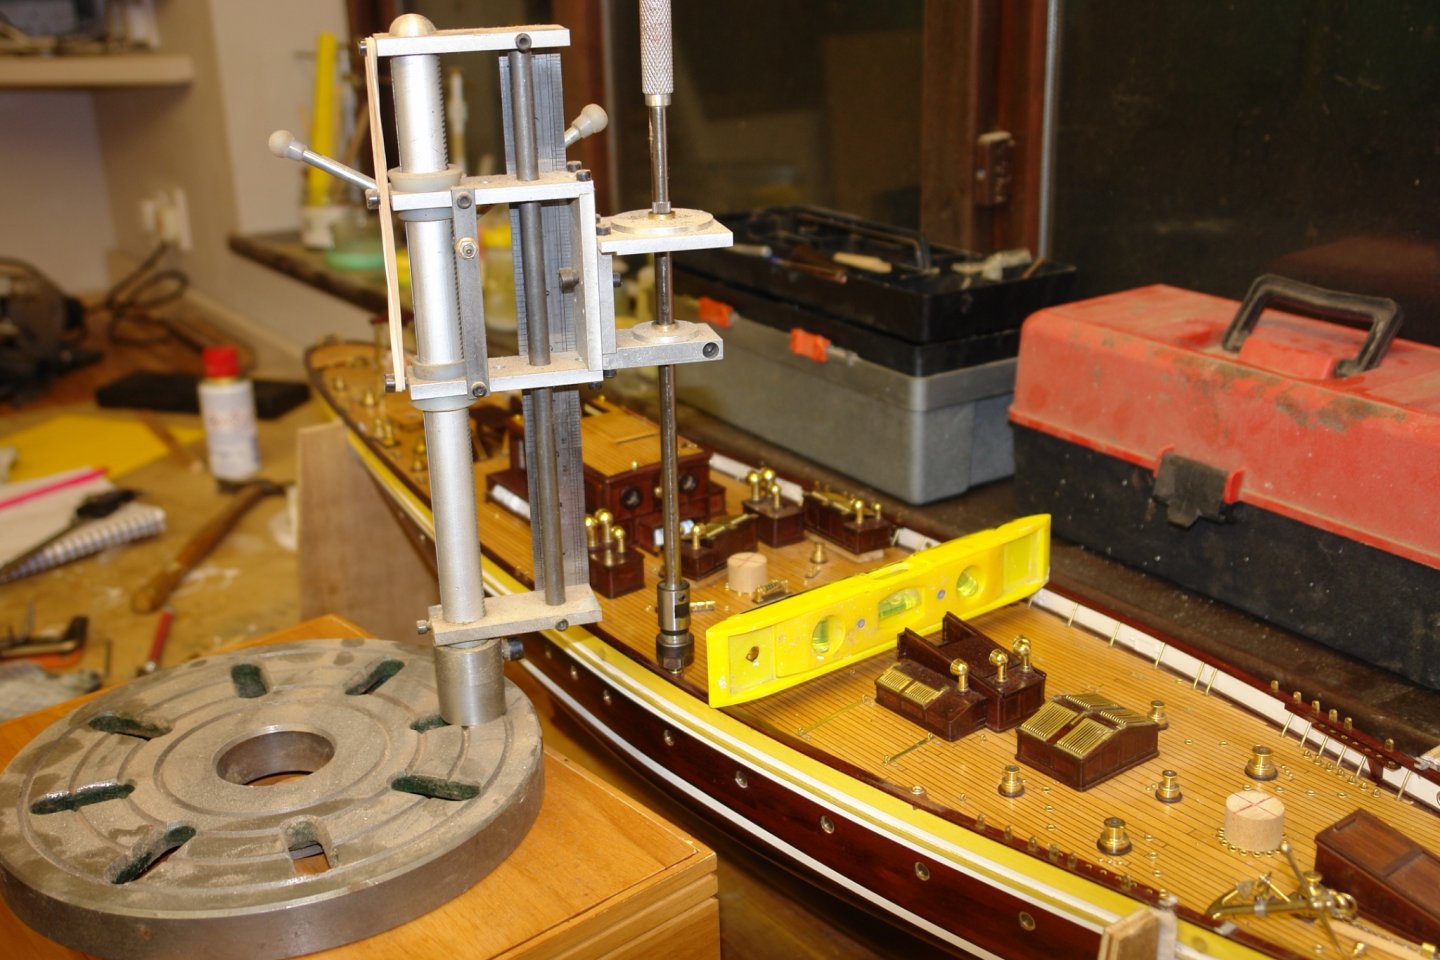
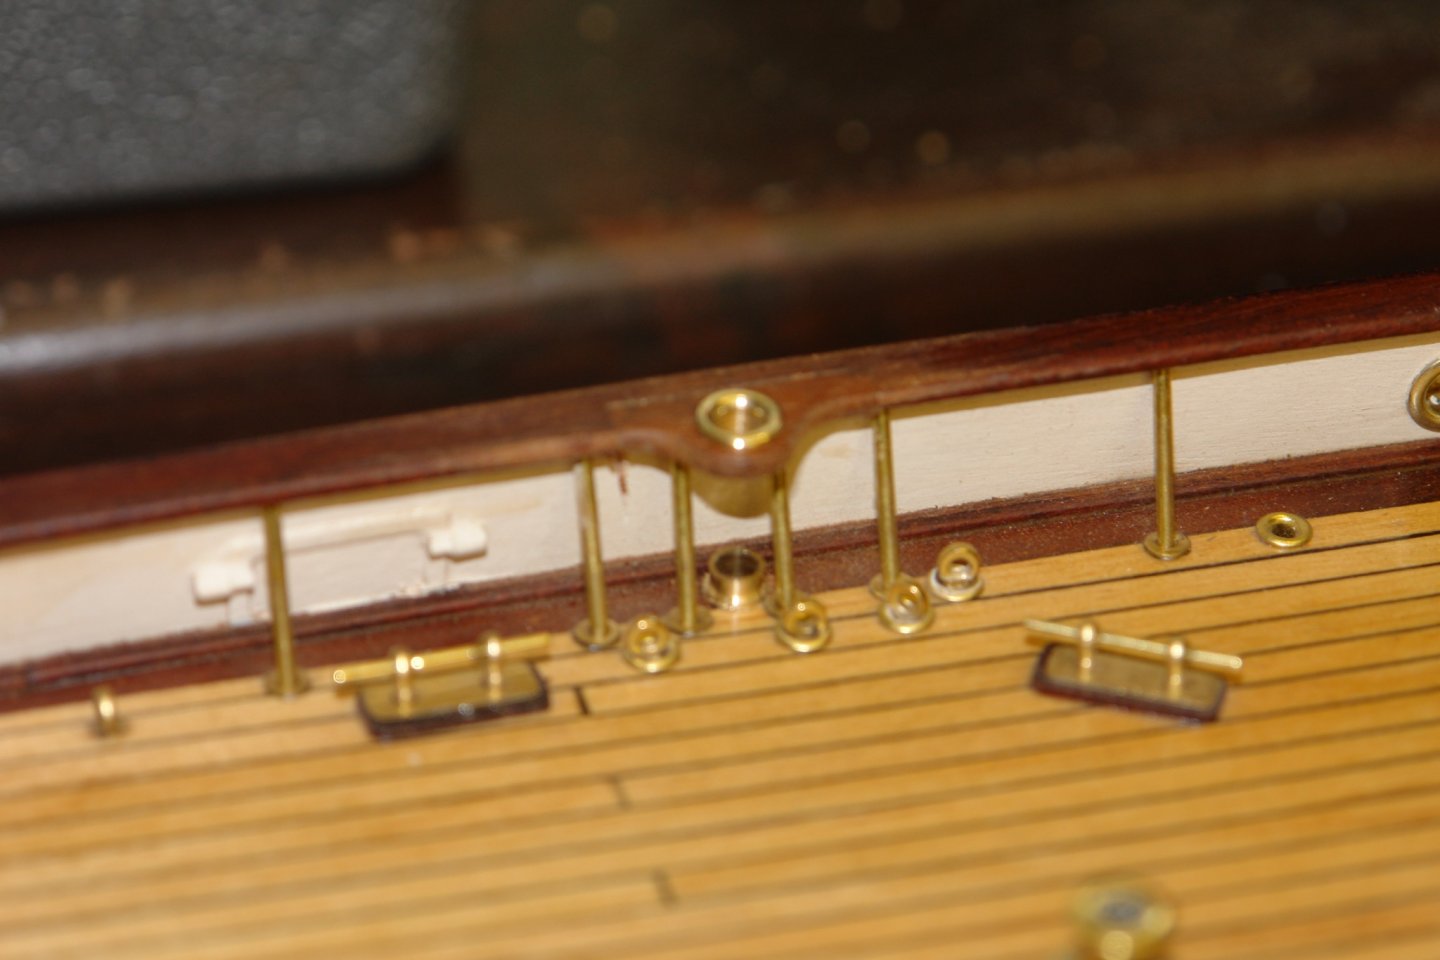
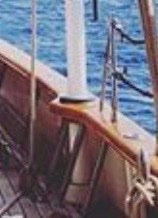
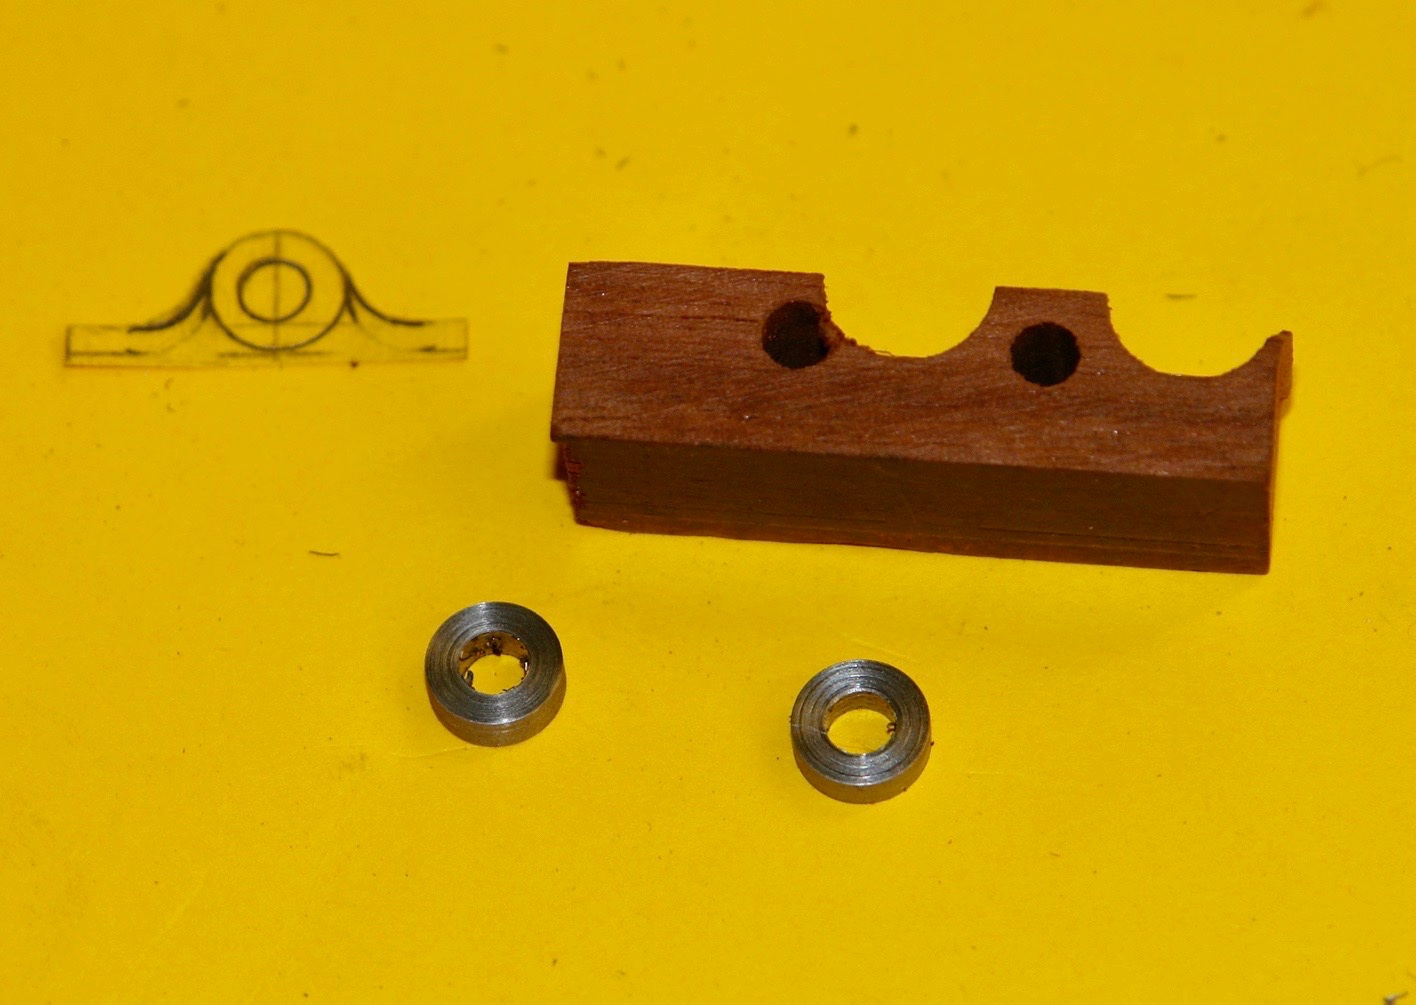
Moving on:- But not very far. I have been putting off doing a small job on the rail to take the pair of tender handling davits. The rail is shaped round the davits as can be seen in the photo. Only the starboard rail has this feature. I started by making a card pattern to check how it would look. Then I took a scrap of mahogany and did some basic profiling on the mill. The hole is 5/32". I also made a pair of filing buttons to assist shaping of the outer profile. With the shaping complete I sliced off .065" strips - slightly thicker than the rail. They were then cut down to the required width. I made 4 - 2 spares for breakages. I broke 1. I cut a template to guide cutting of the rail, this was temporarily held in place with double sided tape. The cut out was made using a craft blade and then squared of with a sharp chisel. The rail pieces were then glued in place and sanded to blend in. I drilled through the holes in the rail to mount the deck davit boss. My dill pedestal kept things square The deck boss and the rail collar were turned and fitted. These take a 1/8" davit. I drew the 2 davits - identical apart from the shaft length. I have started making the davits but will save progress for the next post.


-
Lovely looking little boat and so well displayed, well done.
- 69 replies
-
- 1
-

-
- Galway hooker
- fishing
- (and 2 more)