Cathead
-
Posts
3,057 -
Joined
-
Last visited
Content Type
Profiles
Forums
Gallery
Events
Everything posted by Cathead
-
 Here are two other ideas for threading lines through tiny holes. This is often a problem because even tiny threads can come loose and catch on the block. So you want to make the business end of the line as sharp and tight as possible. You can try wetting the tip with your mouth or water, which helps pack the threads in. Or you can use a tiny dab of glue on the end of the line, which you can then shave into a sharp point with a knife. Otherwise you can get a needle or a threading tool from a variety of sources, whether model shops, craft shops, or even fly-tying suppliers.
- 128 replies
-
- 1
-

-
- King of the Mississippi
- Artesania Latina
- (and 1 more)
-
Just saw this mentioned in your other log. What a cool project! I'm all in. The deck far overhanging the hull was a standard design feature on American paddle steamers, too.
- 31 replies
-
- 2
-
-
- Paddlewheeler
- Paddleboat
- (and 6 more)
-
Oh, wow. And here I was telling myself it was ok to be moving so slowly on my riverboat because Brian wasn't making much progress either. Oopsie. This looks amazing, and I enjoy all the problem-solving.
-
Seems to me the builder is free to use whatever methods he feels most comfortable with, unless he's aiming for a specific contest standard. And I don't see any functional problem with his choices that would require warning or criticism (as opposed to, say, using wood glue to bond metal parts or something, which actually might require a gentle nudge of advice). And plastic is already becoming quite common through the use of 3D printed parts. There are fair perspectives for and against this, but it seems a touch rude to imply that the builder here is somehow diminishing wooden ship modeling by using a few plastic parts for clearly explained reasons, especially in a thread where the builder and others have already shared stories of overly critical commenters demeaning their work.
-
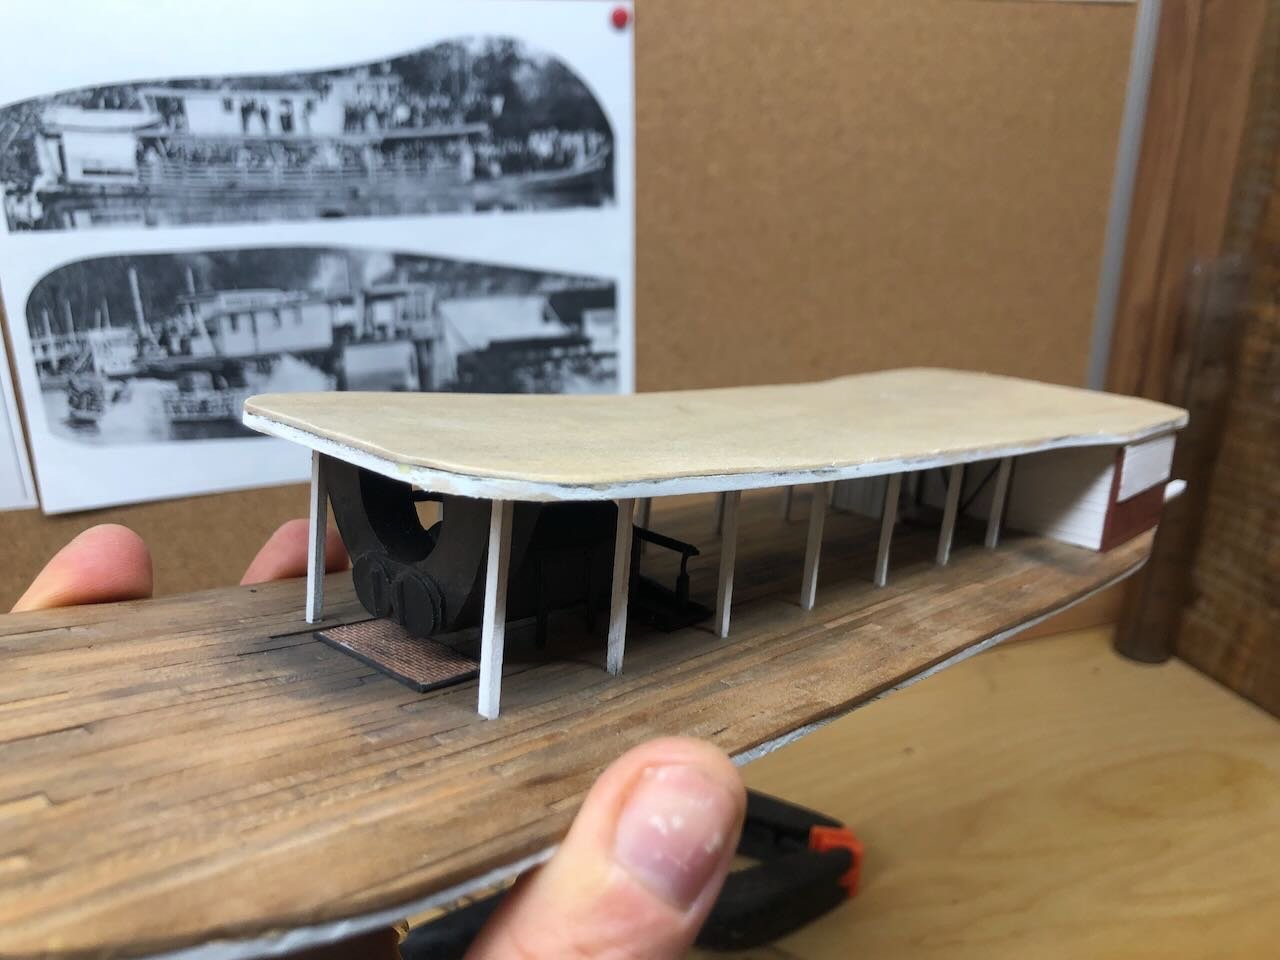
I roughly trimmed the deck back with a knife and then sanded it smooth to the beams. The edges look rough but it doesn't matter because they'll get wrapped with a piece of trim. Next it was time to cut the access hole for the staircase. I measured out its approximate location, drilled some pilot holes, then slowly started cutting away the opening with a sharp knife. A few shots of the sequence: And here's the deck with its cute little access hole: And here's a teaser for work underway, fidding with the pilot house and chimneys: Thanks for following along!


- 255 replies
-
- 18
-
-
Sorry to hear that but it also takes courage to make such a decision. Many of us have embarked on a version II at some point. Looking forward to your recommencement!
-
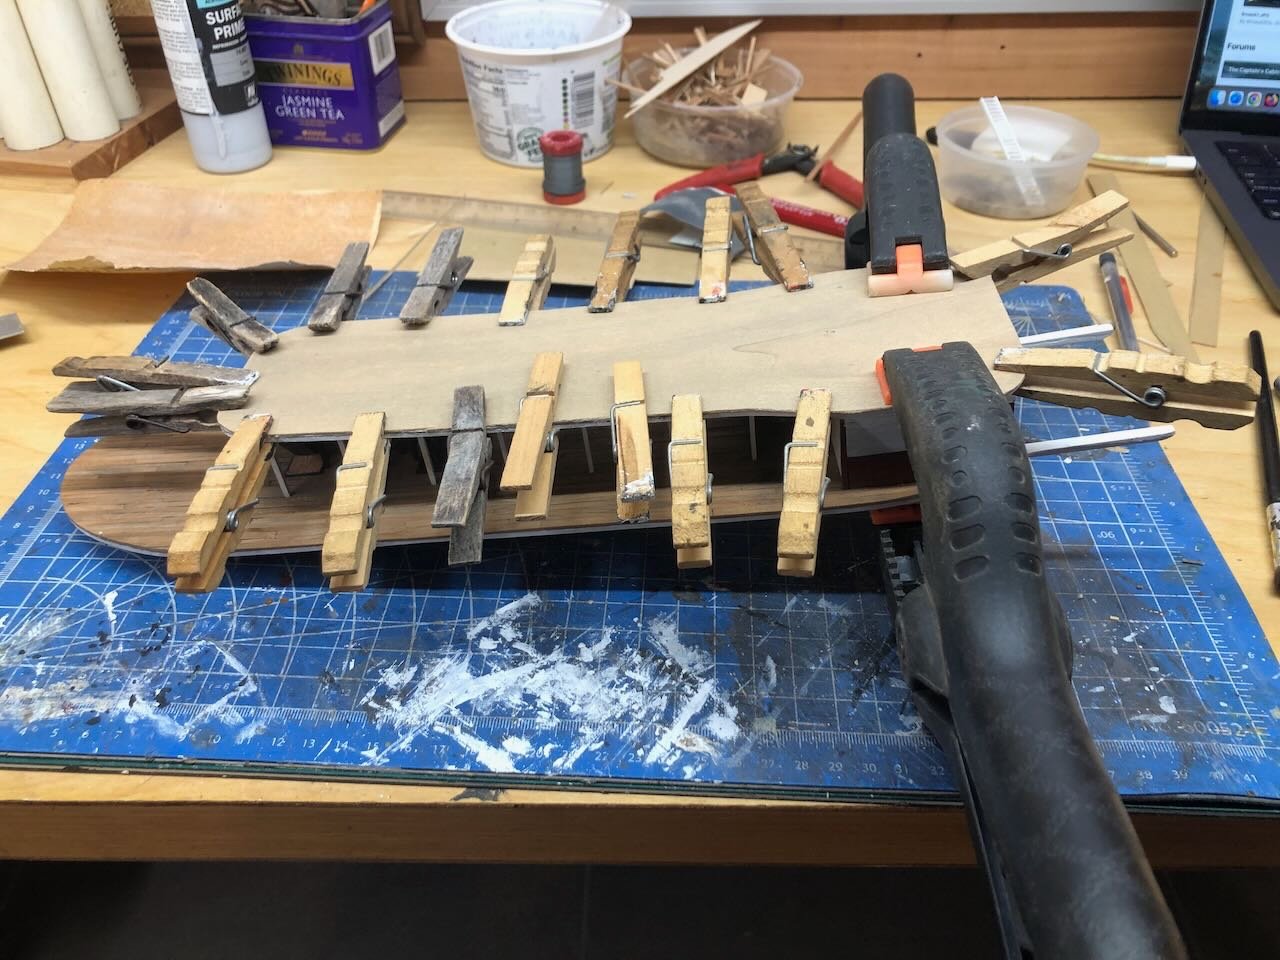
You guys made me laugh, but in fairness, the clothes pins/pegs are clamping the deck onto the open beams, where the span is very small, whereas the two big clamps are holding the deck onto the solid engine room. So I had to use large clamps there because the deck is essentially flush with the wall, running all the way down to the base of the hull. There isn't that much risk because the entire space between the two parts of the clamp is solid wood. The two clothes pins at the stern are grabbing a small corner where the deck sticks out enough for them to grab. There will be more progress to post later today!
-
I love that German idiom, though I learned it as "Schnee von gestern" (snow from yesterday). You might be interested to know that a rough English equivalent is "water under the bridge", both referring to something that has passed and can be forgotten or forgiven. Wonderful work as always!
-
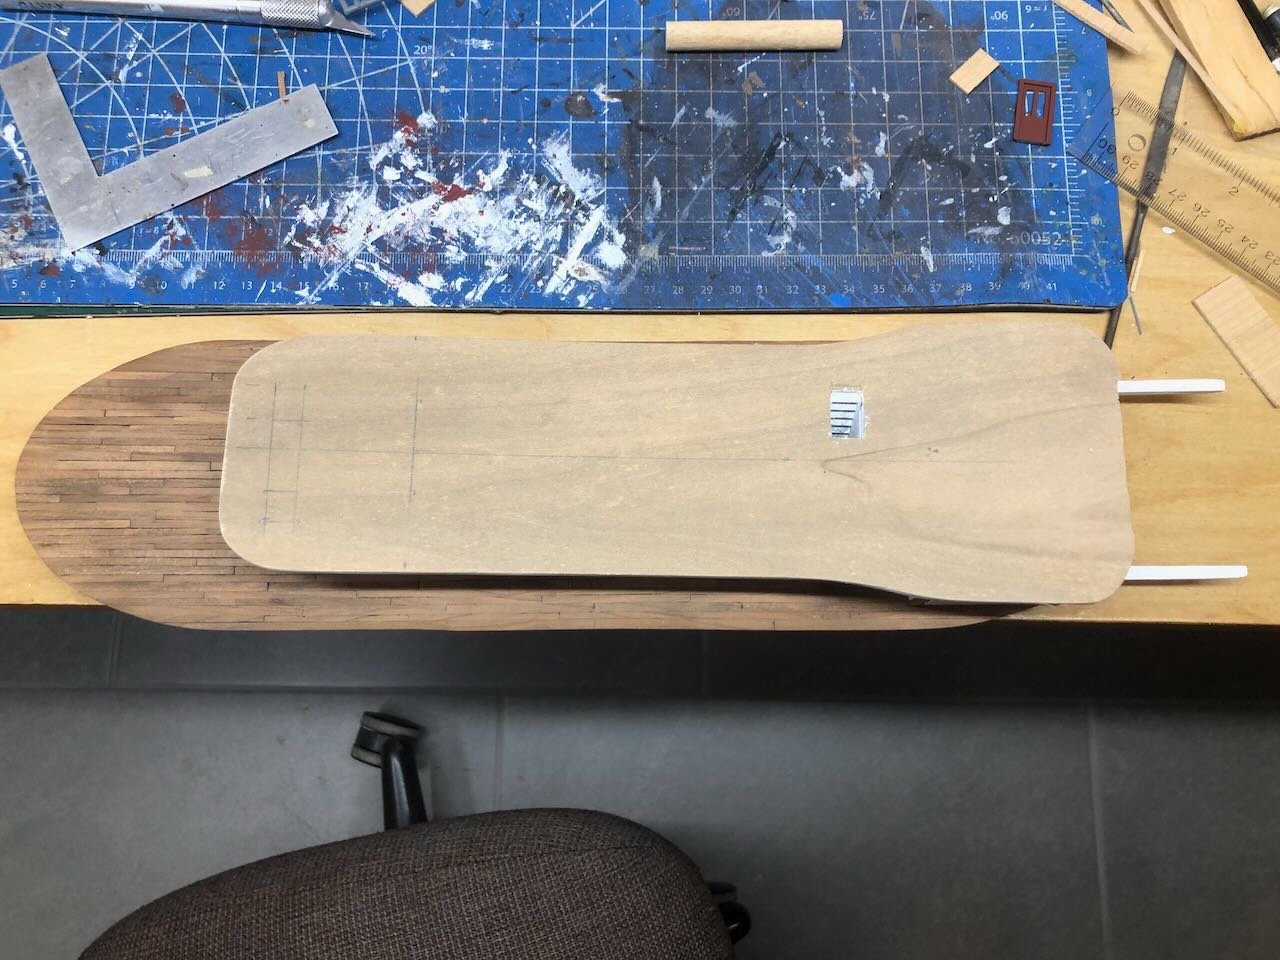
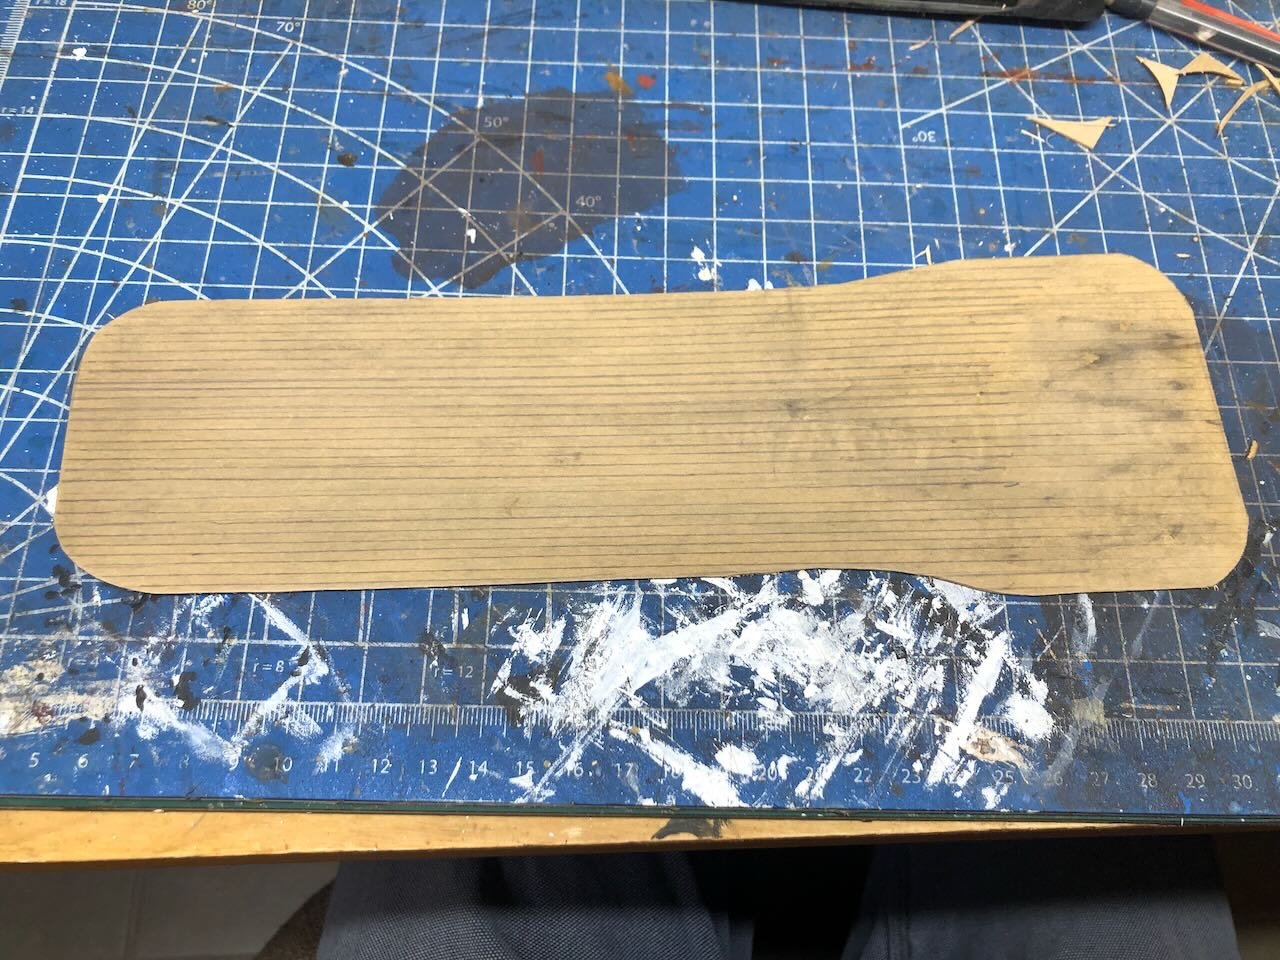
Well, I did it. I cut out a boiler deck from some thin scrap I had on hand and did some basic scribing with a knife and ruler. Messed up a couple places where the knife wandered but it really won't be noticeable when it's installed. I then used a pencil to darken the scribing lines, since a test-fit showed that just the cut lines couldn't be seen at all when on the model, then used some black pastel to weather the underside. If you notice the messier pastel streaks at the stern, that was intentional (really!) to demonstrate that you have to be careful applying pastels. That area will be hidden over the engine room so it was a good demonstration zone for why not to smear pastels directly on from the stick. I used a brush to gently apply powder, working along the scribing lines, and rubbing it in with a finger once applied. Gives the surface some subtle texture. Then I brushed wood glue across all the relevant surfaces of beams and so on, which took longer than I'd anticipated trying to keep the glue from leaking down onto the sides of all the narrow beams. Then I took the plunge and clamped the deck down. It's cut to be a little wide all the way around so I can do final exact edge trimming on the model. Will let it dry overnight, then see how it turned out!
- 255 replies
-
- 19
-
-
As a former Russian major, I have a soft spot for relevant history. Never done a MK kit but they've always struck me as well-made. If you want to keep your card credentials, you can always do paper sails!
-
Leaving the brass showing is an artistic styling choice, not one based on realism. It looks nice but in most cases isn't accurate. So it's up to you which direction you want your model to go (more artistic or more realistic).
-
The eyes on that piece are where they eventually suspend the anchor chains from (via some rope loops), but darned if I can tell why the wooden post has a hole in it. Can't be for a flagstaff, that would directly interfere with the rigging plan.
-
If you want to see canoes on the river in Kansas City, check out the Missouri River 360, an annual canoe race from KC to St. Charles (outside St. Louis) that happens every summer. Hundreds of people launch from Kaw Point, just above Kansas City. As for recreational use in Sioux City vs. farther downstream, keep in mind that in the former you're a lot closer to the lowermost dam near Yankton, so the water levels are more controlled and it's easier to have recreational use. Down here in Missouri, especially below KC, river levels vary a lot more and there's also more water entering from various tributaries, so floods and changes in river level are more common, making it harder to maintain recreational infrastructure.
-
I just keep getting ahead of myself! You are all correct and I shouldn't be referring to "tar paper". I got sloppy and used that as a general name for a sealed roofing material, when what I was thinking of was something like the suggestions of sealed canvas. I remembered this topic coming up in my Arabia log but hadn't gone back to check the details yet. Which I've now done and @Bob Cleek wrote a long, very useful post on the subject that's worth reviewing for anyone interested. I can't check Bates at the moment as I'm away from home but I feel like the canvas approach makes a lot of sense. And yes, Keith, it was a great day out. We're hoping to find time to do a longer (4-5 day) canoe trip on the Missouri this summer, probably from Kansas City to somewhere in central Missouri.
-
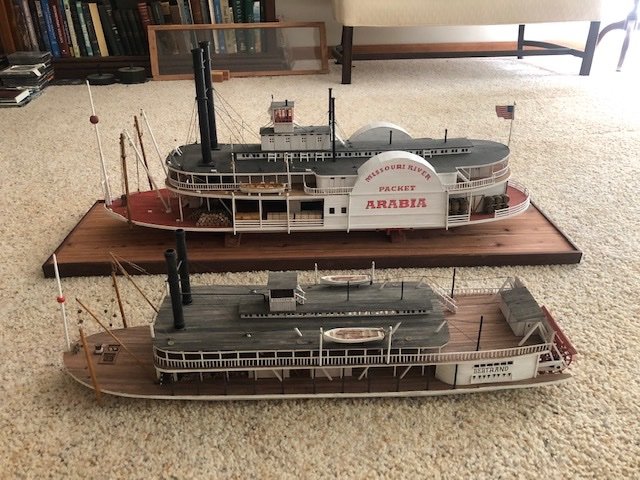
So I had a sort of epiphany that might really change how I move forward on this model, and I want to get some feedback on it. From the very beginning I was assuming I'd plank the boiler deck. Why did I assume that? Because on every other steamboat I've built, the boiler deck was planked, so of course this one would be too. But. On all those other boats, the boiler deck wasn't the uppermost deck; it was partially or fully covered by the hurricane deck. See these two: The uppermost deck (in these cases, the hurricane deck) wasn't left openly planked but instead covered in some form of waterproofing because they functioned primarily as roofs over the lower decks. This was based on my general understanding of steamboat practice. But in the case of Peerless, the boiler deck fulfils that "roof" role. As previously argued for other reasons, I don't think passengers would have routinely been up there. So why not model the boiler deck covered with something like tarpaper, rather than a nicely planked deck? Not only does this make a fair amount of sense from a realism point of view, it also vastly simplifies the job of completing that deck. Instead of another painstaking planking job, I can use a single thin sheet of scrap wood and lay "tarpaper" over it. The other reason to plank the boiler deck was you can technically see it from below, through the open framing. At first I assumed that laying a thin sheet of wood on that would look silly, but I tested it and I don't think you can really tell. I could also scribe the bottom of the sheet or otherwise weather it to hide the "sheetness", but in practice there's almost no viewing angle where you're seeing the underside at more than a very shallow angle. So this feels really exciting because it saves a ton of work, while actually potentially making the model more realistic as it seems logical that this uppermost deck was covered rather than openly planked, or at least that that's one logical option. Thoughts?
- 255 replies
-
- 14
-
-
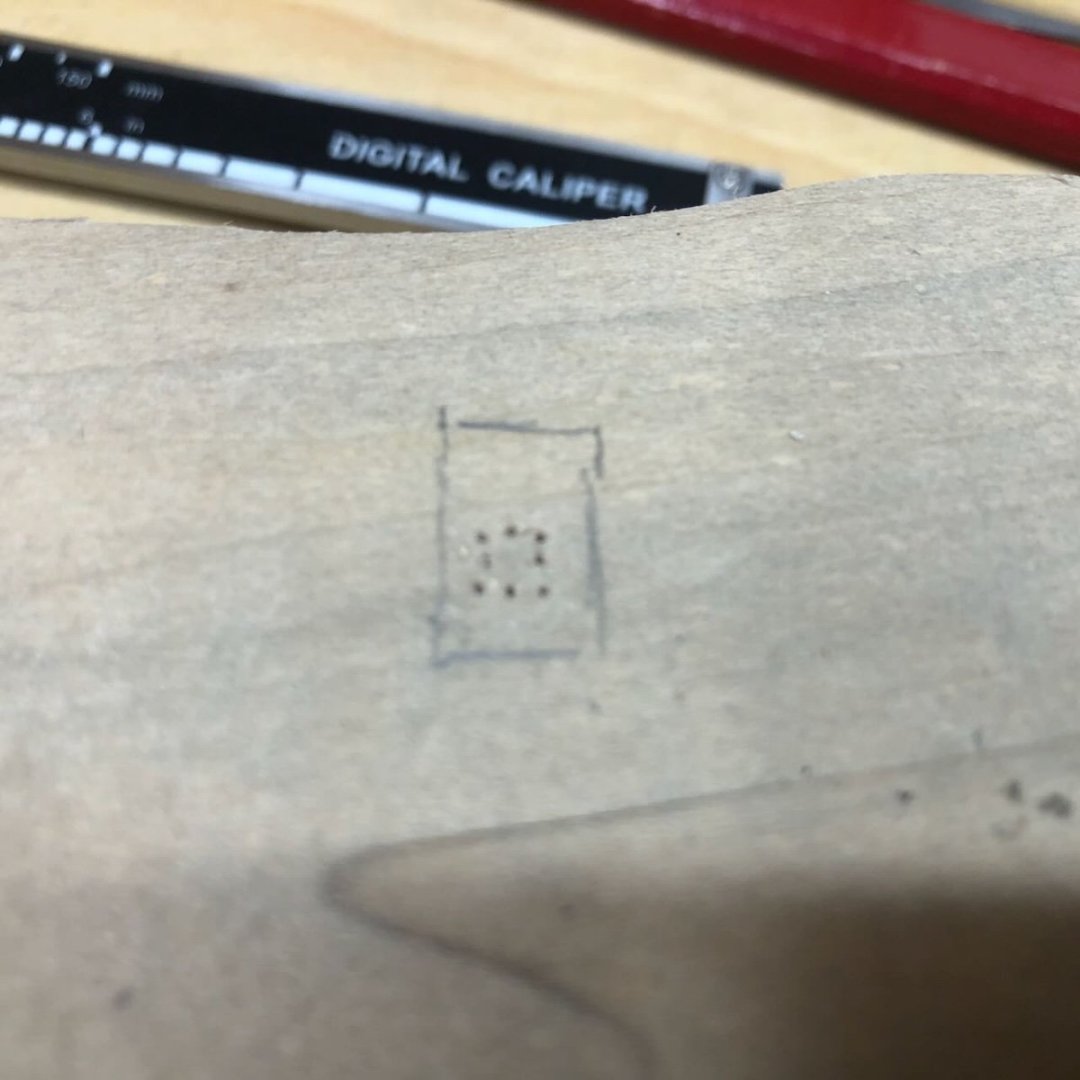
Aligning holes between post and deck is definitely hard. What I do is drill into the post, insert a wire/pin just a fraction longer than the hole, then press the post in place to leave a tiny divot in the deck. That's why you leave the pin just a hint longer, so you can get the post where it's supposed to be. Then you drill into the deck using the divot you left, and install using a longer wire/pin. That way you're not trying to match up two different holes; the hole in the deck ends up wherever the hole in the post ended up.
- 128 replies
-
- 3
-
-
- King of the Mississippi
- Artesania Latina
- (and 1 more)
-
One reason to advocate for models under 2' long is that they'll fit through standard 30" doorways without having to turn sideways, even allowing for a case. Any bigger than that and they get more awkward to move around. That also "feels" right for something that won't dominate any space it's put it.
-
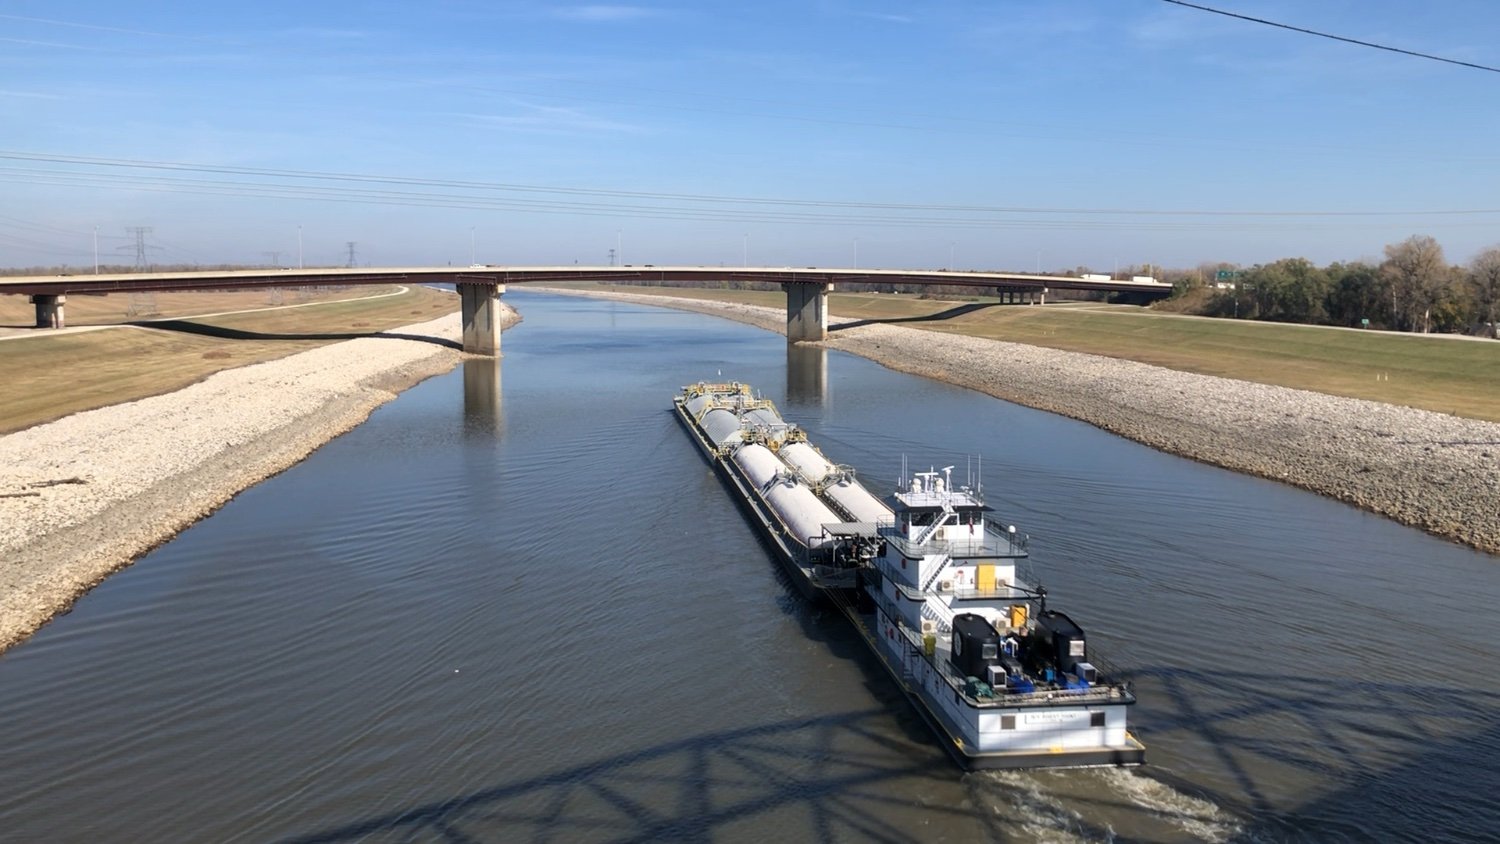
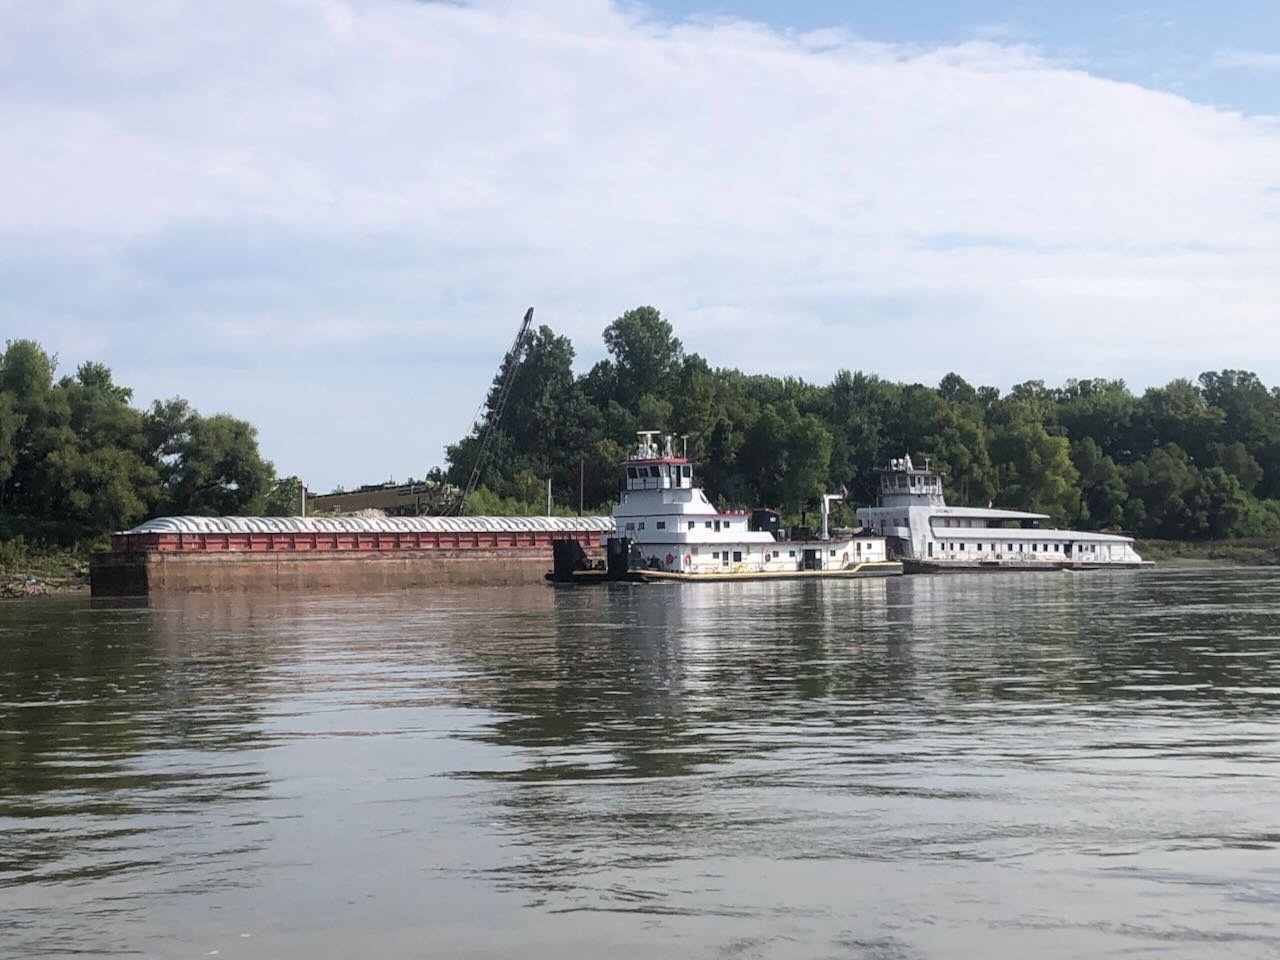
I'll betray my regional bias and suggest a modern river towboat of the kind used on American inland waterways (such as the Mississippi River and its many navigable tributaries). BlueJacket has a nice collection of work boats and this would really expand that genre. Lots of modern prototypes available; here are a couple from the Missouri River (my photo): And another in the Chain of Rocks canal near St. Louis (also my photo): As for scale, if you made these in 1:87 there'd be a lot of crossover sales appeal for model railroaders, while you could also make them at a larger scale (1:64 or 1:48) to allow for detail and ease of building. These vessels are amazingly diverse in size and design; you can flip through a large gallery of images here: https://www.towboatgallery.com/The_Towboat_Gallery.php?pic=162&tnc=1&mnu=

-
You didn't by chance have a career in the medical field, did you? Always love watching your carving evolve.
-
Have you considered drilling a small hole in each post and inserting a small pin that helps anchor it to the deck? This can really help with accidental swipes.
- 128 replies
-
- 1
-
-
- King of the Mississippi
- Artesania Latina
- (and 1 more)
-
Building wooden kits takes a LOT of attention to detail; it always amazes me what I forgot, overlook, or screw up no matter how much I think I've been paying attention! Just keep your head on straight and plug away. If you're not satisfied with your doors, you could try making new ones from thin pieces of scrap wood. These might be easier to paint cleanly than a single brass piece. You could even consider using a single piece of wood and using a thin pen or pencil to draw in the framing. Beagle is a neat ship and I look forward to seeing how you make this model your own!
-
Brian, freezing rain here, too, I almost wiped out this morning dumping the overnight ash from my wood stove even though I knew perfectly well there was ice. John, depending on how young you are, ice on that stretch of the Mississippi (I assume from distance you mean around the Rock Island area) probably behaved very differently. Once the Mississippi was lock-and-dammed in that area were relatively few stretches of free-flowing water, whereas the Missouri is entirely free flowing in its lower reaches (from South Dakota down). So it would be hard to get this kind of flowing ice field on that part of the Mississippi because the regularly spaced dams slow the current and intercept the ice, whereas here we're getting a straight flow of ice from however far away it manages to travel on the open current.
-
Steamboats, like another nautical venues, had a lot of terminology that wasn't logical but just...was. The main deck is the main deck, which is logical. The second one is the boiler deck, although the boilers were never there (always on the main deck). The third deck is the hurricane deck. The fourth, if there is one, is the Texas deck. There is no clear answer for any of these, though theories abound, but they were universally known and used. One argument for "hurricane" is that it's high enough up on the vessel to really start catching the wind. But none of these were assigned, they just developed organically into a universal idiom, and language doesn't always make sense. For a loose comparison, think of the orlop deck on a sailing vessel. That word universally tells mariners you mean the lowest deck of however many there are, even though the word itself sounds nonsensical in English. Supposedly it comes from a Dutch word meaning "overlap", and there's probably some organic language development going on there that made perfect sense at one time (I don't know the detailed etymology). But, like lots of jargon, "orlop" or "hurricane" deck let us refer to a specific idea very concisely and clearly as long as we all understand the definition, regardless of how convoluted the origin story is.