Cathead
-
Posts
3,522 -
Joined
-
Last visited
Content Type
Profiles
Forums
Gallery
Events
Everything posted by Cathead
-
 That's a pretty strong kink. If it were me I'd redo it (you asked!), but it's your model and many issues like that end up being far less noticeable on the finished model than during construction. As for soaking, I've rarely needed to soak a whole ship-length plank. It really only needs to curve significantly at bow and stern, so you can soak one end and then the other; it doesn't matter if the middle gets wet. I use an old rain-gauge tube.
 -
I'm no expert at drilling holes straight. On my NRG capstan I used this drill jig from Lee Valley and still didn't get it right: Here are two thoughts on simple homemade jigs: 1) Set up a slab of wood at the angle you want to drill at, so that the drill body can just slide down it. Make the foot of the jig small enough to fit on the deck. 2) Take a solid block of wood and drill a mast-sized hole through it at the correct angle. Then set the block on the deck and slide the drill bit into it; this will hold the bit at the right angle. If you want to do it without a jig, here's another suggestion. Drill the hole straight down, or at a somewhat shallower angle than you need, but do it with a smaller bit than the final hole. Then use a curved or round file to widen the hole to the right dimension, shaping the sides of the widened hole to represent the correct angle. No matter what, I'd alter Keith's suggestion and advise using a slightly smaller bit rather than a slightly larger bit, because you can always widen and shape the hole just as you look but a too-wide hole will make the mast loose. I realize that writing out physical tasks makes them hard to understand. If you're not sure what I mean, I can try to whip up a drawing.
-
Endurance by john D - OcCre
Cathead replied to john D's topic in - Kit build logs for subjects built from 1901 - Present Day
Have fun! There's extra incentive now that she's been found. -
I agree with Keith, and to go even farther, at times in modeling (as in other art) it can work better to do something that isn't right but that looks right, and sometimes looks more right than the accurate choice. Think of it like a painter giving someone a skin tone that, up close, is inhuman but presents just the right coloration from a normal viewing distance. To put it another way, sometimes it's worth doing something wrong but well (good-looking glued-on paper hinges) rather than right but poorly (sloppy or out of scale metal hinges). To put it yet another way, by the time someone looks close enough to "judge" your paper hinges, they'll also be close enough to see that the copper plating doesn't have rivets, that the wood grain is coarse, etc., none of which matter in the least, any more than that looking too closely at a painting reveals brush strokes rather than the pores of the subject's skin. What matters is that you like the outcome, it looks cool from a normal viewing distance, and you file away some new ideas and skills for the next project.
-
Here's yet another approach to ash removal. Bertrand (1865) didn't have ash wells within the hull, but rather a brick-lined trough that ran from under the fireboxes out to a hole in one guard. It appears that ashes were simply shoveled into this trough and then swept/shoved overboard, never passing through the hull. This is shown in the archeological drawings and recreated on my model as shown below: Obviously this wouldn't work for the ironclads, since their boiler room is below the waterline. But I thought it would contribute to the broader discussion.
-
The only way I could see a problem is if the narrow overlap produced a weak glue joint, such that the planks separated later on, either as you're handling the model and flexing the hull, or as the wood naturally shrinks and swells with environmental changes. On my Viking longship, I had some plank joints like this that cracked open later in the build during handling. The gaps were minor and I decided to ignore them (you can only see them looking straight down between the planks) but it is technically a concern. There's such a long run of glue connecting the plank edges that you'll likely be fine if any one place gives out. Model looks great overall!
-
A method for making panelled sails using paper
Cathead replied to Cathead's topic in Masting, rigging and sails
Fair point, but in practice it depends on just how precise the modeler is trying to be. And for those of us who don't like being around the smell of things like varnish and CA more than we can help it, a threader is a far more benign and time-efficient method. I've also found that carefully placing just the smallest tip of rope into the threader makes it easier to thread holes that are closer in diameter to the rope, rather than trying to pull a full 2x diameter length through.- 49 replies
-
- 2
-

-
- sails
- sail panels
- (and 1 more)
-
A method for making panelled sails using paper
Cathead replied to Cathead's topic in Masting, rigging and sails
Thanks for catching that! It does look like ME stopped selling the basic ones, and a lighted one seems rather wasteful. I updated that post to include a link to an equivalent product from Joann Fabrics: I've definitely used these with blocks to great success.- 49 replies
-
- 4
-

-
-
- sails
- sail panels
- (and 1 more)
-
As discussed in that thread, I used bond paper, which is a high-end paper used for printing that needs to last. Specifically, I used supplies left over from my wife's graduate thesis 20 years ago, still in perfect shape. It should last as long as any model that isn't museum-grade does.
- 35 replies
-
- 1
-
-
- Constitution
- Revell
- (and 1 more)
-
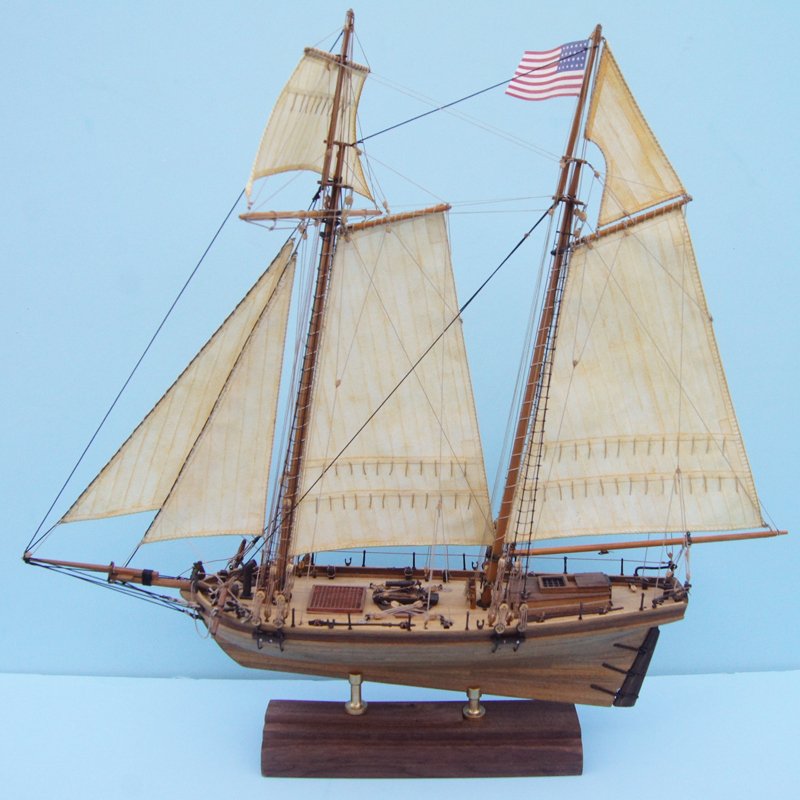
Glad to find this log, I think your approach is excellent: recognizing the kit isn't perfect and not presenting it as accurate, but also having fun with a build and learning from it rather than getting bogged down or despairing. My first models are laughable to me now but I enjoyed them and learned so much! As for sails, at risk of self-promotion, here's a method I developed for making paper sails that I find very effective and attractive. There are various other ideas in the sails section of MSW. Following are two examples from my revenue cutter project.


- 35 replies
-
- 4
-
-

-
- Constitution
- Revell
- (and 1 more)
-
Nice progress, Lynn. I'm a fellow member of the pain club right now, but in my case it's going to prevent any building for the next few months. So I look forward to living vicariously through you and others. Good luck getting through your hurdles efficiently!
-
Another point here in case it helps clarify your situation: hull planking will almost always require either edge bending or spiling because the planking will curve through three dimensions. Most kits provide only straight stock that isn't wide enough for spiling, meaning that you have to edge-bend to use kit stock, but most such kits never explain this and it can give newer builders fits. Unless you buy a rare kit whose planking is pre-spiled, you either edge-bend the kit stock or buy sheets of wood that you can cut your own spiled planking out of, discarding the kit stock.
-
Nice start!
-
Nice start. I find that sharp knives can sometimes be better for carving than chisels, as the different geometry of the handles and hand position just seems to create an easier cutting motion. Rotary tools are great, but it's pretty easy to take off too much!
-
I haven't built this so can't offer good advice on this question, but am looking forward to seeing how you solve it.
-
Any progress to report?
-
What a great start! I love reading about others' problem-solving.
-
Any further progress after your good start?
-
Looks like a neat project. I'm not familiar with this source, so what a great chance to learn about their kits!
- 84 replies
-
- 4
-
-
- Statenjacht
- Kolderstok
- (and 1 more)
-
Beautiful, and thanks for the detailed instructions from the beginning. Helps folks like me learn.
-
Wooden ship building definitely has a steep learning curve. You're doing great and you'll be proud to display this when you're done. And yes, I think you'll love building a new project with good materials and instructions!
- 89 replies
-
- 3
-
-
- Enterprise
- first build
- (and 2 more)
-
Welcome back! I hesitate to note this, but will do so in case you care: several of the deadeyes are rigged incorrectly. They should always be rigged so that the top hole in the triangle of three holes faces away from the other deadeye, like this (from this great page on rigging by the San Diego Ship Modeler's Guild😞 Of the four you show, the second from the left is correct, the rest are not. Now, you don't have to fix this; the vast majority of viewers won't notice or care and the model will look great regardless. I just mention it because a lot of modelers enjoy learning as part of the building process, and if this level of accuracy is important to you, it's easier to correct it now as you've only done 4! But you have every right to shrug and move on; we all draw the line somewhere. EDIT: Oops, apparently you posted your update as I was writing the above. Adding all the ratlines does change the equation on redoing the deadeyes. It's still up to you, as they're technically independent from the shrouds. But you can always apply the "correct" method to the other mast and just not worry about this obscure detail.
- 89 replies
-
- 3
-
-
-
- Enterprise
- first build
- (and 2 more)
-
Here's a thread (no pun intended) from the MSW rigging section that contains a variety of suggestions, examples, and links for methods:
- 96 replies
-
- 2
-
-
- topsail schooner
- revenue cutter
- (and 3 more)
-
If I understand your question correctly, I did that in two ways depending on context: (1) by passing the line through the bolt or block, tying the simplest possible overhand knot to hold it in place (think the first step of shoelace tying), using a small clamp to hold both ends of the line parallel, applying a tiny drop of glue to fix the proto-knot in place, then finishing the knot or wrapping the loose end around the taut end as needed. (2) by doing something similar, but to simulate "serving" (the finer line wrapped around two rope ends to hold them in place), once I used a drop of glue to hold the original rope in place, I simply used fine tweezers to wrap finer line around just like real serving, again using a spot of glue to hold it in place once done. If these written descriptions aren't clear, I can try and whip up a mock photo or two for you.
- 96 replies
-
- 2
-
-
- topsail schooner
- revenue cutter
- (and 3 more)