Cathead
-
Posts
3,522 -
Joined
-
Last visited
Content Type
Profiles
Forums
Gallery
Events
Everything posted by Cathead
-
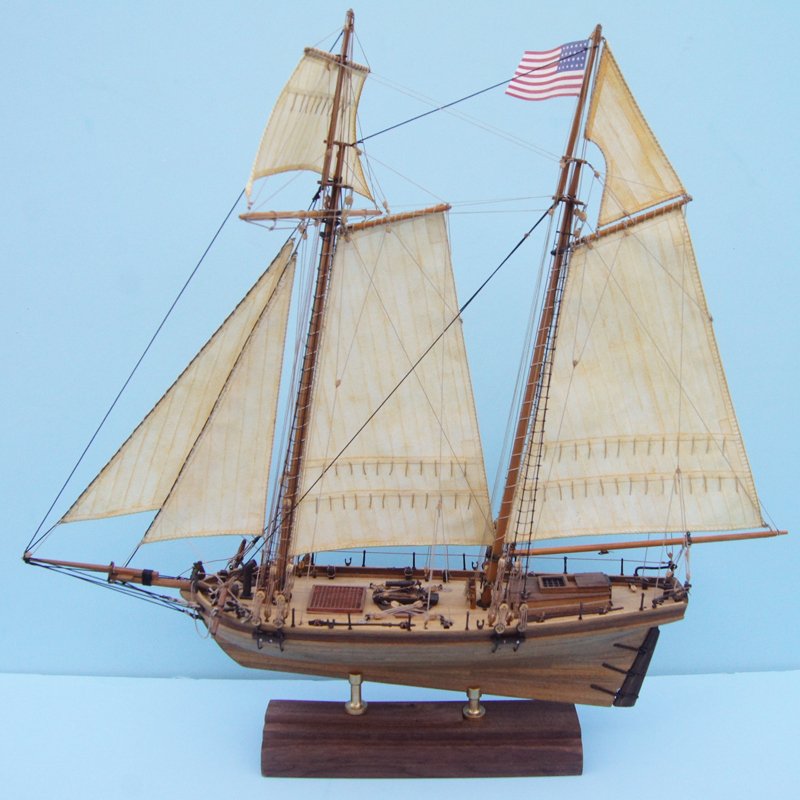
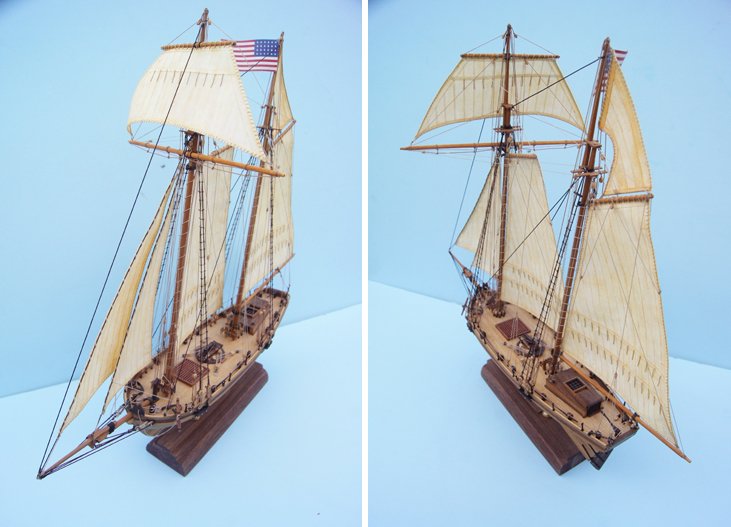
A few years ago I wrote up my method for making paper sails using bond paper and pastels. I think it works quite nicely and the thread generated some useful discussion of different techniques. See here: Here's what these sails look like the way I made them: Hope this helps!

-
 I had a lot of problems with the provided frames not being right and needing to be reduced or built up. That in itself is a useful learning process, though, as it'll happen in almost any kit! There's definitely an awkward knuckle in those lower planking runs. I also recall the intended counter method being very difficult to understand.
 -
Buying building kits in Norway (Oslo area)
Cathead replied to ObviousNewbie's topic in Wood ship model kits
My goodness, that's a problem. While I know nothing about Norwegian model sources, I suggest using the MSW community map to locate members in Norway and contact them. A quick look showed 46 members listed there, so if you send enough PMs, presumably someone will respond! You can also look at their profiles to see how active they are and choose contacts accordingly. -
Congratulations! She came out nicely. Thanks for sharing your work. Did you have the case custom-made, or do it yourself? Best wishes for continued recovery.
- 117 replies
-
- 1
-

-
- Pyro
- Robert E Lee
- (and 2 more)
-
Essentially, yes, because almost every other decision you make and skill set you develop will relate to what you choose to build. But in terms of research, for example, the Wood Ship Model Kits section has three threads pinned right at the top about how to choose a good kit for a beginner: These have a lot of good discussion that will give you context. If you still have a specific question, that's a good time to post a new topic (or a new question in one of those threads). Also, in addition to @allanyed's suggestion, consider starting with the NRG's half-hull planking tutorial model. Hull shaping and planking is probably the hardest thing to master for modelers new to wooden ship building, as it's the most different from anything you've experienced in the plastic modeling world, and you might well benefit from trying this simple and inexpensive learning kit before diving into a full (and more expensive) model. It looks cool when finished and doesn't take up much space. There is a full tutorial build log on MSW as well as multiple people's personal logs (including mine) that you can consult for diversity.
-
Most of your questions are subsets of the main one, "which model to choose". For that, it'd help to know which kind of kit you're interested in (wood, plastic, card, etc.) and which kind of vessel (open boat, ancient sailing vessel, modern warship, etc.) because the methods can be quite different. For example, fabricating parts for a wood Viking longship may be quite different than for a plastic aircraft carrier. You can find relevant discussions of different kit types: https://modelshipworld.com/forum/58-general-ship-model-kit-discussions-not-build-logs/ MSW has specific forums for most aspects of model-building (such as painting) listed here: https://modelshipworld.com/forum/12-shop-notes-ship-modeling-tips-techniques-and-research I'd start with the kit discussion/decision, which can also be informed by looking for build logs for kits you're considering, reading them to get an idea of the kit's nature and upgrade potential, then contacting those builders for their ideas. If you can't find a log for a kit of interest, look for logs for similar kits from the same manufacturer to get a sense of their quality and difficulty. Overall, I'd start by doing research before asking questions. Look for and read as much relevant material on MSW as you can find, before adding new questions to the mix. Use the Search box and its customization features. For example, you'll find that many people before you have posted questions about how to choose a kit, and reading those discussions may answer many of your questions. And reading through existing build logs will help you learn what's involved in kit construction, part fabrication, and so on. Once you've given yourself a grounding in existing material, you'll have a better idea of what questions you still need to ask.
-
I'm not sure where John got his, but Micromark (an excellent model-tool supplier) sells a similar-looking set: https://www.micromark.com/Micro-Mark-10-piece-Planking-Clamp-Set
- 158 replies
-
- 2
-
-
- chaperon
- Model Shipways
- (and 1 more)
-
Never seen pigs leave a deck that clean! Seriously, lovely model, that'll look great on display. Neat to see the extra attention you paid to learning about the backstory and getting more details right.
- 117 replies
-
- 1
-
-
- Pyro
- Robert E Lee
- (and 2 more)
-
I totally agree, that's why I mentioned above that one factor in kit selection is companies that make popular prototypes. And upgrading kits can be quite a rewarding experience, check out my Viking longship and US revenue cutter, both of which started with frustrating kits and (I think) came out quite nicely with some serious research and upgrades. But it's still worth knowing what you're getting into ahead of time, which is where pre-researching kit companies is worthwhile. Open eyes compensate for many problems. I went into my Corel revenue cutter eyes closed and much of the frustration was the sense of betrayal at how bad the kit was.
-
Calm and patience is definitely the right strategy!
-
Very cool, thanks for taking the time to share the build!
- 62 replies
-
- 2
-
-
- amati
- greek bireme
- (and 1 more)
-
Not to derail this thread for too long, but I'm not sure that MSW build log count is a good metric. For example, BlueJacket is a good company but there aren't many logs for their kits, which has always surprised me. Whereas lots of people keep buying trash from Corel, AL, etc. because they're cheap, often on sale, and widely available through resellers; whereas people get sticker shock from good companies like Vanguard, Syren, etc. Or the trash companies are the only ones making popular prototypes like Beagle, whereas better companies like Vanguard or Syren seem to focus on relatively obscure prototypes. Within my own little riverboat world, for every (good) Model Shipways Chaperon, there are probably 10 (trash) AL King of the Mississippis (referring to kit quality/accuracy, not the builders). But that also fits the pattern, everyone's heard of a Mississippi riverboat but an Ohio River boat is a much more obscure vessel. I do agree that reading build logs is a great way to assess quality; even if you can't find one for the kit you want to build, read logs for other comparable kits from that company to get a sense of their style.
-
Glad Brian saw this and gave you a more detailed answer. I figured I'd jump in just in case you were antsy for a response, I know I don't check MSW every day and I didn't know how long it might take others to reply.
- 158 replies
-
- 1
-
-
- chaperon
- Model Shipways
- (and 1 more)
-
What you've done is certainly better than attaching to the railing (???) but in real life I think it's highly likely the hog chain extended down through those decks all the way into the hull, or at least to a more solid anchor than a fragile upper deck. For example, look at your copy of Bates (p. 29, fig. 39) and see how the longitudinal chains are shown anchored down in the hull at both ends; this is the only place that could take the strain; anchoring a longitudinal chain to the upper deck would rip it off just as easily as to a railing. Keep in mind that that chain is helping support the weight of those immense paddle wheels toward the vessel's aft, redistributing it forward (where it would also be anchored in the hull). The superstructures on these boats, even the big fancy ones, were lightweight and flimsy for reasons of cost and practicality (strong, heavy superstructures would be too top-heavy). I'm not an expert on the R.E.Lee, just speaking from broader knowledge of the design and engineering of these vessels. So I could be wrong, but anchoring to anything on the upper deck just doesn't seem likely to me. Your solution is a reasonably compromise given that it'd be more complicated to drill and run the chain down through multiple decks. But I'd be pretty surprised if that's how the real vessel was built. Caveat: could be wrong!
- 117 replies
-
- 1
-
-
- Pyro
- Robert E Lee
- (and 2 more)
-
I haven't built this model, but I think I understand what you're asking. If you were to place 38S in the orientation shown in the plan, its outboard face would be up, not down. Same for 38S. The first question is how thick 38S/P are compared to the 3/32" strip called for? If the same, this doesn't matter. If thinner than the strip, then it does, because it affects whether the strip stands out from the flat piece or is flush with it, when looking from the outboard side. I looked at photos on the Model Expo website and couldn't honestly tell which way they did it. So I checked a few other build logs, which seemed to confirm (a) that the strip is thicker and (b) that it should stand out from 38S/P outboard. This would have been my guess as well, since it seems natural that a corner post would be thicker than the siding between it. @RussR did it with the strip standing out from 38S/P (https://modelshipworld.com/topic/21351-chaperon-by-russr-finished-model-shipways-148-scale/#comment-645826) : Looks like @mbp521 (Brian) did it this way too (https://modelshipworld.com/topic/20408-chaperon-1884-steamer-by-mbp521-finished-model-shipways-scale-148-first-build-log/?do=findComment&comment=635188) : So this would seem to imply that the plans are right and the written instructions are wrong; lay 38S/P out as shown, outboard side up, and glue the square strips so that they stand out from the flat part on the outboard side.
-
Patrick, it's been a while, are you still working on this?
-
Nice job. I agree that adding the boiler tops is a significant upgrade.
-
Don't sell yourself short, modifying/upgrading kits is a great way to model. Frankly, fixing kit mistakes takes just as much knowledge as scratchbuilding, in some ways more because you not only have to know WHAT to do from scratch, you have to recognize what NOT to do in terms of kit errors. For example, check out my Viking longship build; this was a fairly simplistic kit that I did extensive research on and made major upgrades to in terms of accuracy and detail. I'm not sure it wouldn't have been easier to build one from scratch than to deal with all the kit's problems! I think it's great that you cared enough to learn about what you were doing rather than just slapping something together that you didn't understand.
- 117 replies
-
- 4
-
-
- Pyro
- Robert E Lee
- (and 2 more)
-
I have to keep reminding myself how small the scale is on this.
-
Bingo. Asymmetric bulkheads. The good news is that learning how to fill/reduce bulkheads to achieve a proper run of planking is a REALLY useful skill that you will need again. But it's rather annoying when it smacks you in the face like a wet fish. Have fun!
-
Yeah, those are definitely not right. Are there similar or mirrored problems on the port side? I remember a kit once where the bulkheads weren't symmetrical and only worked right if they went in using a specific orientation (i.e., flipped one way they all matched up, but if one was flipped the other way it was too short on one side and too wide on the other). Too late to flip bulkheads. Definitely needs to be fixed before planking. Even in your first photo, I'd swear things don't look quite right though it could be a trick of the light. I'd recommend clamping a test plank to every bulkhead and seeing where you find any odd kinks. Given the work you've done so far, the only real way to fix any problems is to fill in missing space using strips of wood curved over the bulkhead, and carve out excess wood, until you get a smooth run of planking everywhere.
-
Thanks! Hope you enjoy it, the project was fascinating and fun. You'll probably enjoy the video lecture linked toward the end of this log, too, though it won't apply directly to your Robert E. Lee project as it focuses on the somewhat different Missouri River boats. Best wishes for surgery recovery, I've been there and it's no fun. This project actually wrapped up a couple years ago, though it doesn't seem like it. Since then I've completed a few others, including a Viking longship and several NRG learning projects (see links in my signature) but I haven't taken on anything in a while due to a complicated situation including wrist injury/surgery, extensive other commitments in my non-modeling life, and the temporary loss of my workshop to (currently delayed) remodeling projects. If/when I get back to building, I'm considering scratchbuilding the JR Wells, a neat little steamboat that operated on Missouri's Osage River; some photos and info are available here.
- 599 replies
-
- 3
-
-
- sidewheeler
- arabia
- (and 4 more)
-
She's coming together nicely.
-
If you're looking for something accessible that will give you a decent overview of the evolution of wooden ship design over time, I strongly recommend "The Evolution of the Wooden Ship" by Basil Greenhill. It's a simply and clearly written work heavily illustrated with really nice drawings, that reads more like a narrative than a reference work. I think it'd be particularly well-suited for beginners. Many of the reference works out there that experienced modelers use can be pretty difficult for those newer to the subject. I think it helped me more than anything else I've read to really understand the geometry and evolution of ship design. It mostly focuses on hulls, less so on rigging, so you'll have to look elsewhere for that. Also, in terms of books on modeling, I'd be cautious about using older books. There are many old staples that are good in their way, but are also pretty out of date with respect to modern materials, methods, and kit design. Honestly I think there's better and more accessible information online than in most books, and I say that despite being the son of a librarian and a confirmed book lover.