
MORE HANDBOOKS ARE ON THEIR WAY! We will let you know when they get here.
×


Cathead
-
Posts
3,418 -
Joined
-
Last visited
Content Type
Profiles
Forums
Gallery
Events
Everything posted by Cathead
-
 Fantastic! Thanks for explaining the considerations regarding weight vs. volume in the holds, something I'd given little thought to with regard to ship design.
 -
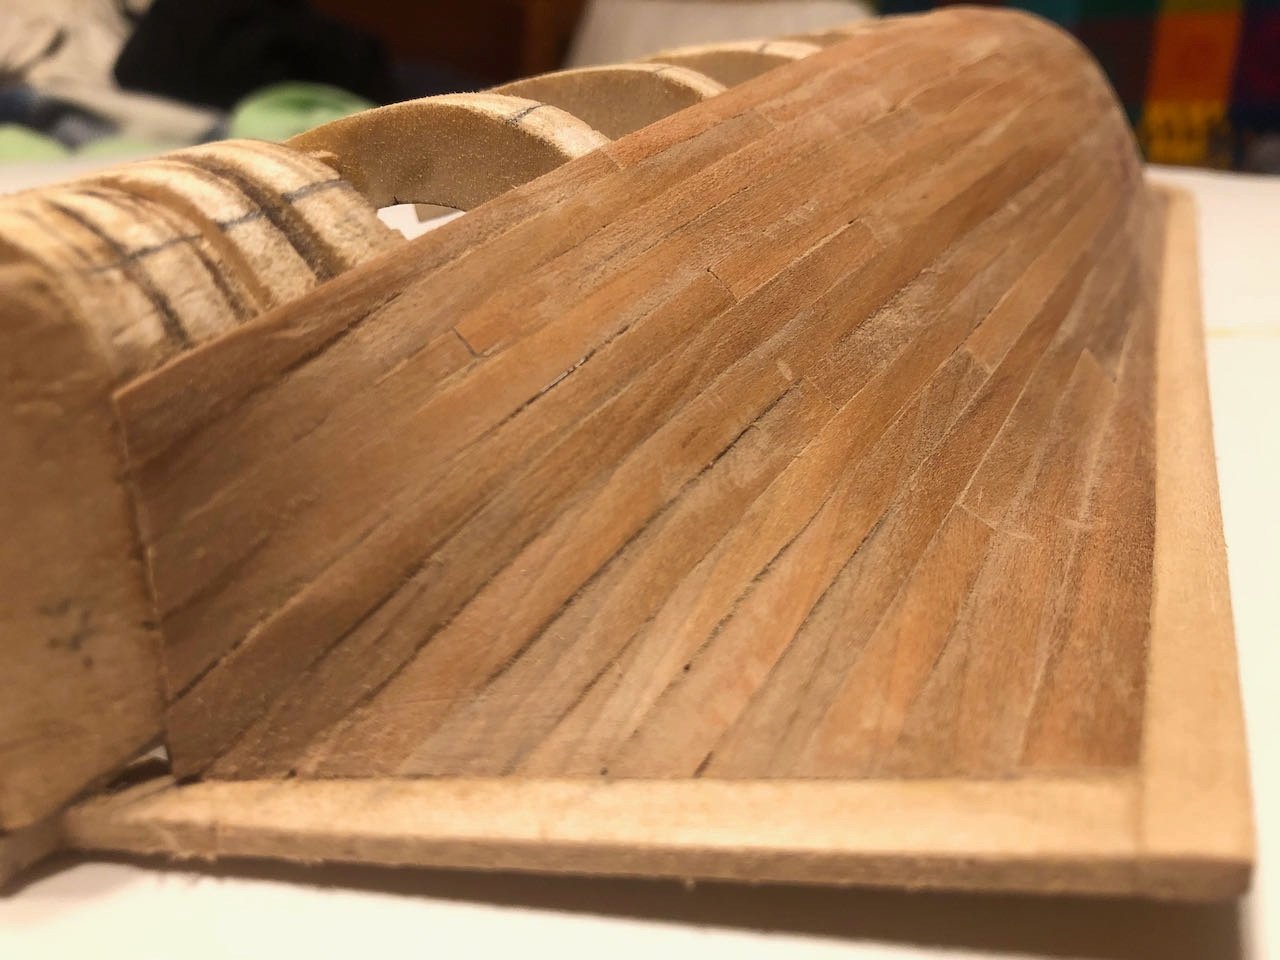
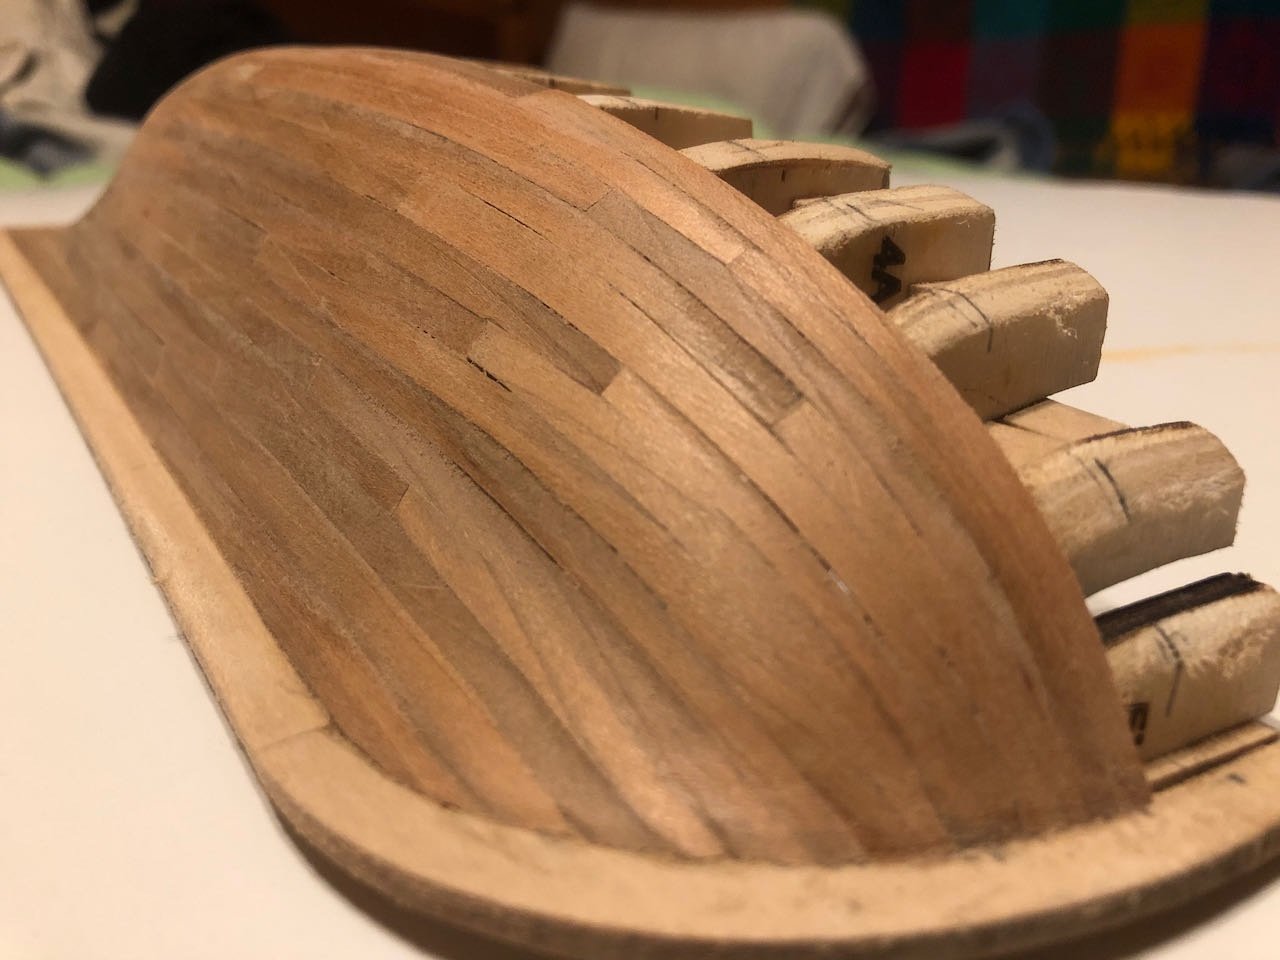
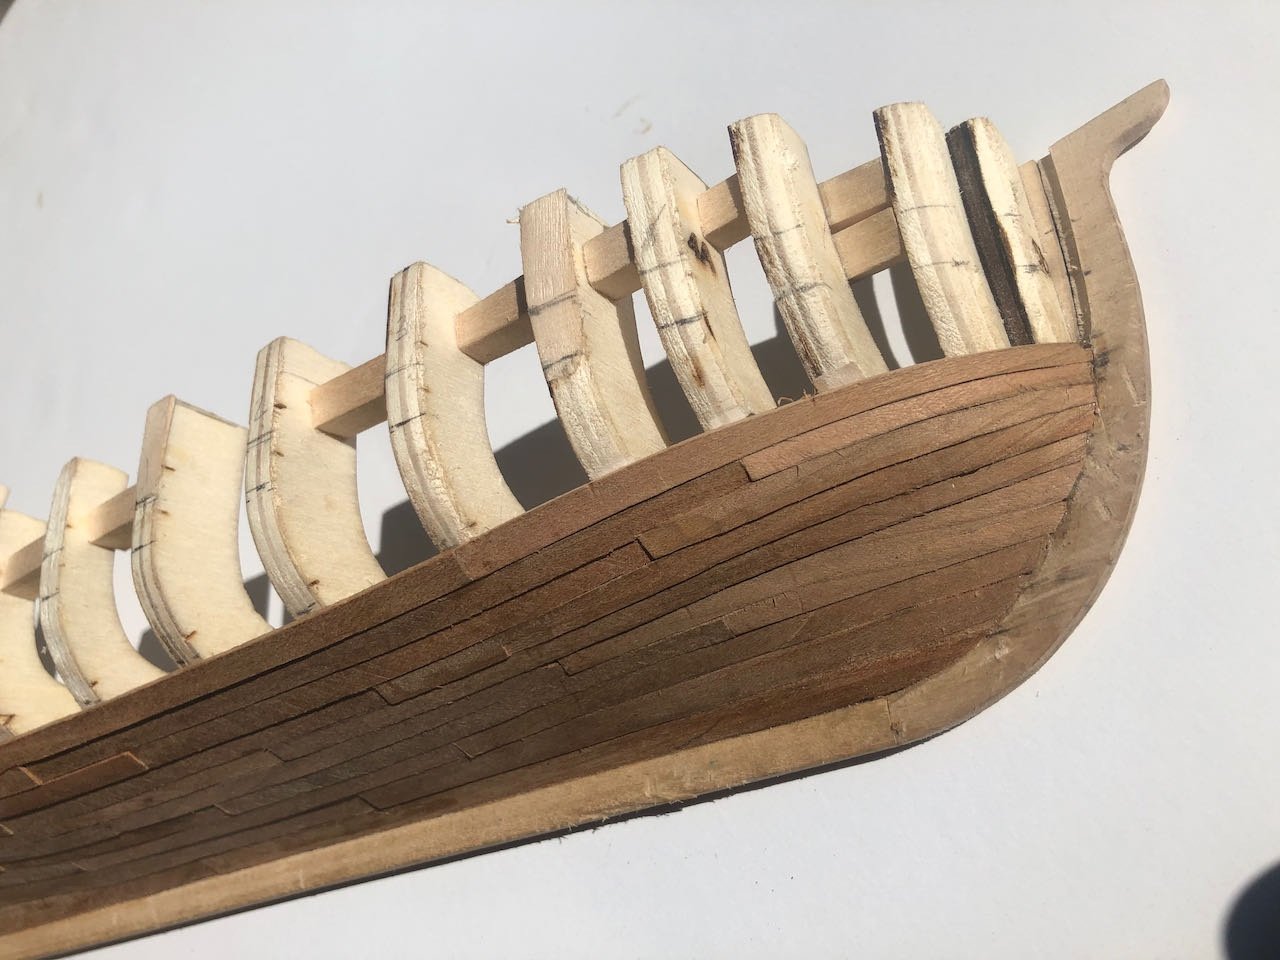
Exactly a month later, I manage to have an update. The planking is complete up to where the wale starts. This is as far as I'm going in cherry; the wale will be walnut and all the planking above in maple. I think this will make a nice color contrast on what is, after all, a somewhat artistic model. Below are two before and after shots showing the effects of a first sanding on the cherry planking: Photos sure do pick out every flaw, don't they? Others' projects have been cleaner, you can really see the unevenness of my planking. Some of this I put down to milling my own wood, some just to the fact that I'm not an artisan, just a happy muddler. Learning some good lessons, which is kind of the point. Now to start on the wale, which I'll do in two layers as suggested by the instructions. Thanks for sticking with me.


-
Andrew, I'm so sorry to hear that. I've been in the same position of trying to find purpose and value in the things a loved one leaves behind. However, this thread probably isn't the best place to ask your question as it's devoted to a single build of this model and hasn't been updated in almost a year. You might consider posting in this thread, a general discussion of all riverboat-related items, where you're likely to find a larger audience of people interested in such models. Also, have you considered trying to finish it yourself as a tribute to, and memoriam of, your father? You'd find a lot of support here if you did.
-
Any further progress? I miss following this project.
-
If you like historical fiction, Ken Follett's cathedral-building epic The Pillars of the Earth is subtly built around the sinking of the White Ship, in a way that pays off very satisfyingly at the end but I can't say more without providing a spoiler. The actual writing can be a bit purple at times but it's a satisfying read for its breadth of character and historical context. Personally I think his later writing went off the rails a bit but this early book is quite good. I love how well the castles match the seals, it truly brings the images to life. There's something very satisfying about turning 2D art into 3D art in this way.
-
Sorry, I've never bought a case. Google turns up various options.
-
Just saw this. How cool! Thanks for sharing.
-
So often, in steamboats, the rule is "anything reasonable was probably done somewhere" (and sometimes unreasonable). I agree that the boiler and hurricane decks look like they have canvas, and it seems more likely that those weren't painted red, so a natural canvas color would seem appropriate there? With a dull red for the main deck as a contrast? In the absence of better evidence I'd say choose what looks attractive to you personally and what you can reasonably justify.
-
Just catching up, beautiful as always. To clarify an earlier discussion, I've used pastels for both weathering and primary color on various ship builds as well as model railroad projects. On Arabia, the deck planks were colored by pastel while the main white color was paint. On the Viking ship, the shields were primarily colored pencil while the sails were layered pastel and colored pencil.
-
Sorry for slow reply , been off grid and now browsing at airport on phone so hard to study diagrams or write long reply. Will try to help more later this week. Just wanted you to know that you weren’t being ignored.
-
Nice start on a neat model. Hope you're still working on it.
-
I've already beaten the crap out of the keel, sternpost, and stempost, and wish I'd remade those in maple before getting started. As it is I'm considering trying to add a thin veneer or something, depending on how well the damage sands out. Some of that damage comes from my stubborn insistence on building this as a loose model (not attached to a build board as in the instructions), which definitely exposes these parts to harm but I'm finding makes many parts of the process much easier. Sounds like a good plan. I really think this is going to clean up well with a bunch of sanding.
-
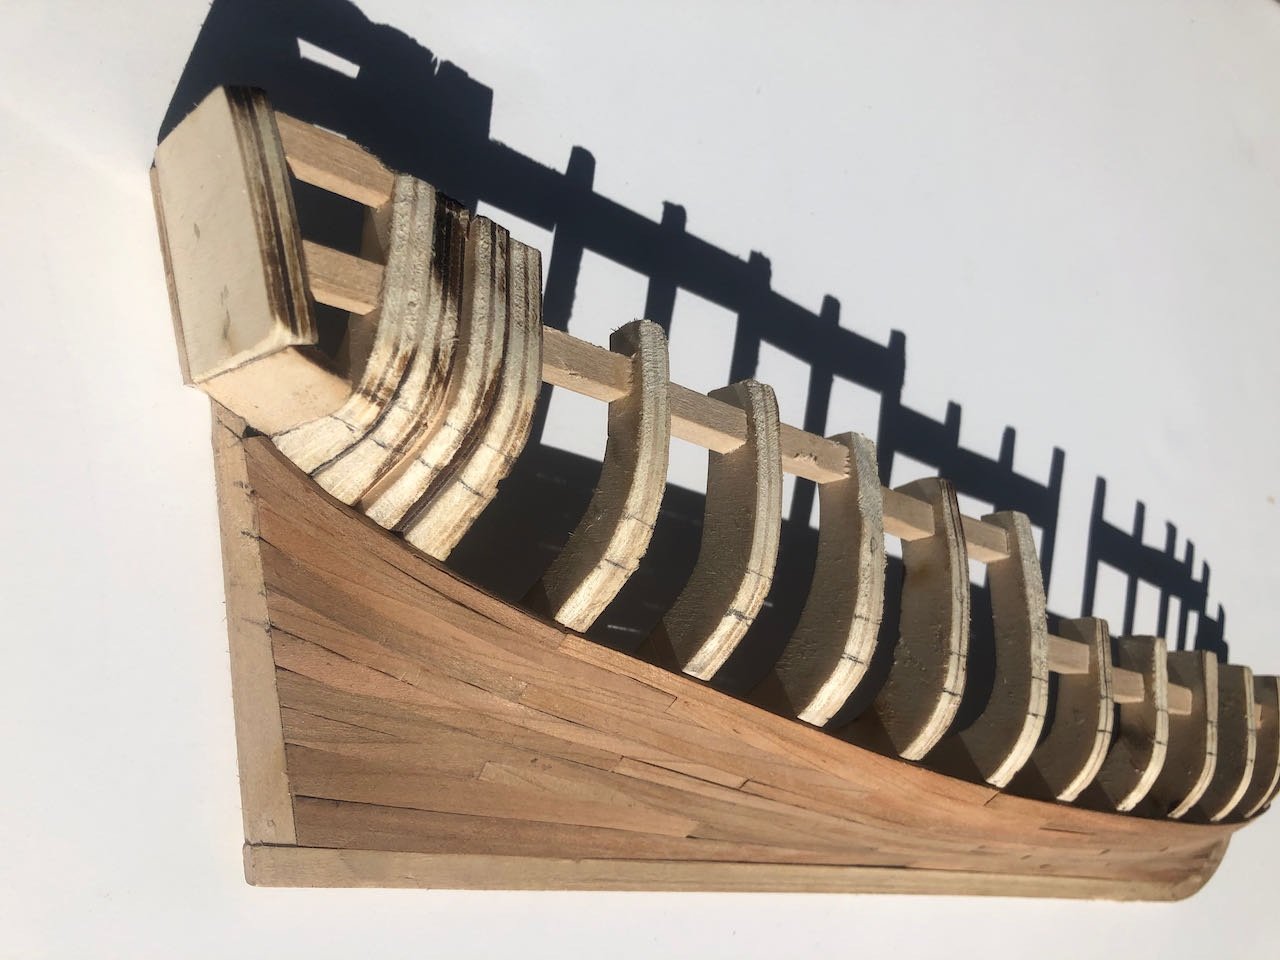
I agree that the directions are pretty difficult to follow regarding how to handle the complex planking around the counter, and none of the photos really capture it in progress. I had to study a lot of different images to even get as far as I have.
-
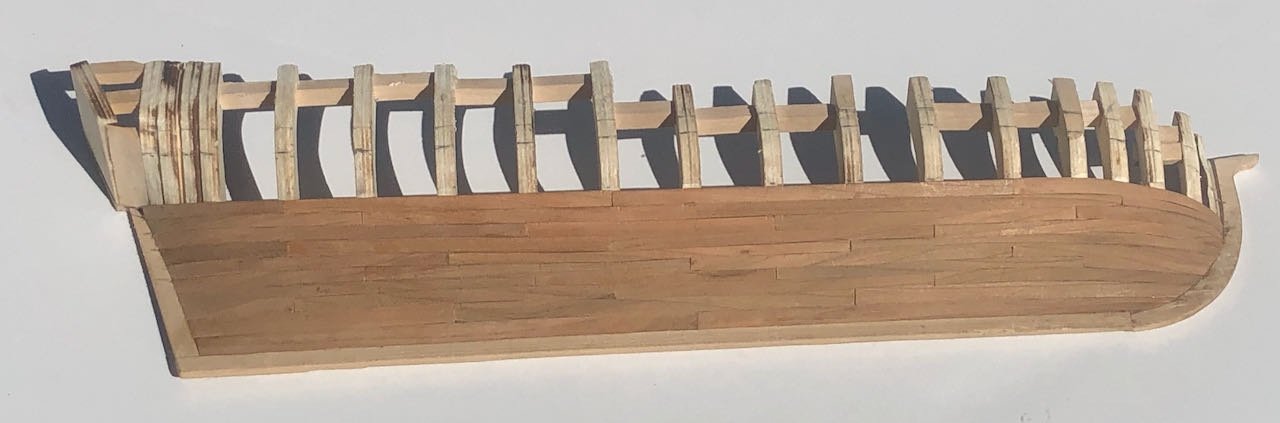
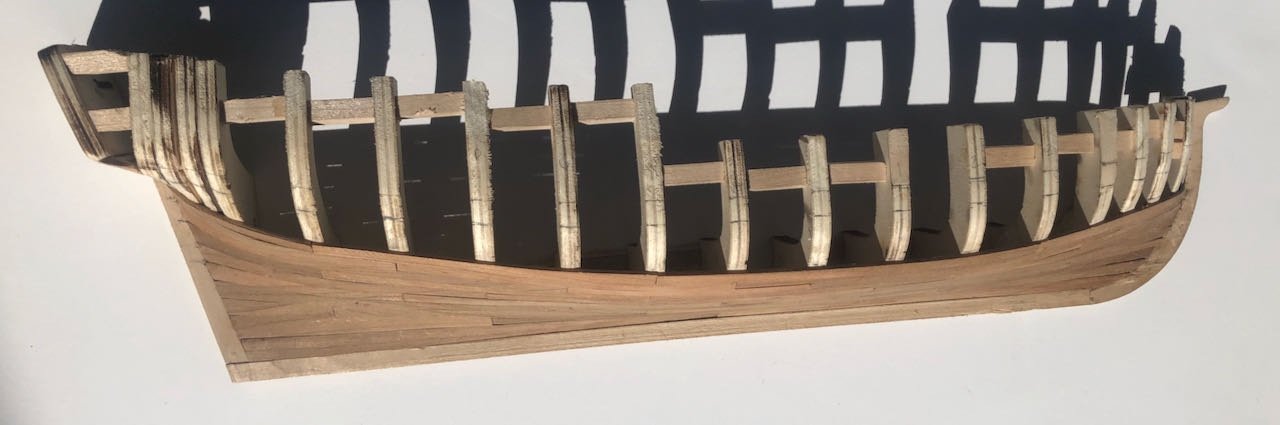
It's been over a month since I updated this, so here's the current status. I'm 2/3 of the way through the lower planking (below the wale). I haven't been in the mood to make updates, partly because life has been stressful and distracting, and partly because I don't think plank-by-plank updates really add anything to what's already well documented for this project (and planking in general). I have mixed feelings about the results. I just haven't been able to make the planking runs as consistent in width as I'd like. Seems like a mental block or something. I know what I'm supposed to be achieving but there's a lot of variability that just seems to have crept in. I honestly think I did a better job planking my revenue cutter than here, where I'm paying more attention. Some of this may be due to working with the home-milled cherry, which has variable width and a fairly coarse grain, which sometimes makes precise cutting difficult. Here are two closer views of the bow and stern: You can really see the varying plank thicknesses that result from using the Byrnes saw but having no thickness sander. I intentionally milled my strips a bit thick to allow for final sanding, so I think this will look a lot better as a finished product than it does now. I haven't used a stealer at either bow or stern, even though I knew I was supposed to. Somehow it didn't develop naturally from the way my planks flowed. I see a lot of mistakes and problems overall, and plead (a) a relative lack of experience with this process and (b) a really distracting period in my life right now. Even when I sit down to work on this, my mind isn't really focused, so I'm just sort of drifting through this. I am learning some things, and I think the final product will be reasonably attractive. But I thought I would be doing a better job. Here's one more shot of the current hull. Four planks to go before the wale, and then things get a lot easier. Thanks for looking in.
-
Following you over from your last build as well. I haven't built this kit but it seems most reasonable to follow the template. I also wonder if you're being confused by terminology. The word "keel" refers specifically to the timber along the bottom of the vessel; it has no vertical component. The part that doesn't match your template runs along what would be the sternpost (if this were a framed model), the structural piece rising up from the keel toward the transom. See the first diagram here for a good illustration of what the framed pieces would look like in this area, if the terminology remains confusing. So the directions do make sense in that you appear to need to remove material from the stern (not the keel), especially where the sternpost meets the transom (again thinking of where the real framing would be).
-
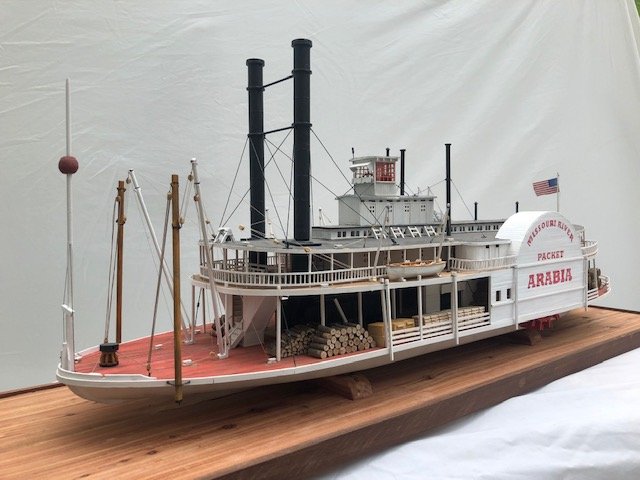
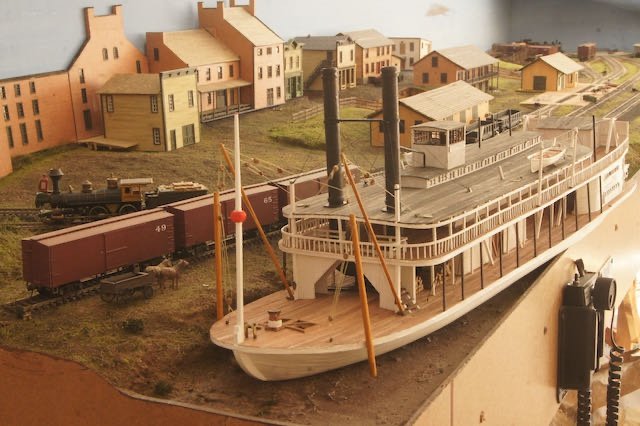
Welcome! I'm also a model railroader who diverted into shipbuilding. You might enjoy this photo of my steamboat Bertrand at a mid-1800s railhead of the Hannibal & St. Joseph Railroad, on the Missouri River in northwest Missouri. If you're going to built Chaperon, I strongly recommend this additional guide written by Kurt Van Dahm, a director of the Nautical Research Guild and resident steamboat expert. It's got a ton of good details and suggestions that complement the kit instructions. The price is well worth it compared to the cost of the kit and the time you'll spend on it (especially the time you'll save avoiding mistakes!). There are also some very good build logs for the kit here on MSW that would be well worth reading through for insights and inspiration. I weather my steamboat models to the same extent I do railroad models: to look reasonably well-used but not decrepit. Many ship modelers don't weather because there's something particularly attractive about a pristine stand-alone model, but I think riverboats just don't look right if too crisp. Certainly if it's going on a model railroad layout, weathering makes sense. I primarily use pastels for light shadings of dirt, grime, rust, and so on. For example, here's my lightly weathered Arabia (another Missouri River steamer); not grimy, but not shiny either: I'd certainly encourage you to start a build log for your Chaperon here, as it'll be the best way to get advice and support as you dive in. It's a great choice of kit, really the only accurate riverboat kit available, and turns into a beautiful model. Good luck and I'll be there in your build log if you start it.
- 20 replies
-
- 10
-

-
I honestly don't know what to say re. the boiler deck. You have good arguments supporting either arrangement. The model looks lovely so far.
-
This is a devastating story and loss, and I'm so appreciative that you were willing to share it. You certainly have the right to take a break from the model. My last project, a Viking ship, was in part dedicated to my father-in-law, an Old English scholar to whom I was very close. He, too, died (this past winter) before I could finish it, and never really got to appreciate even the build properly as his health and mind failed too rapidly once the project had begun. But I'm so glad I did finish it eventually, and now I think of him whenever I see it displayed in my home. It helps him be a part of my everyday life to see that ship there. So I hope you'll at least consider the suggestion of coming back to the model when you're ready, whenever that may be. In the meantime, I feel your loss as deeply as a stranger can, and hope you'll take care of yourself as you mourn. All I can ask is that you set the model aside, rather than enabling any possible urge to dispose of it. That way, it's there if you decide to return later.
- 89 replies
-
- 3
-
-

-
- Enterprise
- first build
- (and 2 more)
-
Good start! That's a neat way to simulate the original carved stem, I was scratching my head about how one would do that on my recent Viking build.
-
Great improvement! More accurate, saves space, and looks better all around.
- 89 replies
-
- 1
-
-
- Enterprise
- first build
- (and 2 more)
-
That's a good method for simulating the real effect at a small scale. One note, especially if you're going to redo this anyway: model blocks should be oriented so that the hole is on the opposite end of the loop made by the string as it goes through the hole. In other words, you'll want to flip the blocks shown in your photo end-to-end. This is because, on real blocks, the line is going around a pulley in the center of the block, so it needs to pass over most of the block before going through the "hole". In even other words, the line should pass over most of the block before looping through the hole, not looping through the hole at the very tip of the block. Look really closely at the drawing you posted above and compare where the line passes through the real block compared to where it passes through on the model block you show above. This is always hard to explain in text, let me know if it makes sense. It's a really common thing to overlook and nothing to be ashamed of. As for manufacturers, certainly BlueJacket and Model Shipways tend to have clearer instructions. I've seen Vanguard and Caldercraft mentioned as well, though have never built a kit from them. There are lots of threads on kit/manufacturer reviews elsewhere on MSW that you can dive into. It's complex enough that any one person's opinion only counts for so much. Some manufacturers provide the instructions as a free digital file, which is especially good for evaluating a kit ahead of time.
-
This is an especially common problem with kits produced by manufacturers for whom English is not a native language. Few bother to have their instructions checked for language or clarity. Even native-language instructions can have errors, but it's particularly prominent in "foreign" kits, although in fairness this varies quite a bit by manufacturer.
- 89 replies
-
- 1
-
-
- Enterprise
- first build
- (and 2 more)