
HOLIDAY DONATION DRIVE - SUPPORT MSW - DO YOUR PART TO KEEP THIS GREAT FORUM GOING! (Only 24 donations so far out of 49,000 members - C'mon guys!)
×


amateur
-
Posts
3,516 -
Joined
-
Last visited
Content Type
Profiles
Forums
Gallery
Events
Everything posted by amateur
-
Sails to yards first, without doubt. Jan
-
I am still surprised by the relatively small part of the hull that is below the waterline. The camo-pattern is a very nice one, indeed. Jan
- 345 replies
-
- 4
-

-
- graf zeppelin
- trumpeter
- (and 2 more)
-
Just a question: did you use the red parts straight out of the box, or did you paint over the red? Jan
-
Very nice. And now the plane around it Jan
-
Hi Ed, I could have hit the like-button, but I wanted tot say that I enjoyed all your posts (even the ones were you said you were only showing repetitive work ). The final result is absolutely fabulous. And although the artwork is perhaps a bit amateurish, the point of view of the picture really shows the impressive height of the ship. Turn it into a black-white pic, and photoshop New York harbor in the background, and nobody can tell this is a model. Jan
- 3,618 replies
-
- 5
-
-
- young america
- clipper
- (and 1 more)
-
But the smallest part so far were near invisible. half of that size means: invisible to the human eye Jan
-
Hi Marcus, Bending isn’t the bedt way to go: some need serious sideway curves, and the width isn’t constant over the length. Making templates, and fabricating planks from a sheet is perhaps the easier way to go. Jan
- 332 replies
-
- 2
-
-
- fluit
- abel tasman
- (and 1 more)
-
Nice ship, not the easiest hull to plank. (Never tried one myself, but saw lot of strugling ) Emke's drawings show enough detail to keep you busy for some time . Jan
- 332 replies
-
- 2
-
-
- fluit
- abel tasman
- (and 1 more)
-
Talent? Outside and painted you get an idea of the size of the ship. Jan
- 345 replies
-
- 7
-
-
- graf zeppelin
- trumpeter
- (and 2 more)
-
Shipmodels everywhere Although the maritime musea tend to shift from models to stories. Jan
-
Looks good. How picky are you in the details of the hulls molding? In case you are, the indentation of the hull around the forward guns need a very small amount of filler: in the original it is rounded slightly below the upper plating belt, in the model it cuts into it.... Jan
- 345 replies
-
- 5
-
-
- graf zeppelin
- trumpeter
- (and 2 more)
-
The pics are easy: www.bundesarchiv.de the rest is wizardry, as far as I'm concerned ... Jan
- 345 replies
-
- 1
-
-
- graf zeppelin
- trumpeter
- (and 2 more)
-
Is that a framed model with a bottom, a framed one on a triangular backbone, or a box-like internal structure? JSC has some variations. And: did you also bought the laser cut detail set? Jan
-
I understand that you needed a break from your major build, but we want some update there Those little black thingies can become a real problem: Doing the second planking on my Prins Willem (same gun-port system), I didn't manage to get the run of the planks exactly in line with the line of the gunports. There was (especially at the ones glued to the bulkheads) almost no margin for error. In the end I decided to leave out the guns on the upper deck., and live with the fact that I can see the lower edge of the U's in some cases. I did not drill the holes for the guns. I still fear the moment of drilling, and coming to the conclusion that fifteen years age I should have used more glue to attach them to the inner planking. Ah, well, I can always decide to show her with the guns behind closed ports Jan
-
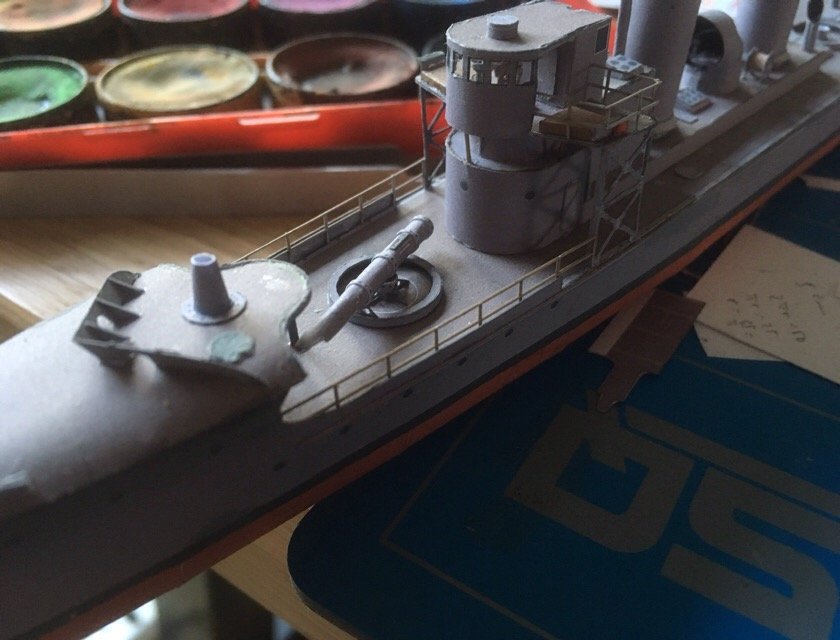
Next will be the aft torpedo, some railing, the compass and the guns. (In that order) I checked the pics: the box is slightly too large, and the grey squares that indicate glueing surfaces are misleading: the light should be on top of the brackets, not sitting in between them. Jan
- 64 replies
-
- 2
-
-
- v108
- digital navy
- (and 2 more)
-
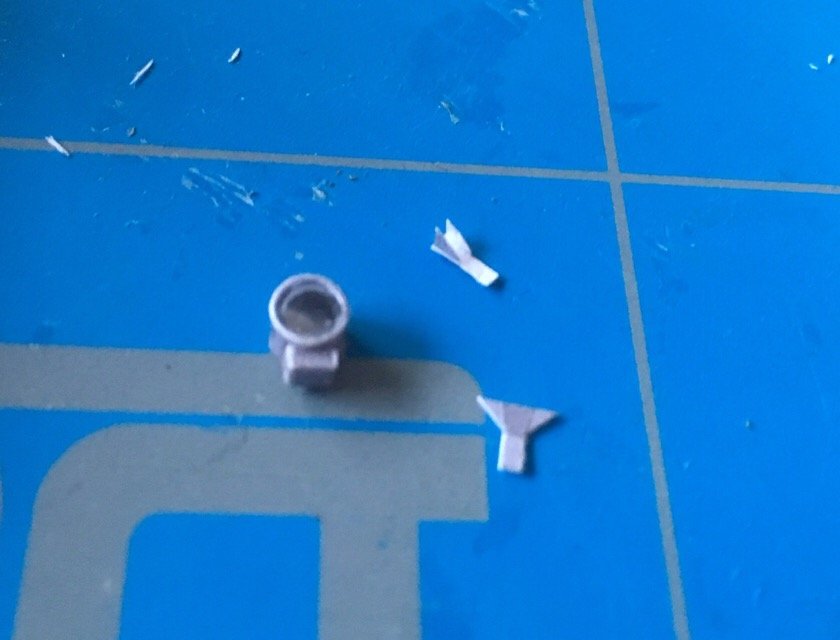
Some more little stuff. Torpedo tube on deck, pedestal for the gun, and for the searchlight installed. Searchlight, and brackets. and installed on top of the bridge. Could have been done better. There seems ro be some interference between brackets and little square box at the bottom of the light. And now I'm really done for this week. Jan


- 64 replies
-
- 6
-
-
- v108
- digital navy
- (and 2 more)
-
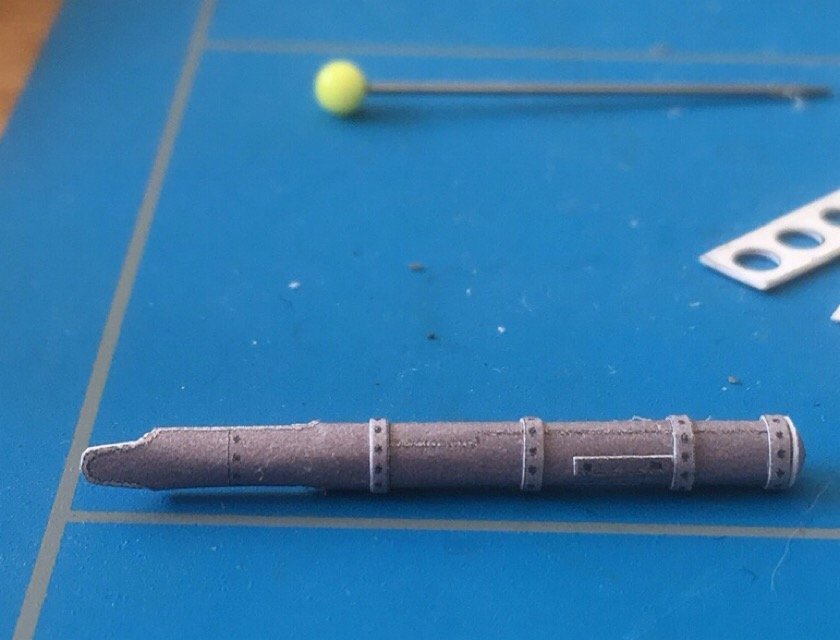
Little, or shouldI say small progress. Today I did somerailing stuf (draf model, poland). I used scal 1:250 in stead of 1:200. The reasonfor that: stanchion-distance is still too large in this scale, and pics show that the railing on these ships is on the low side. I think this is a reasonable compromise. Draf has used gray card, and I don't think painting will make itanybetter than it is now. I also made the first torpedo-tube. More to follow (don't know when) Jan
- 64 replies
-
- 6
-
-
- v108
- digital navy
- (and 2 more)
-
That is small..... what is the thickness of cardstock you use? Jan
-
No, perhaps not, but it was standard practice in Dutch rigging around 1700. Why they did it, and when they stopped it, I never checked, but quite a lot of pic on gaff-rigged vessels show a double vang on both sides, especially on the slightly larger see-going vessels. Jan
-
Oops, I missed the updates on this one. I made that up just now. those Halinsky's are unbelievable. Another masterpiece! I promise: I will follow the next one more closely Jan
-
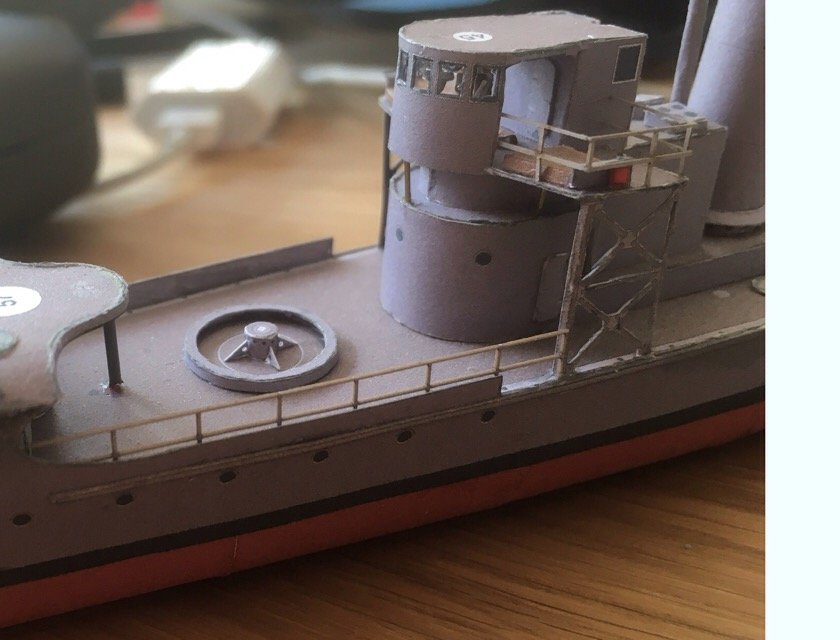
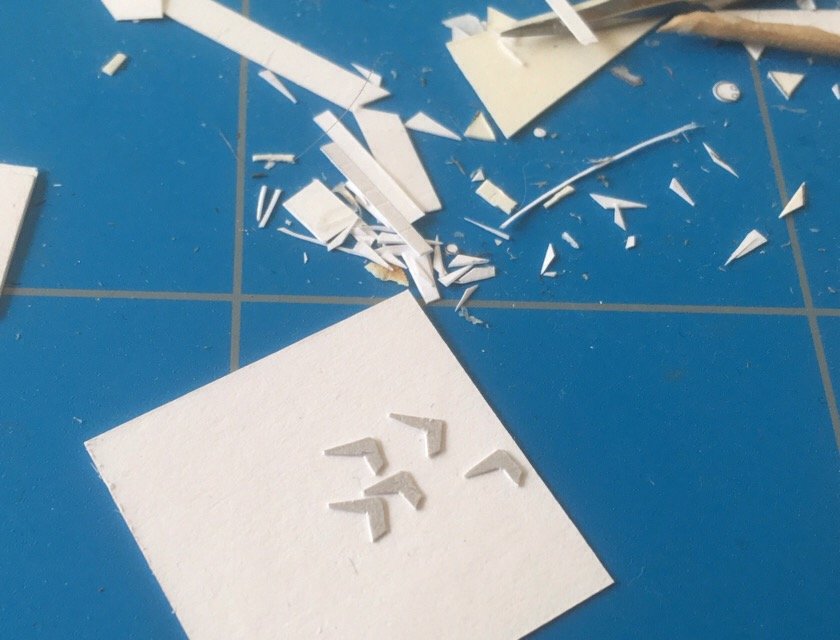
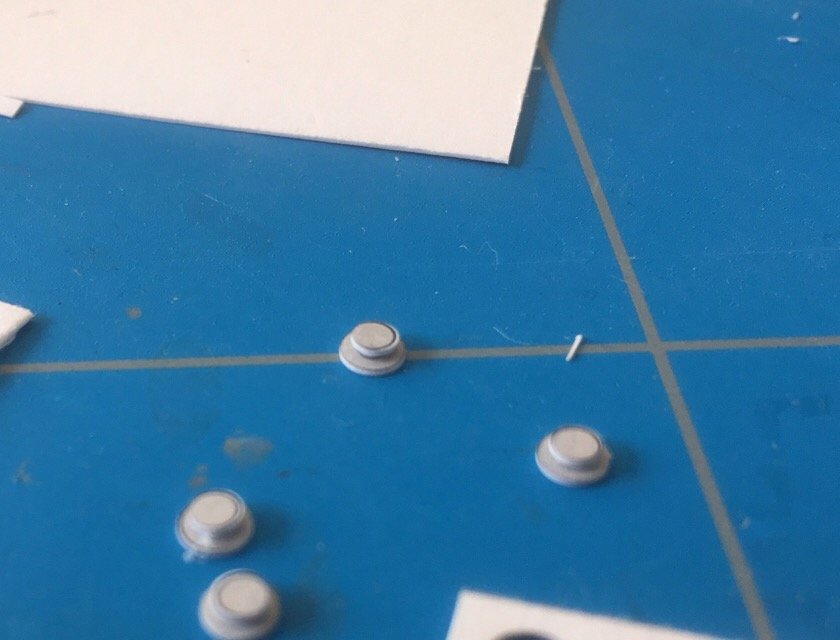
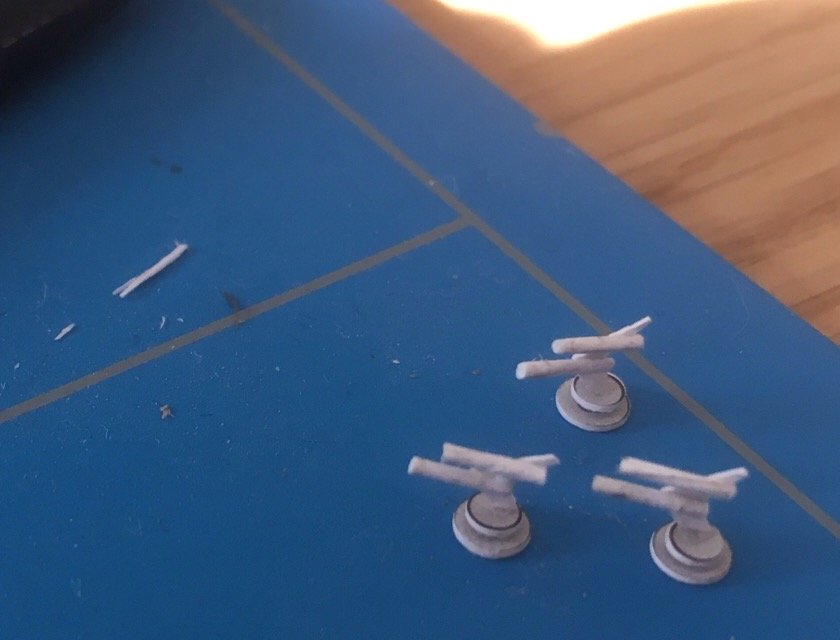
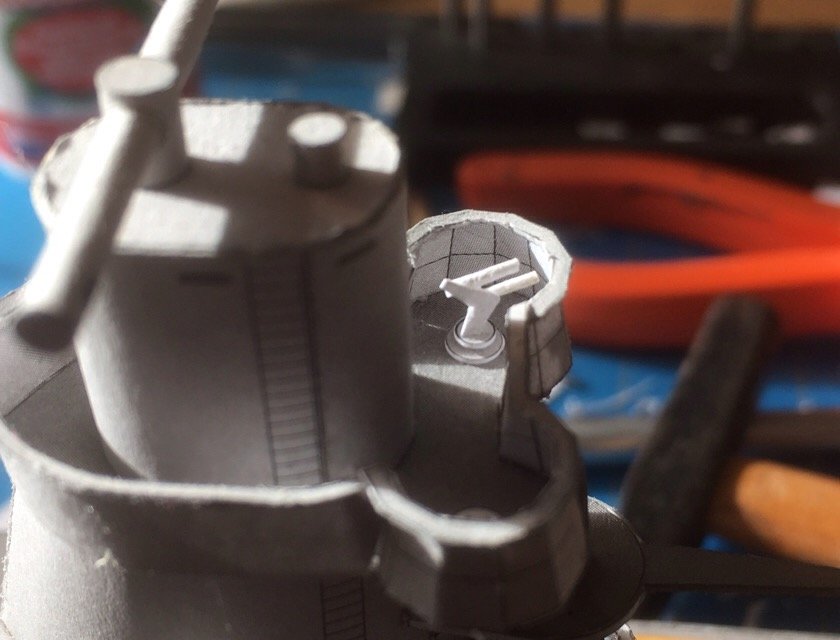
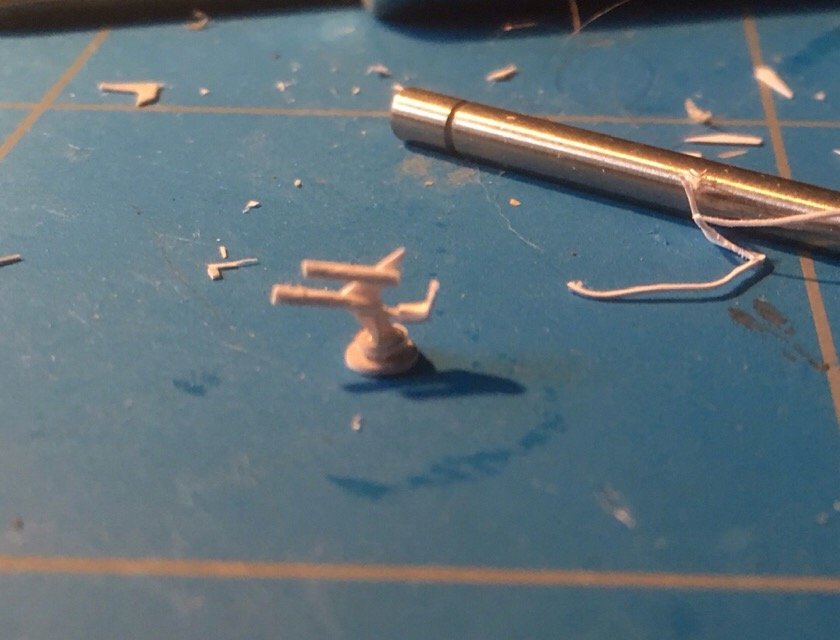
Today my amiration for the 1:350 PE builders increased by another huge amount. I deceded to build some 'gunlike' things, in order to replace the kit-provided parts. In the end, I have some partial results (paint still to be done), but it took me far more time than expected. In the previous post I showed how it could have looked like. So here is what I made of it. sides and pedestals added together with some barrel-like things. Actually the forward part was round (watertank), and the back end square, but that proved beyond my capabilities. Making correct sized barrels, too, by the way. They are made of tightly rolled 80 grams paper, but a strip of 4 mm wide proved to much, a strip of 3 mm didn't roll as I wanted.... placed on the conning tower, I noticed two things: the struture is a tad small (it should have reached just above the railing. Second: it does need some kind of chair. The chair I made. The size remains at it is. No-one willever know, as long as you guys don't tell the whole thing is so small that my cellphone camera doesn't focus properly. Will be fun painting. All wheels and other small stuff remains unmodelled. Jan
-
Sorry for a need help to identify post
amateur replied to macmac's topic in New member Introductions
Do those marines wear a kilt? Jan