-
Posts
3,519 -
Joined
-
Last visited
Content Type
Profiles
Forums
Gallery
Events
Everything posted by amateur
-

Enzo Ferrari by CDW - Tamiya - 1:12 Scale - PLASTIC
amateur replied to CDW's topic in Non-ship/categorised builds
I have been looking for quite a while at those pics. I would have believed anyone telling me these are pics of the real car, and not a model. Jan -
Hello Ab, in anorher thread you explained you building method: grey card for the framing, soft cardboard for the outer hull. I tried to find that softer board. My local supplier (arts and crafts) doesn’t sell it. What is more, they don’t recognize my description. They come up with atiff passepartout-board, or foamboard, or even bristol-board. on the internet I can find so-called finnpappe (can only find it in German sites), but they charge ridiculous prices for transport to this side of the border. So here is my question: where do you buy yours? Jan
-
The fingertip in one of those instructions is helpfull Just for my idea: how large(small) are those airplanes? I guess you can get at least two on your thumbnail? Jan
-
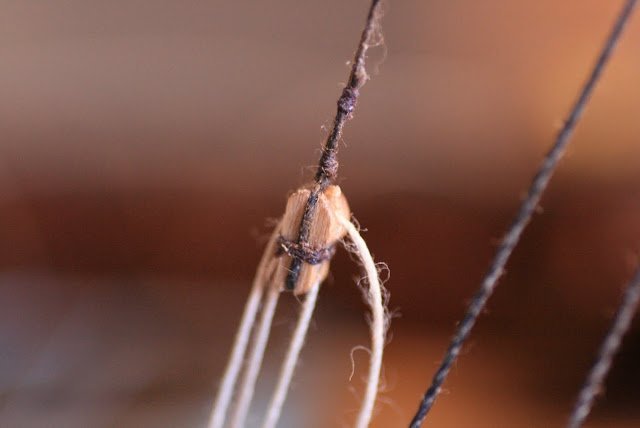
Two pics from my build: the long tackle block is secured with a half hitch, and two seizings : the first pic is just after making the seizings, the second in the final (and due to loooong building times, somewhat dusty) state. fir reference: block is 5.5 mm, serving thread is gutermann machine tarn from the shop around the corner. Jan
-
It also depends on the scale: what os acceptable ar 1:100 might be rather unsightly at 1:24 scale. at large scales you will need to strop the block, and splice the rope into the strop. at 1:100 you can gake a lot of things, without creating visual problems (unless you are a purist,than you have to strop at 1:100) After much trial an error I landed at : rope around block, half hitch under the blick to secure the block in place, and a seizing to fix the running end. Fix with diluted white glue (which makes sure it holds, but can bevremoved when really necessary) Works easy, quick, and the result looks fine to me Jan
-
No, the fun starts when/where he is doing something wrong He will do more research, rips down his wrongs, and start all-over. Jan
-
Although I like your little parts, I start wondering: when (if ever) will work on the 'main model' continue?? Jan
-
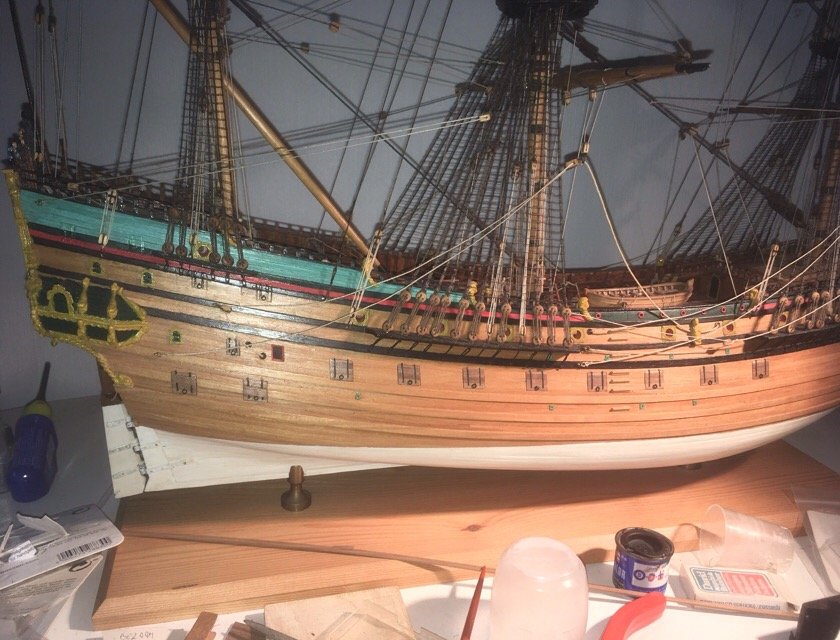
The carpetmonster took one more than he was allowed to. one portlid to go on this side. The others are done. I'm pleased with the looks of it. not the best of pics (iphone with flash on short distance in an otherwise dark room), but you get the general idea. I wonder how long it will take for the portlids to blend in with the planking of the hull. This wallnut is changing colour as a result of daylight-exposure. But as I like the lighter version better than the original darker one, I don't complain. Jan
- 139 replies
-
- corel
- prins willem
-
(and 1 more)
Tagged with:
-
What is nowcalled fiddle, is called 'long tackle' in steel. interesting: fiddle in dutch translates as viool. (Which sounds more or less like viol). Sounds alike, but different blocks. Jan
-
So am I. There is a build-log on a German forum for some years (so: not going in a Danny speed). And that guy claims there are some issues with the laser0cut parts for the frame. He decided not to use them, but use the laminated parts in stead. For all of you that can take some german : http://www.die-kartonmodellbauer.de/index.php?thread/1470-hcp-1-6-2-bulgar-1-25-modelik/&pageNo=1 btw: how many parts are there in the kit? (quite a few, I guess) Jan
-
I don't know how it was/is done in eastern parts of europe, but here it is not both buffers convex on one side, and both concave on the other side: it is a left/right business: the left one (when standing in front of the wagon) being the mushroom-one, the right one flat. So, there never is any problem when turning around, or sorting. Good to hear your loco finally made it to australia ! Jan
-
I can't think anything else than Jud having removed his post.... (btw: also hitting the like-button results in a notification that someone reacted to a post) Jan
- 378 replies
-
- java
- pacific crossroads
-
(and 2 more)
Tagged with:
-
Look at the Dutch Sterns: they all have some kind of curved bar on top, with two small lions resting on top of it, and some kind of curtains around the central piece (some cow in your case). Jan
-
I was surprised buy the fact that you have the styrene visible from the side. It does not quite match the quality of the hull and your fantastic paintwork. What will your final display look like? Jan
- 2,696 replies
-
- heller
- soleil royal
-
(and 9 more)
Tagged with:
-
Hi Ken, thanks for the extensive answer and the pics. I checked: the pics in the naval archive are all taken in Europe, shortly before the war. So that matches your suspicion that the shields were put on very shortly before the action in the Java sea. btw: the same applies to the colourscheme of both ships. Virtually all pics show them basic grey, just as build. Almost no camouflage pics of these ships. Jan
- 378 replies
-
- java
- pacific crossroads
-
(and 2 more)
Tagged with:
-
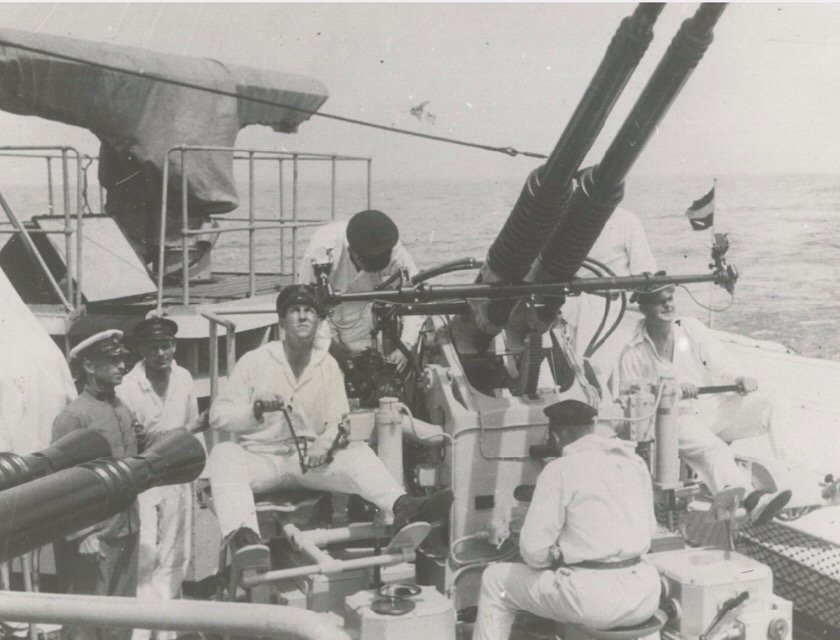
Just a question: the bofors on The Ruyter had no shields.... why did they fit they on Java, but not on the (newer) guns of De Ruyter...? (And: the pics I can find show all WwII dutch bofors without shields. Or are we talking different shields?.) Pic from tha navy-archive (nimh) of one of the Java-bofors Jan
- 378 replies
-
- java
- pacific crossroads
-
(and 2 more)
Tagged with:
-
How are the davits and boats progressing? Jan
- 238 replies
-
- leviathan
- troop ship
-
(and 2 more)
Tagged with:
-
Yep, there is: the so-called standing rigging (the non-moving parts like stays and shrouds) used to be more heavily tarred, so are darker than the running rigging (anything that is used to handle sails and spars), which was not so heavily tarred, to keep the lines plyable. Jan
About us
Modelshipworld - Advancing Ship Modeling through Research
SSL Secured
Your security is important for us so this Website is SSL-Secured
NRG Mailing Address
Nautical Research Guild
237 South Lincoln Street
Westmont IL, 60559-1917
Model Ship World ® and the MSW logo are Registered Trademarks, and belong to the Nautical Research Guild (United States Patent and Trademark Office: No. 6,929,264 & No. 6,929,274, registered Dec. 20, 2022)
Helpful Links
About the NRG
If you enjoy building ship models that are historically accurate as well as beautiful, then The Nautical Research Guild (NRG) is just right for you.
The Guild is a non-profit educational organization whose mission is to “Advance Ship Modeling Through Research”. We provide support to our members in their efforts to raise the quality of their model ships.
The Nautical Research Guild has published our world-renowned quarterly magazine, The Nautical Research Journal, since 1955. The pages of the Journal are full of articles by accomplished ship modelers who show you how they create those exquisite details on their models, and by maritime historians who show you the correct details to build. The Journal is available in both print and digital editions. Go to the NRG web site (www.thenrg.org) to download a complimentary digital copy of the Journal. The NRG also publishes plan sets, books and compilations of back issues of the Journal and the former Ships in Scale and Model Ship Builder magazines.


